Quick Start
Updated on 2026-11-09 · Estimated reading time: 6 minutes
This guide walks through the basic DeepWorks workflow: create a workspace, describe a task, review results, summon AI employees, and connect tools.
Understand the Interface
After you open DeepWorks, the page is divided into the left navigation area, central workspace, bottom task input area, and account entry.
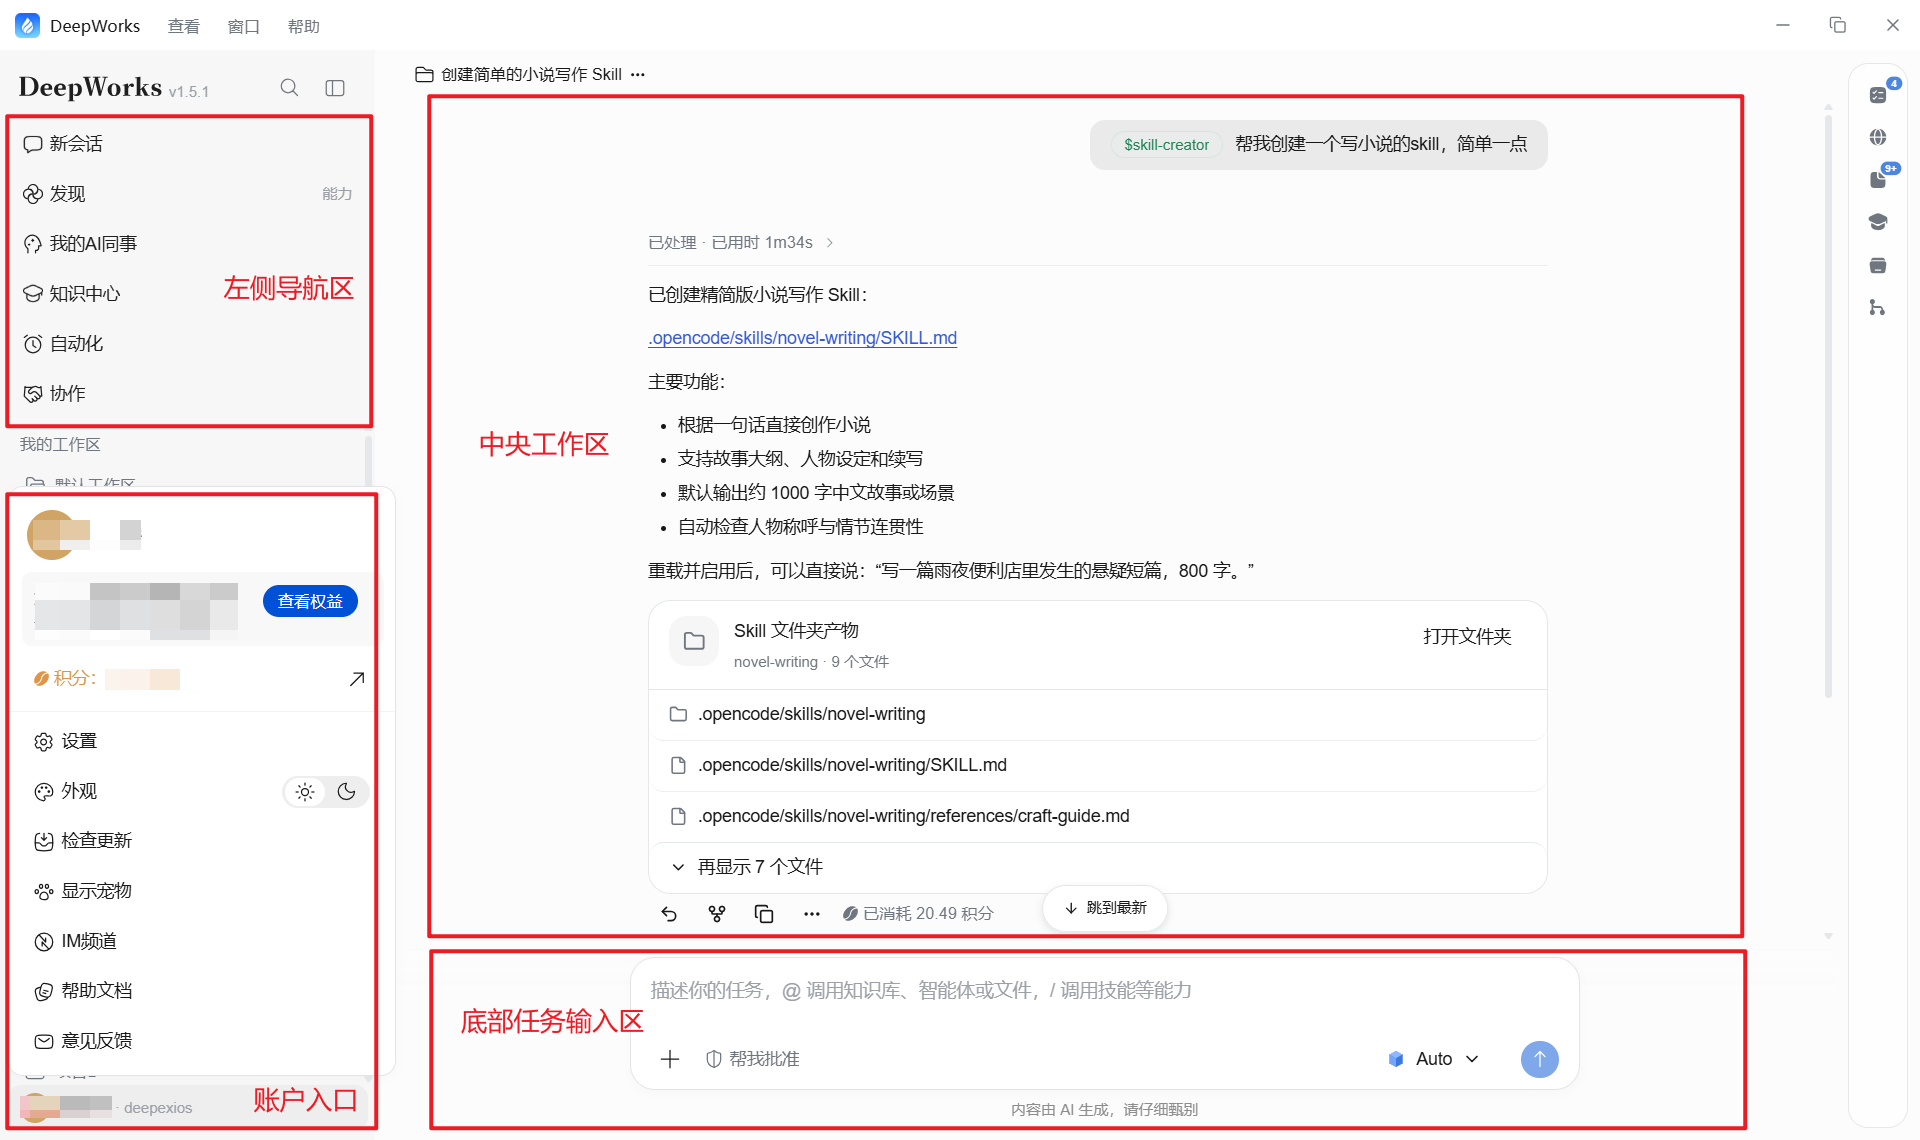
| Area | Purpose |
|---|---|
| Left navigation | Open new sessions, My AI Colleagues, Automation, Knowledge Center, IM Channels, workspaces, and the My AI Colleagues workspace. |
| Central workspace | Shows the current conversation, task execution, or a feature management page. |
| Bottom task input | Enter task requirements and choose the workspace, execution permissions, model, attachments, and tools. |
| Account entry | Switch accounts, change the theme, check updates, show the pet, open help, submit feedback, or sign out. |
Create a Workspace
A workspace is the local file directory associated with a DeepWorks task. It provides task context and defines the read/write boundary for accessible files.
-
After you open and sign in to DeepWorks for the first time, a default workspace is initialized automatically.
-
Choose an existing workspace on the left, or select Add Workspace and choose a directory as the workspace root.
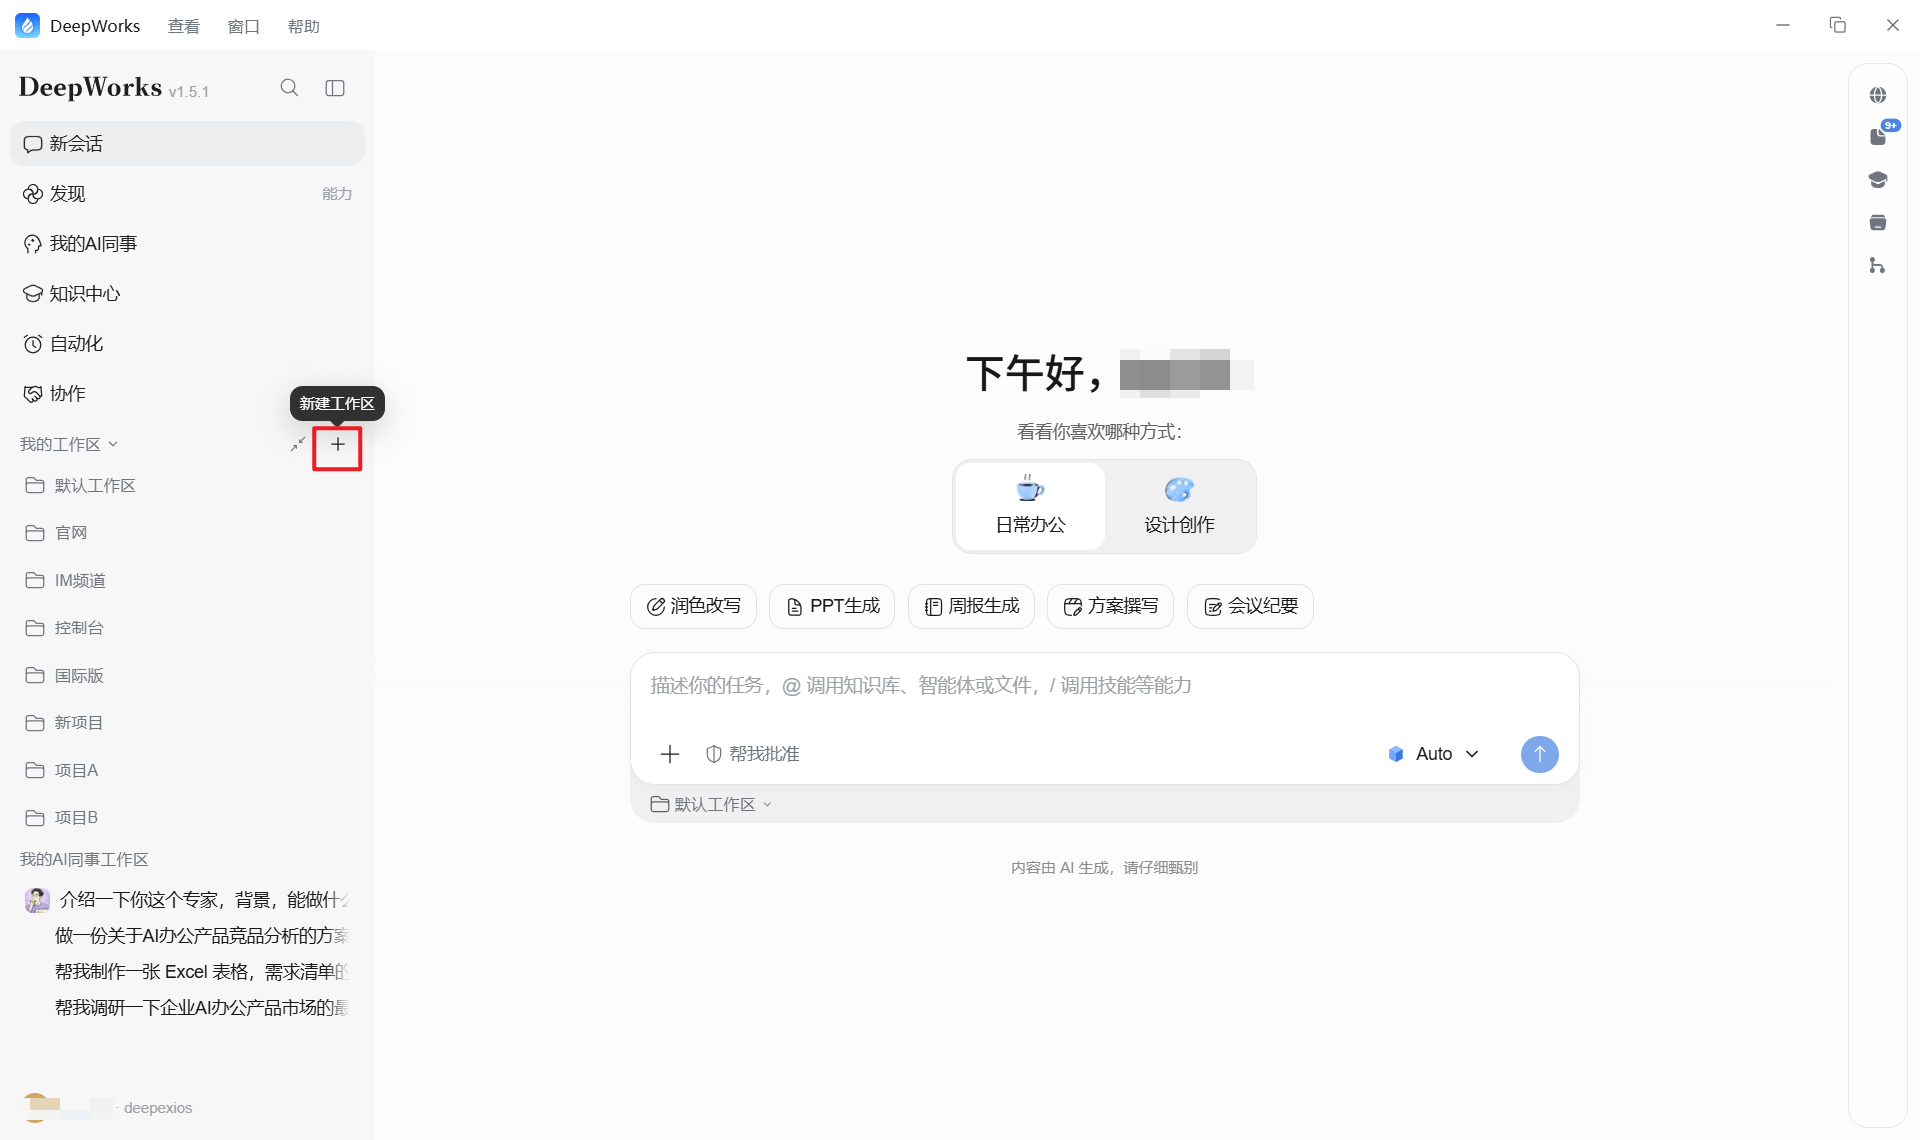
- DeepWorks receives read/write permission for that directory. It can read files you place there, create and edit files for you, and process new files dragged in at any time.
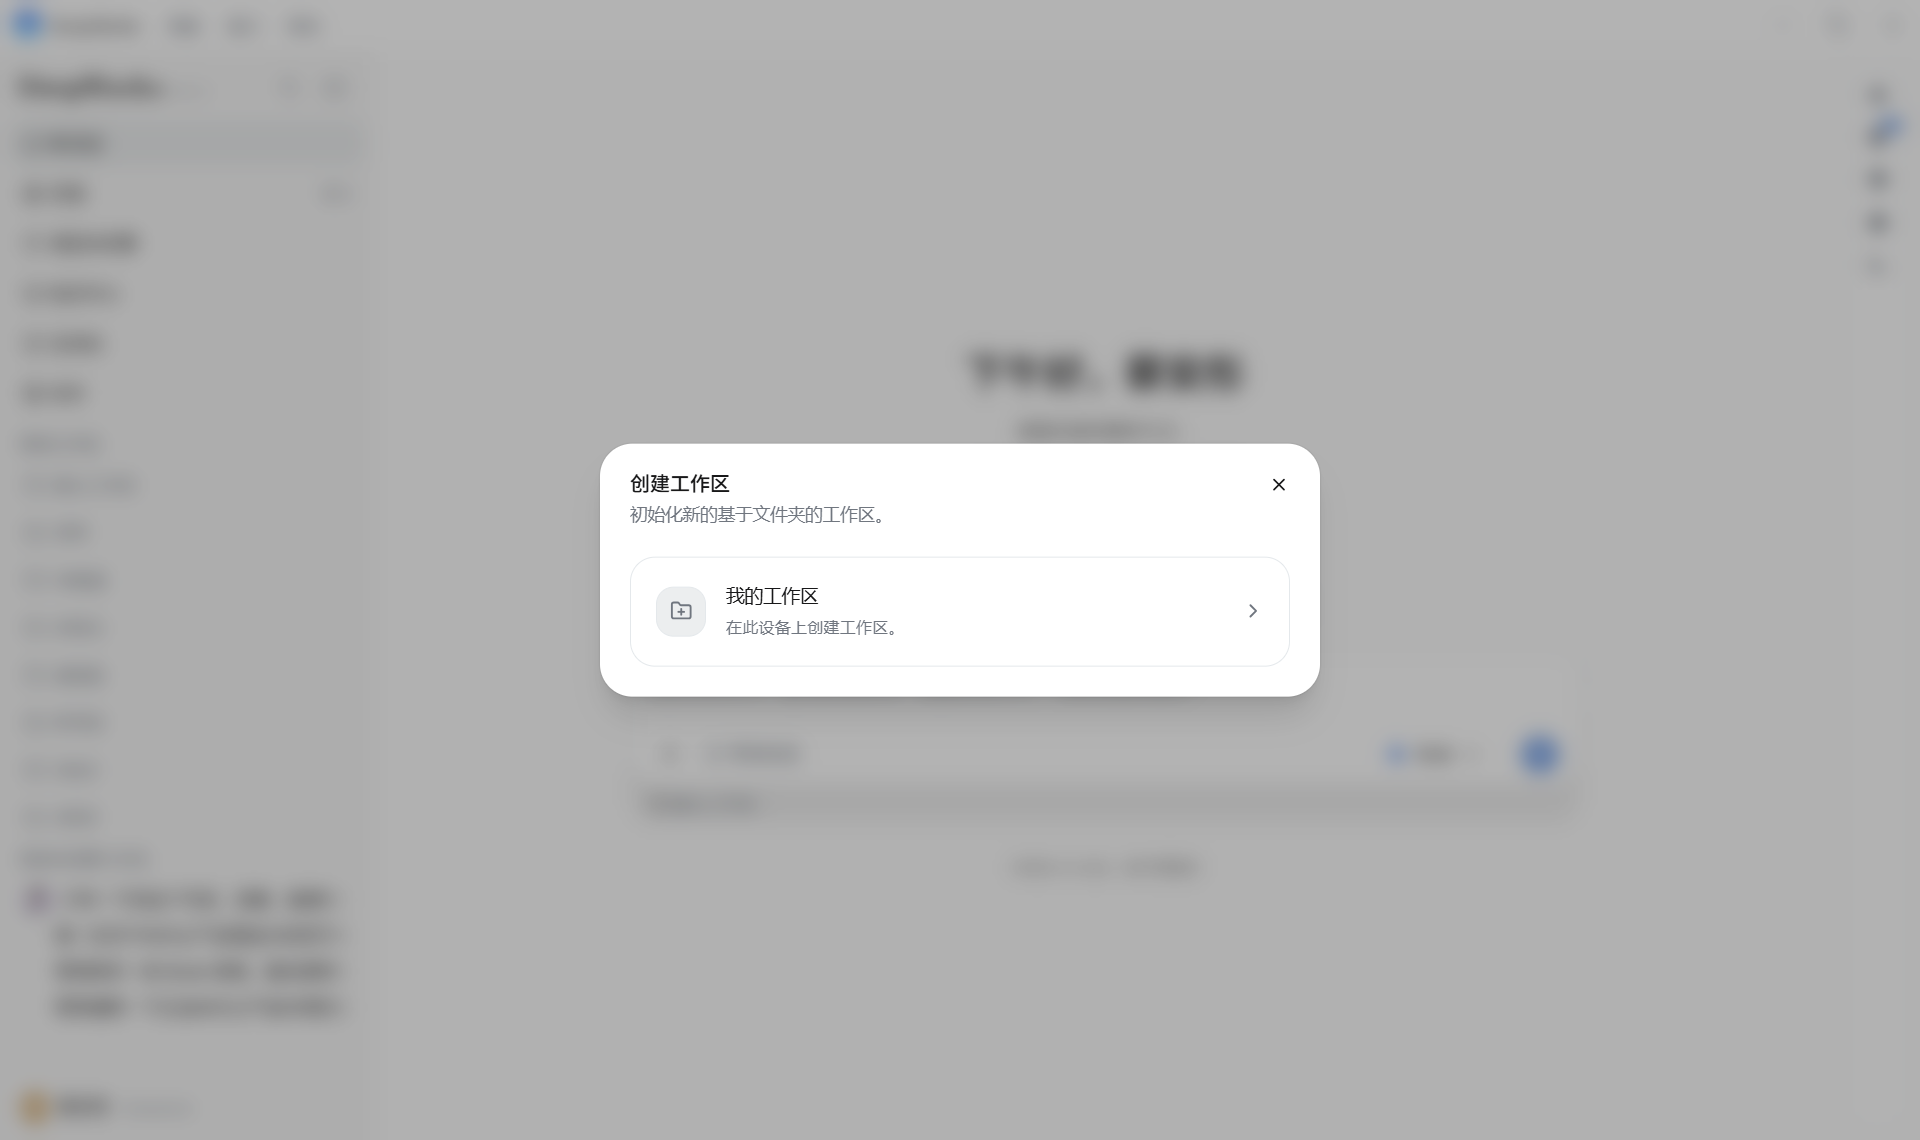
Tip: A workspace is where DeepWorks begins to understand your project context. Choose a directory containing project documents, data, or code so DeepWorks can reference those materials directly.
- After the workspace is created, its sessions appear in the left sidebar. Use New Session at the top to start a task, or select a previous session to continue.
Workspace Recommendations
-
Create separate workspaces for different projects or business topics.
-
Authorize only directories that tasks actually need.
-
Before deletion, overwriting, or external calls, carefully confirm the scope of the operation.
Start a New Session
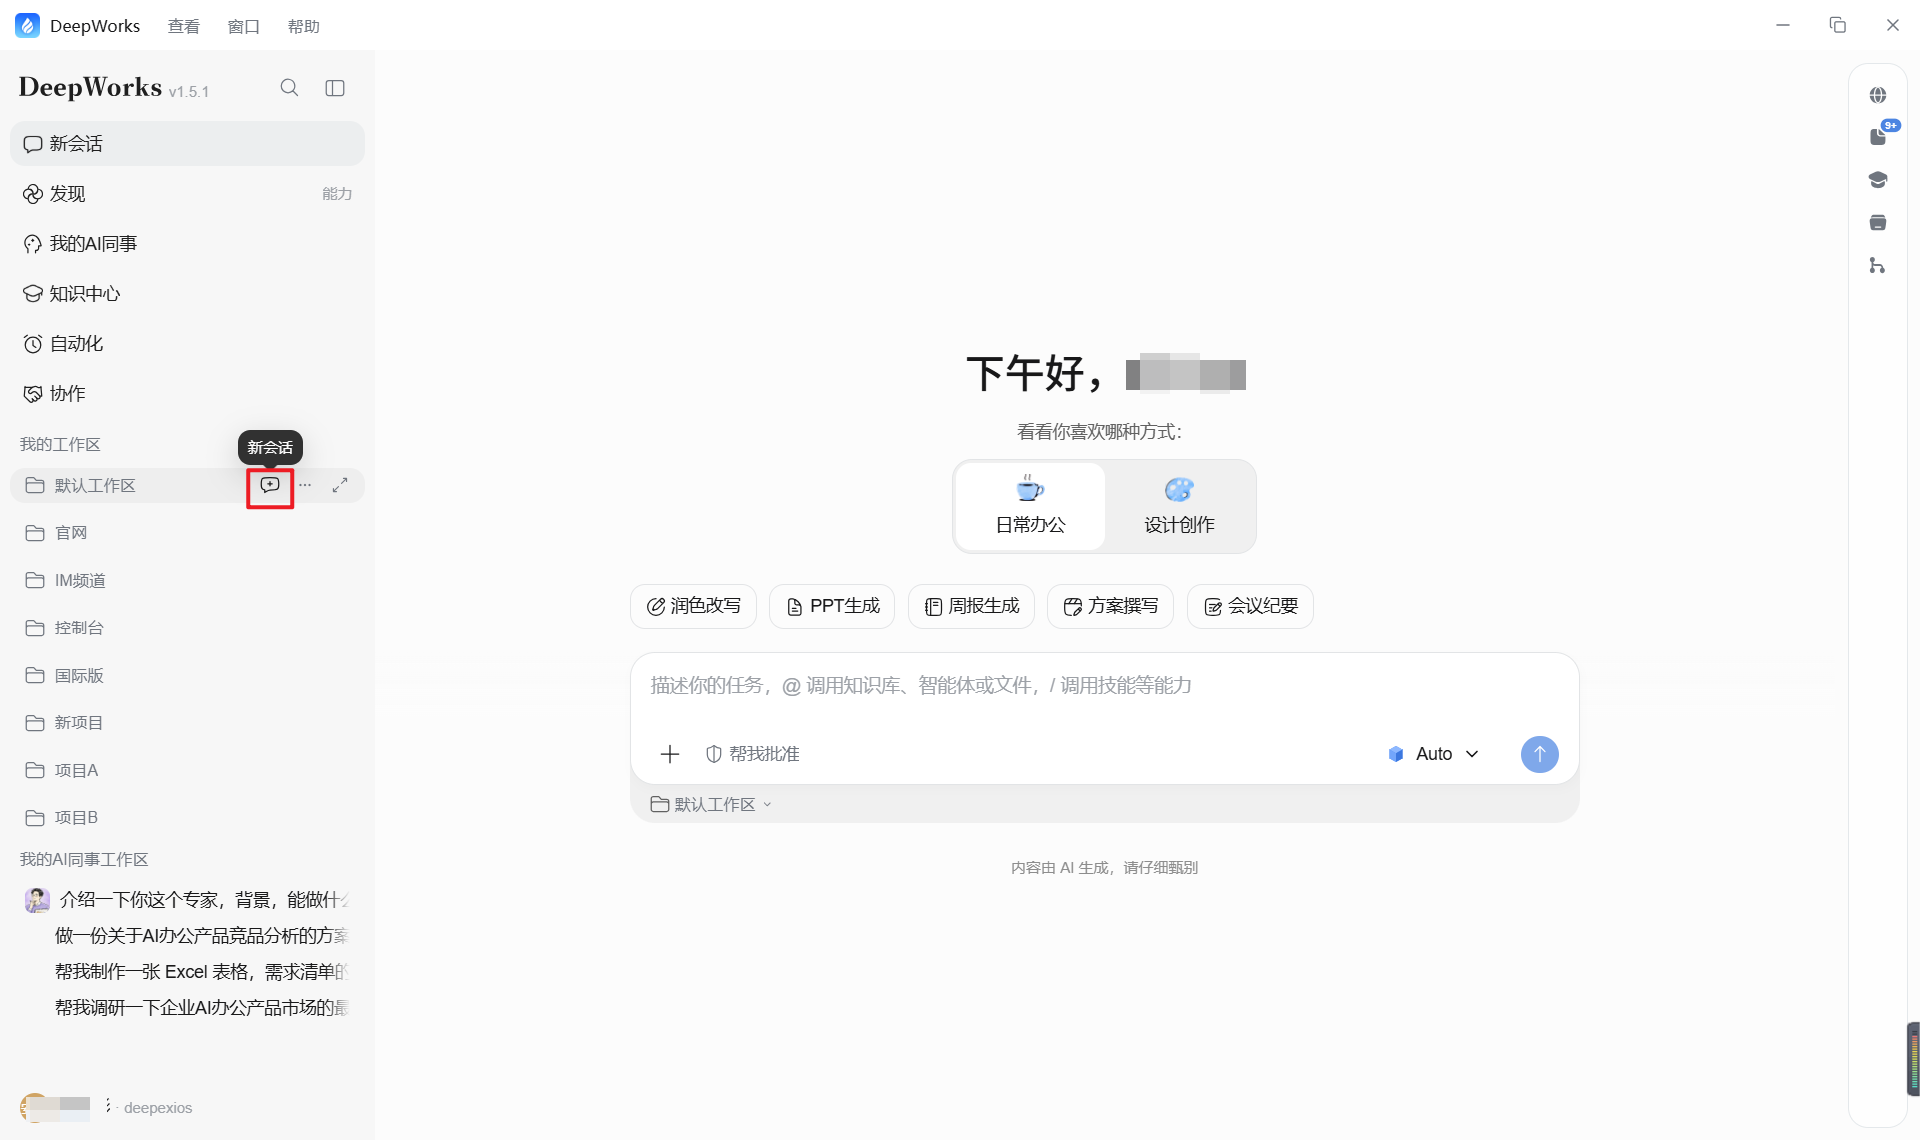
- Select New Session in the left navigation, or choose New Session in a workspace.
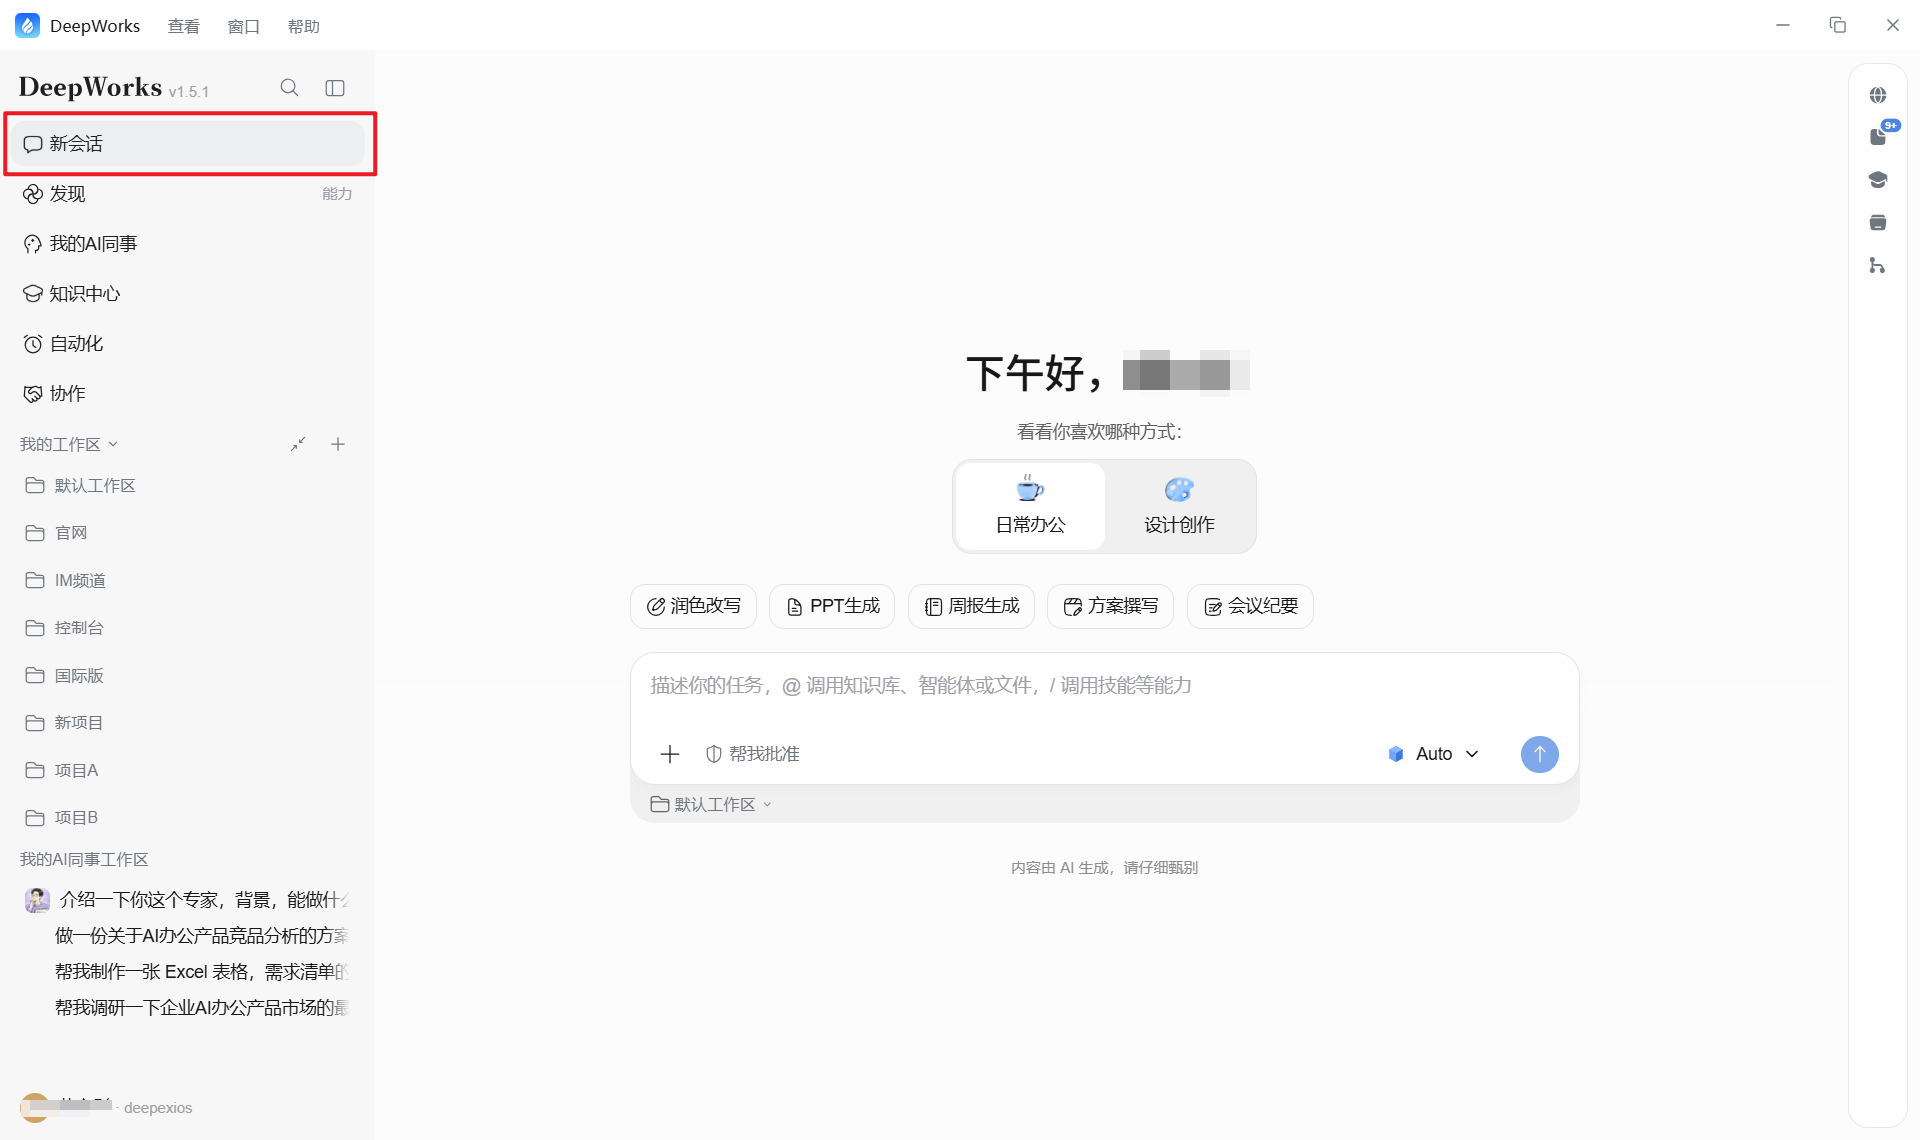
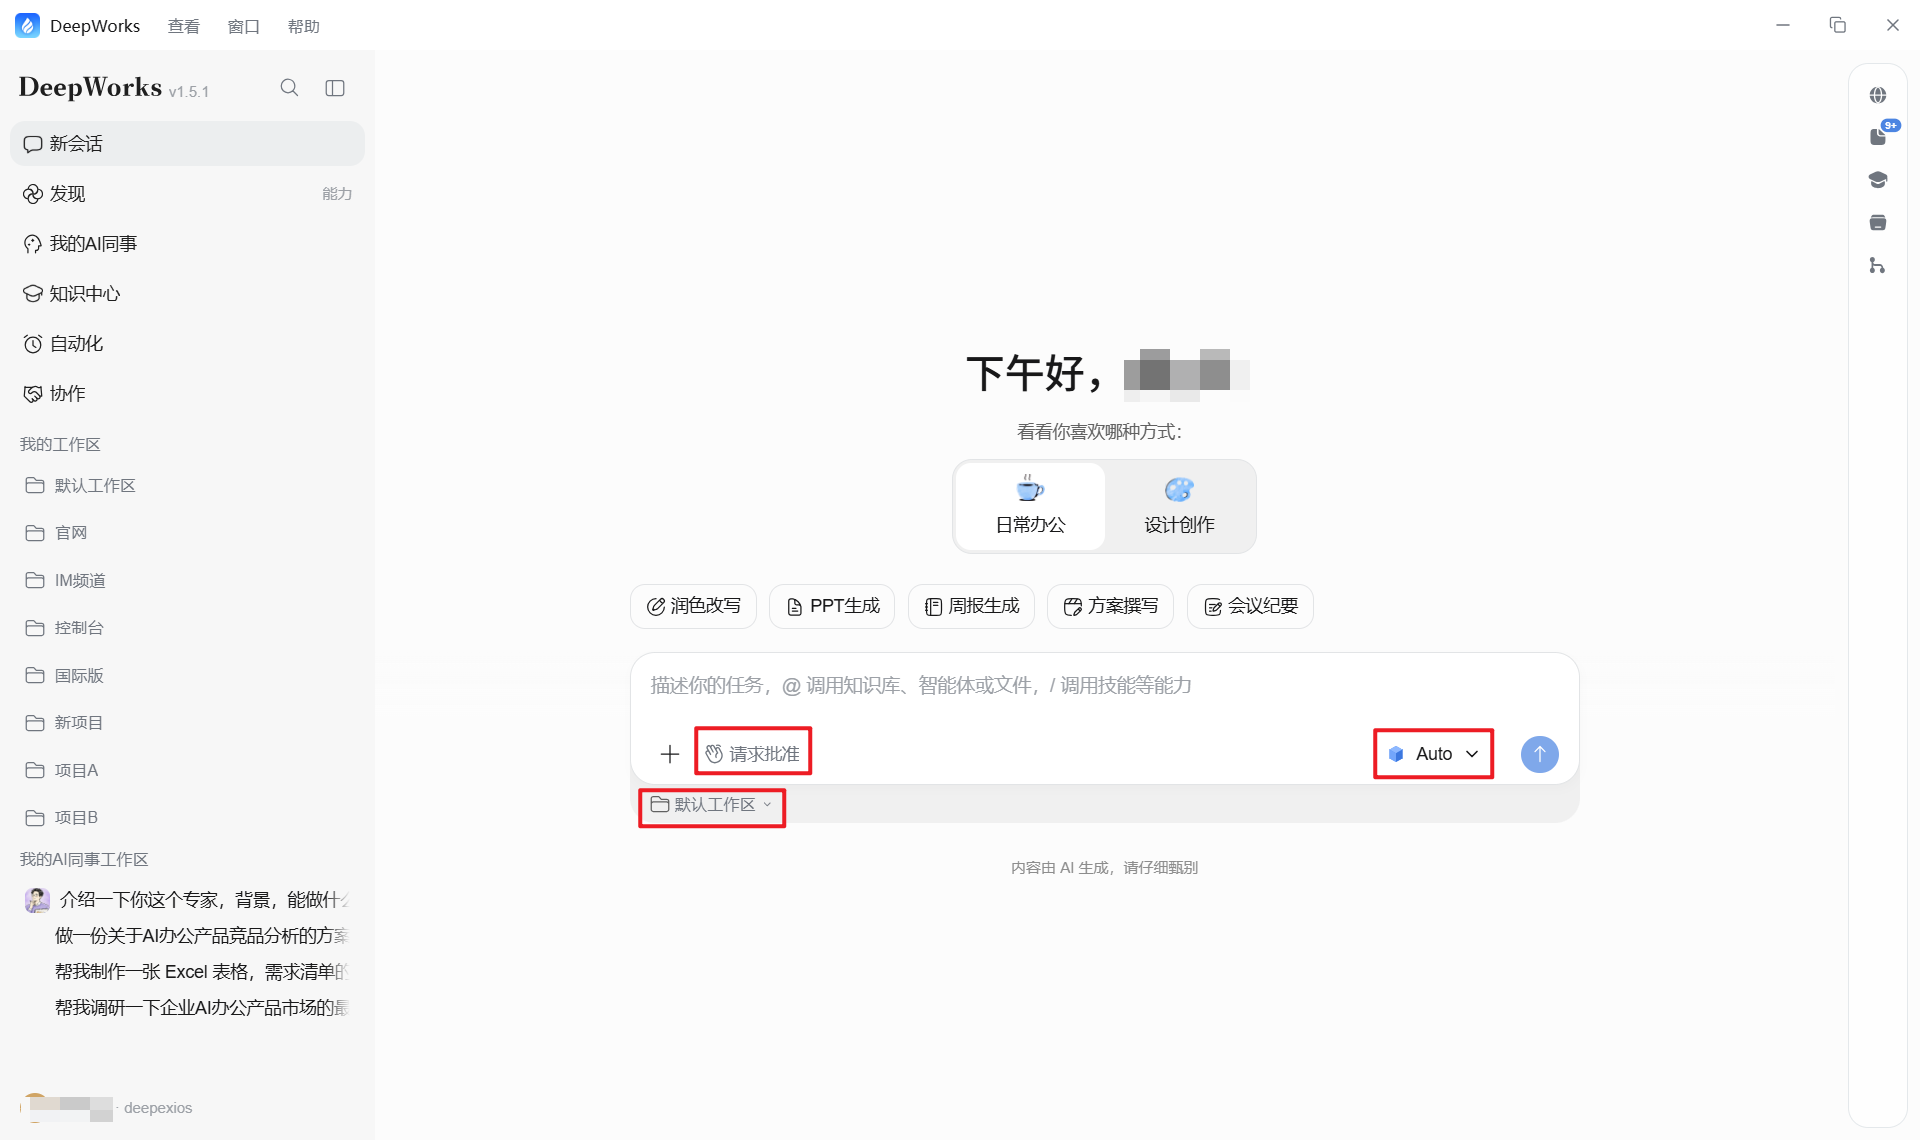
- At the bottom, confirm the workspace, execution permissions, and model. You can change them according to your needs.
- Describe what you want in the input box, for example:
-
“Refine this competitive analysis report and add the market trends section.”
-
“Generate an acceptance report from this SOW file.”
-
“Read this Excel file, clean outliers, and create visualizations.”
You can also choose a preset shortcut for daily office work or design creation, then describe the goal using the recommended prompt.
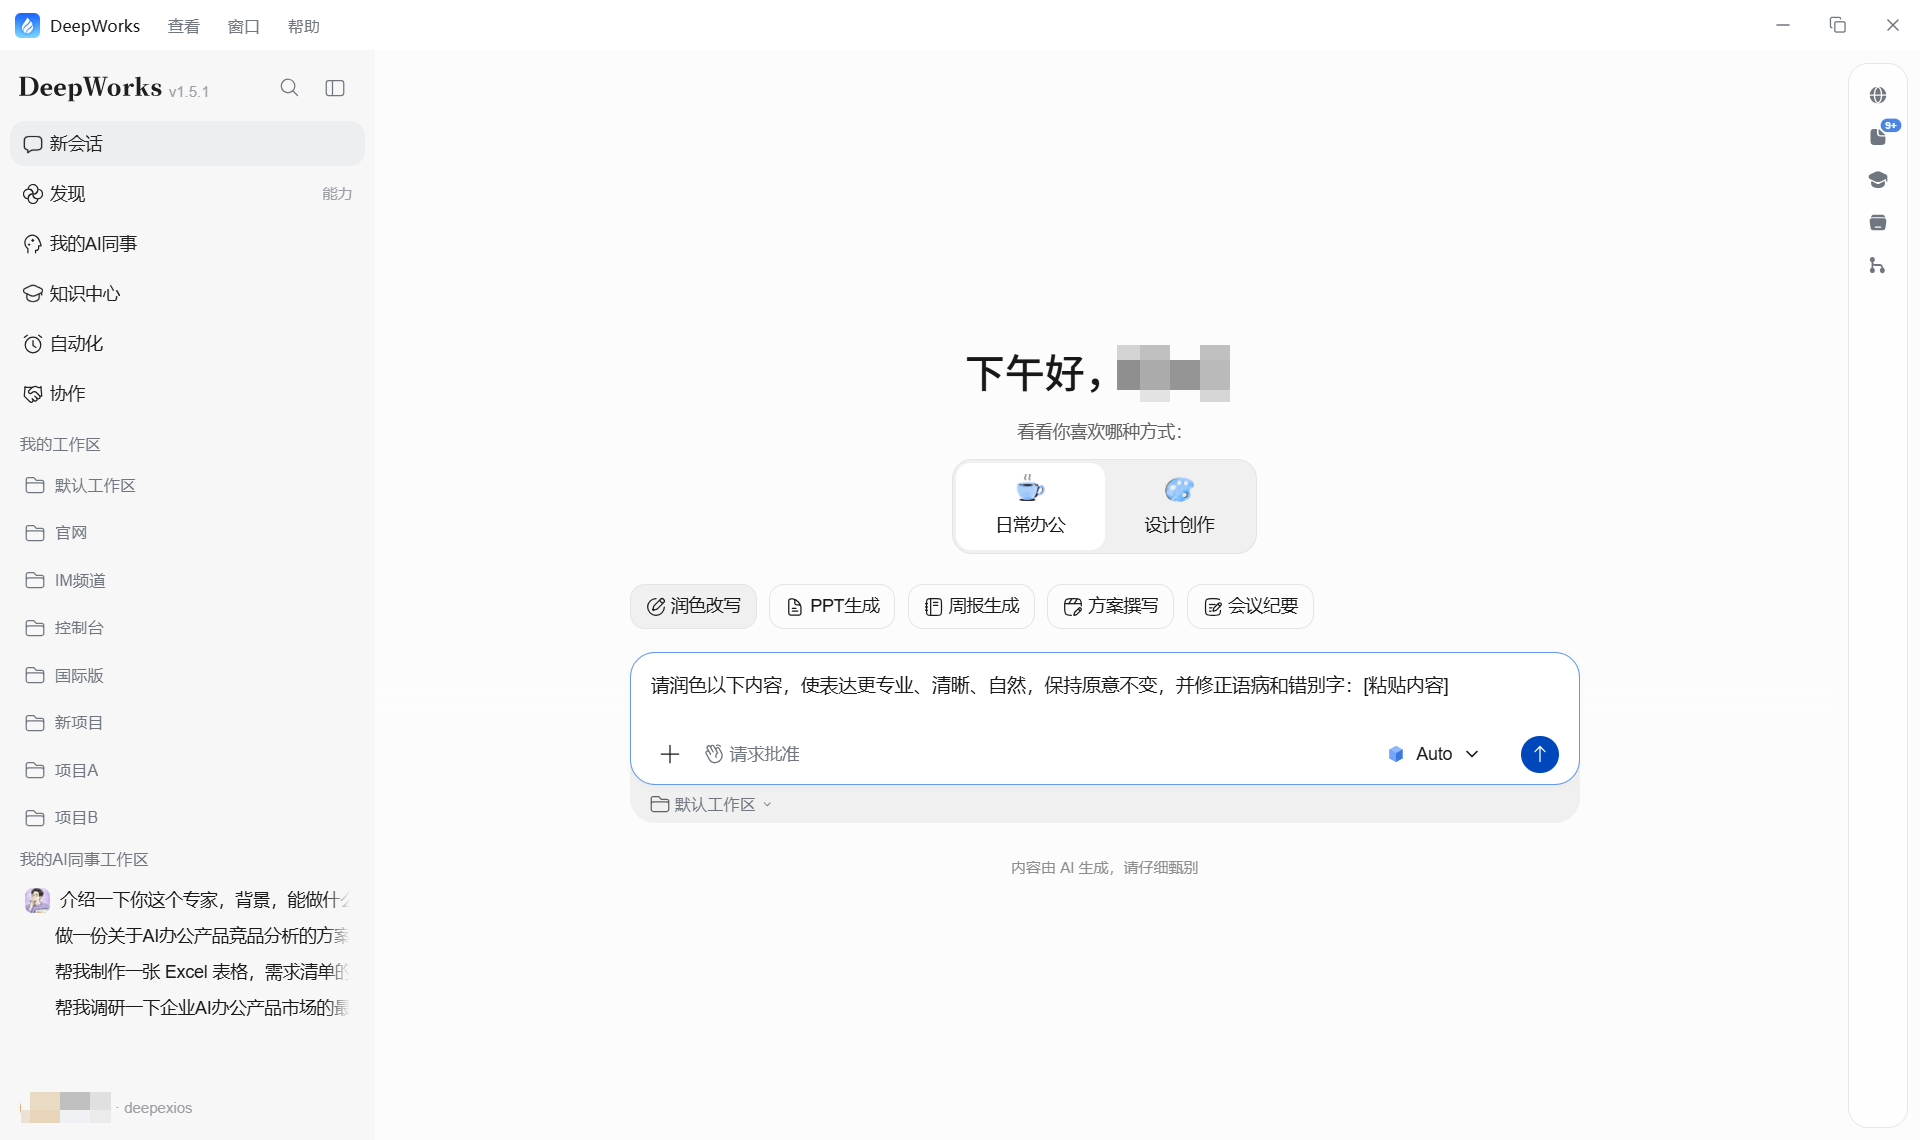
- Select Run Task. DeepWorks starts execution with the selected model and workspace.
Add Attachments
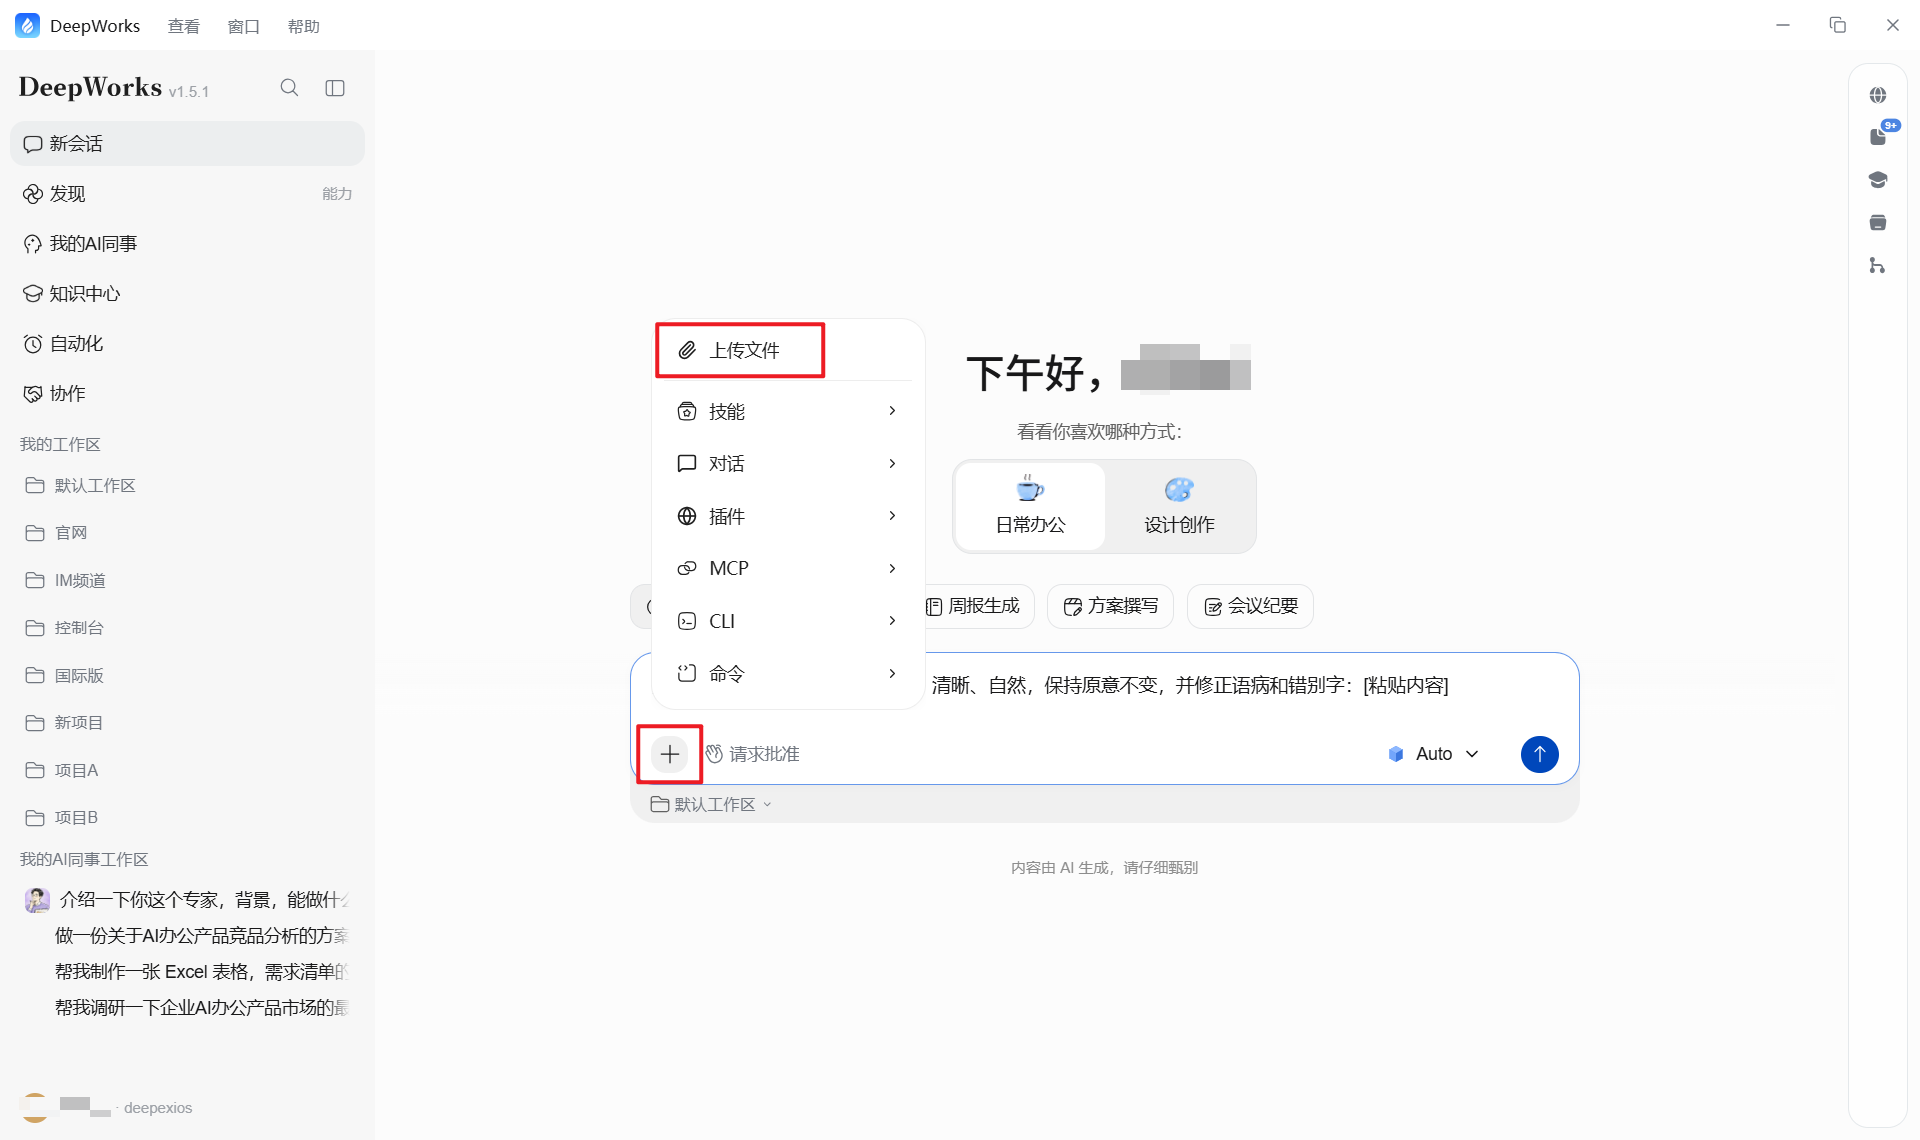
If a task needs specific files, select Add Attachment in the lower-left corner of the input box and choose local files to send with the conversation. DeepWorks reads the attachments and references them in the task.
Call Tools
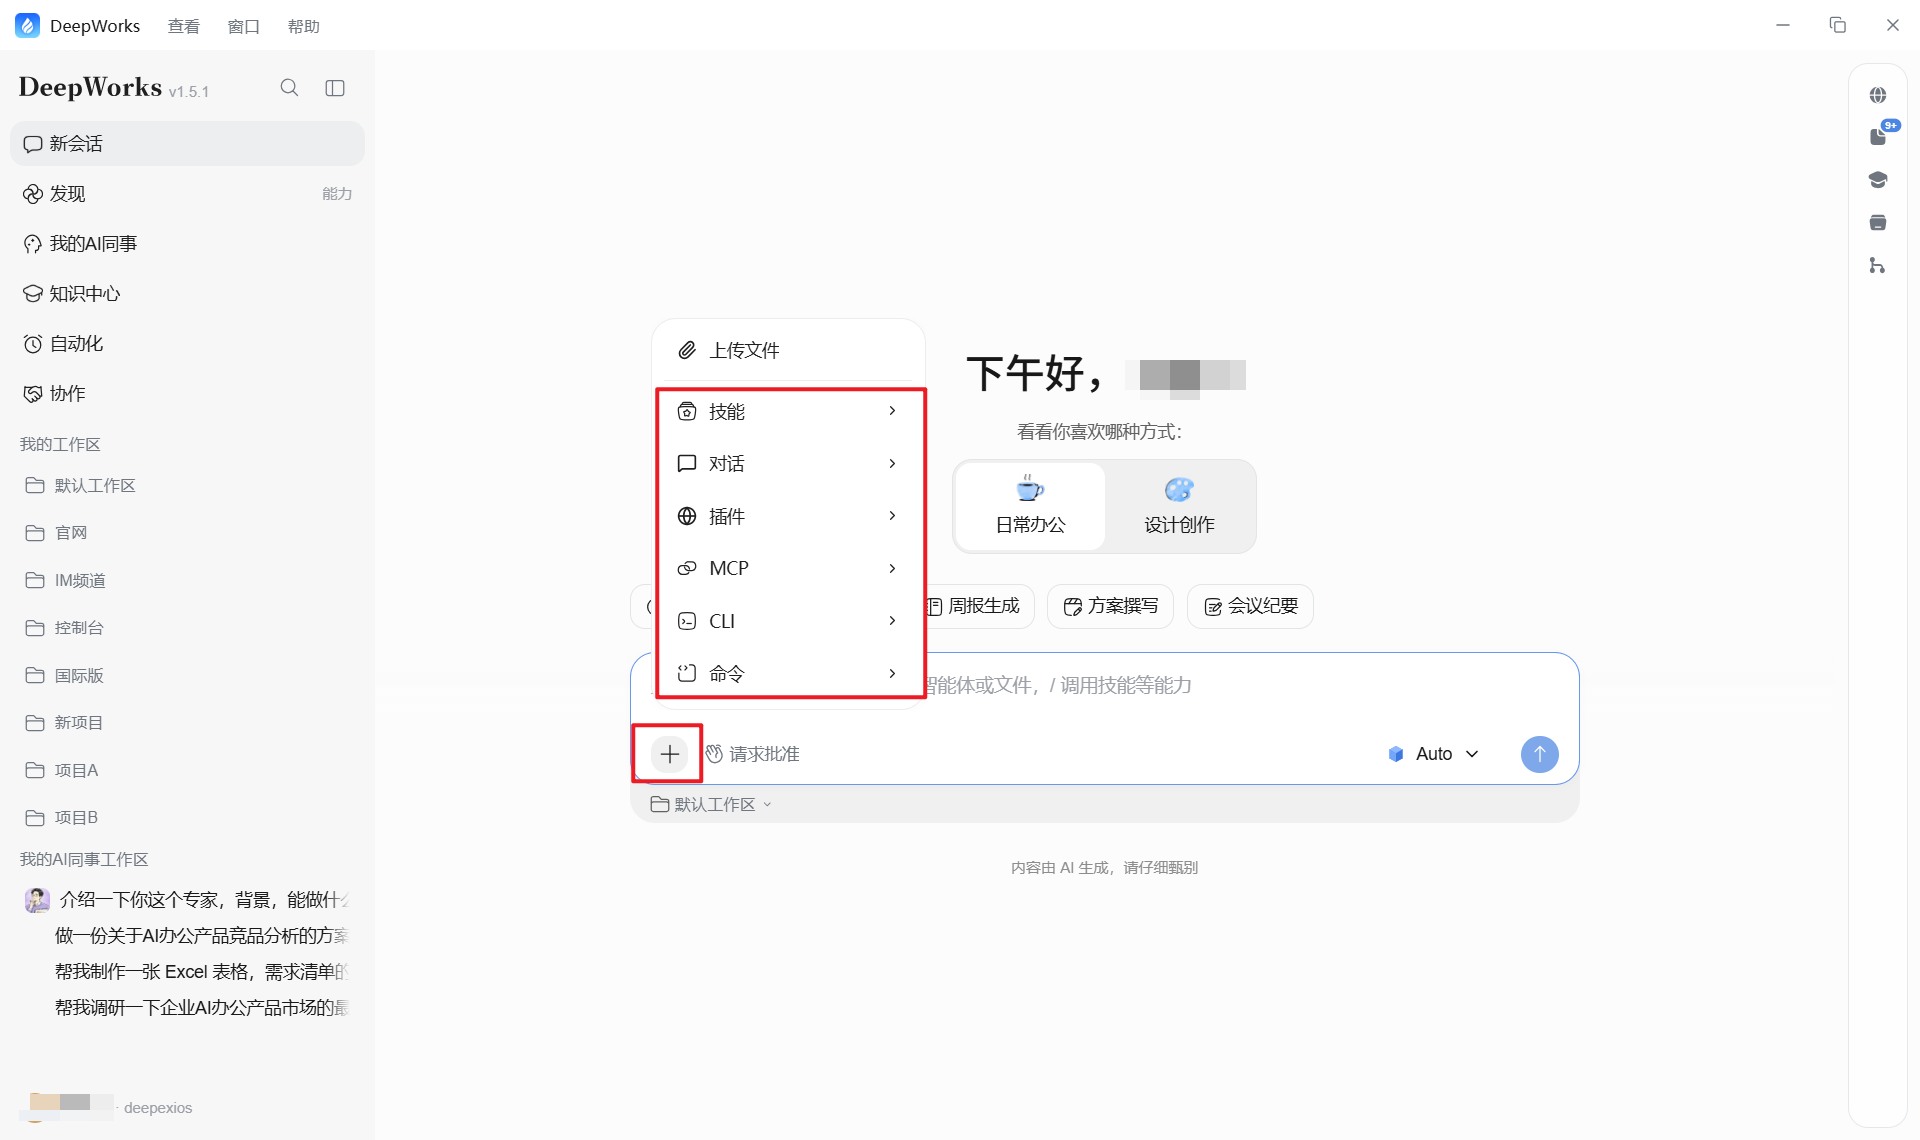
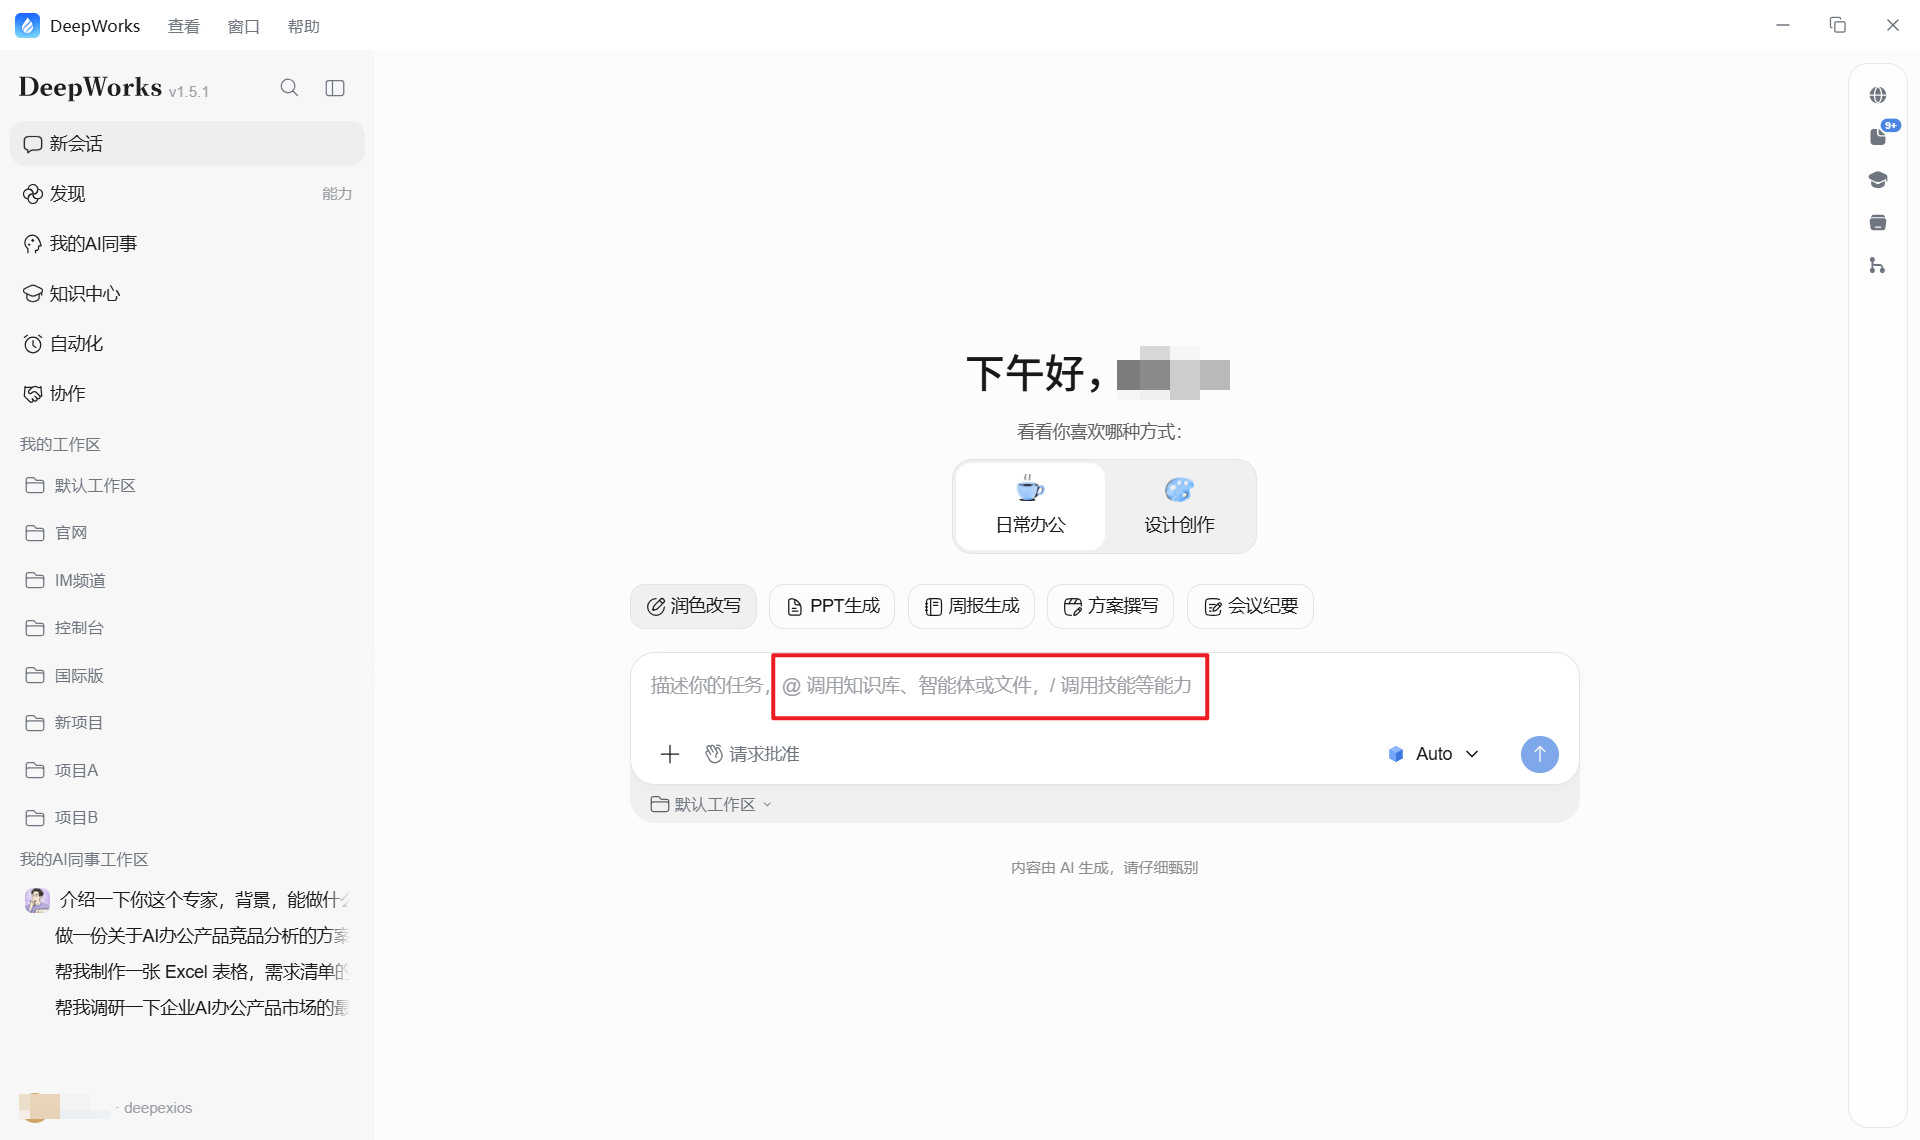
Click + at the bottom-left corner of the input box to choose a capability. You can also enter @ in the input box to call a knowledge base, agent, or file, or enter / to call capabilities such as Skills. Available types include:
-
Commands: Run predefined system commands.
-
Skills: Call installed Skills, such as data standard generation or proposal material organization.
-
Plugins: Call installed plugins.
-
CLIs: Call installed CLIs.
-
MCP: Call connected MCP servers.
Review and Iterate
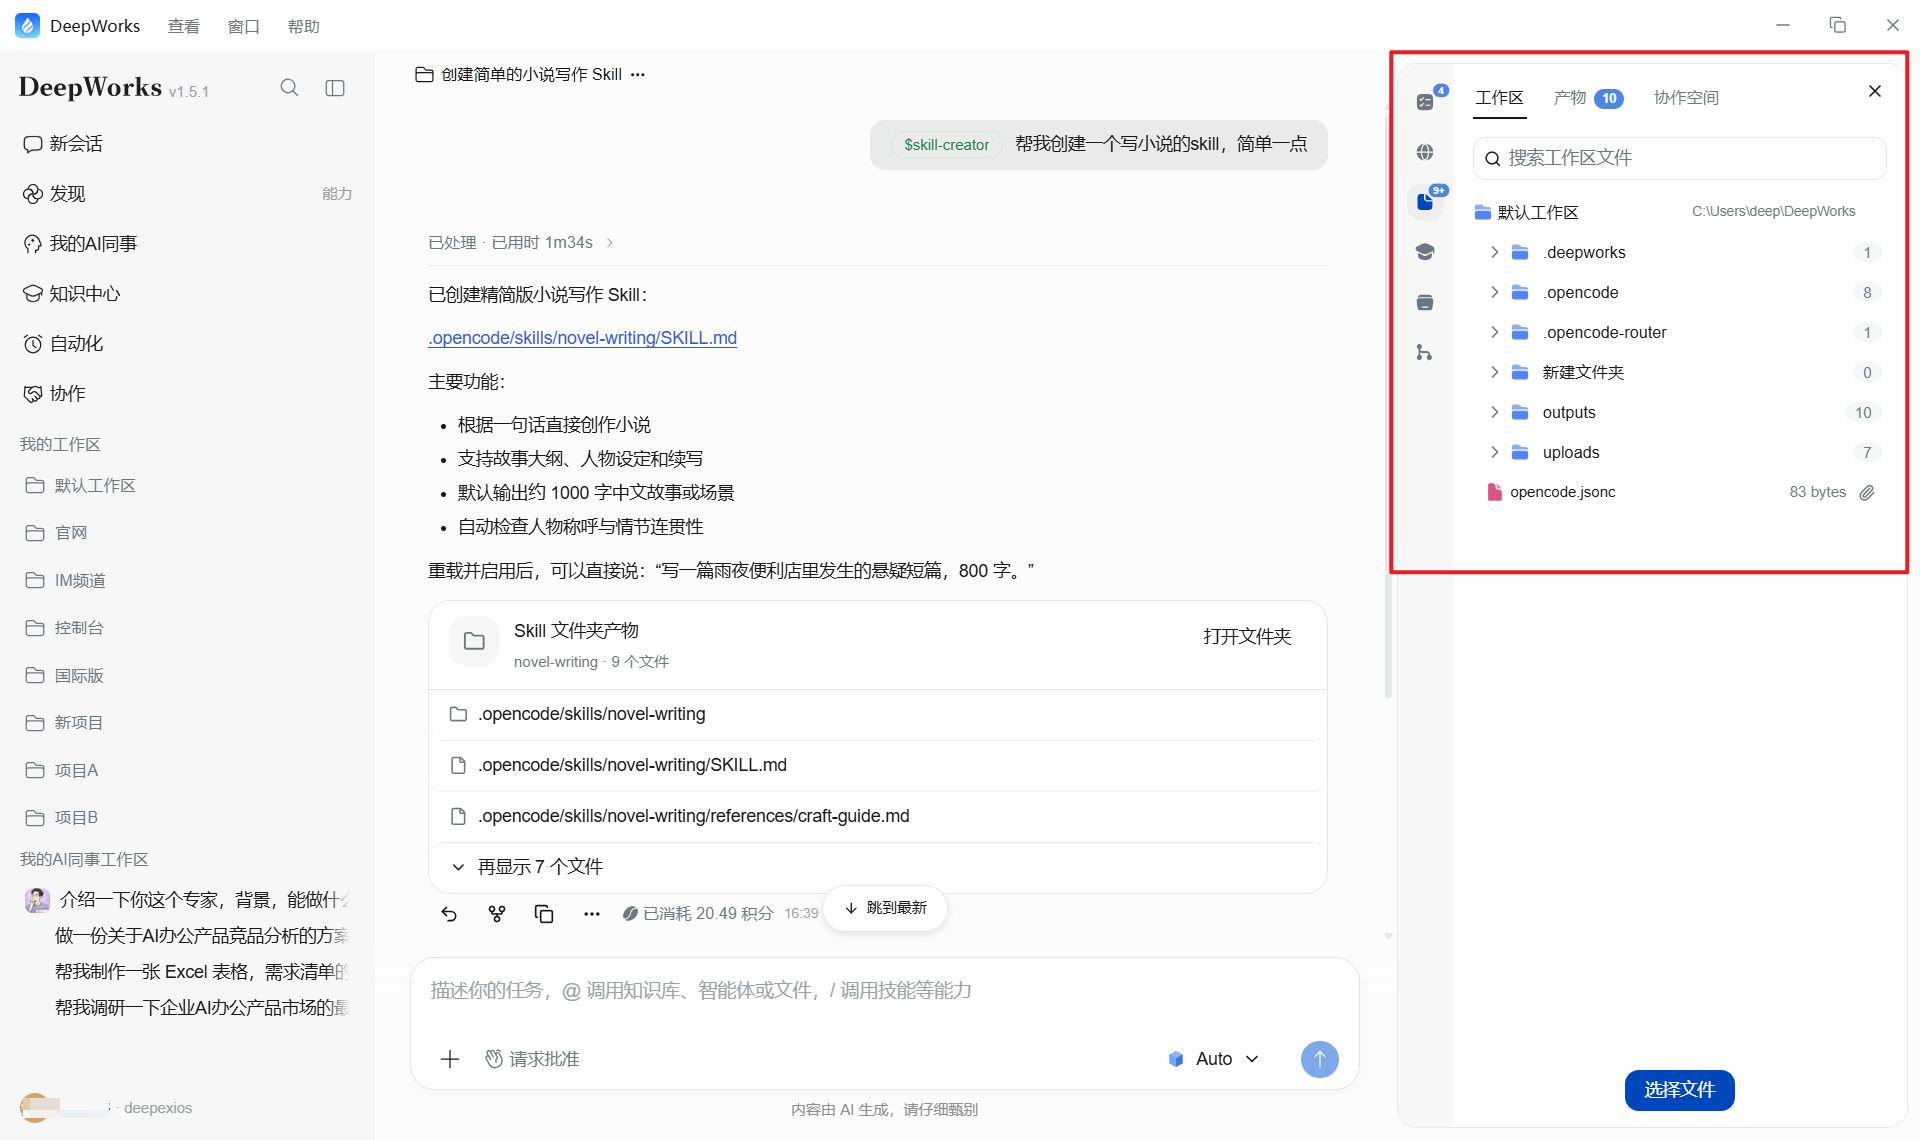
When a task finishes, DeepWorks shows the result in the conversation area. Use the right navigation to review artifacts.
After completion, you can:
-
Follow up: Enter additional questions or changes in the input box to continue the same conversation.
-
Approve actions: When a key action writes data, deletes data, or calls an external service, DeepWorks asks for confirmation before execution.
-
Save artifacts: Files generated by the task, such as documents, spreadsheets, and code, are saved in the workspace. View them from the artifact panel or open and edit them directly in the local file system.
Tip: Every conversation is a traceable workflow. Return to a previous conversation at any time to continue or adjust the direction.
Artifact Management
Artifacts are documents, spreadsheets, code, and other files generated or modified during a task.
-
Task artifacts are usually saved in the associated workspace and can be edited with local tools.
-
Use clear file names and directory structures for important artifacts so teams can collaborate and retrieve them.
-
Before publishing, overwriting, or deleting an artifact, confirm the target and impact.
Conversation Traceability
Historical conversations retain task goals, processes, and results for continued collaboration and review.
-
Continue asking questions in a historical conversation to reuse its context.
-
Review expert actions and confirmation records to understand how a result was produced.
-
Turn mature task processes into Skills or other reusable assets.
Configure Models
- Select the user avatar in the lower-left corner, then choose Settings.
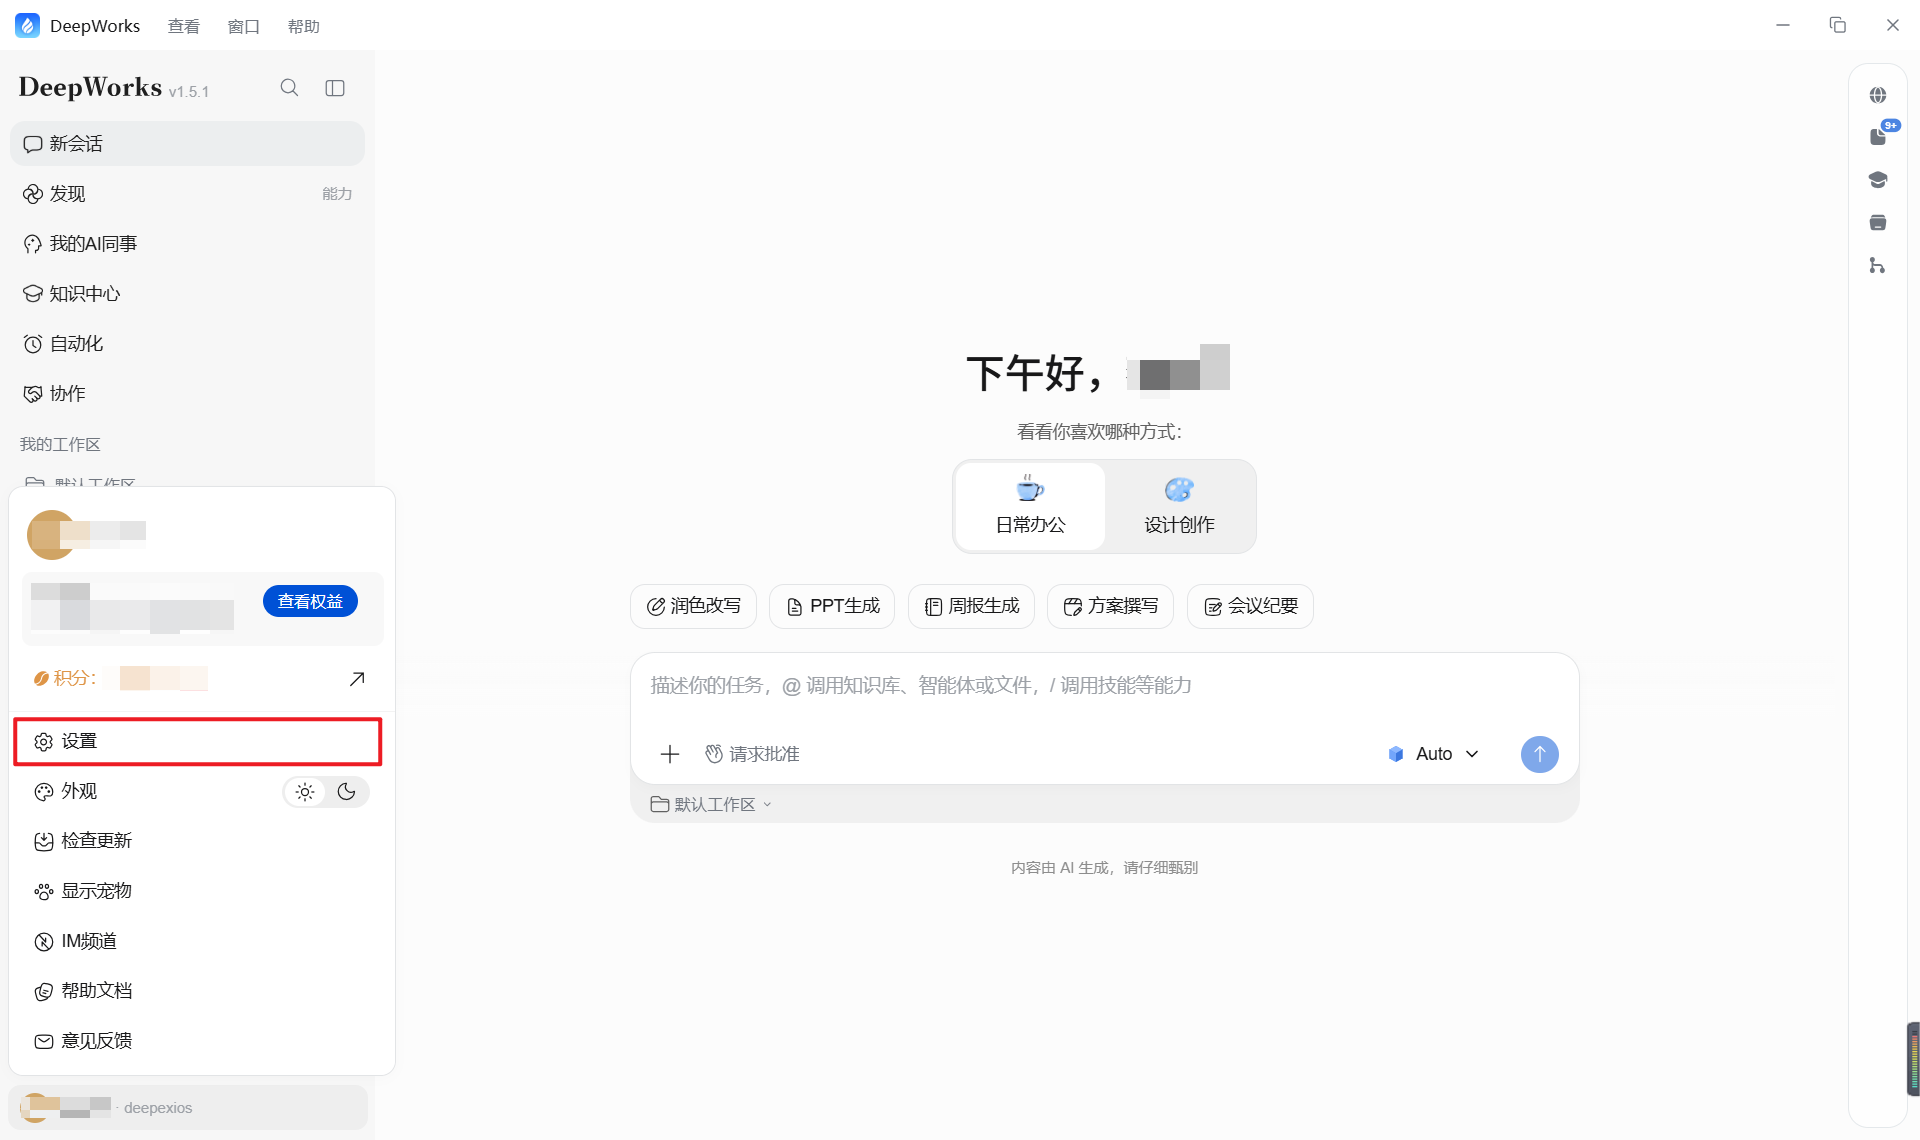
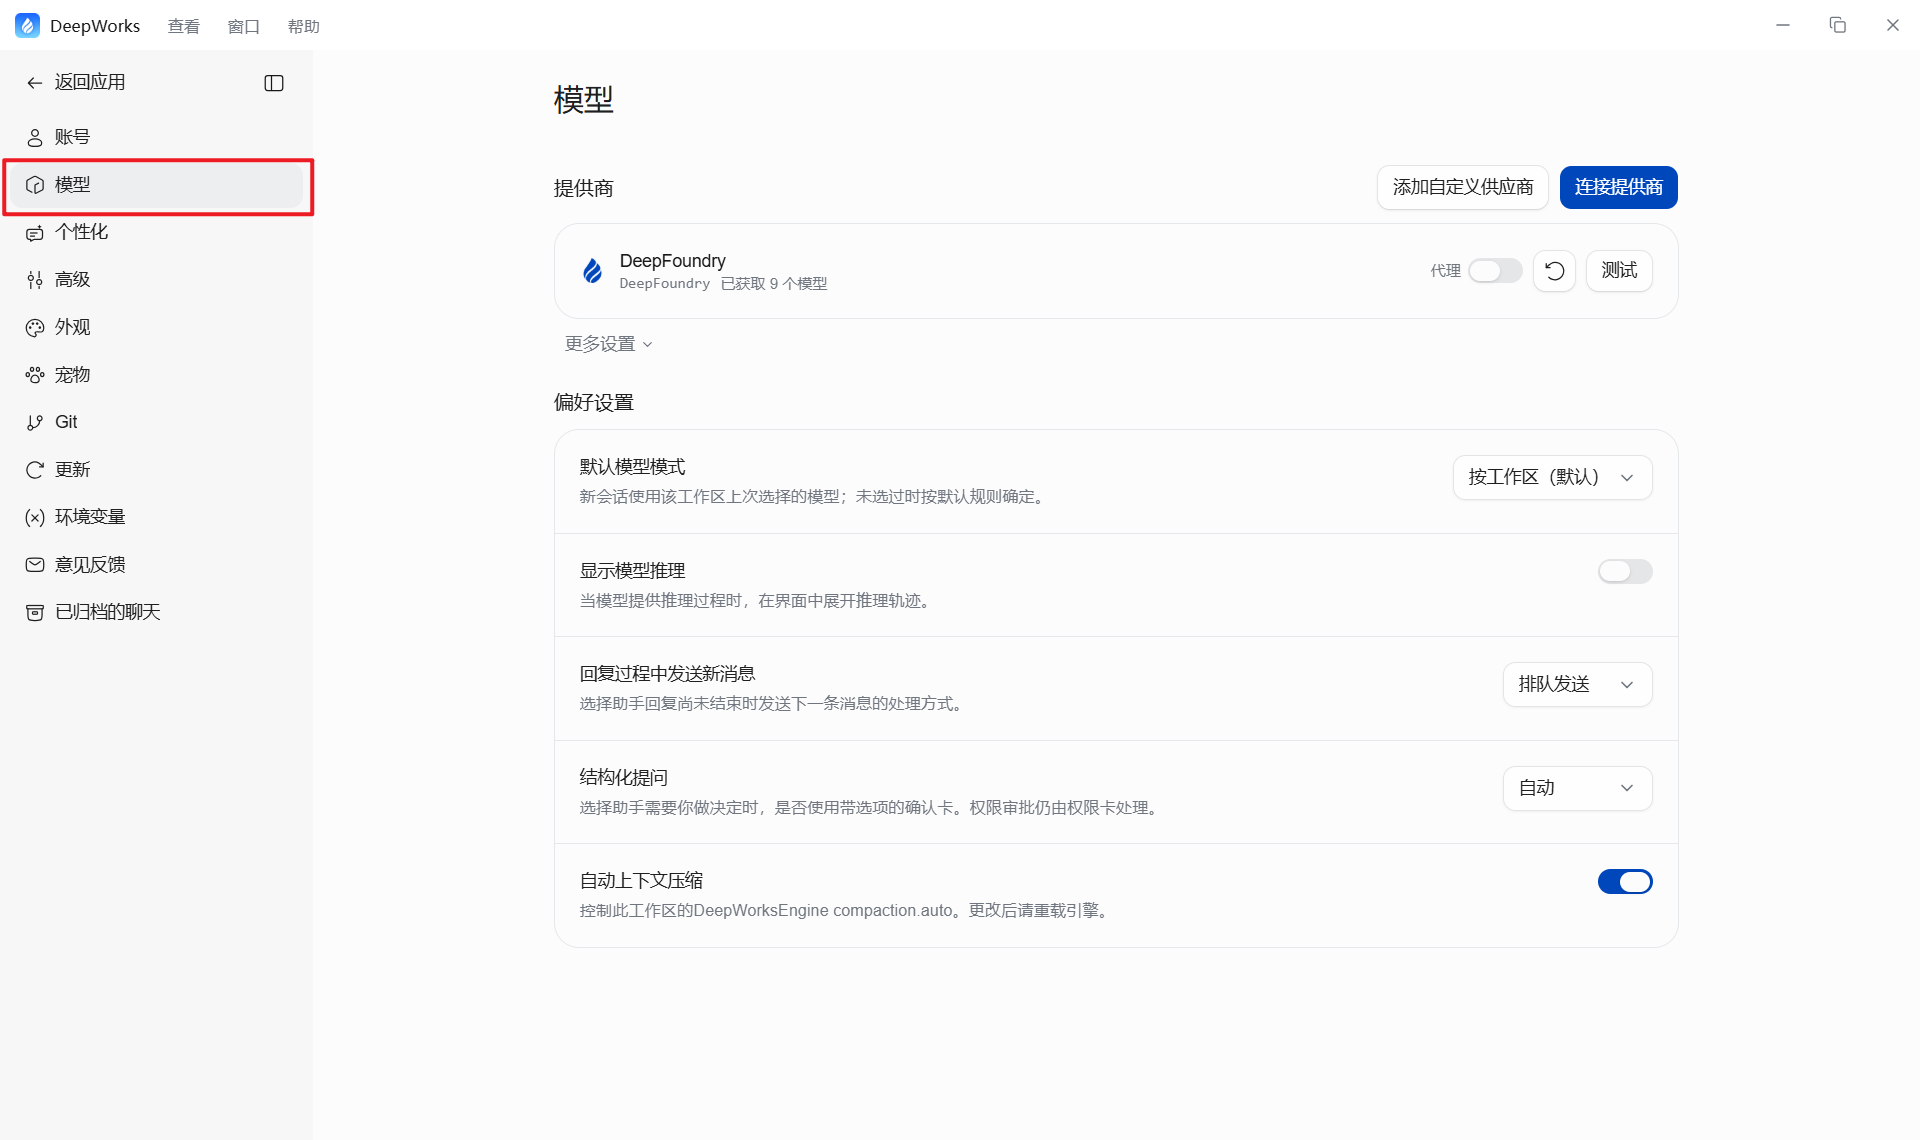
- In Settings, select Models.
-
Built-in AI providers: DeepFoundry is built in and supports multiple models.
-
Custom models: Select Connect Provider to access OpenAI, DeepSeek, Kimi, and other third-party model services. After entering an API key, the models can be selected in conversations.
-
Preferences: Set the default model, whether reasoning is displayed, and whether automatic context compression is enabled.