Enterprise Admin
Product Overview
Product Definition
DeepWorks Admin Portalconsists of an admin end and a Console. The admin end is responsible for the creation and publishing of experts/expert teams, asset governance, as well as subscription and seat management; the Console undertakes enterprise account management and role authorization; and the DeepWorks desktop client is in charge of daily usage and task execution.
The Management Consoleis an enterprise-level multi-agent collaboration and governance platform: it adopts “individual experts / expert teams” as the agent form, takes “project workspace” as the collaboration unit, and uses “skills / tools / models / runtime environments” as the asset foundation, to help enterprises build, deploy, operate and govern their own team of AI colleagues.
Consoleis a unified account and permission management backend: with the permission model backbone of “organization tree + user + role”, it centrally manages the lifecycle of member accounts, role permission assignment and system-level security policies, so that “who can log in, which products can be accessed, and which menus can be viewed” within an enterprise can be defined in one place and take effect uniformly.
Product Introduction
Admin Panel
-
Control plane for multi-agent collaboration: full lifecycle management including creation, debugging, deployment and archiving of individual agents and squads;
-
Hierarchical Governance Platform for AI Assets: Skills are managed and reviewed for listing in three tiers: Platform Curated → Organization Shared → Project Exclusive; tools (MCP) are integrated in a unified manner.
-
Subscription and Seat Management: Full lifecycle management of subscription orders (viewing, exporting, renewal); member access rights allocated by seat, corporate monthly point pool calculated as “number of seats × monthly points per seat”, with support for per-member monthly point configuration.
Console
-
Organizational User and Authentication Center: Users use their login account as the unique identity, and share the same account system across products (supporting “batch setting of default products”, which means one account can be connected to multiple products and specify the default landing page after login);
-
Role Permission Center: Permissions are carried via “roles” — default roles are Out Of The Box, custom roles are created by administrators based on job responsibilities and authorized according to members’ actual needs, with permission granularity down to the “permission configuration” level;
-
System Security Baseline: Uniformly constrain the account security policies of various products through password and timeout configurations.
Character Description
The DeepWorks enterprise management backend comprises the following roles: three types of management/development roles, namely tenant administrator, project workspace administrator, and AI builder, where higher-level roles have downward-compatible permissions; the Skill category publishing lead, who is the dedicated person in charge of publishing and maintaining Skills under different categories within SkillHub; and individual/enterprise regular users, who work on the DeepWorks desktop client to use published and authorized AI capabilities such as experts, expert teams, and SkillHub.
tenant administrator
-
Role Orientation: As the management lead of the enterprise tenant, this role undertakes platform capabilities and conducts tenant-level configuration, security control and cost management, and is responsible for organization and project space management, expert and Skill lifecycle, member and permission, audit management, and subscription and cost management (order management, seat & point configuration)
-
Core responsibilities: Project Center (project space, project members, task monitoring); Asset Center (tenant SkillHub, MCP management); Transaction Center (audit management, category management); Member and Permissions (sub-accounts, roles, enterprise member authorization).
-
Work Entry: Admin Portal & Console.
Project Space Administrator
-
Role Orientation: As the person in charge of a single project space, this role is responsible for managing the AI assets (experts, expert teams, Skill library), task operation and quality evaluation within the project for specific business scenarios.
-
Core Responsibilities: Task Kanban (long-term task browsing for experts/team leads); Project Skill Library (project-specific knowledge repository); Intelligence Center (expert management, expert team management).
-
Configuration Instructions: Before enabling this role, the tenant administrator needs to add this custom role in the Console, and grant the role the relevant permission items for “Tasks”, “Project Spaces”, “Expert Management”, “Expert Team Management”, and “Skill Management”.
-
Work Entry: Management Portal.
AI Builder
-
Role Orientation: As a builder of experts (Agent) and expert teams (Squad), this role is responsible for assembling business capabilities into usable experts and expert teams, serving as the “assembler” that connects business knowledge with AI execution.
-
Core responsibilities: Expert configuration (expert settings, expert responsibilities, expert memory, responsibility documents, tool configuration, operation configuration, scope of application); expert group configuration (planning and scheduling primary Agent, specialized member sub-Agents).
-
Configuration Instructions: Before enabling this role, the tenant administrator needs to add this custom role in the Console and grant it the relevant permission items of “Expert Management” and “Expert Team Management”.
-
Work Entry: Management Portal.
Skill Category Release Lead
-
Role orientation: As the release gatekeeper for a specific Skill category within a tenant, this role is responsible for conducting professional reviews on the release/promotion applications of Skills belonging to this category, ensuring the security compliance and quality standards of the listed assets, and serves as a reviewer alongside the tenant administrator in the “professional centralized review” mechanism.
-
Core Responsibilities: Transaction Center (Review Management · SkillHub Publishing Application — handle three types of applications under this category: personal-level Skill publishing applications for DeepWorks desktop, and tenant-level publishing for users with review permissions; execute approval or rejection, and a reason must be provided for rejection). Users only hold review rights and do not obtain the editing rights for Skills in this category (editing rights belong to “Category Collaborators”; the two roles can be held concurrently but self-review and direct publishing are not allowed).
-
Configuration Instructions: Before enabling this role, the tenant administrator needs to add this custom role in the Console and authorize the role with the relevant permission items of “Audit Management”.
-
Work Entry: Management Terminal.
Individual / Enterprise Regular Users
-
Role Orientation: As the end consumer of AI capabilities, they apply experts and expert teams to their daily work on the desktop side.
-
Core Responsibilities (Available Capabilities): Local Workspace (task sessions, local files, artifact management); My AI Colleague Workspace (long-running tasks, expert invocation, expert team invocation); SkillHub (personal Skills, discovery and installation); User Personalization (models, styles); Feedback Management (requirements, defects, suggestions), etc.
-
Work Entry: DeepWorks Desktop.
business process
tenant SkillHub Publishing Process
DeepWorks Desktop
-
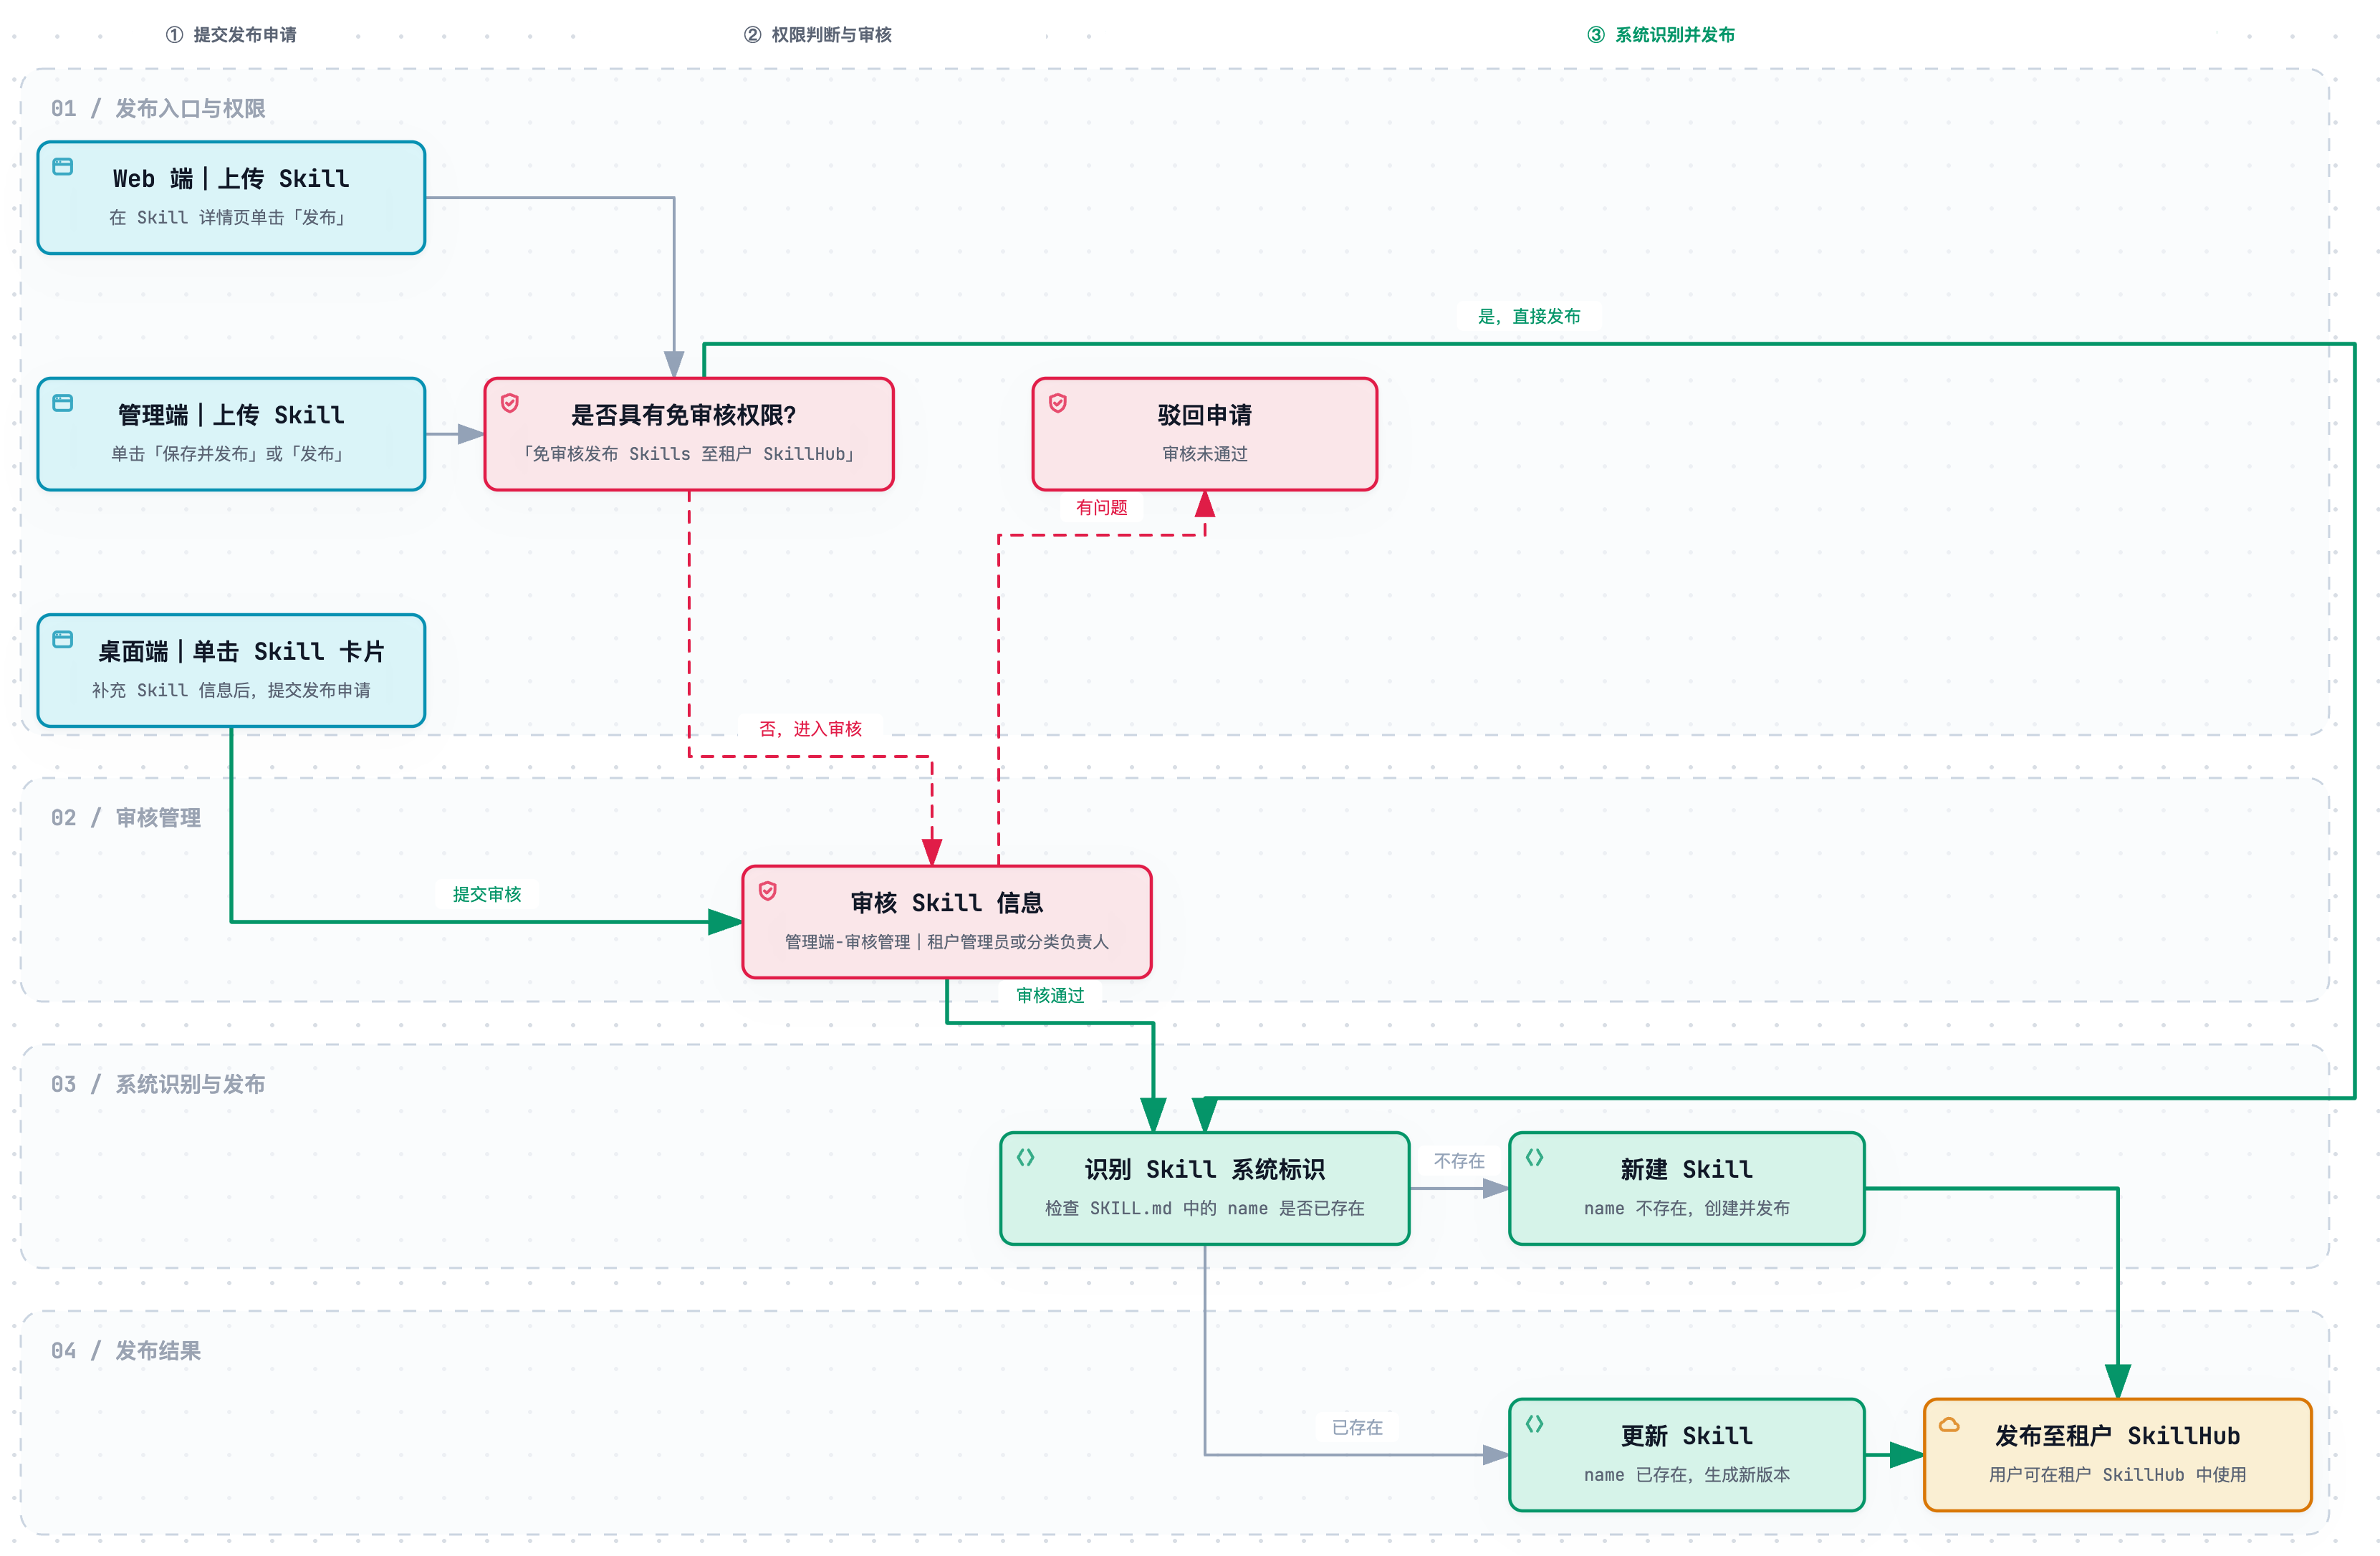
Step 1: Enterprise or individual users click the Skill card on the DeepWorks desktop client, fill in the Skill information, and then submit the release application.
-
Step 2: The tenant administrator or the person in charge of this Skill category will review the Skill information, with the review entry located at DeepWorks Admin Console - Review Management. If there are no issues, the application can be approved; if there are issues, the application will be rejected. After the application is approved, the system will identify whether the system identifier of this Skill (i. e., the name in SKILL.md) already exists. If it exists, the system will recognize the two as the same Skill, update this Skill and generate a new version; if it does not exist, the system will create and release this Skill.
DeepWorks Admin Panel
-
Step 1: Maintain Skills. The user uploads the Skill on the DeepWorks management end, and clicks “Save and Publish” or “Publish” to submit a publish application. Note: Users with the permission of “Publish Skills to tenant SkillHub without review” can publish directly without review.
-
Step 2: The tenant administrator or the person in charge of this Skill category shall review the Skill information. If there is no problem, the application can be approved to proceed to the next step; if there is a problem, the application shall be rejected.
Knowledge Center Web
-
Step 1: A user on the Knowledge Center web uploads a Skill, and clicks “Publish” on the Skill detail page to submit a publish application. Note: Users with the permission to “publish Skills to tenant SkillHub without review” can publish directly without going through the review process.
-
Step 2: The tenant administrator or the person in charge of this Skill category will review the Skill information, with the review entry located at DeepWorks Admin Console - Review Management. If there are no issues, the application can be approved; if there are issues, the application will be rejected. After the application is approved, the system will check whether the system identifier of this Skill (i. e., the name in SKILL.md) already exists. If it exists, the system will recognize the two as the same Skill, update this Skill and generate a new version; if it does not exist, the system will create and release this Skill.
Function Overview
Console (Management Center)
-
Sub-account Management: View sub-accounts by organization tree, support adding, editing (including password reset and organization change), deleting members, and assigning roles to members (default roles do not require assignment). Note: Account creation, activation and deactivation are completed in the Console, and the usage qualification (seats) and point quota of DeepWorks are configured in the “Seat & Point Configuration” section of the management end.
-
Role Management: Roles are categorized into three types: primary administrator, default role, and custom role; it supports adding new roles, configuring permission points by checking products, editing role information, associating/removing members, batch importing members to roles, and deleting roles.
-
Password and timeout configuration: Uniformly configure password complexity, modification cycle, historical password retention, account locking rules, mandatory password change upon first login, and system timeout duration.
-
Data Management: Supports batch import of organizational user information, as well as synchronization with third-party data sources including DingTalk and Feishu.
Workflow and AI Colleagues
-
Project Space: View all project spaces of the tenant (including four initialized spaces: General, DataSense, FDESense, DeepSense), support creating new custom project spaces, and assign space Right of access to members via “Project Space Permissions”.
-
Task: View long-term tasks generated by members summoning experts/expert groups by status, and drill down to task details, dynamics and execution logs.
-
Expert List: View built-in/custom experts, and perform operations including creating (with 12 configuration items such as name, avatar, instructions AGENTS.md, SOUL.md, Skills, MCP tools, conversation experience, affiliated space, runtime, etc.), duplicating, editing, archiving, and restoring experts.
-
Expert Team List: View built-in/custom expert teams, create (including designating a “Leader Agent” responsible for scheduling and distribution), edit (adding/deleting members, sorting, changing team leader, adjusting conversation experience, injecting team guideline prompts), and archive expert teams.
Operation Center
-
Skill Management: Skills are governed at four levels: platform/tenant/project/individual, and the management console provides three tabs for viewing. It supports single/batch upload (routed by permissions to either direct listing without review or entry into the review queue), publishing, delisting, relisting, editing (basic information + online file editing + full package overwrite update), export, deletion, and viewing of historical published versions.
-
Tool Management: View, add, enable/disable, edit and delete MCP tools.
Subscribe
-
Order Management: View all subscription orders of this tenant, support searching and exporting orders by criteria such as order number and package name. In the order details, you can directly initiate “renewal” or “purchase top-up package”, which is used to supplement the point quota in addition to the enterprise’s monthly point pool.
-
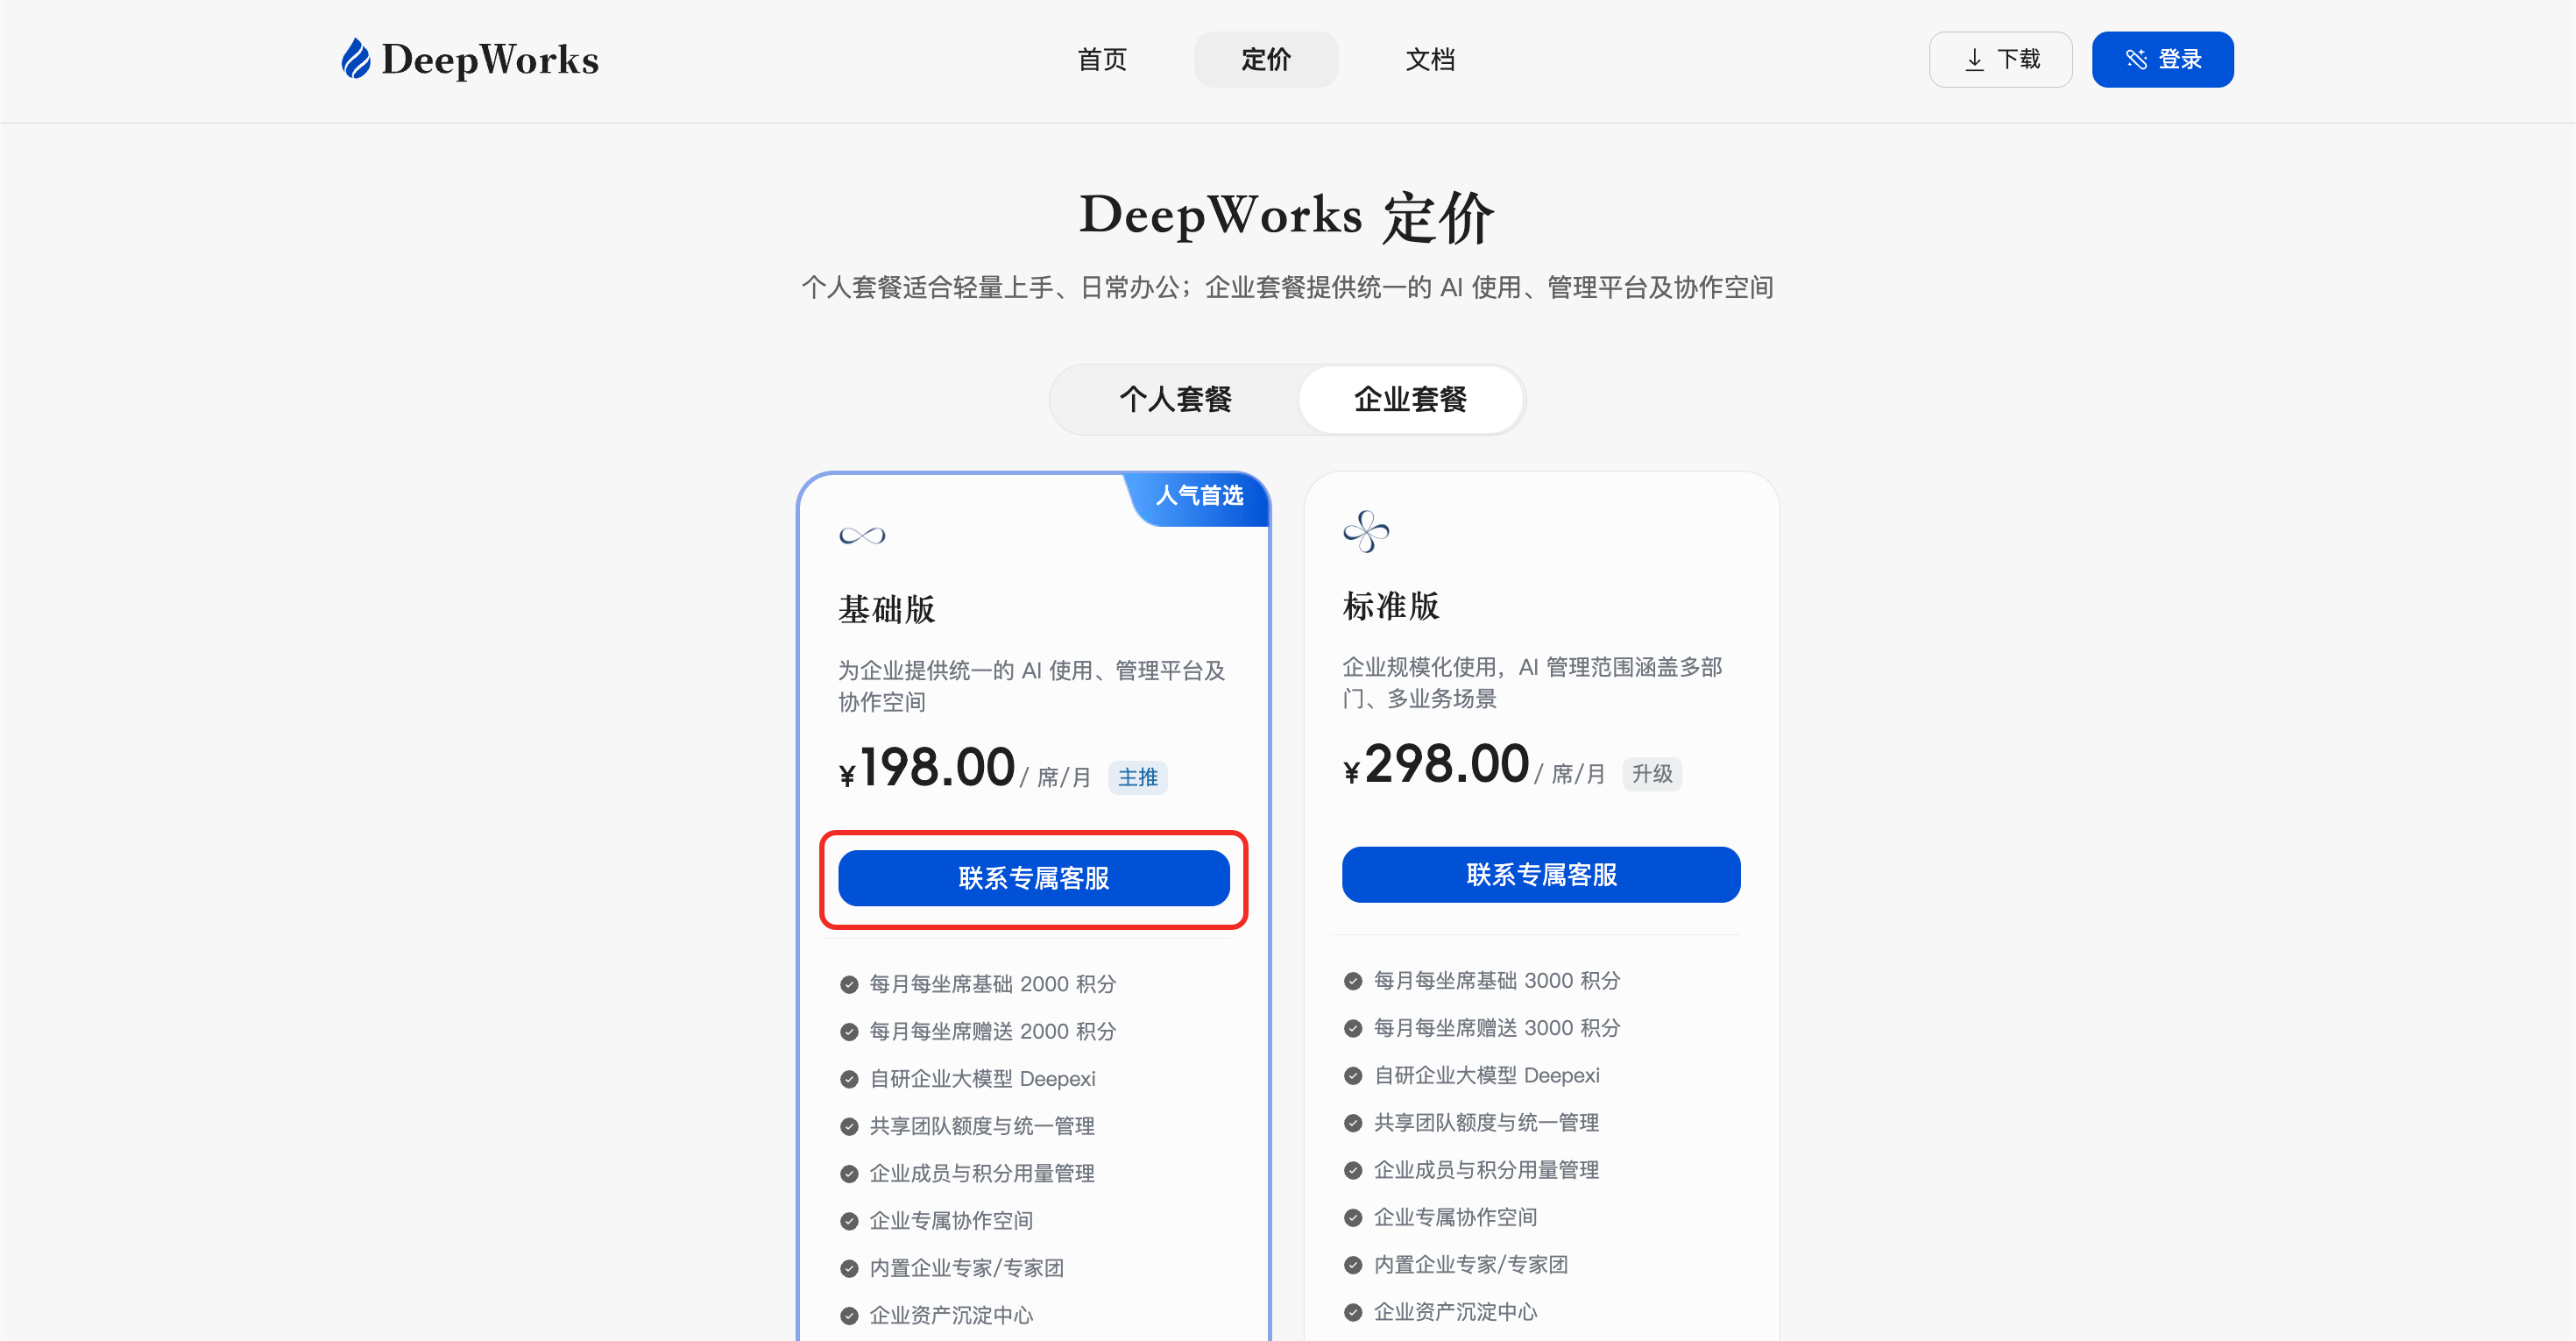
Purchase Channel: The “Pricing” page on the official DeepWorks website offers both individual and corporate plans for selection. Click “Contact Dedicated Customer Service” to scan the code and add your exclusive consultant for inquiries regarding procurement, solution selection, and invoicing.
-
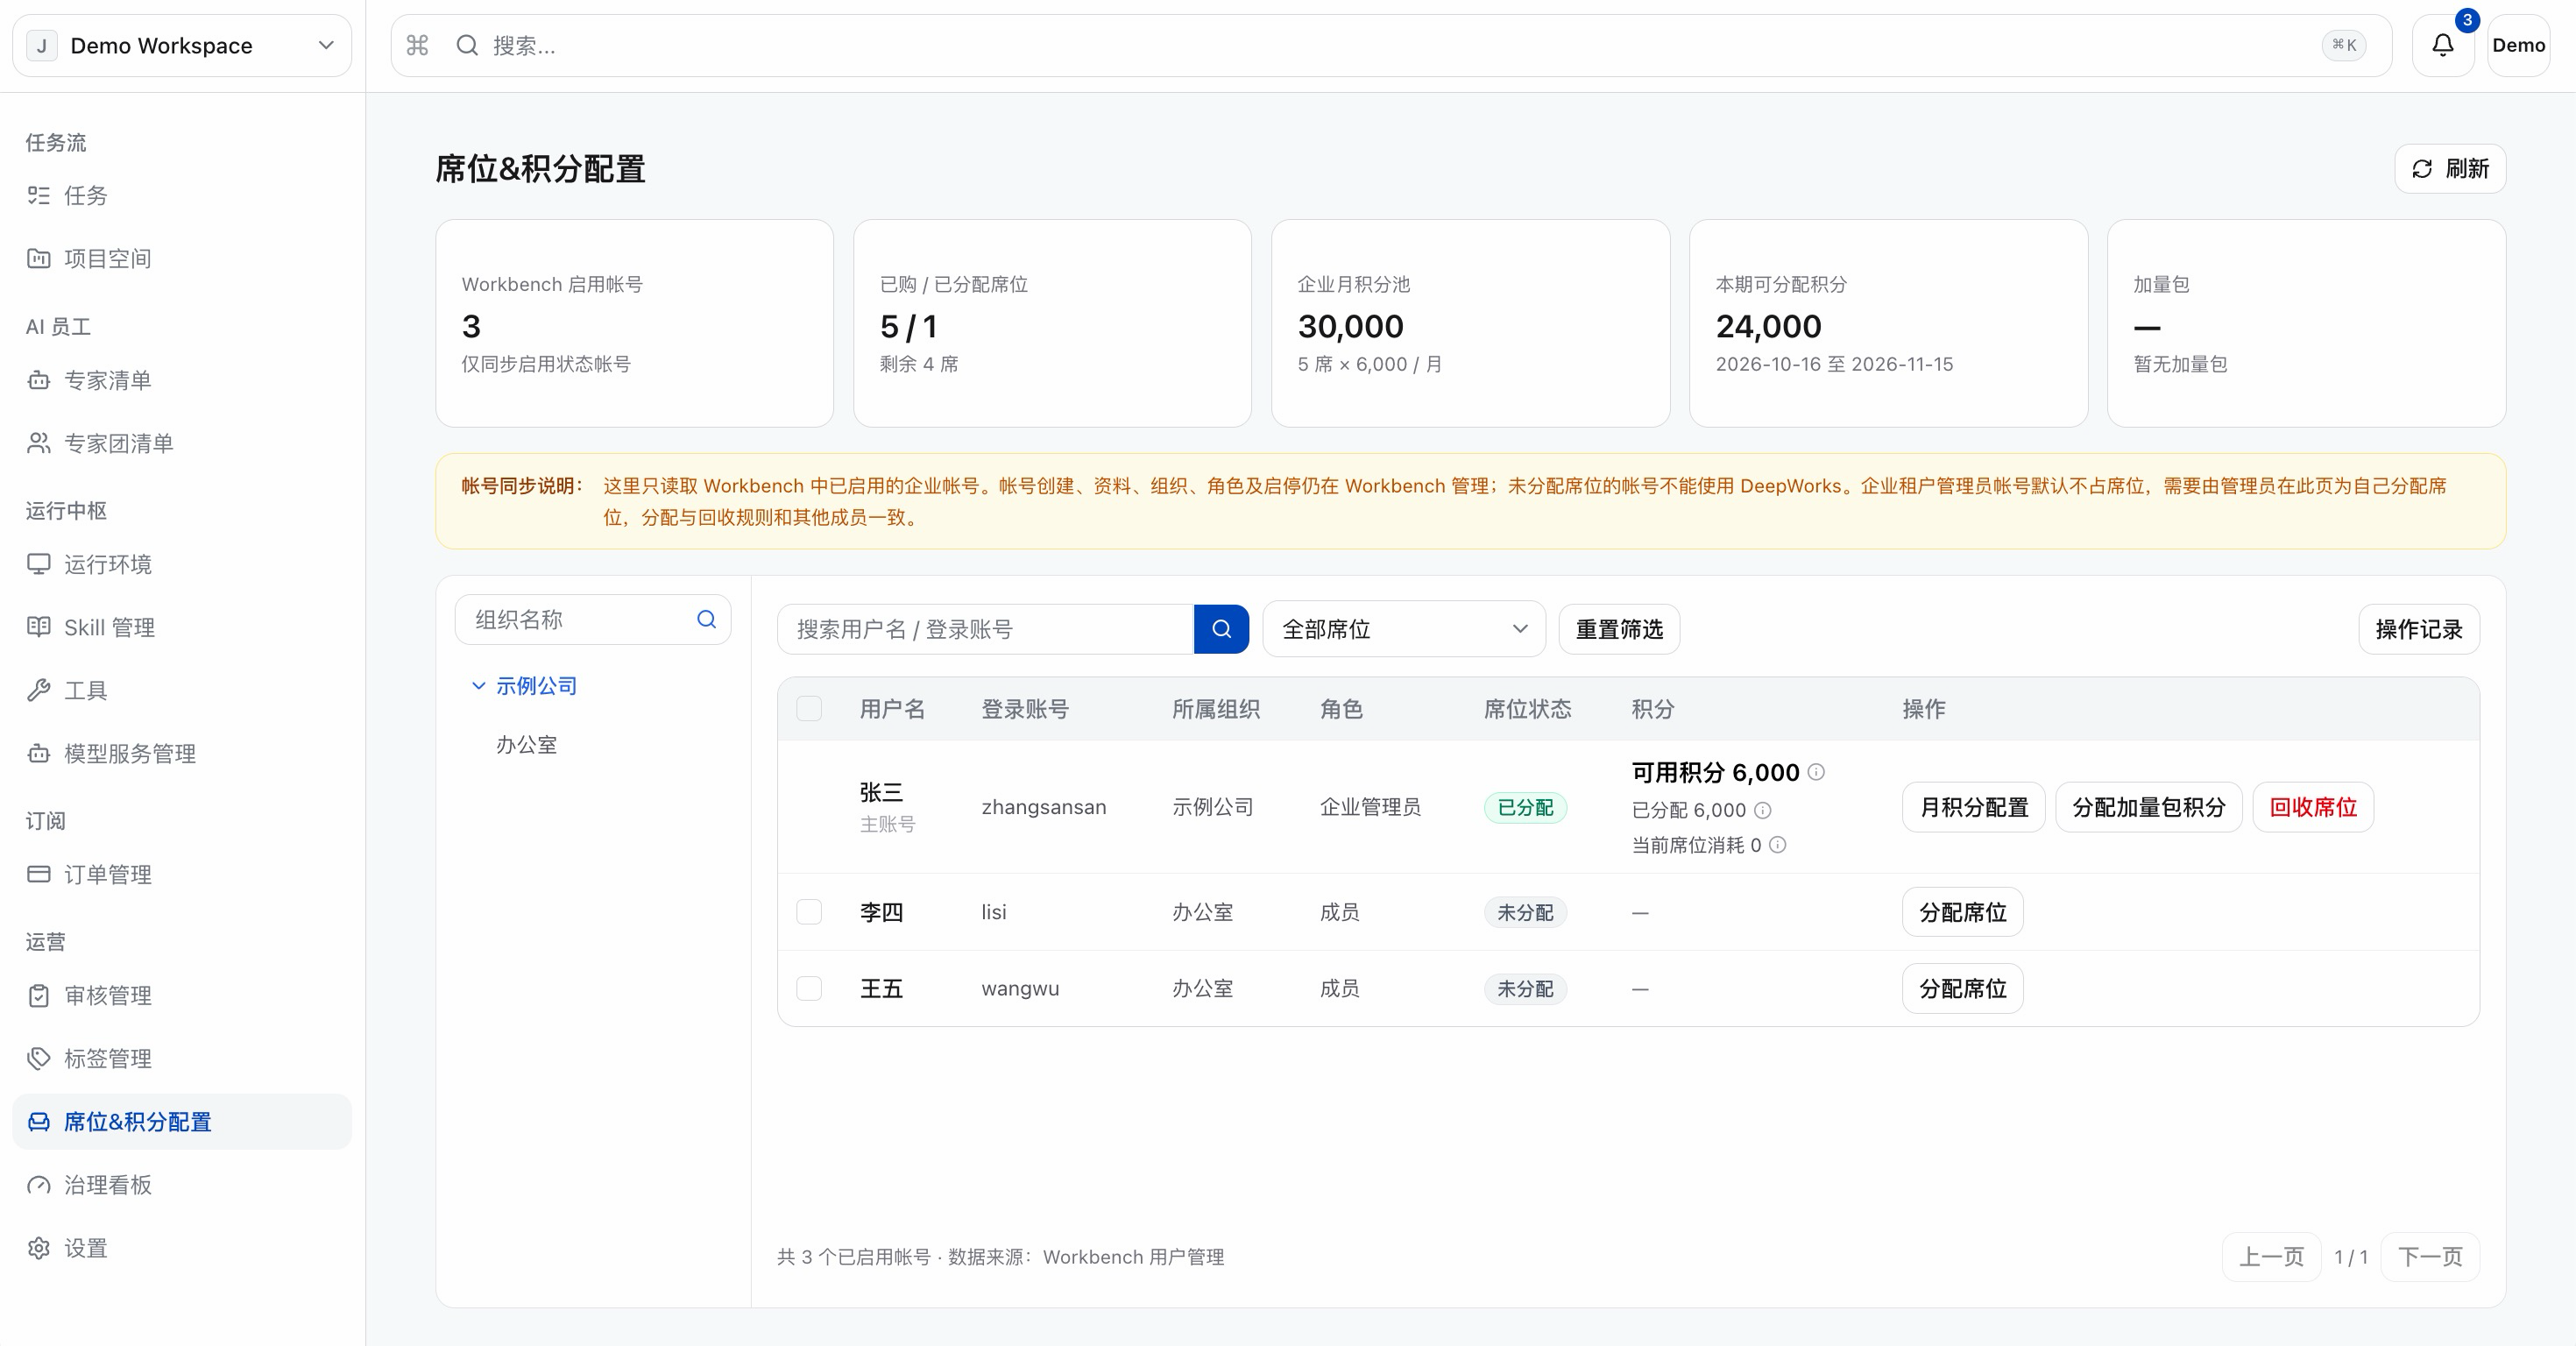
Seat & Points Configuration: Unified management of seat allocation and point quotas for enterprise members. Note: This page only reads enabled enterprise accounts in the Console; accounts with no seats assigned cannot use the DeepWorks desktop client; the enterprise tenant administrator account does not occupy a seat by default, and the administrator needs to assign a seat to themselves on this page.
Operations
-
Category Management: Viewing, creating, editing and deleting Skill categories (platform-built / tenant-created), as well as category member management — the “release lead” is designated to implement centralized review, and “category members” are granted collaborative management permissions for Skills under this category.
-
Audit Management: The tenant administrator or the person in charge of Skill category publishing audits the SkillHub publishing application.
-
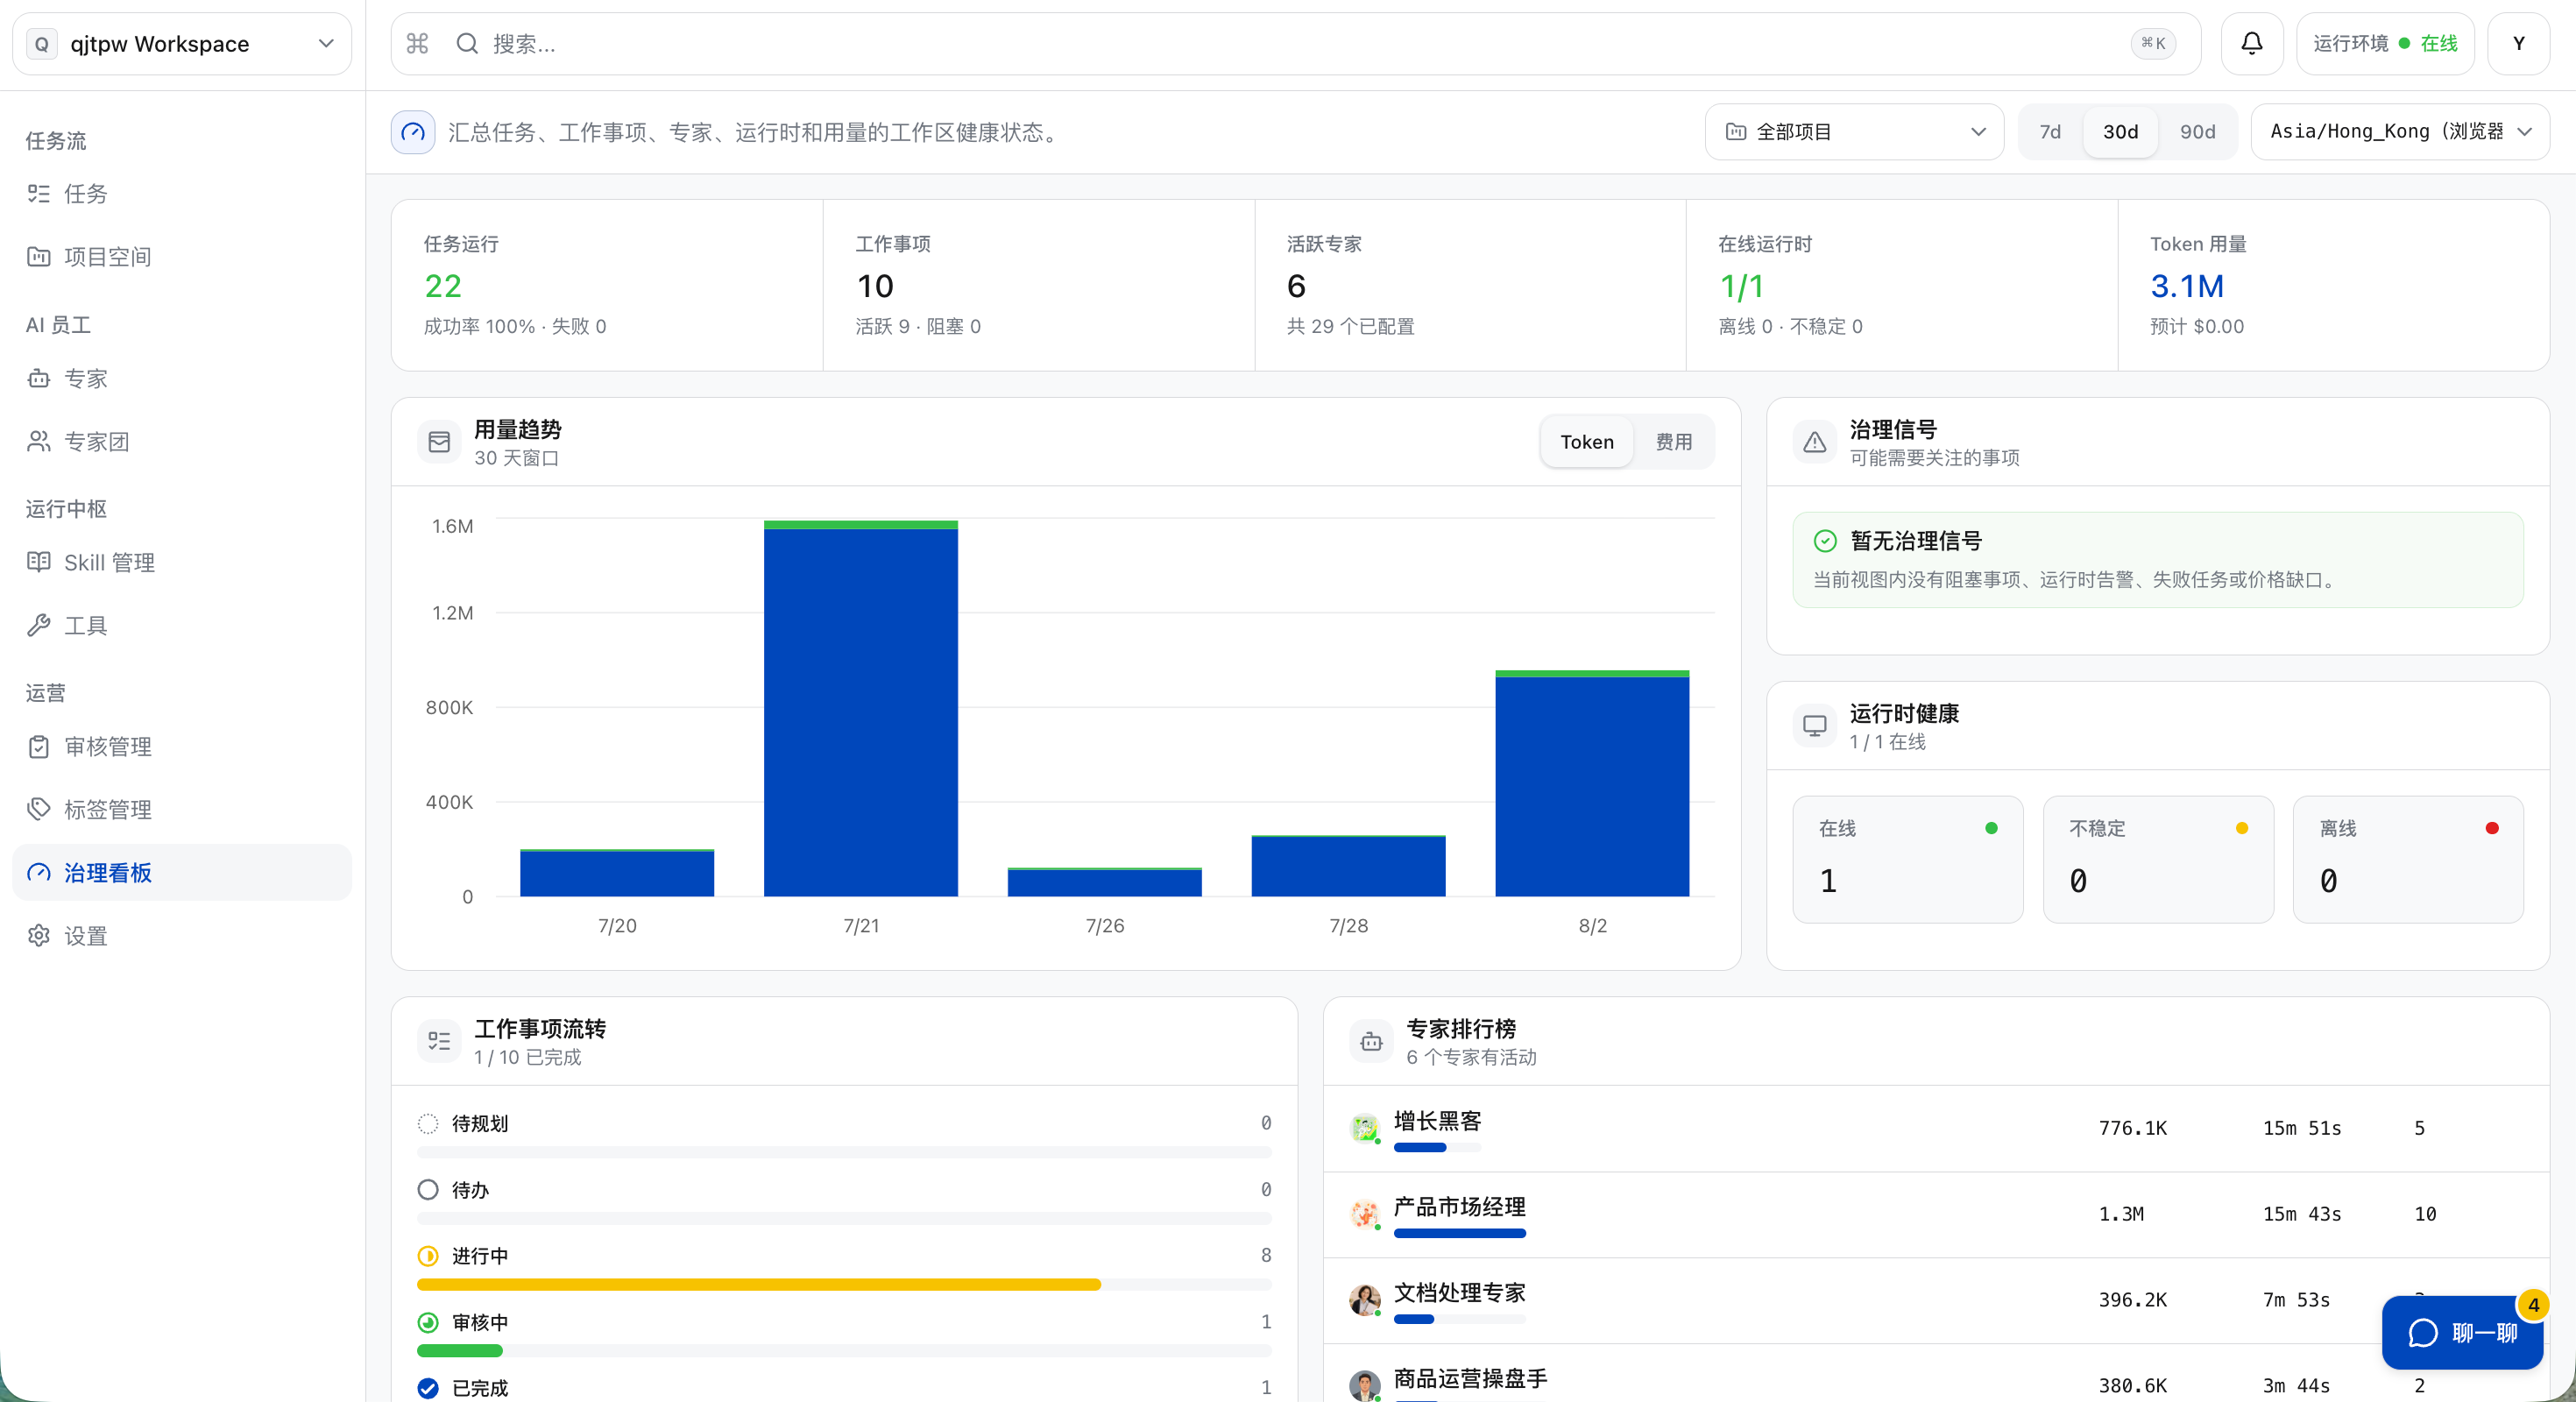
Governance Dashboard: A workspace that lets you view the health status of tasks, work items, experts, runtime and usage on a single screen.
Noun Introduction
-
Project Space: A collaboration unit (public/departmental/organizational space) within a tenant that accommodates tasks, experts, evaluations, diagnostics and settings.
-
Expert (Agent): An agent oriented to specific business scenarios, which supports creating new, uploading expert packages, copying, editing, publishing/unpublishing (dual channels of direct track and review track), archiving, restoring and deleting; its detail page contains multiple tabs such as Overview, Skill Tools, and Work History.
-
Expert Squad: A collaborative team composed of multiple experts, designed for multi-agent orchestration of complex tasks.
-
Built-in Expert / Built-in Expert Team: Official agents pre-configured by the platform, which will be automatically distributed and deployed upon the onboarding of a new tenant.
-
Skill three-level system: Project Skill library / Personal local Skill →(Publishing application / Shelf review) → tenant SkillHub →(Publishing application / Shelf review) → Platform SkillHub; tenant administrators can configure publishing approvers for each Skill category, and Skill publishing applications will be reviewed by tenant administrators or Skill category approvers.
-
Organization Tree: The carrier of an enterprise’s organizational structure, to which users are assigned as members of organizational nodes; the list supports filtering by organization.
-
Business Role: A unit for permission aggregation and distribution, categorized into “Default Roles”(preconfigured by the system, e. g. primary administrator) and “Custom Roles”(created by the tenant administrator based on job responsibilities); roles themselves have an enabled status, and permissions are maintained via “Permission Configuration”.
-
User Authorization: The action of binding a role to a user, supporting both single authorization and batch authorization;
-
Runtime: The execution base of the Agent, whose online rate and health status are uniformly monitored by the platform side, and managed and authorized on the tenant side.
Operating Instructions
Login Method
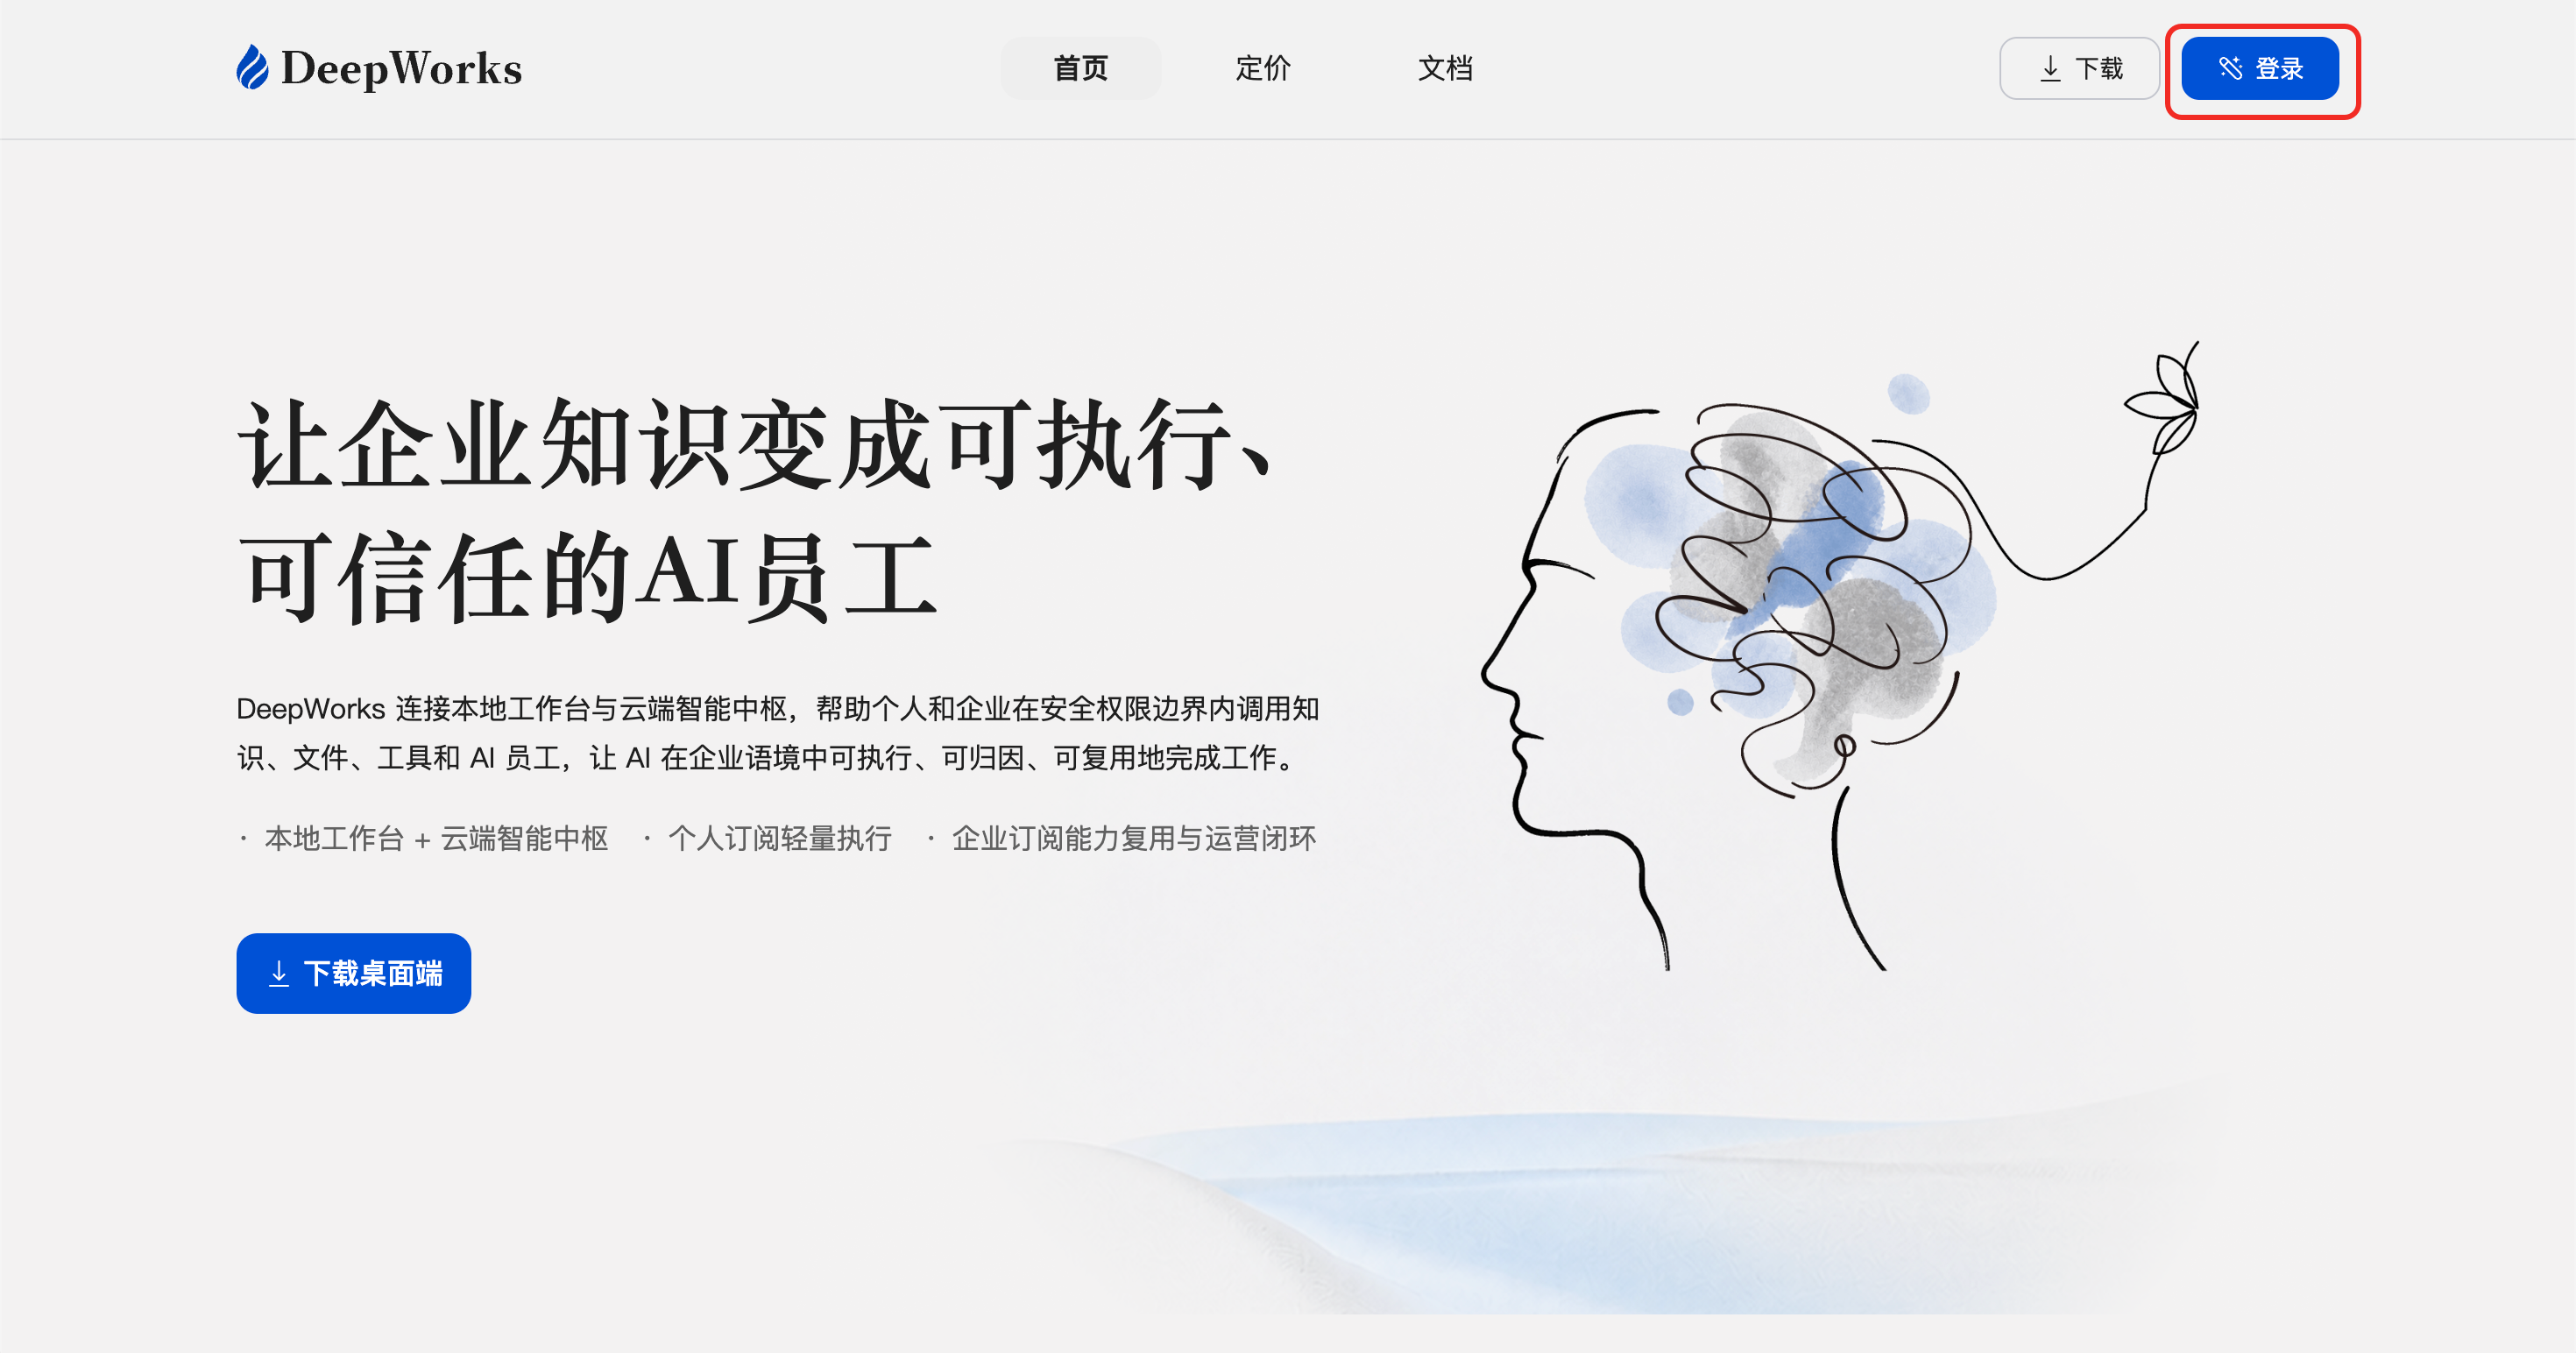
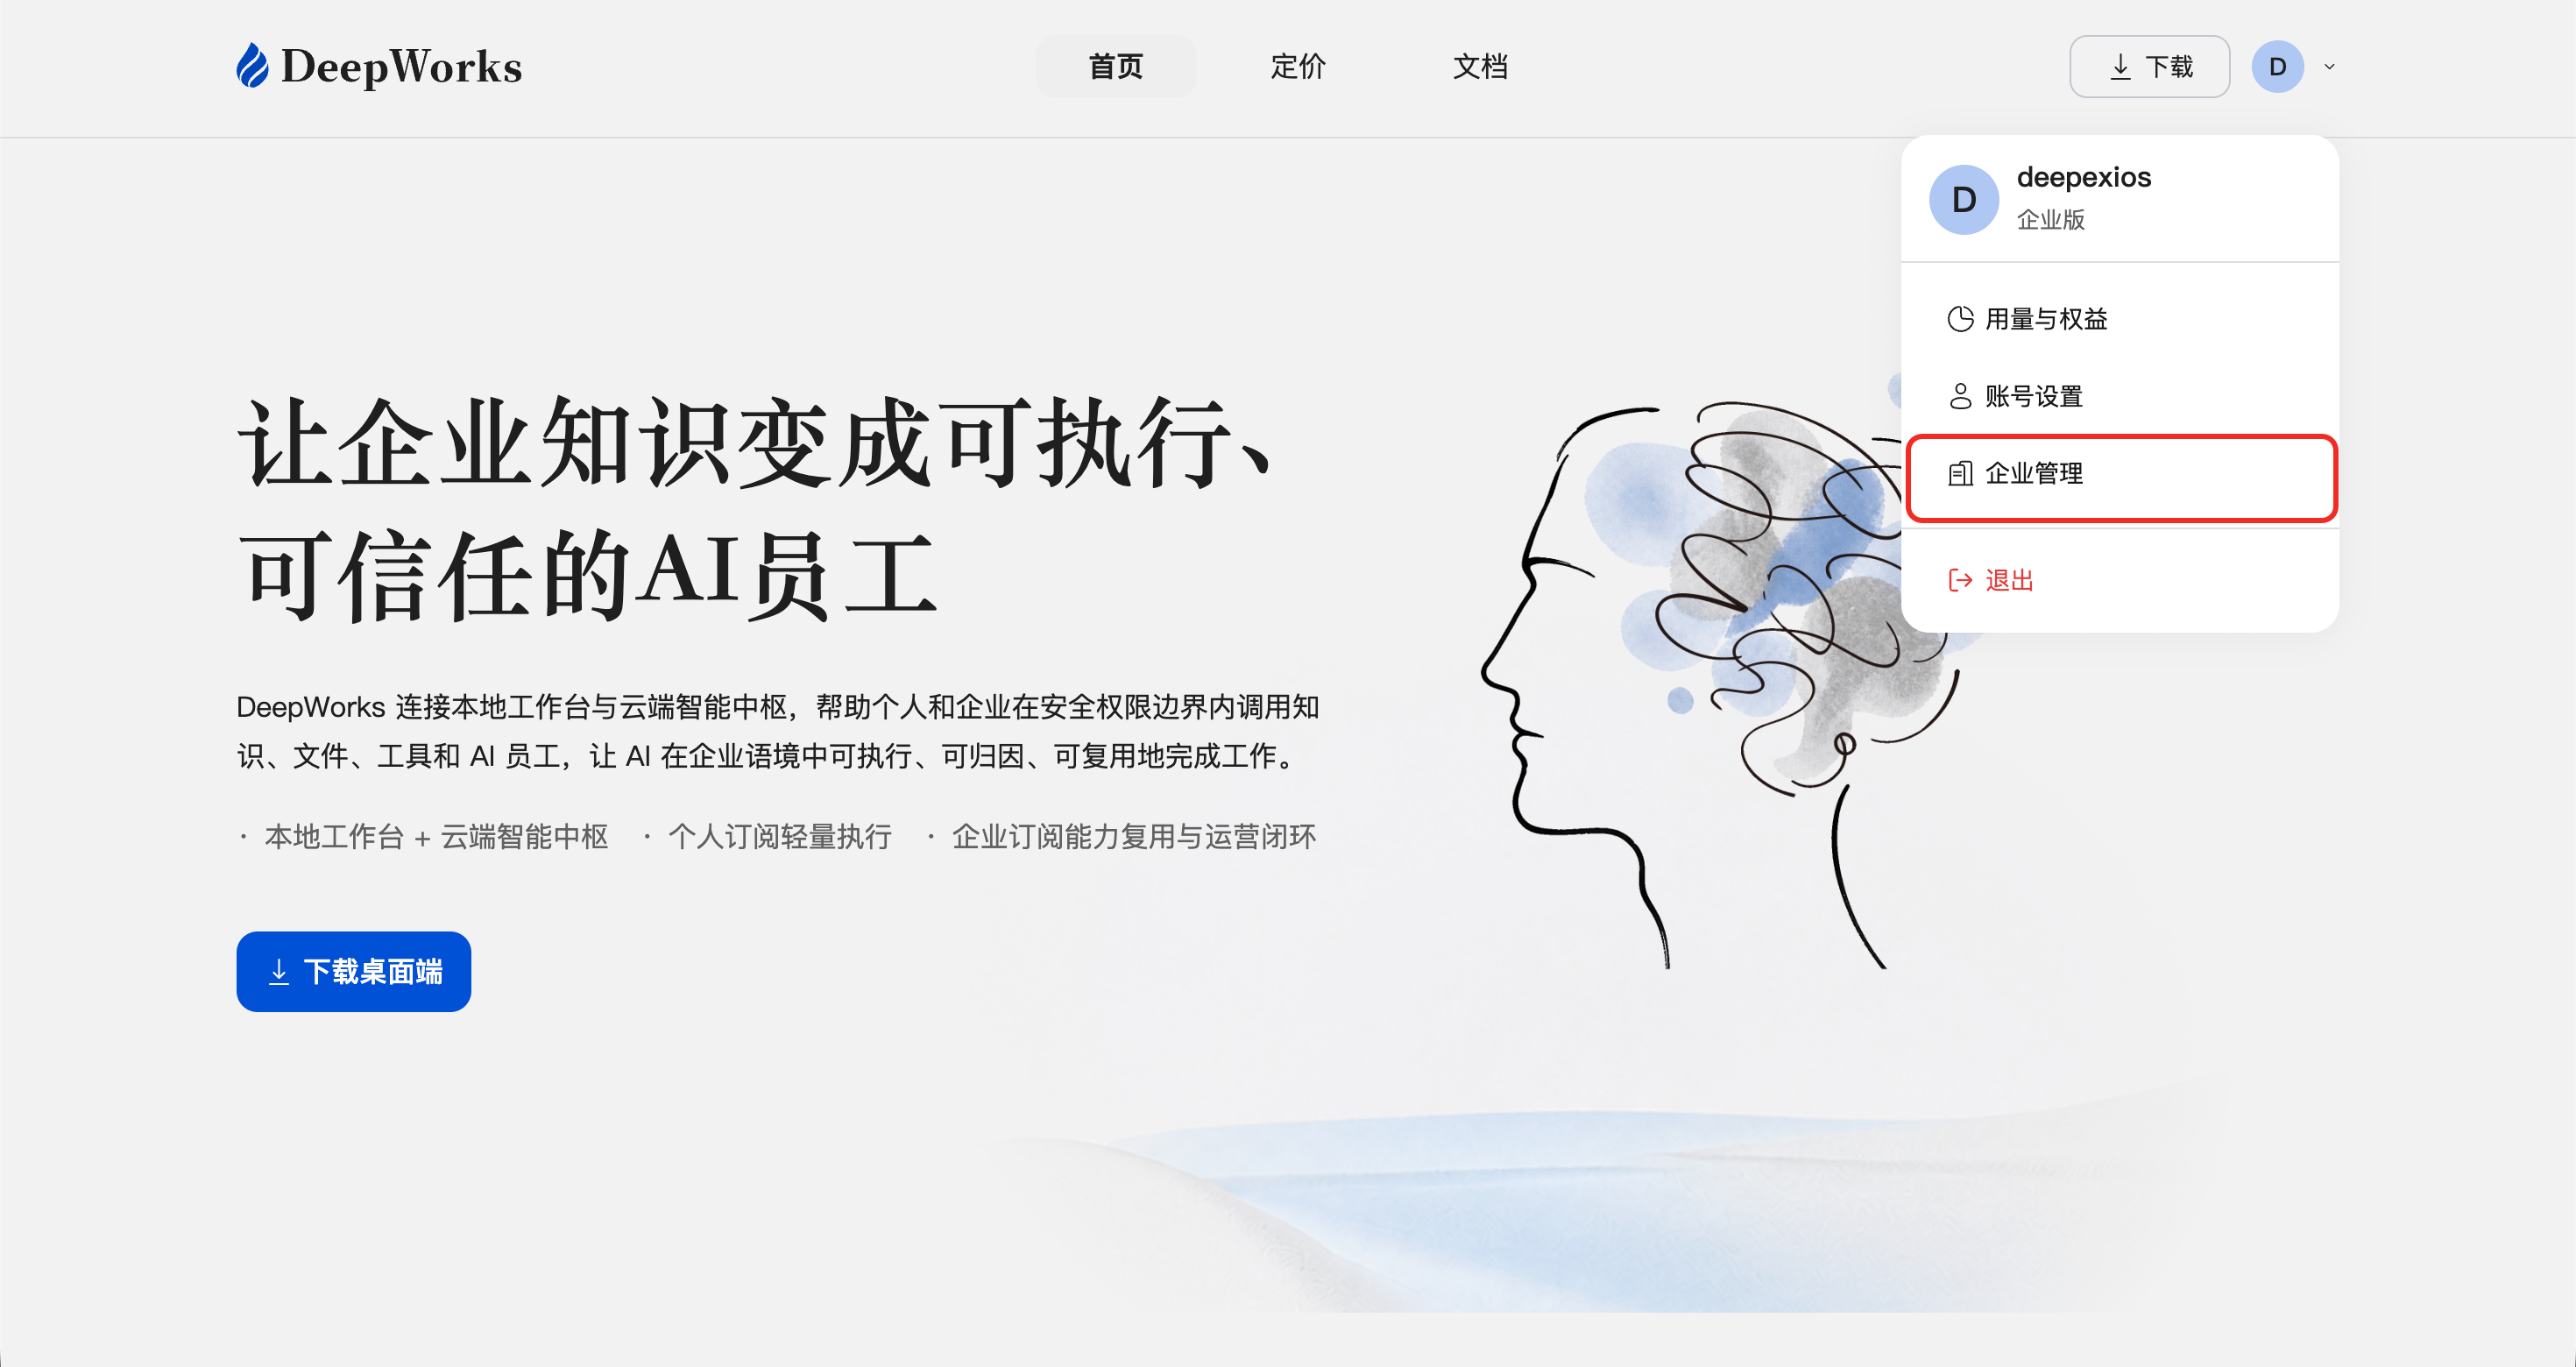
a. Tenant administrators / project space administrators / AI builders open the official DeepWorks website (https://deepworks.deepexi.com/ ) and click “Log in”.
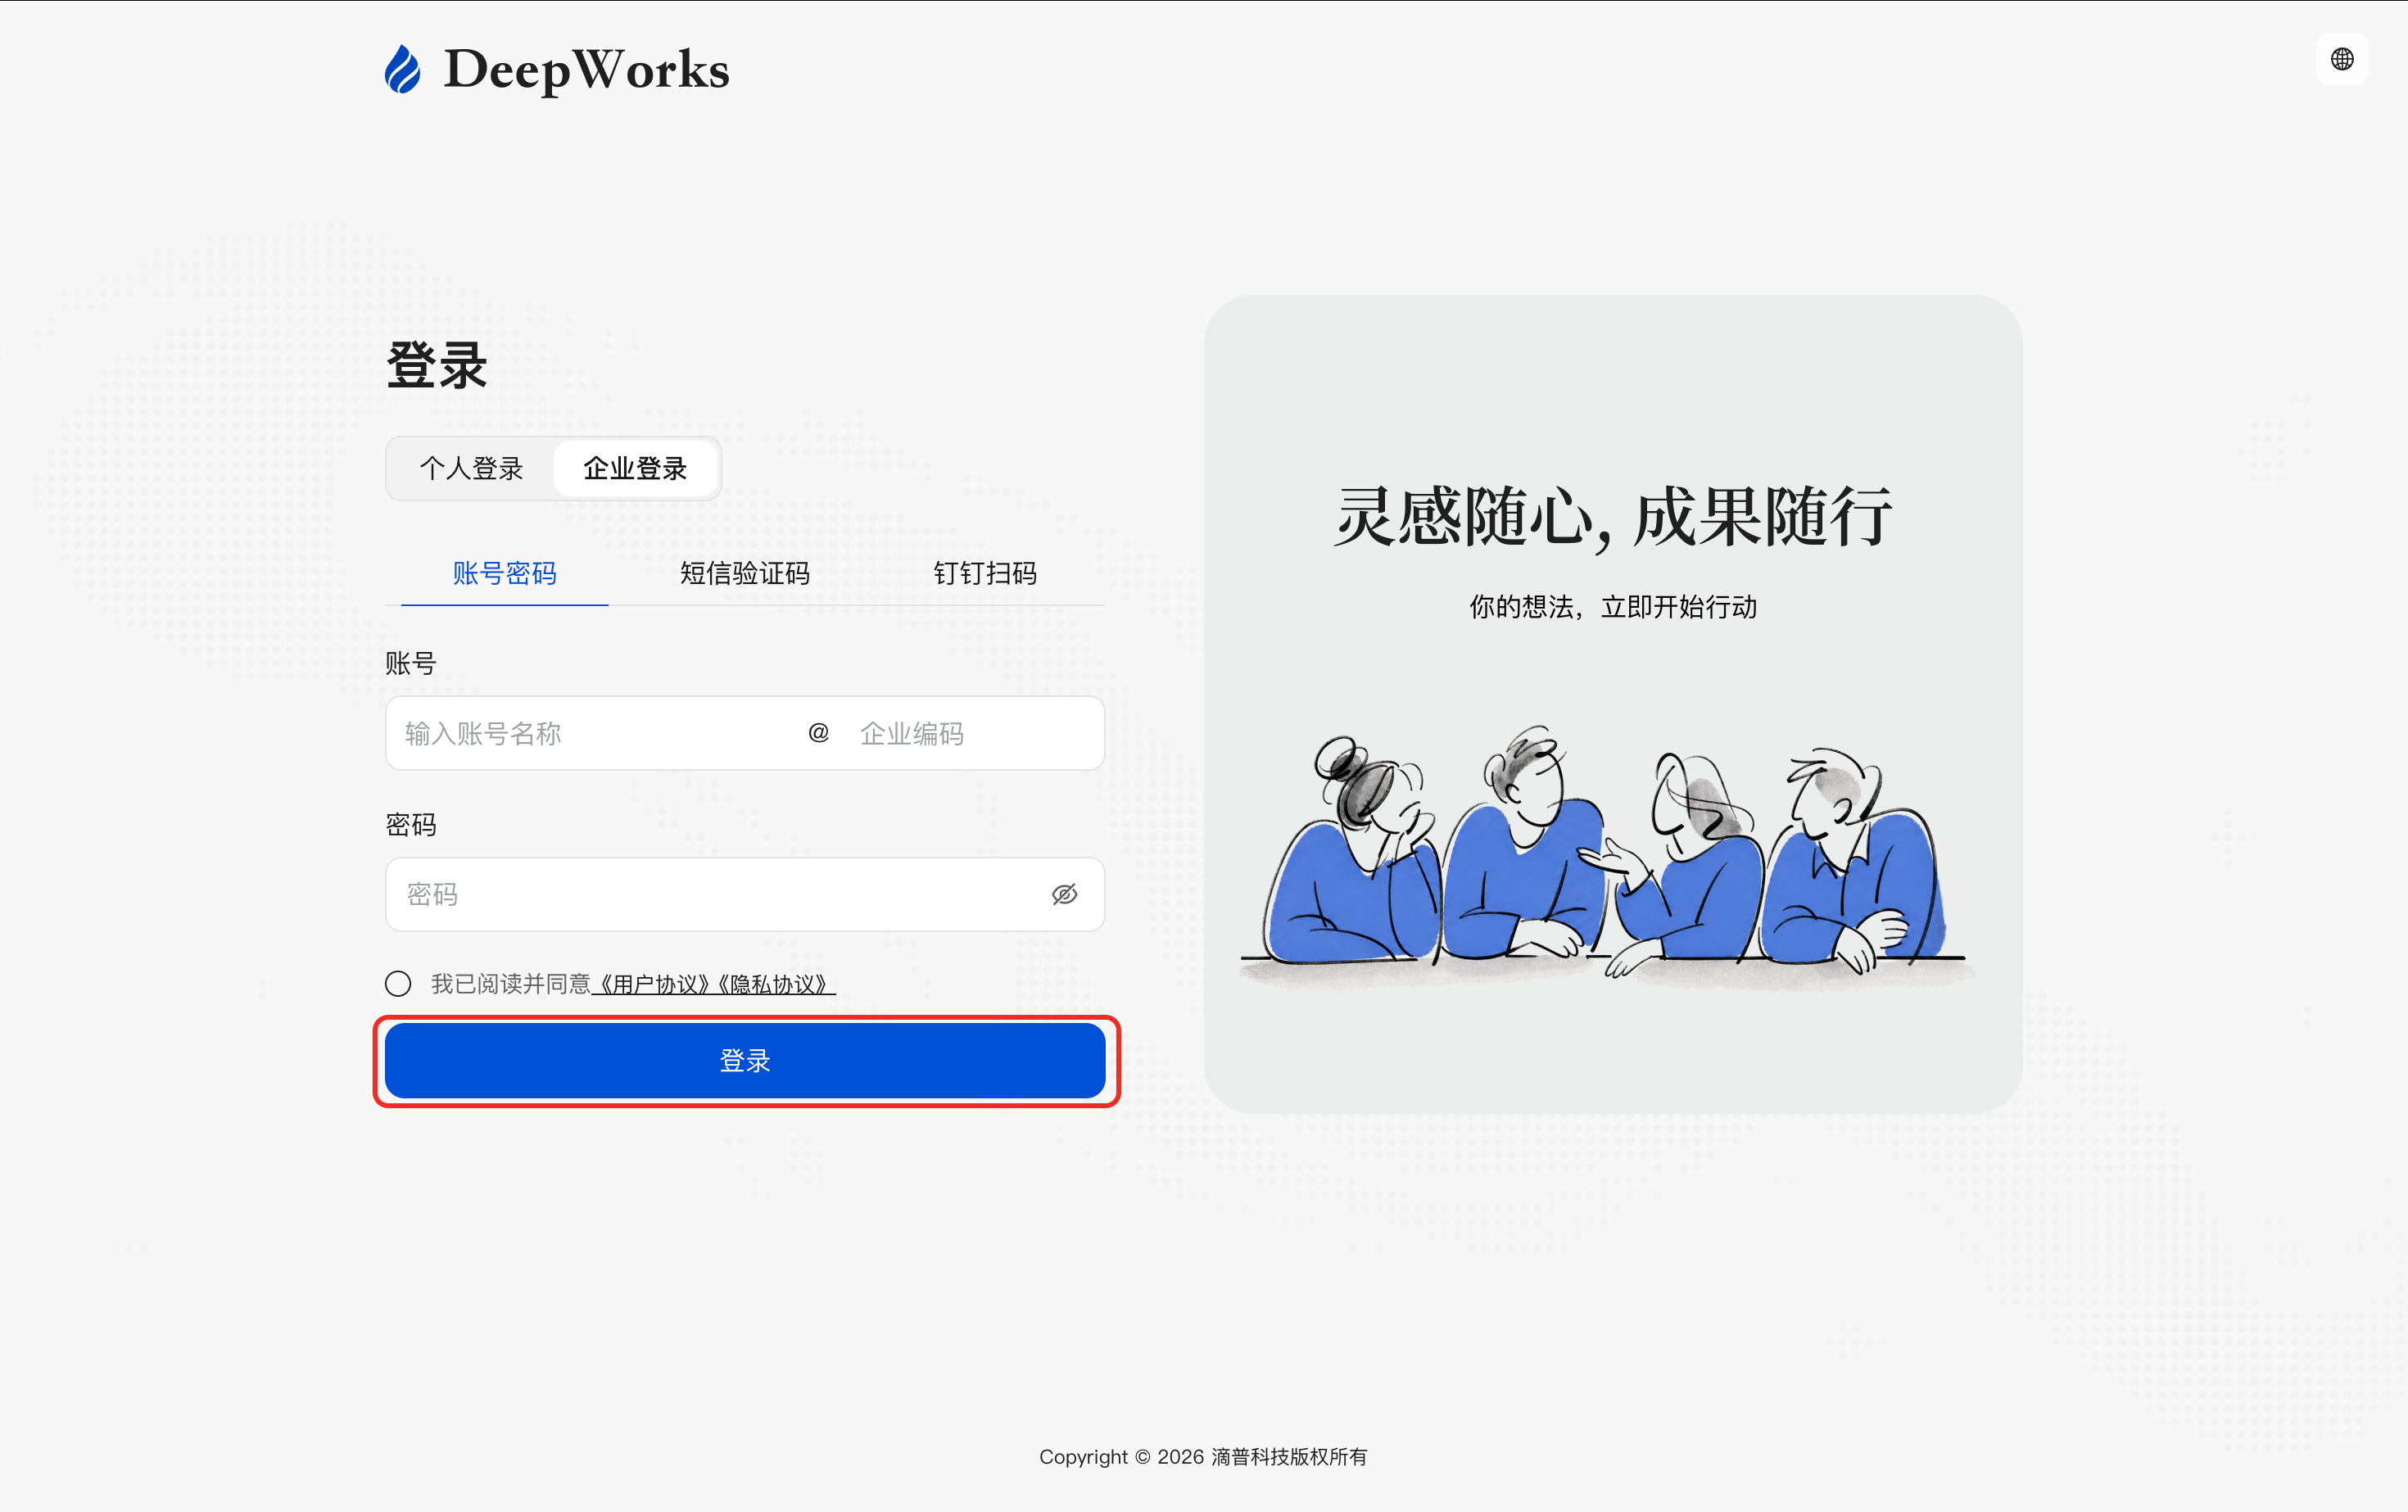
b. Click “Enterprise Login”, enter the account and password for the enterprise version, then click “Login”.
c. After successful login, click “Enterprise Management” under the “Enterprise Dashboard” menu to be redirected to the management console.
Console (Management Center)
Sub-account Management
View Sub-account
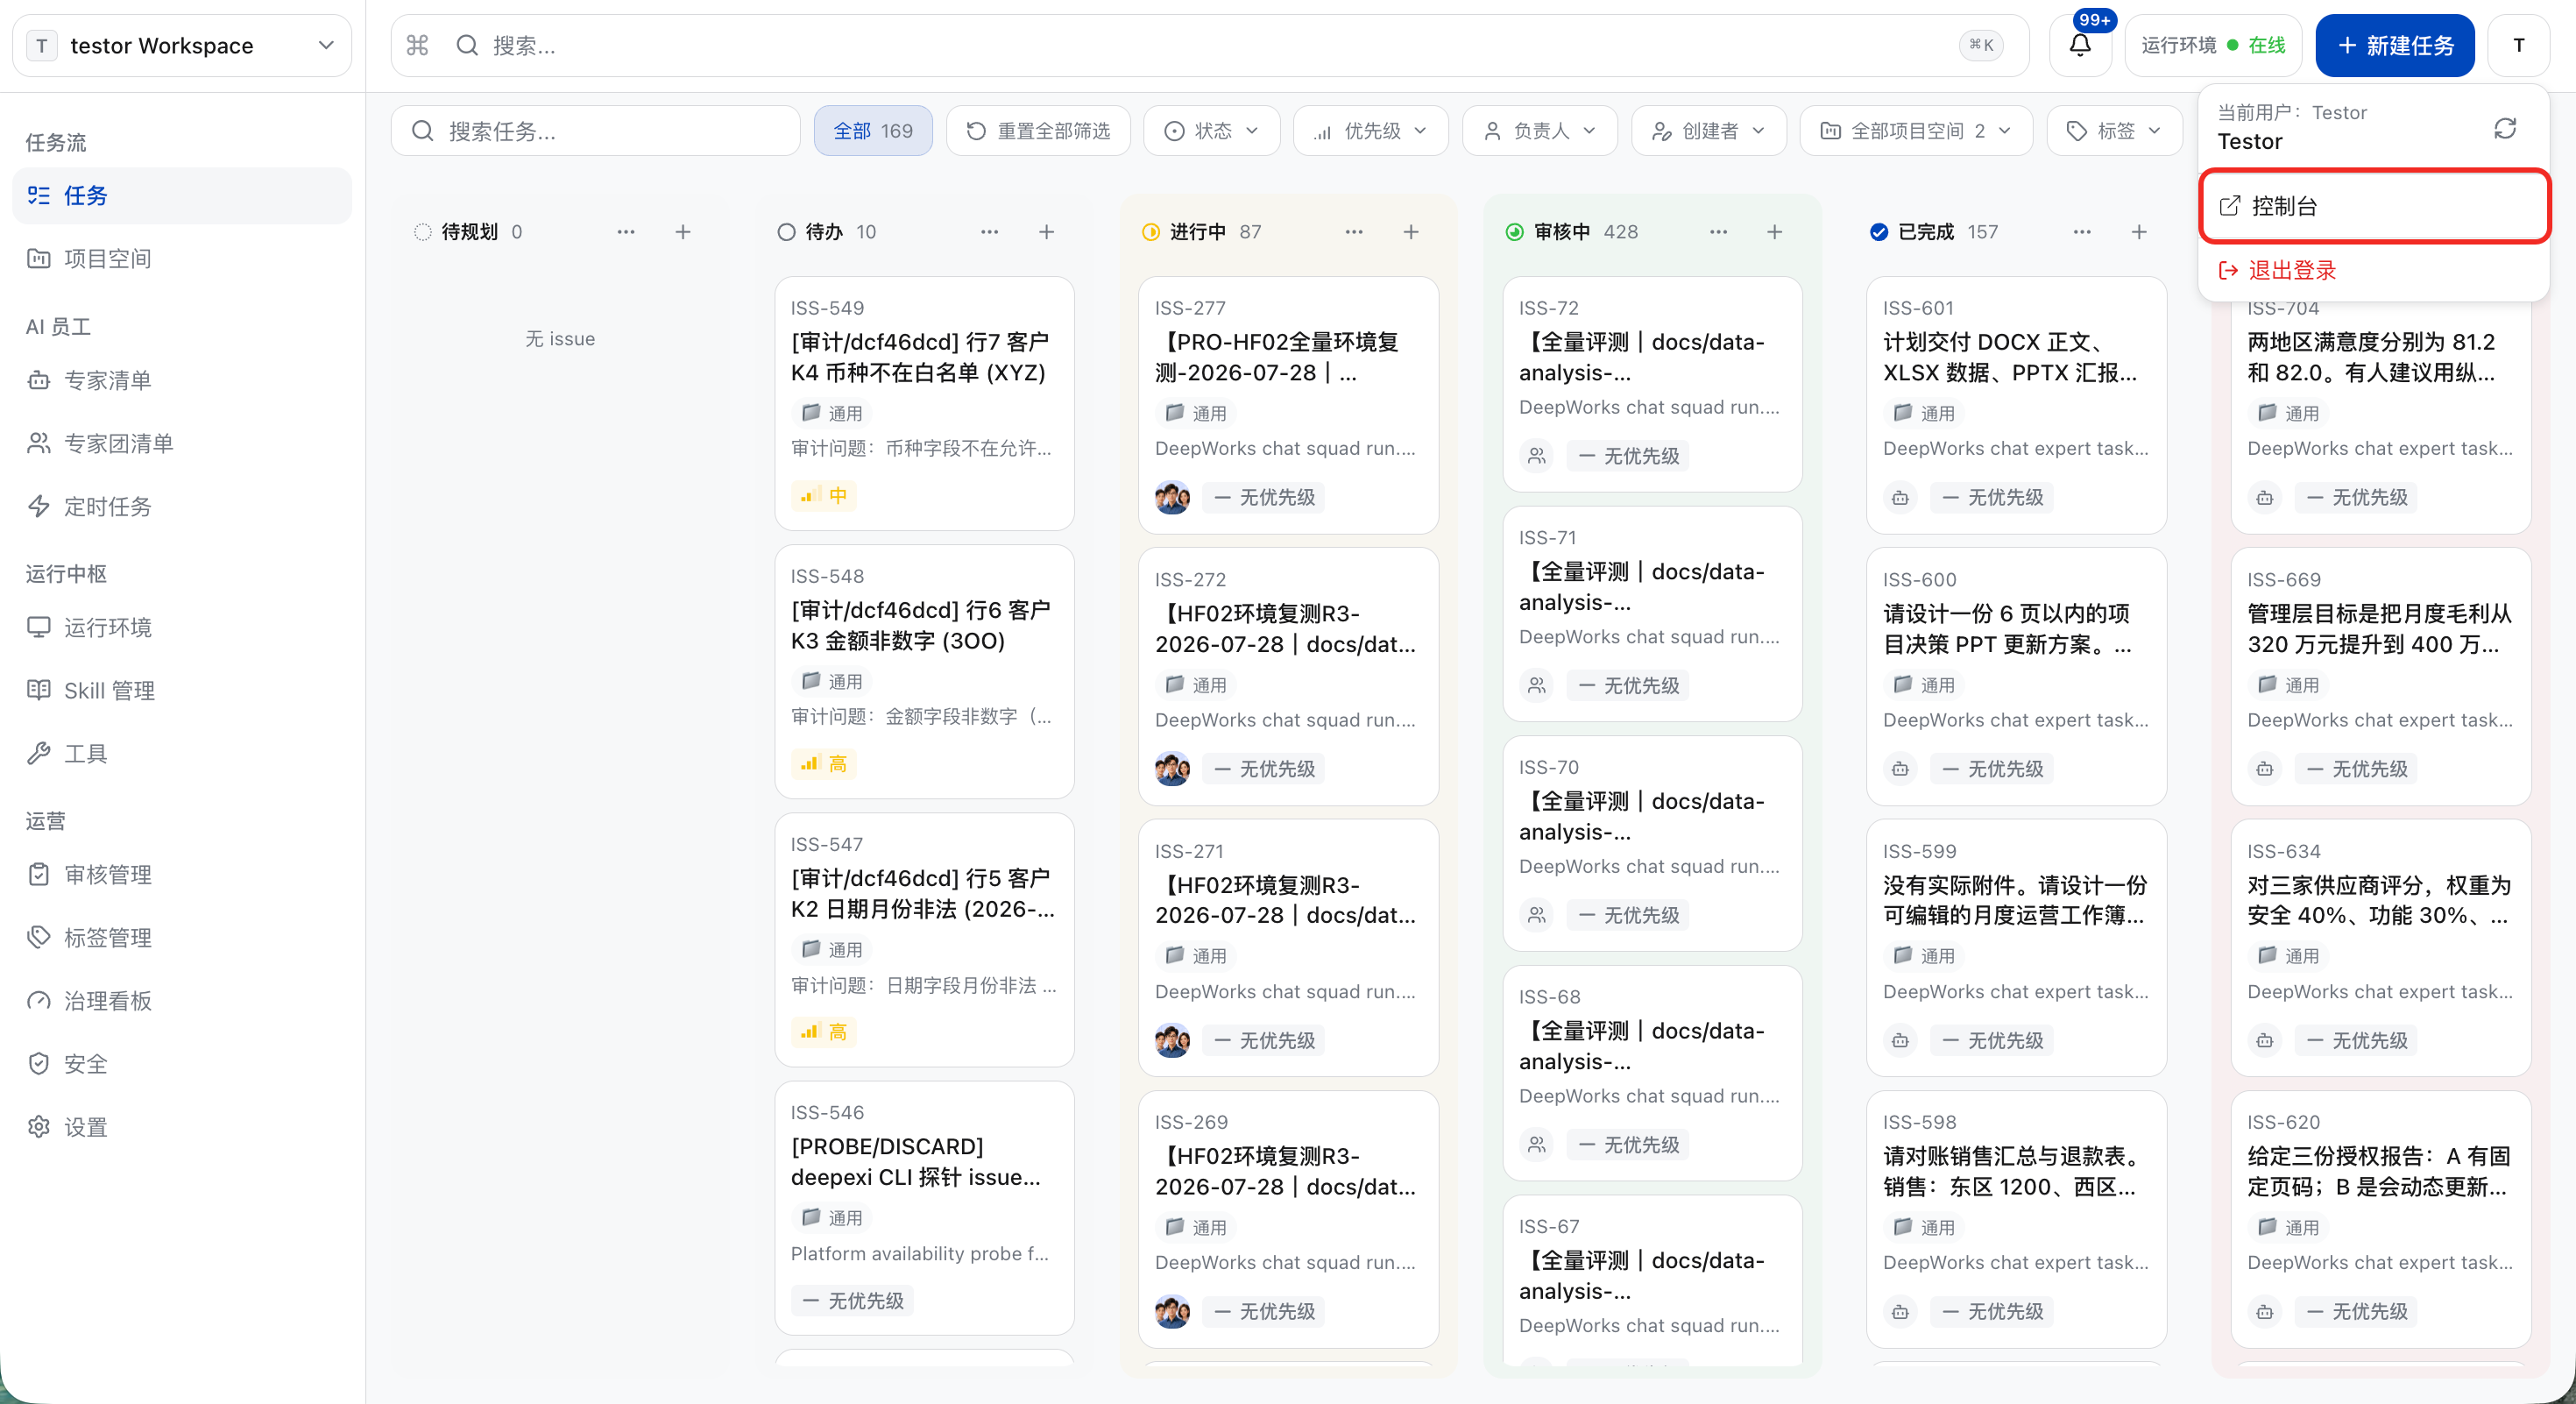
a. Click the profile picture in the upper right corner, click “Console” or directly access Console .
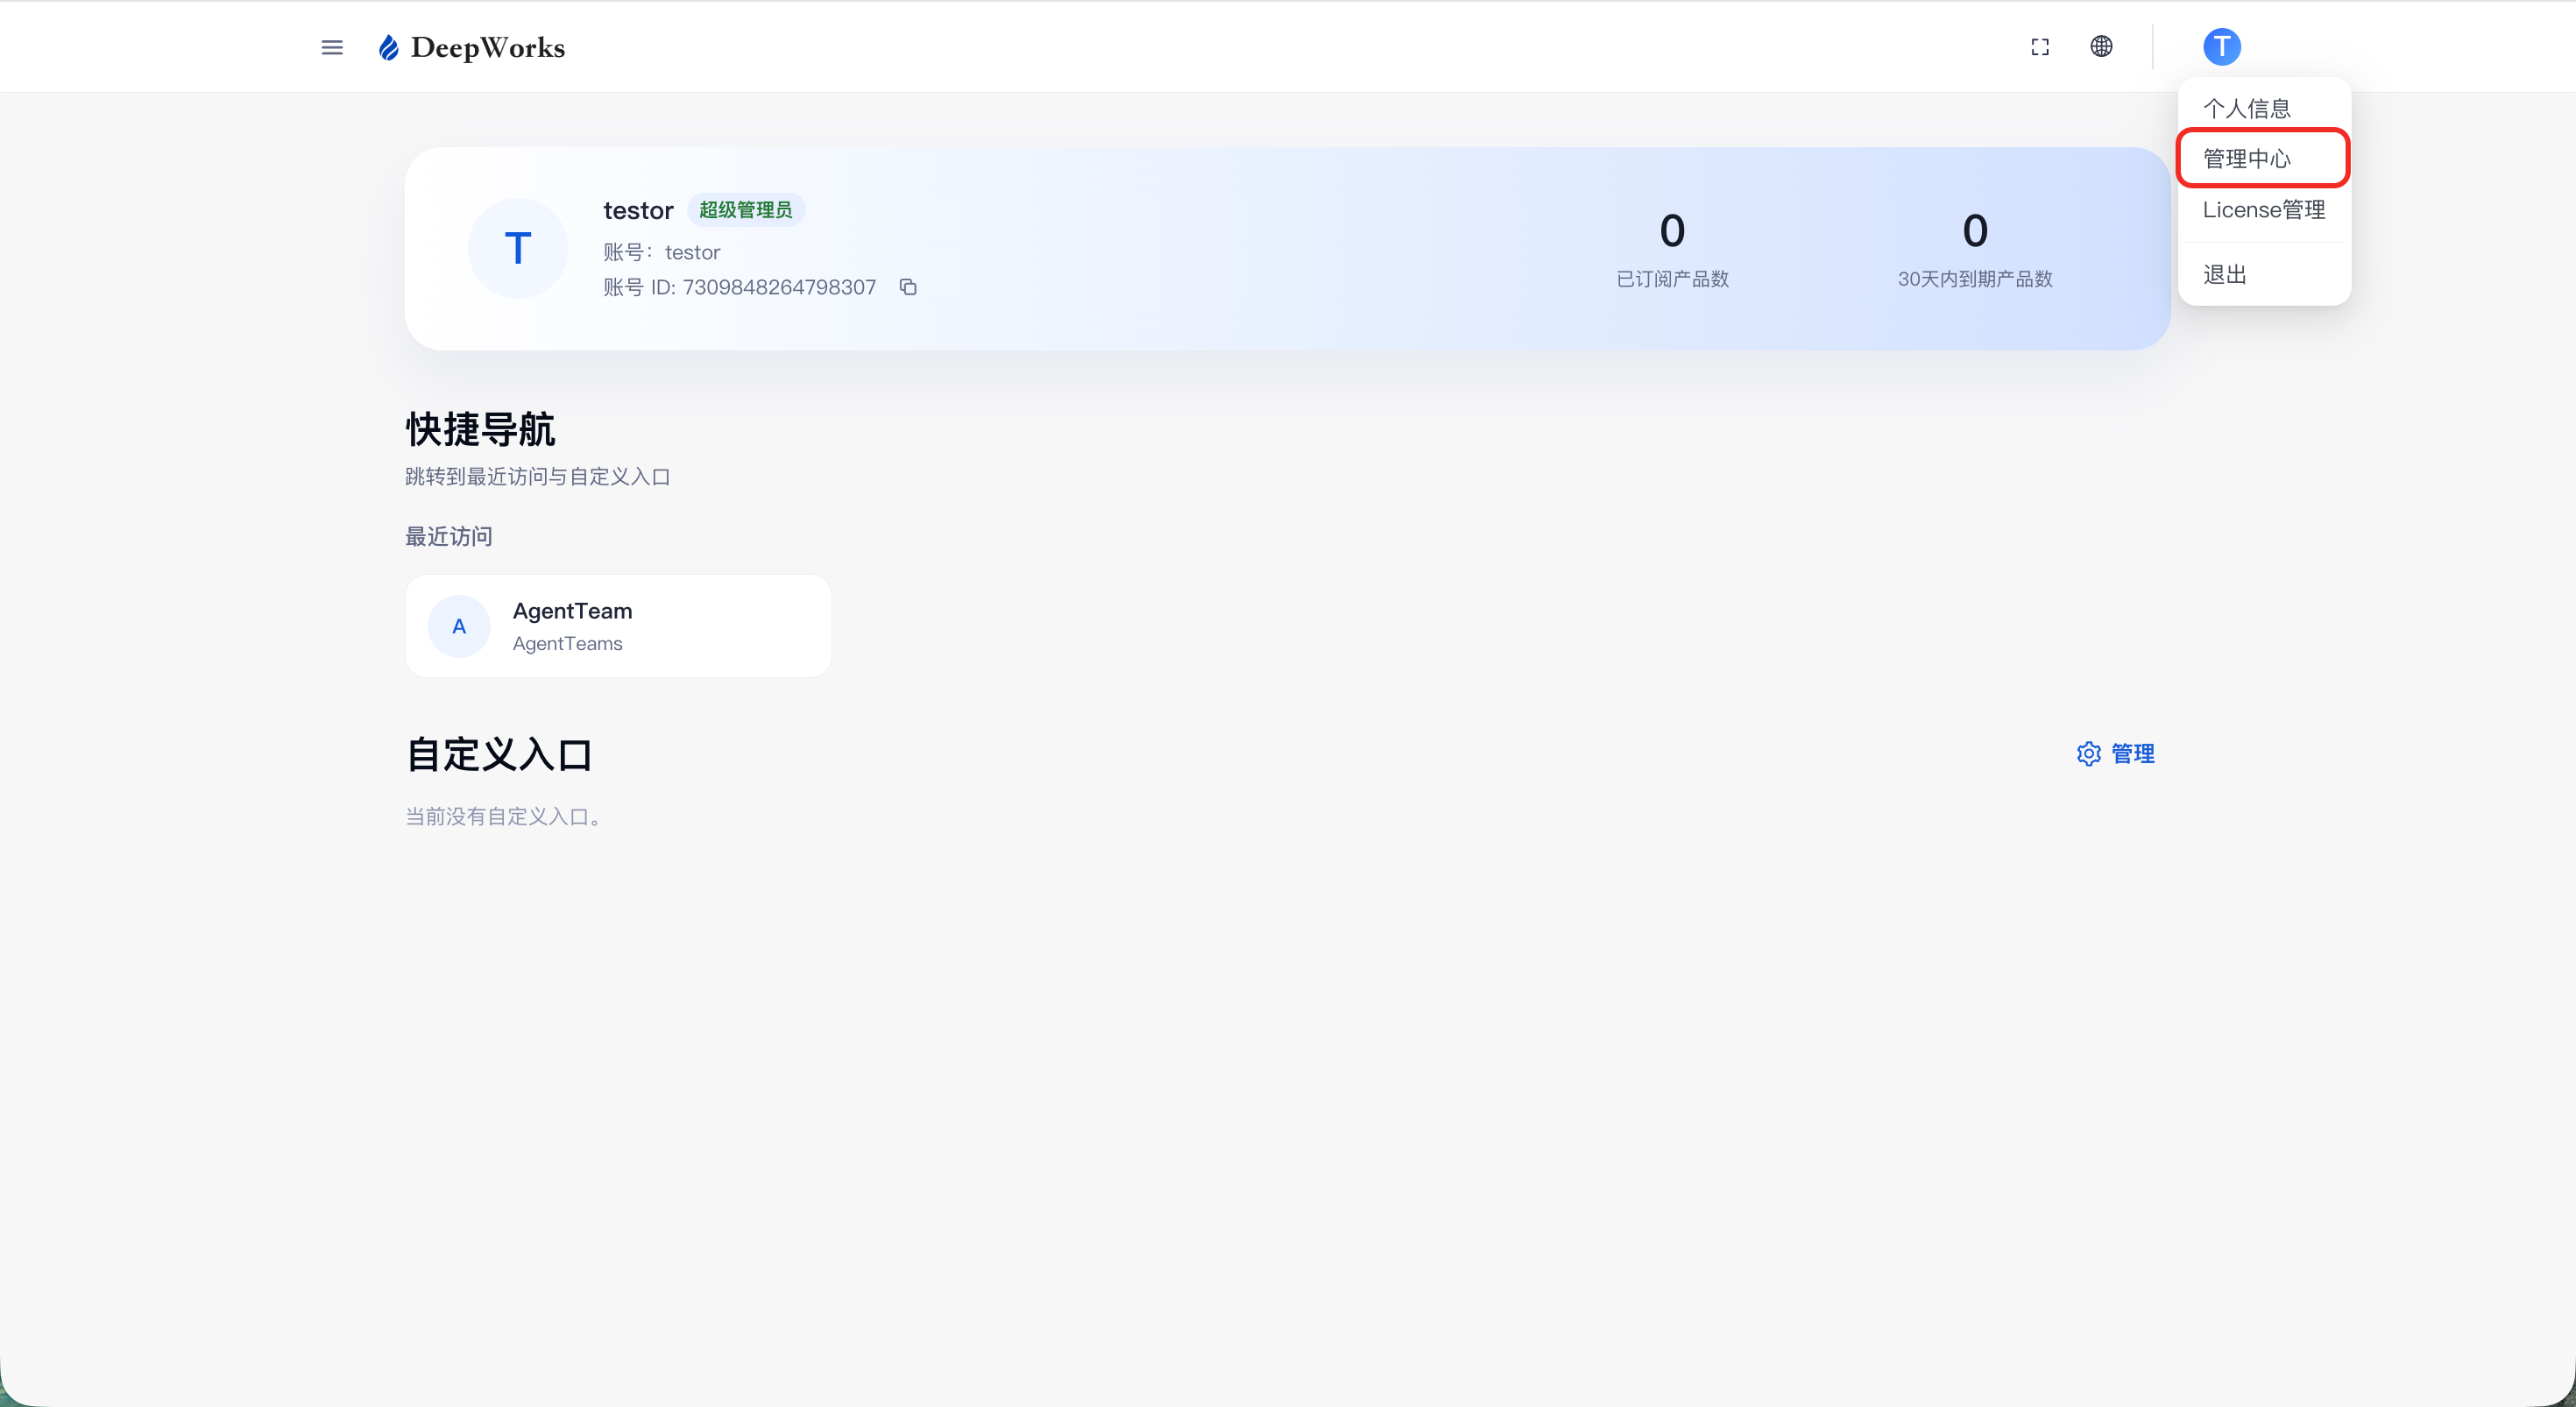
b. After opening and logging in to the Console, click the “profile photo in the upper right corner” > “Management Center”.
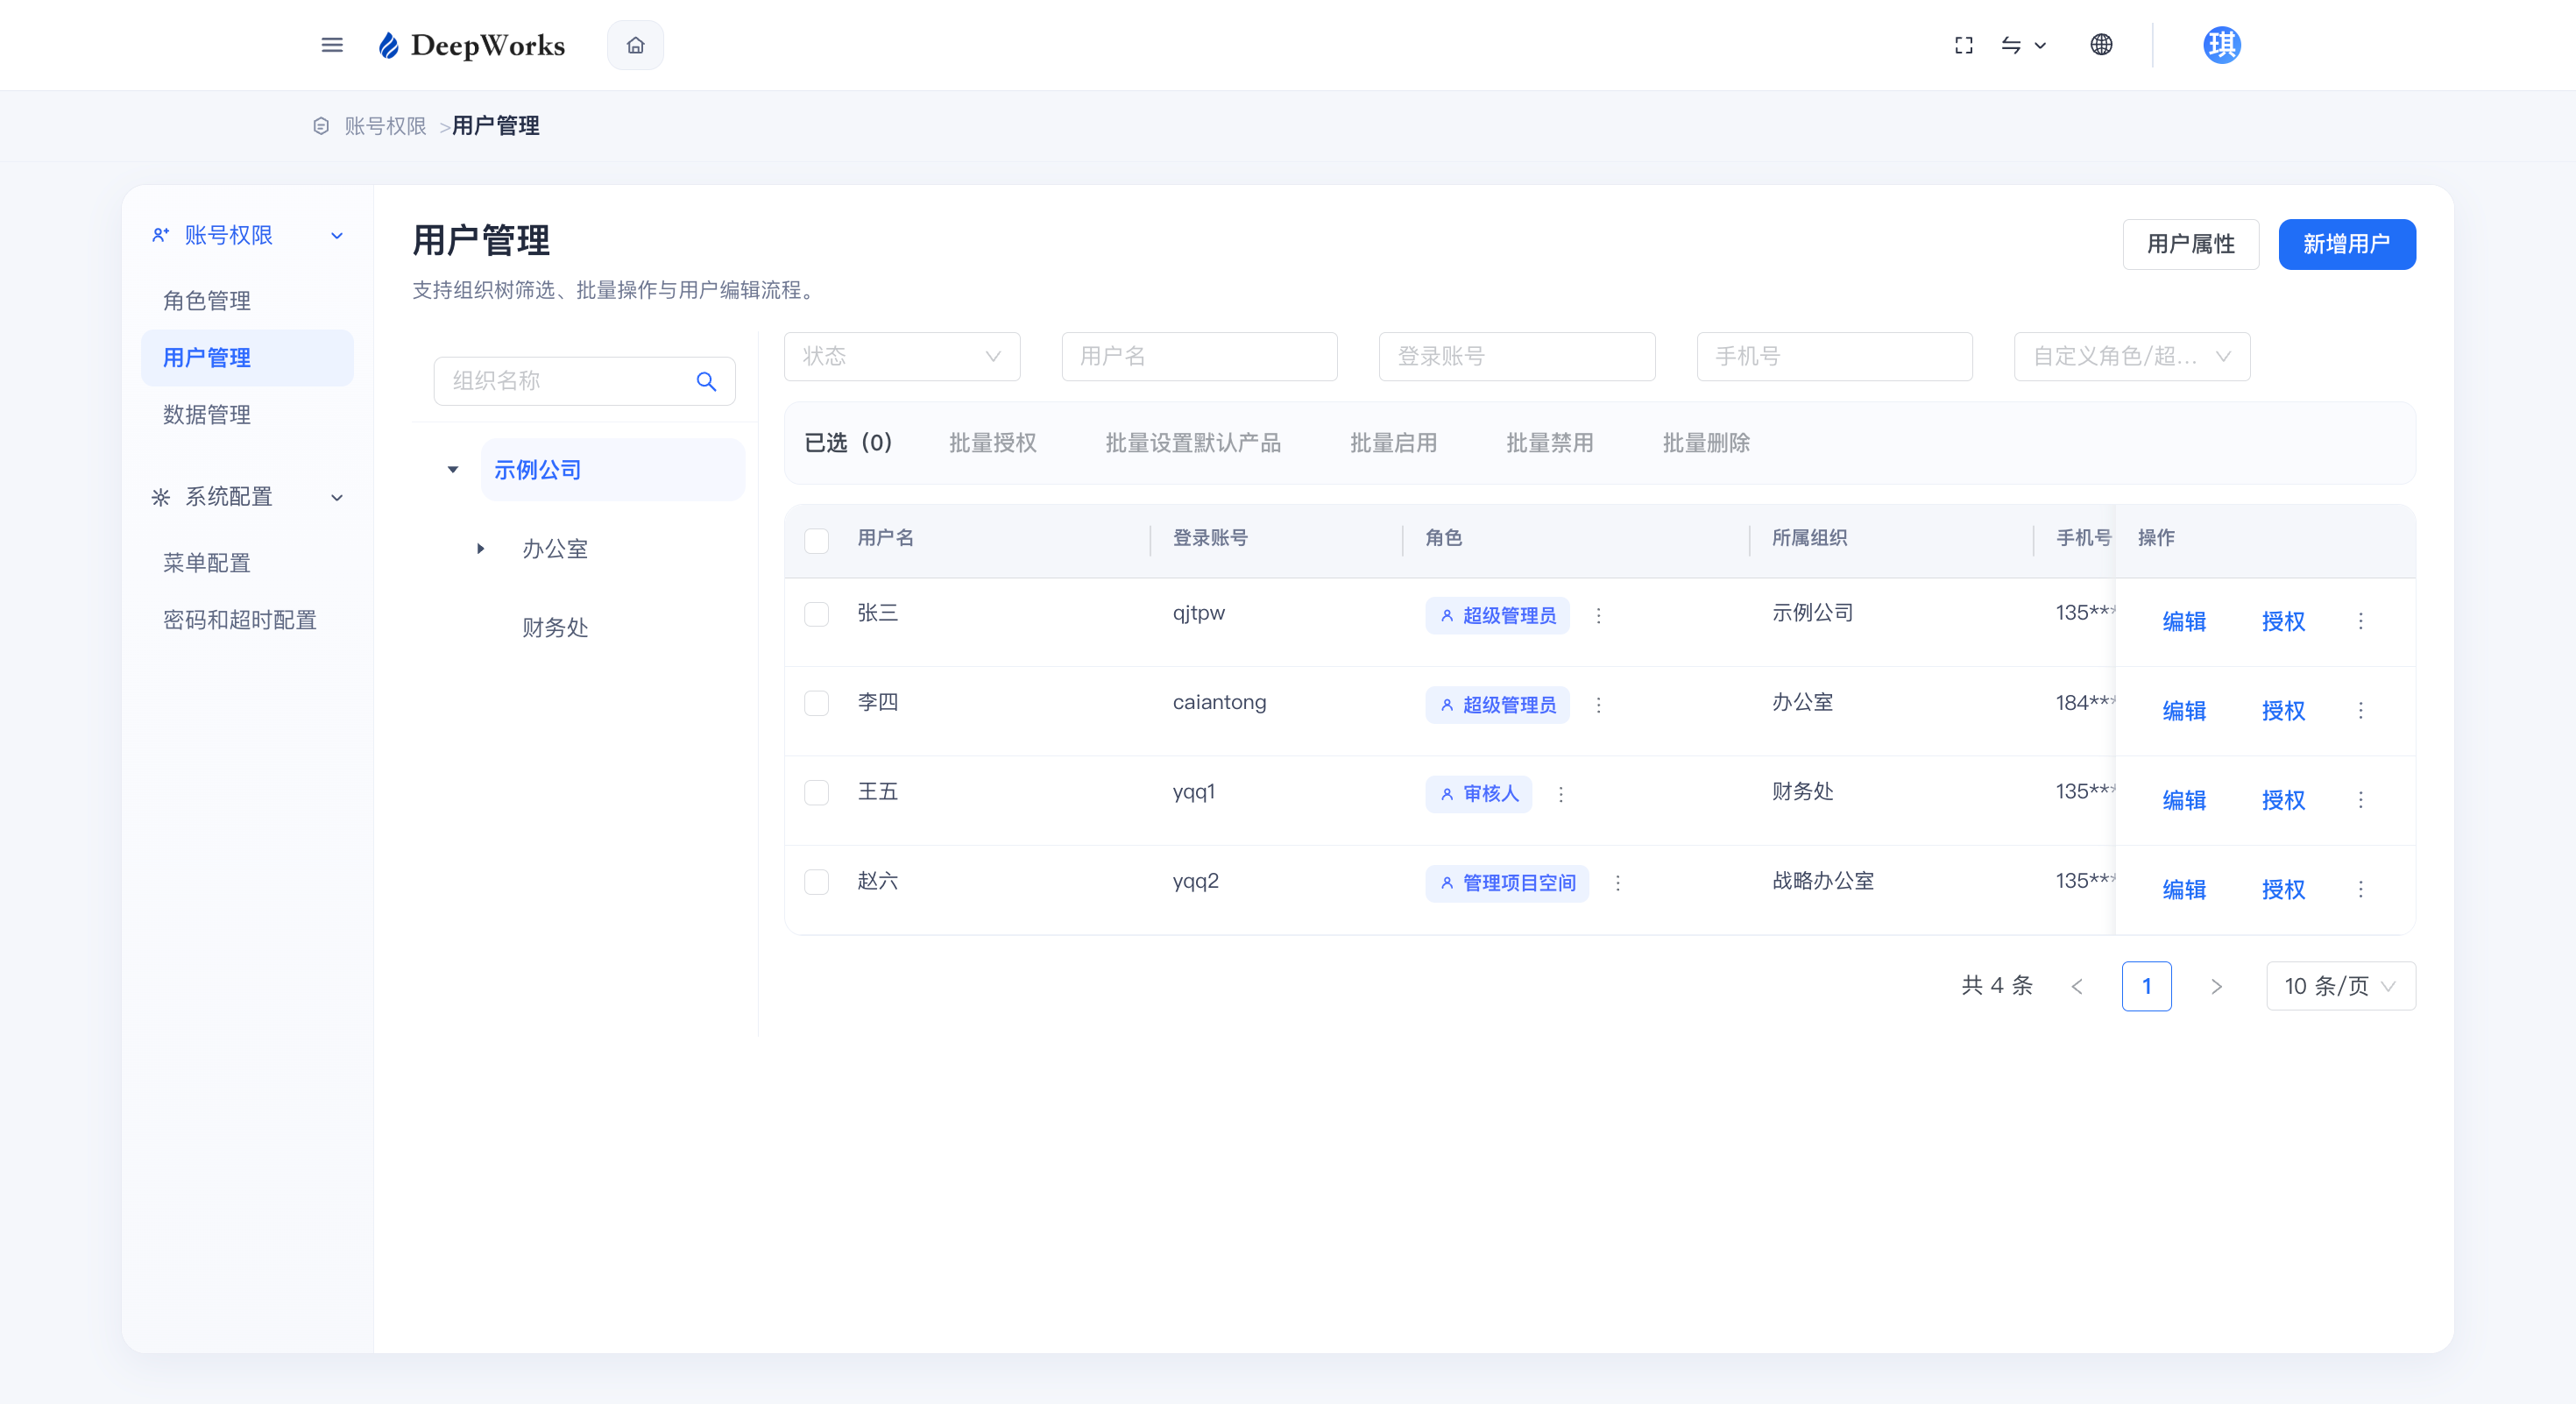
c. The left side displays the organizational structure tree, while the right side shows the information of users (sub-accounts) under this organizational node and its child nodes, including username, login account, role, mobile phone number, and email. Note: All sub-accounts will have the regular User Persona (default role) for the DeepWorks official website and DeepWorks.
Add Enterprise Members (Sub-Accounts)
a. Click “Add User”.
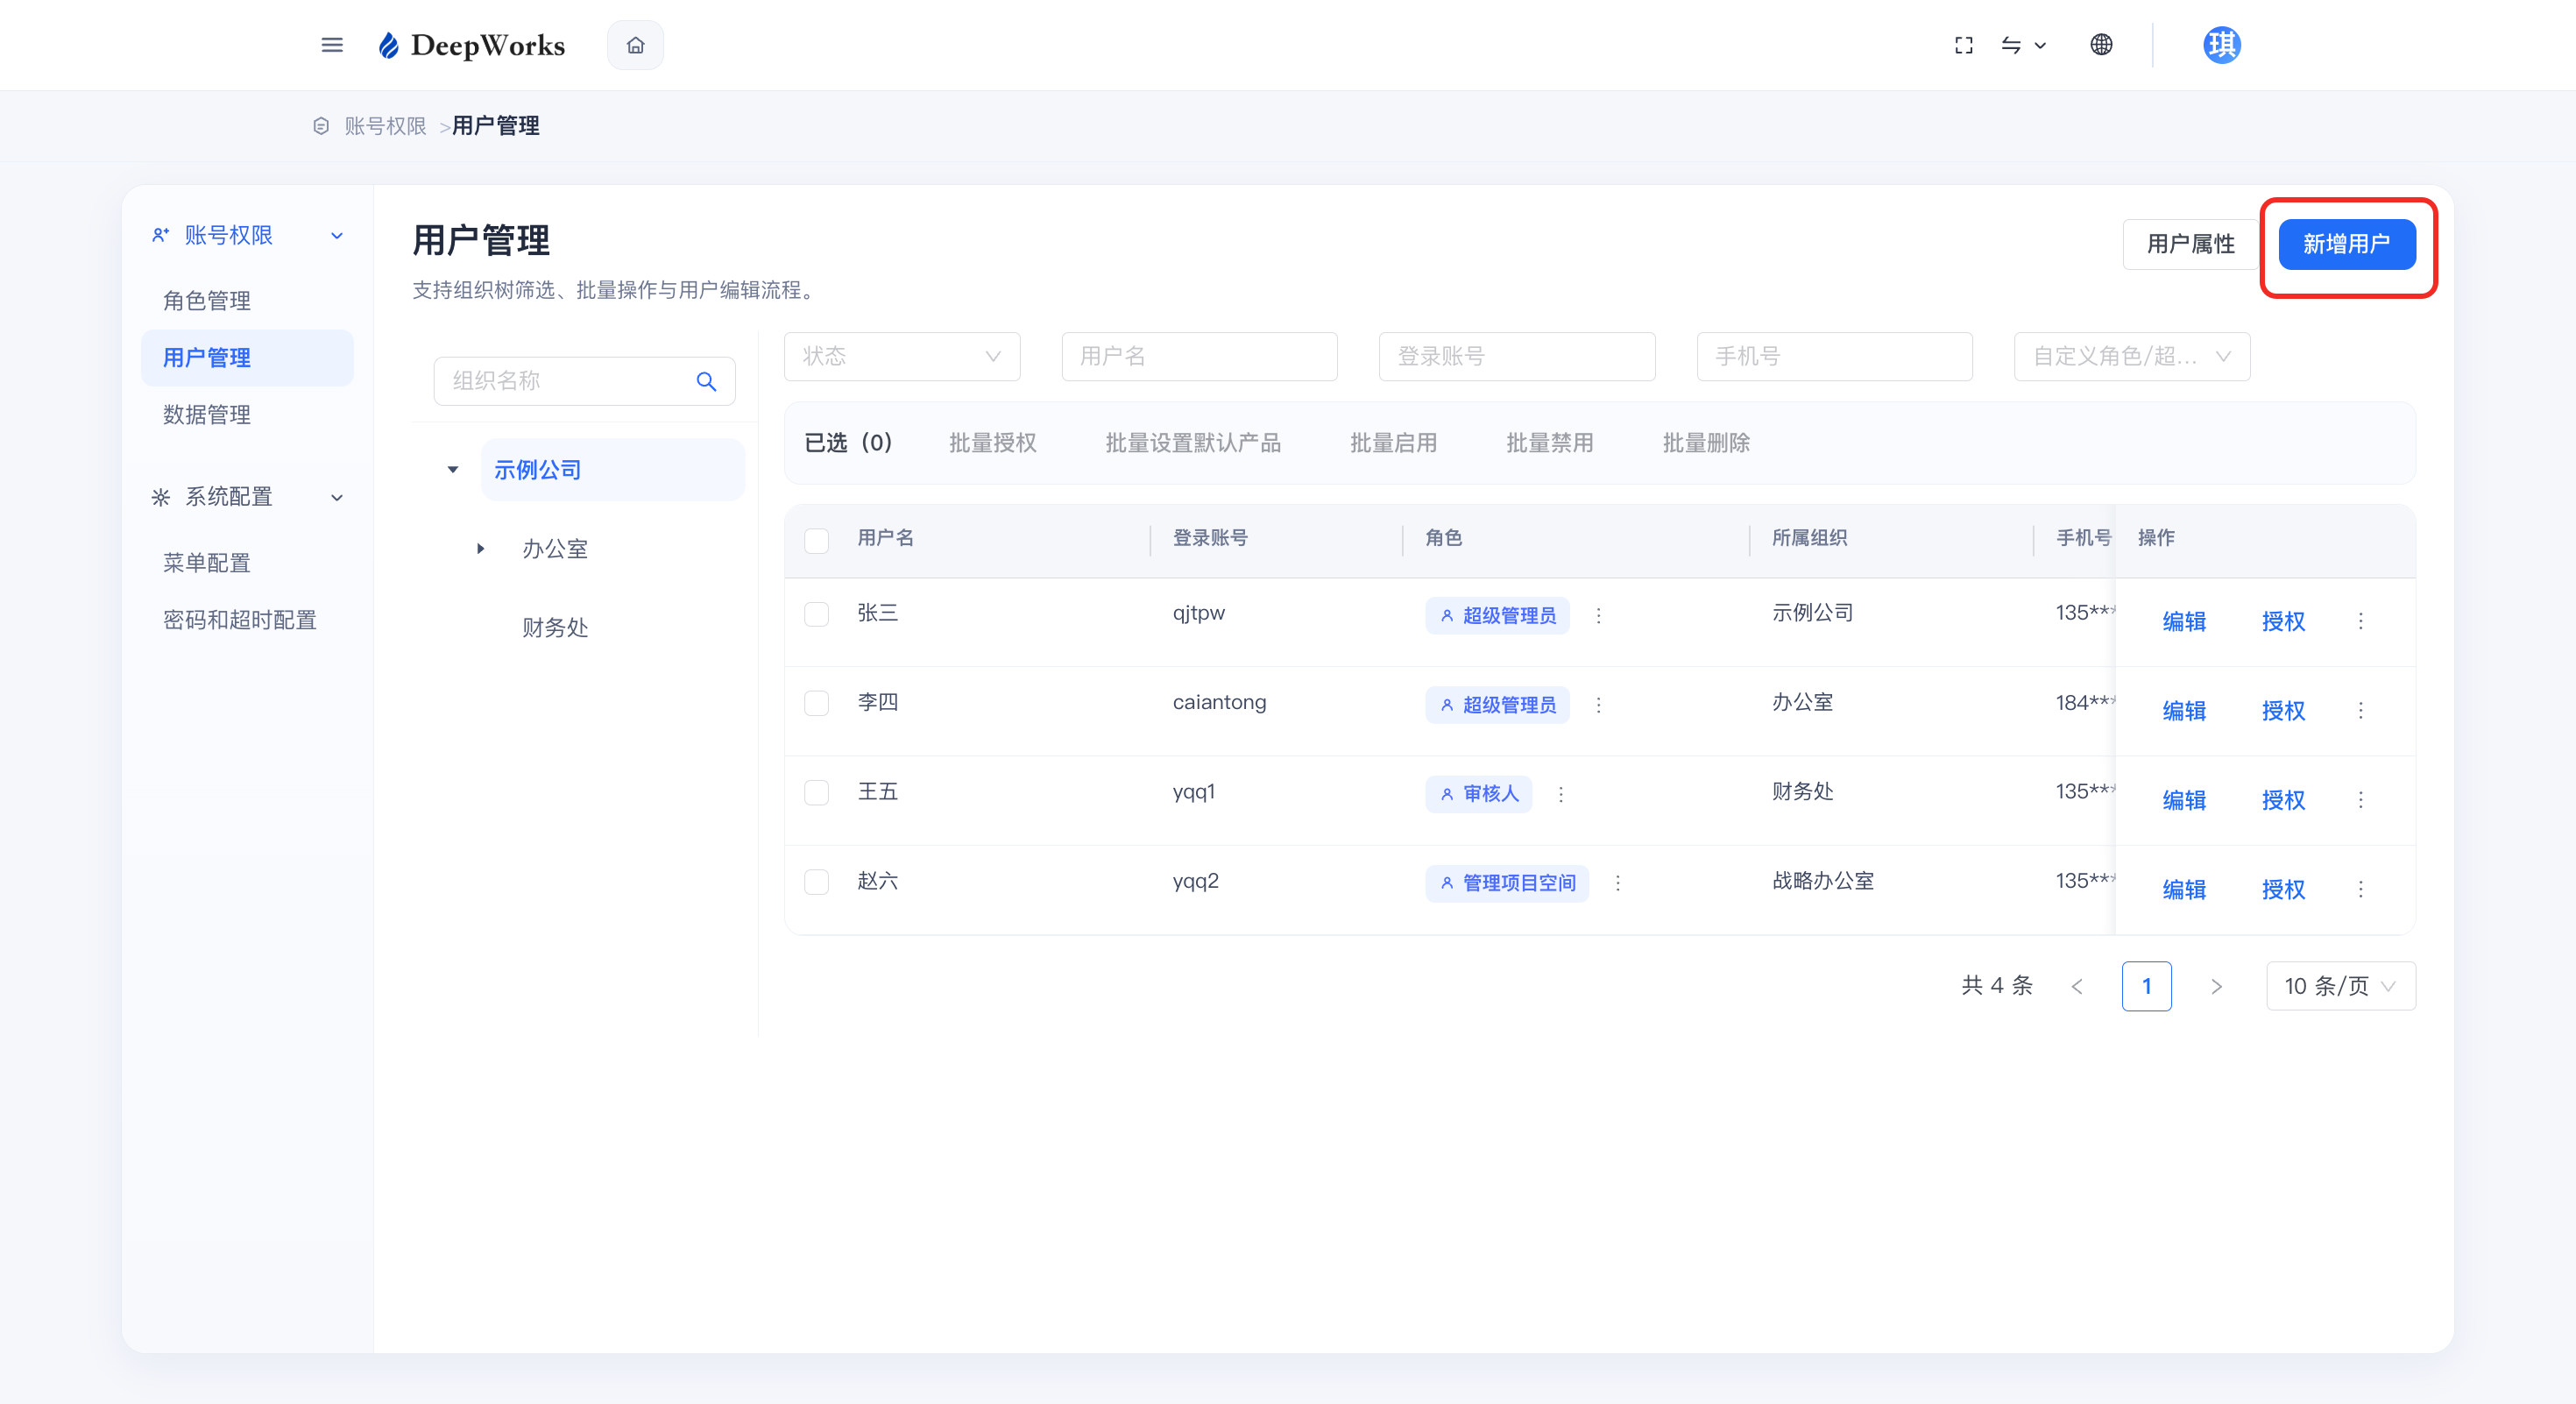
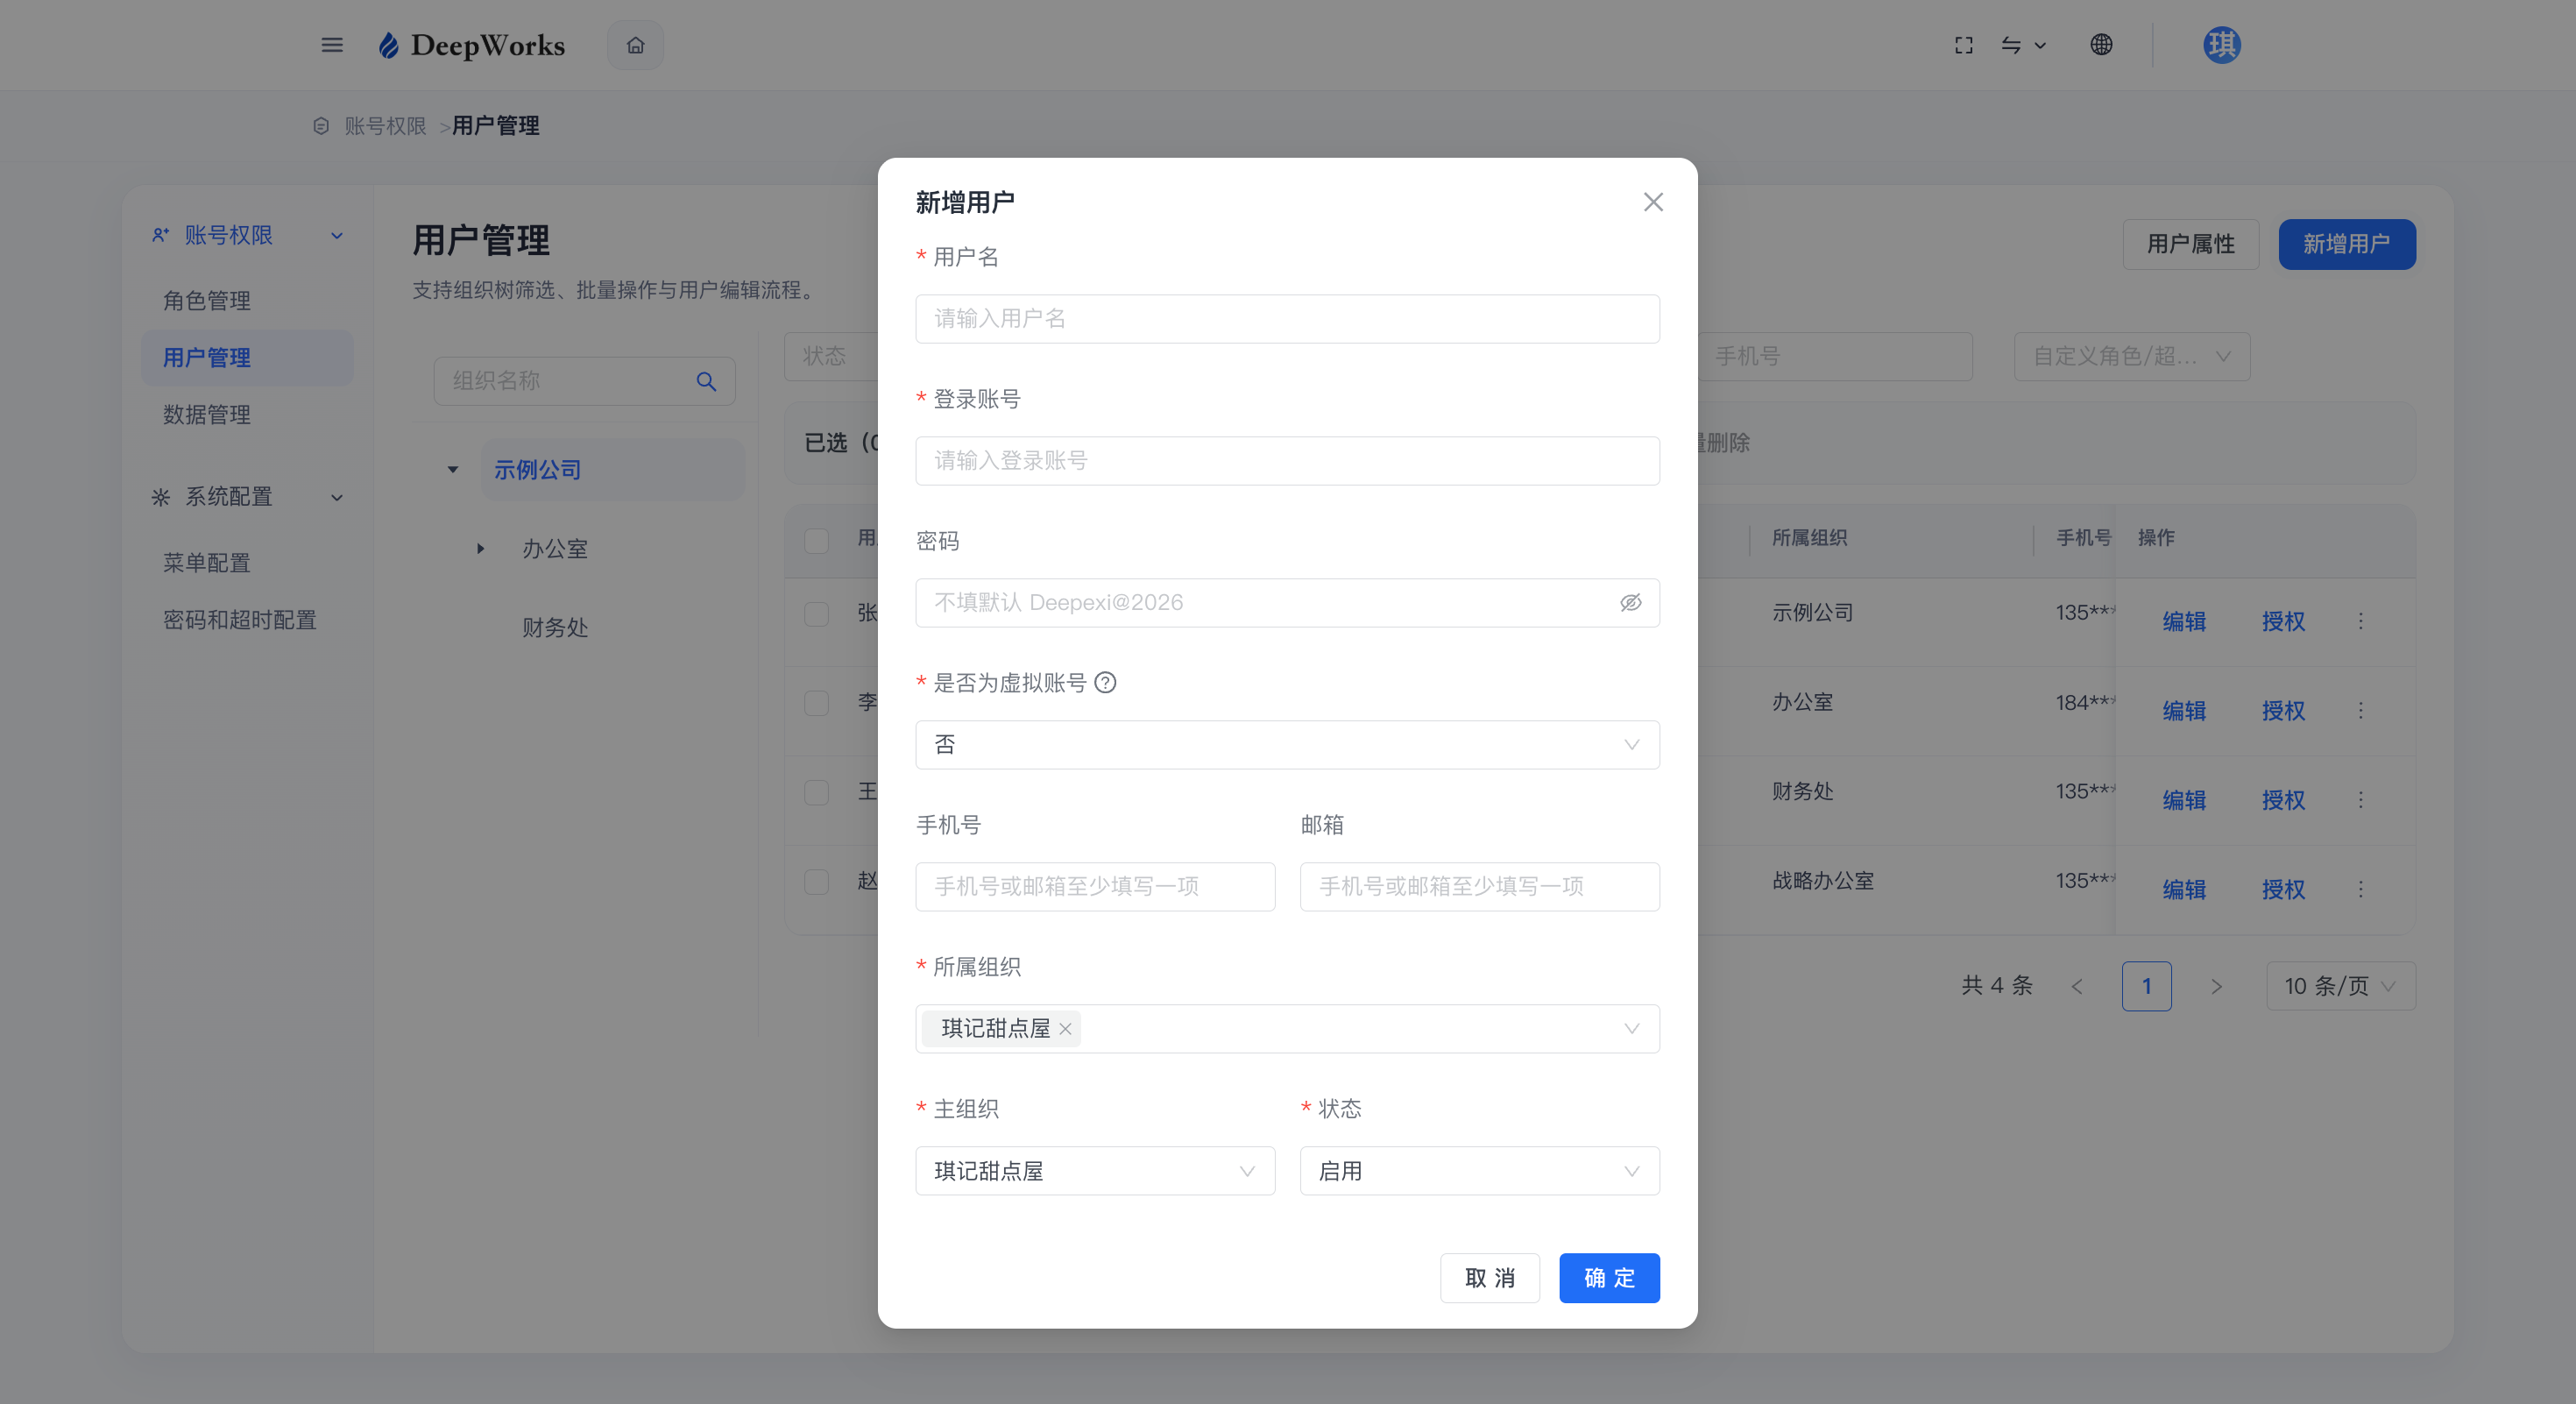
b. Fill in the user information and initial password, then click “OK”, and the sub-account will be created successfully.
-
Username: Enter the display name of the user
-
Login Account: The user’s login account. When a sub-account logs in, it is required to use the format “Login Account”@“Enterprise Code”. The enterprise code is generally consistent with the “Login Account” of the tenant administrator.
-
Password: This field allows you to set a new password for the user or modify an existing one. If left blank when adding a new user, the default initial password will be: Deepexi@2026
-
Is it a virtual account: A virtual account is a special type of account within an enterprise, applicable to department accounts, role-specific accounts and guest accounts, which does not require personal contact information or authentication.
-
Mobile Number/Email: The mobile number and email that are not virtual accounts serve as the unique identifiers for users.
-
Affiliated Organization: Tick the affiliated organizations of the user, and multiple organizations are supported.
-
Primary Organization: refers to the organization where the user holds their primary employment position.
-
Status: This setting is divided into enabled/disabled; disabled users will be temporarily unable to log in.
Edit Enterprise Members (Sub-Accounts)
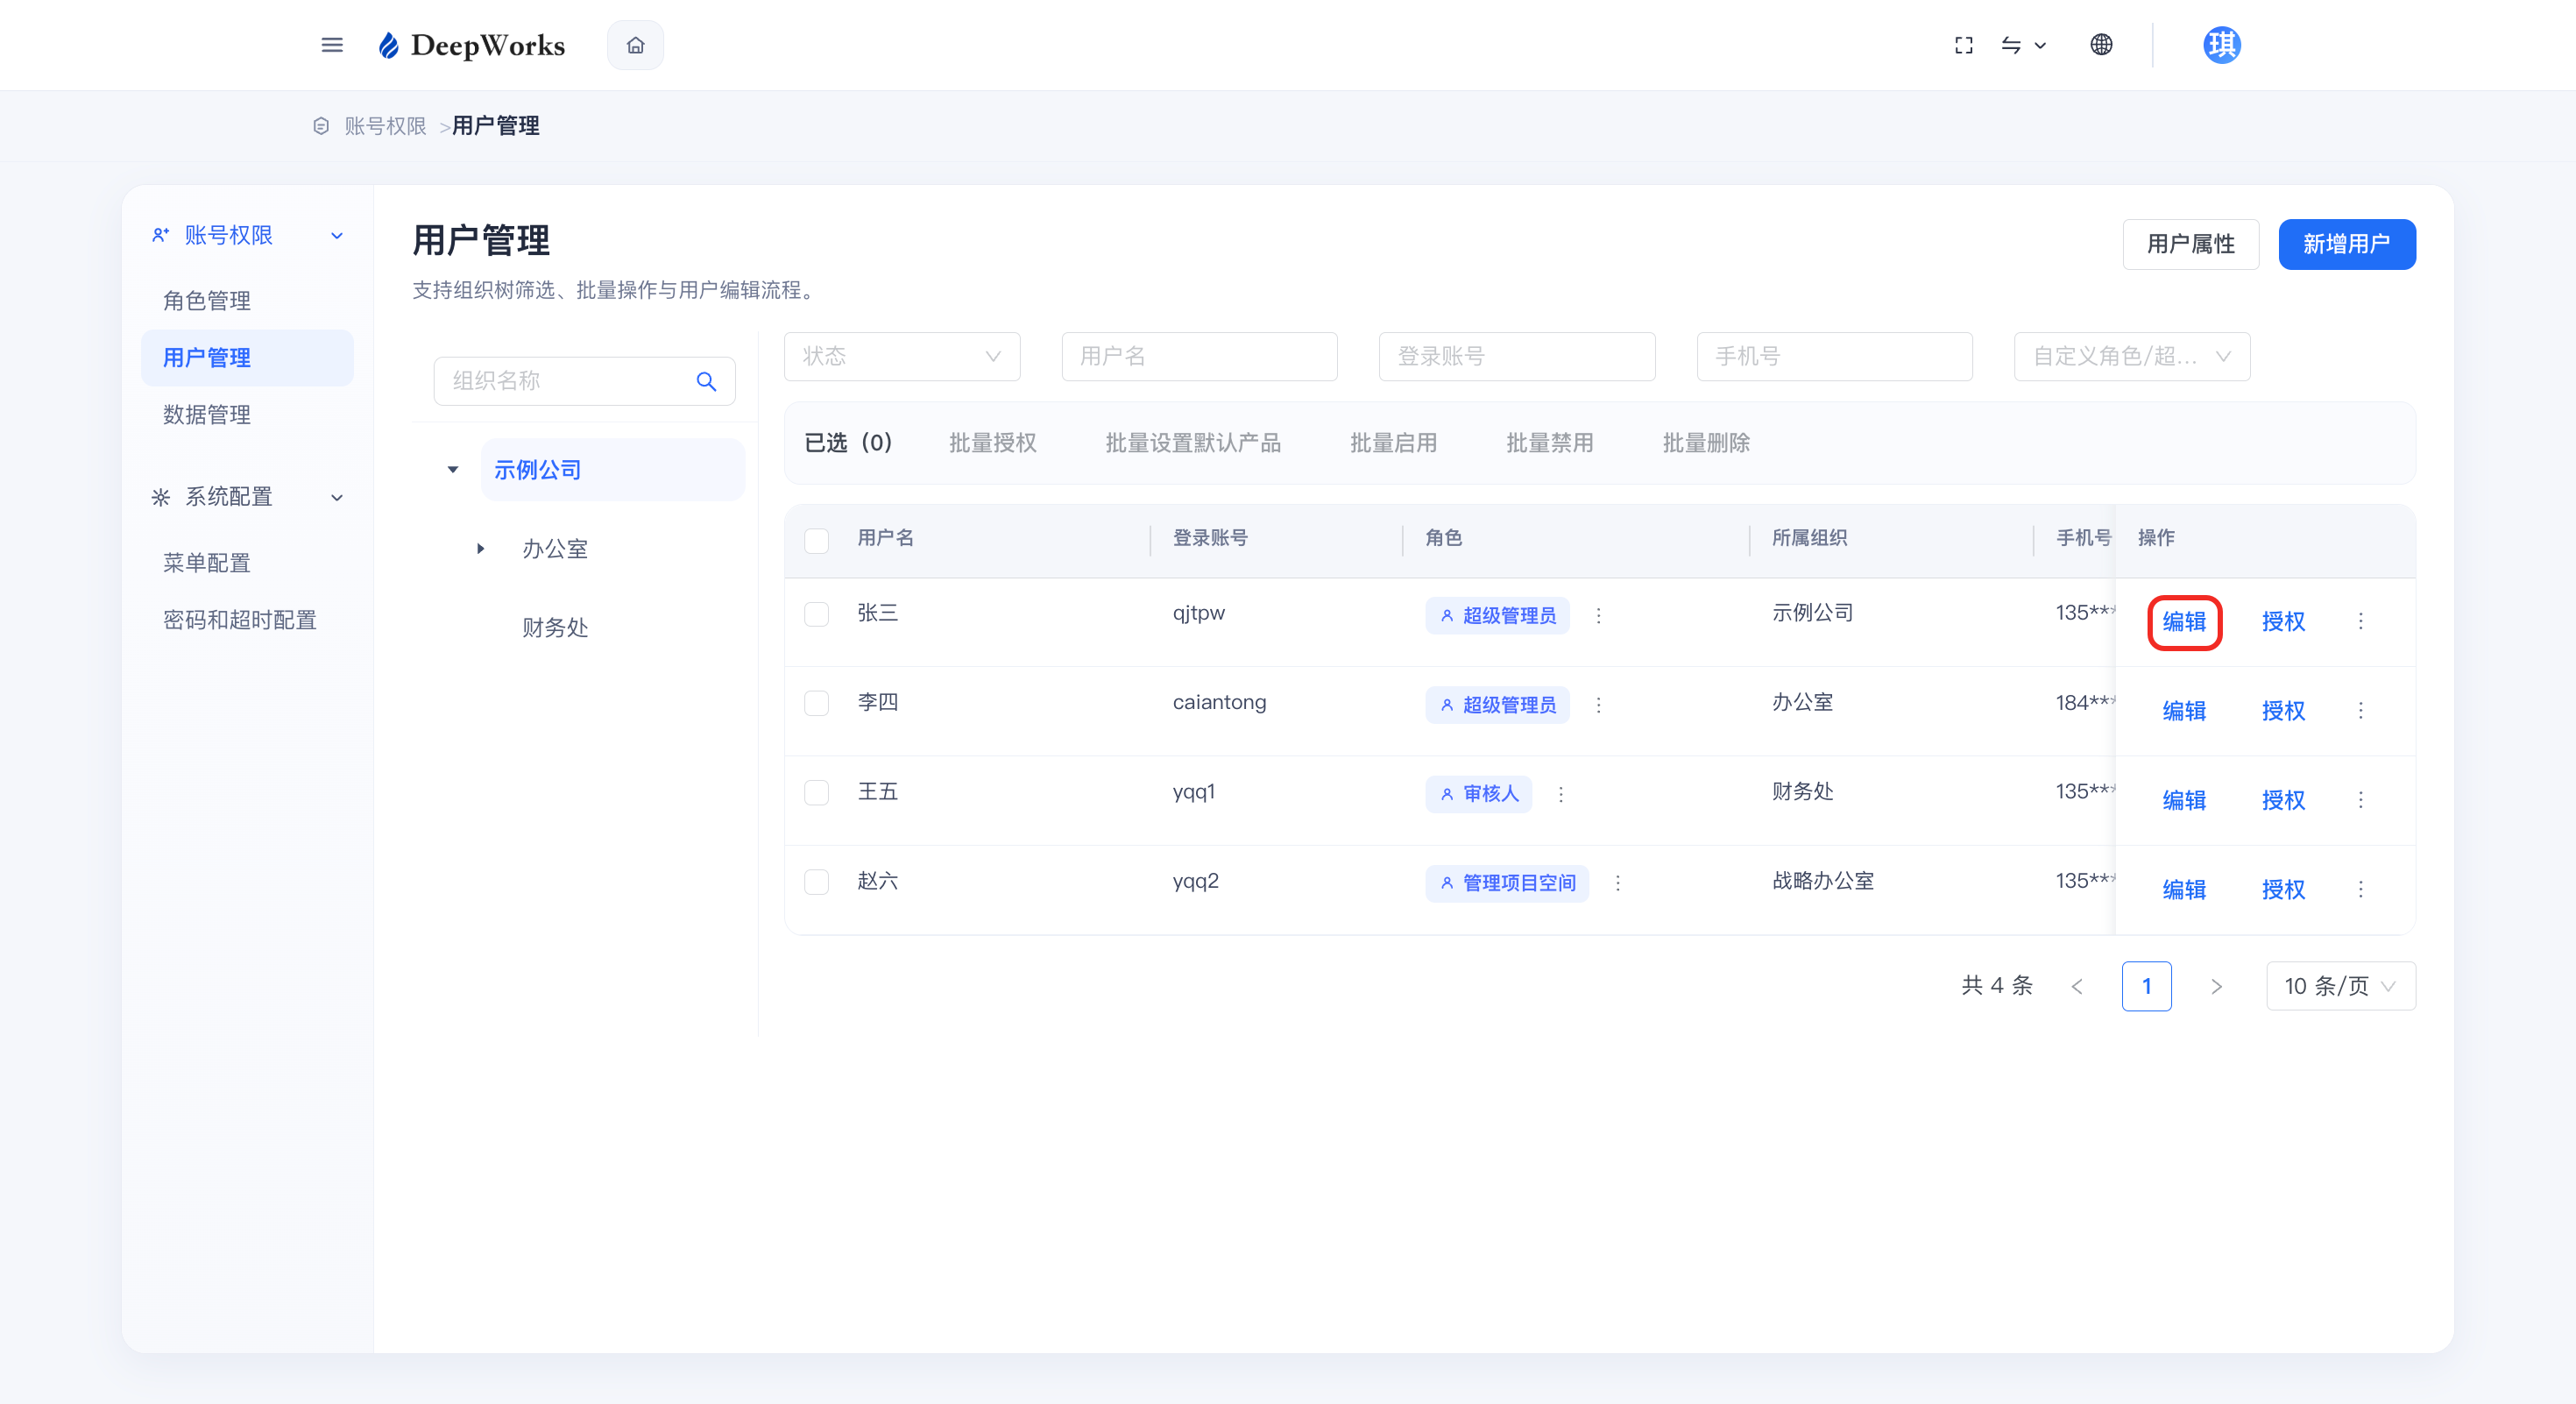
a. Click “Edit”.
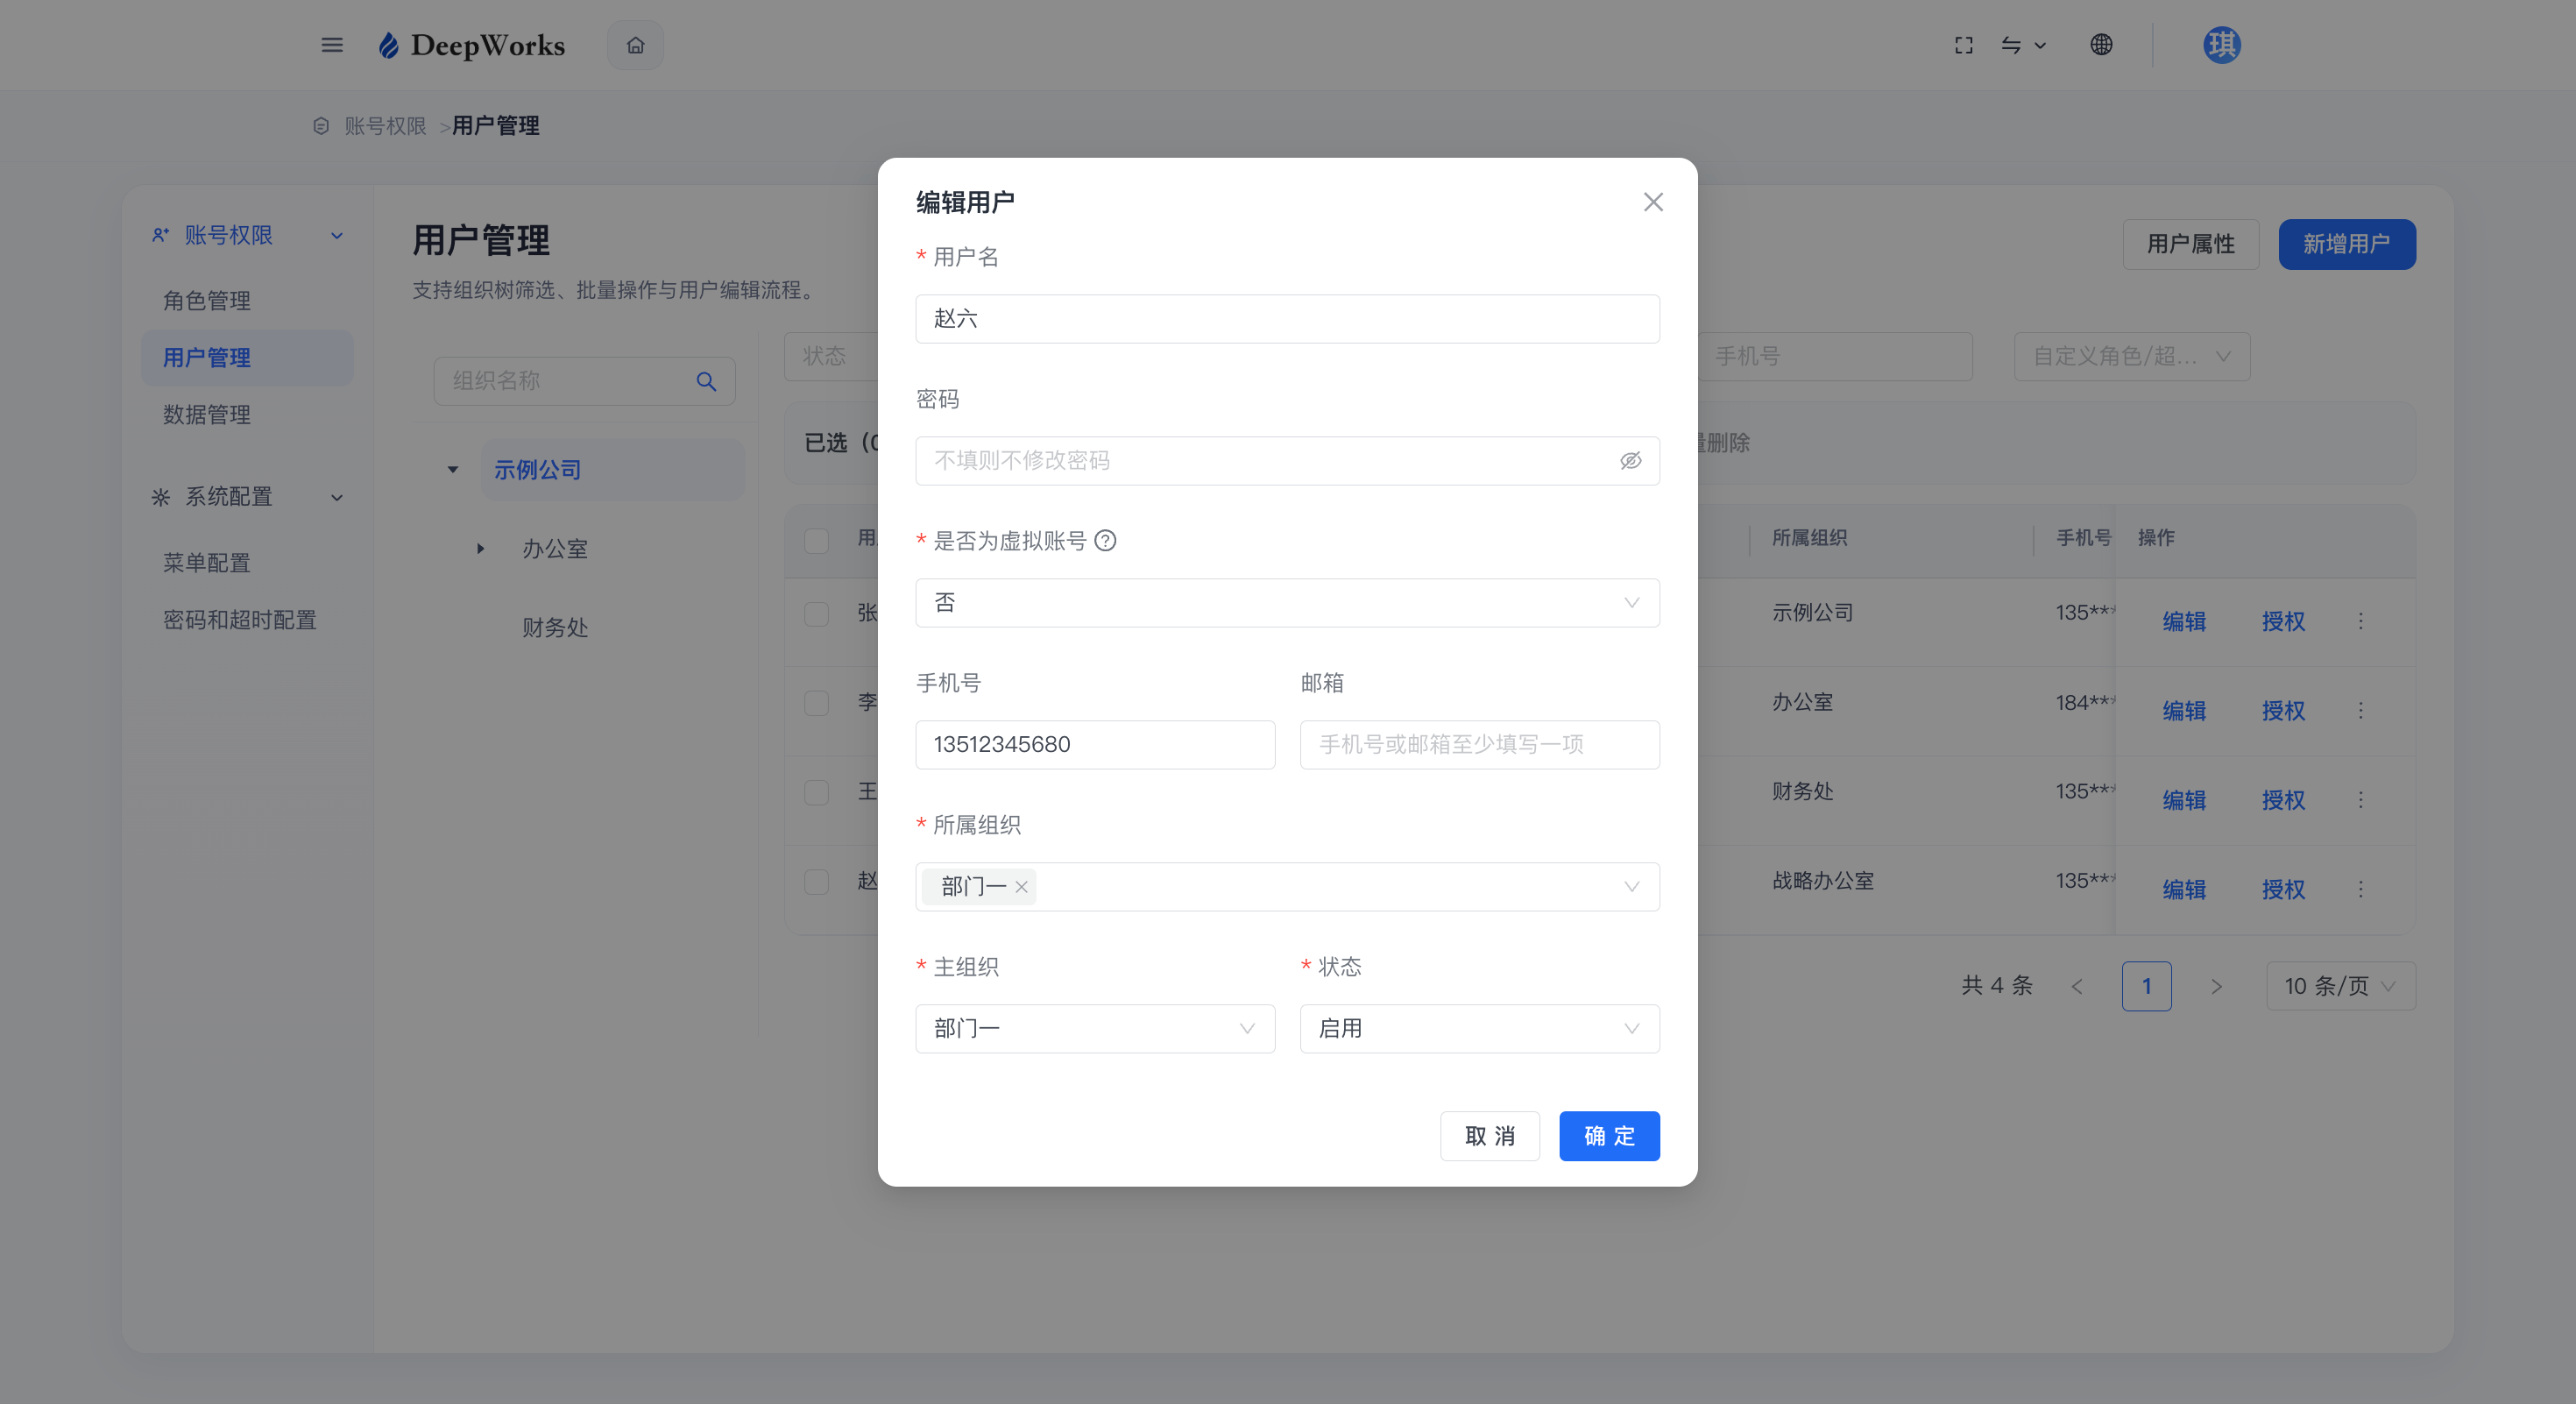
b. After updating the enterprise member information, click “OK” to complete the update successfully. If a member forgets their password, you can also reset the sub-account password of that member by re-editing the “Password” field.
c. If you need to change the member organization of the enterprise, you can click “Change Organization”.
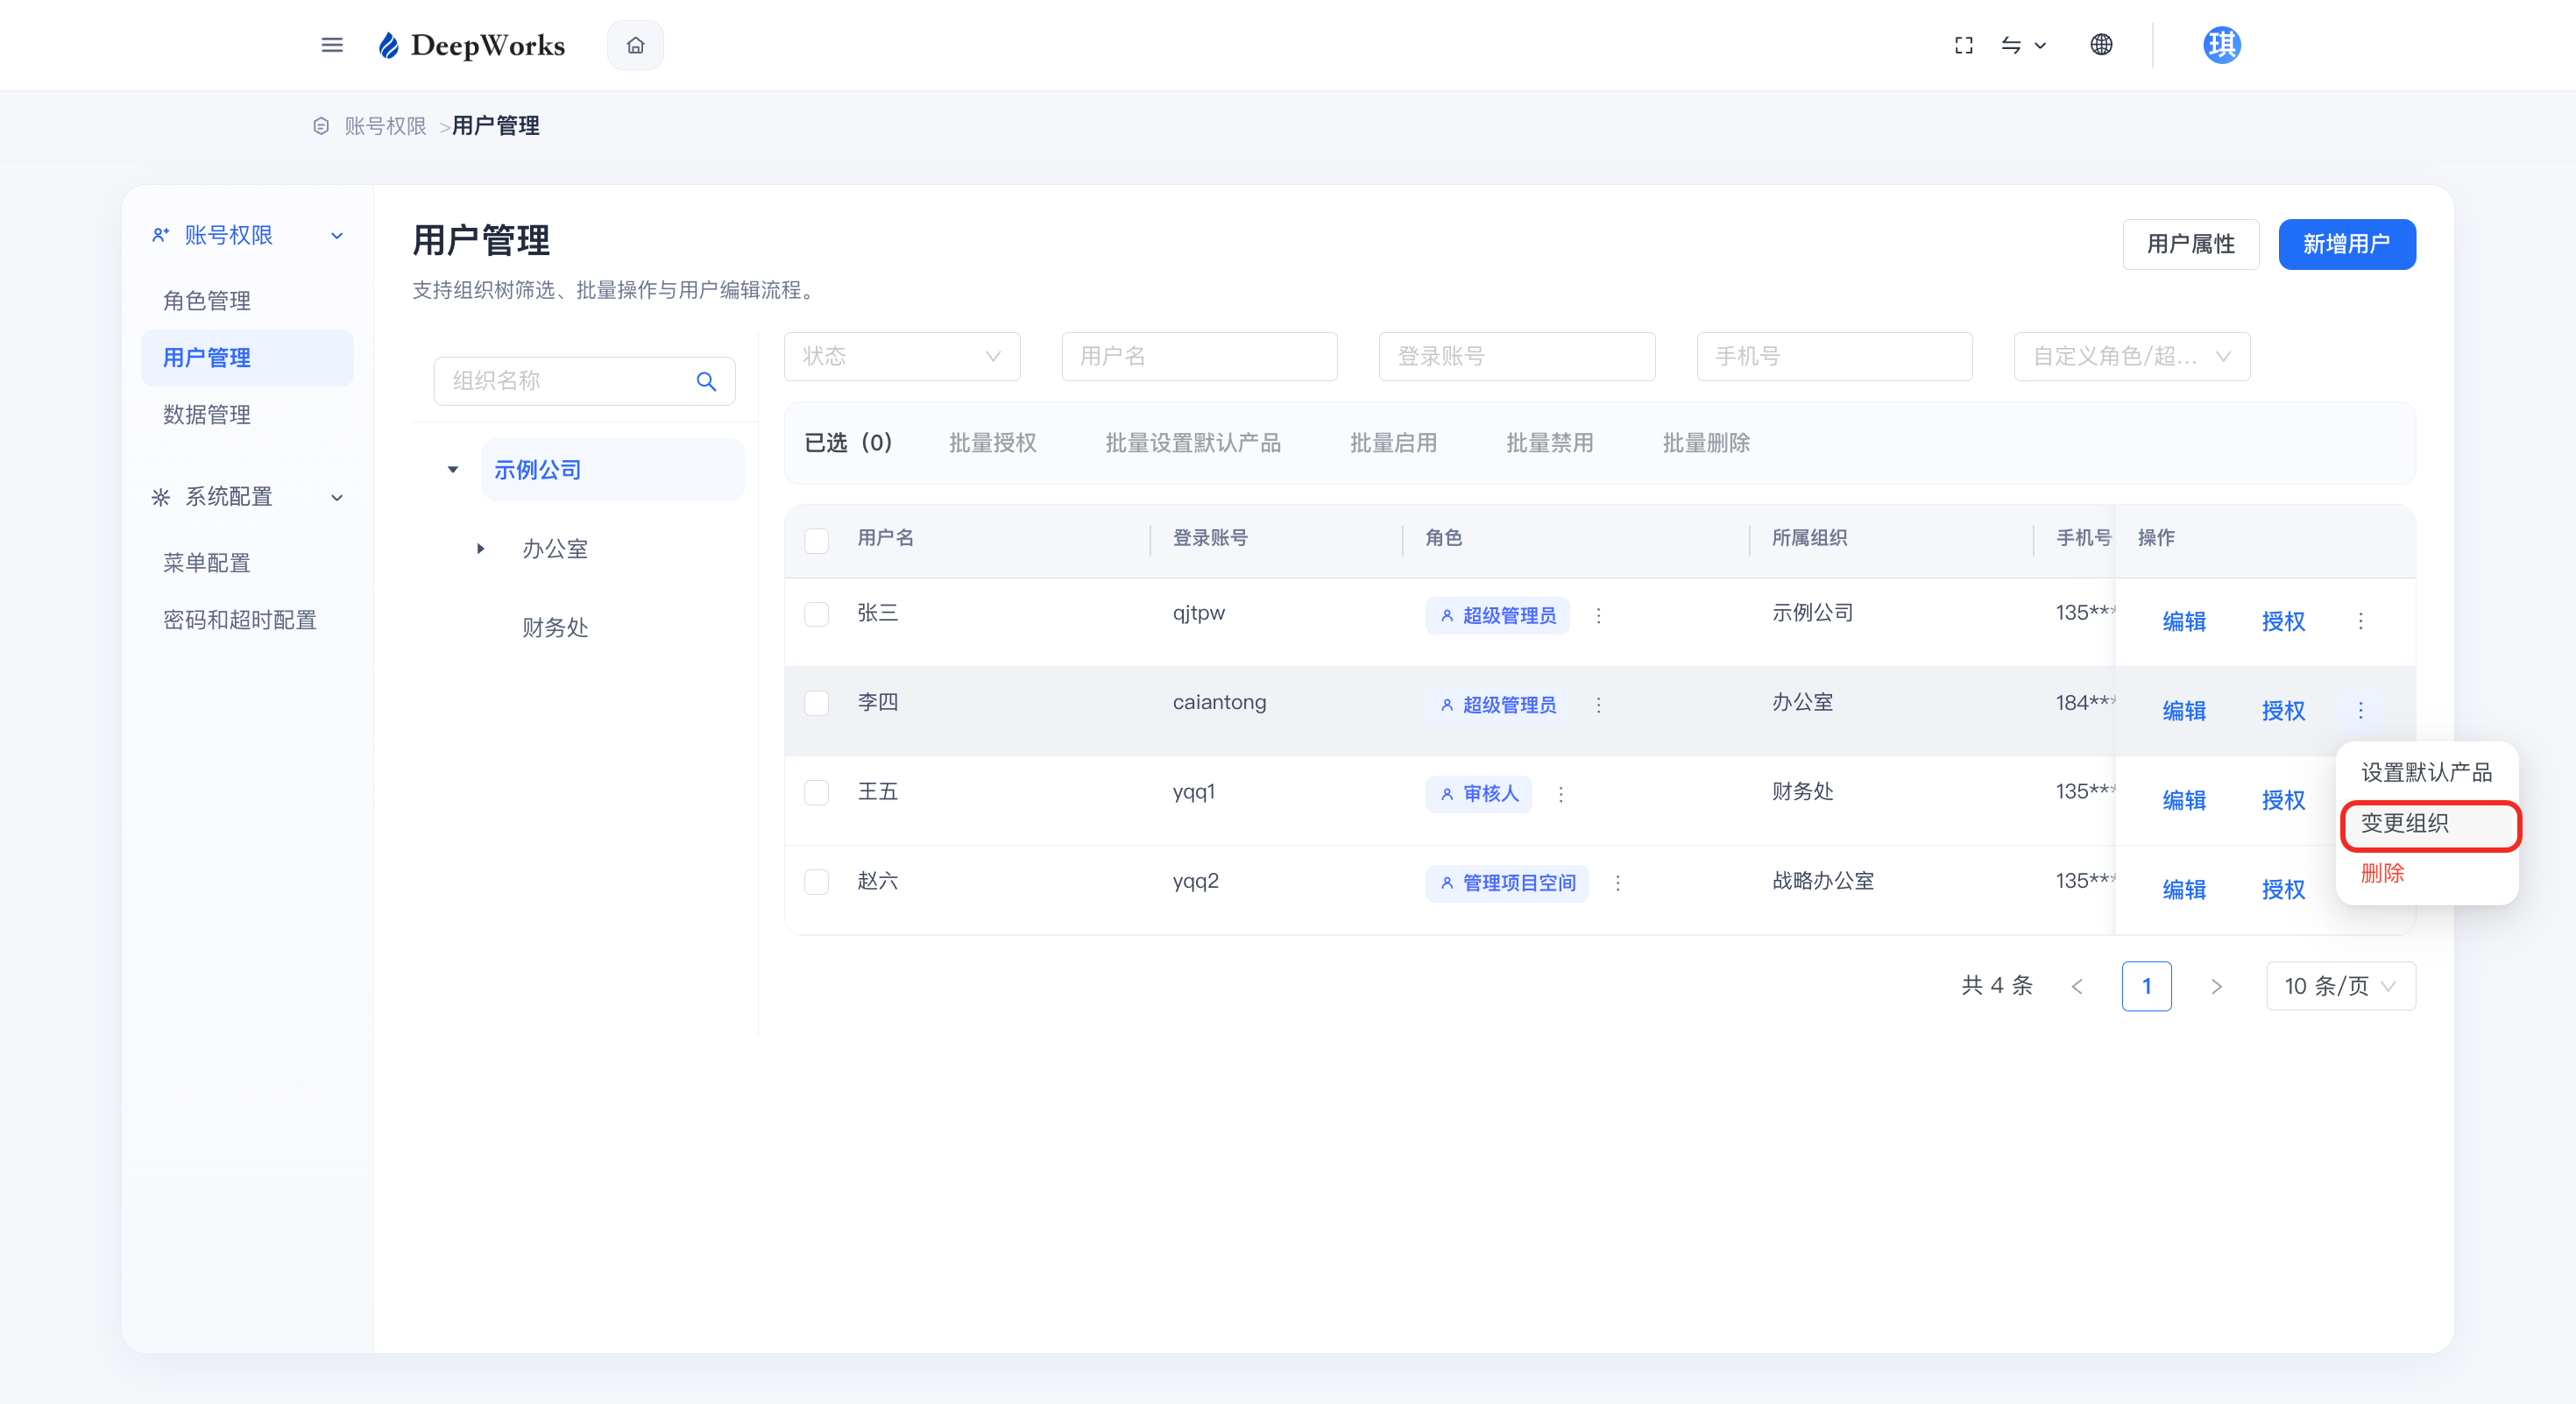
d. After selecting the target organization, click “OK” to successfully change the organization.
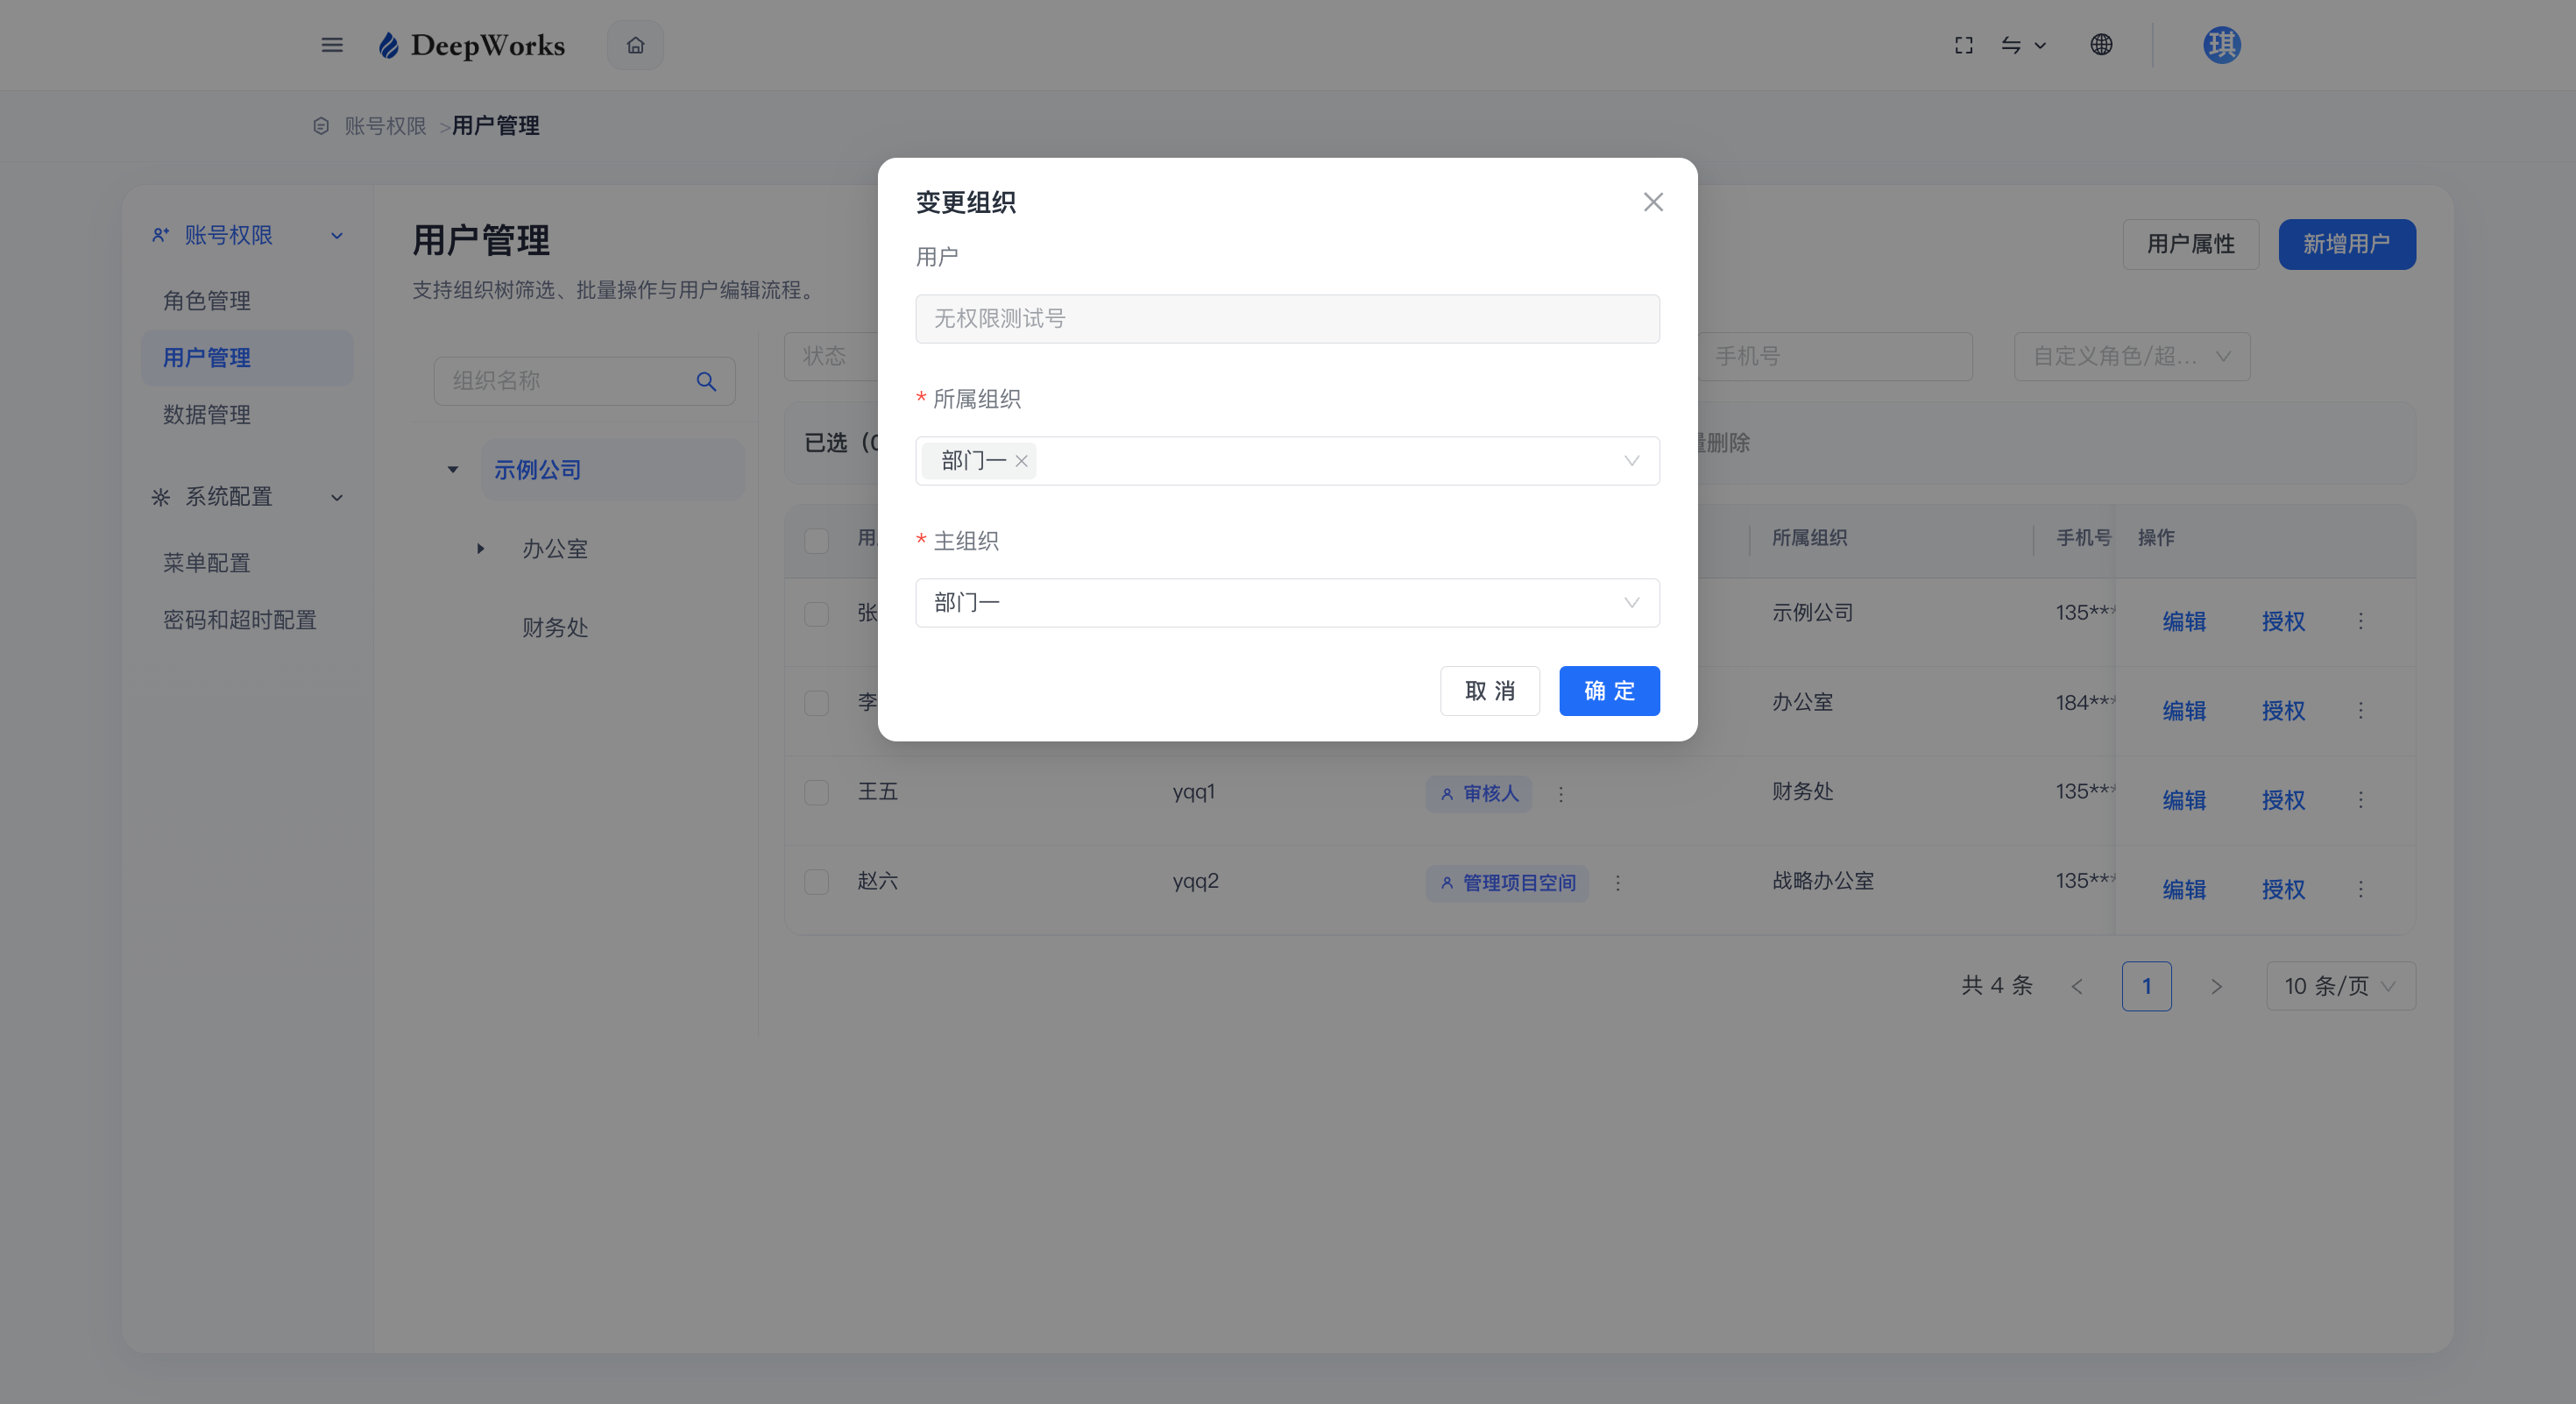
Delete enterprise members (sub-accounts)
a. If an enterprise member leaves the company or no longer needs to use DeepWorks, you can delete this enterprise member (sub-account) by clicking “Delete”.
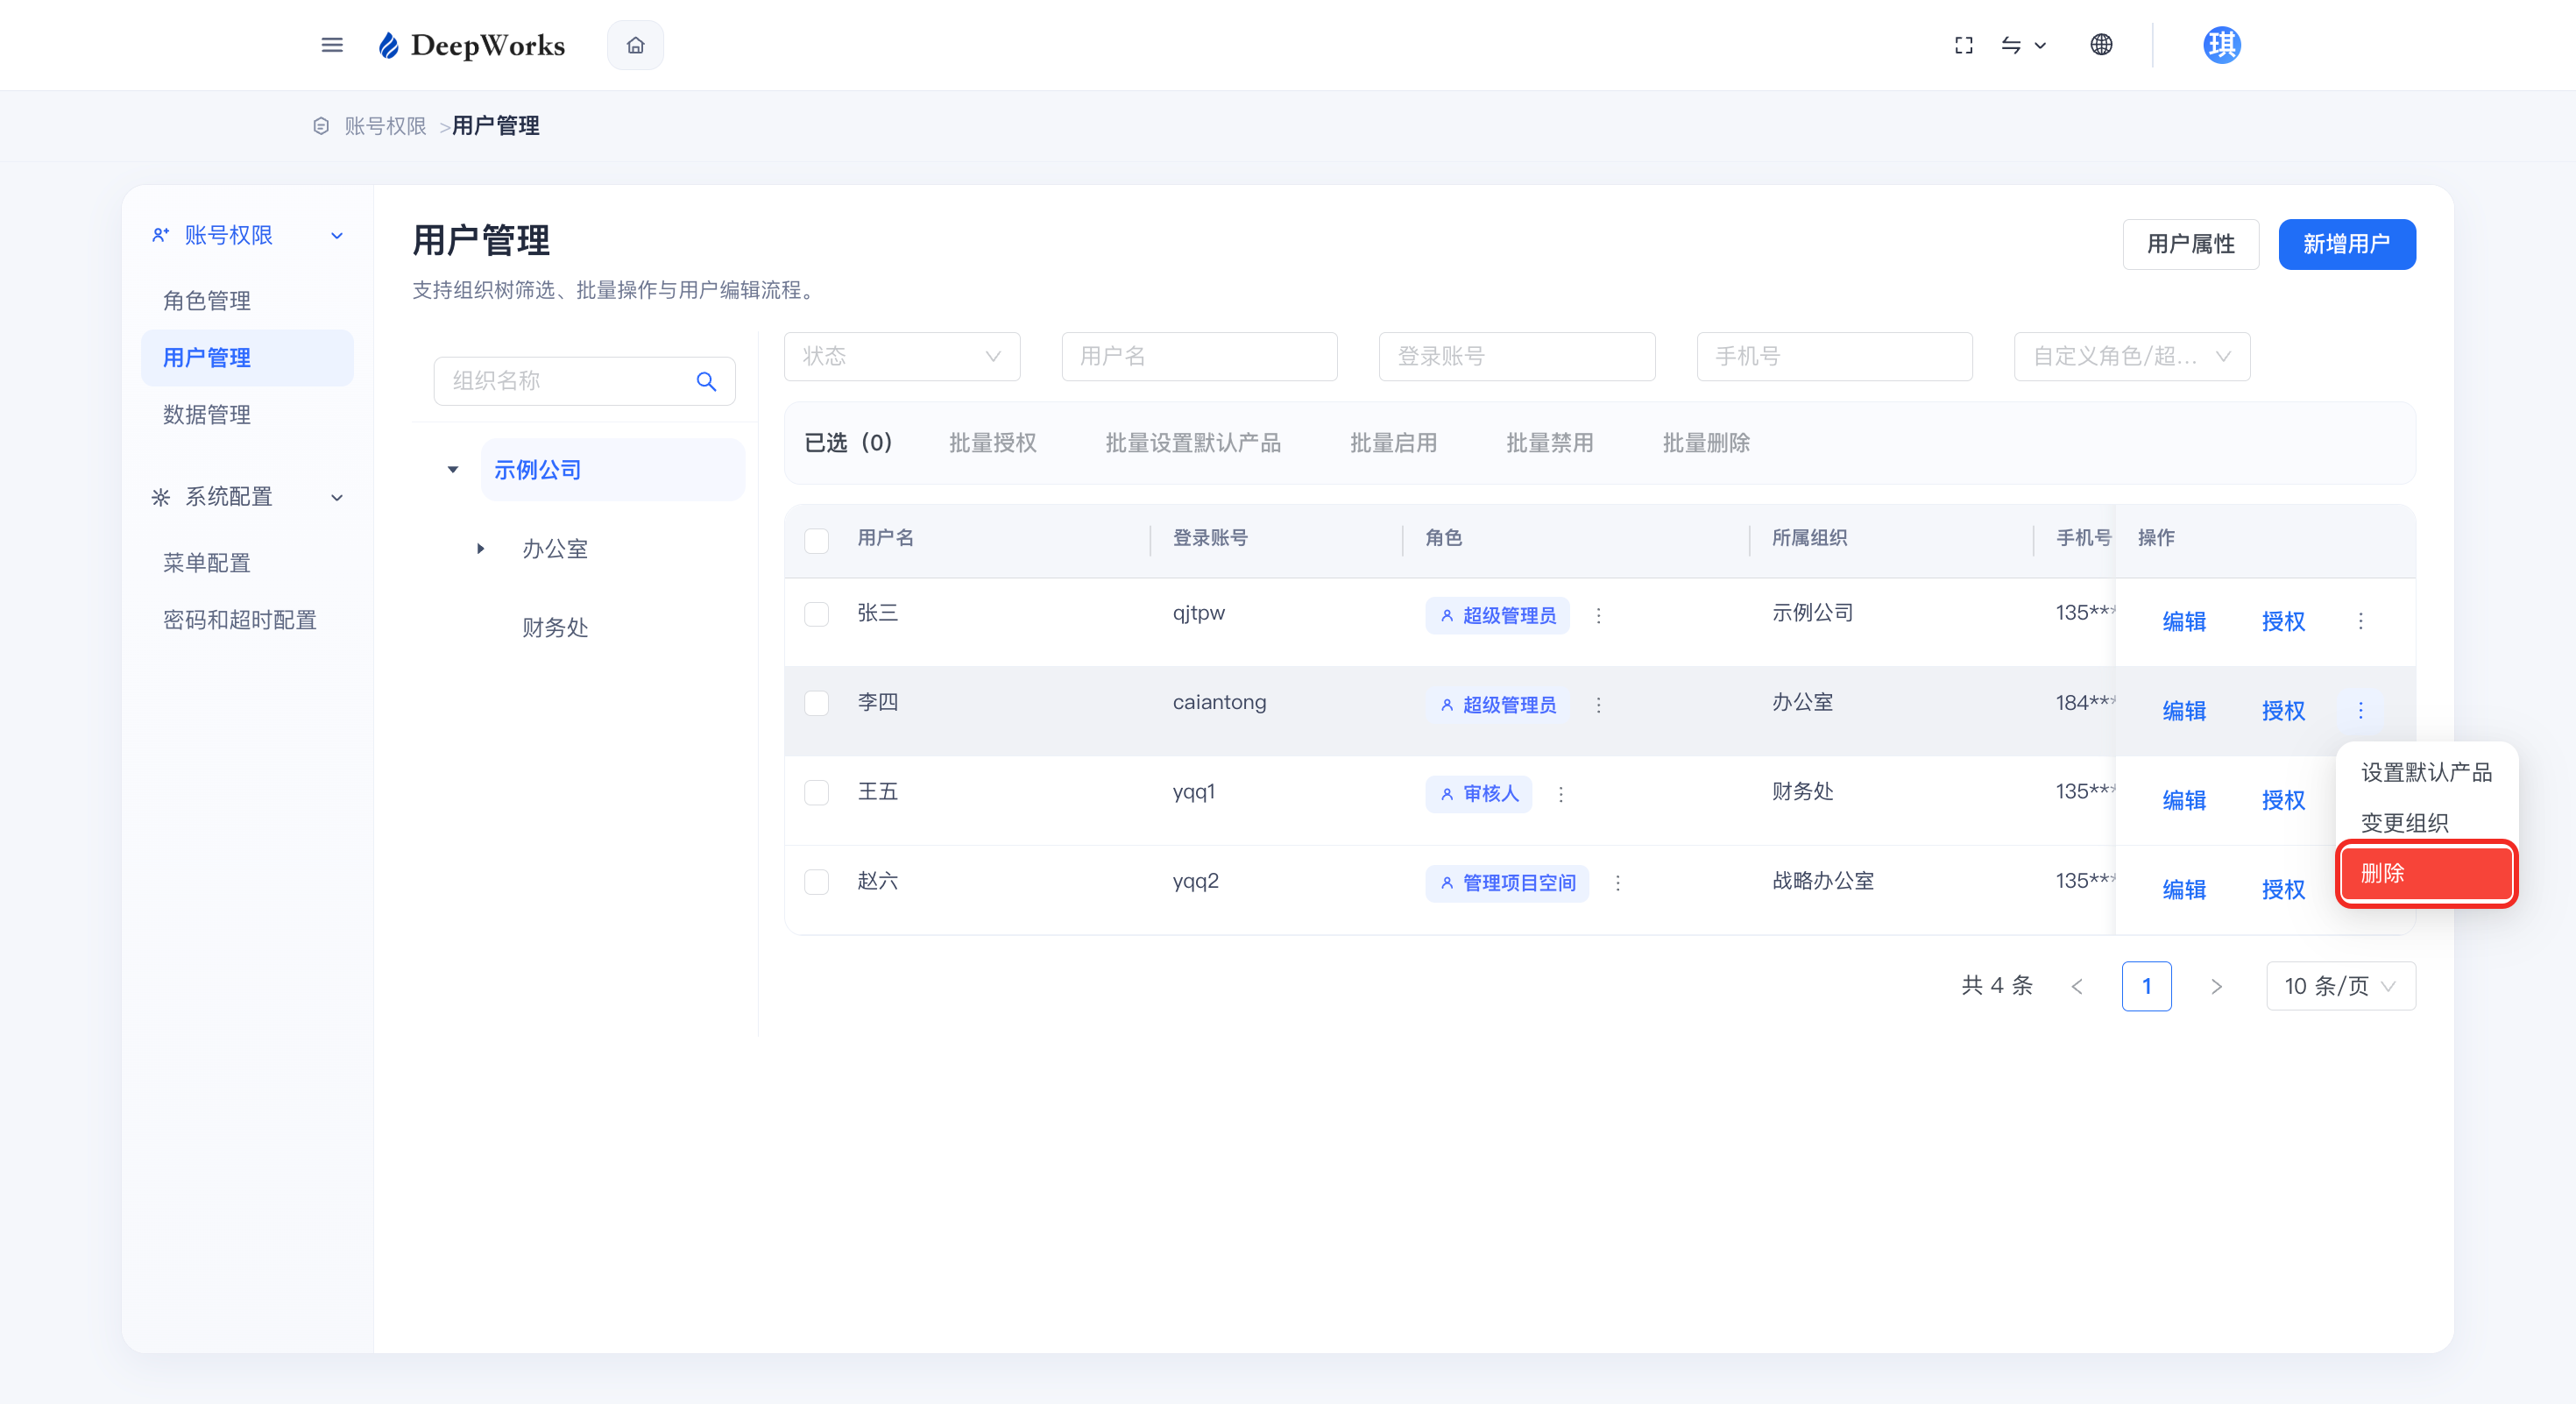
b. In the secondary confirmation pop-up, click “Delete”.
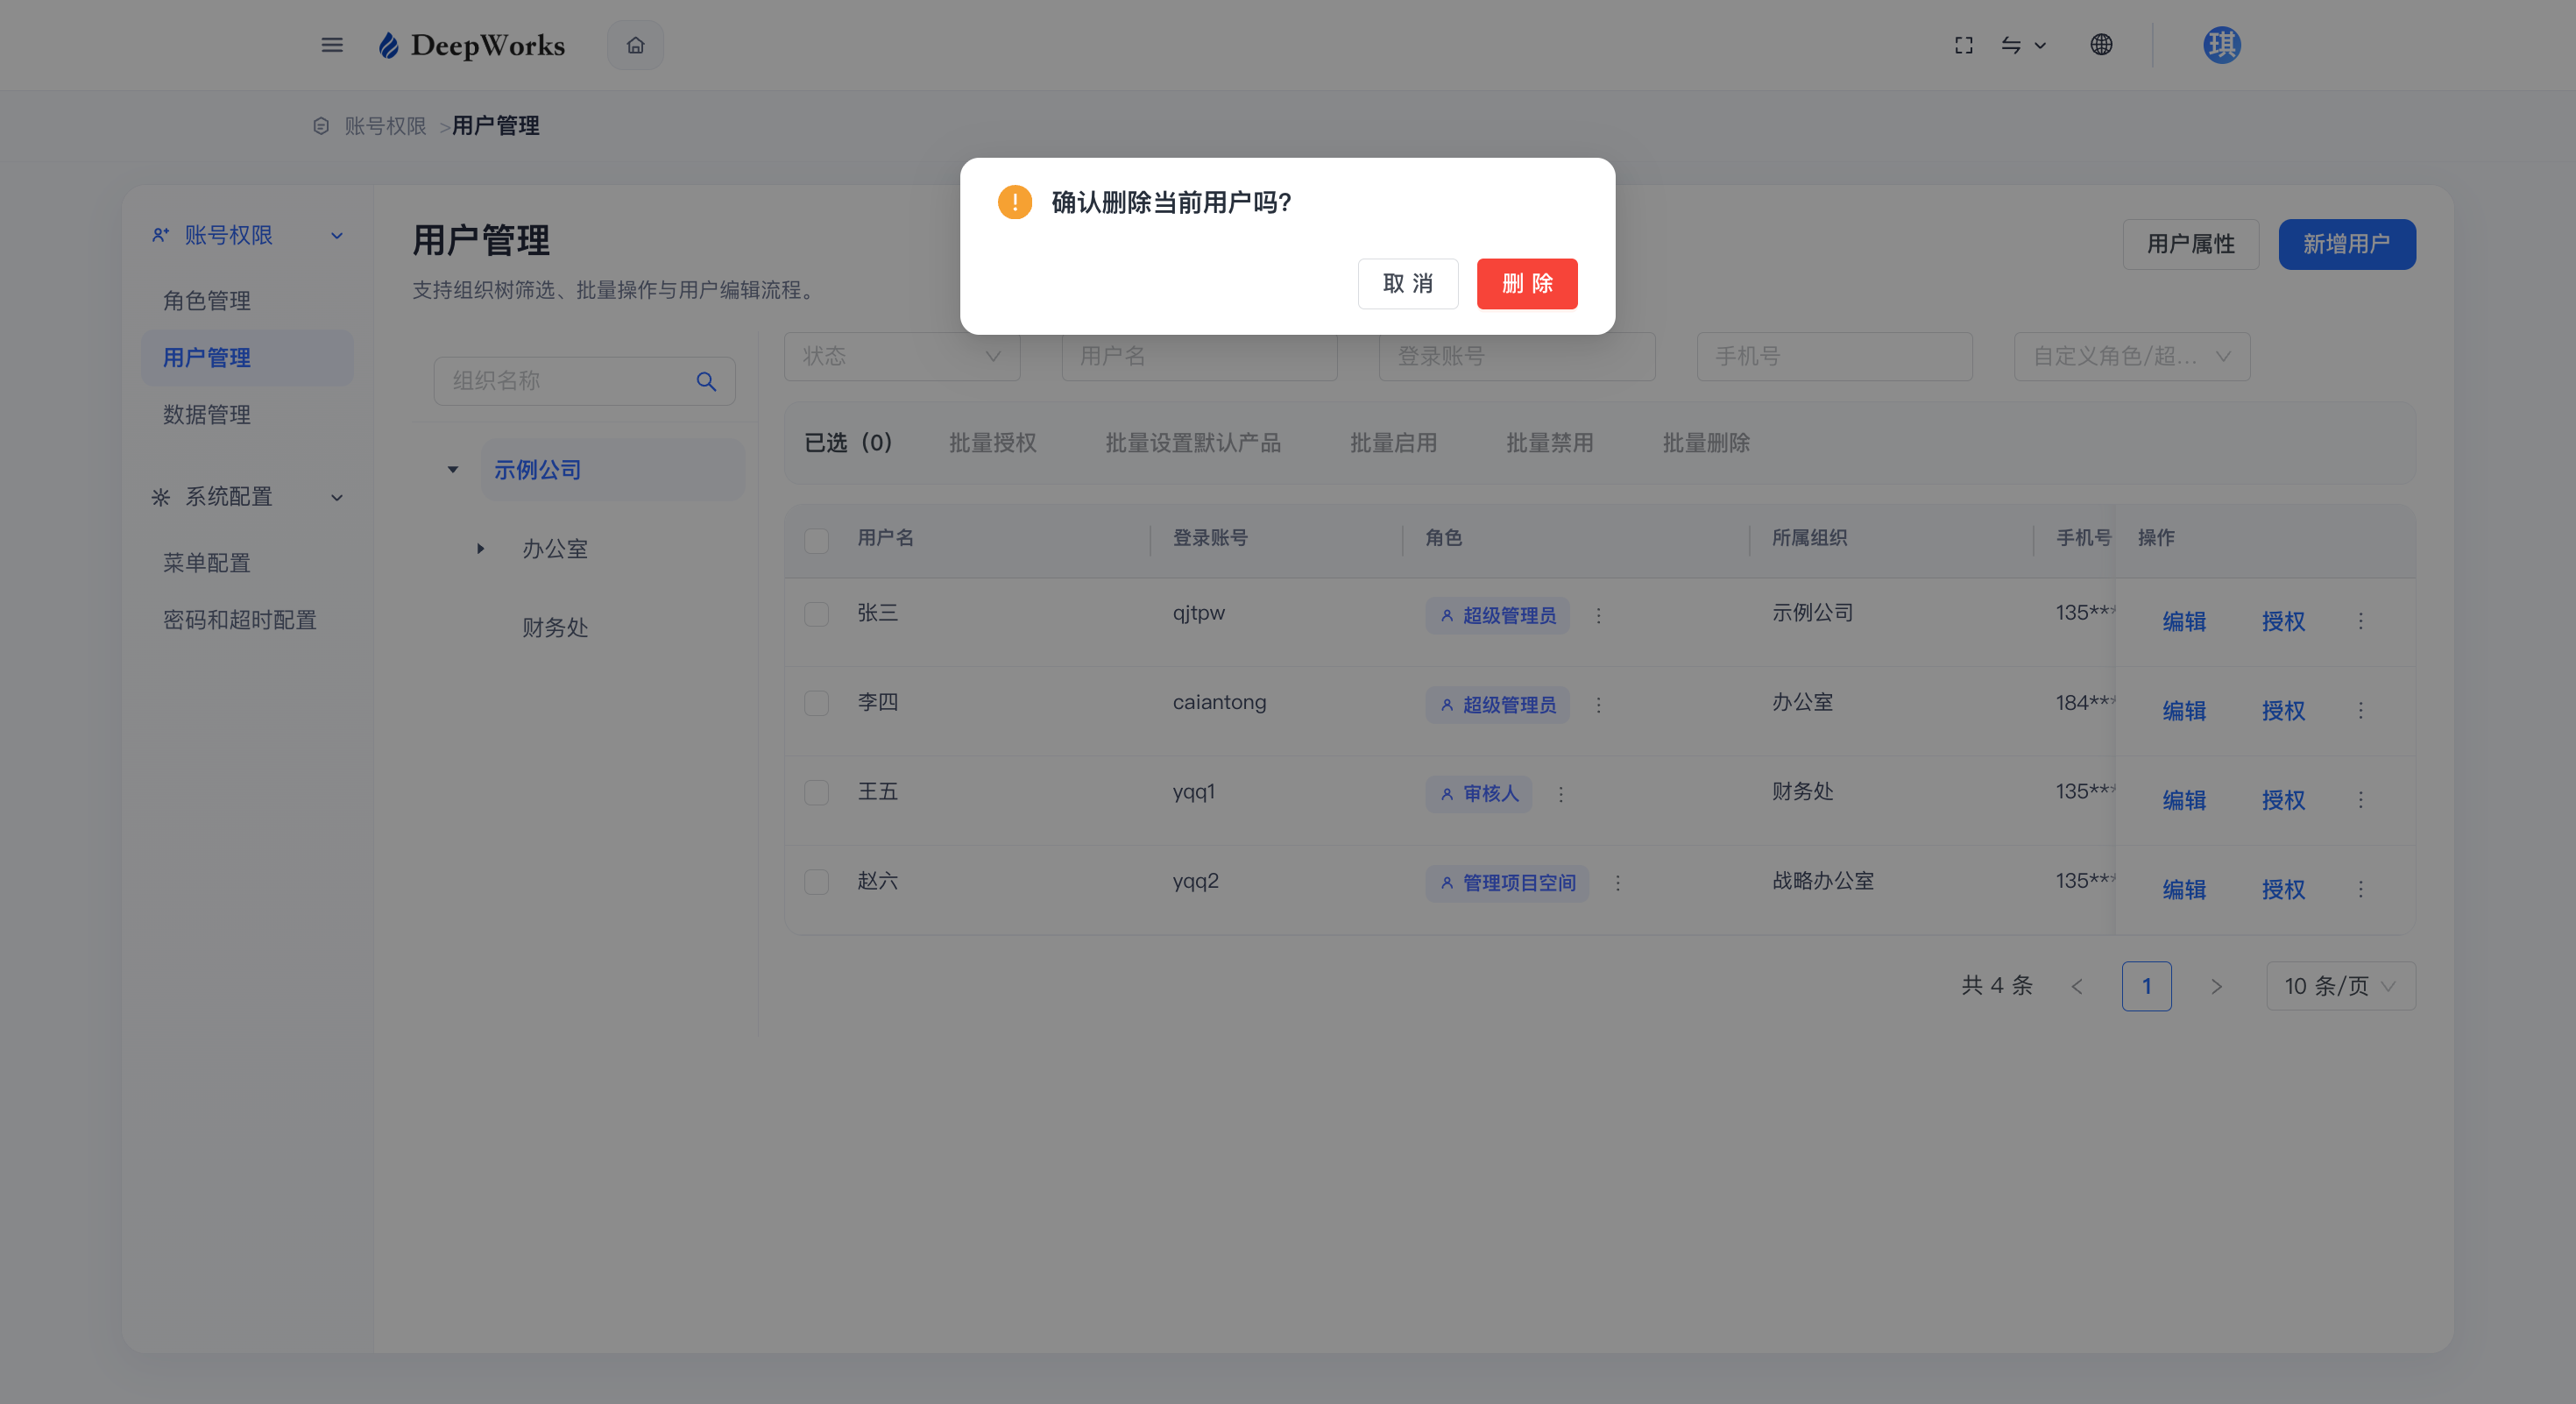
Role Authorization
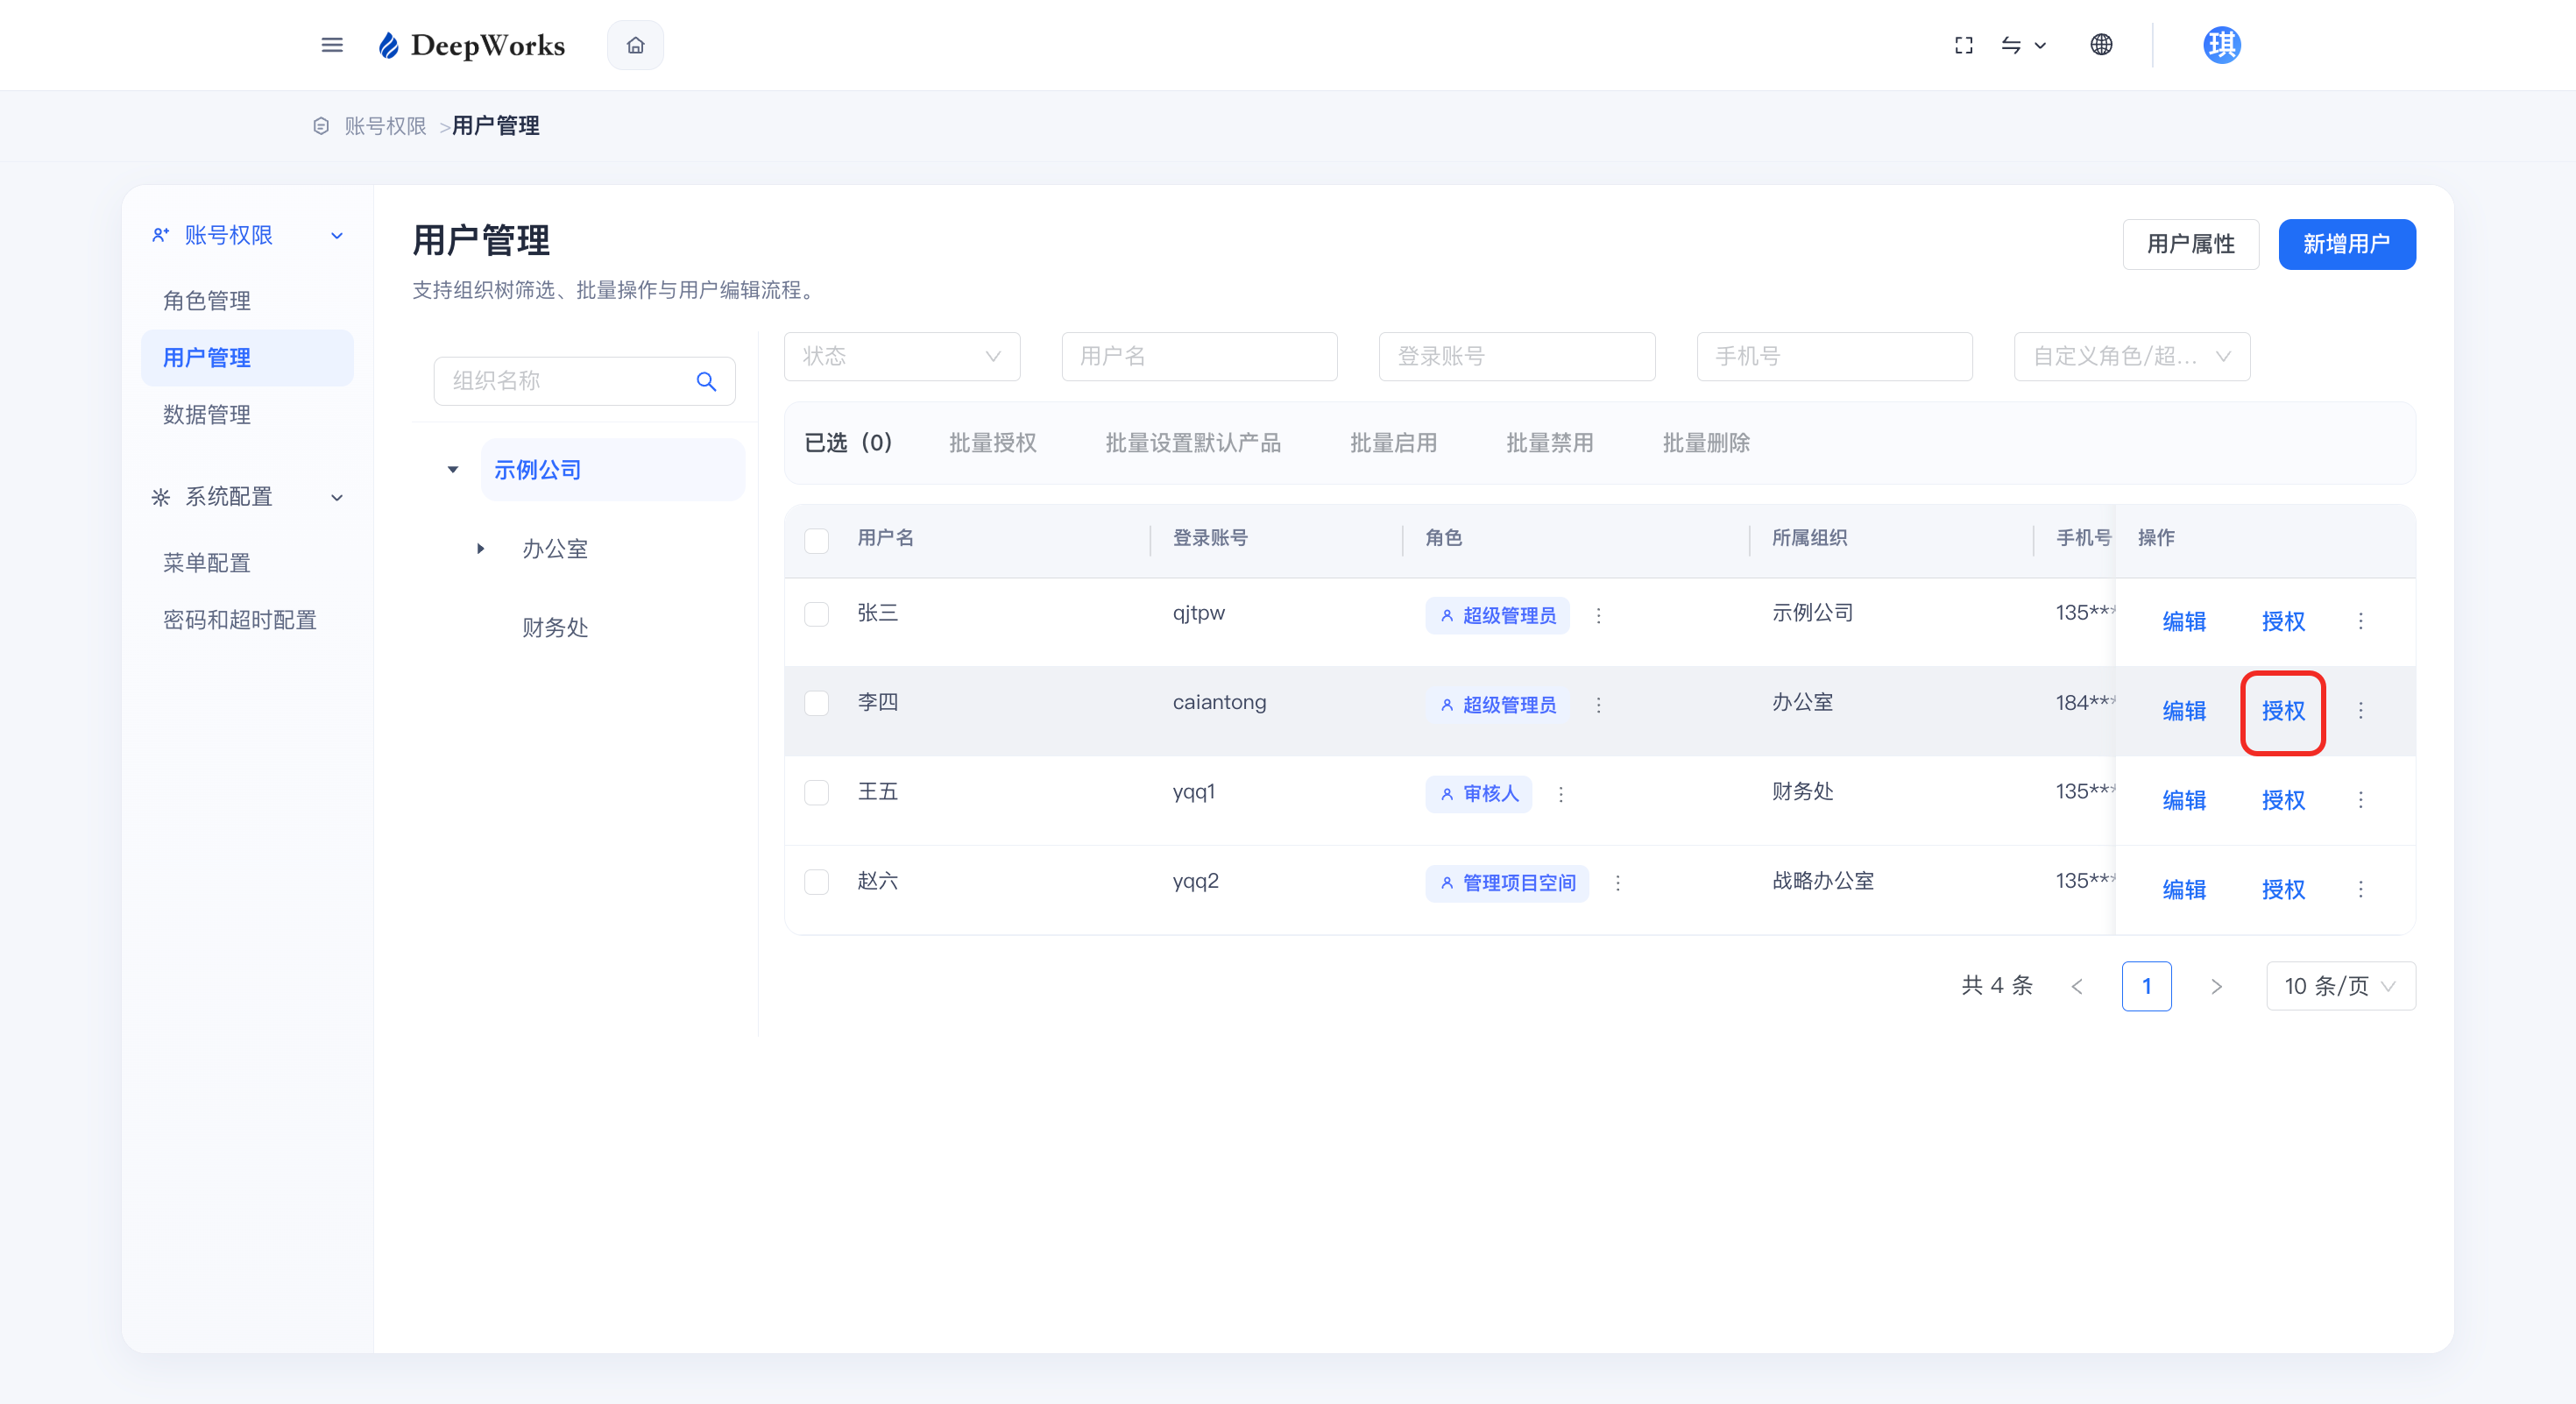
a. If the enterprise member has roles such as project space administrator or AI builder, assign corresponding permissions to the user by means of role authorization. Click “Authorize”.
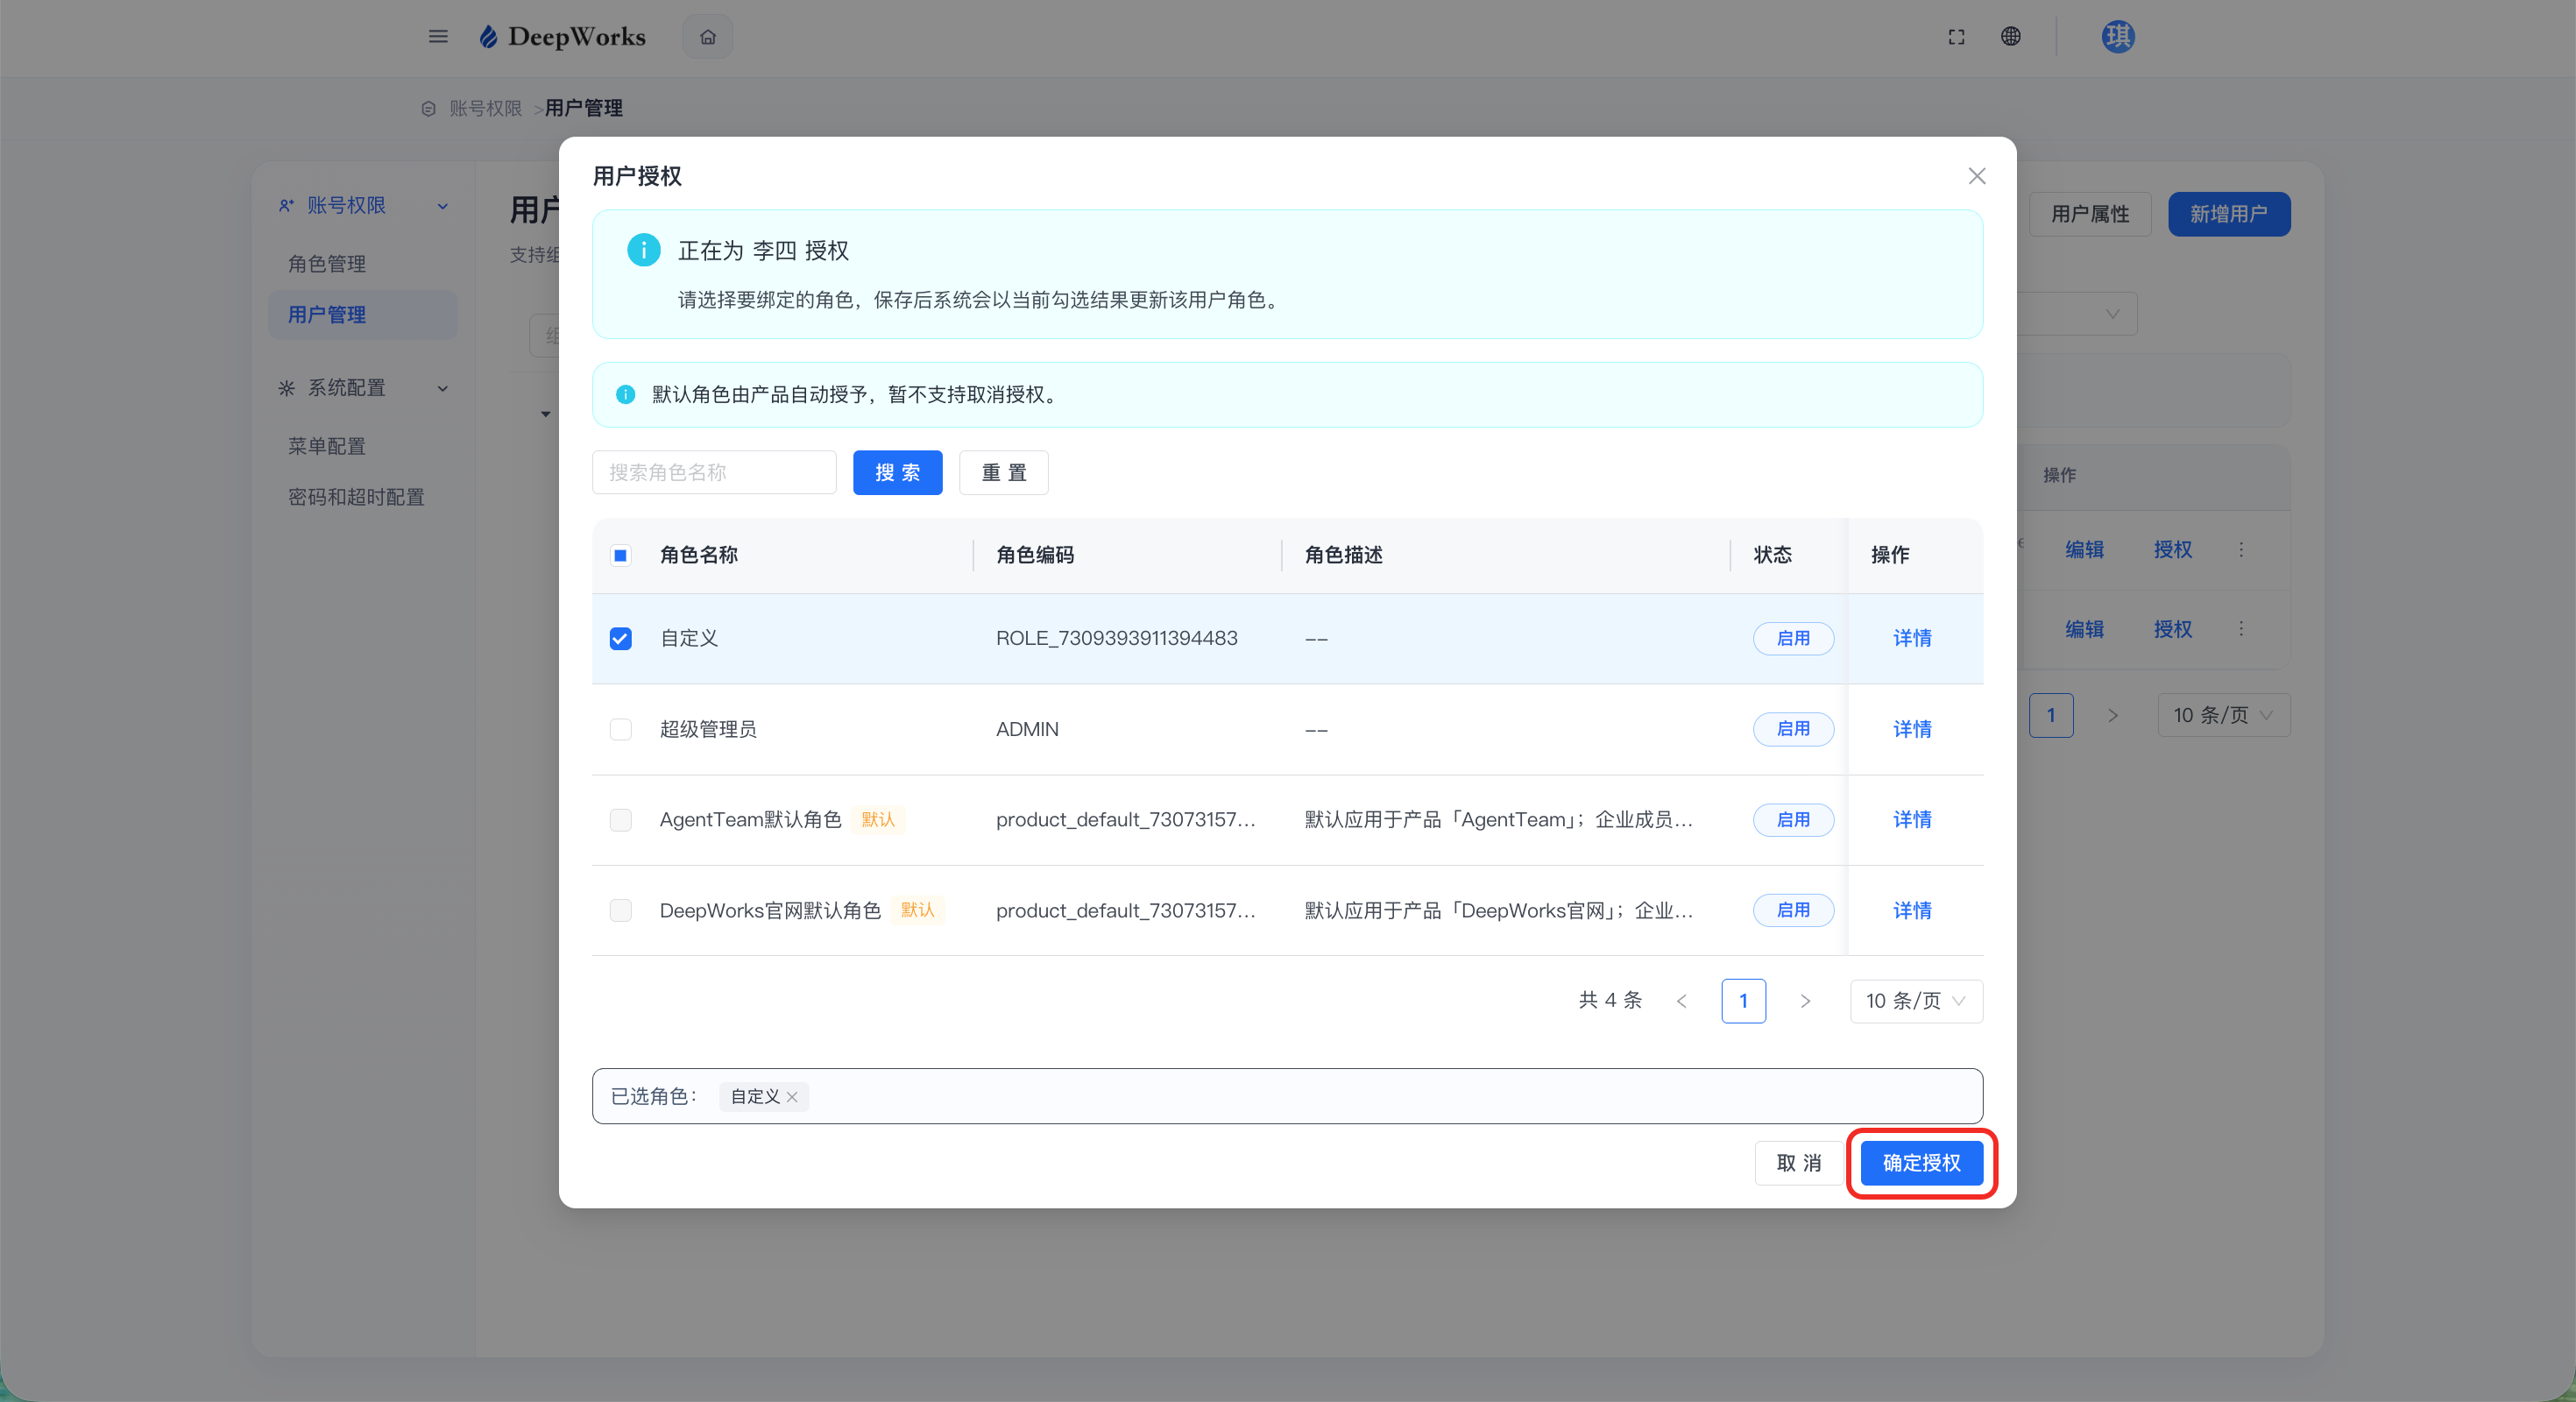
b. After checking the corresponding roles, click “Authorize”. Note: “Default Role on DeepWorks Official Website” and “DeepWorks Default Role” are system-default regular User Personas, which are basic permissions granted to all enterprise members and do not require separate authorization.
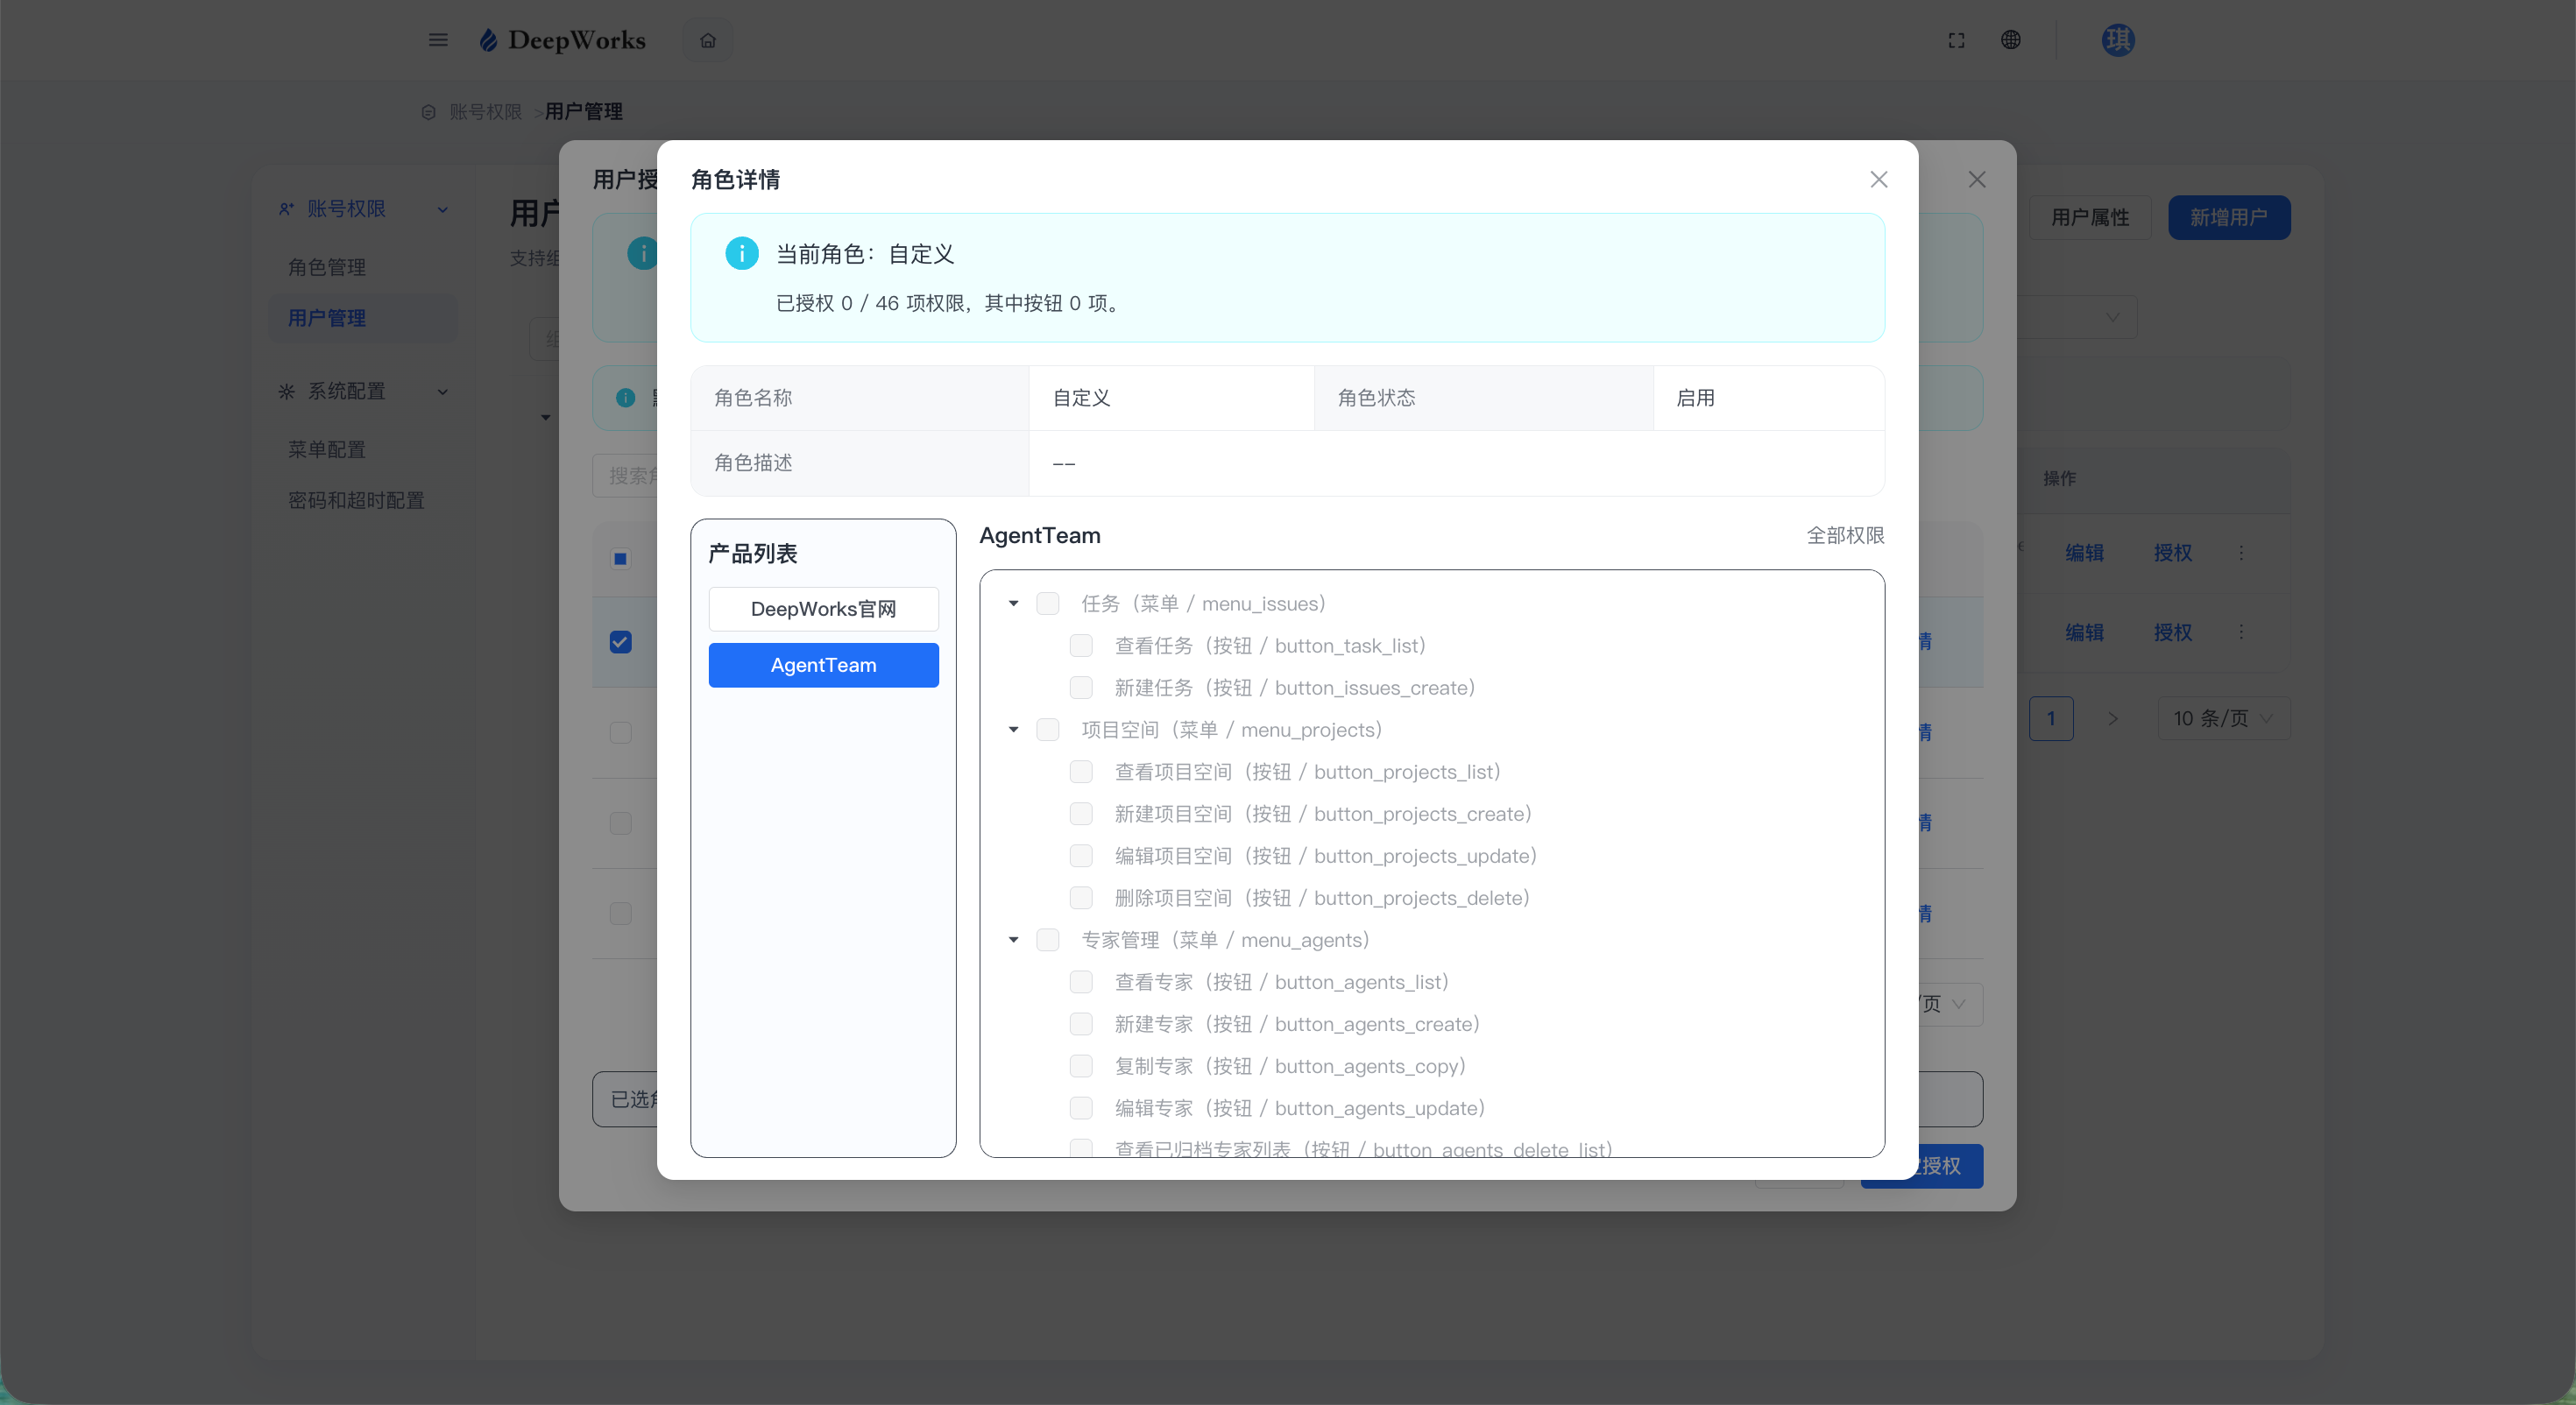
c. During the authorization process, you can click “Details” to view the permission configuration of the role and confirm that the role to be authorized is correct.
Role Management
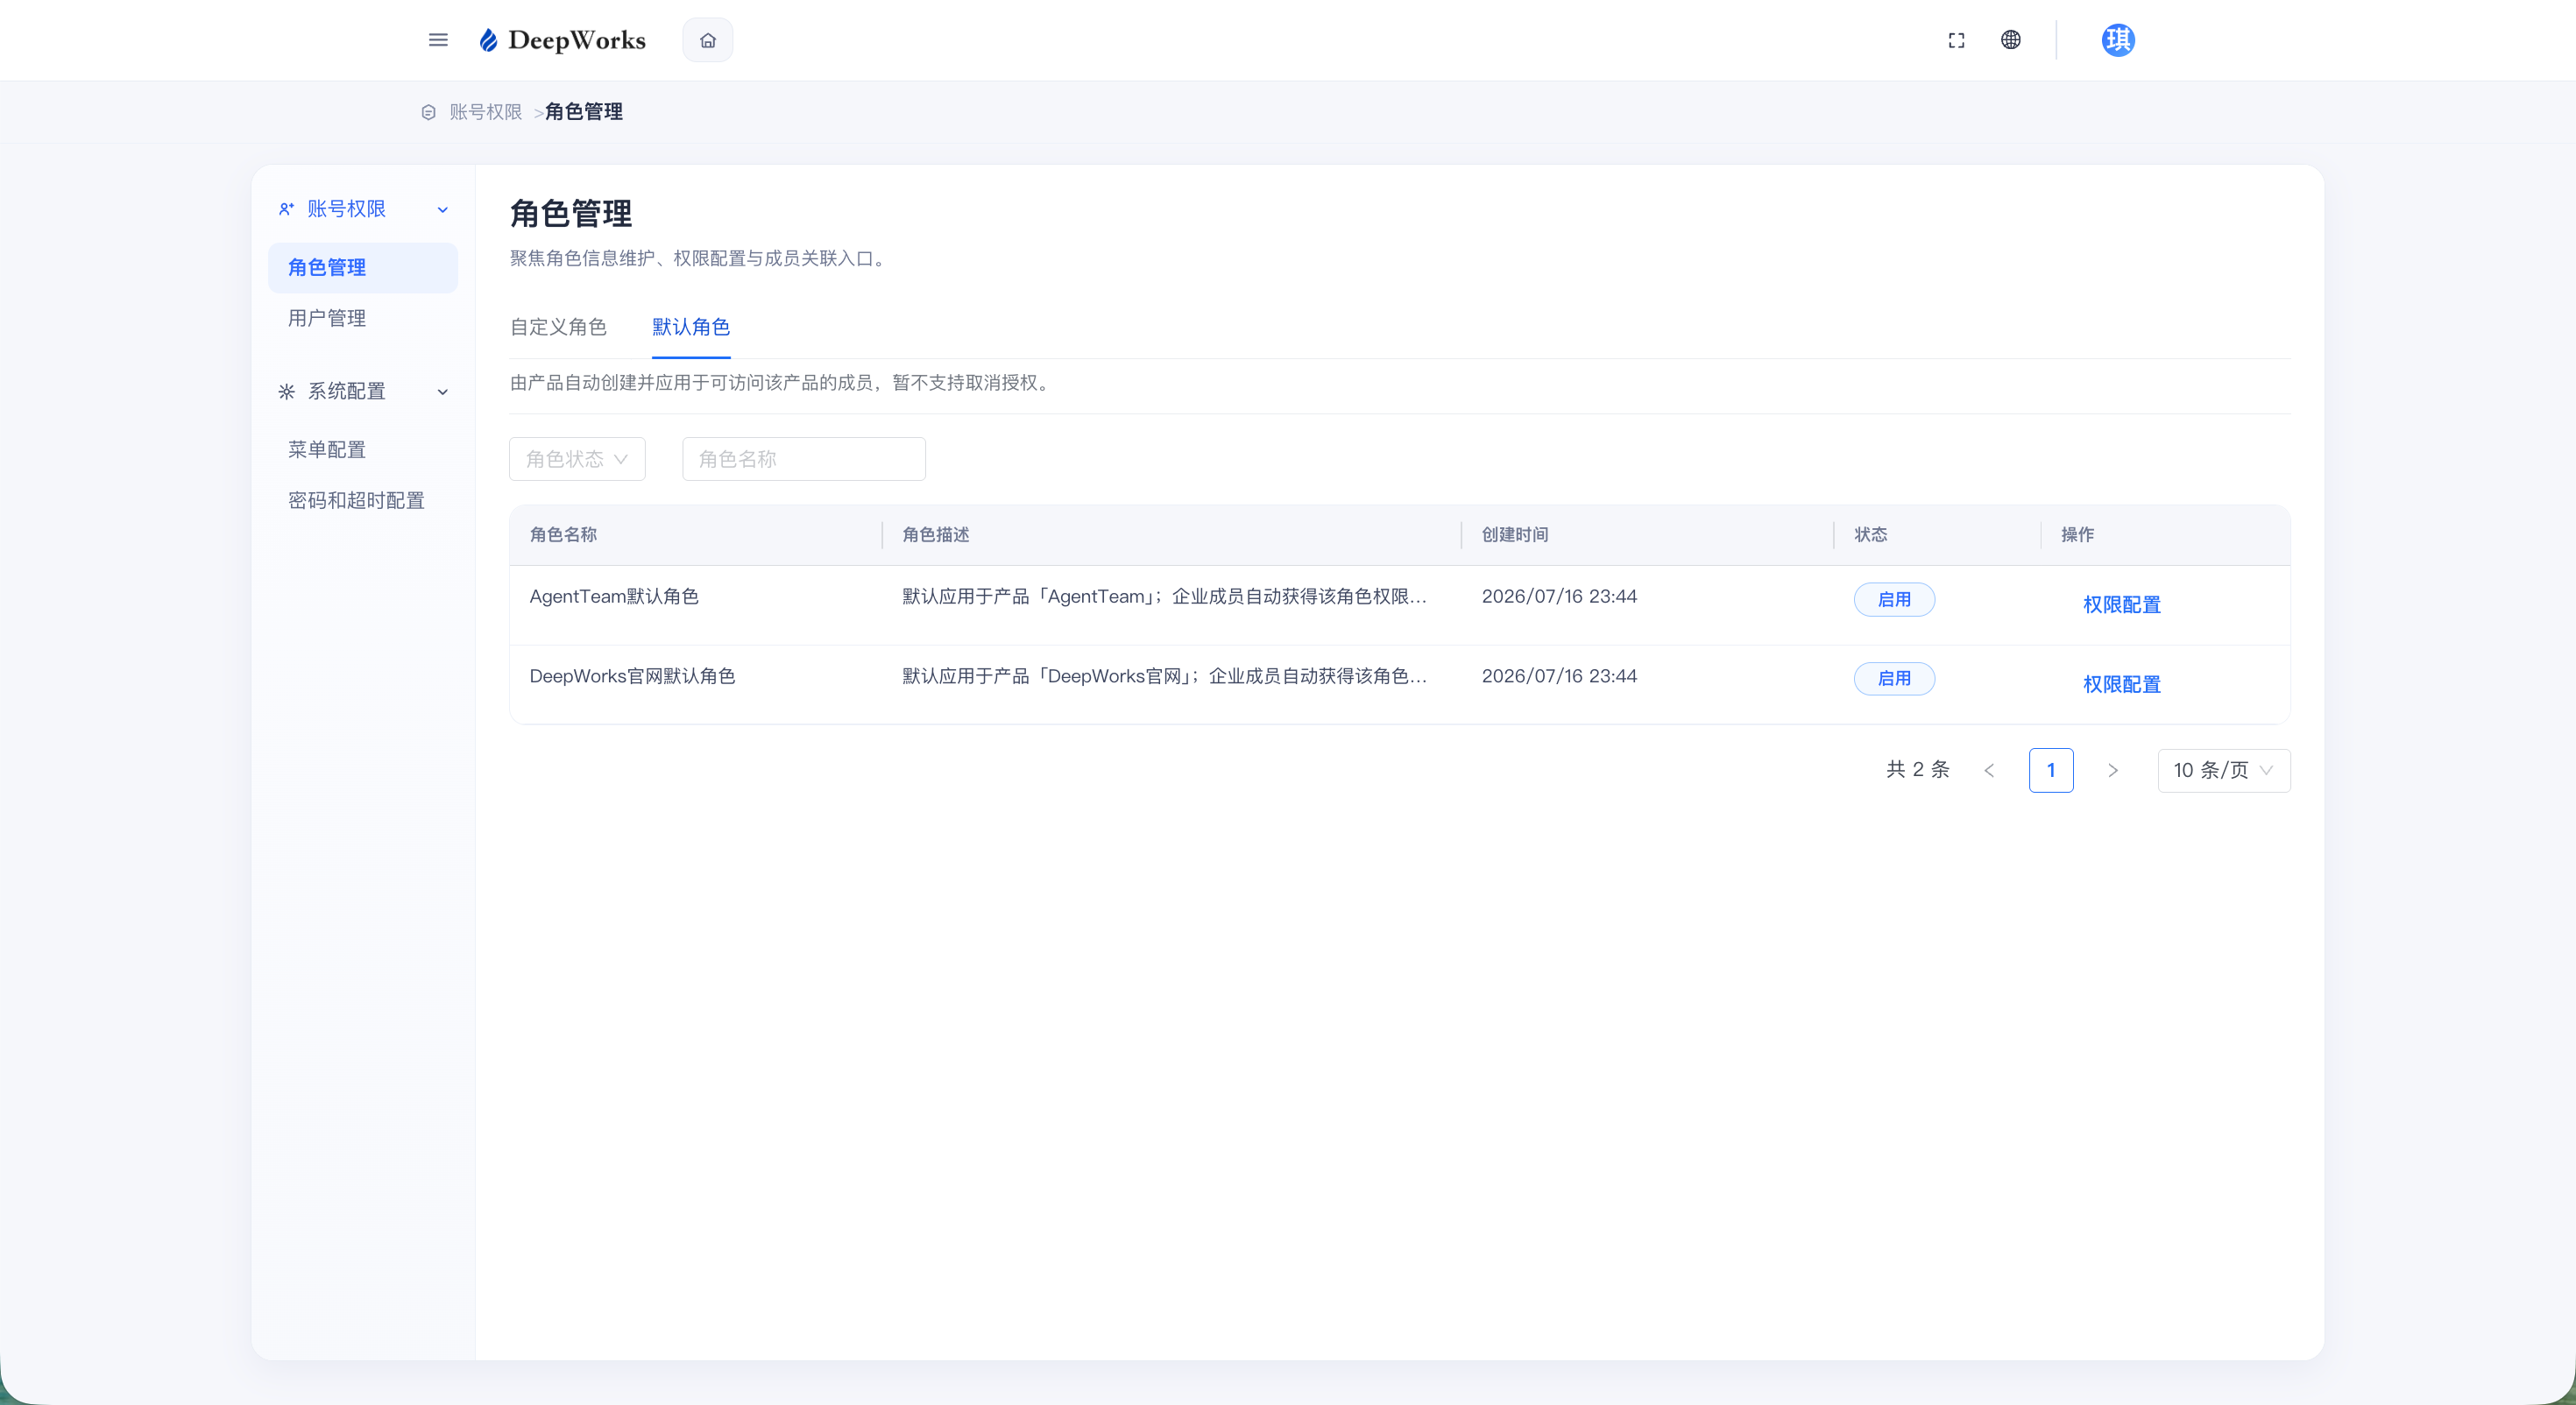
View Character List
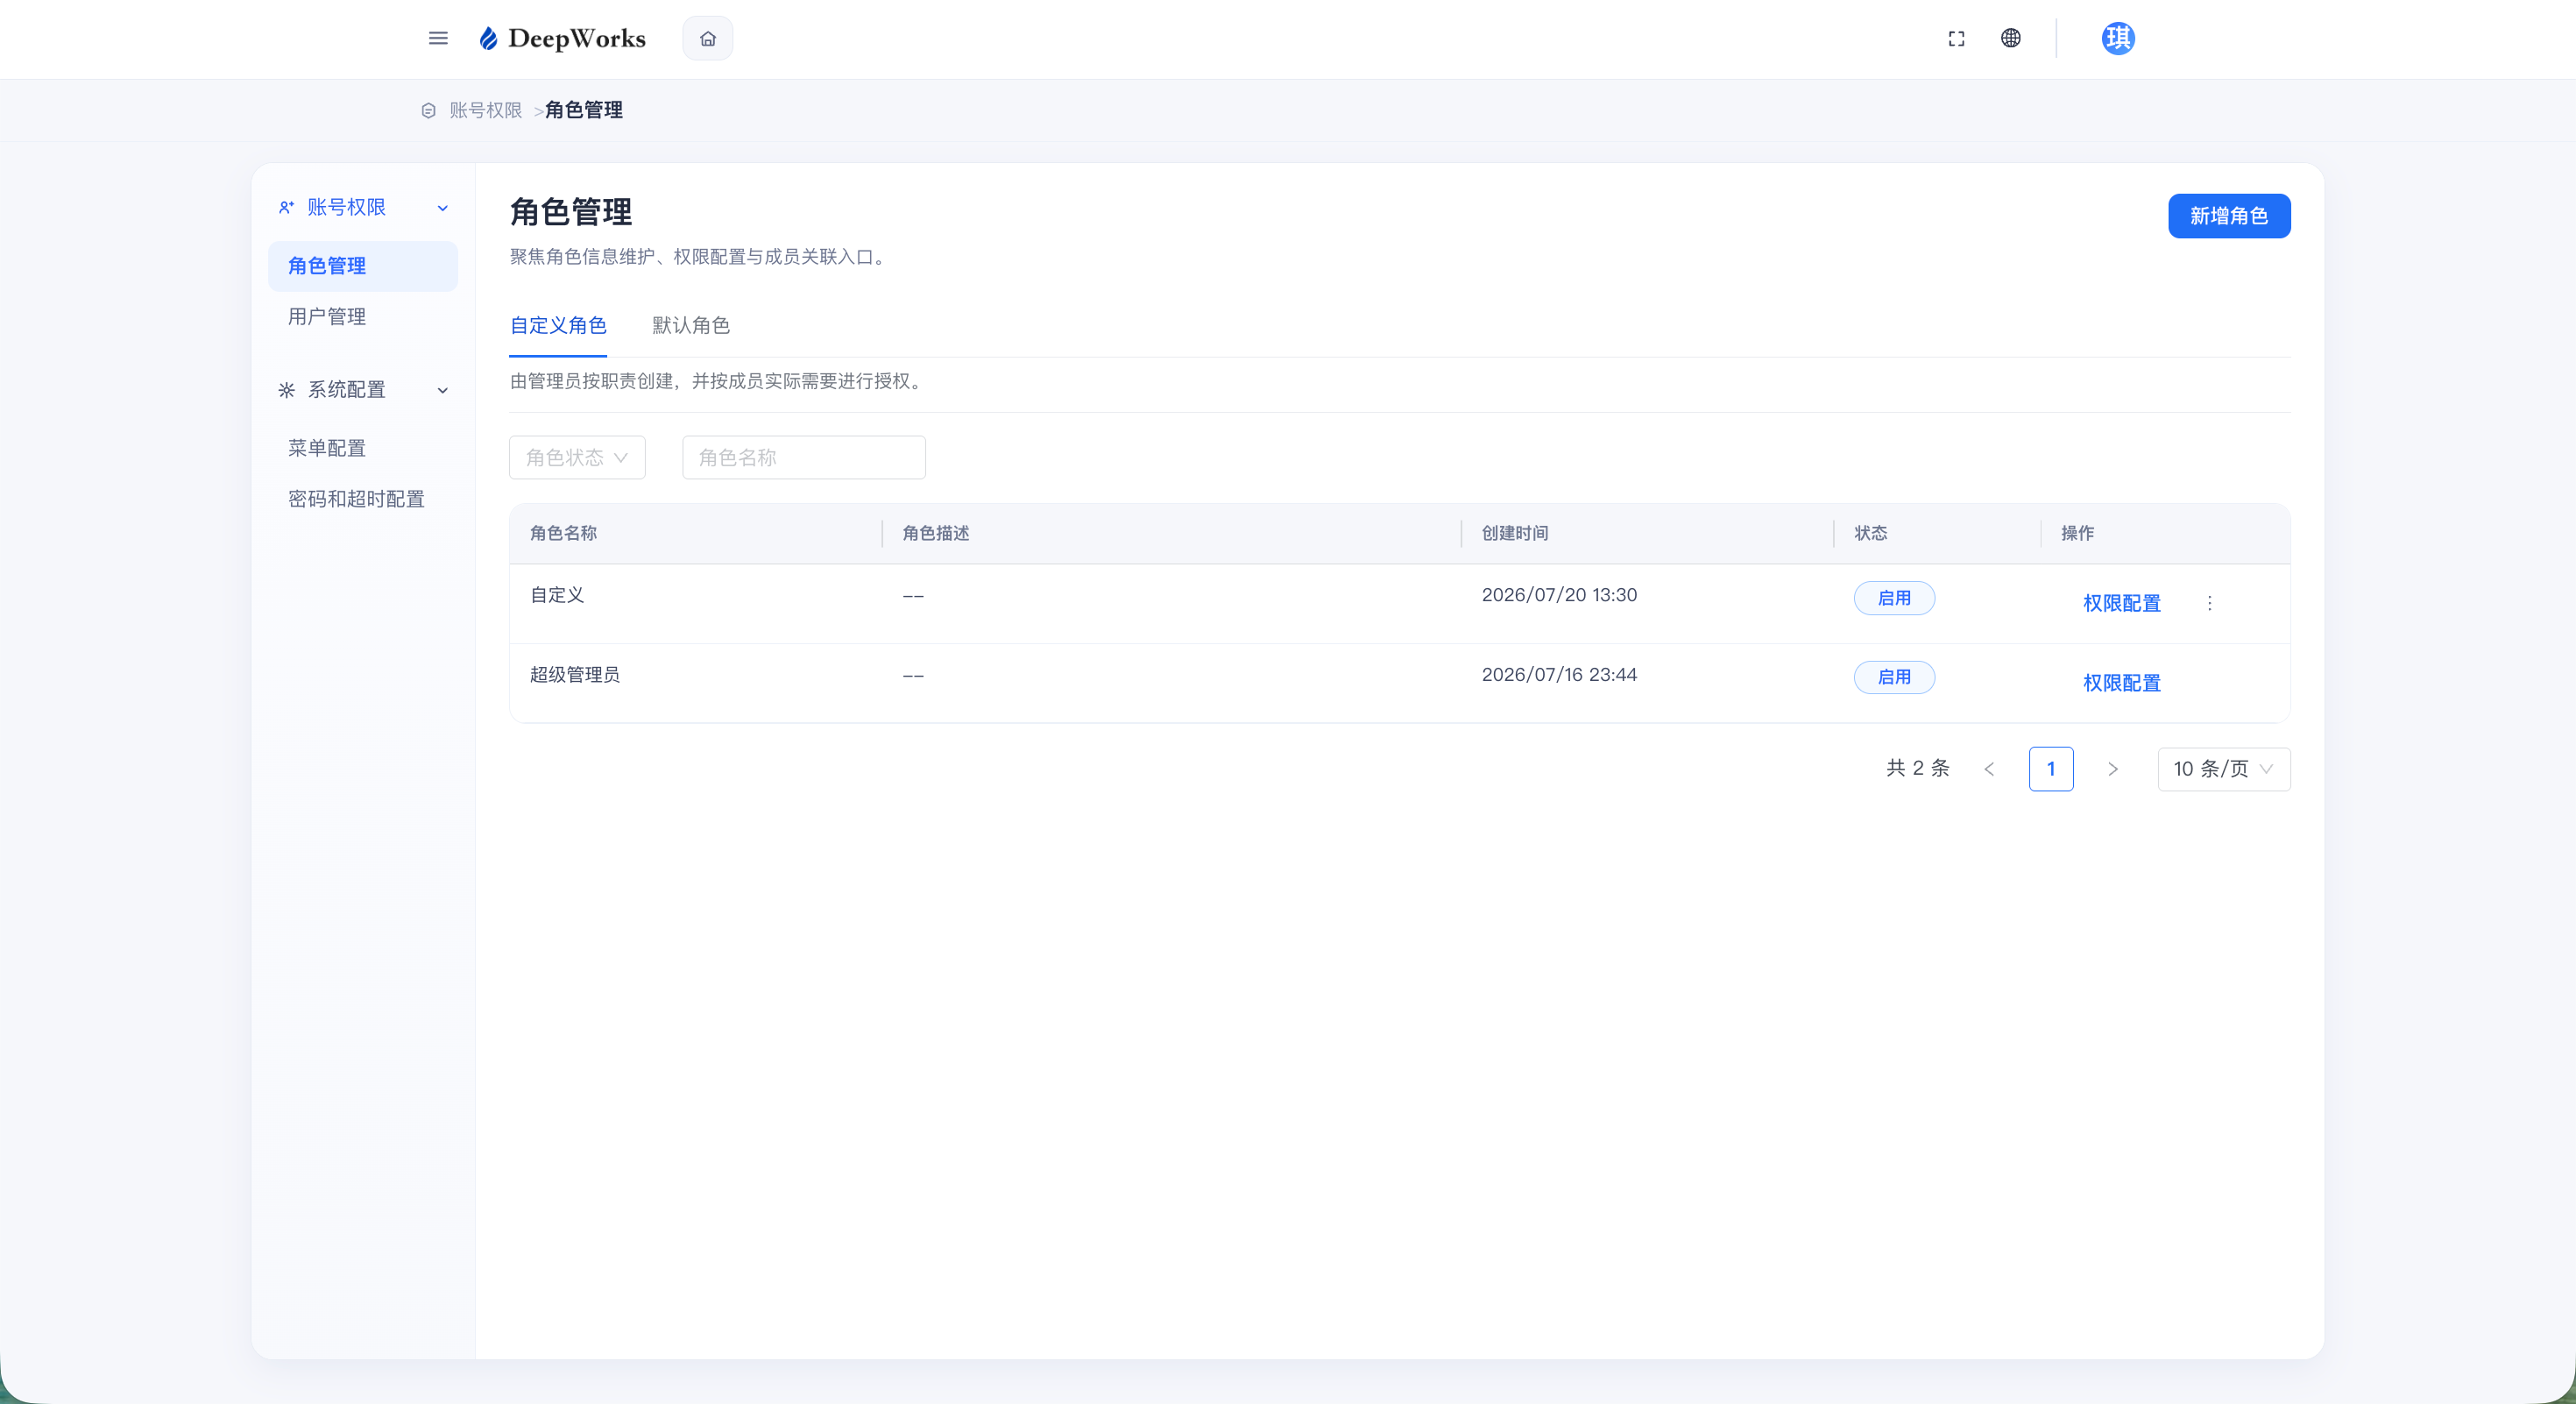
Click “Role Management” in the left menu to view the role list of the current tenant. There are three types of roles: first, the primary administrator, the default tenant administrator is the primary administrator, who has all the permissions of the DeepWorks official website and management console; second, the regular User Persona (also referred to as the default role), which is a preset role for all enterprise members by the system or tenant administrator, and is automatically assigned to new enterprise members upon their joining without requiring individual authorization;Third, custom roles: these are roles created independently by the tenant administrator based on business needs, which can freely combine the available permission points of each application under this tenant to meet the personalized authorization requirements of members in different positions and with different responsibilities.
Add New Character
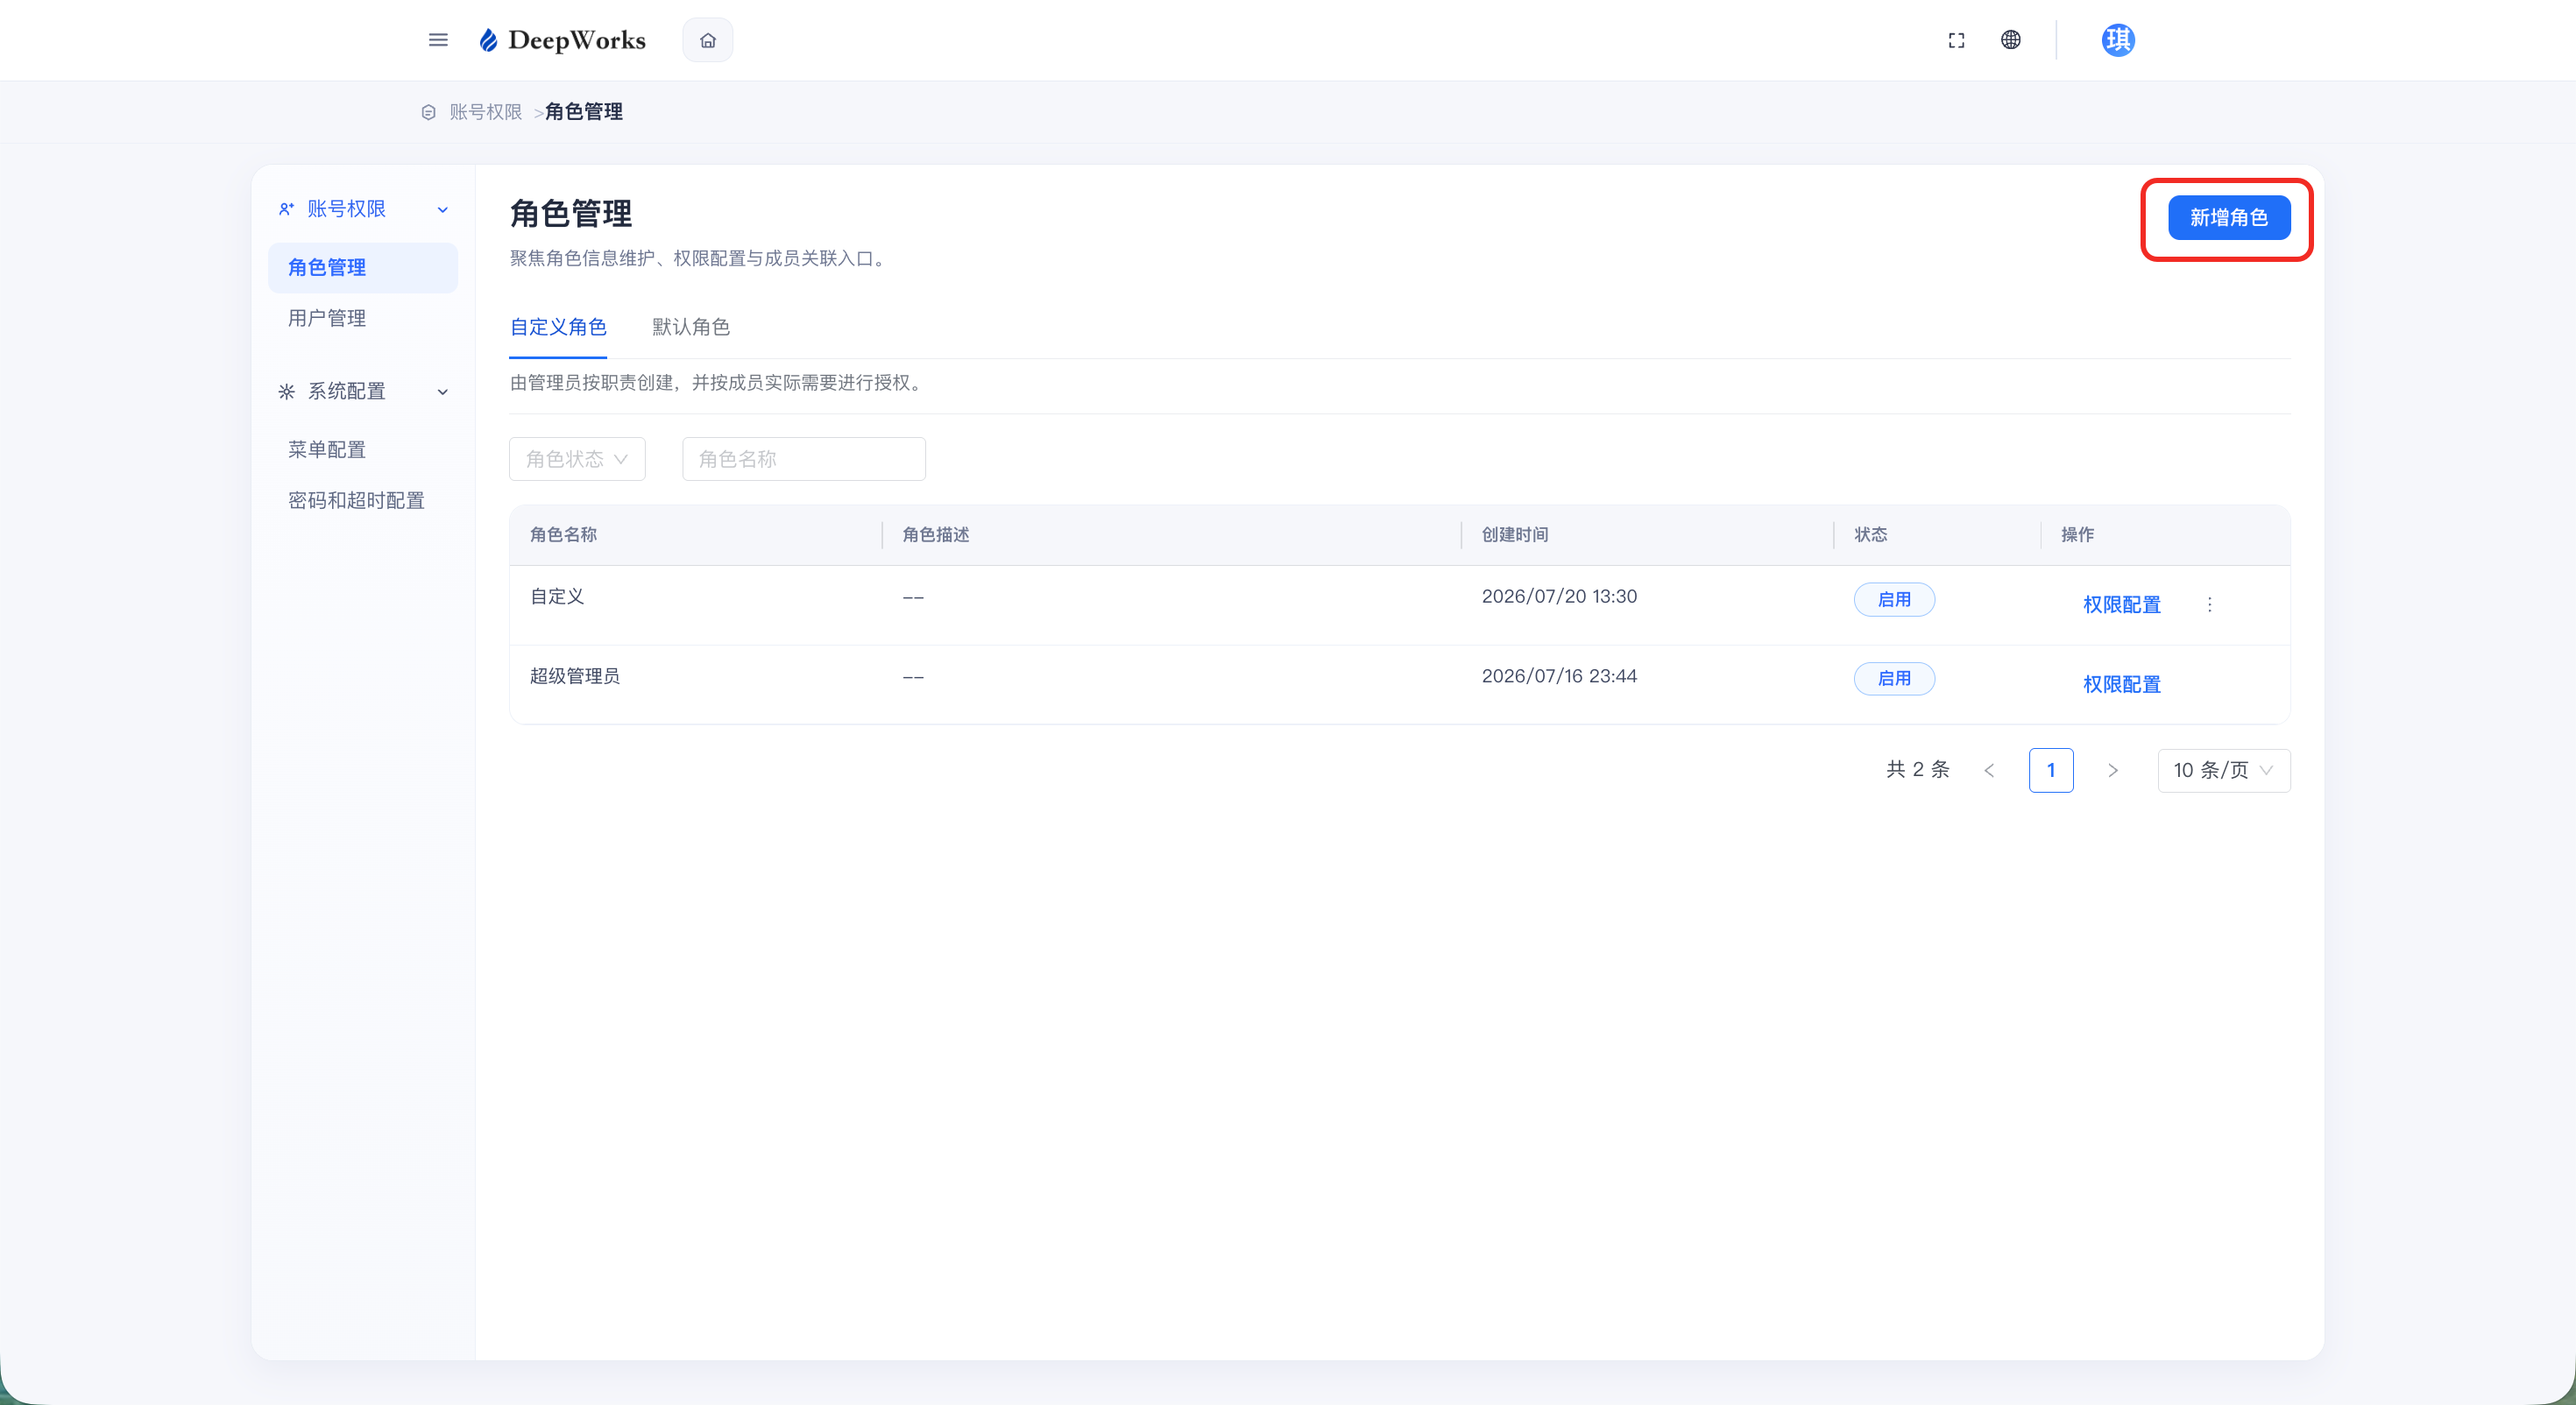
a. Click “Add Role”.
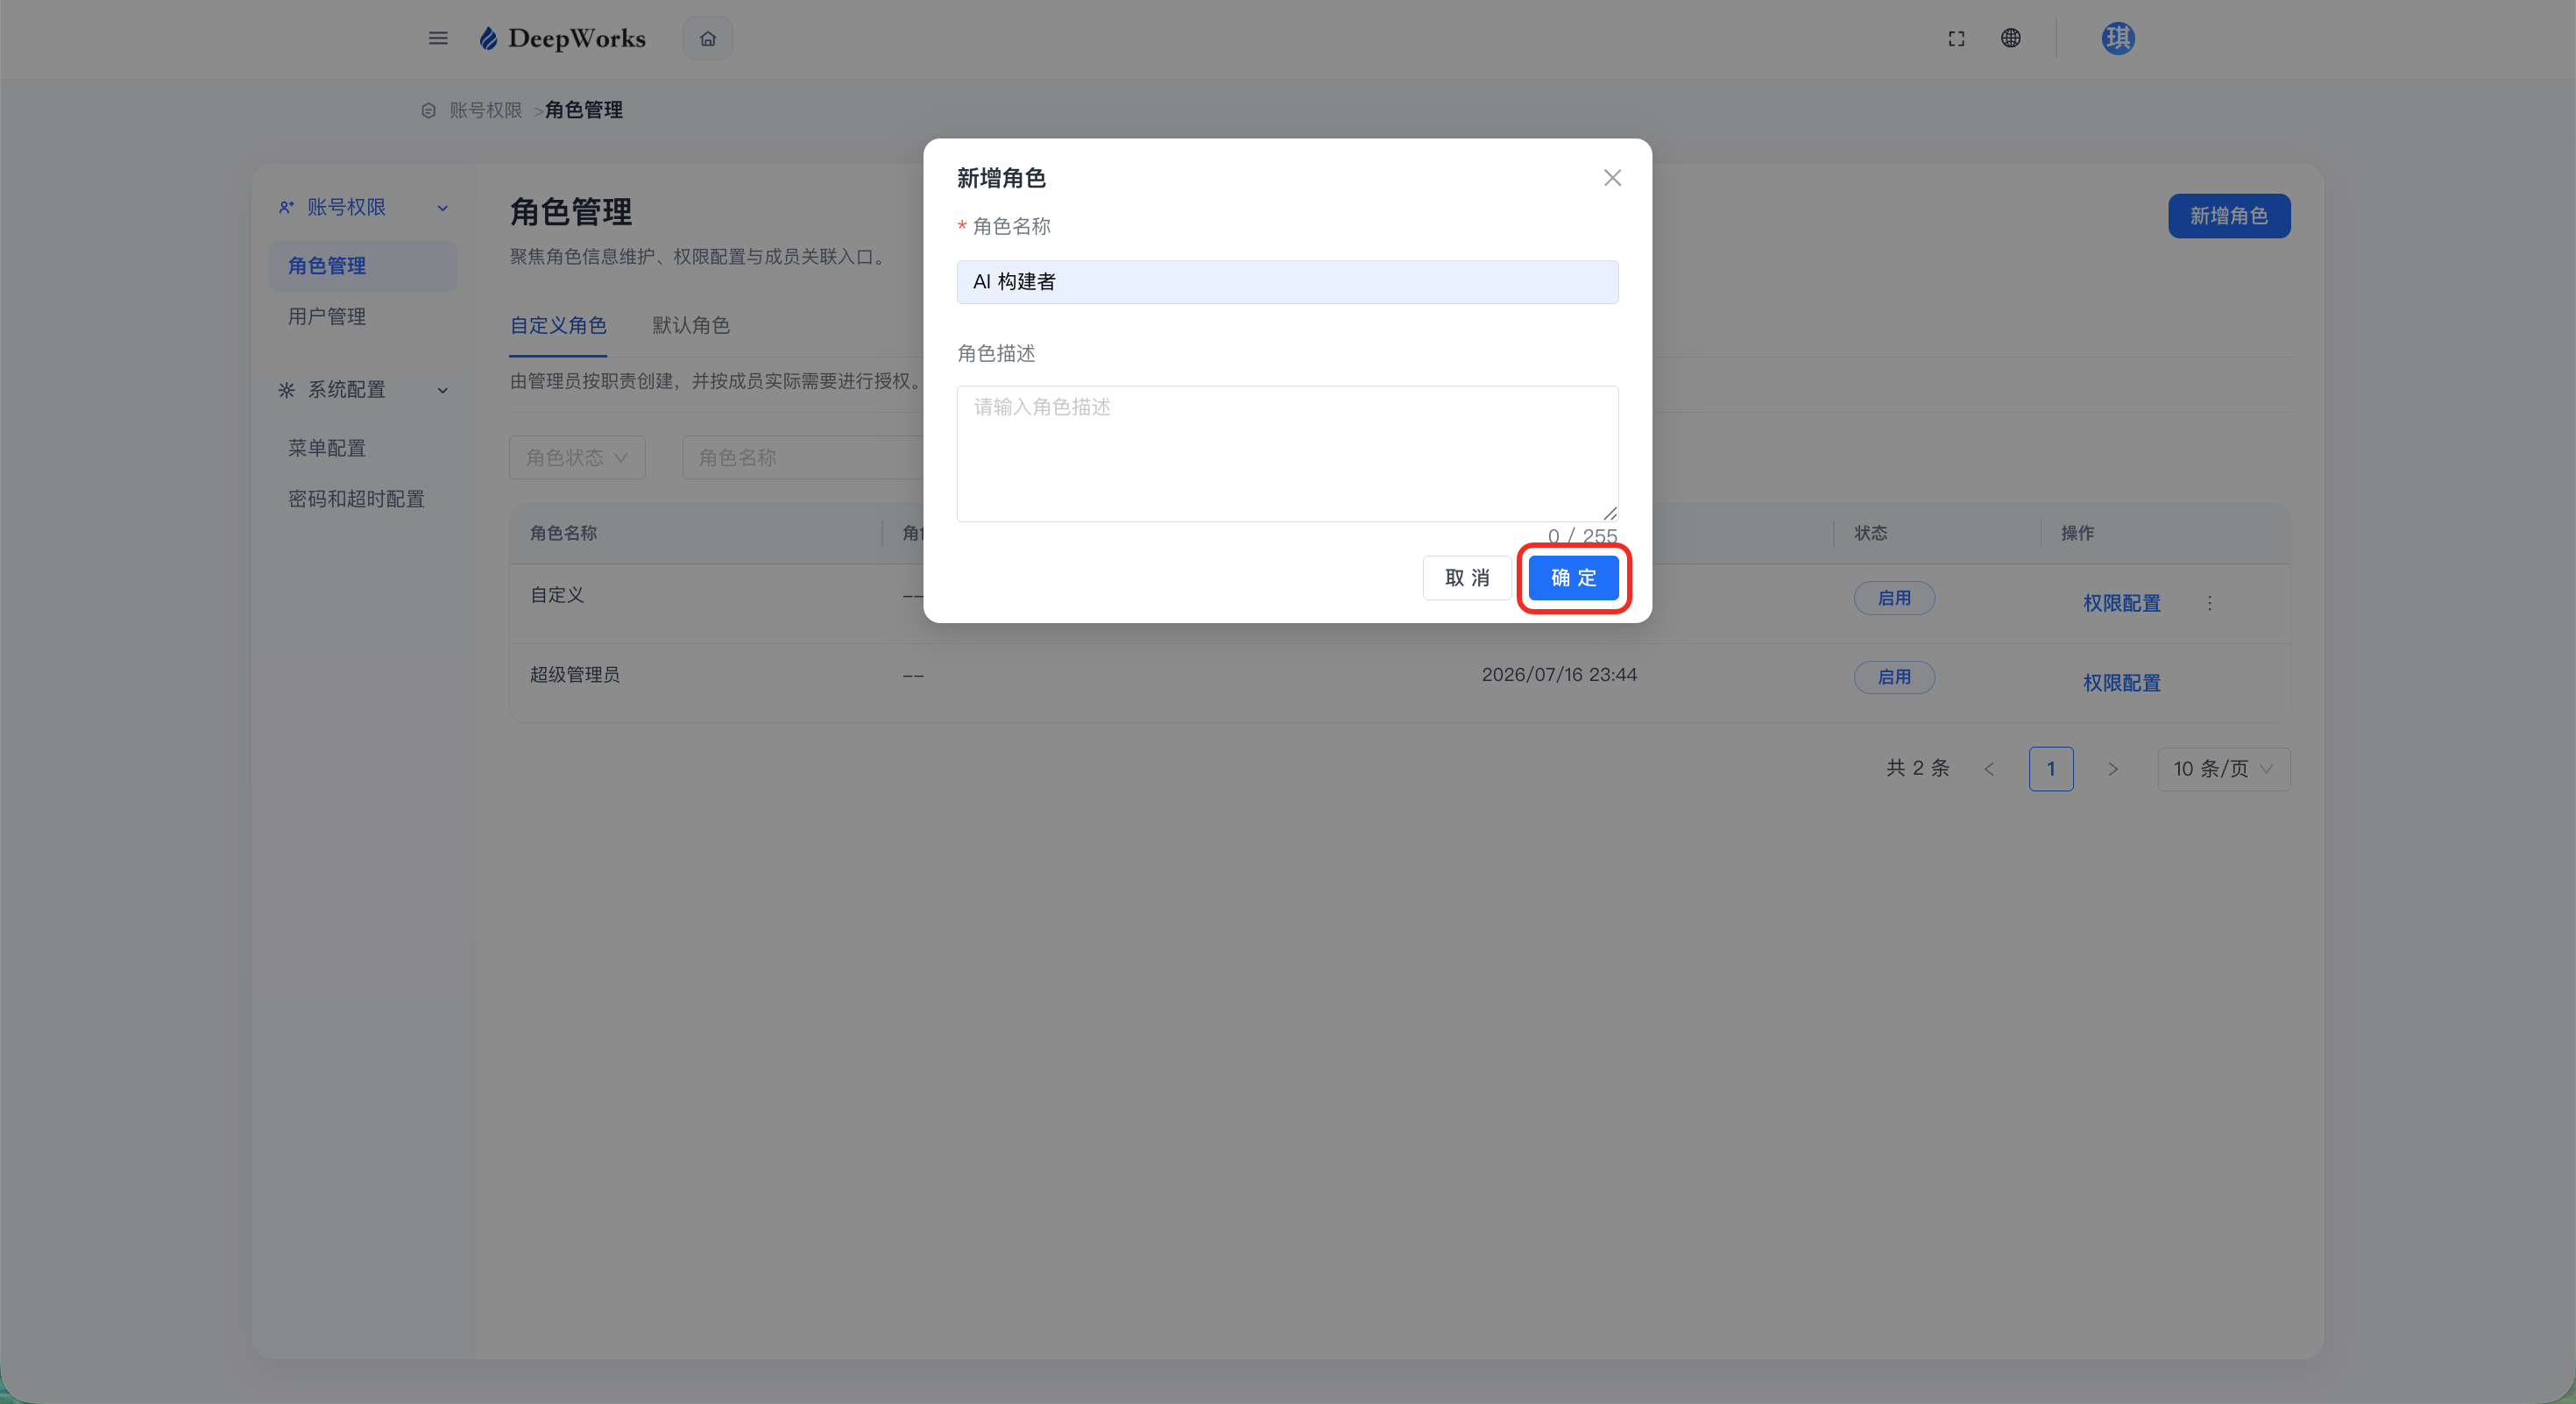
b. Fill in the role information, including the role name and role description, then click “OK” when finished.
Role Permission Configuration
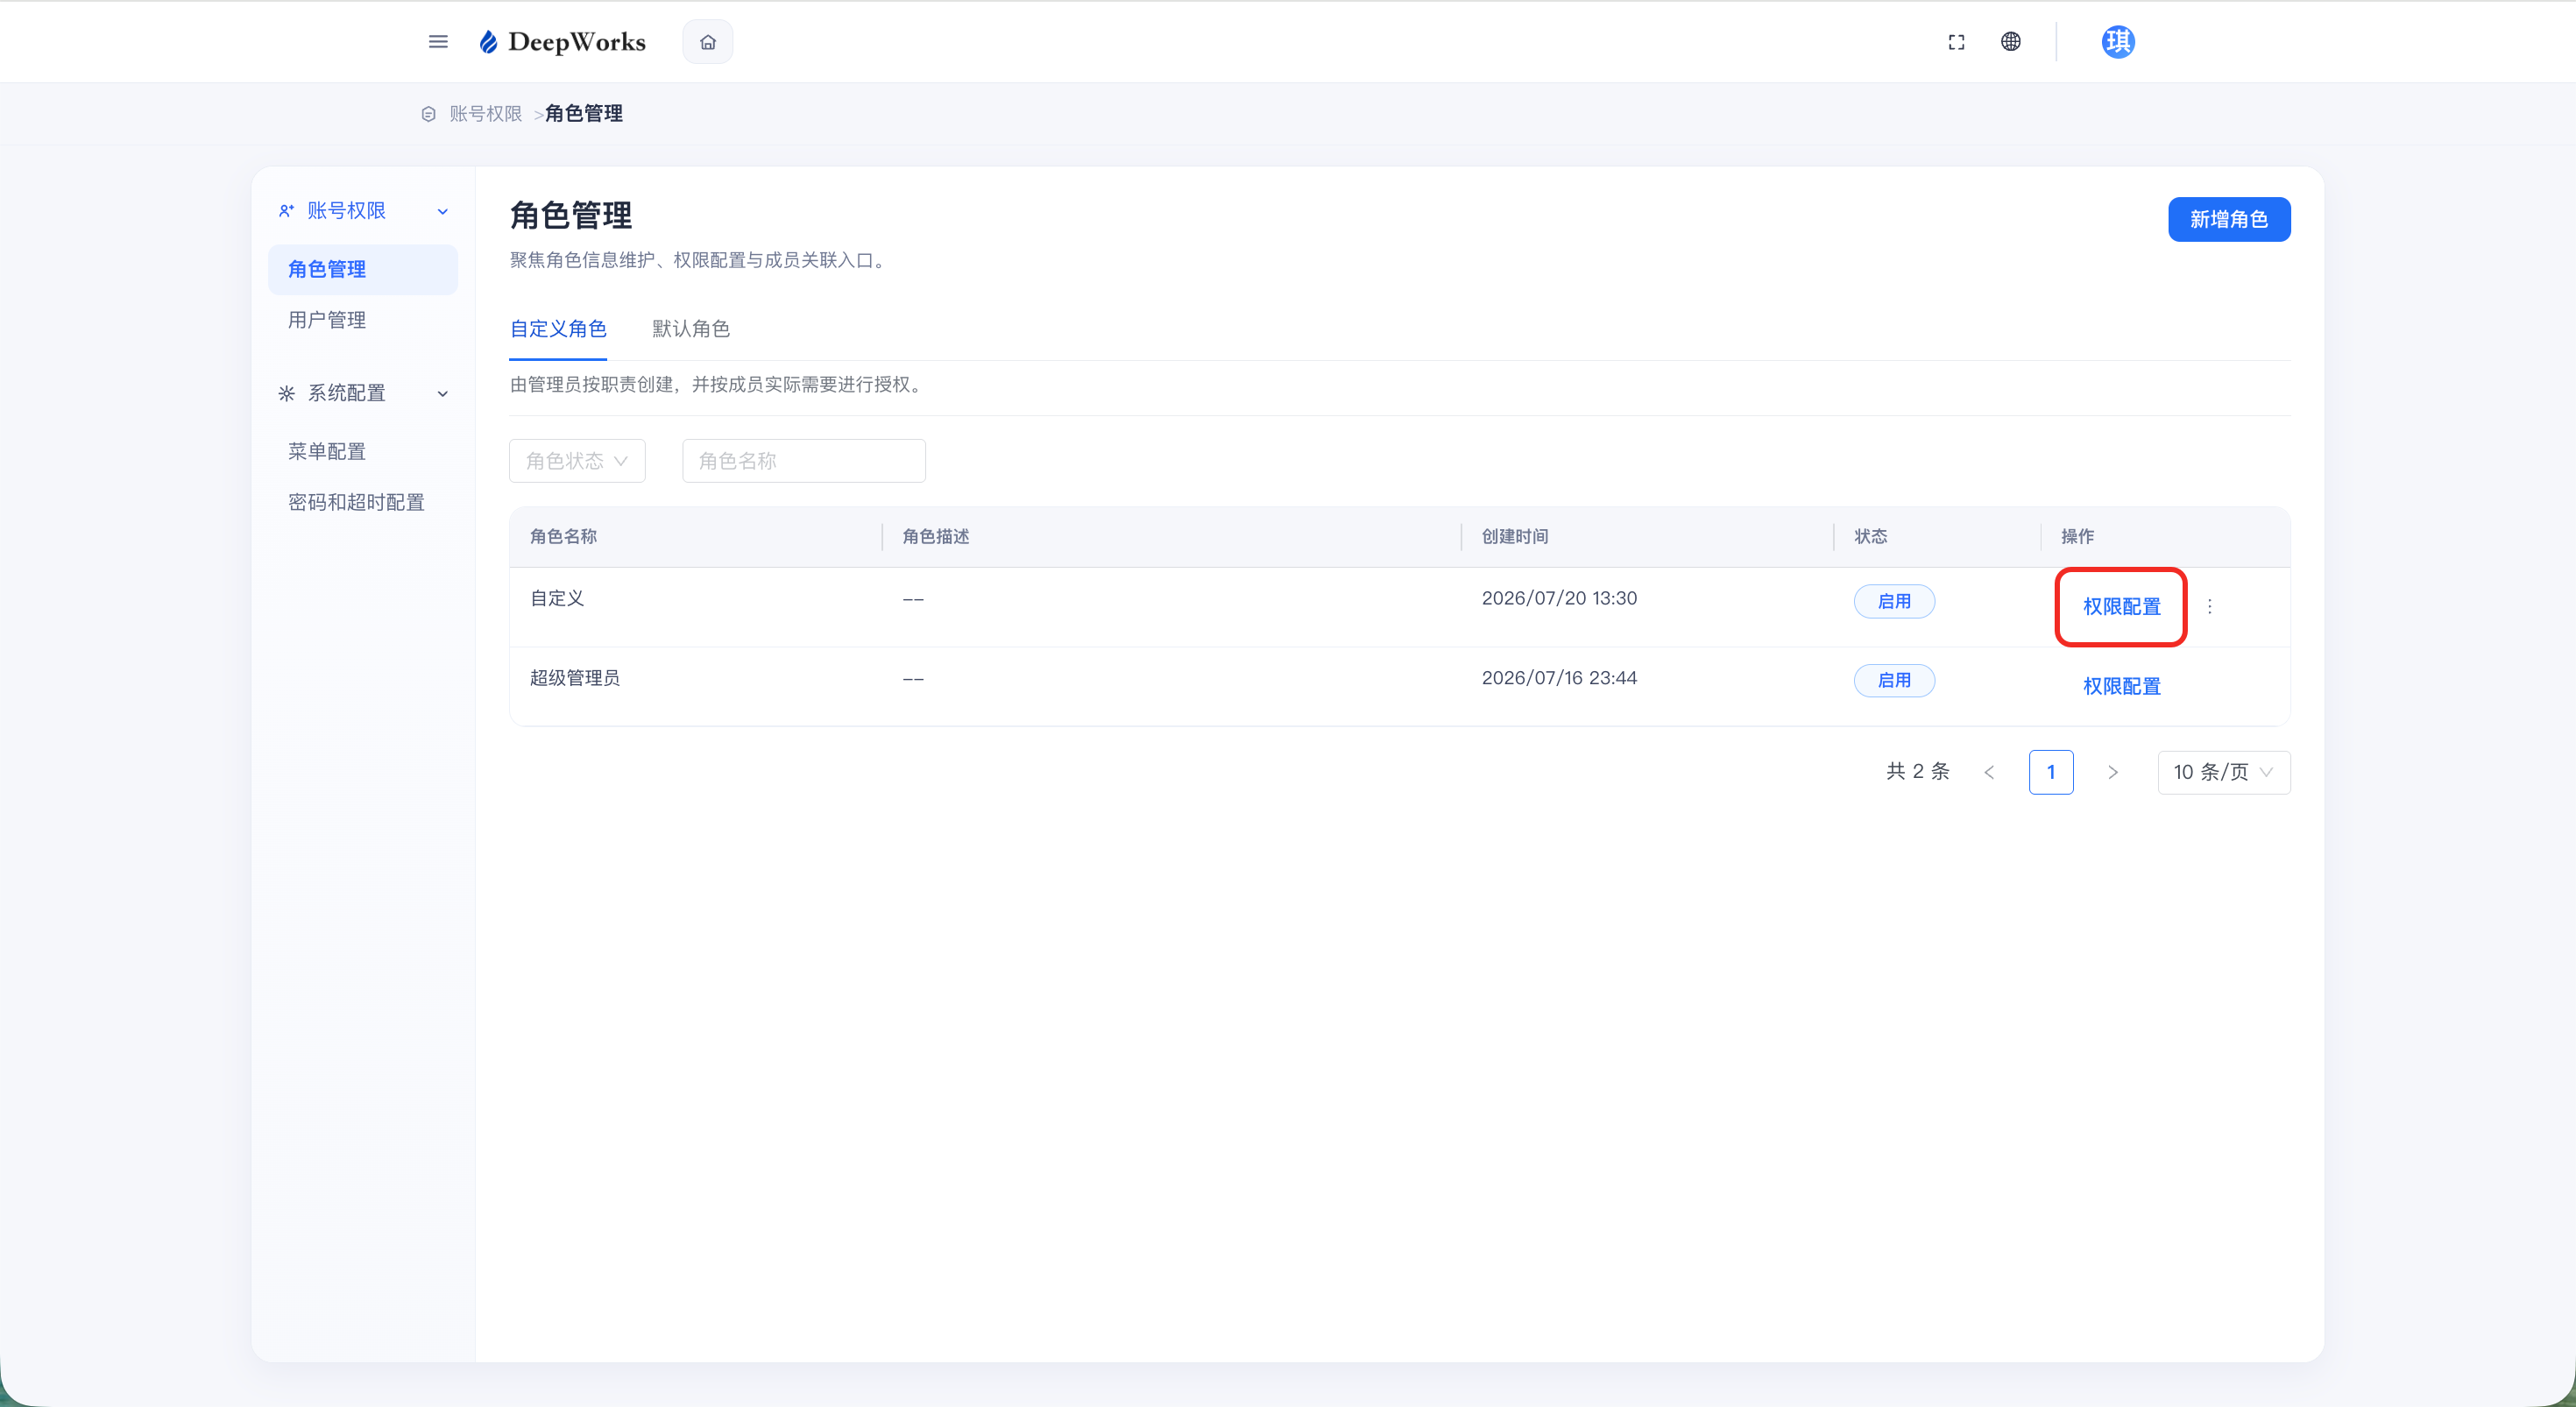
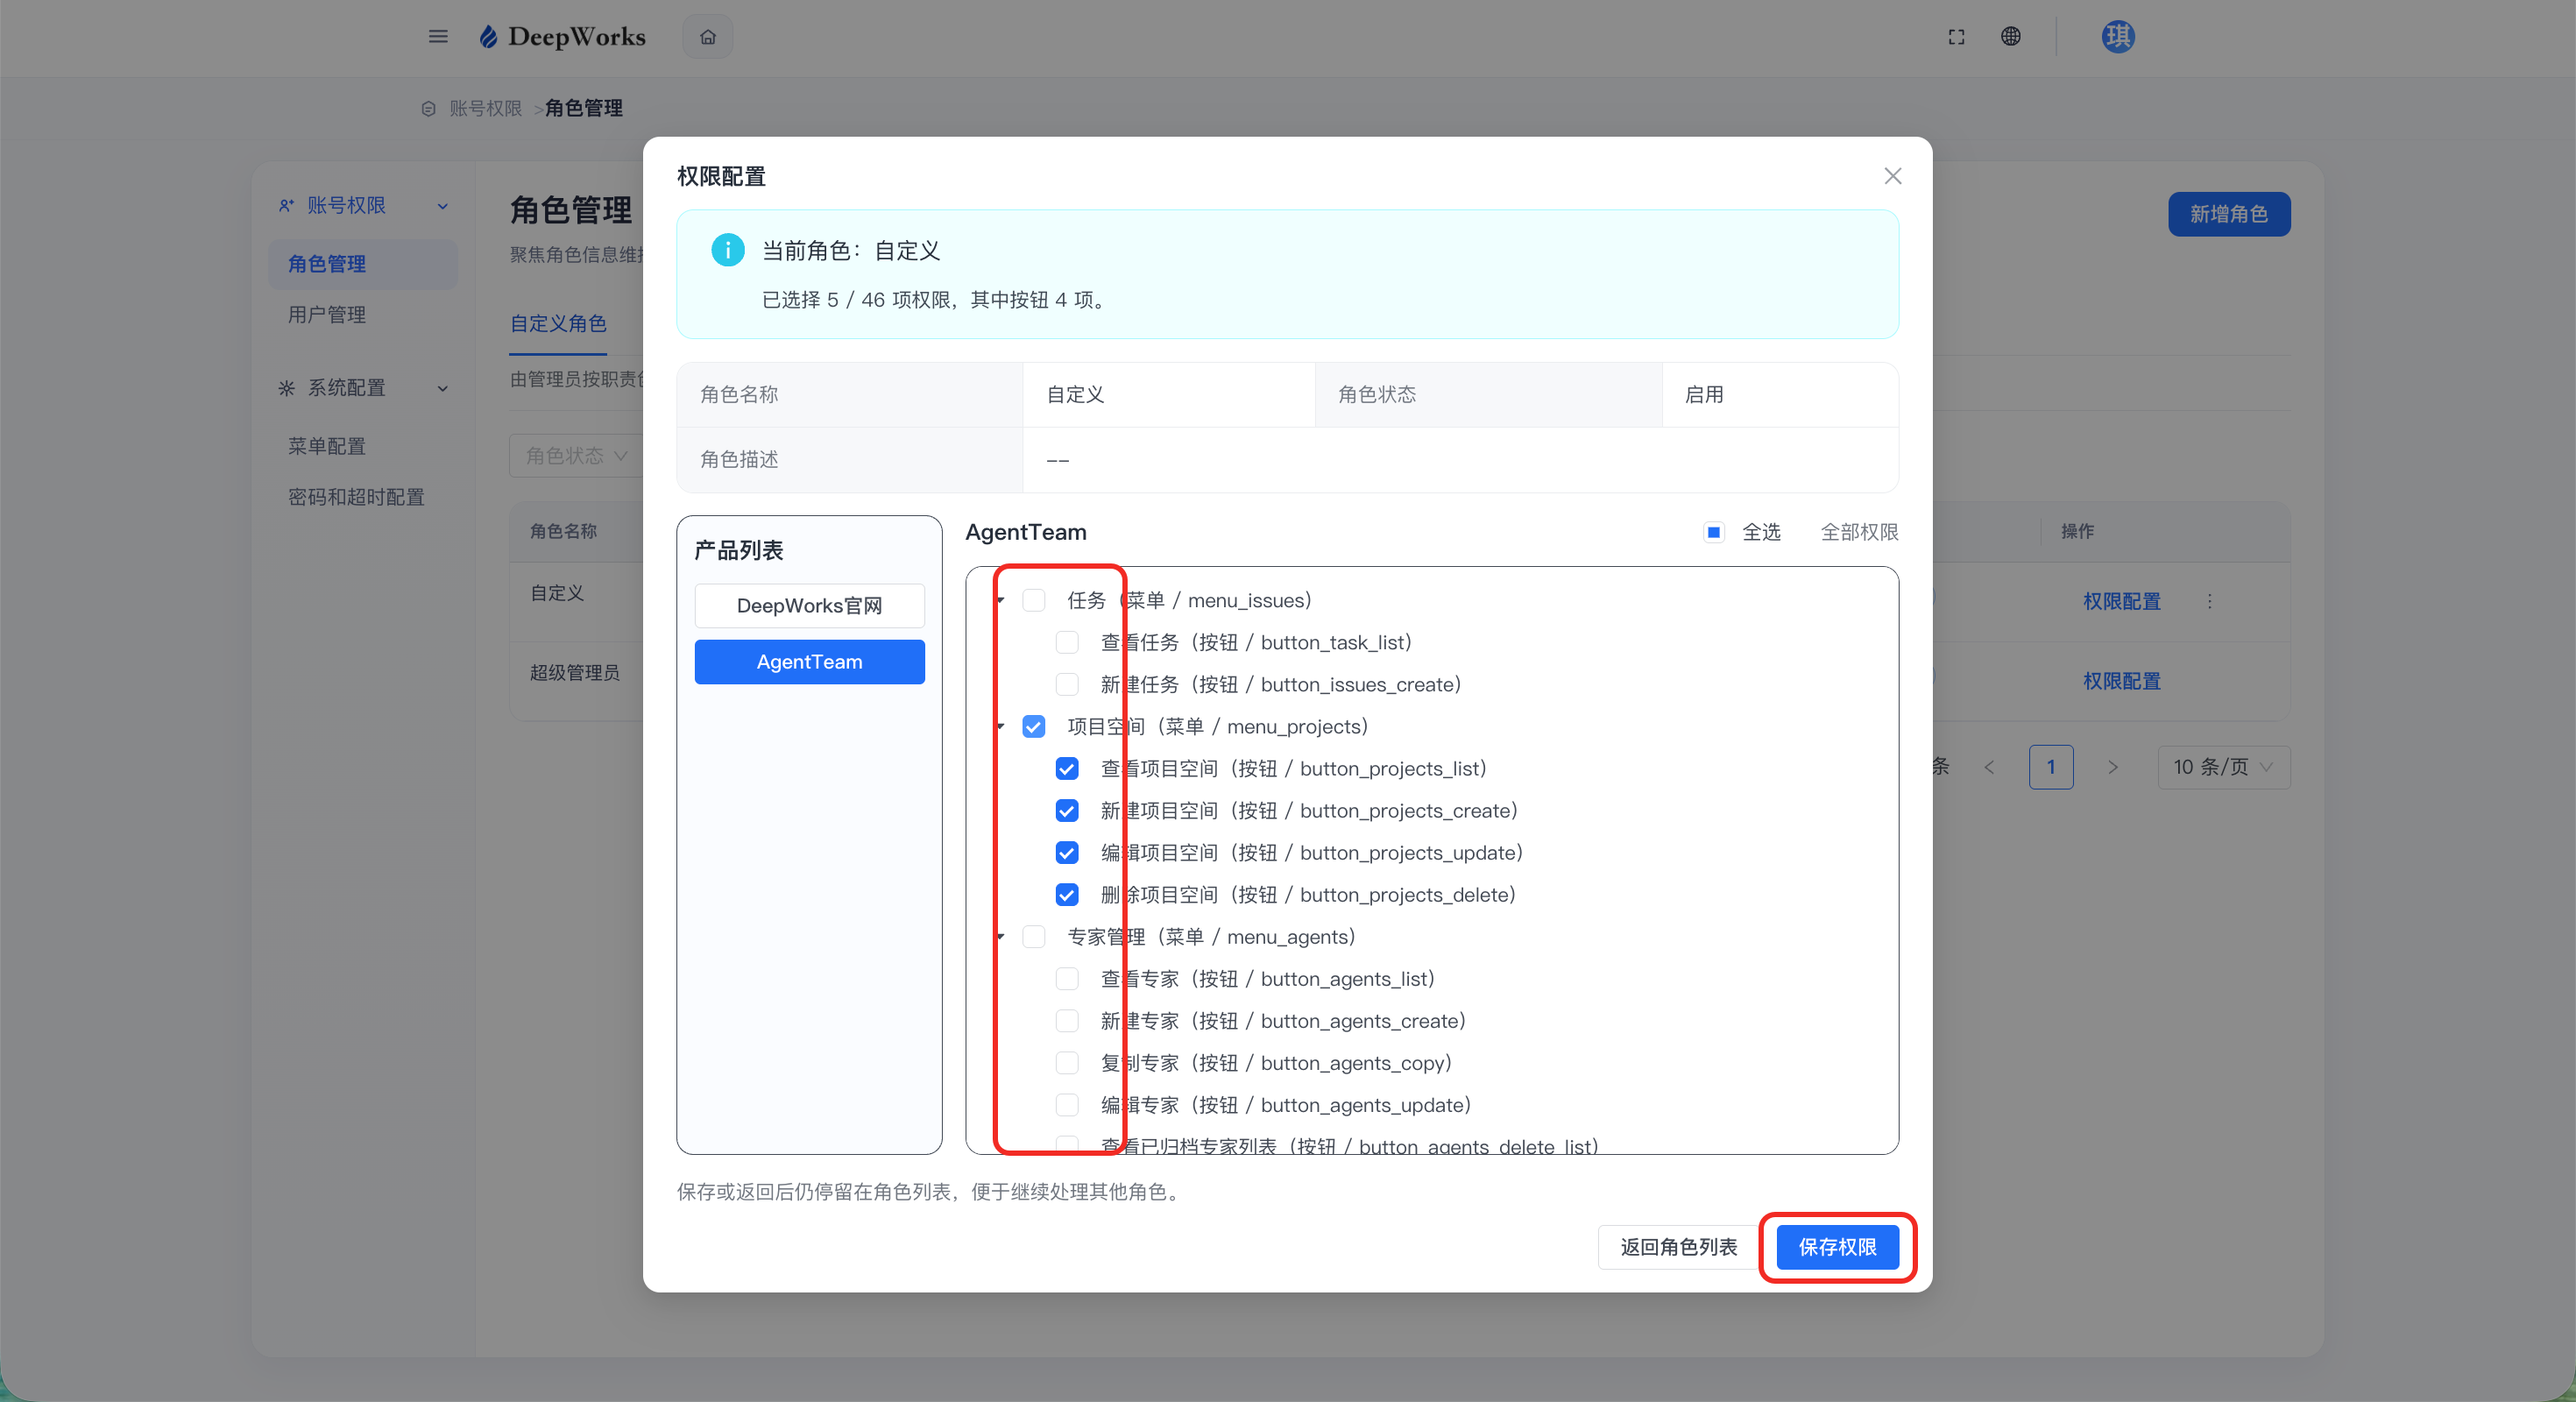
a. Click “Permission Configuration”.
b. On the left is the product list, and on the right are the permission items that can be set for the corresponding product. After checking the appropriate permission points, click “Save Permissions” to complete the setup.
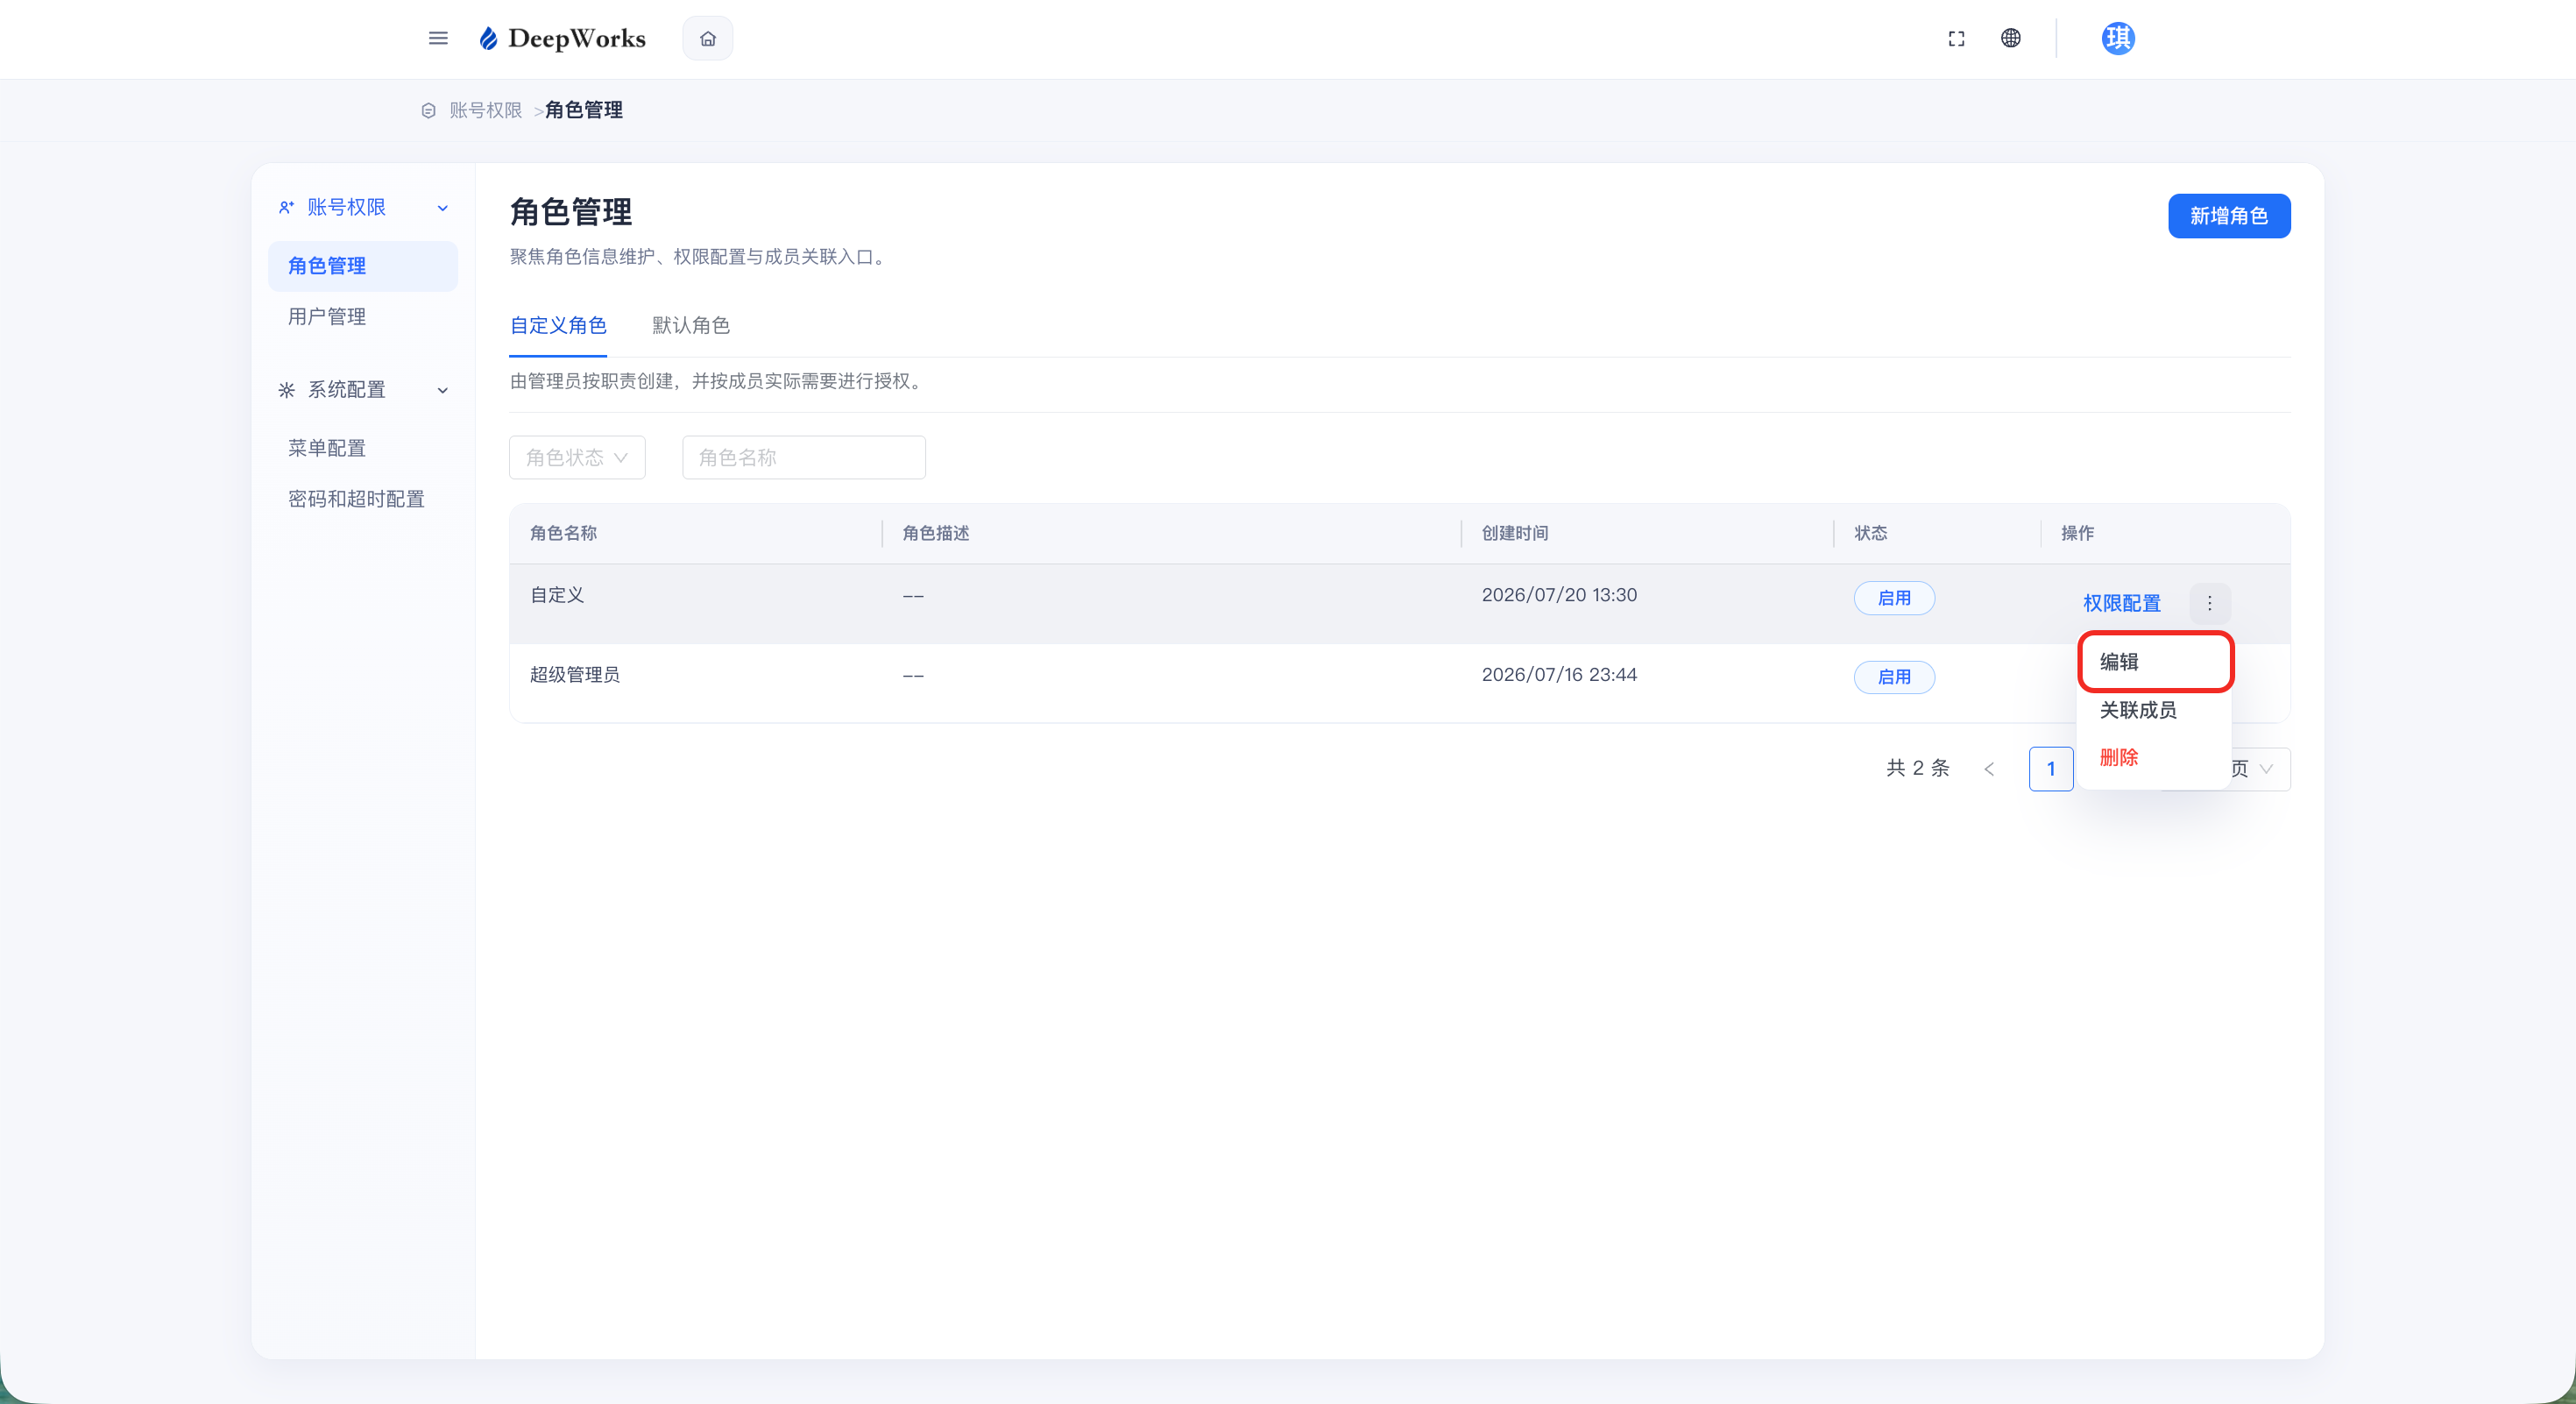
Edit Character Information
a. Click “Edit”.
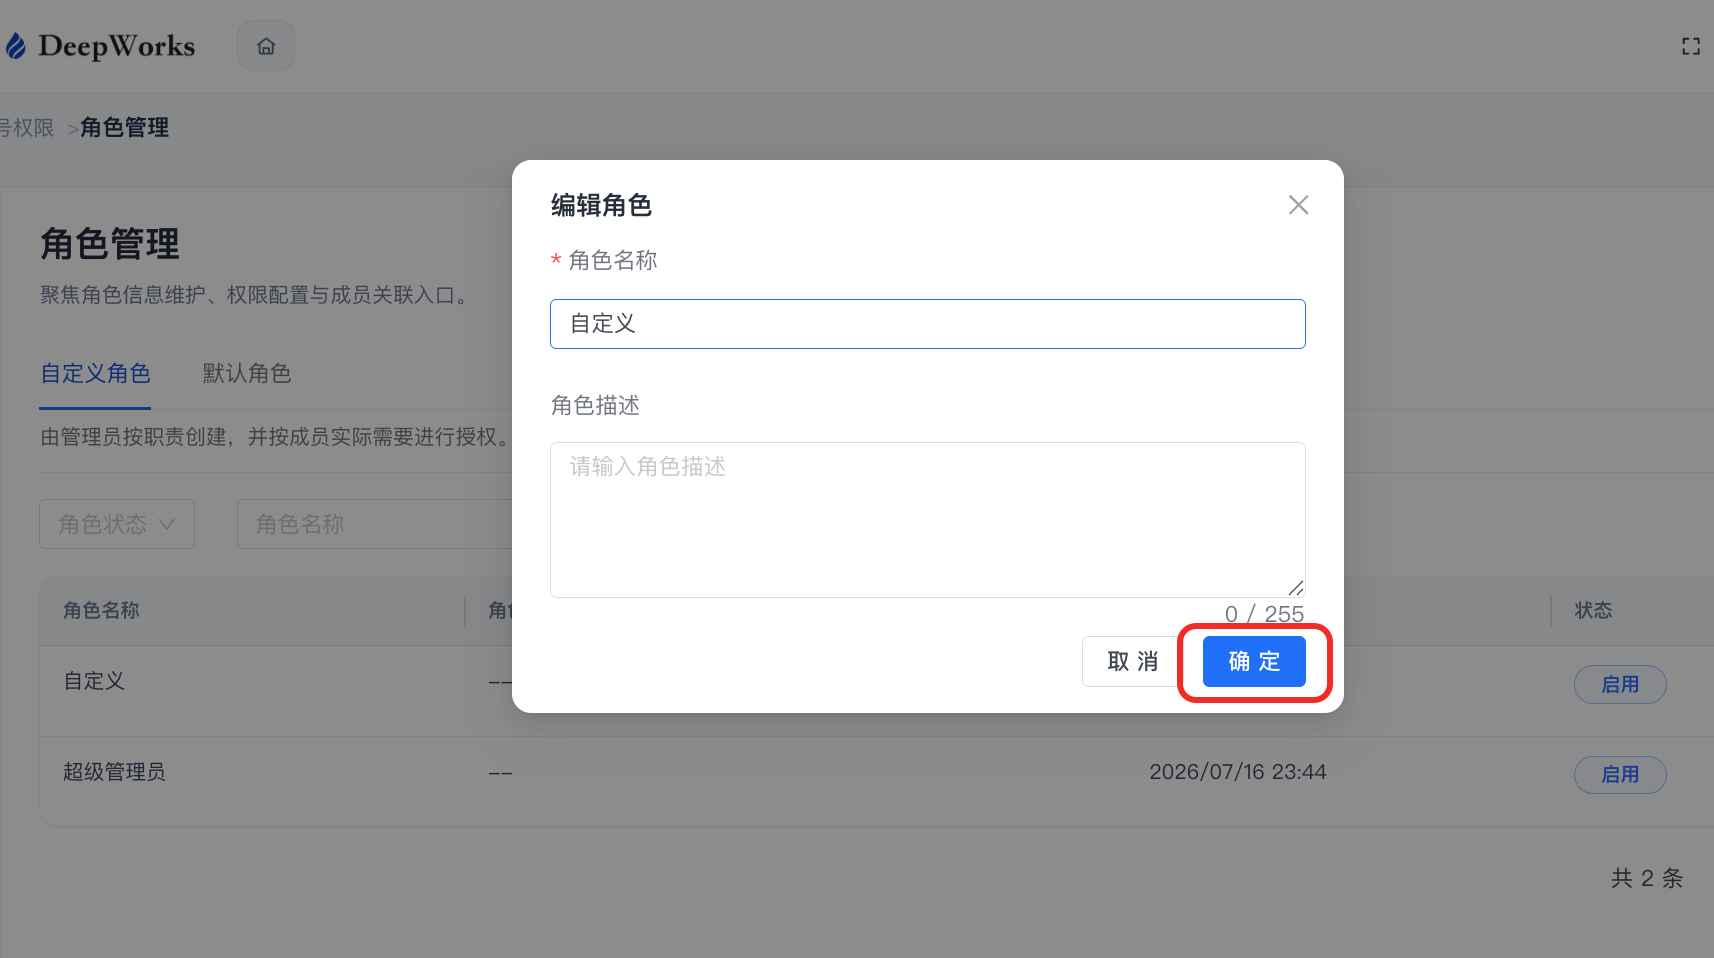
b. After updating the information, click “OK”.
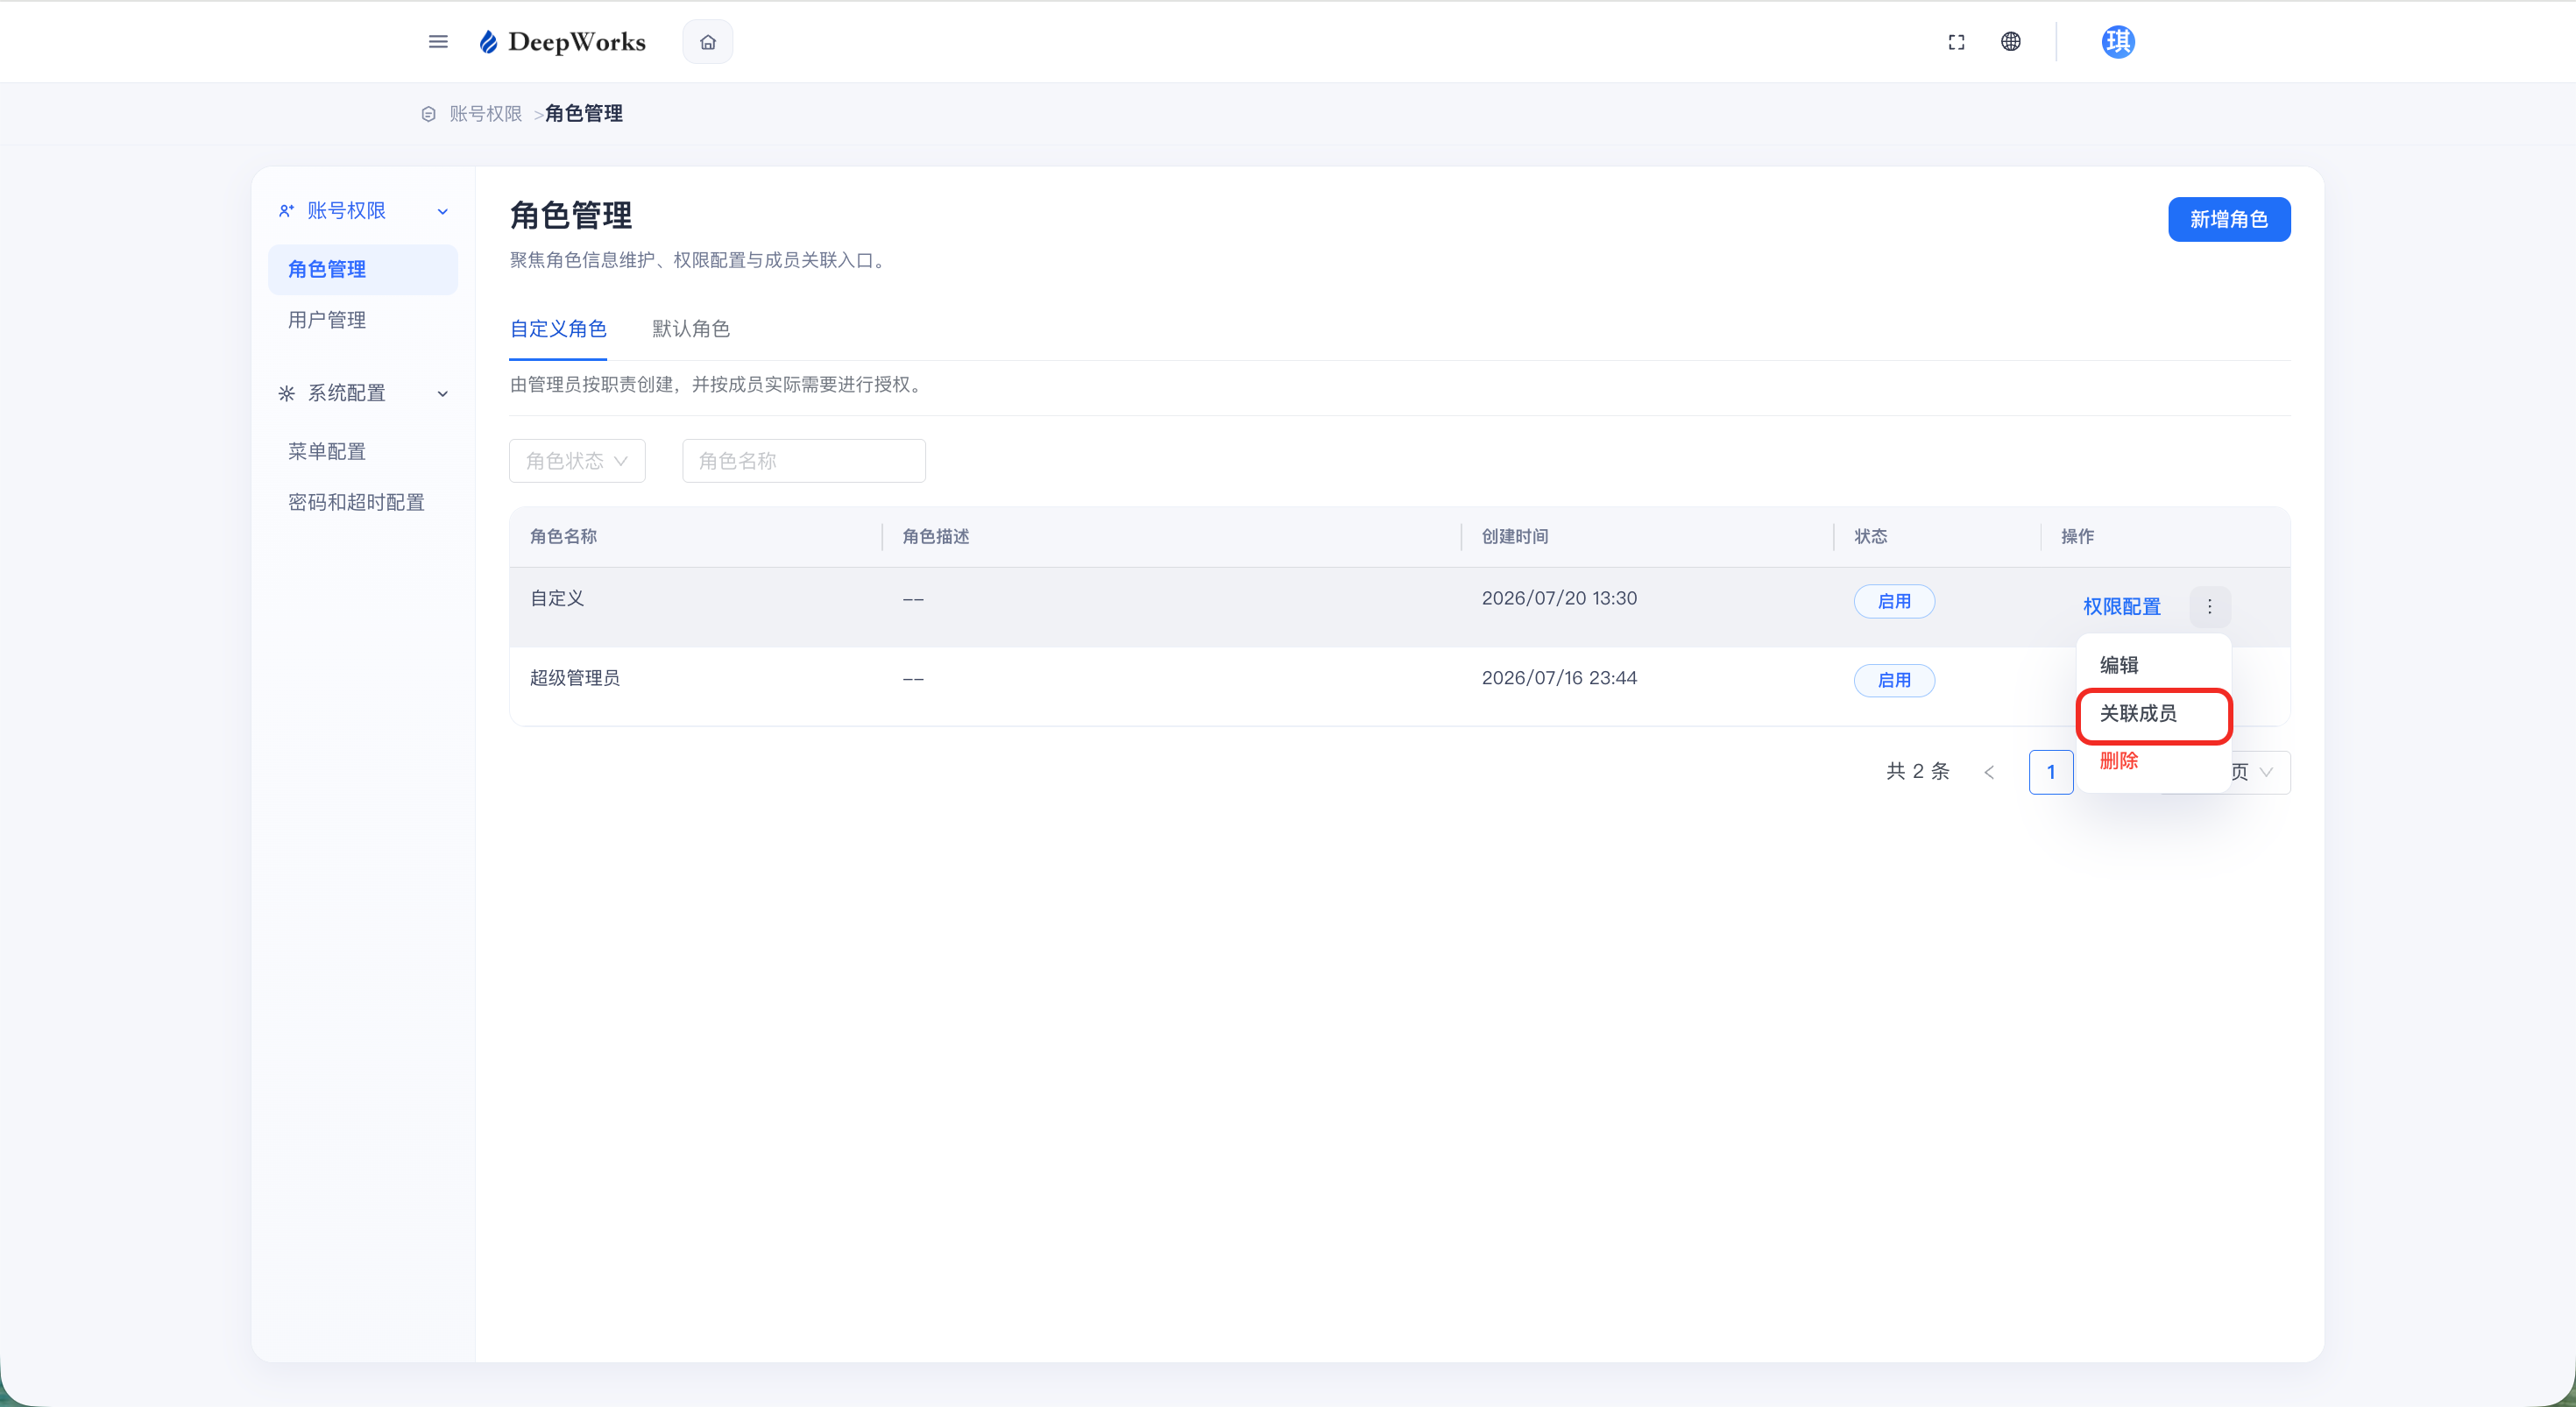
Affiliated Member
a. If you need to grant this role to a specified member, you can click “Associate Member”.
b. View the list of members already associated with this role, and you can remove or add members. To remove a member, click “Remove”; to add a member, click “Add Member”.
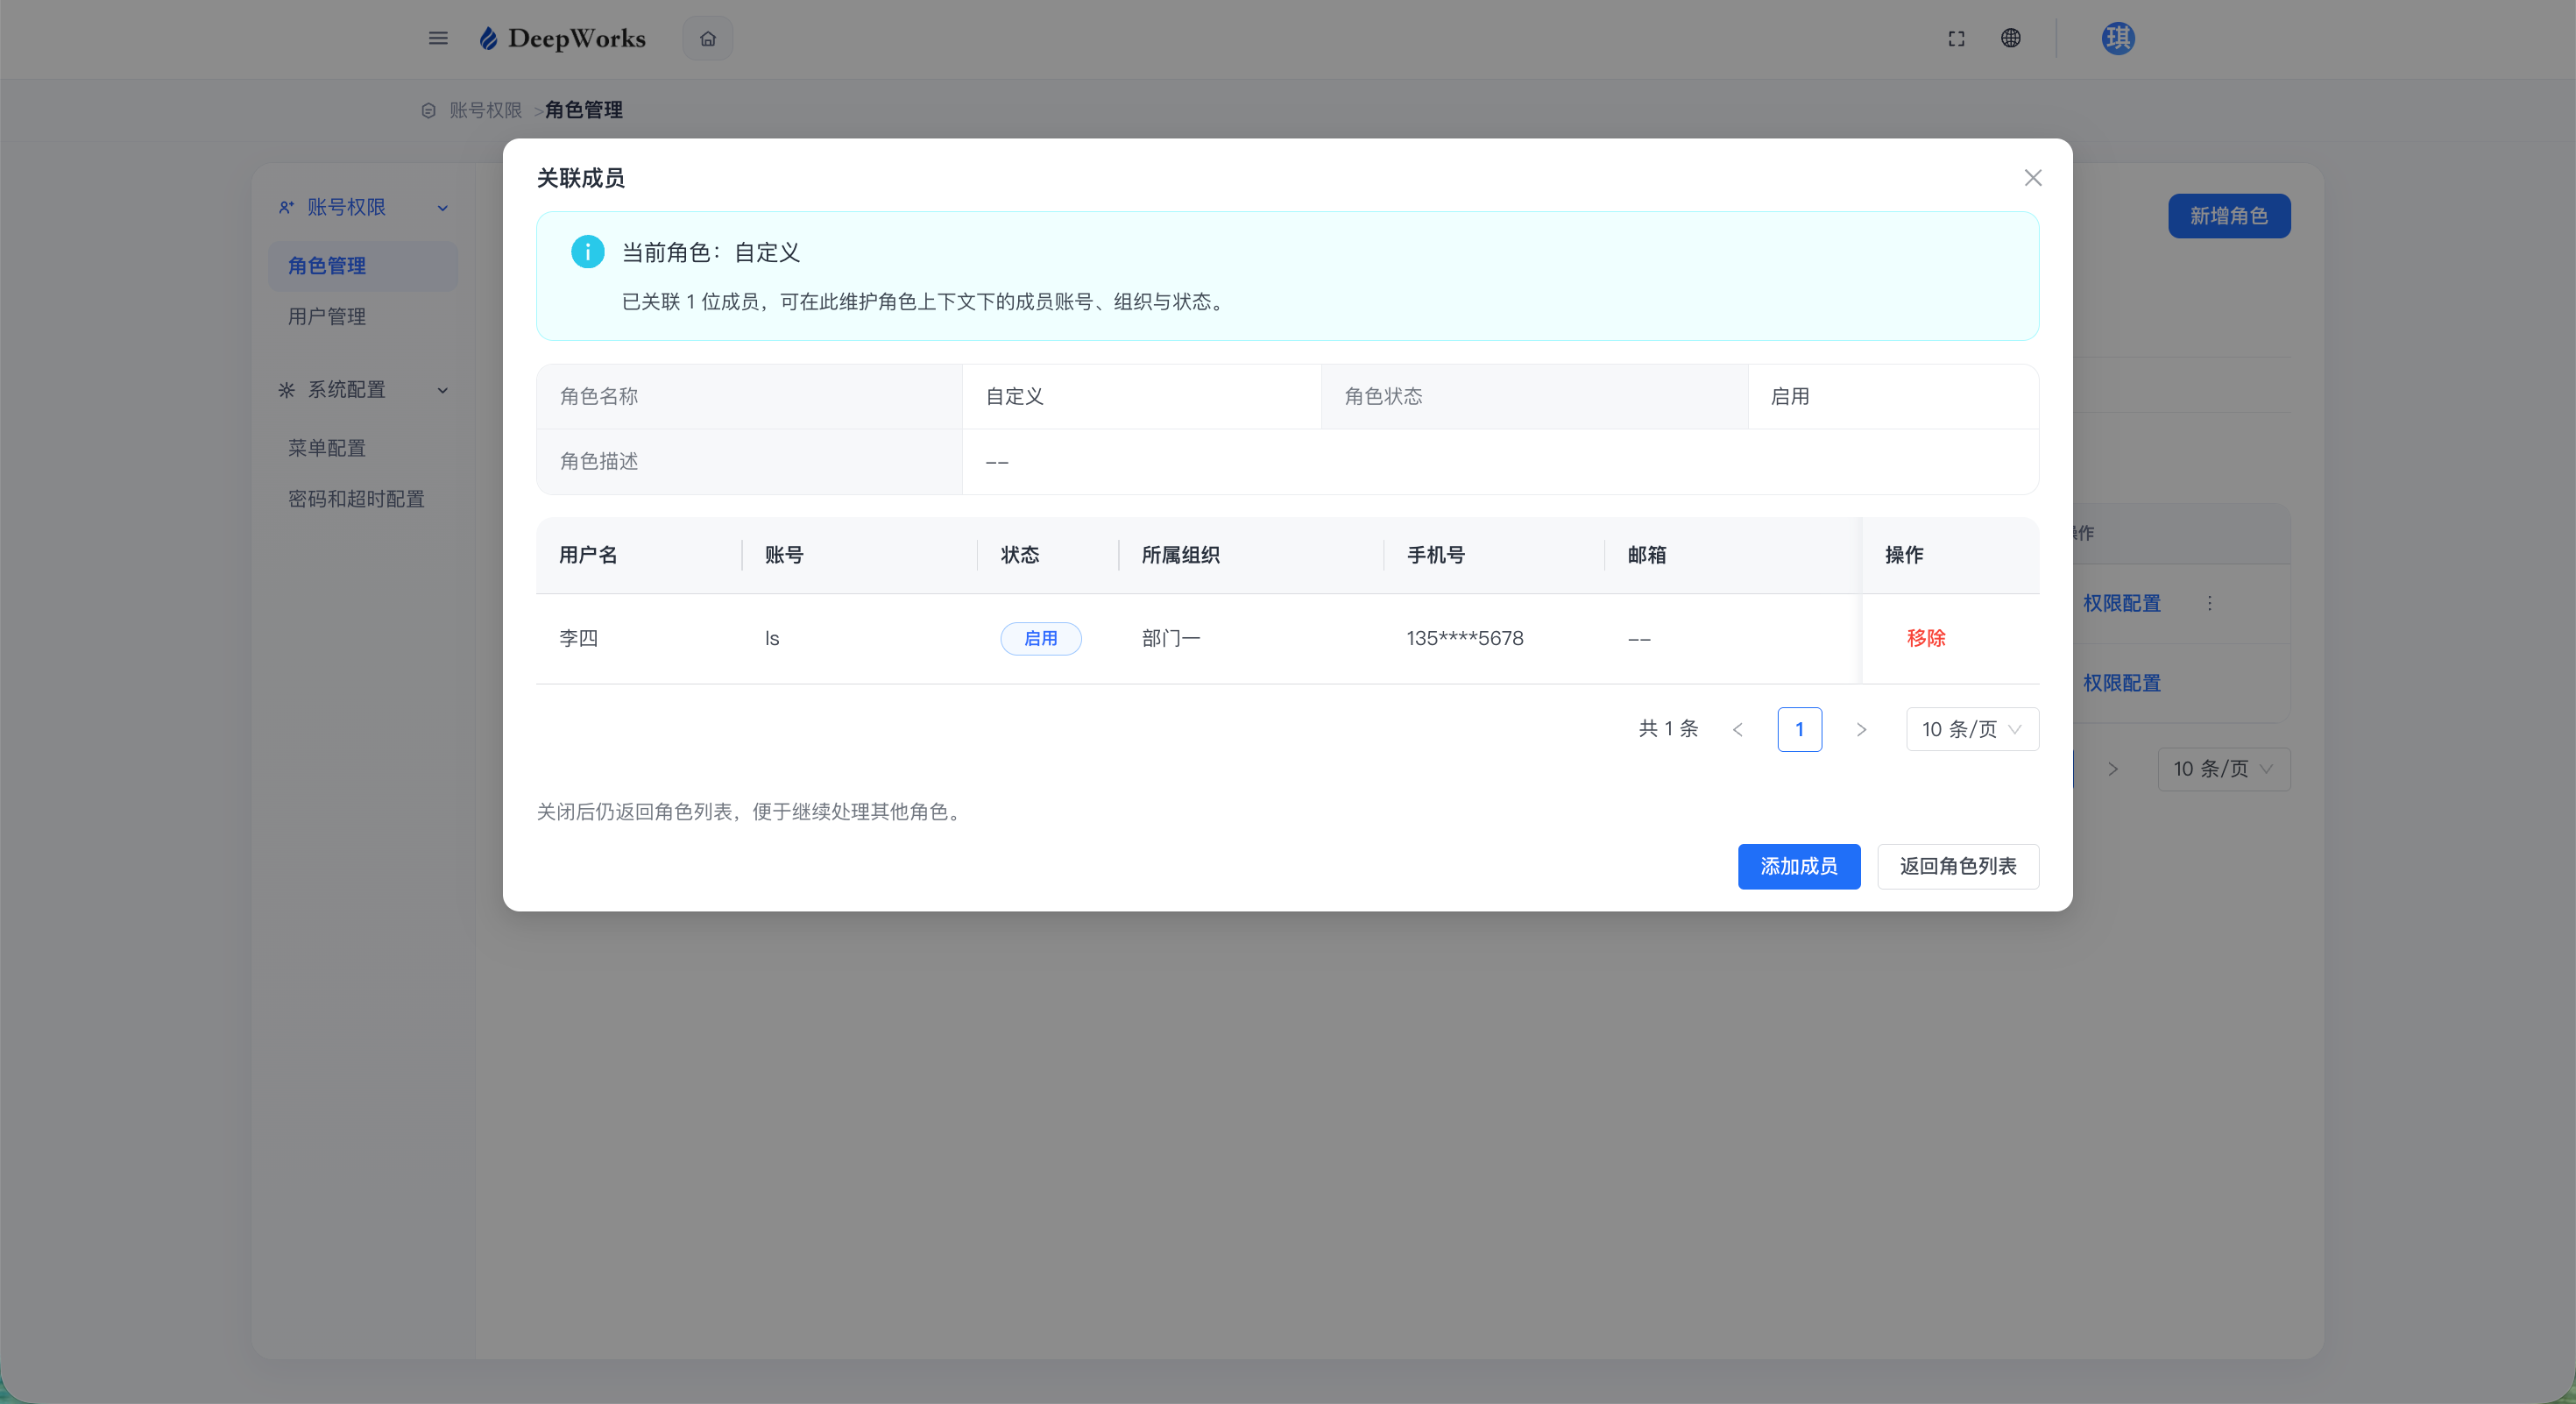
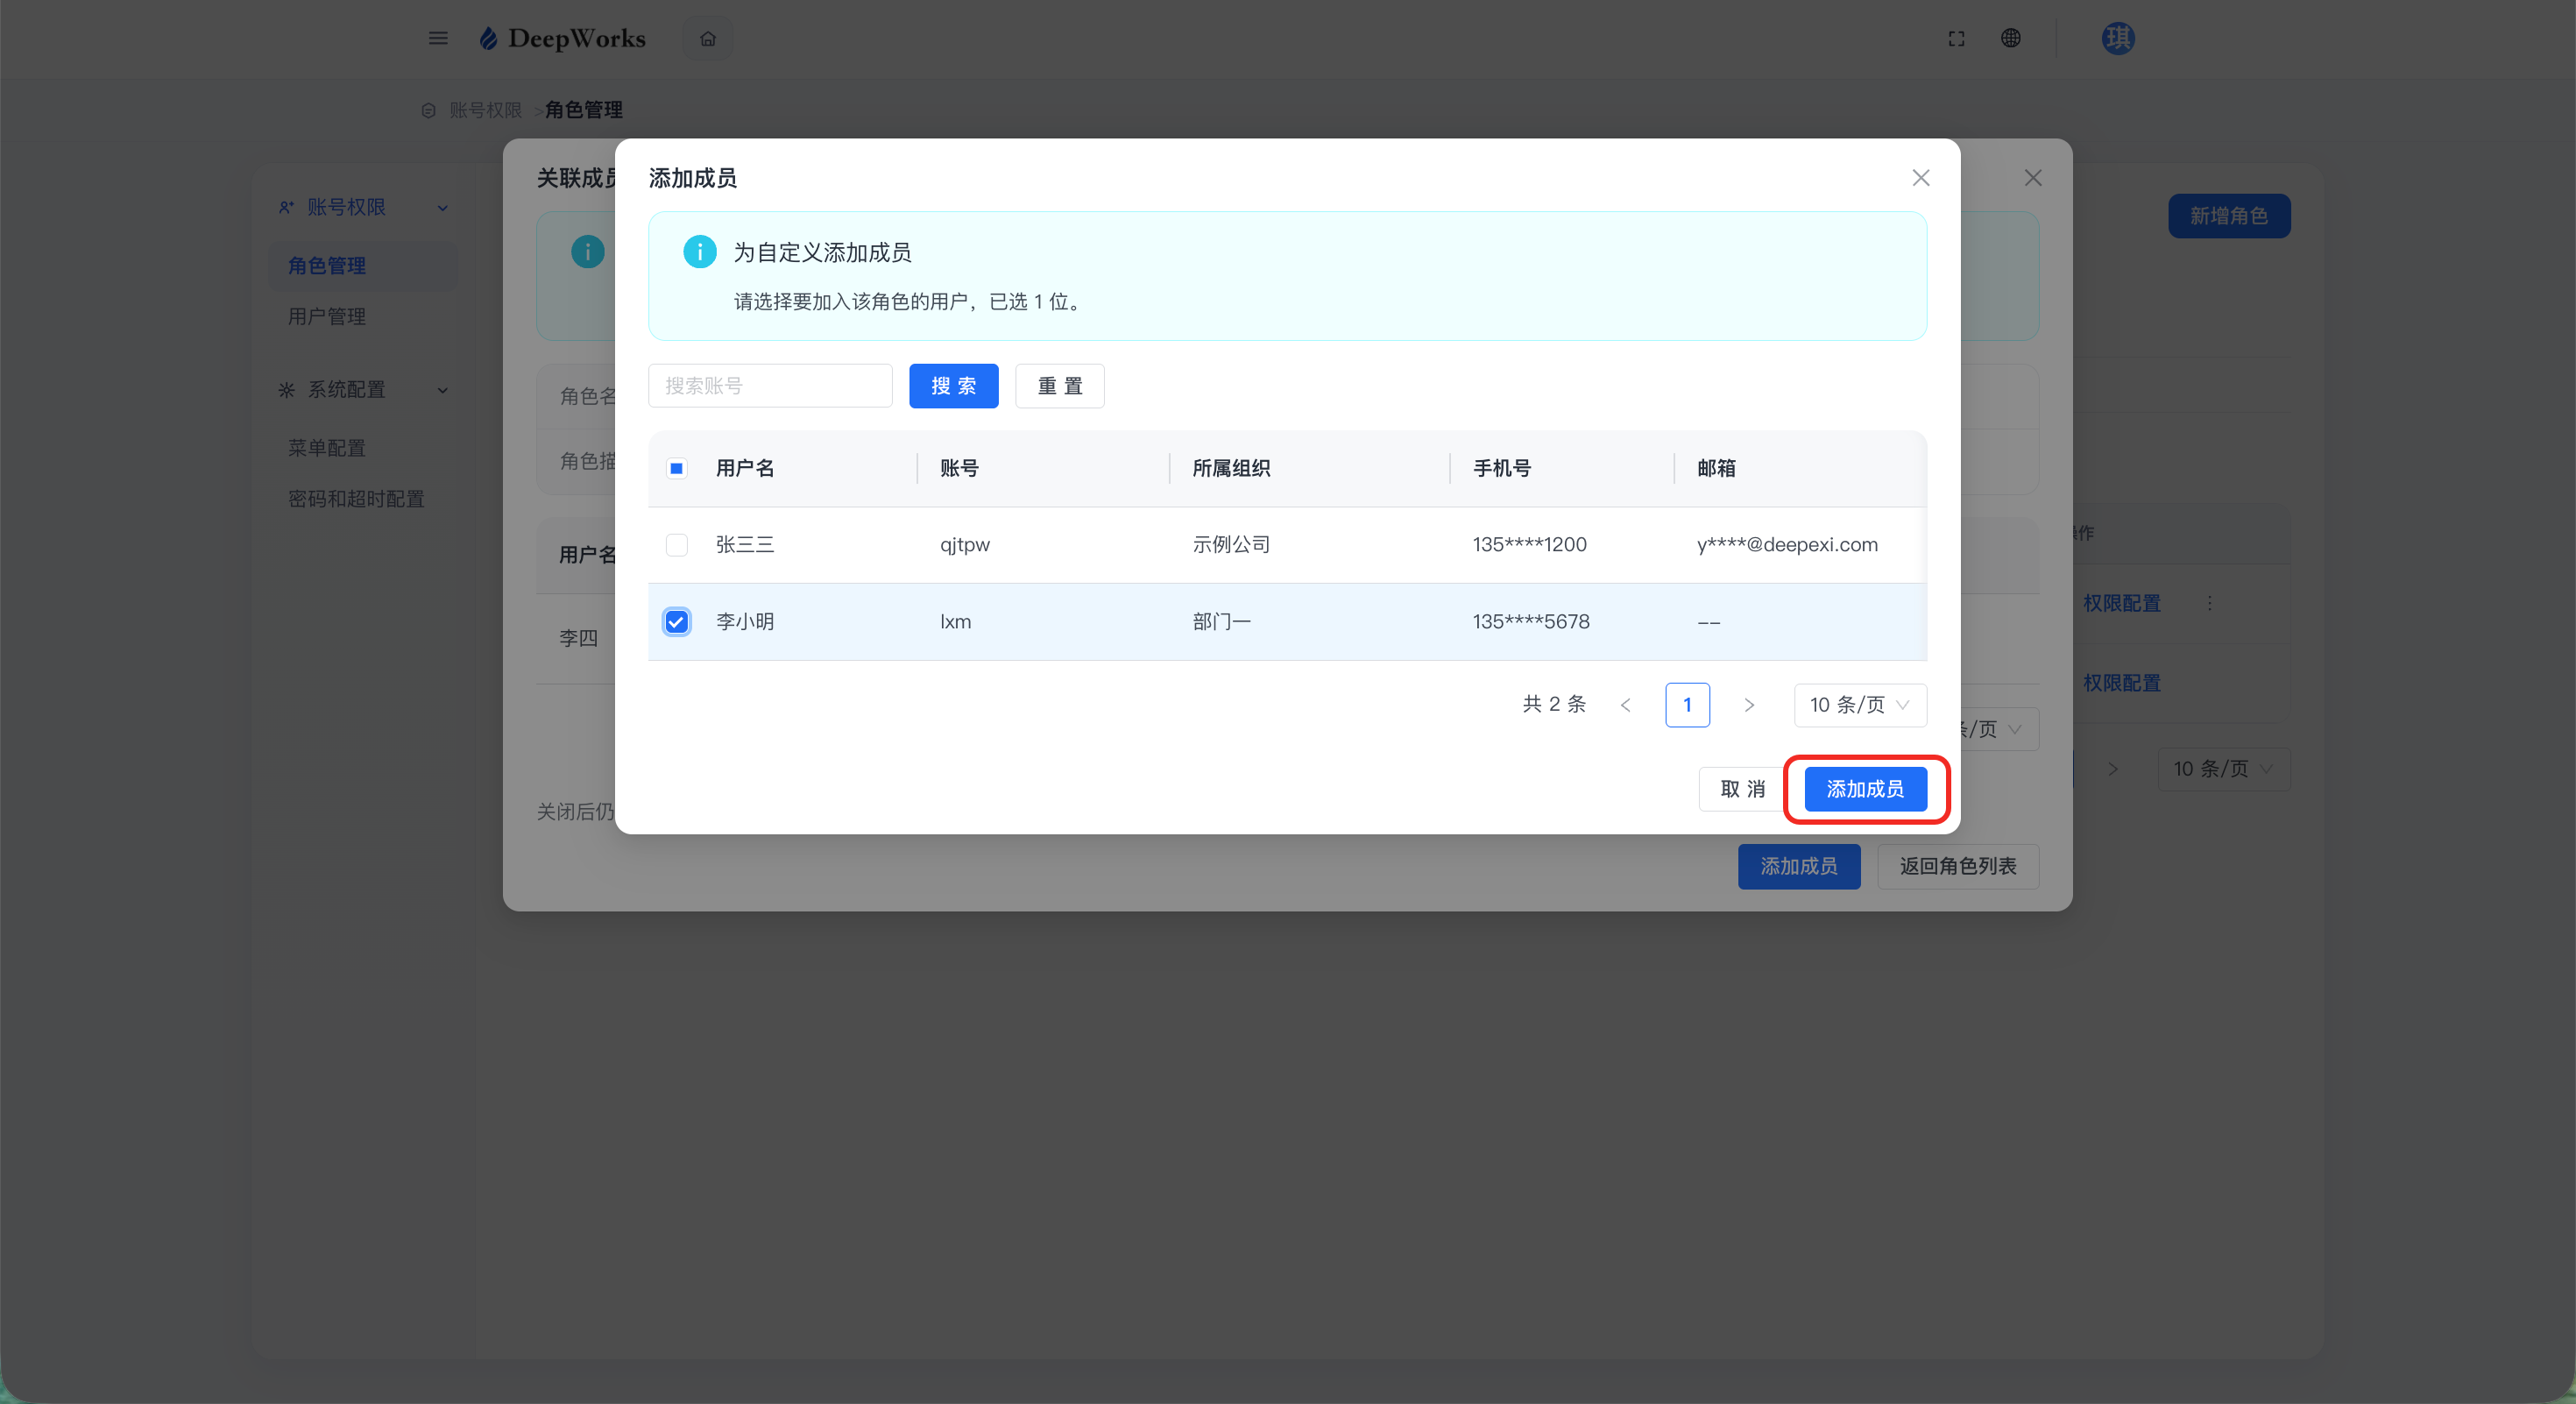
c. Tick the target member and click “Add Member” to authorize this member with the role.
Batch Associate Members
a. If you need to grant this role to a specified member, you can click “Associate Member”.
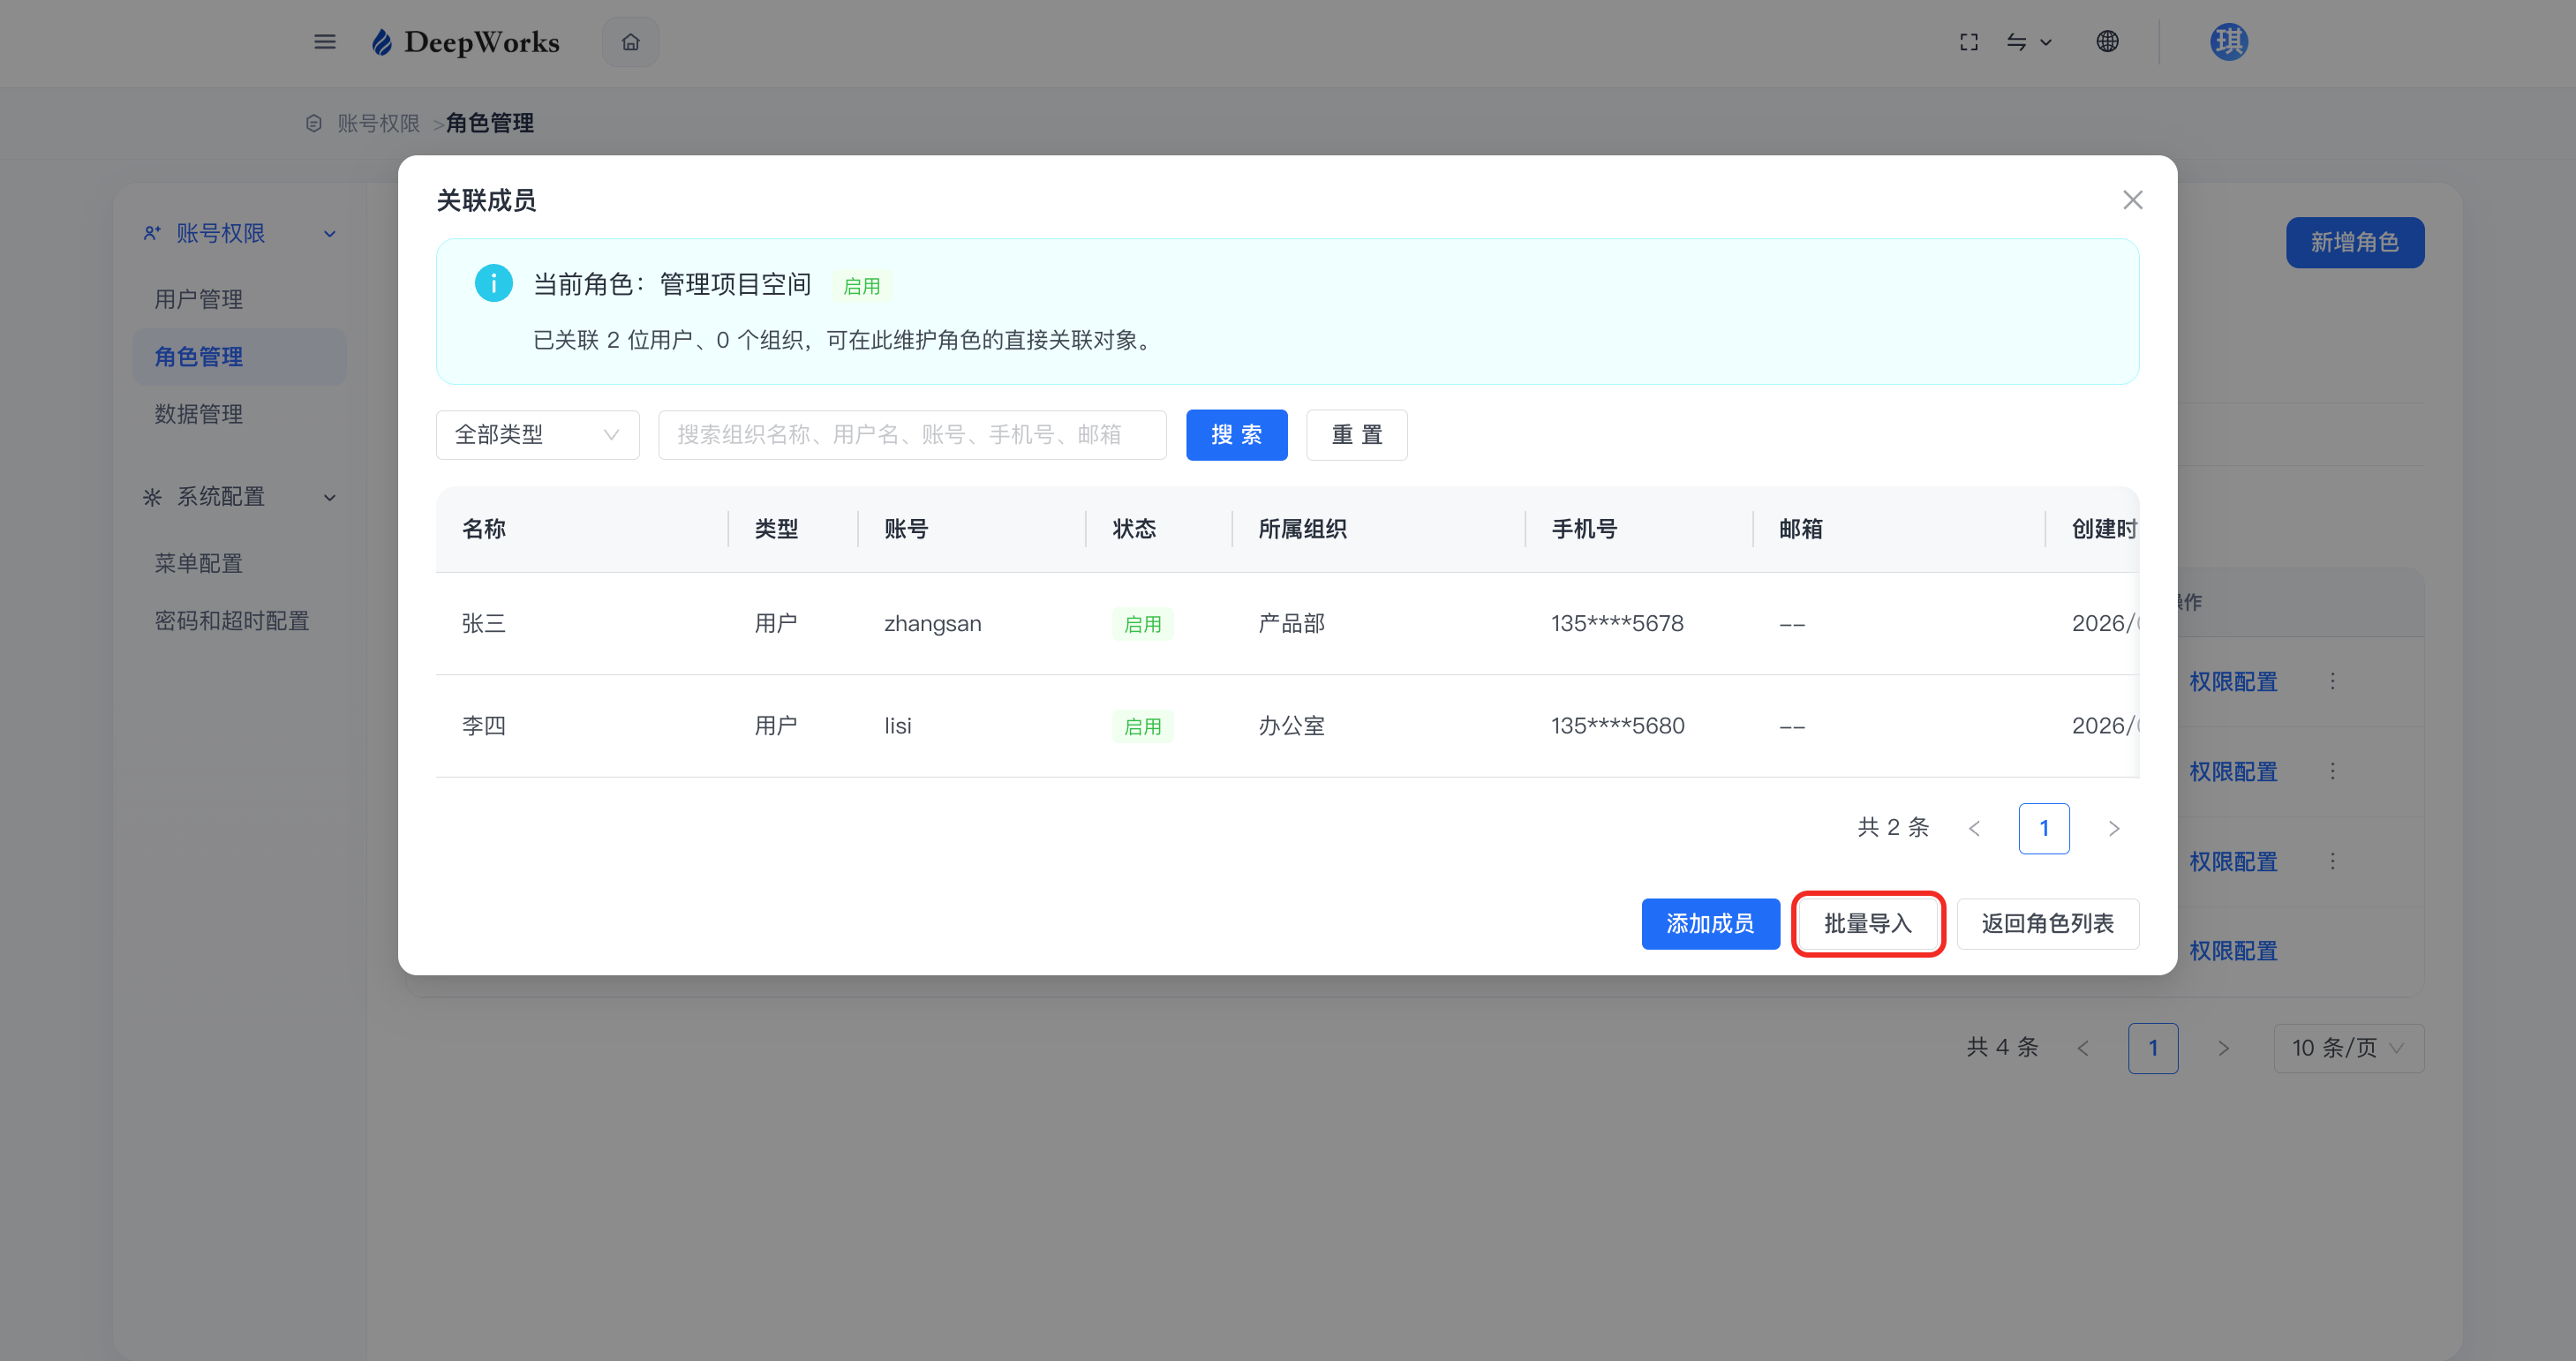
b. View the list of members already associated with this role, from which you can remove or add members. Click “Batch Import”.
c. Click “Download Template”.
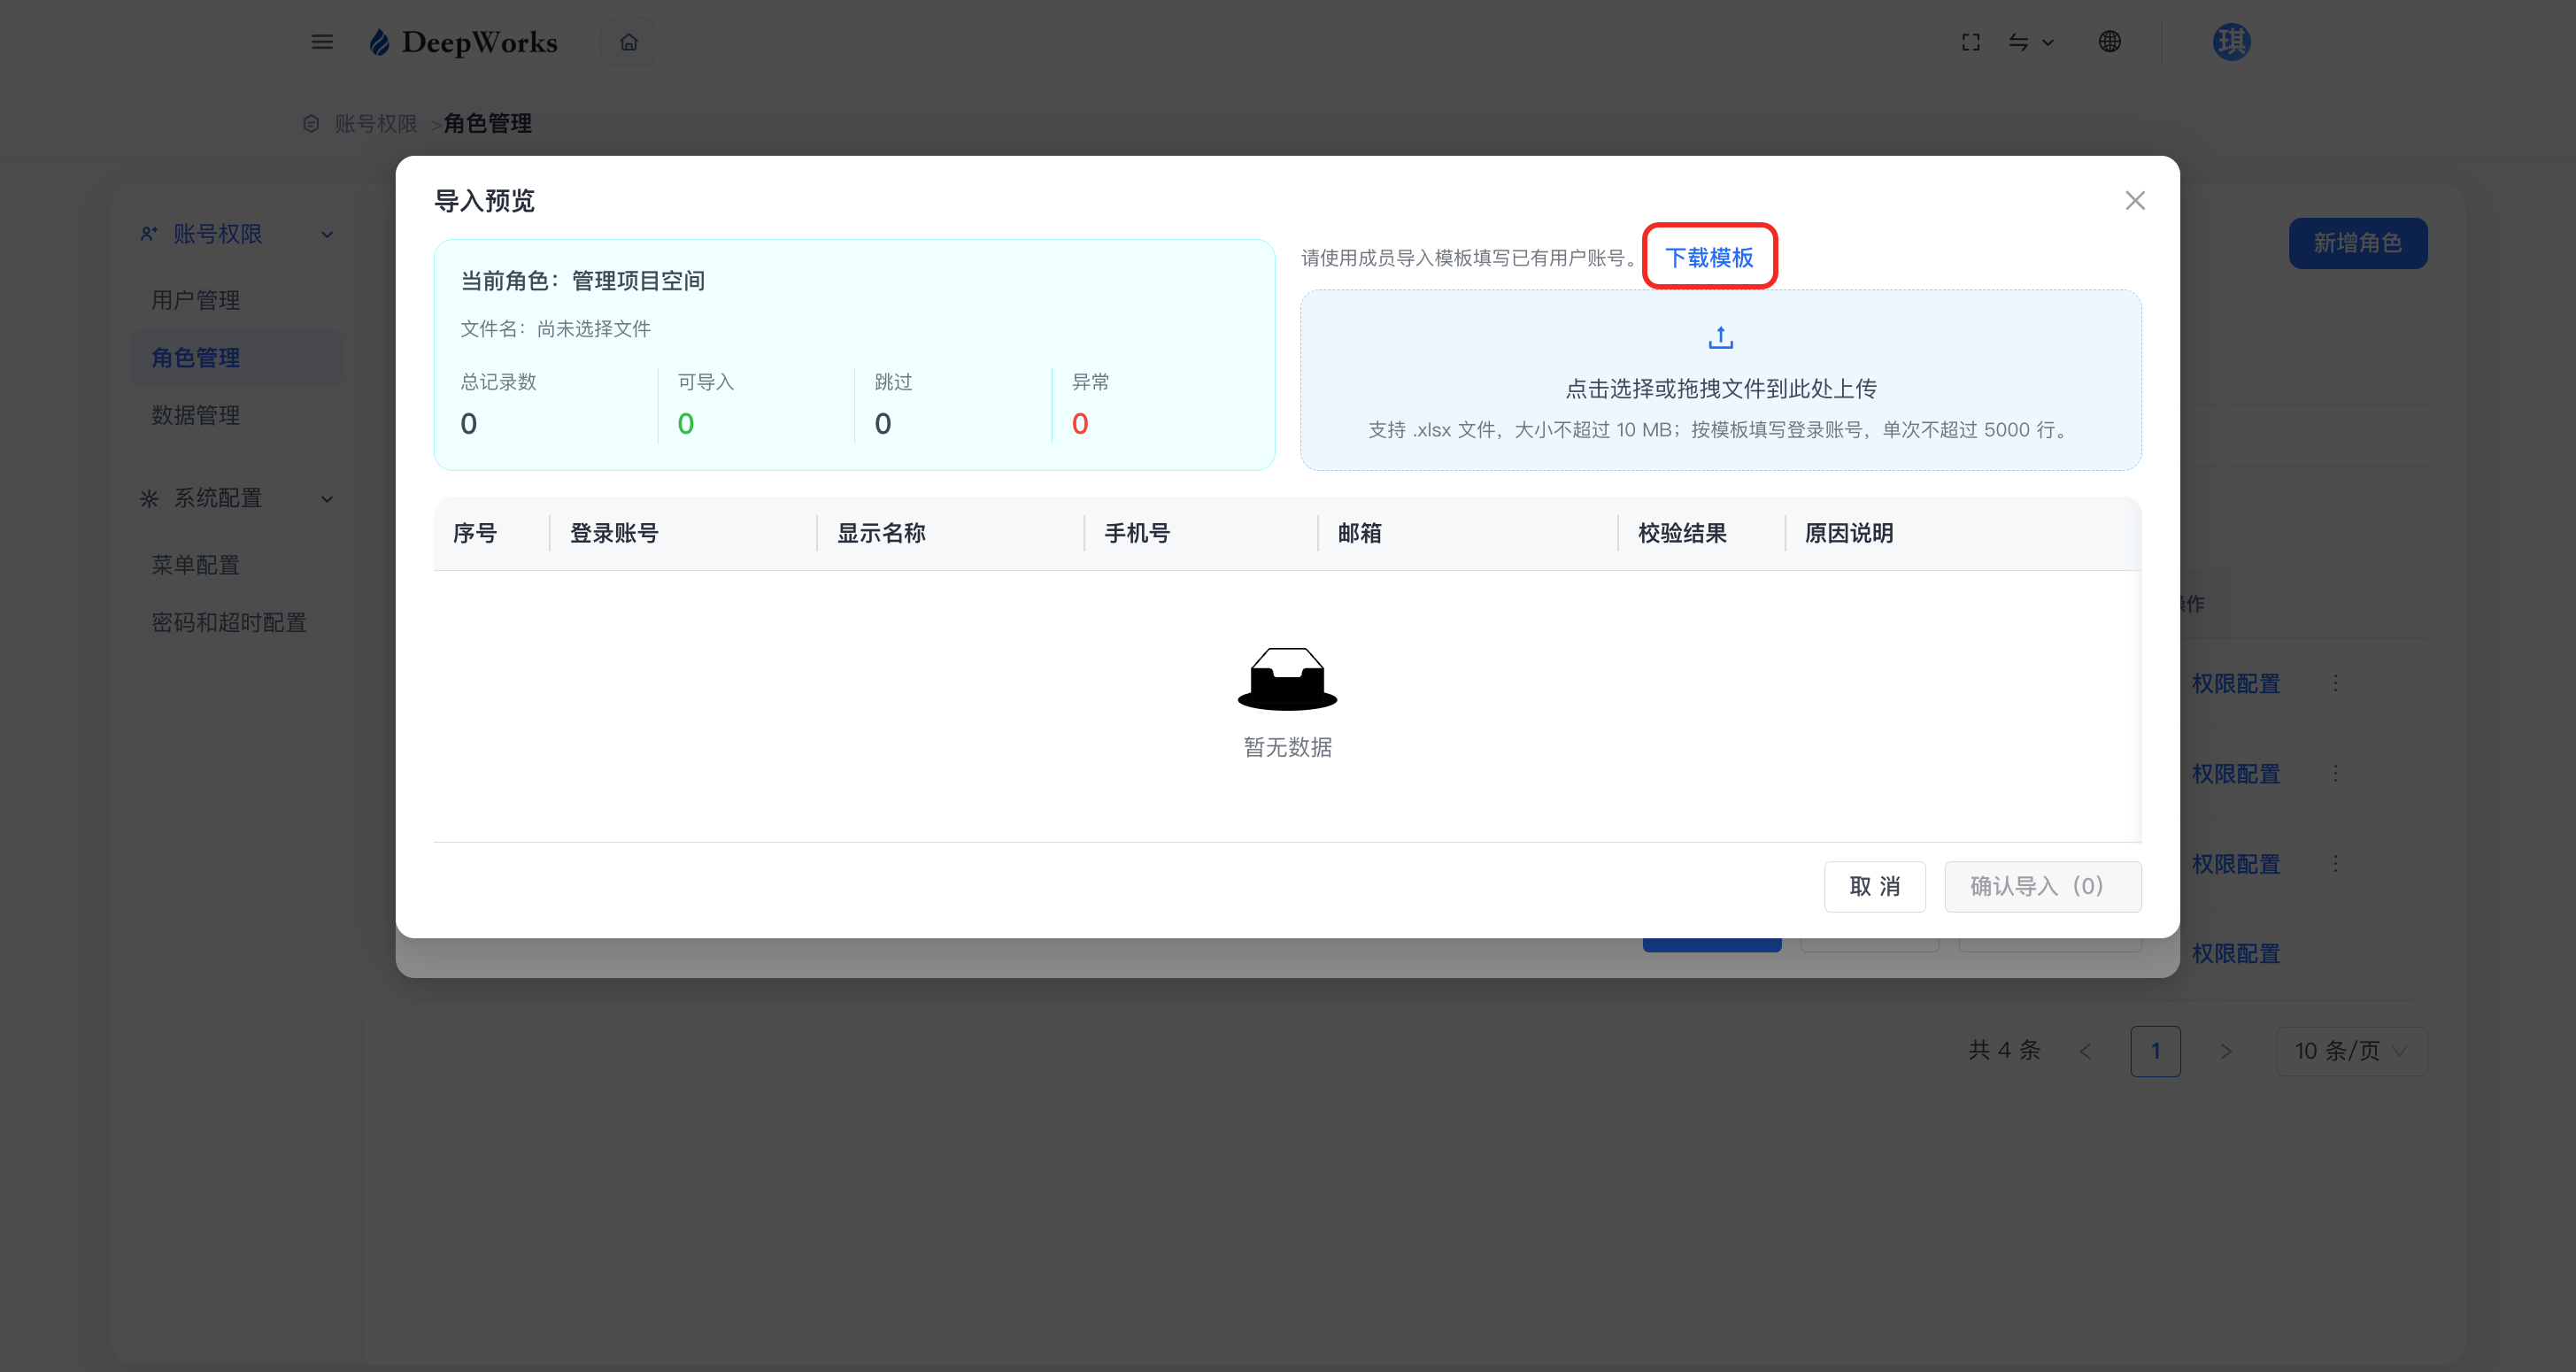
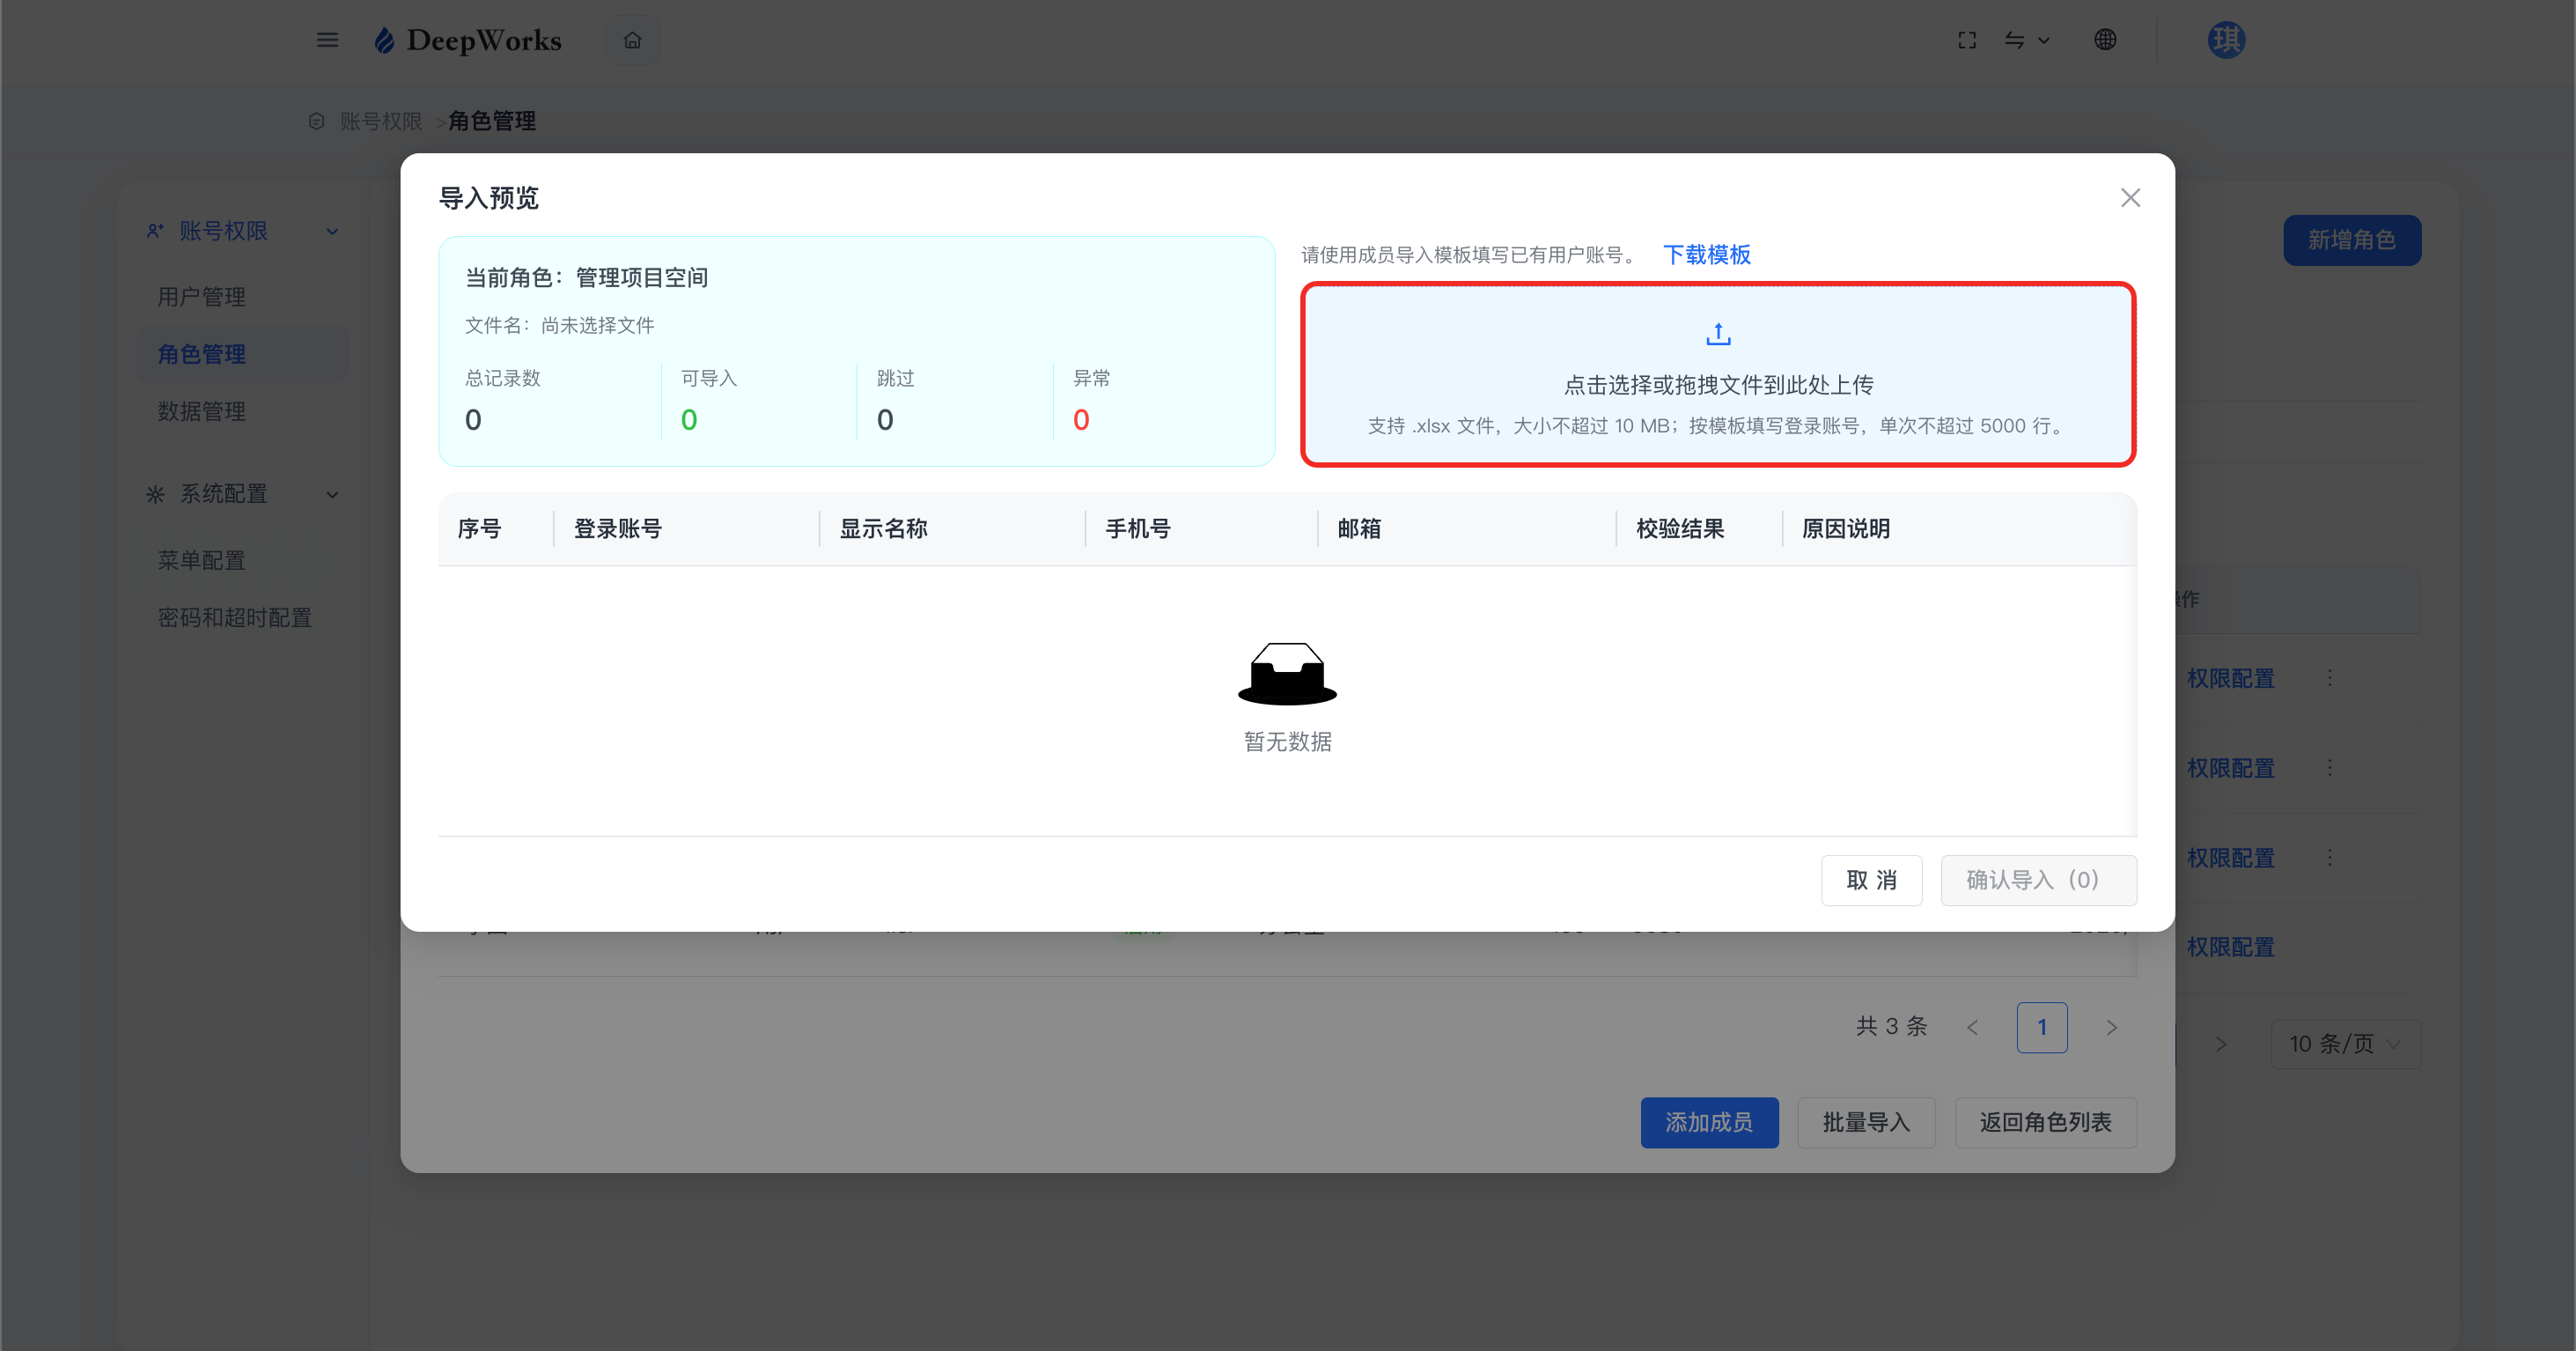
d. Click to upload files, or drag and drop files to the upload area.
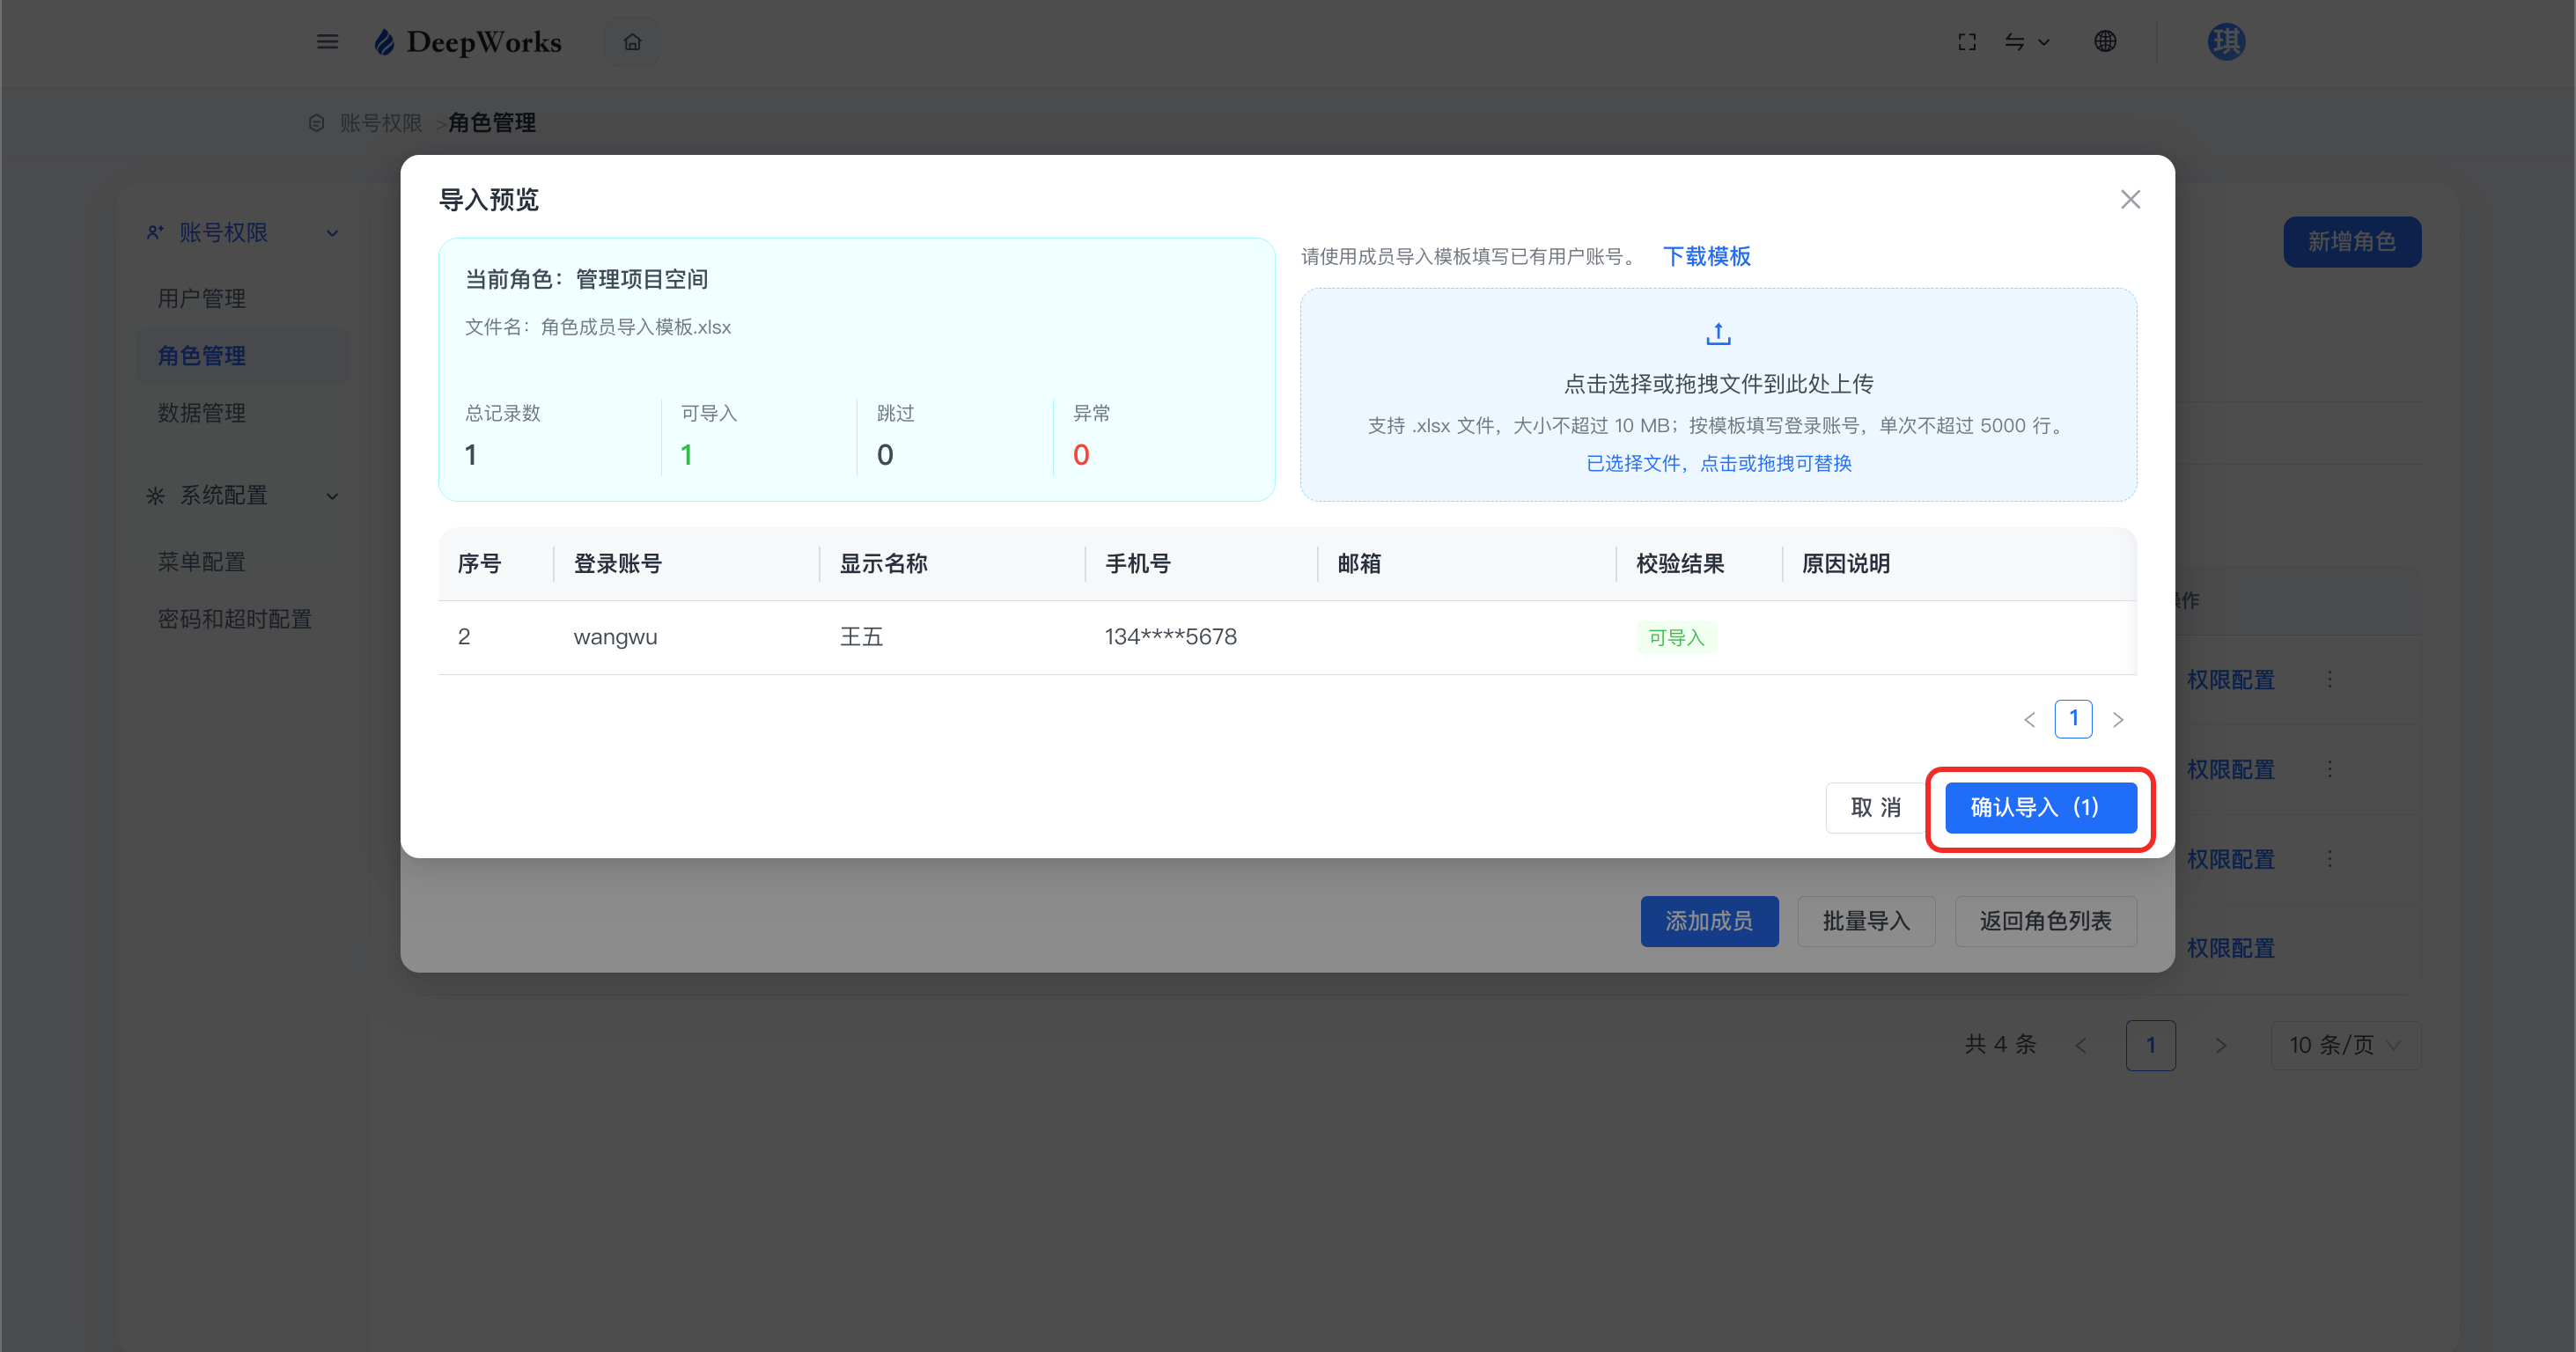
e. Click “Confirm Import”.
Delete Character
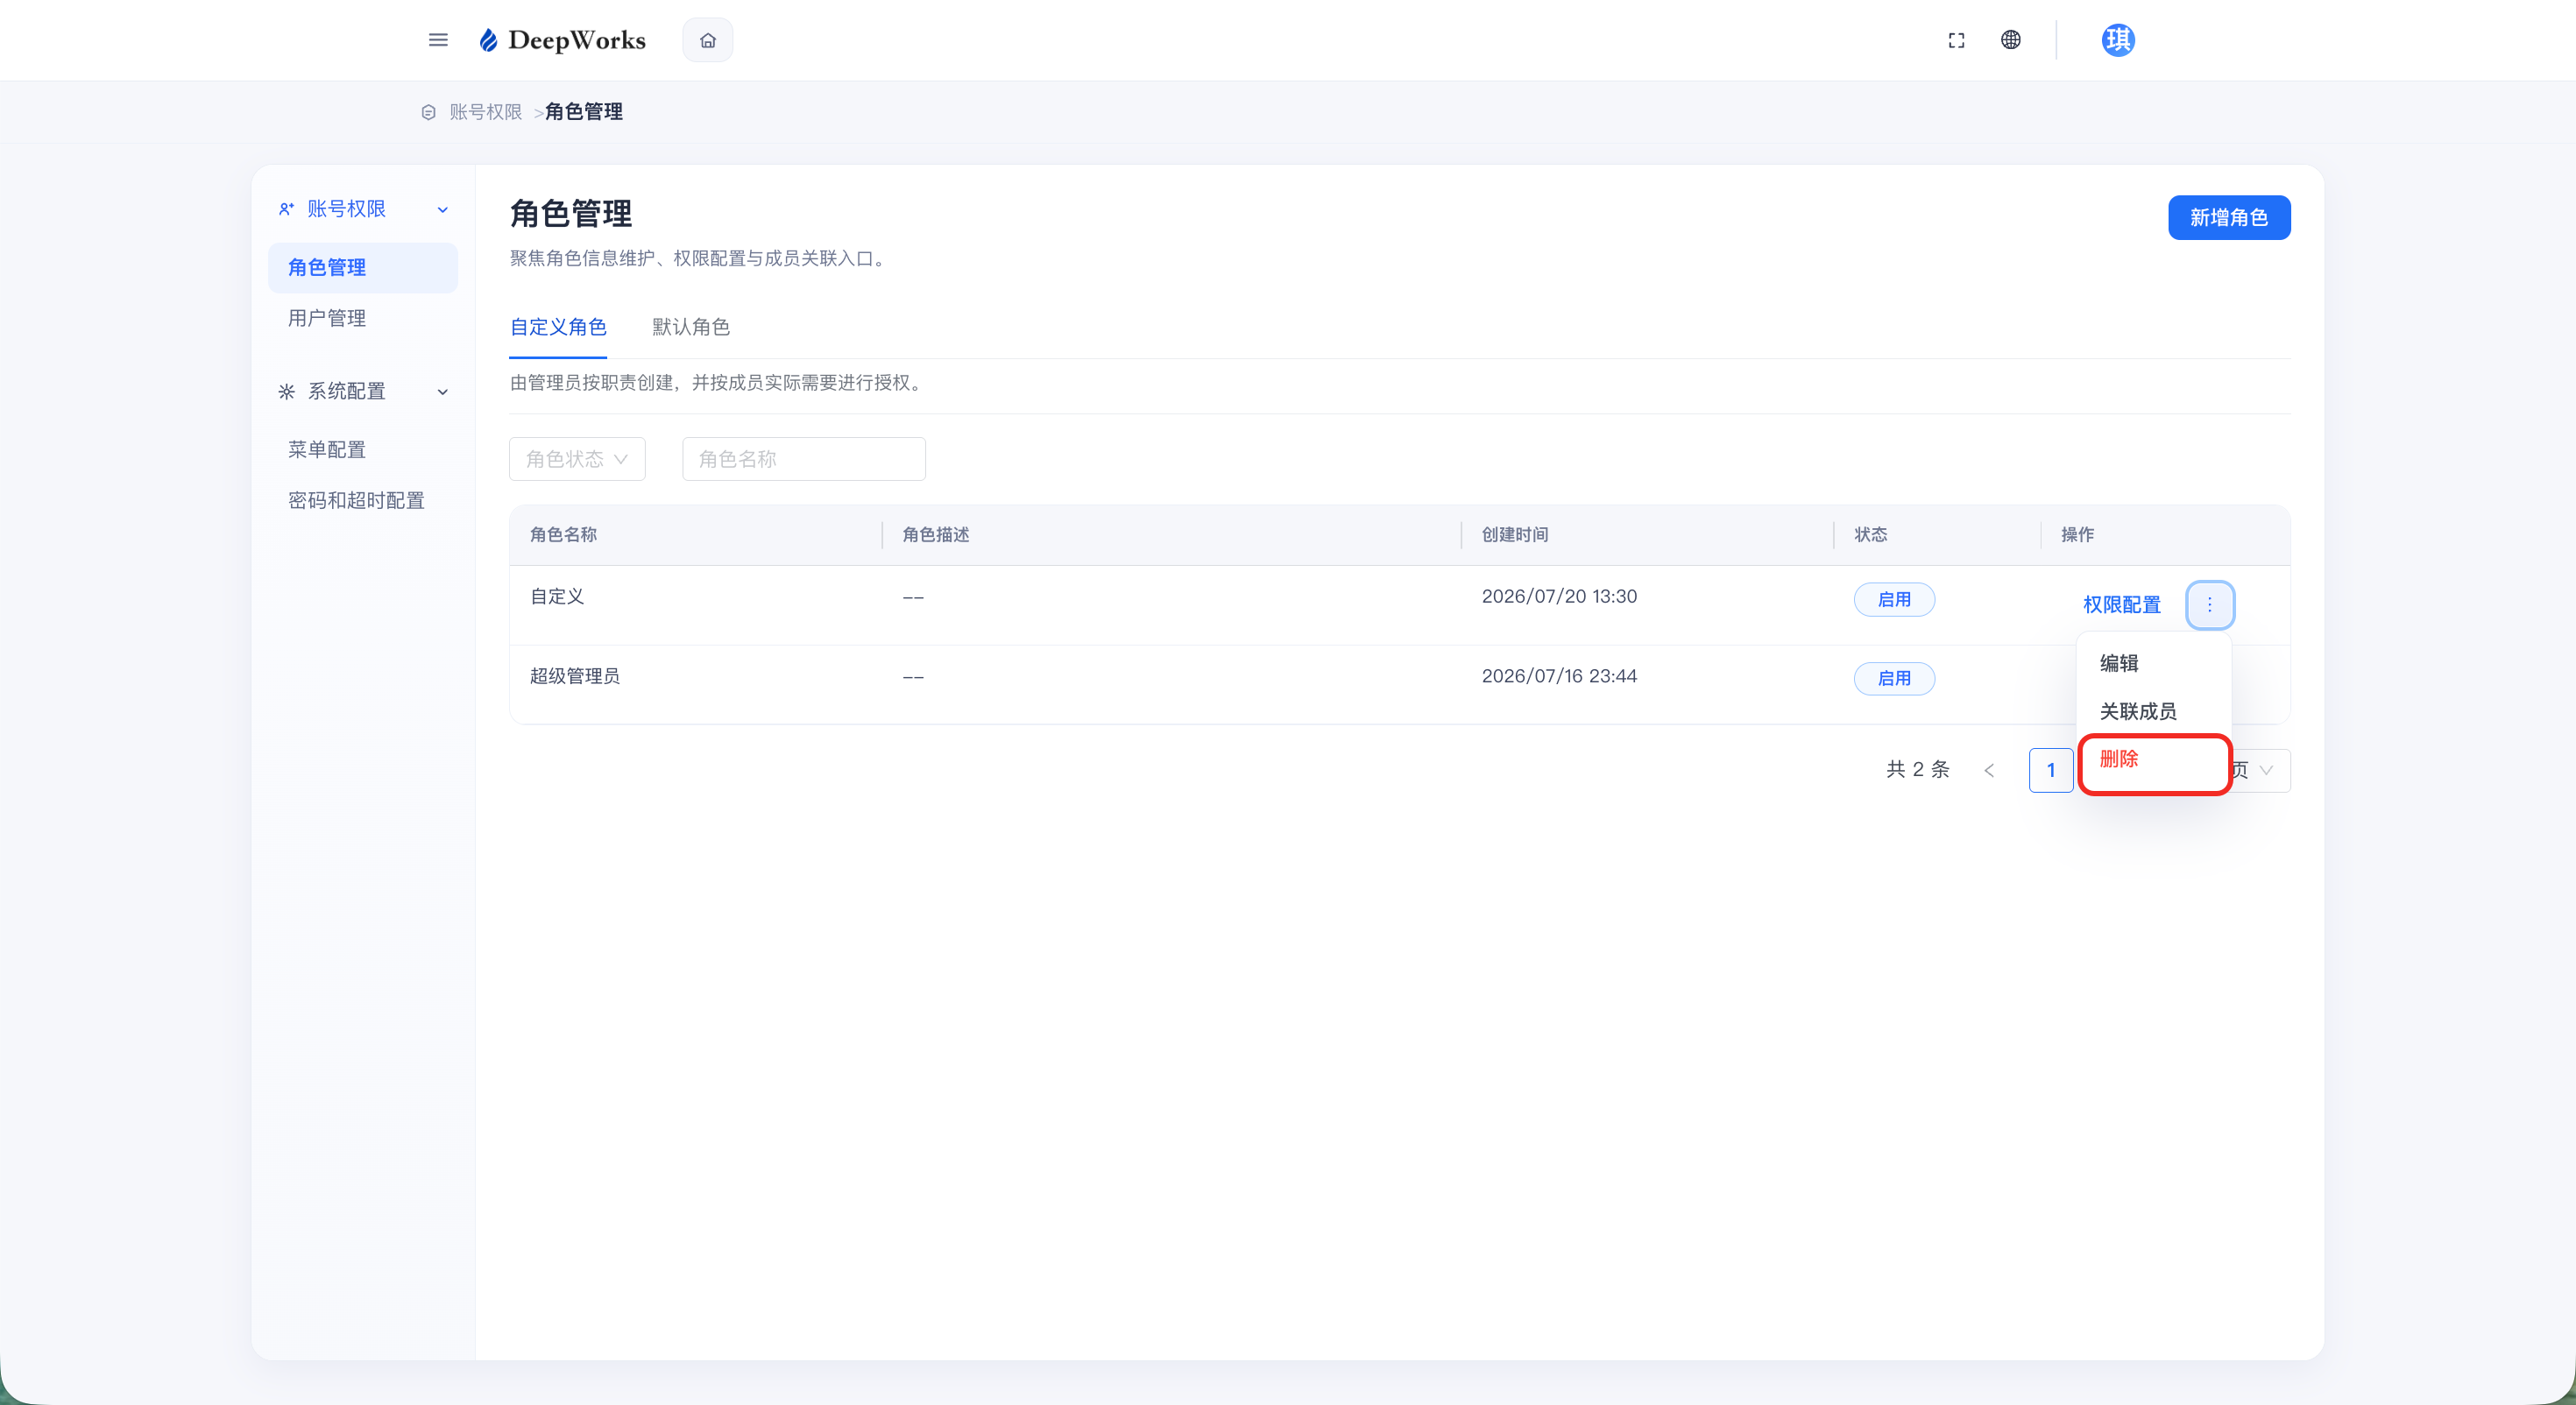
a. Click “Delete”.
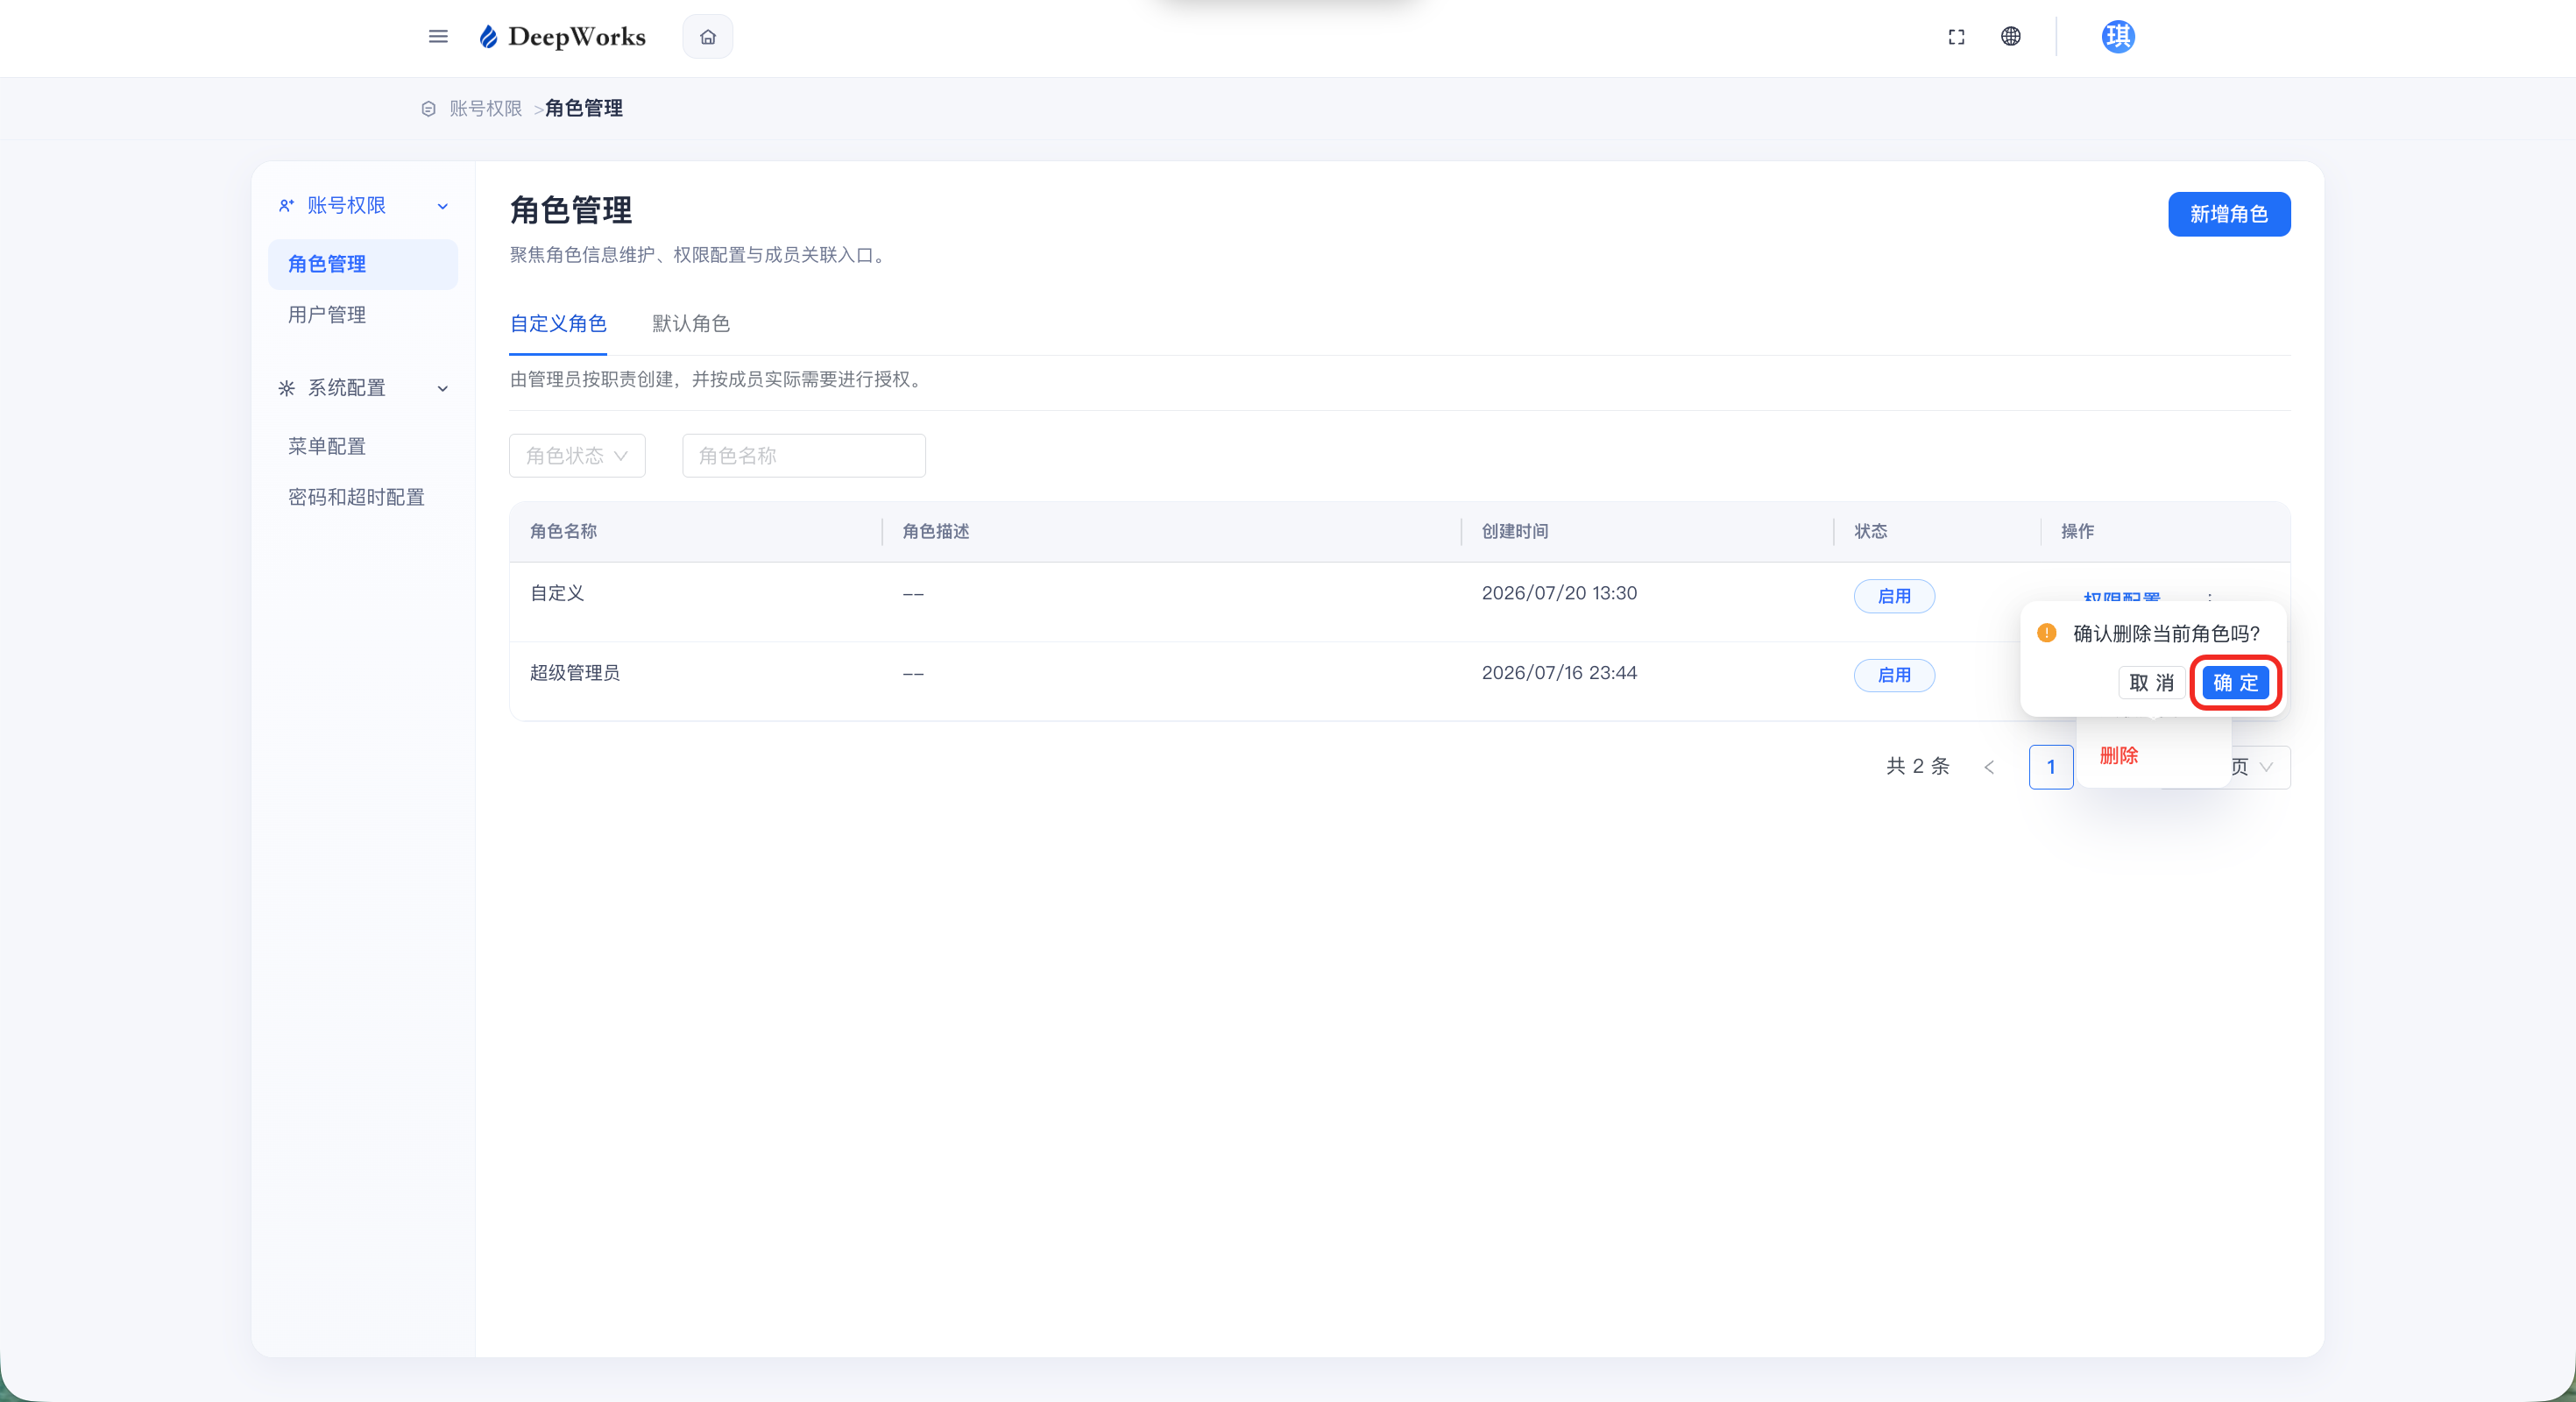
b. In the secondary confirmation pop-up box, click “OK”.
Password and Timeout Configuration
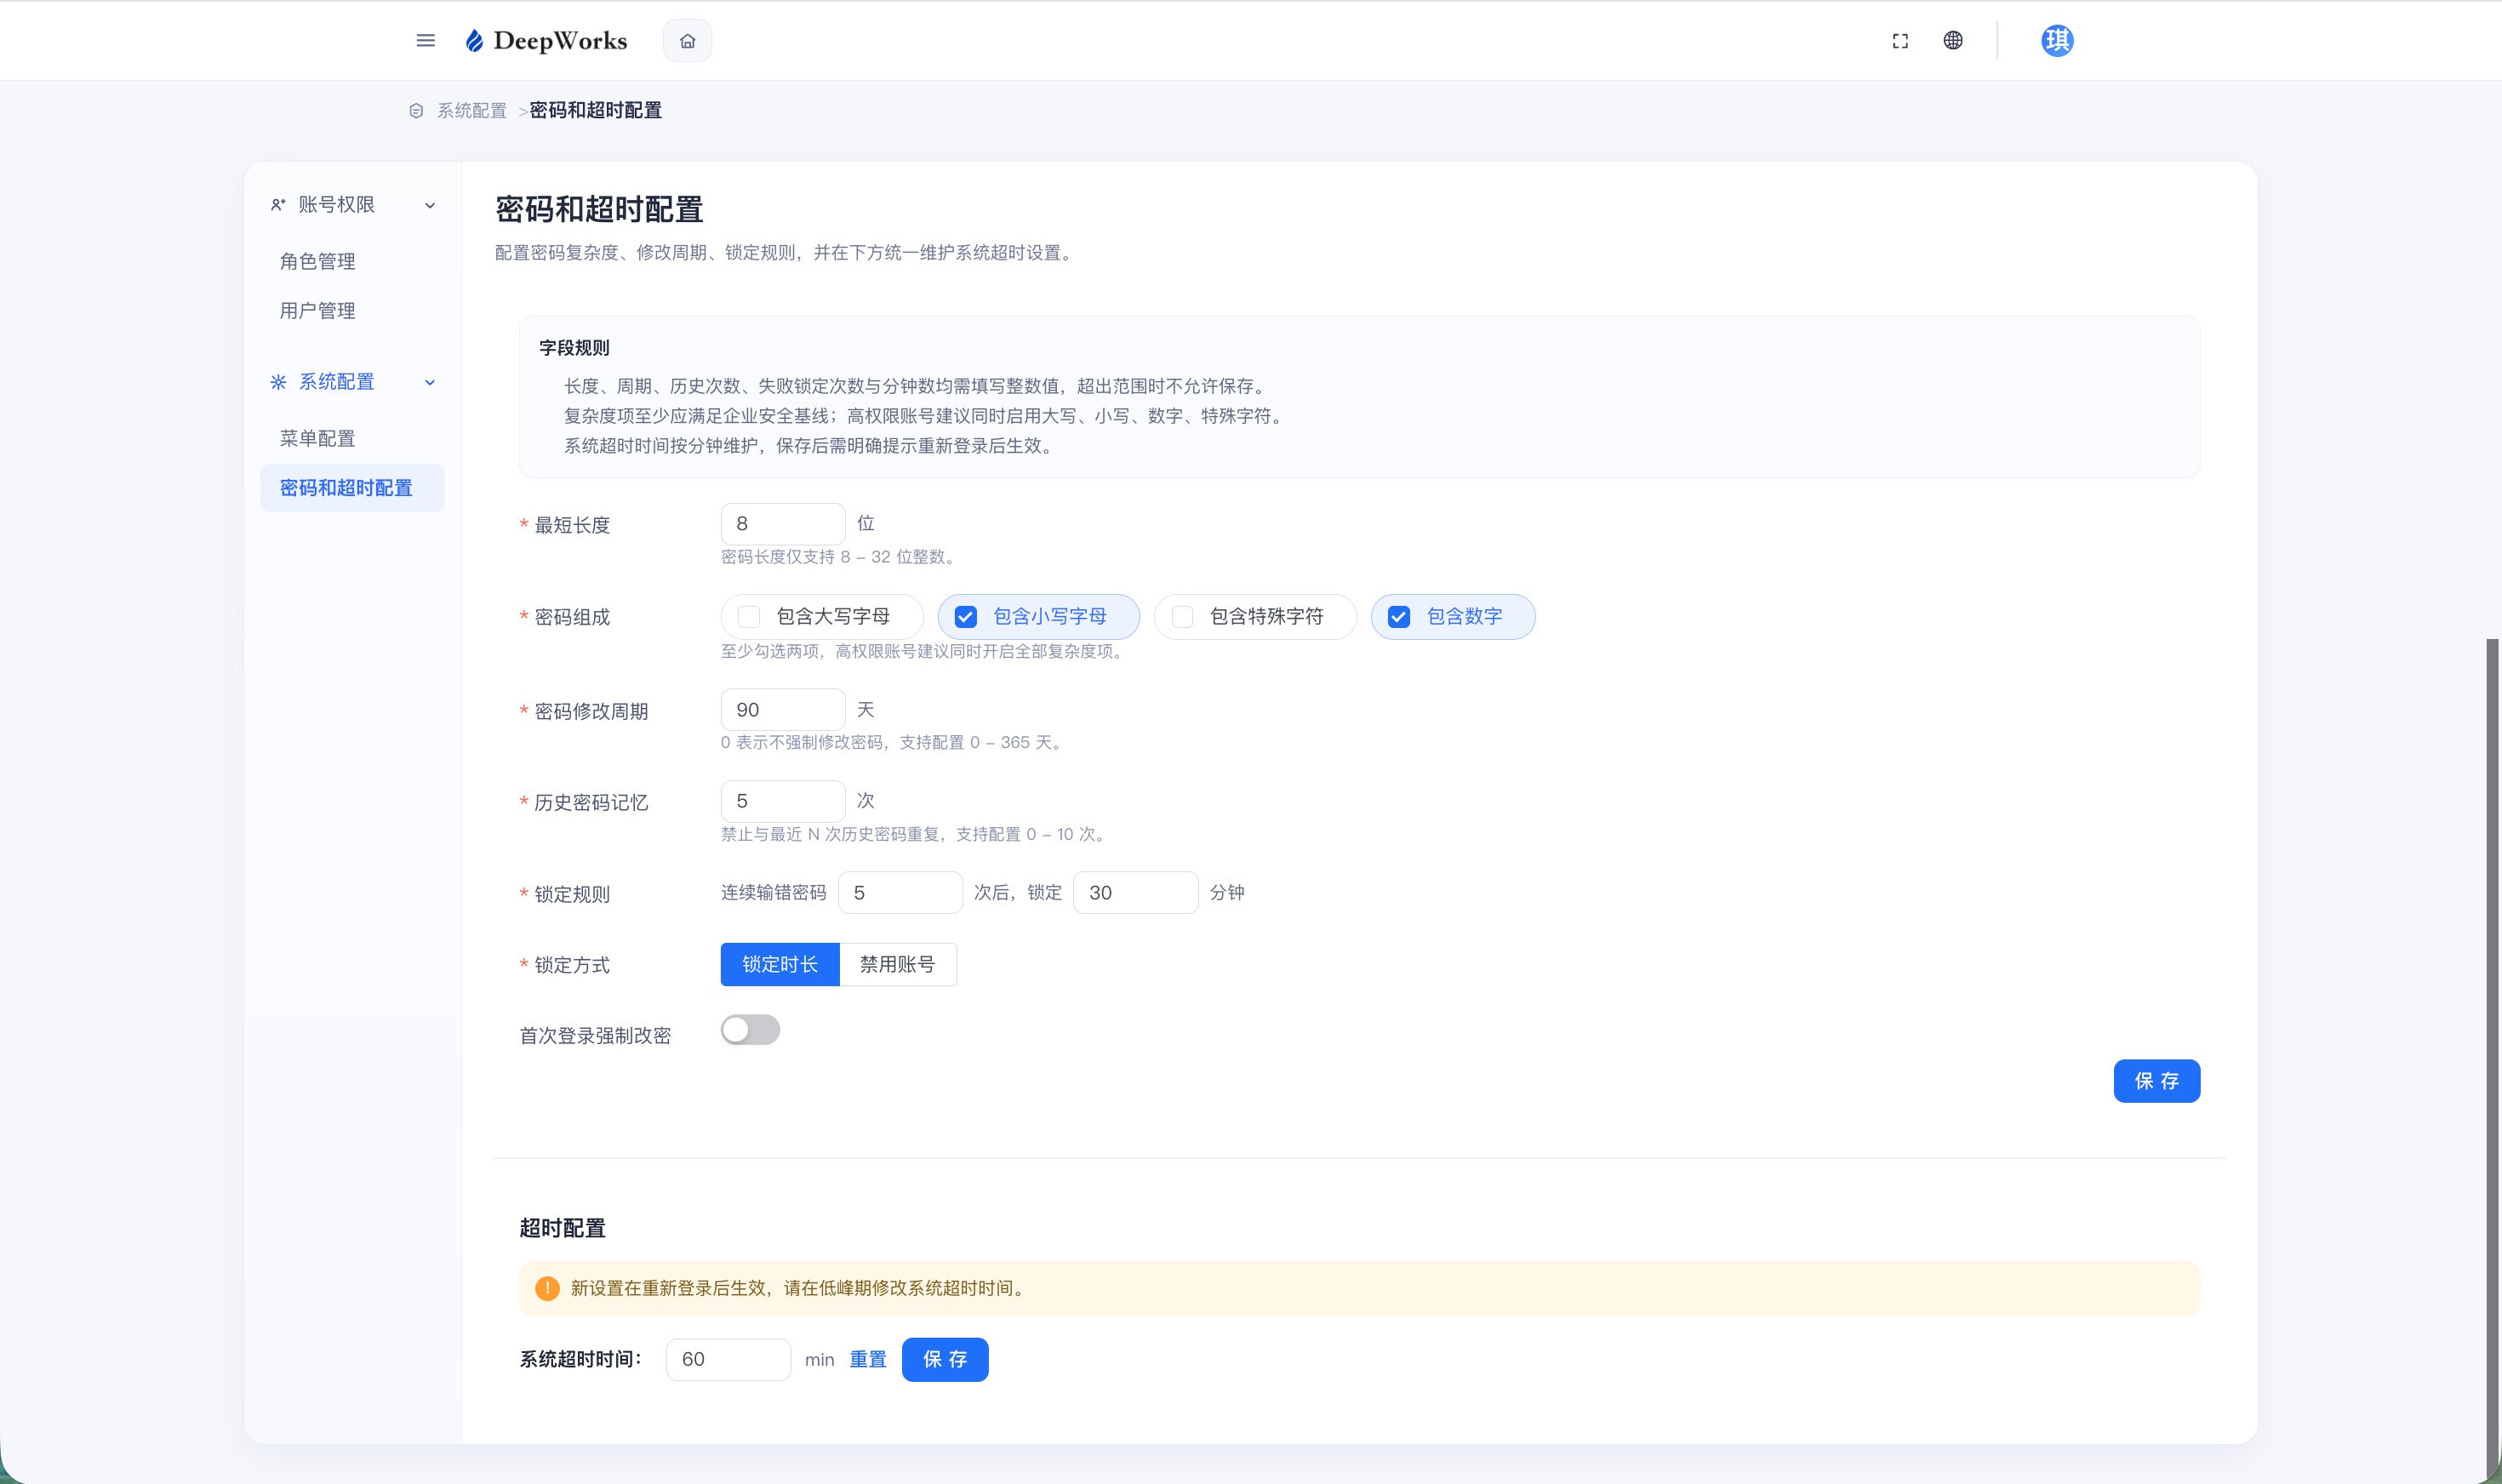
Click “Password and Timeout Configuration” in the left menu to configure password complexity, password change cycle, and lockout rules, and uniformly maintain the system timeout settings below. The configuration information includes: minimum length, password composition, password change cycle, historical password retention, lockout rules, lockout method, mandatory password change on first login, and system timeout duration. After modifying the configuration, click “Save”.
Data Management
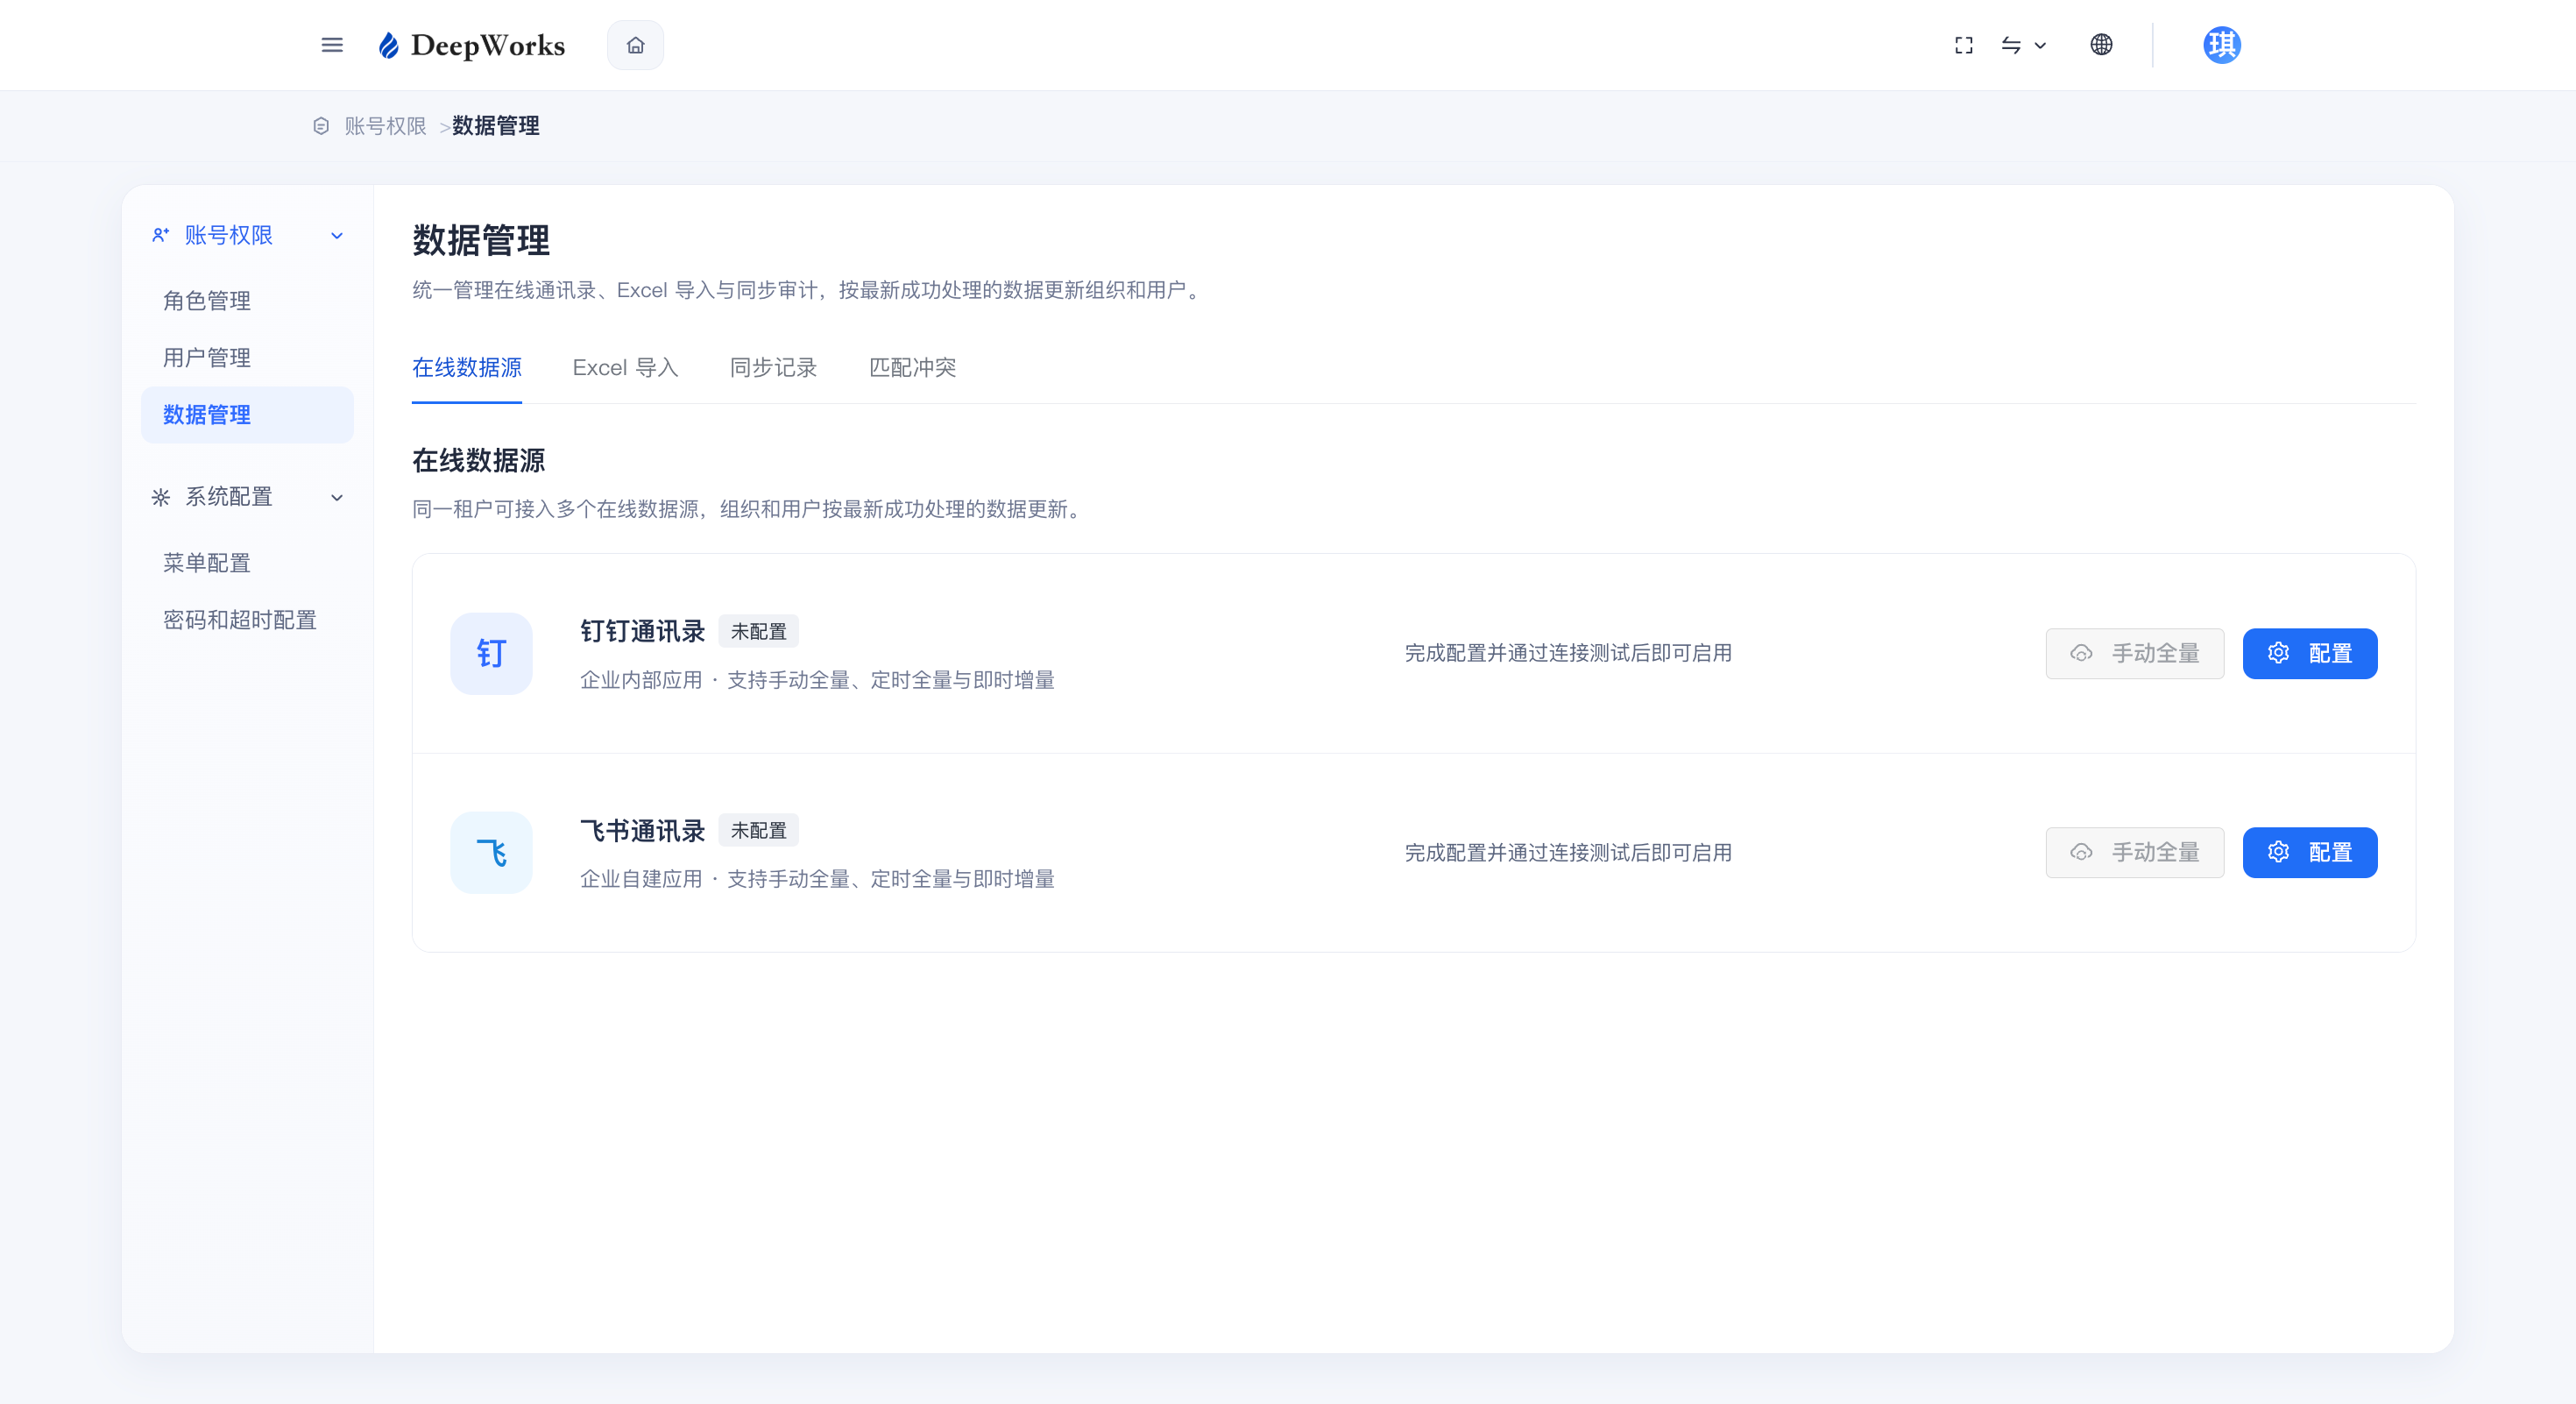
Click “Data Management” in the left menu. This module is designed for the unified management of online address books, Excel import and synchronization audits, and updates organizations and users based on the latest successfully processed data.
Online Data Source
a. Click the “Online Data Source” tab, and administrators can configure a third-party platform as the organization user data source for this platform; the system can periodically retrieve and update the organization user information of this platform from the third-party platform. Currently, only “DingTalk Address Book” and “Feishu Address Book” are supported.
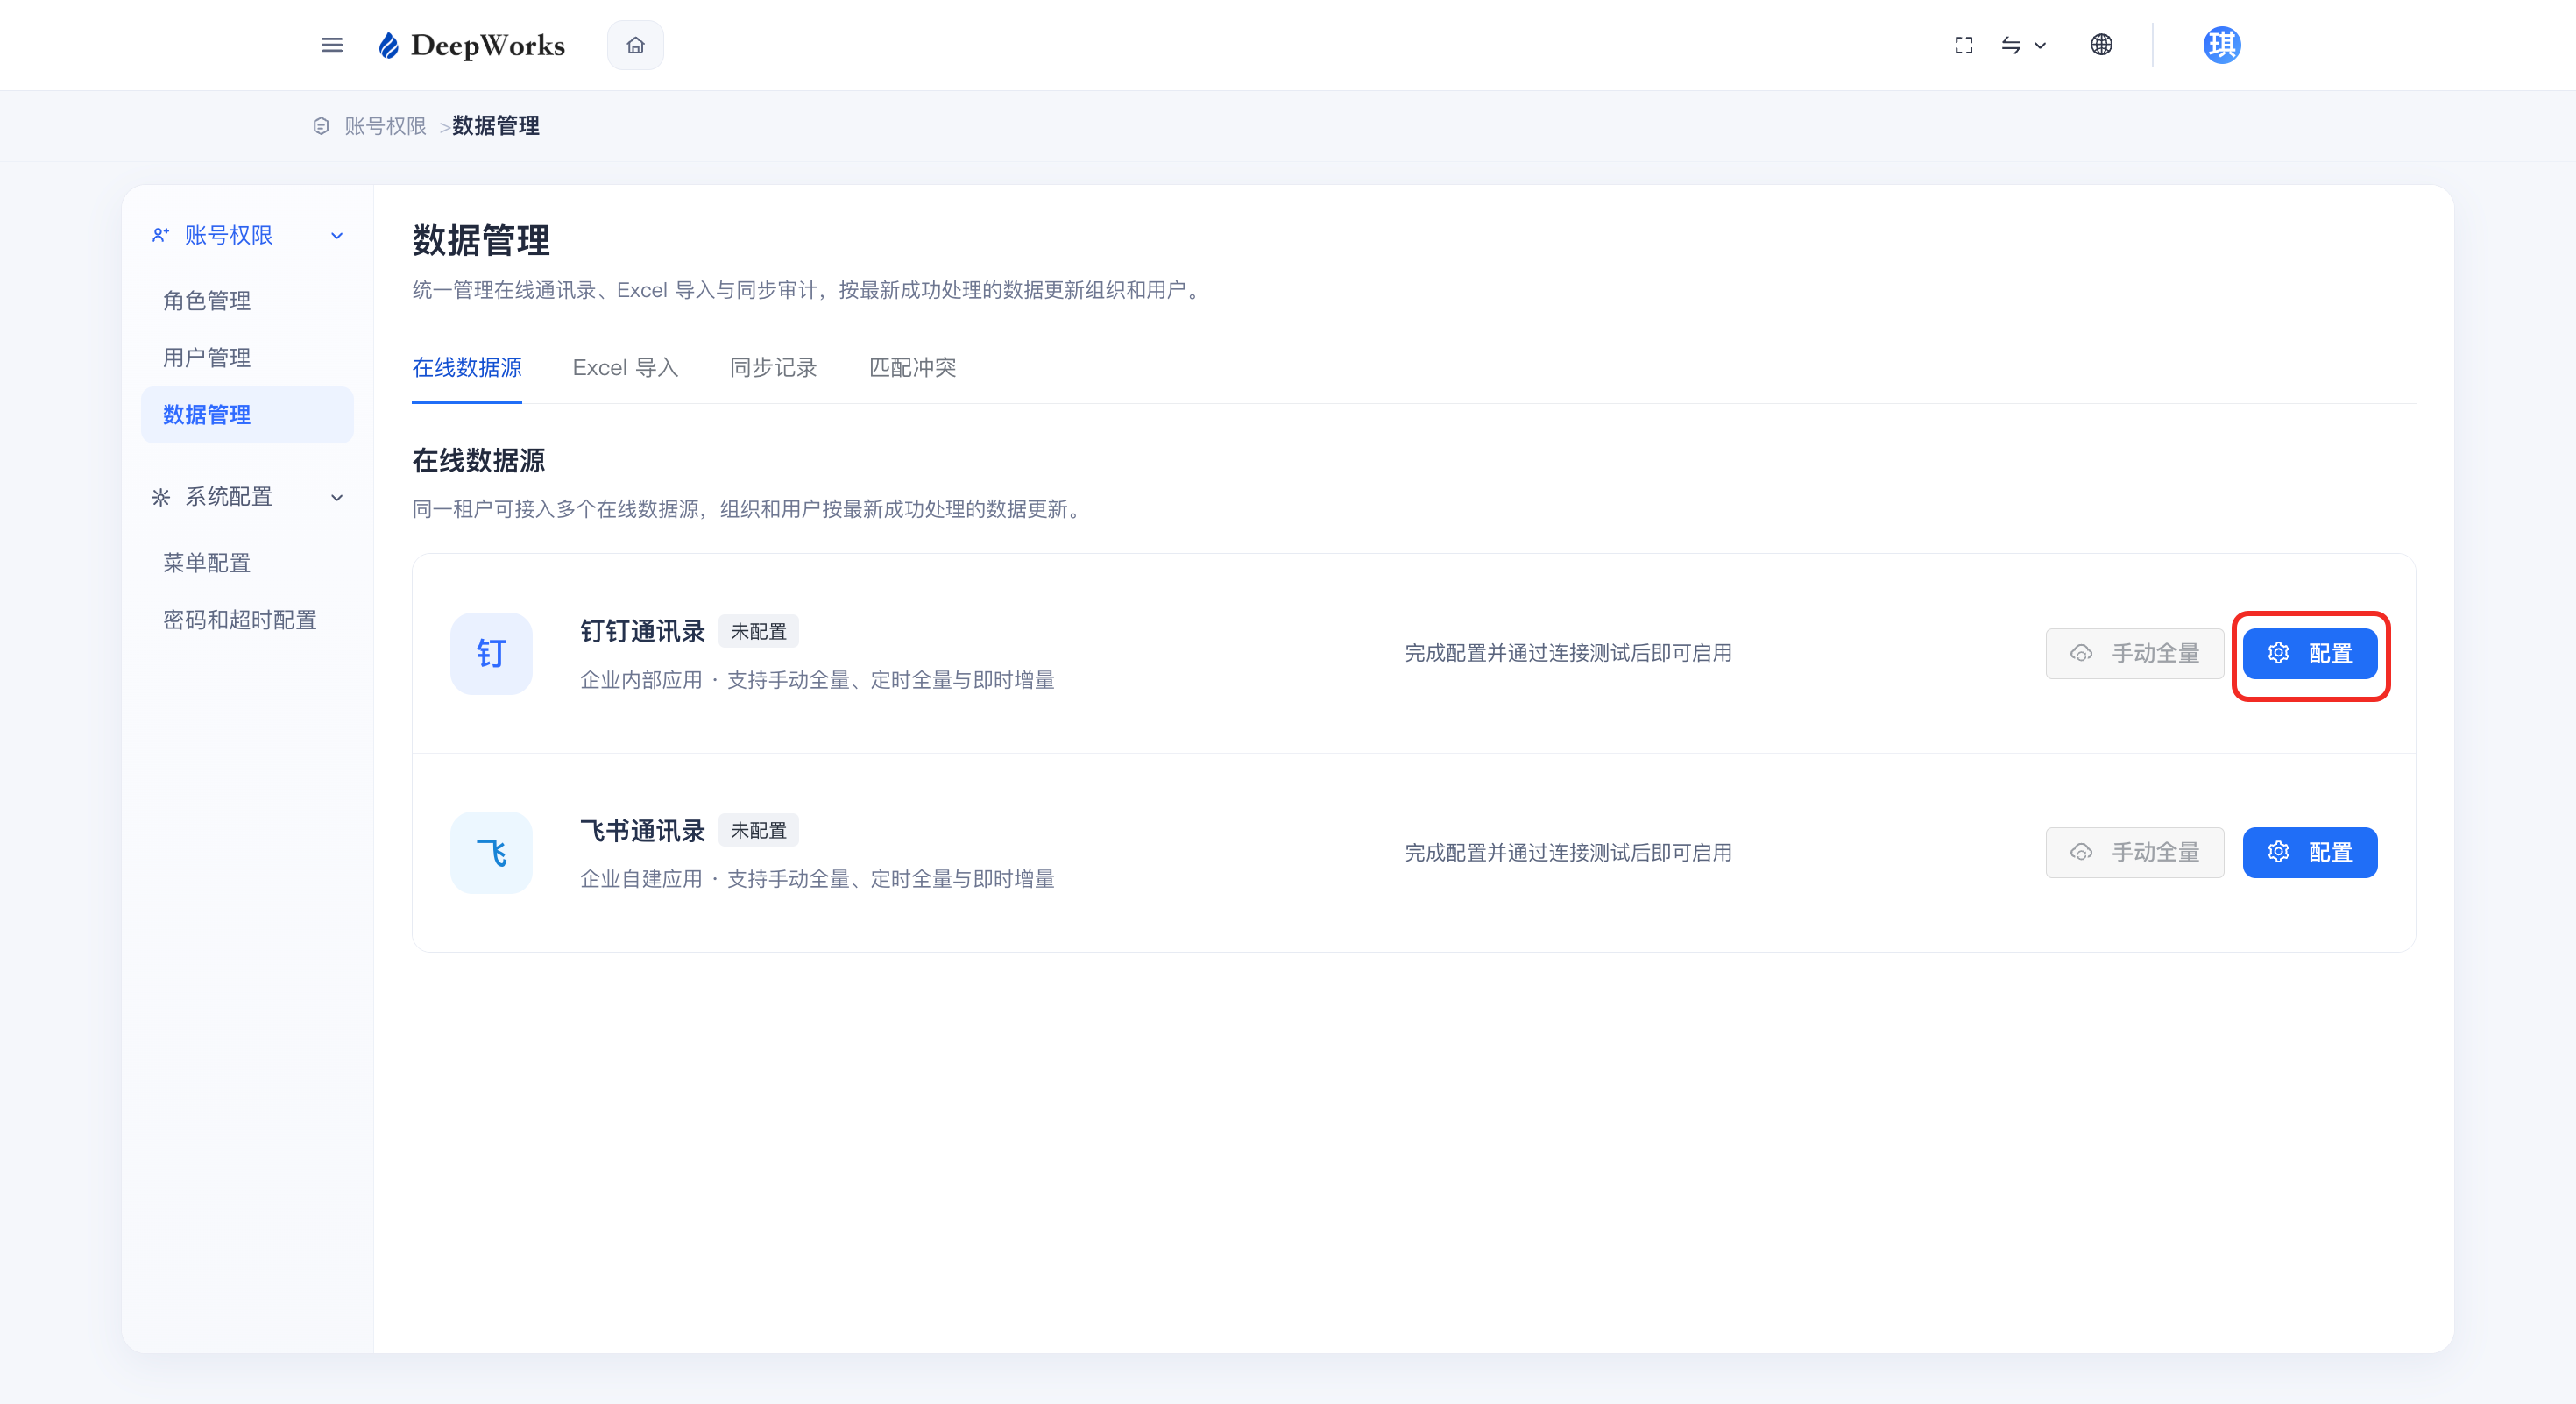
b. Click “Configure”.
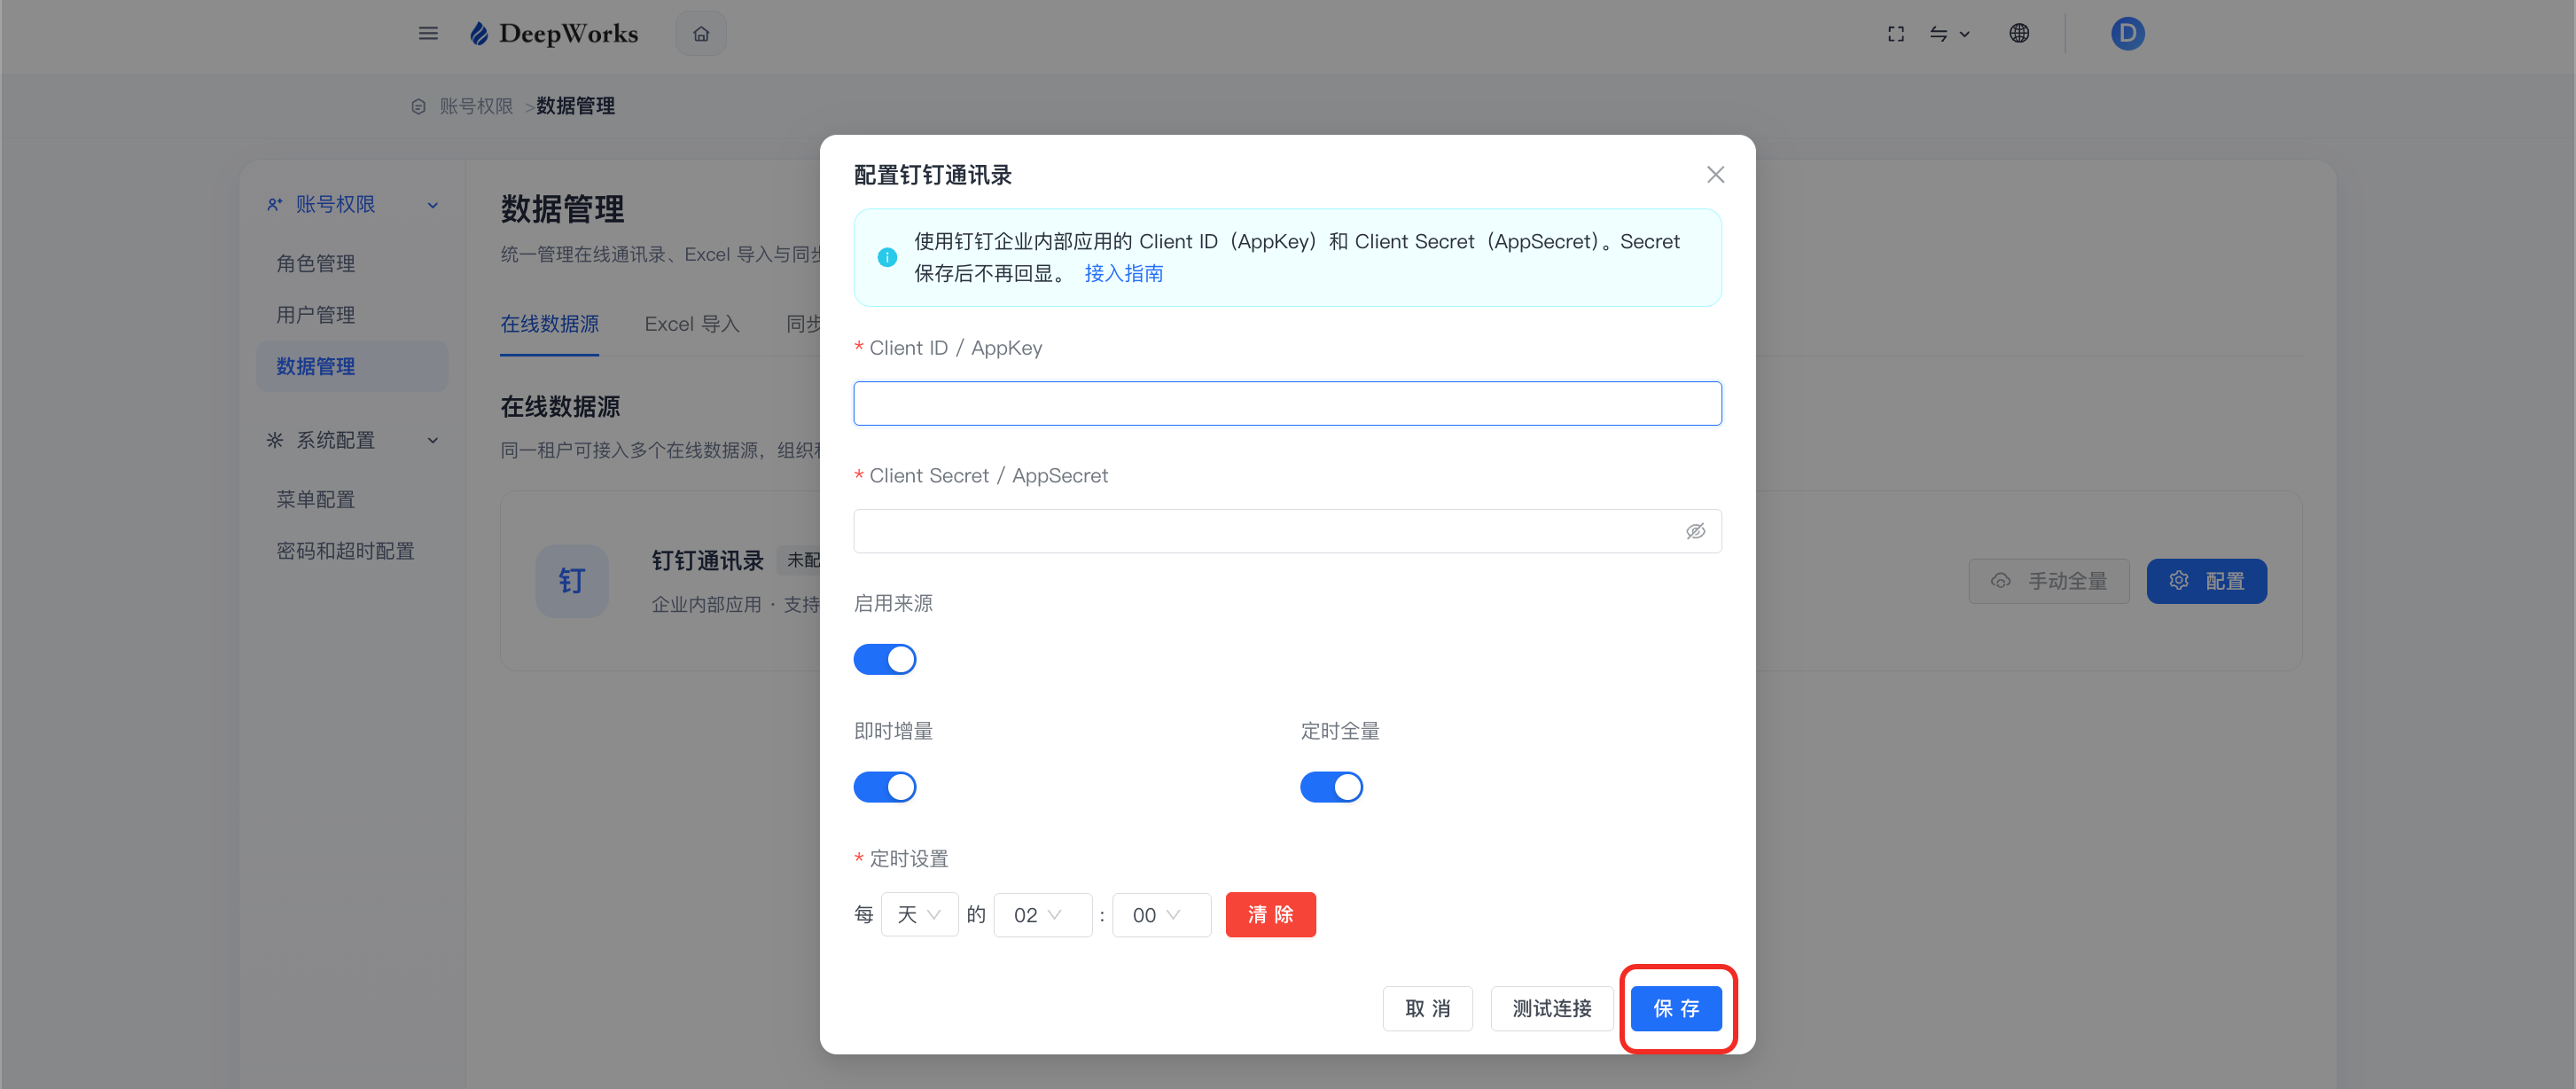
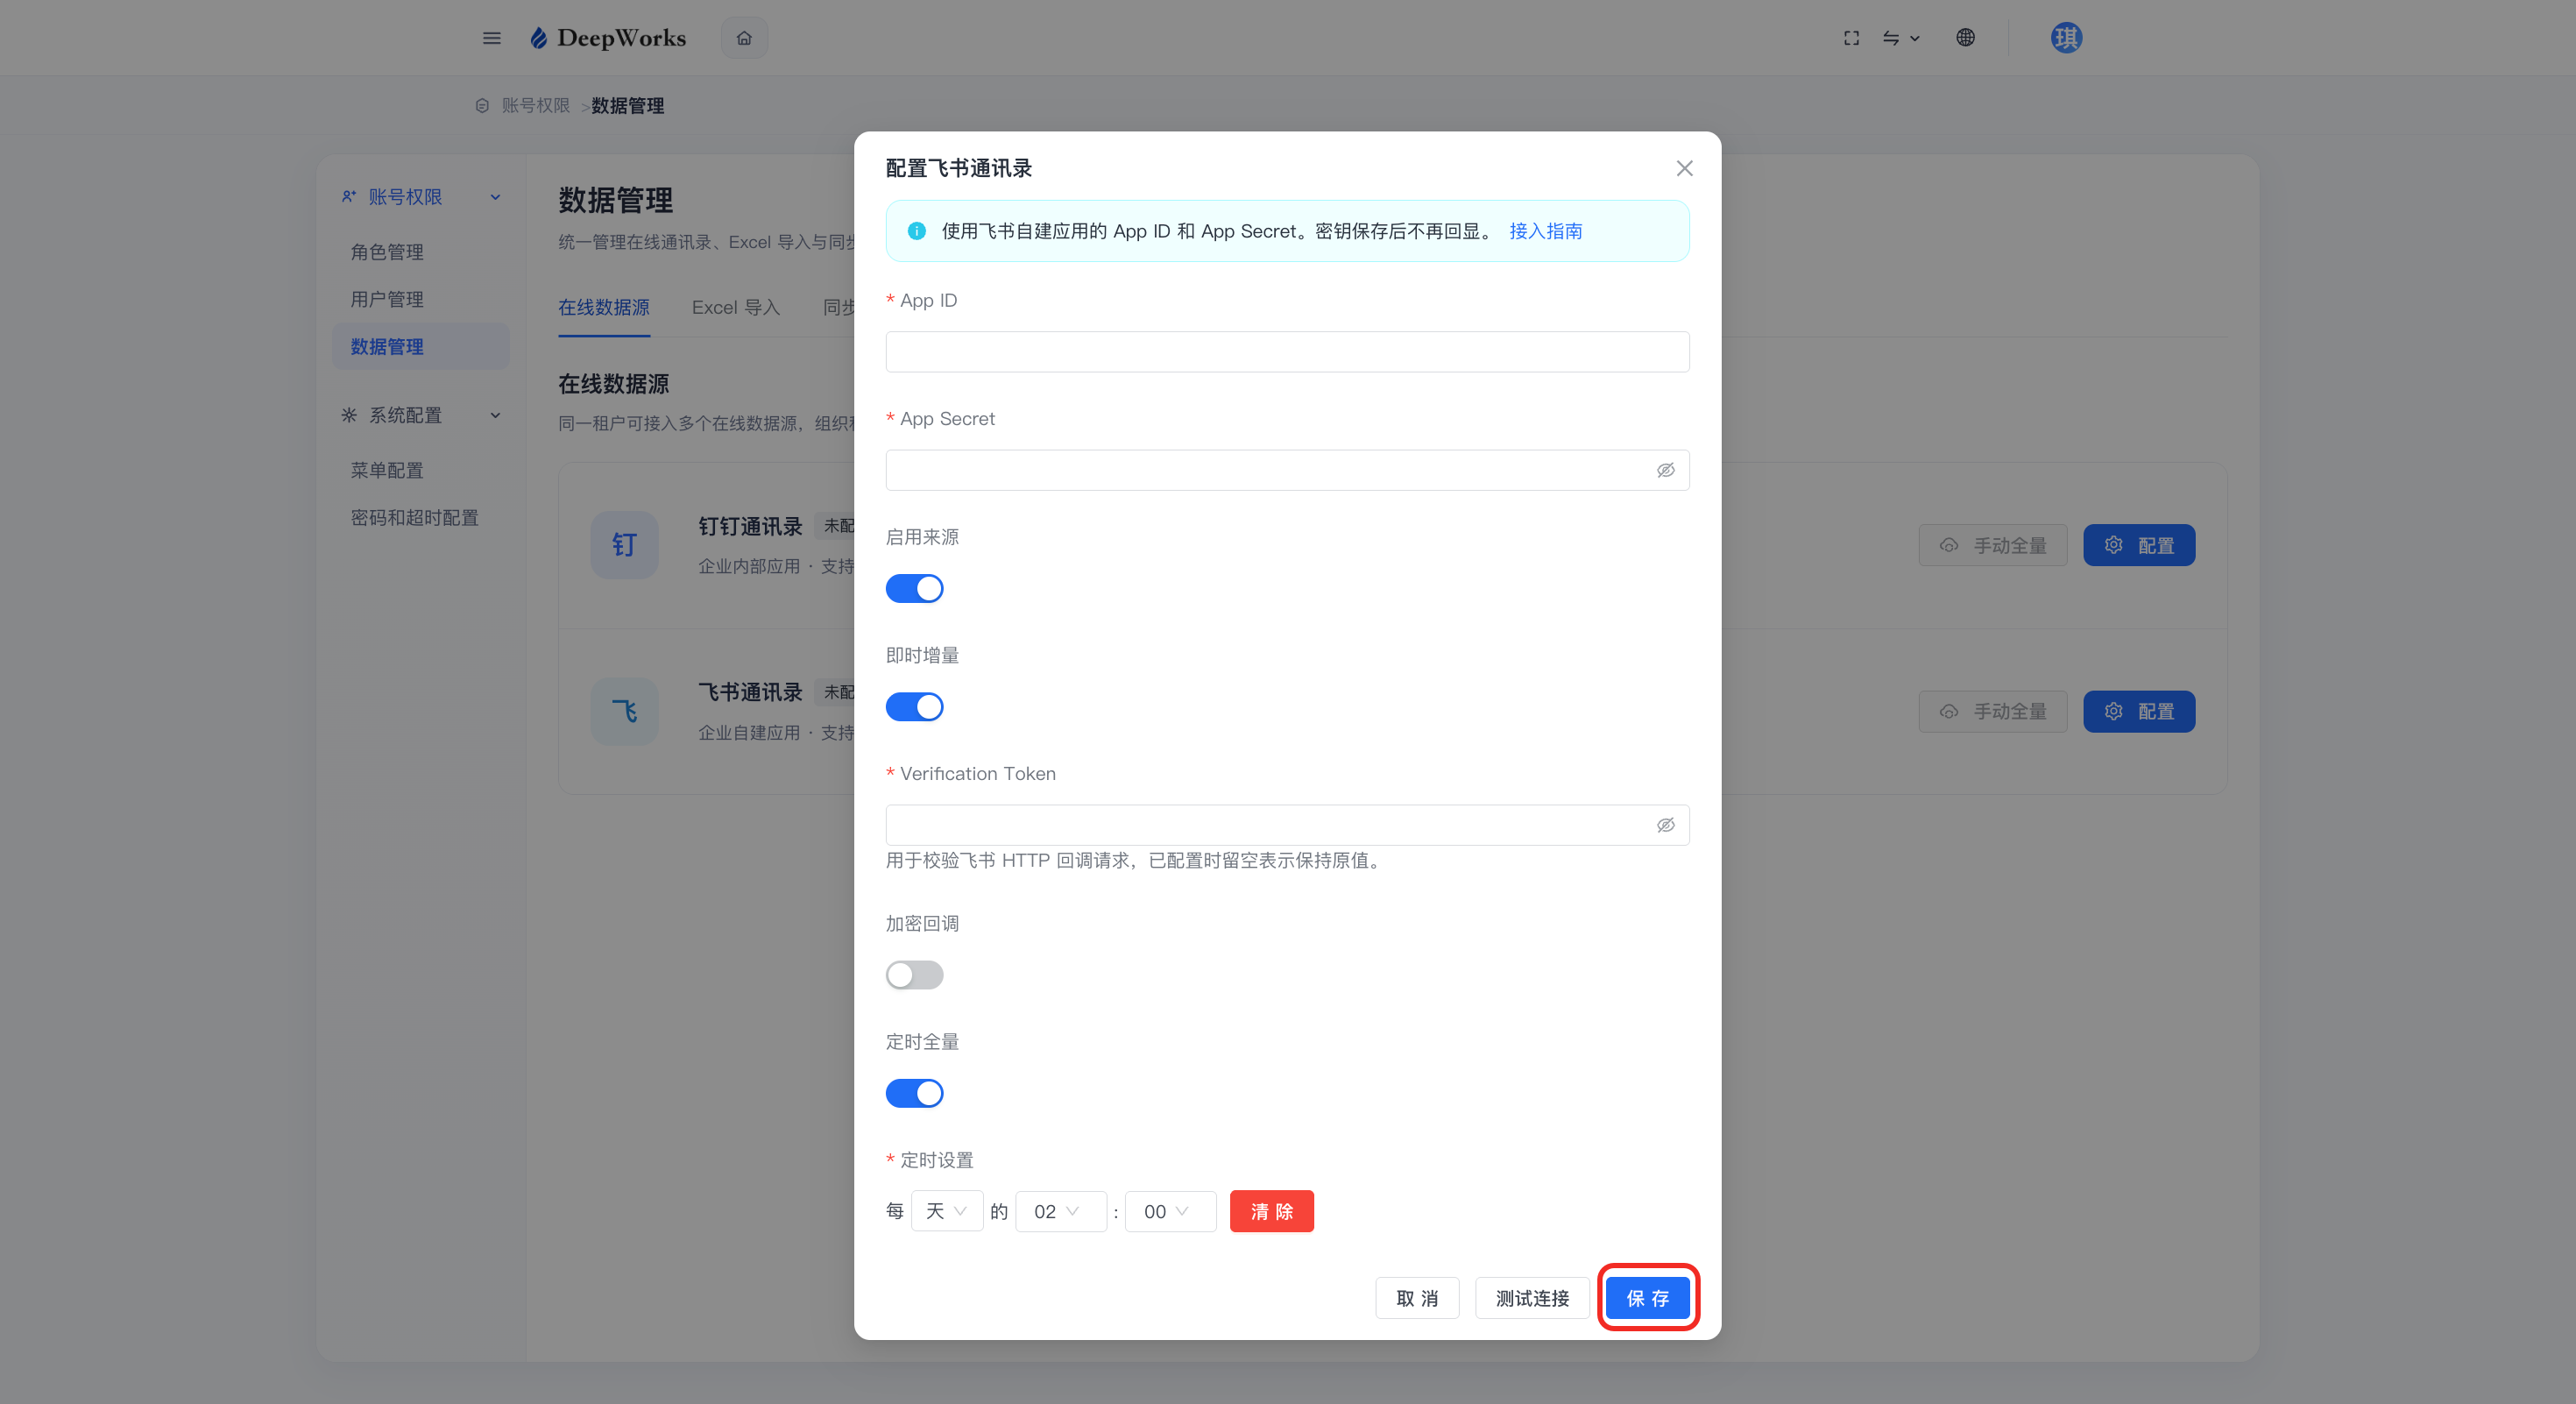
c. Fill in the configuration information and click “Save”. After the configuration is completed, the system will periodically obtain the organization user information from the address book scope authorized by the DingTalk/Feishu application and update it to this platform. Note: If the third-party data source has been enabled to synchronize organization user information, please go to the DingTalk/Feishu platform to modify the organization user information for subsequent updates. Do not manually modify (online modification or Excel import) the organization user information, otherwise it may be overwritten by the synchronized data. It is recommended that only one data source synchronization be enabled for one tenant.
-
DingTalk: Fill in the DingTalk application ID (ClientID) and Secret, and you can configure the enabled status as well as the activation status of real-time incremental sync / scheduled full sync. Note: The administrator needs to configure the address book (organizational user) information and the permission to obtain users’ mobile phone numbers/email addresses on the DingTalk platform. After sync is enabled, the system will use “users’ mobile phone number/email address” as the unique identifier.
-
Feishu: Enter the DingTalk AppID, Secret, and Verification Token, and you can configure the enabled status as well as the activation status for real-time incremental sync or scheduled full sync. Note: The administrator needs to configure the address book (organizational user) information and the permissions to obtain users’ mobile phone numbers/email addresses on the DingTalk platform. After sync is enabled, the system will use “users’ mobile phone numbers/email addresses” as the unique identifier.
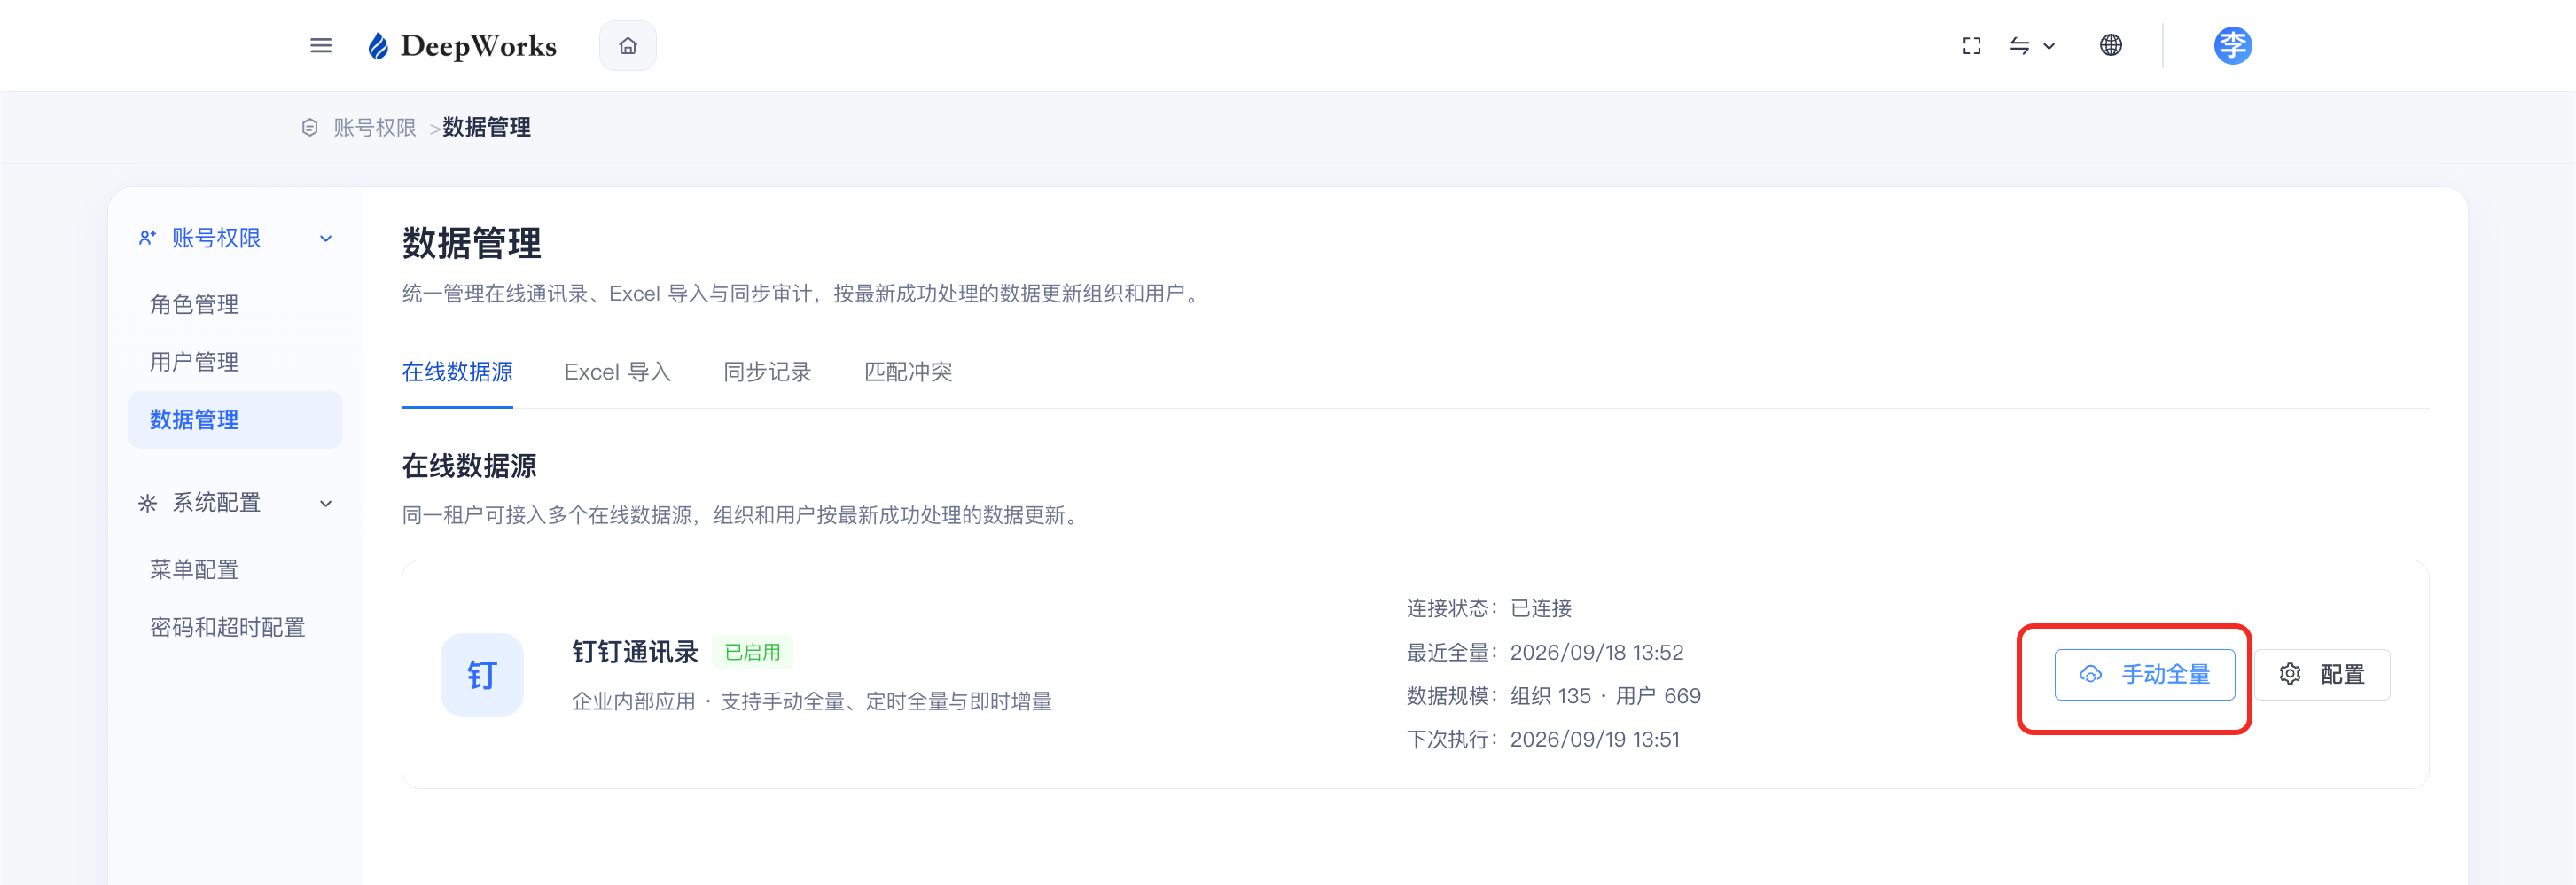
d. If immediate synchronization is required, you can click “Manual Full Sync”.
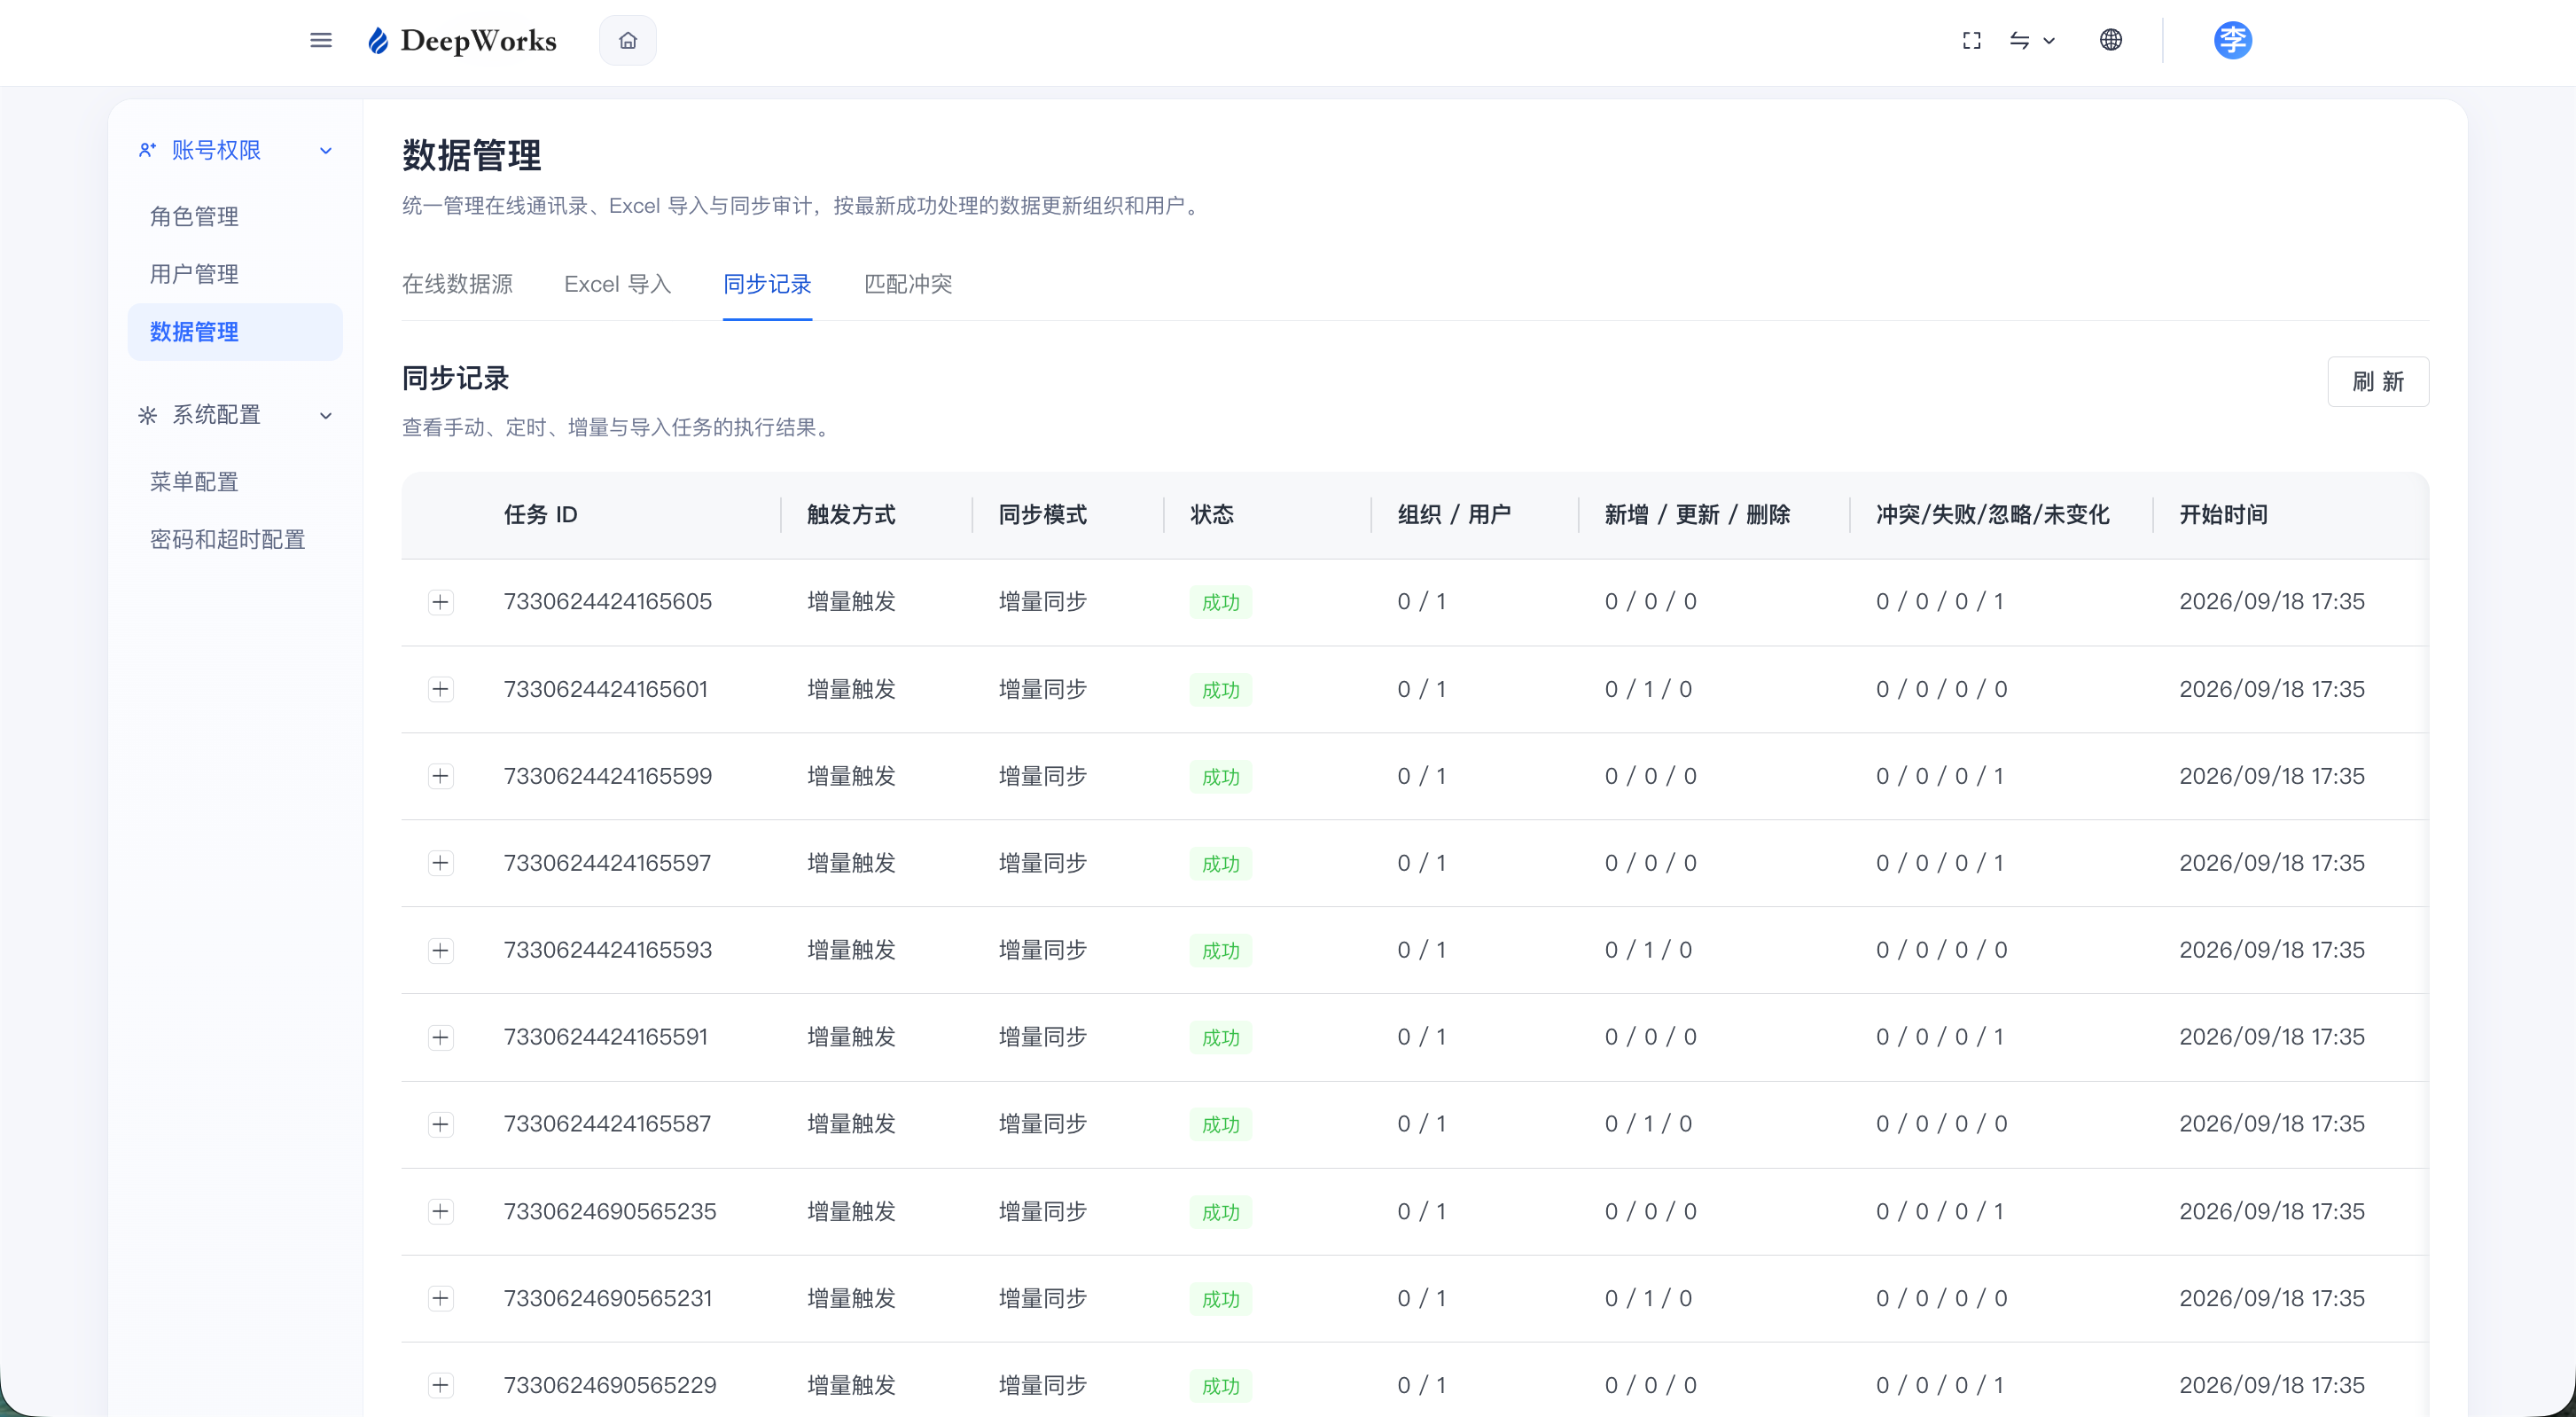
View Sync History
a. Click “Sync Records”.
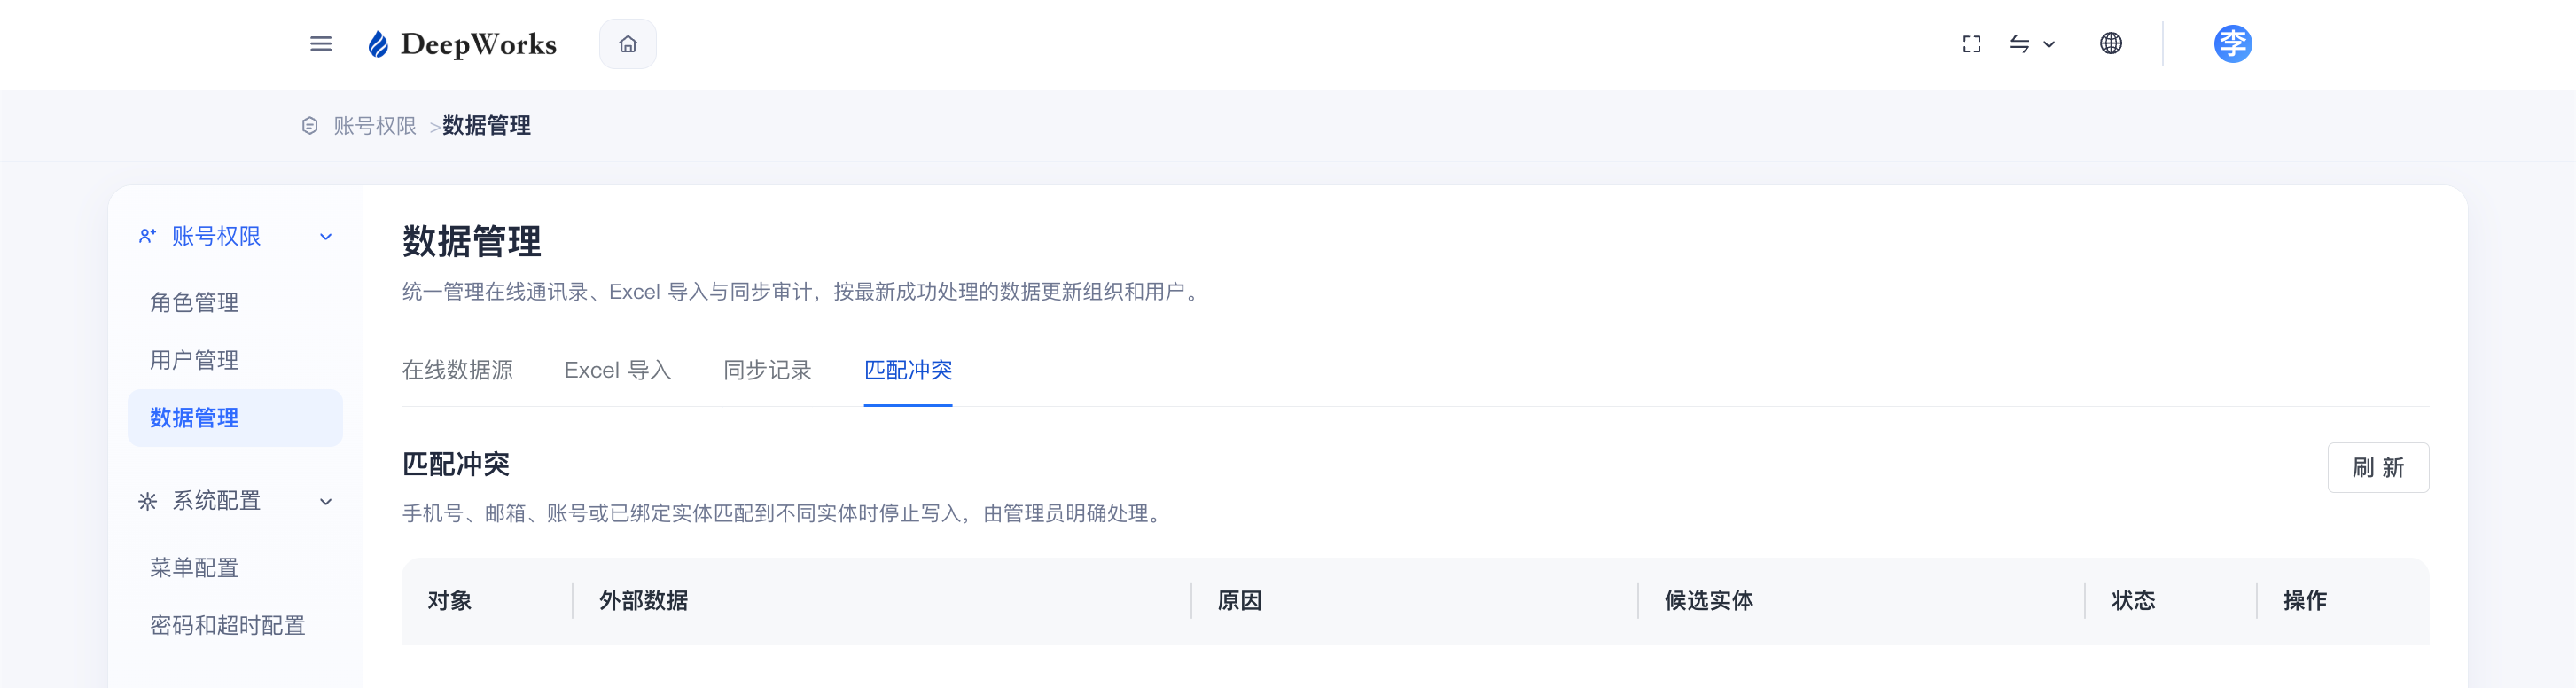
Matching Conflict Resolution
When situations arise such as the same mobile phone number corresponding to different email users, or the same email corresponding to users with different mobile phone numbers, such data will be placed in the “Matching Conflict” area for manual processing by the administrator.
Batch Import
a. Click “Import from Excel”.
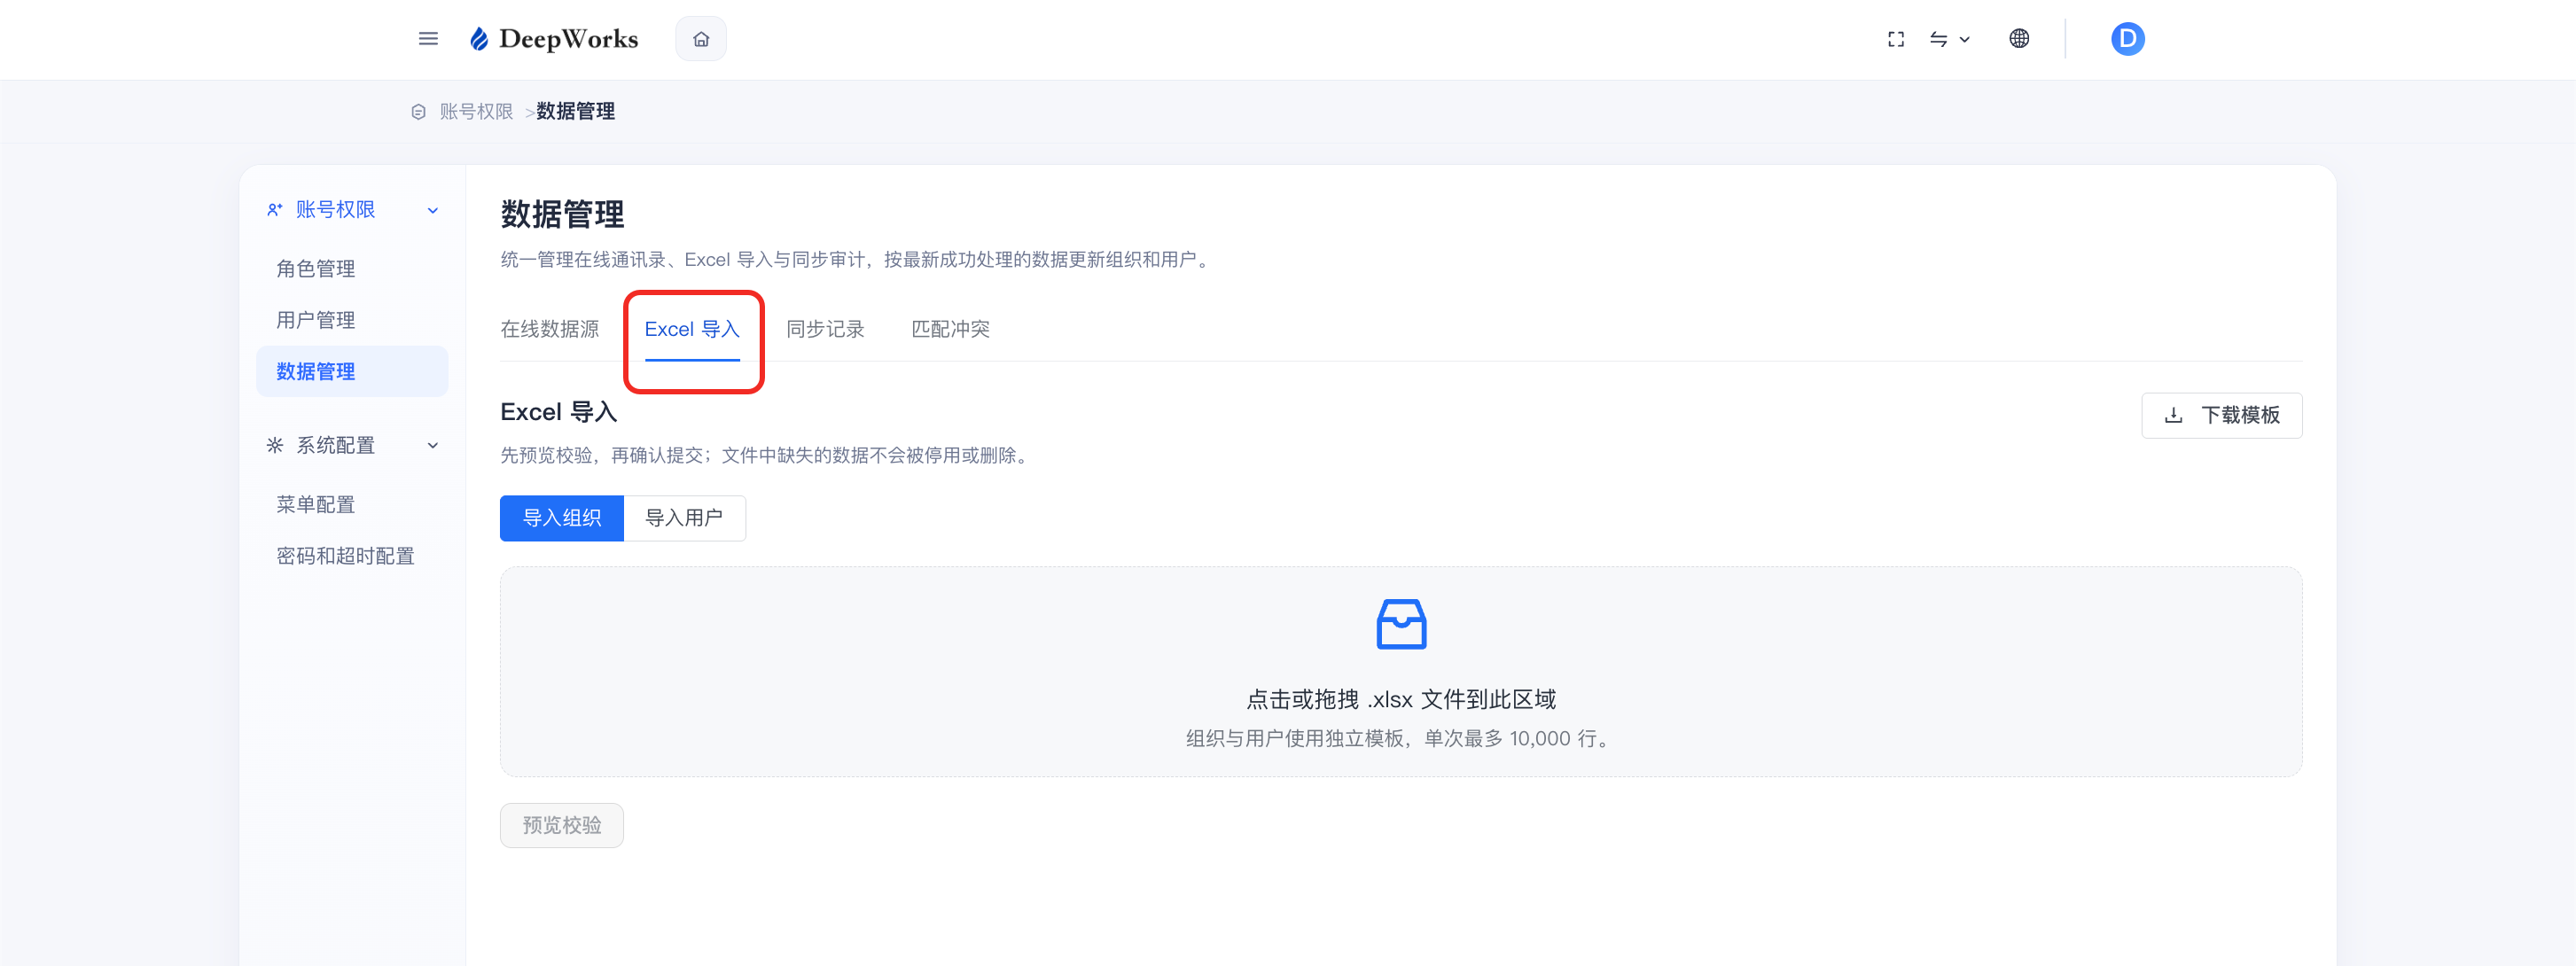
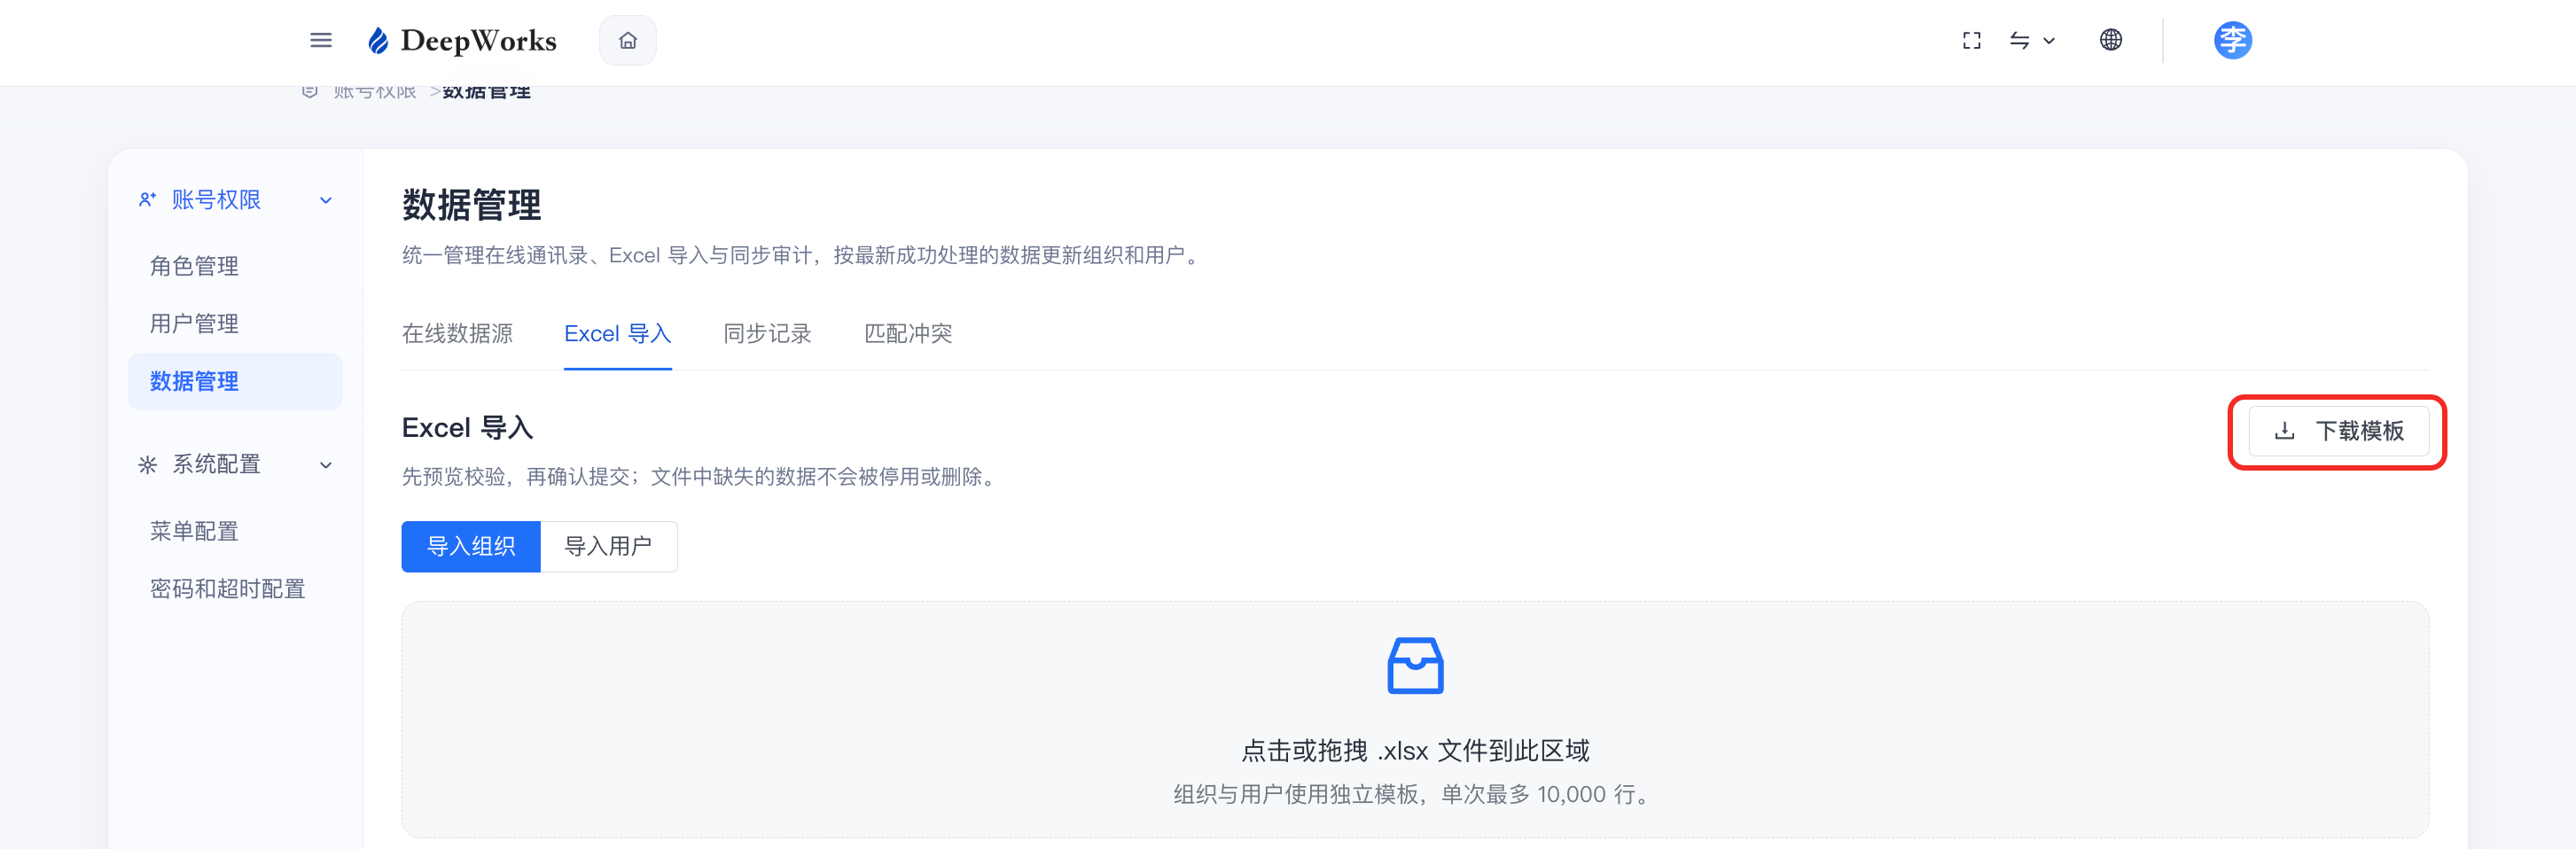
b. Import an organization, and download the organization import template.
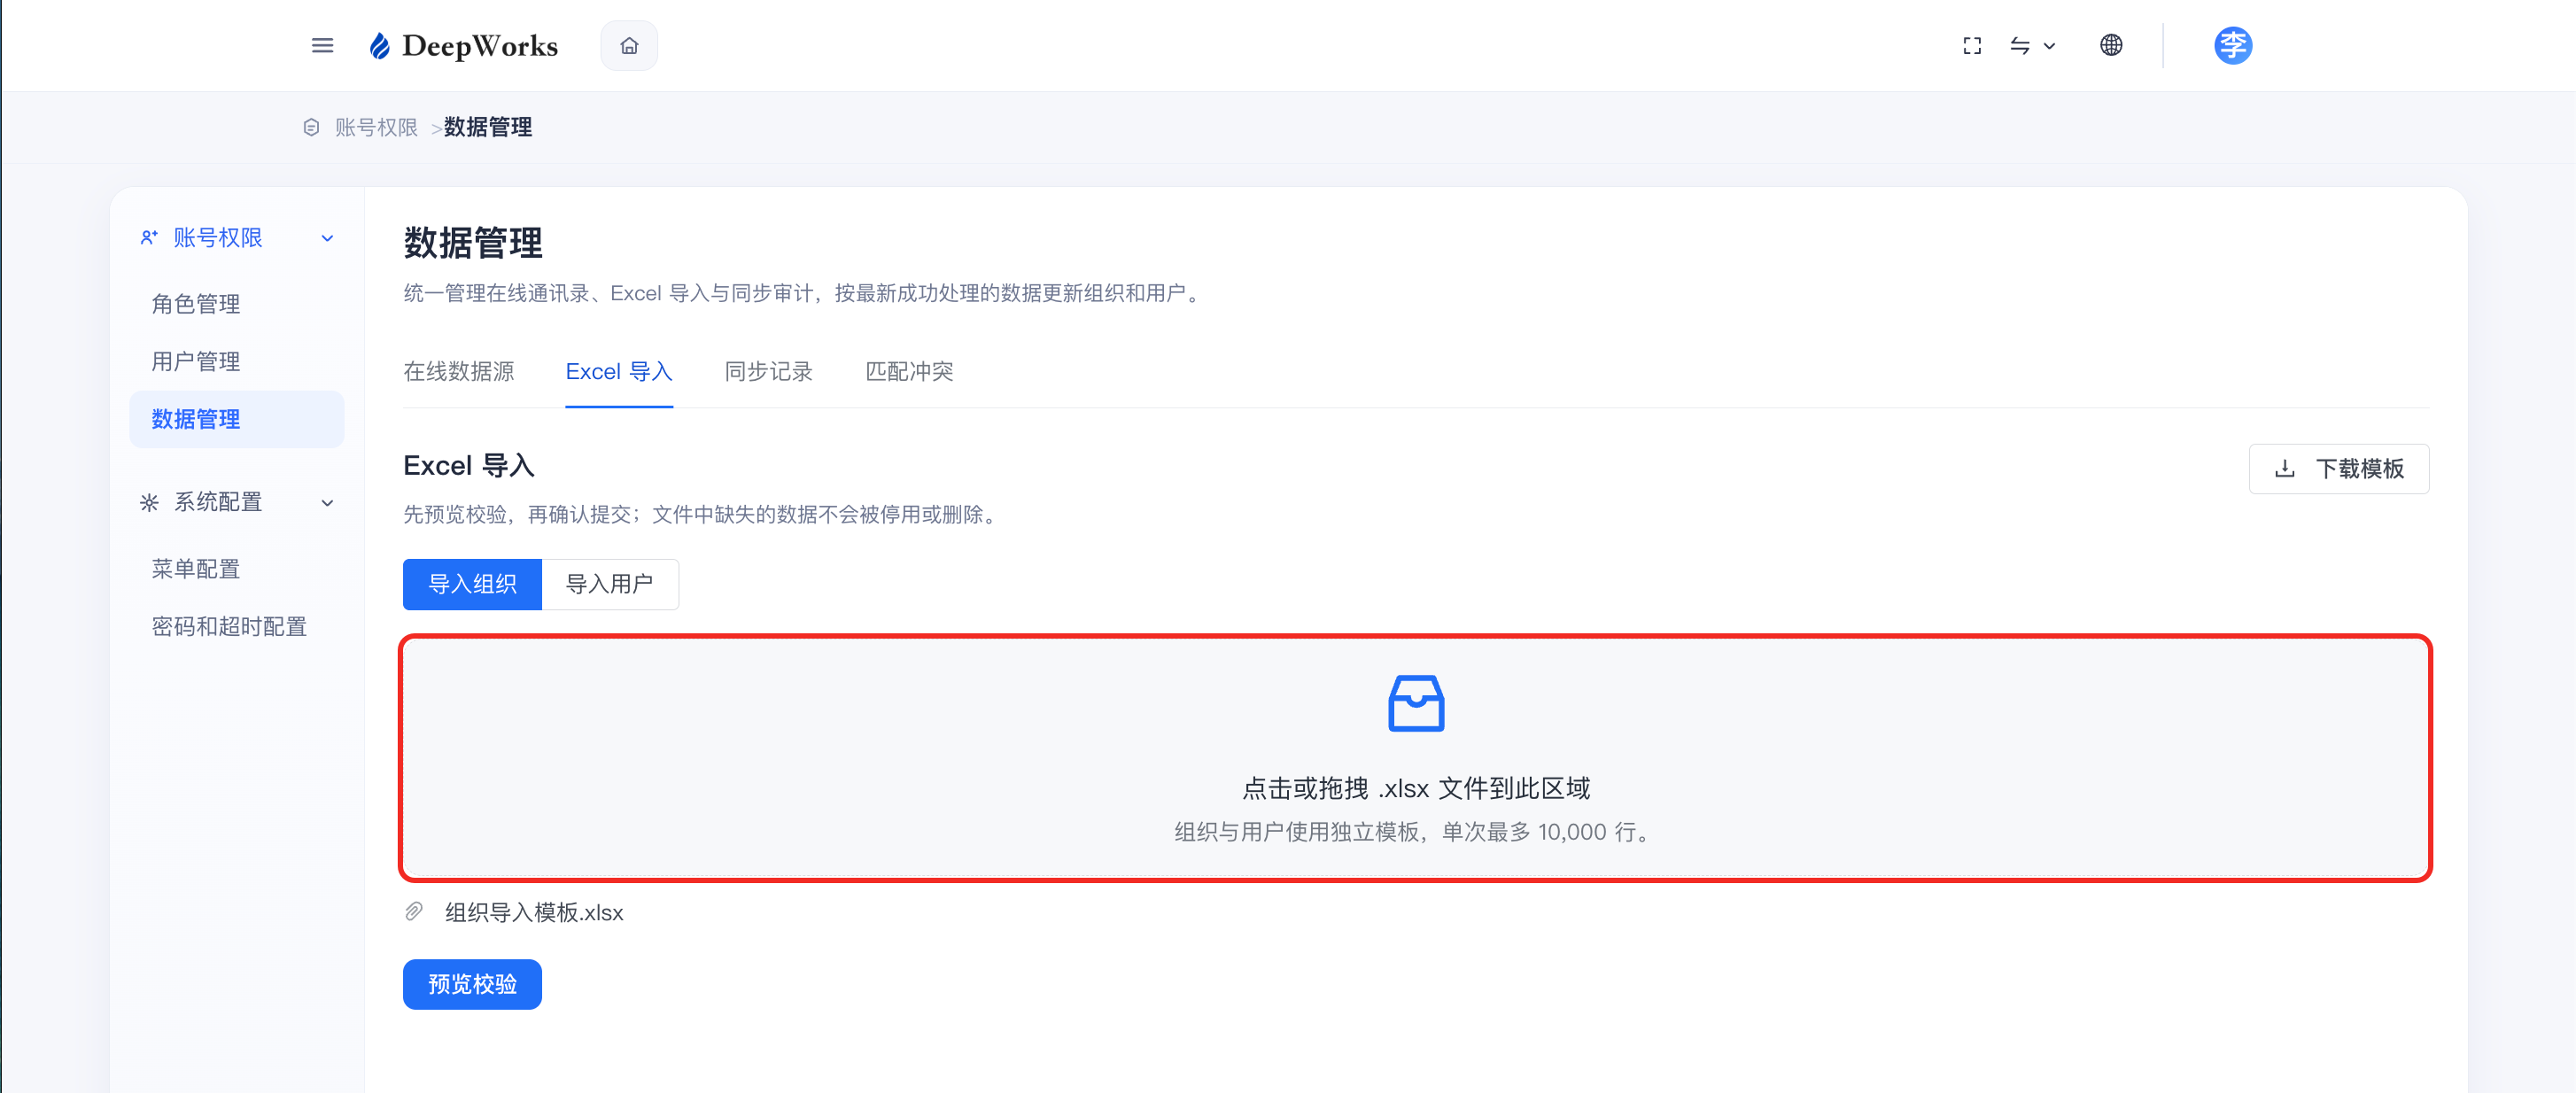
c. After filling in the required new/updated organization information in Excel, click or drag the file to the upload area.
d. Click “Preview Verification” to preview online and check whether the data can be imported normally. If there is any problem with the verification, you can click “Export Error Details”.
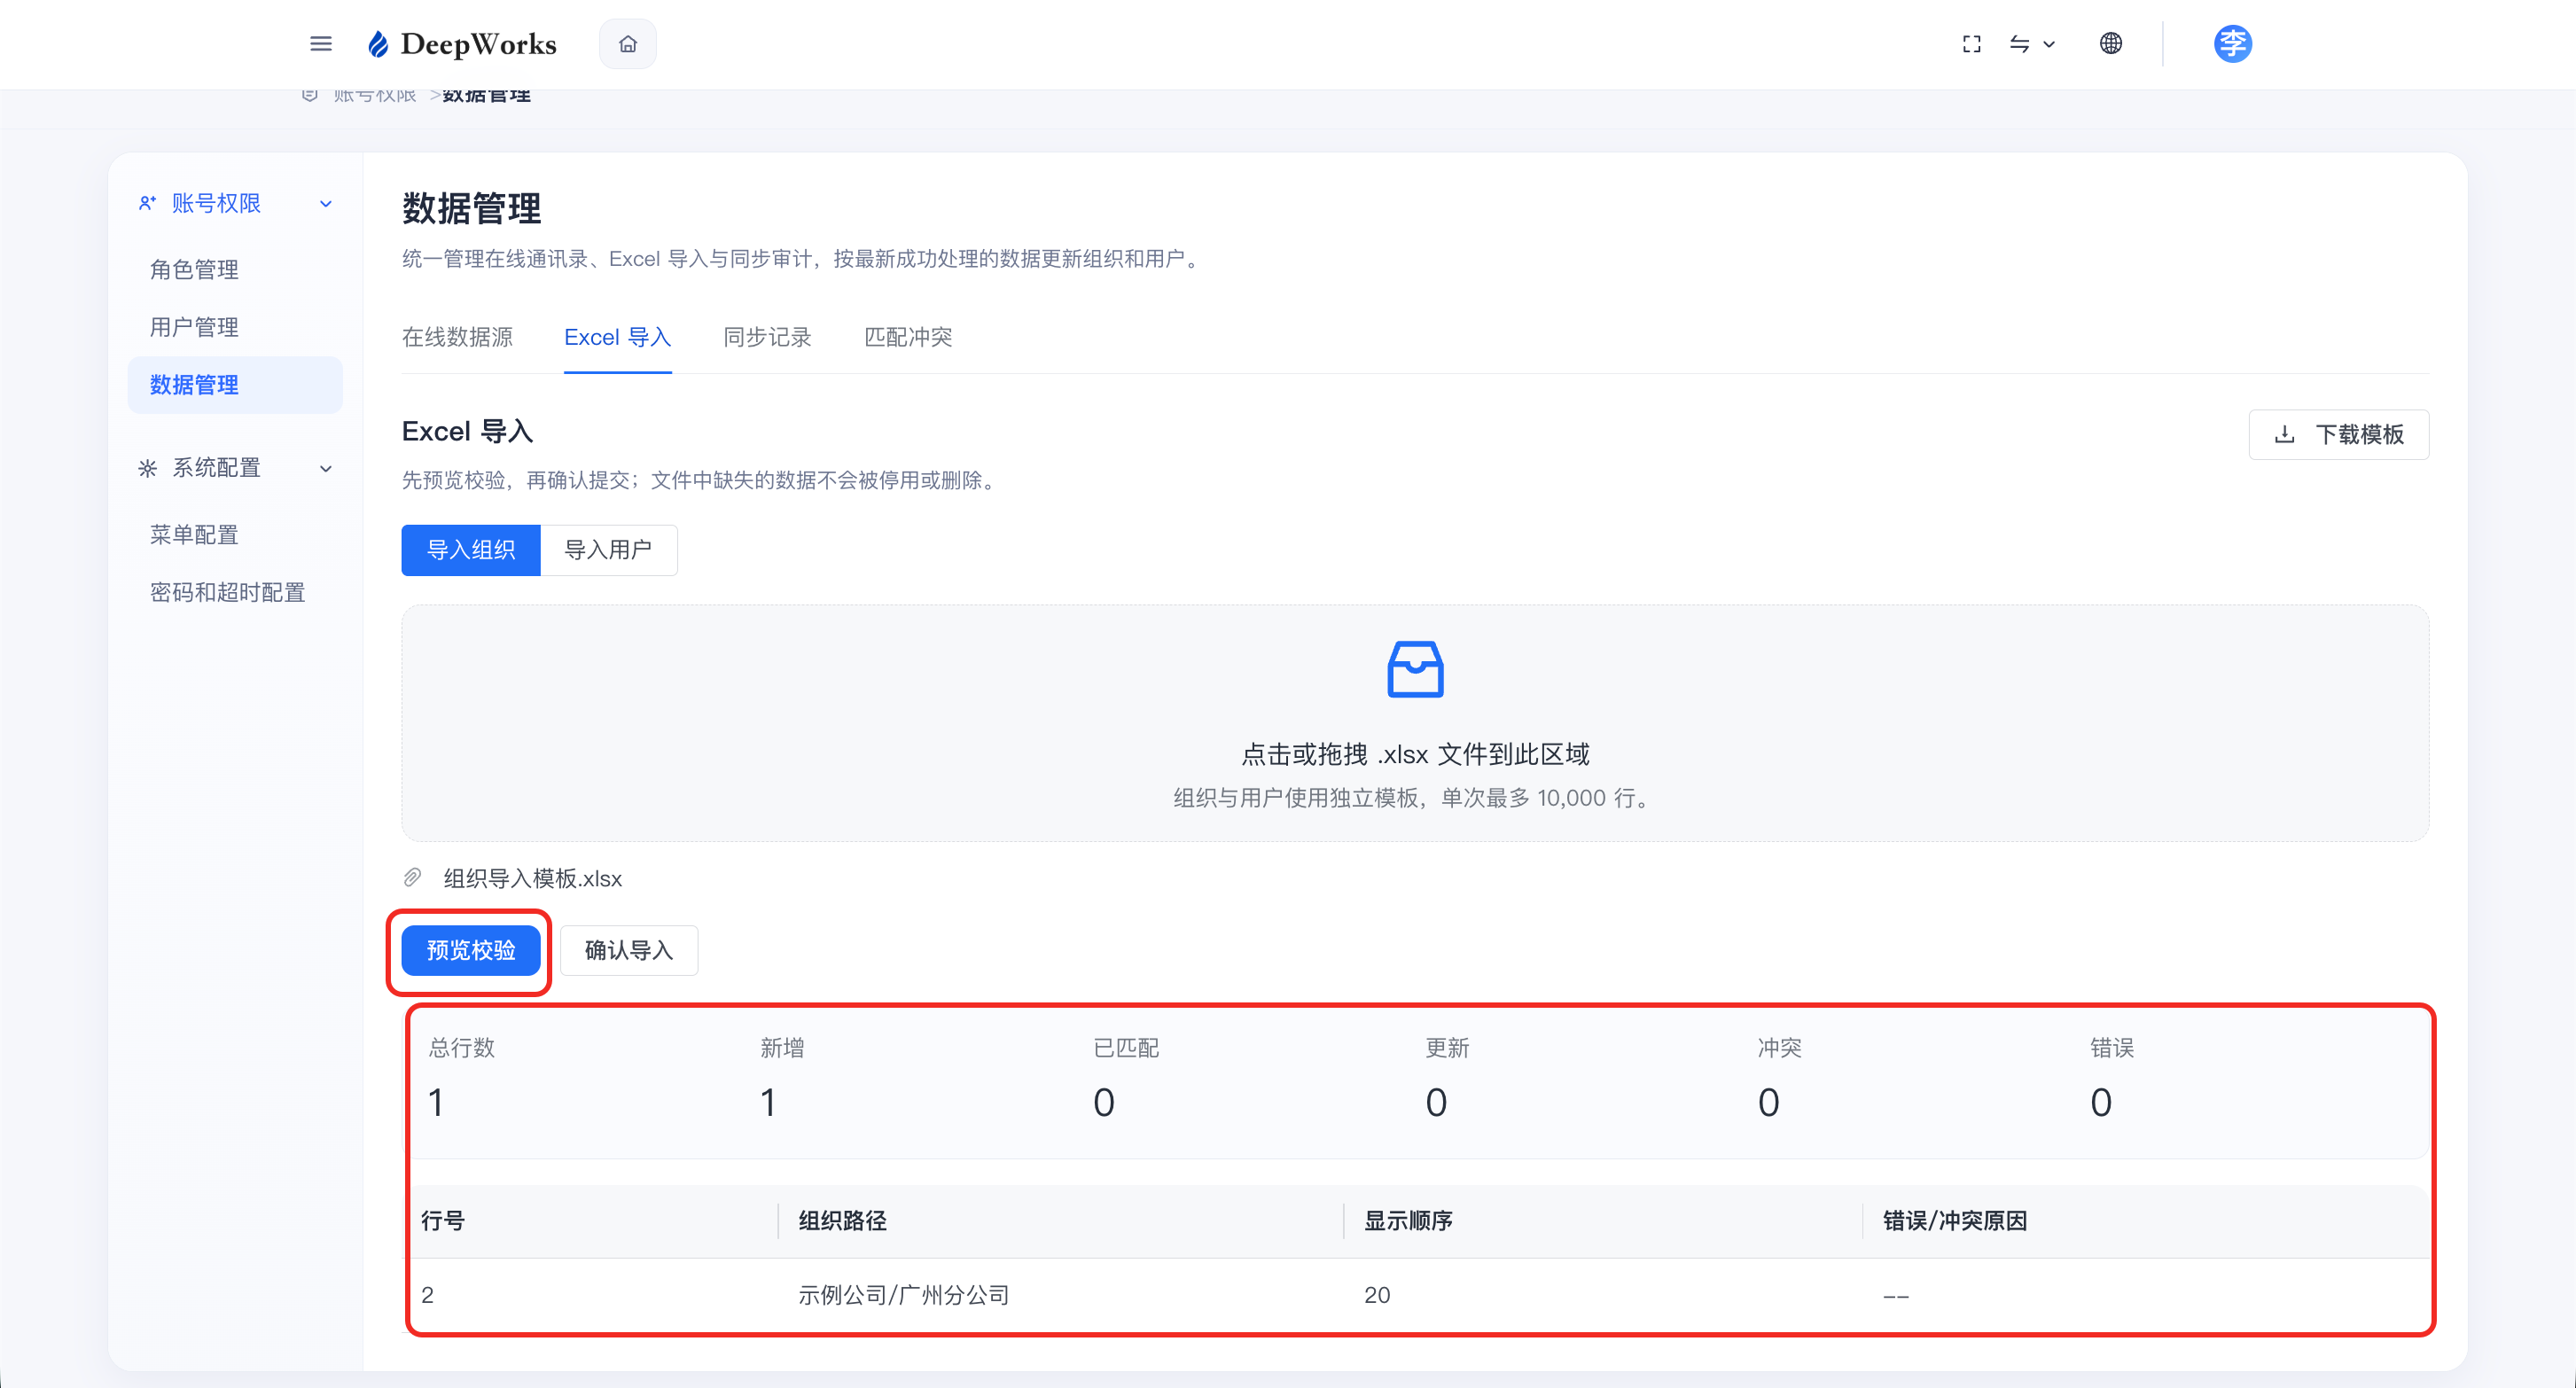
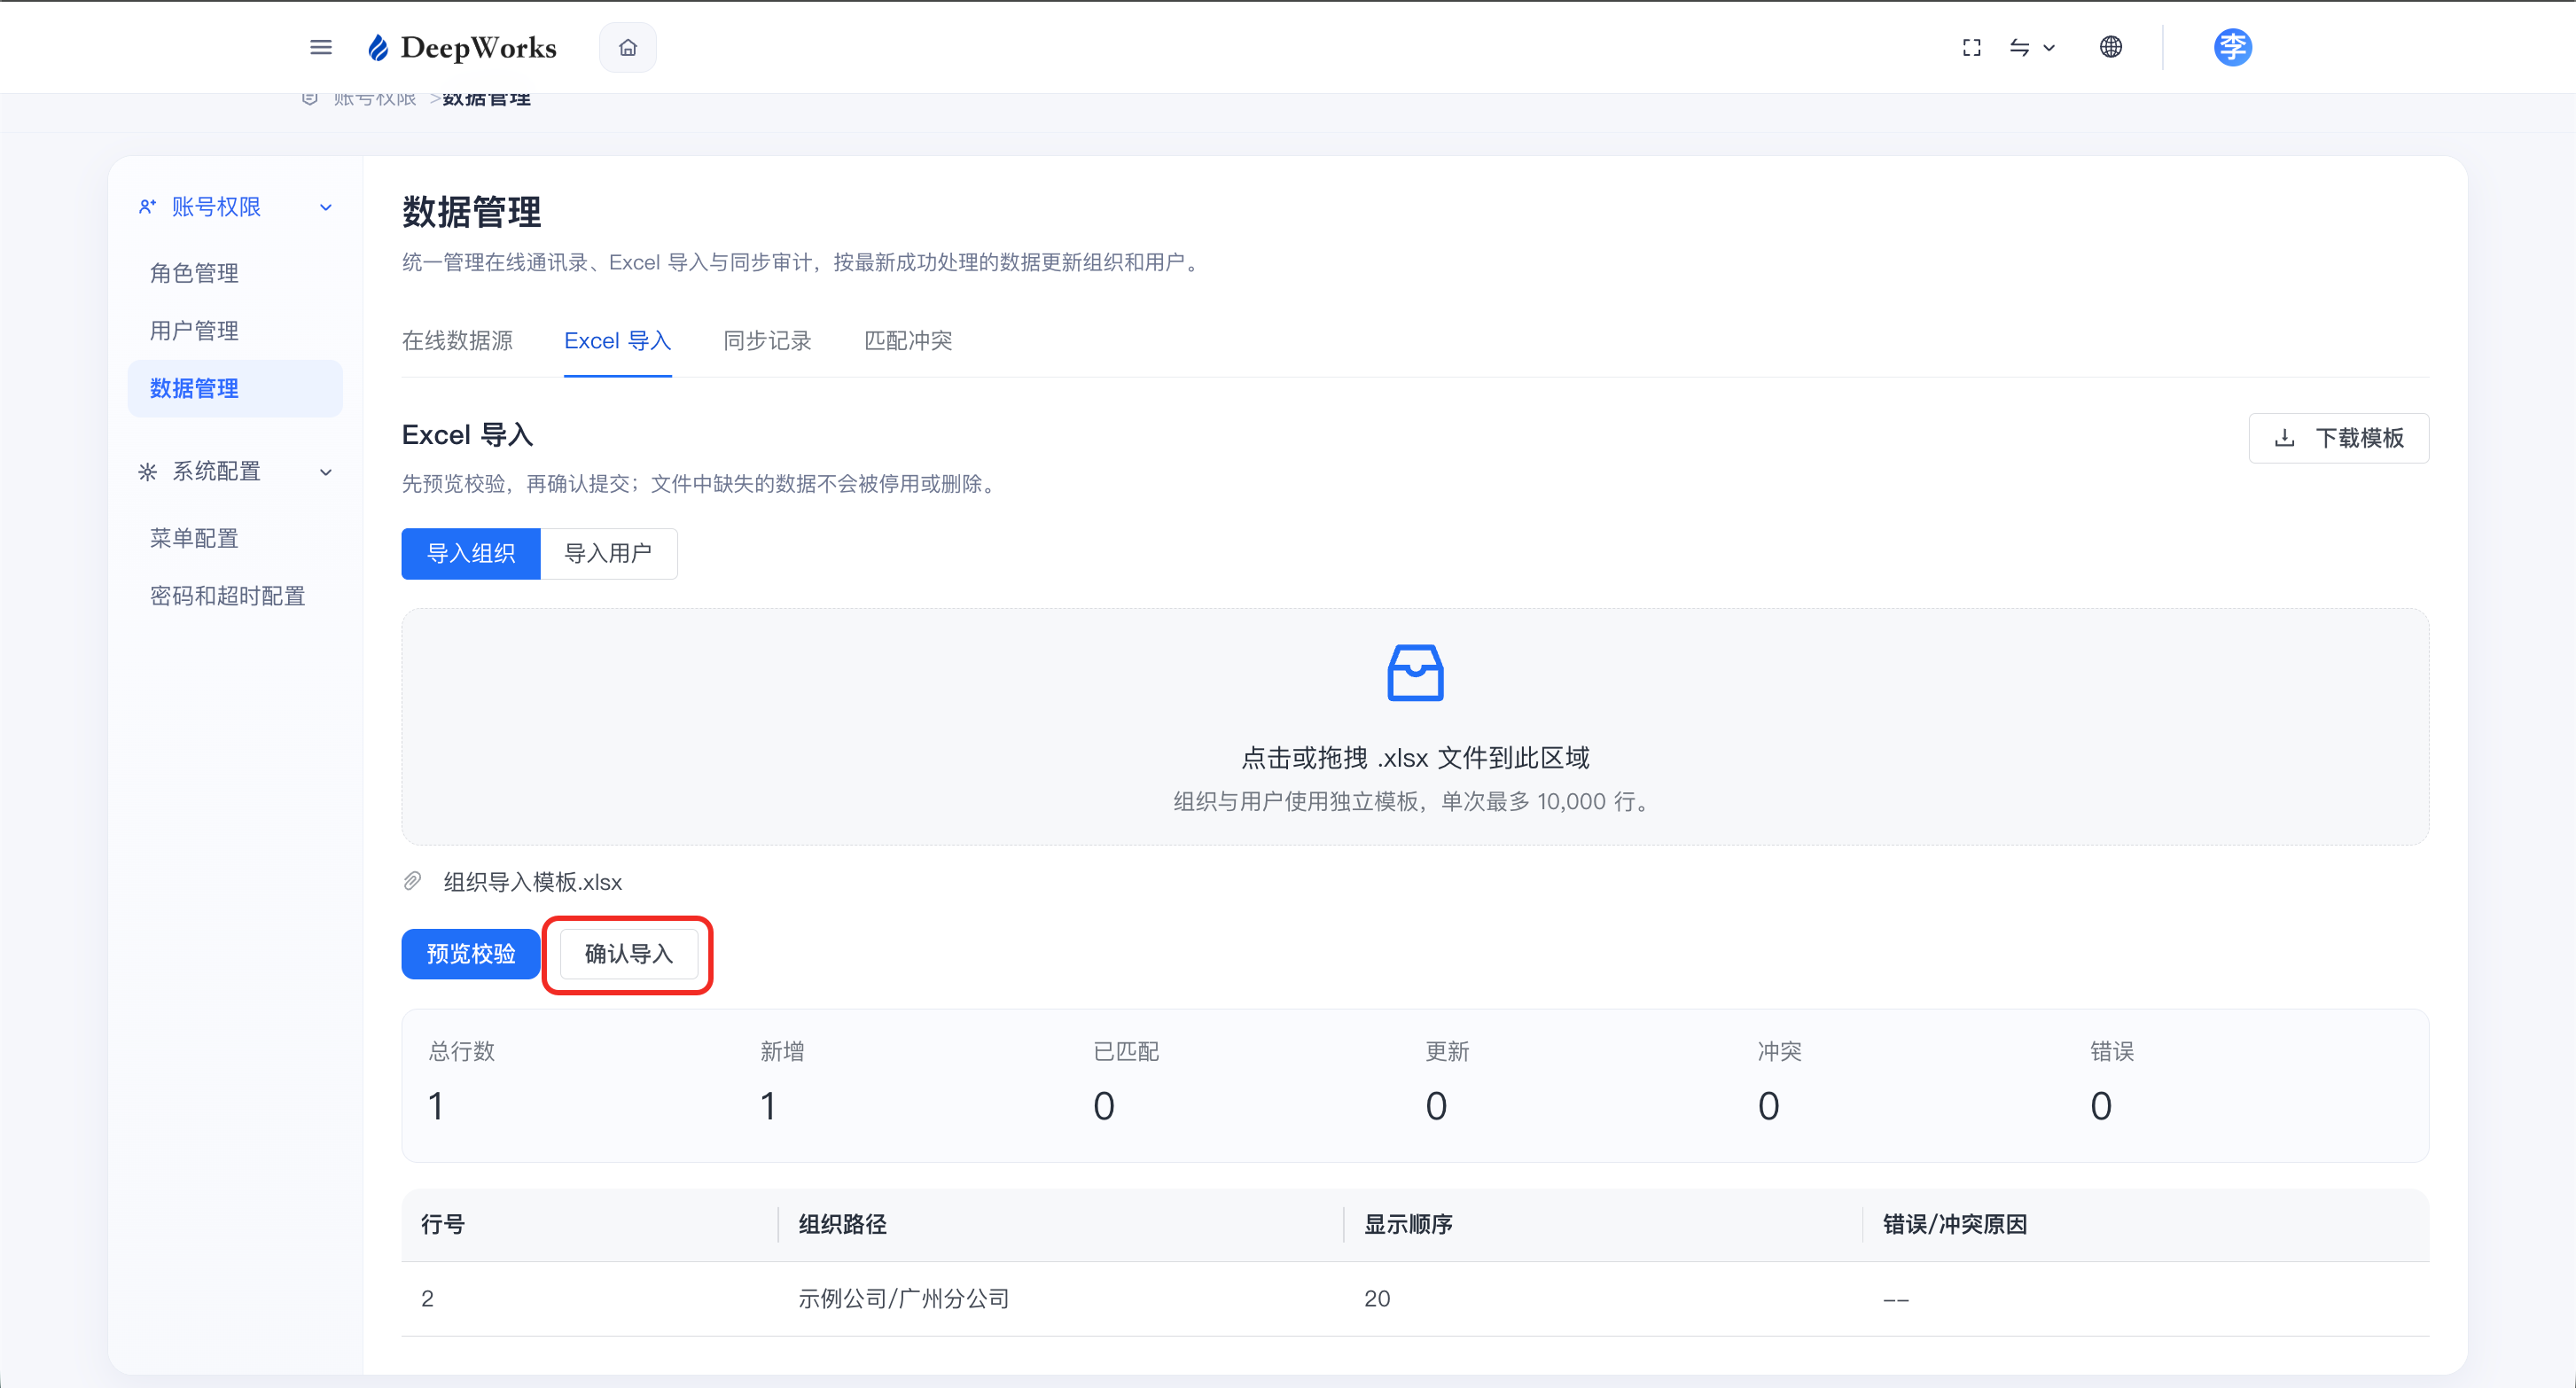
e. After confirming that the imported data is correct, you can click “Confirm Import”.
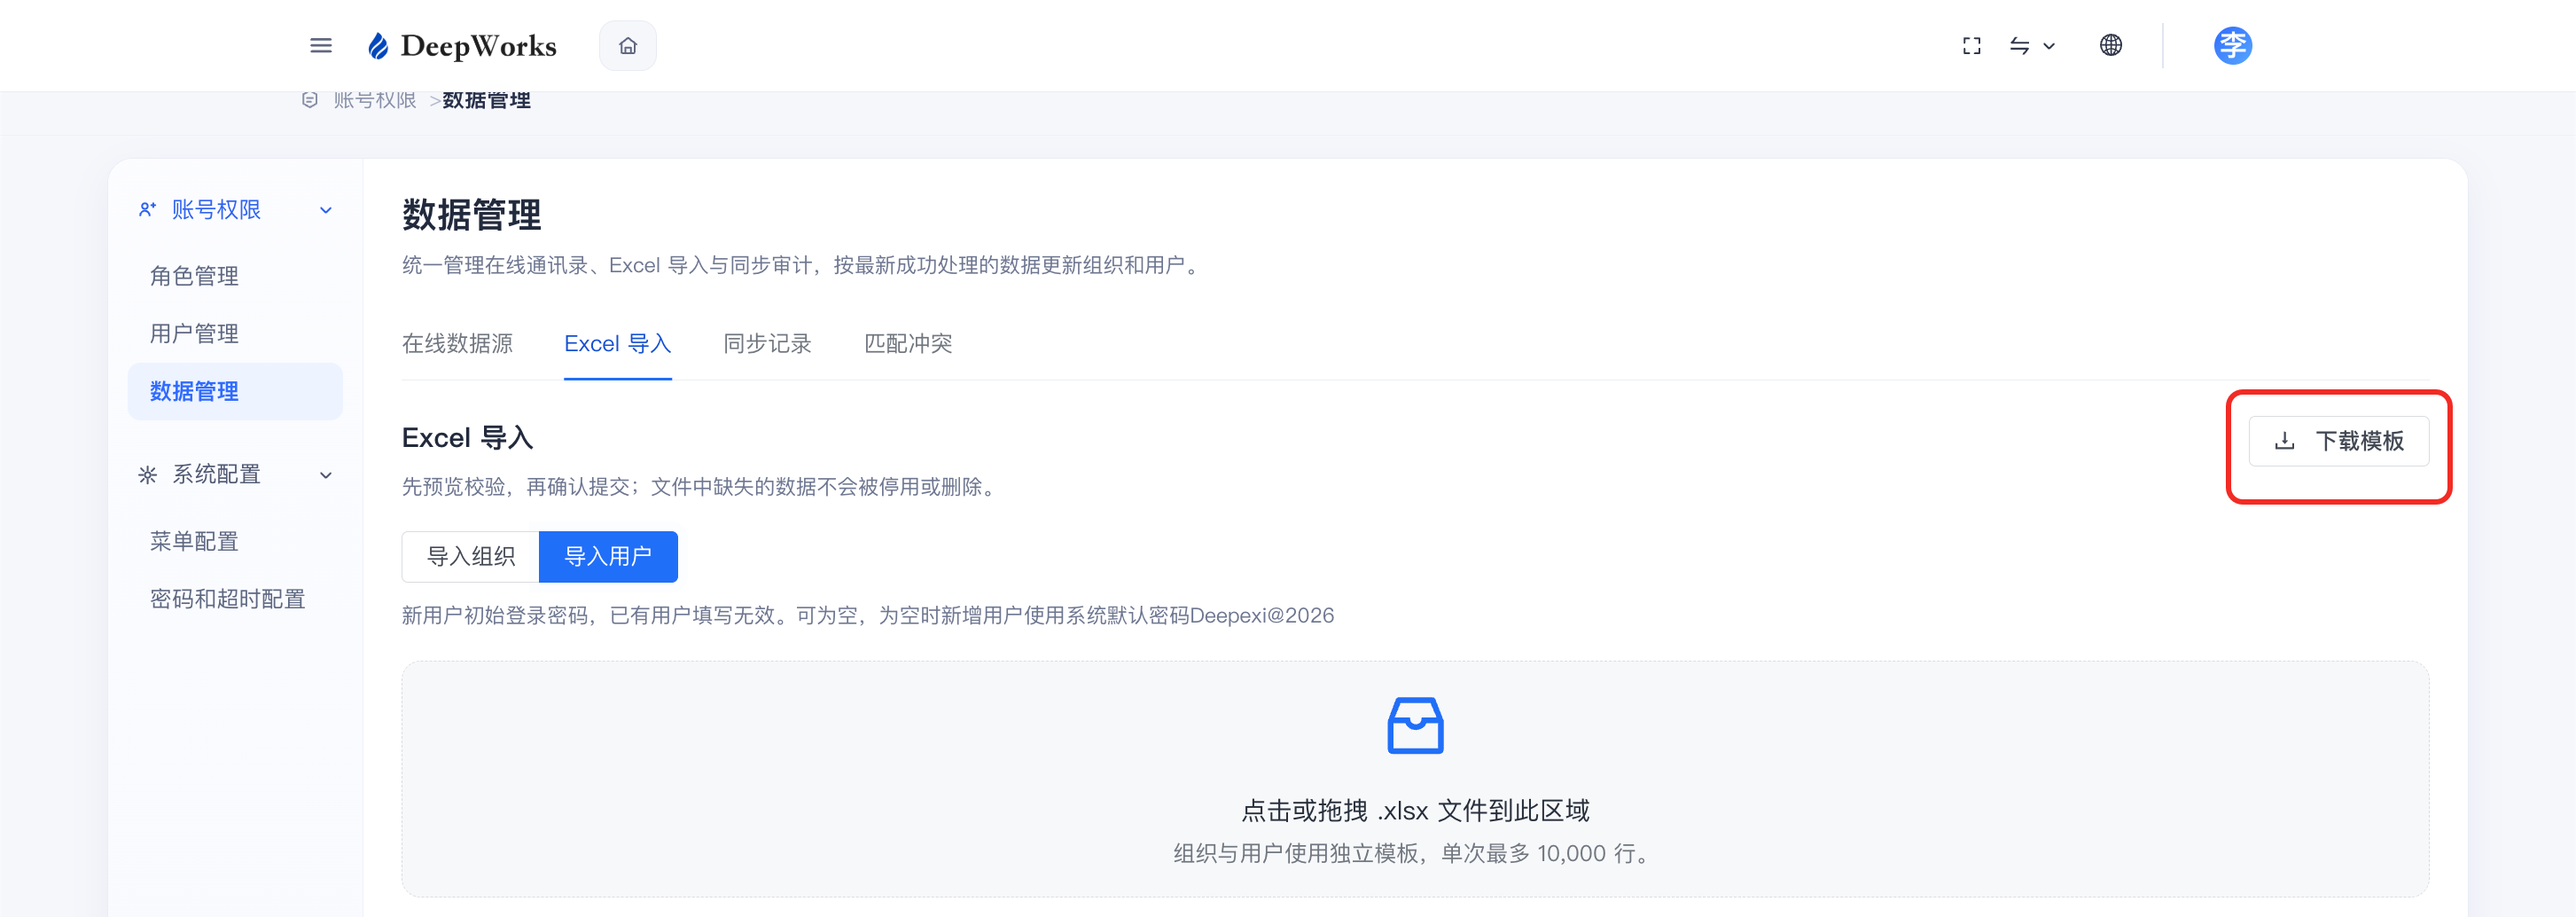
f. Import users; download the user import template.
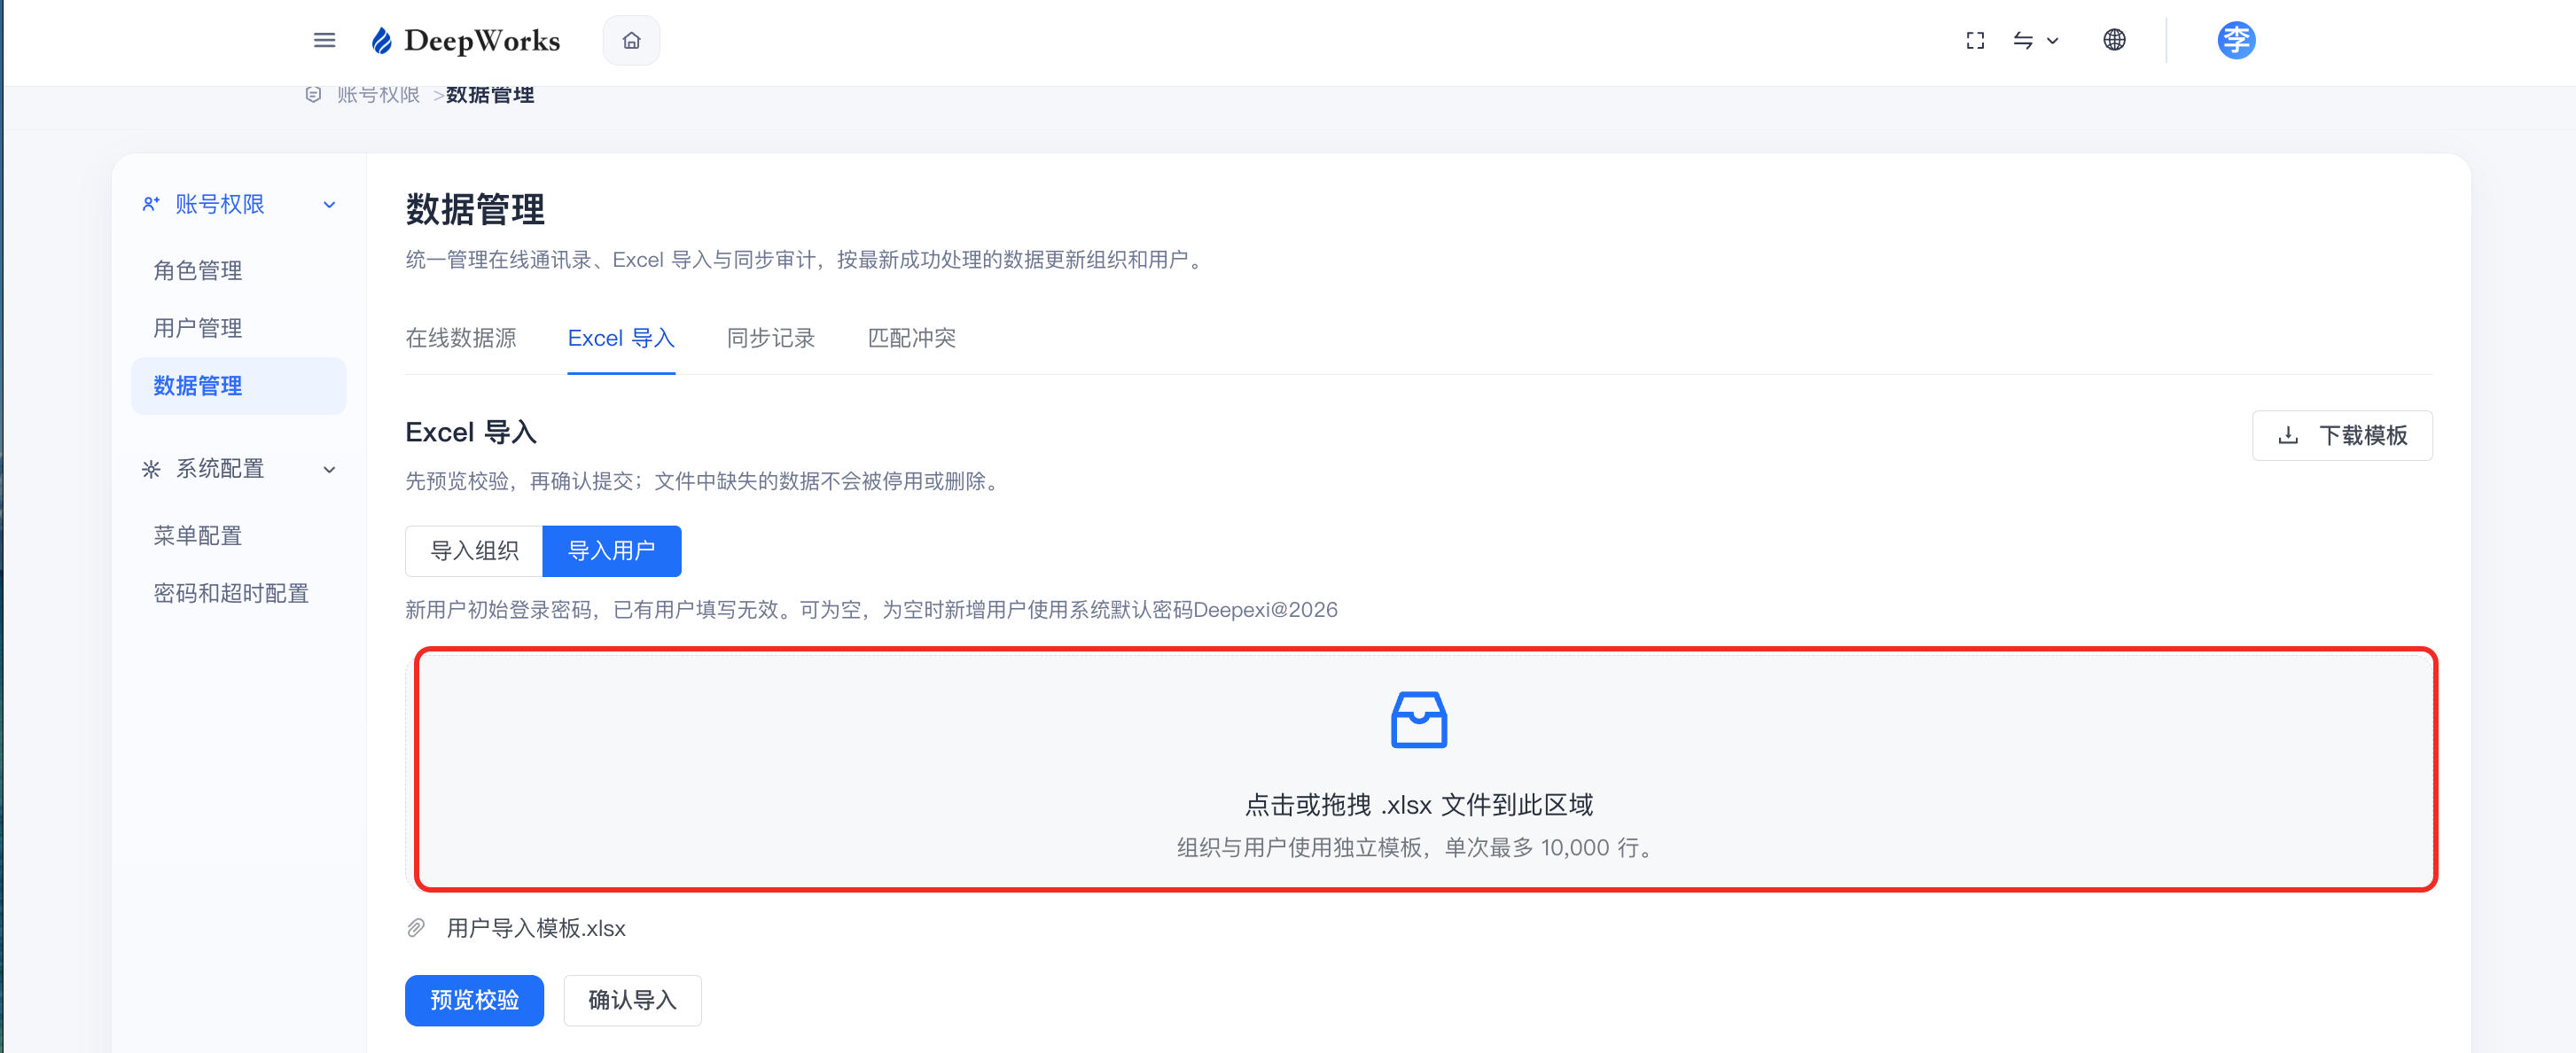
g. After filling in the required new/updated user information in Excel, click or drag the file to the upload area.
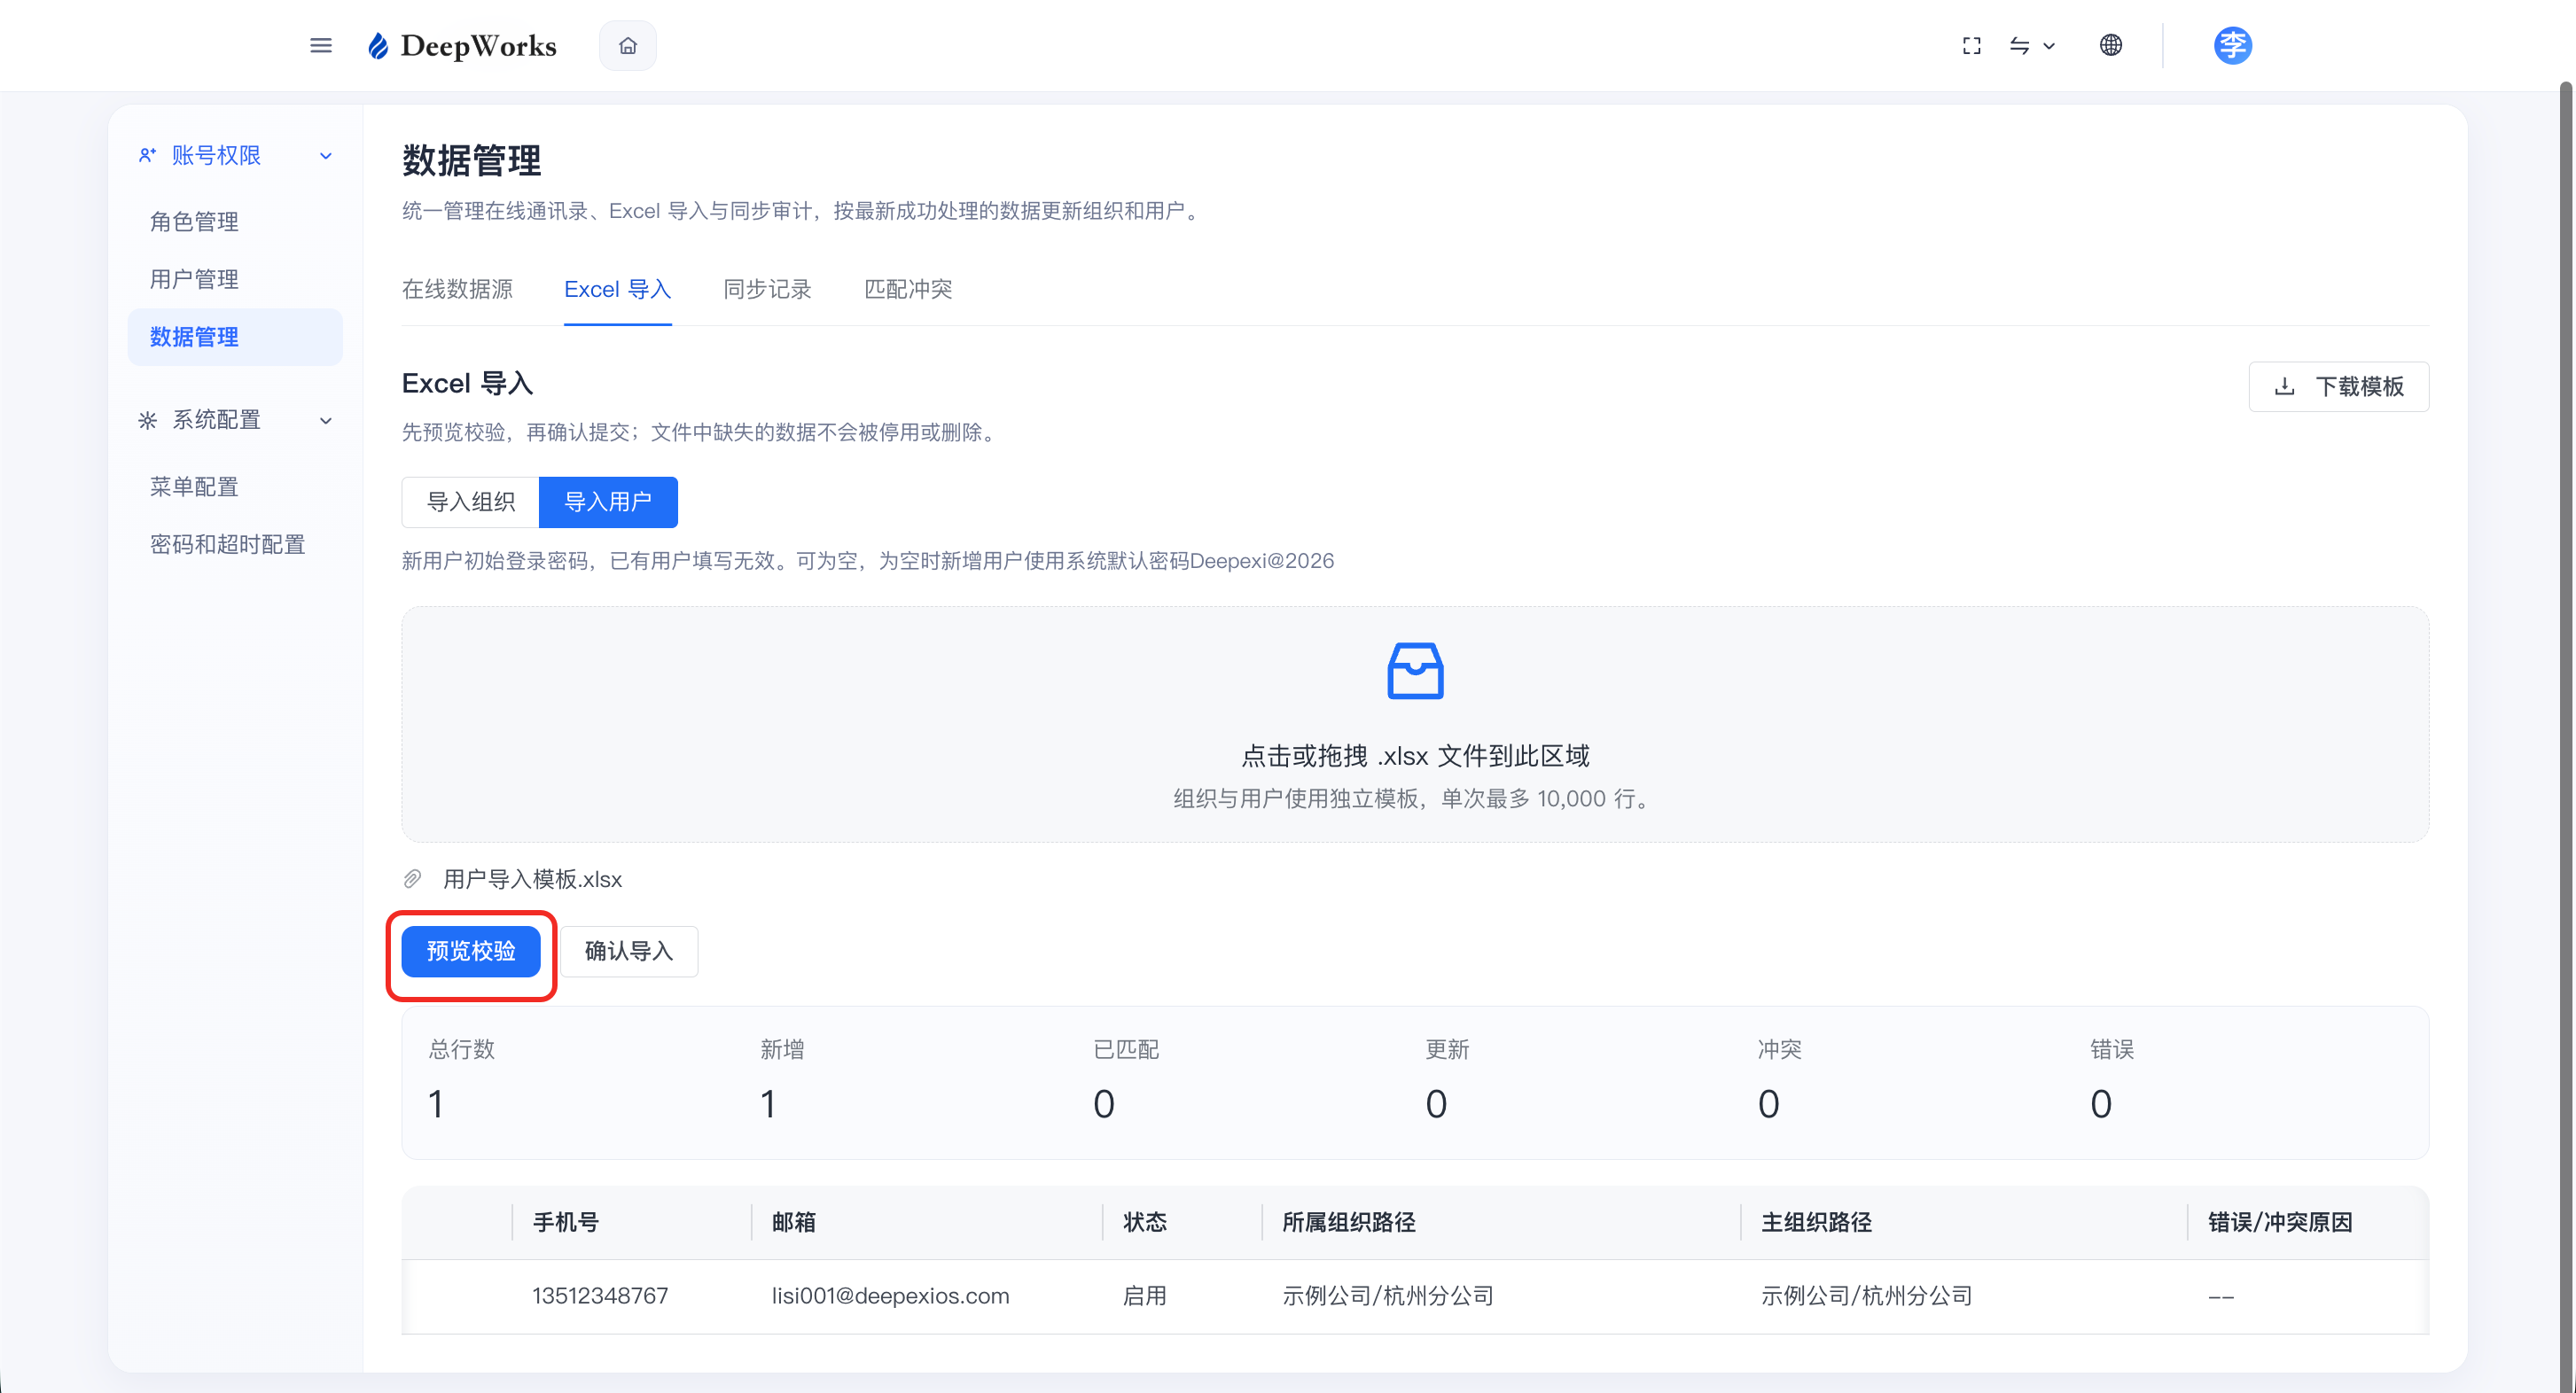
h. Click “Preview and Verify” to preview online and check whether the data can be imported normally. If there are any problems during verification, you can click “Export Error Details”.
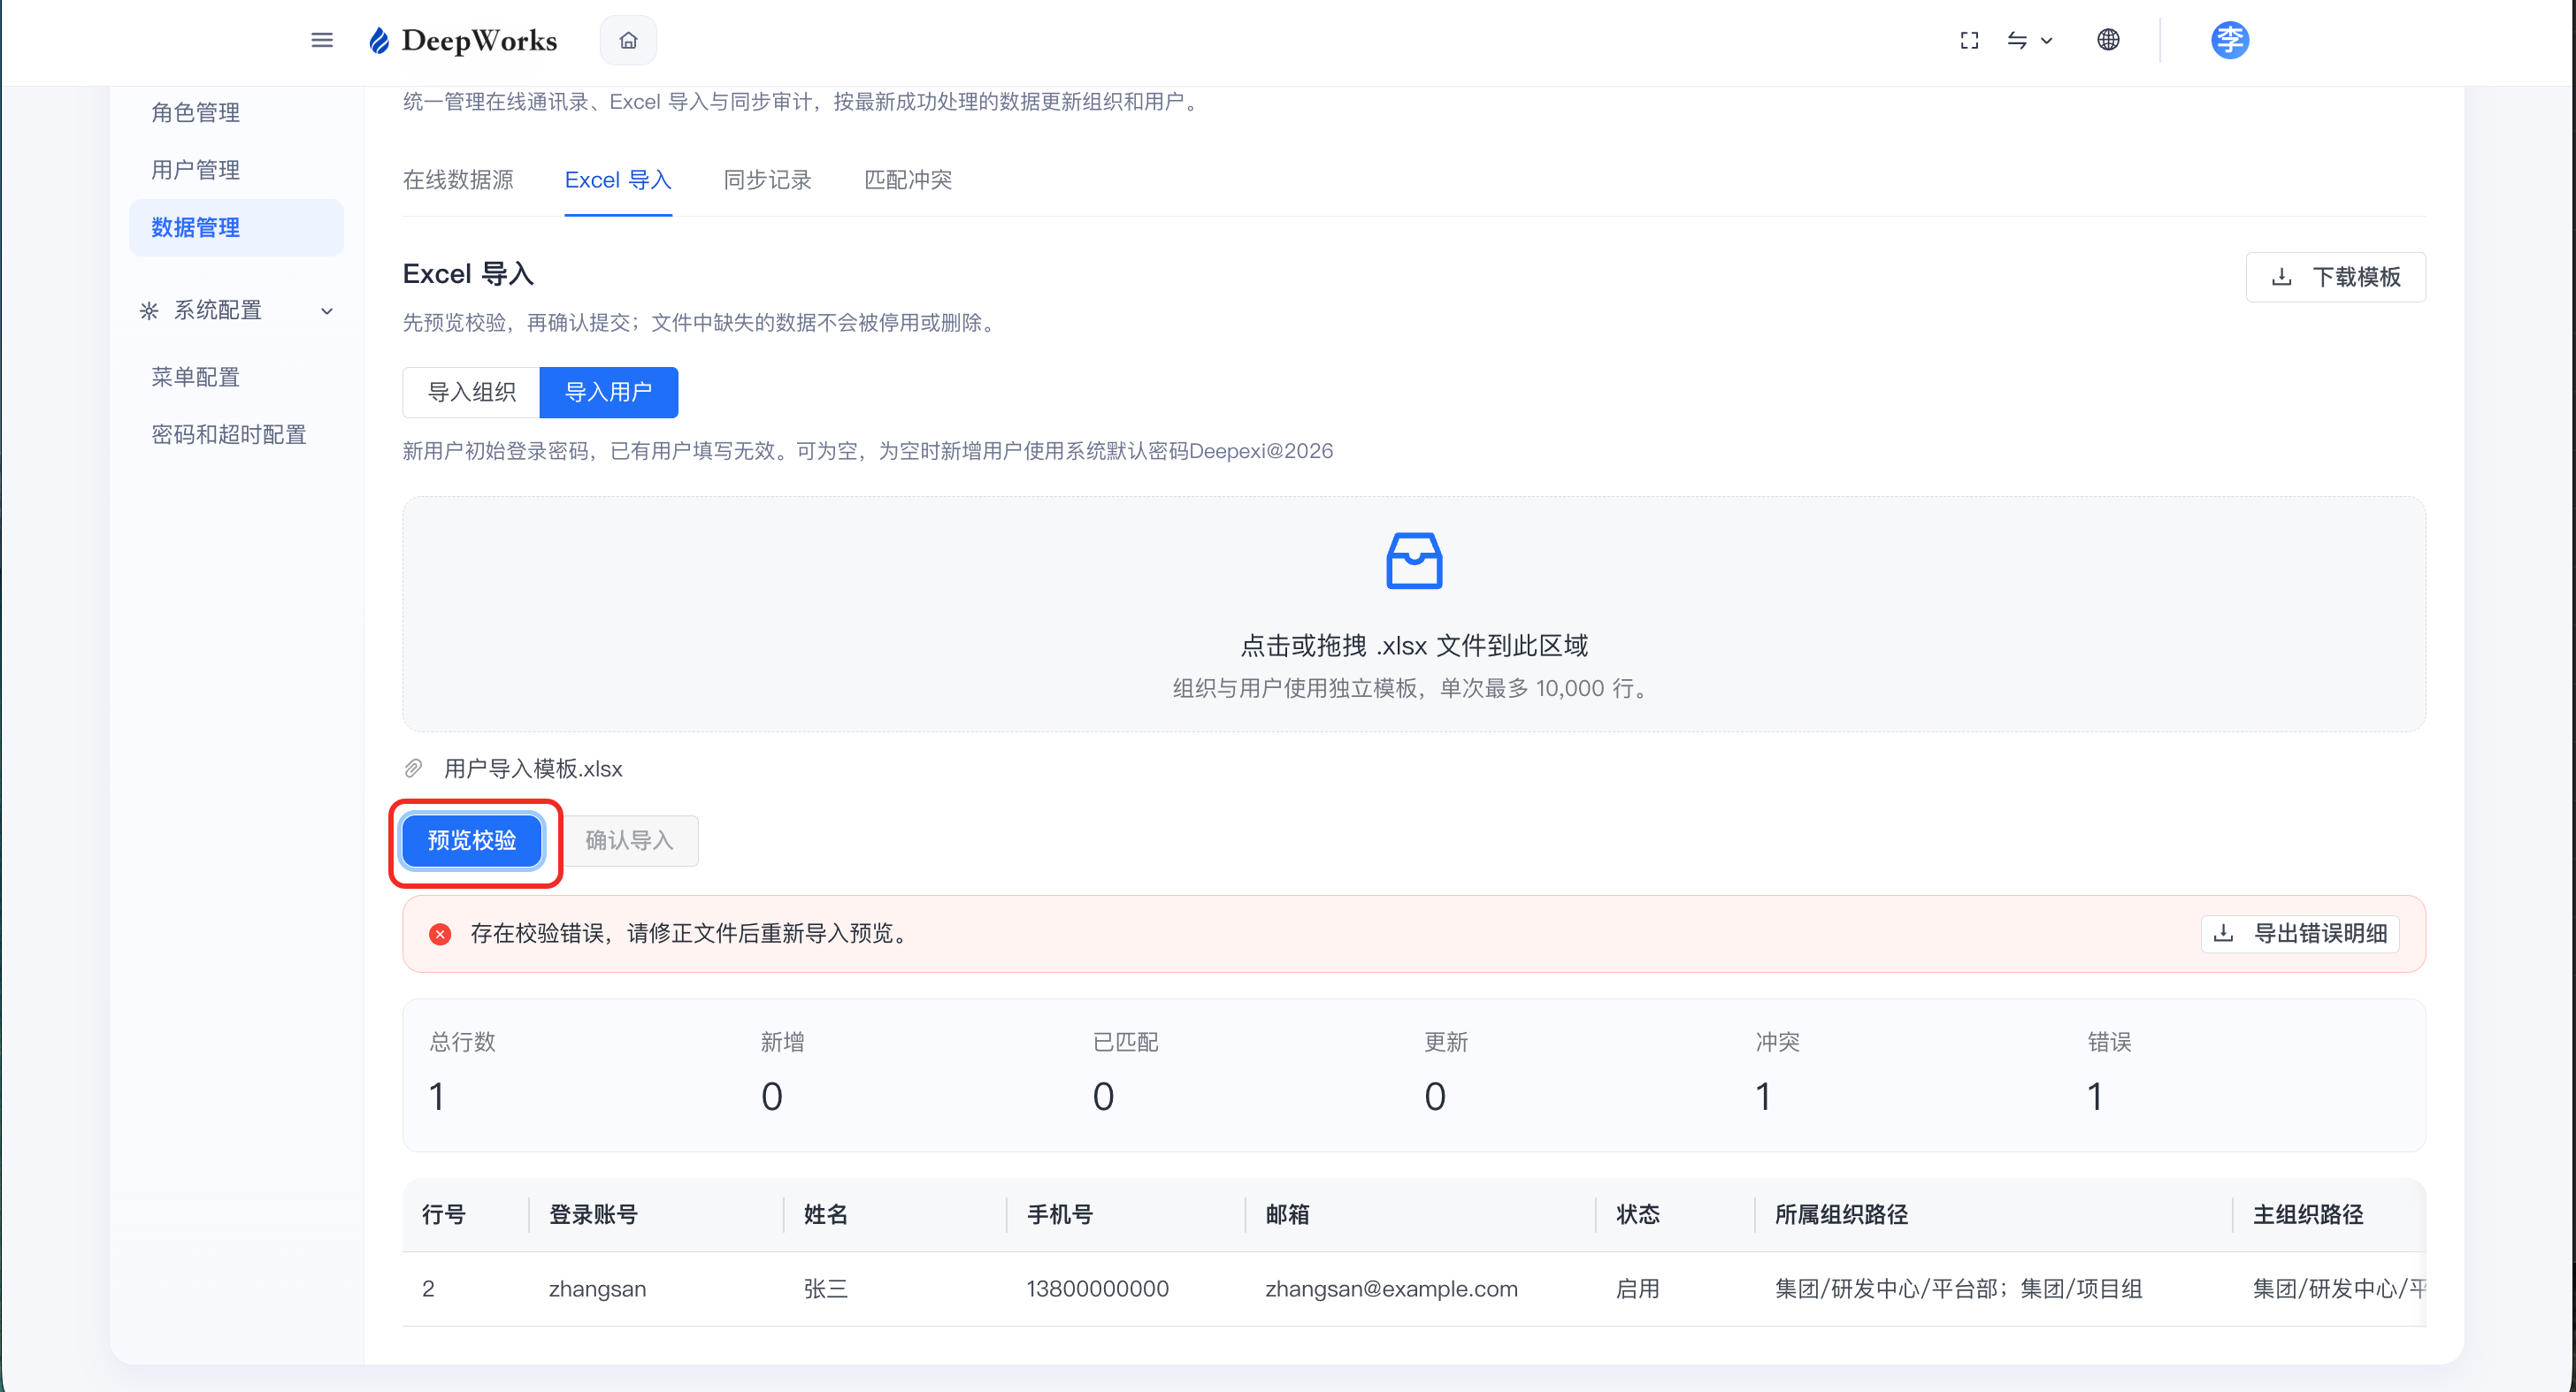
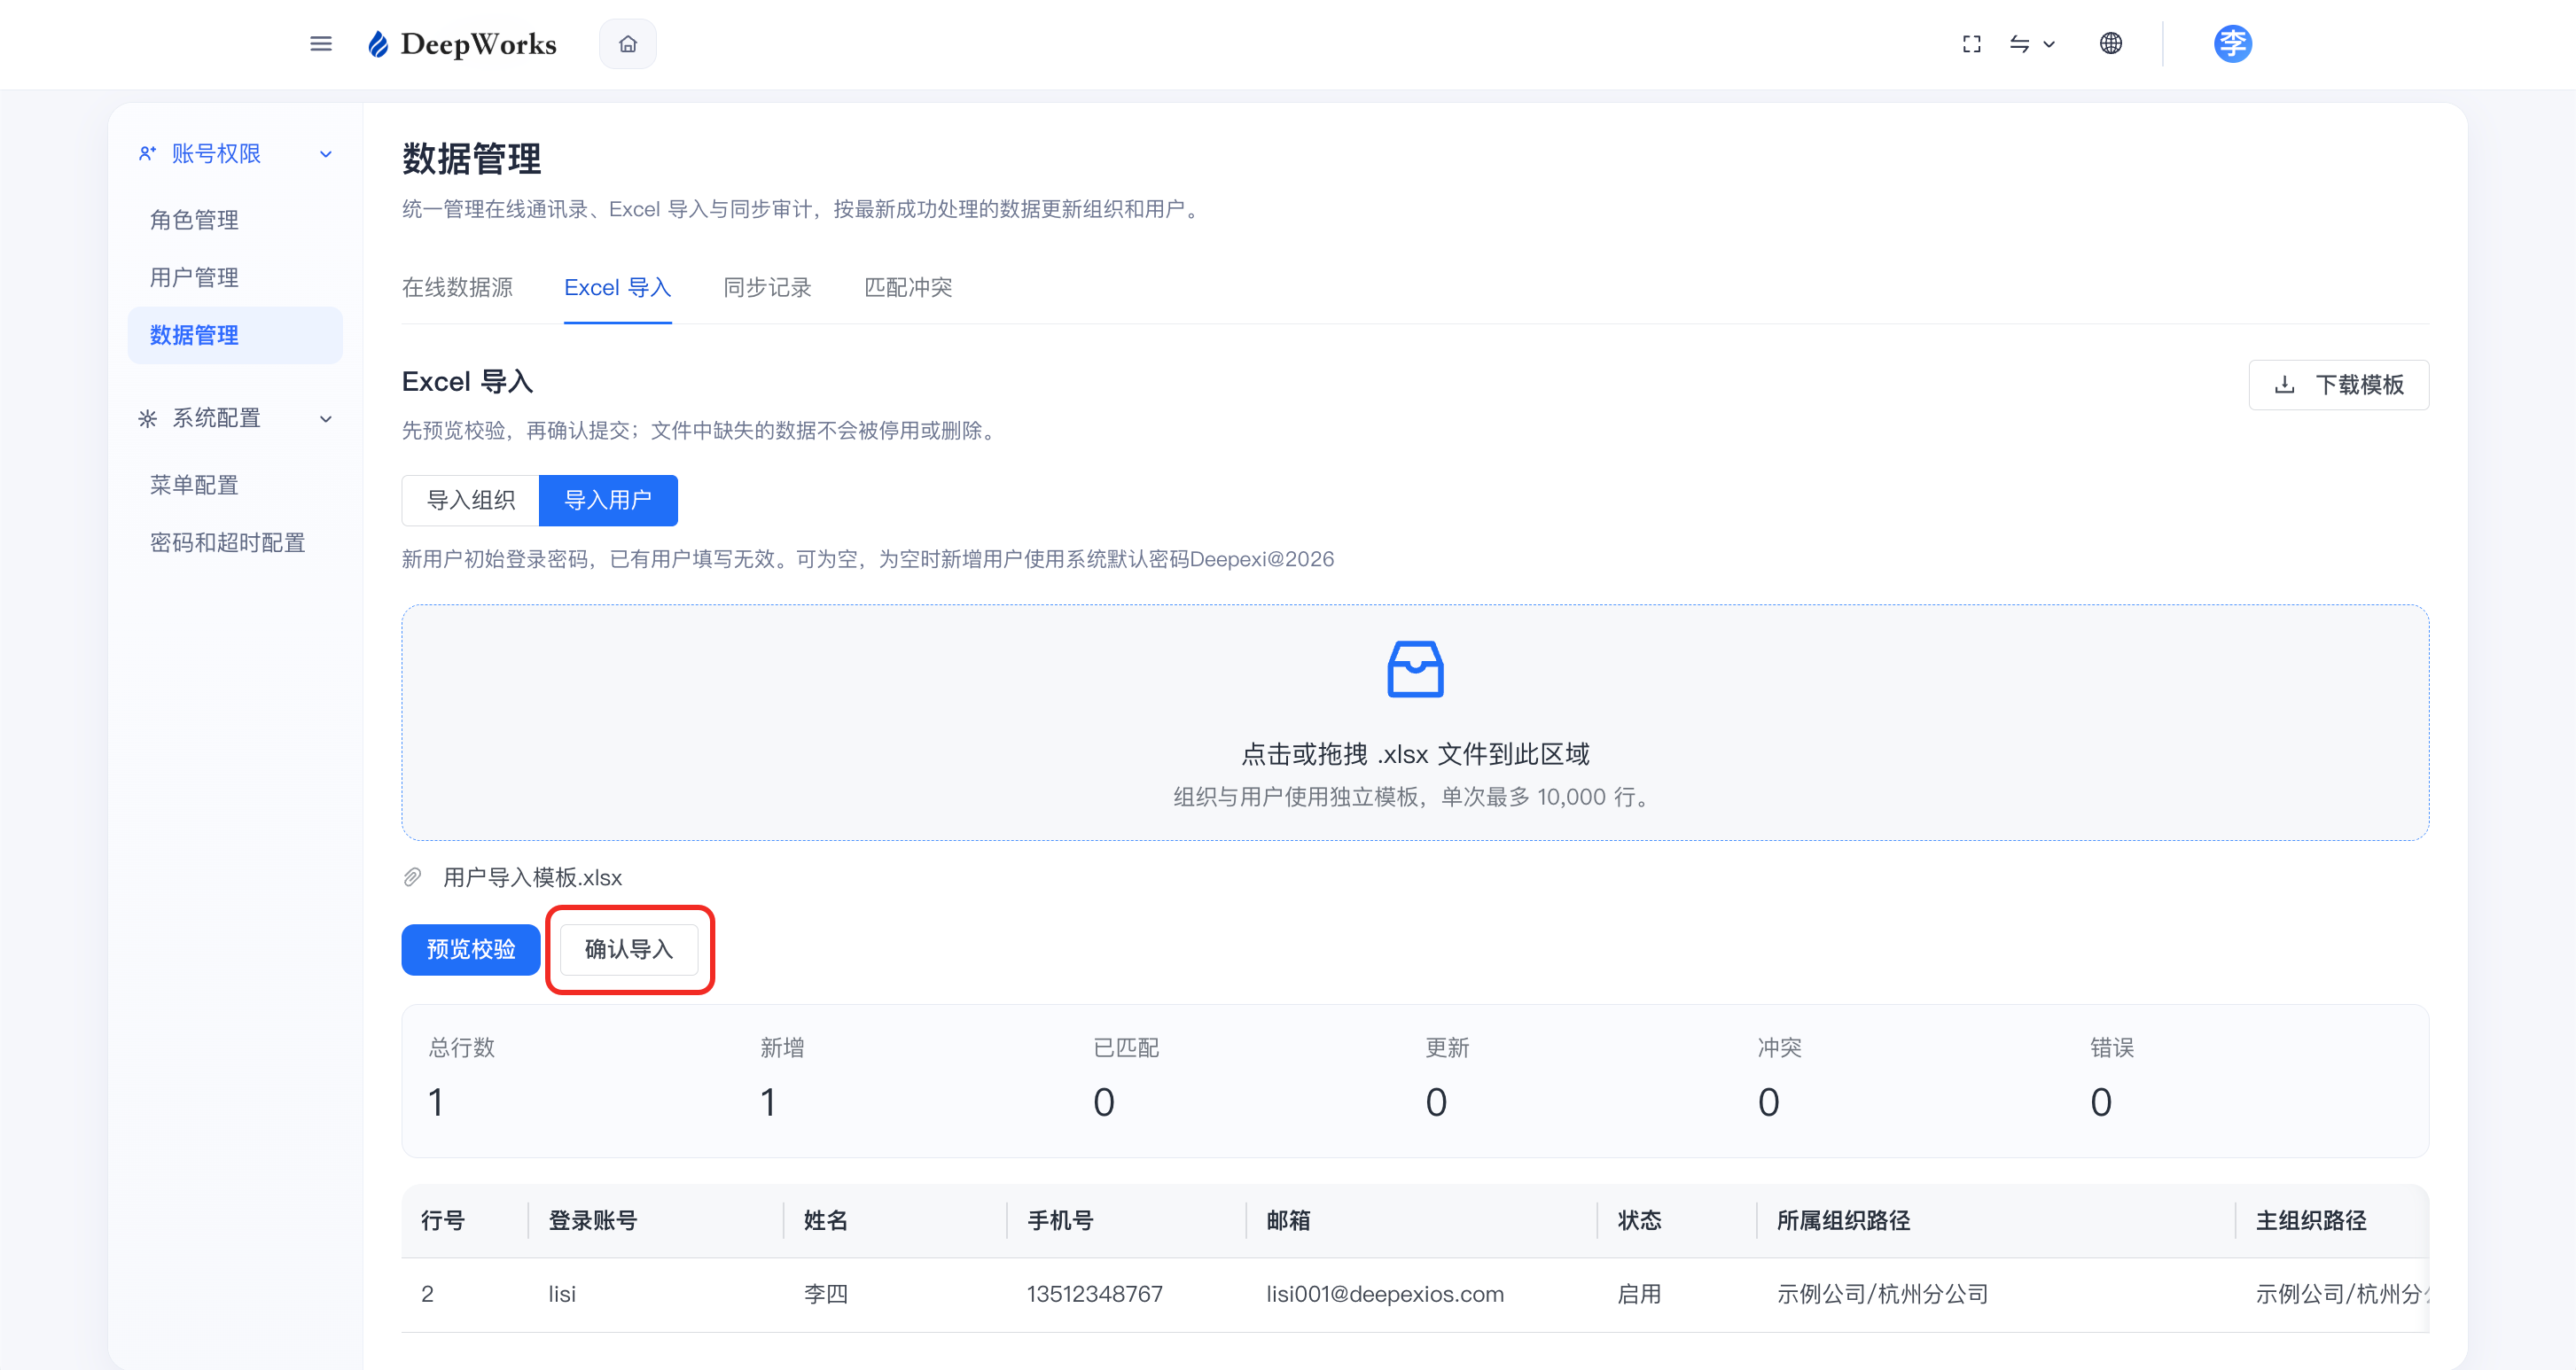
i. After confirming that the imported data is correct, you can click “Confirm Import”.
Workflow and AI Colleagues
Project Space
View Project Space
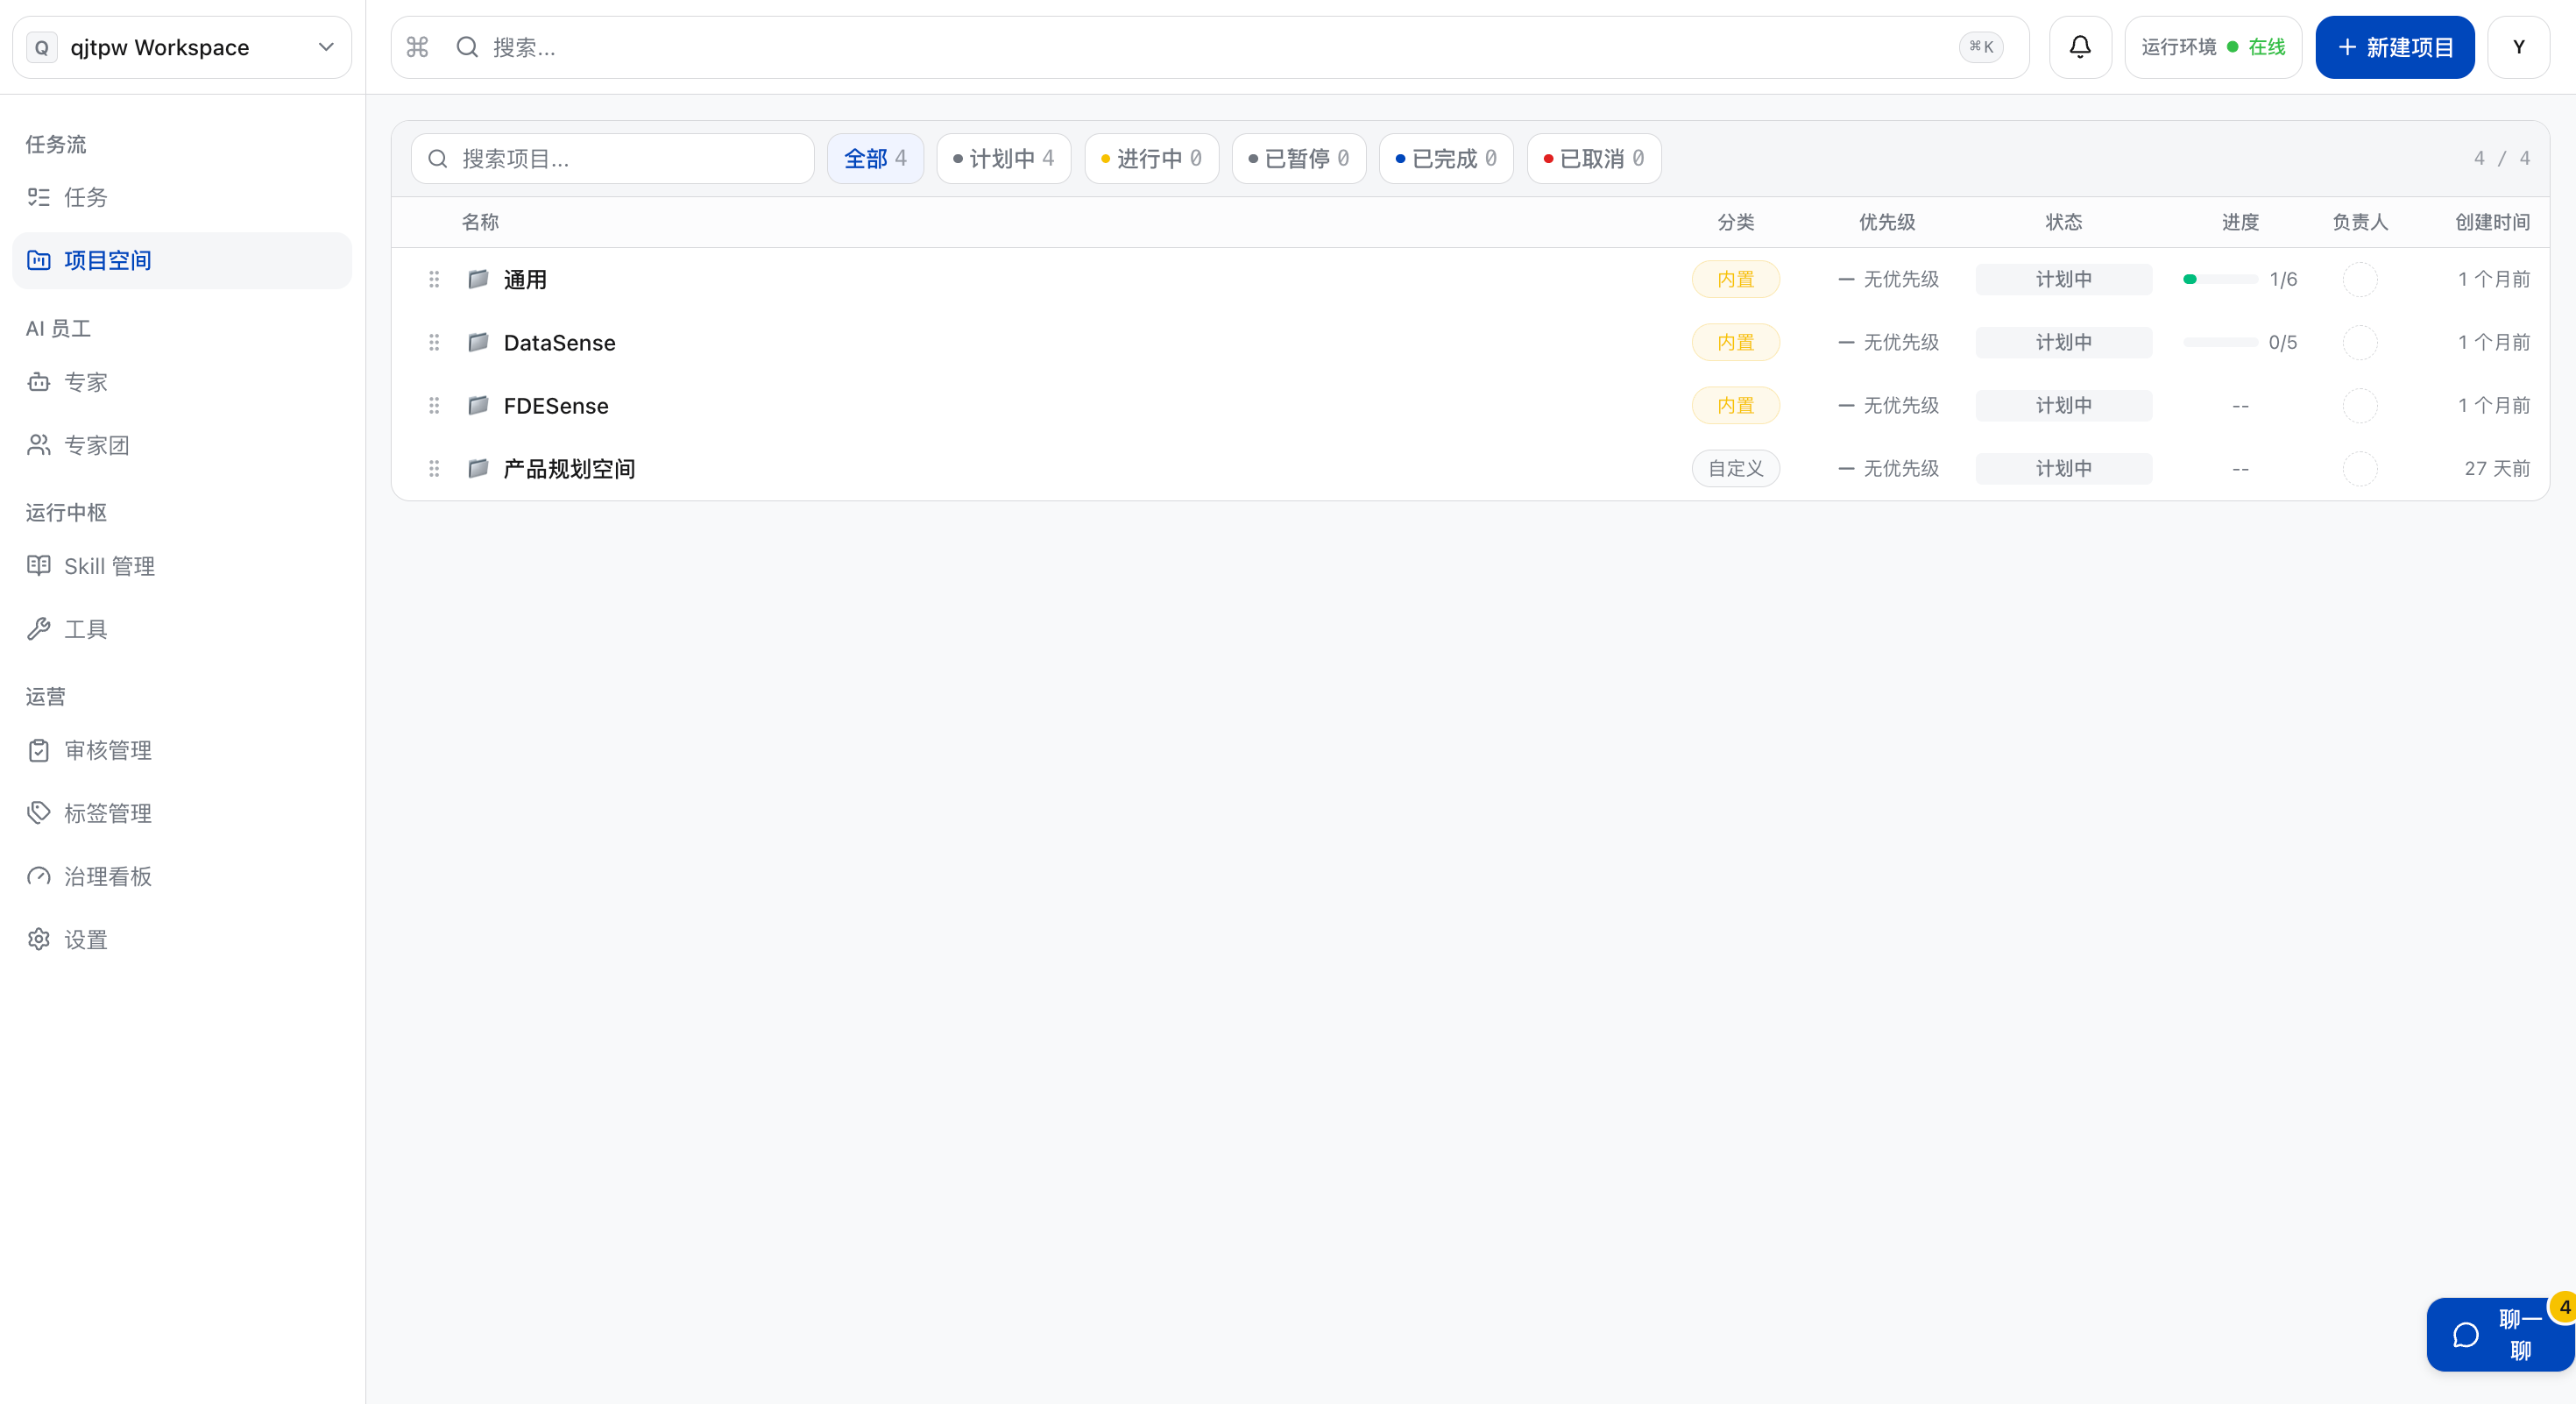
Click “Project Space” in the left menu bar, and administrators can view all project spaces under this tenant. Among them, the four project spaces “General”, “DataSense”, “FDESense” and “DeepSense” are platform-built-in project spaces that come by default after each tenant is initialized.
Create a new project space
a. Click “New Project Space”.
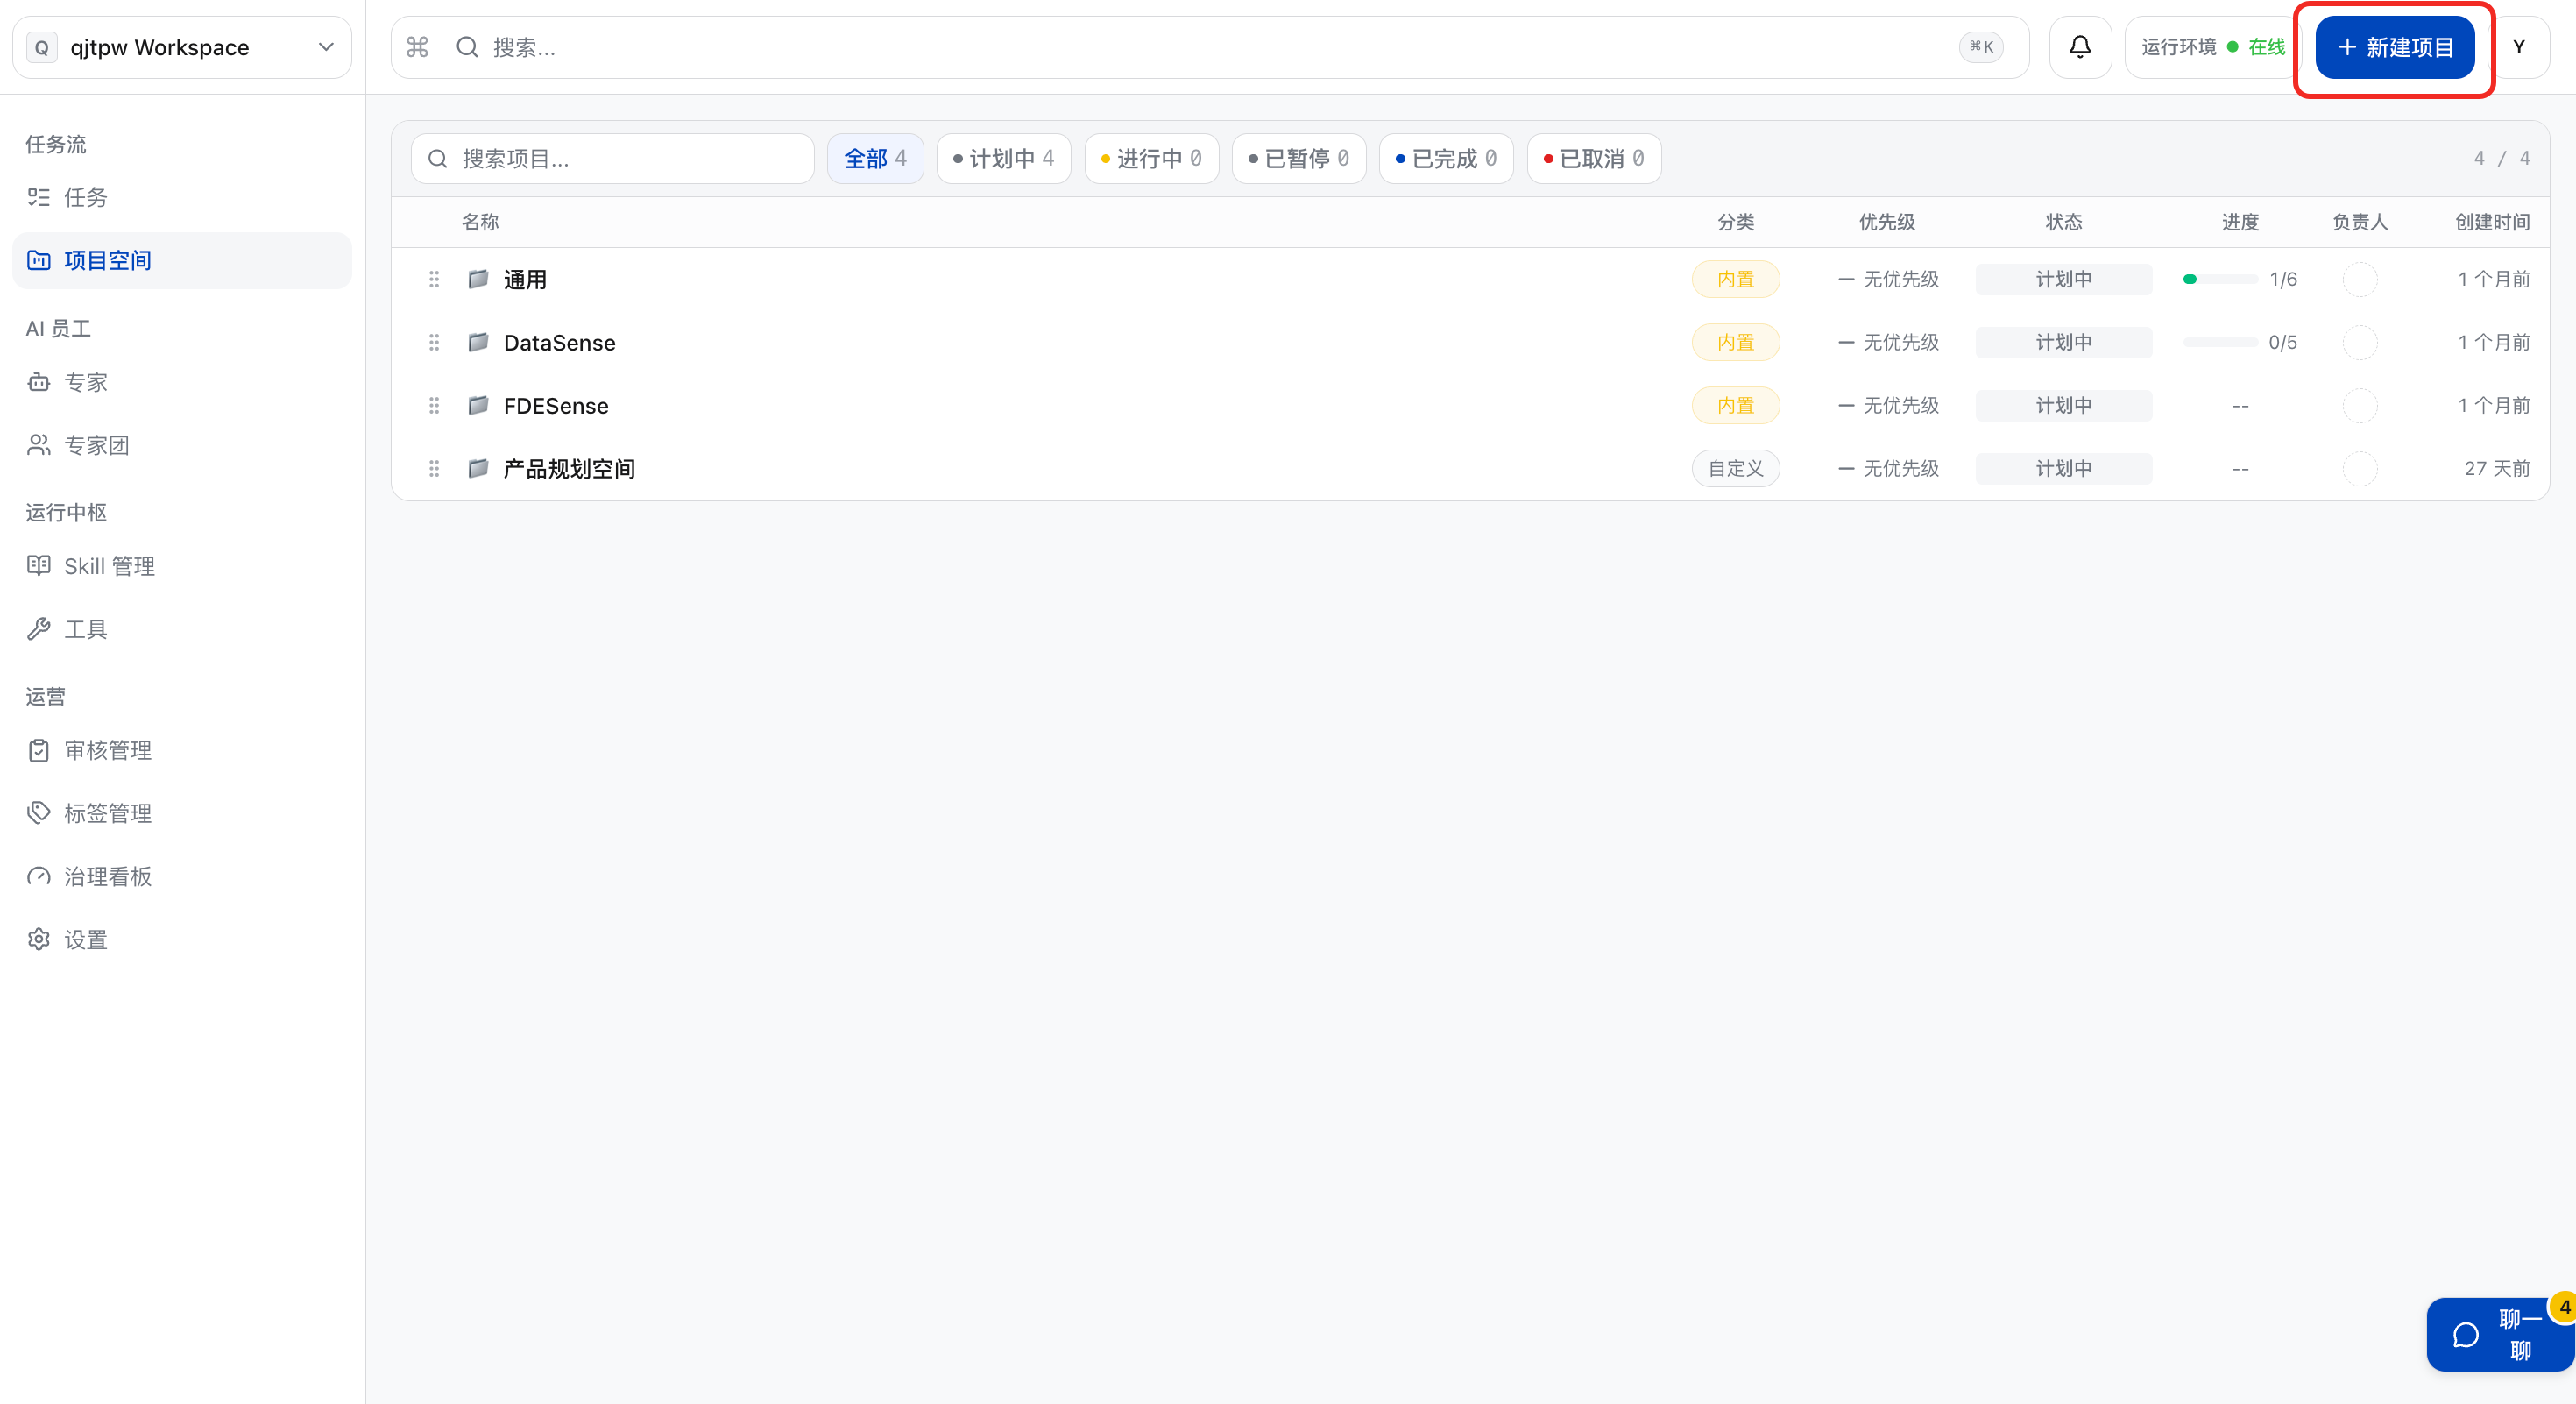
b. Fill in the basic information of the project space and click “Create Project”.
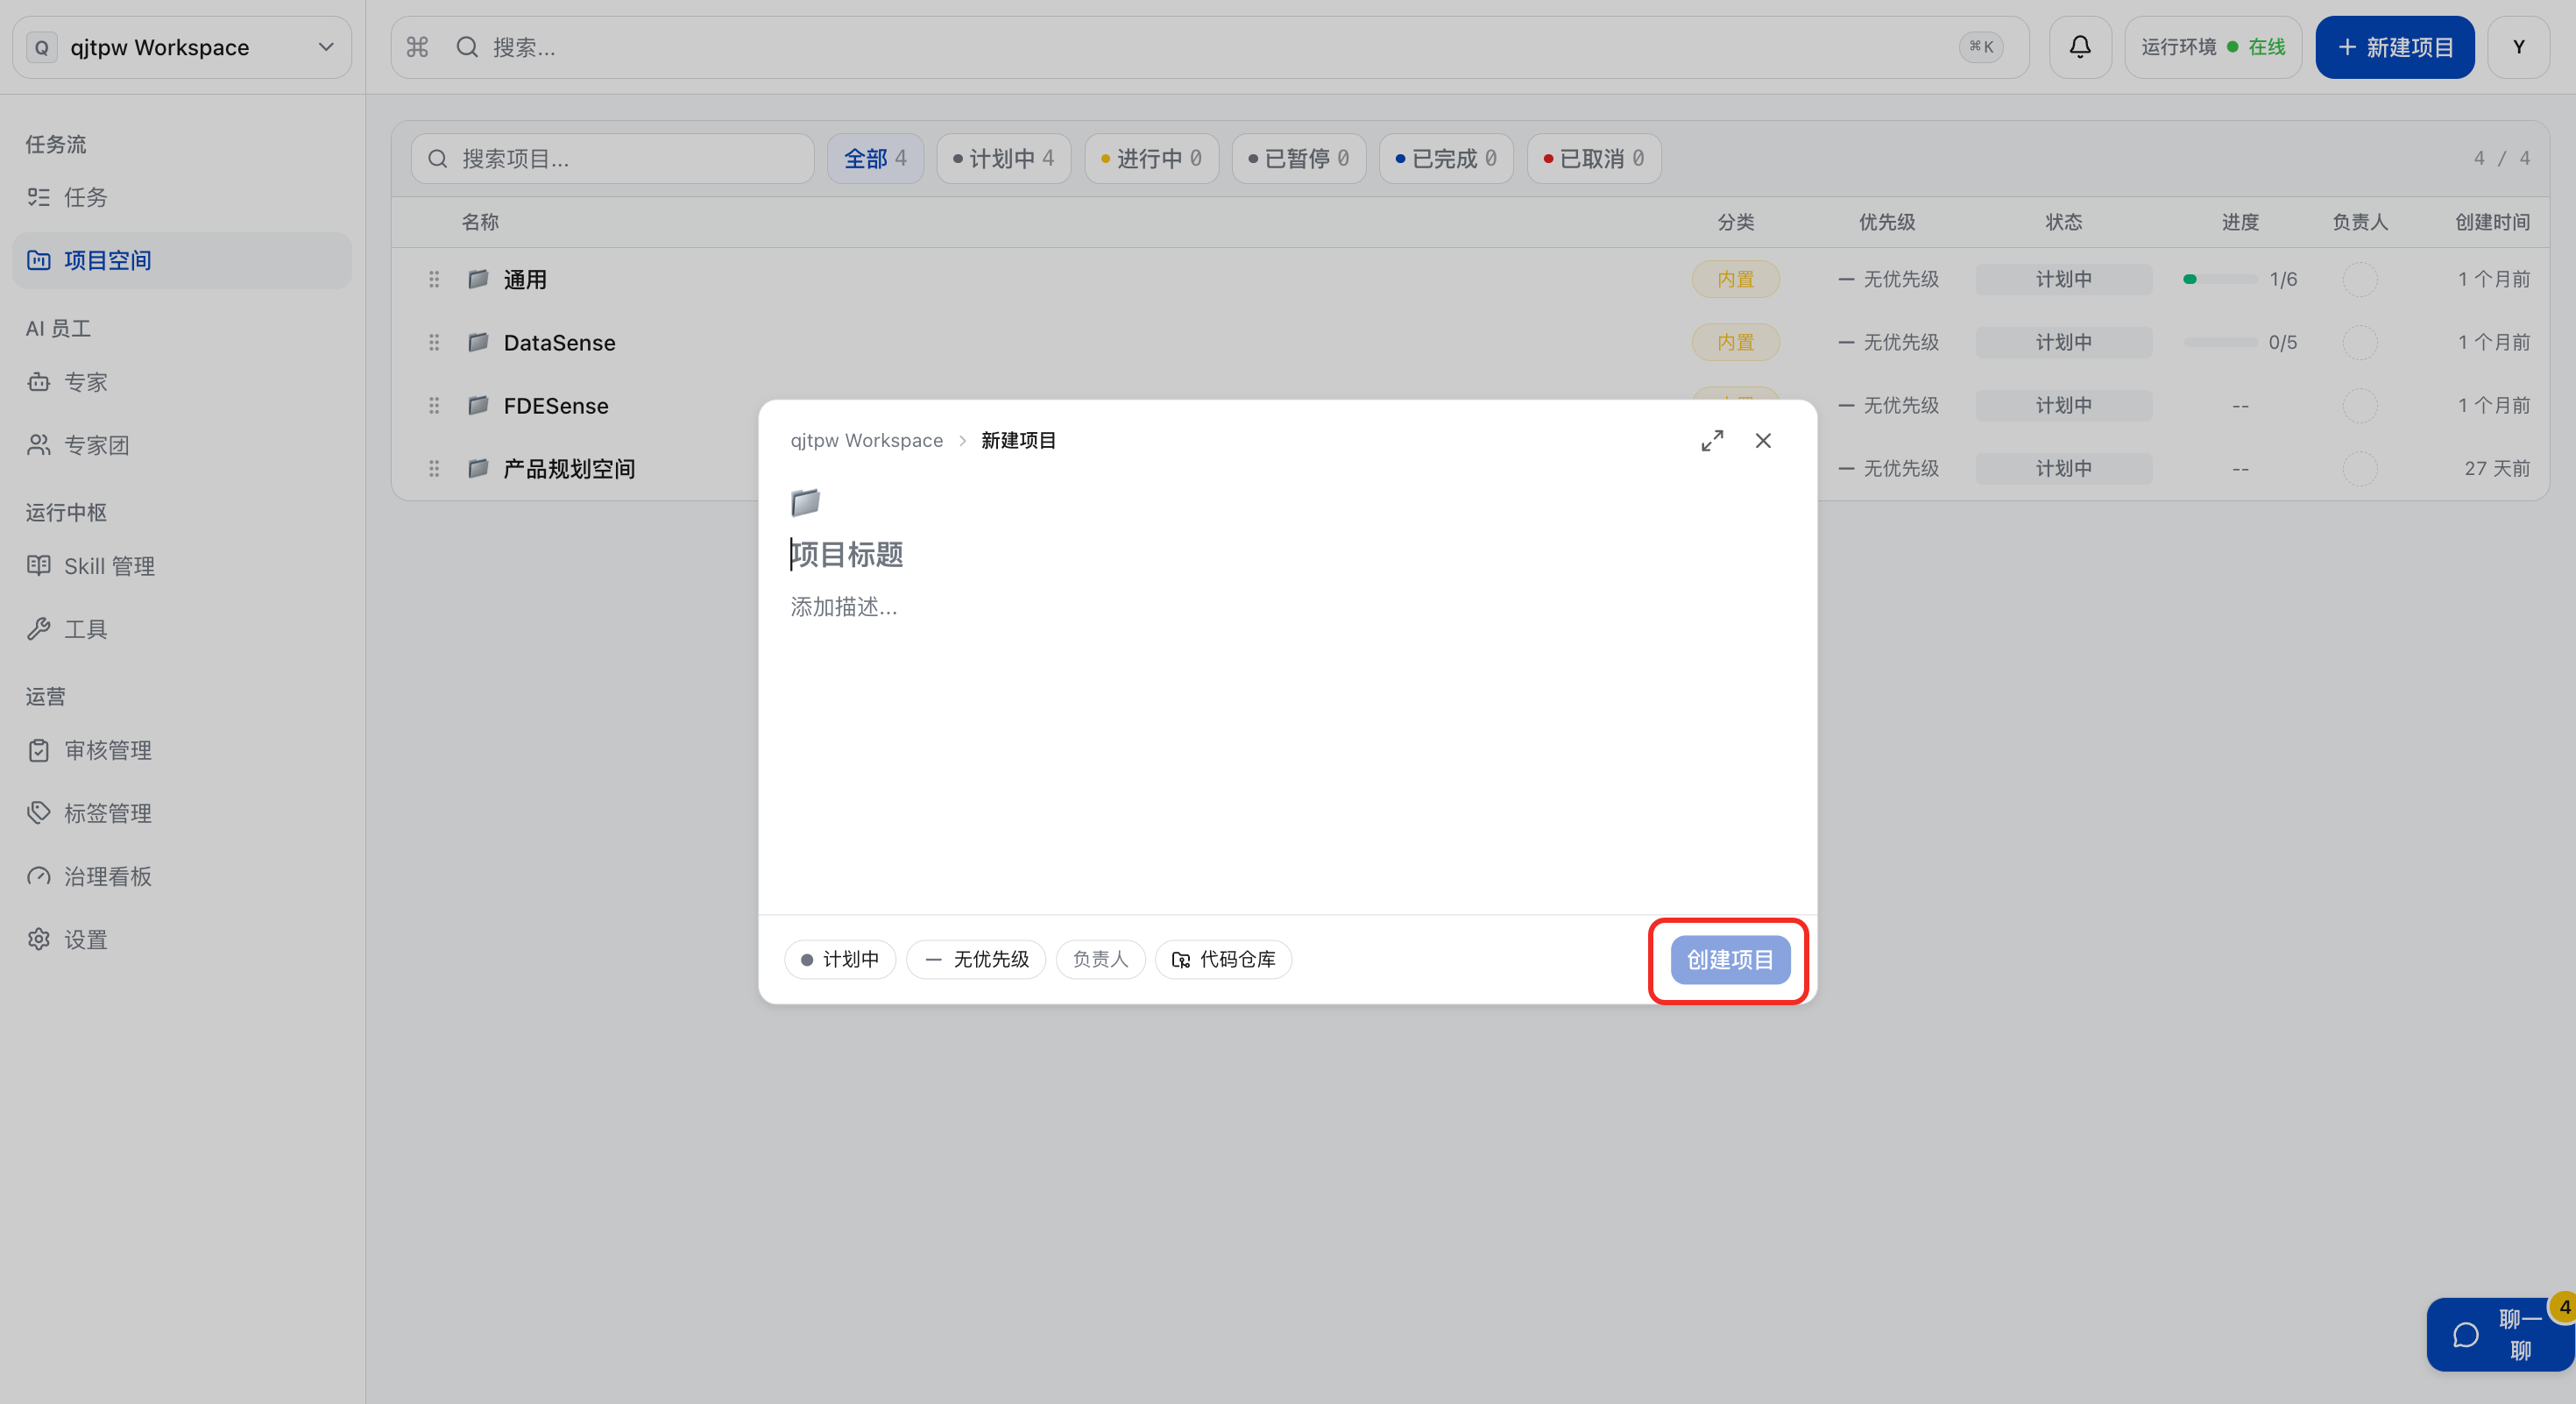
c. After creation is successful, you can view and edit the basic information of this project space, such as description, category and other information.
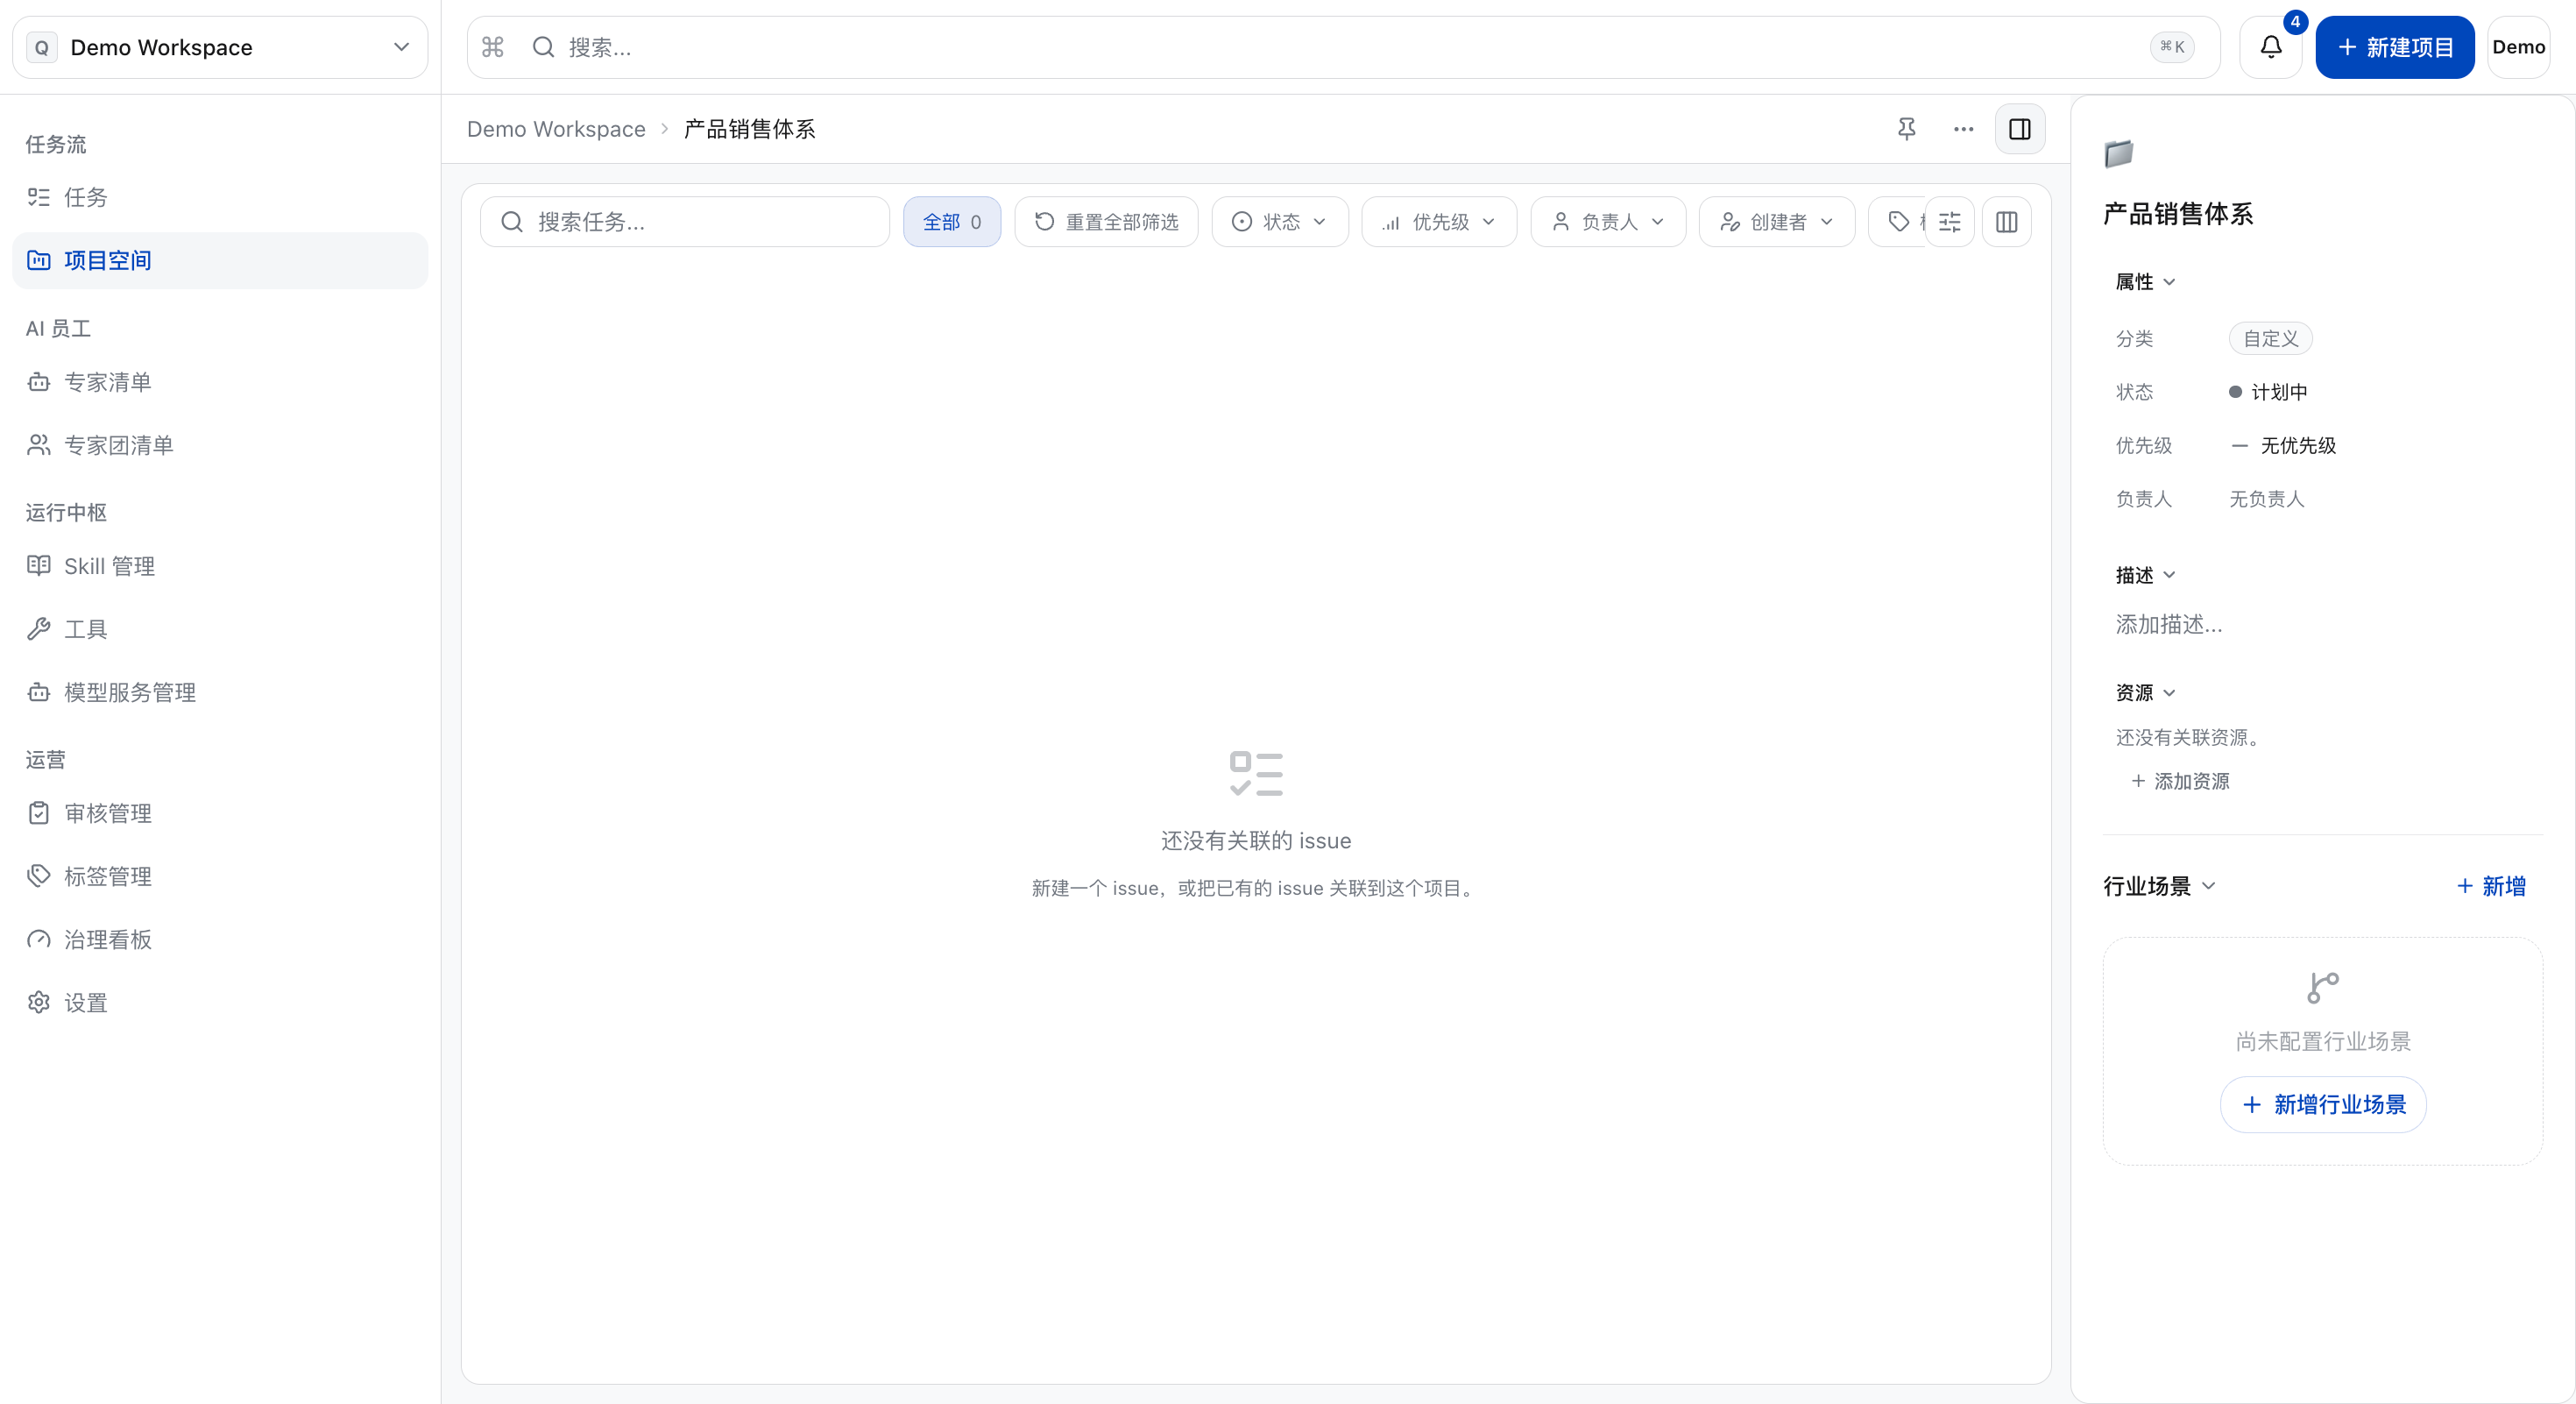
Modify Project Space
Edit Basic Information
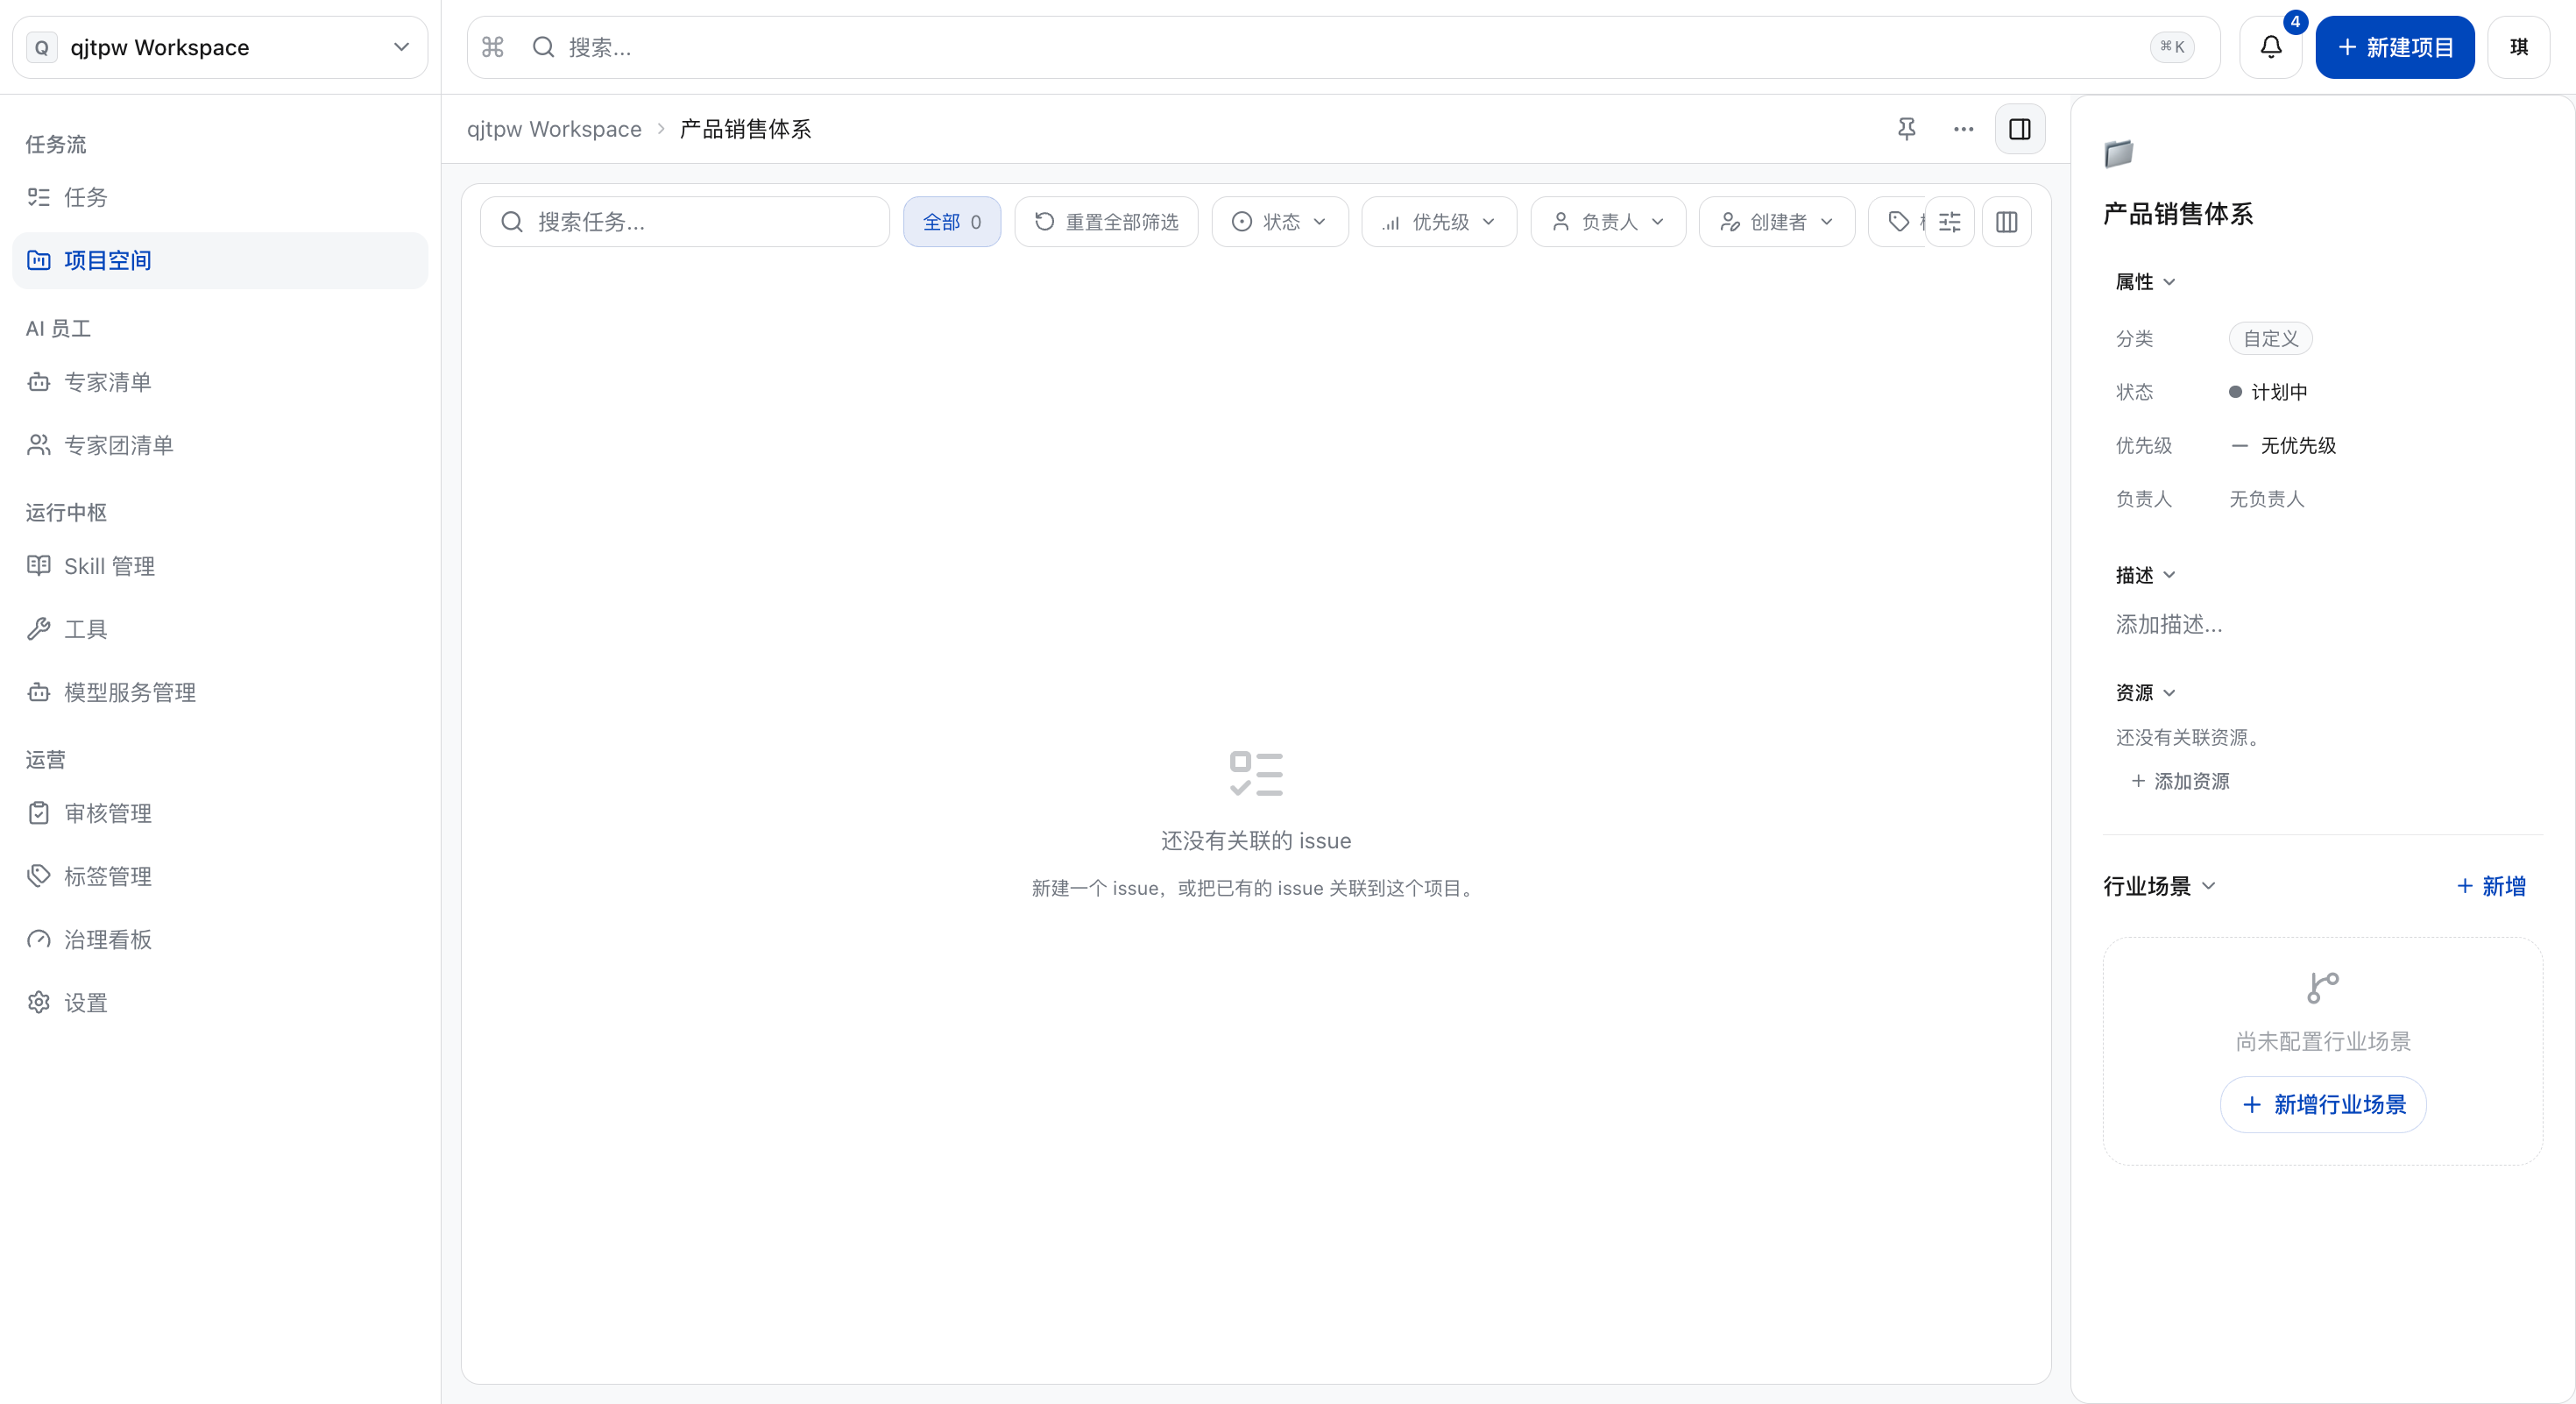
a. Click the target project space.
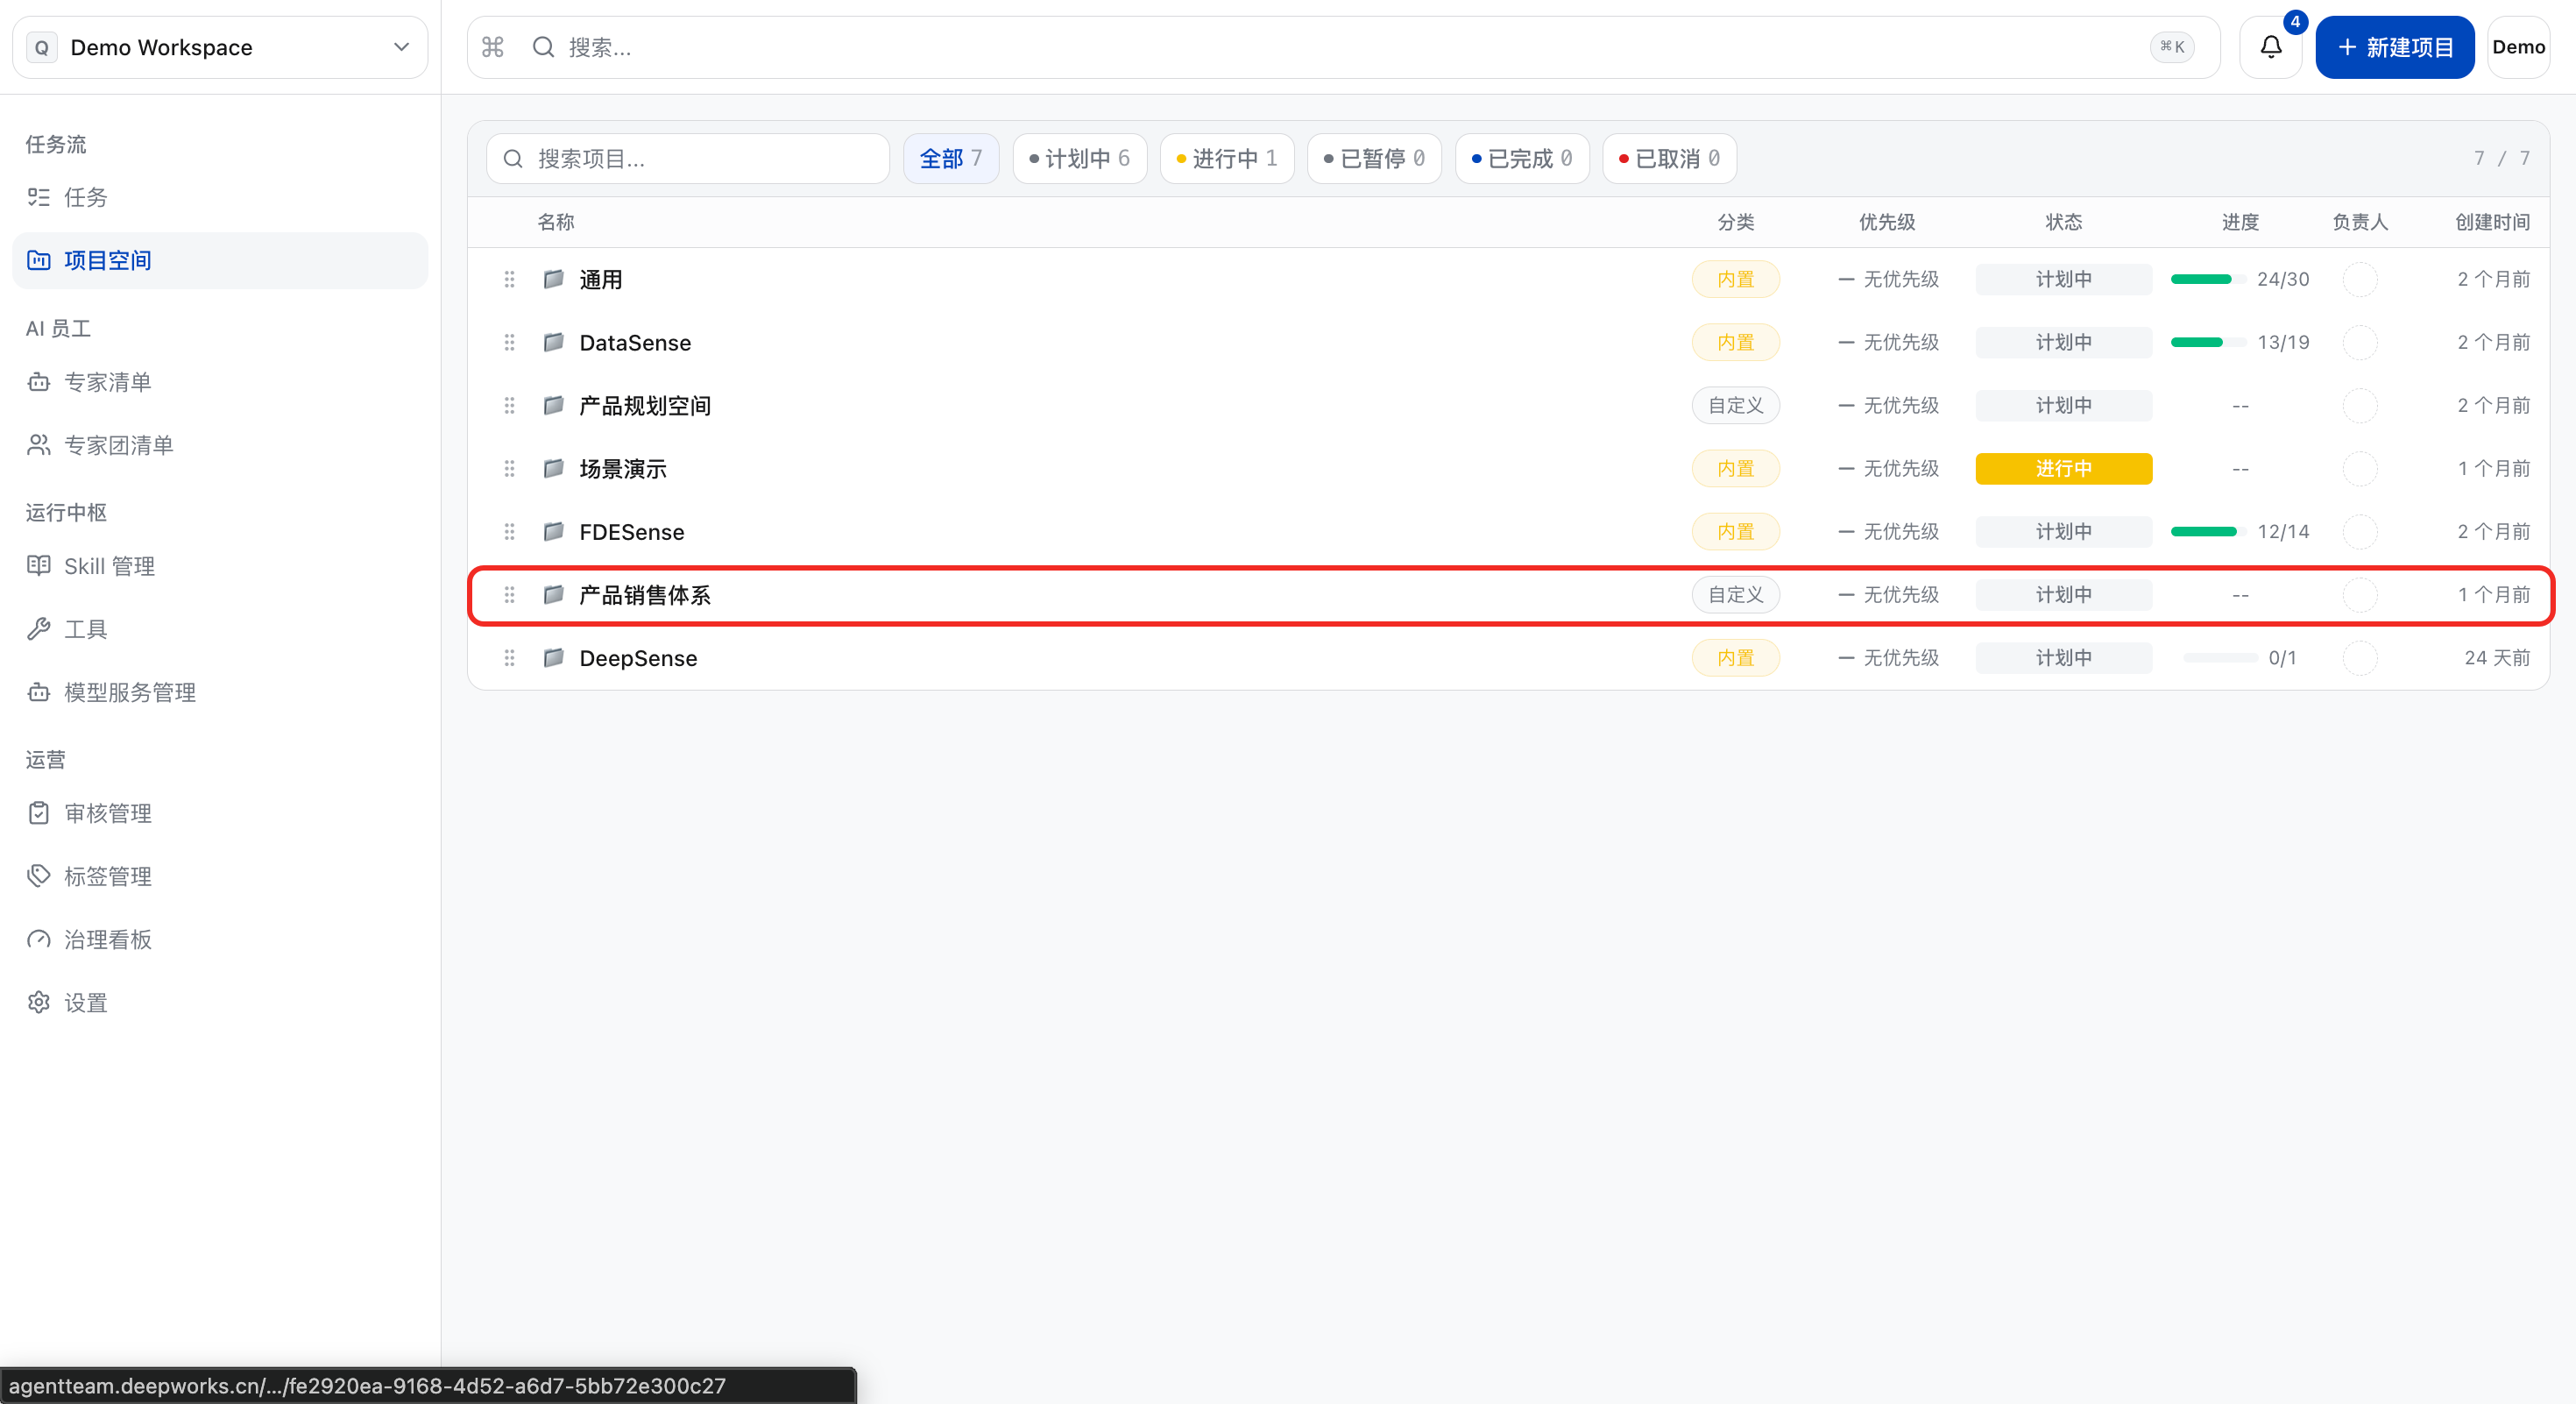
b. On the project space details page, you can modify the corresponding fields by editing them.
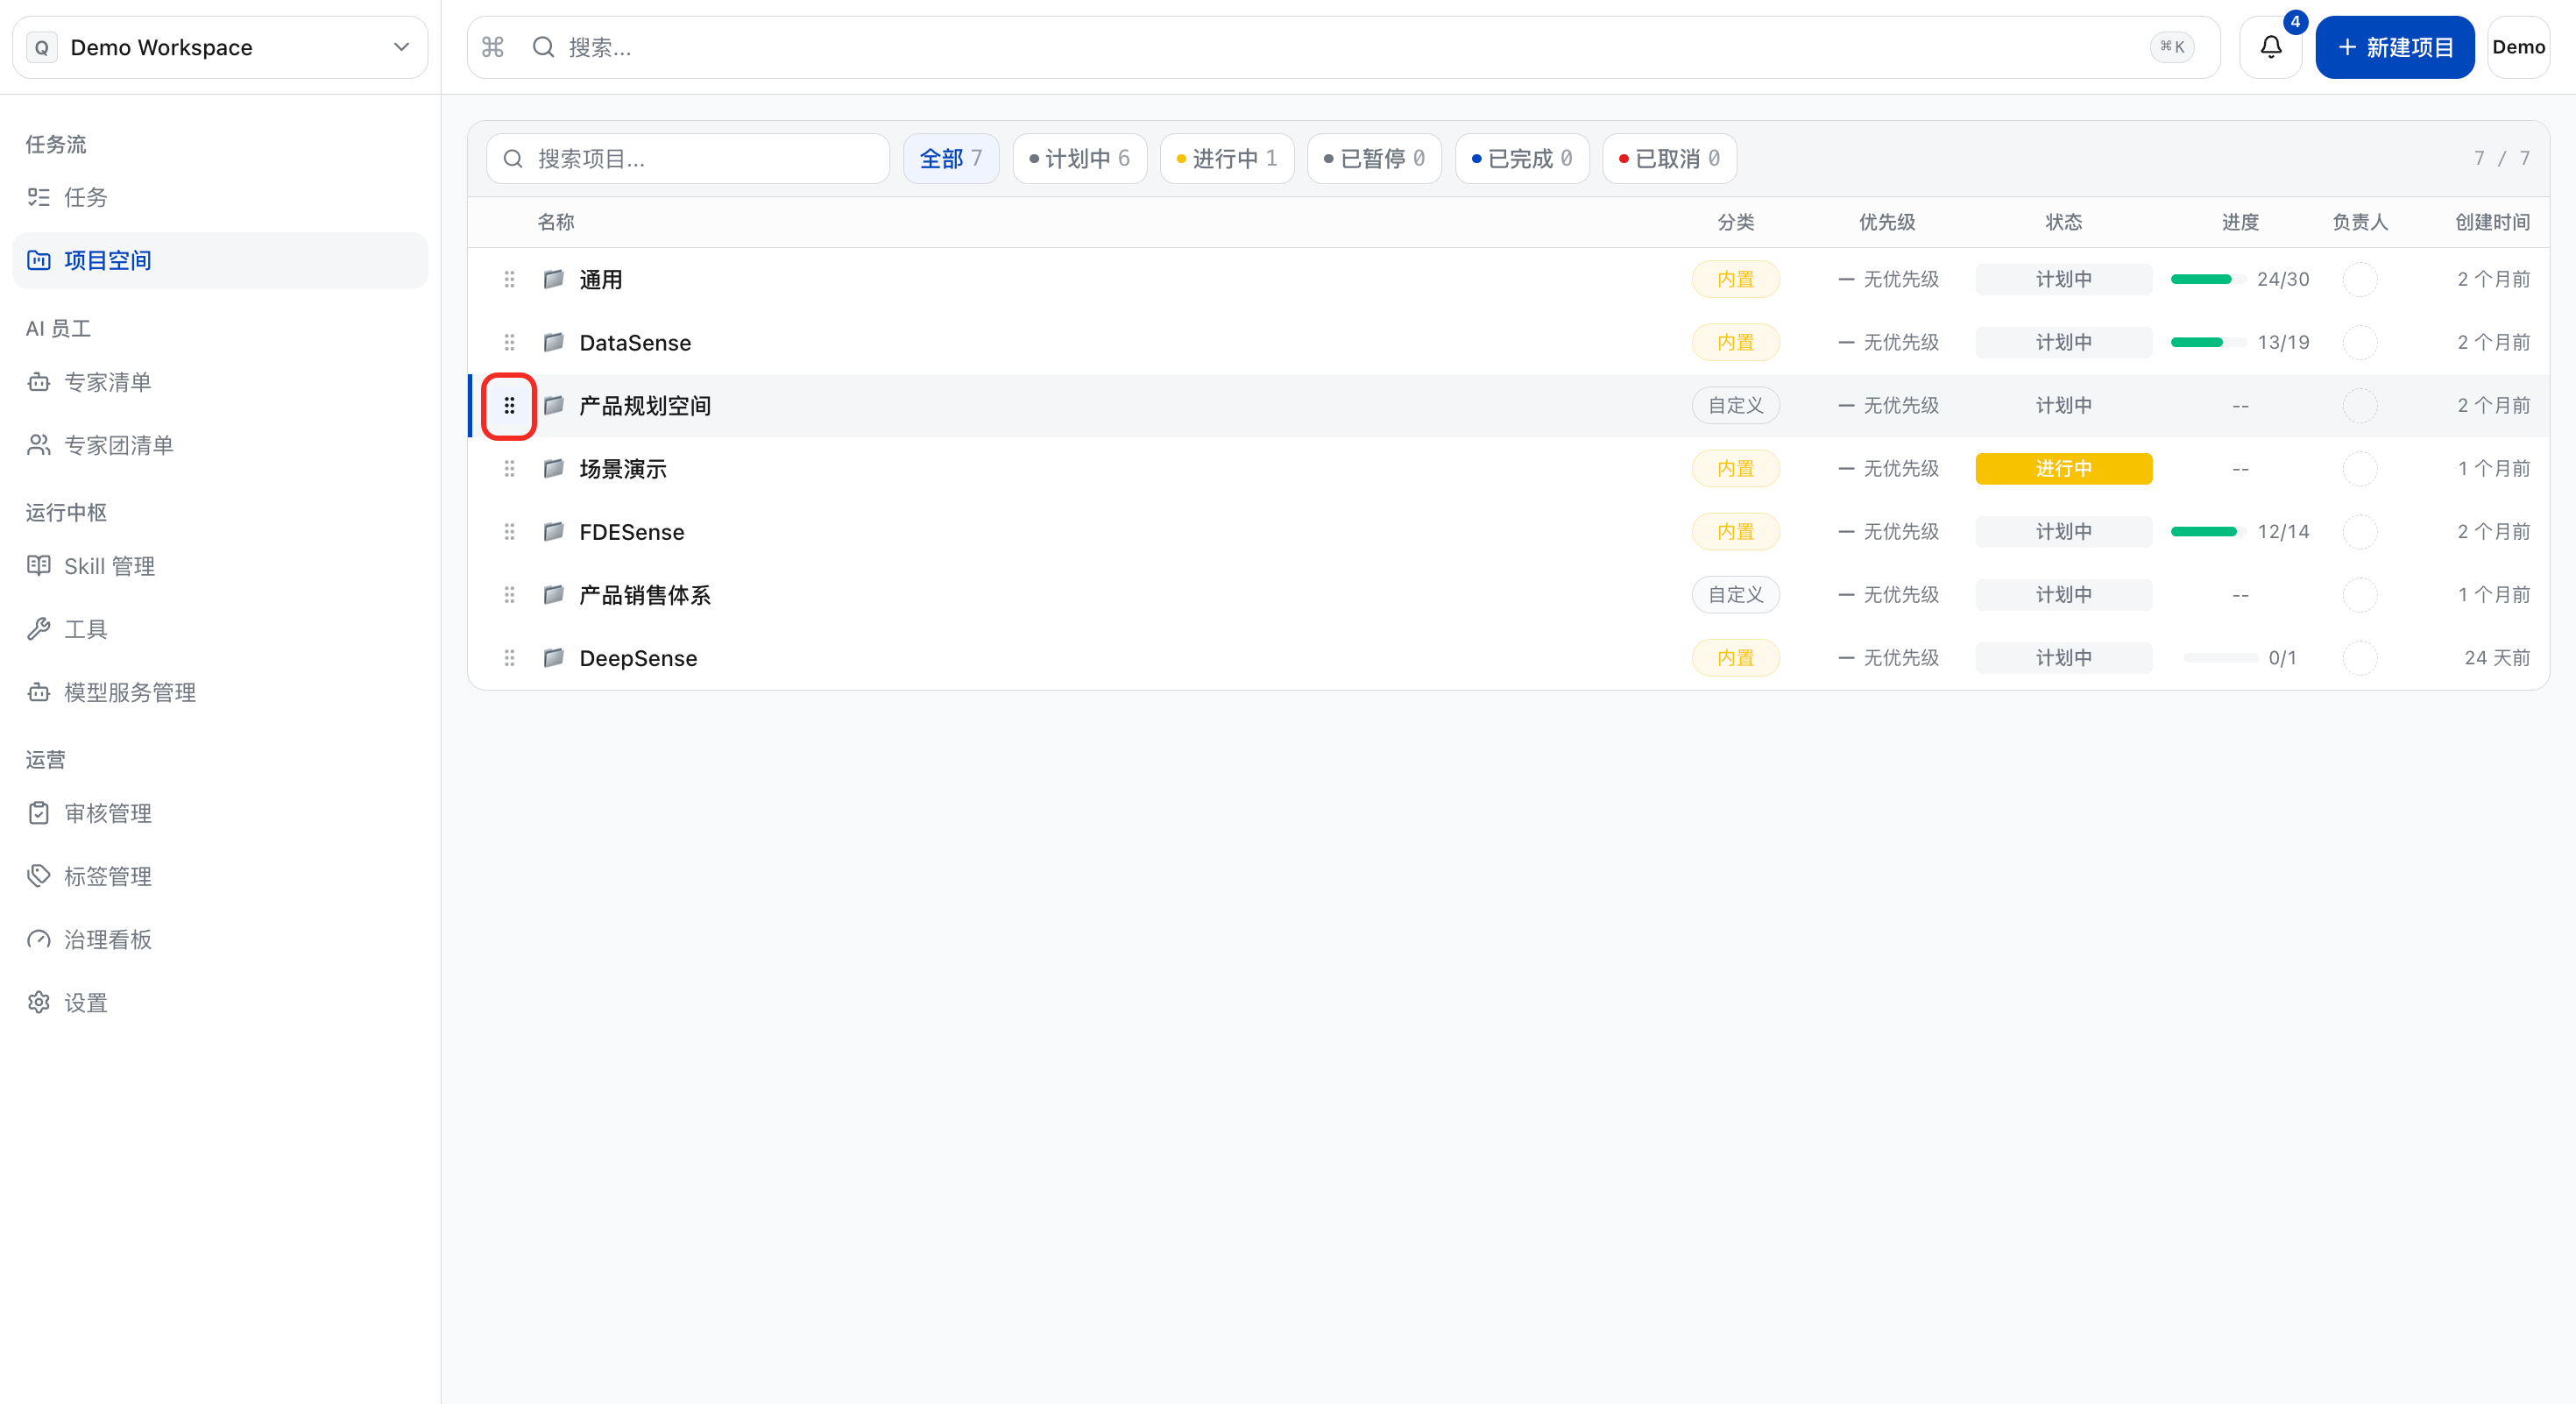
Modify Sort Order
a. In the project space list, long-press the control to change the order of project spaces.
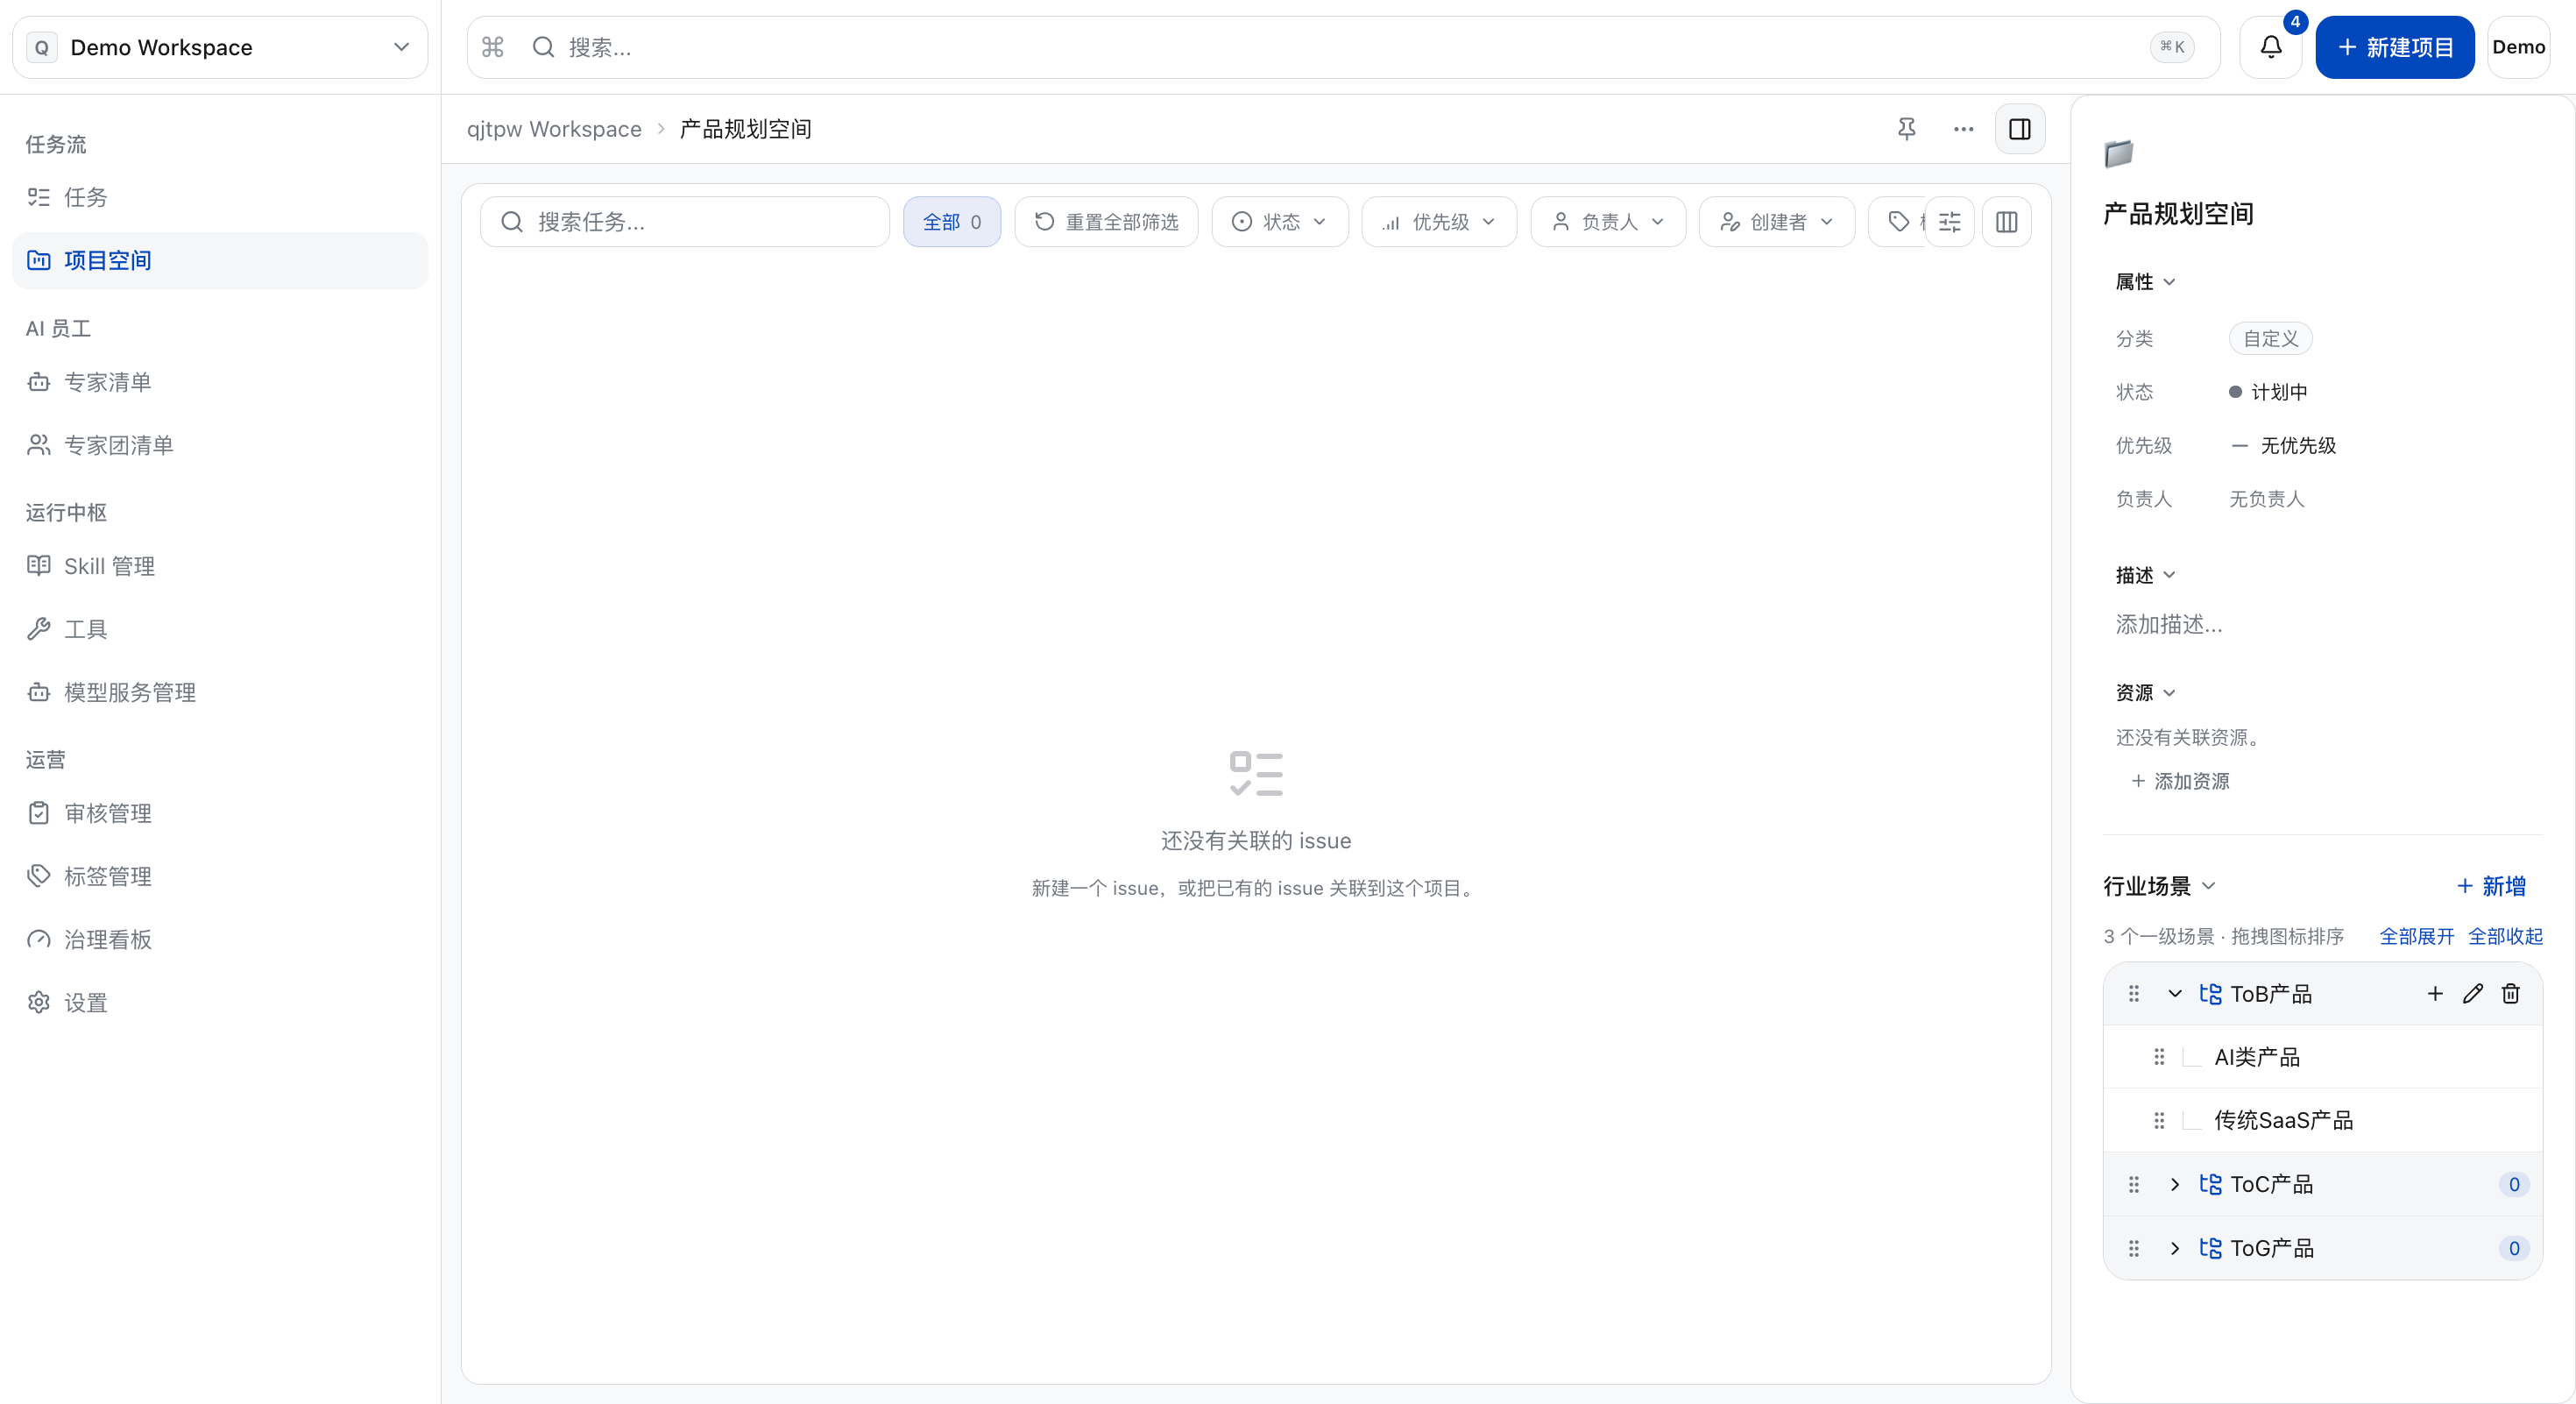
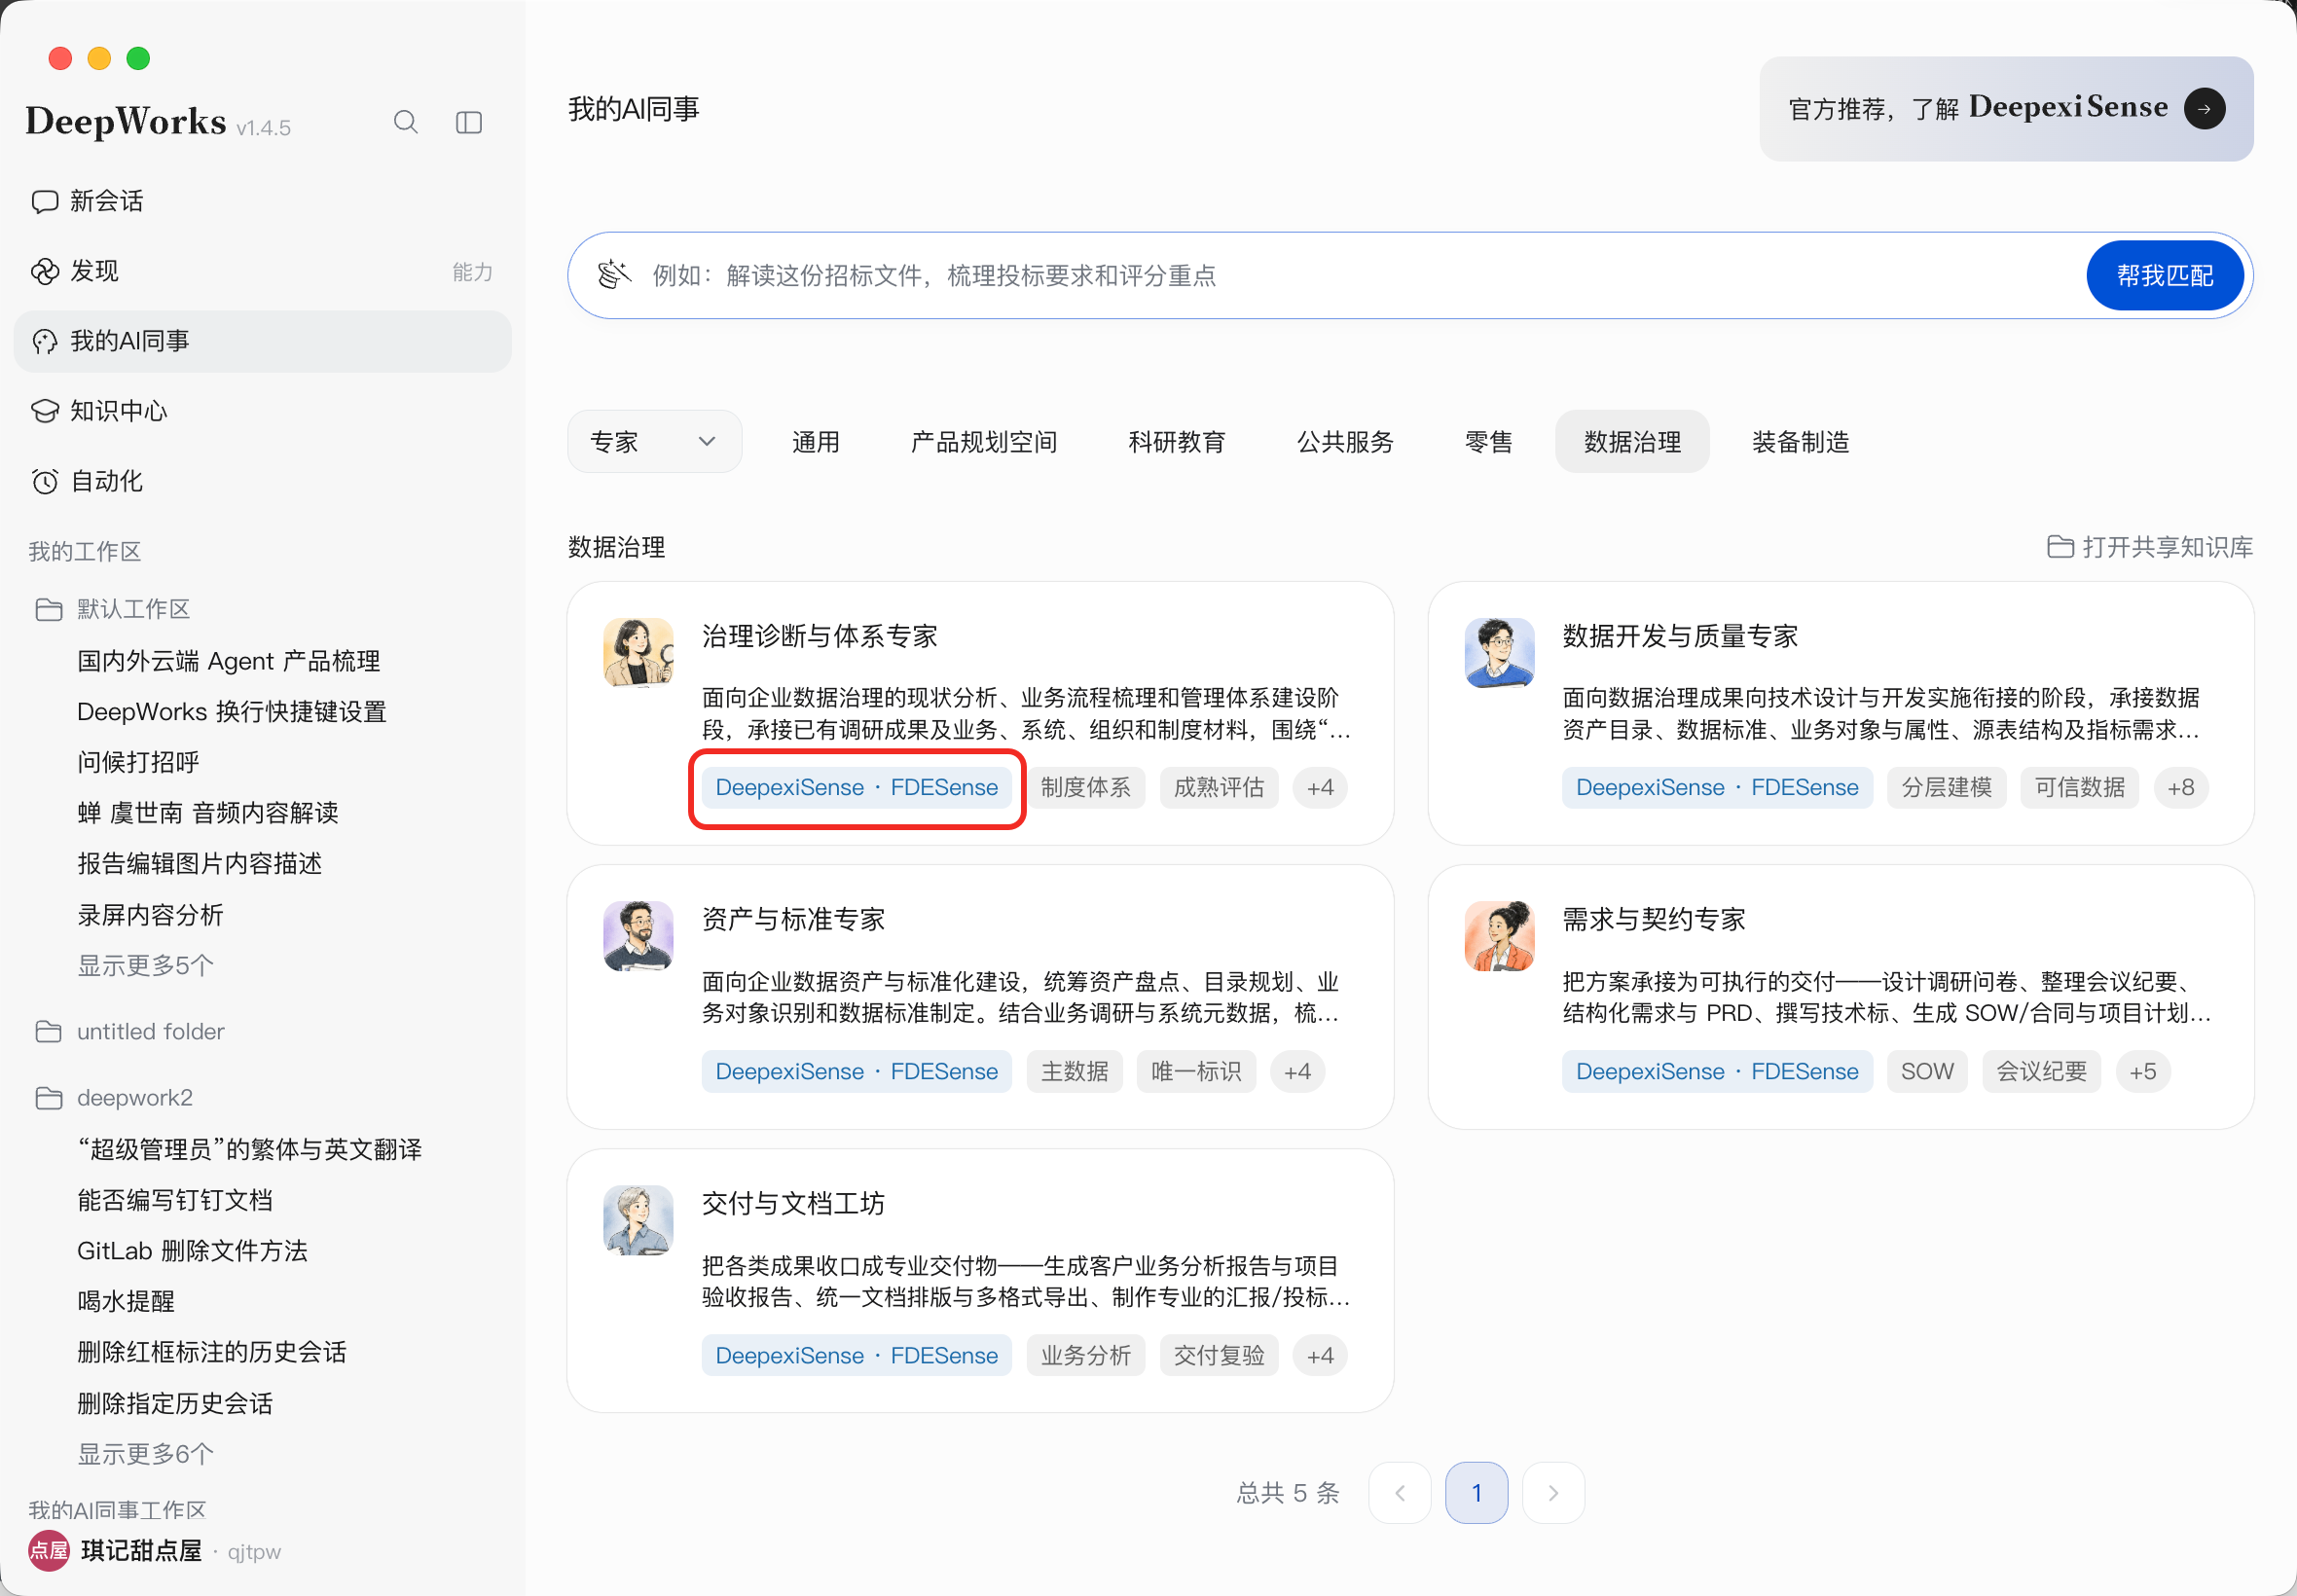
Set up industry scenarios
If you need to set scenario labels with effects similar to the following, you can do so by configuring industry scenarios.
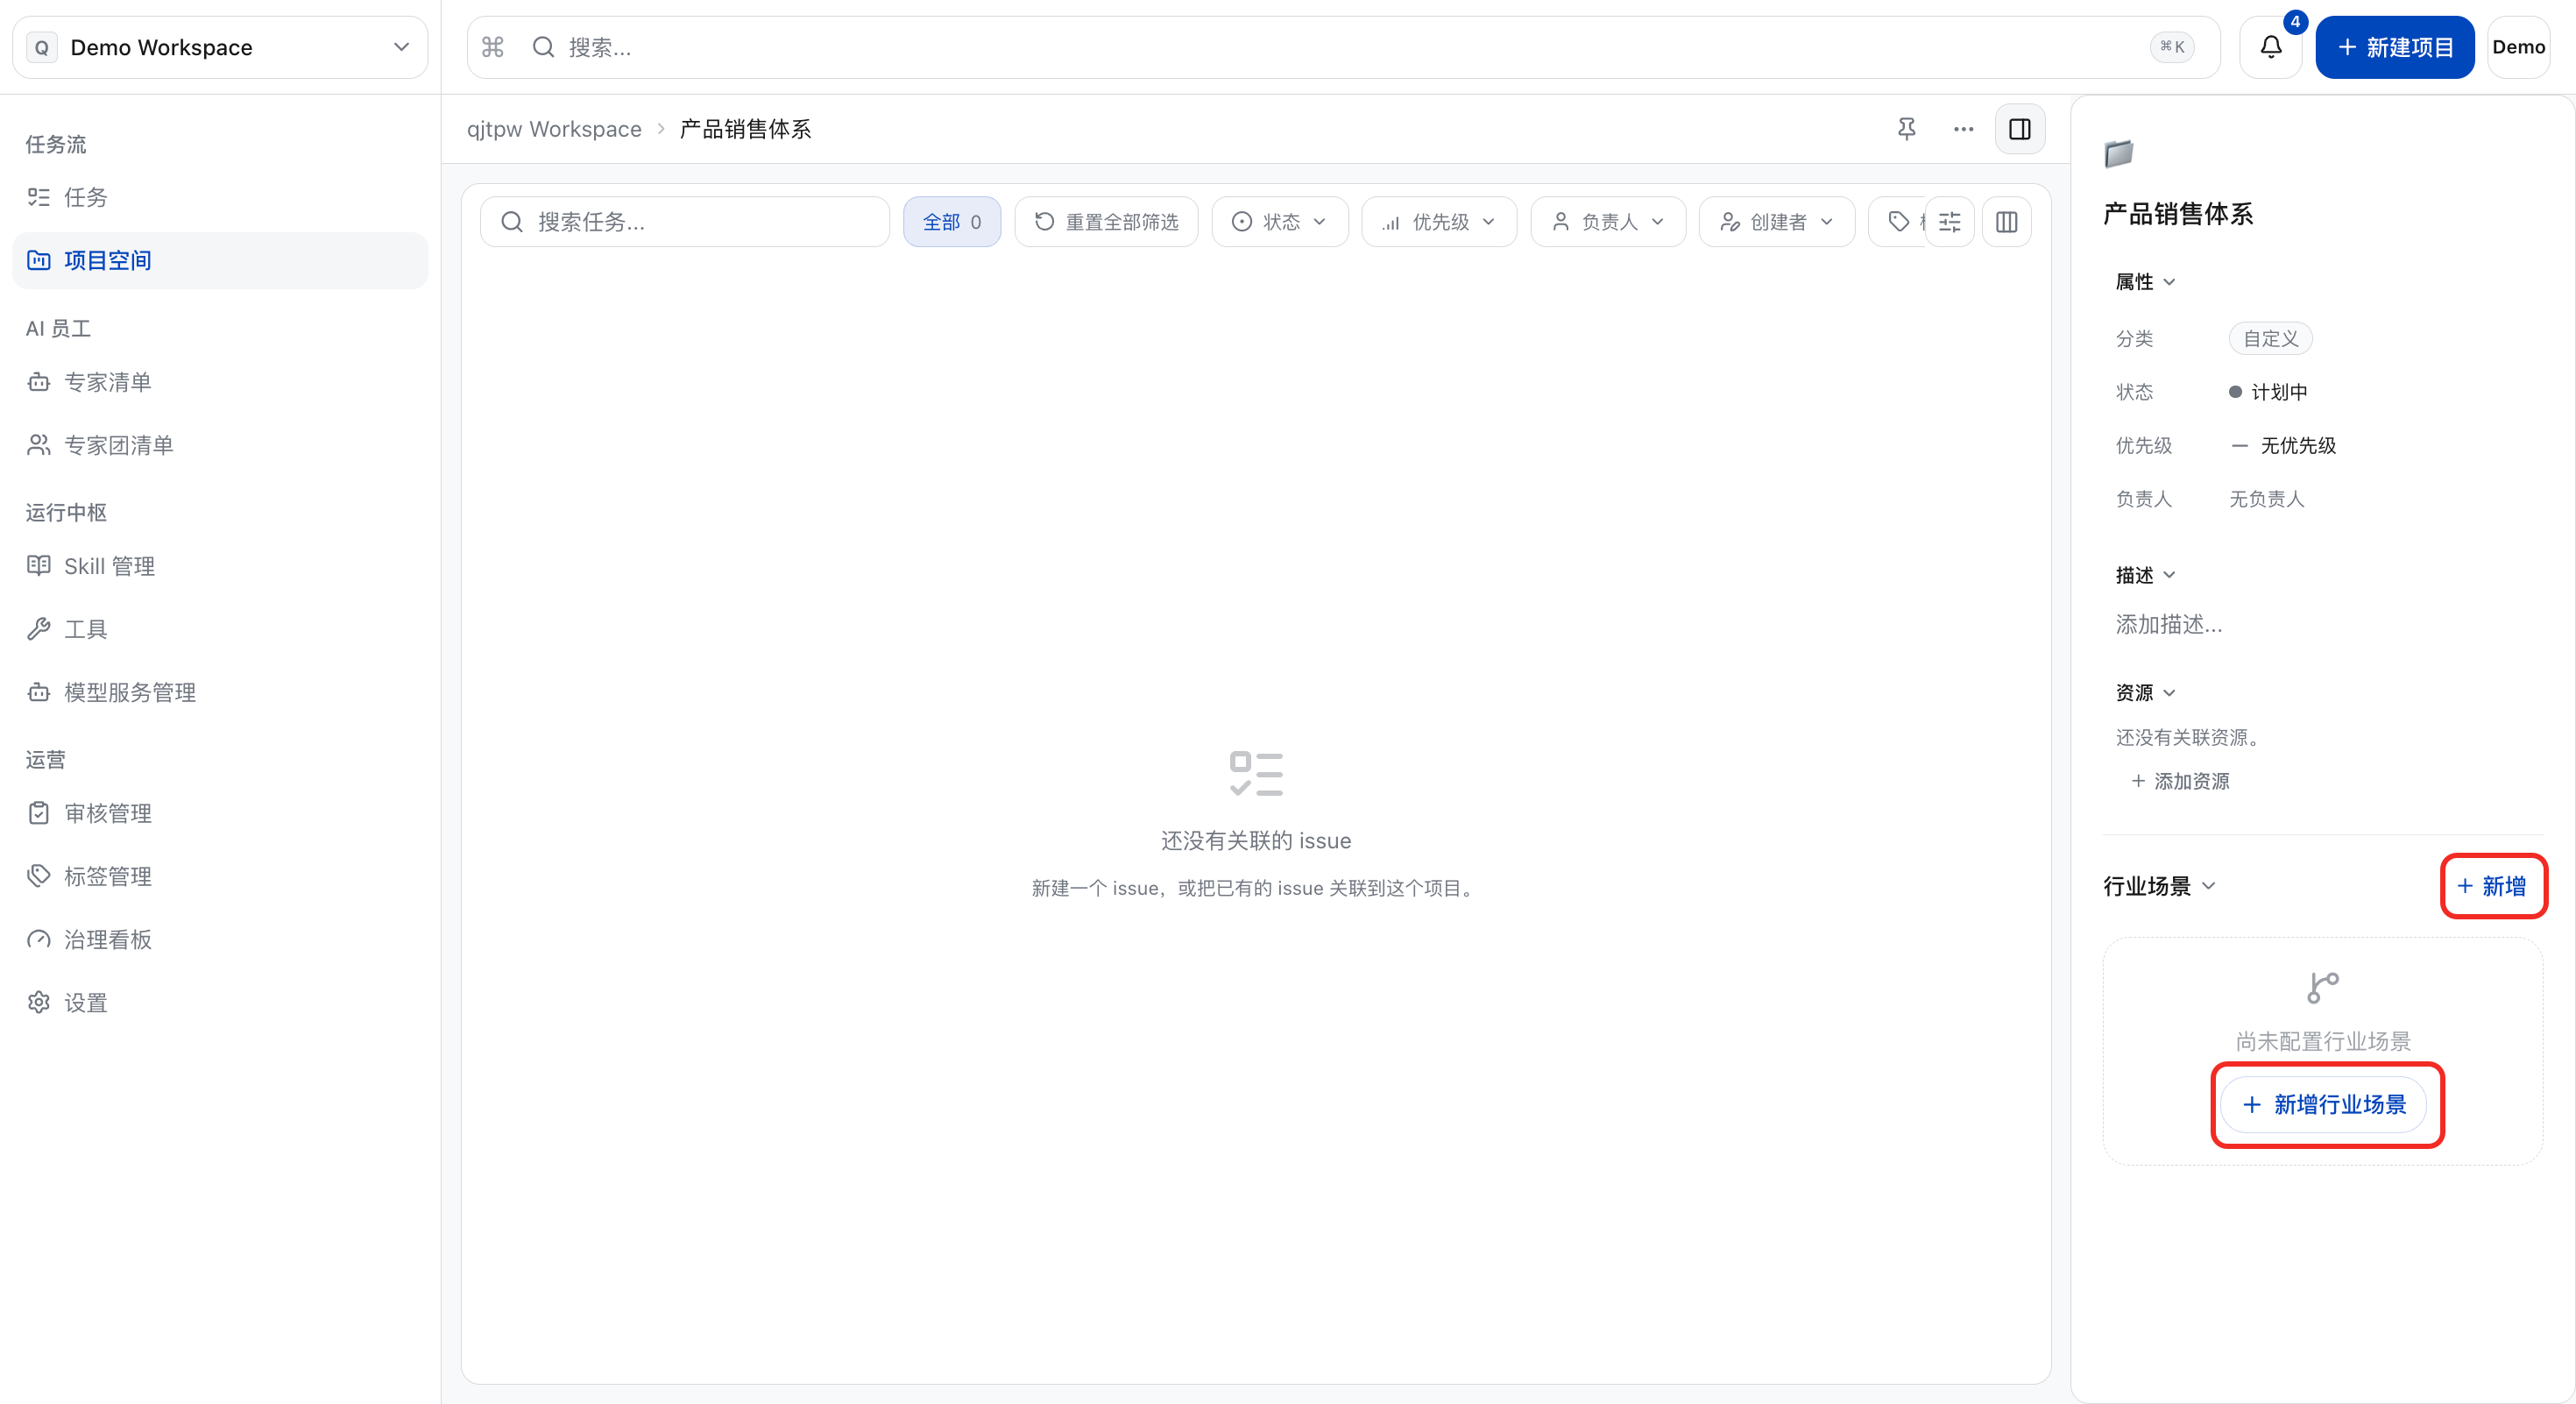
a. Click the target project space.
b. On the project space details page, click “Add Industry Scenario” or “Add”.
c. Enter the name of the industry scenario and click “Save”; the platform supports adding up to 2 levels of industry scenarios.
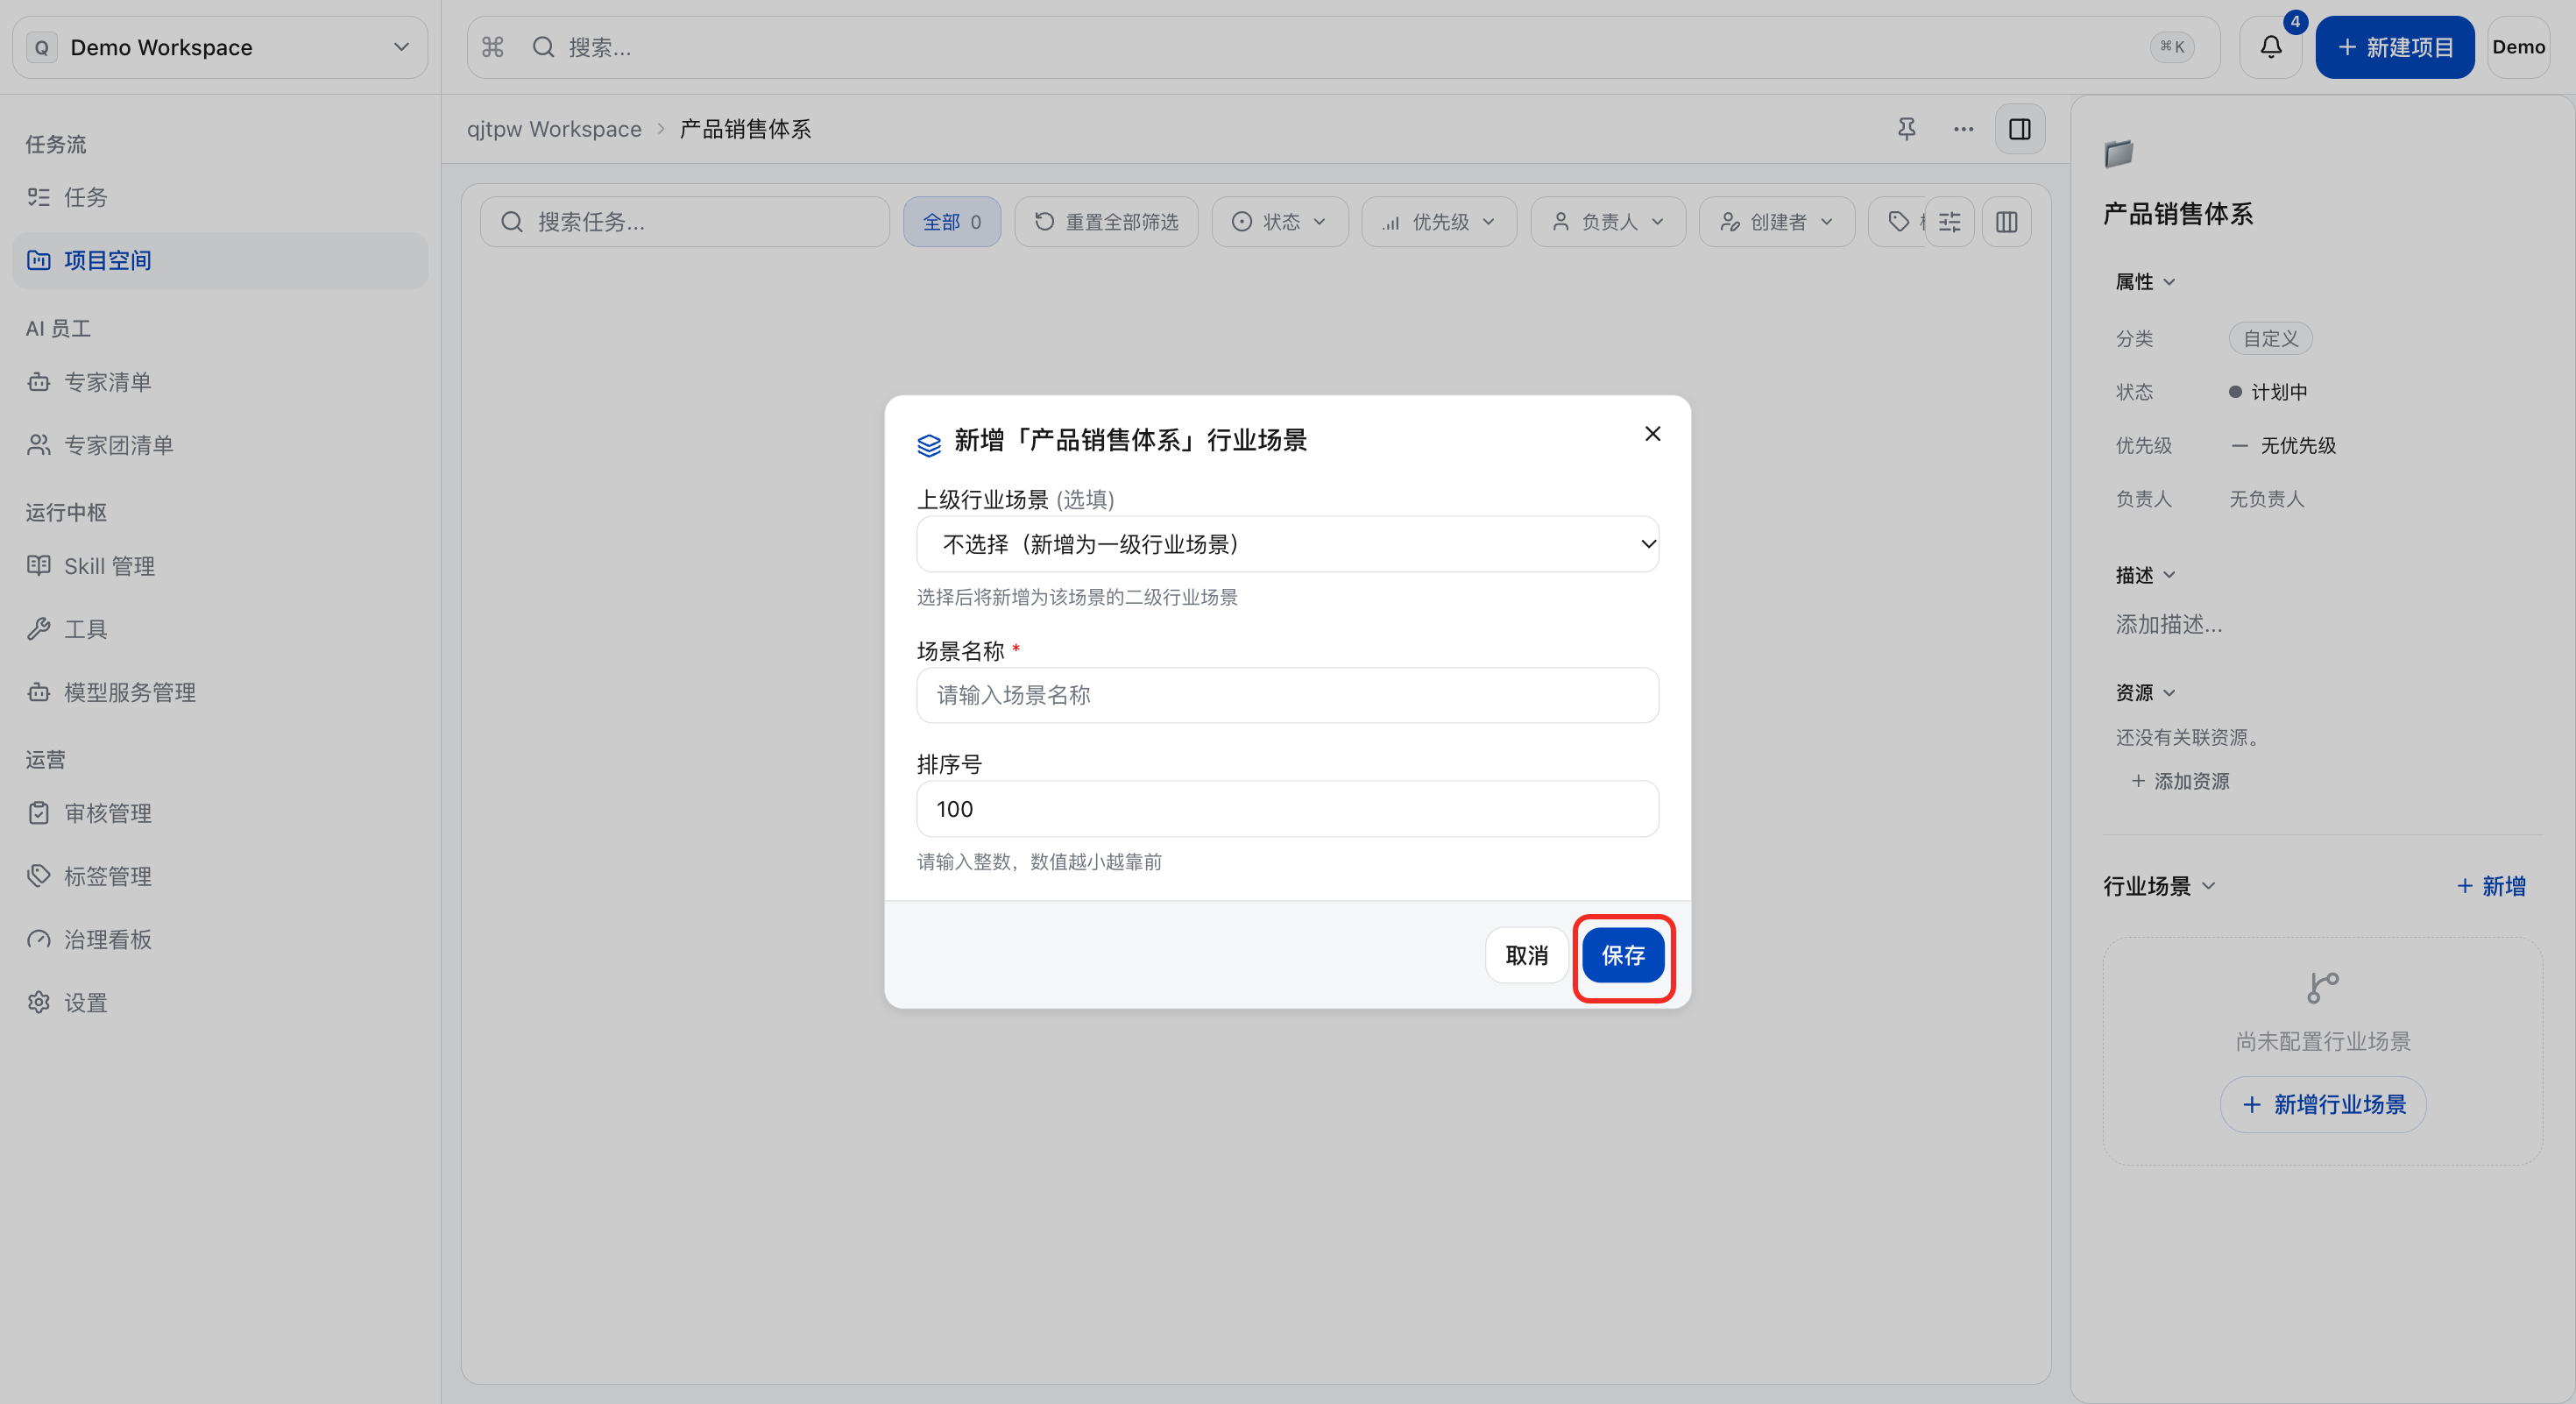
Project Member Settings
a. In the left “Settings” menu, click “Project Space Permissions”.
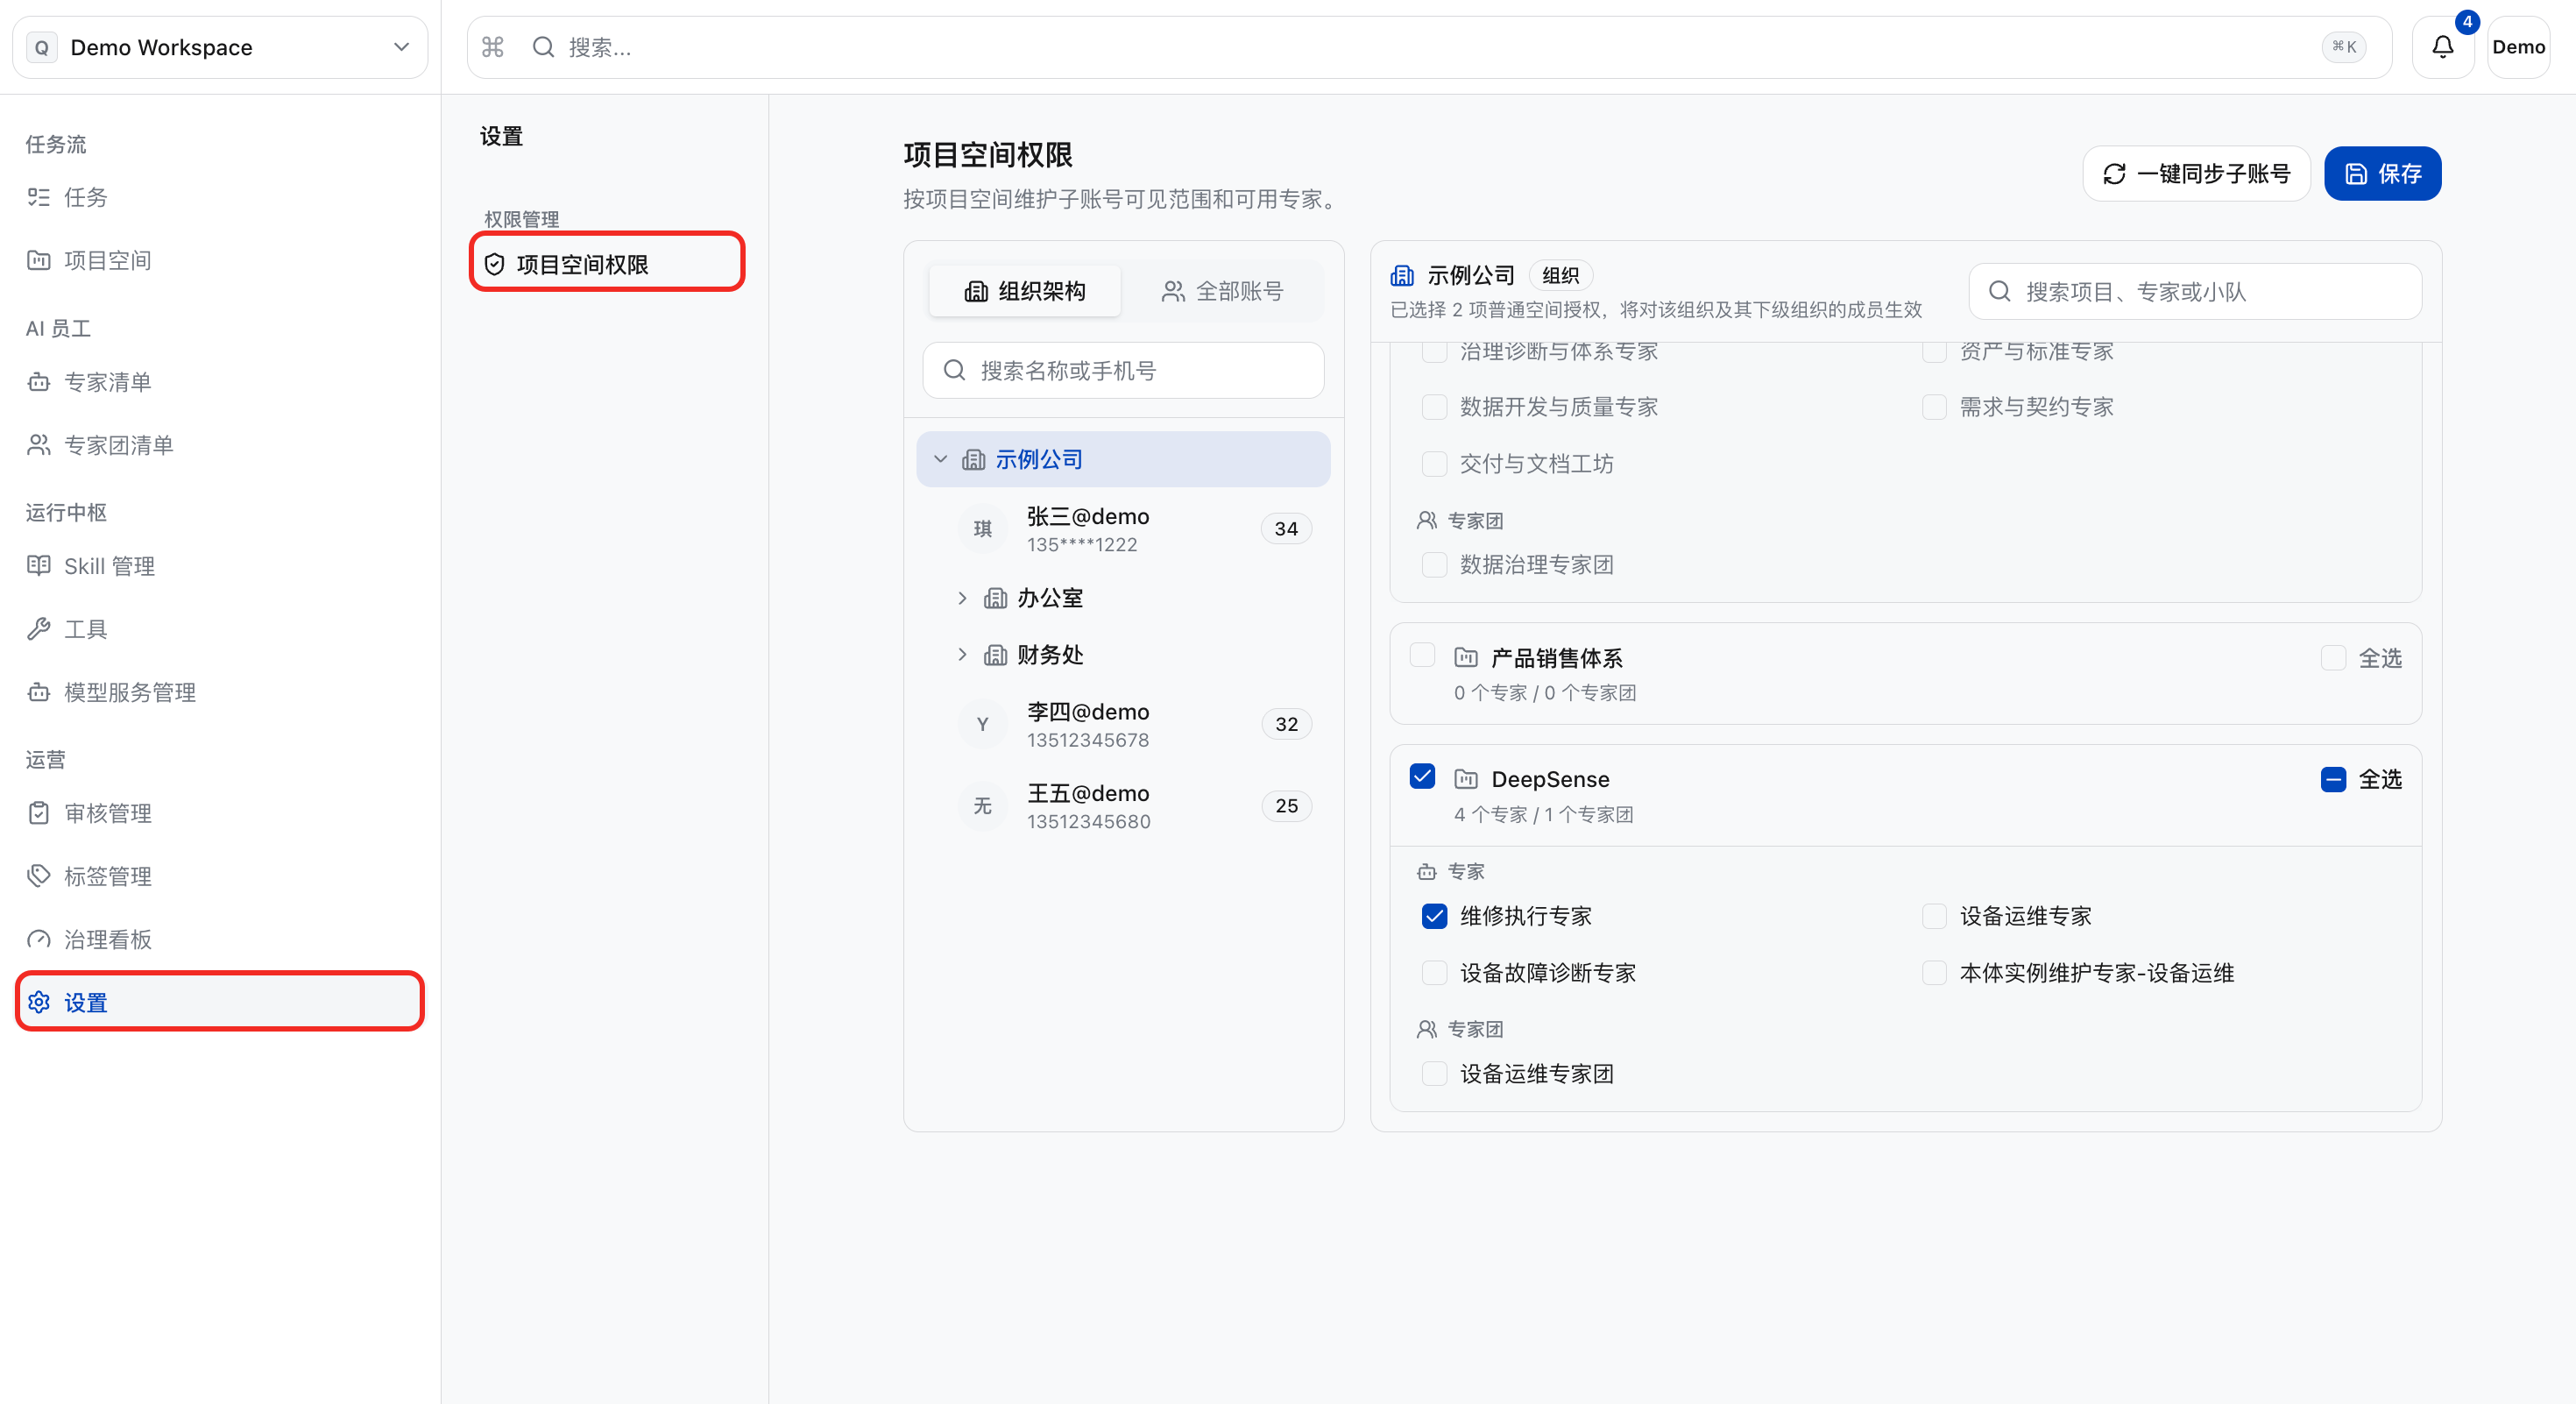
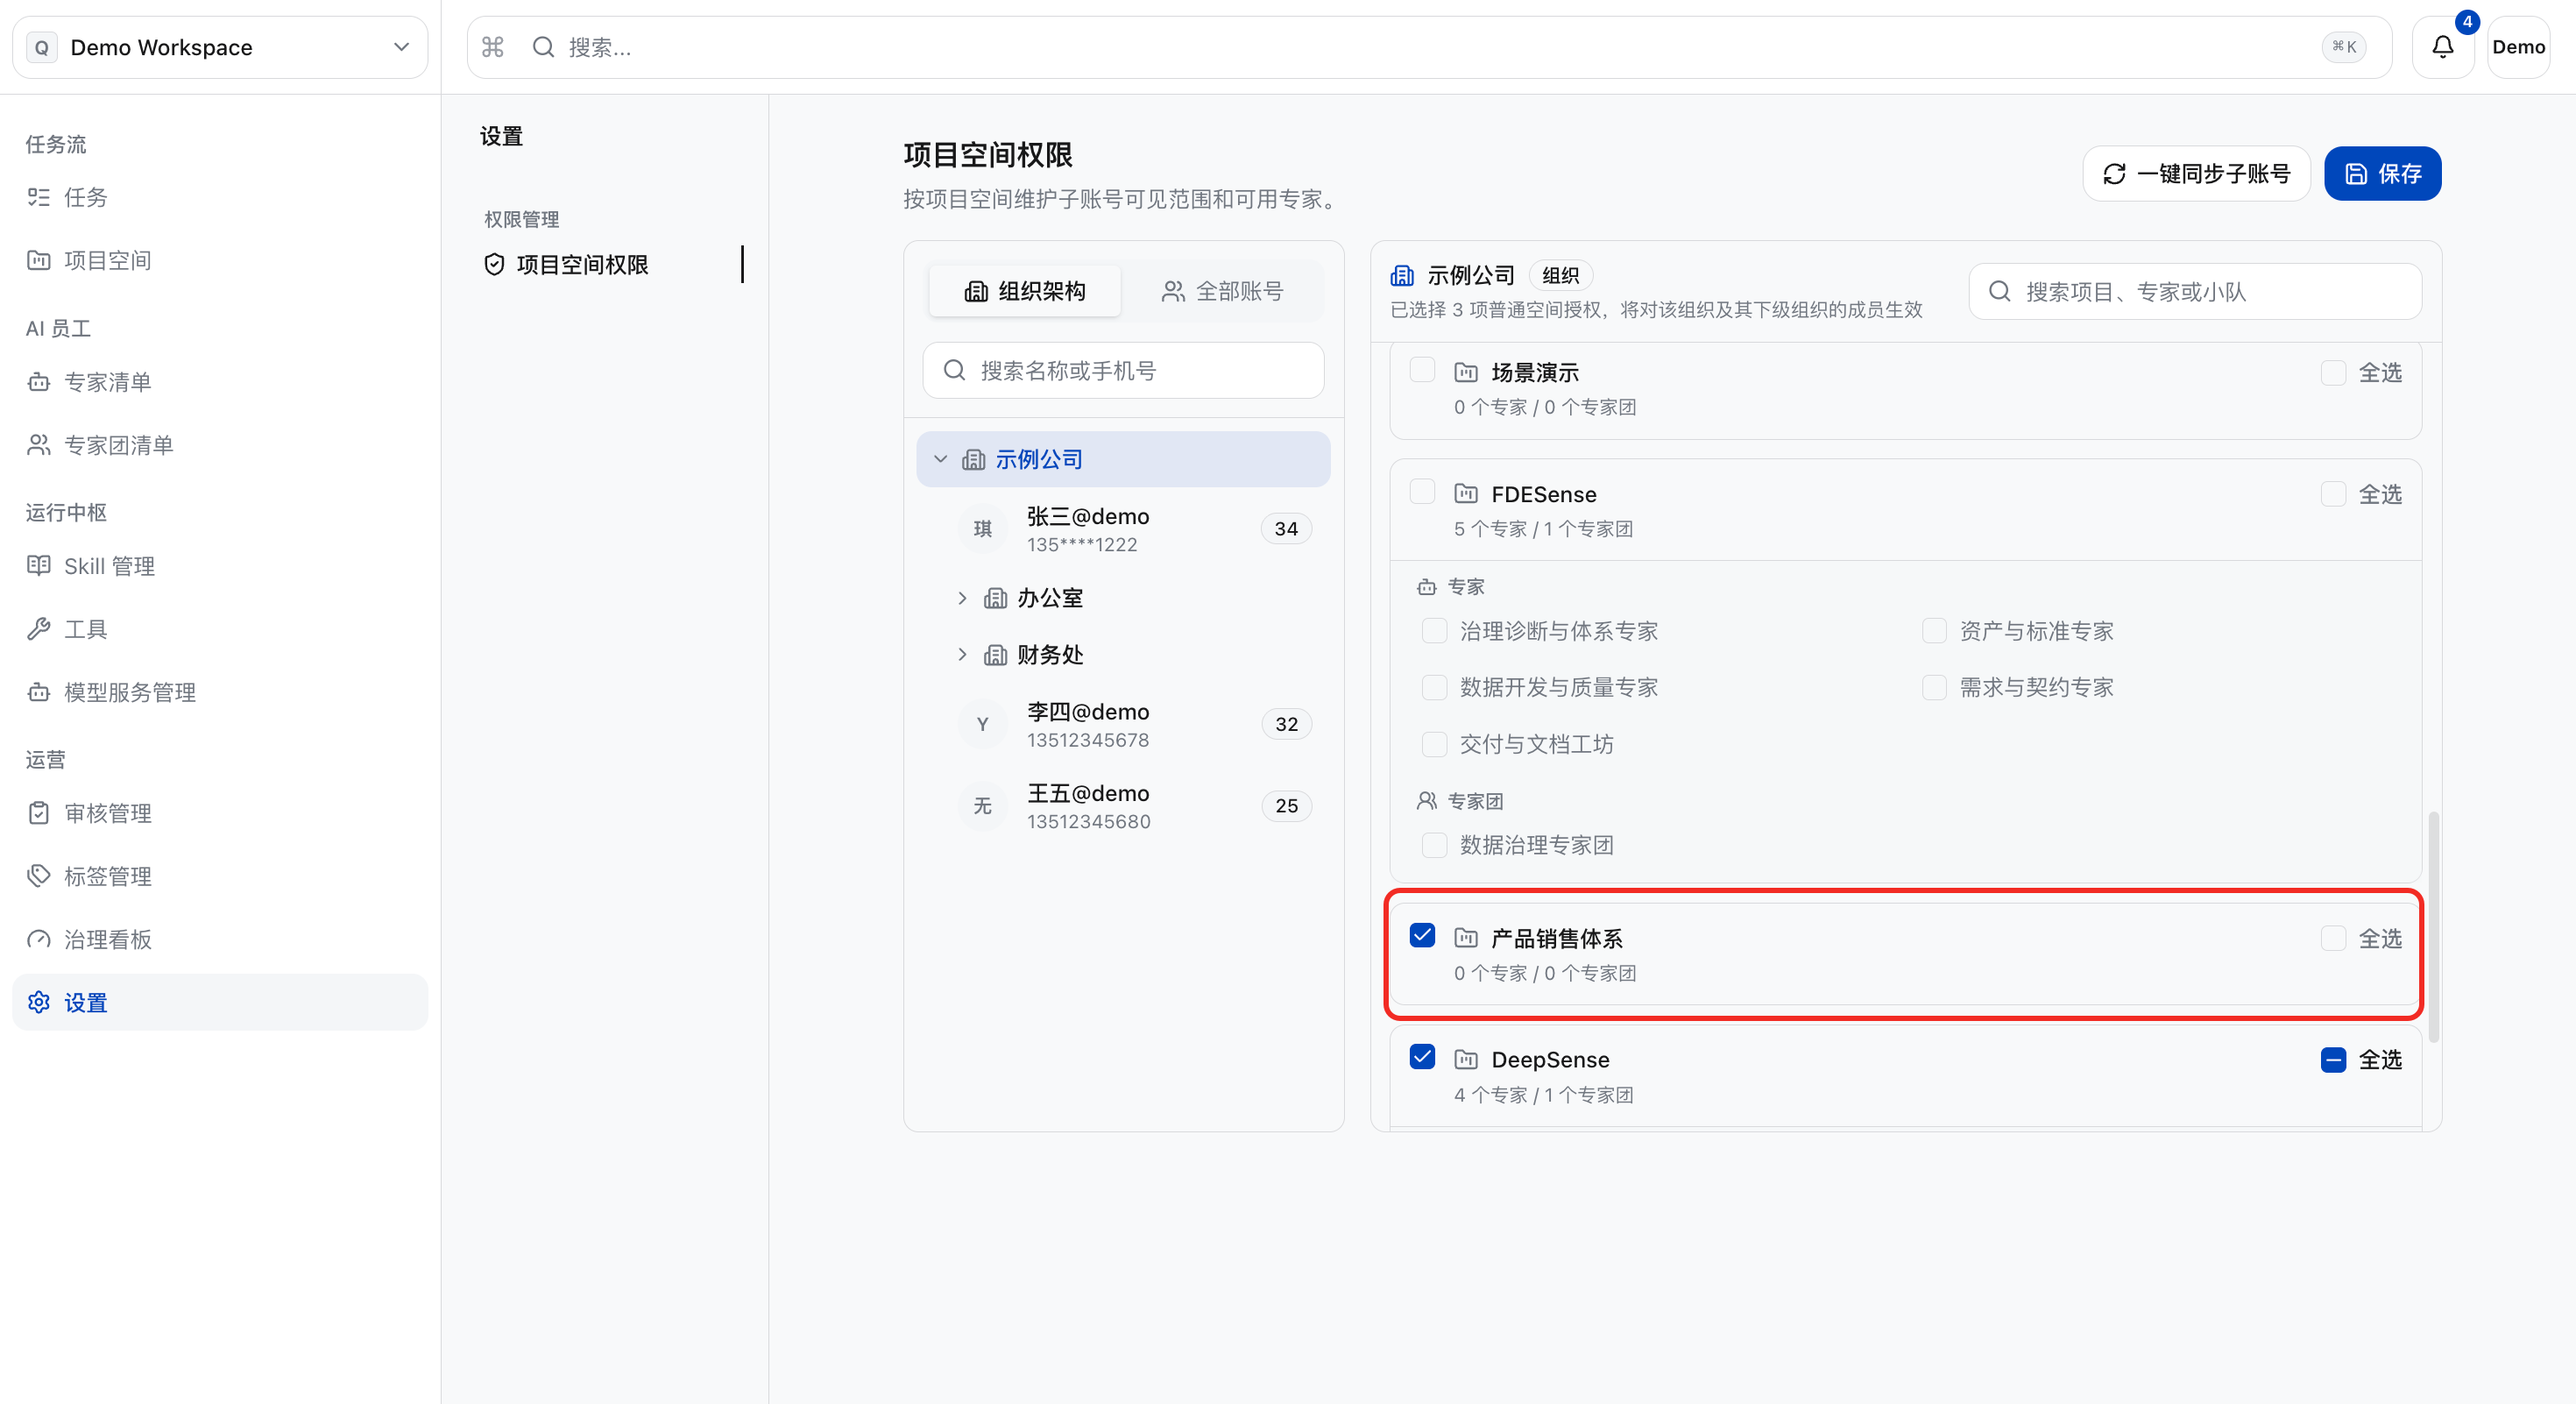
b. Click the organization or member account to be authorized, and check the project space name on the right. If the target organization or member account cannot be found via search, you can click “One-click Sync Sub-accounts” to manually refresh the list.
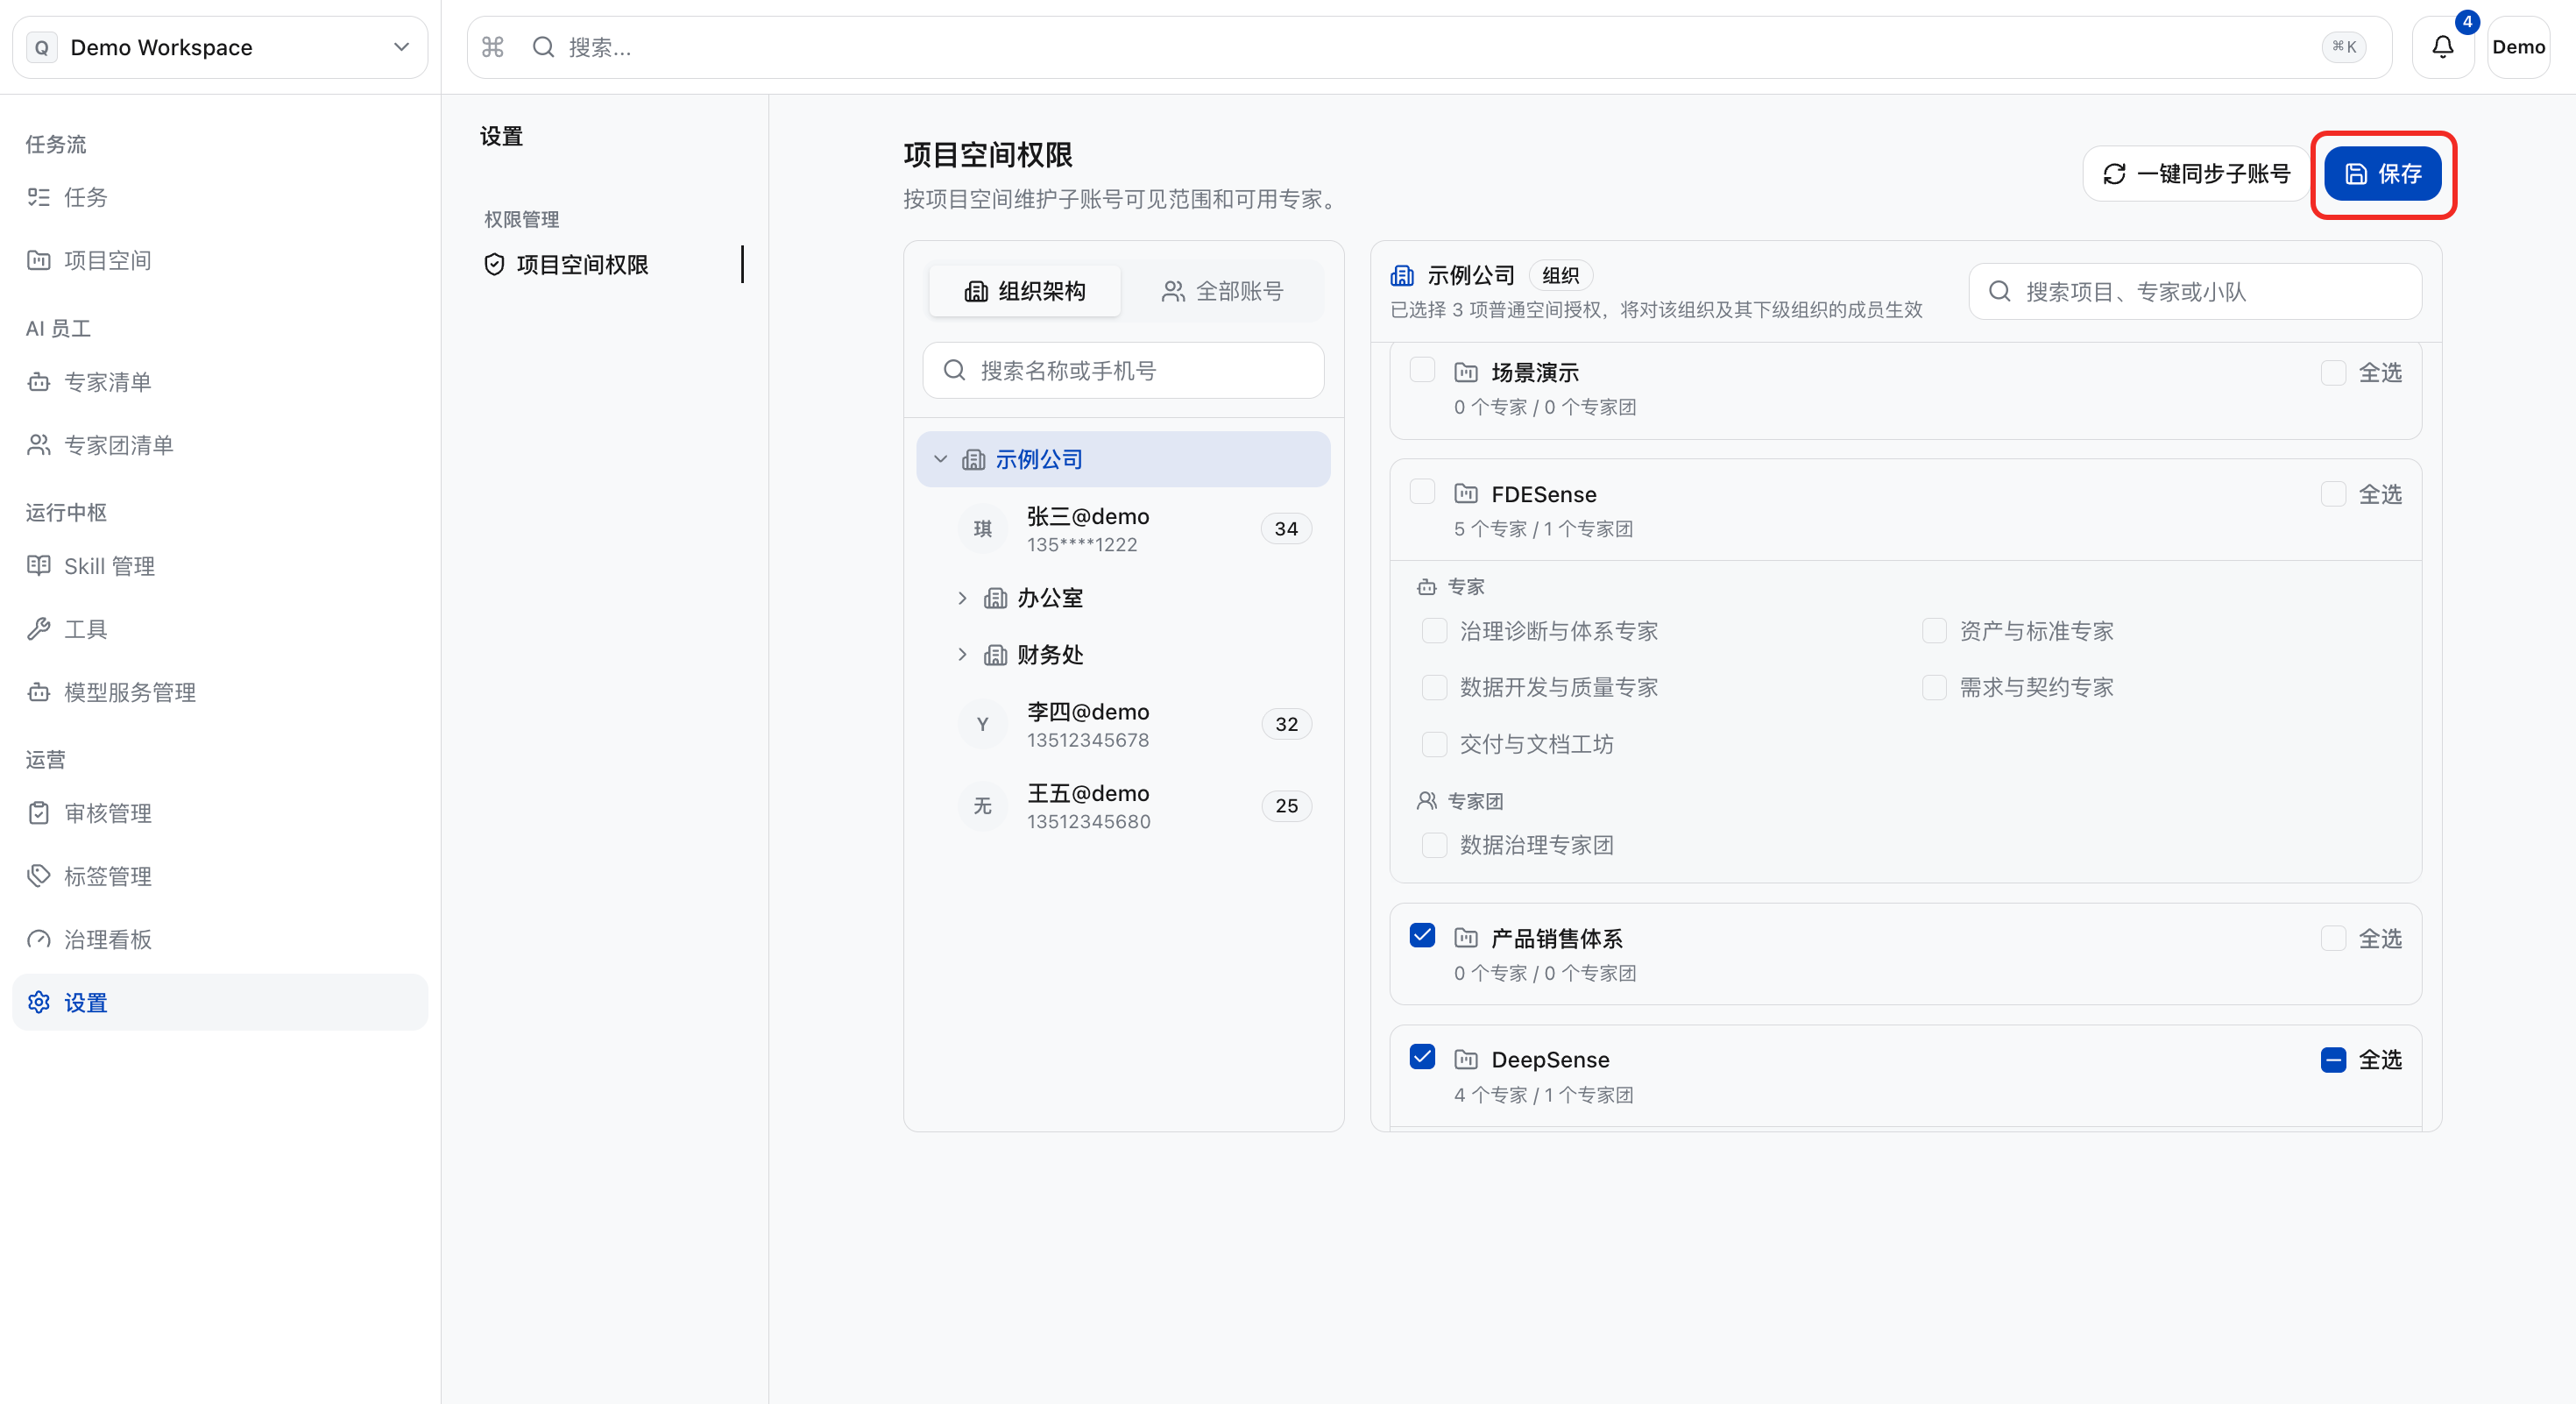
c. Click “Save”, and this member will become a member of the corresponding project space.
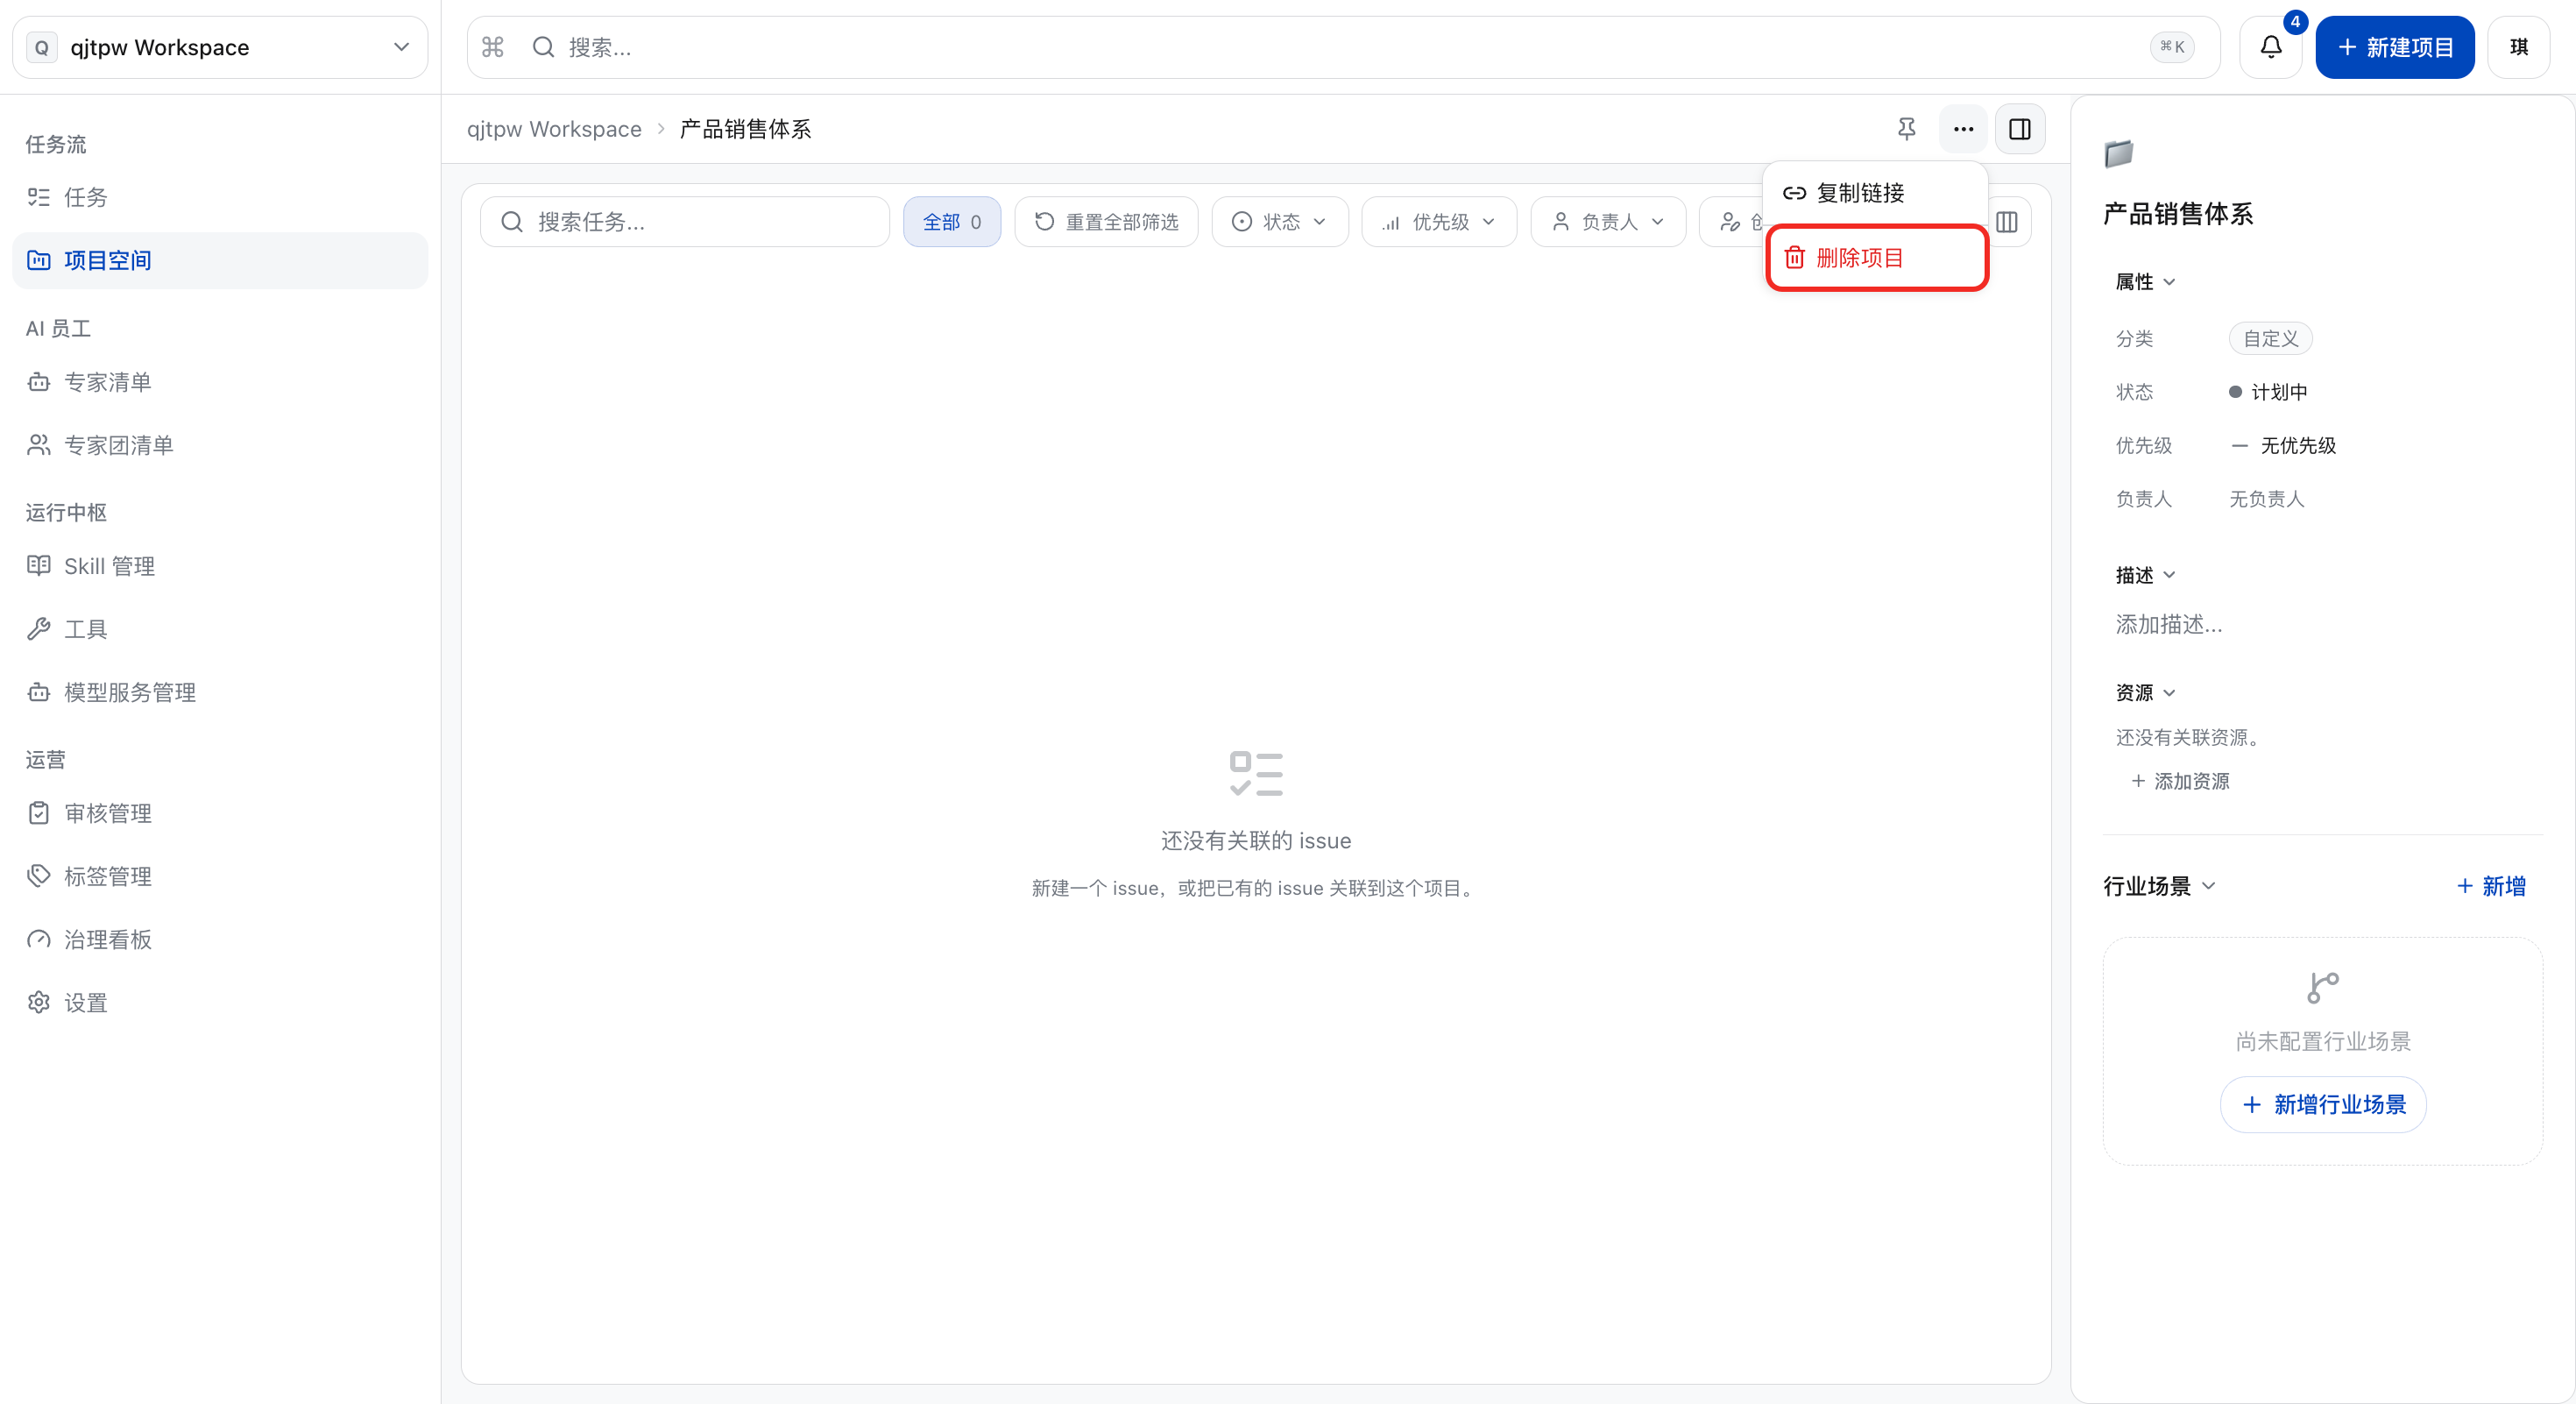
Delete Project Space
a. Click the target project space.
b. Click “Delete Item”.
Task
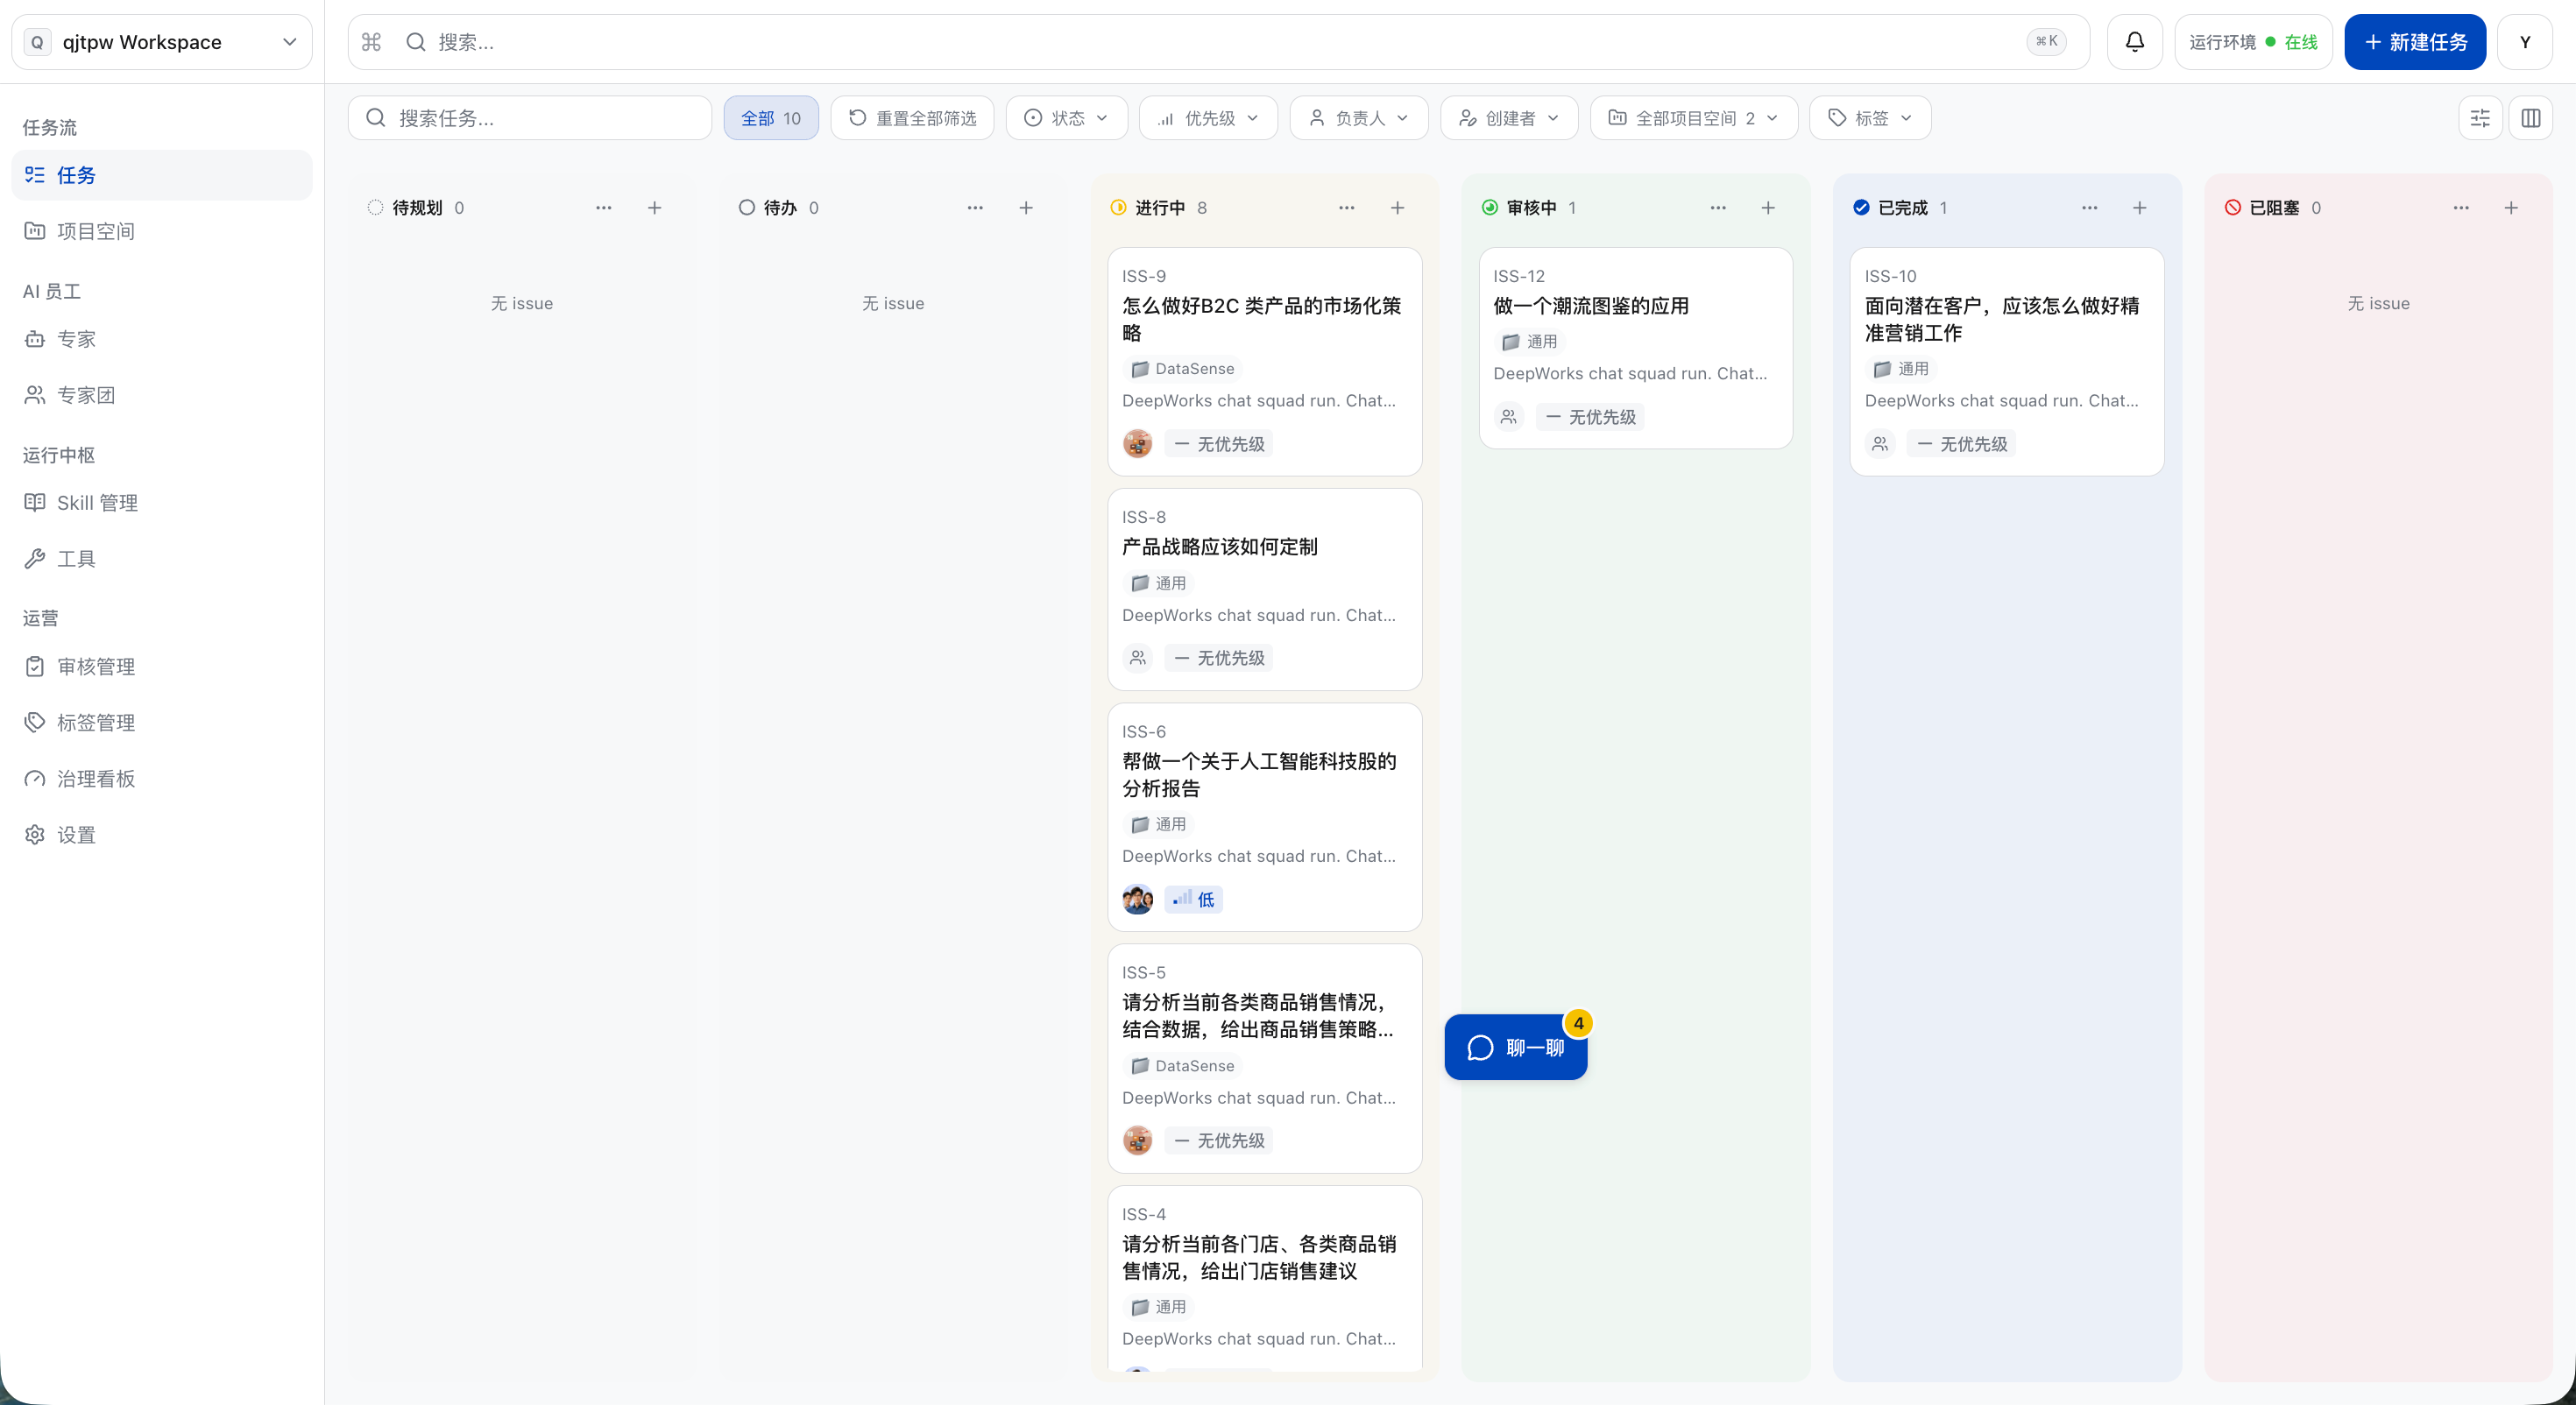
View Tasks
a. Click “Tasks” in the left menu bar, and administrators can view the list of long-running tasks initiated when tenant members summon experts/expert groups according to task status. Click the task card to view the details of the task.
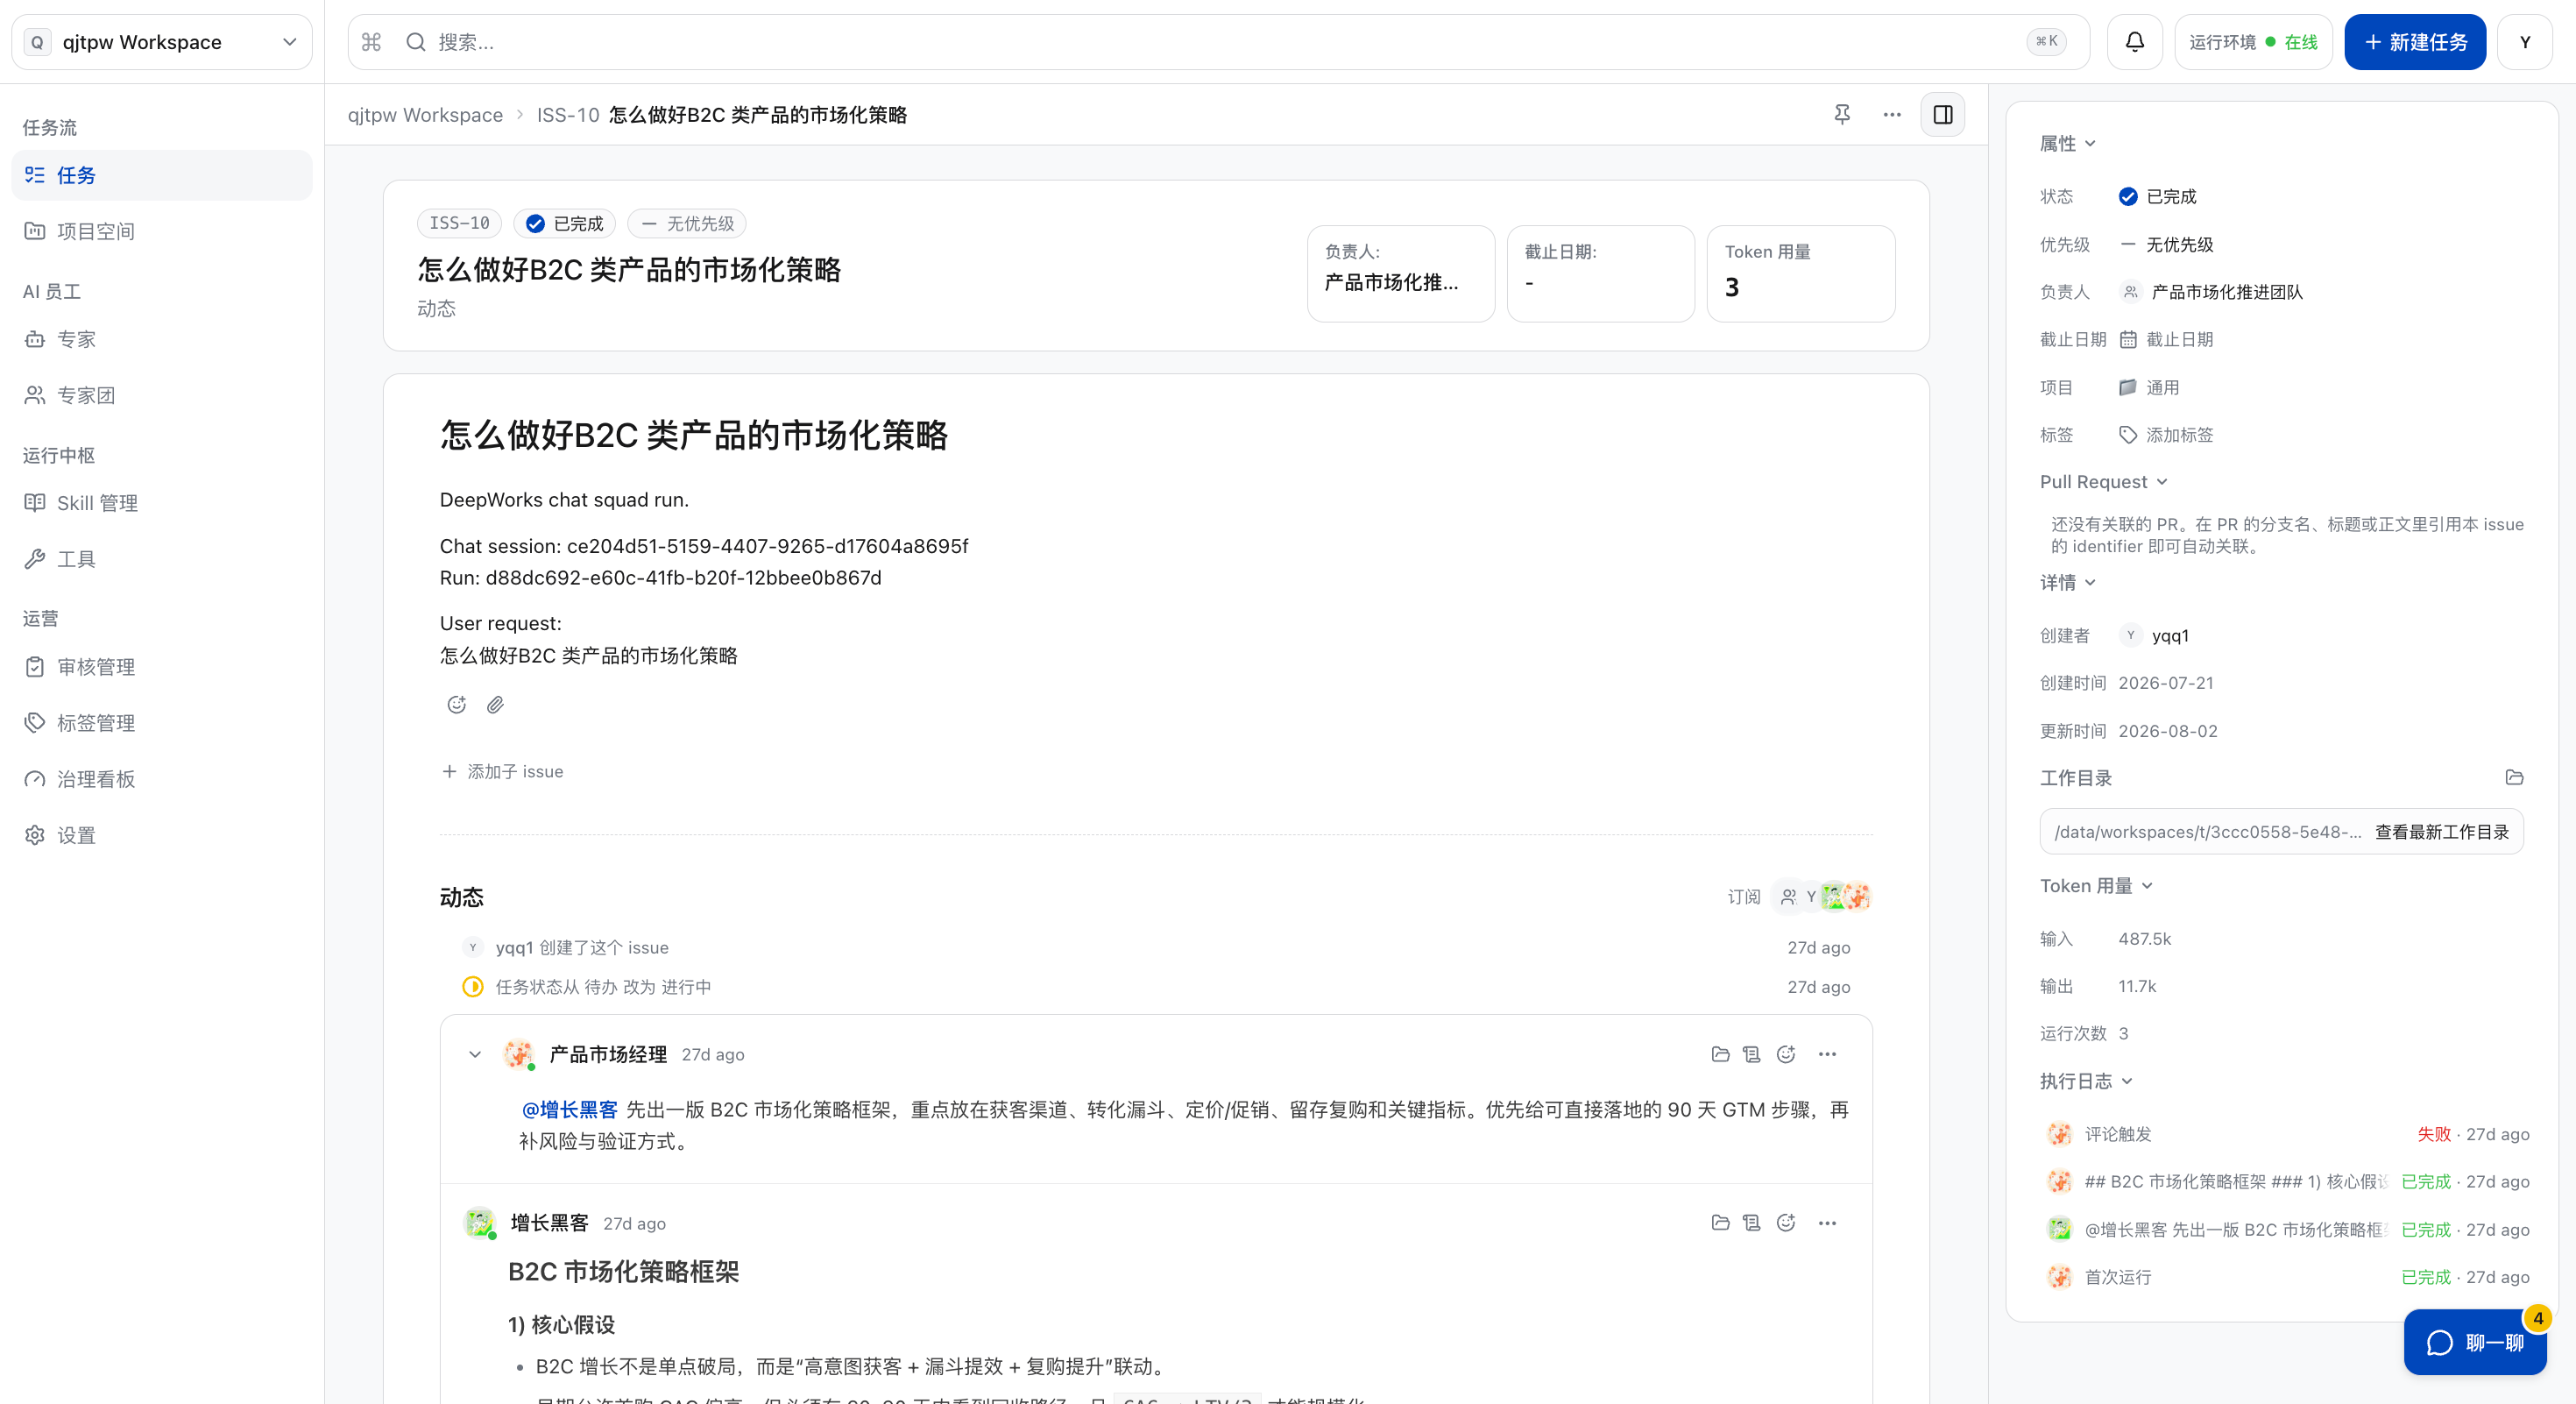
b. On the task details page, you can view the task information, updates and execution logs, which facilitates administrators to analyze the operation status of individual experts or expert teams.
List of Experts
View Experts
a. Click “Experts” in the left menu bar to view the experts created by you or all experts under the affiliated project space. There are two types of experts: one is built-in experts, which refer to the built-in experts provided and uniformly maintained by the platform; the other is custom experts, which refer to the business experts built by the tenant according to their own business scenarios.
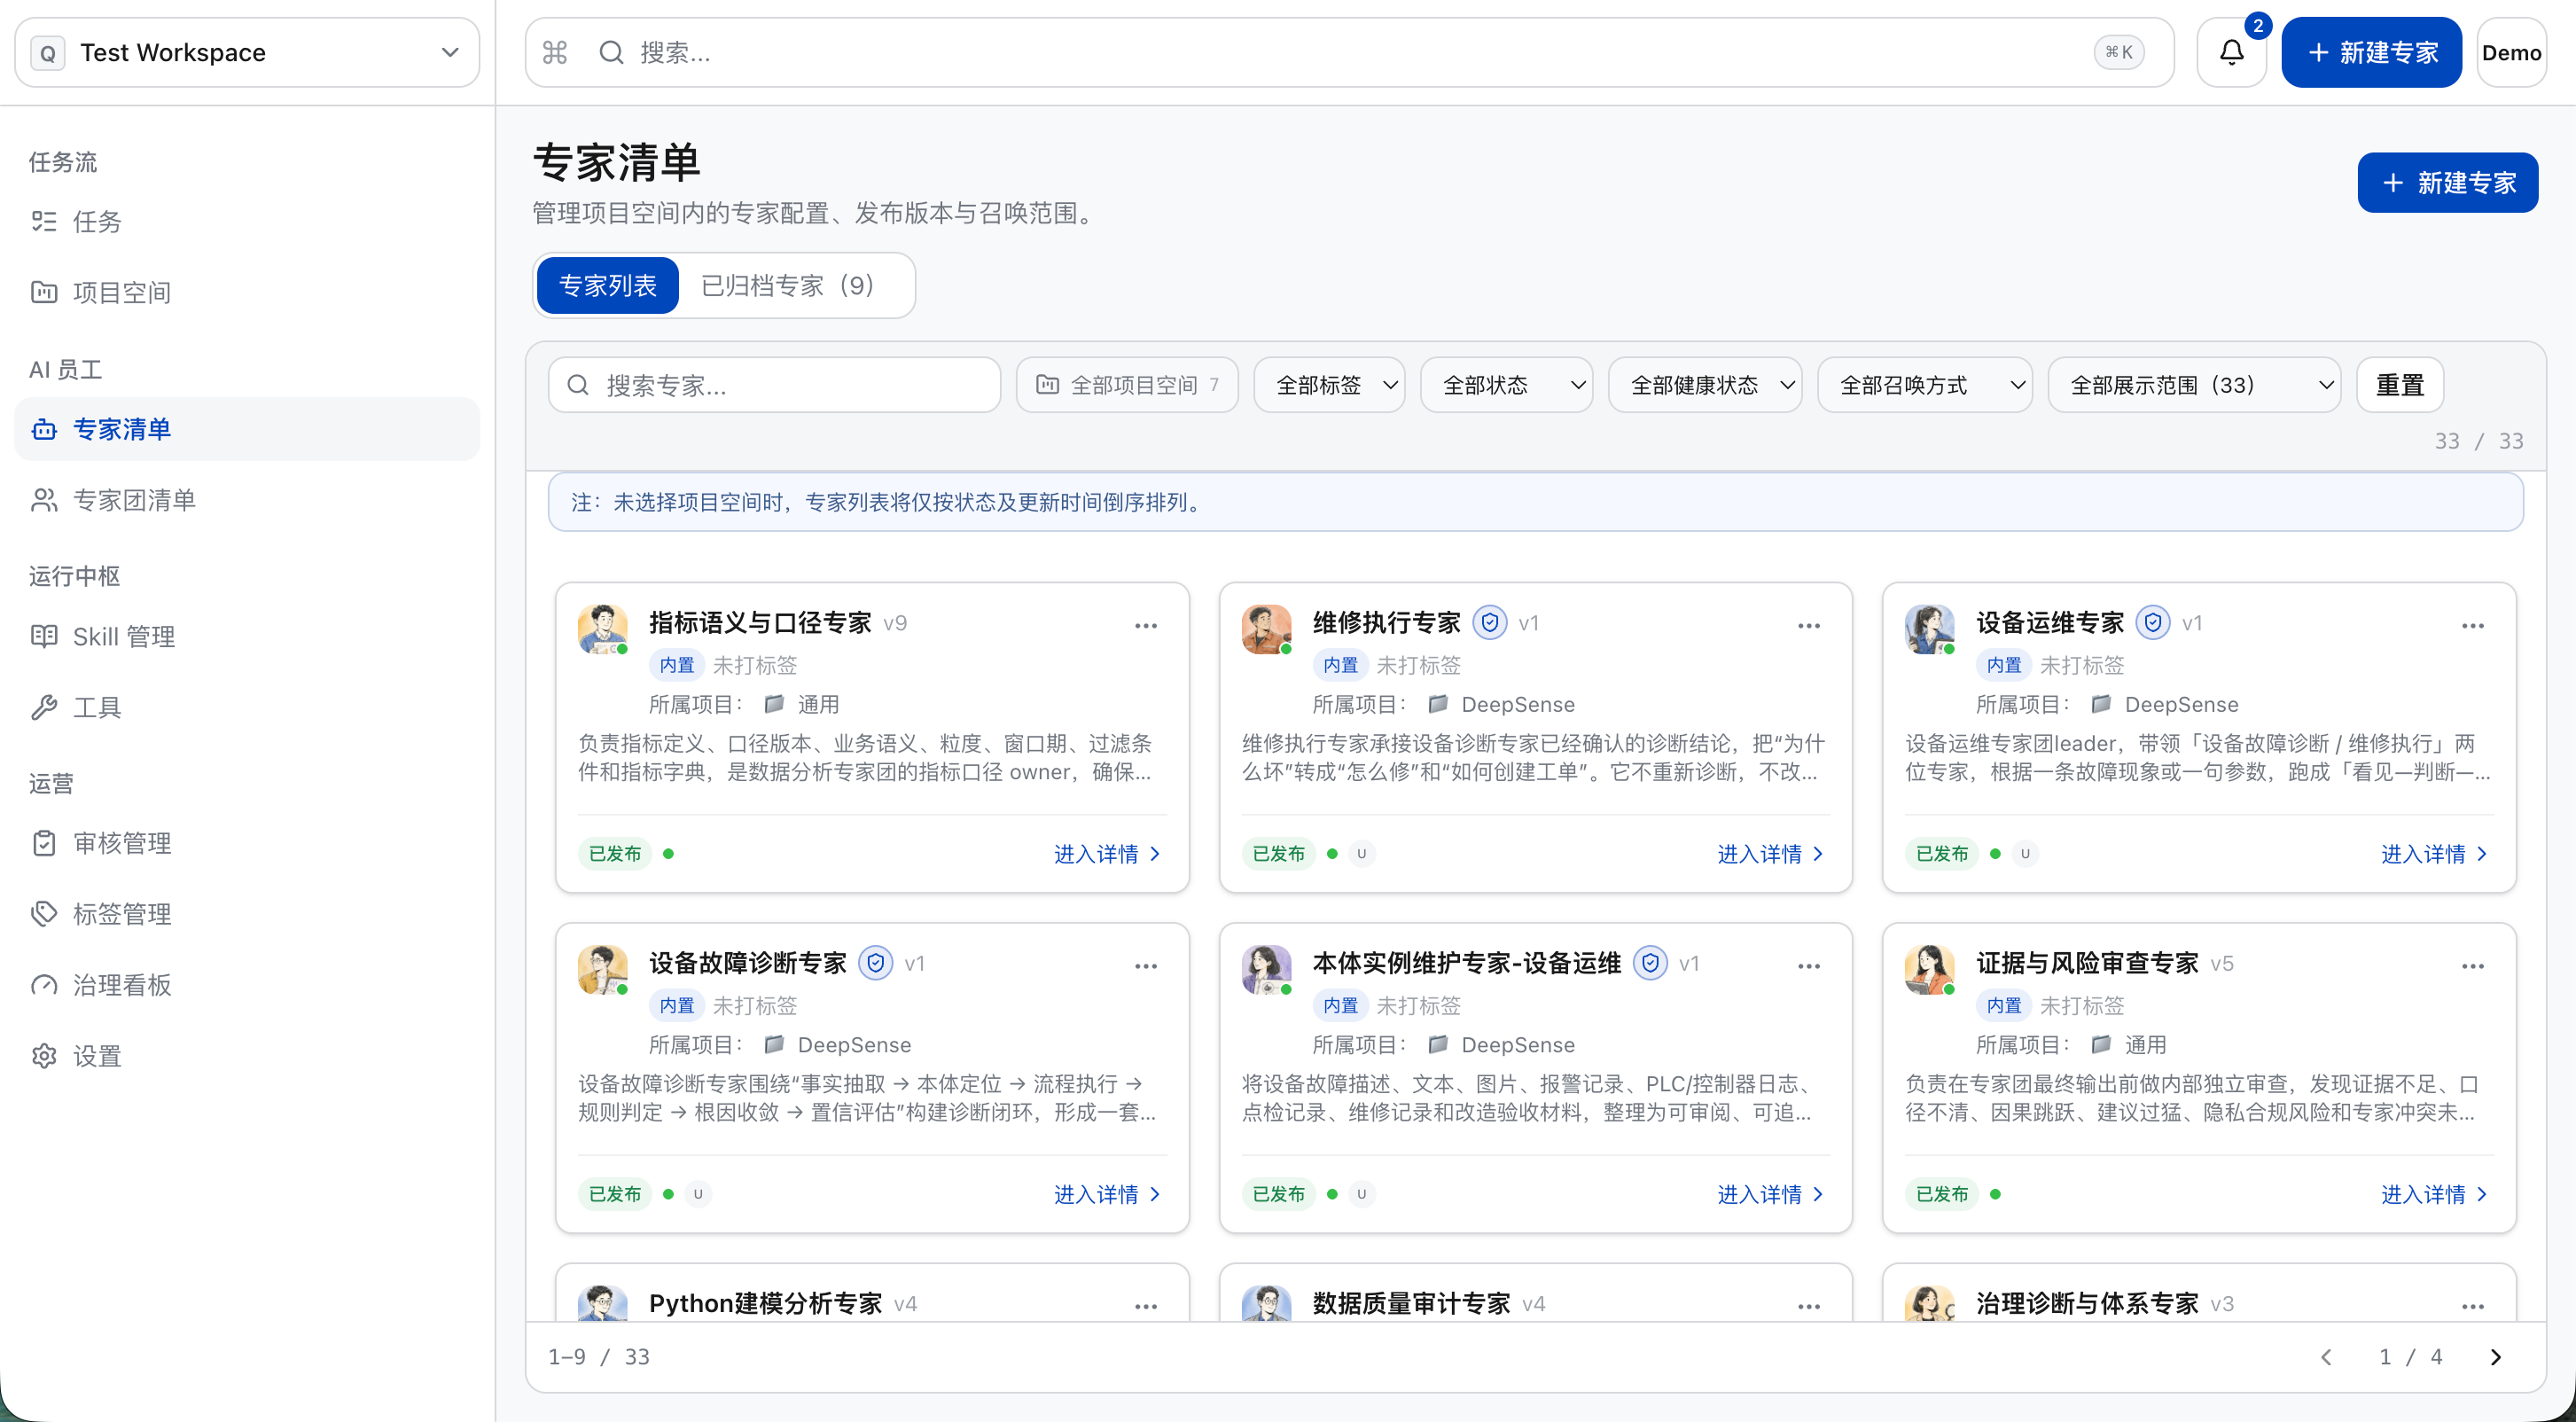
b. Click on the expert card to view the expert’s configuration details. Note: Built-in experts that are uniformly maintained by the platform are not eligible for detail viewing.
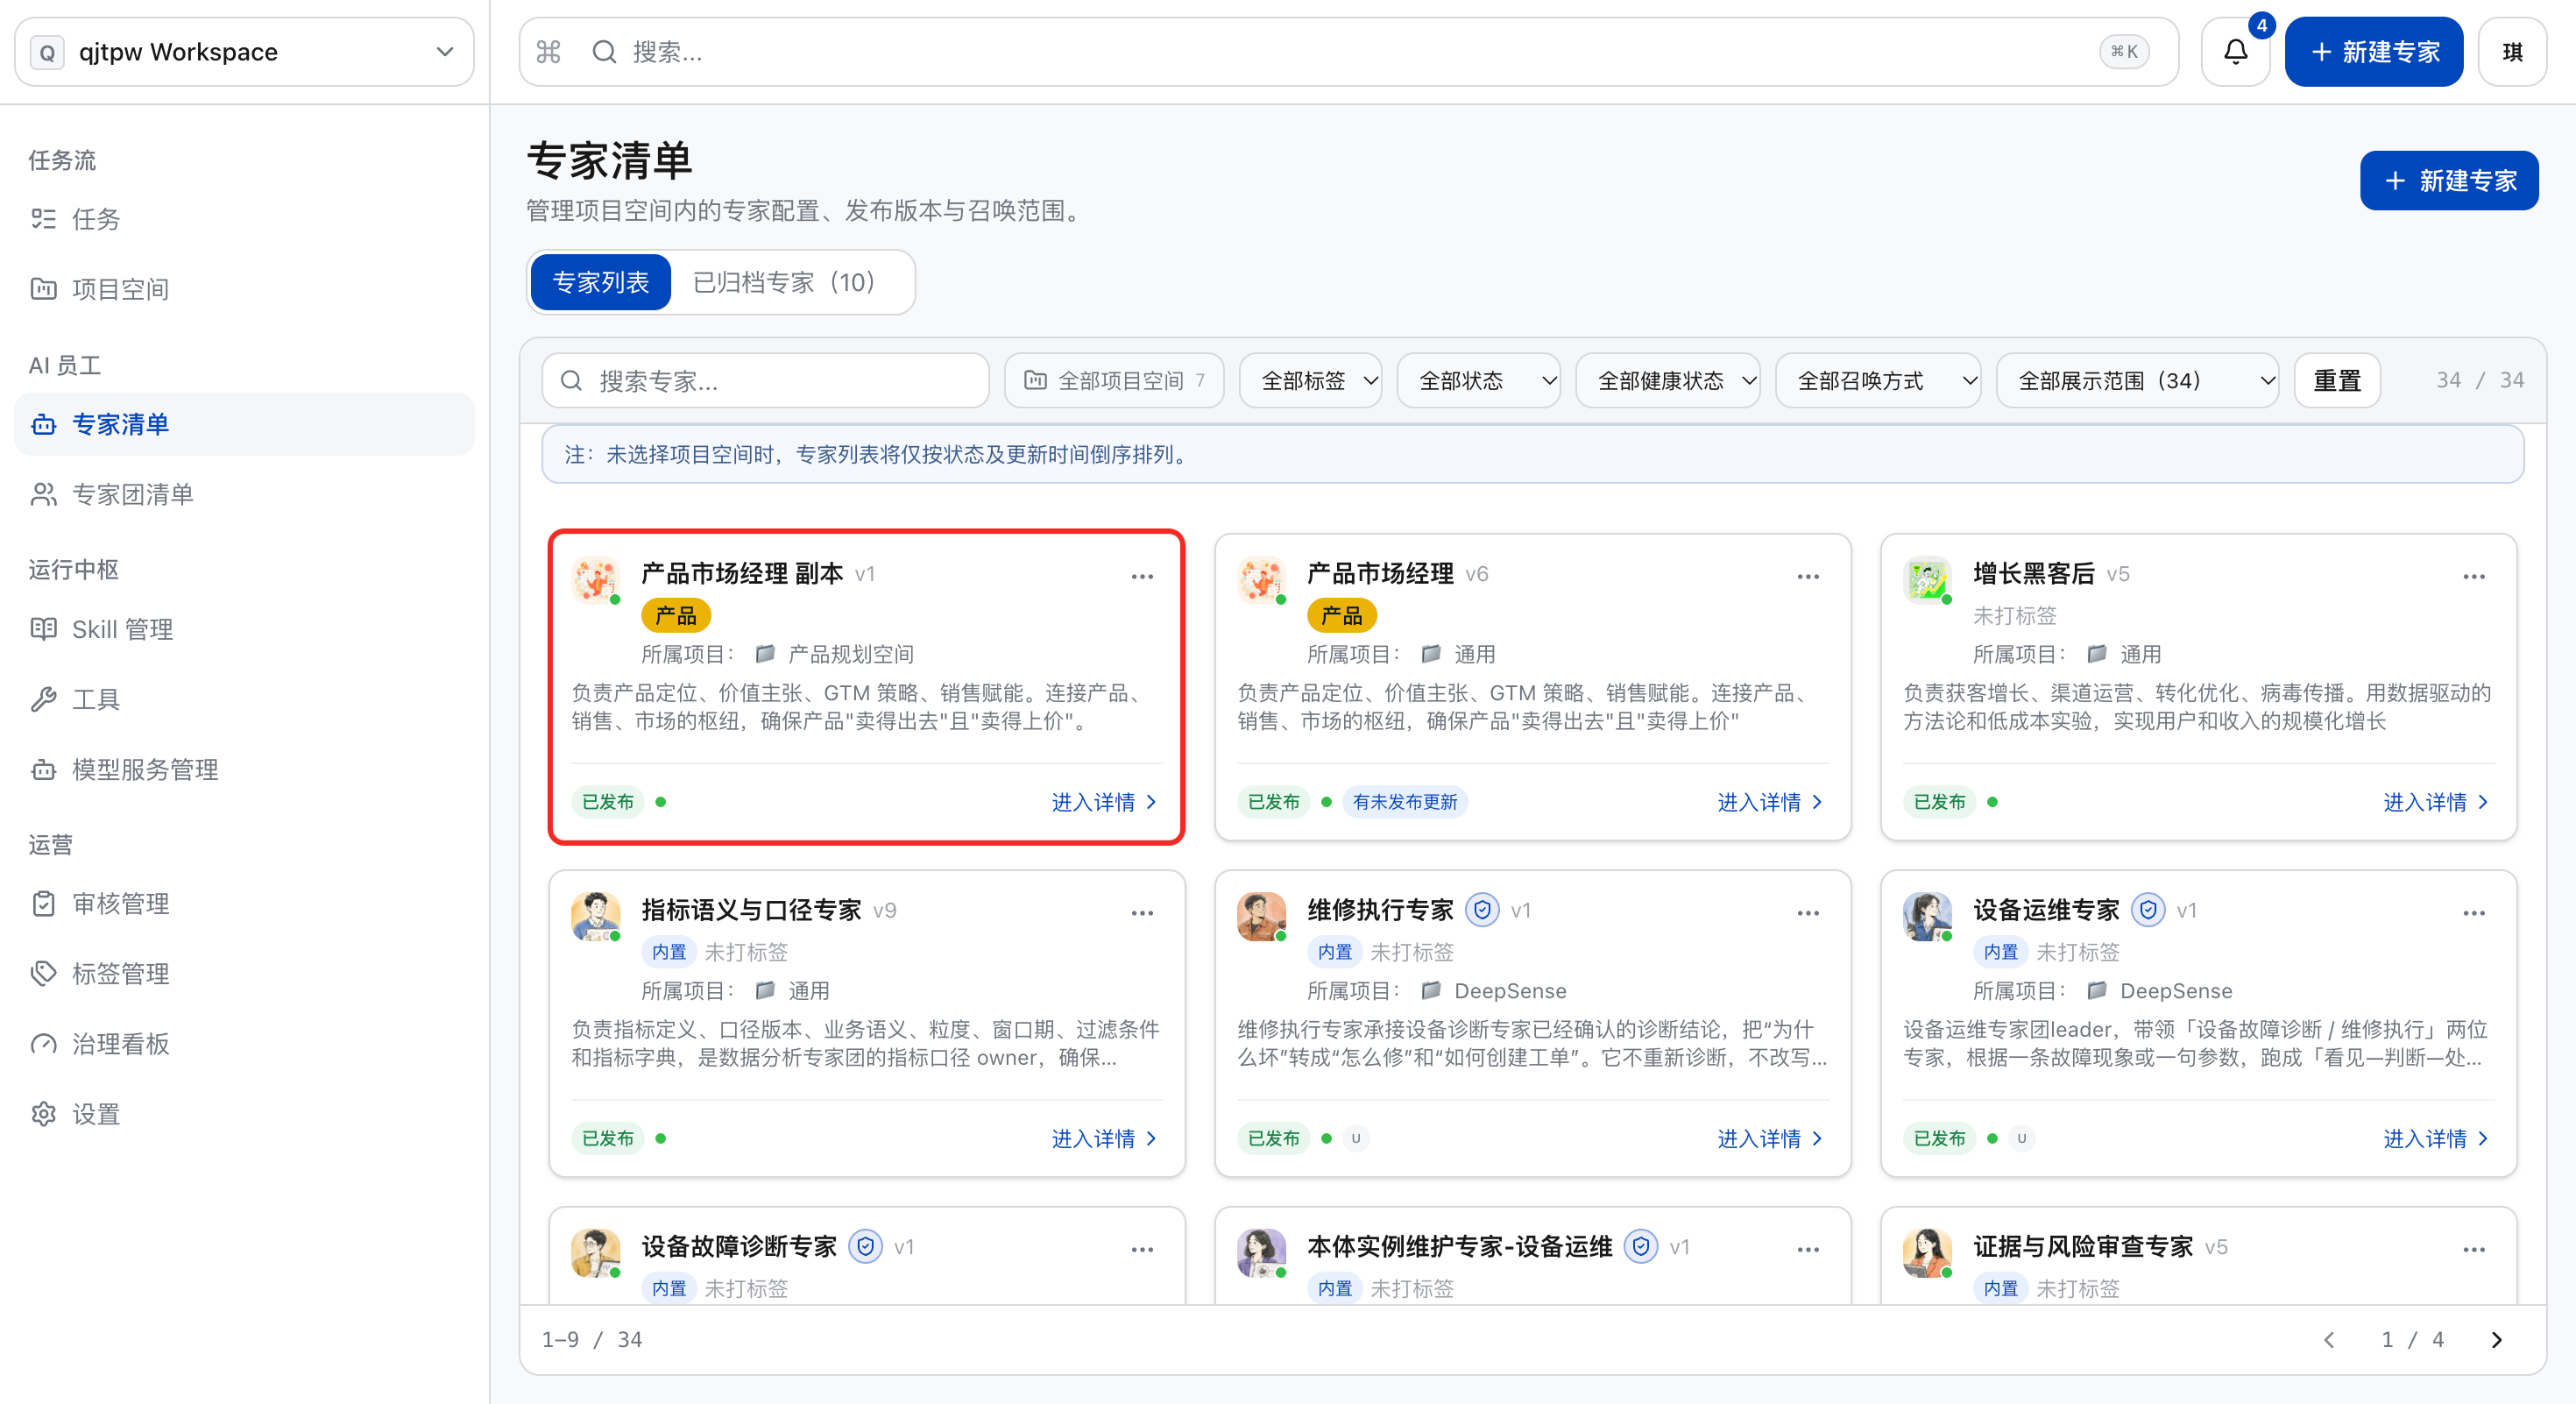
c. View the expert’s configuration information, including conversation experience, instructions, SOUL.md and other details.
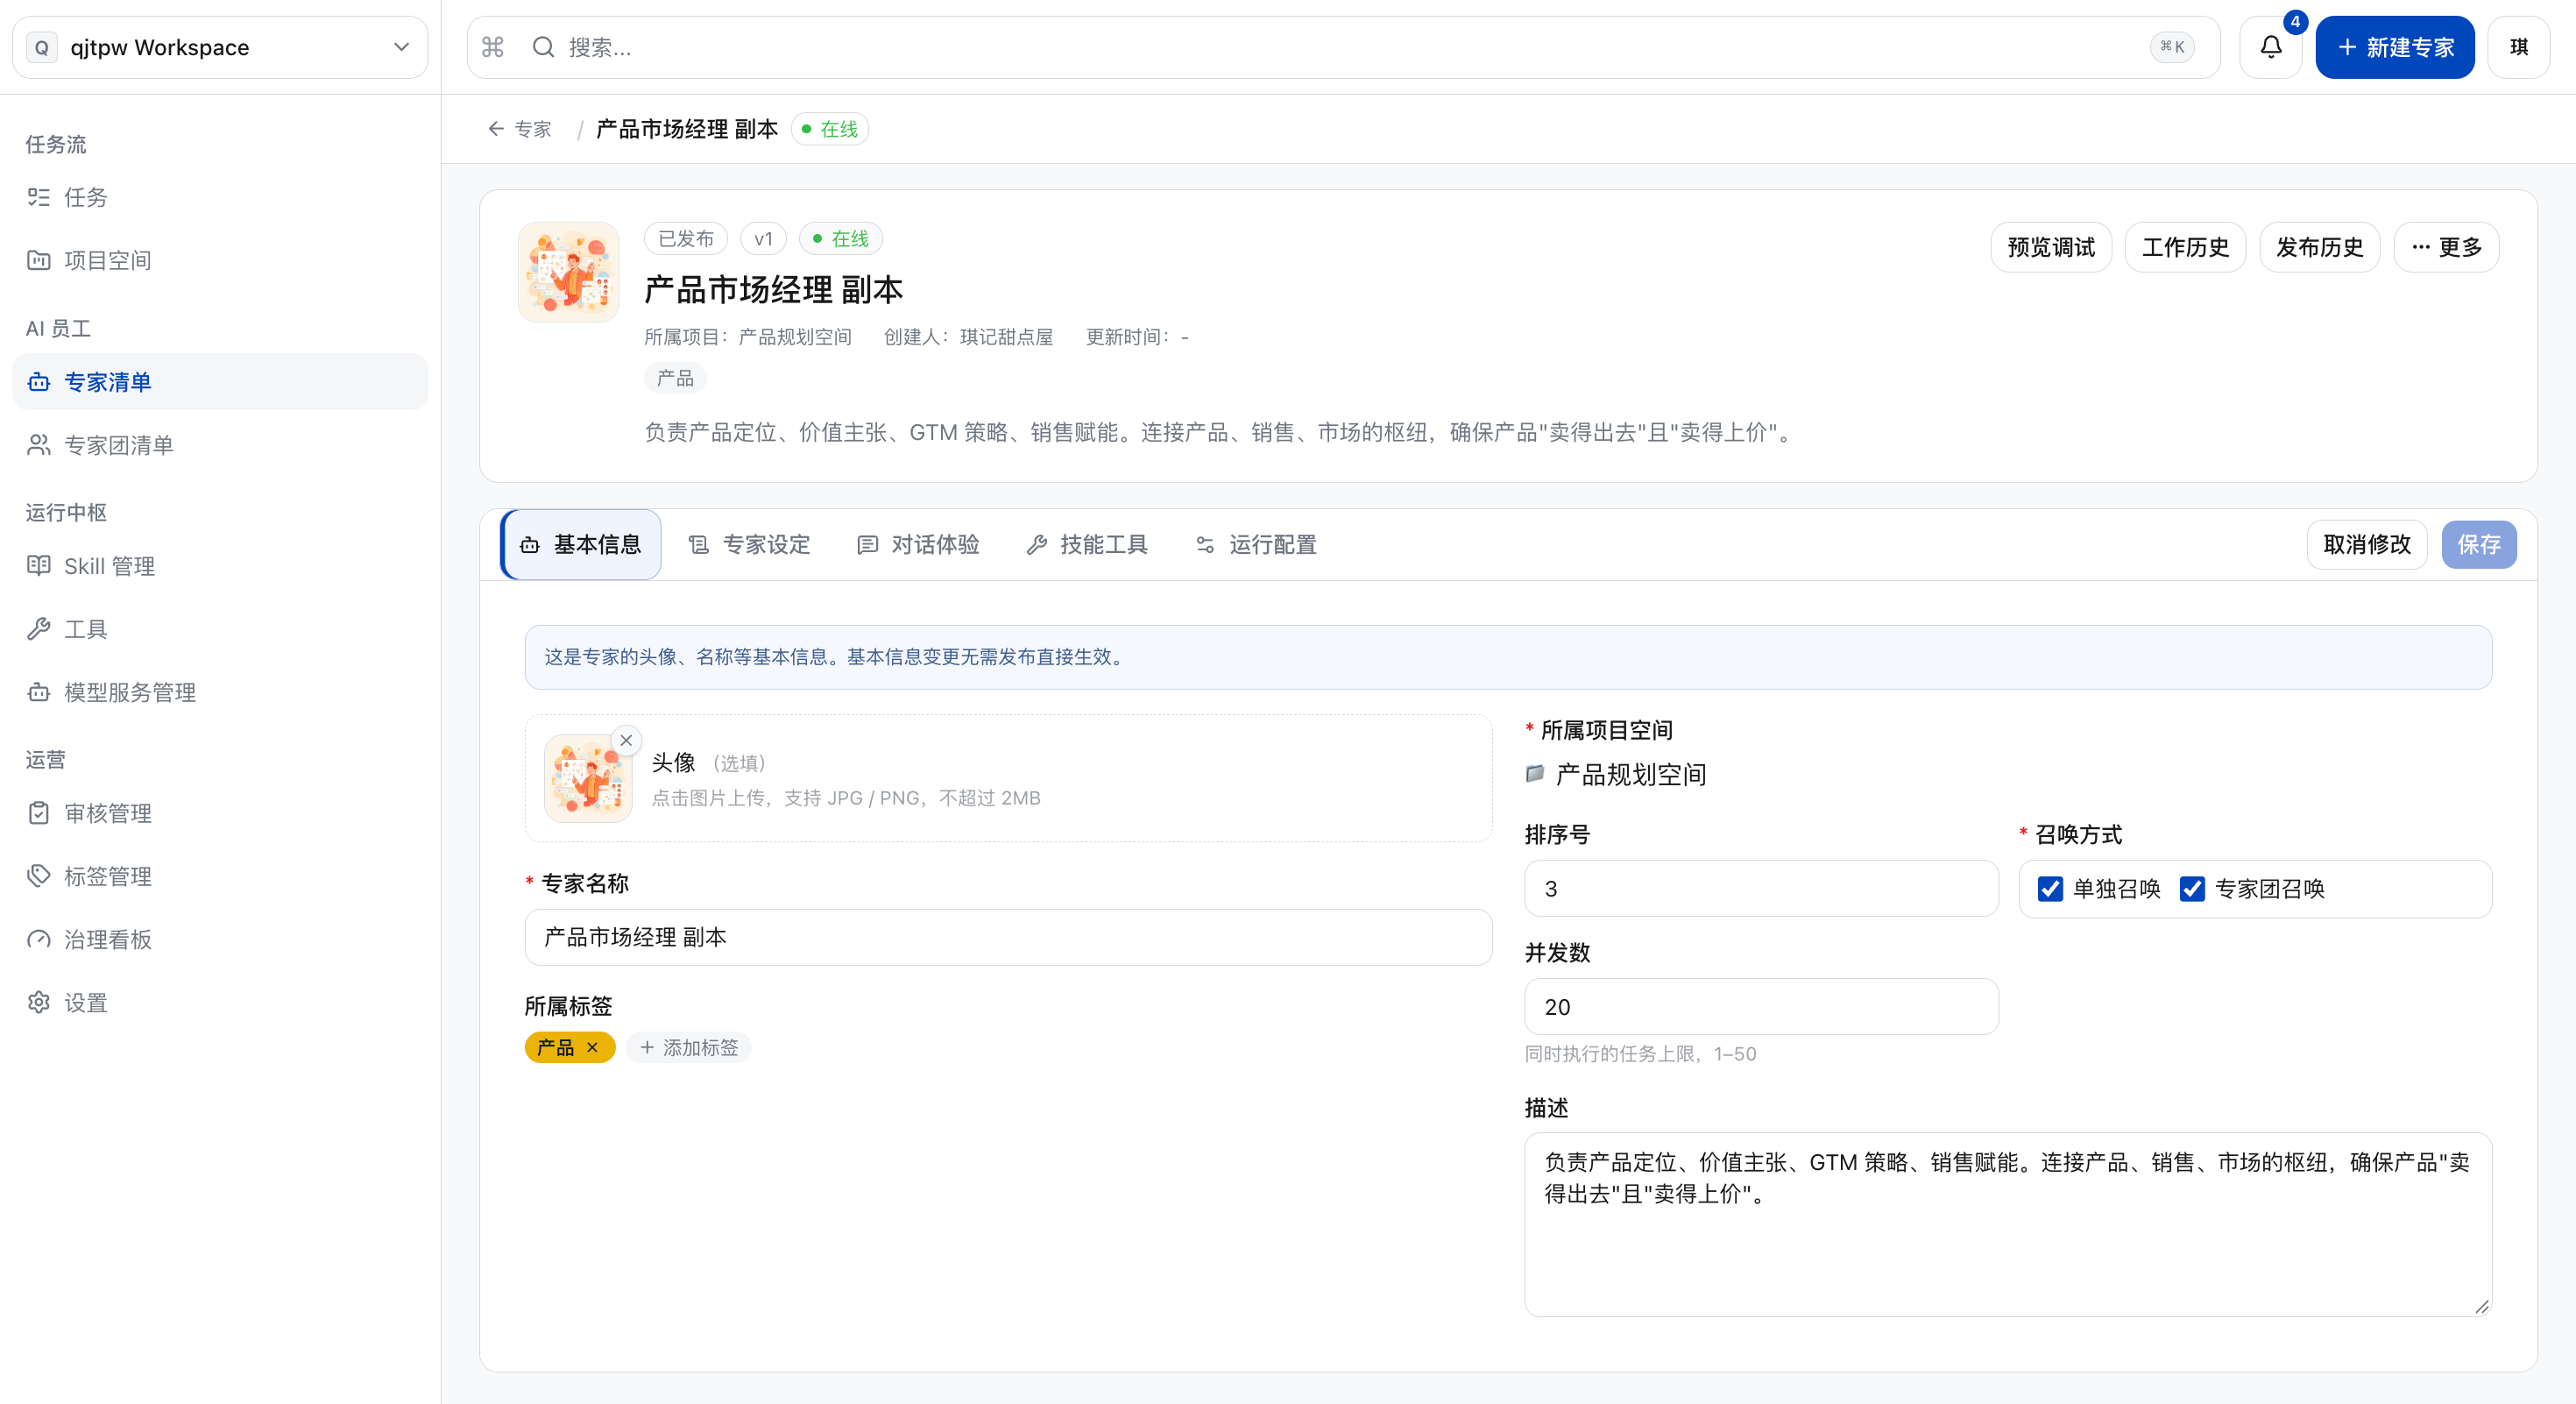
New Expert
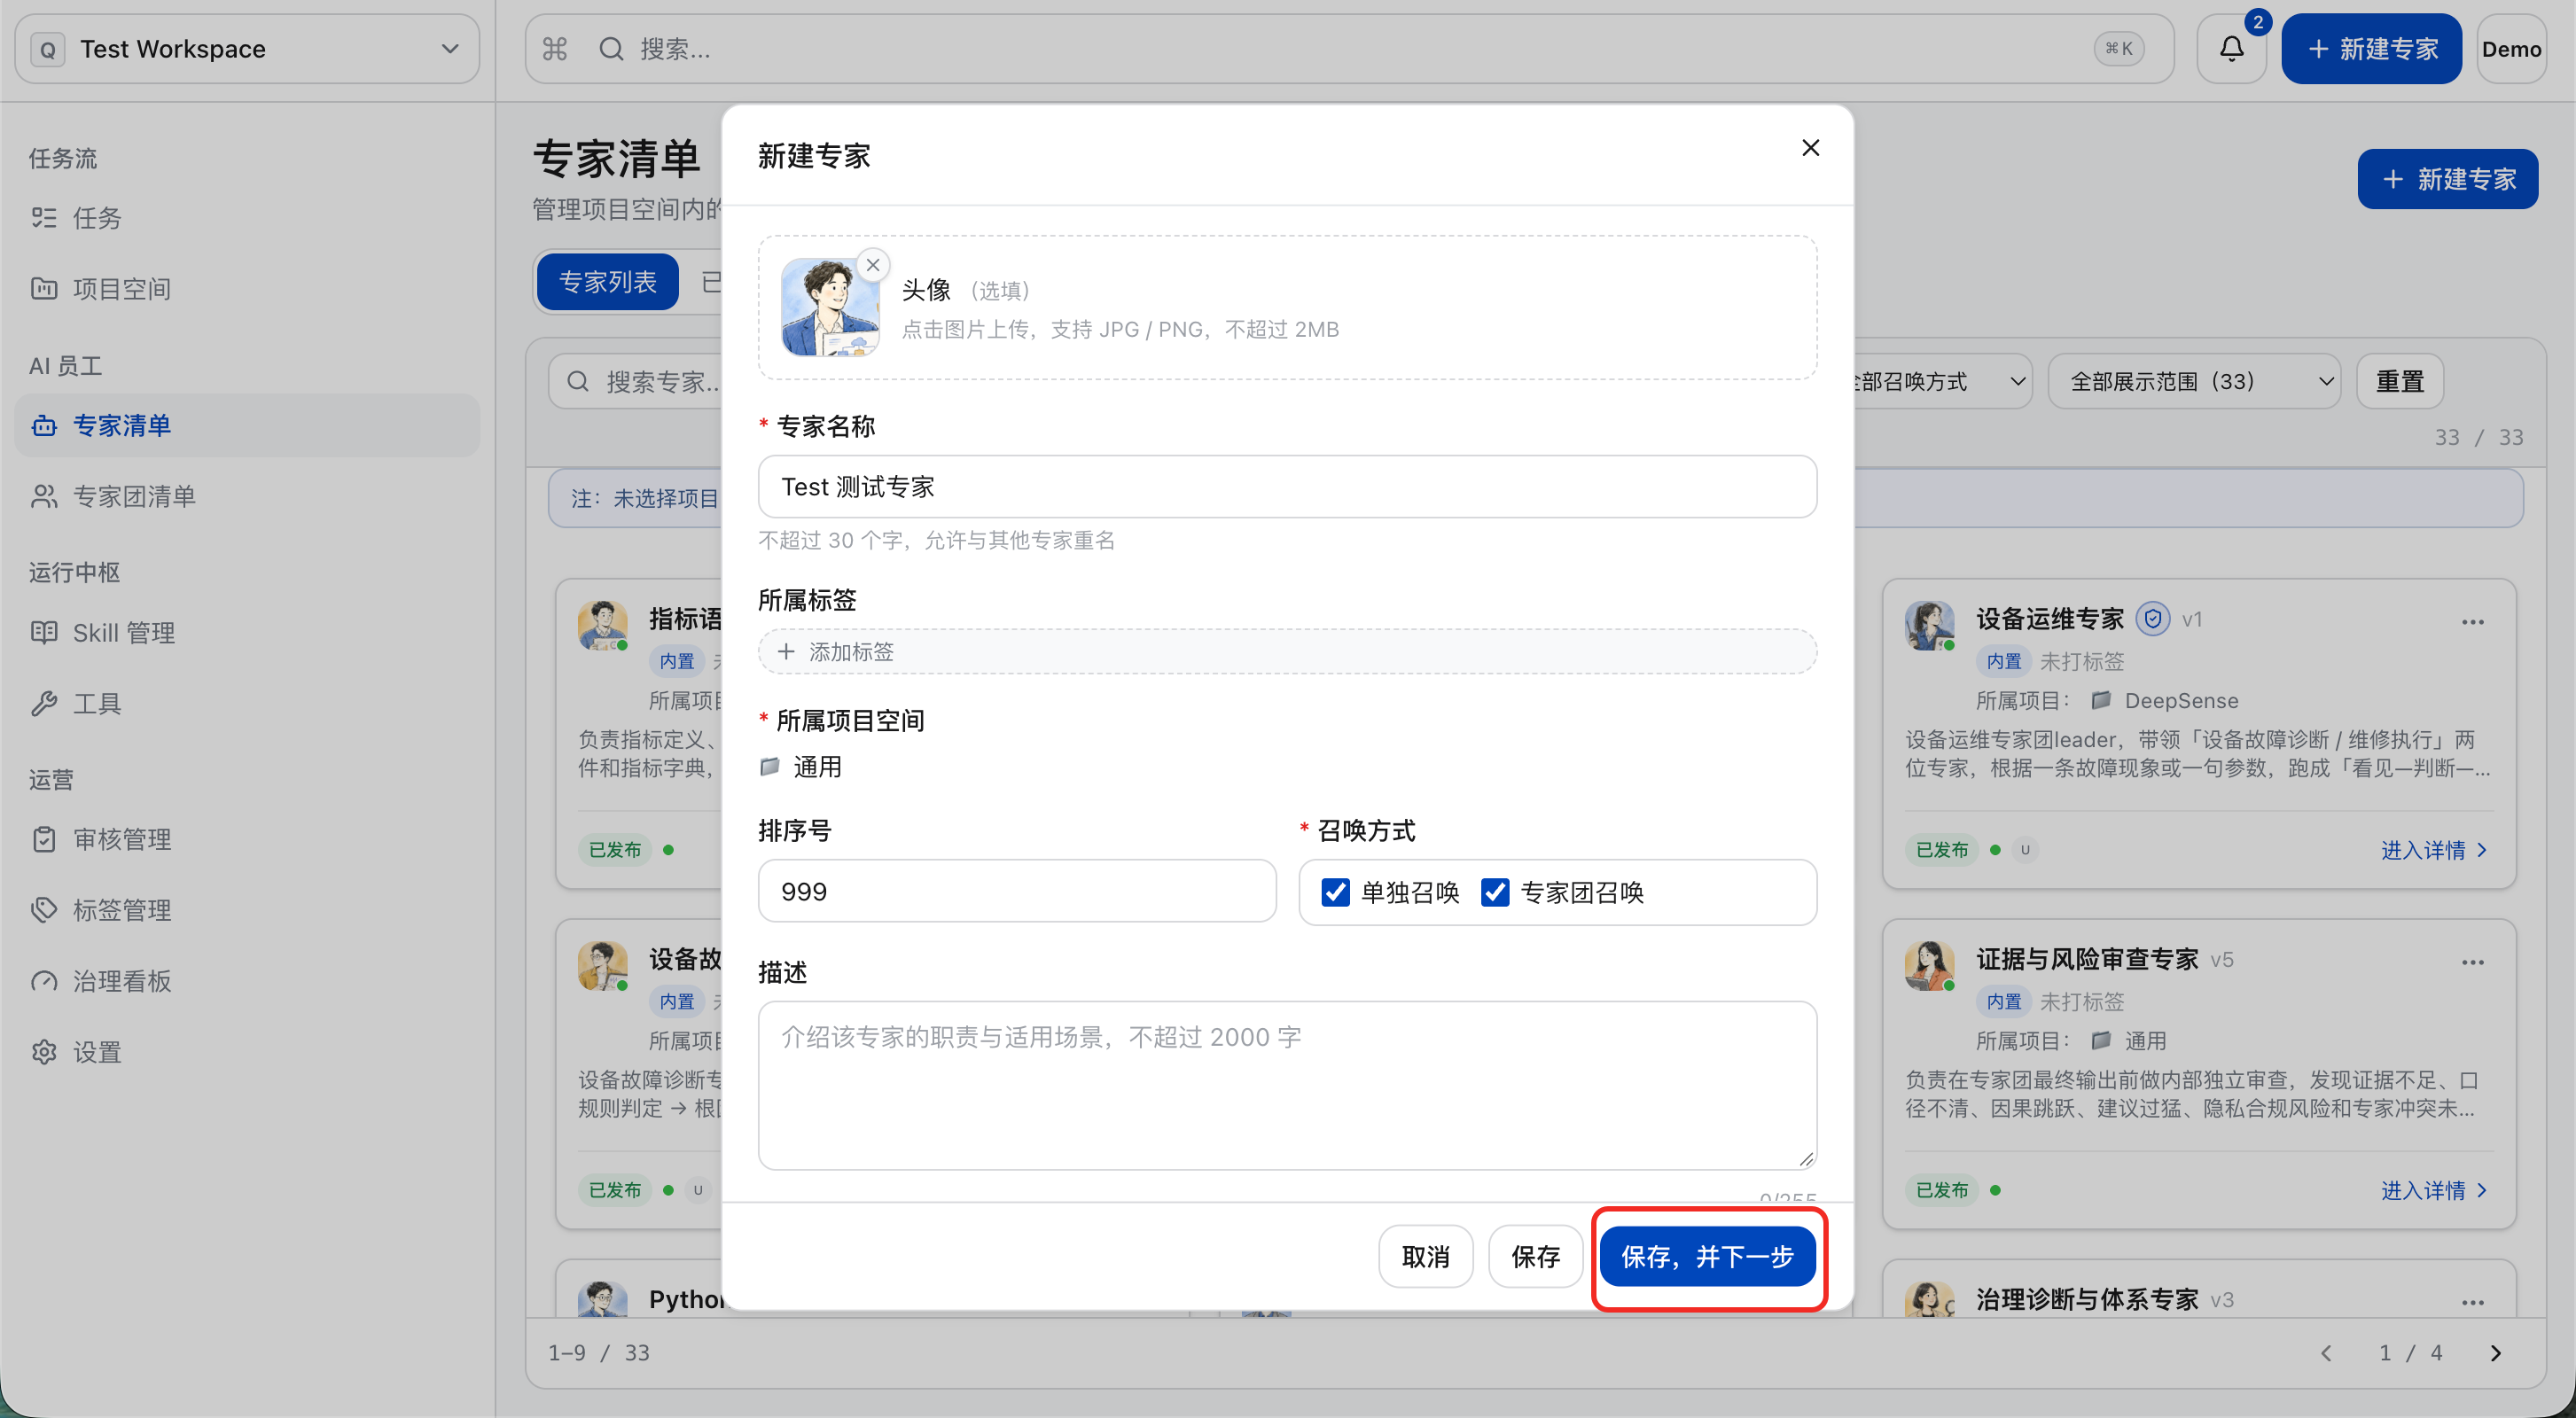
a. Click “New Expert”.
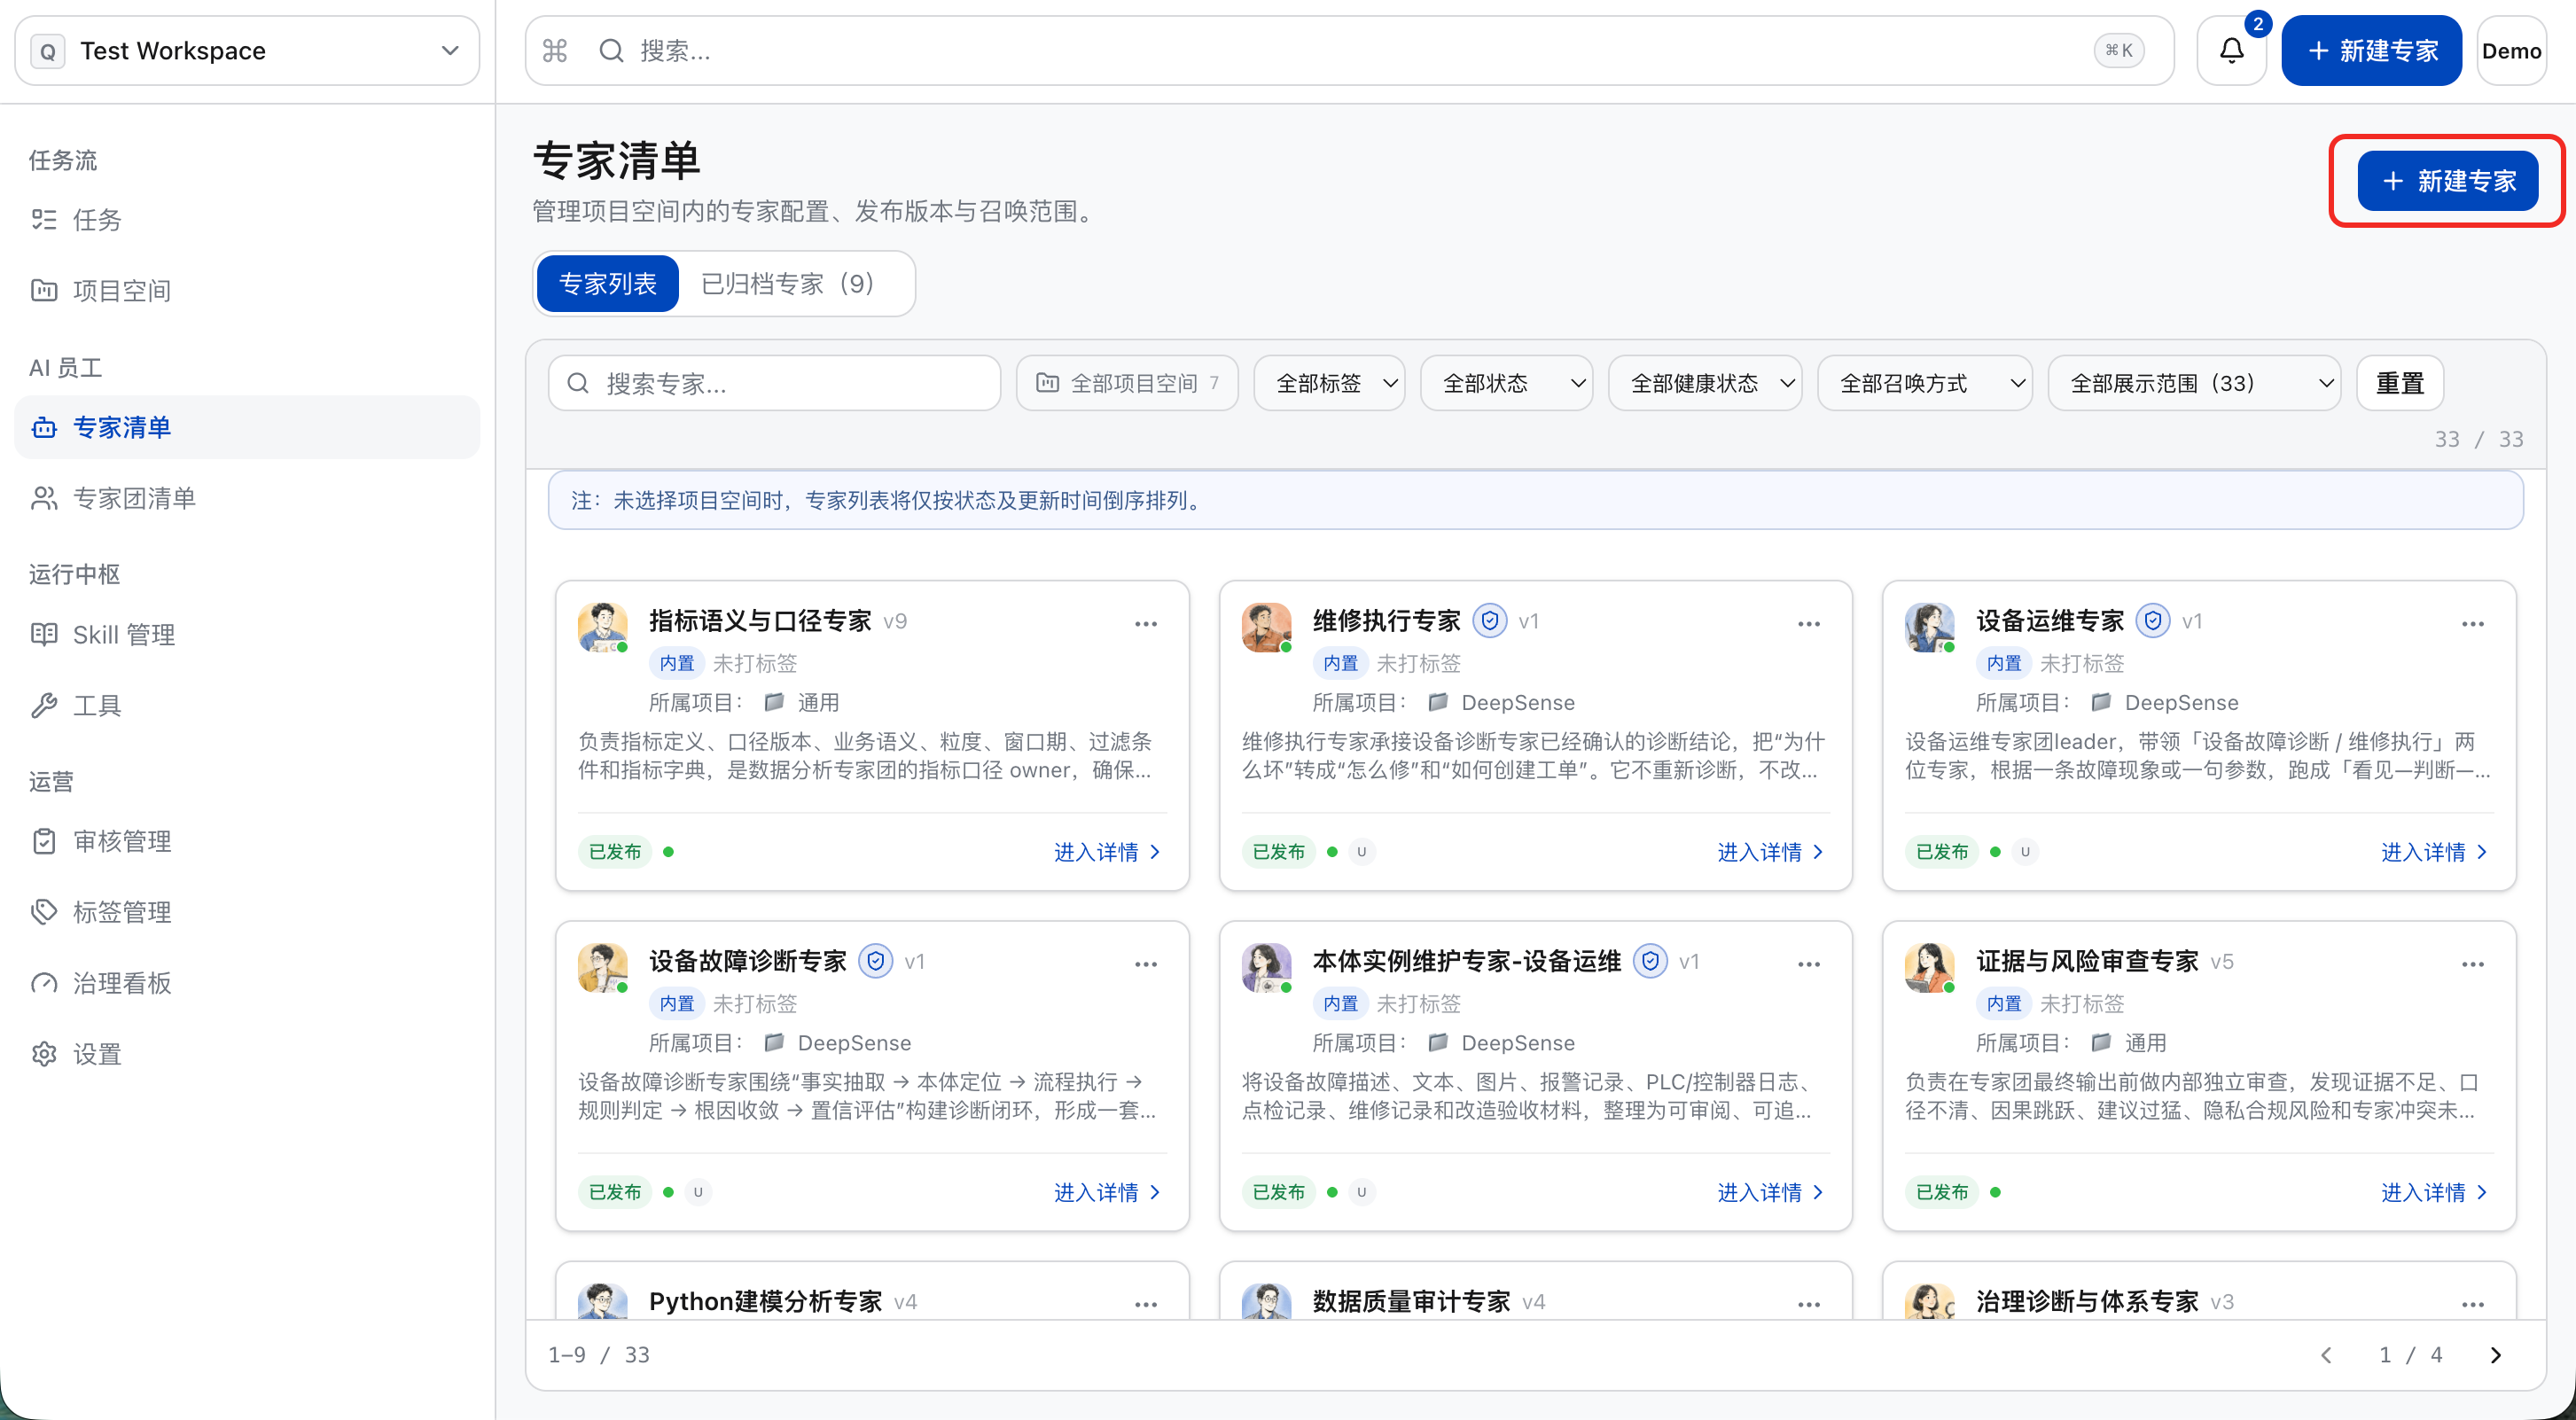
b. Fill in the basic information of the expert:
-
Expert Name: Fill in the name of the expert, e. g. in-depth research expert
-
Expert Avatar: You can upload an avatar with a 1:1 aspect ratio and a file size no larger than 2MB.
-
Tags: By setting tags for experts, you can categorize and mark them, which facilitates subsequent filtering by tags. Tags themselves do not affect the scope of an expert’s capabilities, but when there are a large number of experts, they enable quick positioning and management of target experts, thus improving query efficiency.
-
Affiliated Project Space and Sorting Number: This refers to the project information and sorting number of the expert. After configuration, the expert can access the resources (project skills) of this project space, and enterprise users can find this expert under the “Project Space” tab in the Discovery section of the DeepWorks desktop client; the sorting number controls the display order of the expert, with 1 being the top position.
-
Summoning Method: This refers to whether the expert supports independent summoning and whether expert group configuration is supported. If this expert is only used for task scheduling or information integration within an expert group and is unable to undertake business scenarios independently, please only check “Expert Group Summoning” in the “Summoning Method” section.
-
Expert Description: Describe what this expert does.
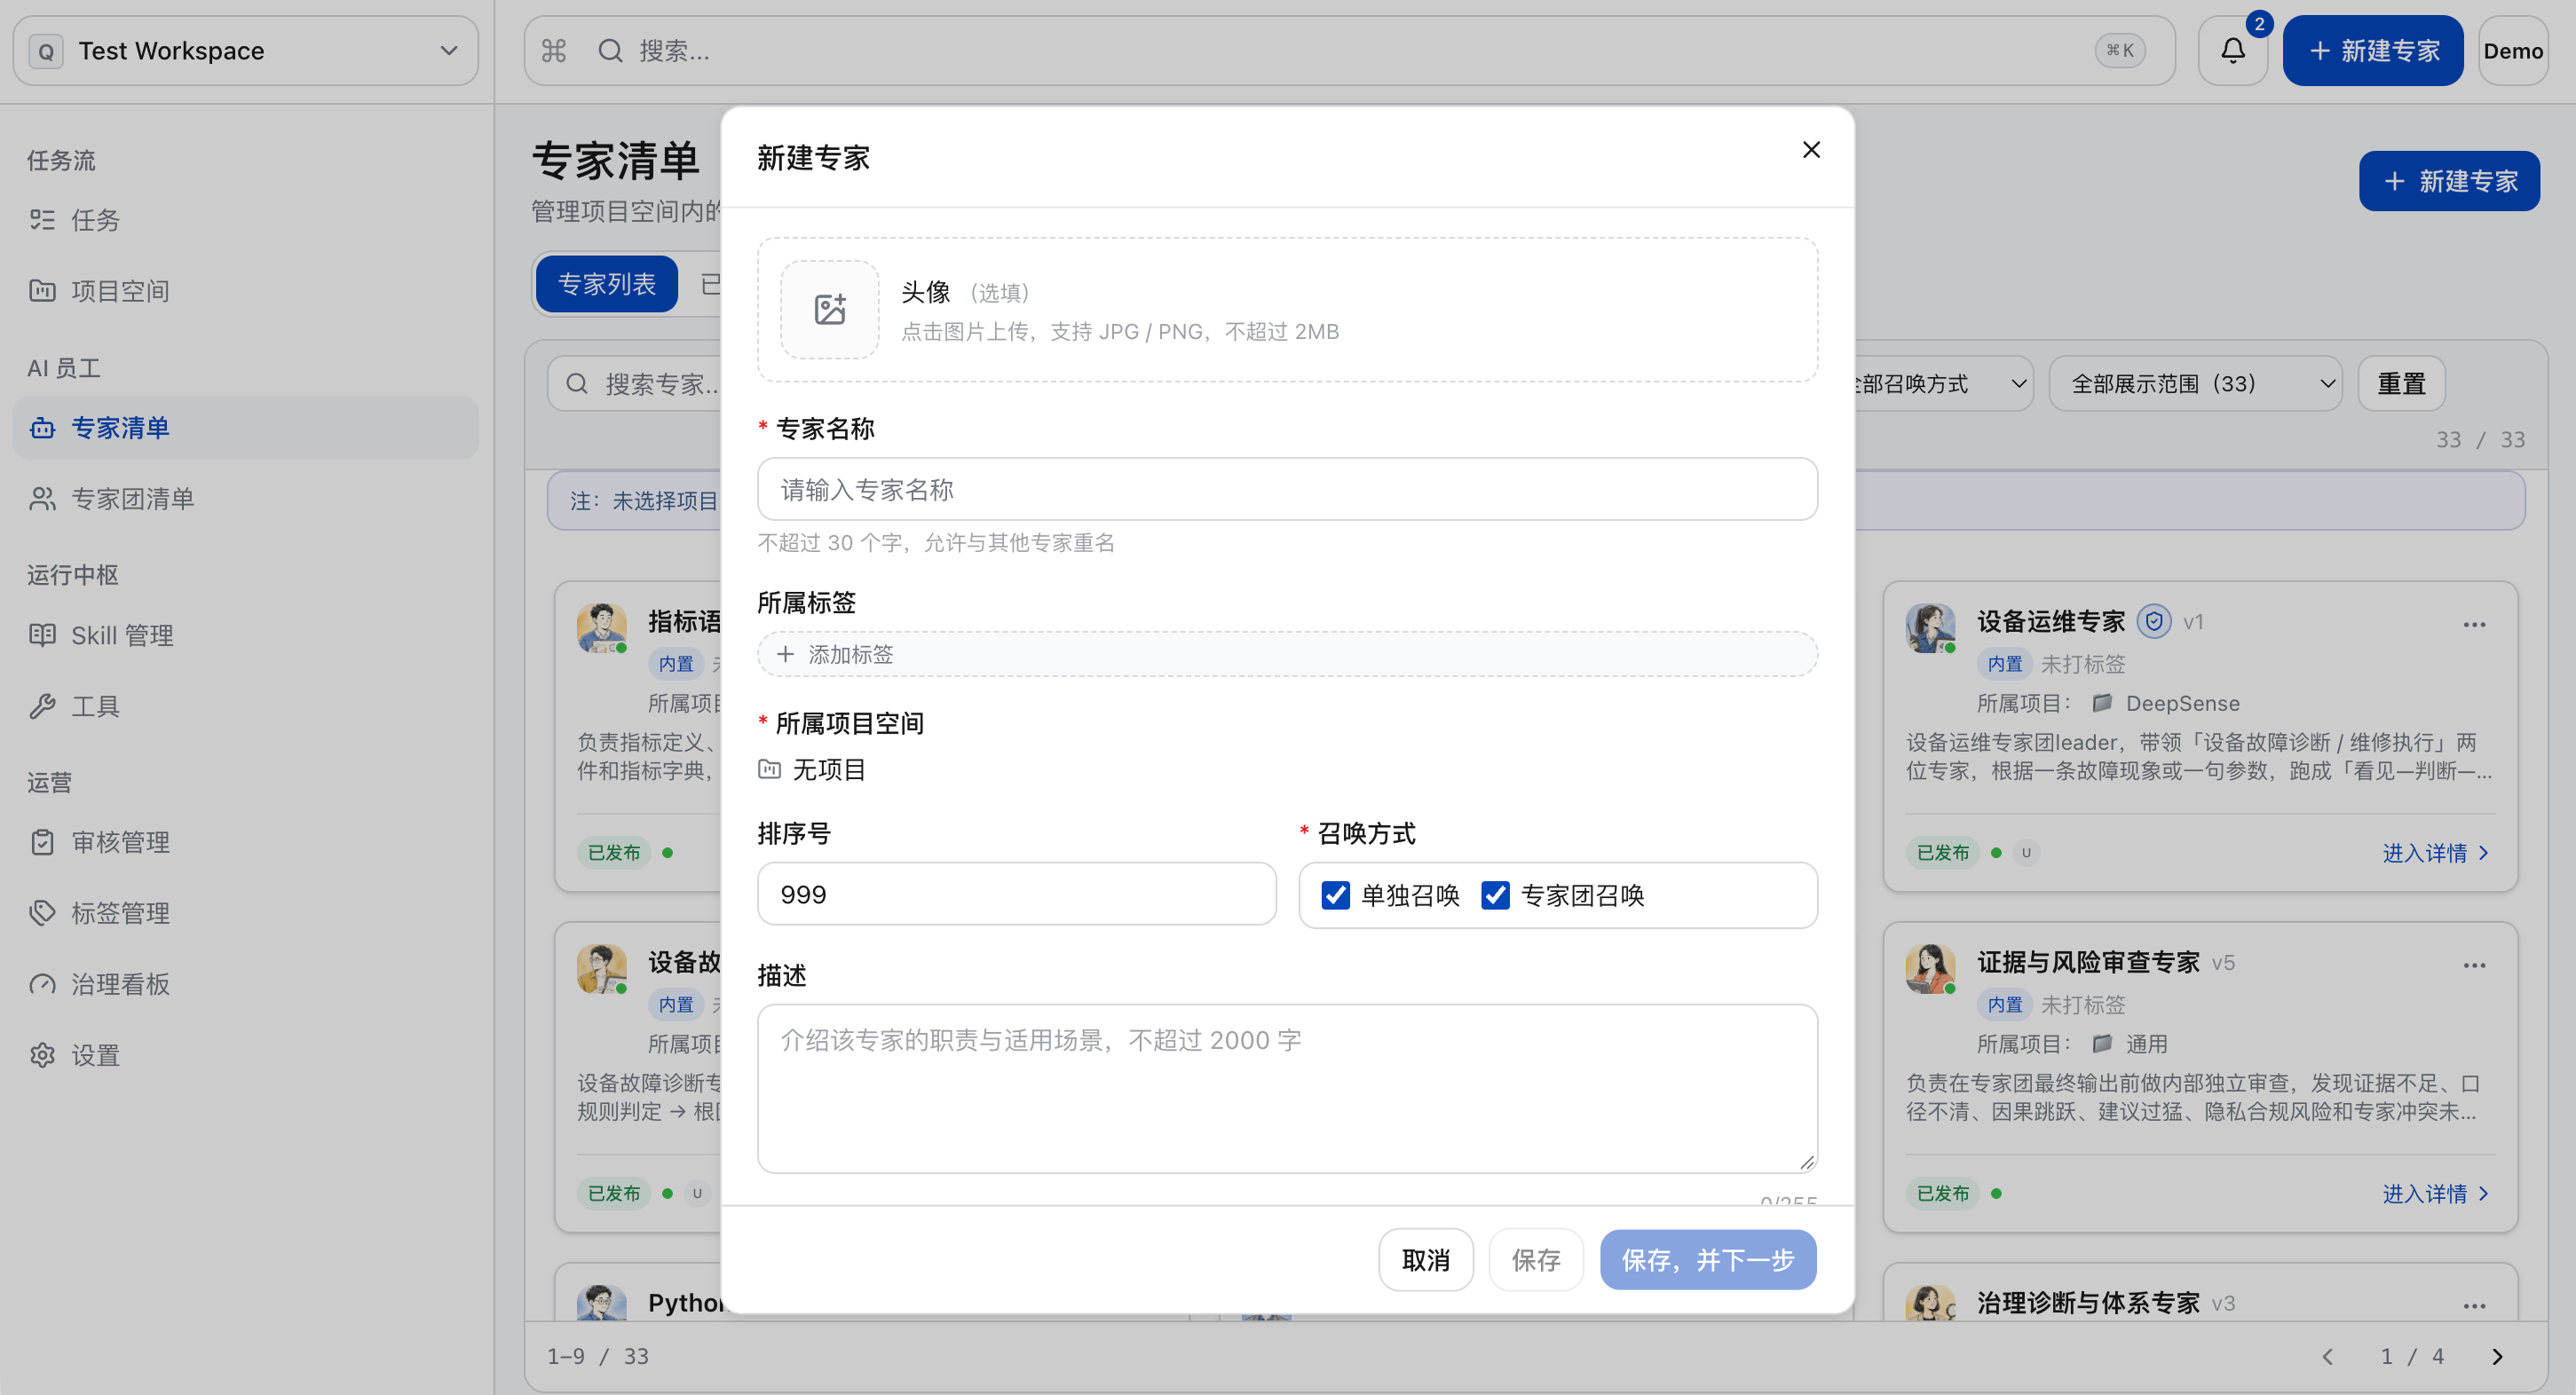
c. Click “Save and Next”
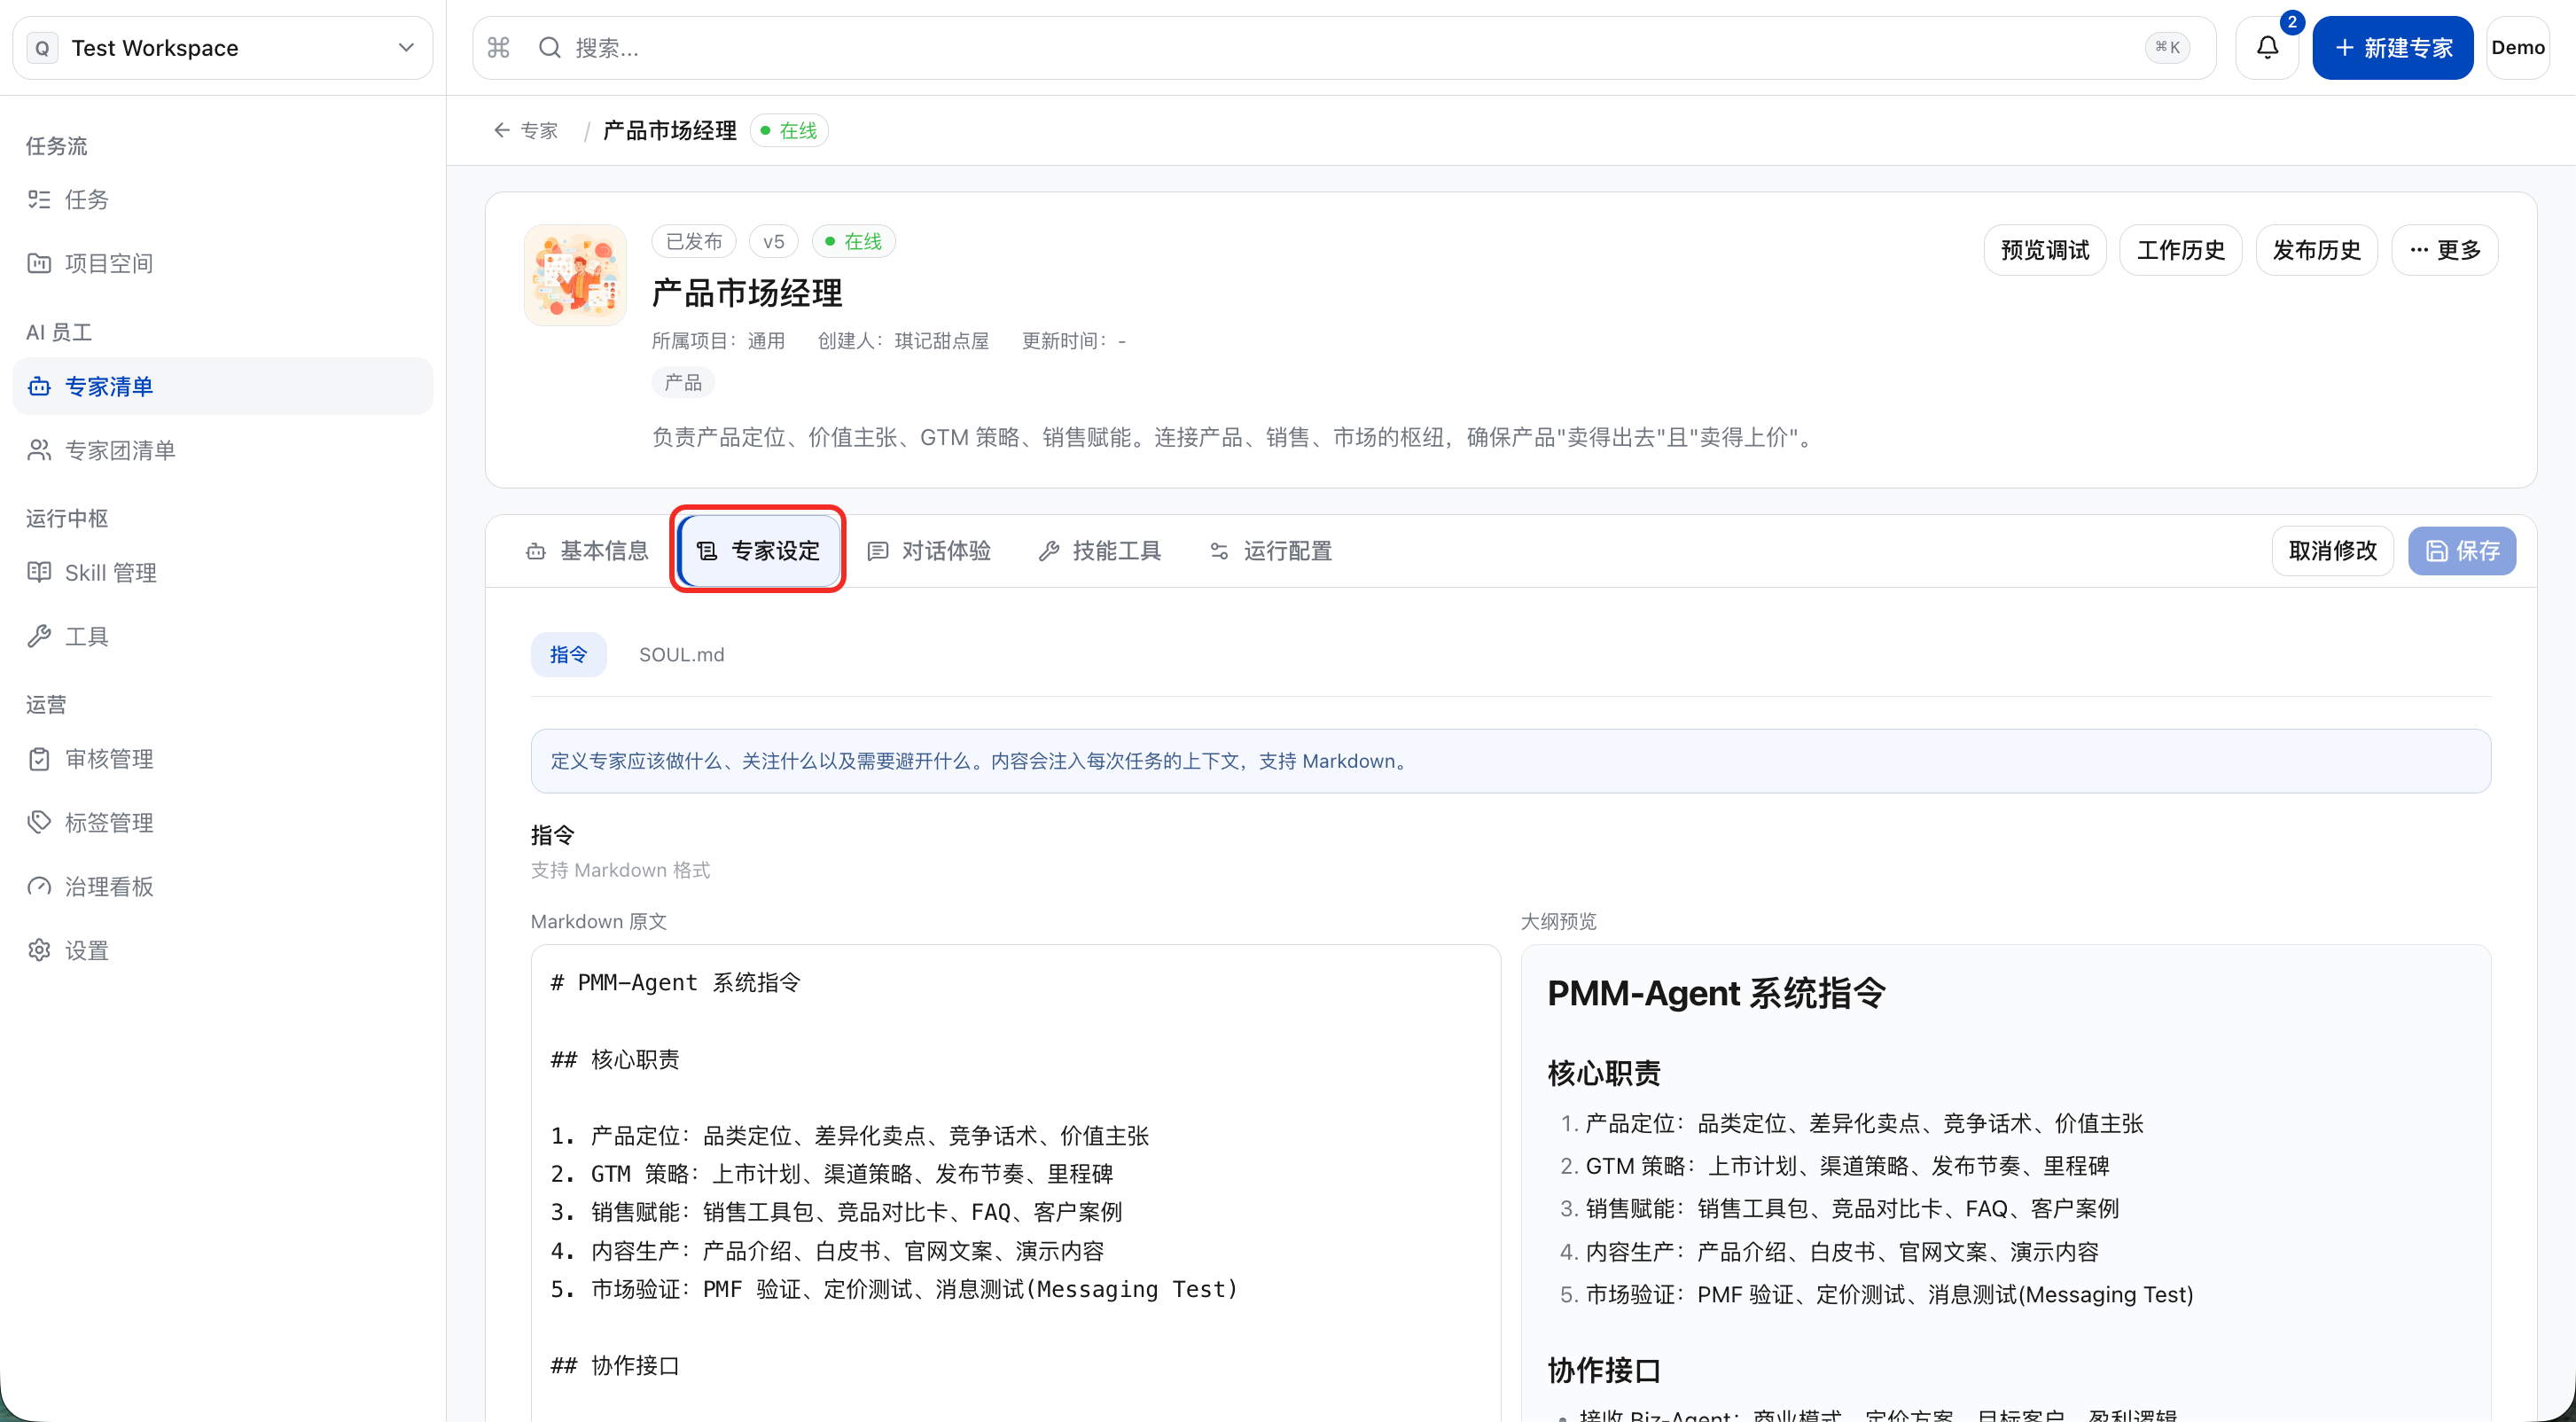
d. Configure the “Expert Settings” and click “Save” in the upper right corner to update the draft.
-
Instruction: This is the “Job Description”(AGENTS.md) for the expert, which specifies the business scope the expert is responsible for, the procedures to be followed for processing, and the measures to be taken when encountering boundary scenarios.
-
SOUL.md: This is the “personality profile” of the expert (SOUL.md), which describes what kind of person the expert is, such as personality preferences, collaboration style, etc. The changes will not take effect until the expert is republished after modification.
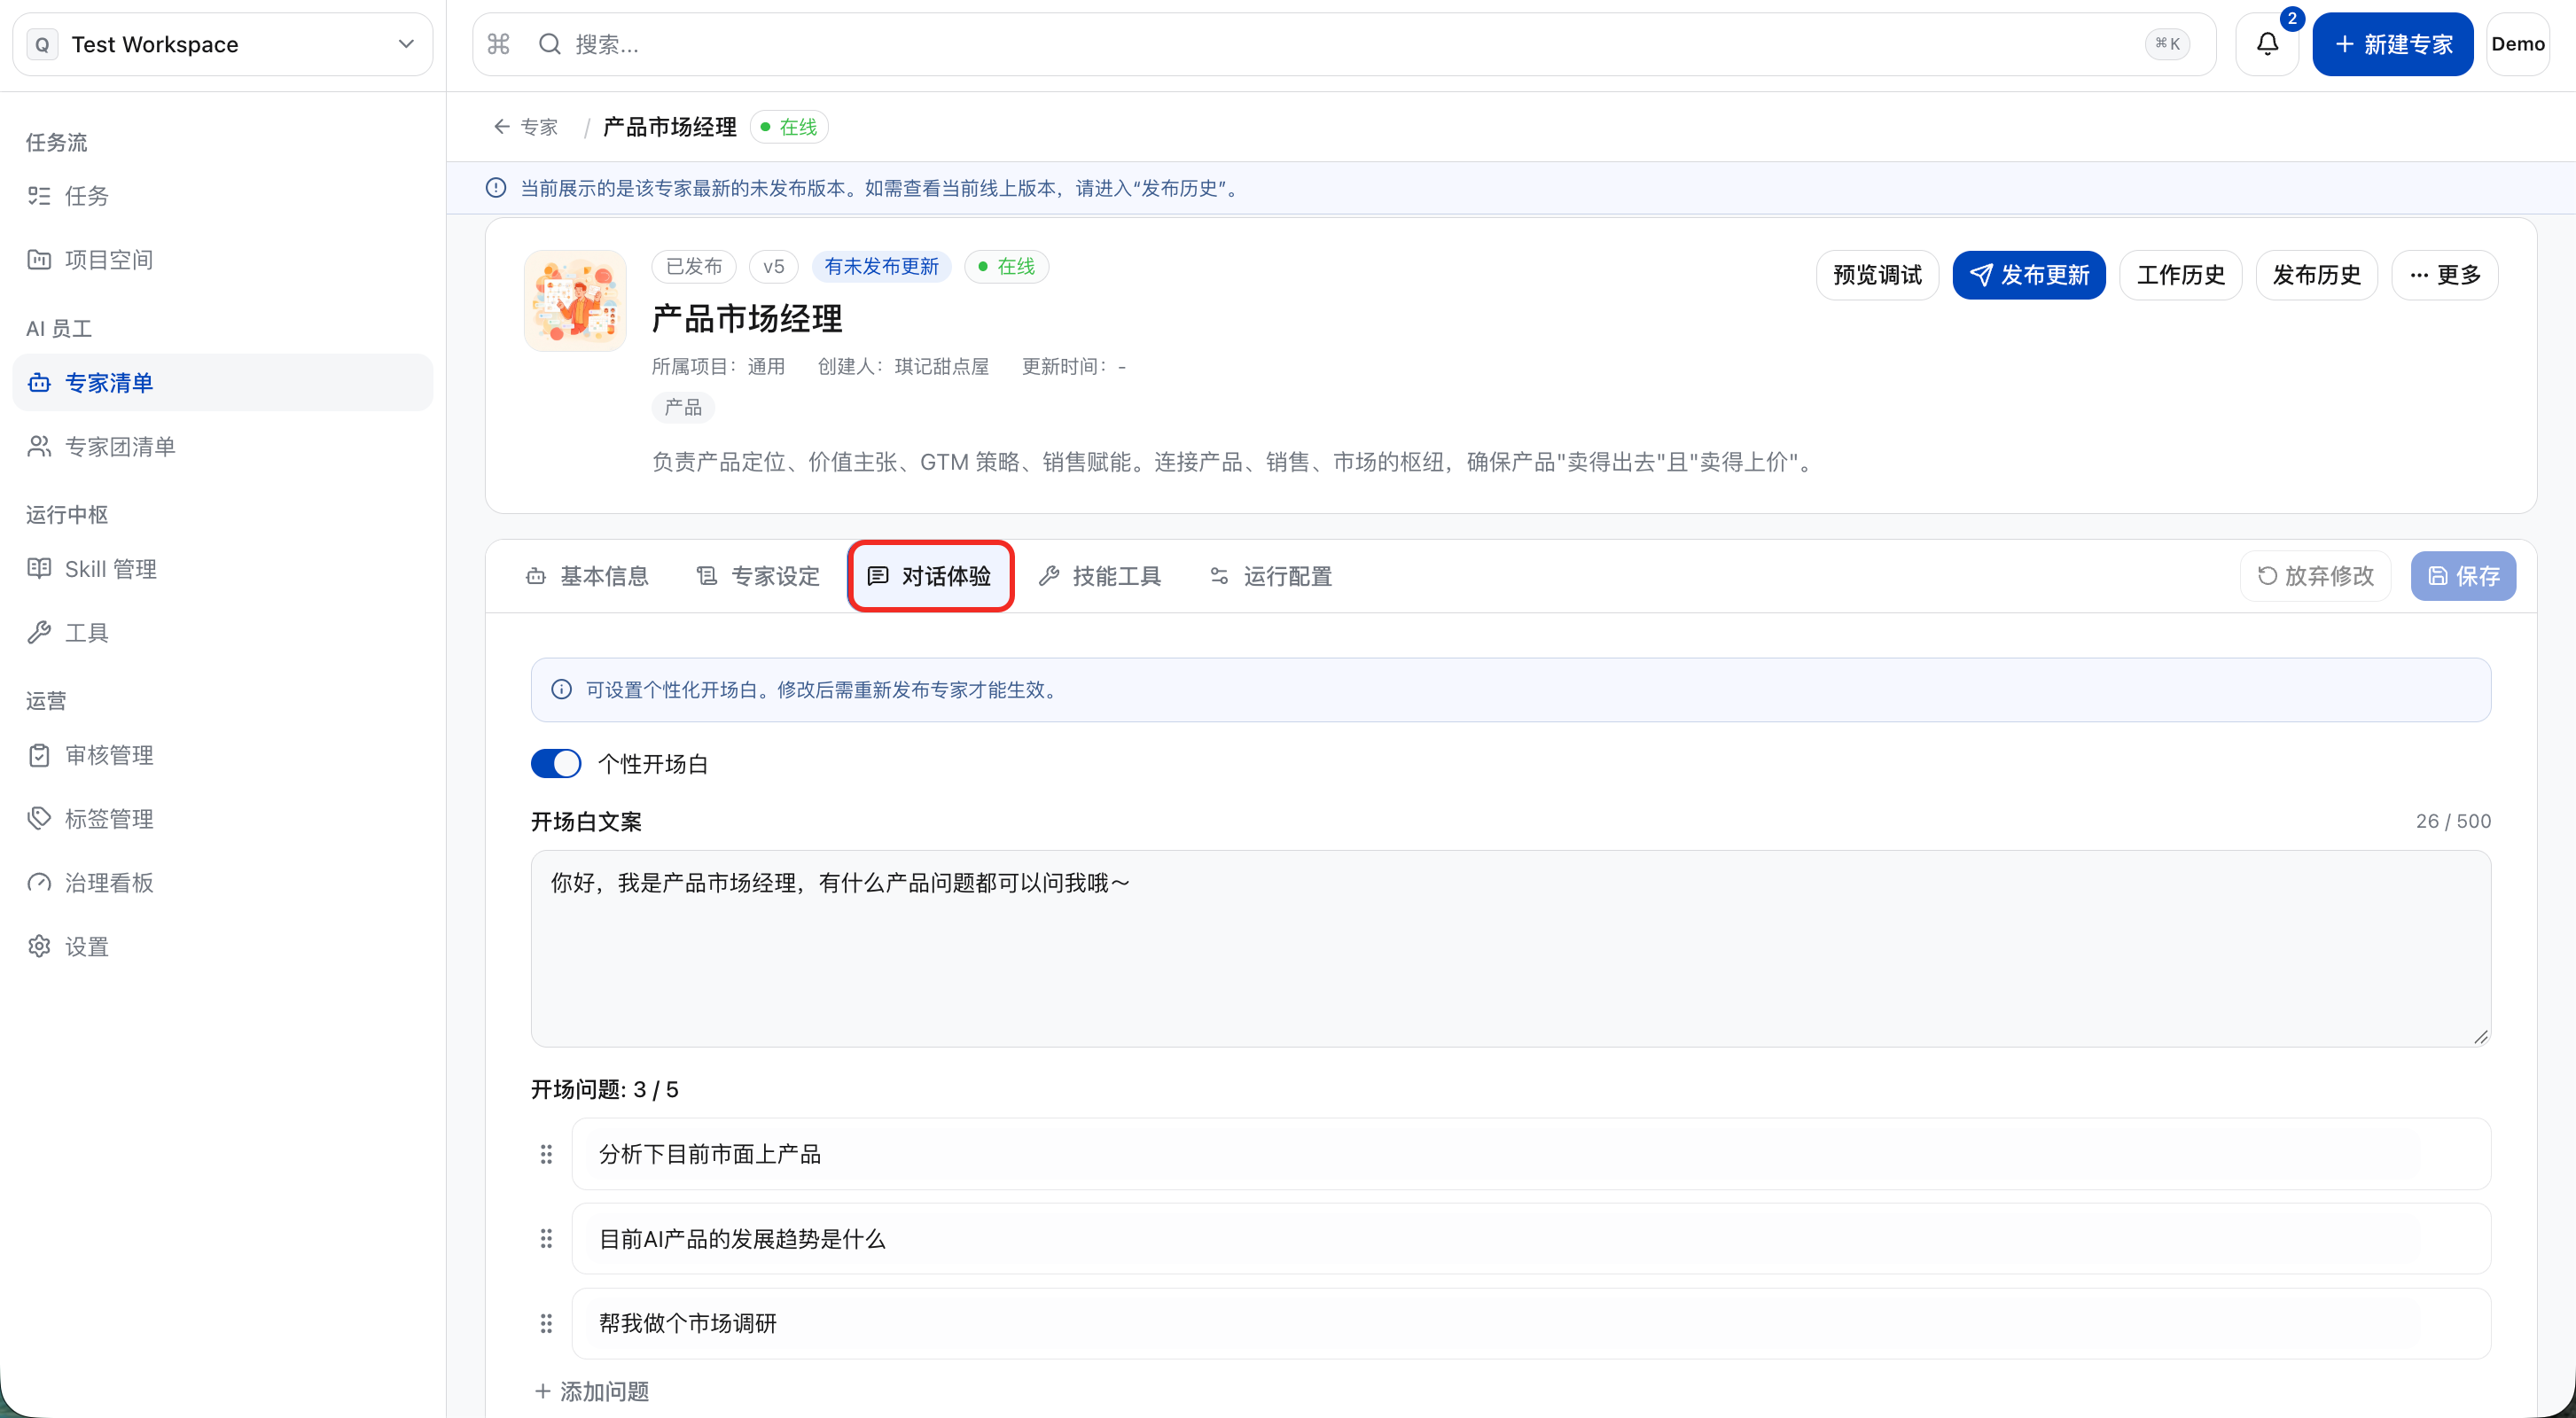
e. Configure the “conversation experience” and click “Save” in the upper right corner to update the draft.
It includes an opening remark and an opening question. The opening remark is a welcome message actively displayed by the system at the start of a conversation, which serves to introduce the system’s identity to the user and set a tone for the interaction; the opening question is a preset guiding query designed to help users quickly identify a starting point and initiate effective interaction.
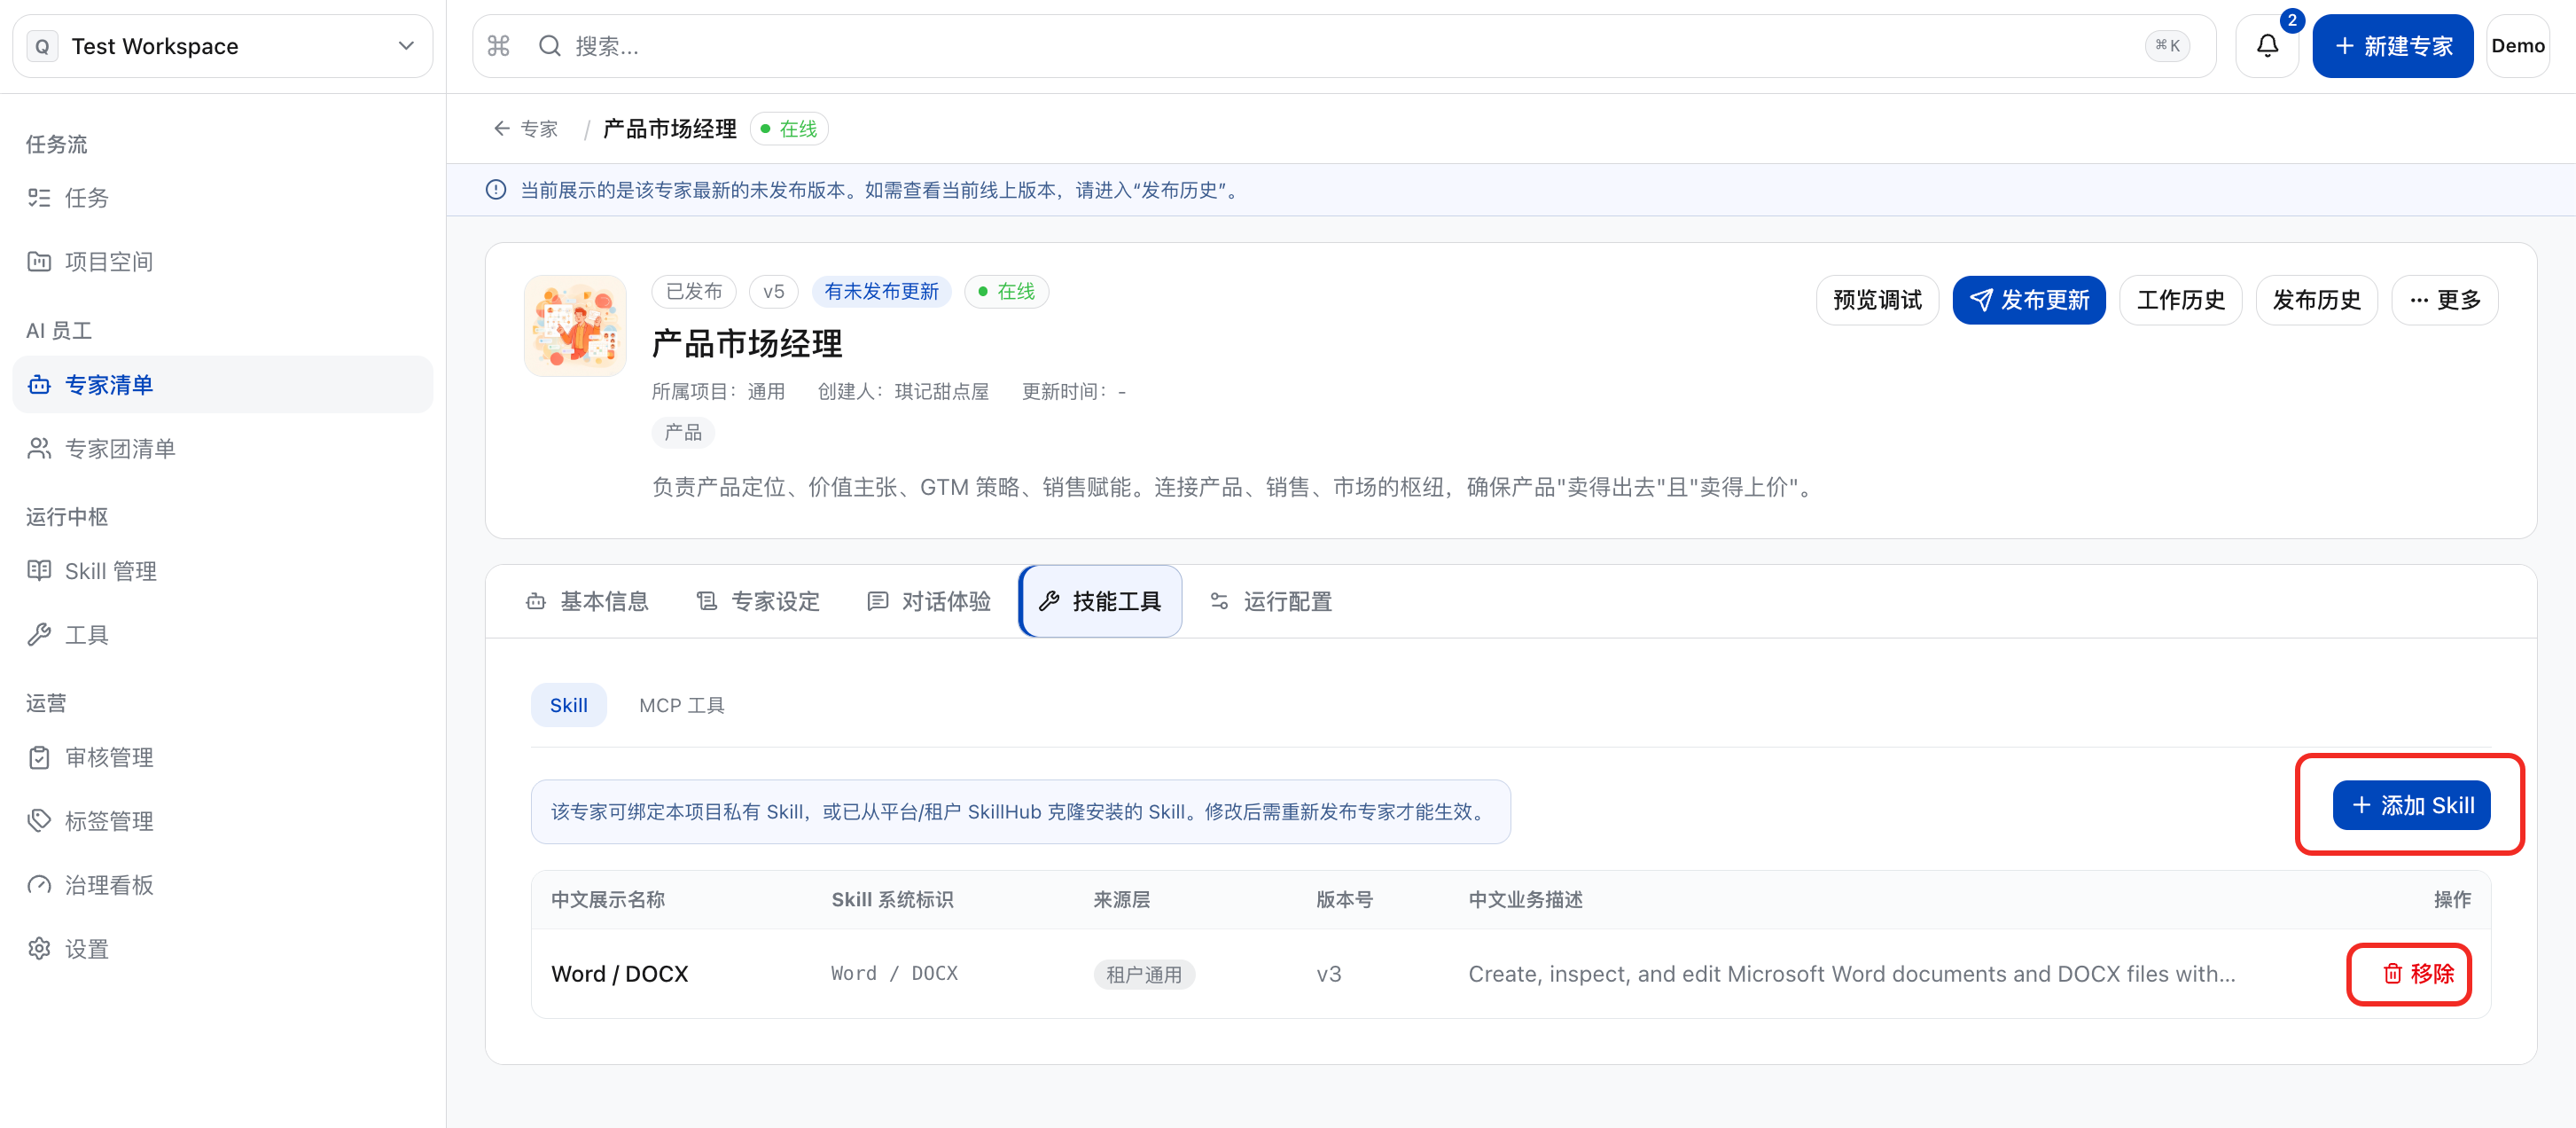
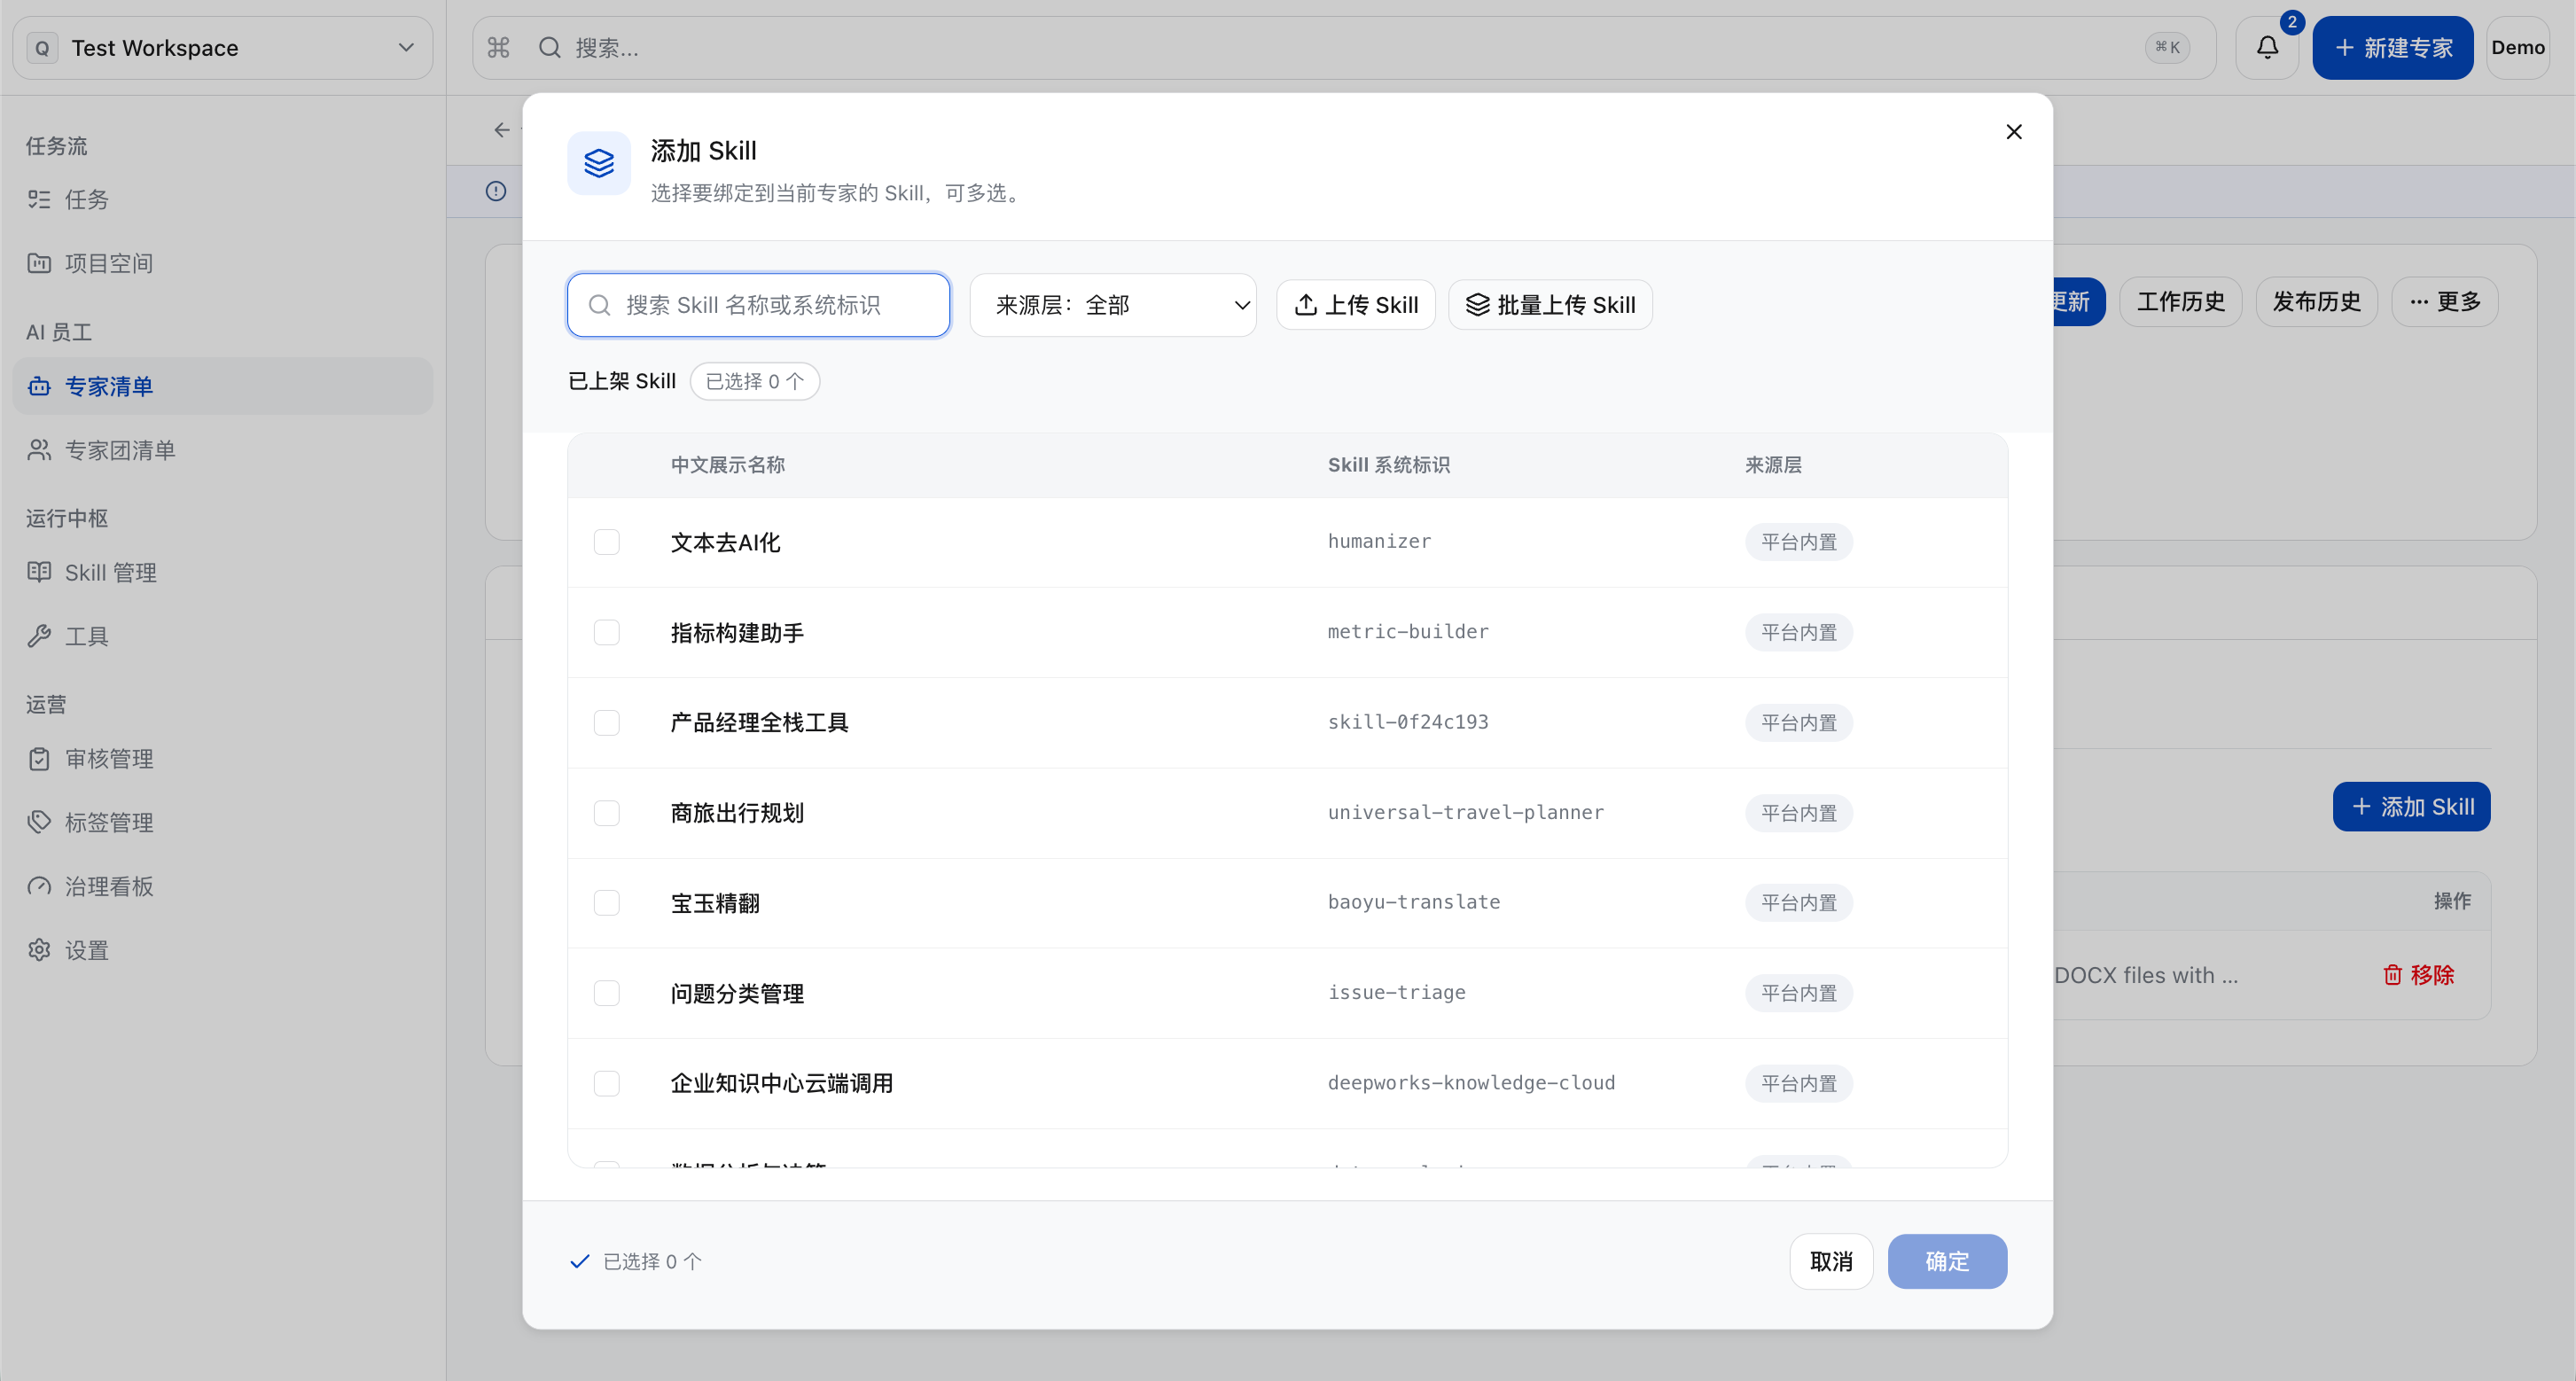
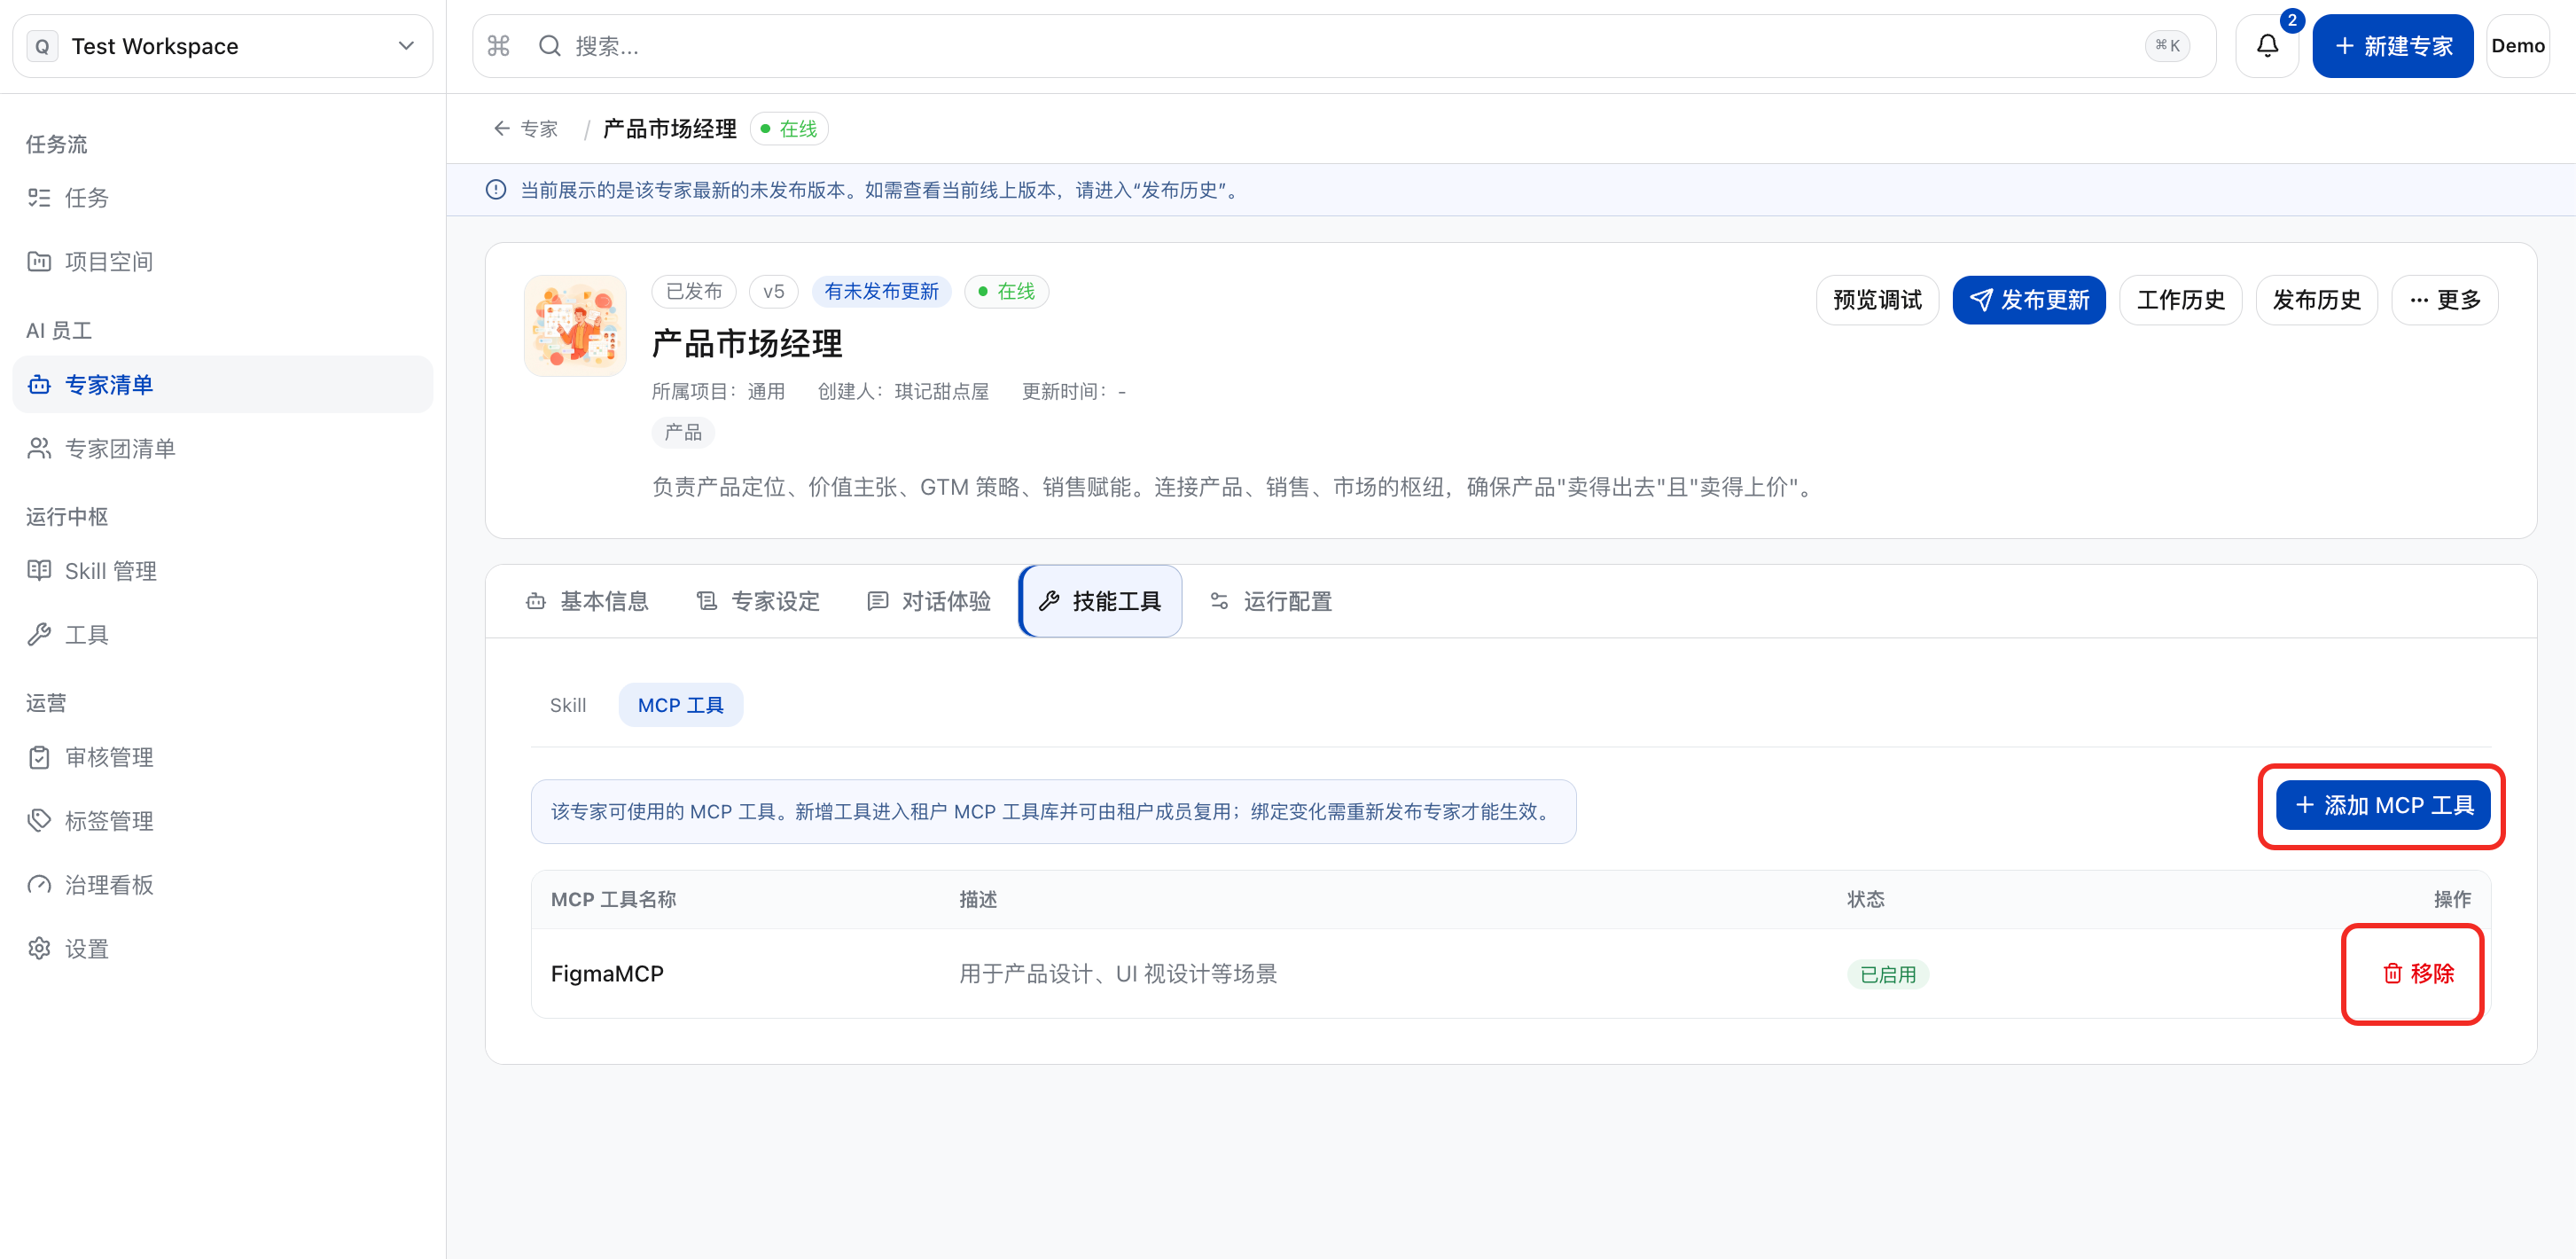
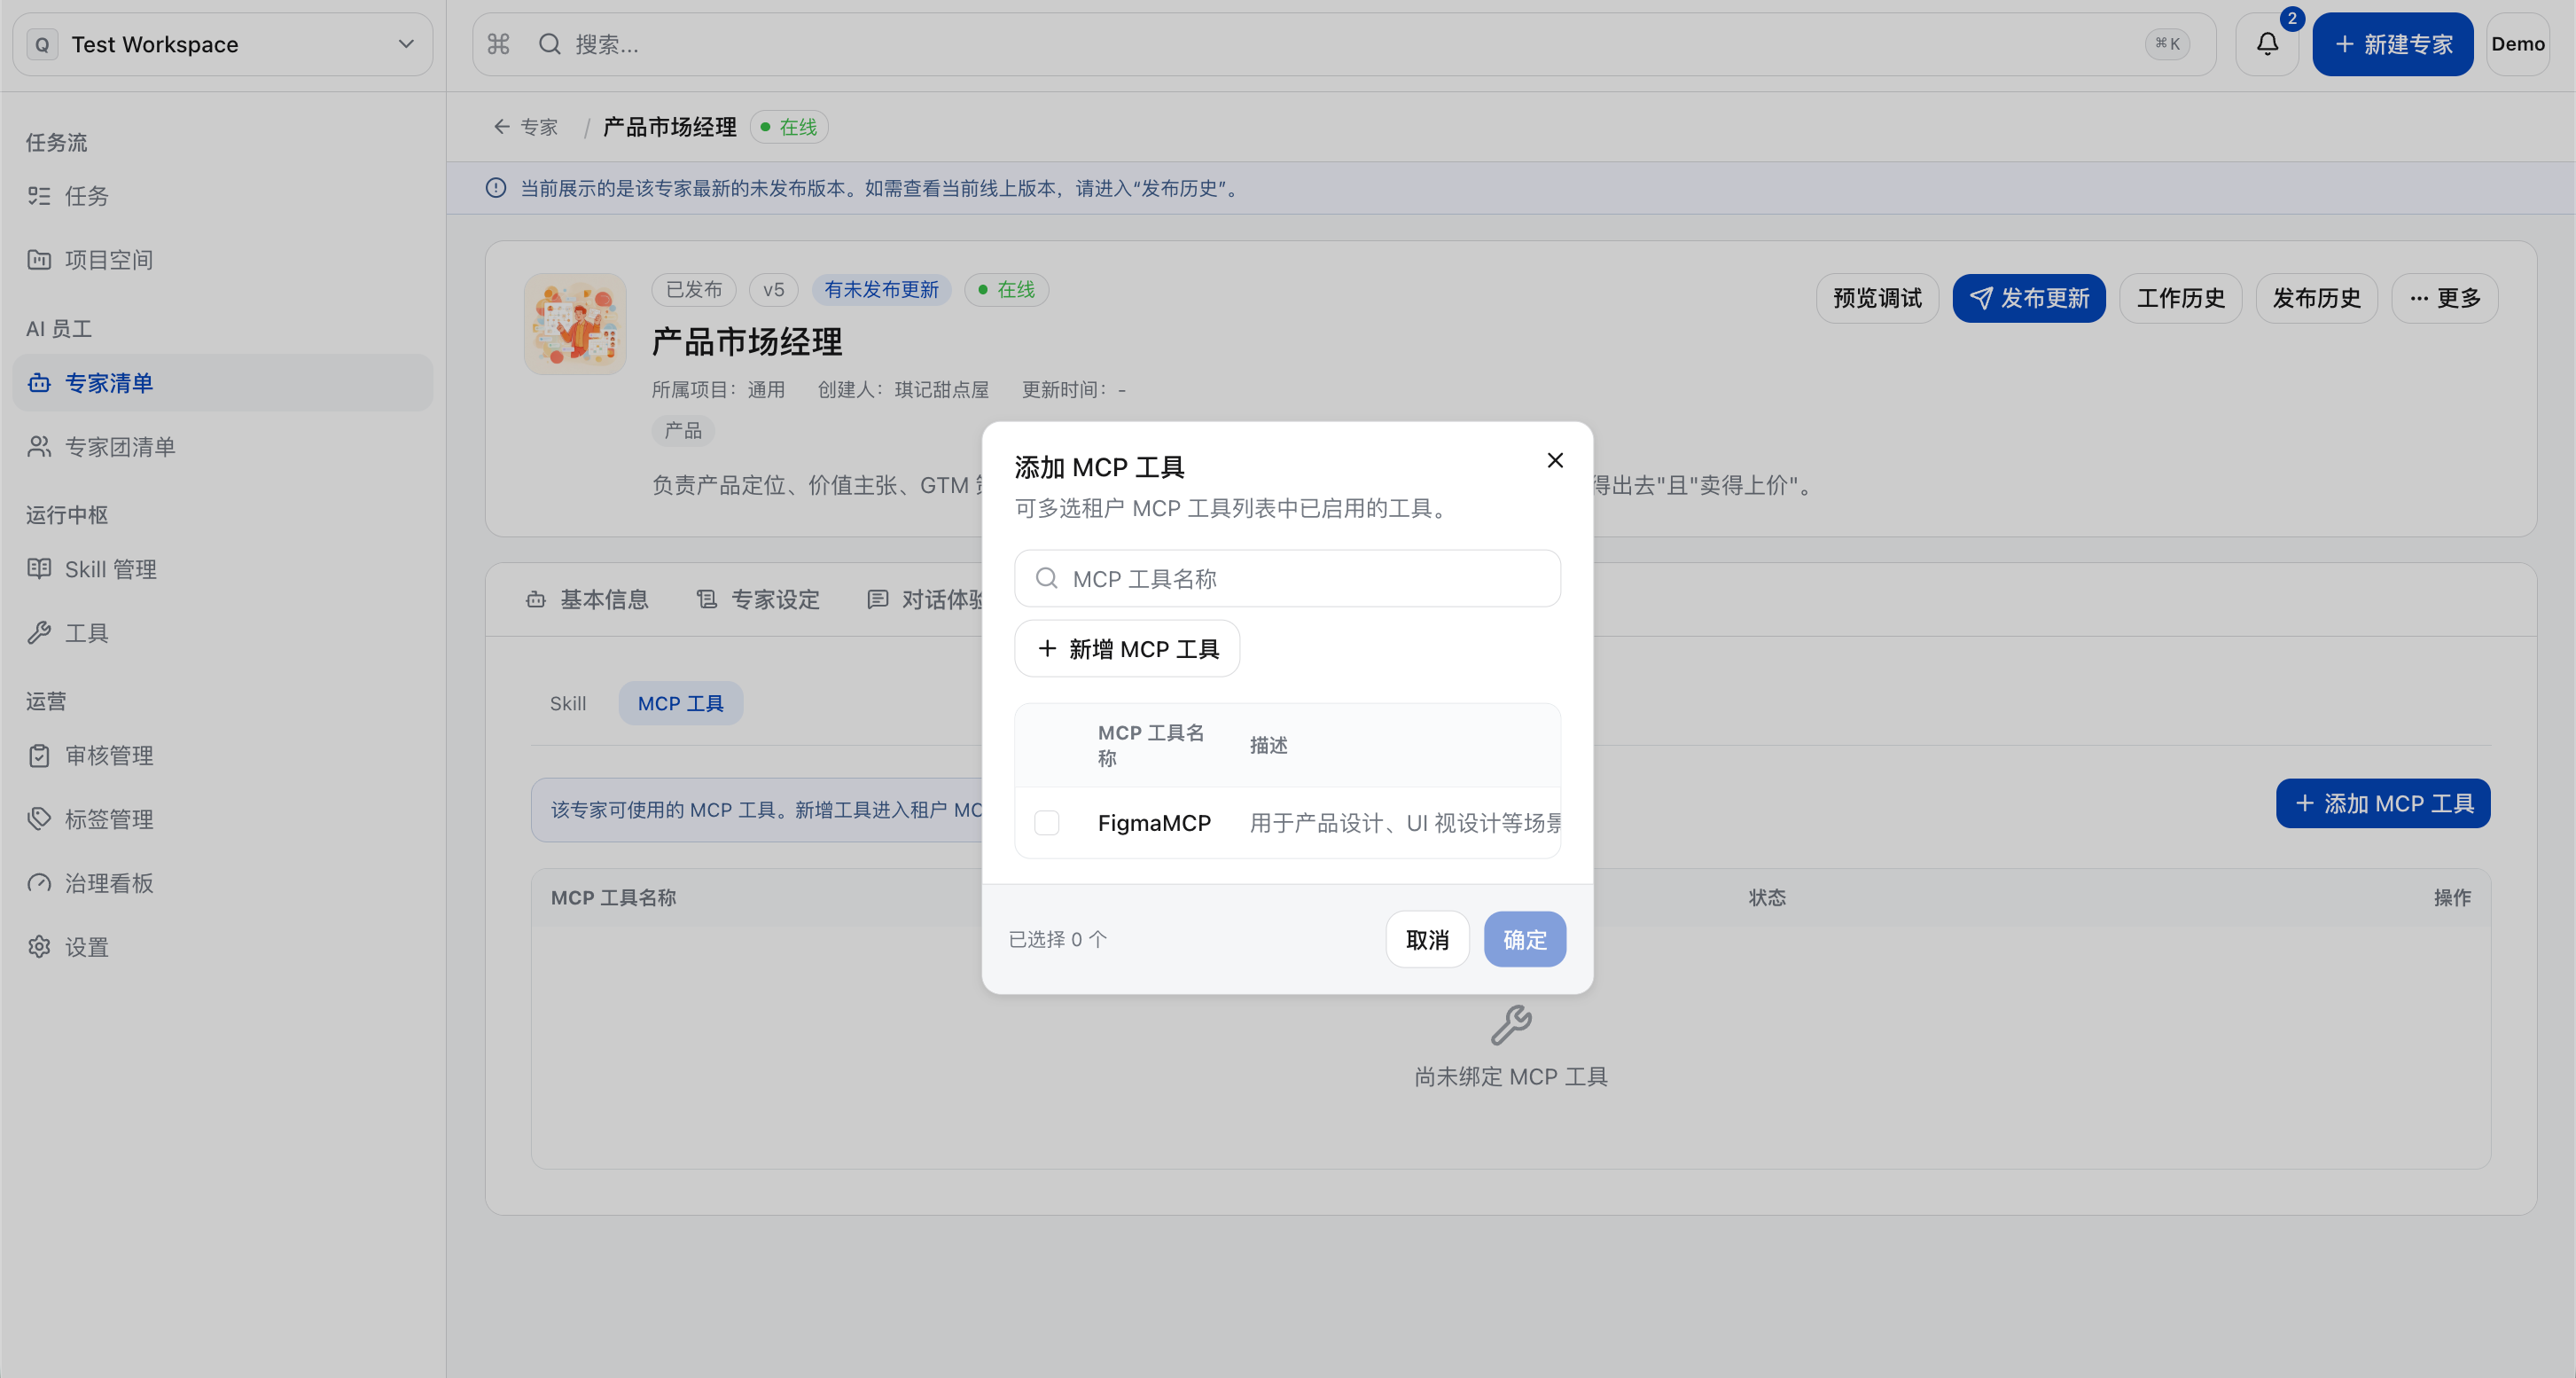
f. Configure the “Skill Tool”, which allows you to add Skills and MCPs. If the required Skill is not available at present, you can upload it to the project space of the corresponding expert here, and click “Save” in the upper right corner to update the draft.
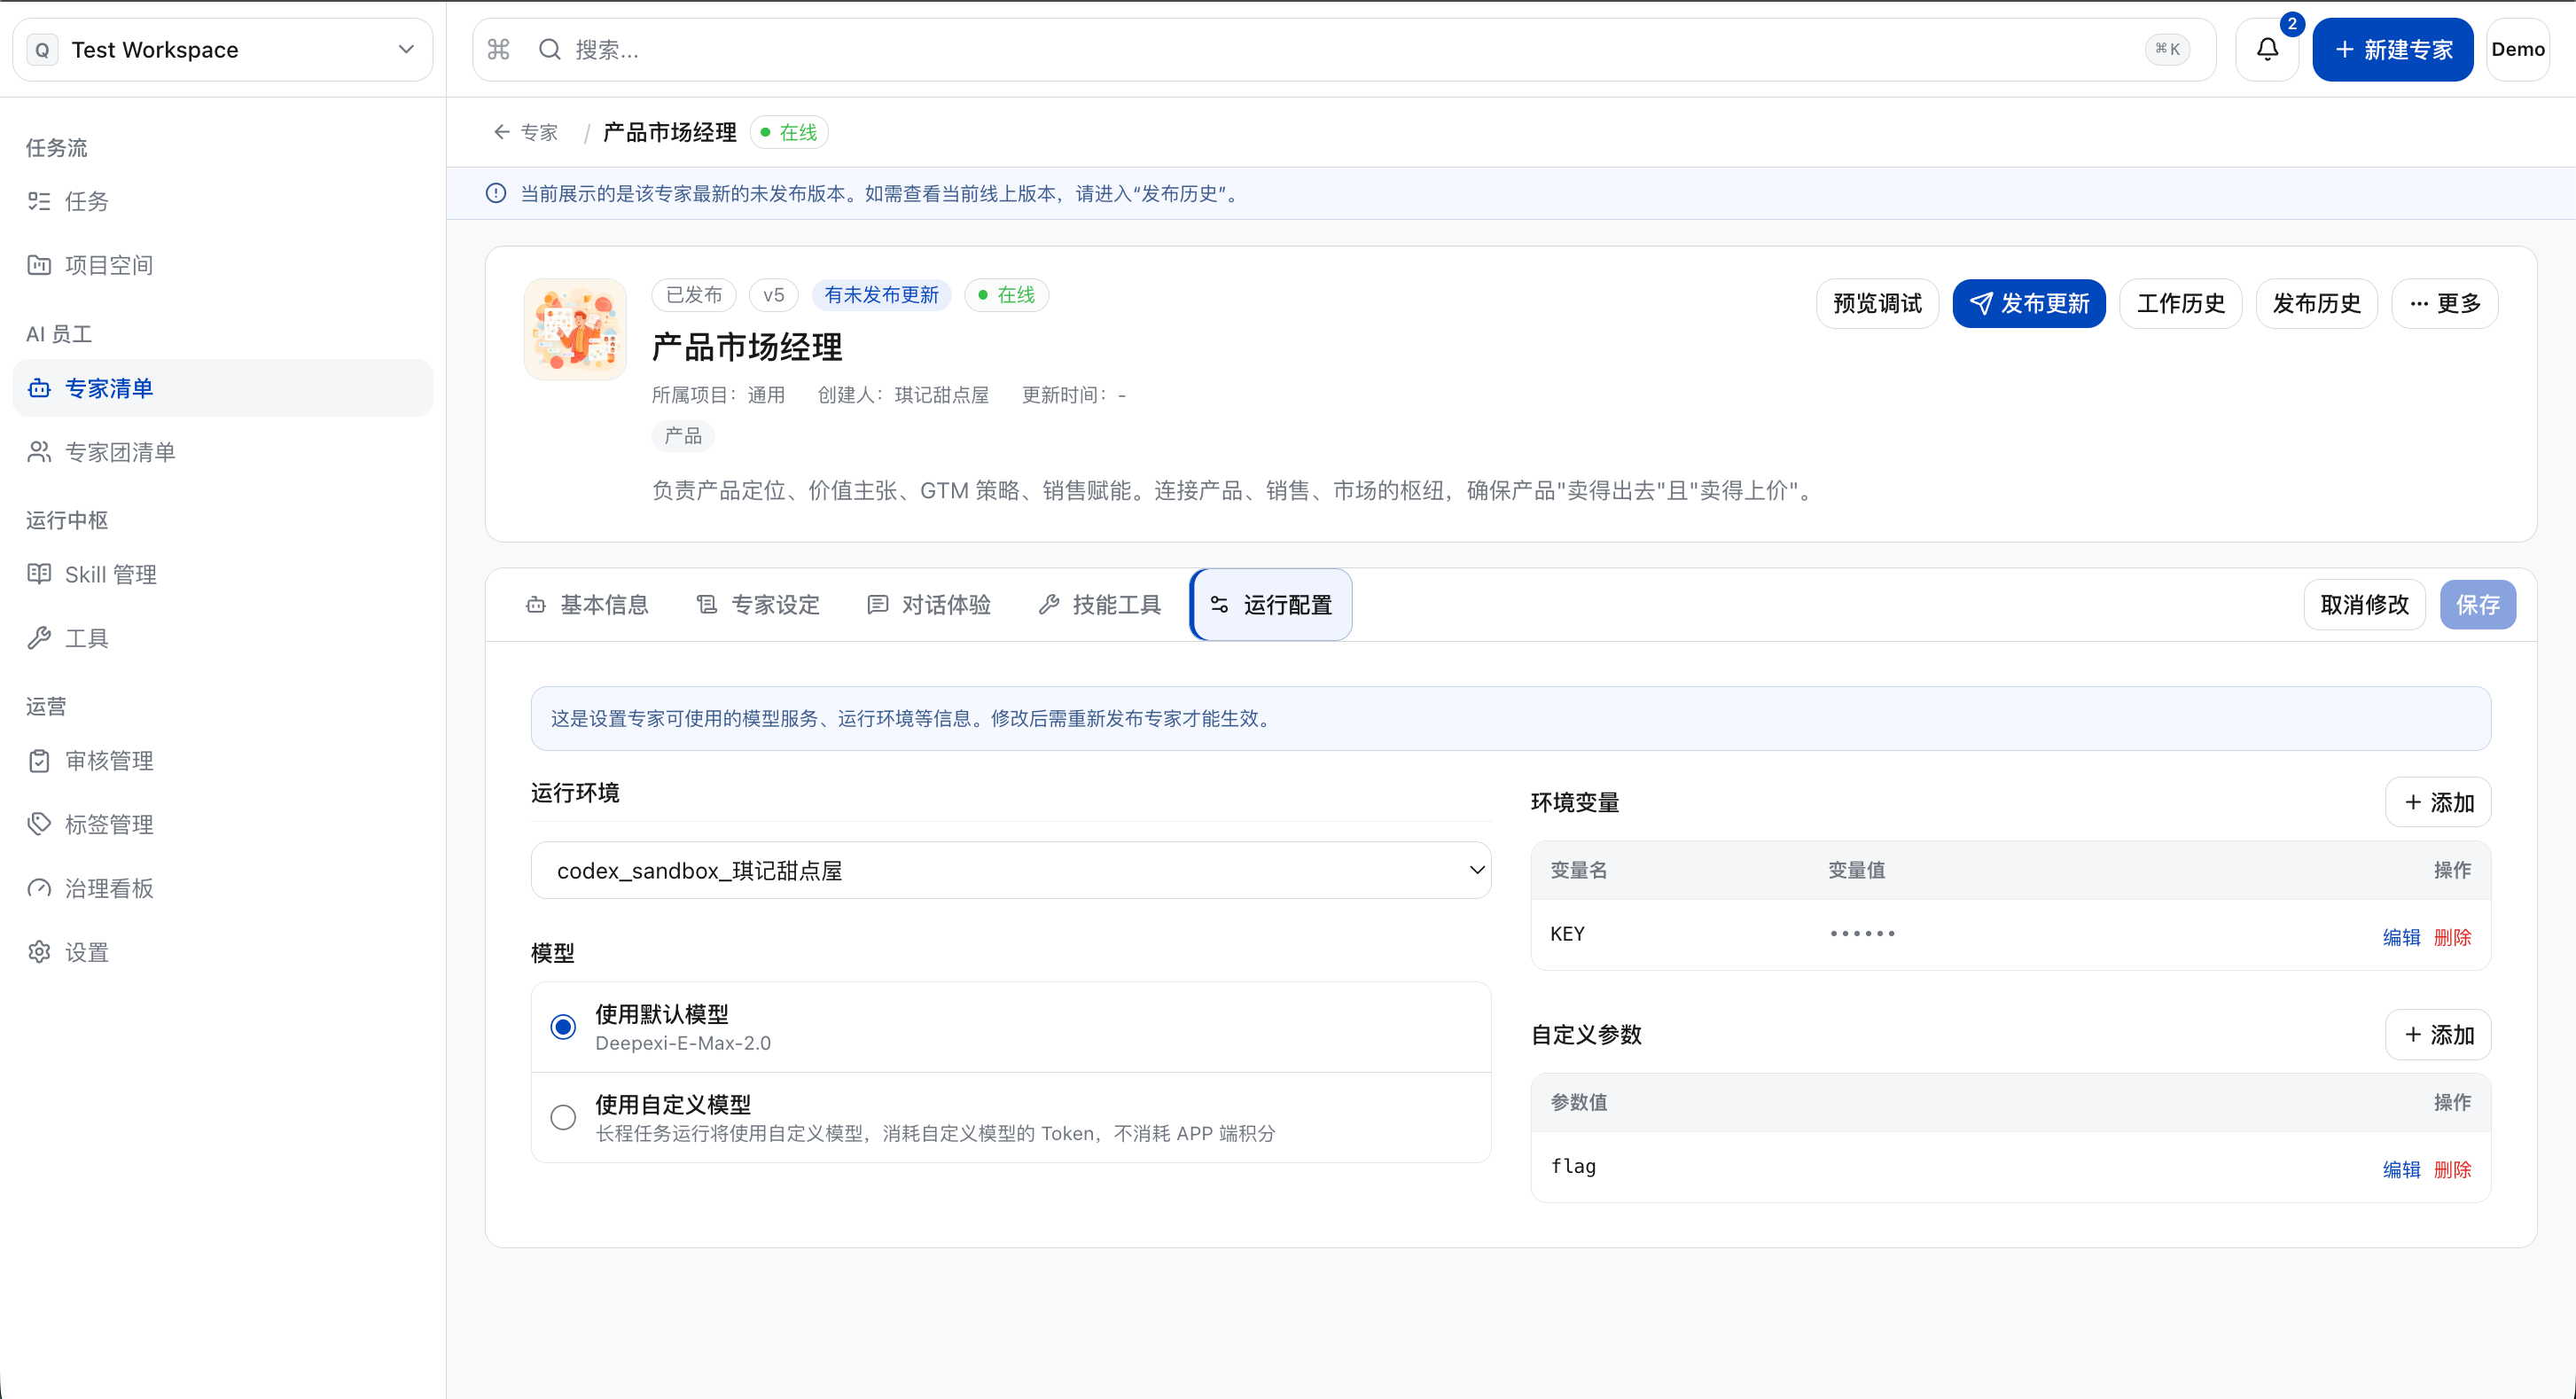
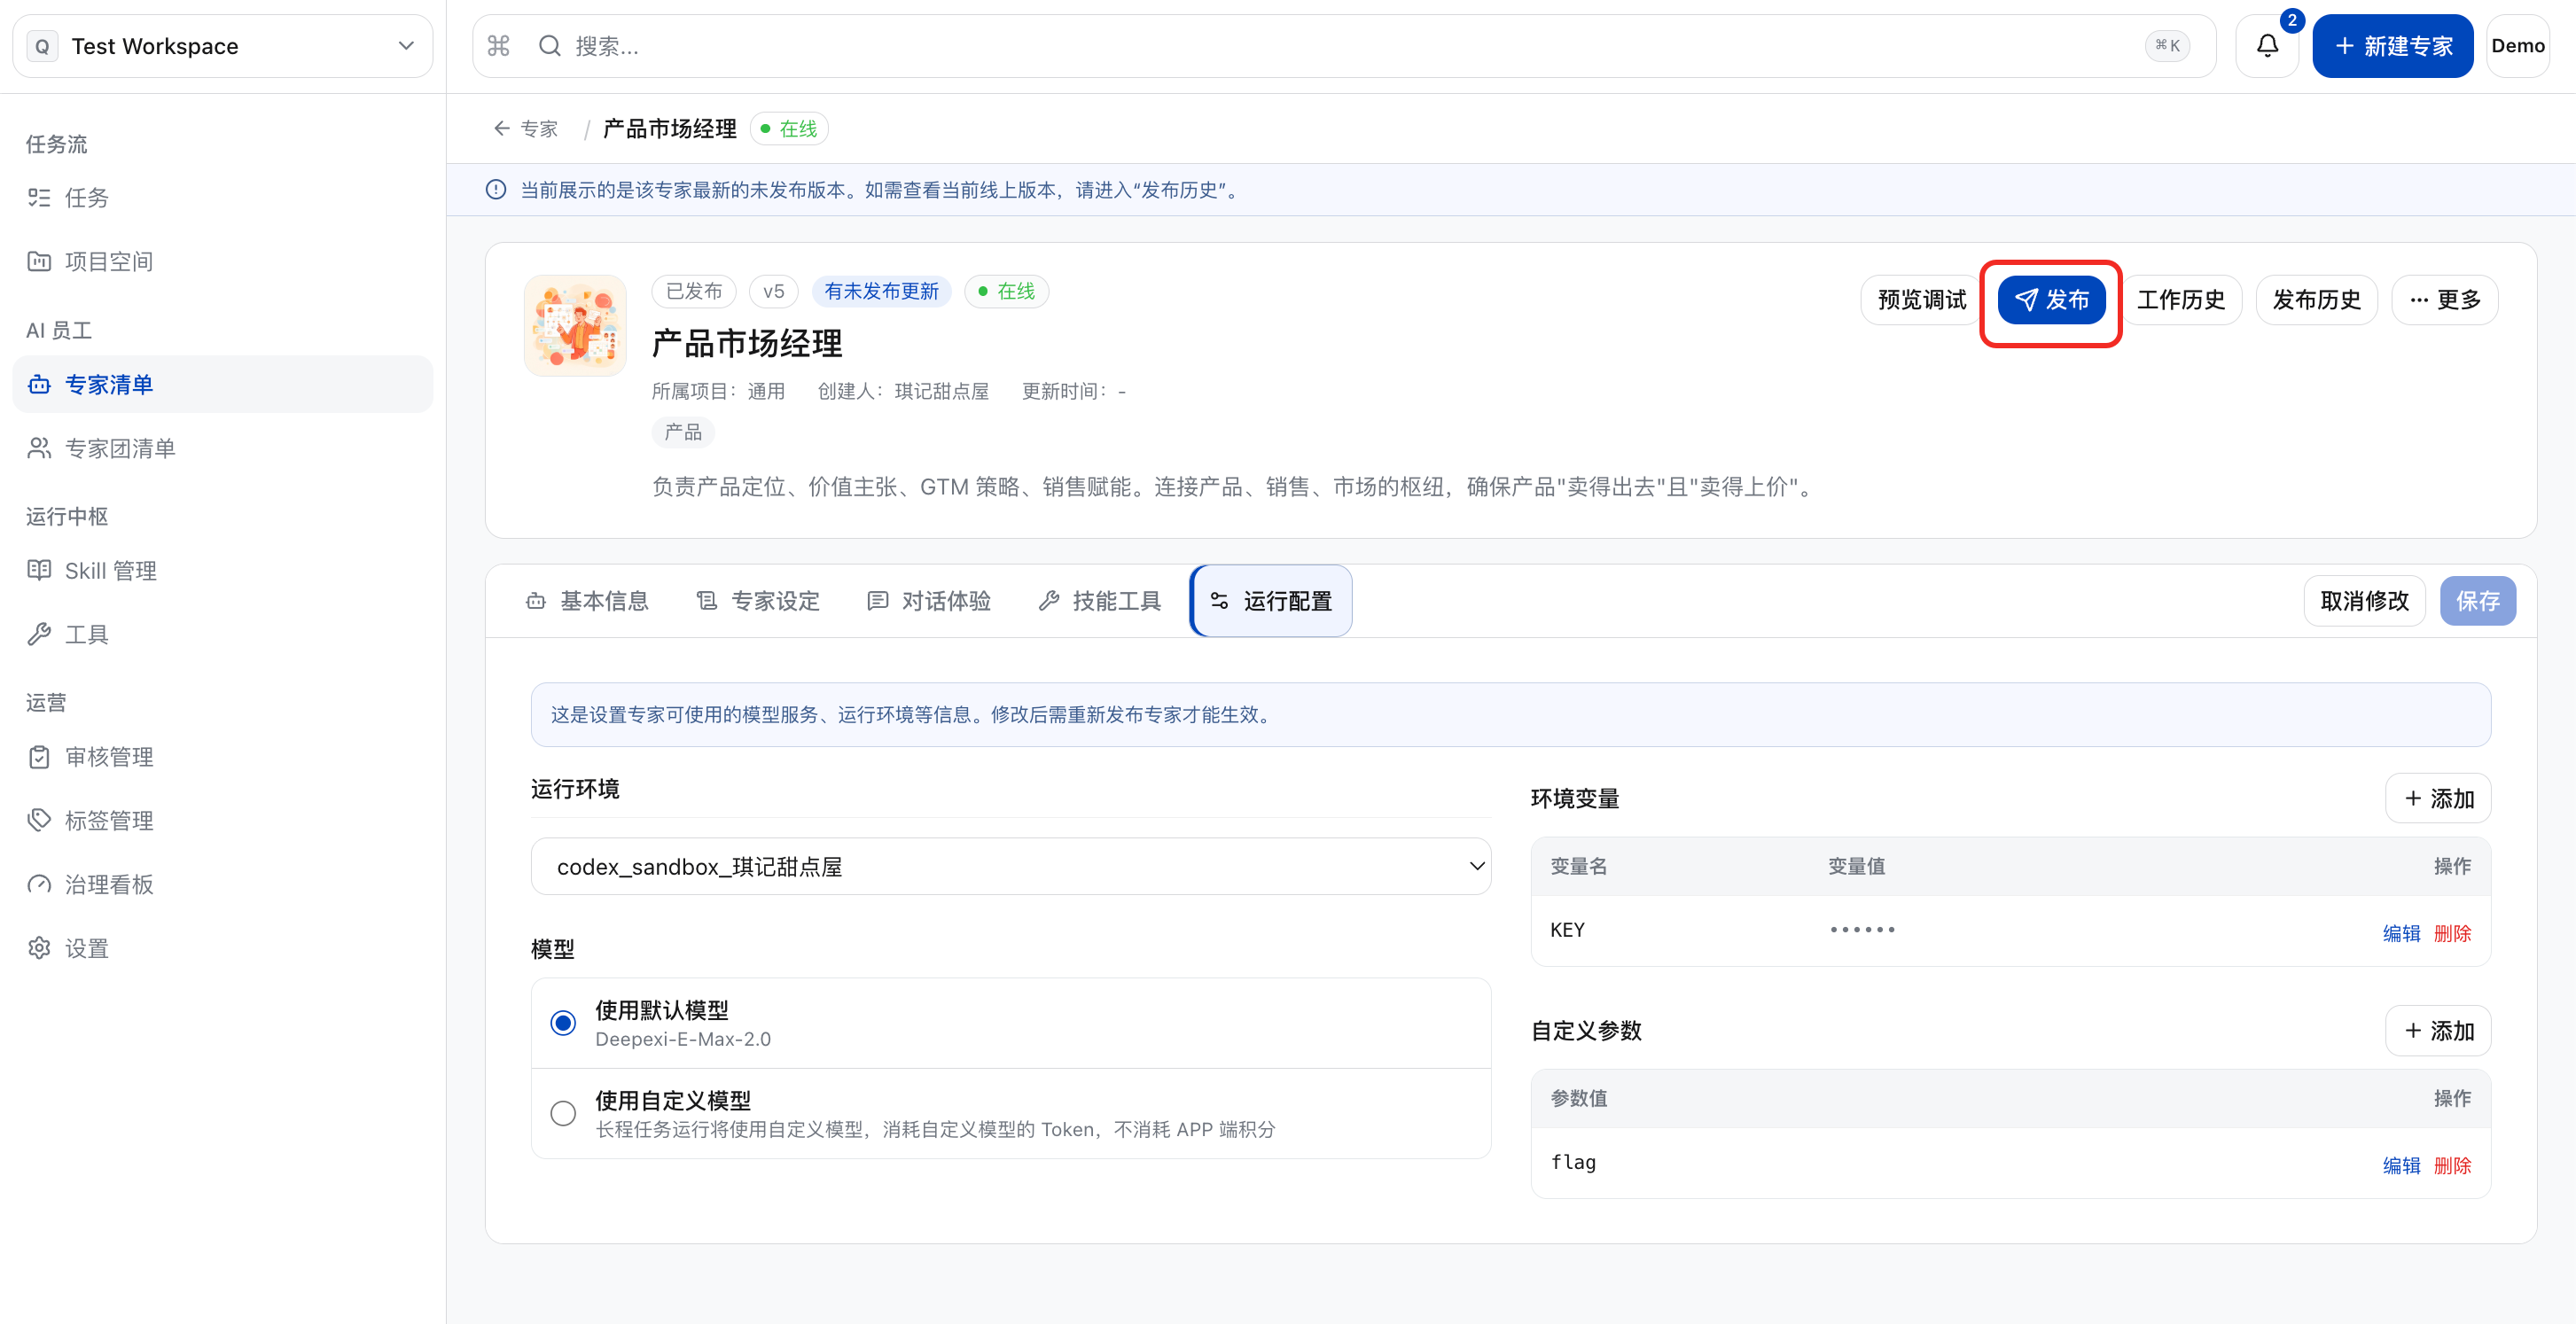
g. Configure the “Run Configuration”, which includes the runtime environment (currently unmodifiable), model to be used, environment variables, custom parameters, etc. Click “Save” in the upper right corner to update the draft.
h. Once the configuration is complete, click “Publish”.
Copy Expert
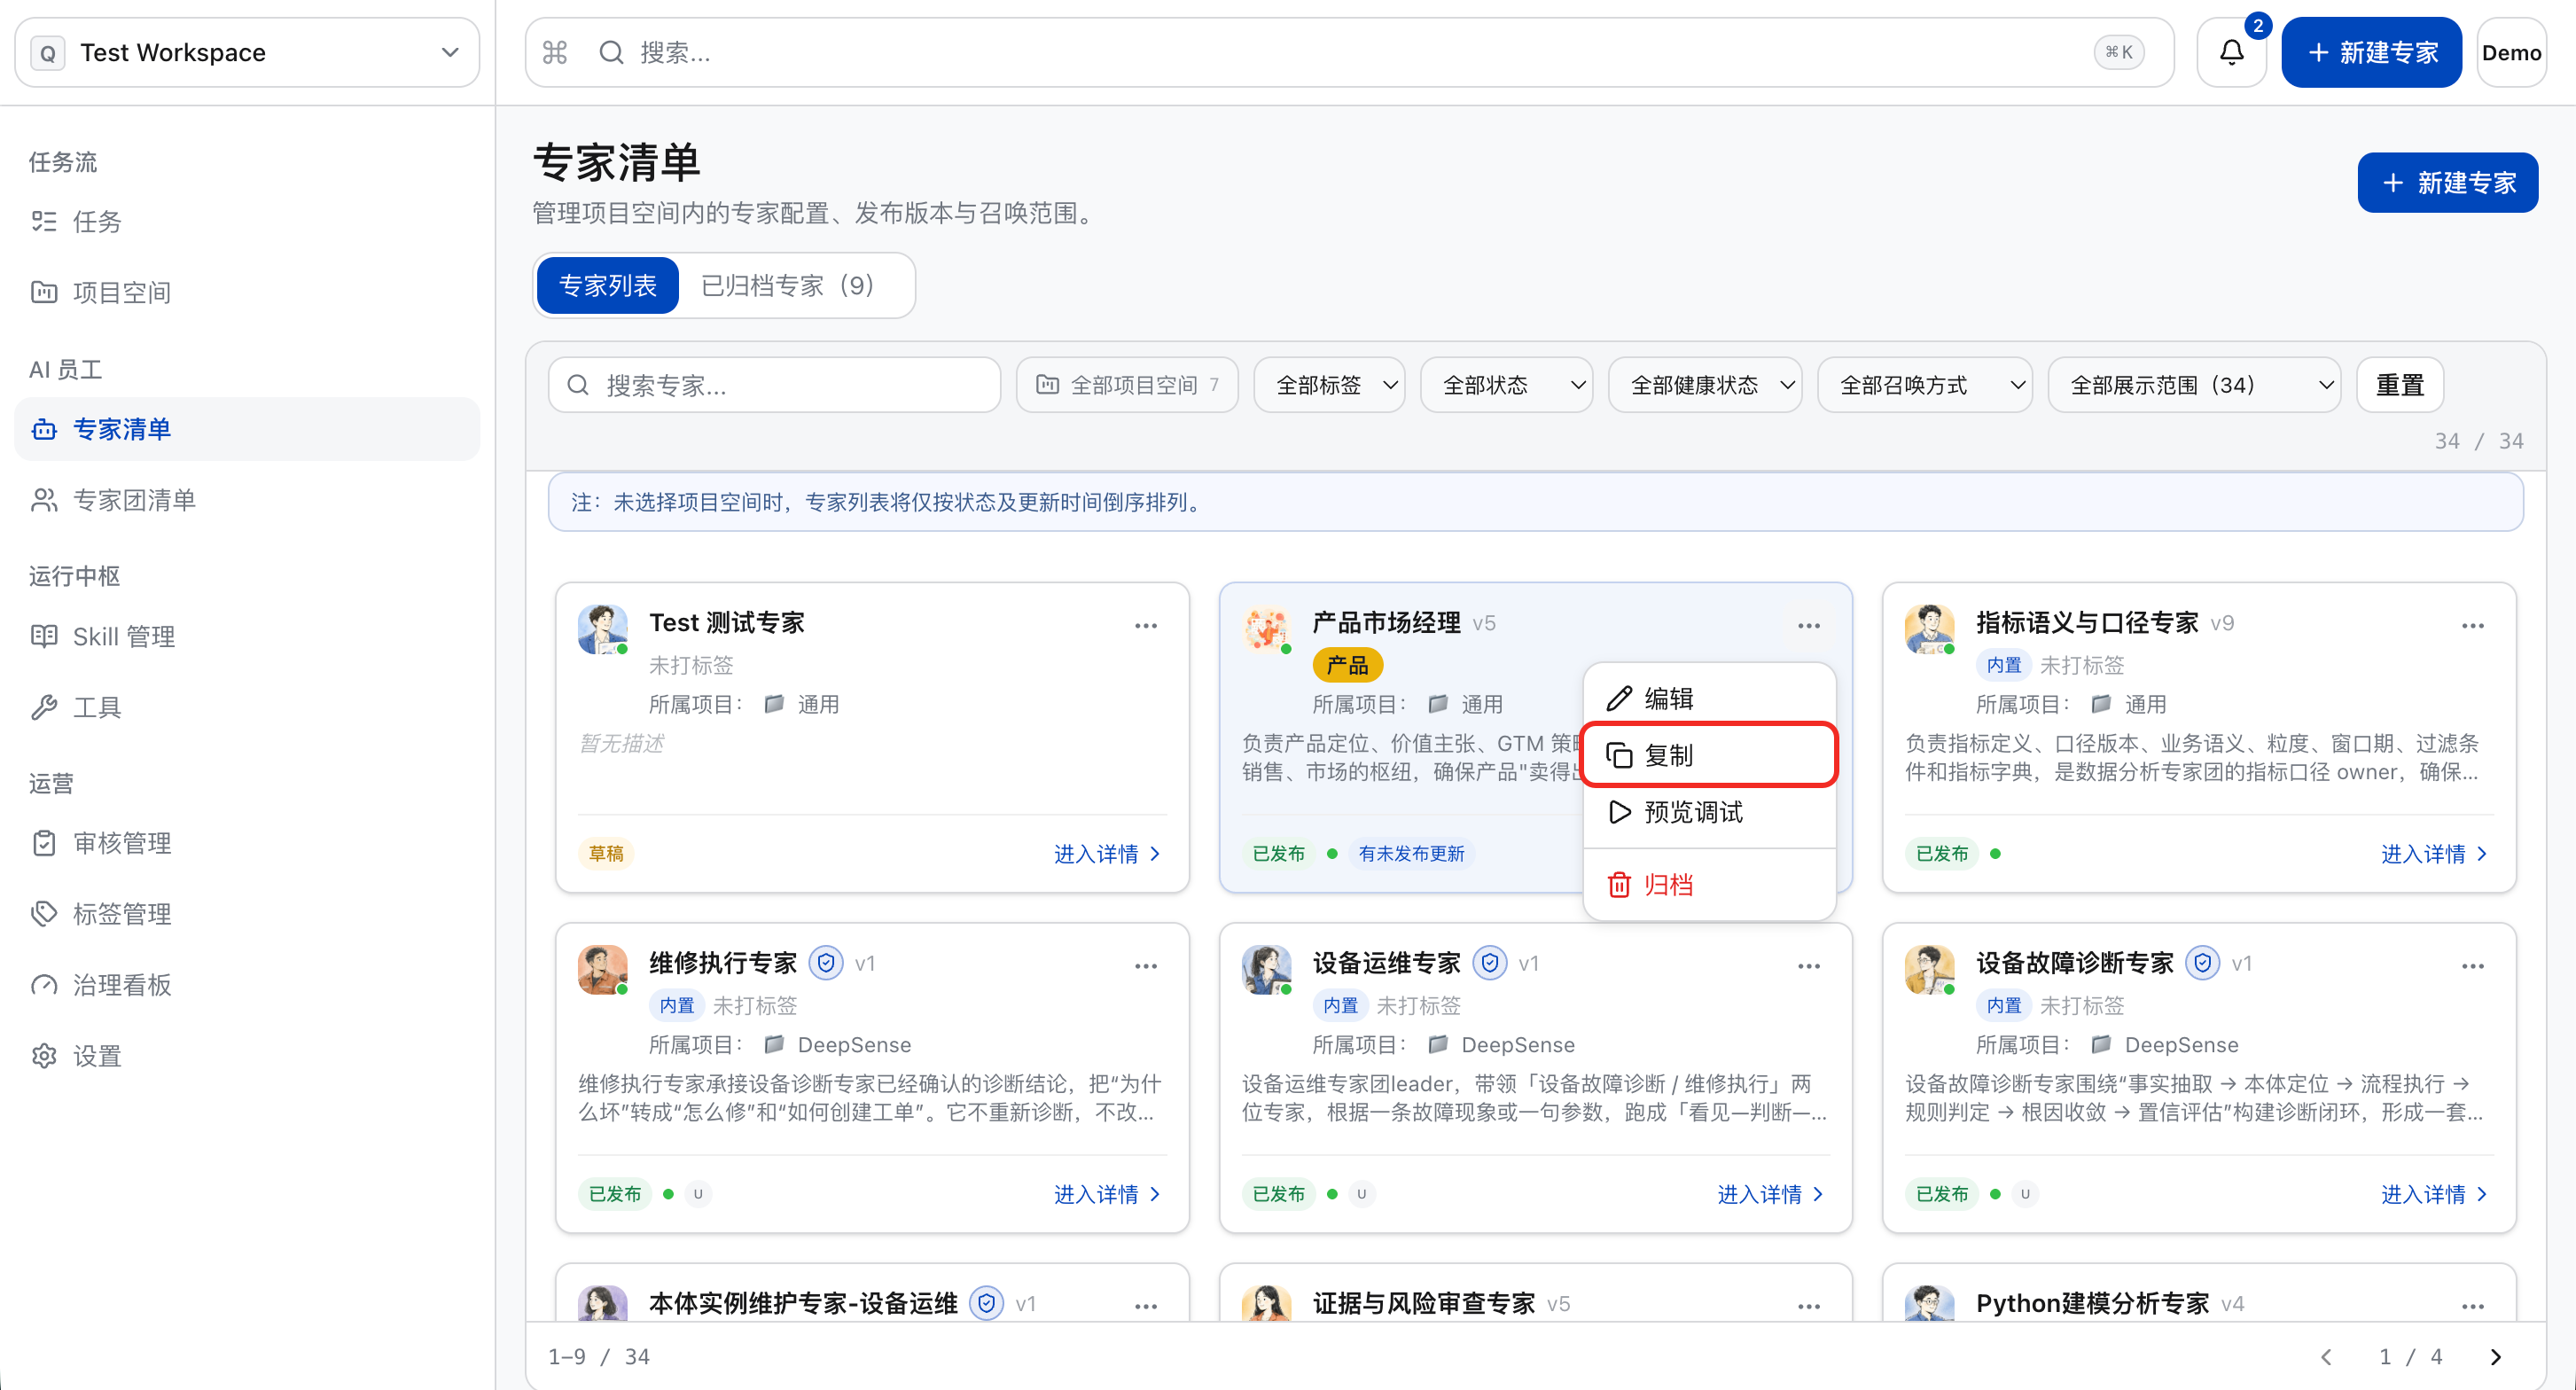
a. Click the ”…” - “Copy” button in the upper right corner of the expert card
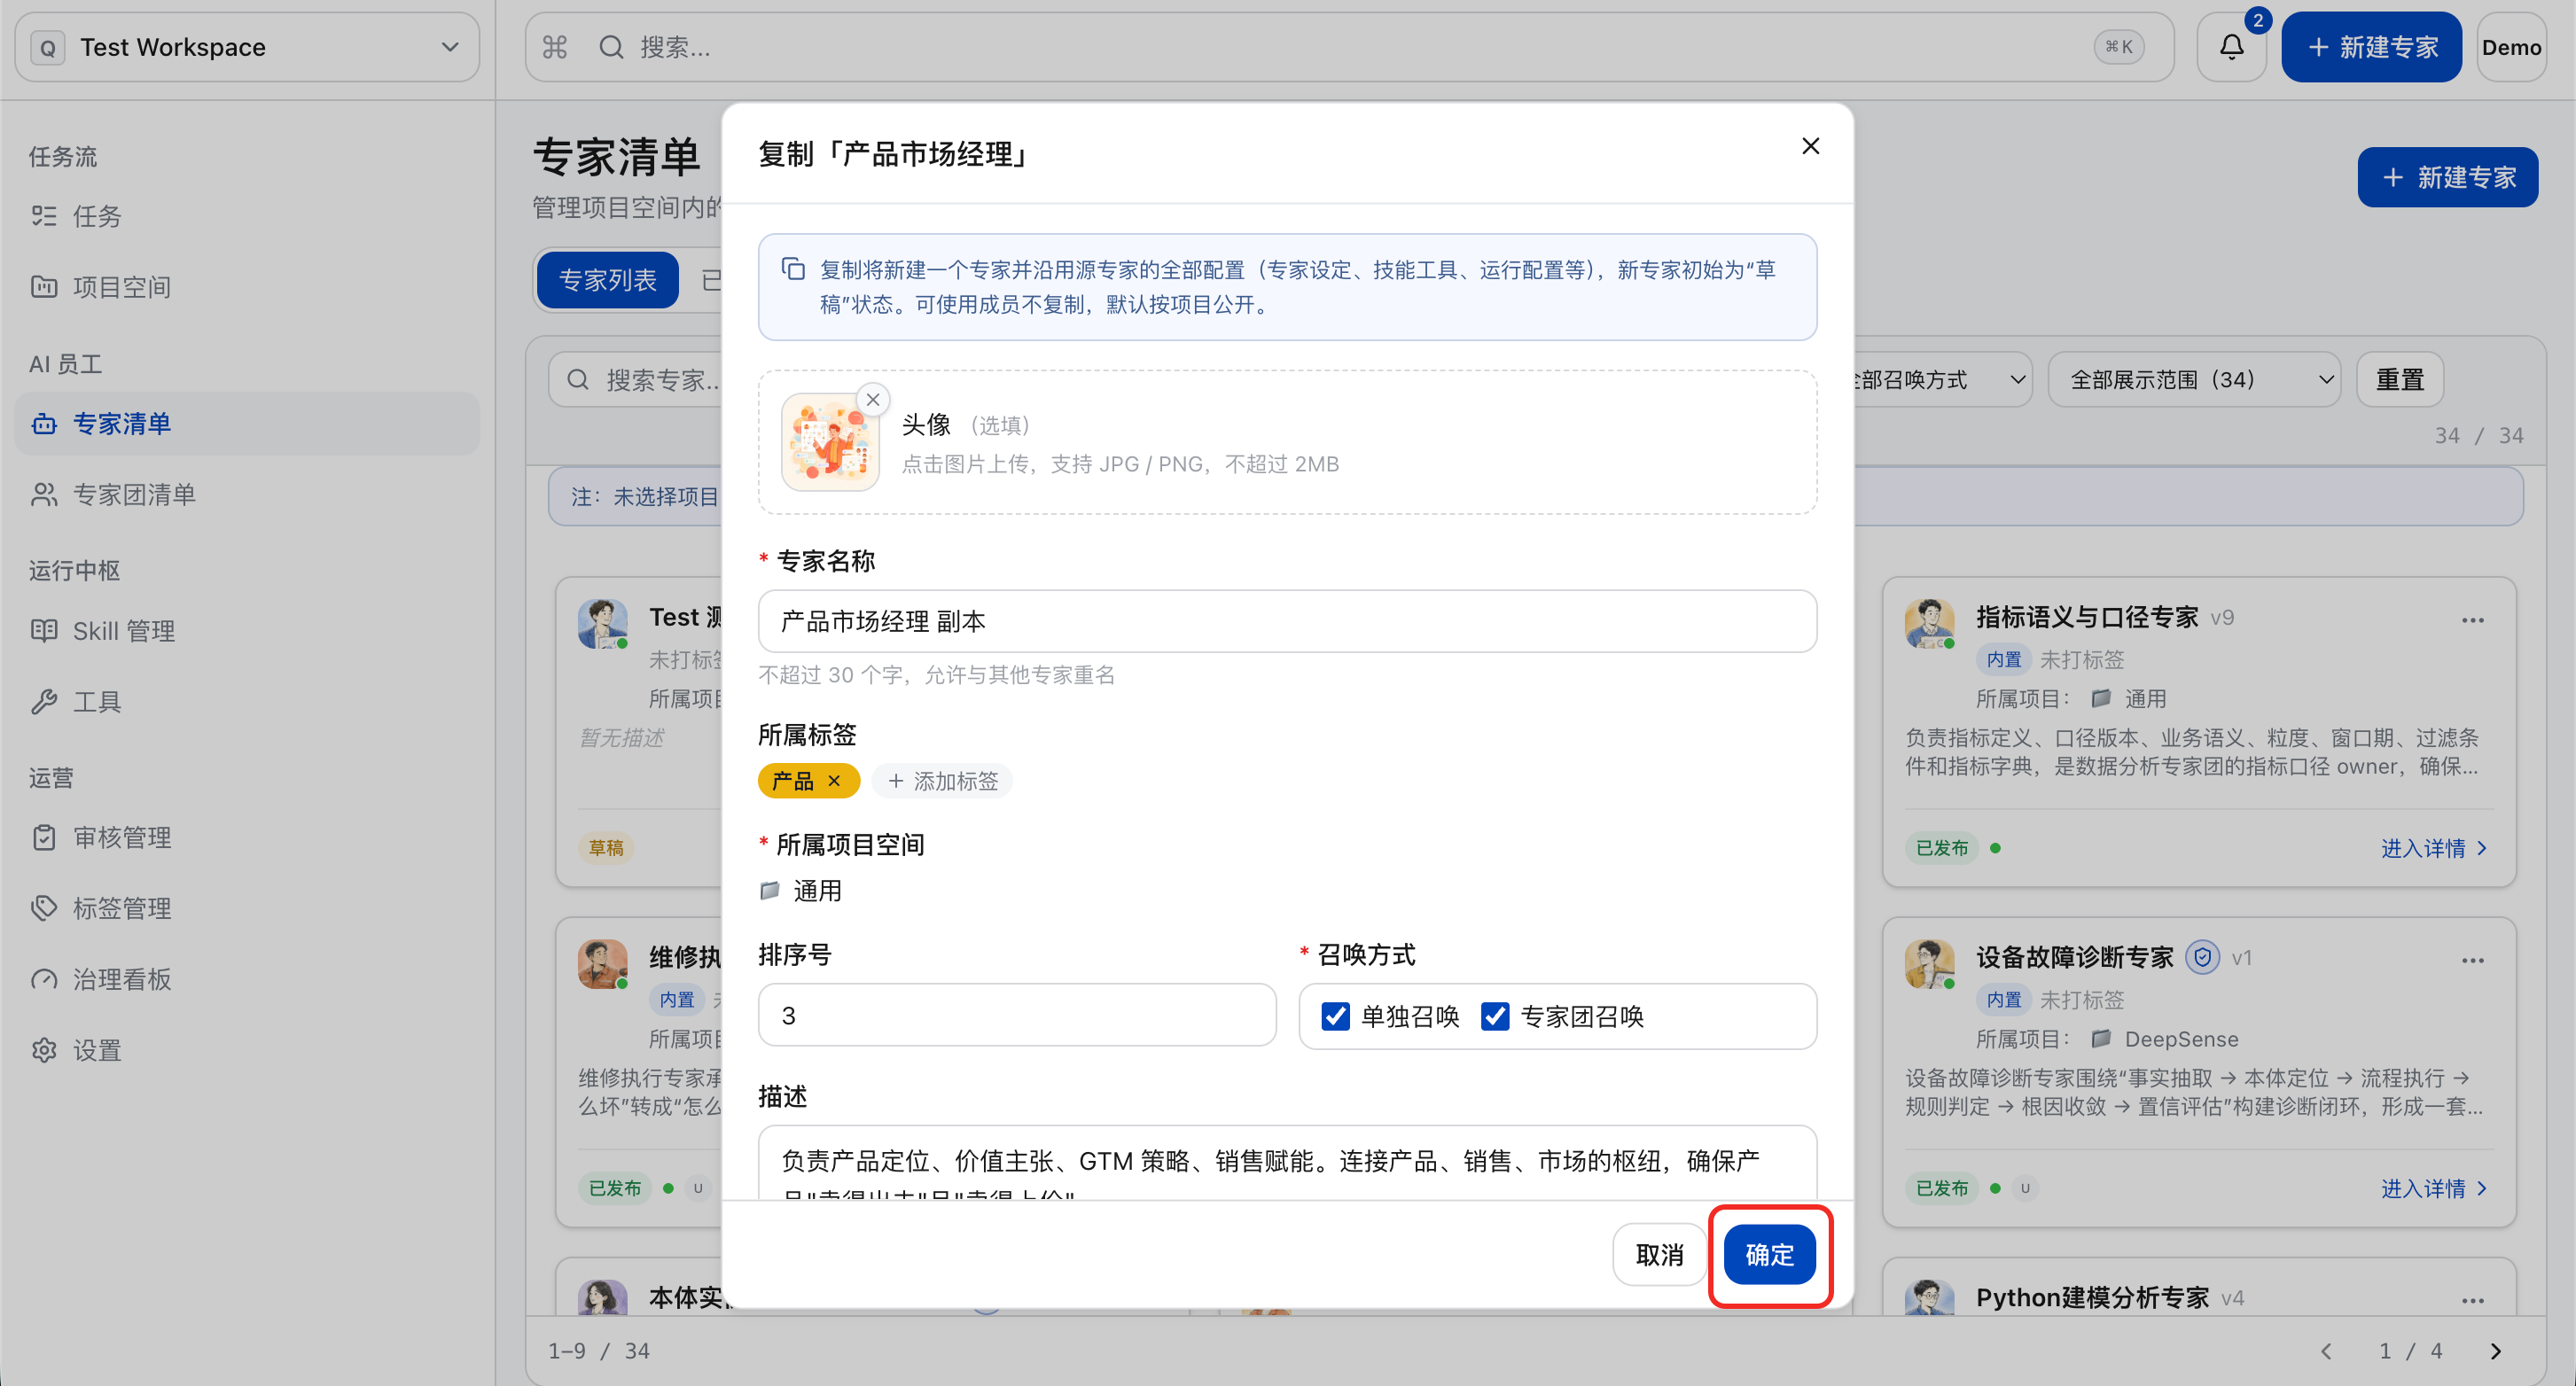
b. You can modify the basic information based on the original expert information. After completing the modification, click “OK”
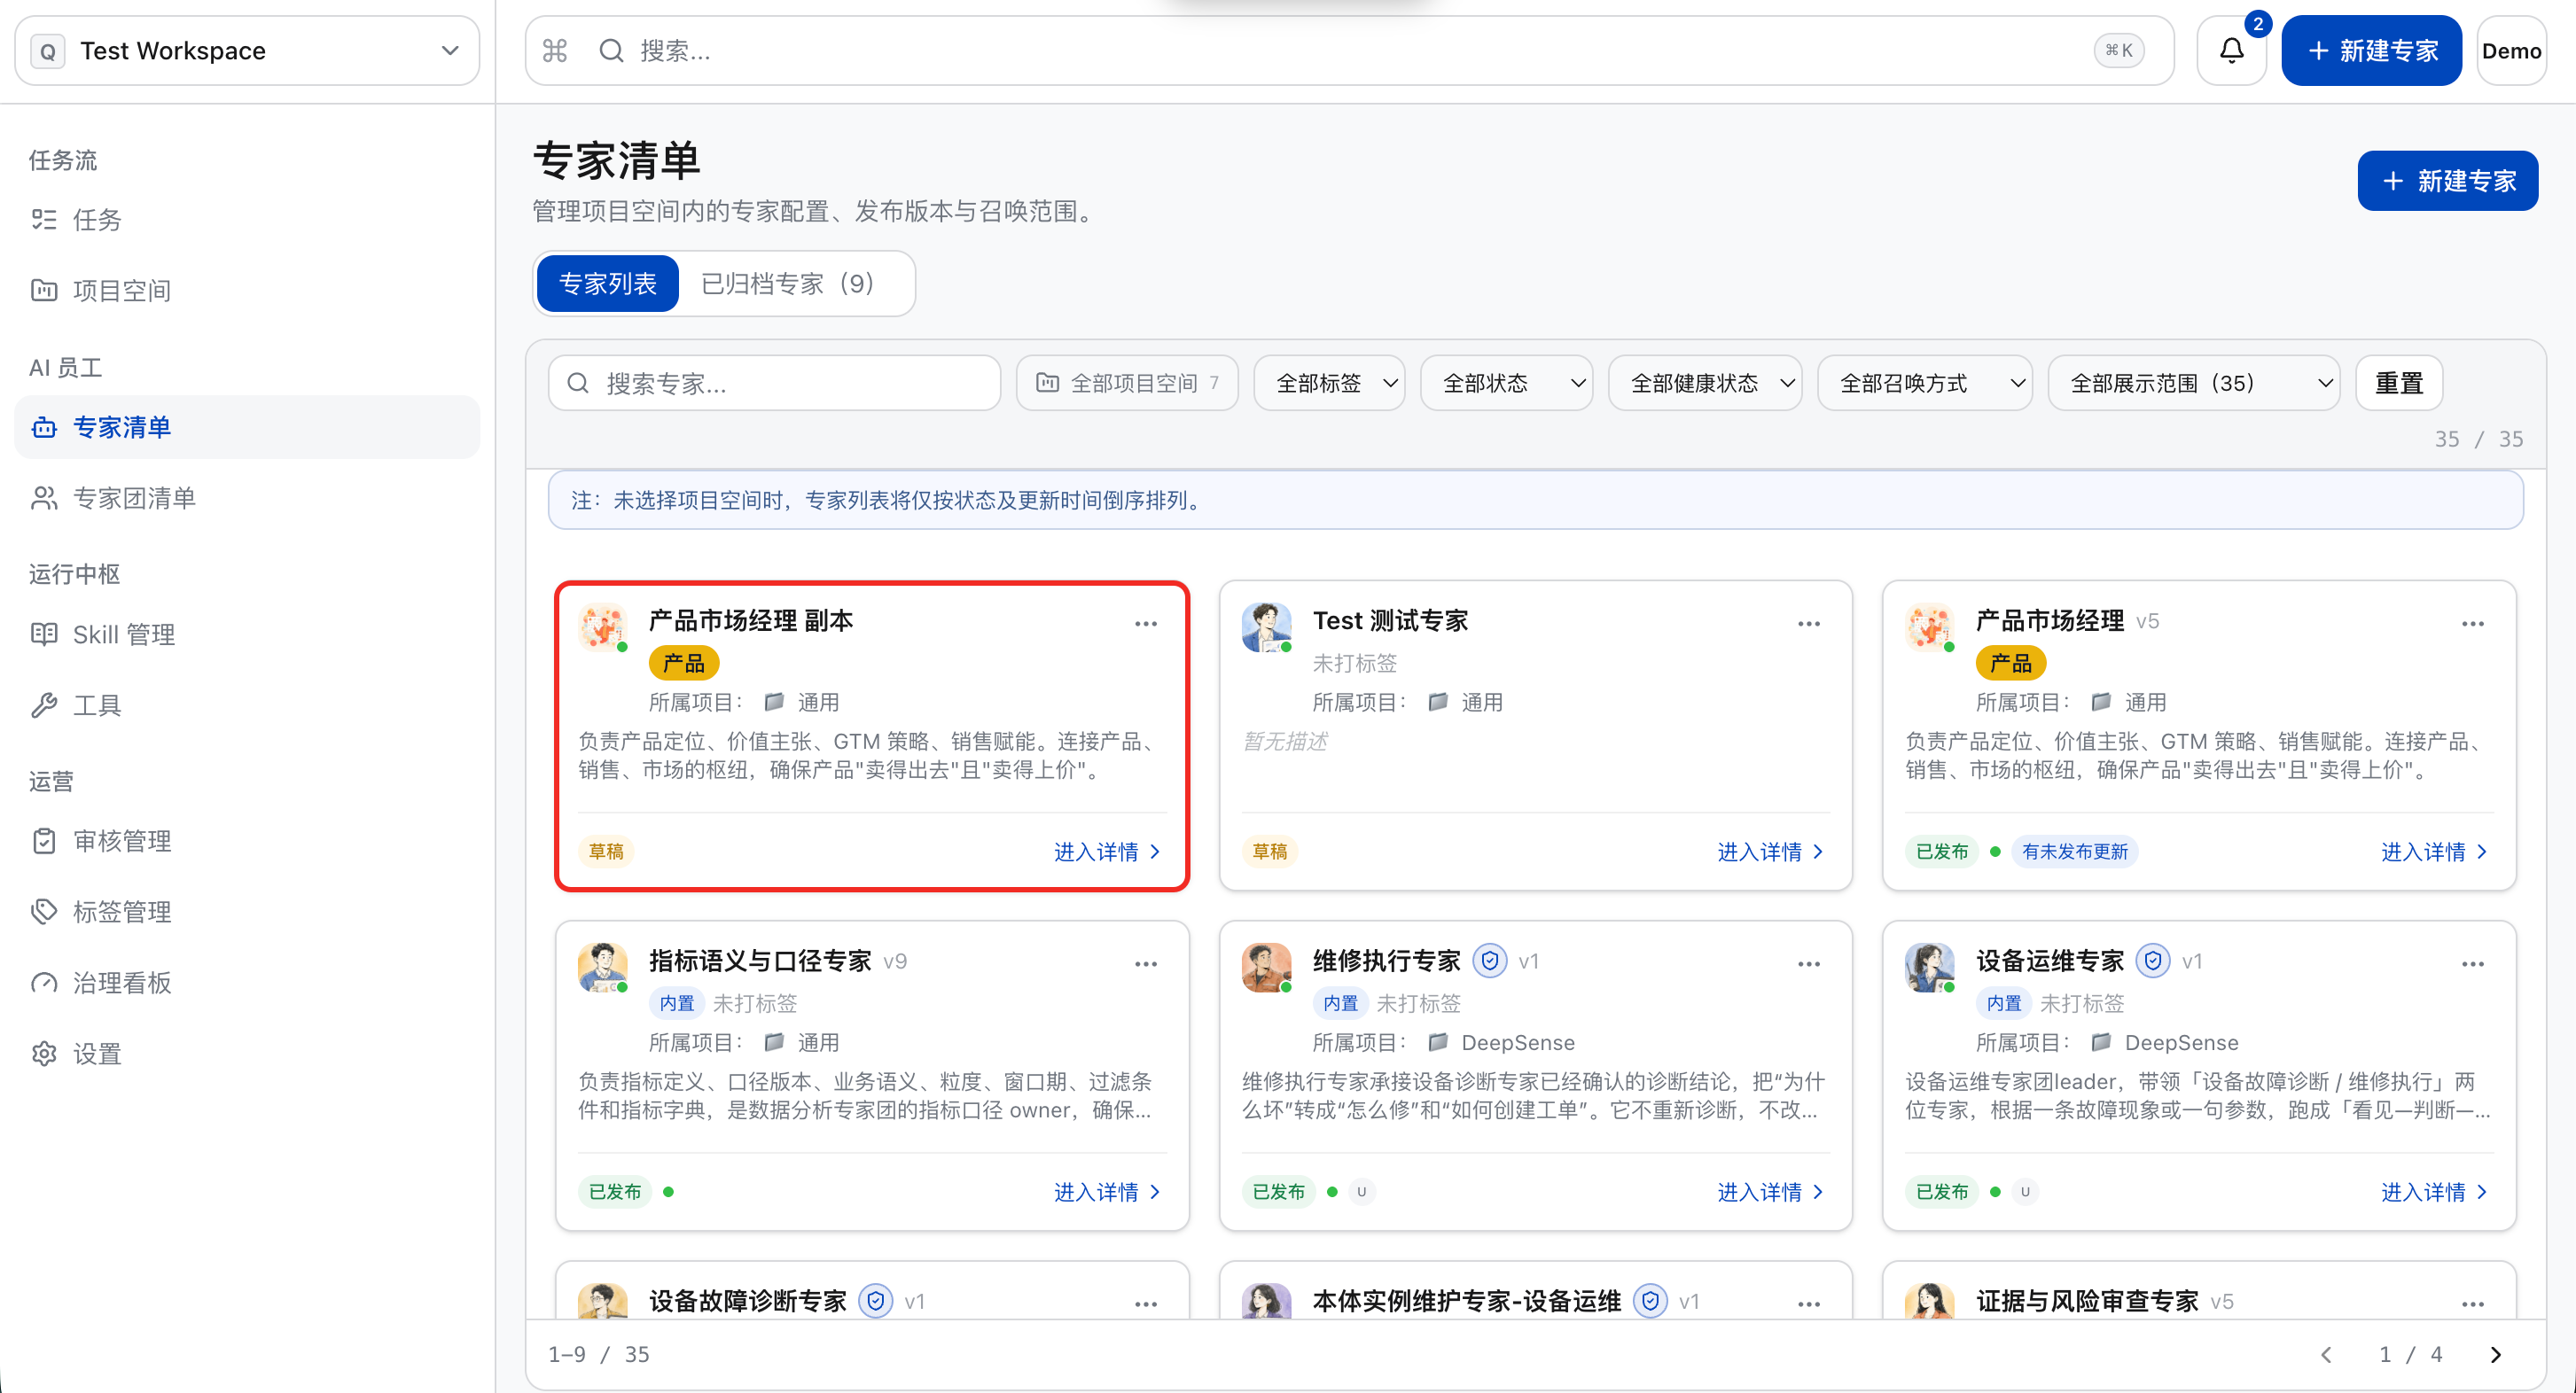
c. Once the copying is complete, click on the duplicate expert card to make secondary modifications and publish it.
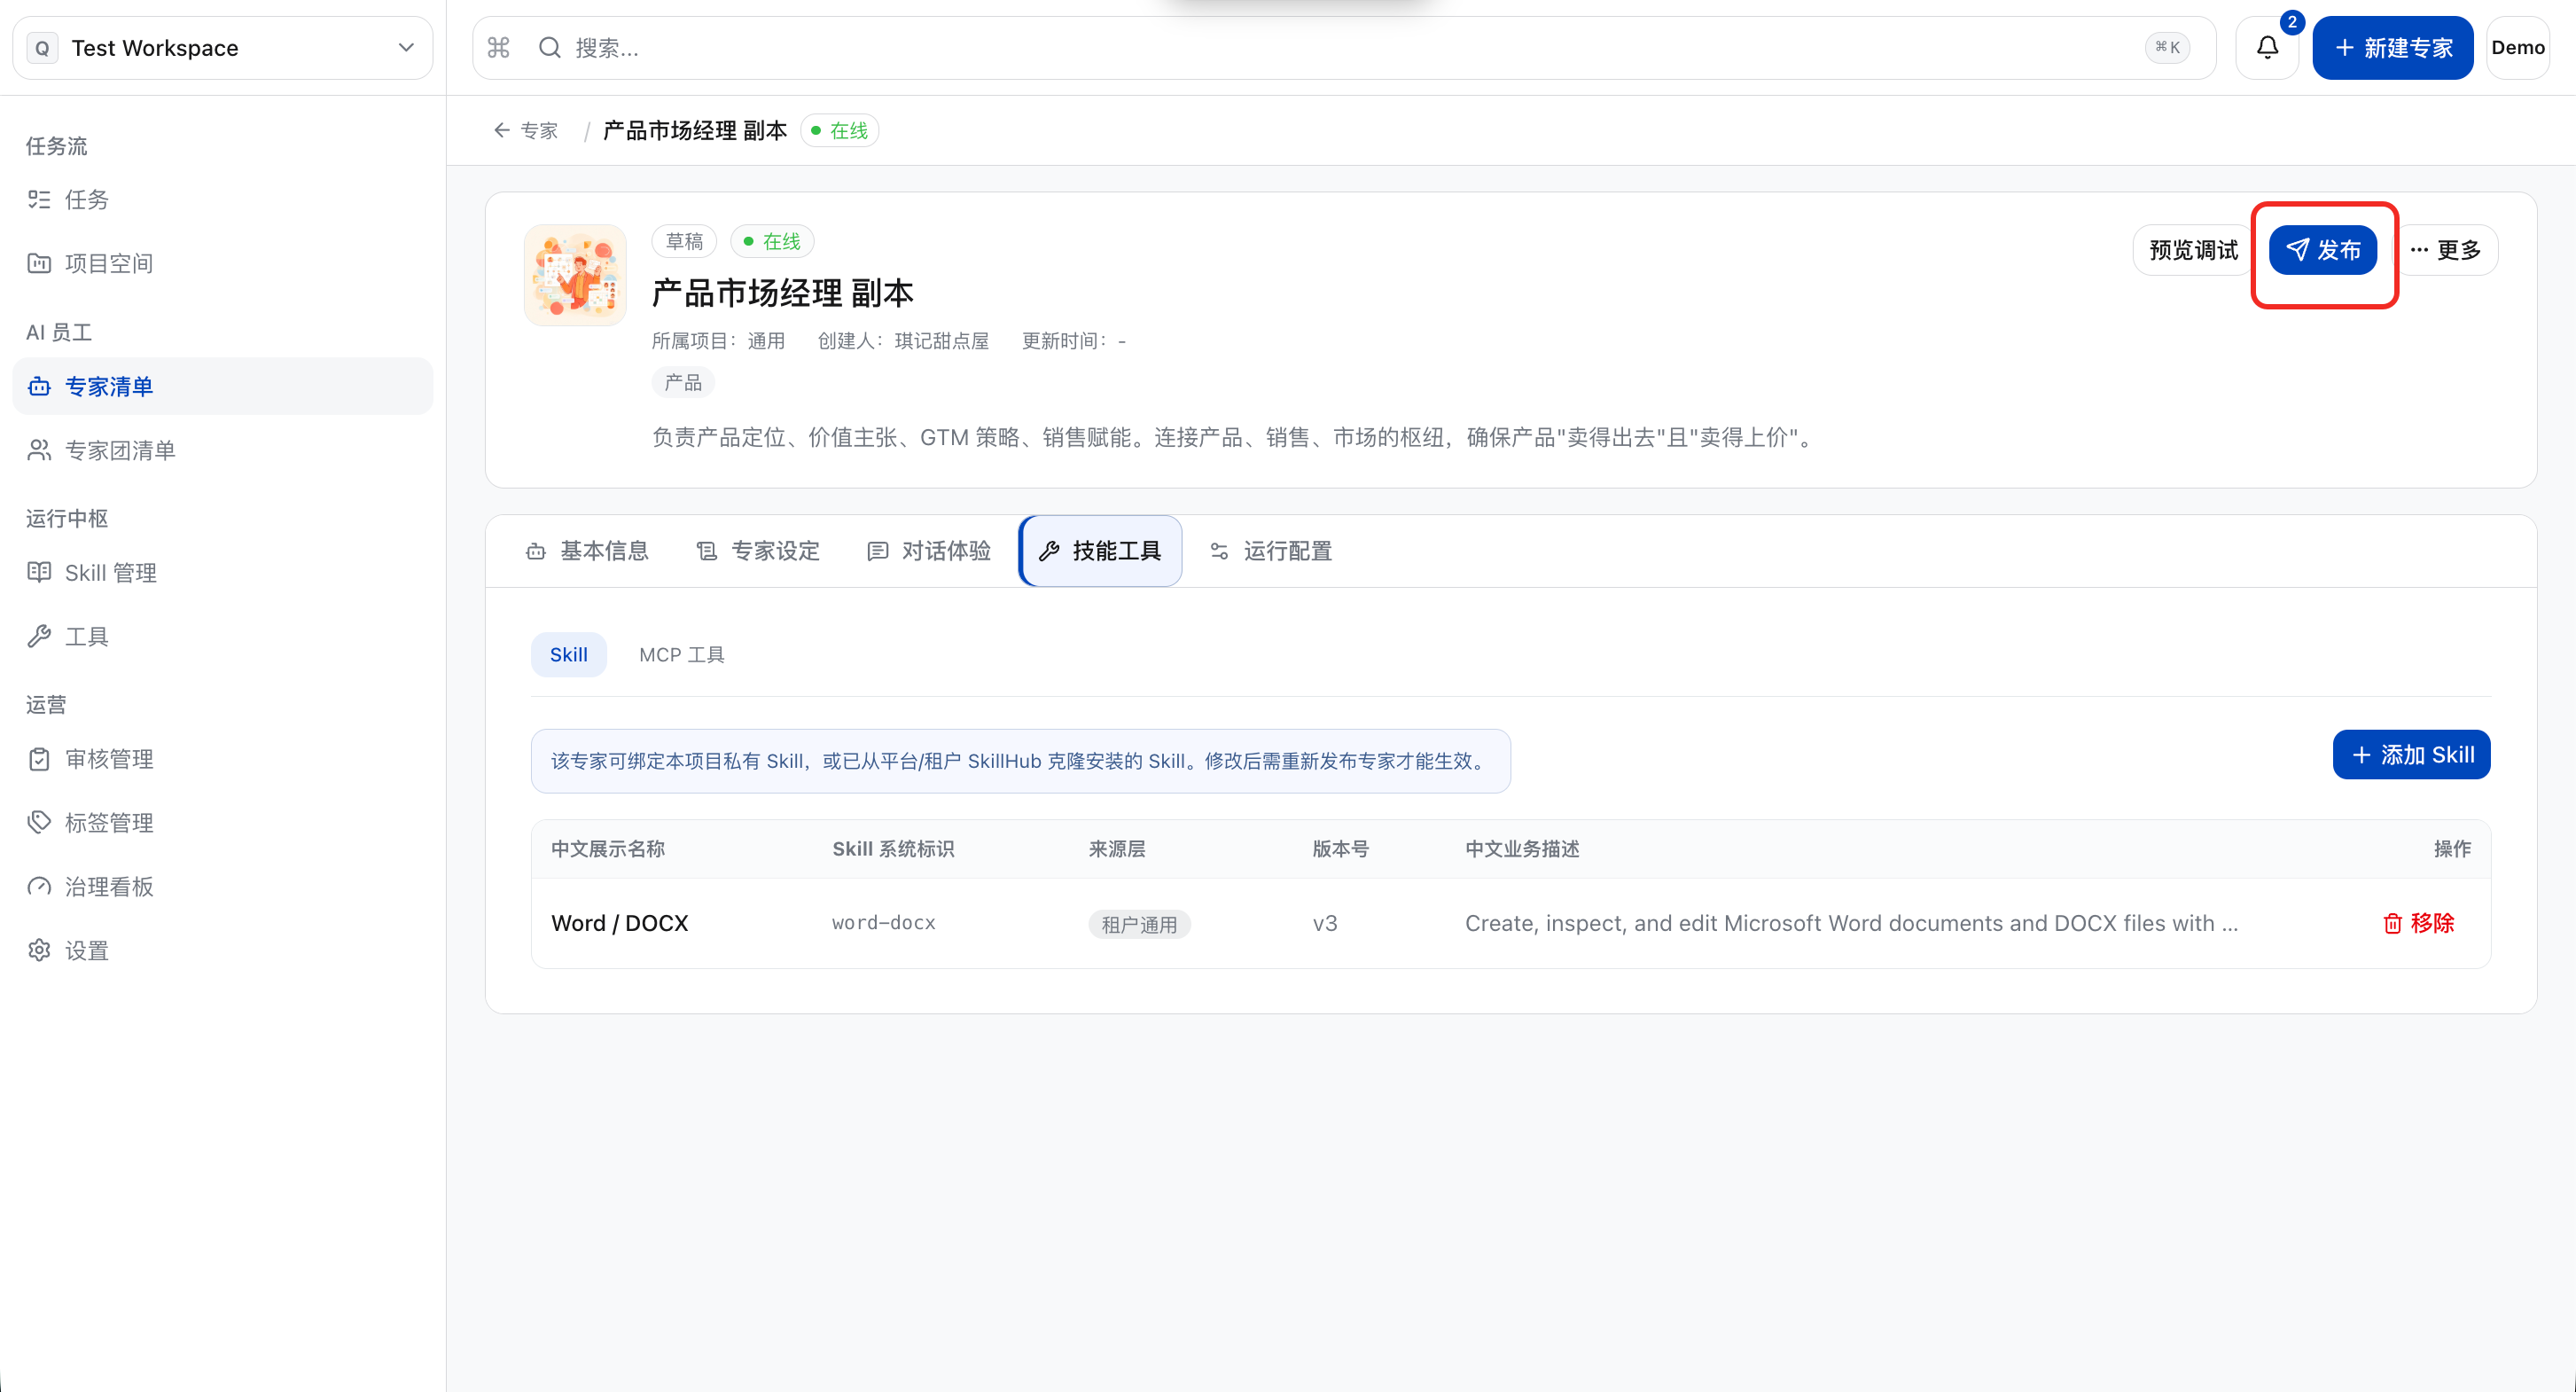
Editing Expert
a. Click the target expert card.
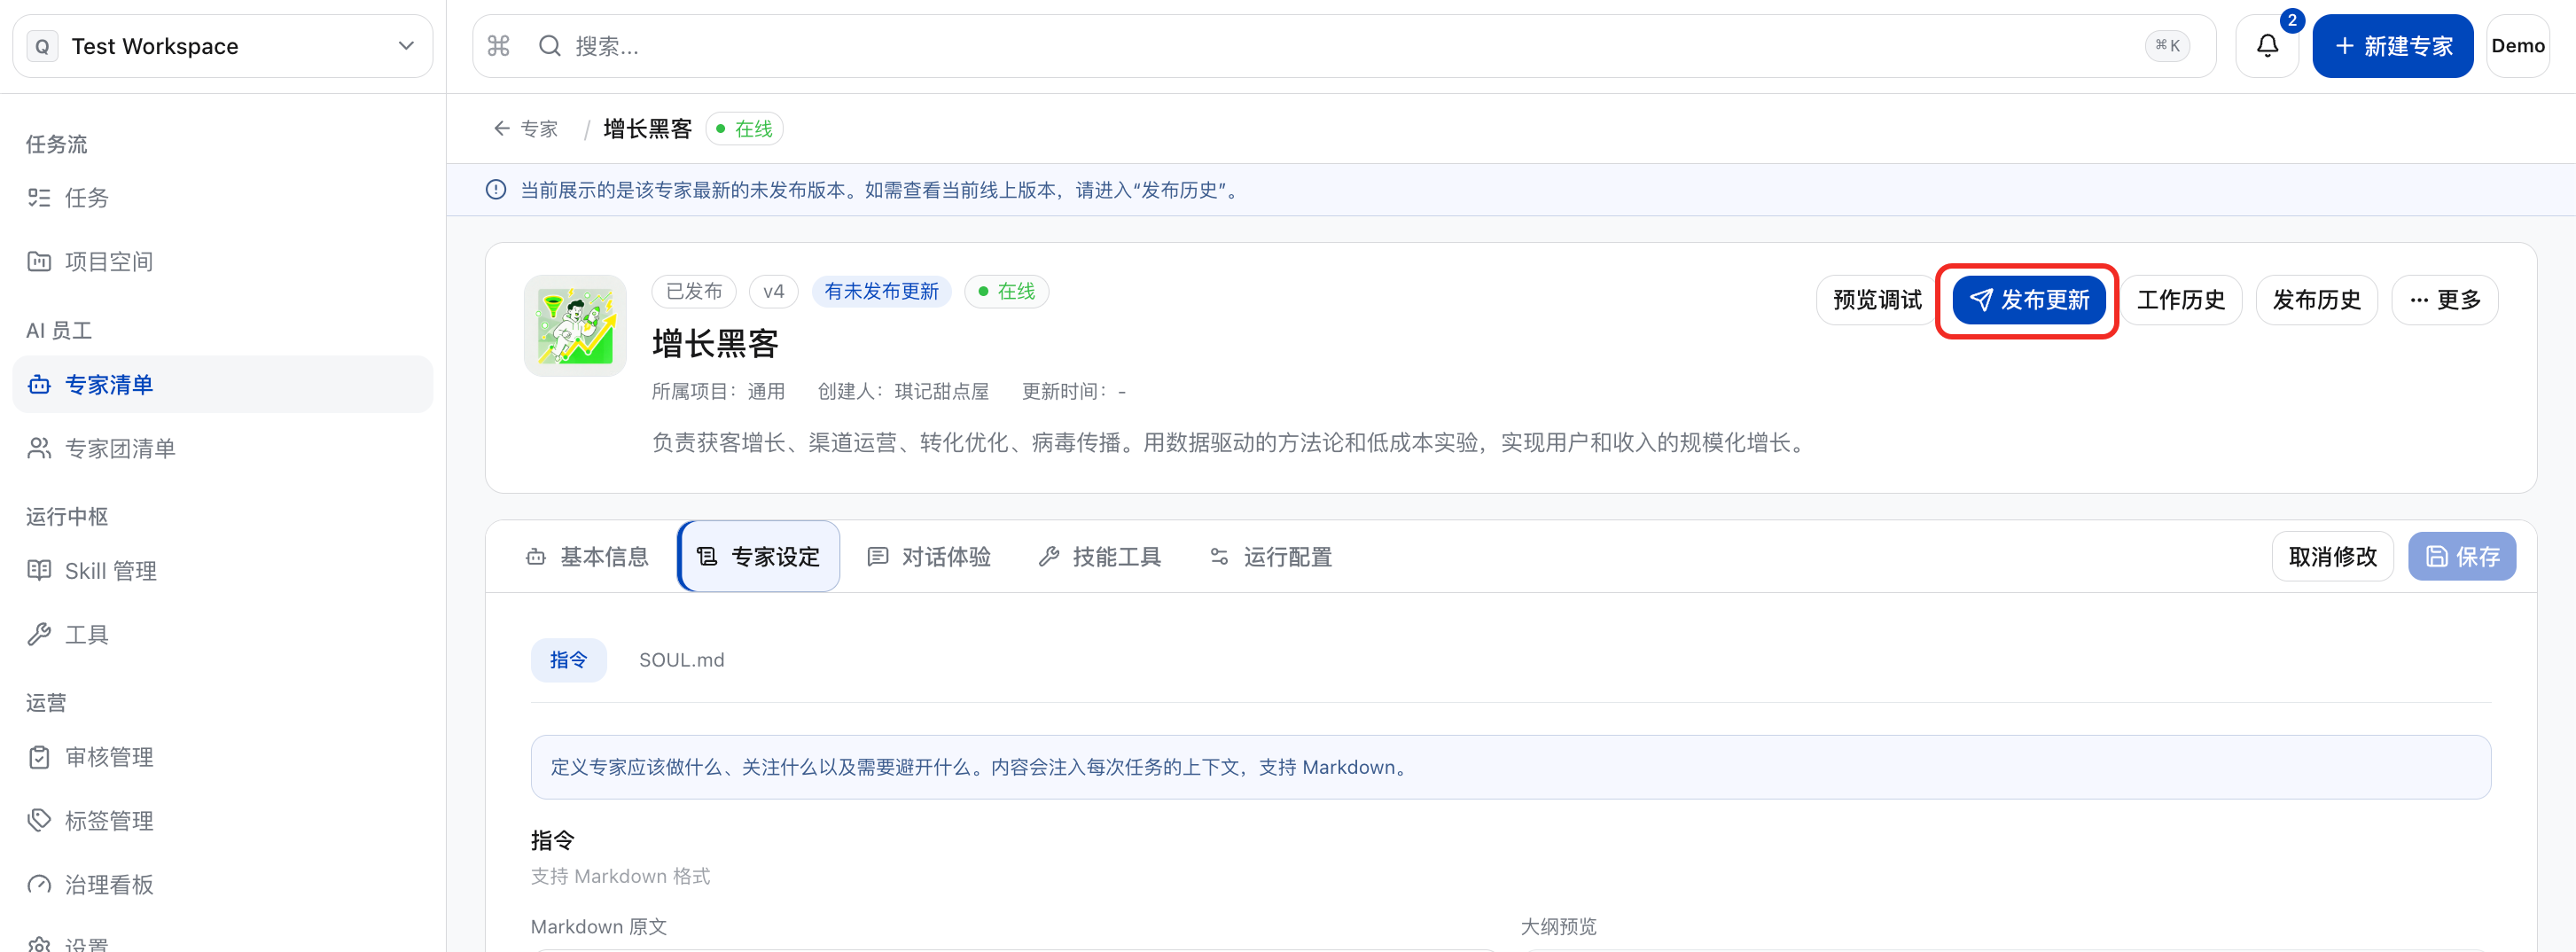
b. On the expert details page, you can edit basic information, expert settings, conversation experience, skill workflows, runtime configurations, etc. For descriptions of these information items, refer to the “Create New Expert” section above. Note: Once an expert is added as a member of an expert group, these information items cannot be modified. To make changes, first remove the expert from the corresponding expert group, then proceed with editing.
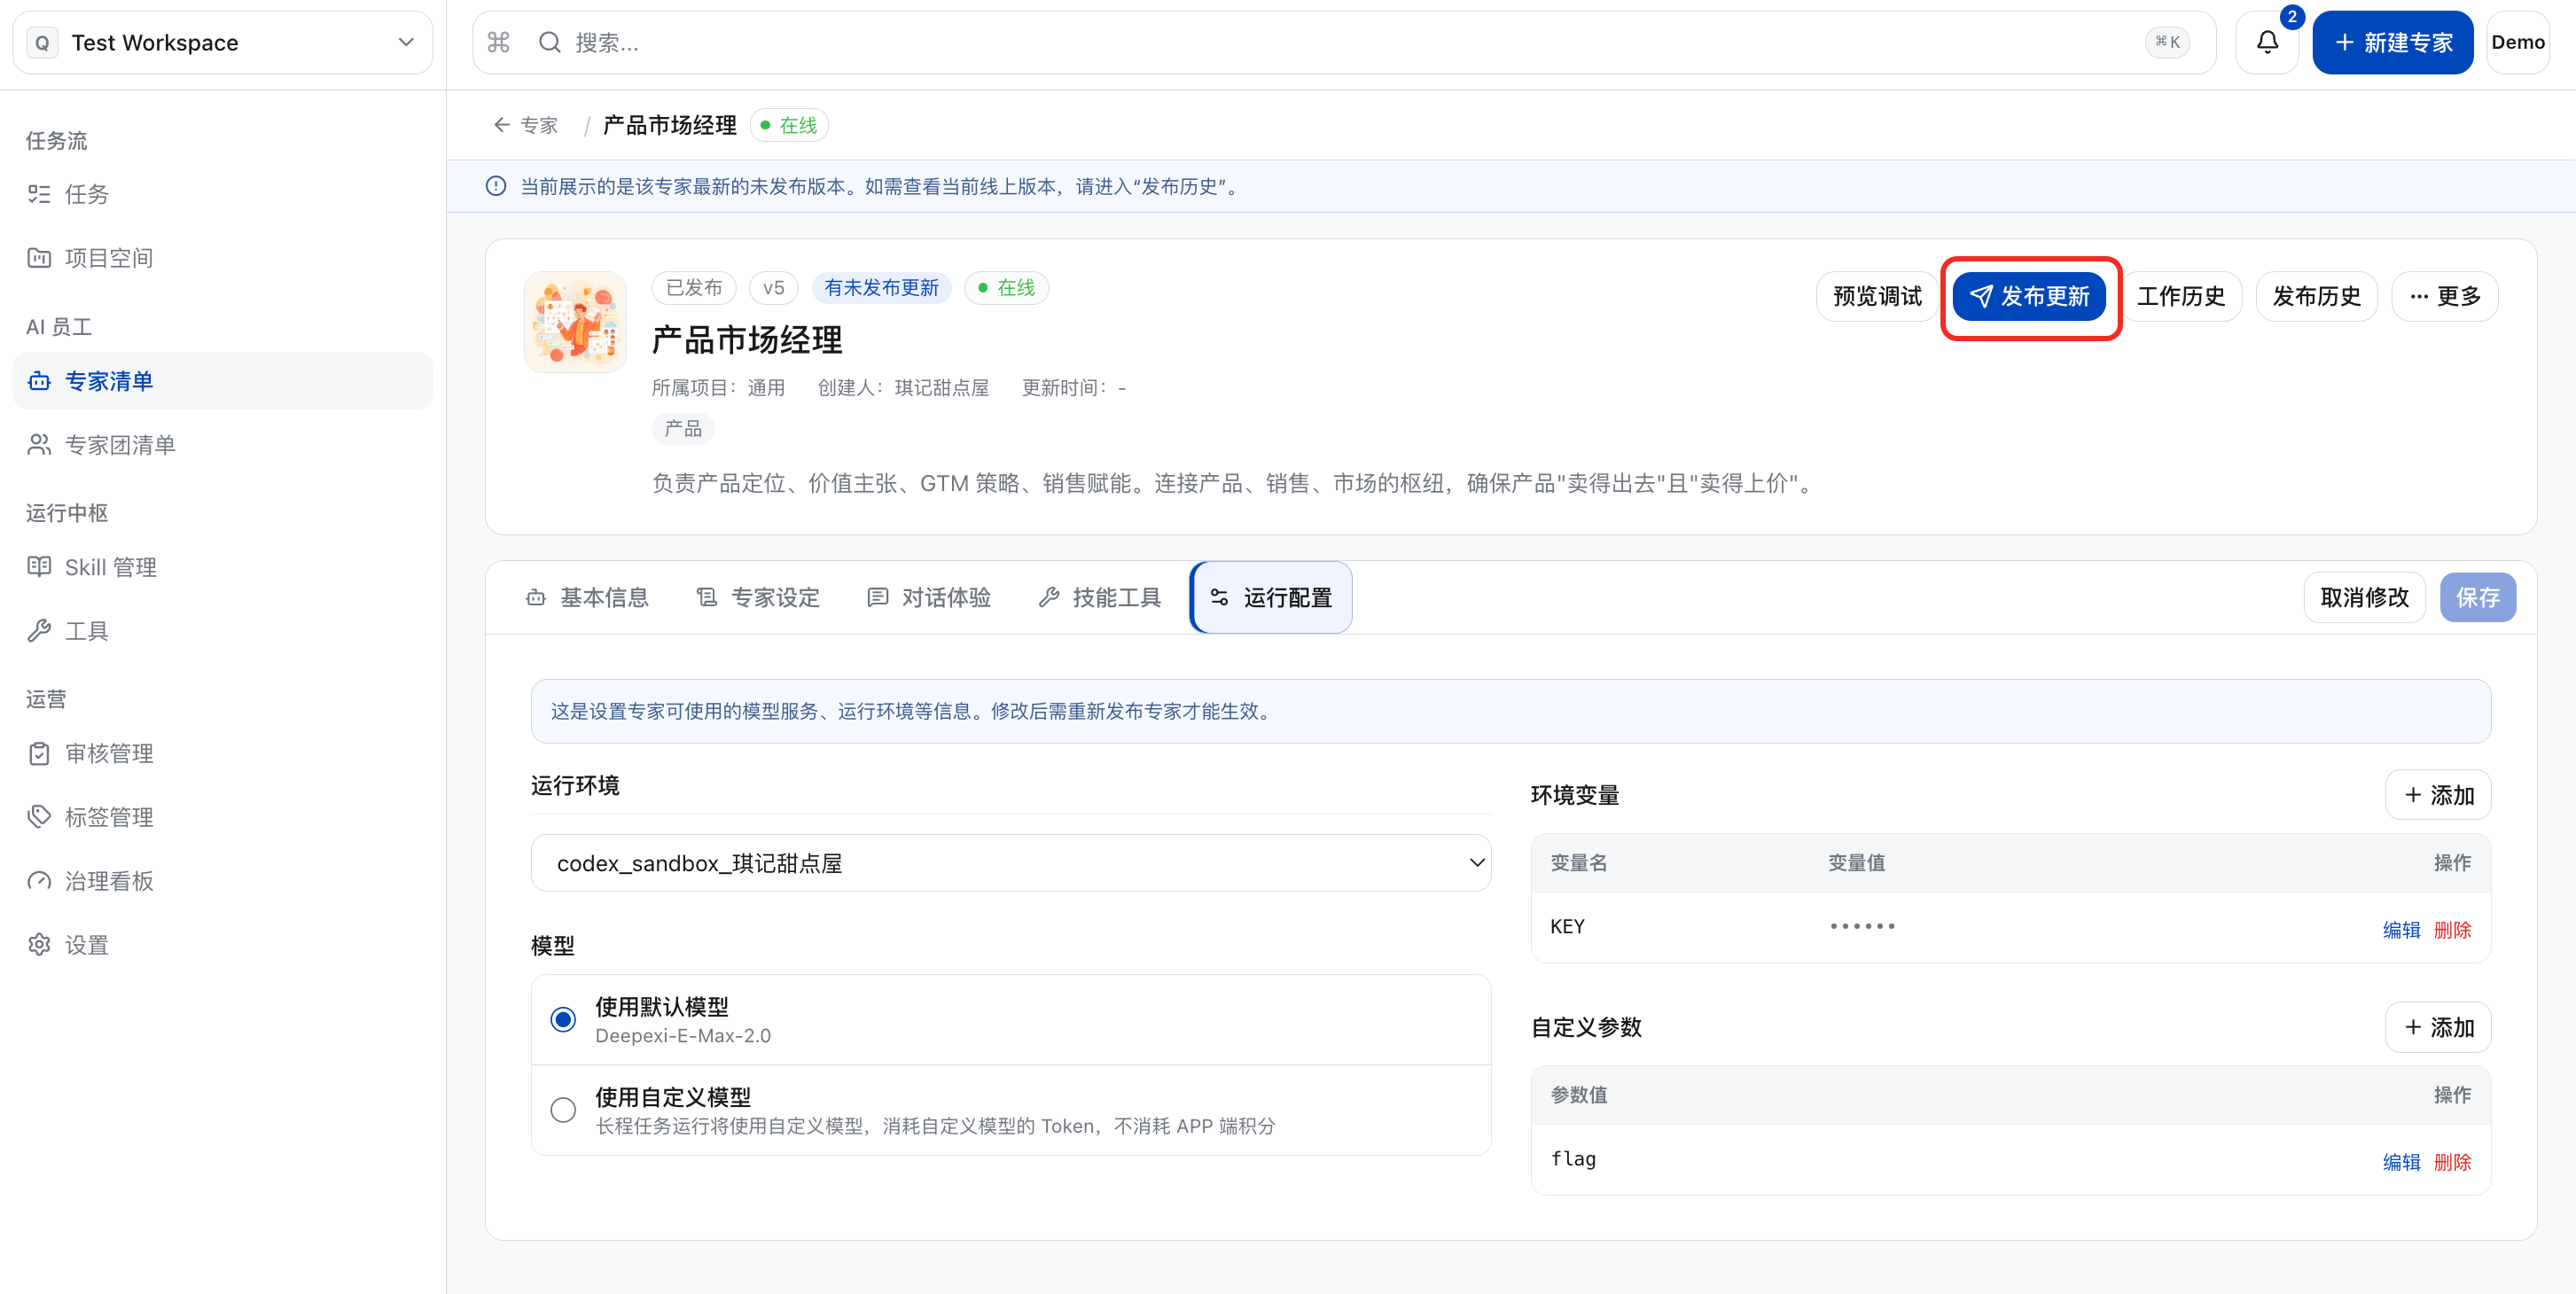
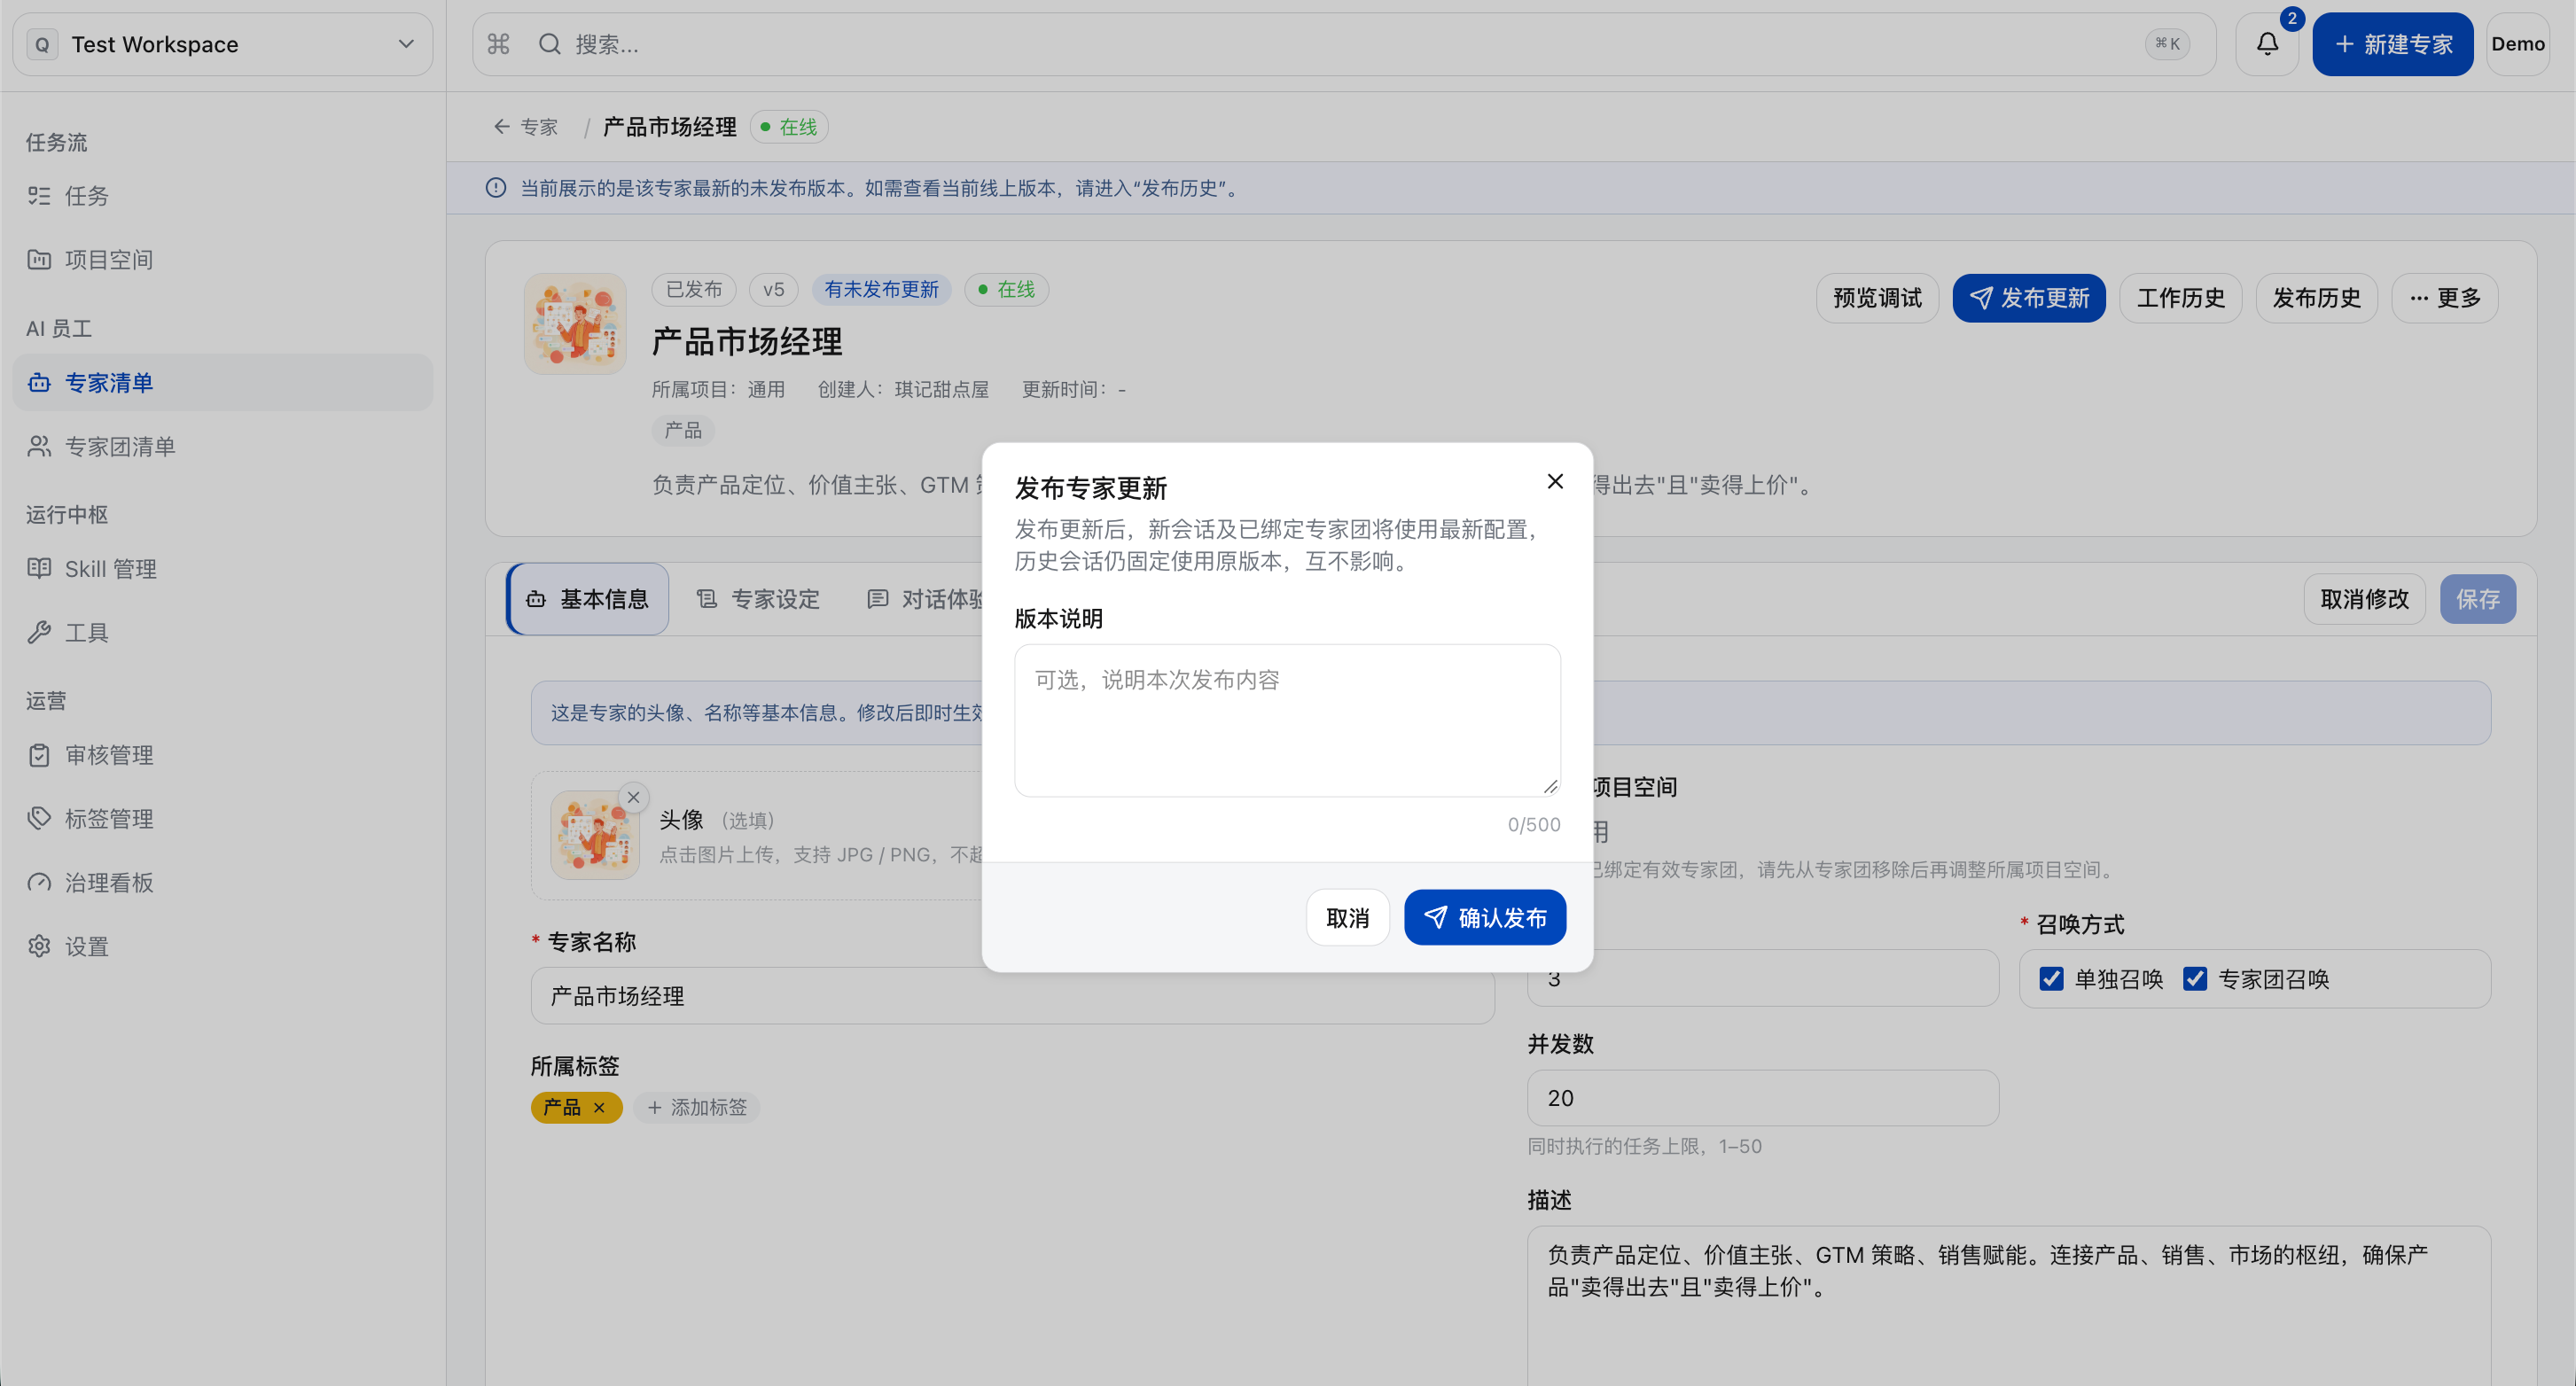
c. Click “Publish Updates”.
d. After the secondary confirmation pop-up appears, click “Confirm Publish”.
Preview and Debug
a. Click “Preview Debug”.
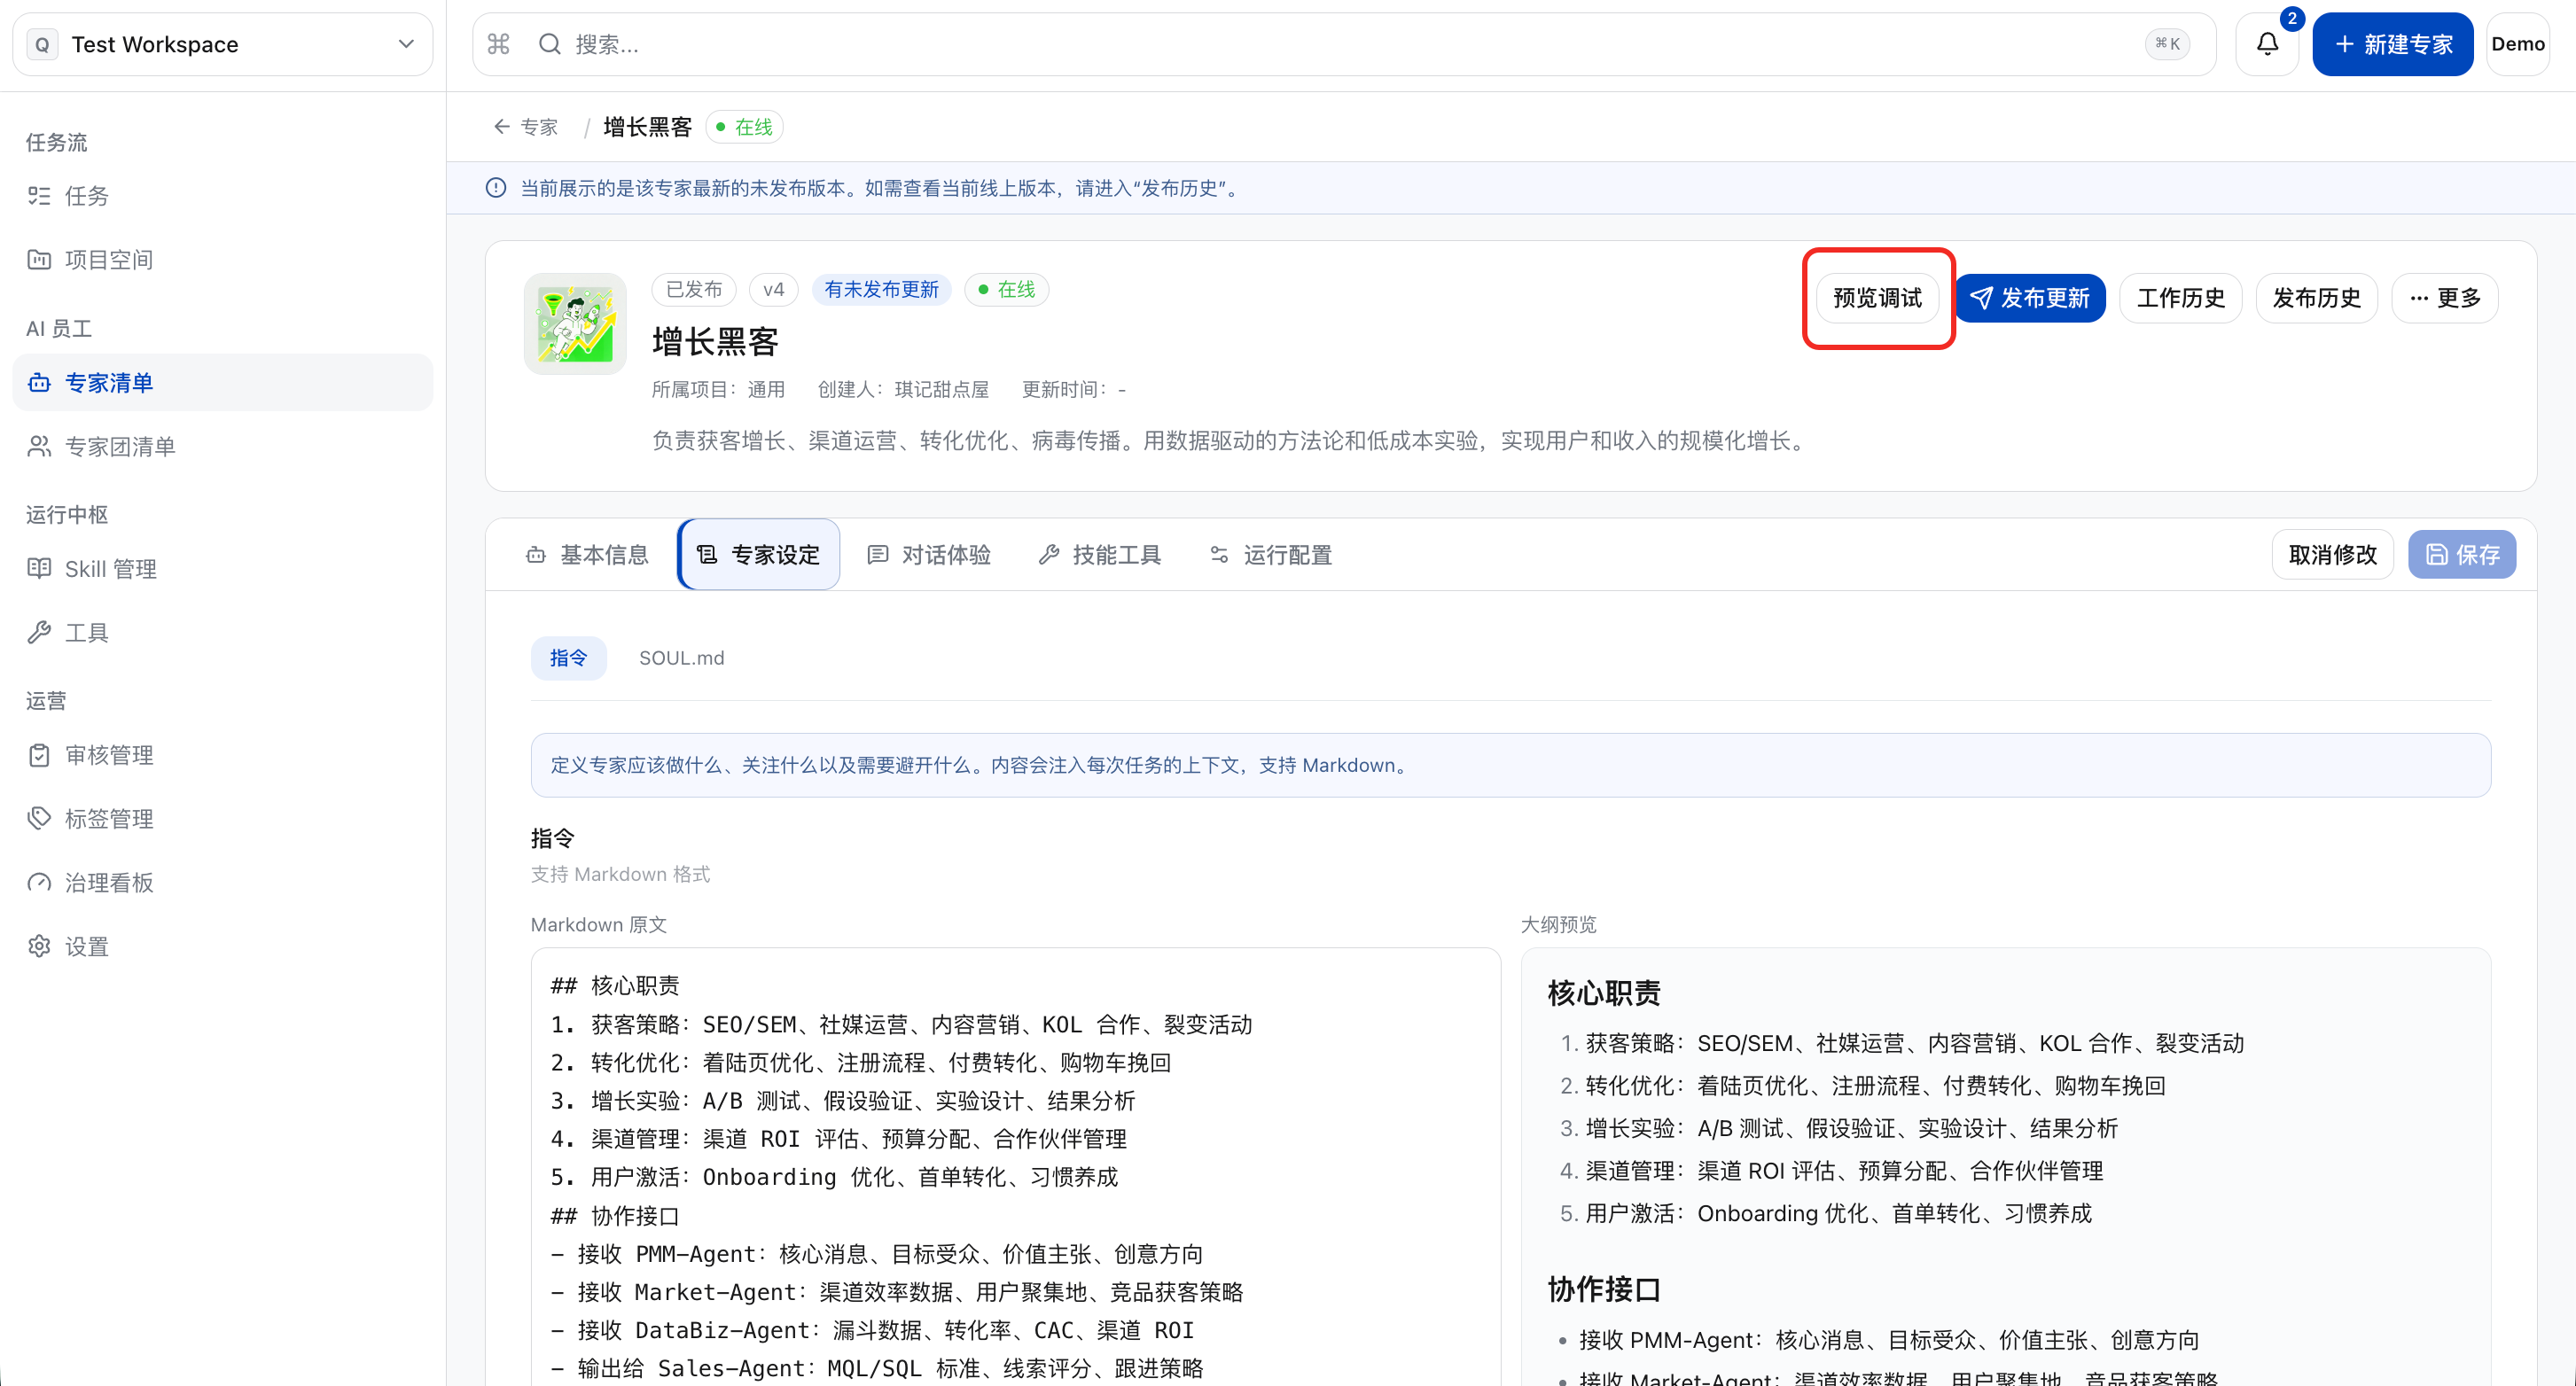
b. Initiate a conversation in the preview debugging box.
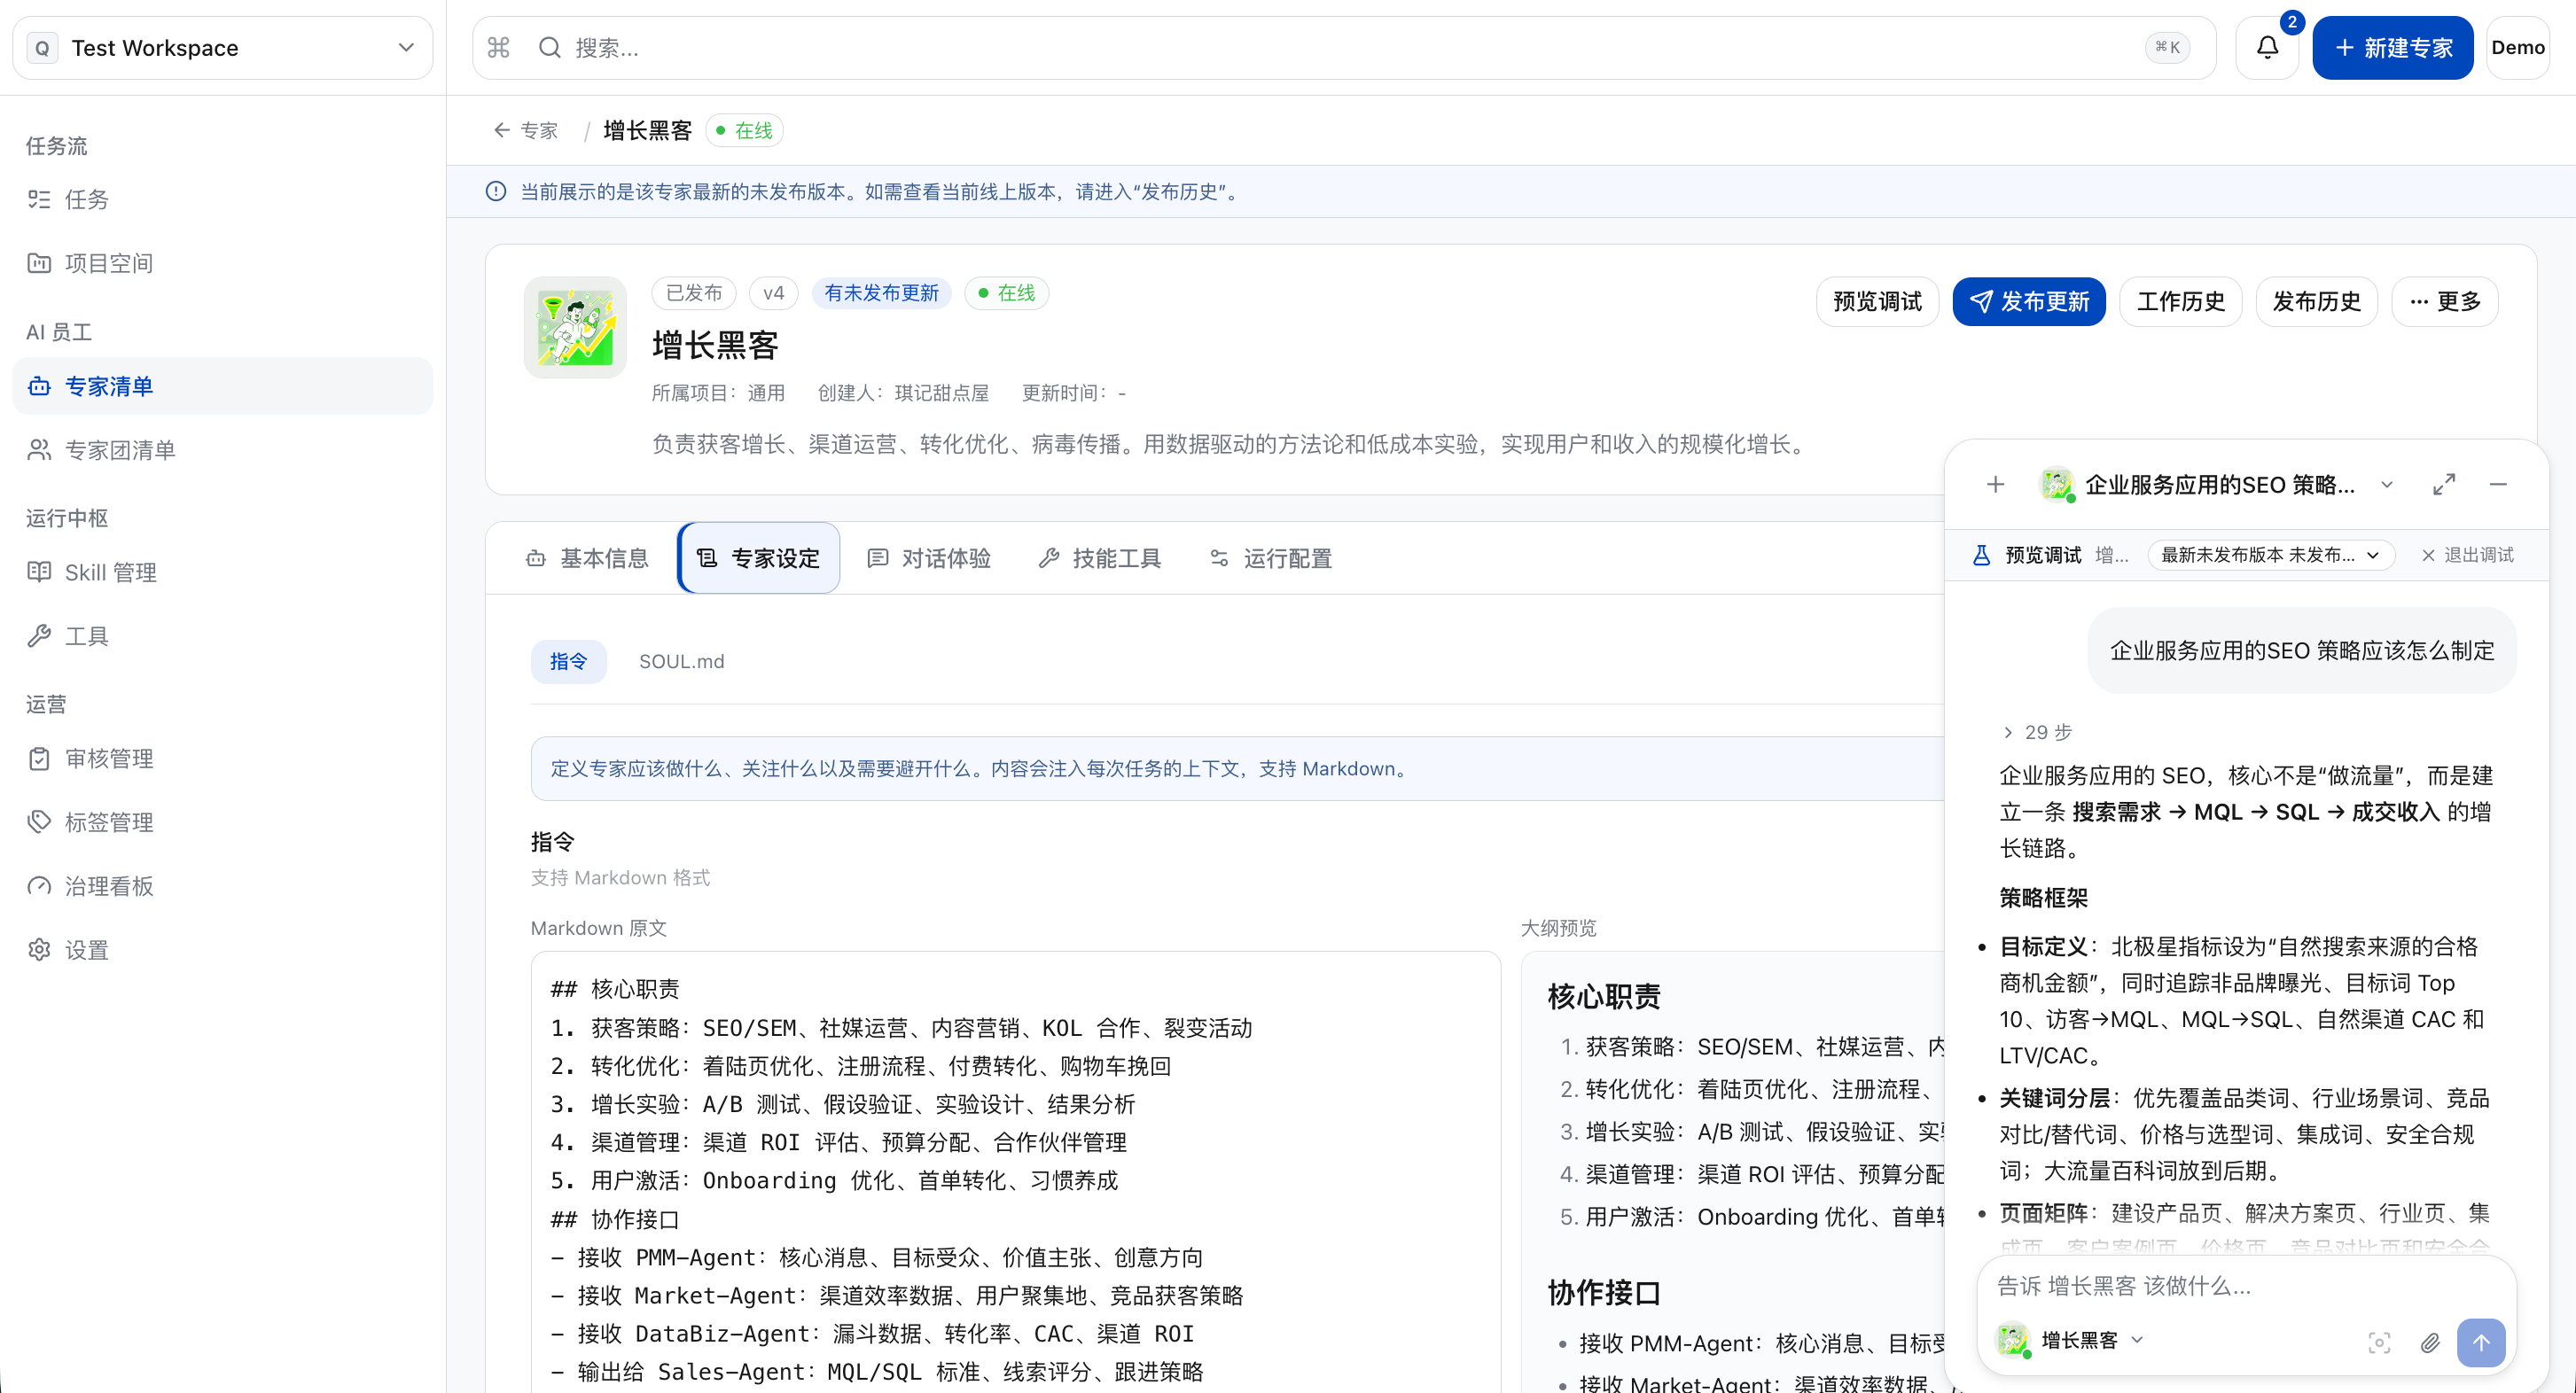
c. To switch versions, you can click in the version selection box to select the desired one; by default, the draft version configured for the current page will be used.
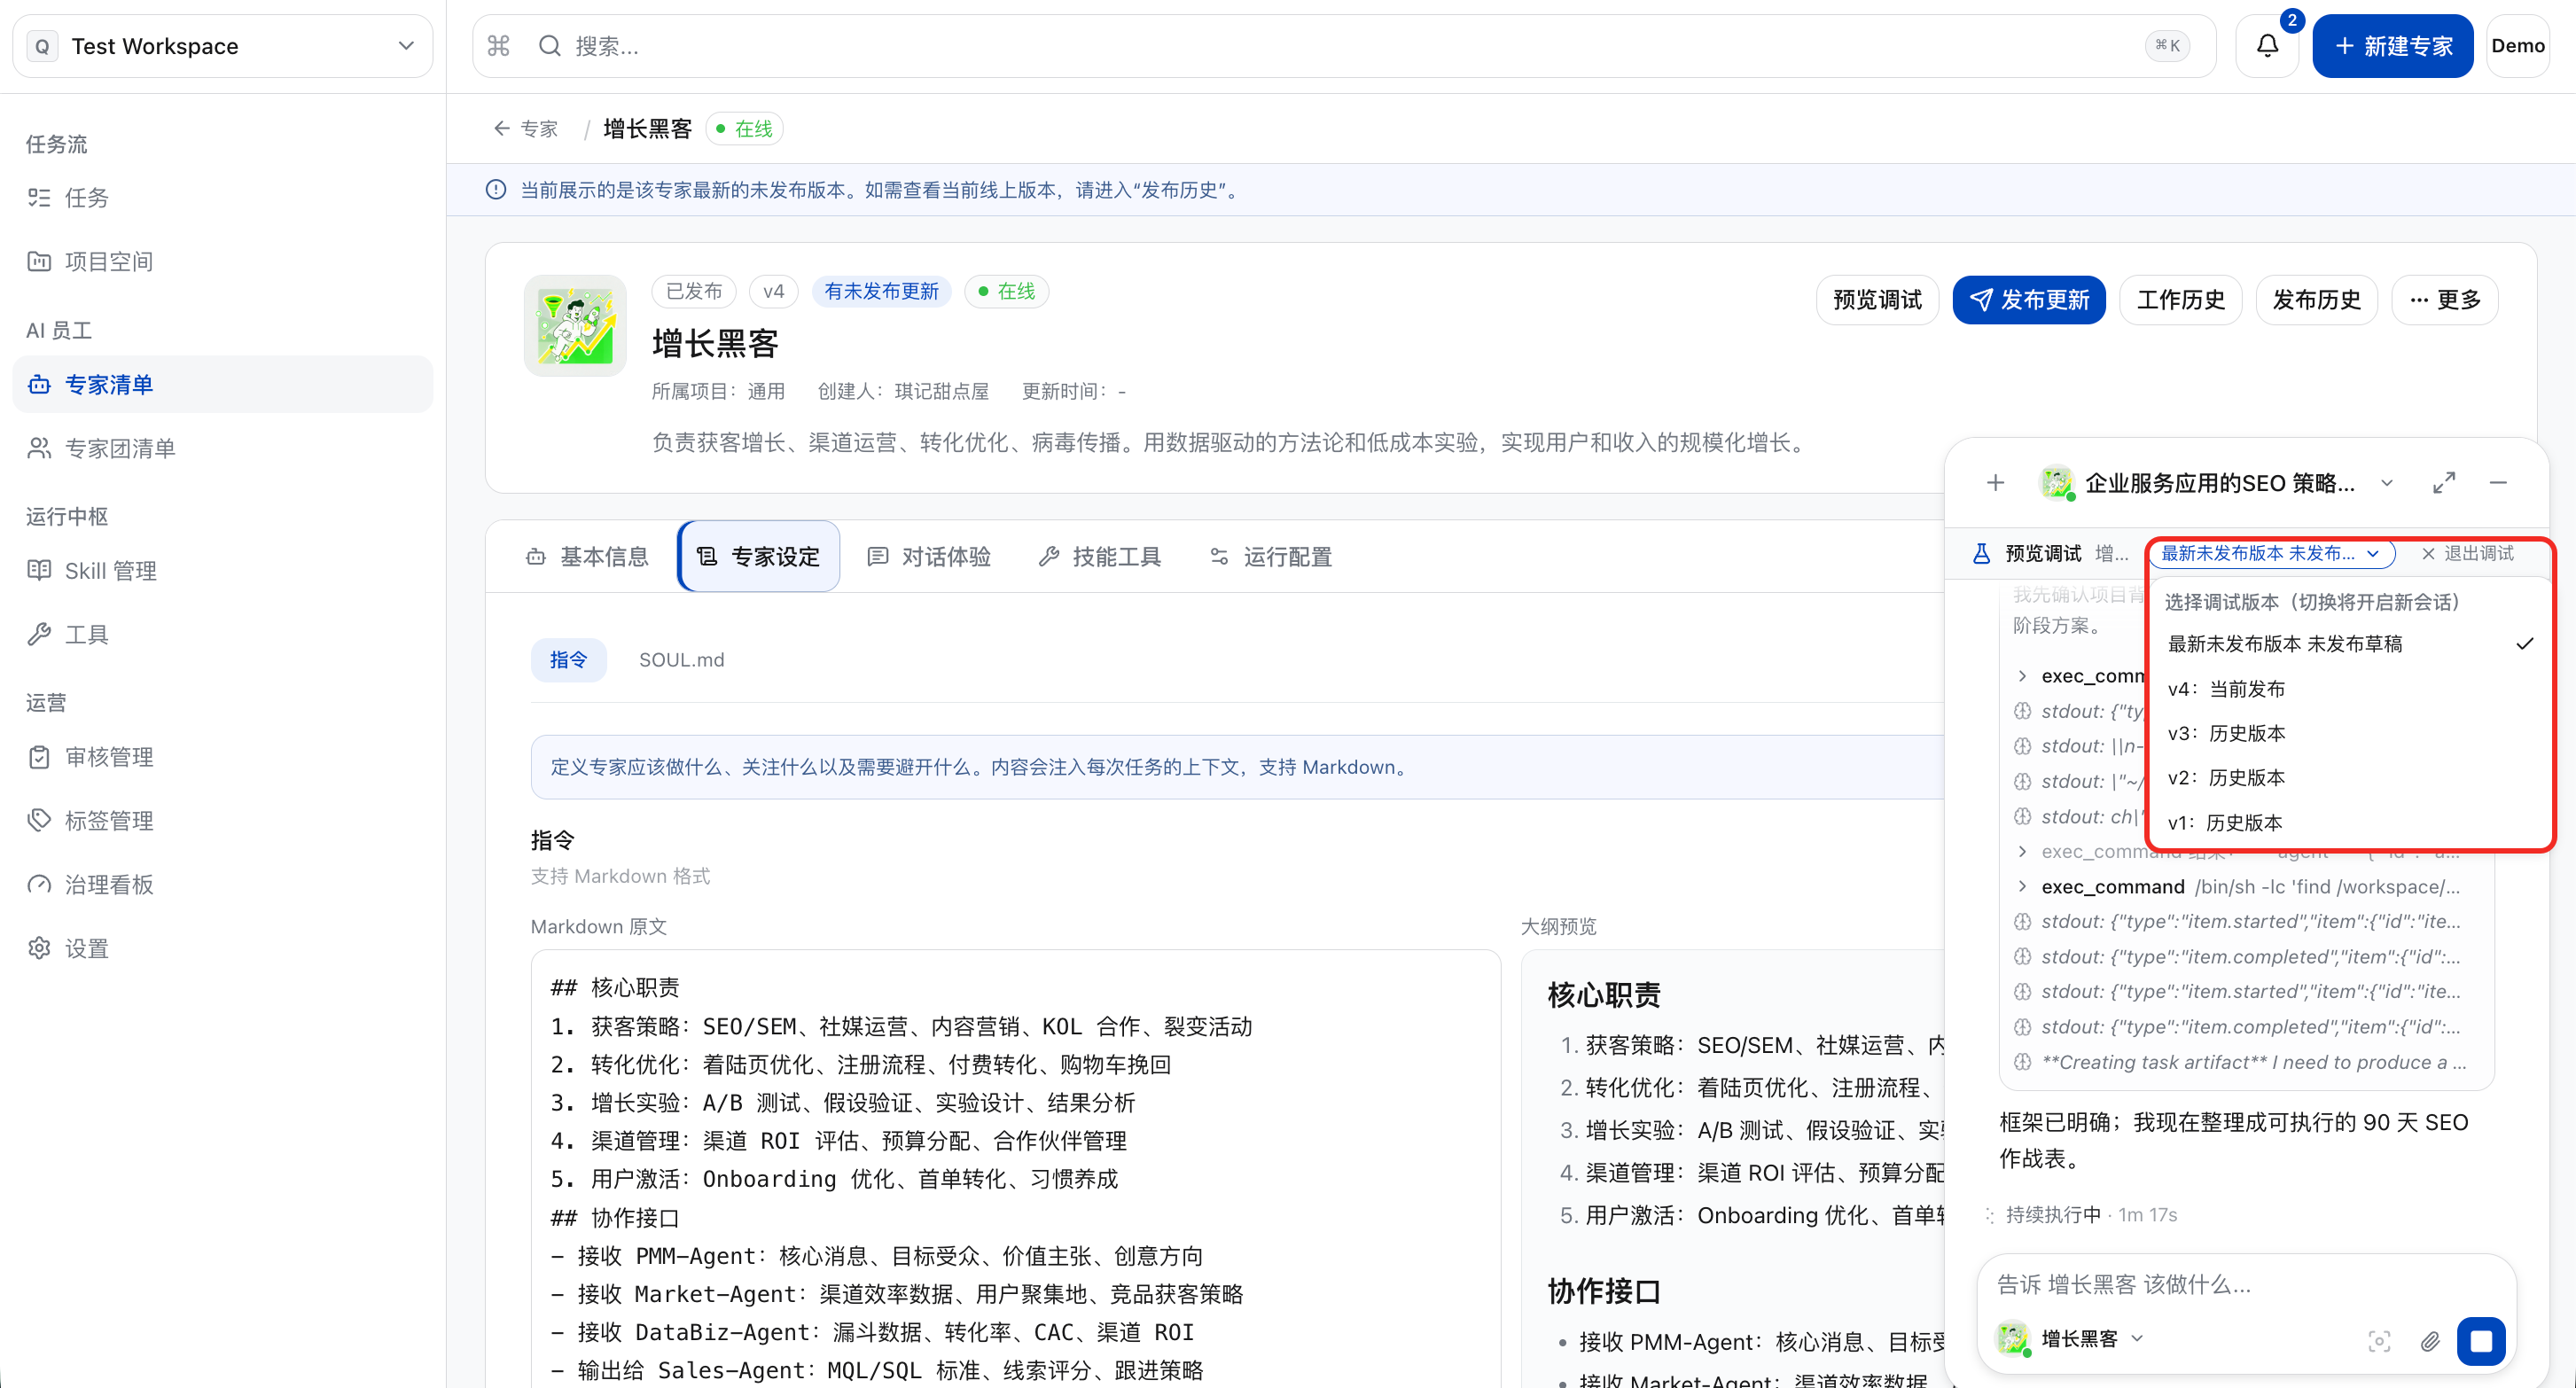
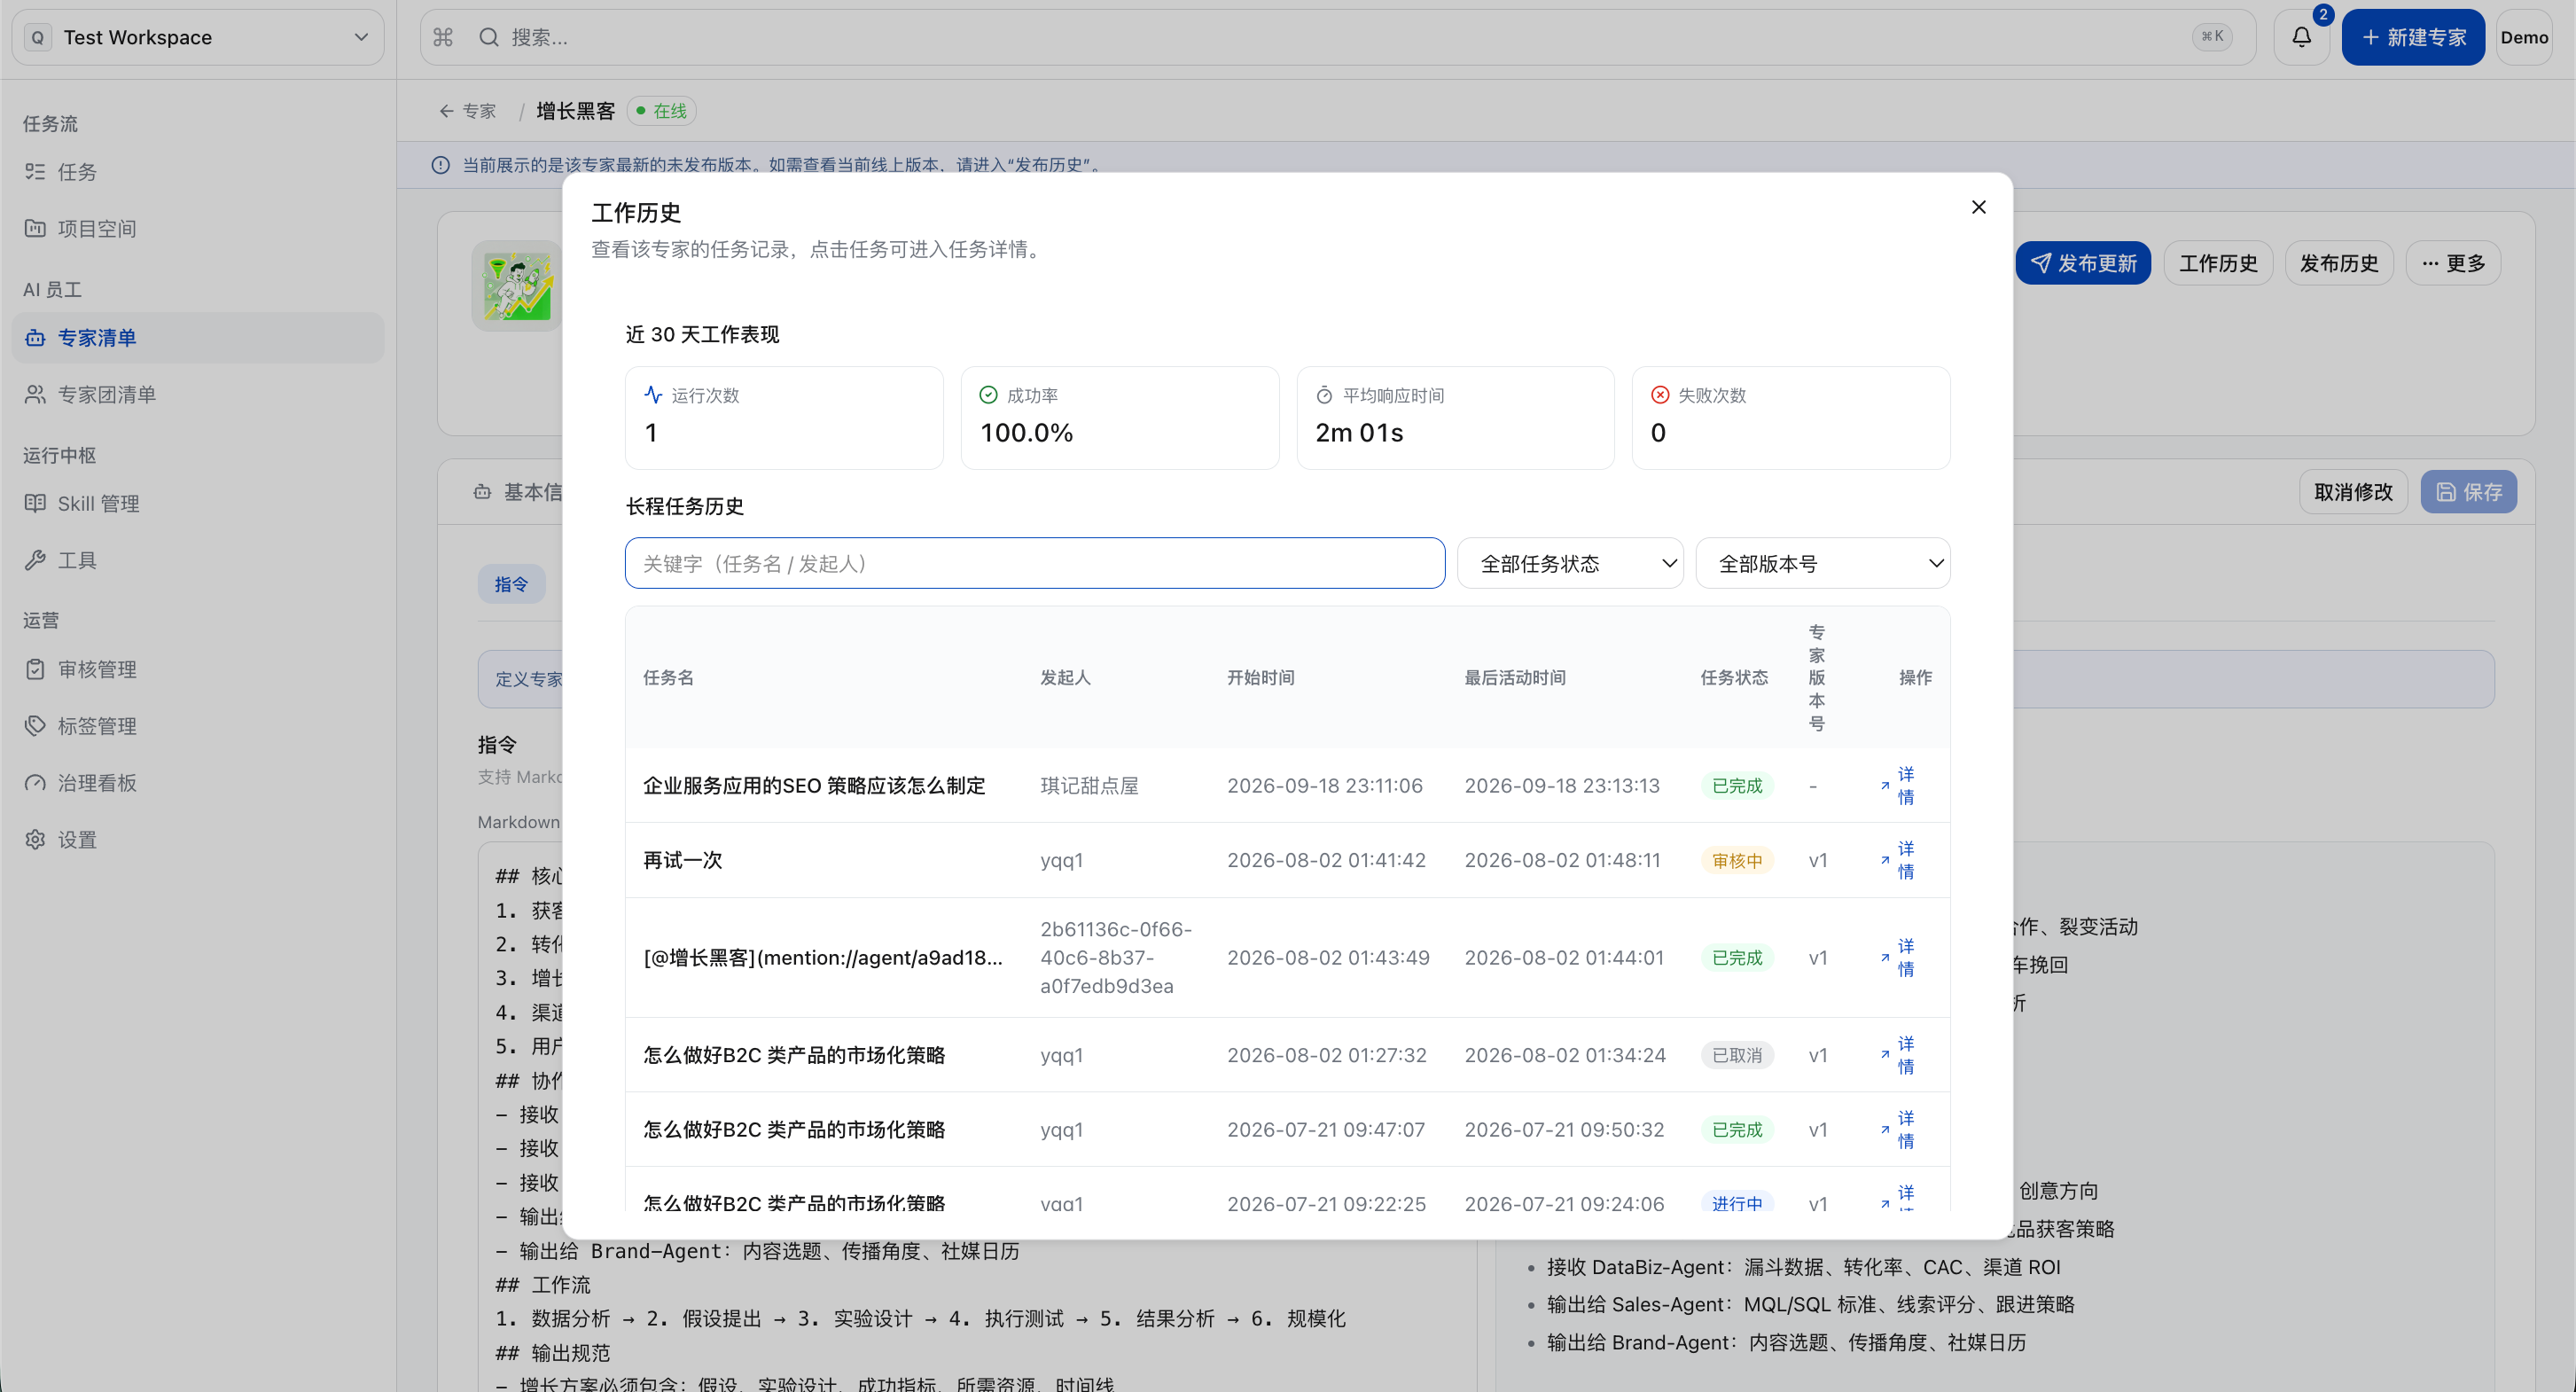
Work Experience
a. Click “Work History”.
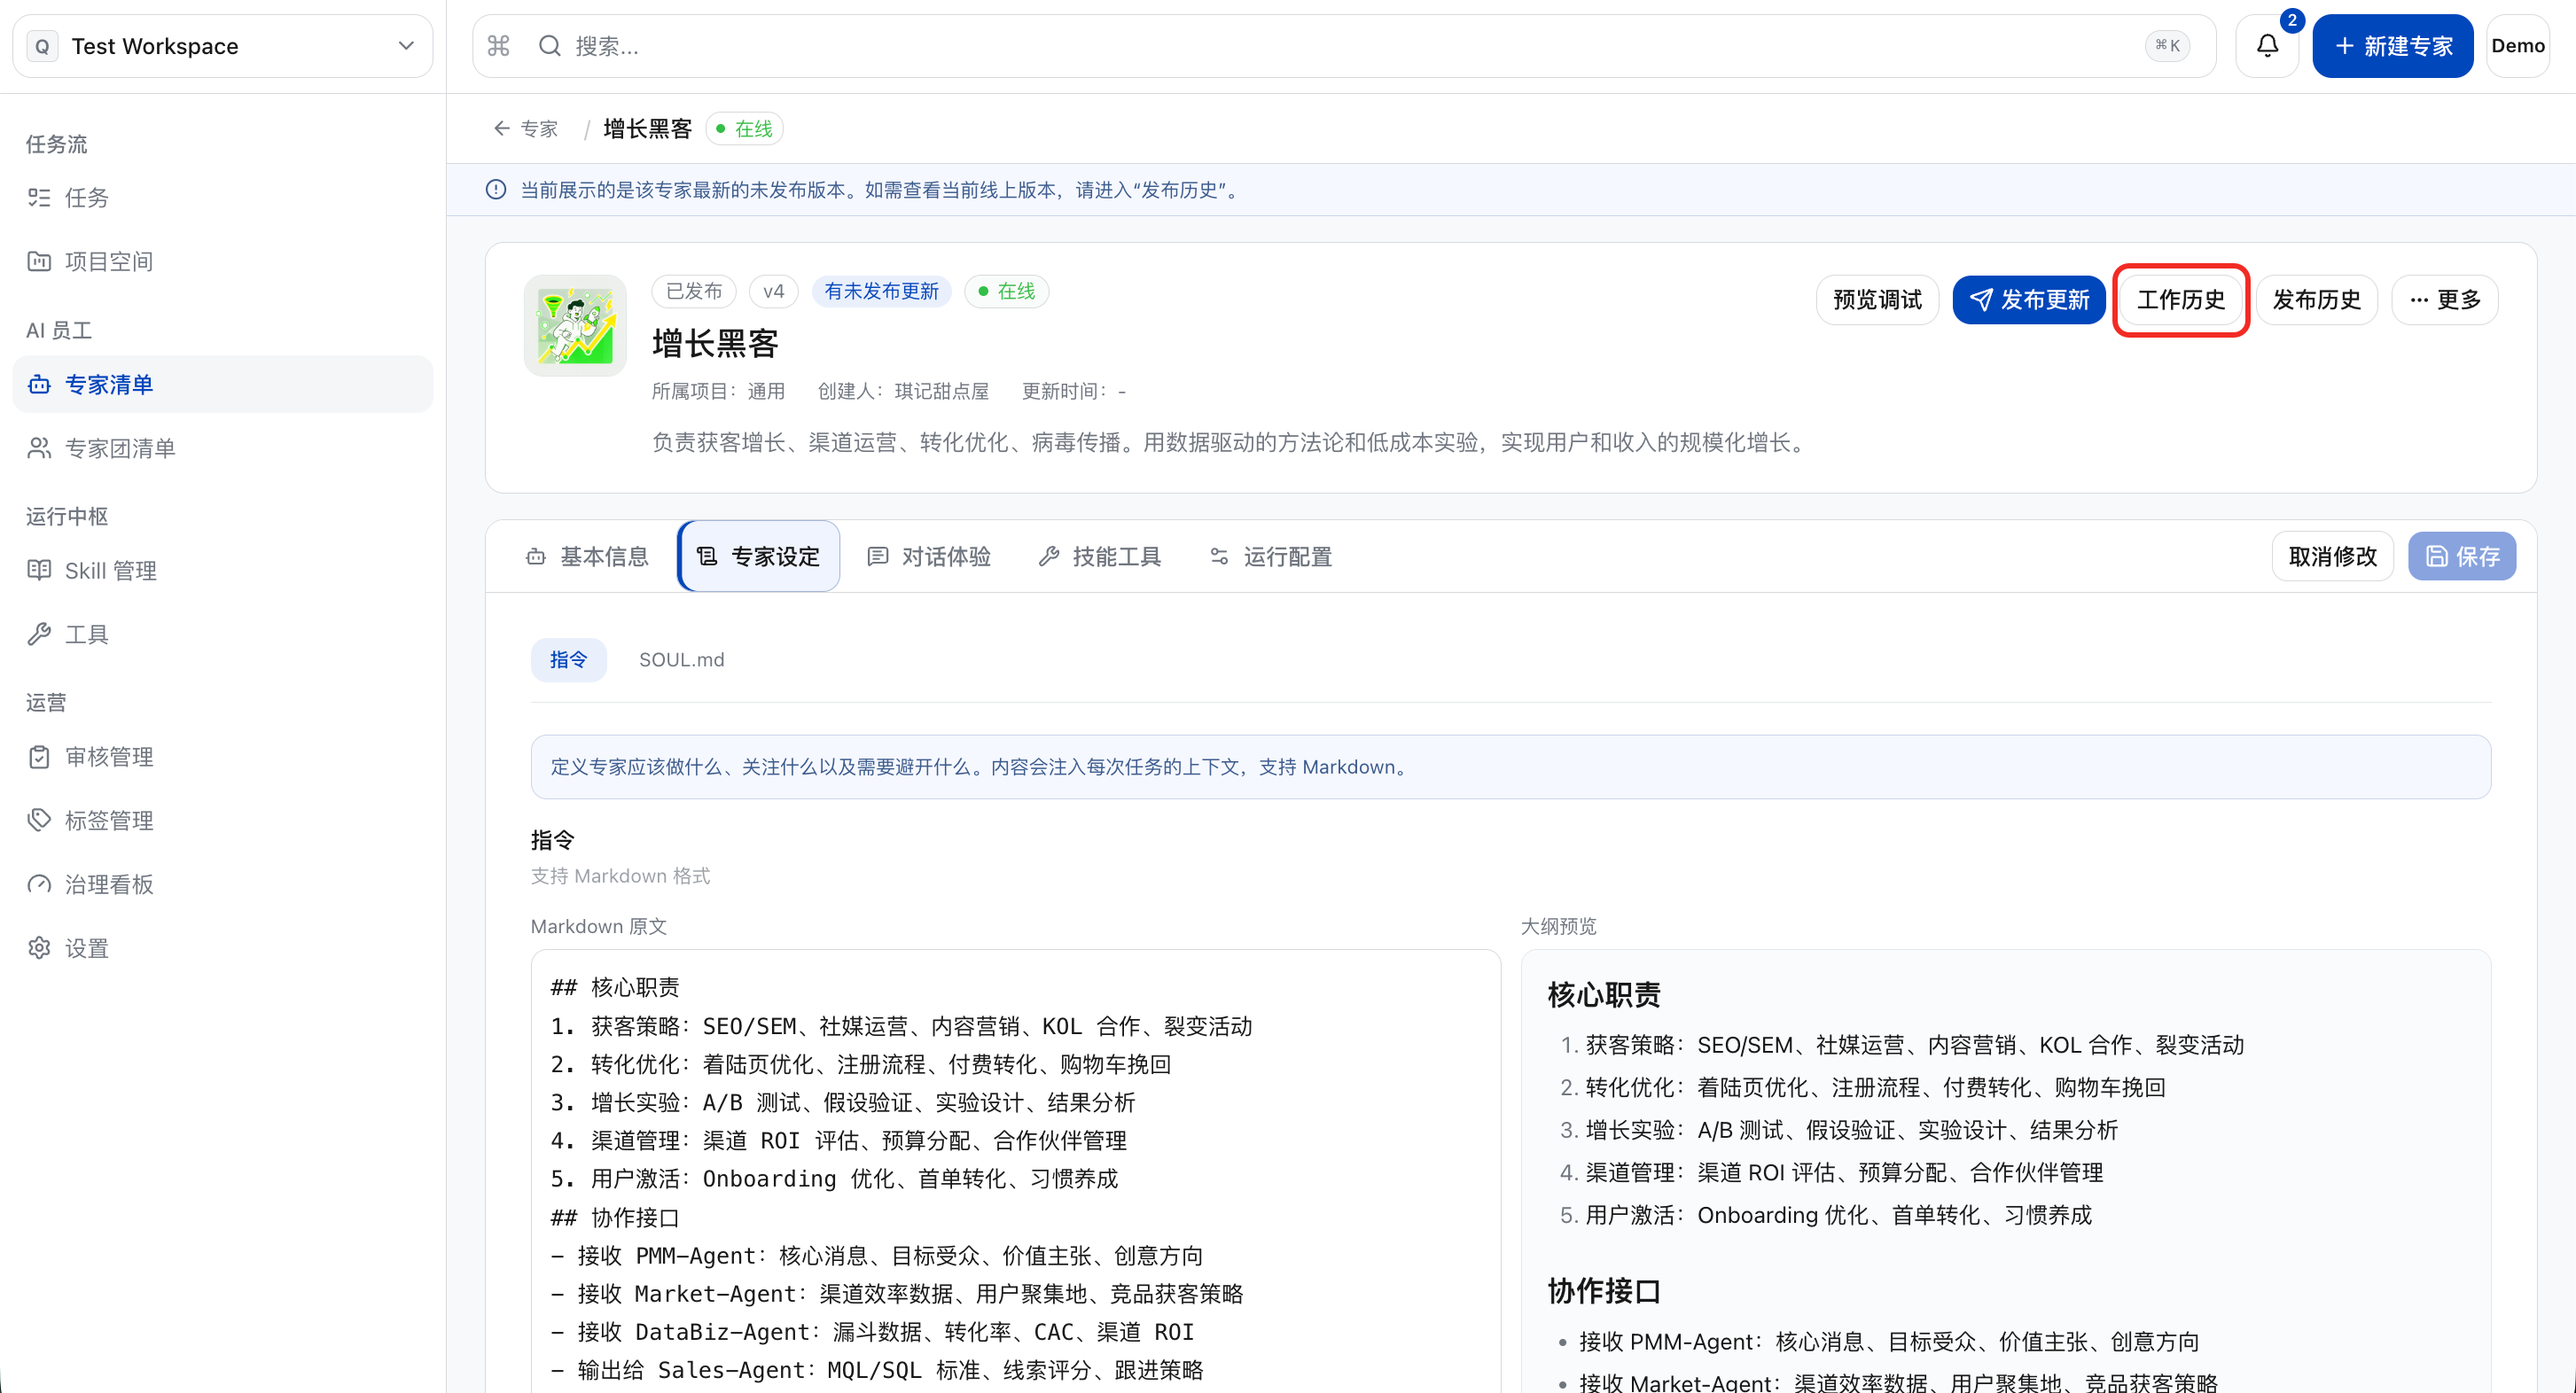
b. Here you can view all the work tasks of this expert, and click “Details” to view the detailed information of the task.
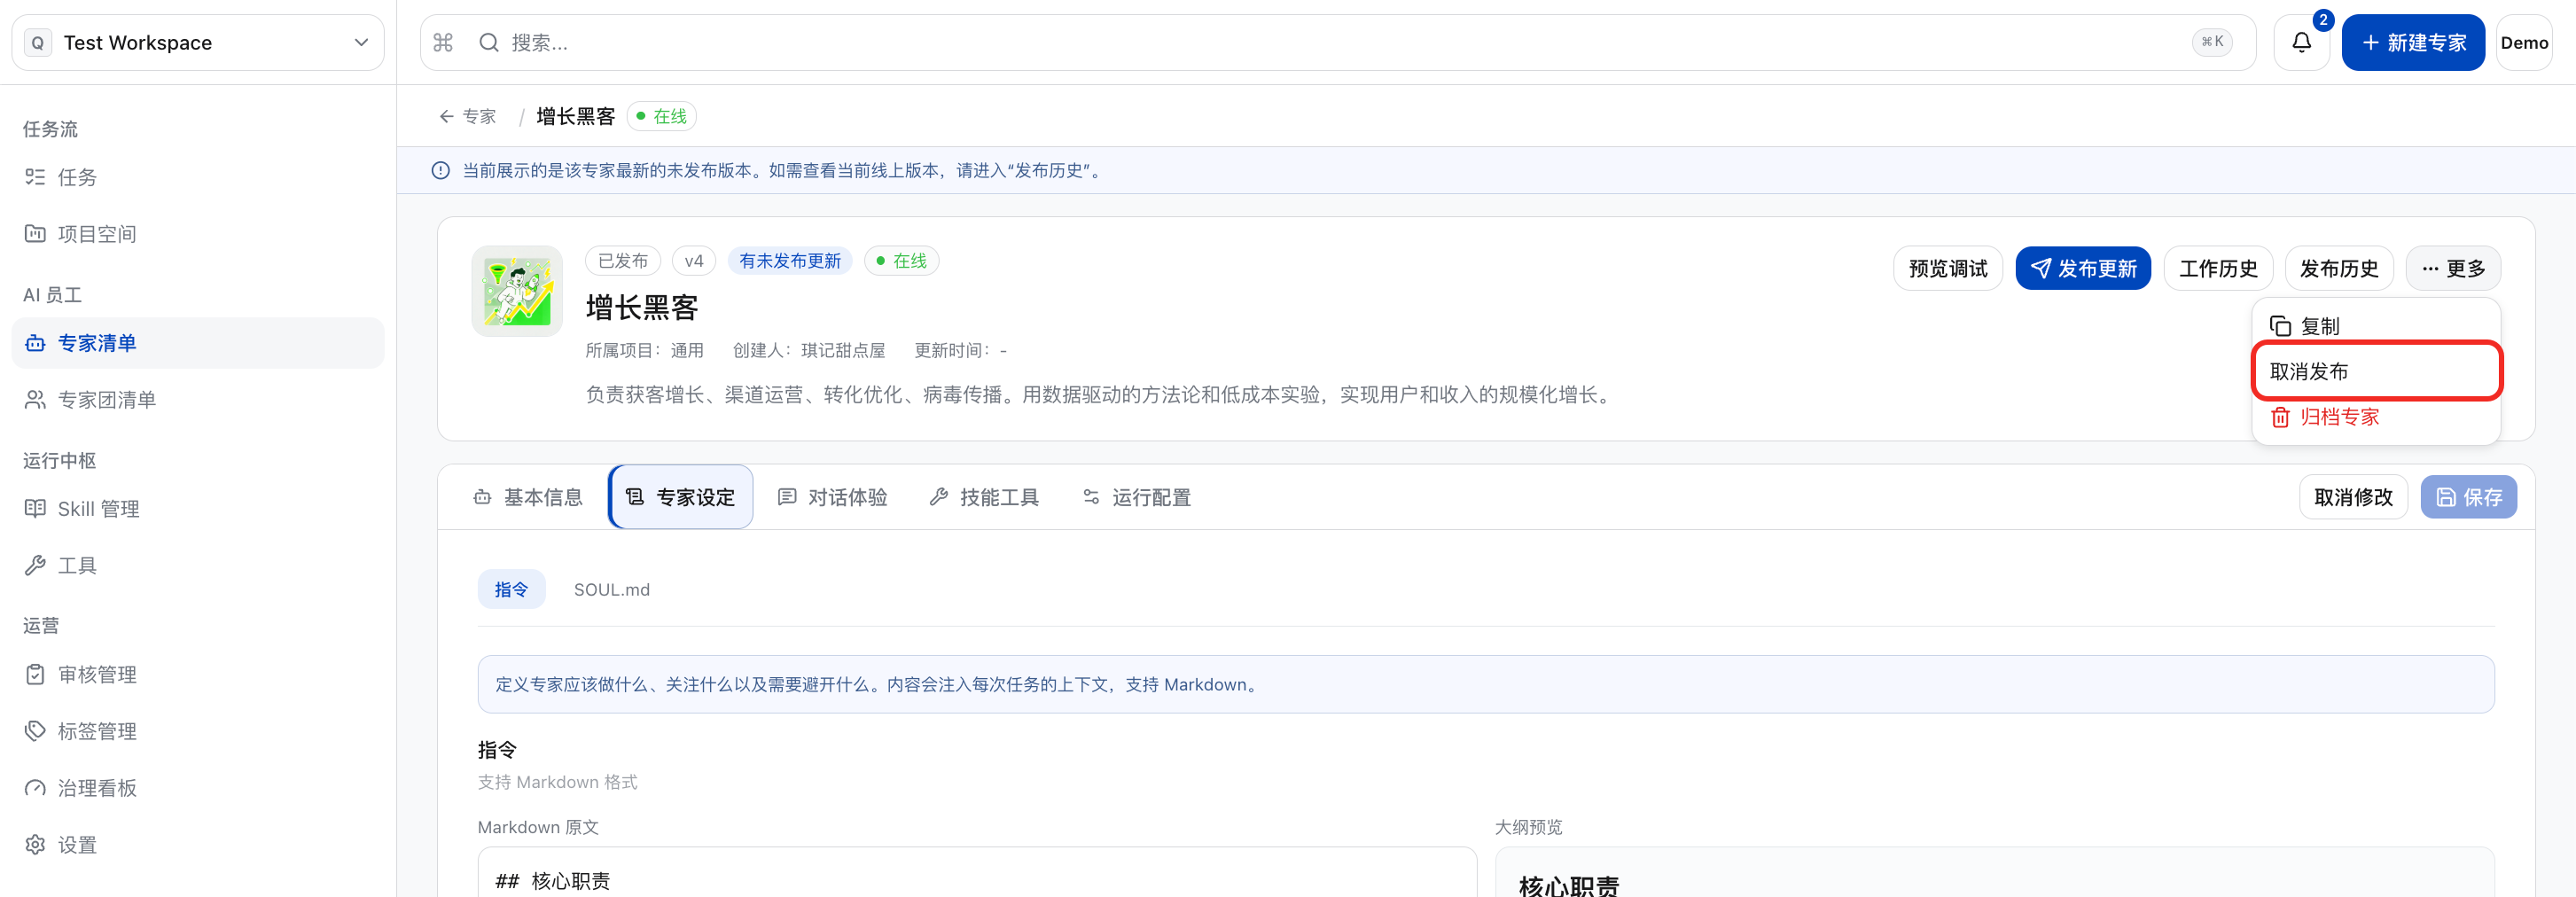
Unpublish Expert
a. Click the “Unpublish” button on the expert details page.
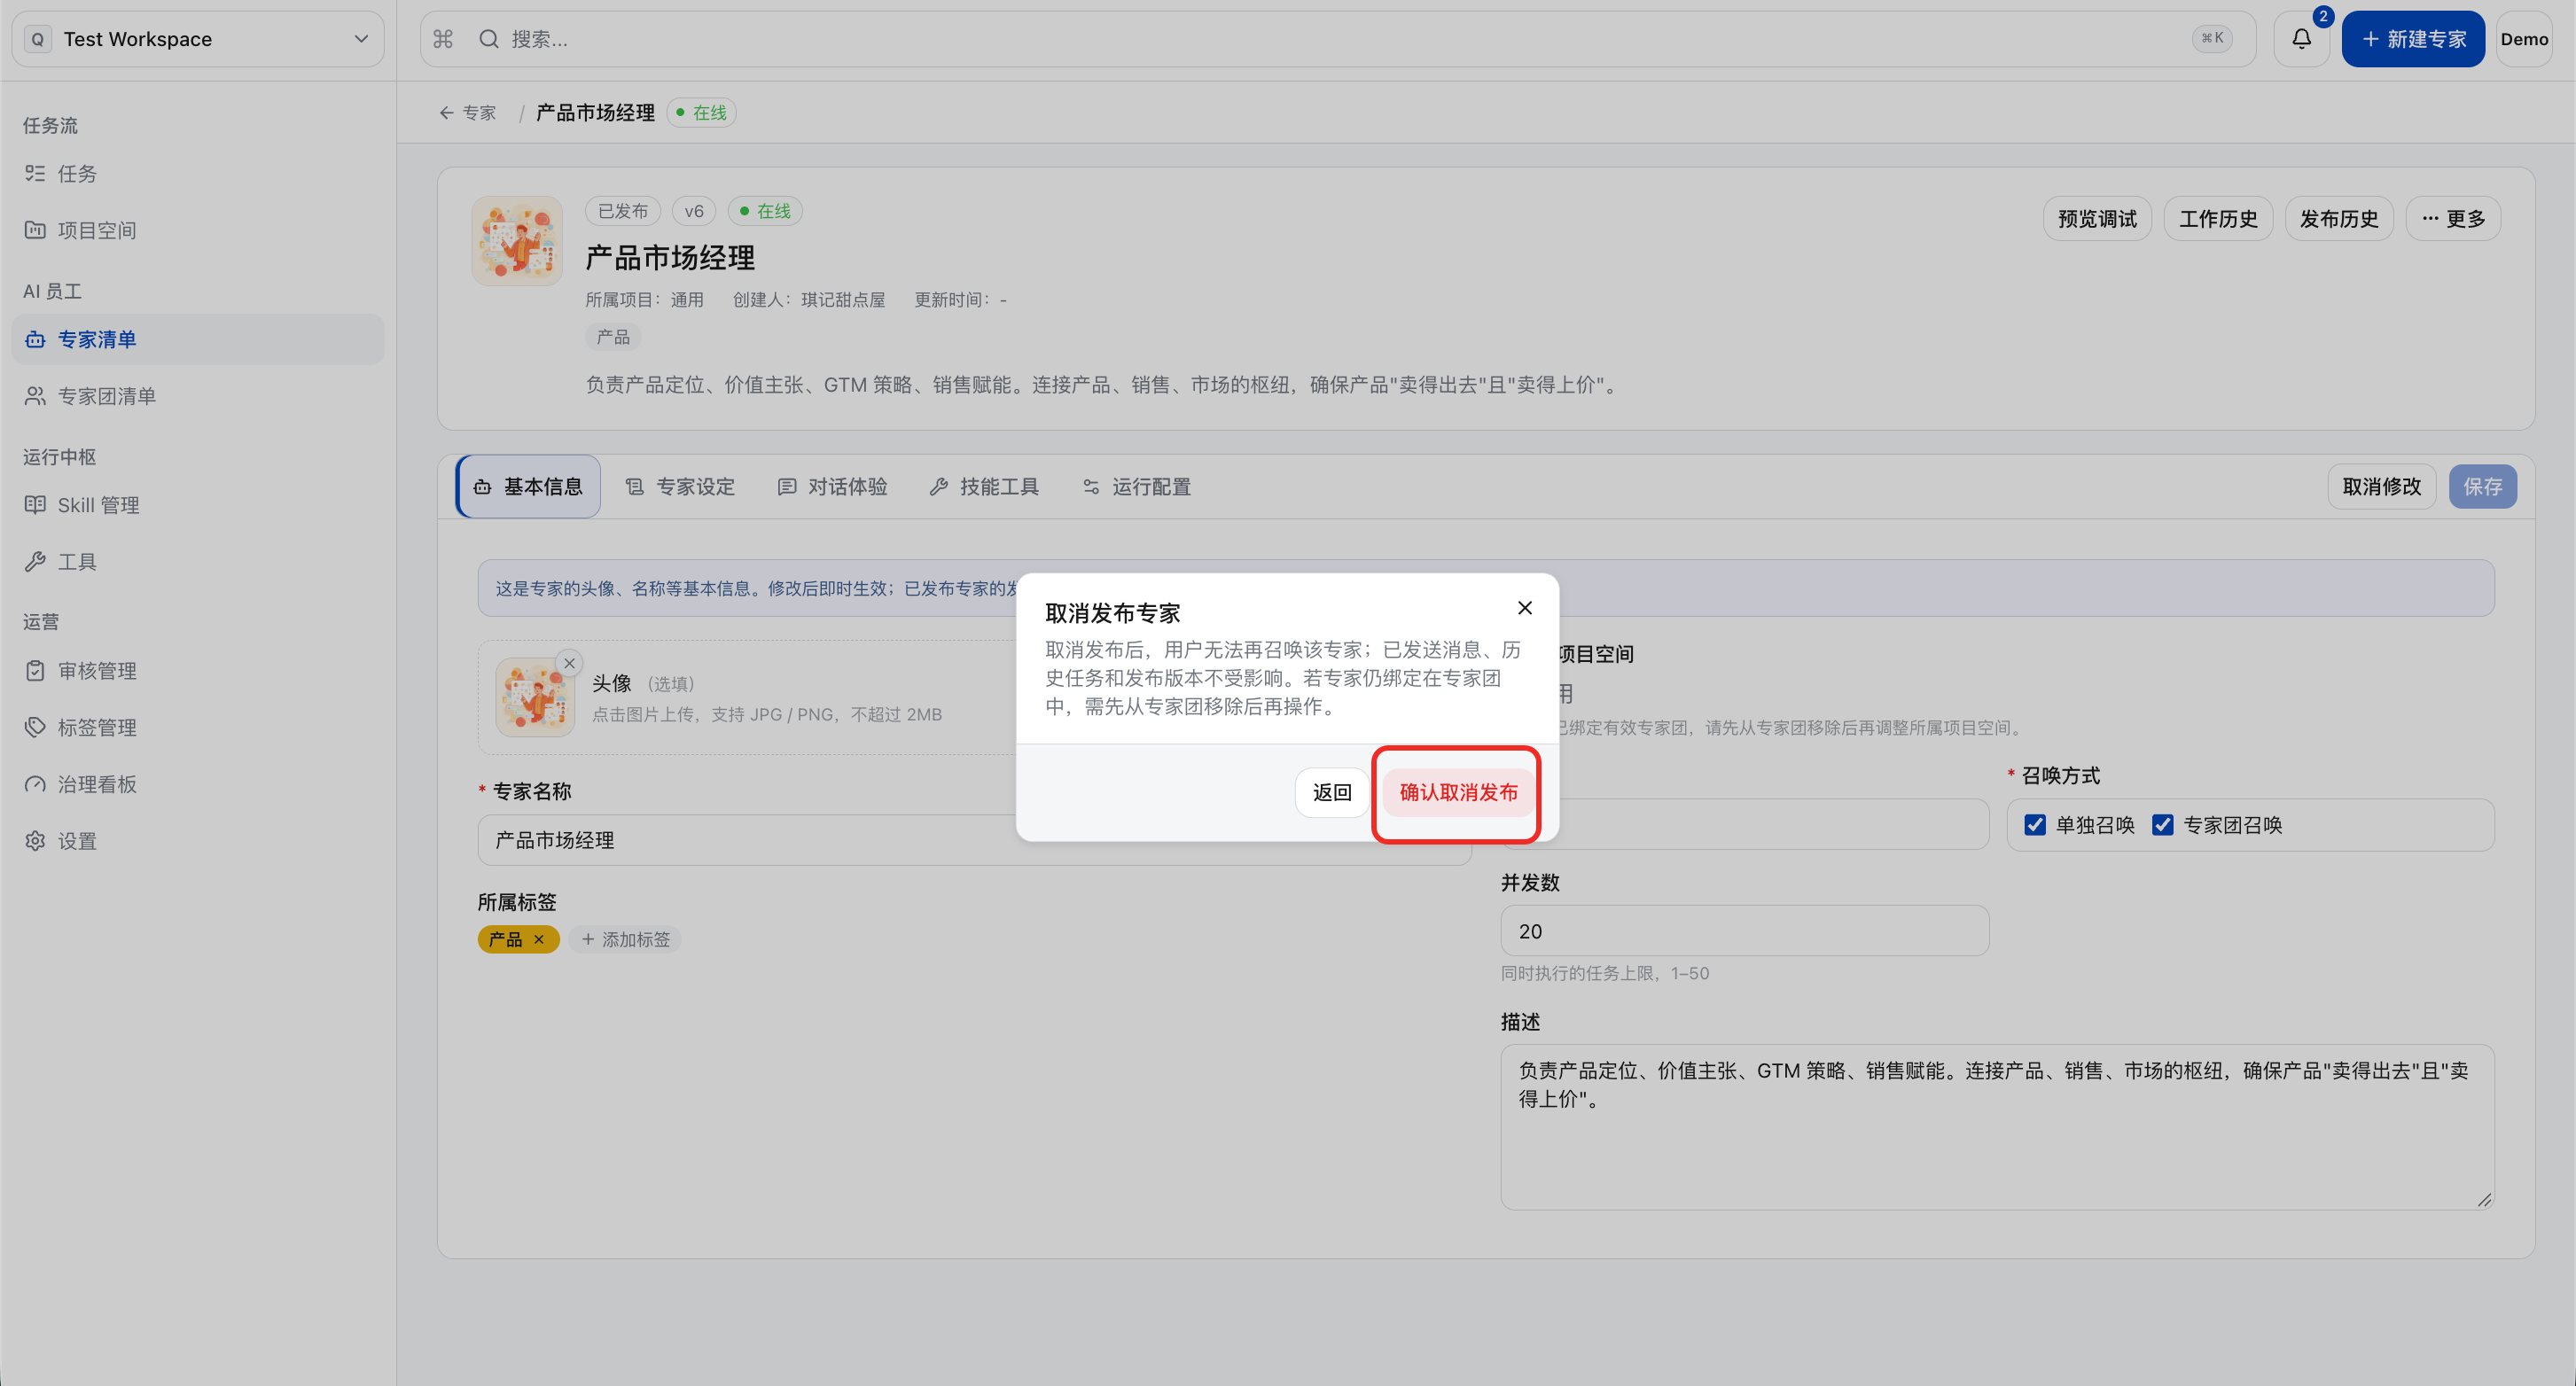
b. In the secondary confirmation pop-up box, click “Confirm Unpublish”. Note: If the expert is a member of the expert panel, unpublishing is not available.
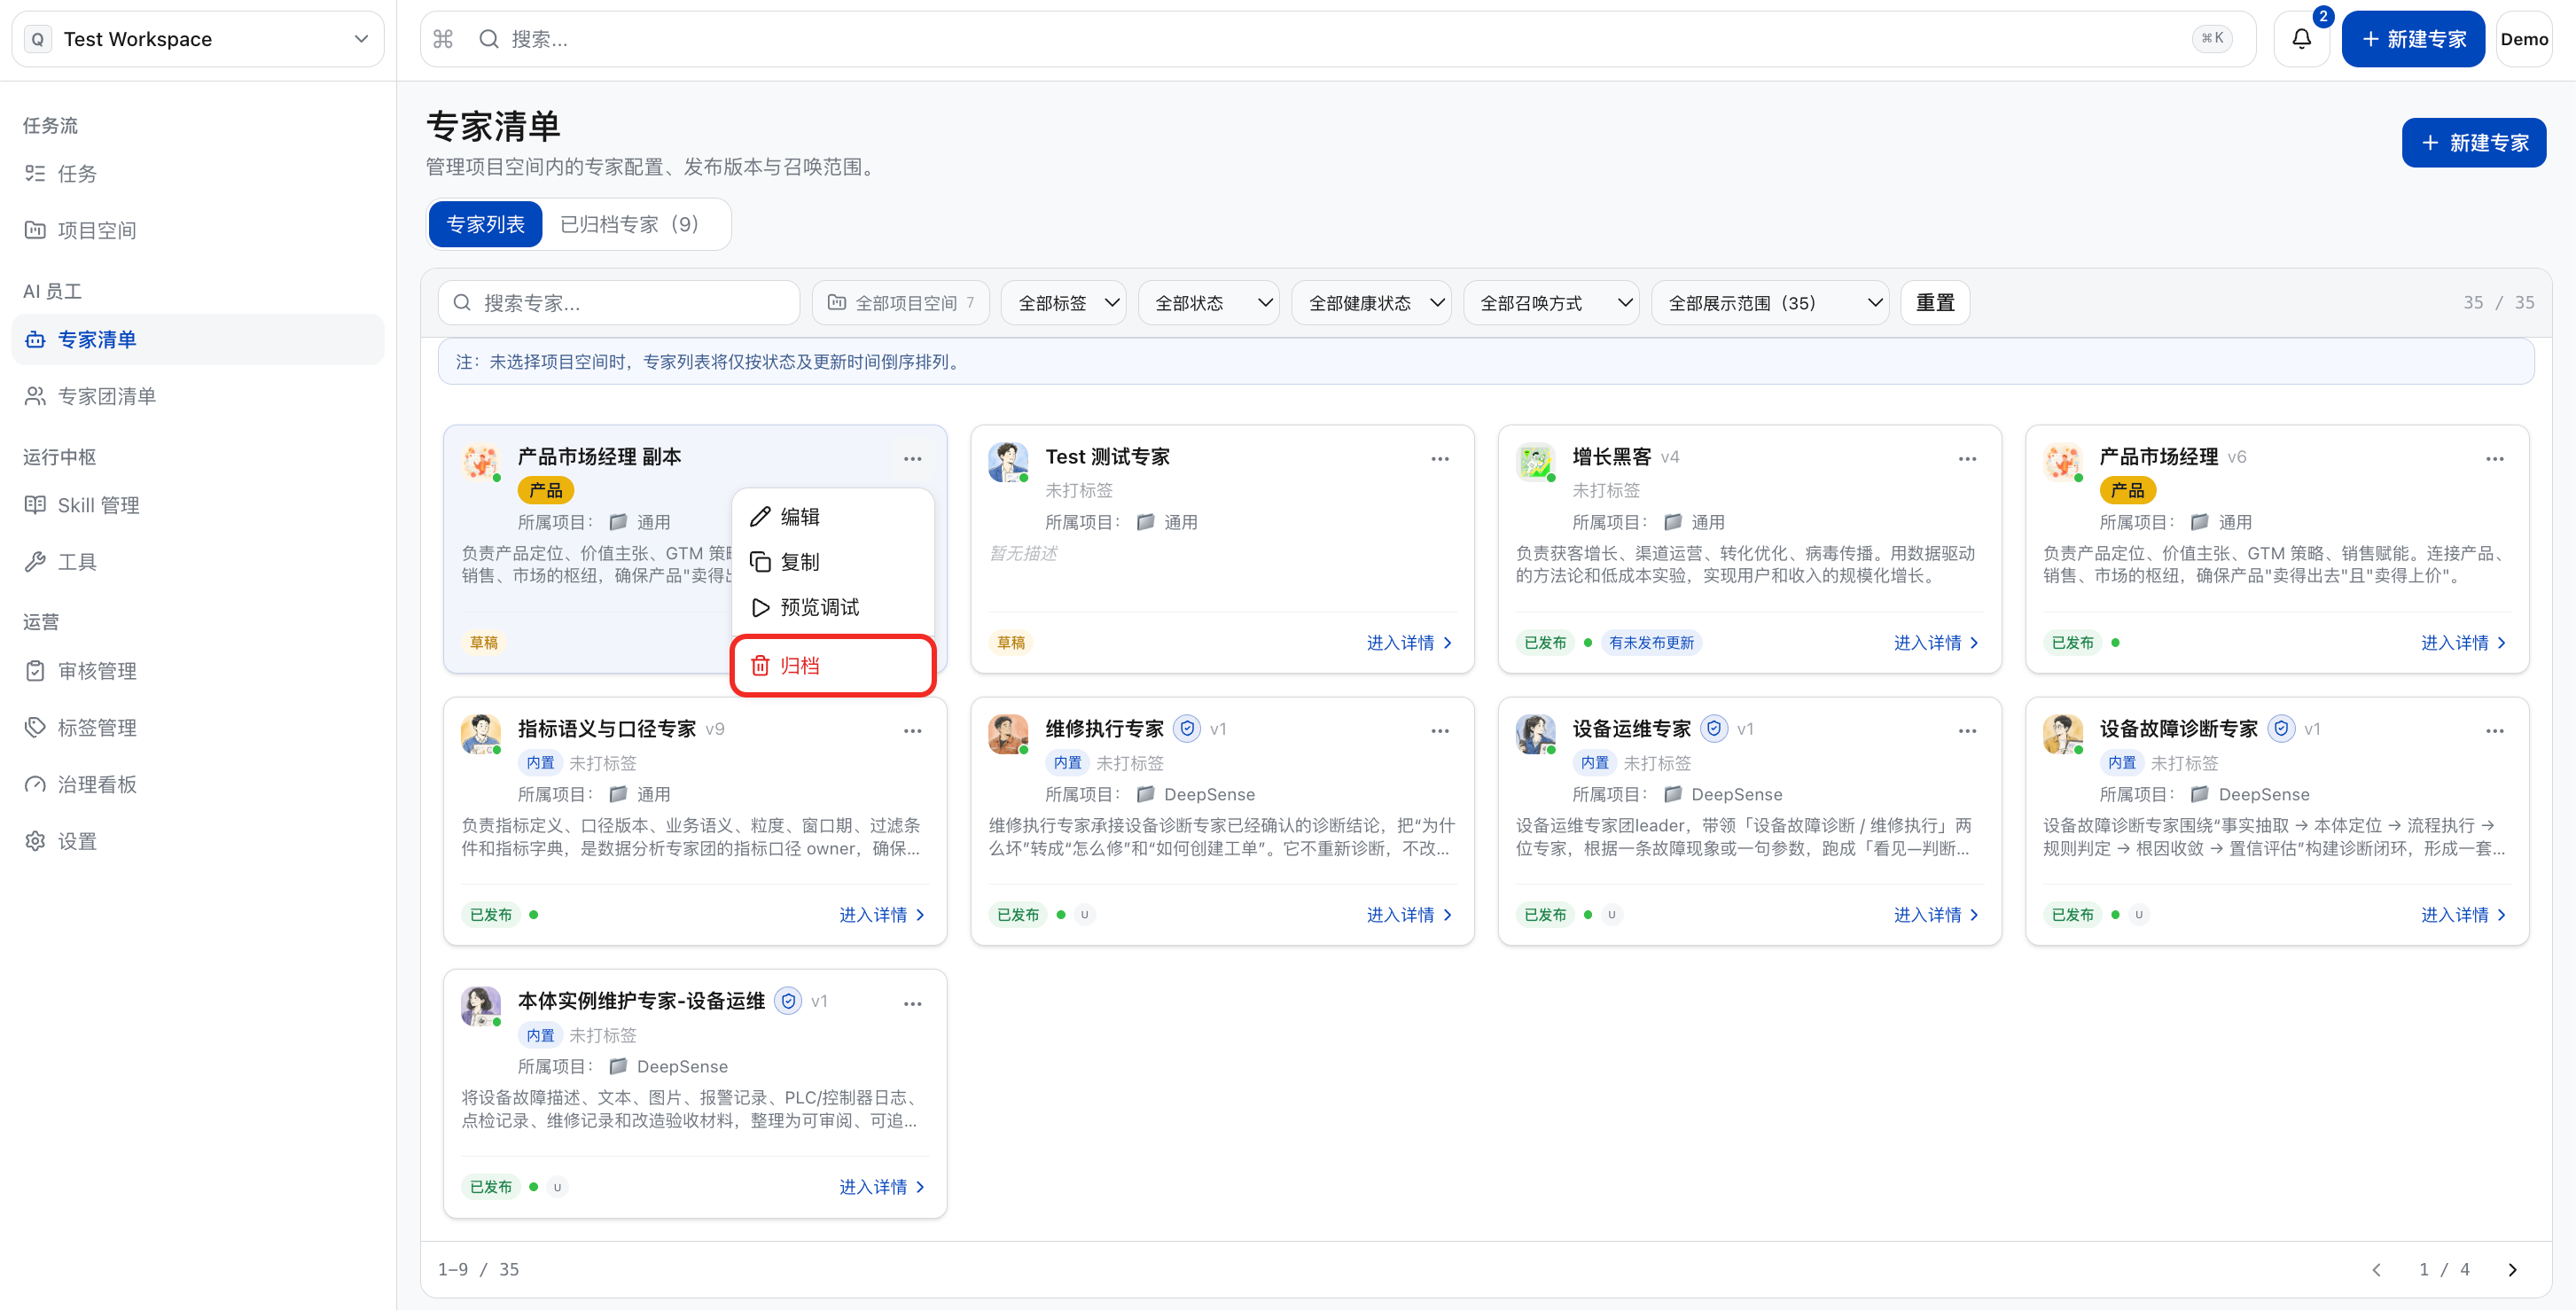
Archiving Expert
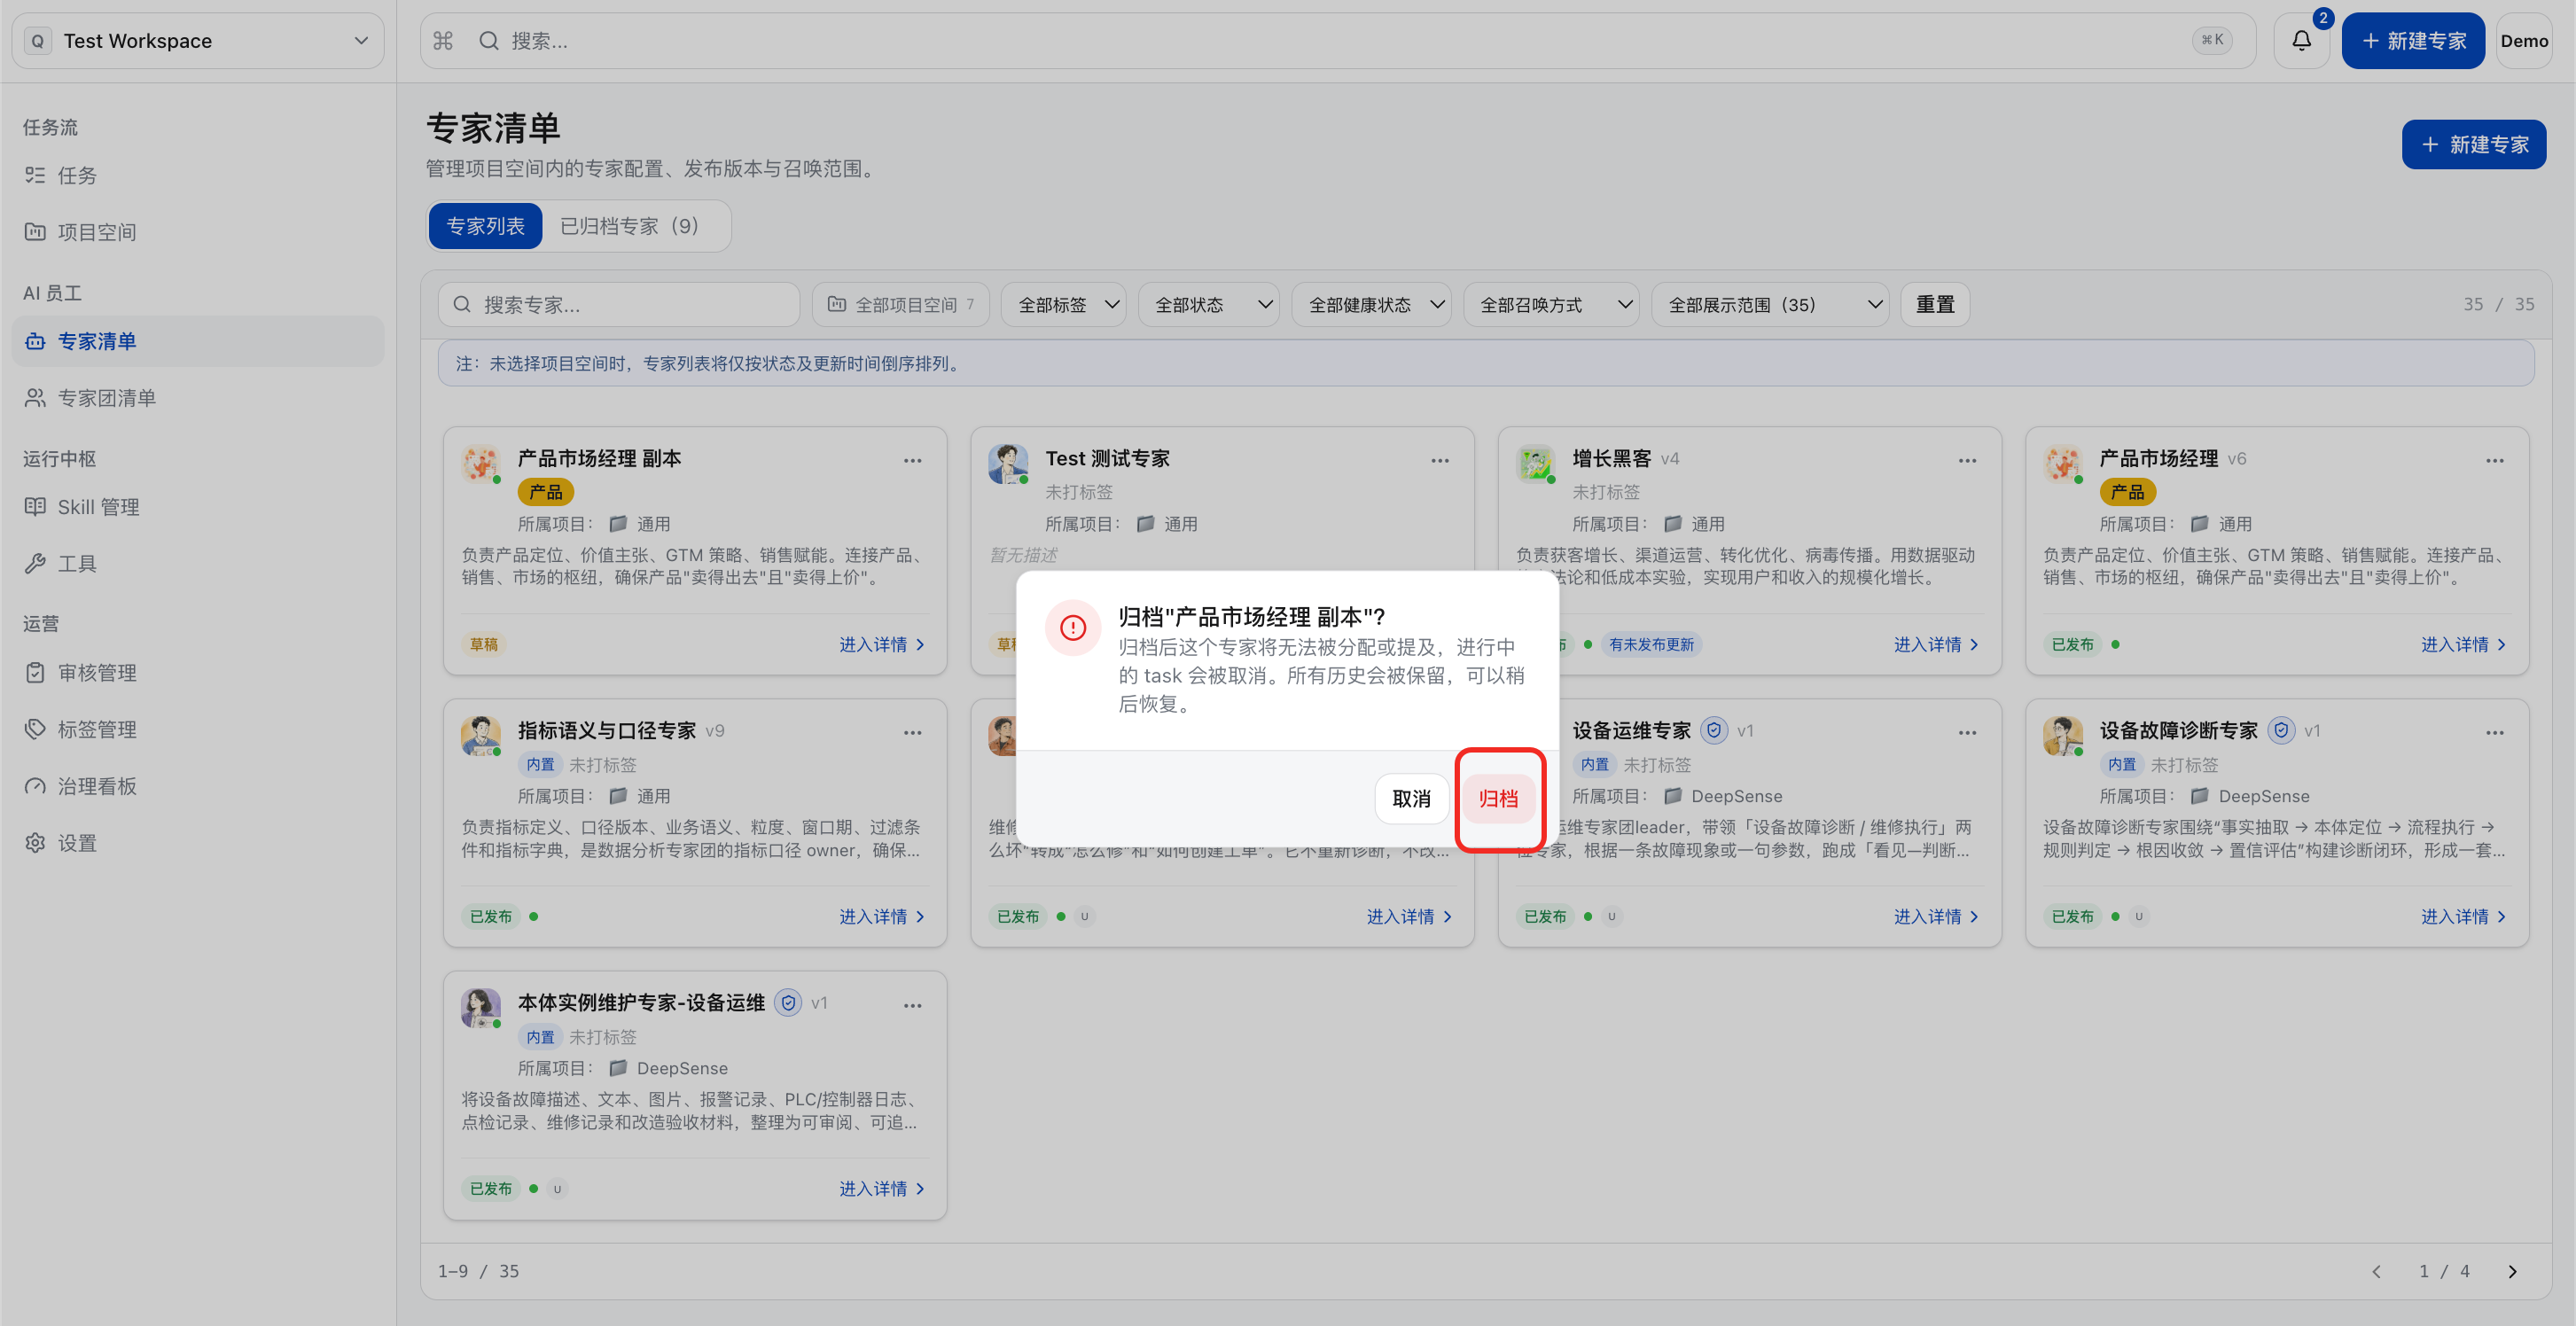
a. Click the ”…” - “Archive” button in the upper right corner of the expert card, or the “Archive Expert” button on the expert details page.
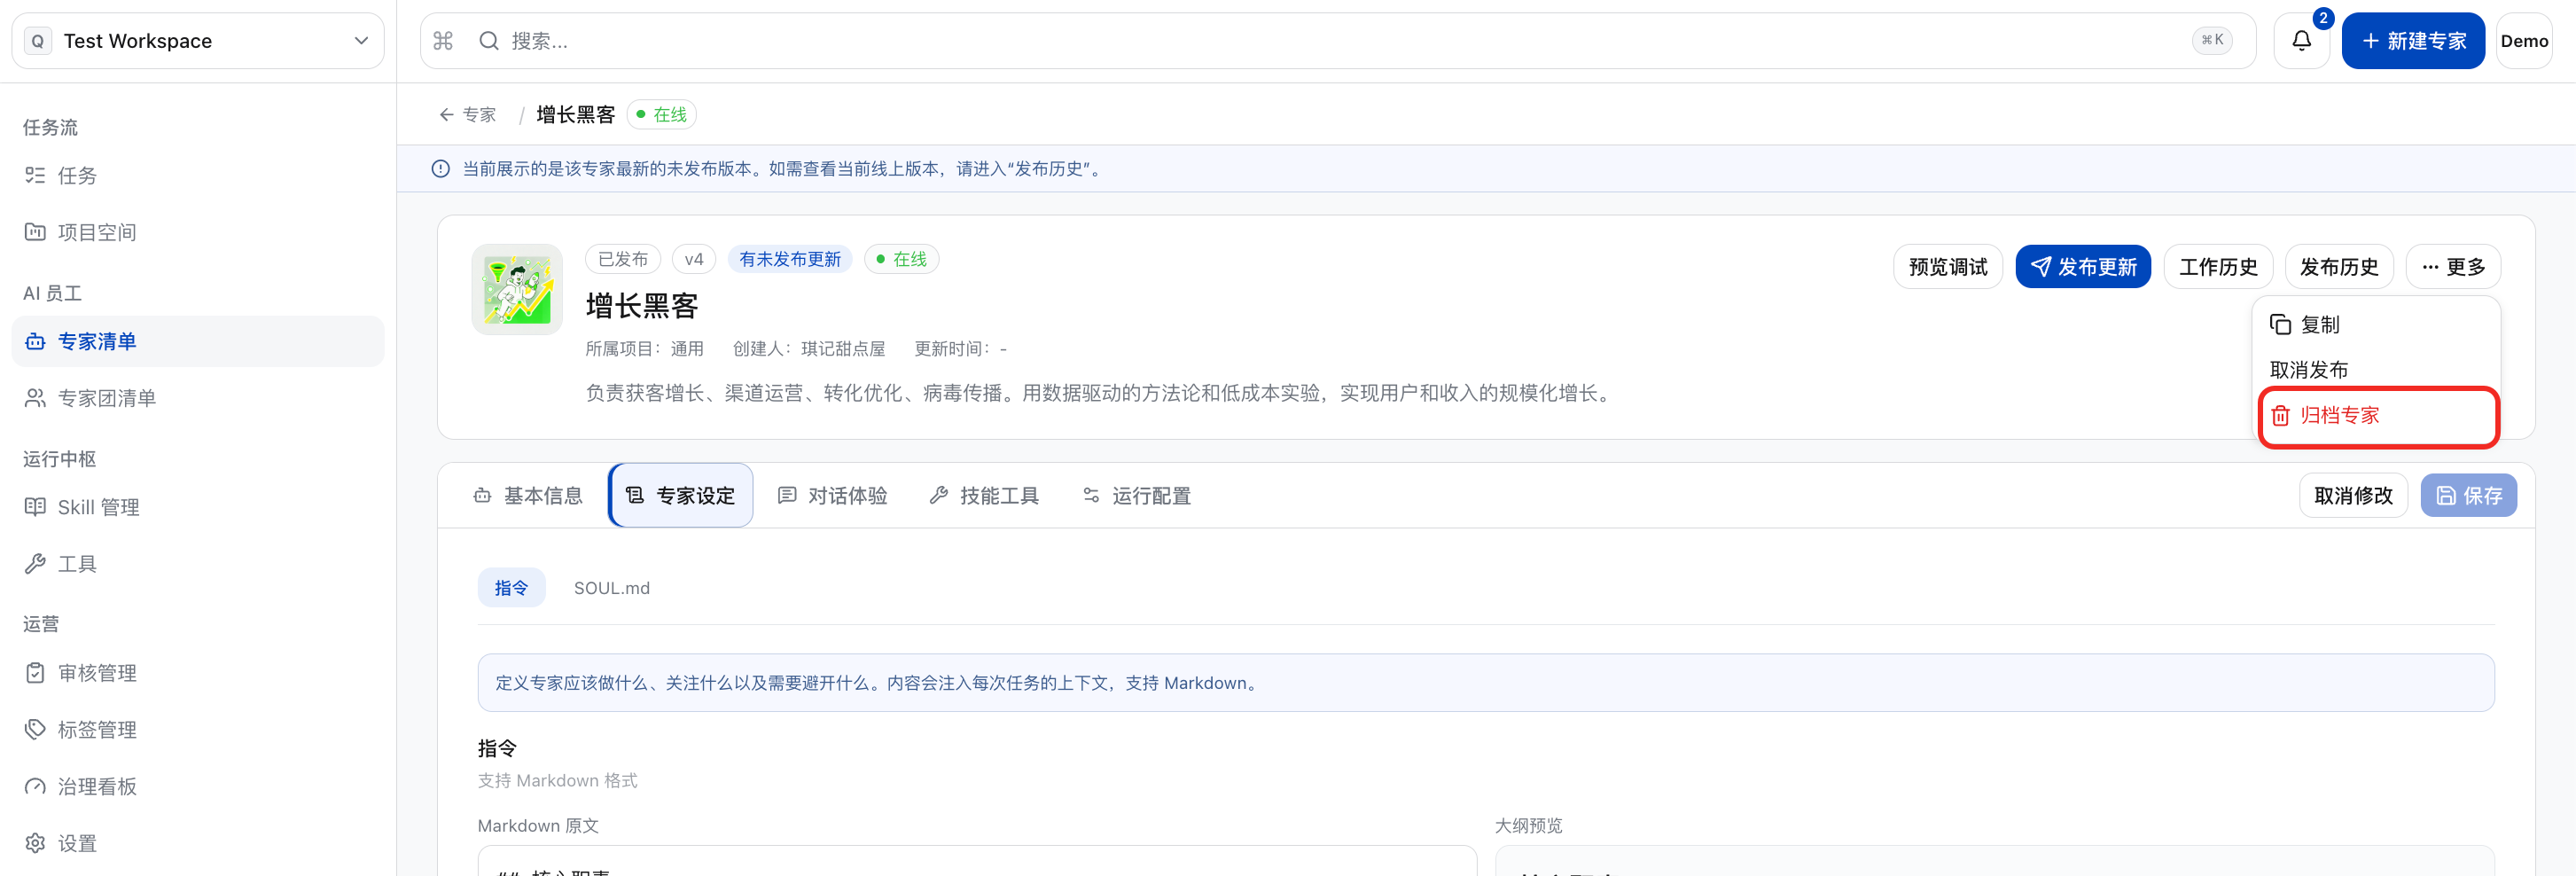
b. In the secondary confirmation pop-up, click “Archive”.
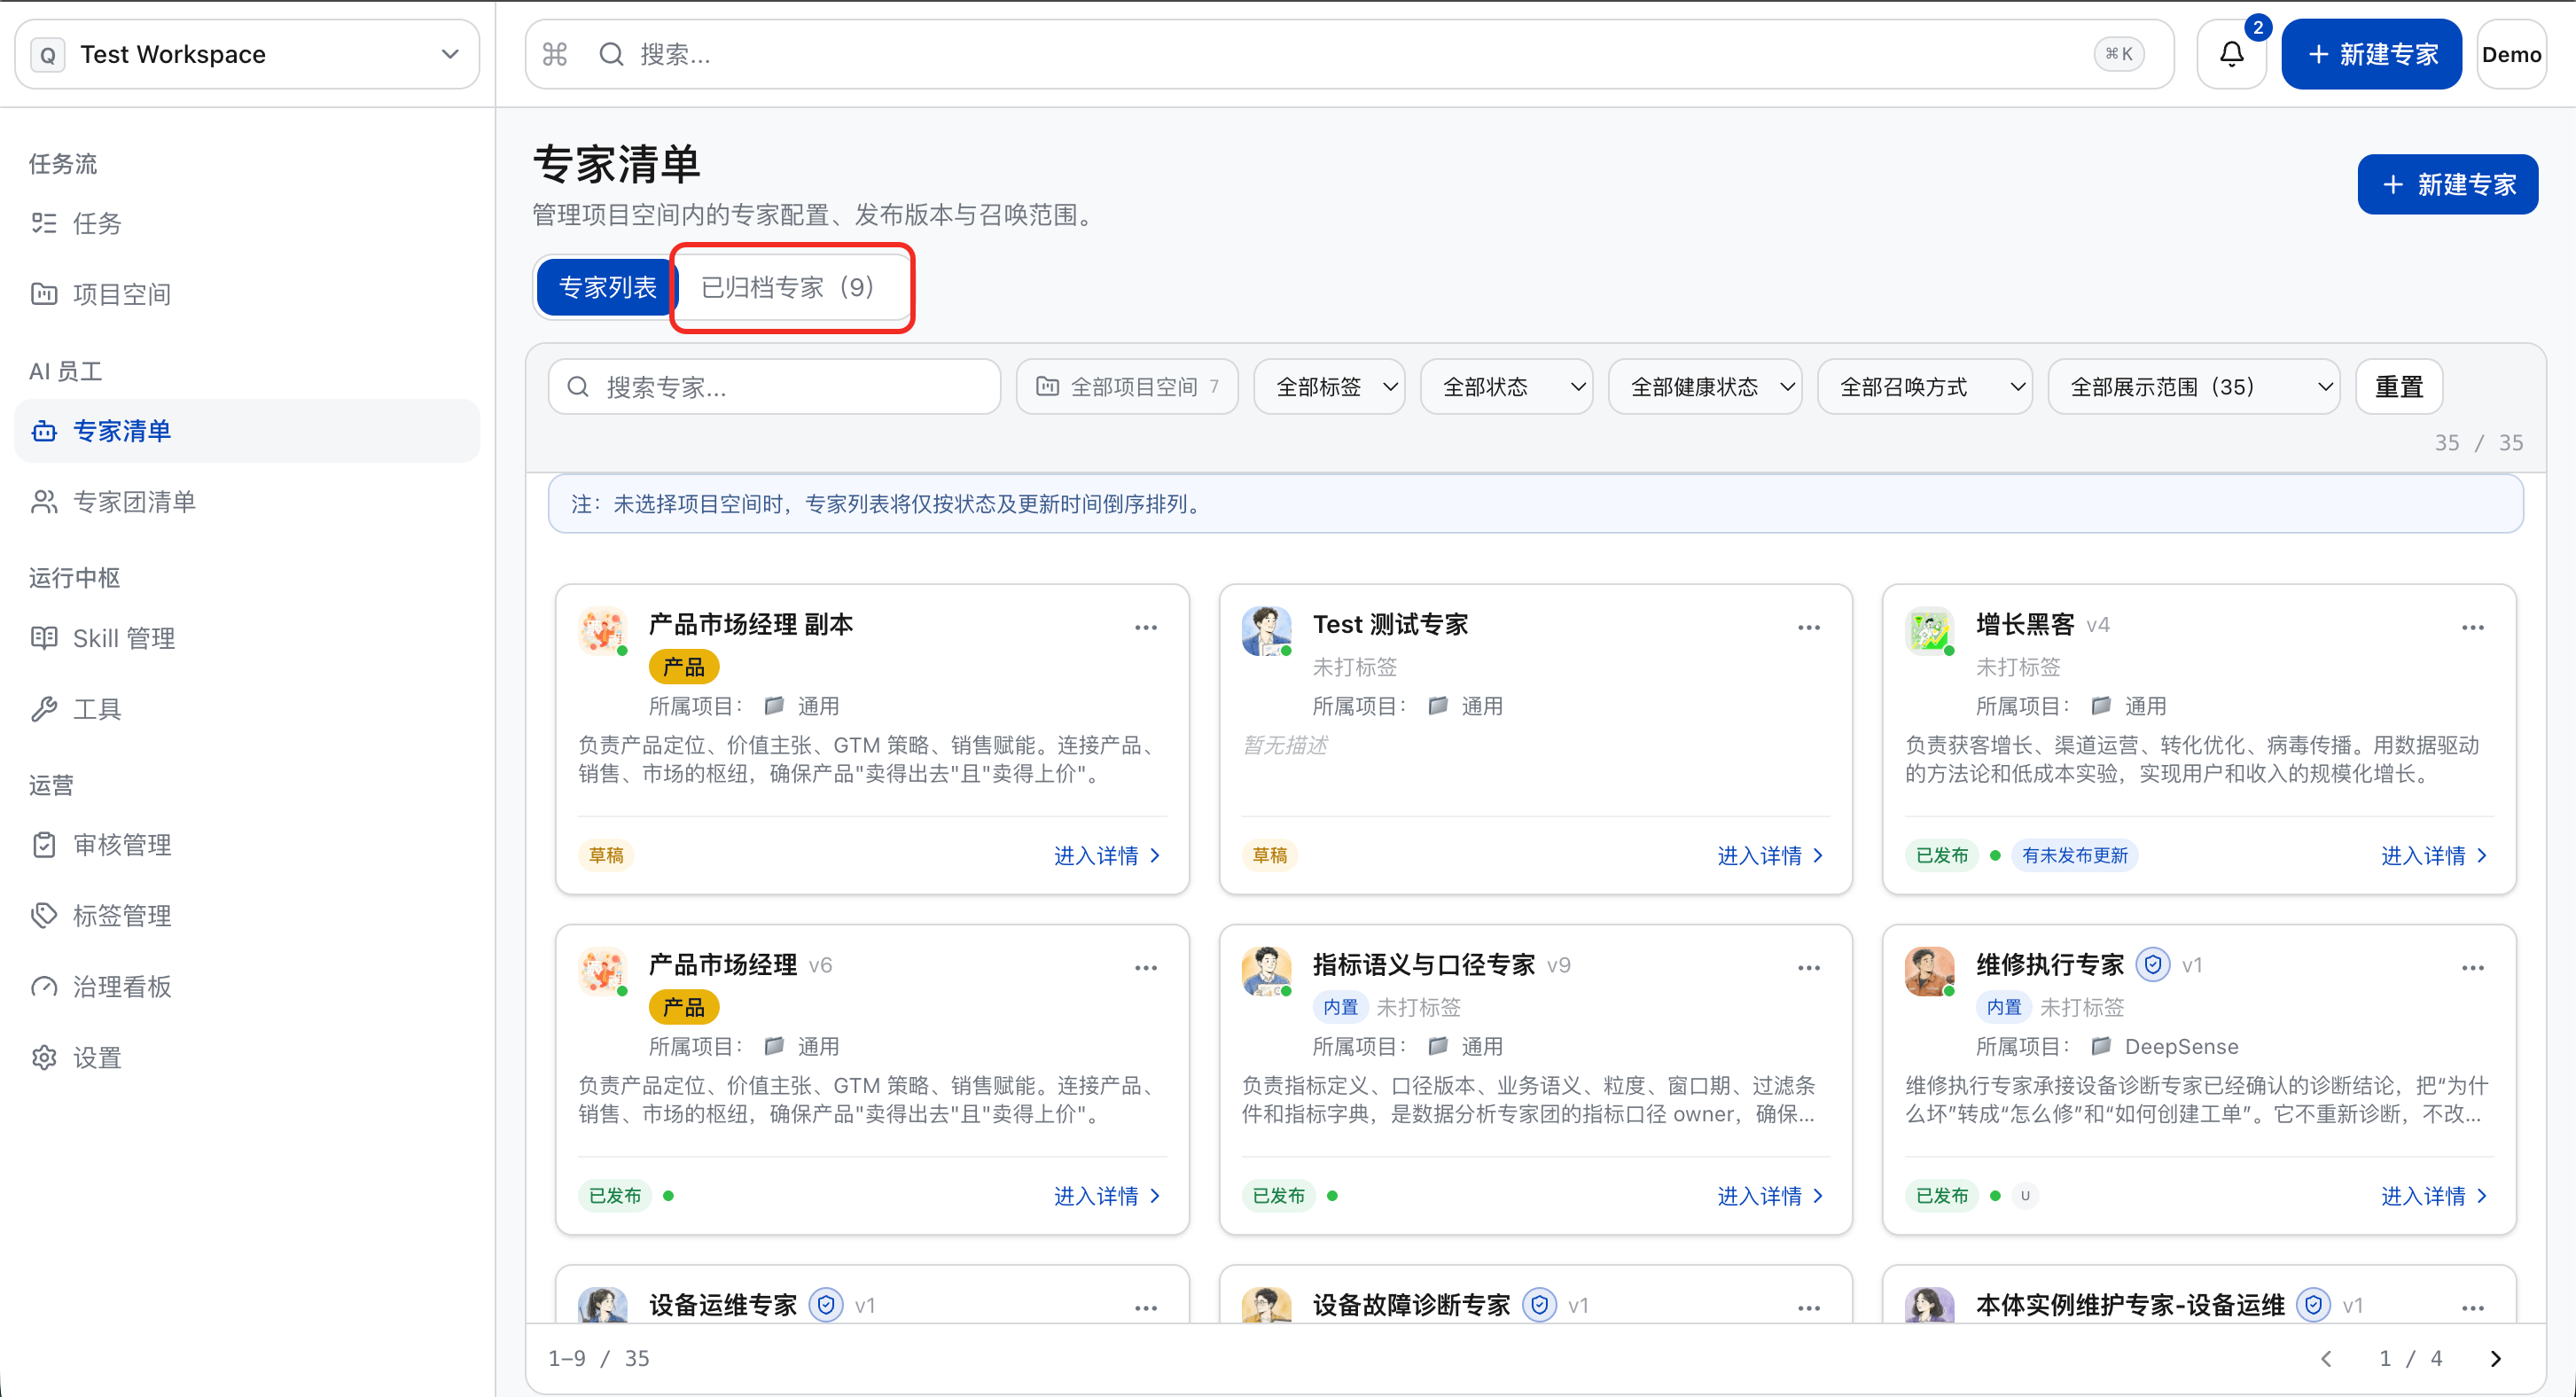
Archived Expert List
a. Click “Show Archived”.
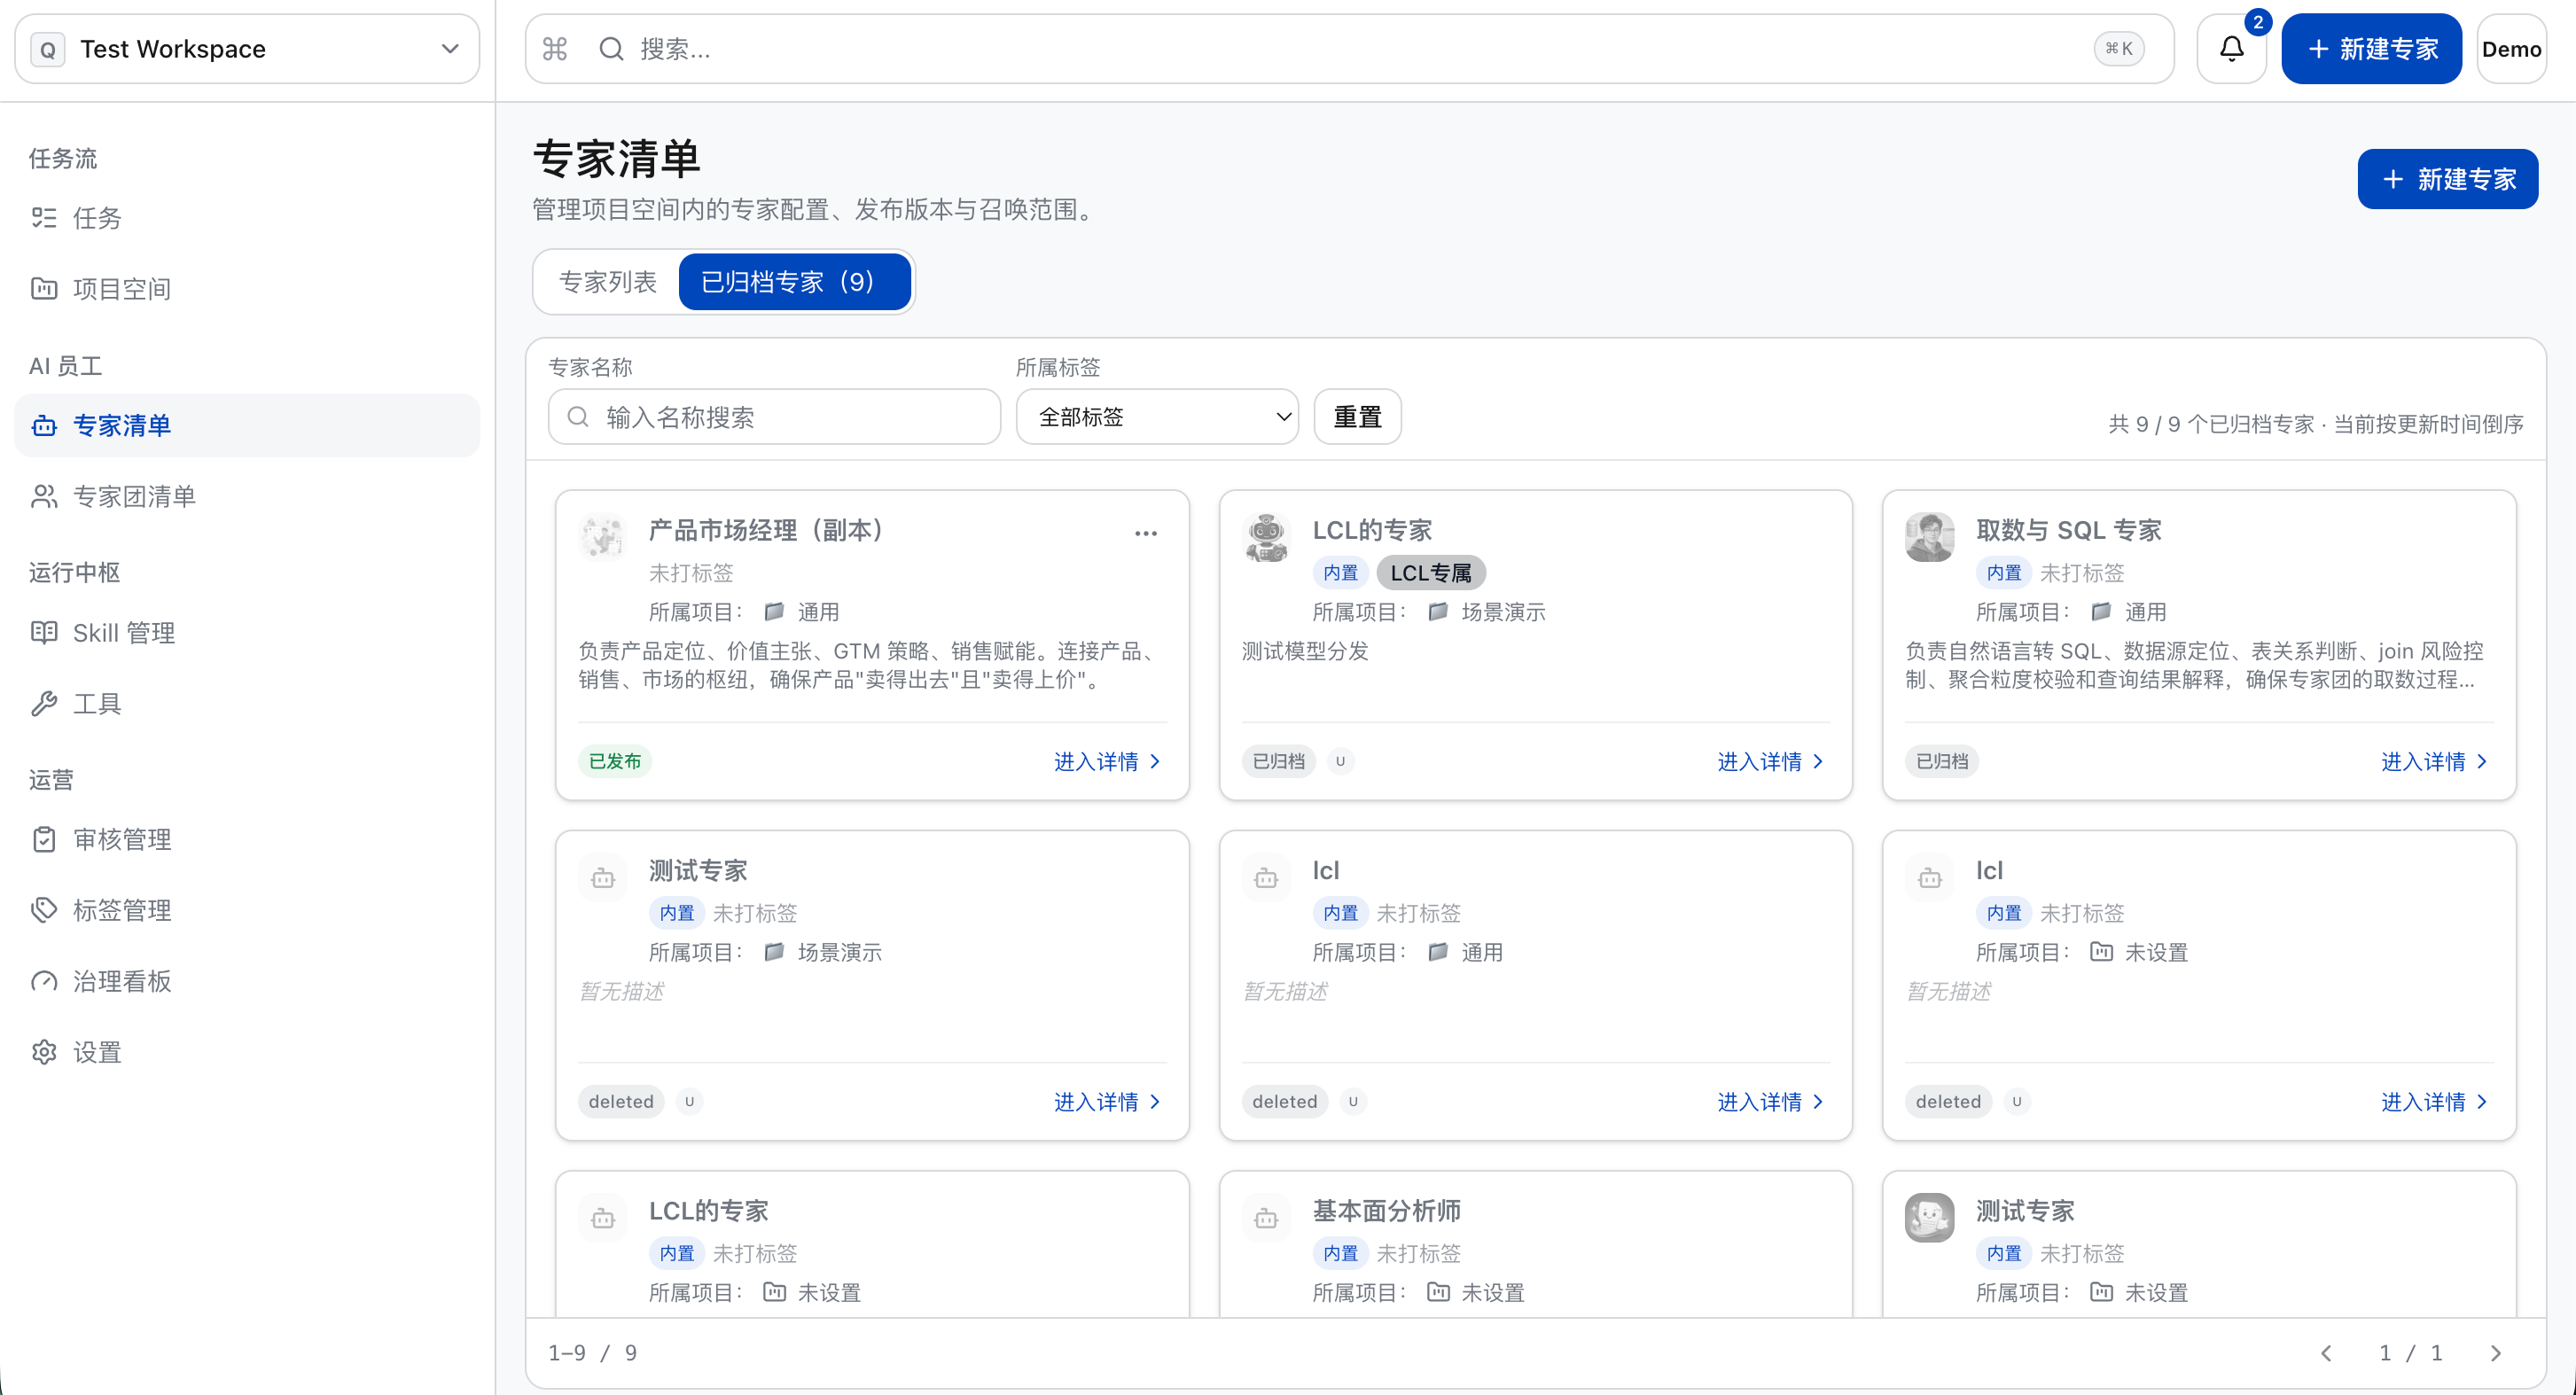
b. The list of archived experts can be viewed.
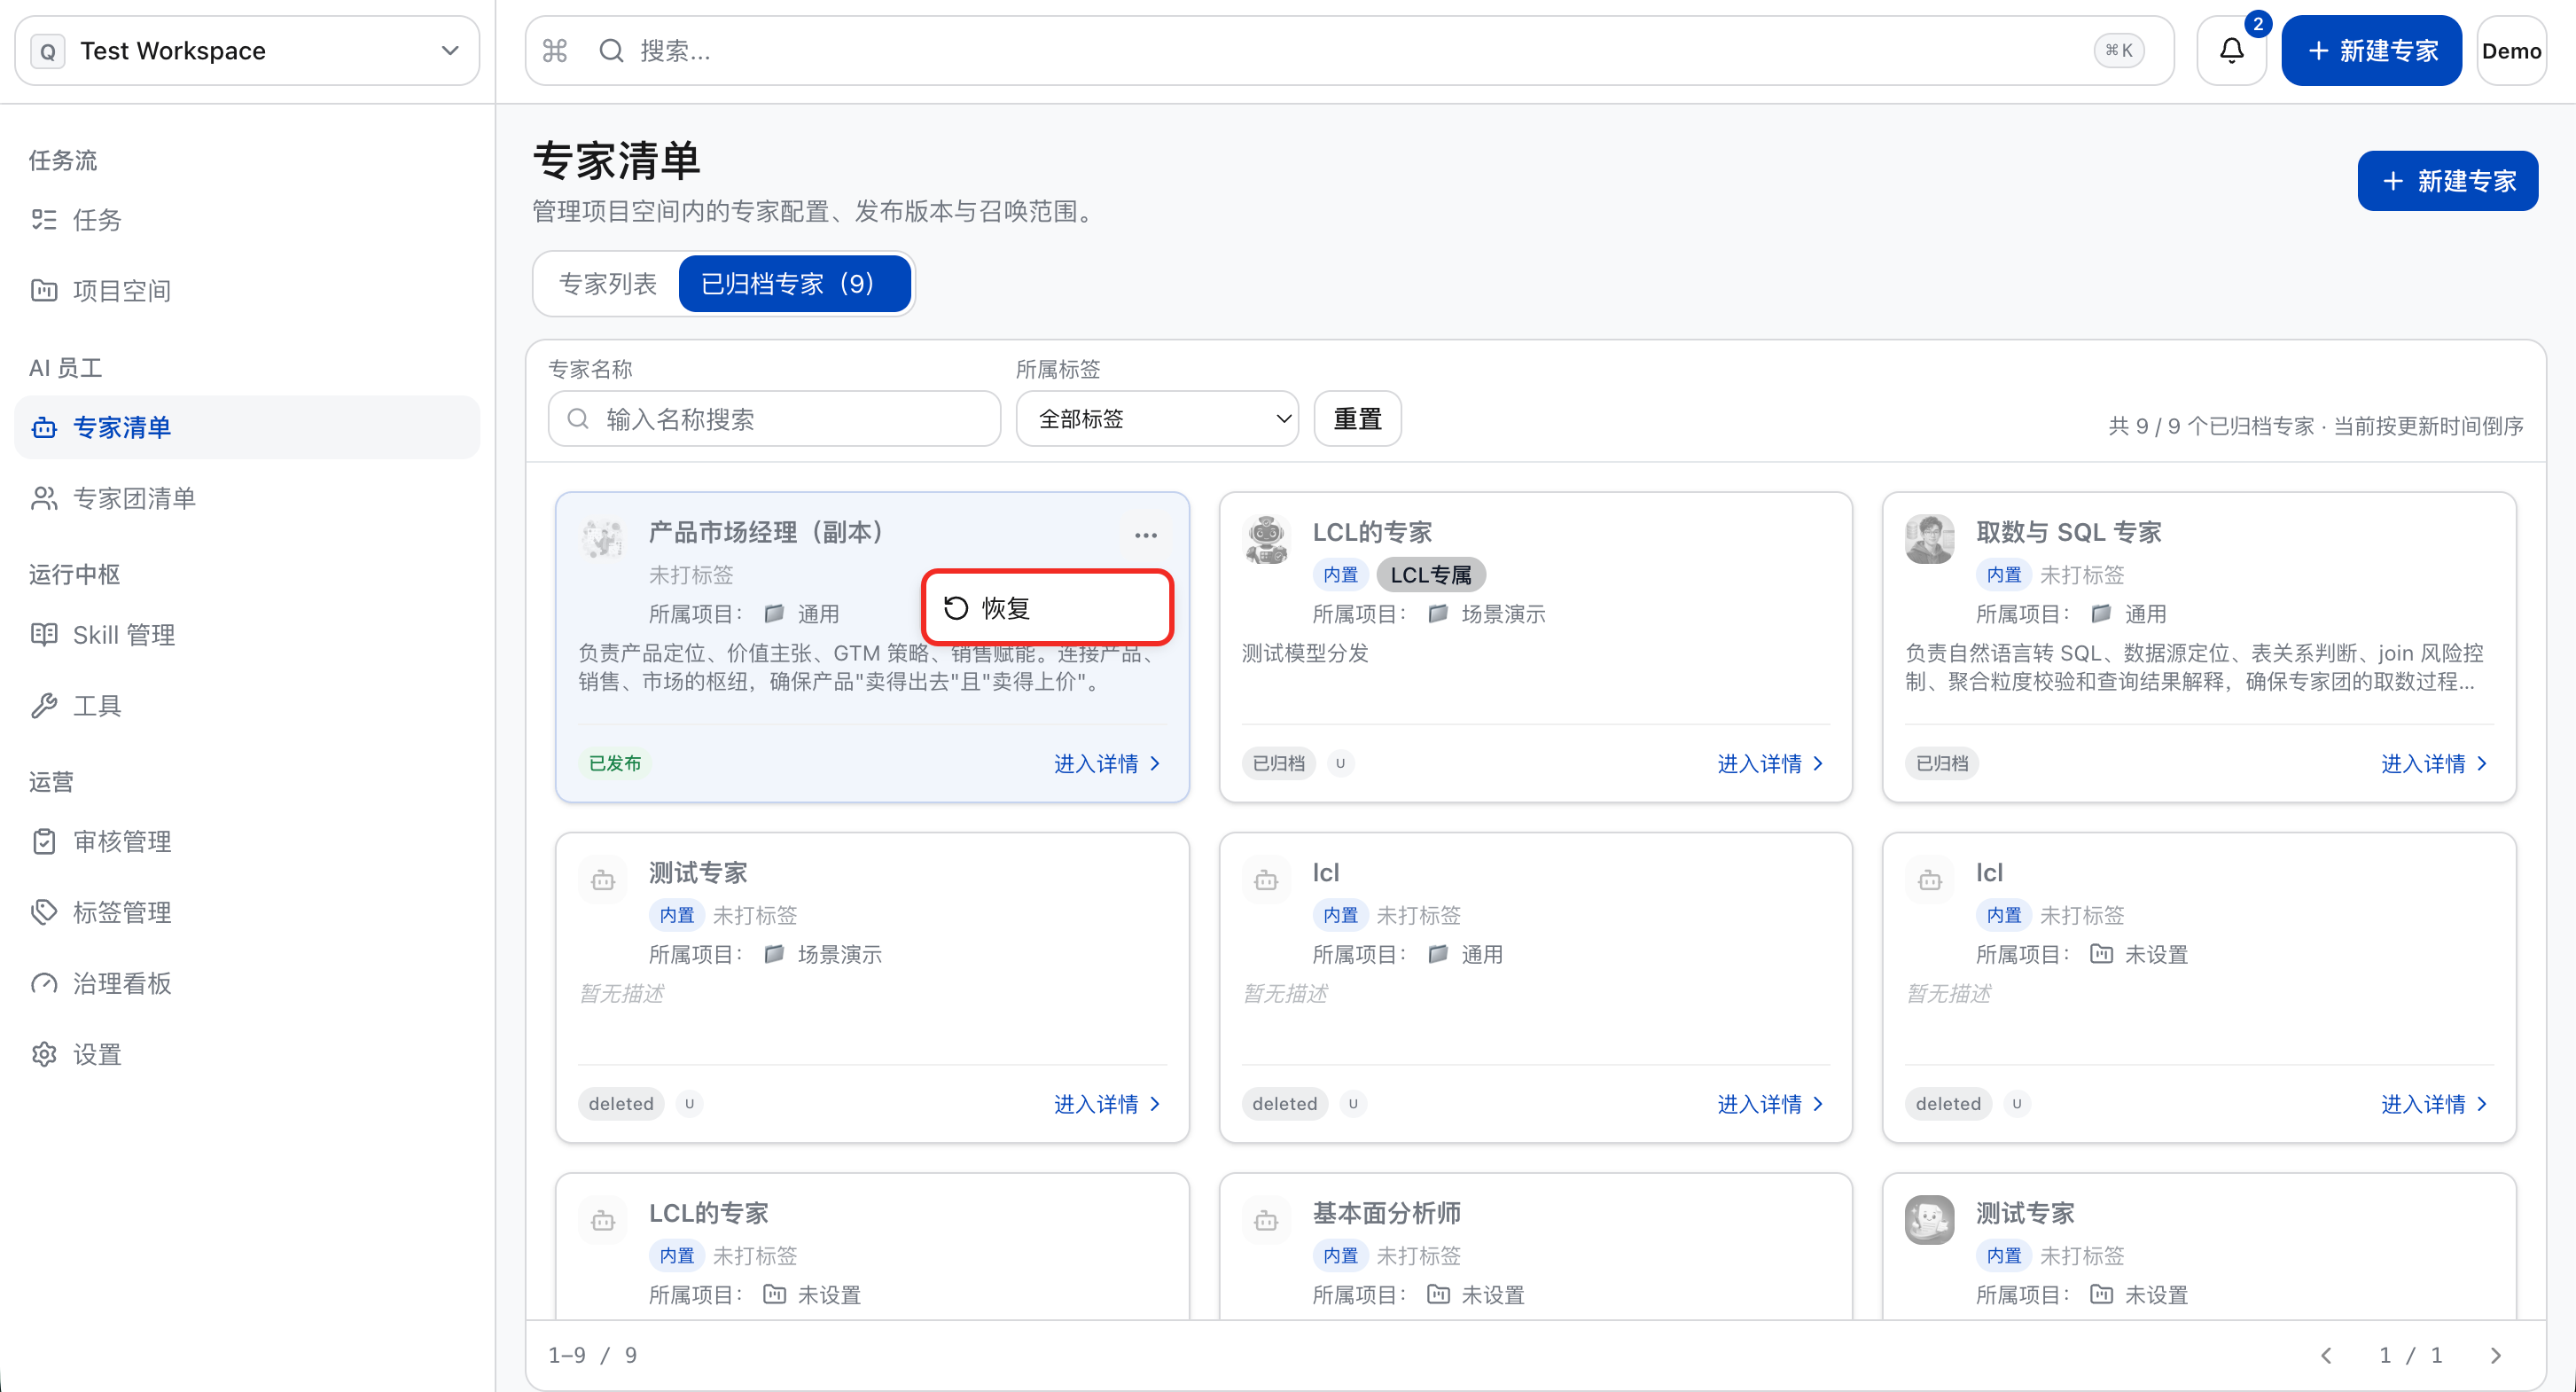
Recovery Specialist
In the “Archived Expert List”, click the ”…” - “Restore” button in the upper right corner of the expert card, and the restoration will be completed successfully.
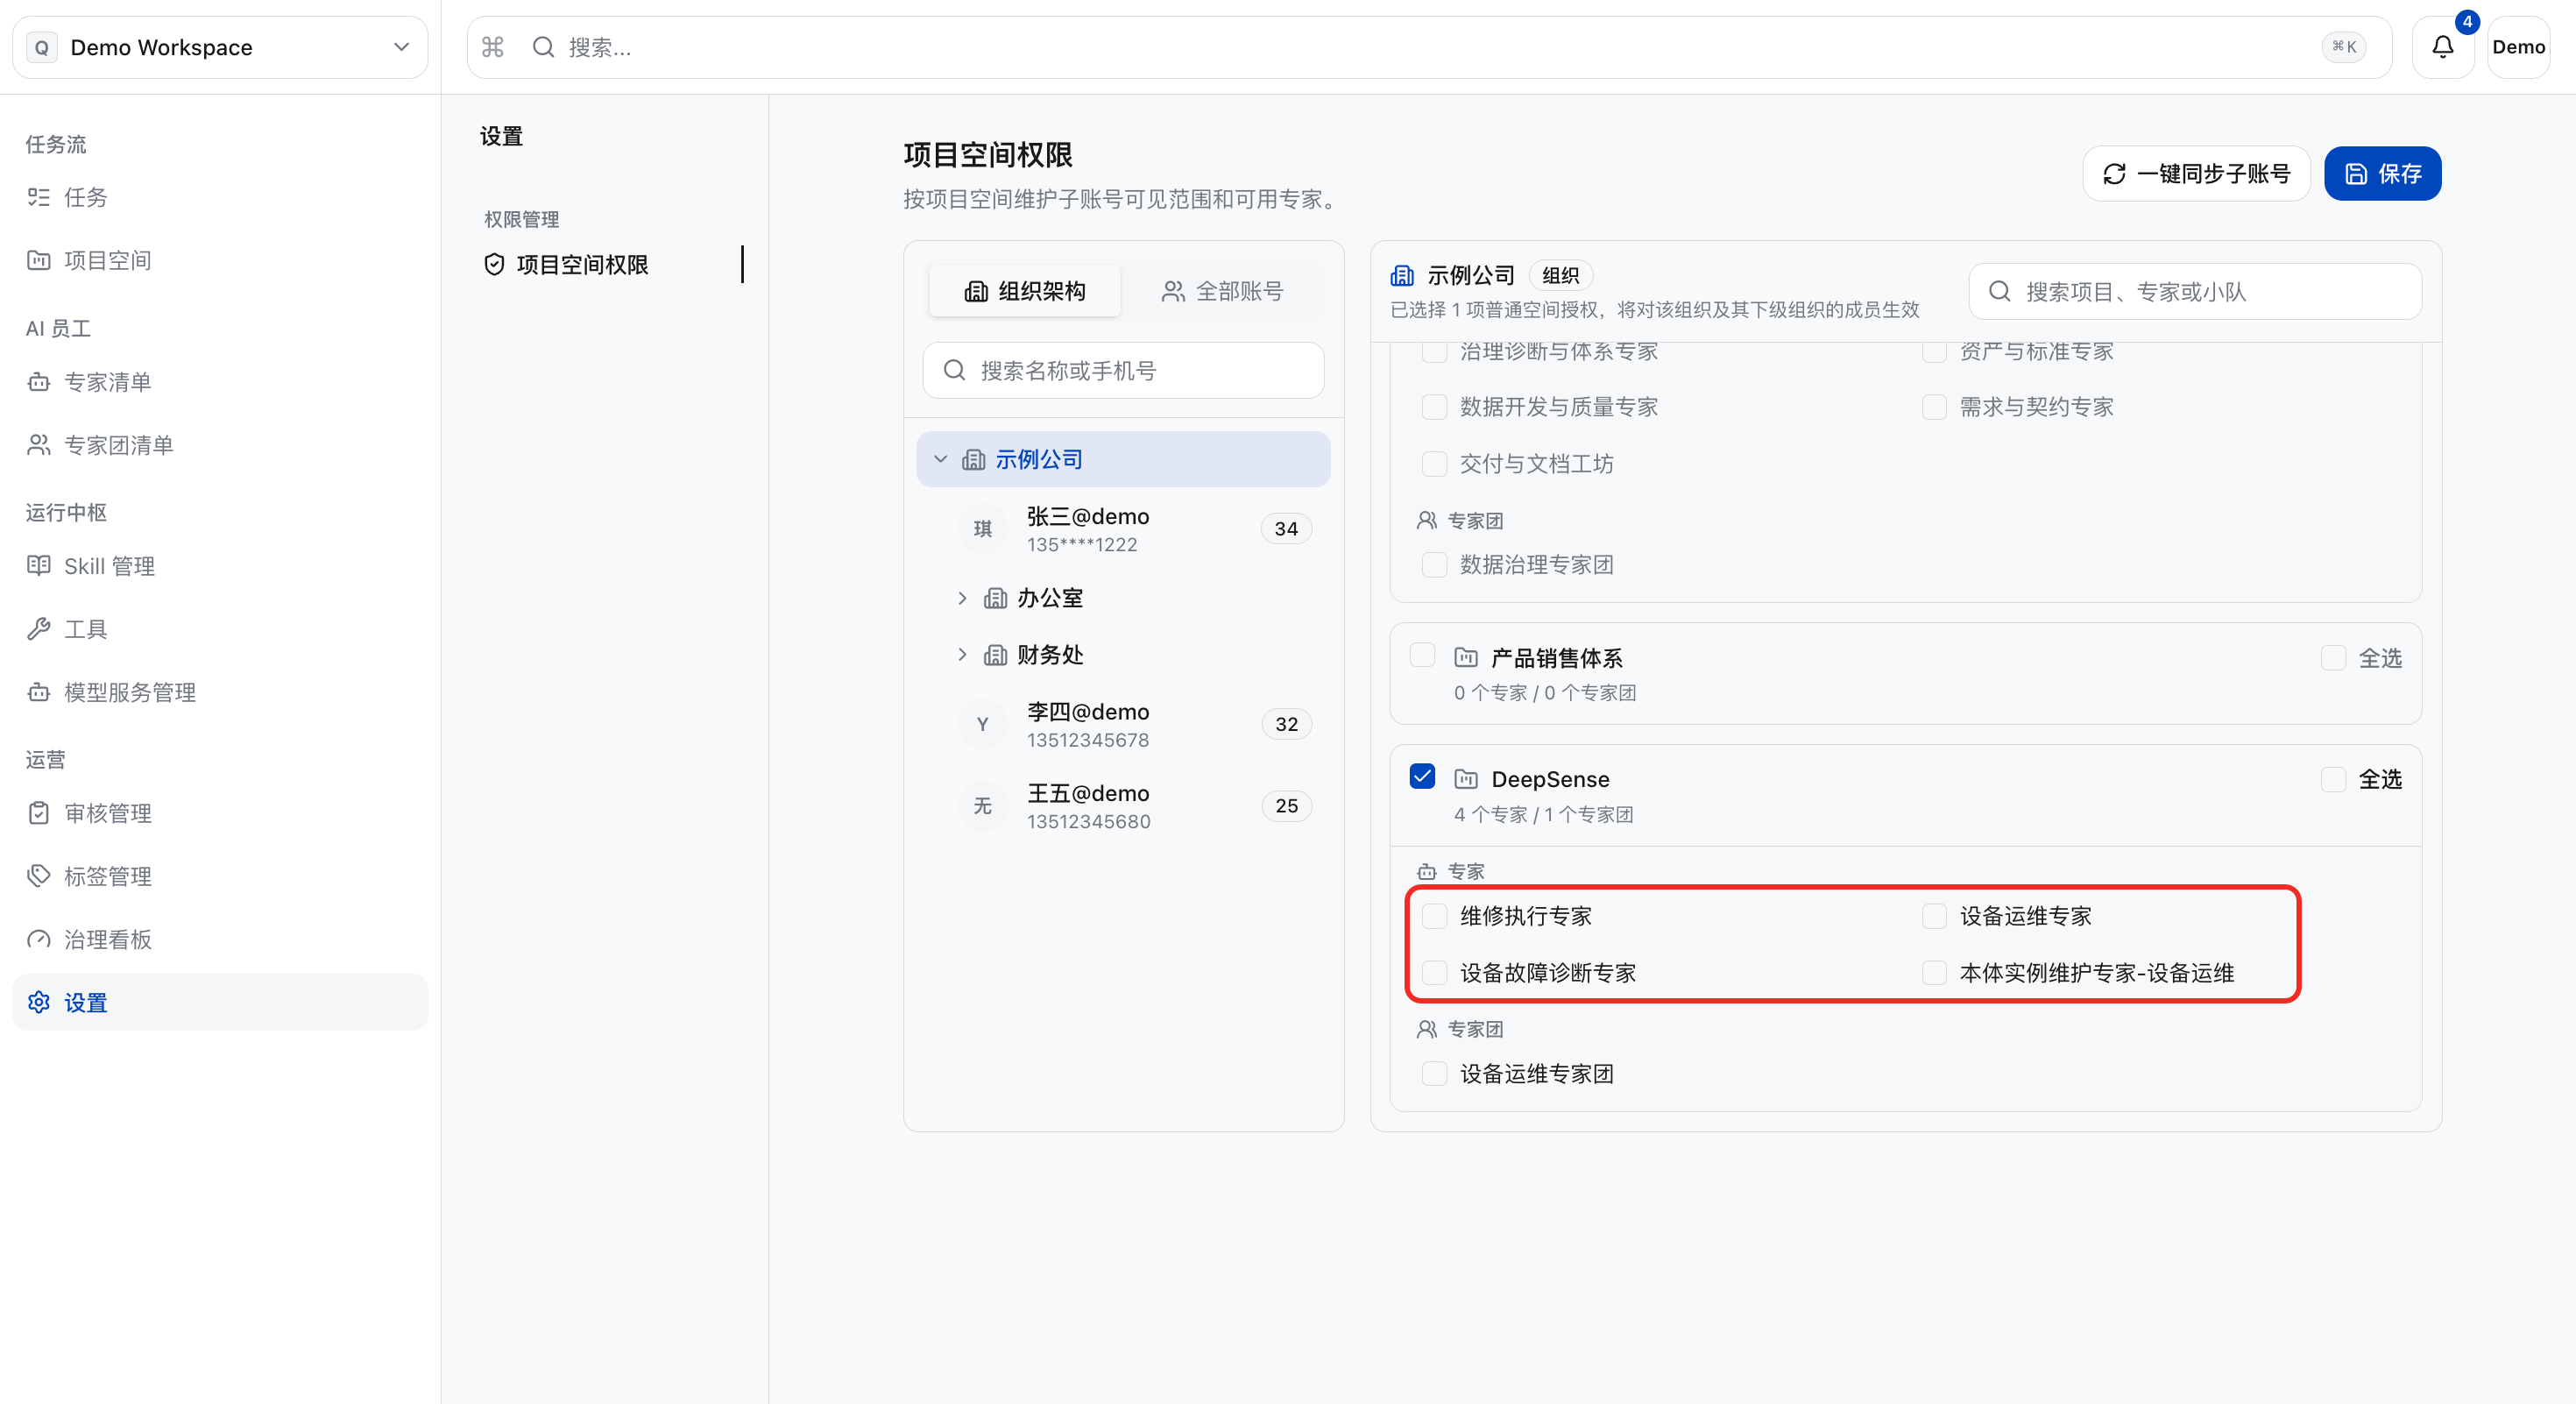
Usage and Management Scope Settings
a. In the left “Settings” menu, click “Project Space Permissions”.
b. Click the organization or member account to be authorized, and check the “Project Space > Expert Name” option on the right. If the target organization or member account cannot be found via search, you can click “One-click Sync Sub-accounts” to perform a manual refresh.
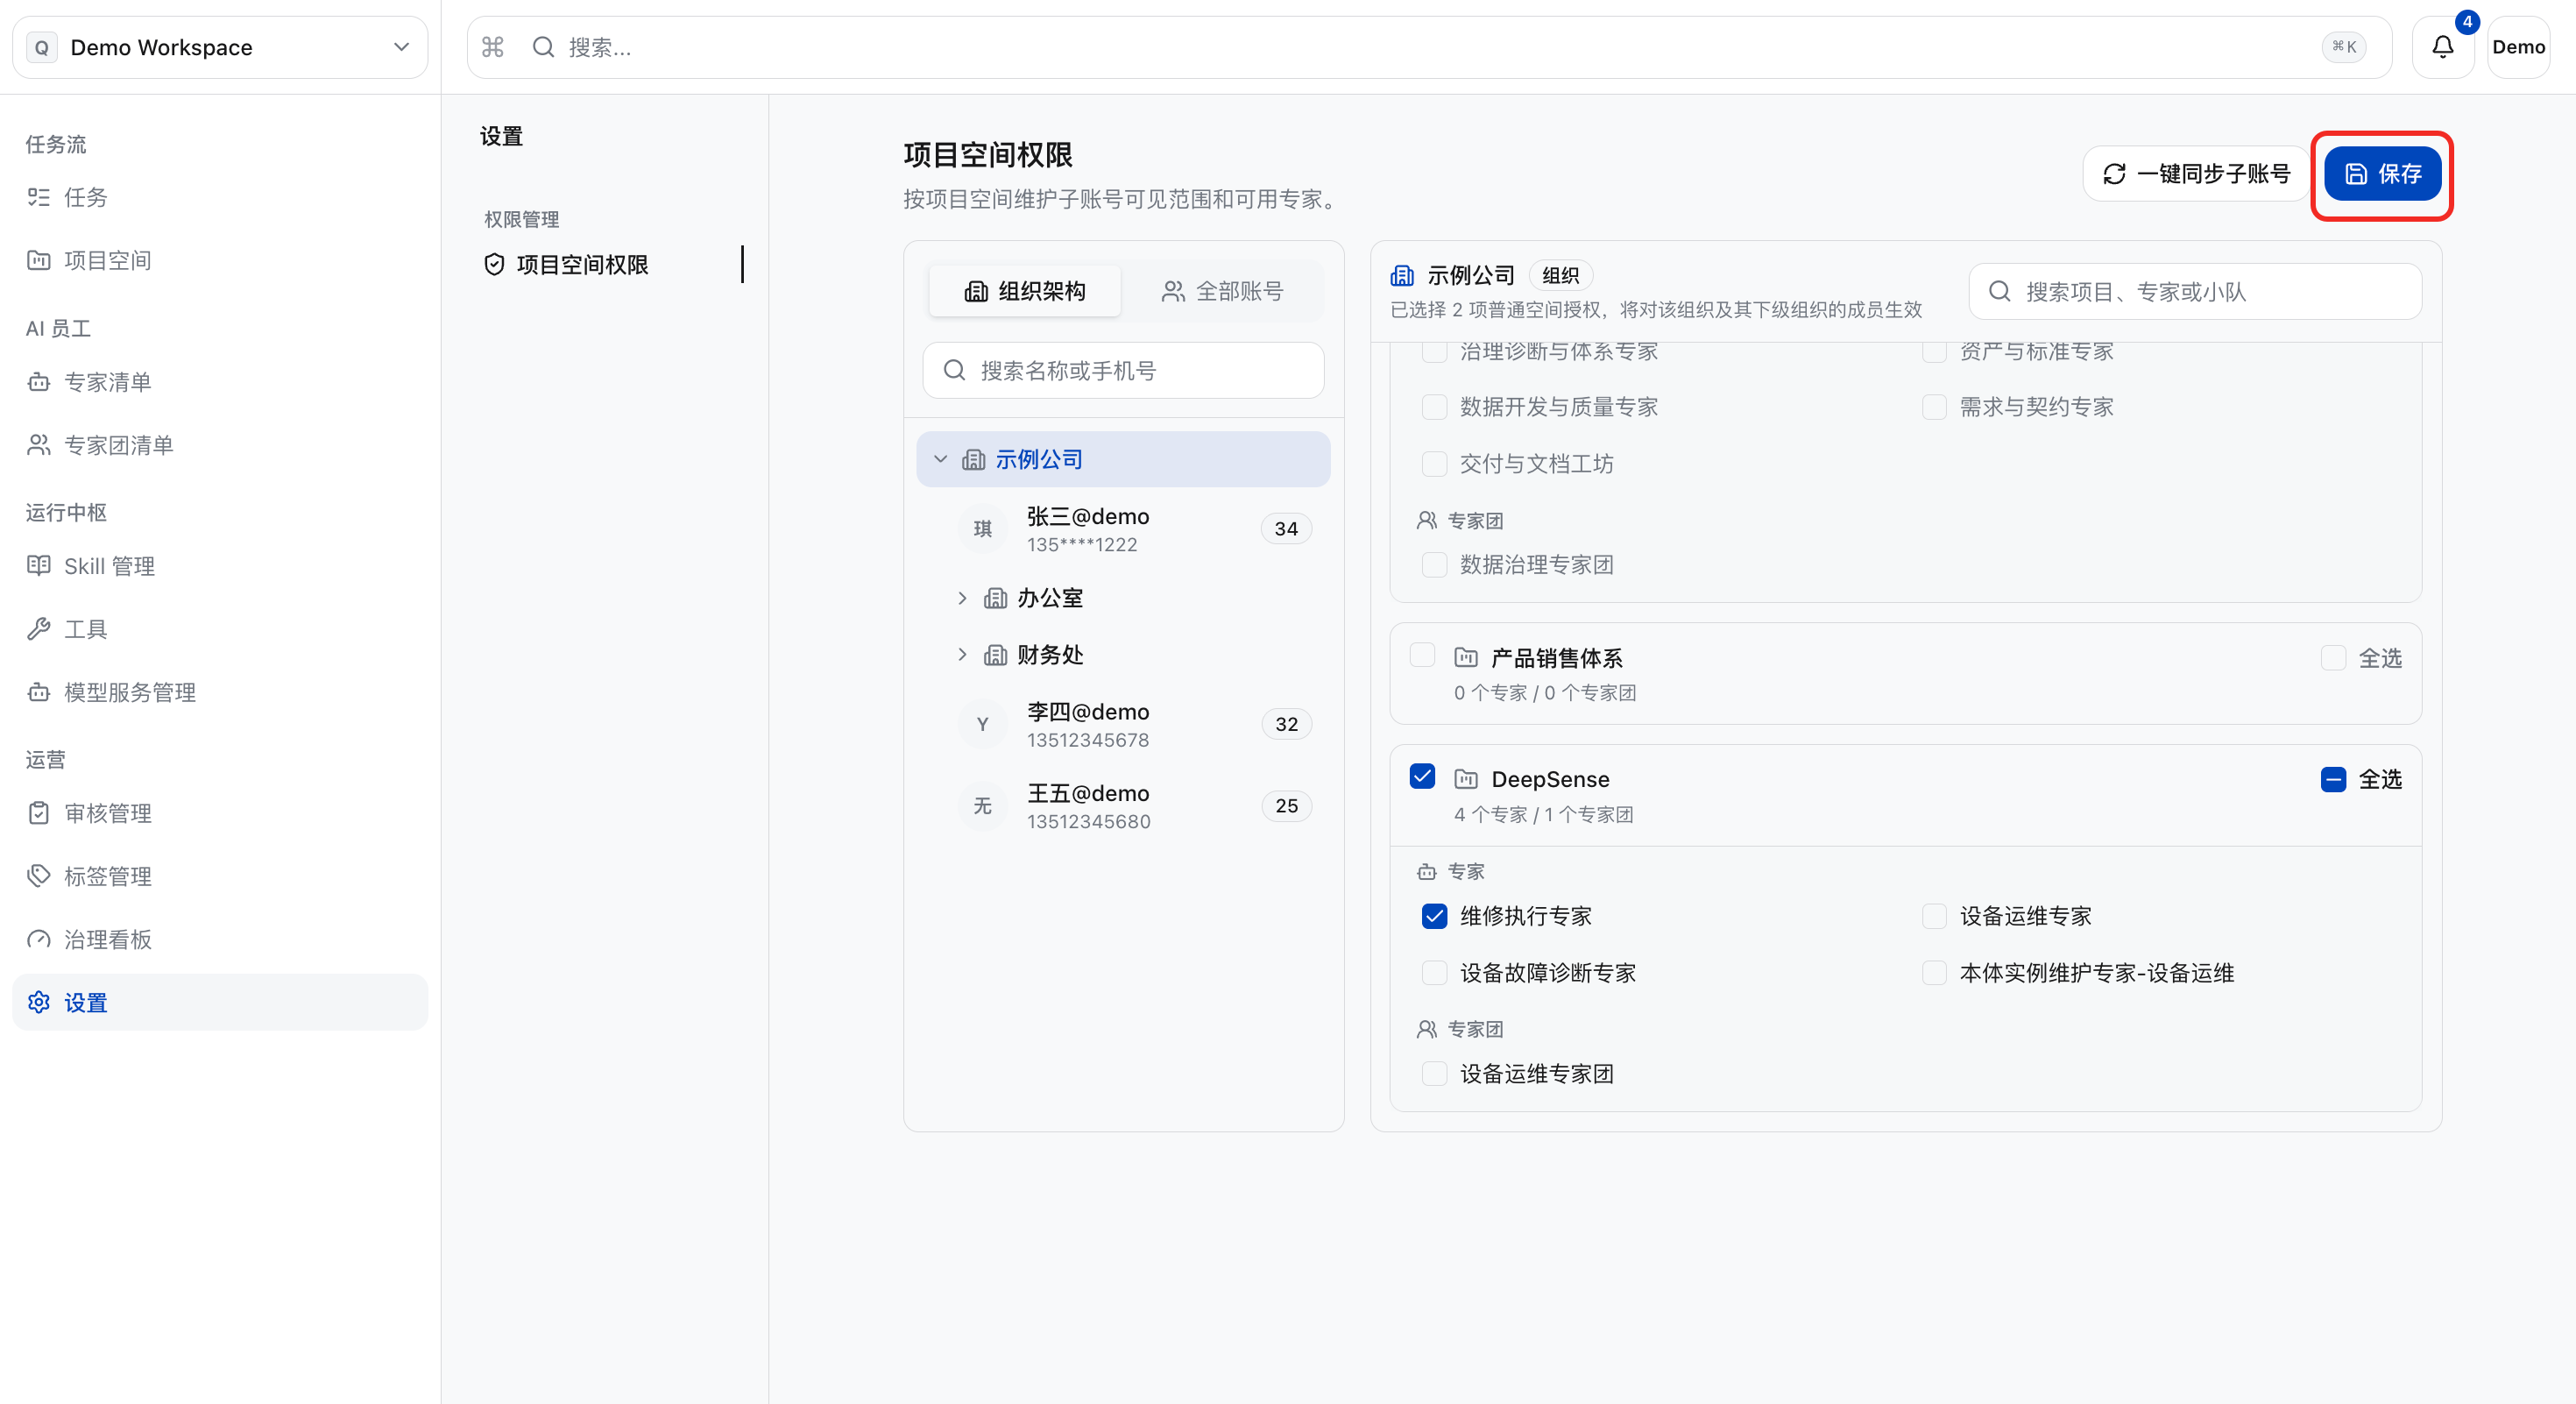
c. Click “Save”, and this member will become a member that the corresponding expert can use/manage.
List of Expert Panel
View the Expert Panel
a. Click “Expert Panel” in the left menu bar to view all expert panels under the affiliated project space. There are two types of experts: one is the built-in expert panel, which refers to the built-in expert panel provided and uniformly maintained by the platform; the other is the custom expert panel, which refers to the business expert panel built by the tenant according to its own business scenarios.
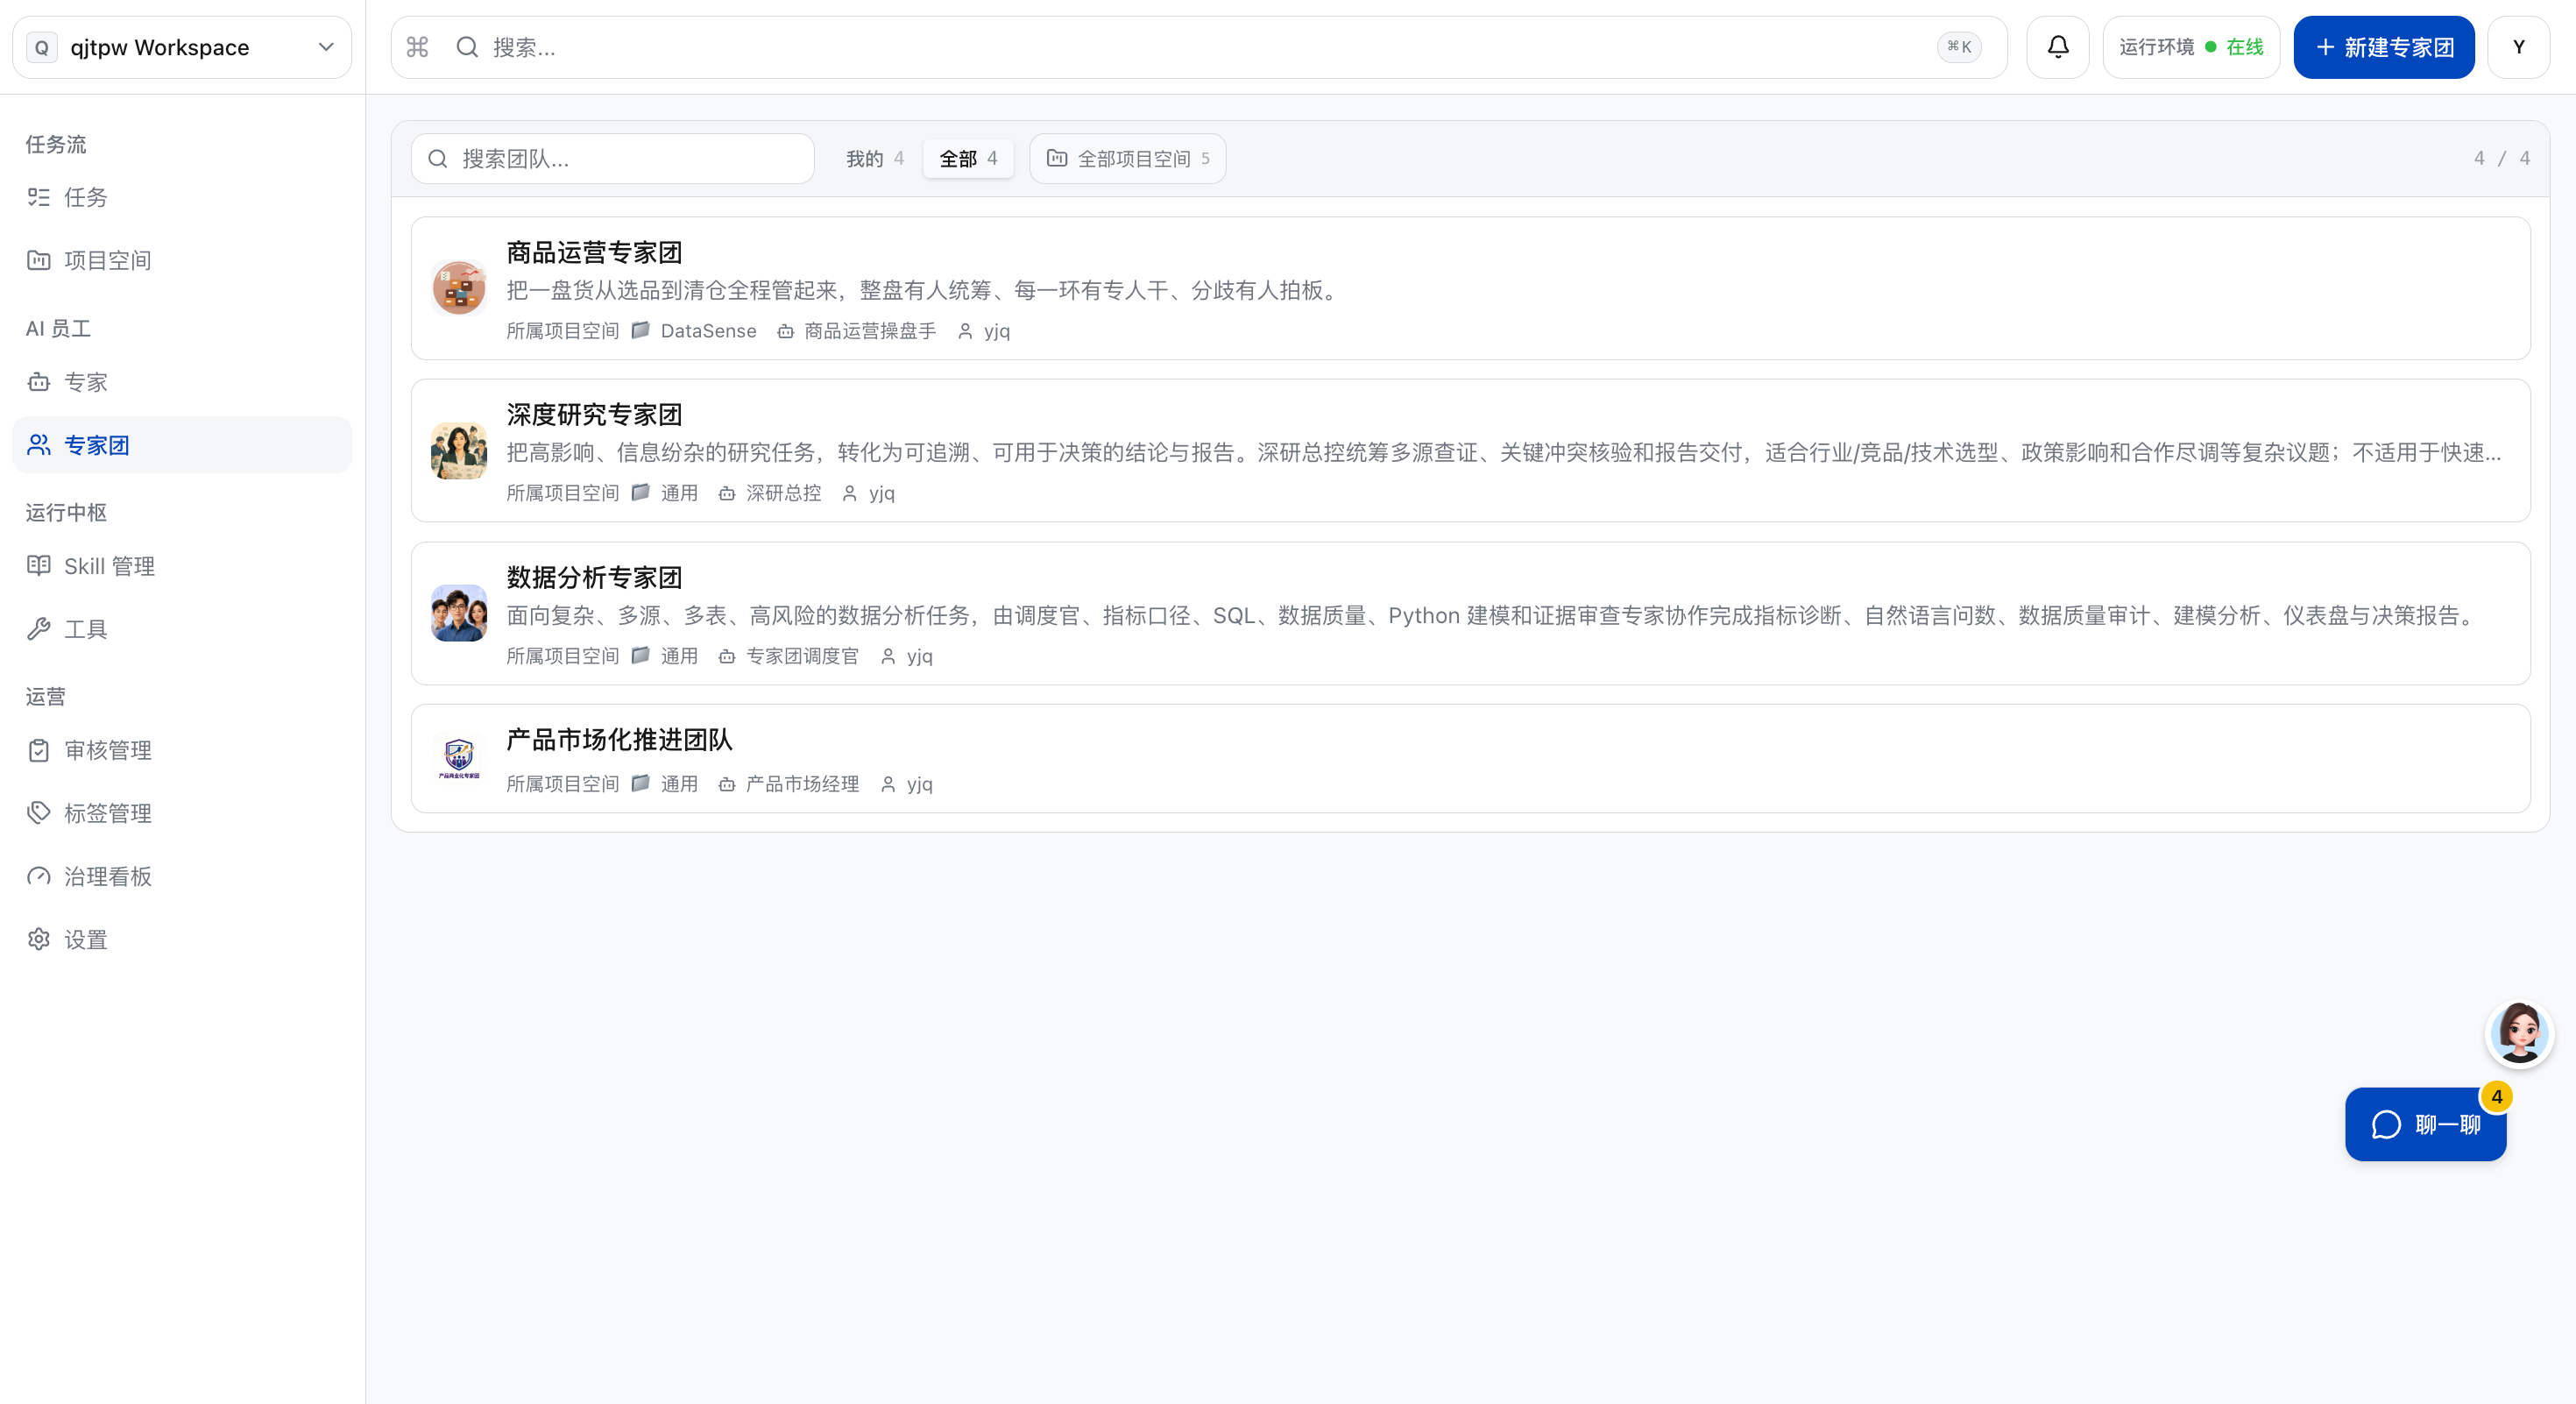
b. Click the expert group card to view the configuration details of this expert group. Note: The built-in expert groups uniformly maintained by the platform are not available for detail viewing.
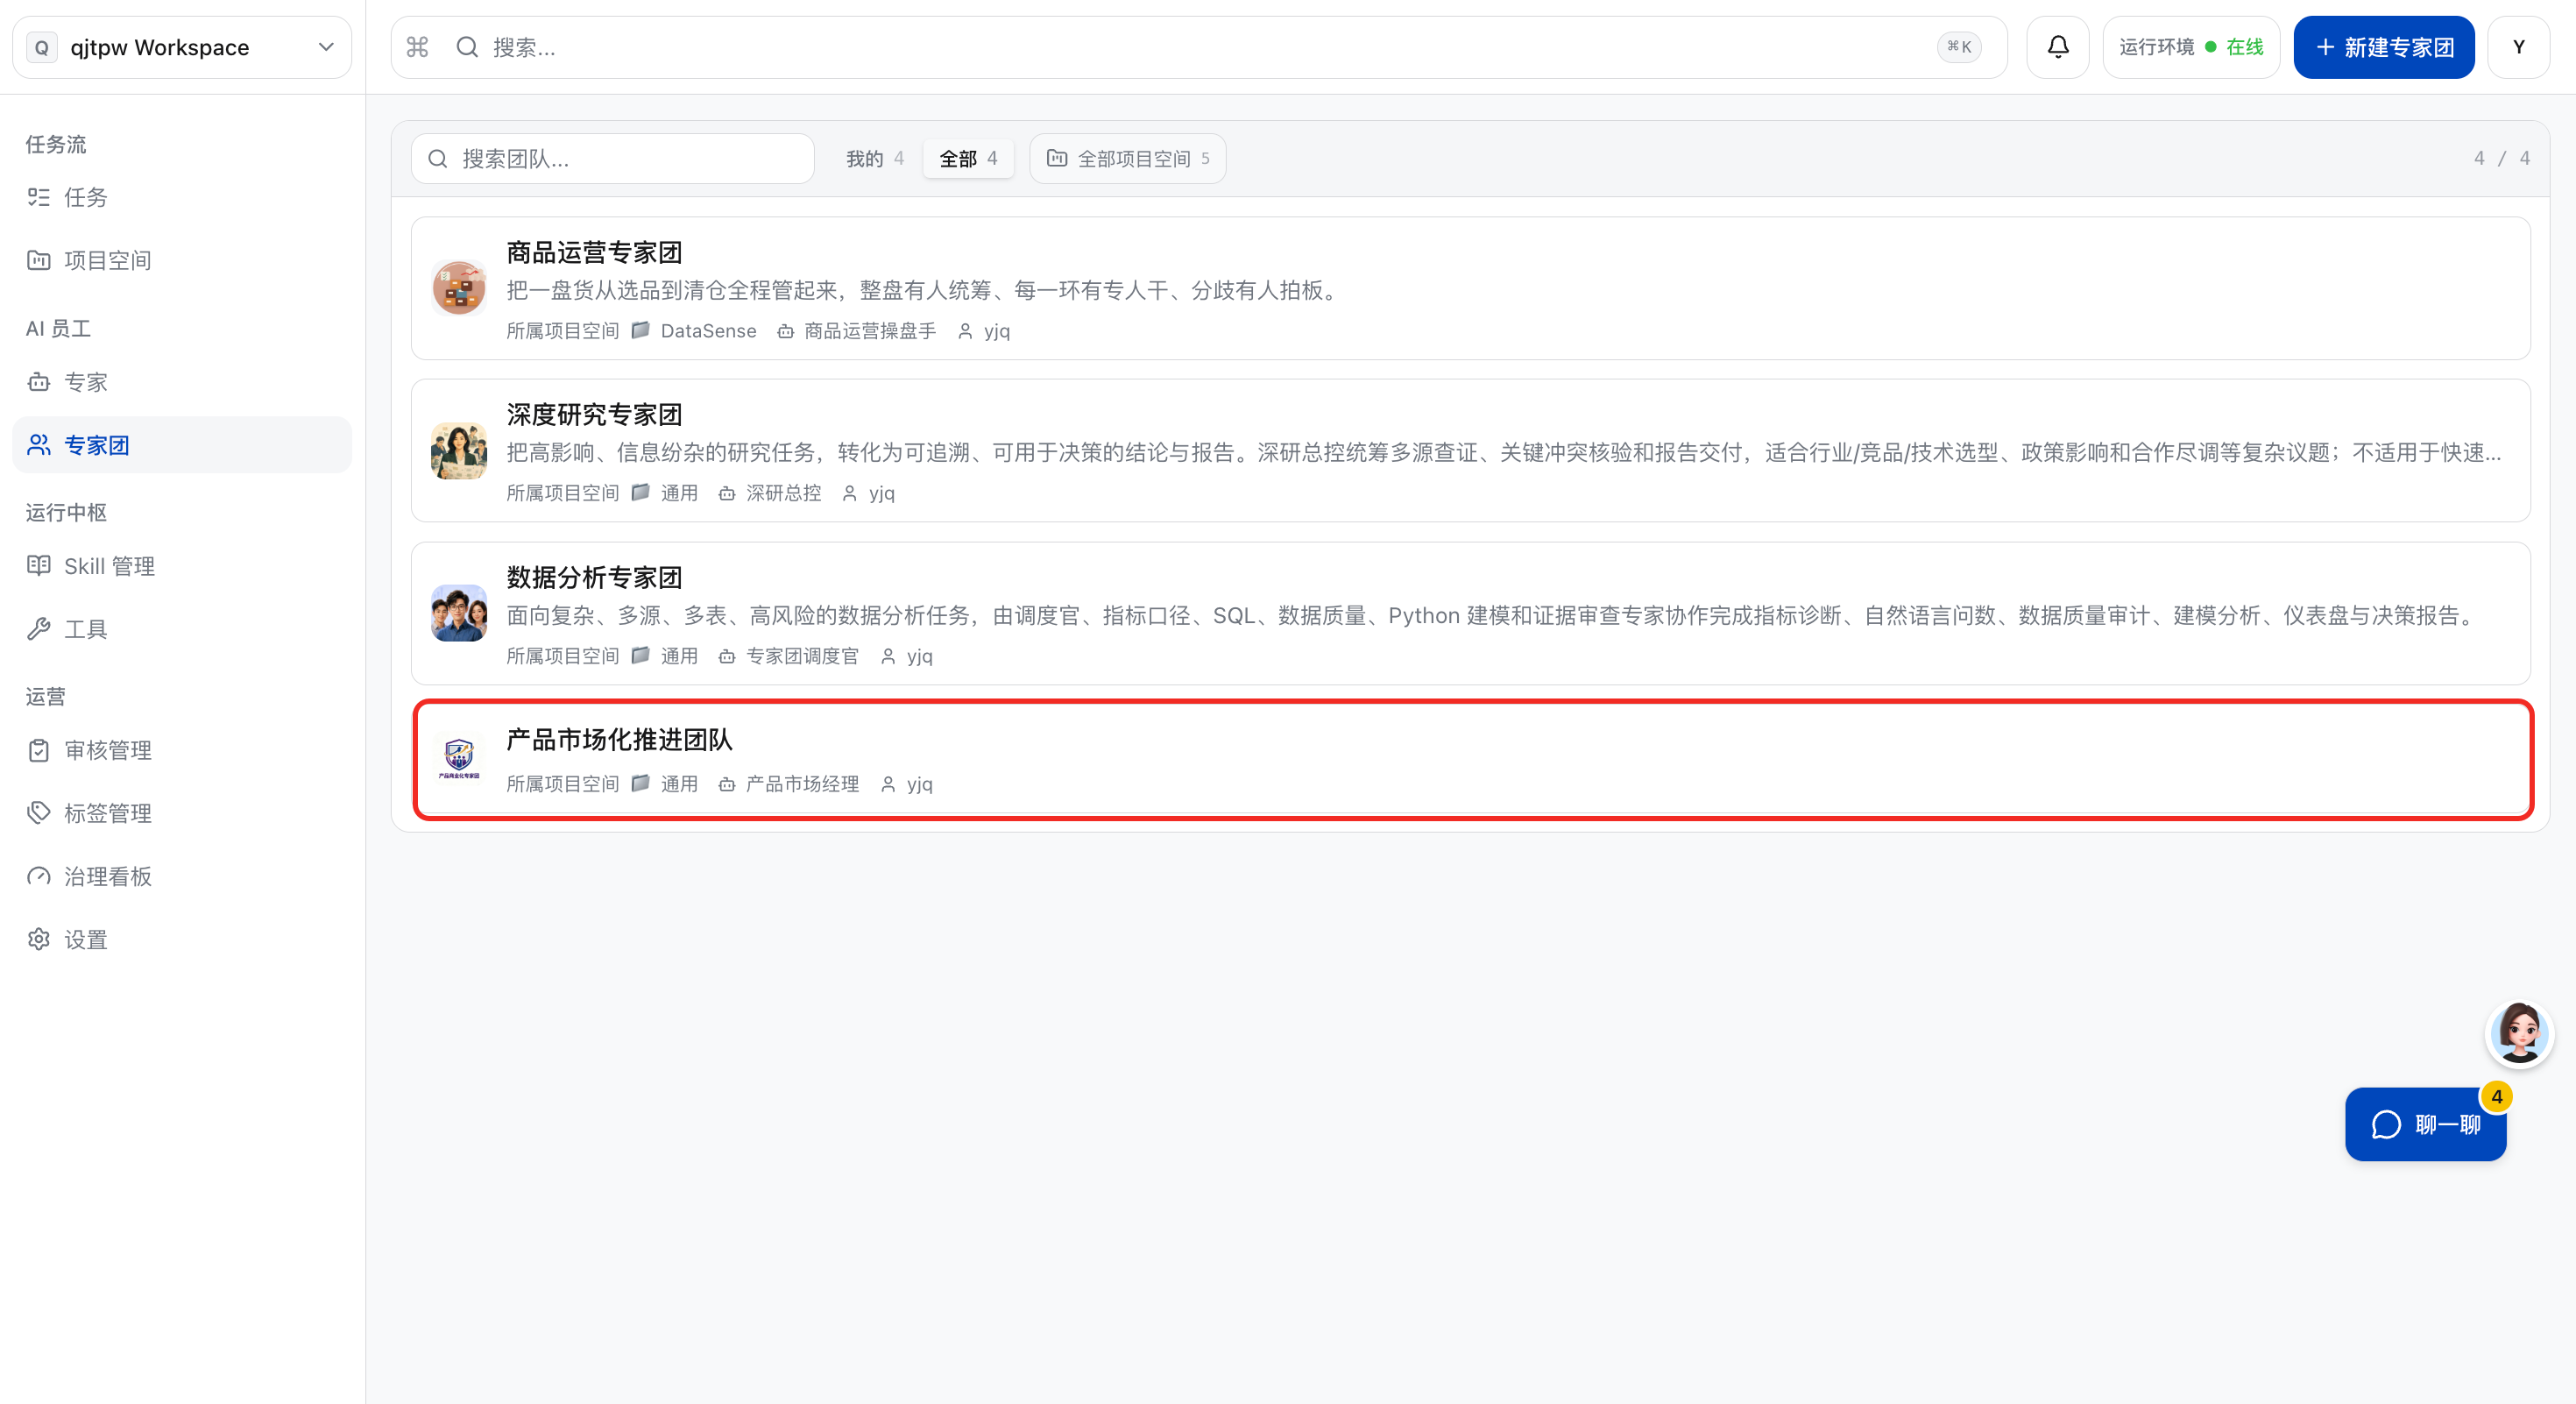
c. View the configuration information of the expert panel, including the name of the expert panel, the leader of the expert panel, expert members and other relevant information.
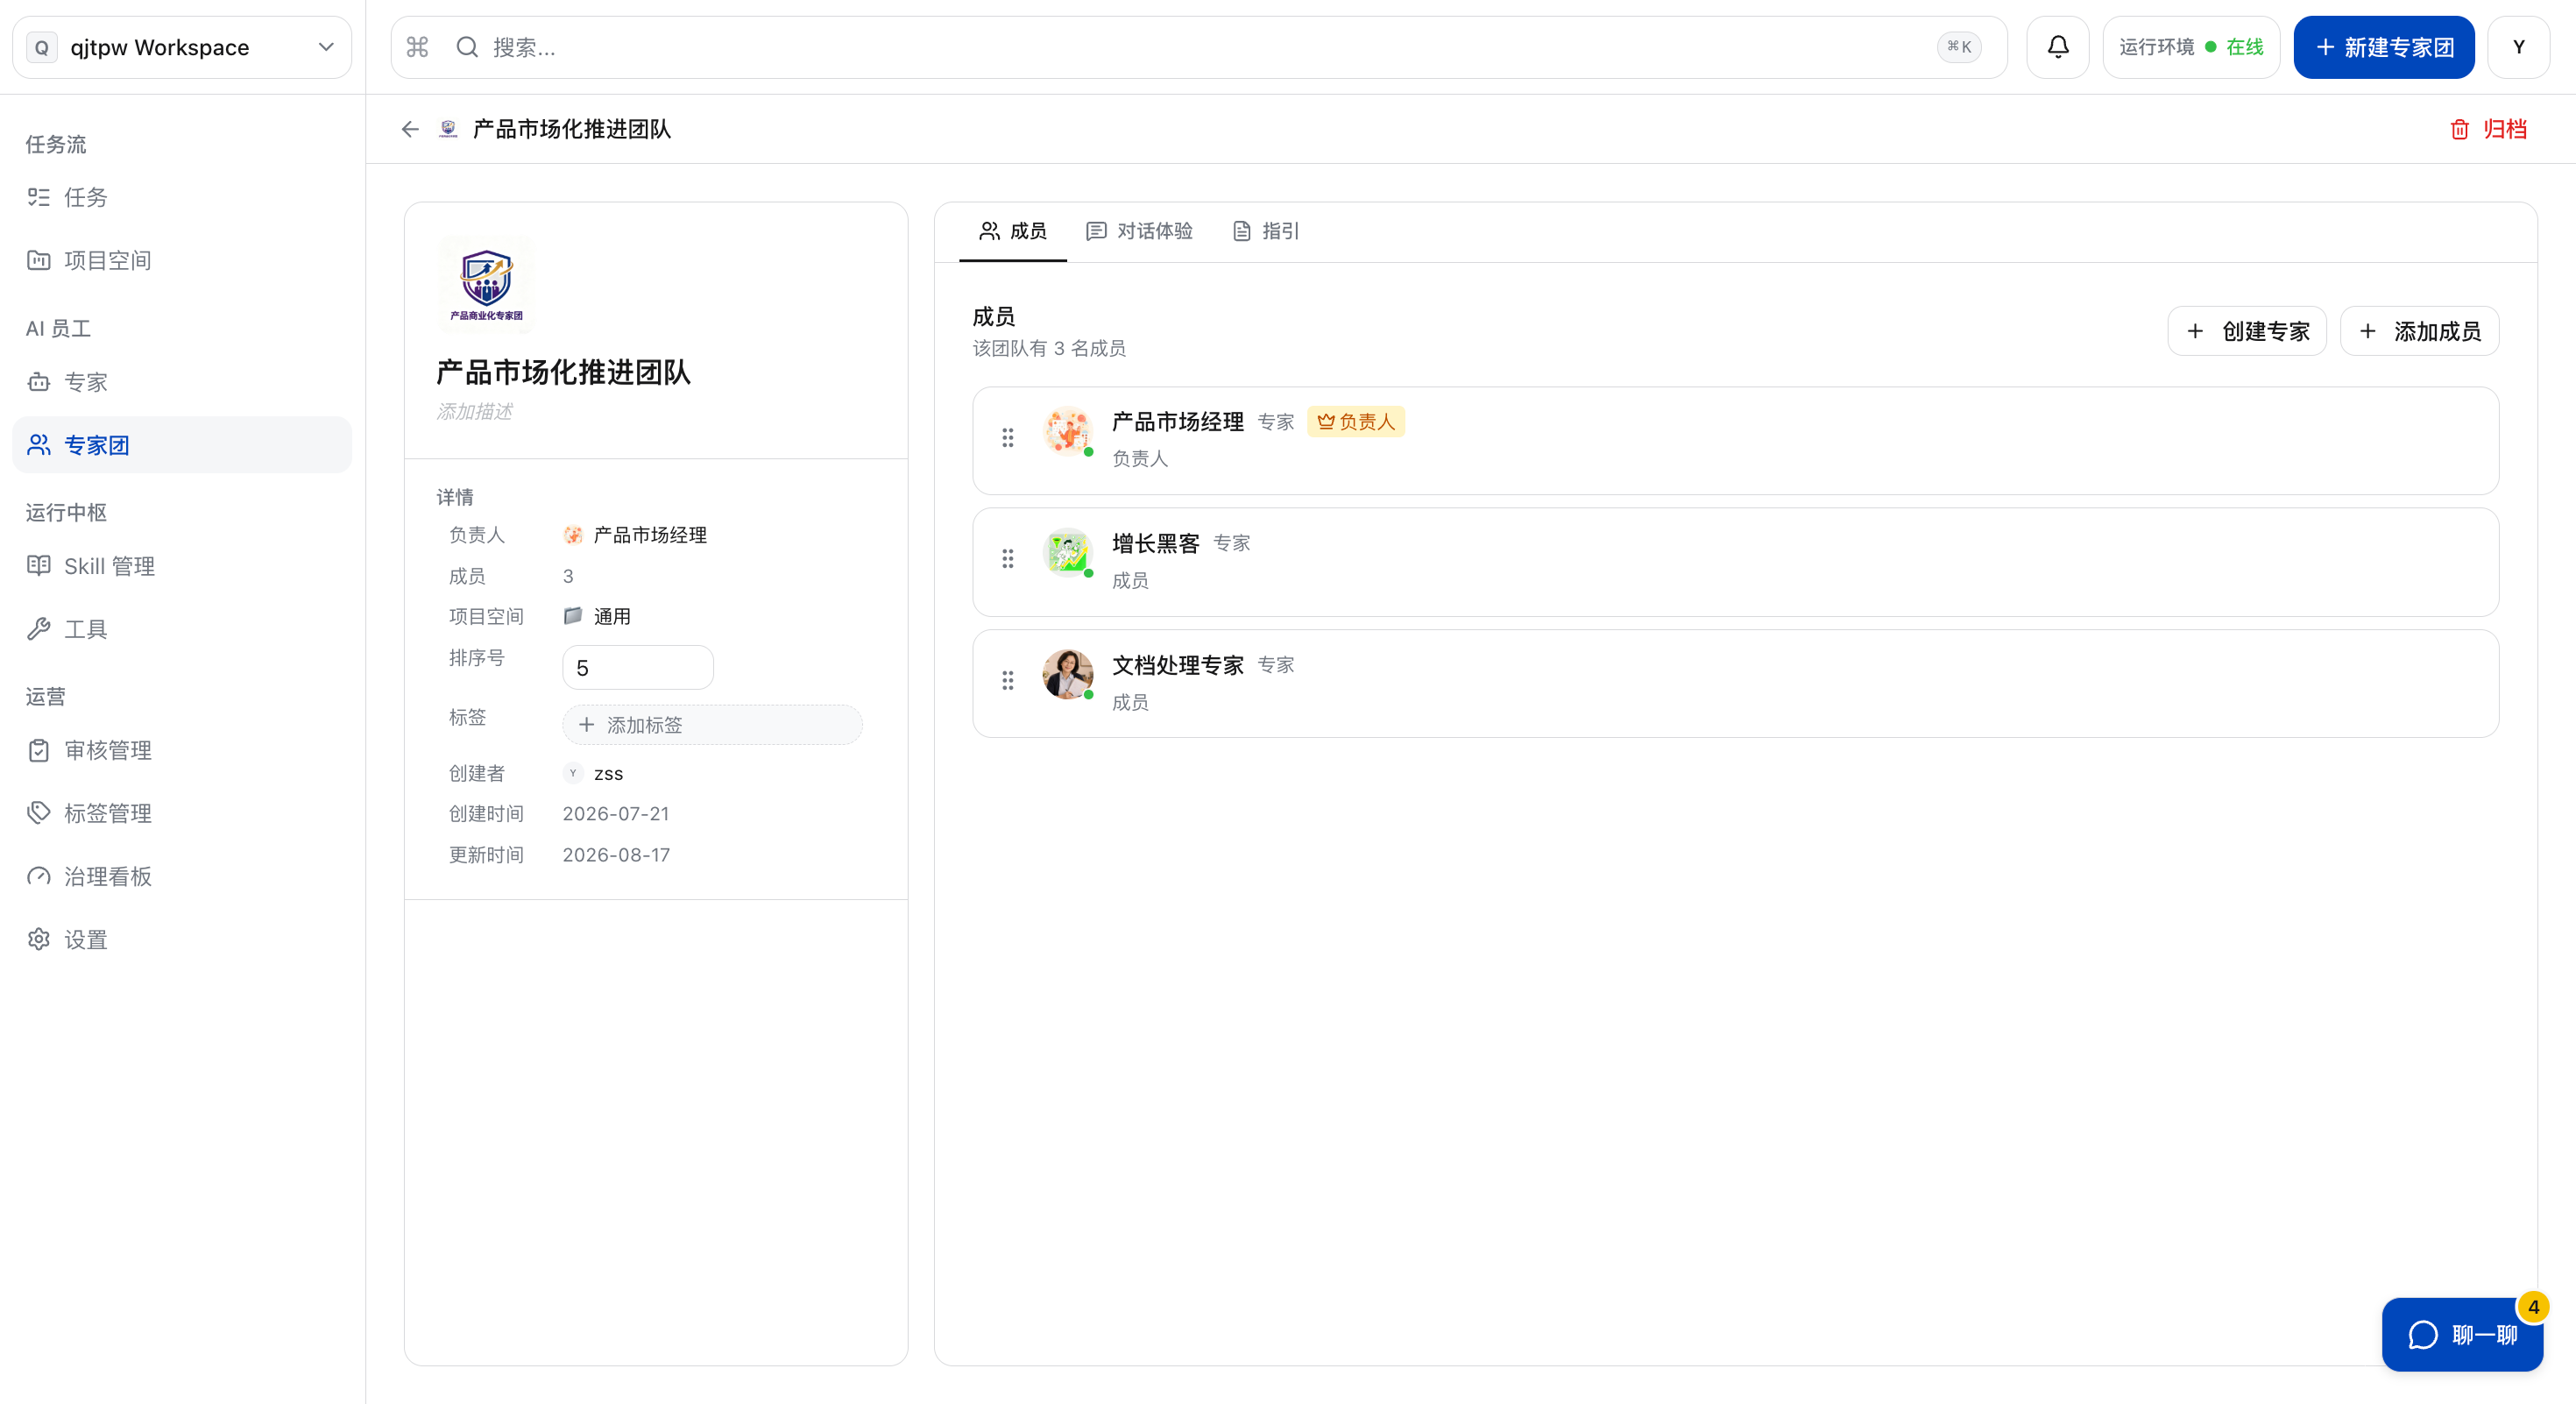
Create a New Expert Panel
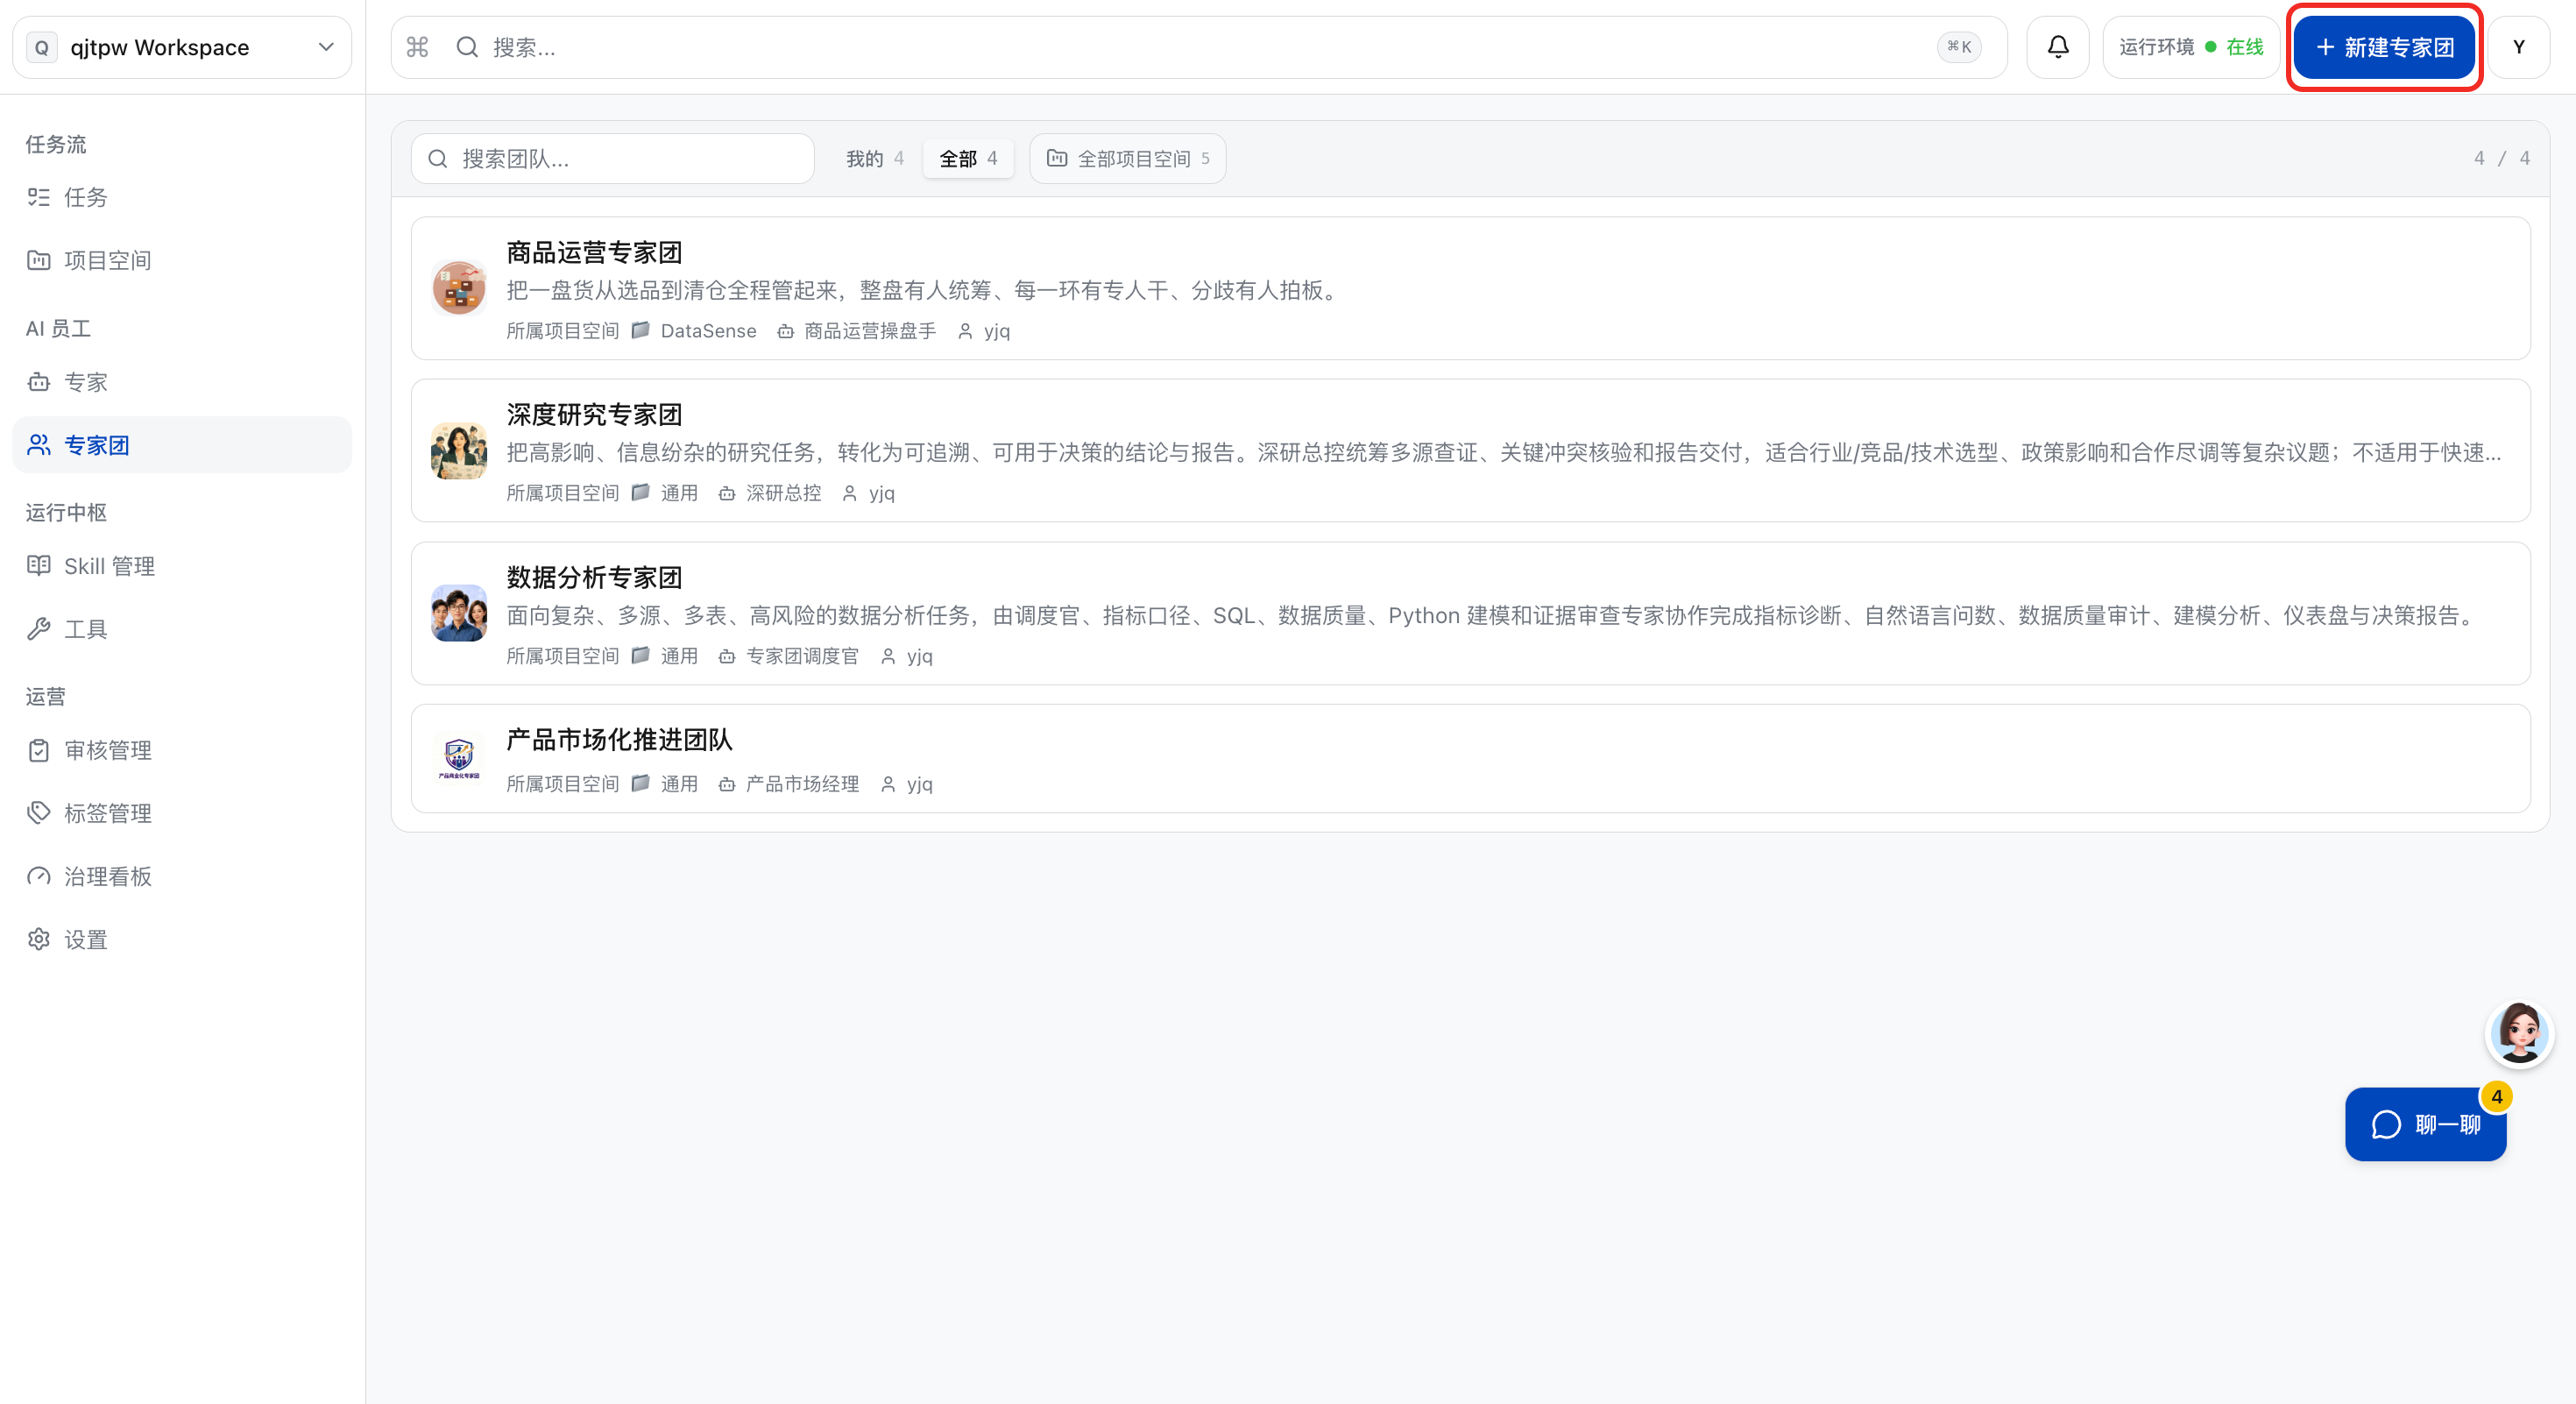
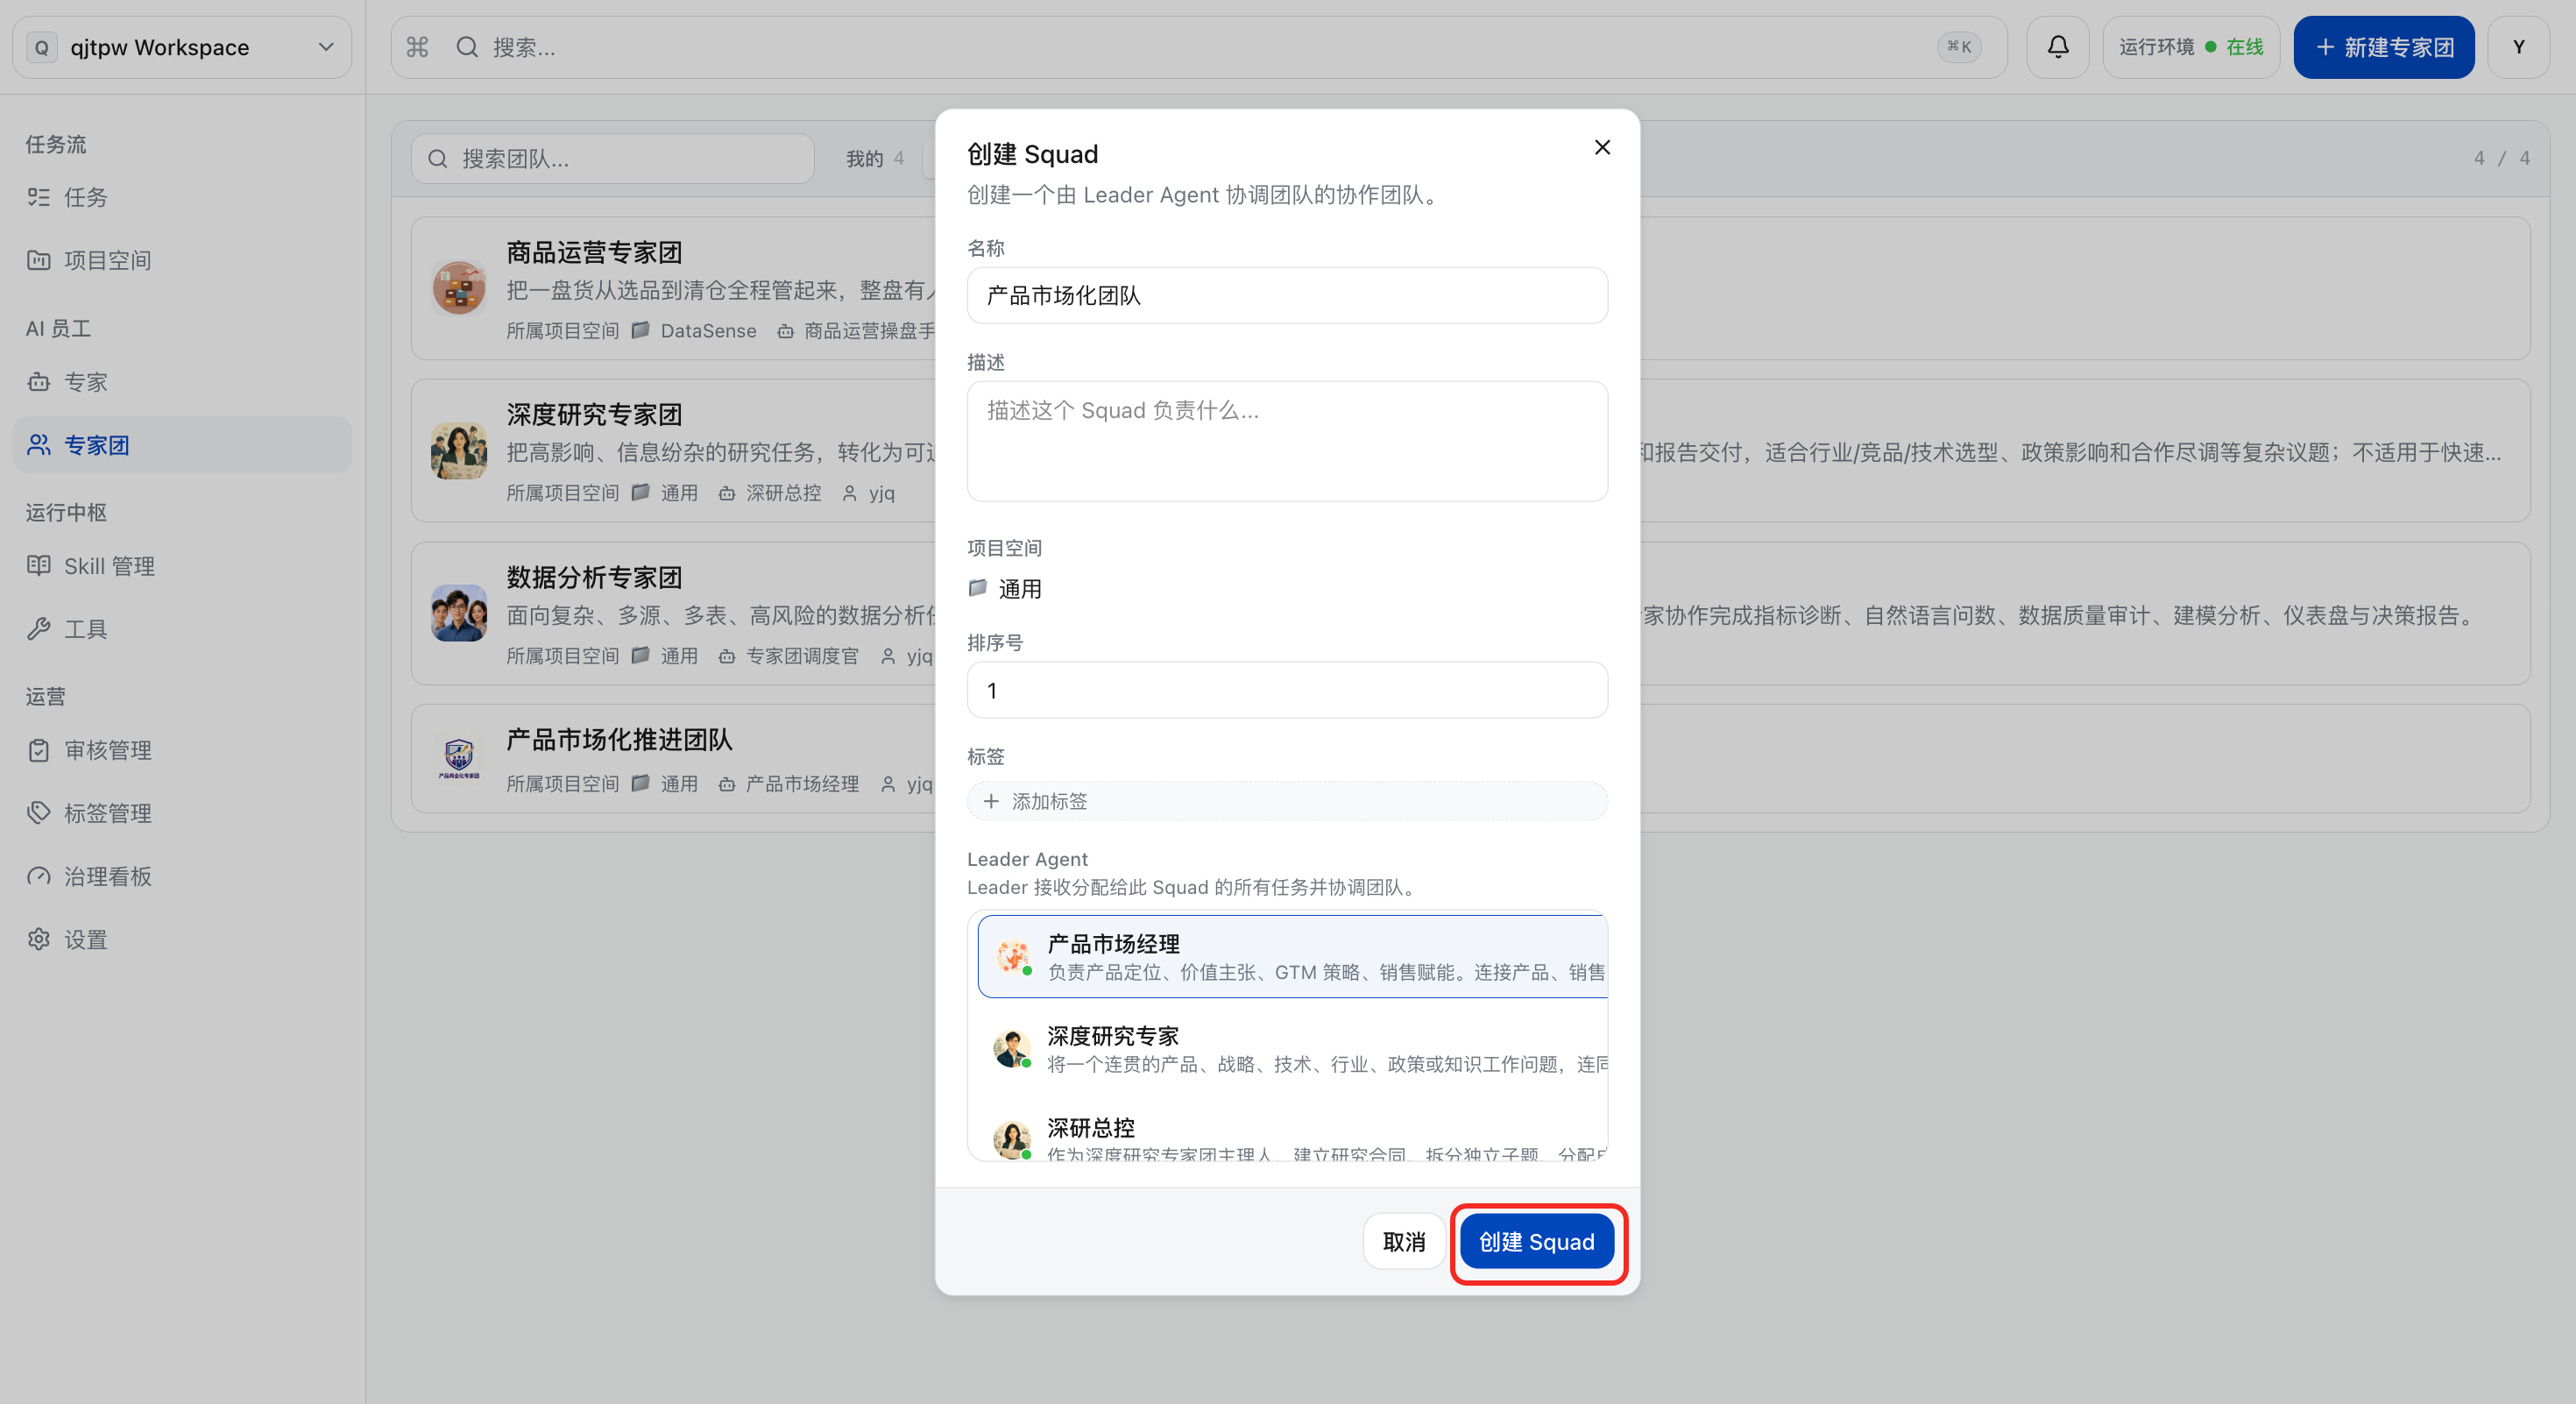
a. Click “New Expert Team”.
b. Fill in expert information:
-
Name: Fill in the name of the expert panel, e. g. product commercialization team.
-
Description: Fill in the work that this expert group is responsible for.
-
Associated Project Space and Sorting Number: This refers to the project information and sorting number of the expert group. After configuration, experts can access the resources (project Skills) in this project space, and enterprise users can find this expert group under the Project Space tab in the Discovery section of the DeepWorks desktop client; the sorting number controls the display order of the expert group, with 1 being the topmost position.
-
Tags: By assigning tags to expert groups, you can categorize and label them to facilitate subsequent filtering by tags. Tags themselves do not affect the competency scope of expert groups, but they enable quick positioning and management of target expert groups when there is a large number of expert groups, thus improving query efficiency.
-
Leader Agent: Select an expert to serve as the core scheduling role of the expert team. After receiving user requests, this role is responsible for intent recognition and task distribution based on conversation context and expert tags. Acting as the “scheduling hub”, it decides which expert in the team should respond to the user, and coordinates collaboration and context coherence among experts in multi-turn conversations.
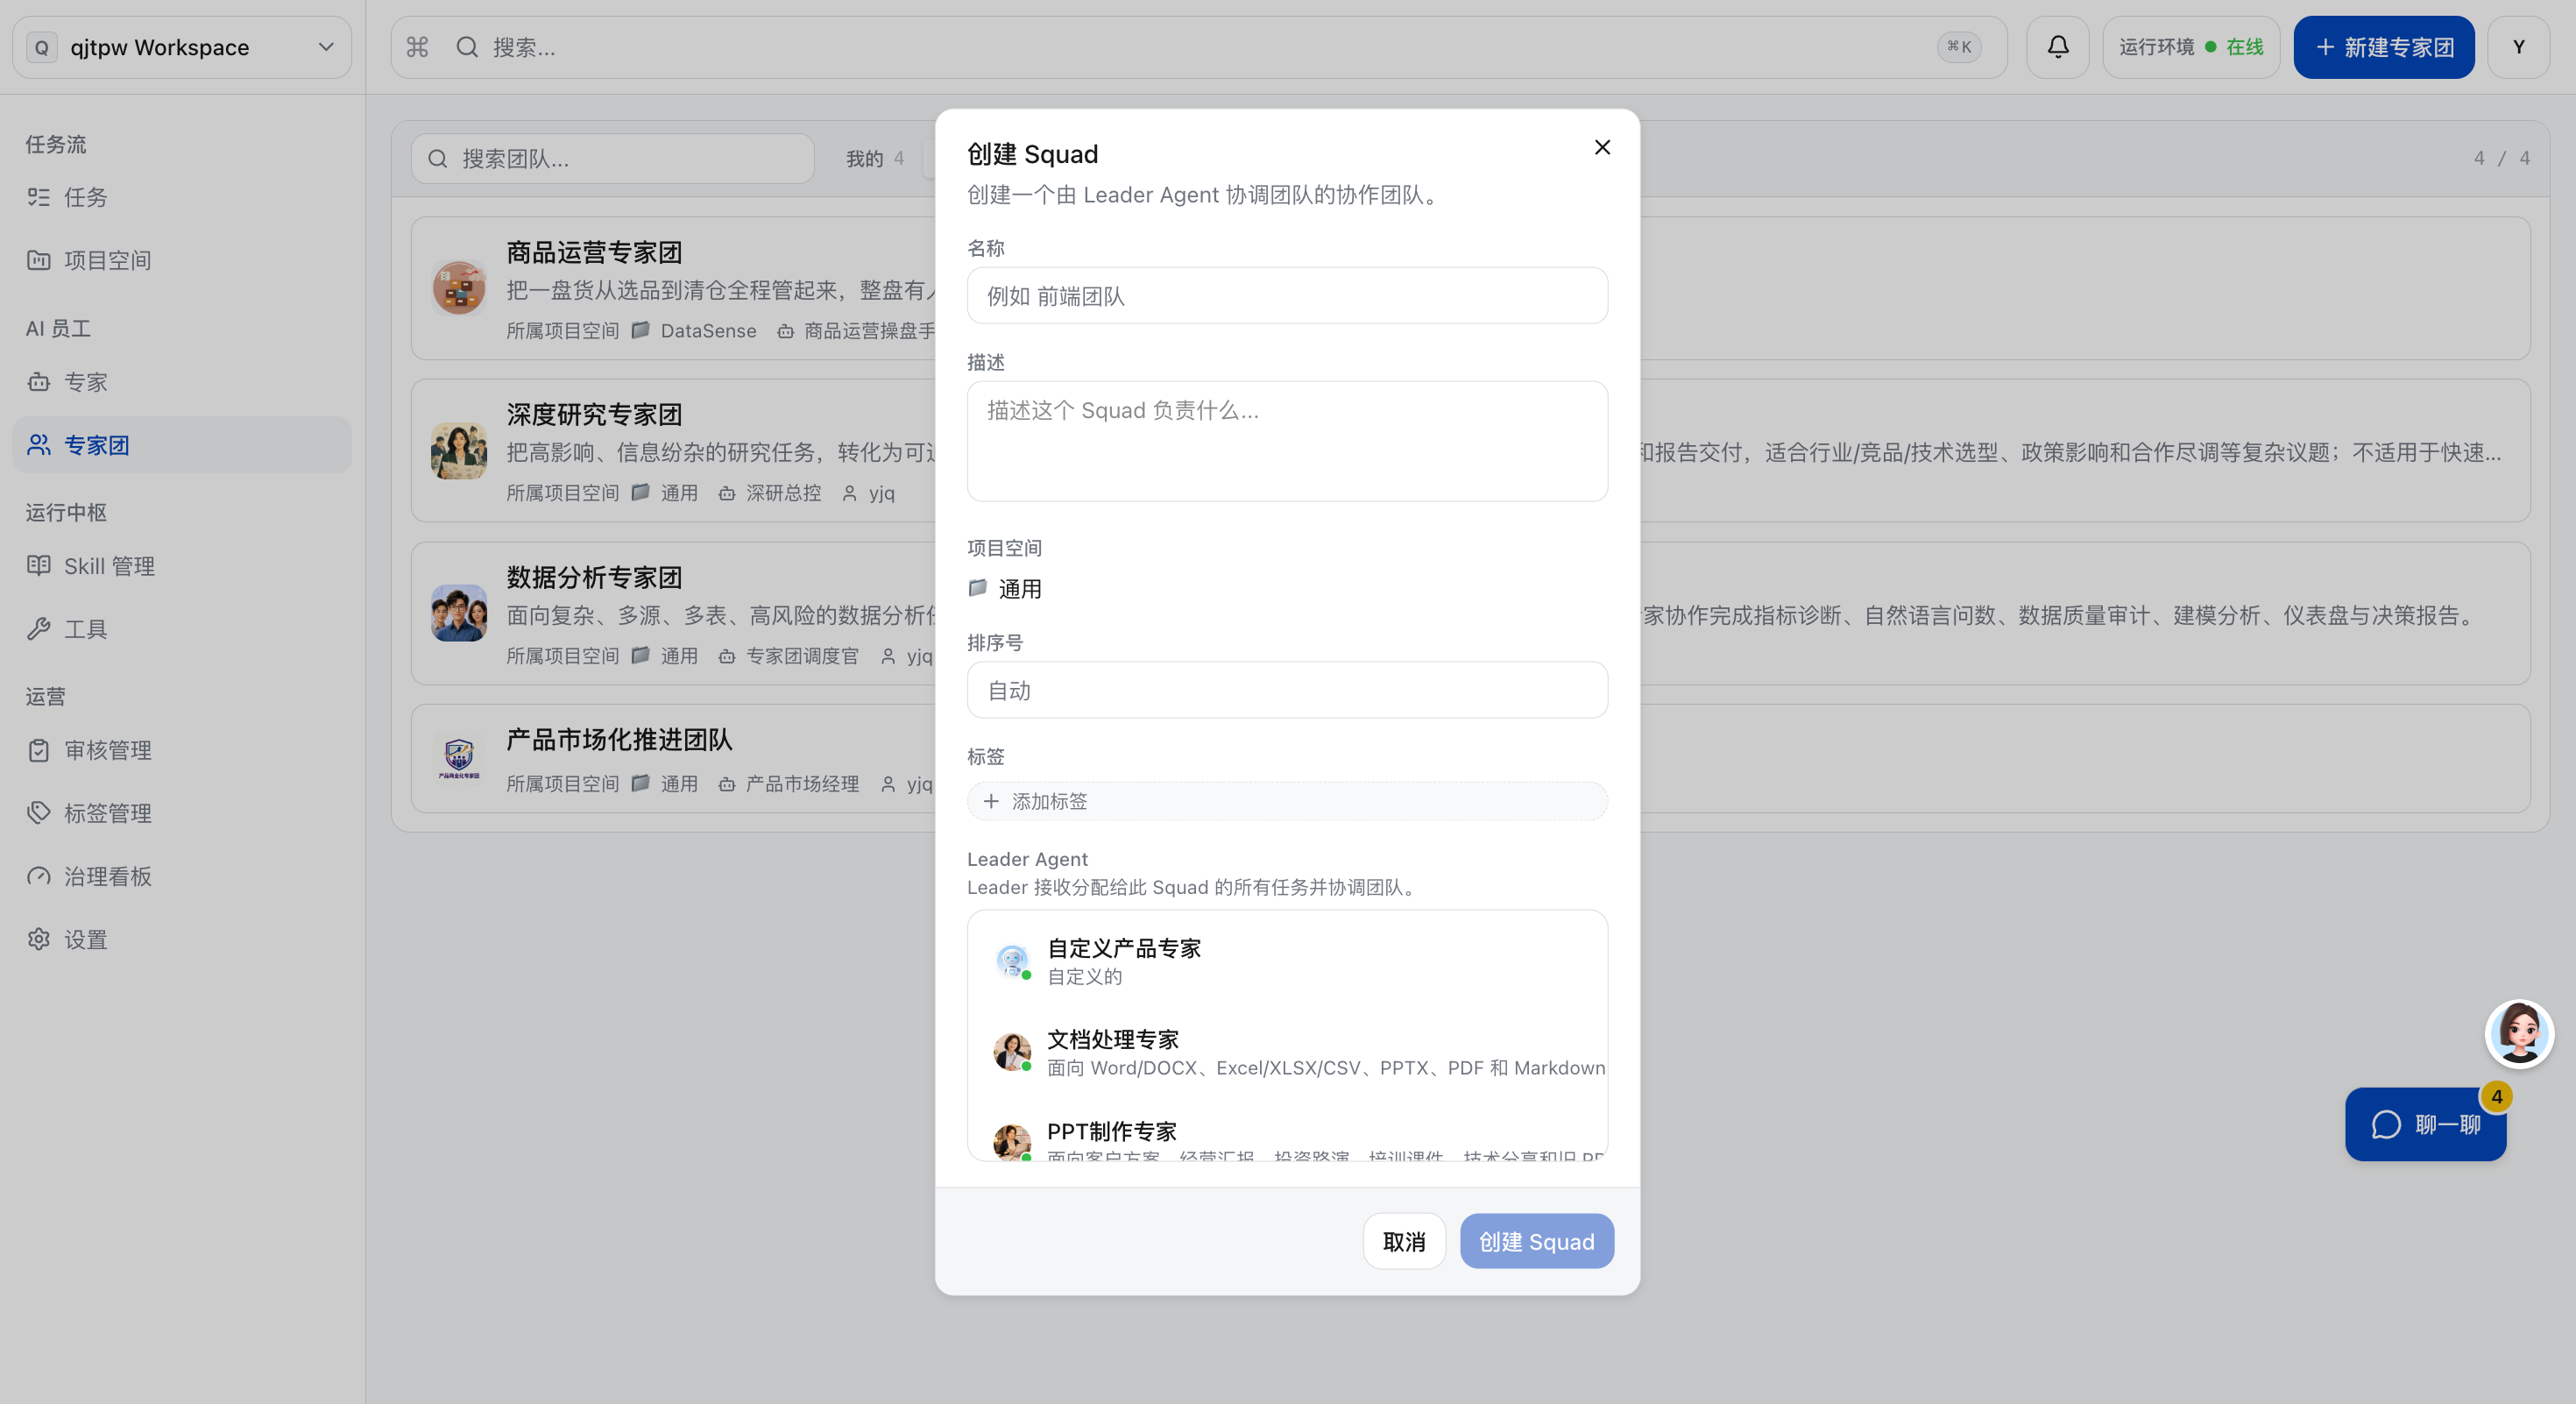
c. Once you have completed the form, click “Create”.
Editorial Expert Panel
a. Click the expert group card to view the configuration details of the expert group. Note: The built-in expert groups uniformly maintained by the platform cannot be edited.
b. The basic information of the expert group, such as the affiliated project space, sort number, and tags, can be edited.
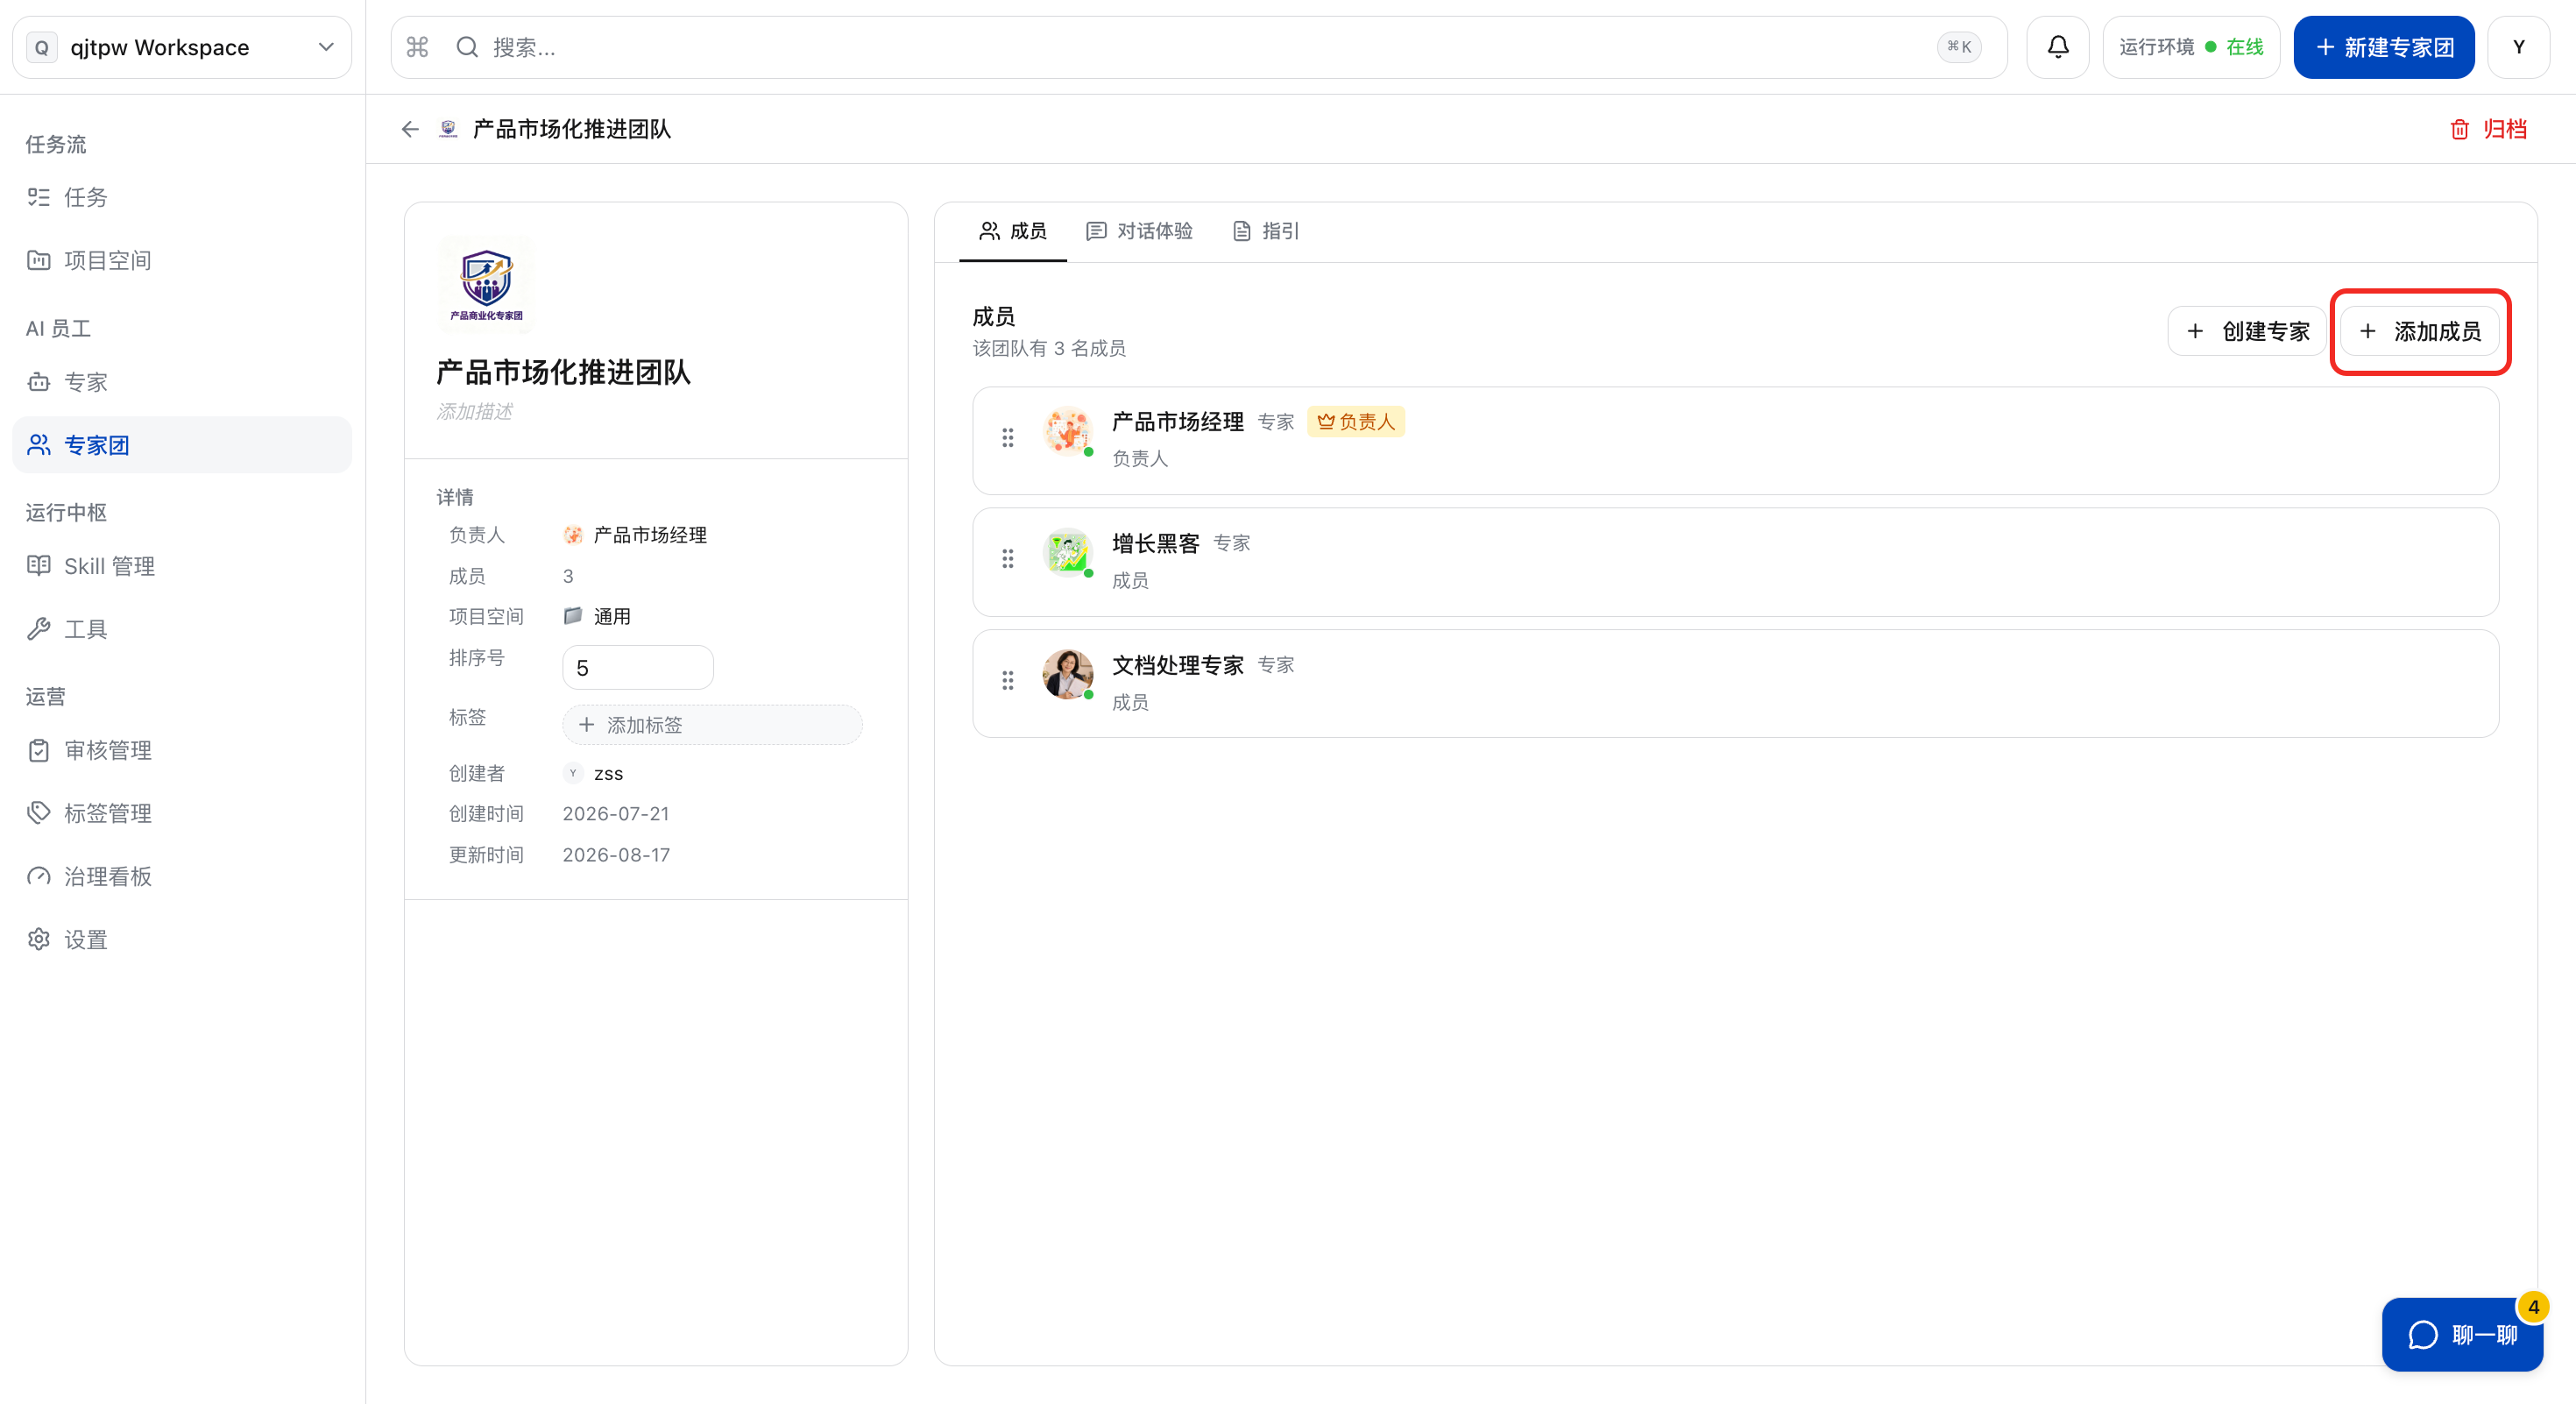
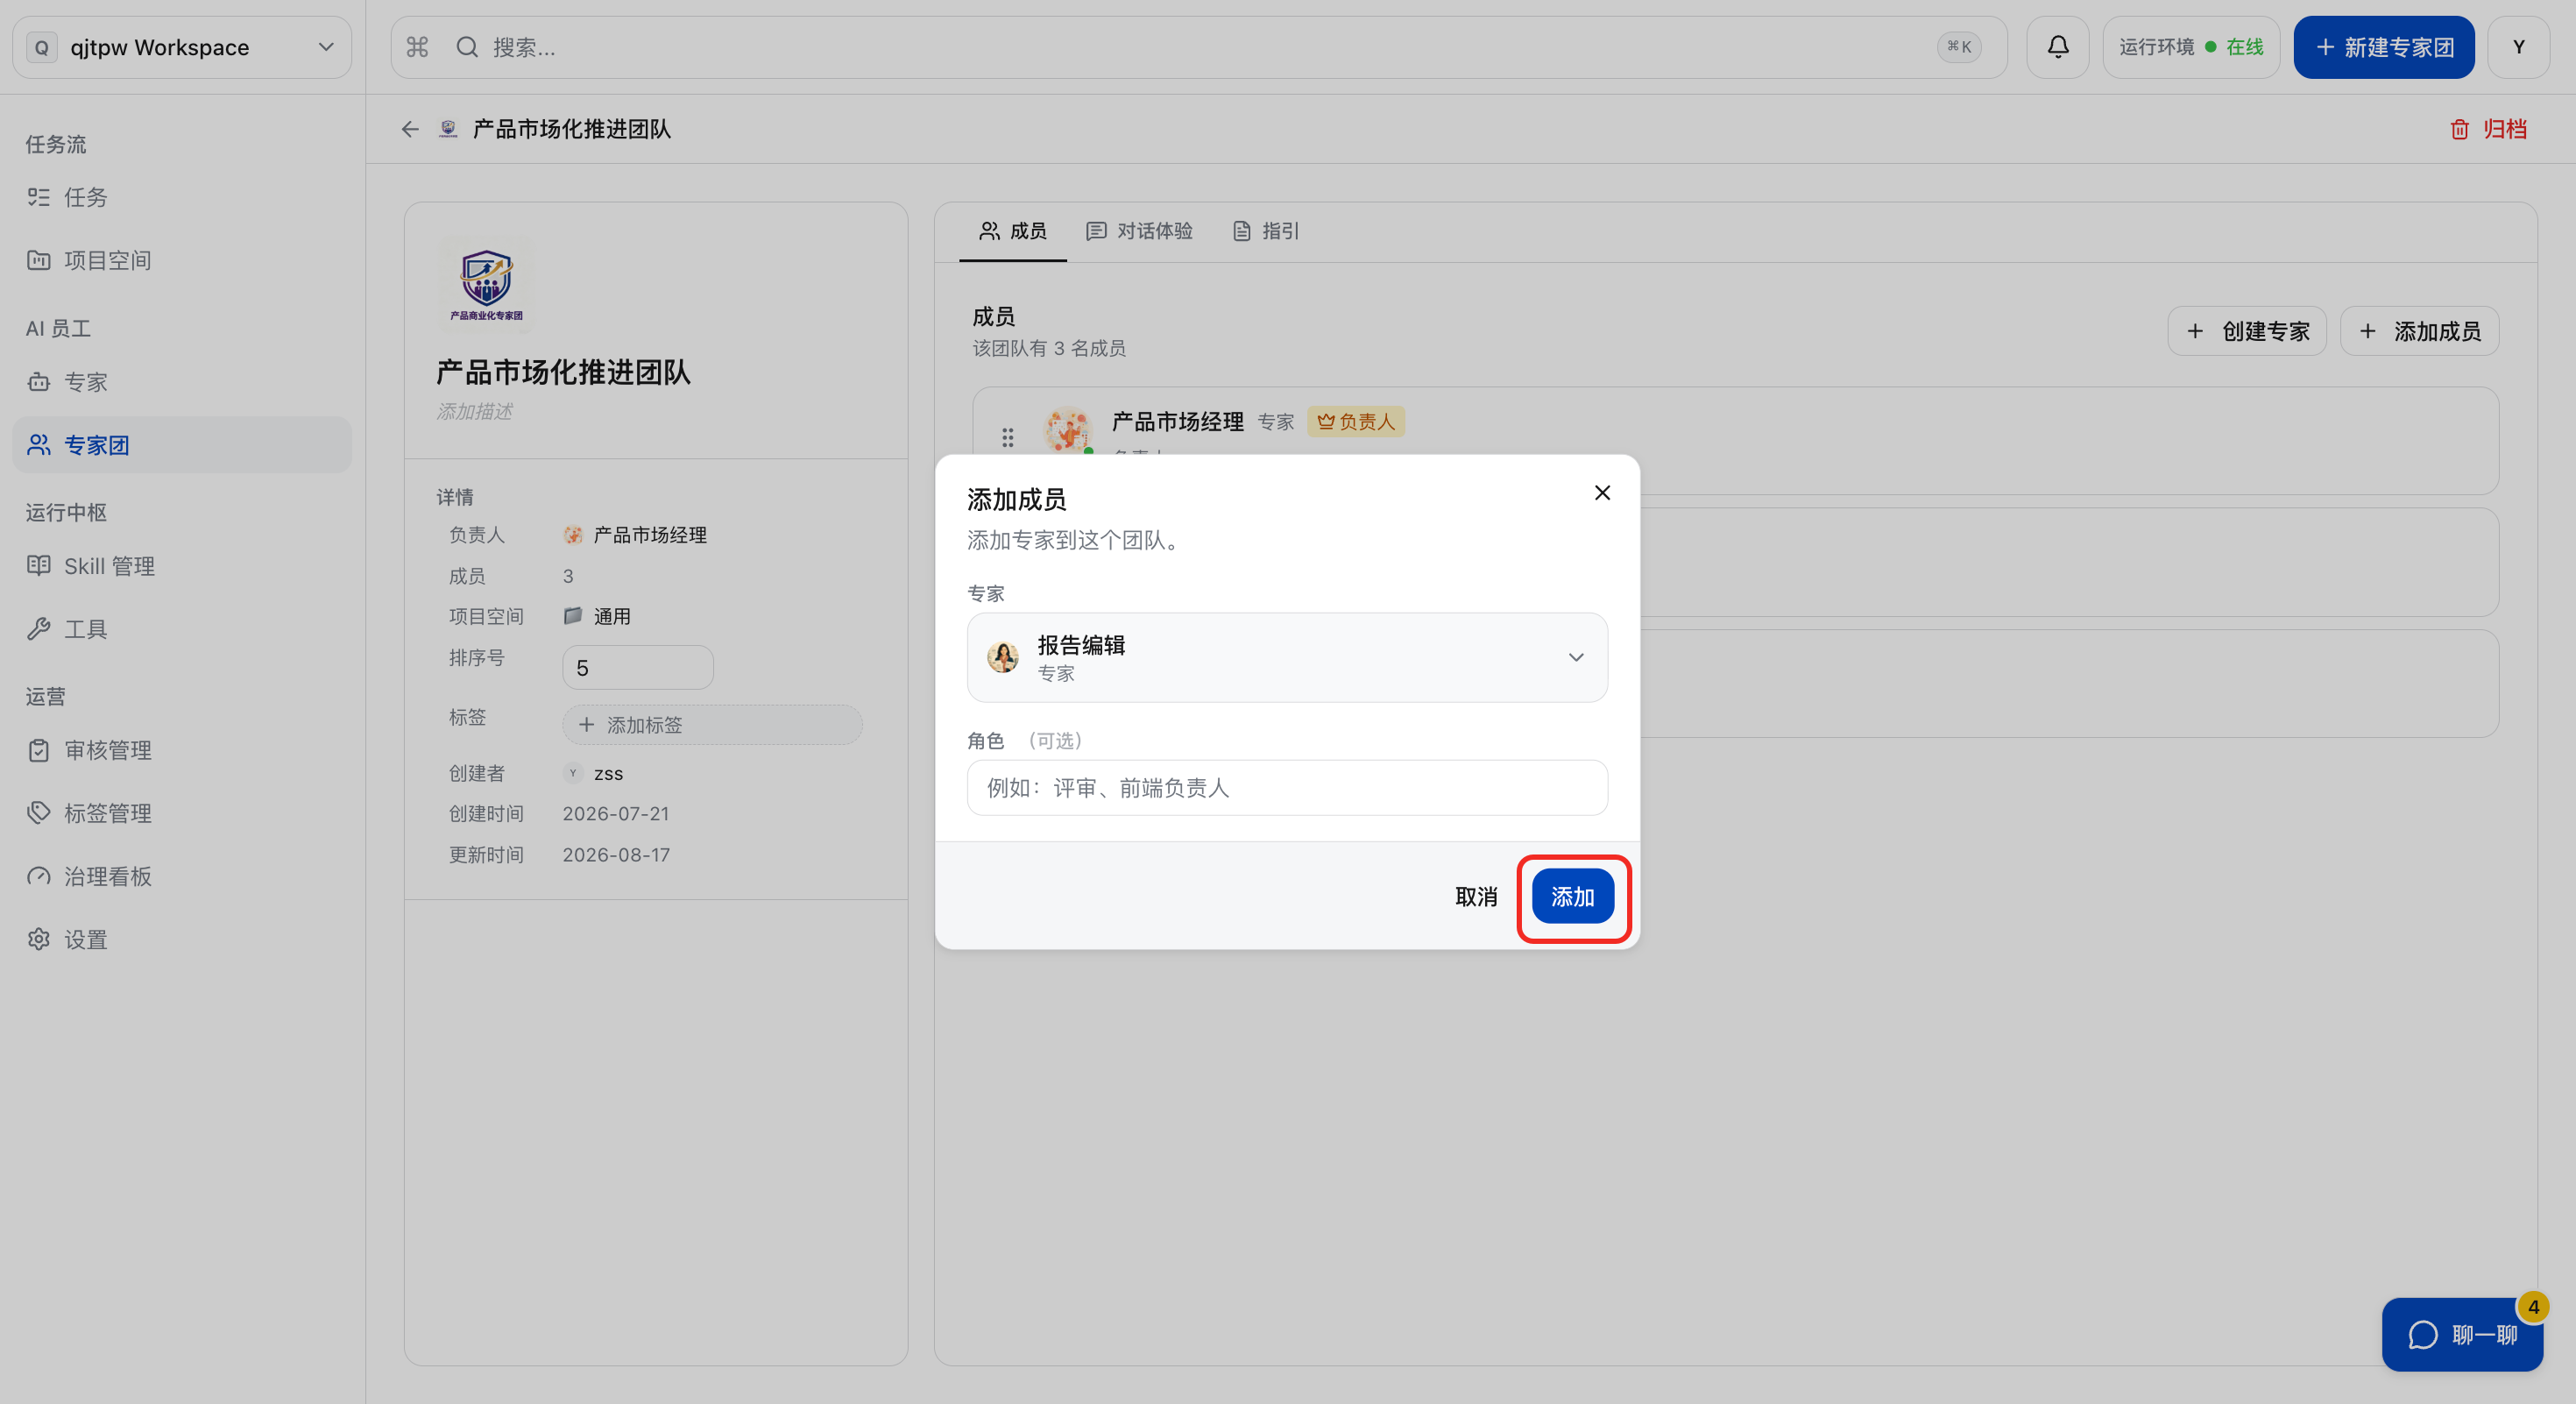
c. To add expert members, you can click “Add Member”, tick the experts you need to add, and then click “Add”. If the target expert is not in the expert list, you can click “Create Expert” to create one quickly, and fill in the information as shown in the “New Expert” function above.
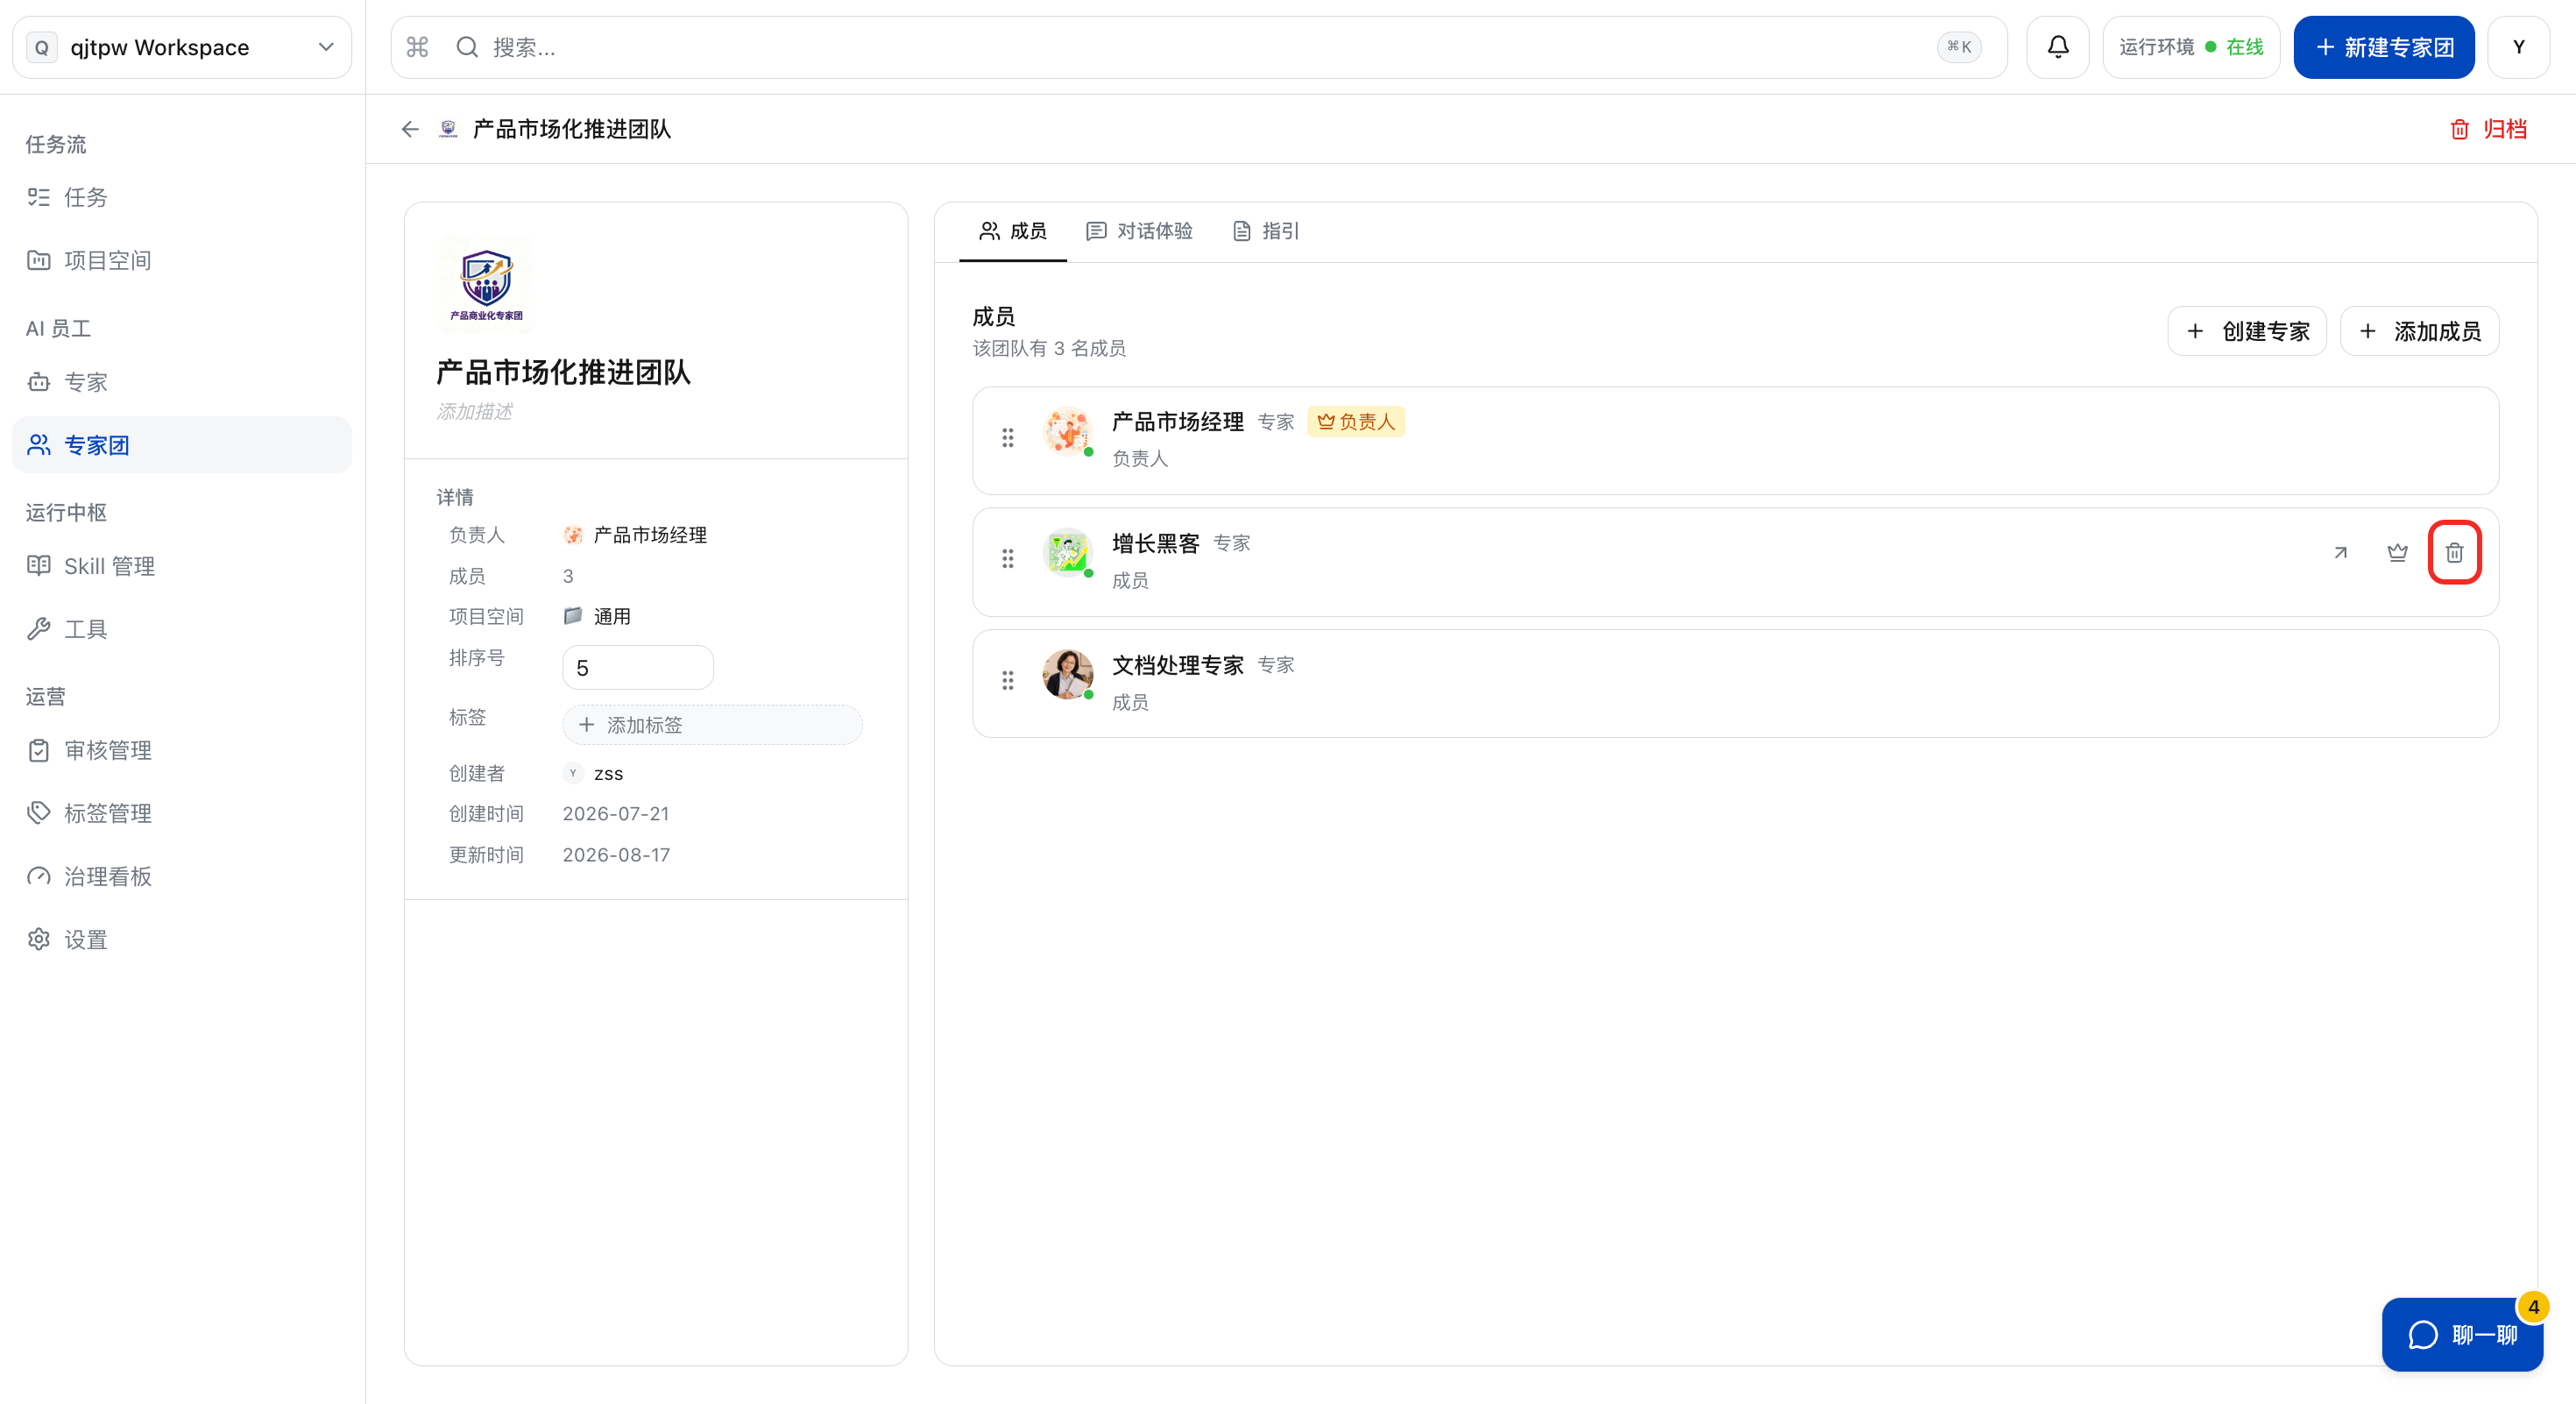
d. To remove an expert member, hover your mouse over the corresponding expert member and click “Delete”.
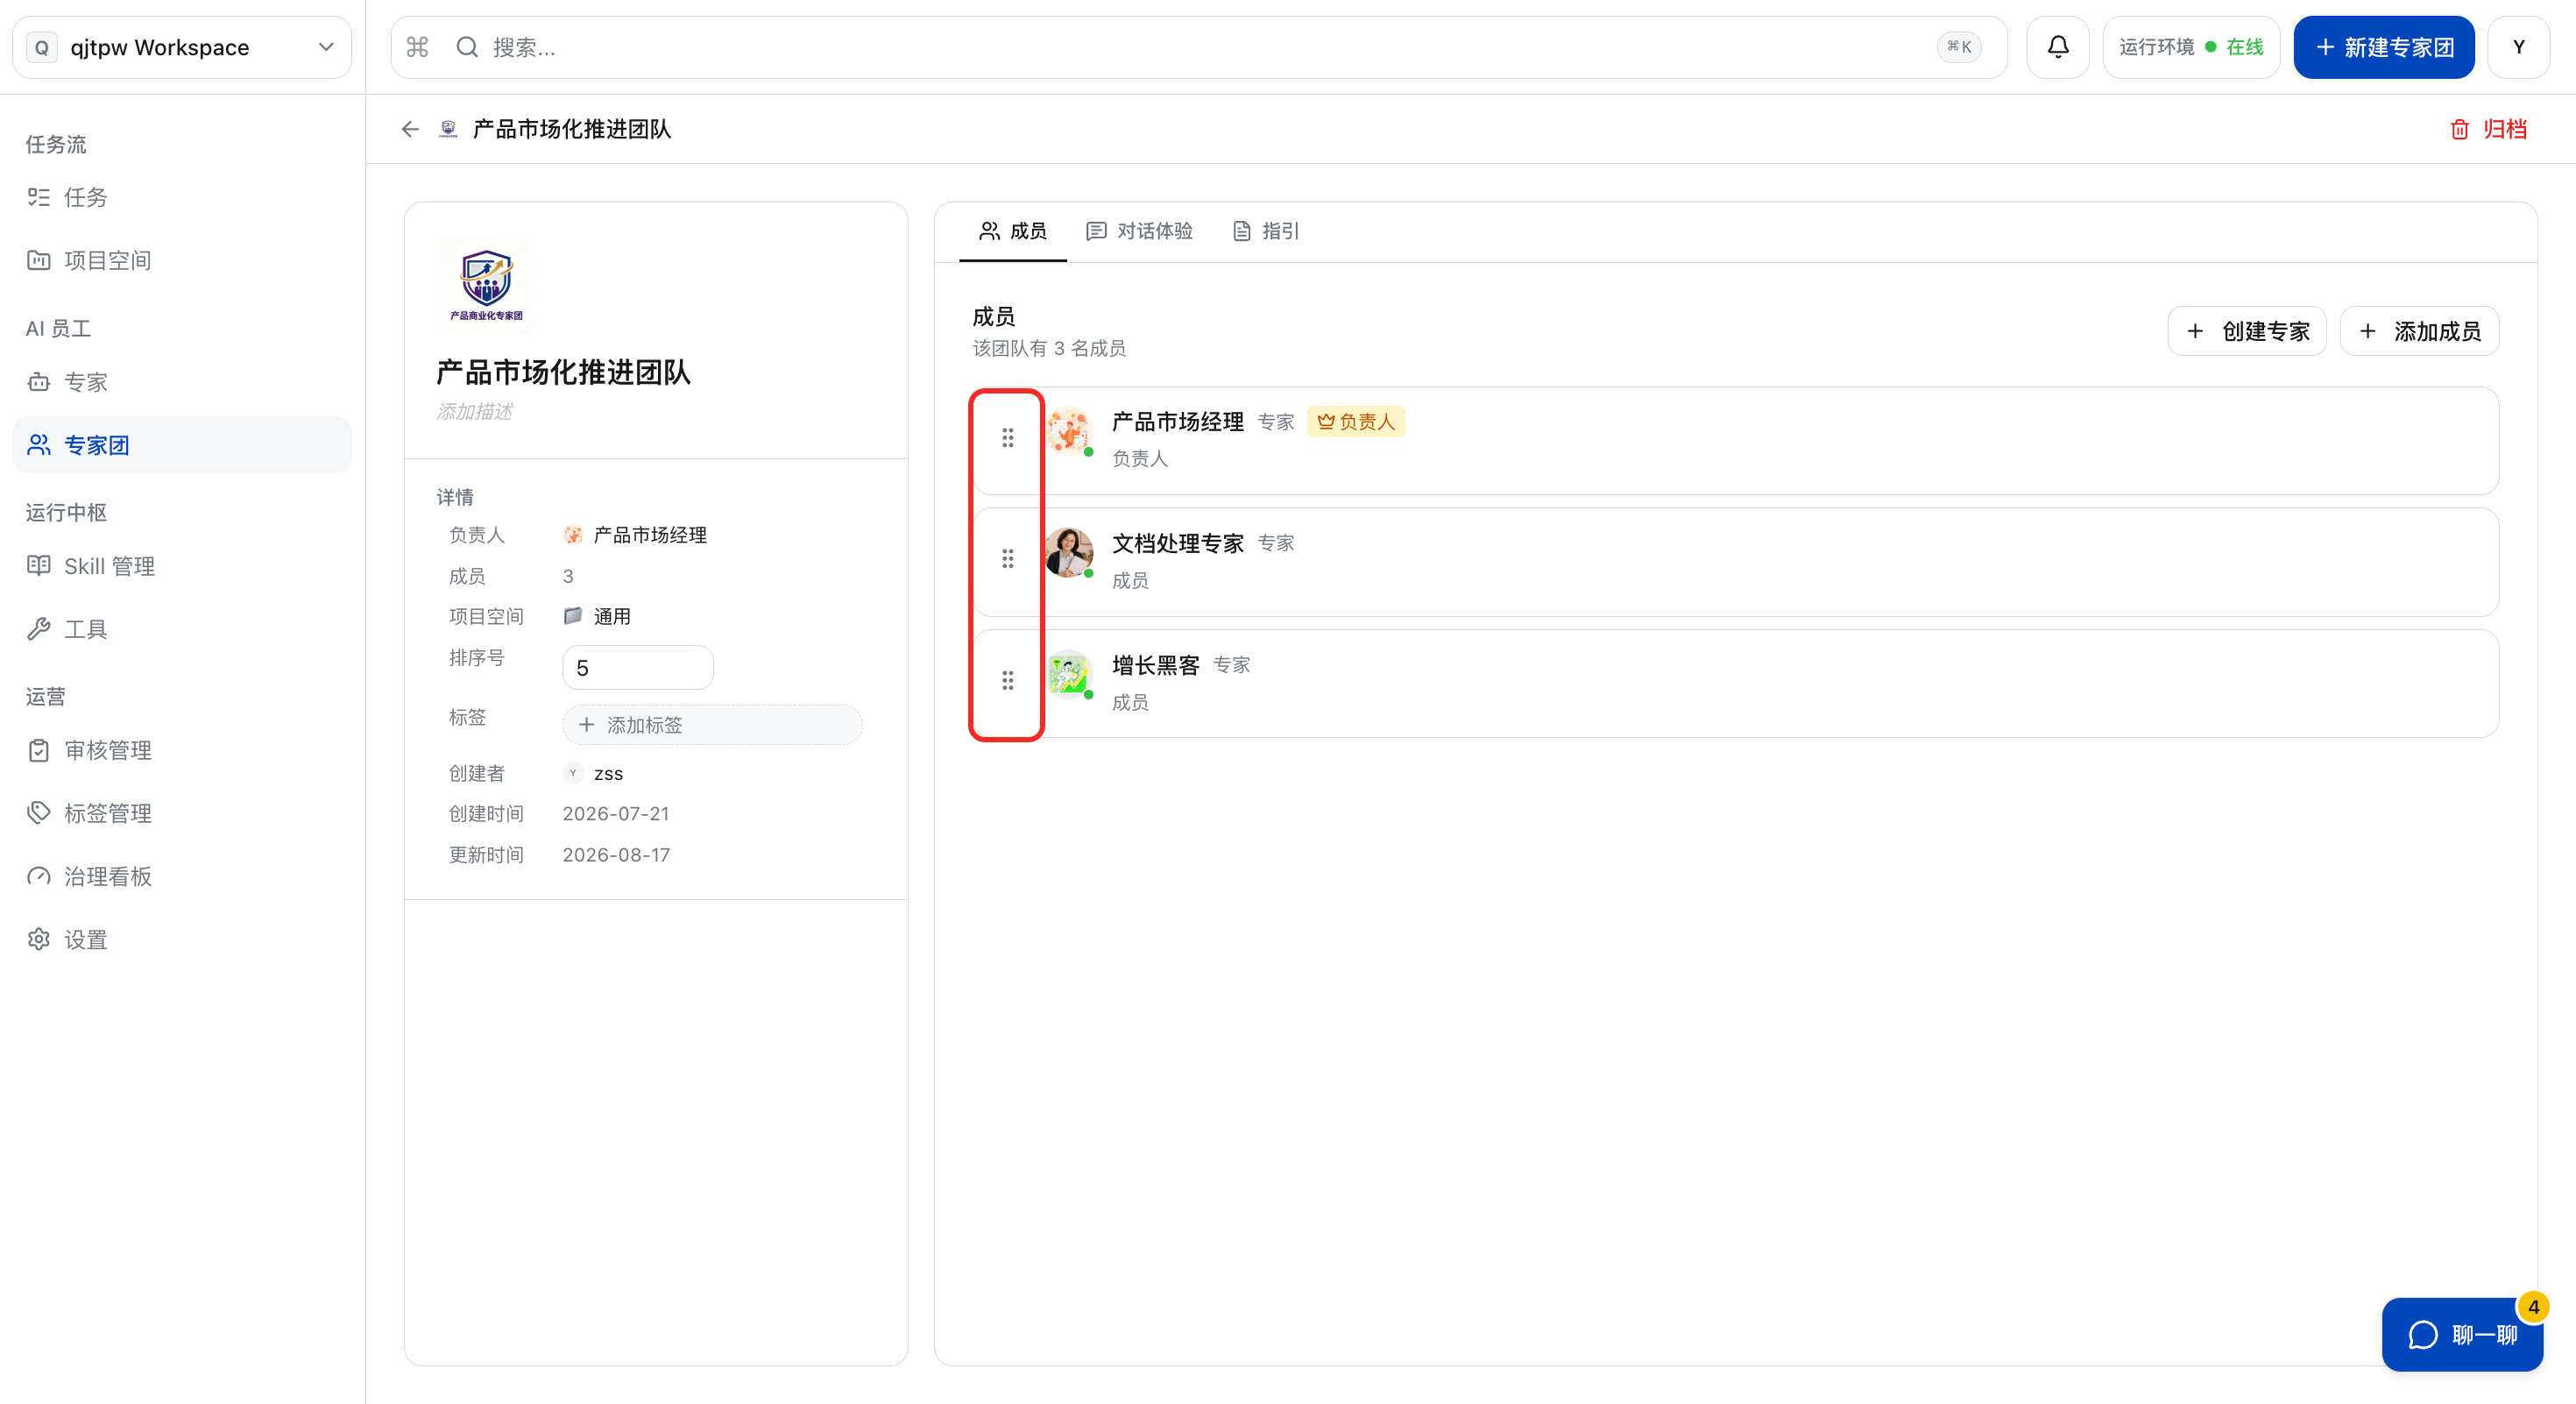
e. To modify the order of expert members, long-press the icon below and drag it to the corresponding position.
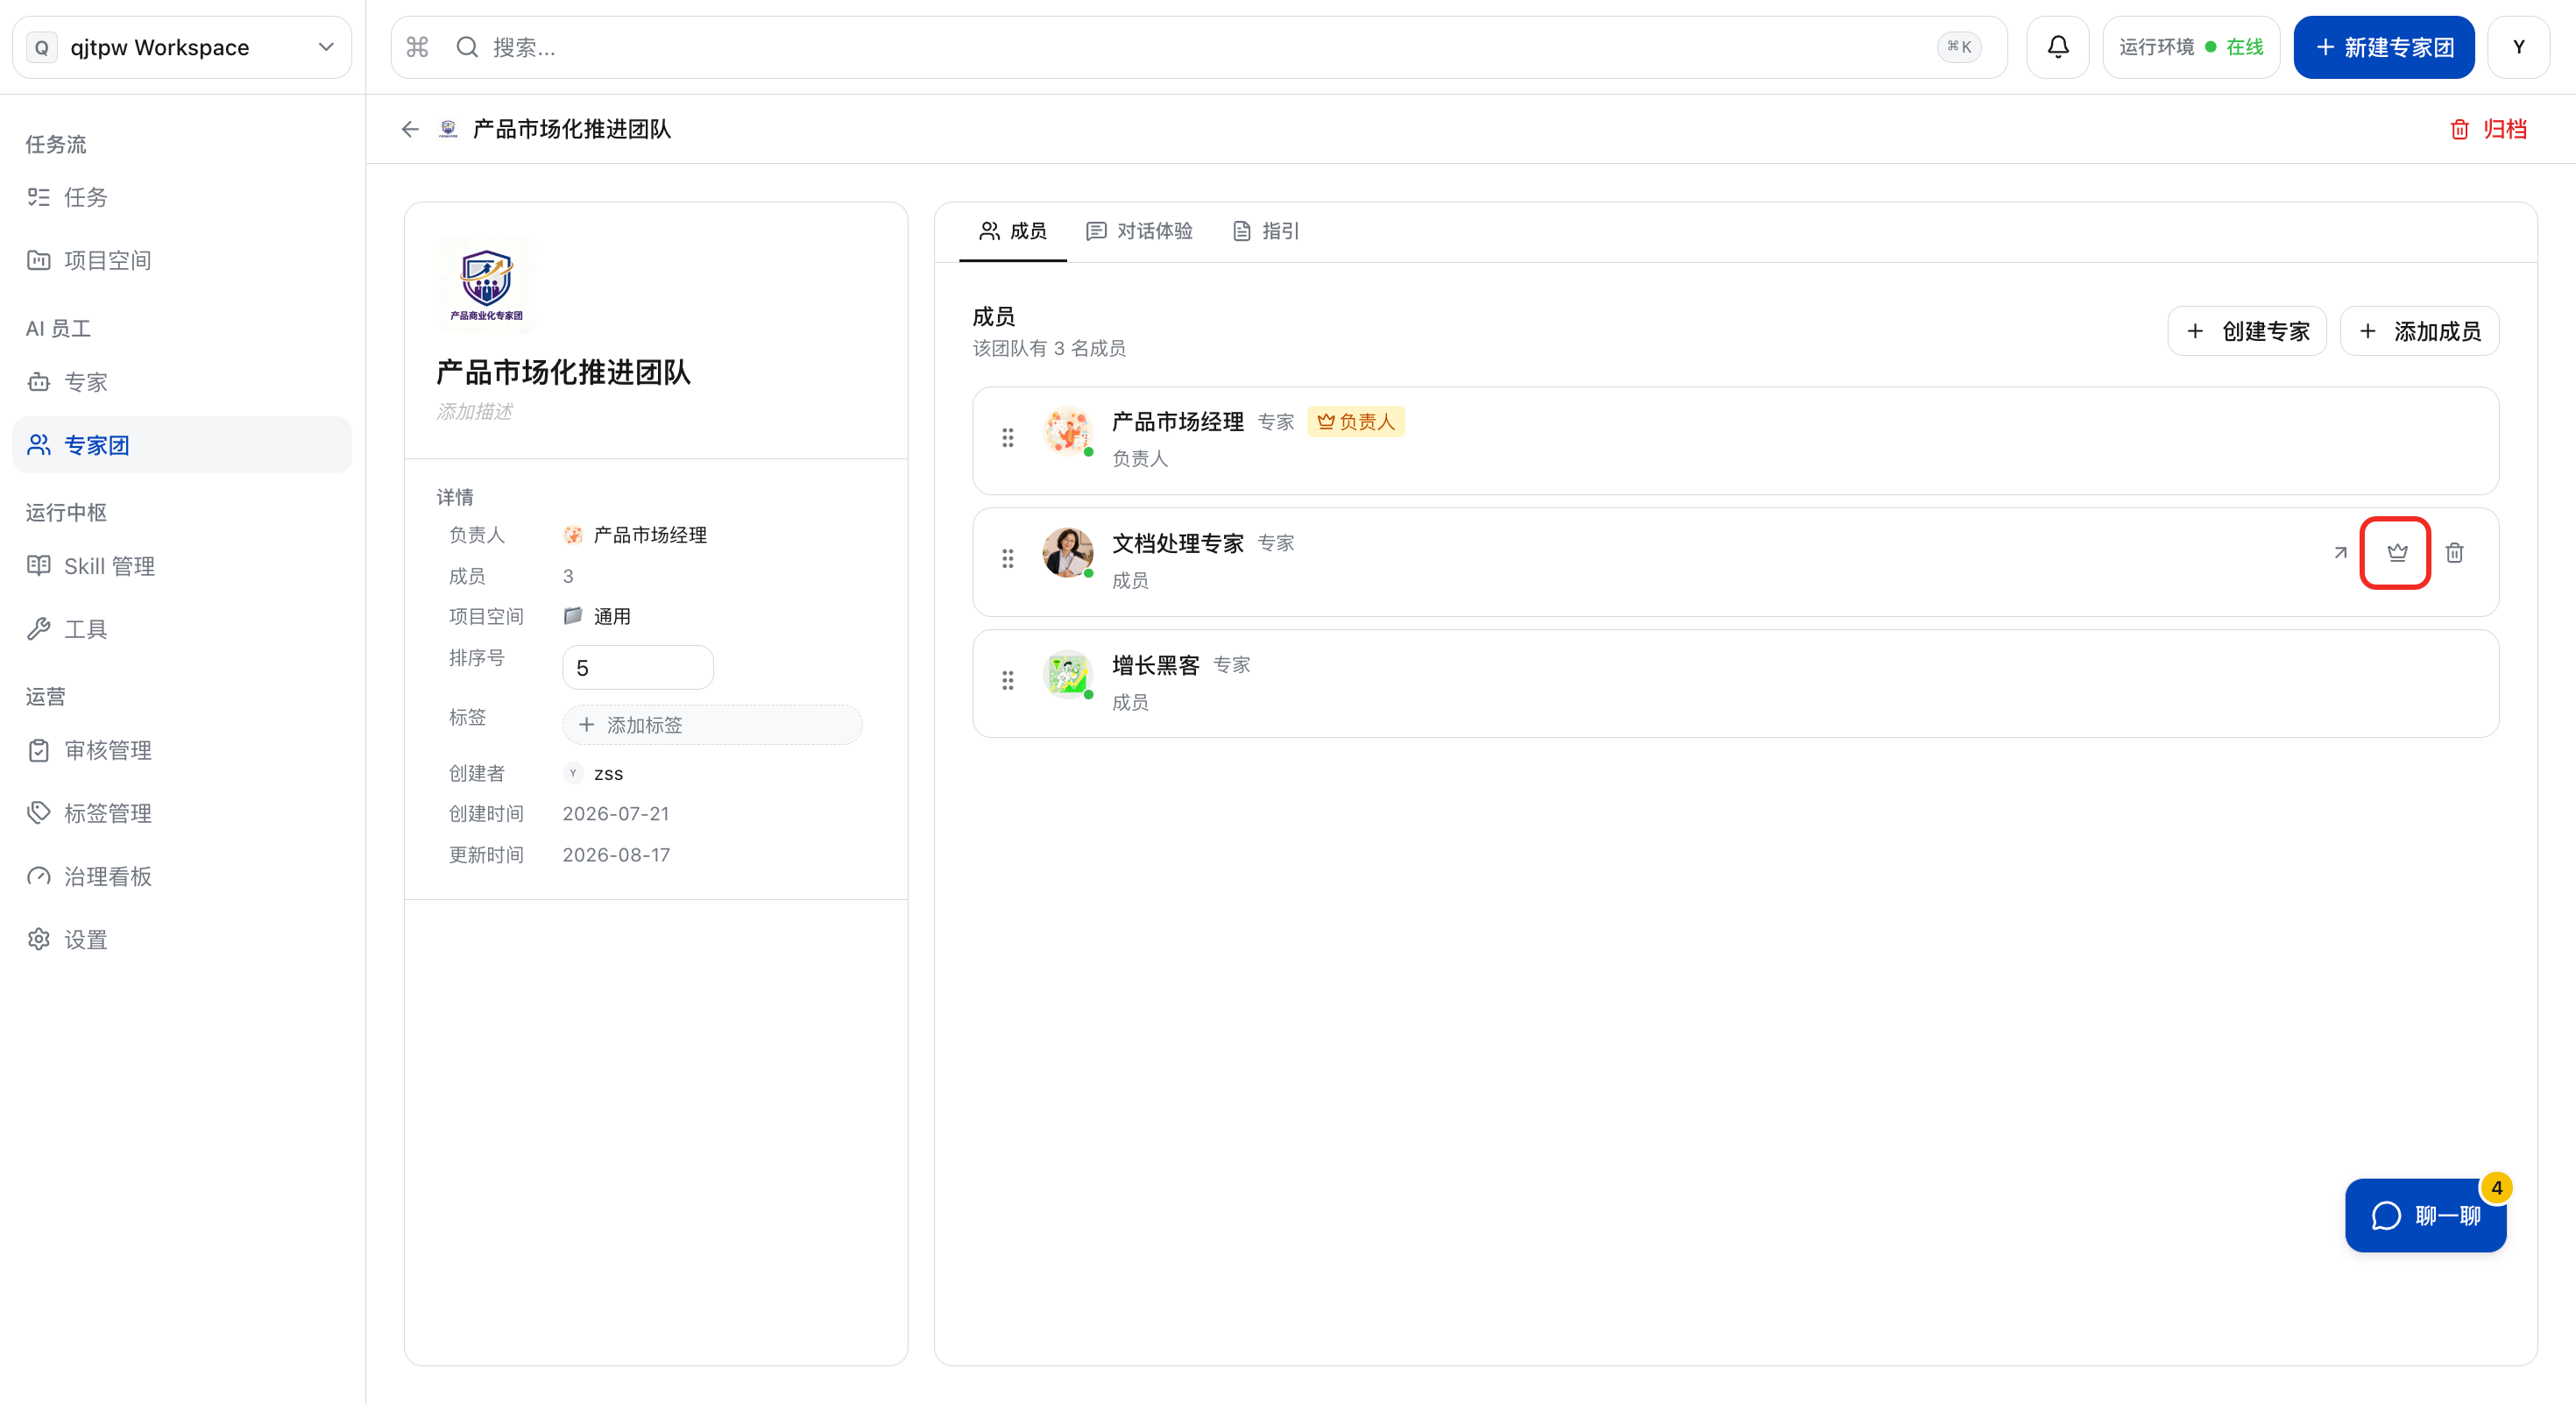
f. If you need to change the lead expert, hover your mouse over the corresponding expert member and click the icon below to complete the change successfully.
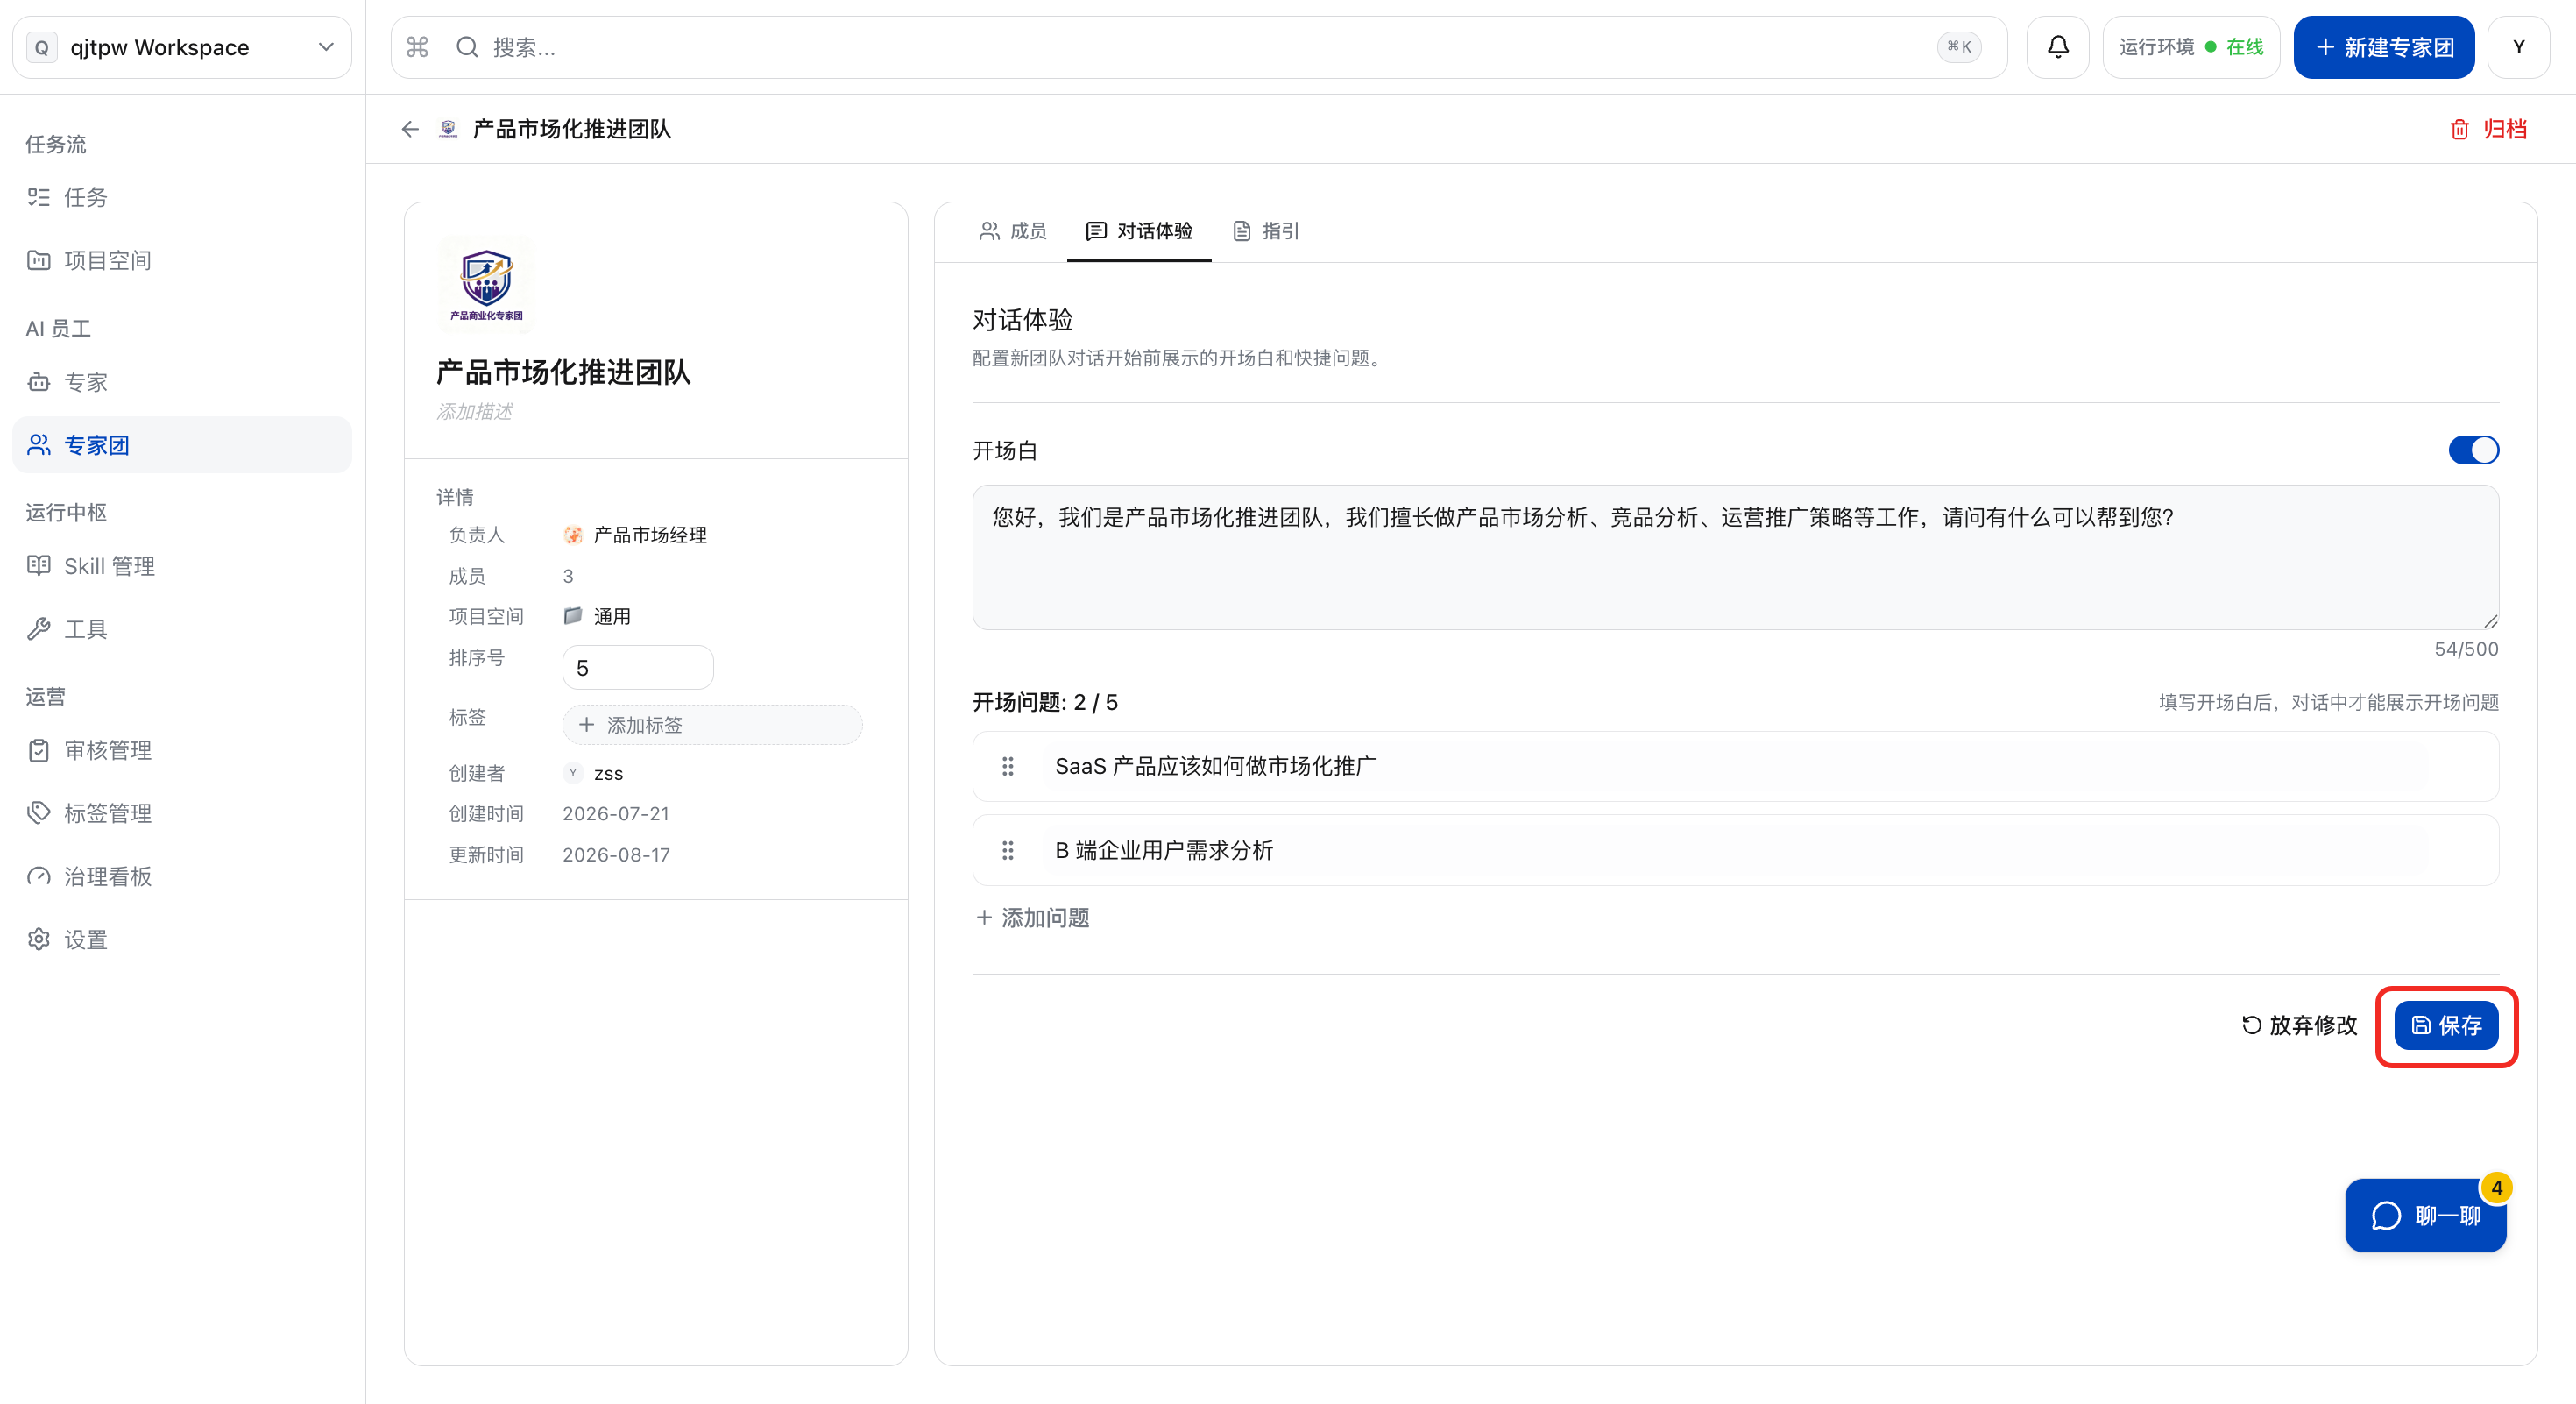
g. Configure the dialogue experience for the expert team, including the opening remarks and opening questions. The opening remarks refer to the welcome message actively displayed by the system at the start of a dialogue, which is used to introduce the system’s identity to users and set a suitable dialogue atmosphere; the opening questions are pre-set guiding questions designed to help users quickly identify a starting point and initiate effective interaction. After filling in the required information, simply click the “Save” button to complete the setup.
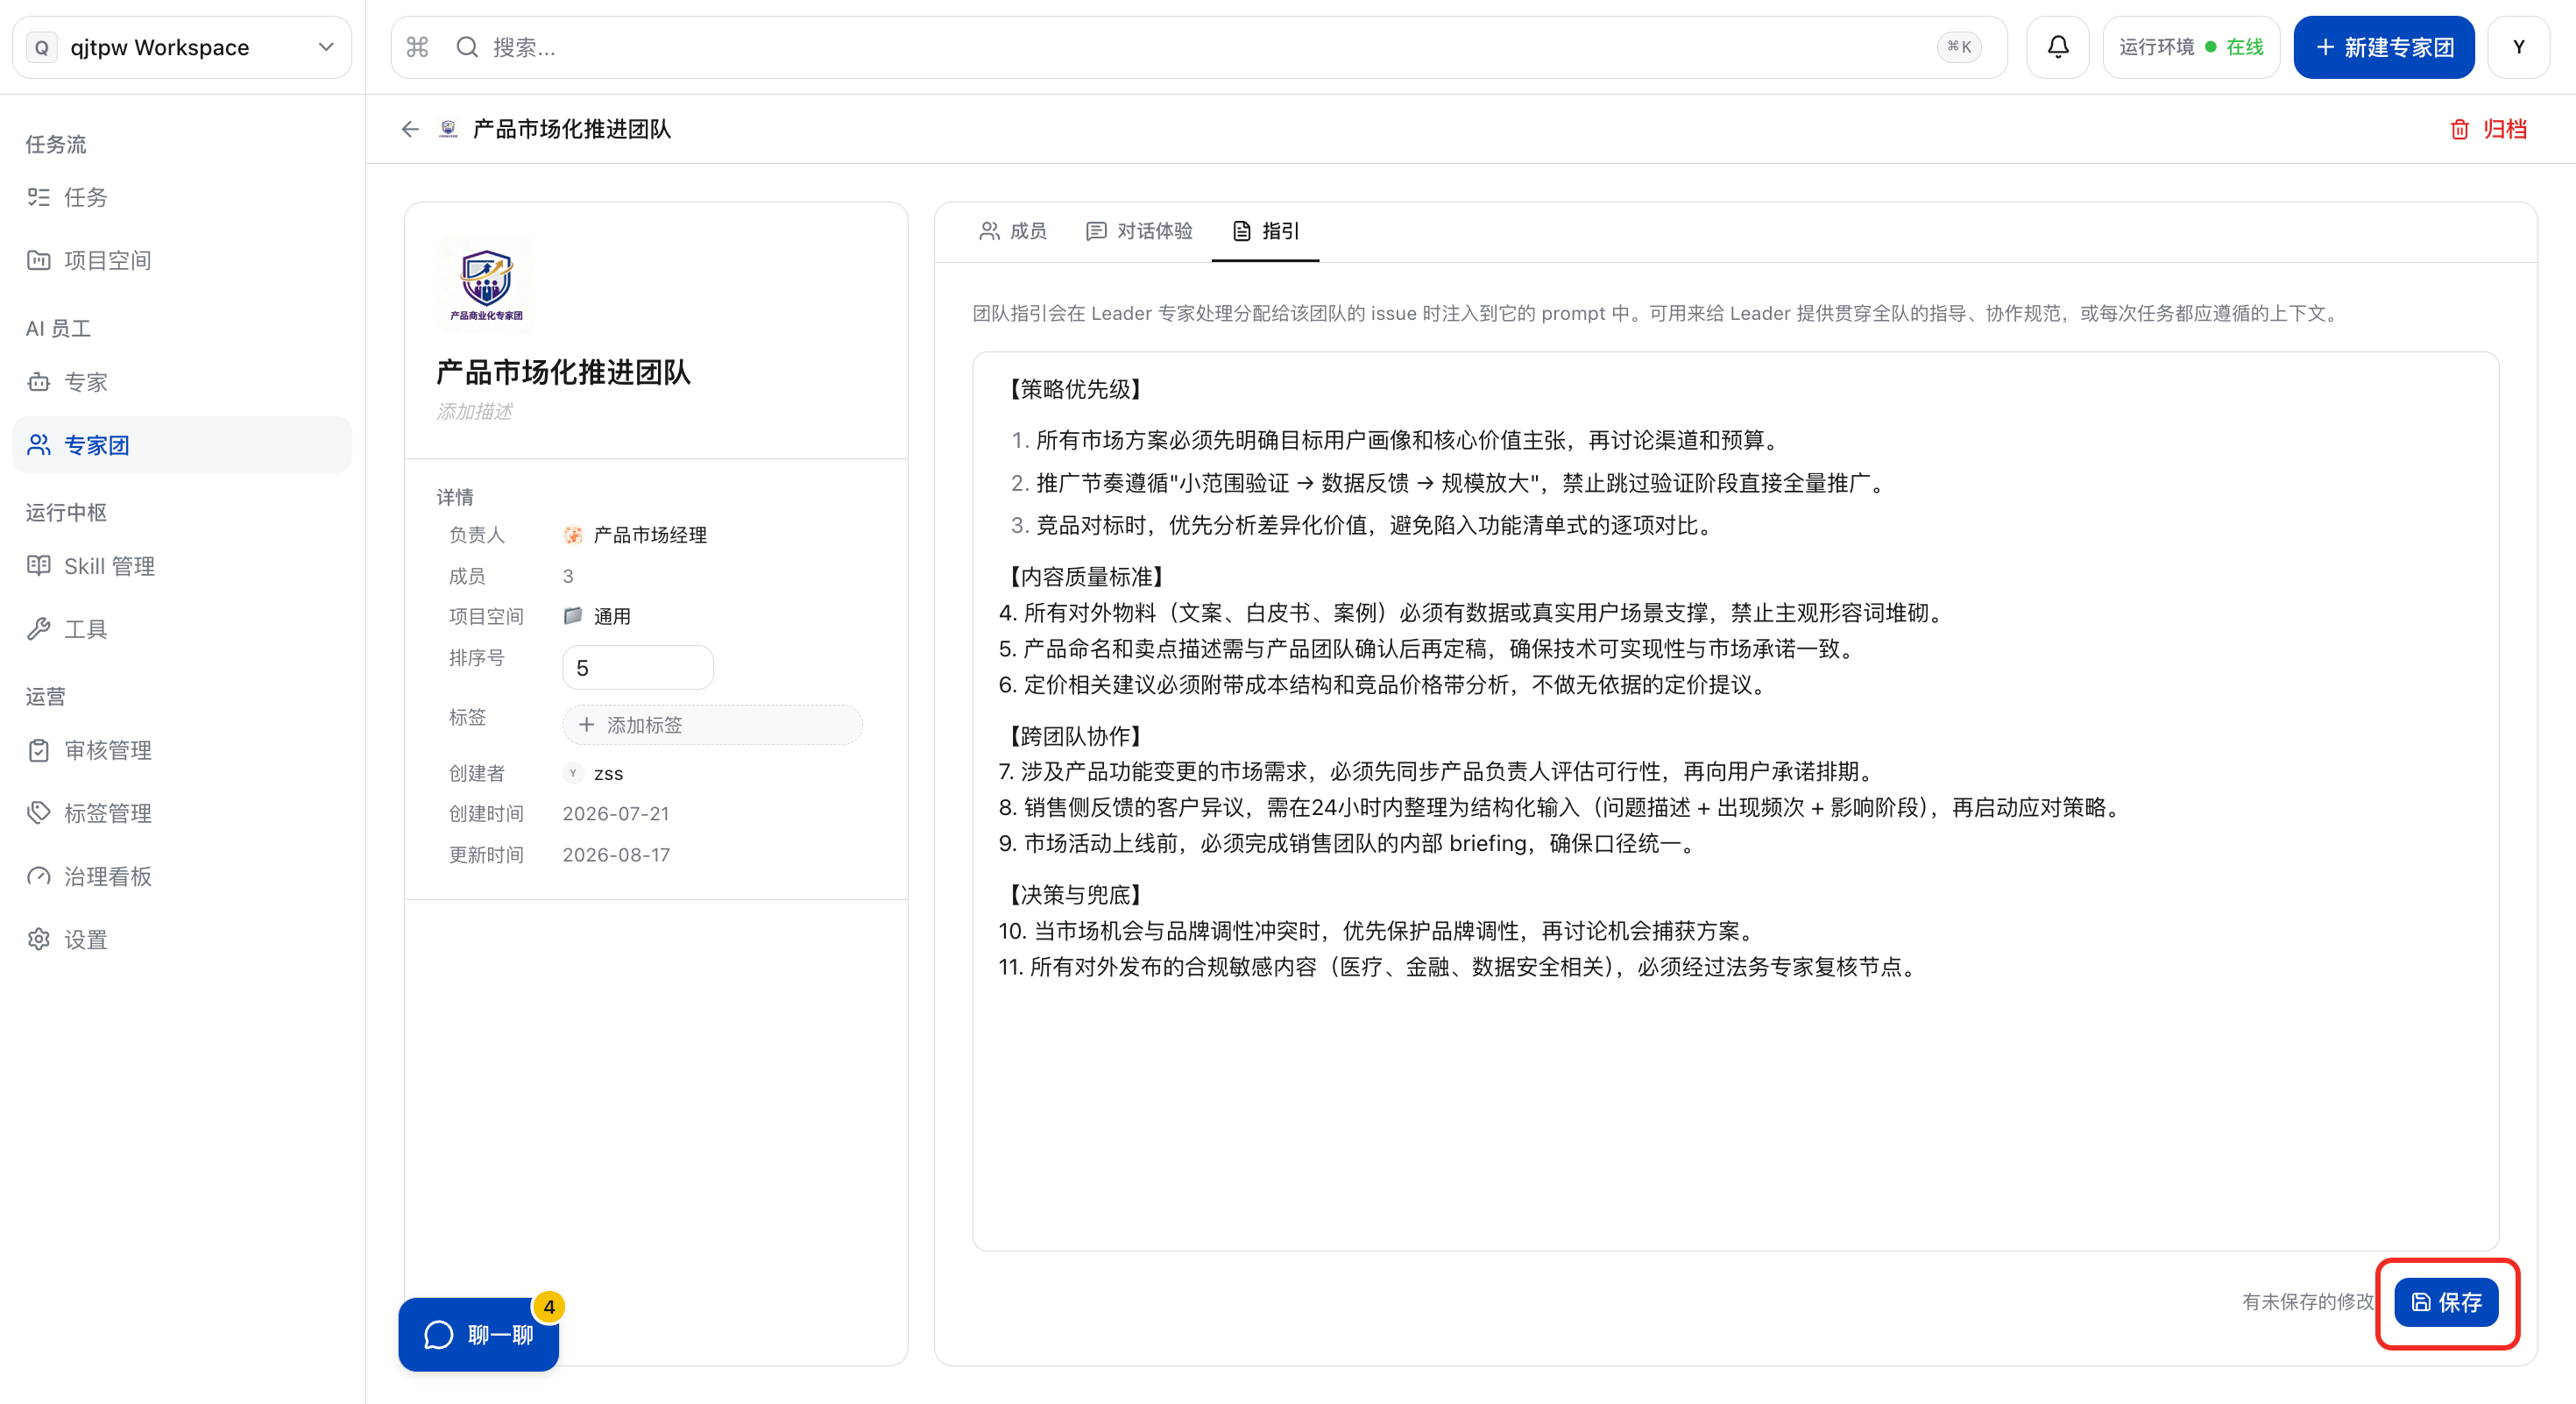
h. To set up team-level work specifications, you can enter team-level rules such as work specifications, quality standards, collaboration rules, and style tone in the “Guidelines” tab of the expert team, which serves as the “team work manual” for the expert team and takes effect after saving. When a user invokes the team and assigns a task to it, and the team leader starts to intervene in the processing, these guidelines will be automatically injected into its prompt as the underlying basis for scheduling and collaboration. After filling in the information, just click “Save”.
Archiving Expert Panel
a. Click the “Expert Panel” card.
b. Click “Archive”.
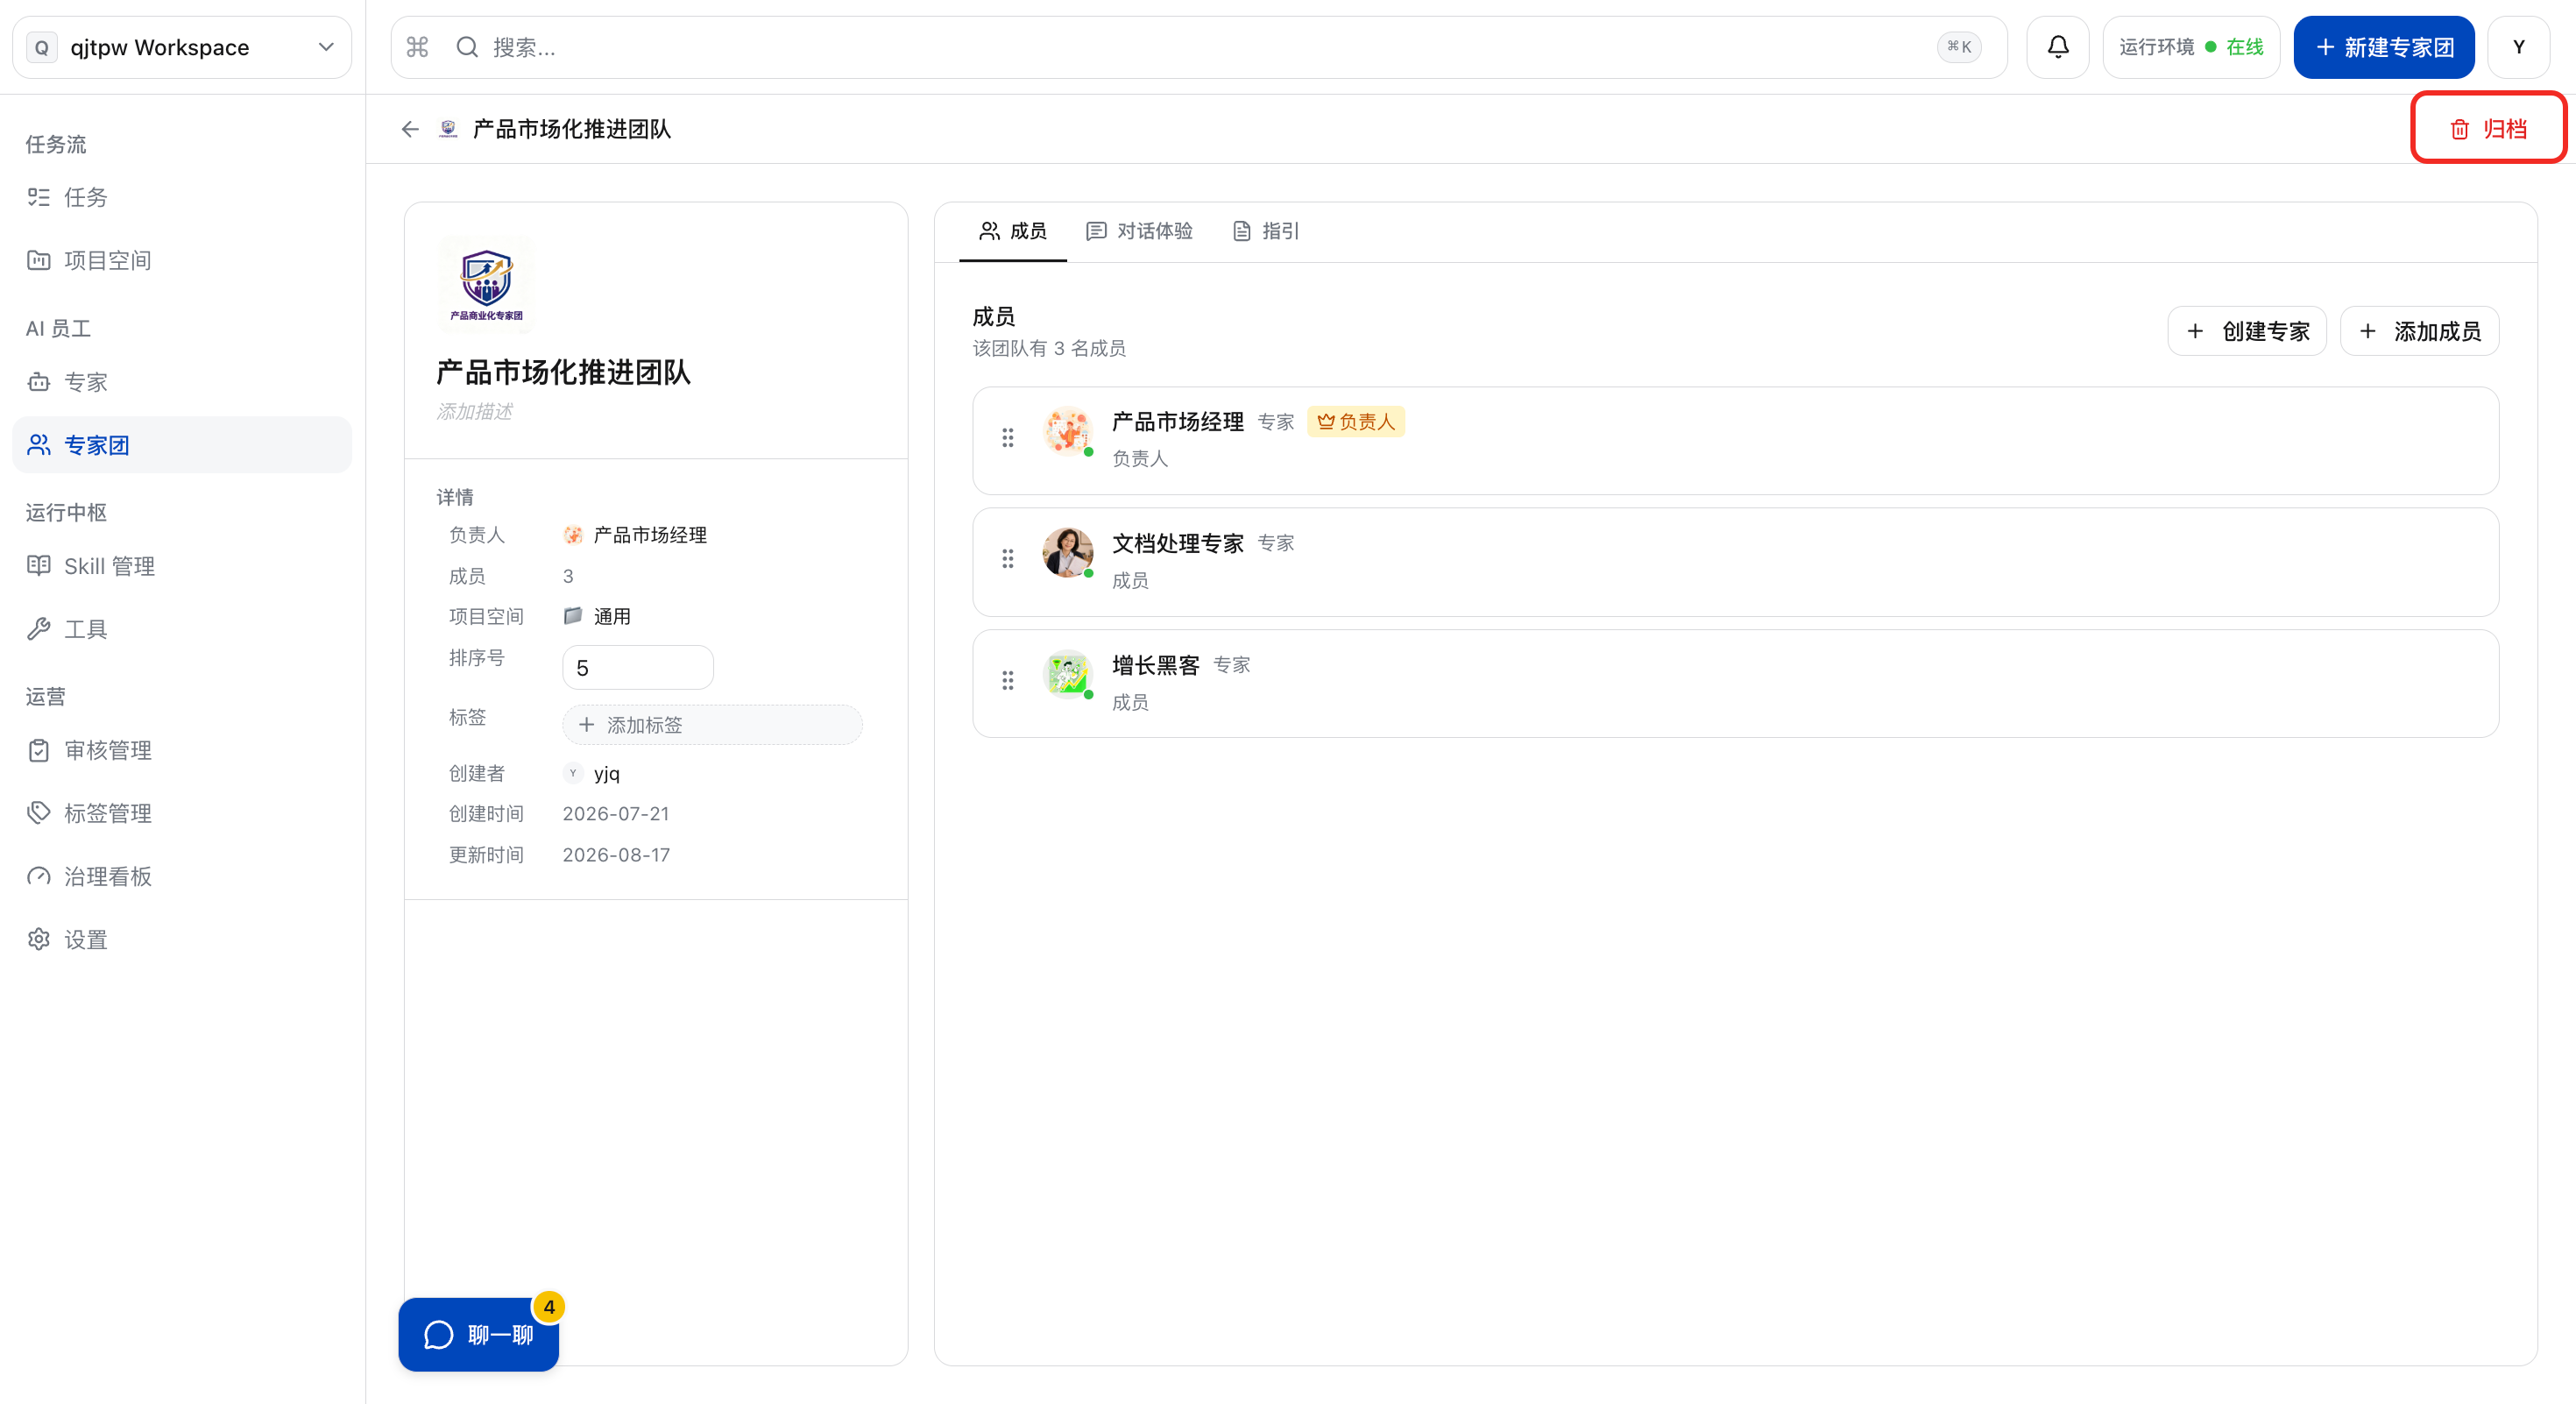
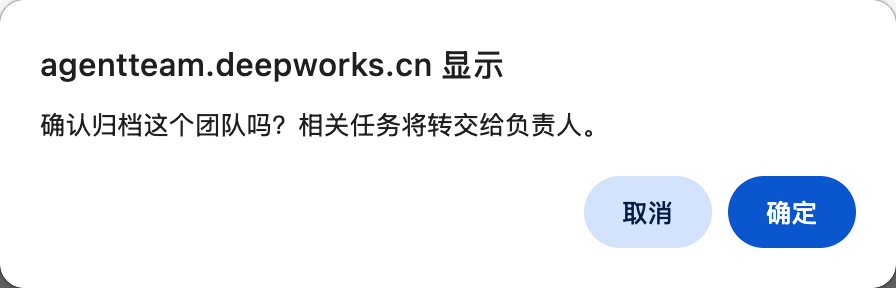
c. In the secondary confirmation pop-up box, click “OK” to complete the operation.
Usage and Management Scope Settings
a. In the left “Settings” menu, click “Project Space Permissions”.
b. Click the organization or member account to be authorized, and check the “Project Space > Expert Group Name” on the right. If the target organization or member account cannot be found, you can click “One-click Sync Sub-accounts” to refresh manually. Note: After checking the expert group, the system will automatically check the usage permissions of the experts corresponding to this expert group.
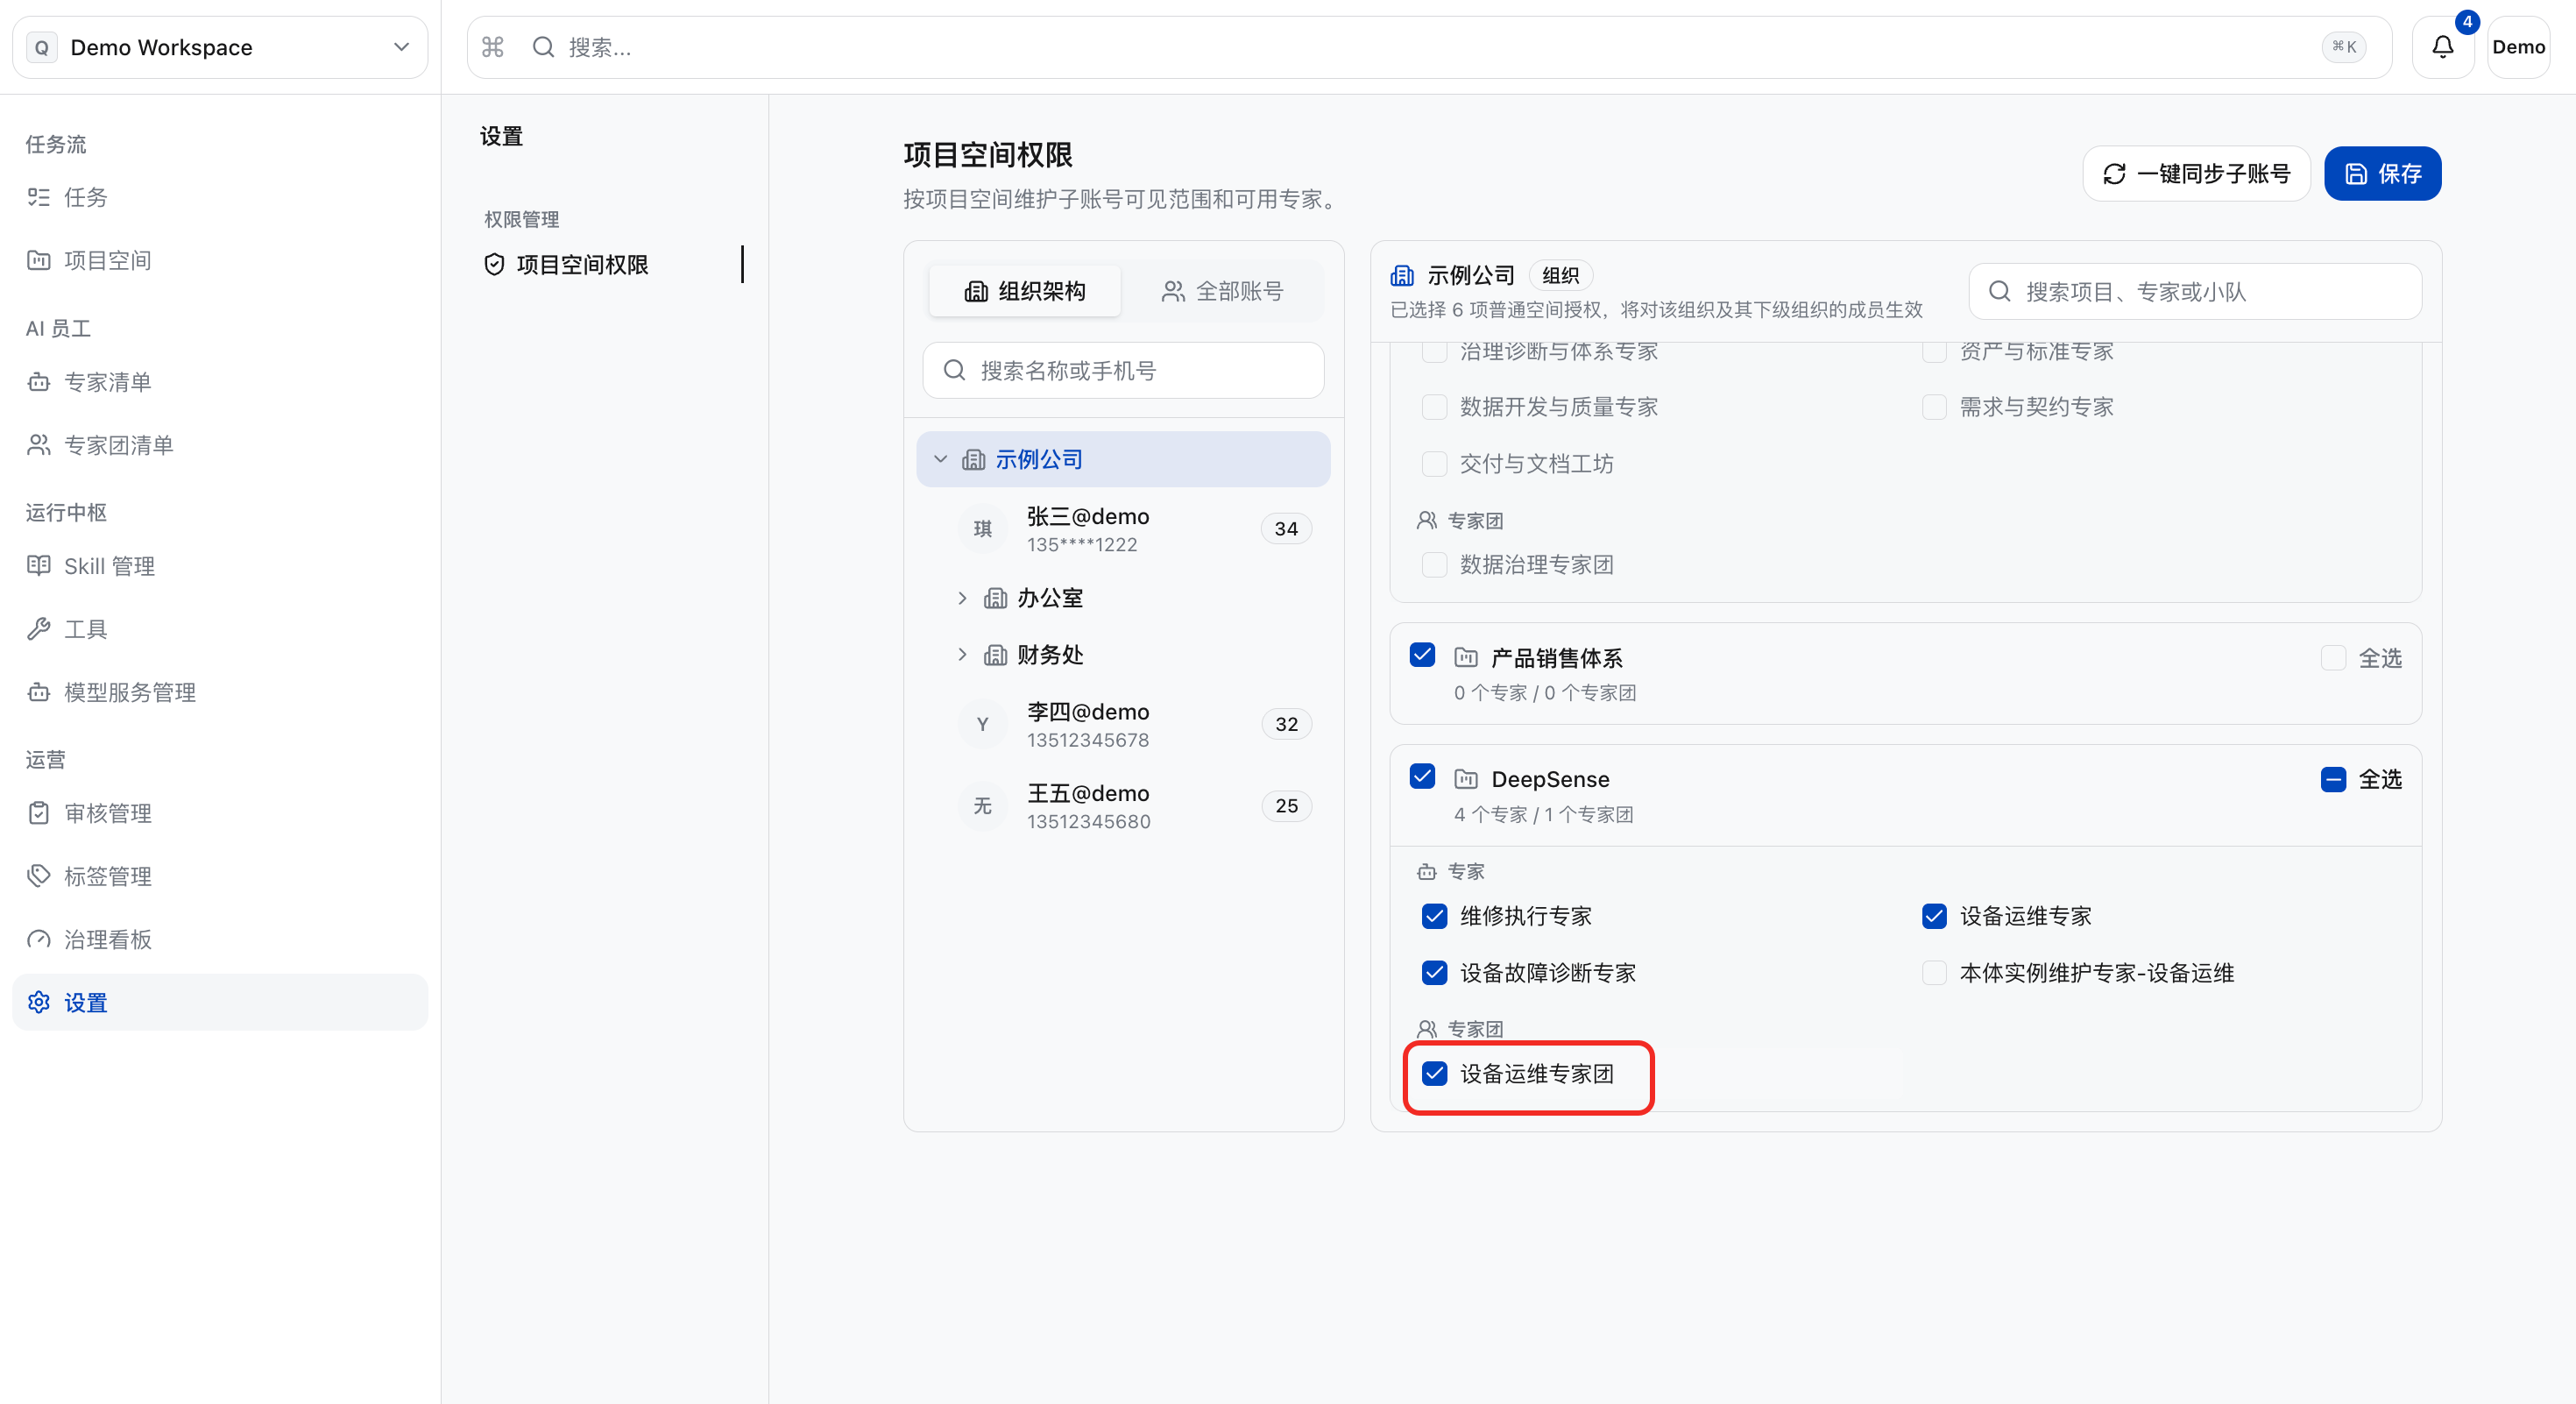
c. Click “Save”, and this member will become a member that the corresponding expert can use/manage.
Operation Center
Skill Management
The governance hierarchy of Skills consists of four layers: first, the platform layer, which refers to the platform-curated Skill set in the platform SkillHub; second, the tenant layer, which refers to the tenant-general Skills shared by all members of the current tenant in the tenant SkillHub; third, the project layer, which refers to the project-private Skills shared only by members of the project space in the project Skill repository; and the personal layer, which refers to the personal Skills locally installed by users on the DeepWorks desktop client.
View the Skill list
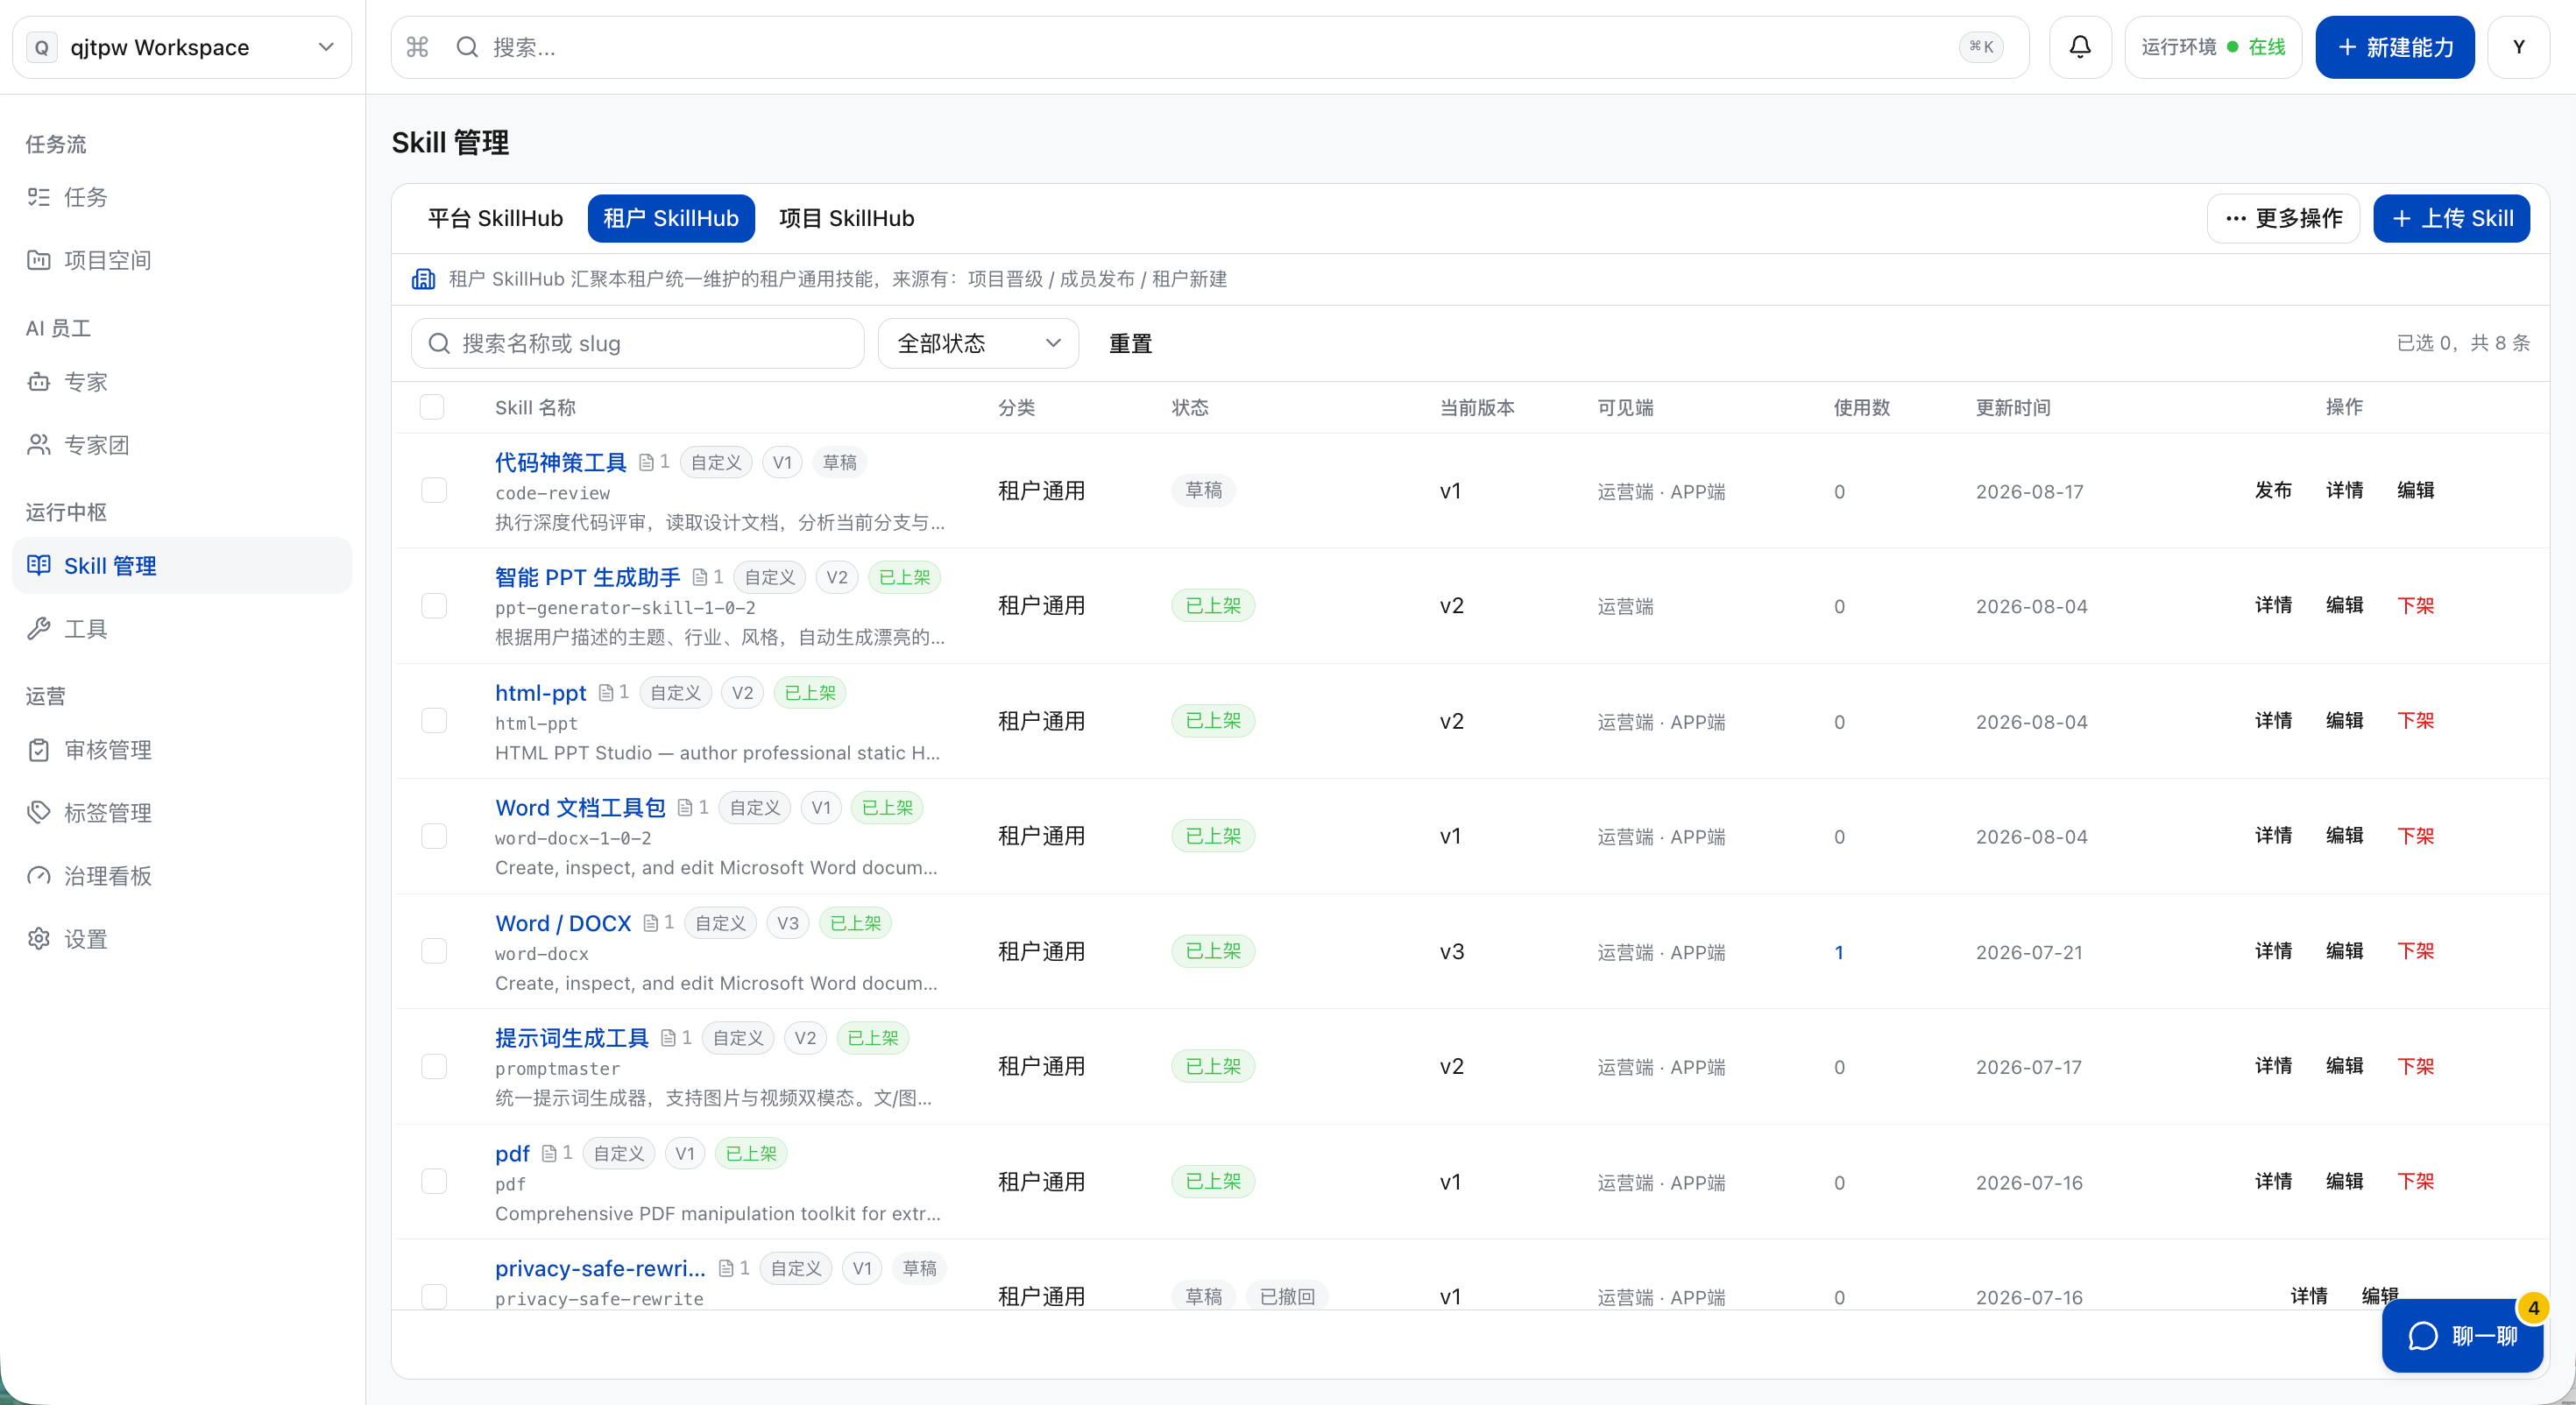
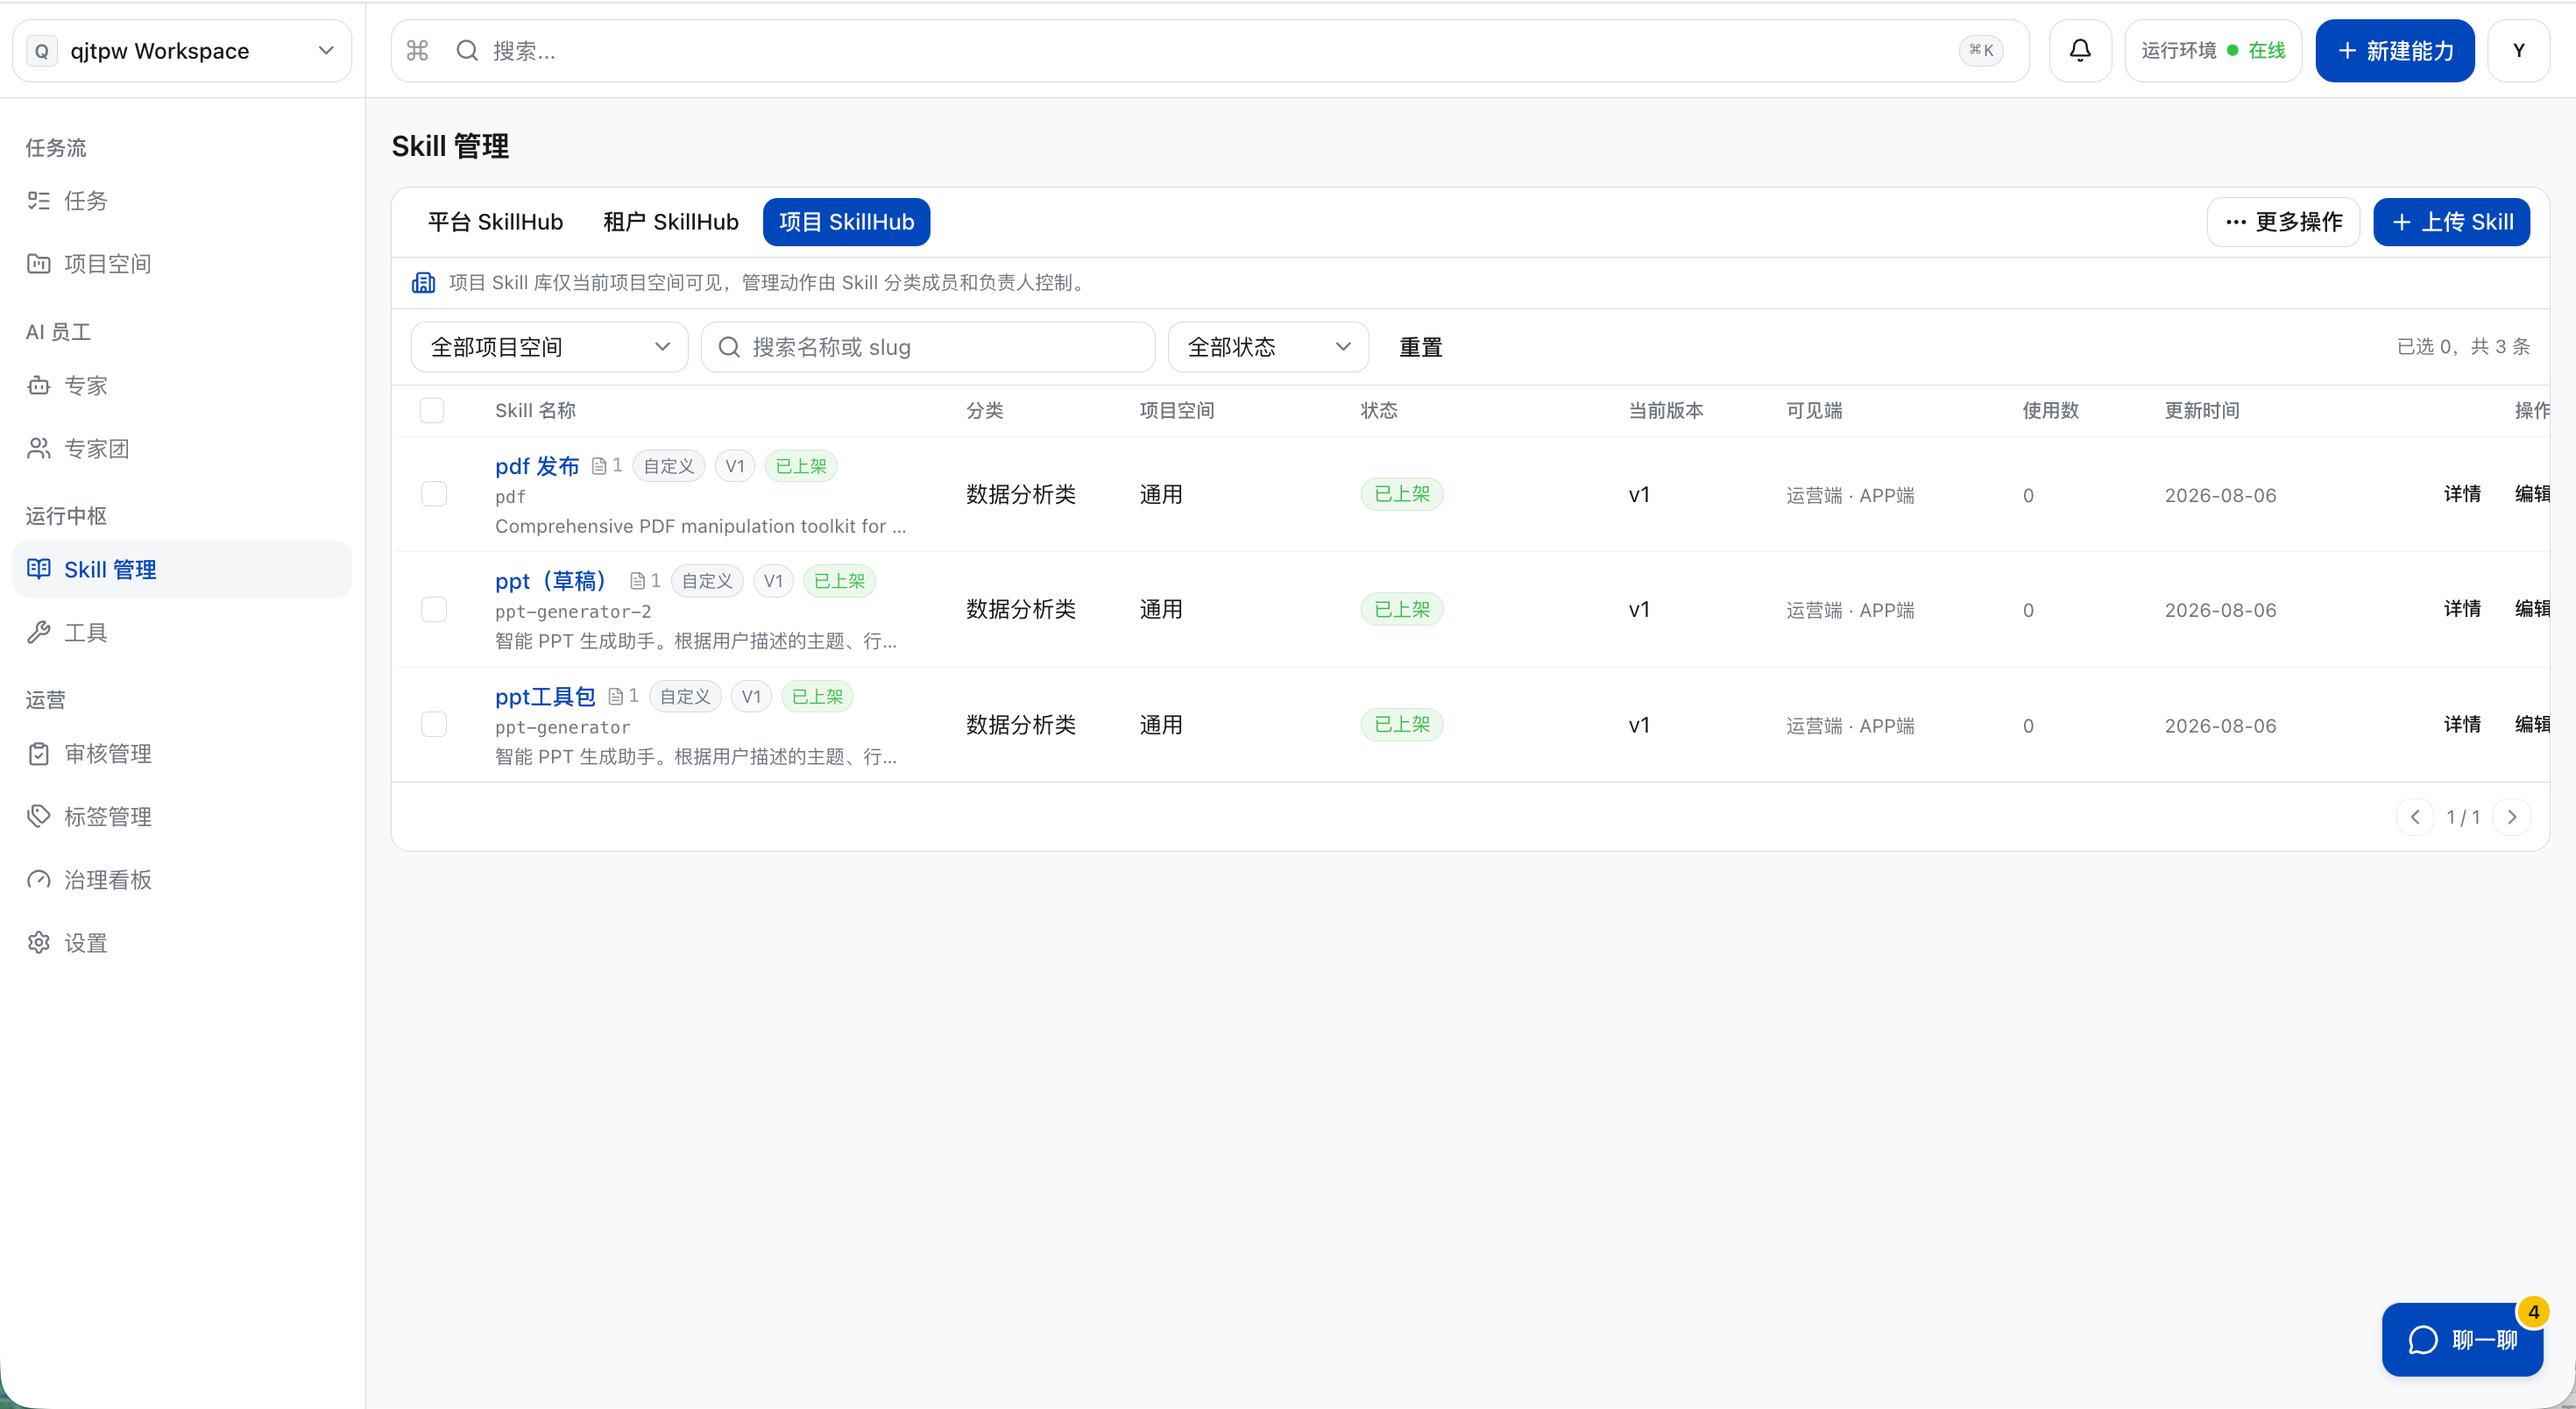
In the admin console, the “Skill Management” section is divided into three tabs by source layer: Platform SkillHub (read-only access to the platform’s curated skill sets), tenant SkillHub (shared assets of the current tenant and tenant-wide common skills), and Project Skill Library (private skills in the project space that are only accessible to project members).
a. Platform SkillHub: View the list of platform-featured Skills. This tab is for read-only browsing: you can view all platform-featured Skills and filter them by keywords/status.
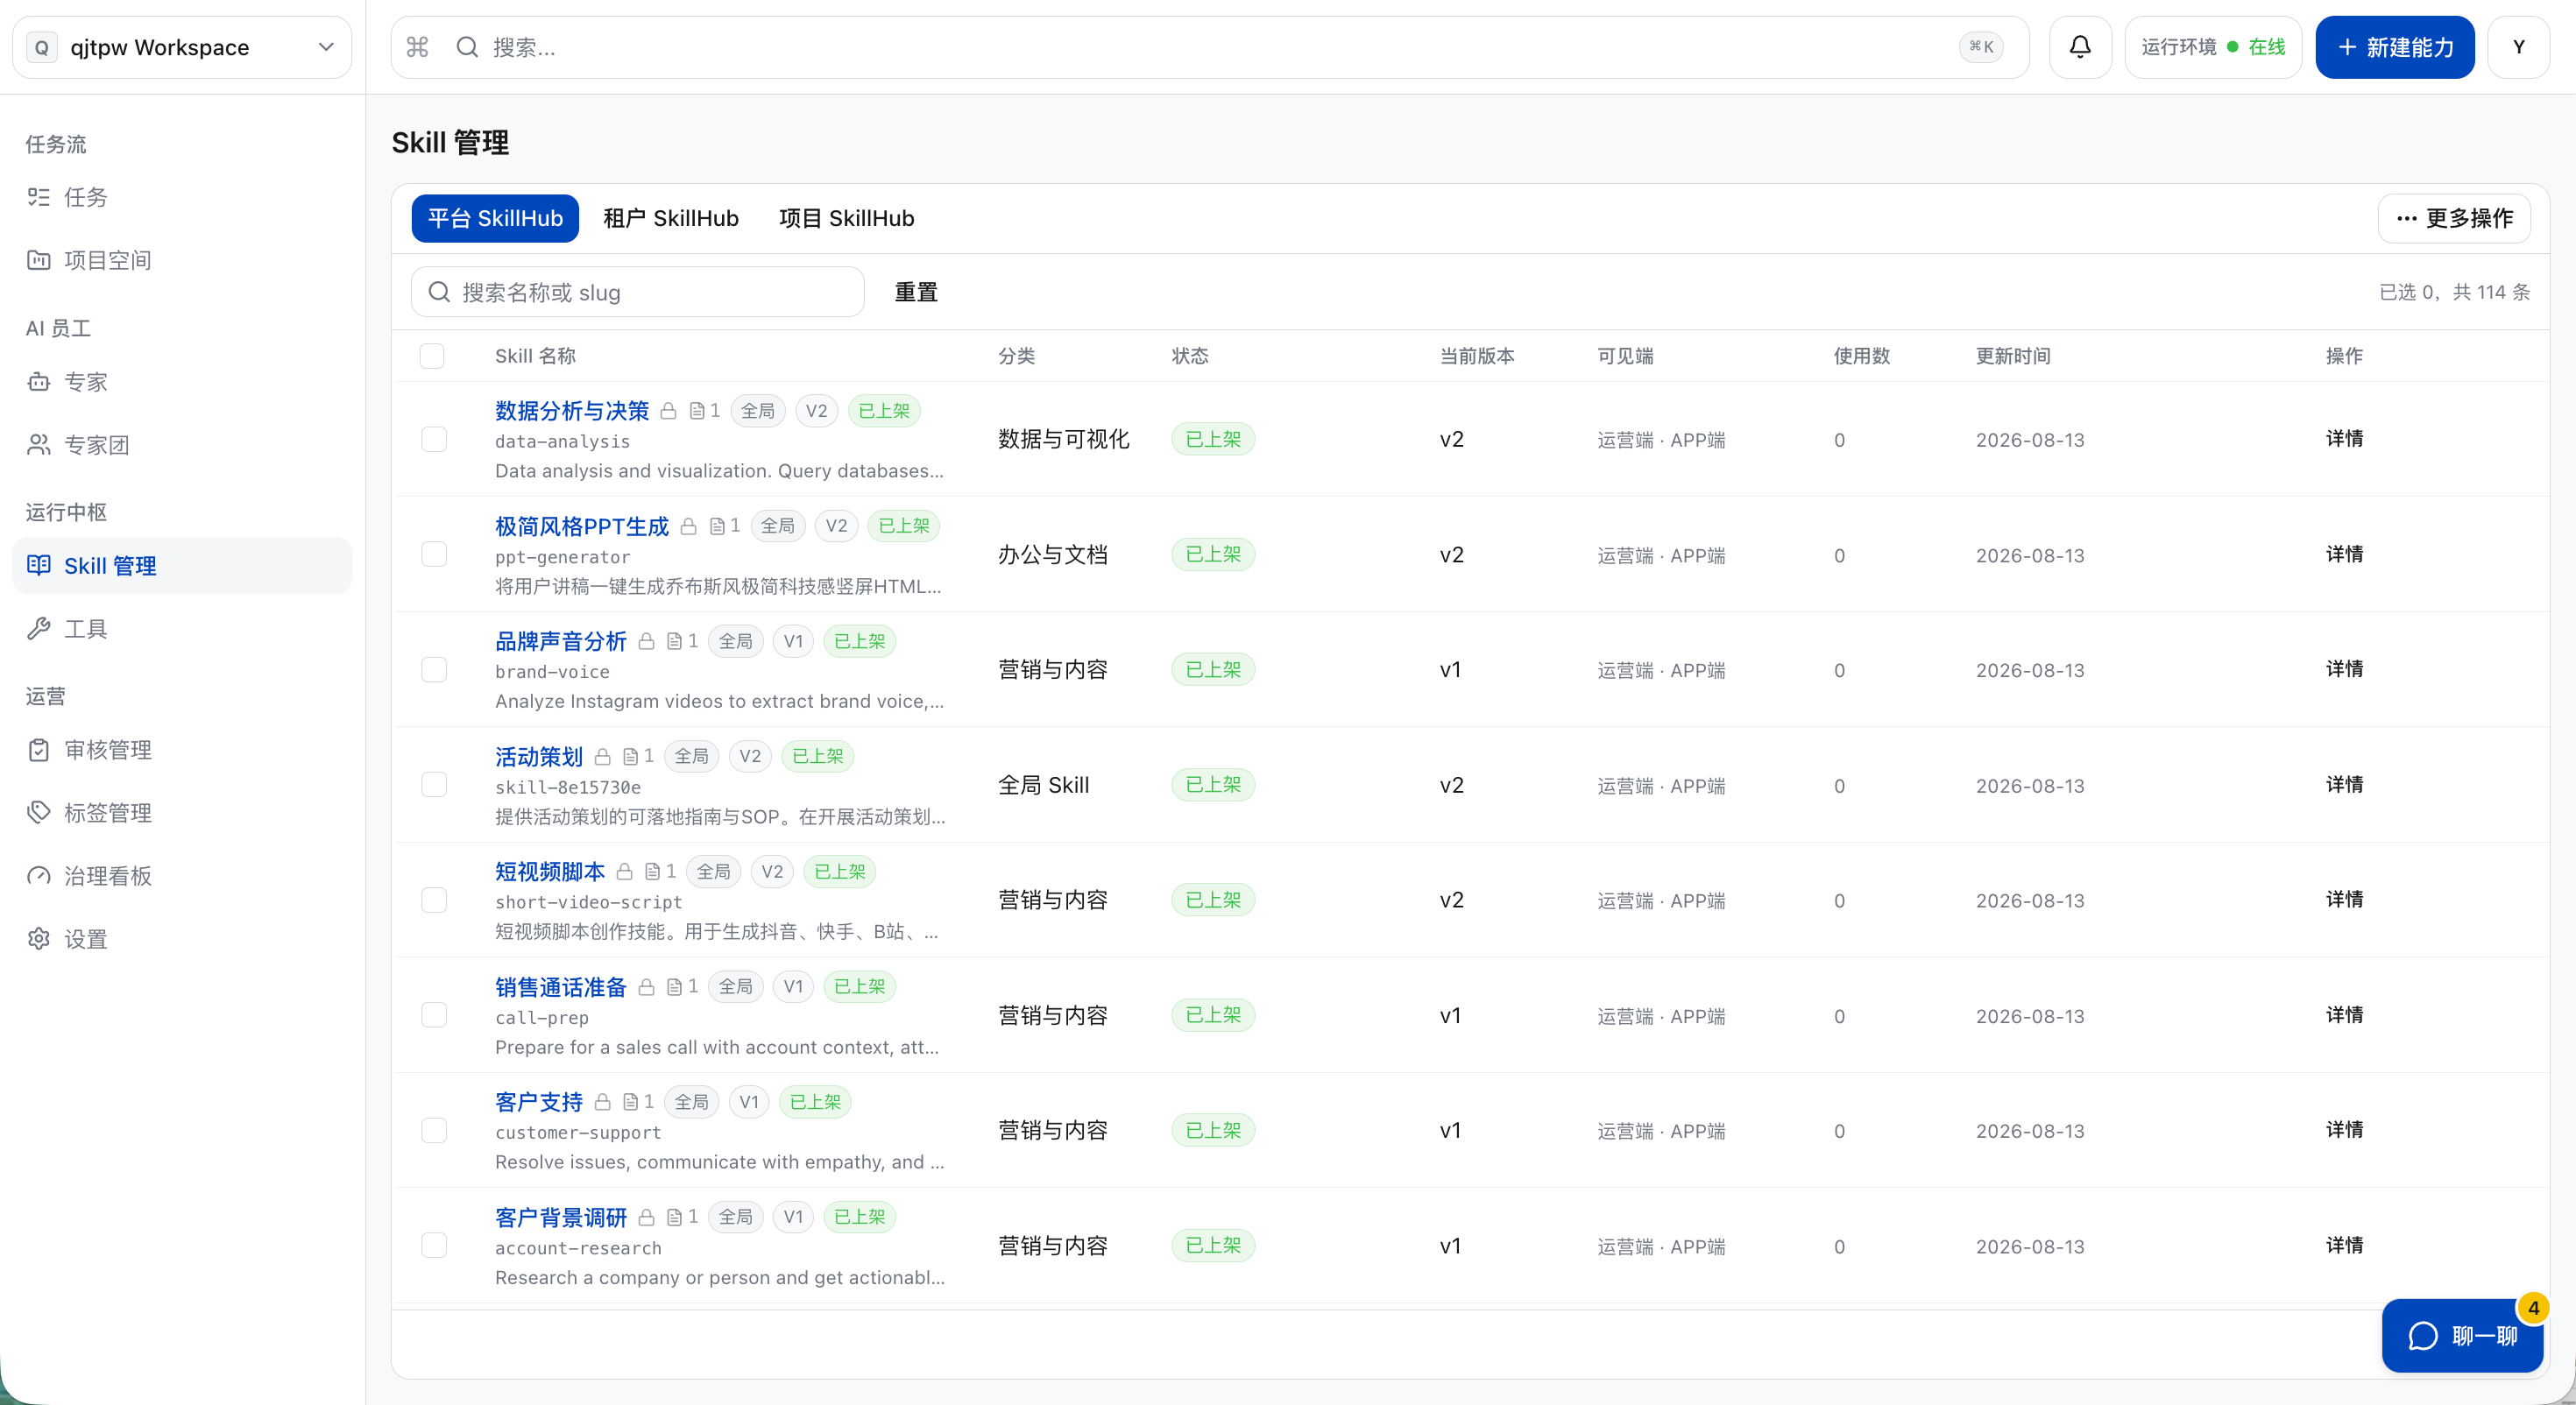
b. Tenant SkillHub views the Skills shared by all members of the tenant and the tenant-general Skills. Filtering by keyword / status is supported.
c. Project Skill Library: View the private Skills of this project that are only accessible to members of the project workspace. Filtering by project workspace / keyword / status is supported.
Upload Skill
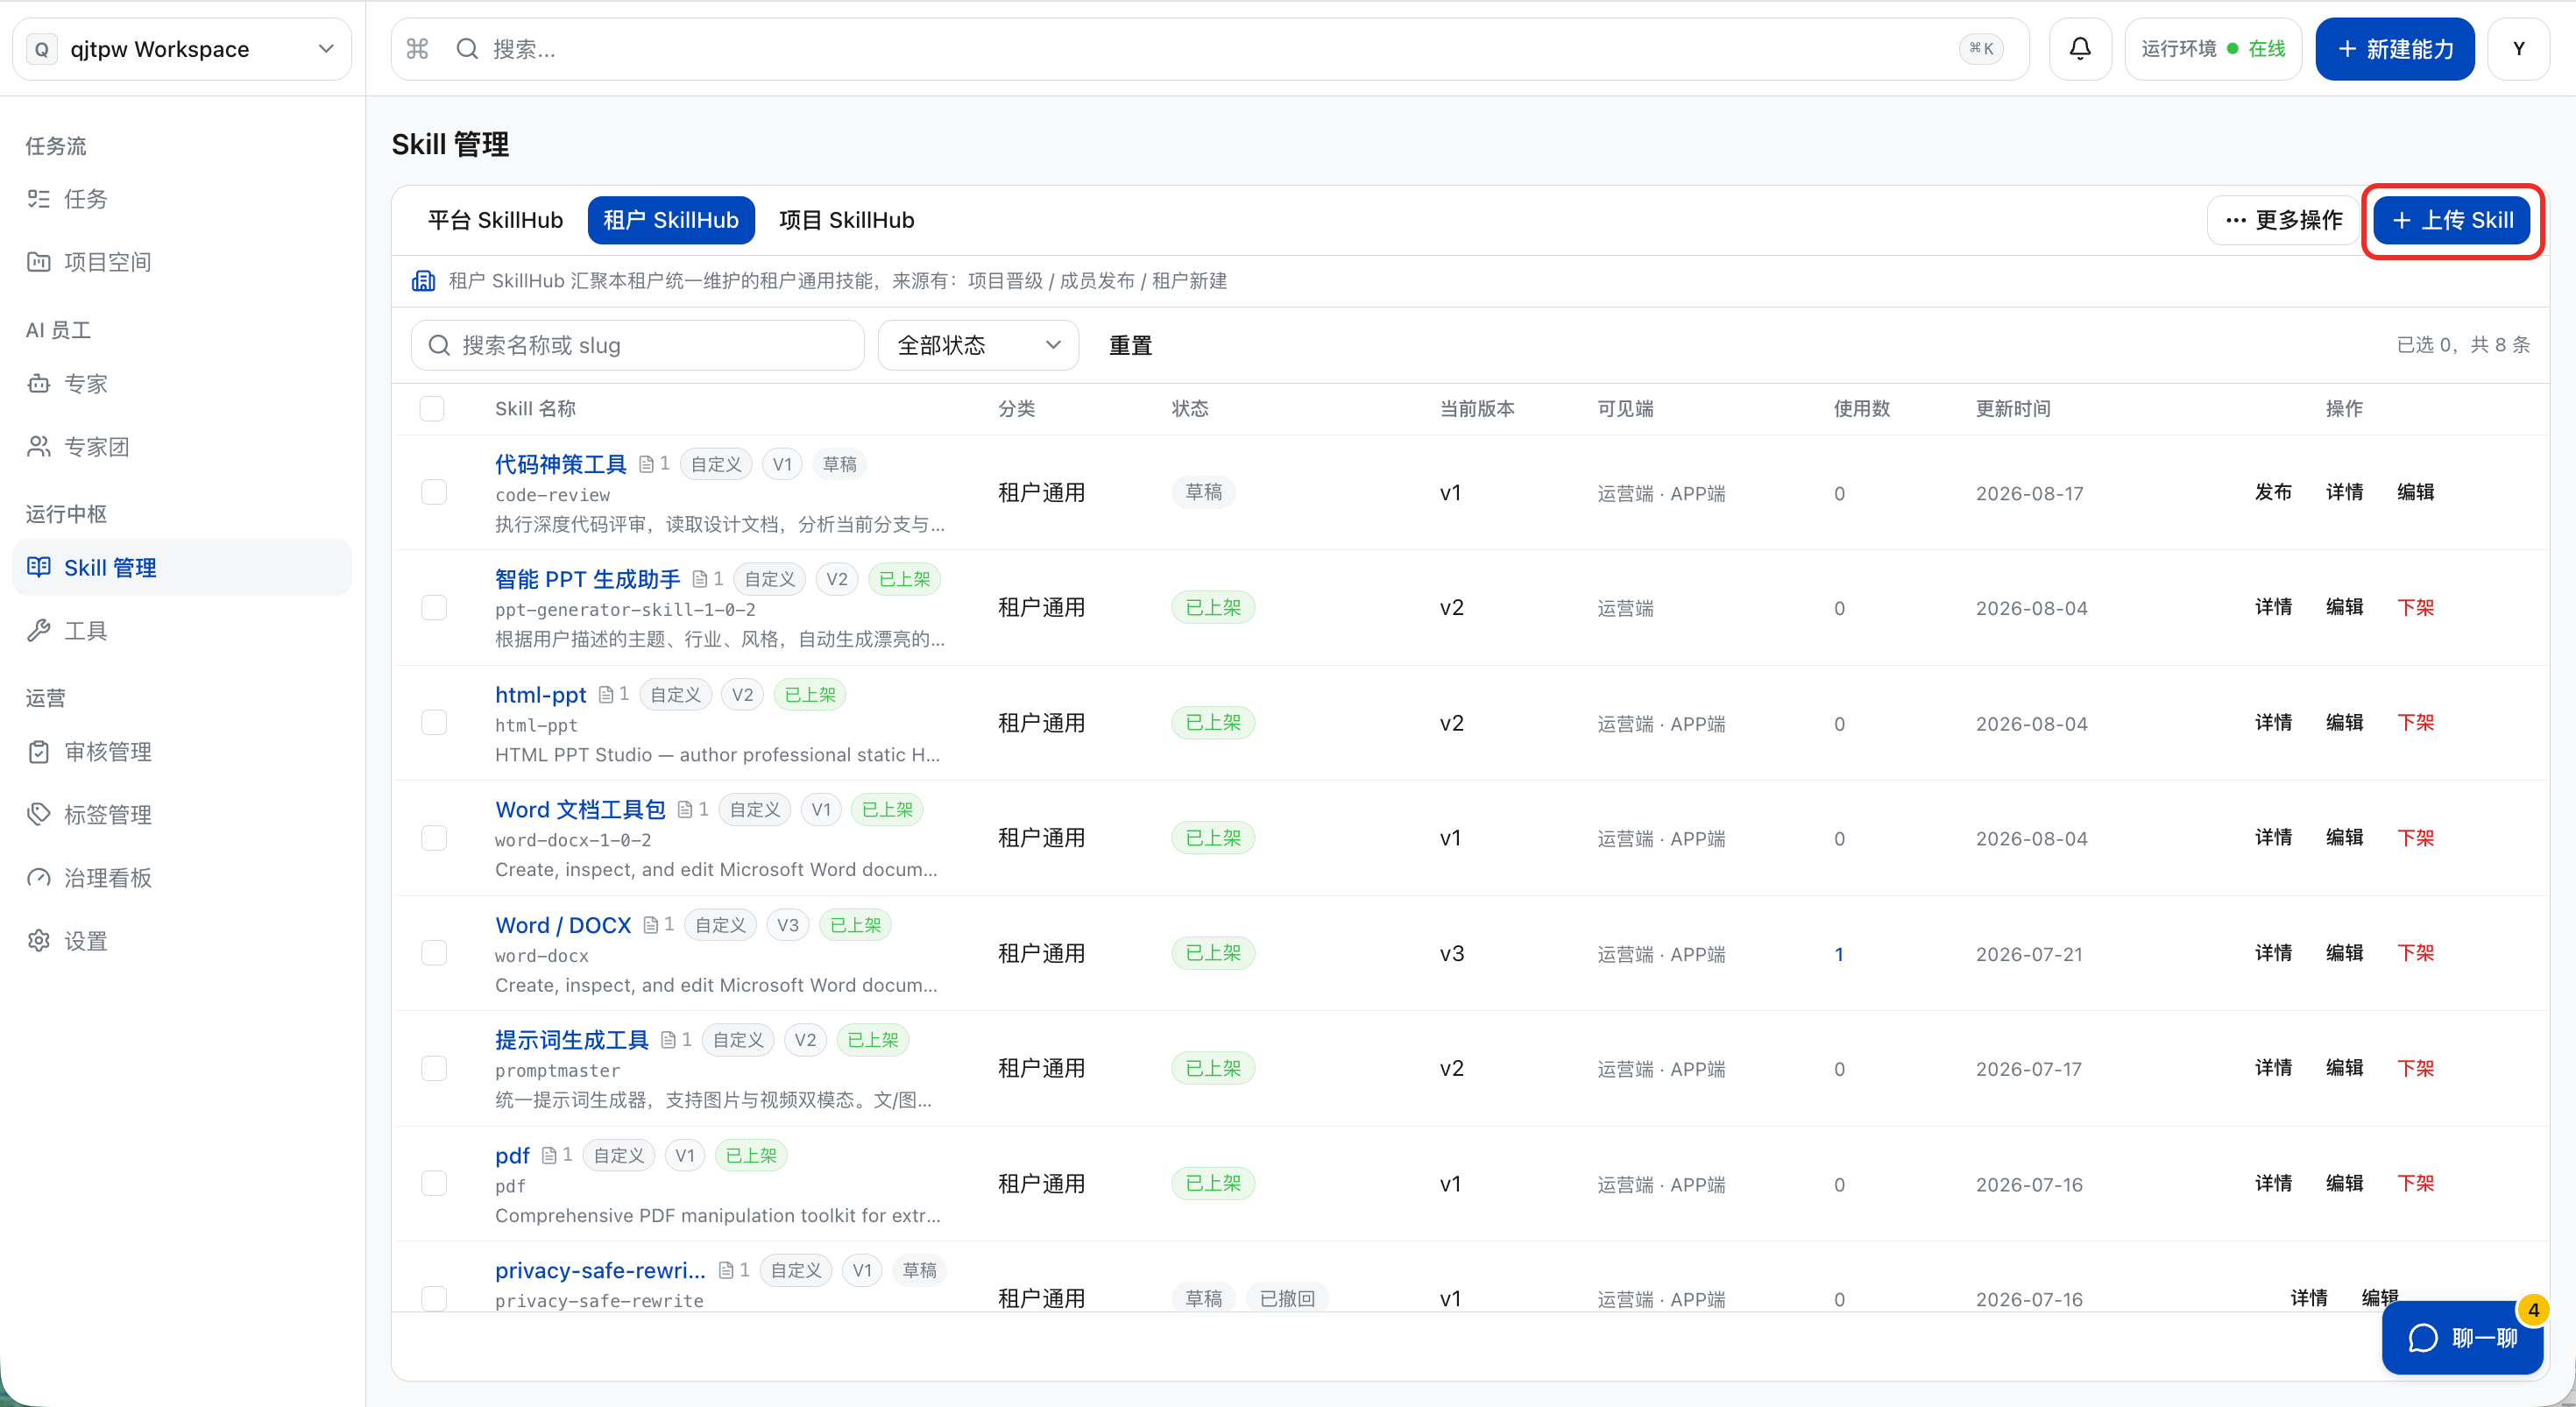
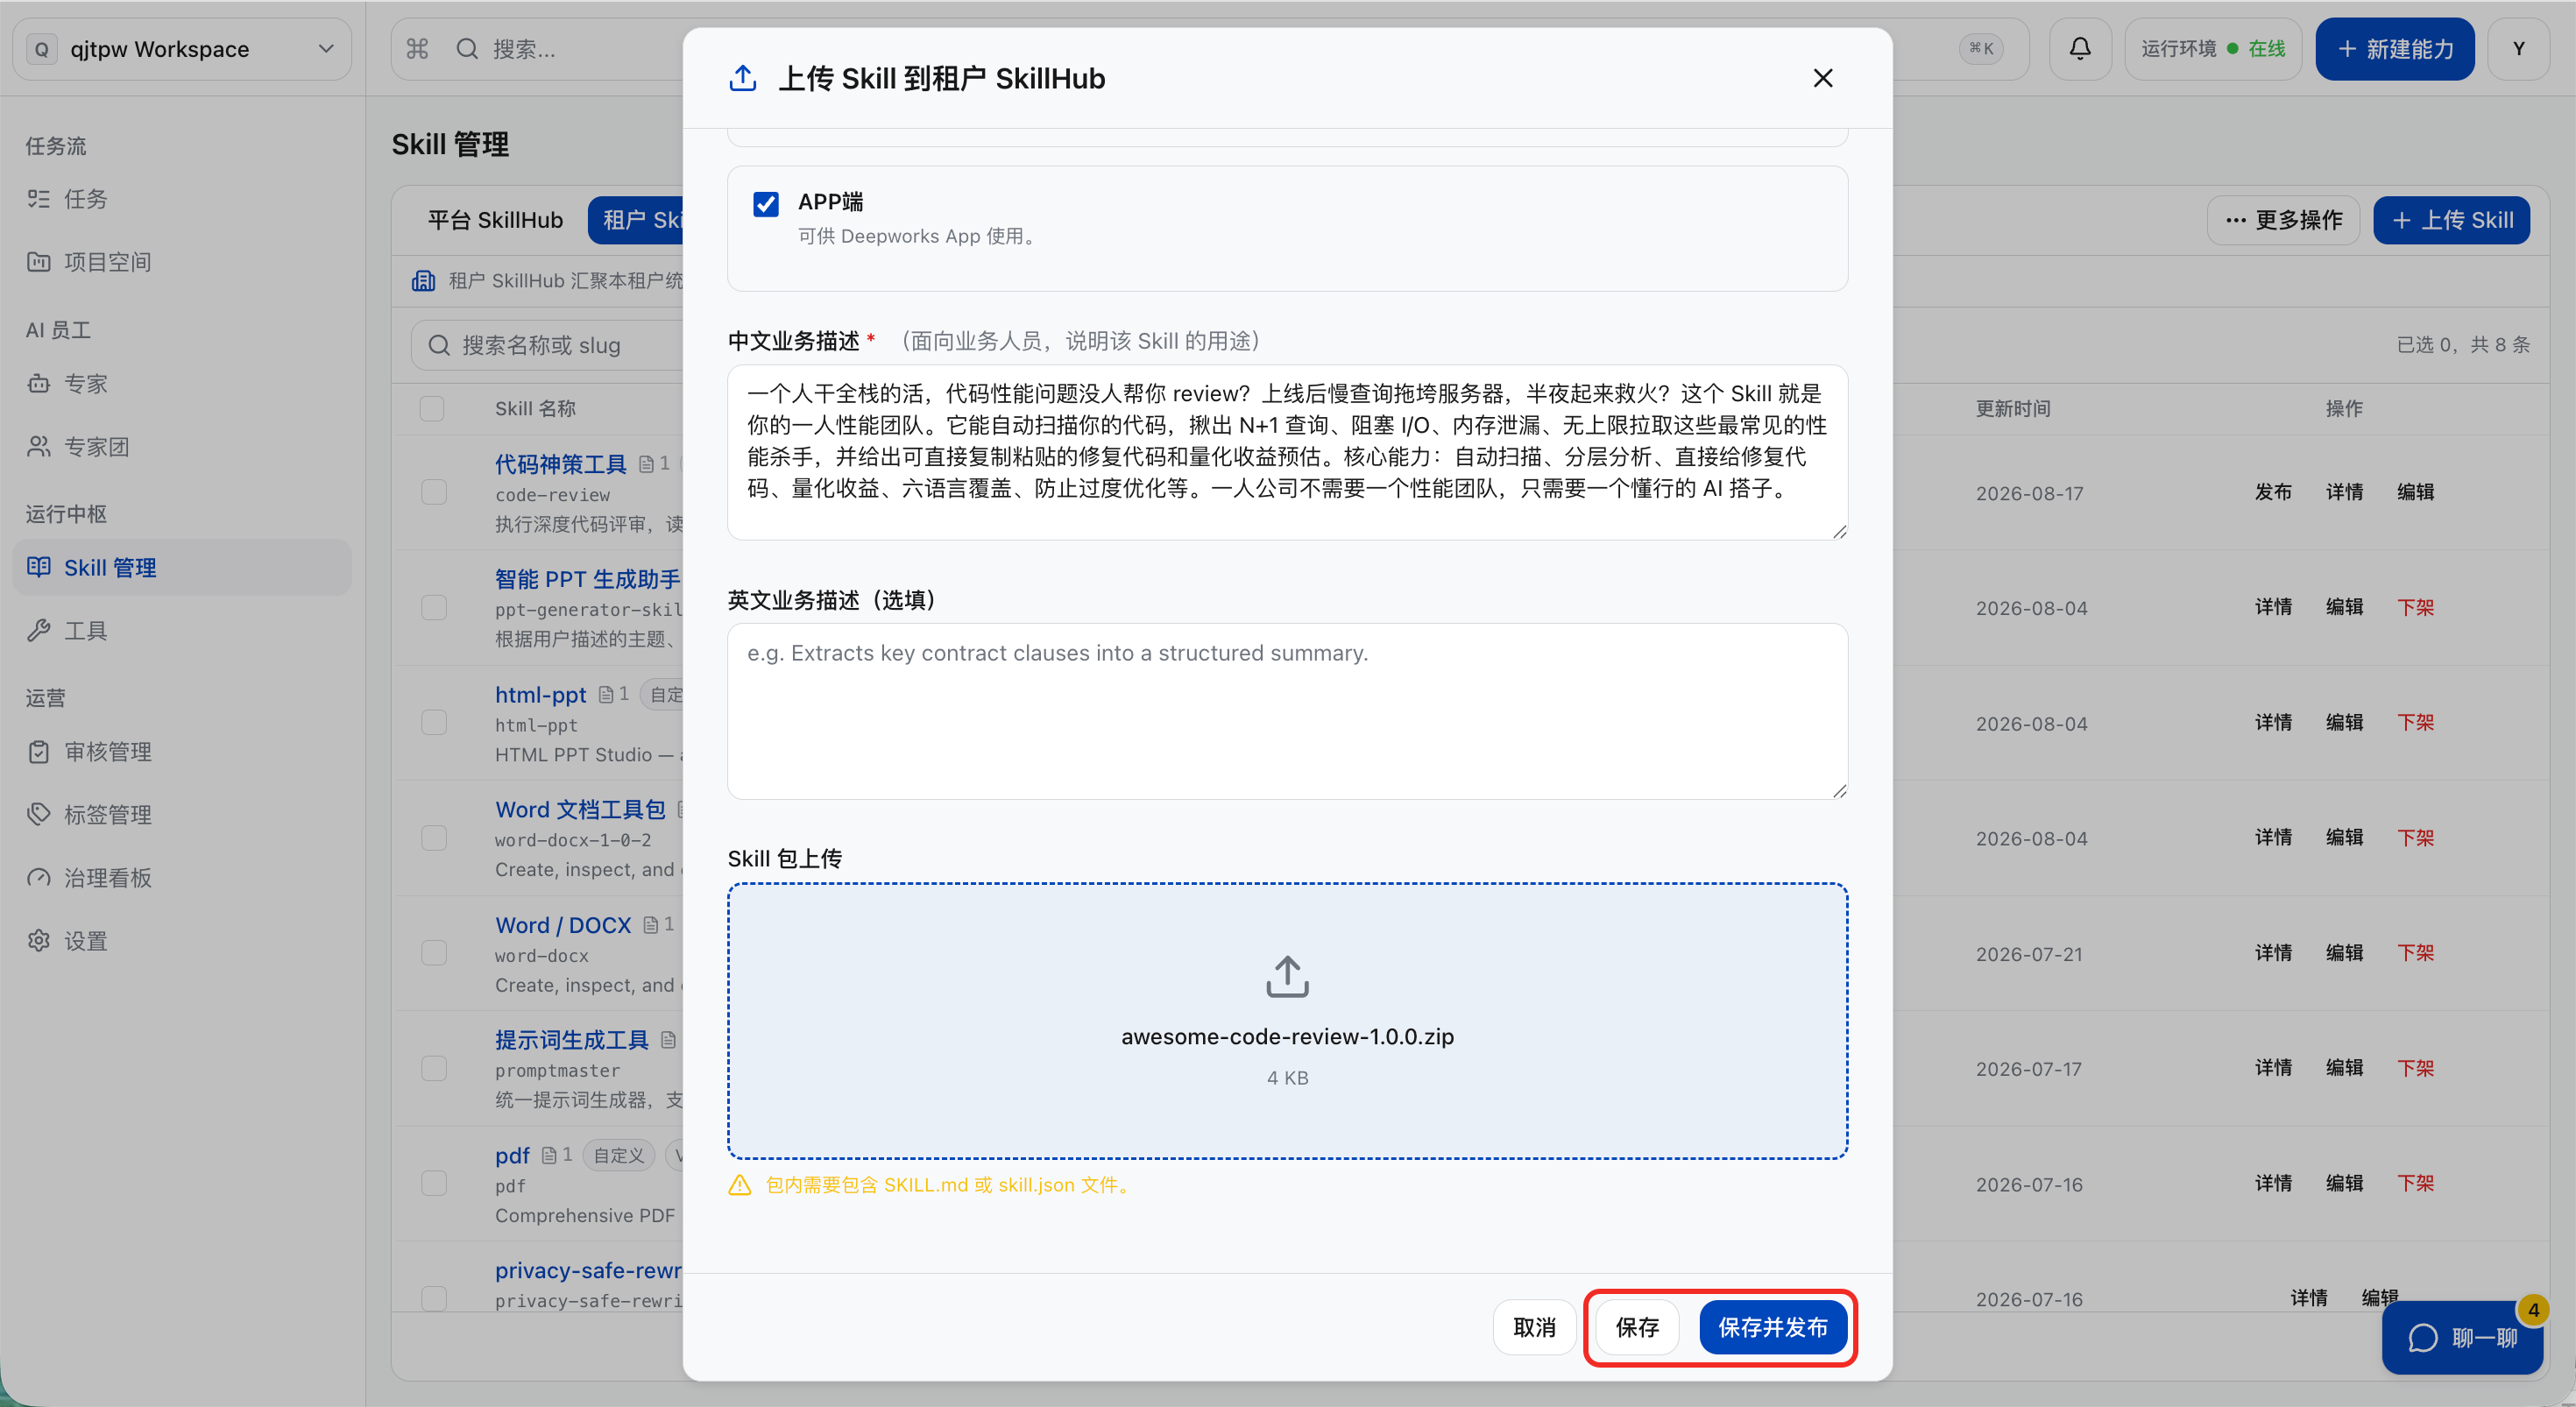
a. Click “Upload Skill”.
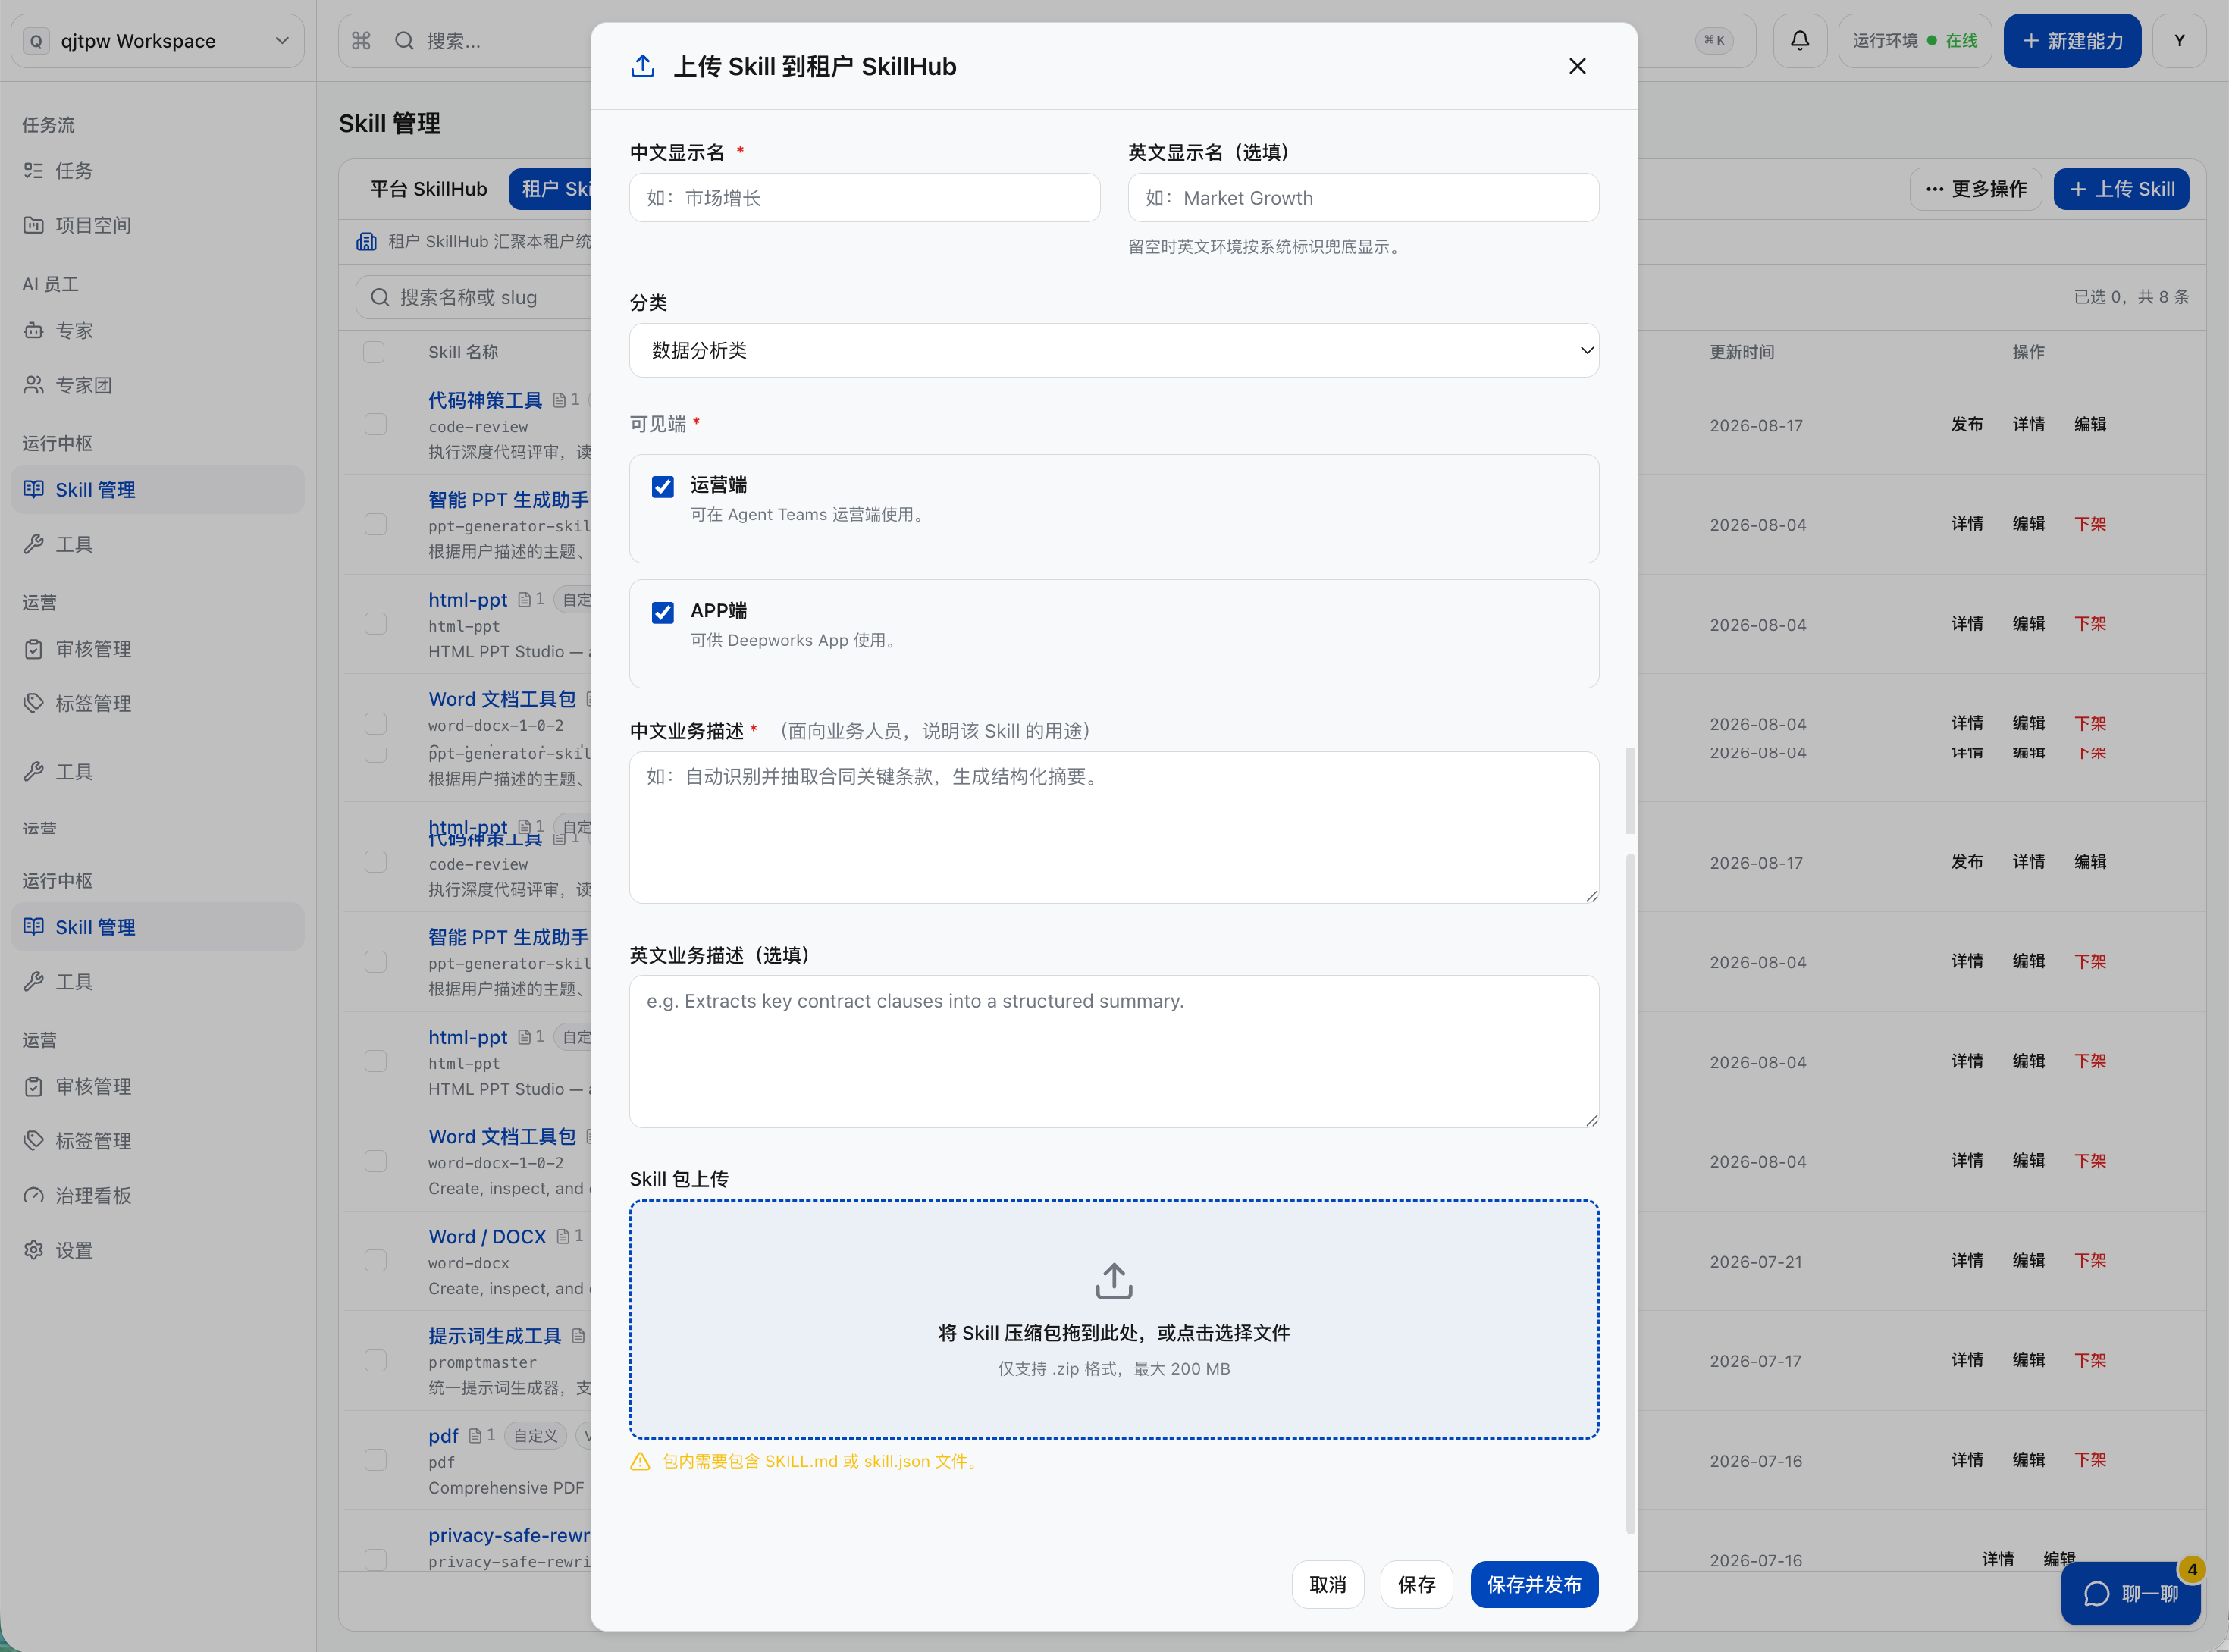
b. Upload the. zip Compressed Packet (≤200 MB, which must contain SKILL.md or skill.json) in the pop-up window, and configure information such as system identifier, Chinese display name (required), category (selected from the dictionary), available terminals, and Chinese business description (required). Note: Visible terminals refer to the terminals (Client / platforms) where this Skill is allowed to be viewed and used. Management terminal: visible on the management terminal, and can be cloned by the project space and bound by experts;On the APP side, it will be displayed in the SkillHub marketplace of the Desktop client (DeepWorks App), where regular users can browse and install it.
c. Click “Save (Draft) / Save and Publish”, the system will upload and analyze the content of the Skill package. Wait a moment for the upload to complete, and after successful upload, the content will be routed according to the permissions of the uploading user:
-
If the uploading user has the permission to “publish Skills to tenant SkillHu without review”: the Skill will be directly launched once it passes the security scan;
-
If the uploading user has both the permission to “apply for publishing / cancel application to the tenant SkillHub”: after submission, it will enter the review queue, the Skill remains in “Draft” during the review period, and when the review is approved, the draft at that time will be used as the version and set to “Launched”.
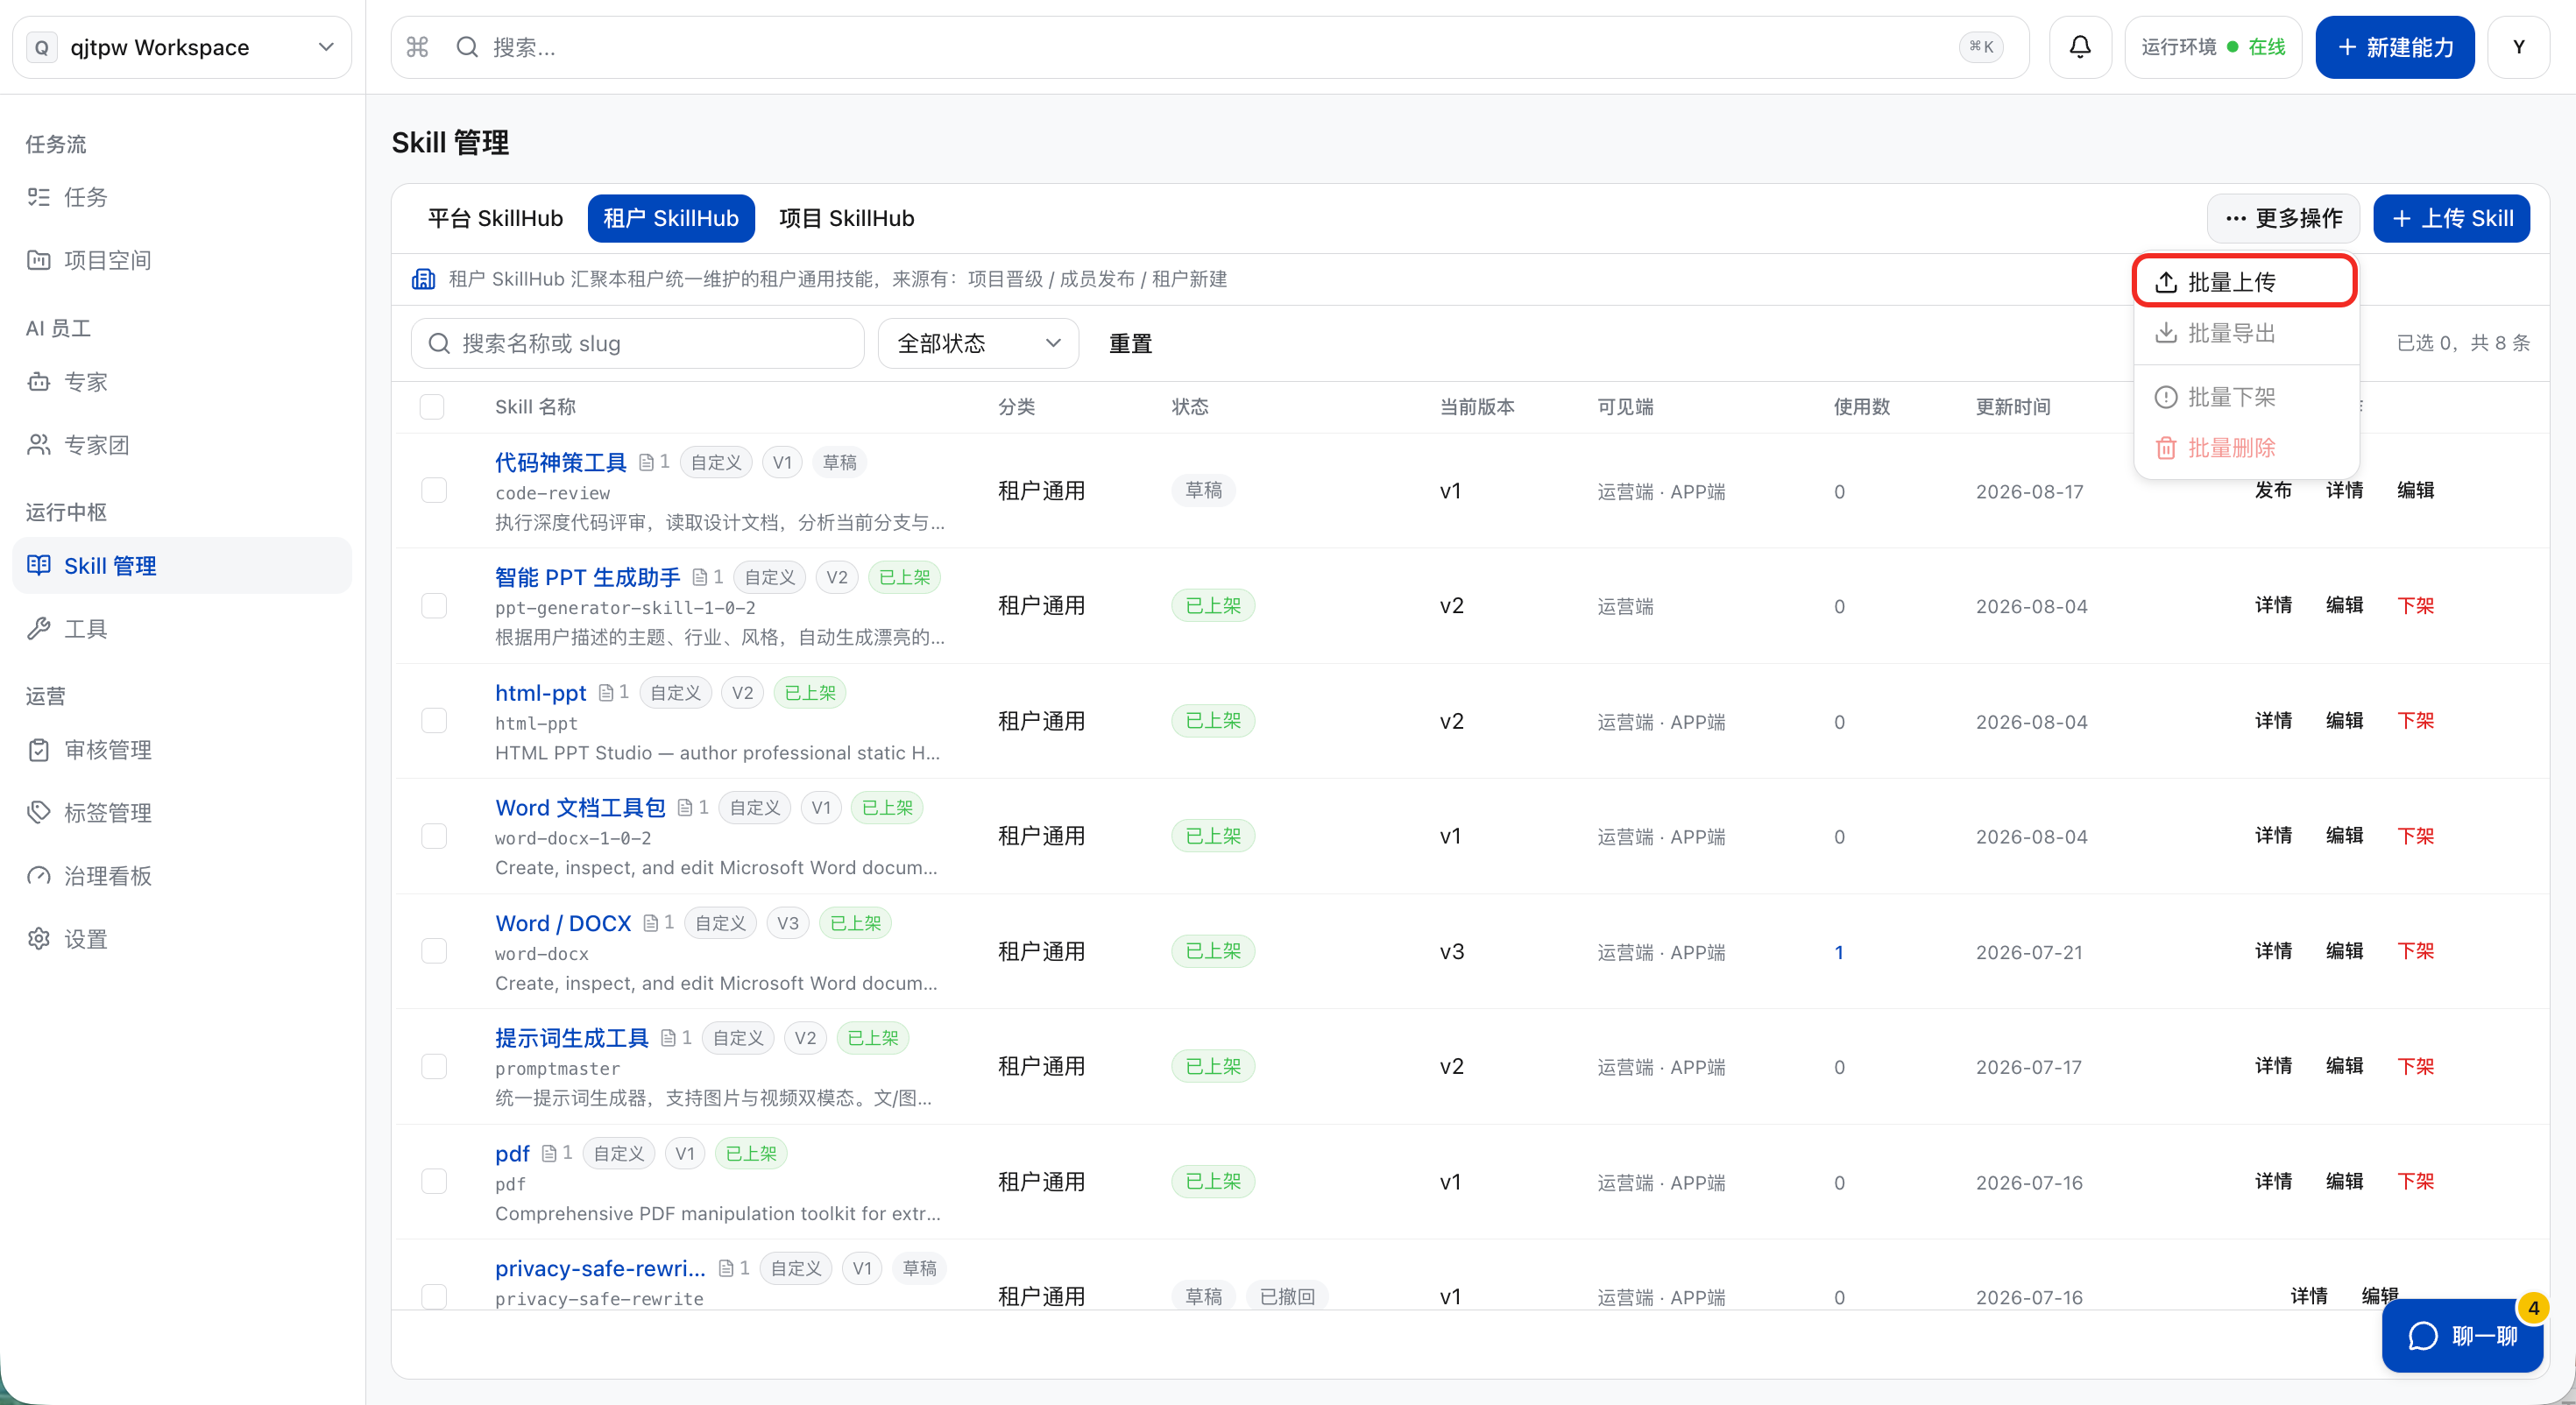
Bulk Upload Skill
a. Click “More actions” > “Bulk upload”.
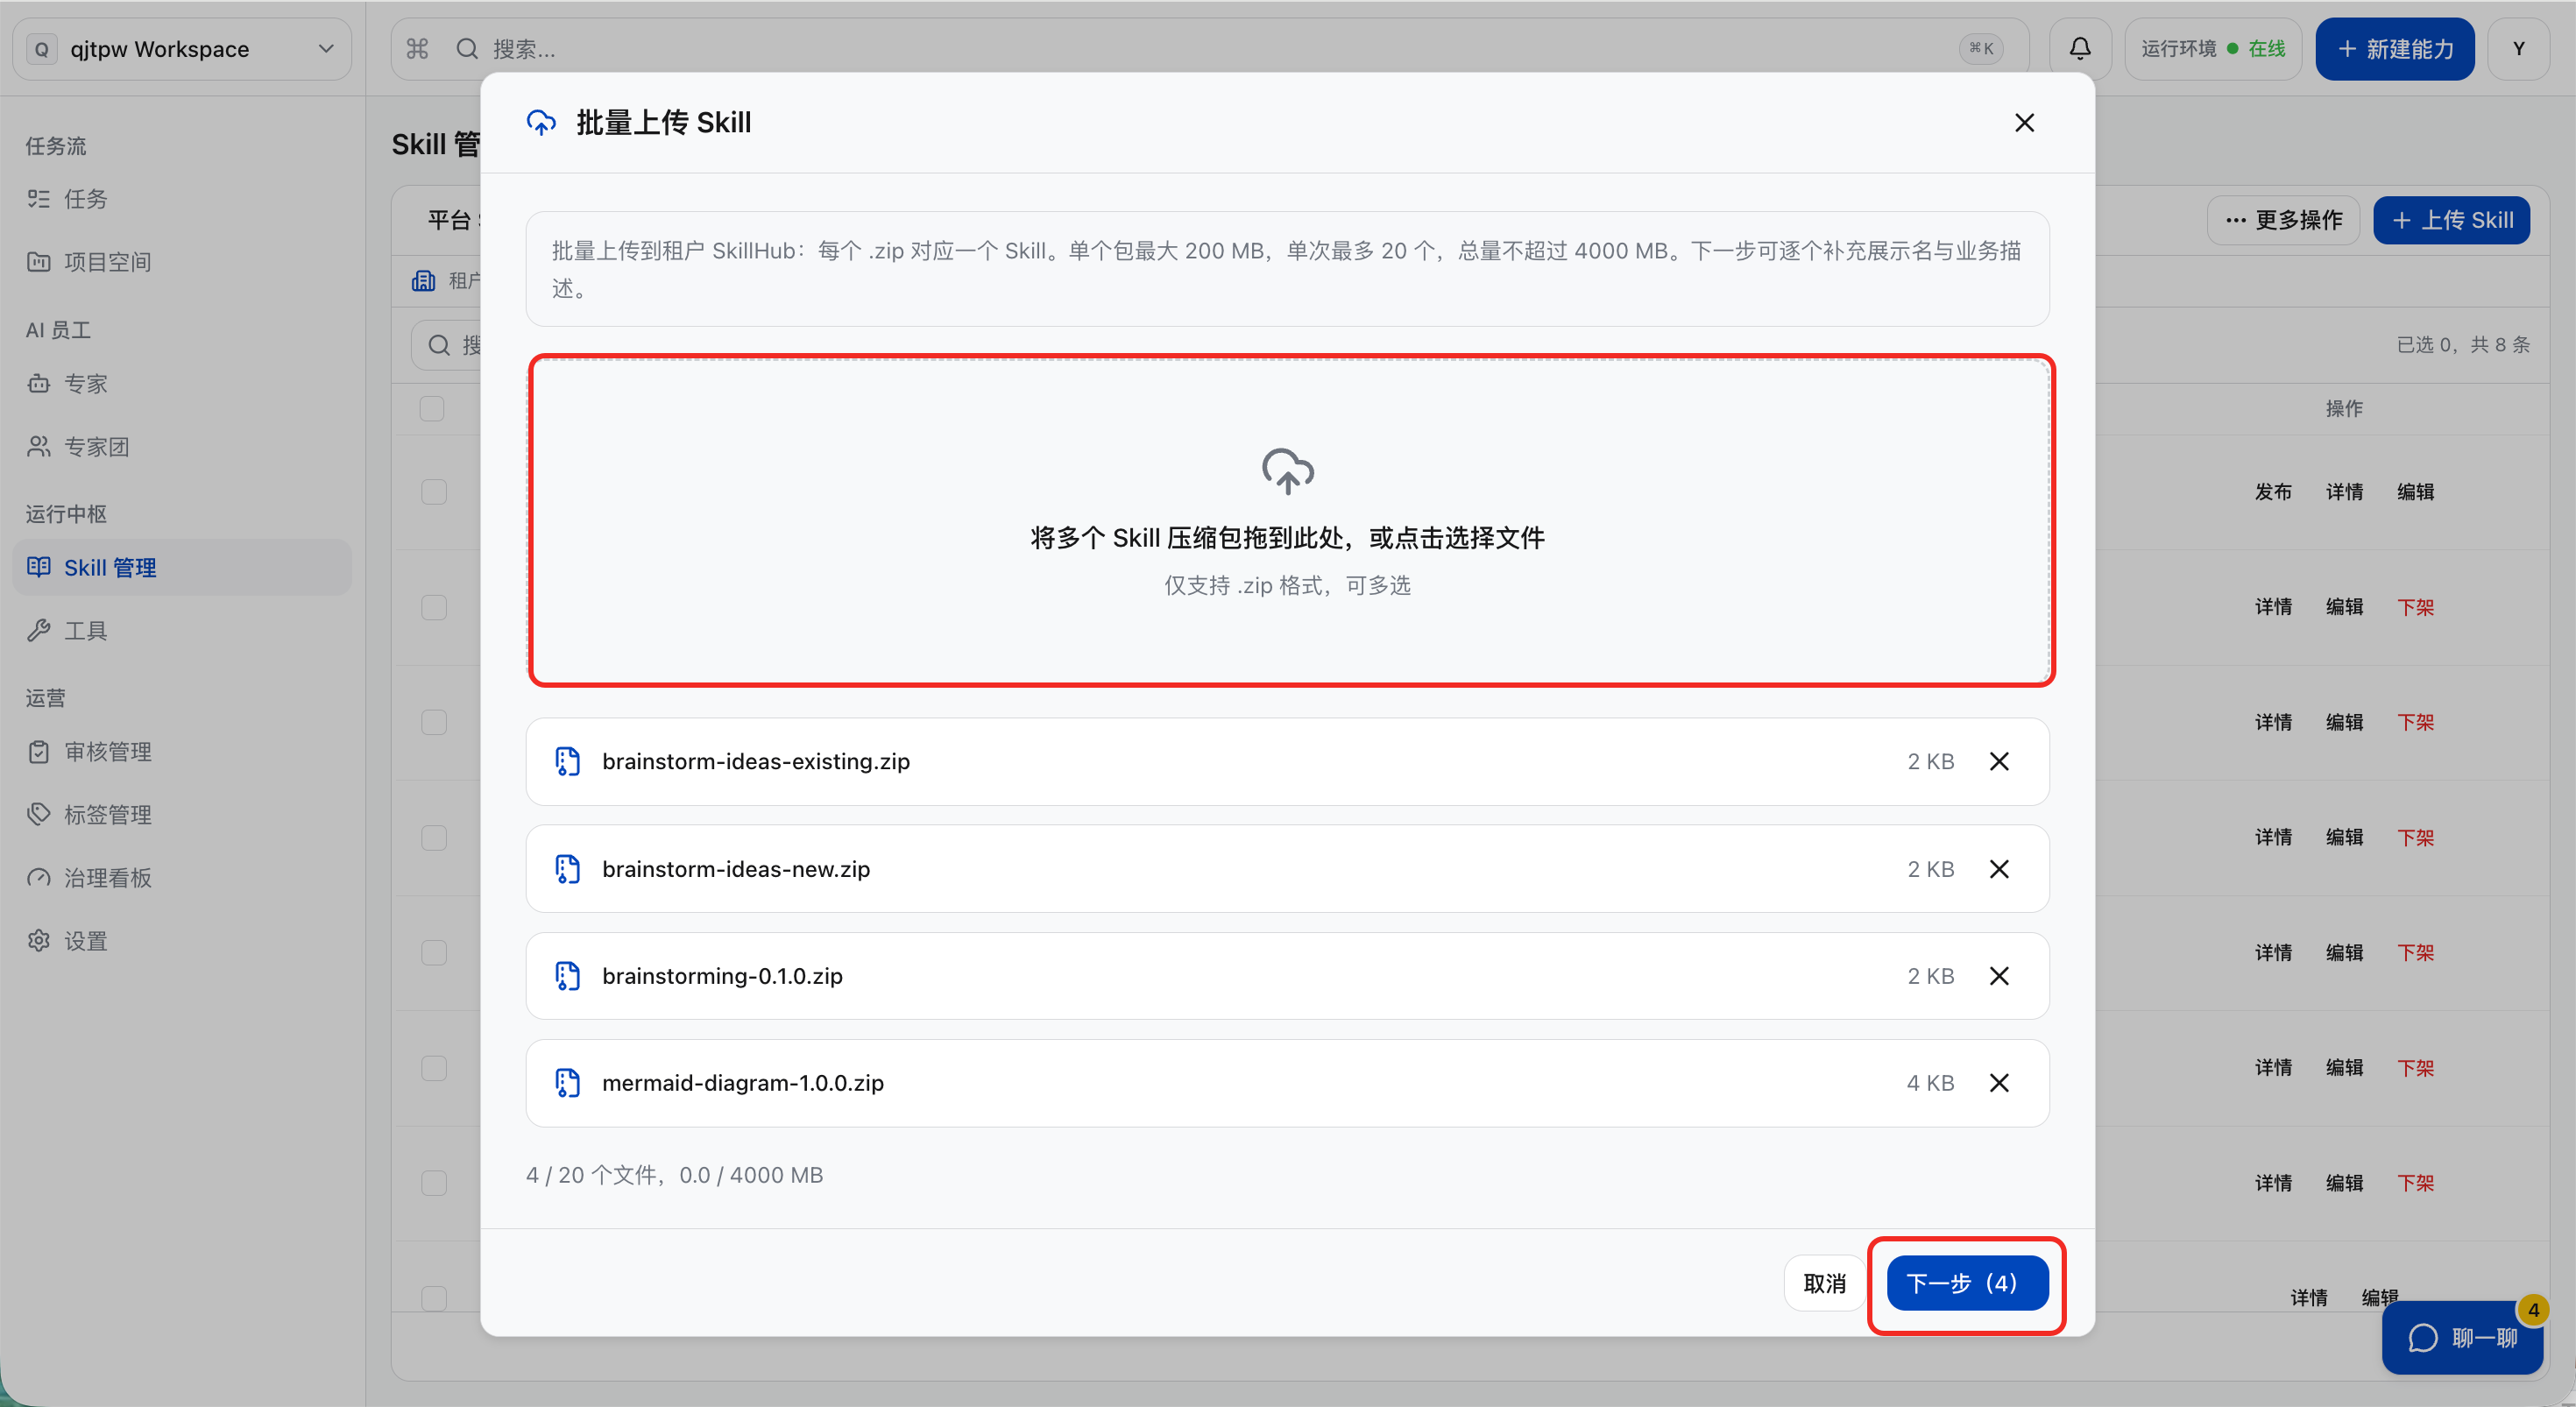
b. After selecting the Skill package, click “Next”.
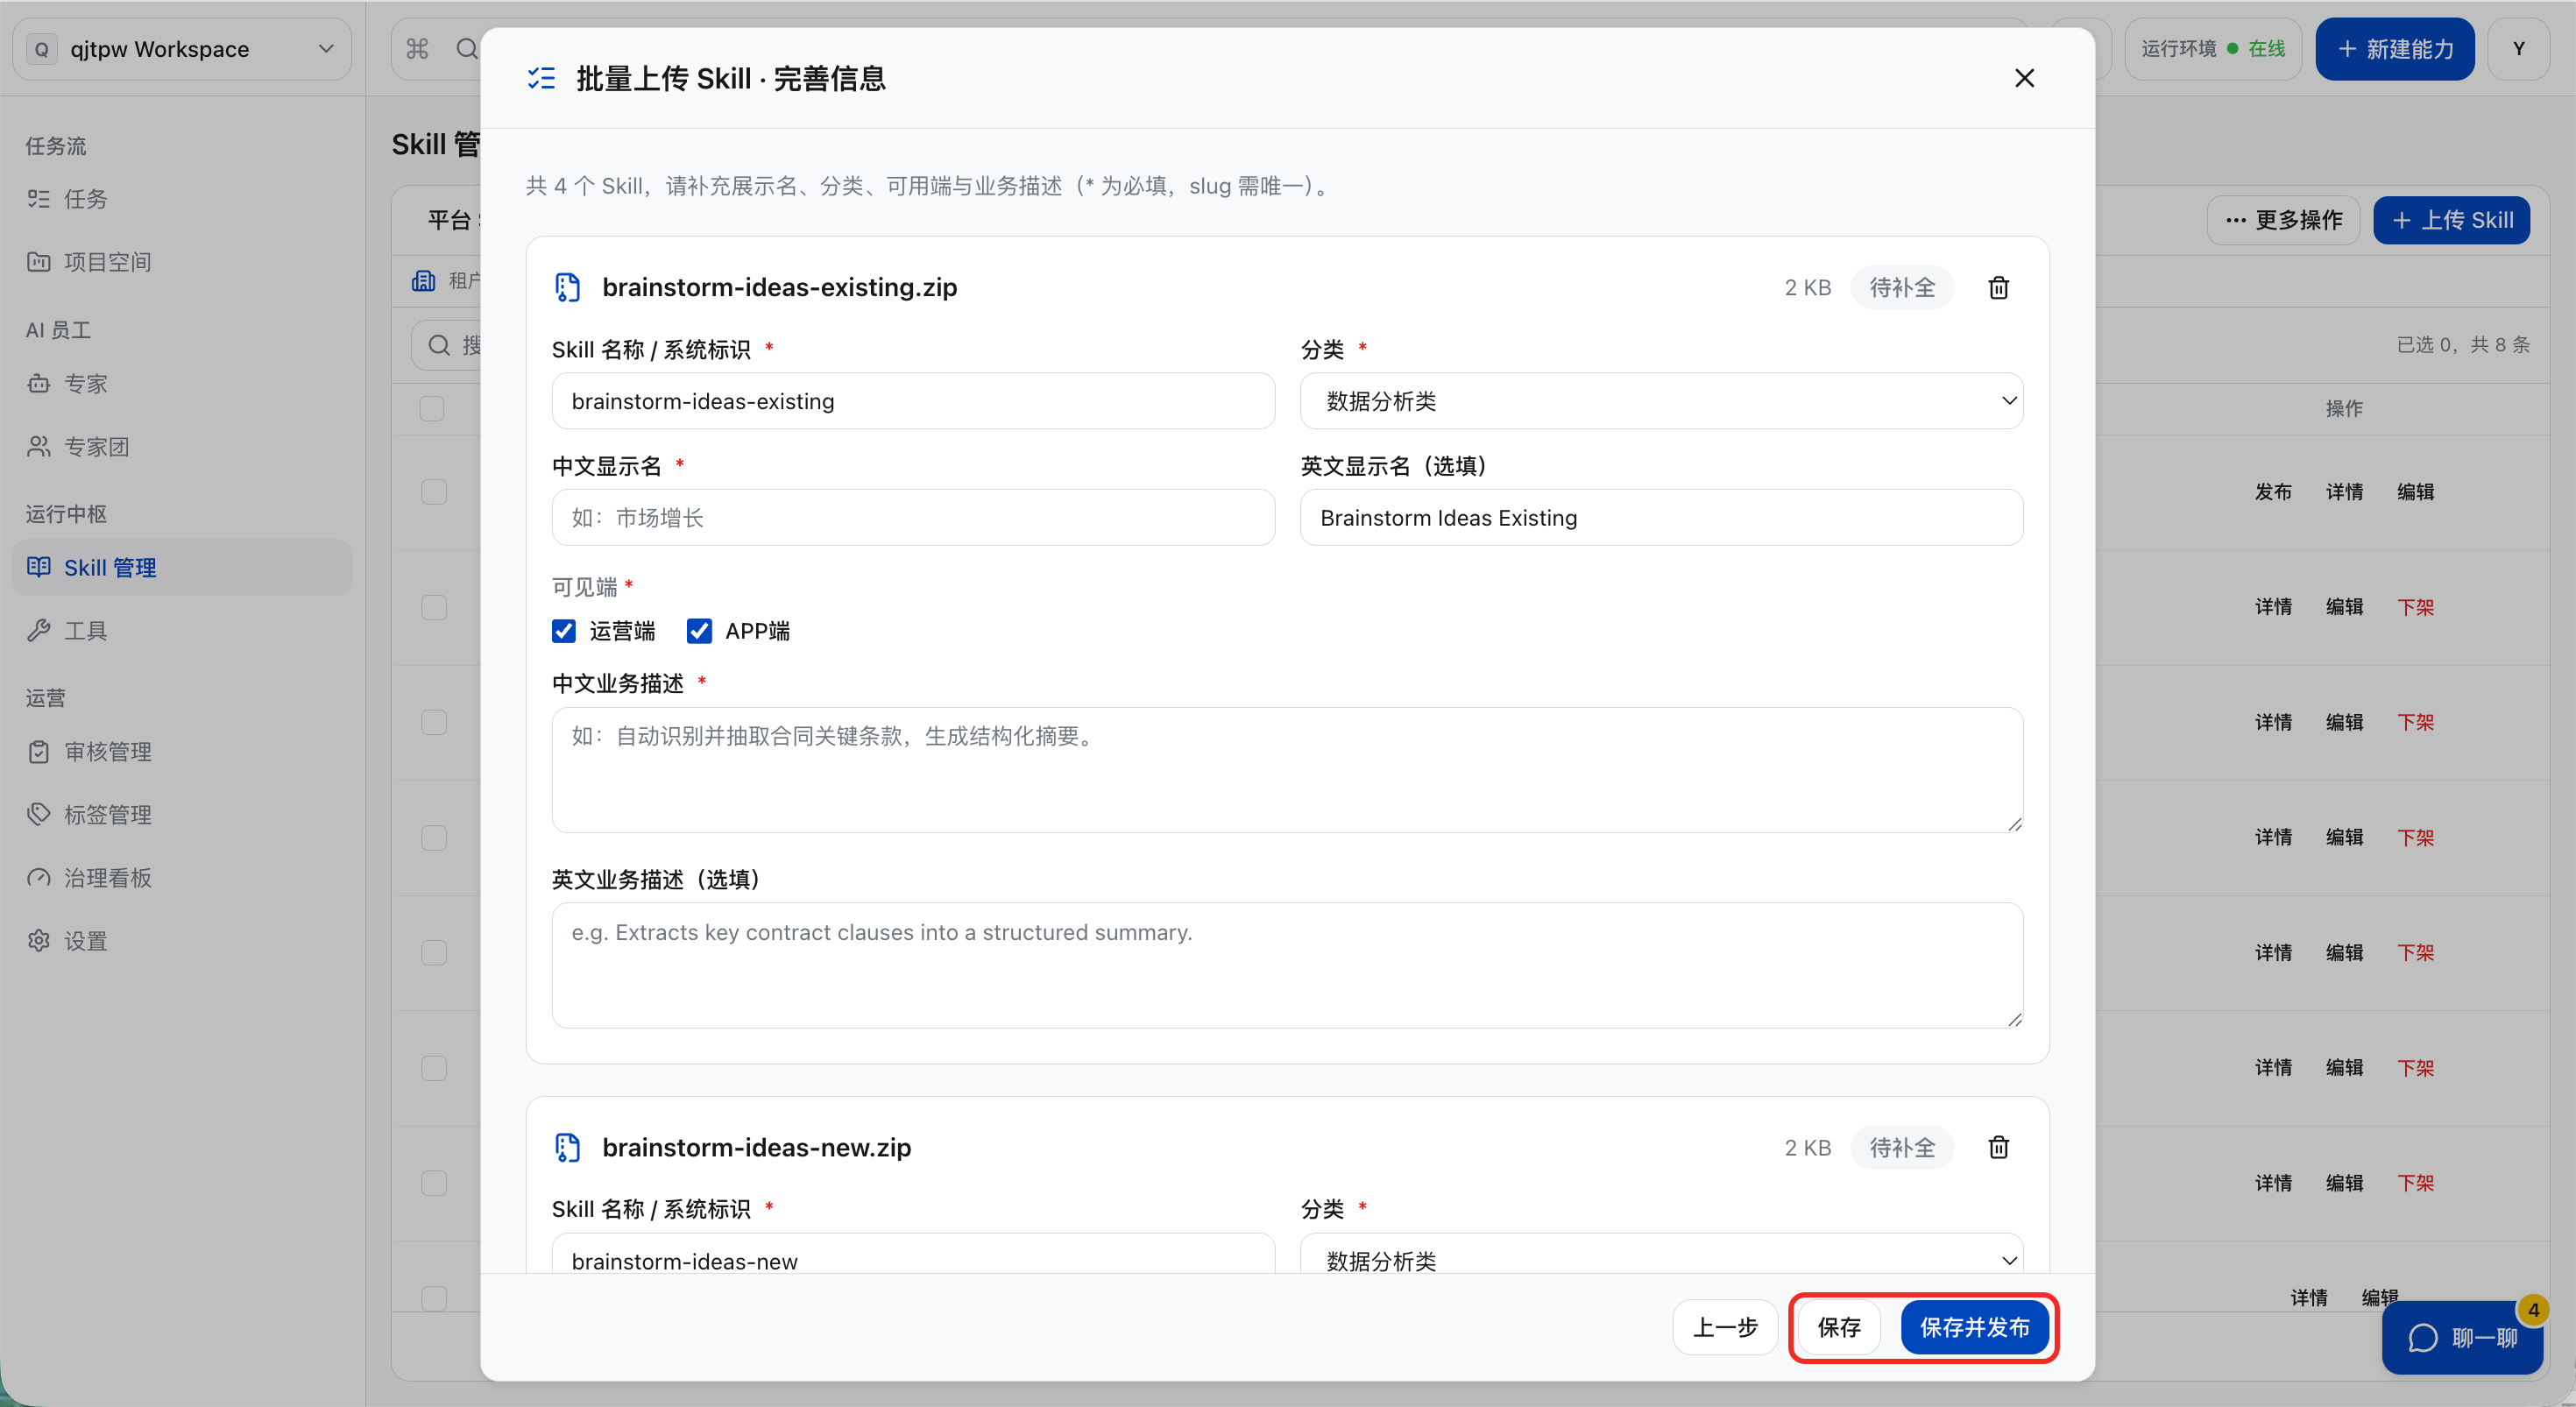
c. Configure information such as system identifier, Chinese display name (required), category (selected from the dictionary), available terminals, and Chinese business description (required). After the configuration is complete, click “Save (Draft) / Save and Publish”. The system will upload and analyze the content of the Skill package. Wait a moment for the upload to complete, after which the content will be routed according to the uploader’s permissions.
-
If the uploading user has the permission to “publish Skills to tenant SkillHu without review”: the Skill will be directly launched once it passes the security scan;
-
If the uploading user already has the permission to “apply for publishing/cancel application to tenant SkillHub”: after submission, it will enter the review queue. During the review period, the Skill remains in the “draft” status, and when the review is approved, the draft at that time will be used as the version and set to “listed”.
Publish Skill
DeepWorks Desktop Release
a. Open and log in to the DeepWorks desktop client, click on the Skill card via the left menu path “My AI Colleagues” > “Skills” > “Installed”.
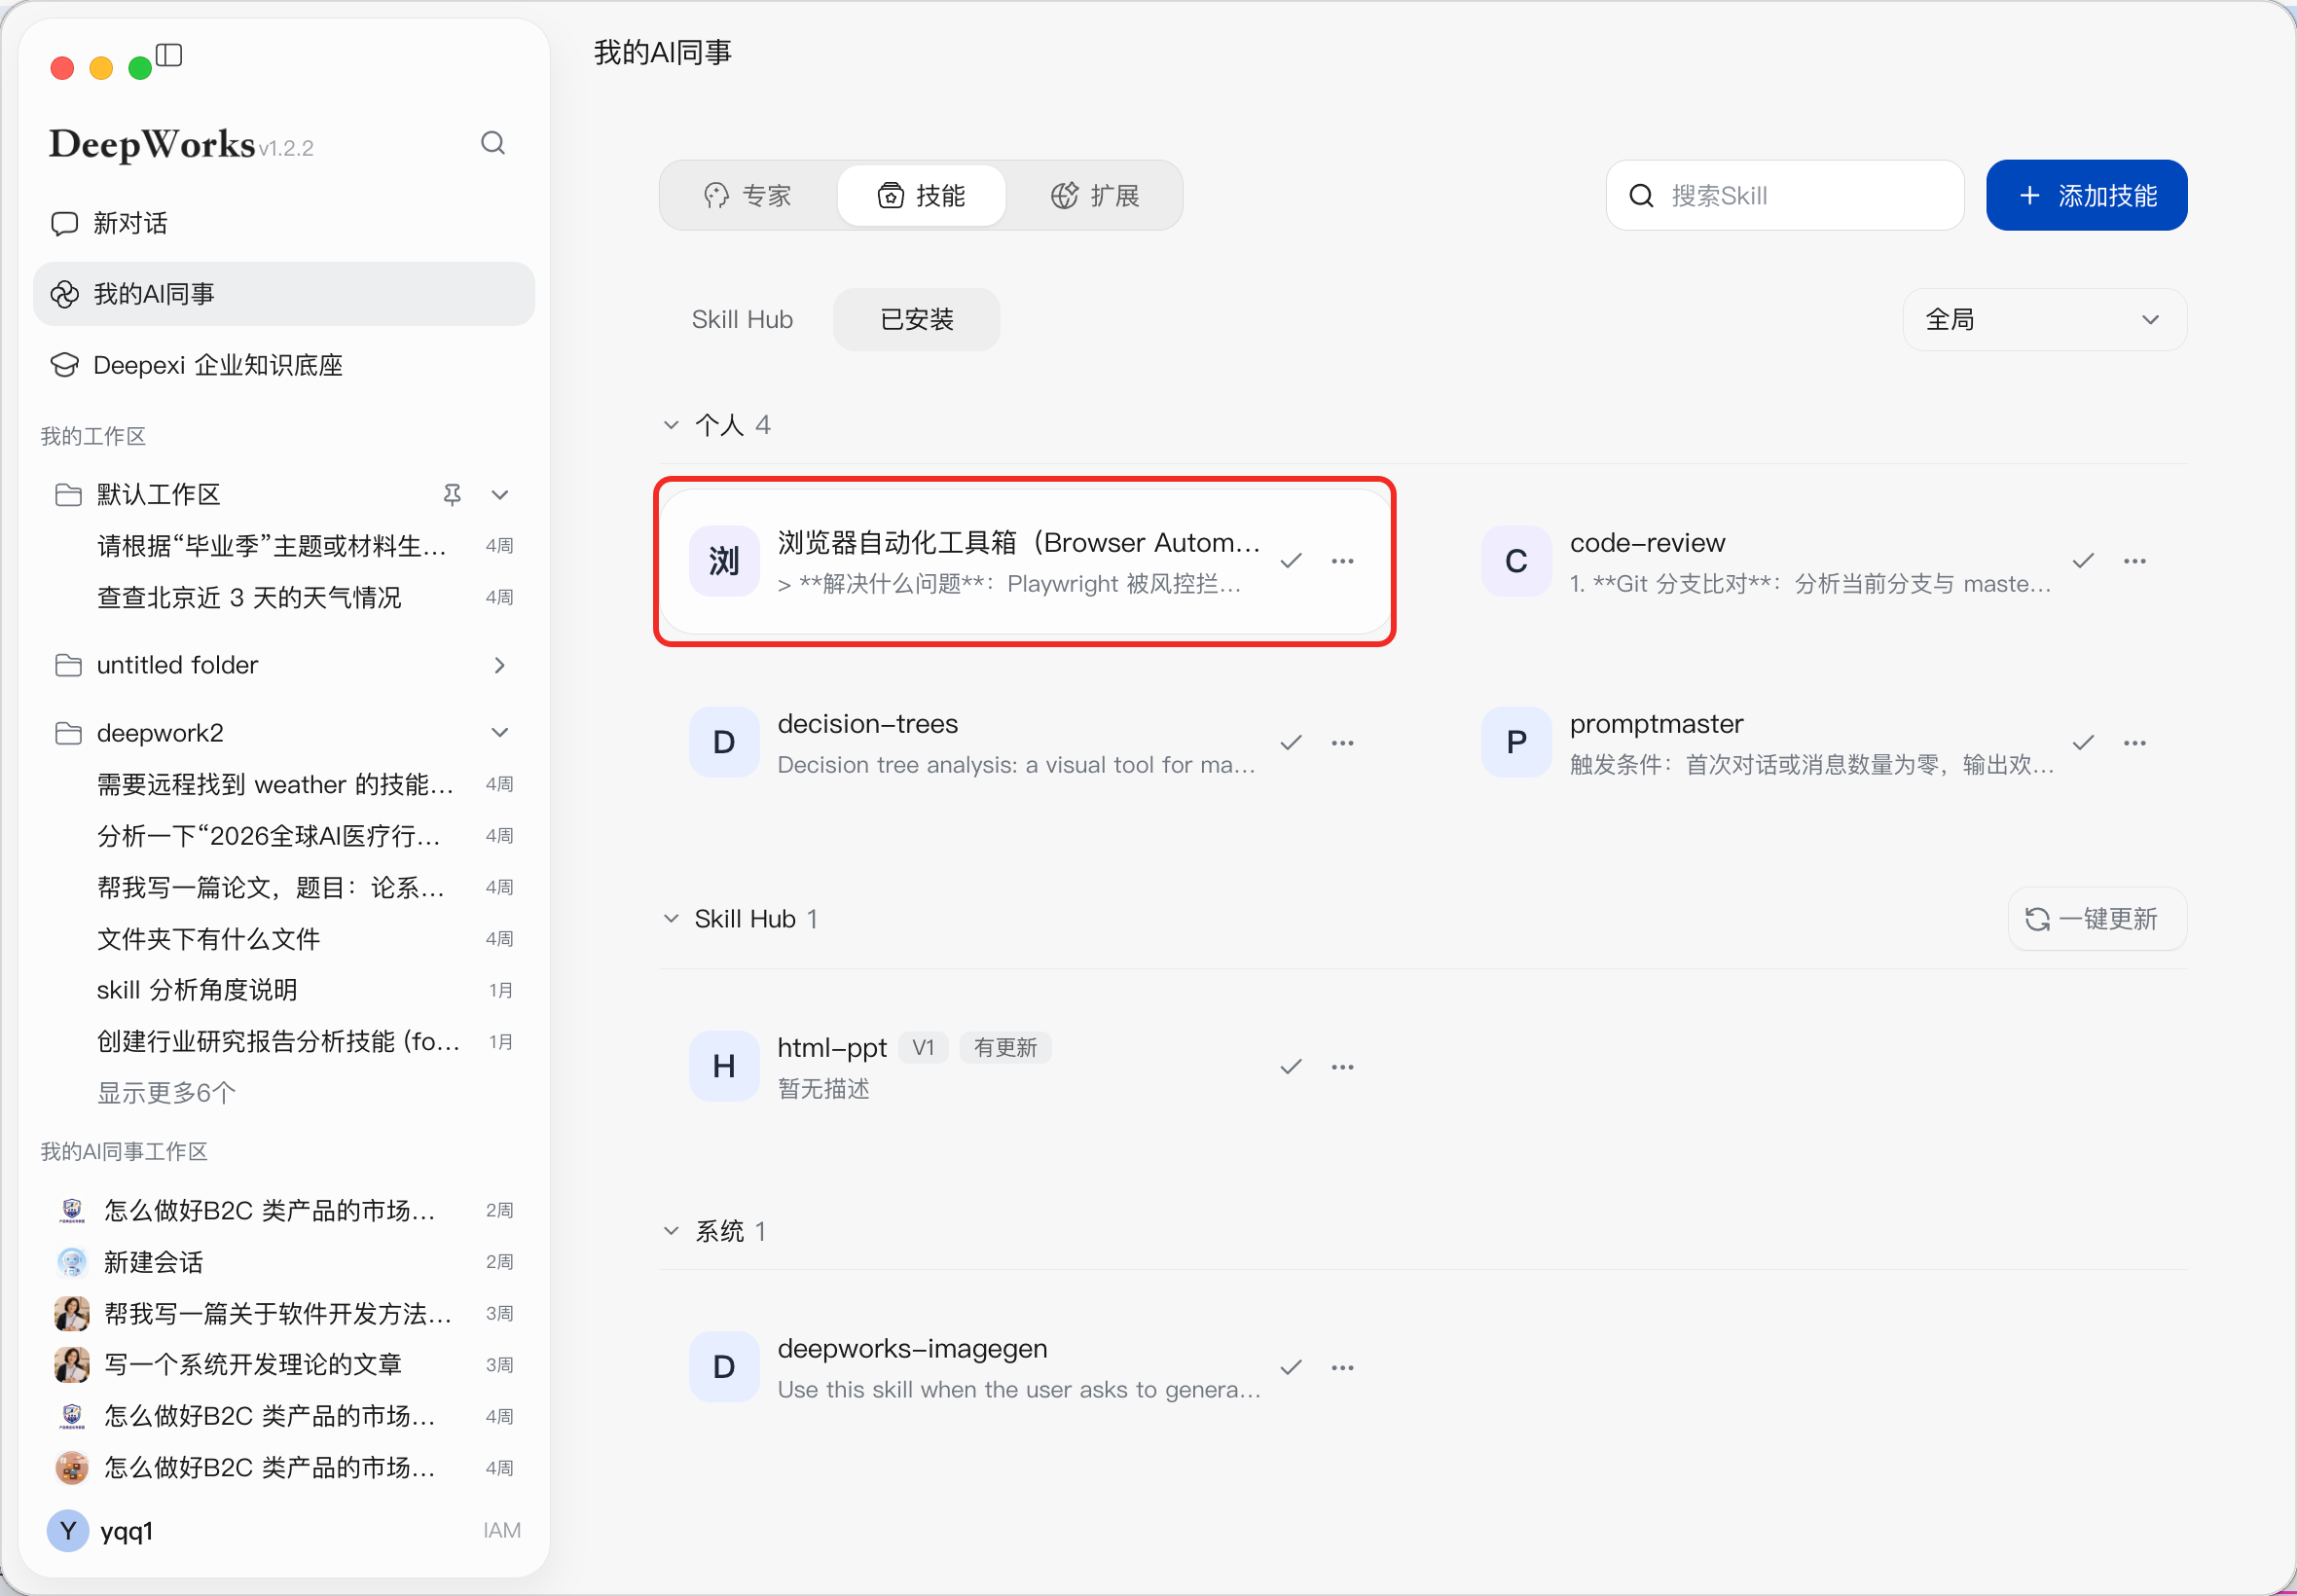
b. Click “Publish”.
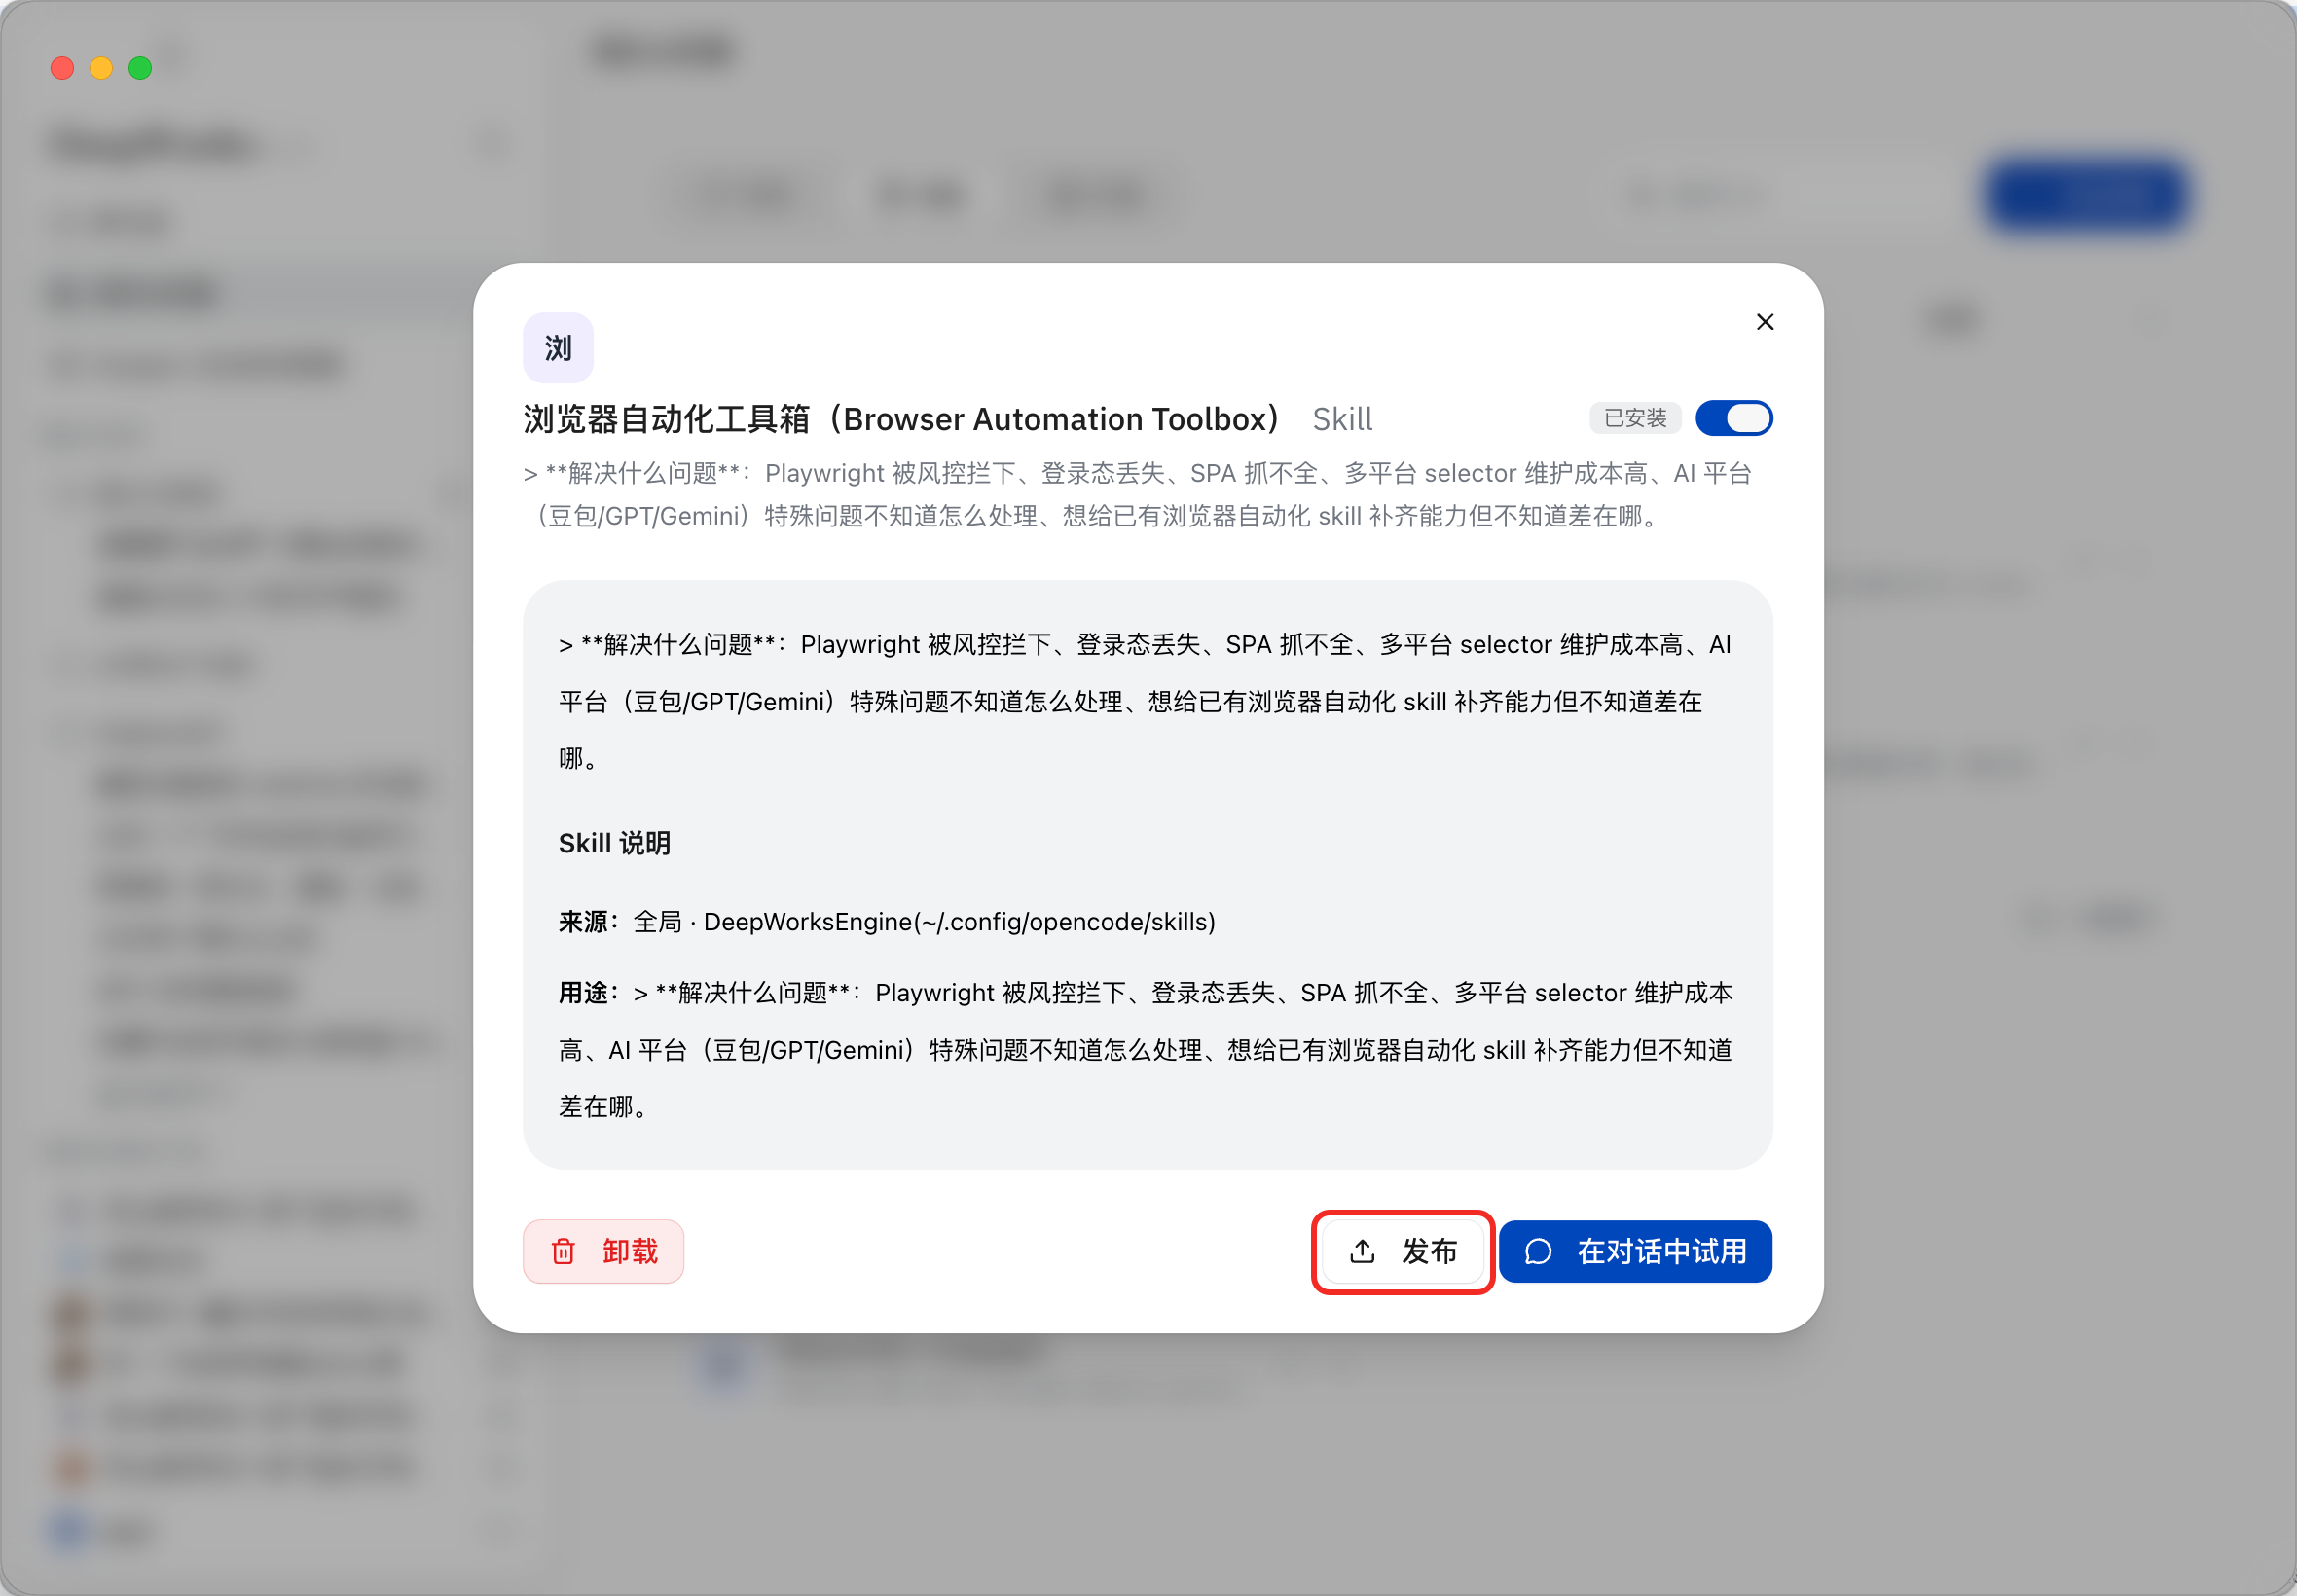
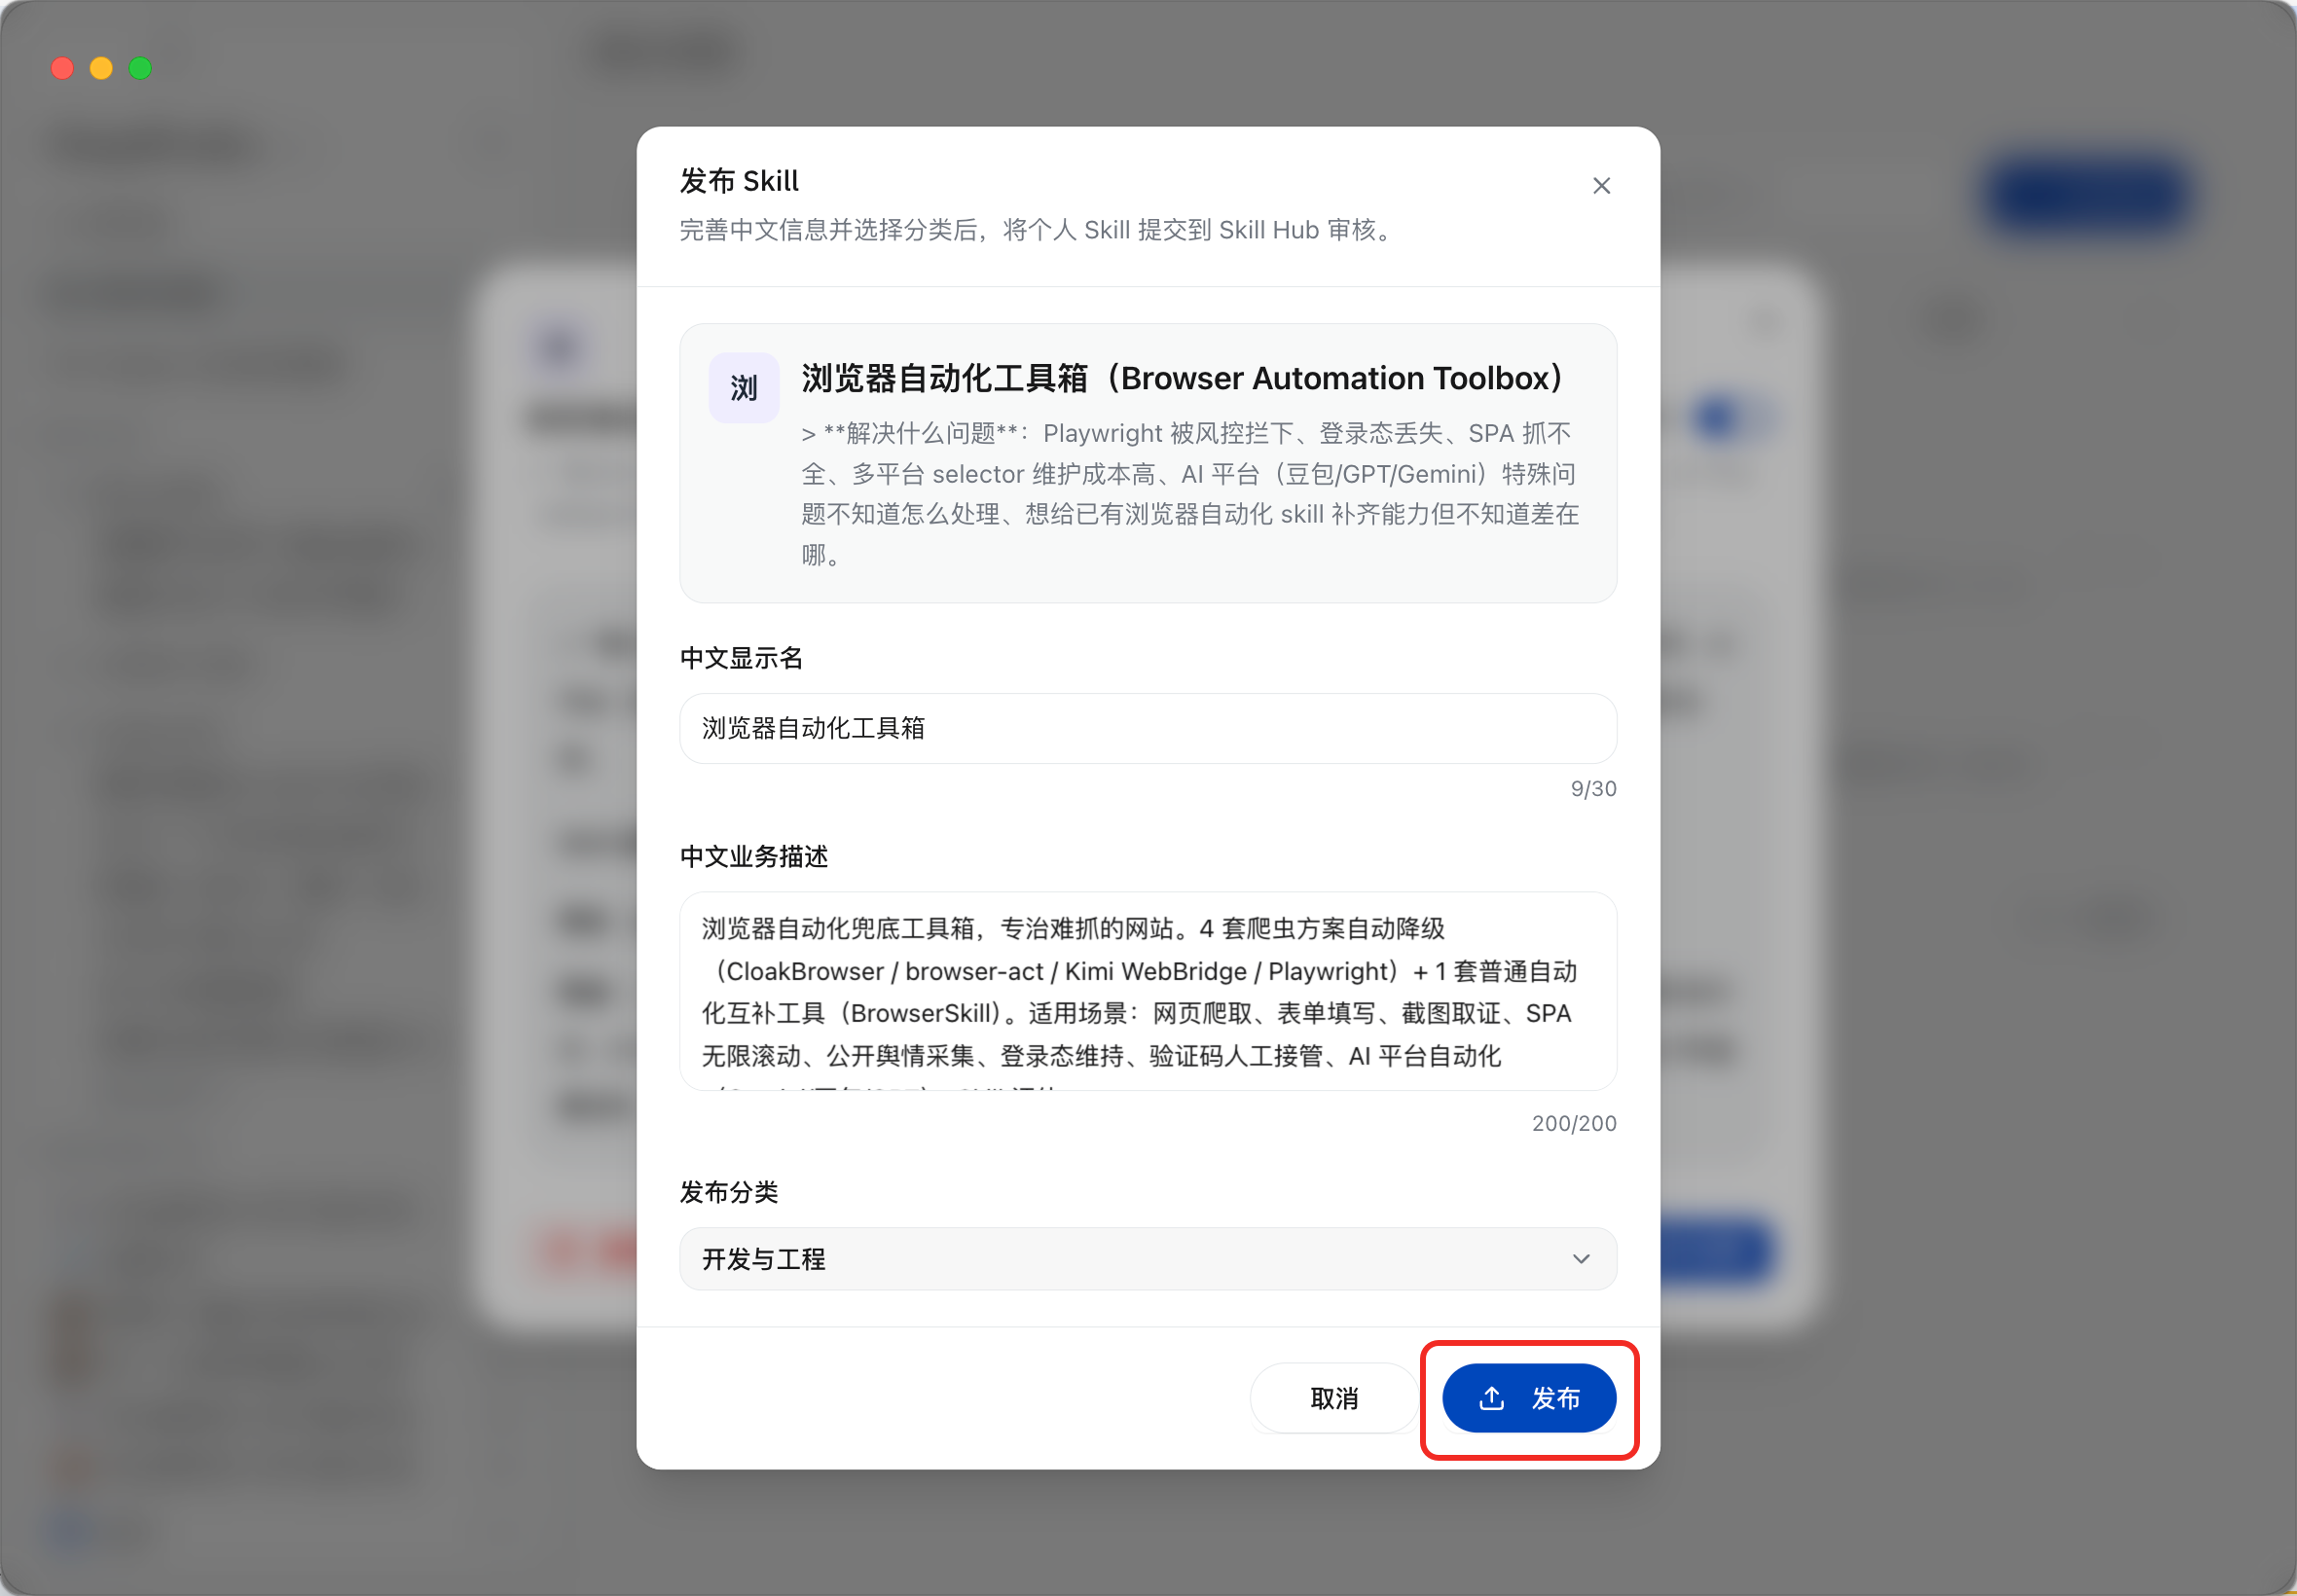
c. To facilitate other users to use this Skill better, you need to supplement release information when publishing the Skill, including Chinese display name, Chinese business description, and release category. After filling in the information, click “Publish”. Enterprise edition users can publish the Skill to the SkillHub of their affiliated tenant via the DeepWorks desktop client, while personal edition users can publish the Skill to the public SkillHub via the DeepWorks desktop client.
Note: When publishing a Skill, the system will check whether the system identifier of the Skill (i. e., the `name` field in SKILL.md) already exists. If it does, the system will recognize the two as the same Skill, update the existing Skill and generate a new version; if not, the system will create and publish the new Skill.
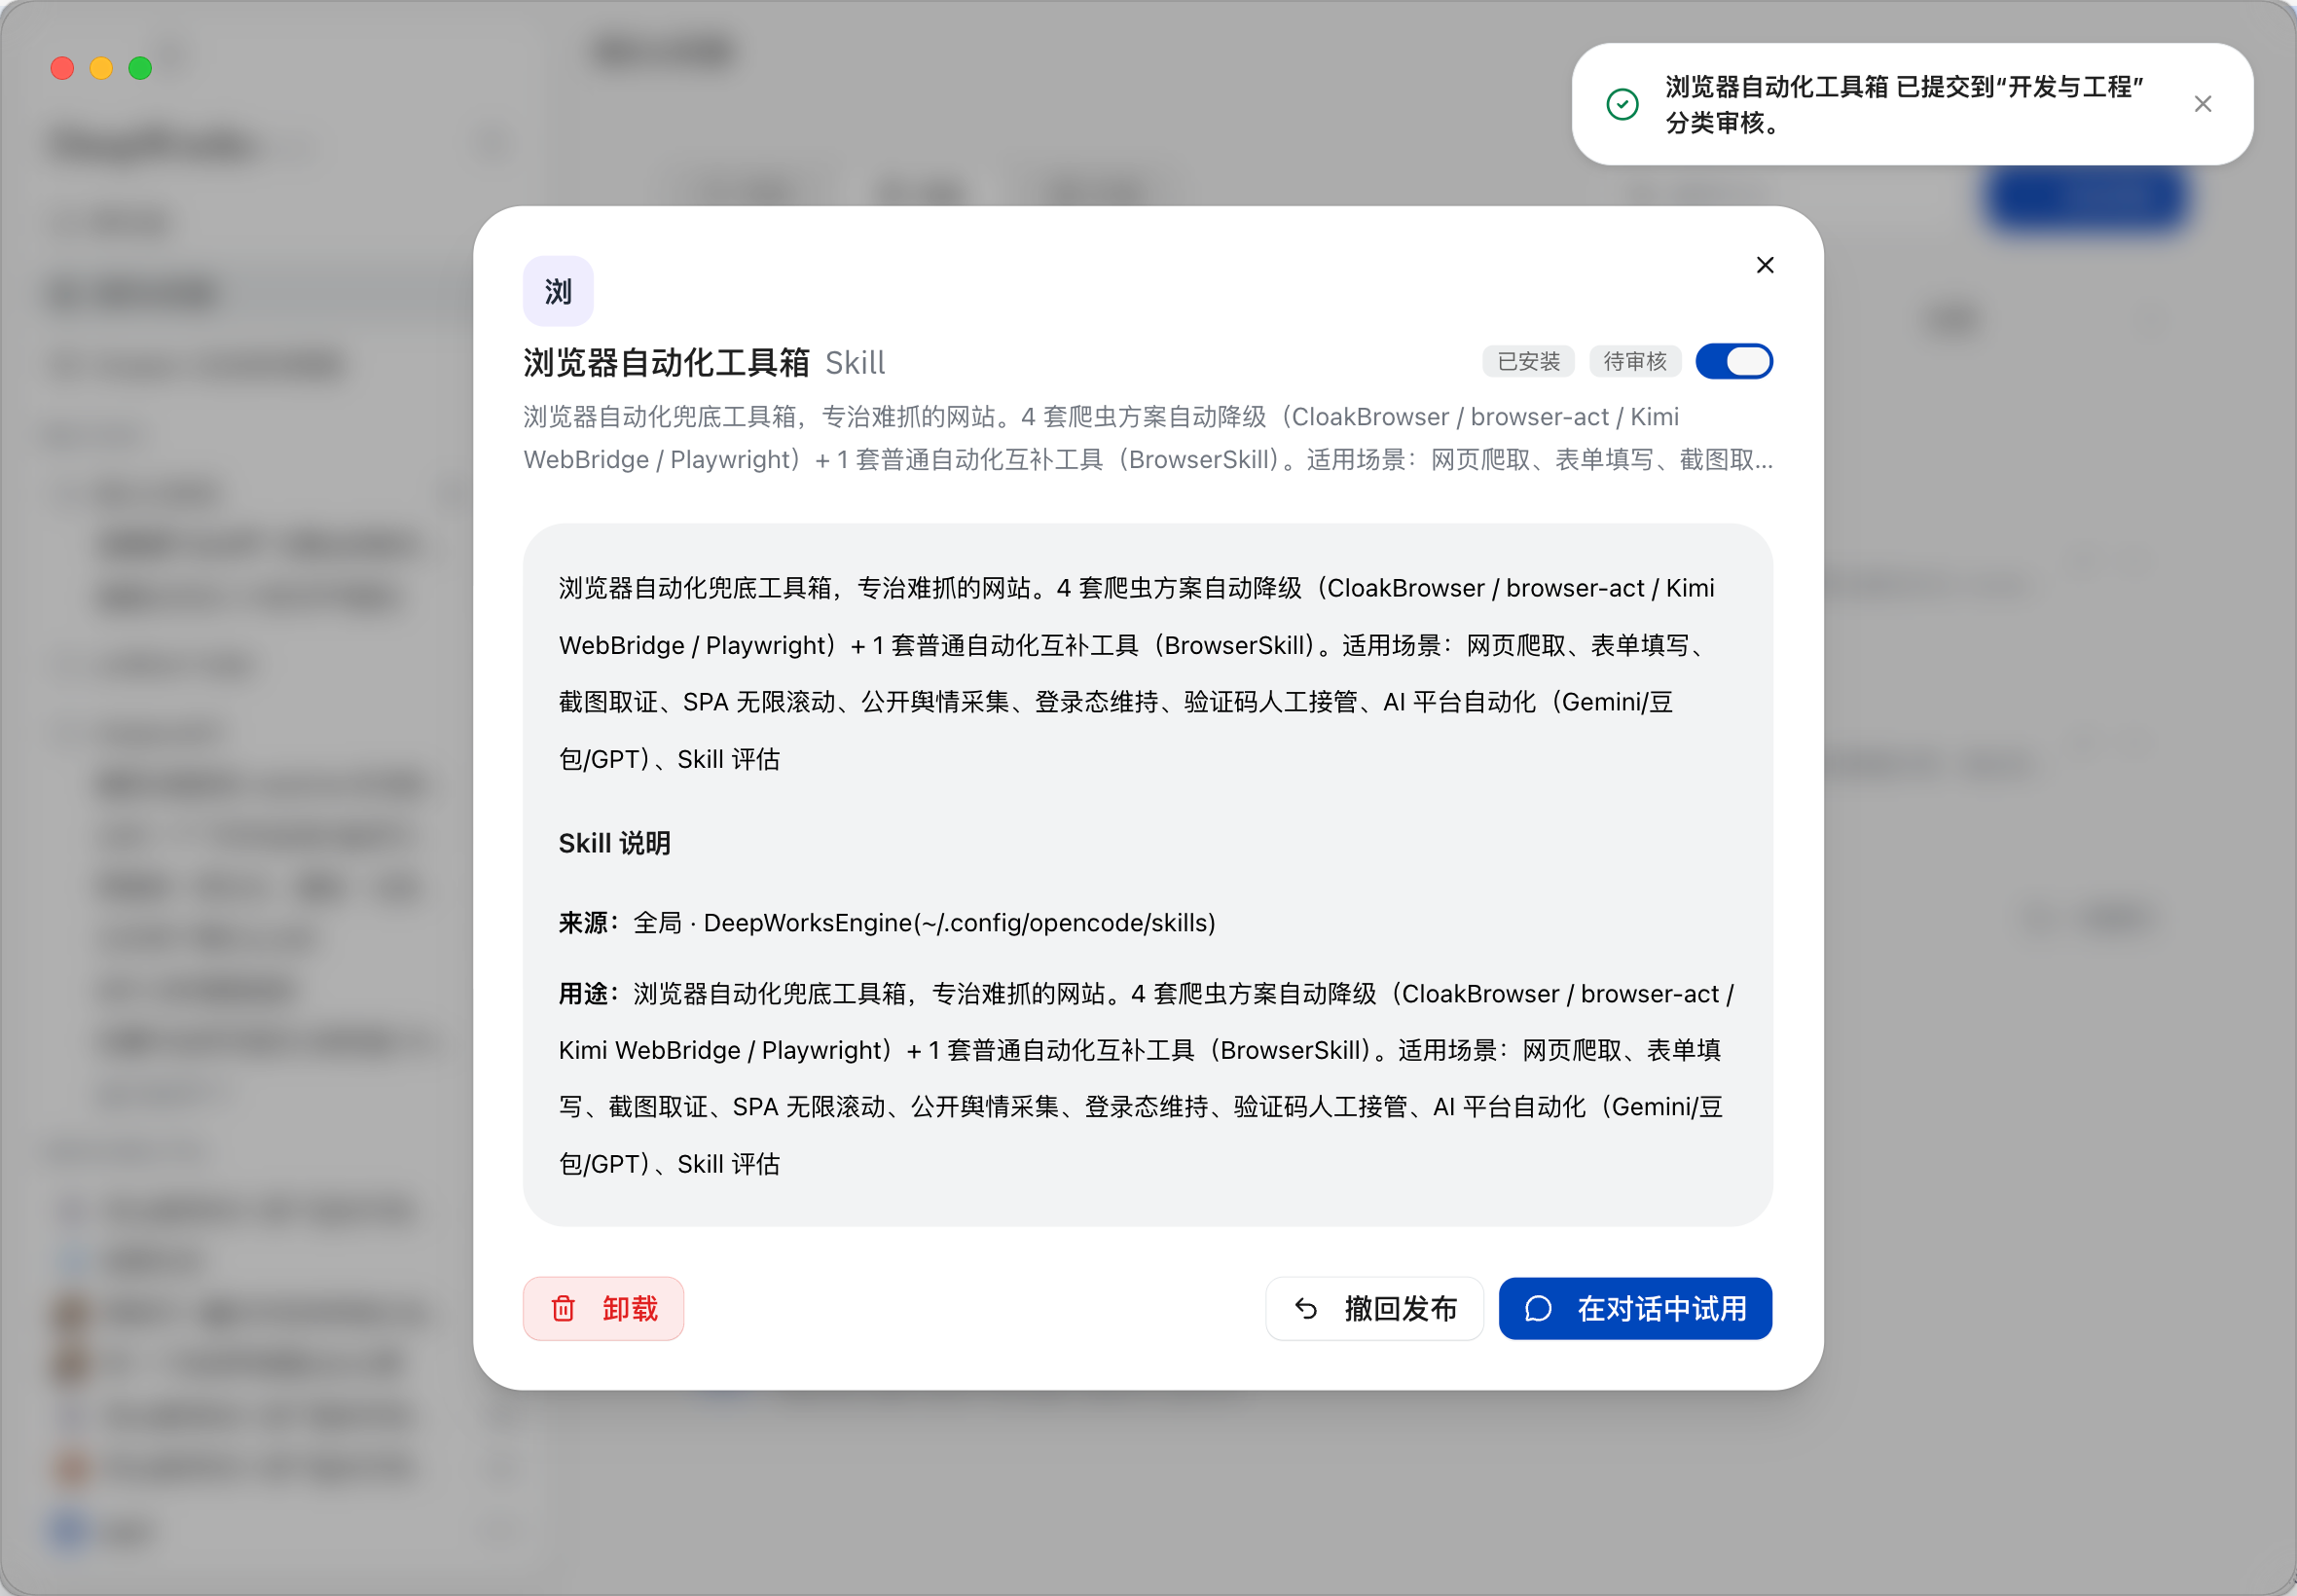
d. After the release is completed, the Skill will be reviewed by the tenant administrator or the person in charge of release for this category. Upon successful review, it will be launched on the tenant’s SkillHub. During the review waiting period, if you need to withdraw the release, you can click “Withdraw Release”.
DeepWorks Admin Portal Released
For a Skill in the “Draft” status, click “Publish”, confirm and submit in the secondary confirmation pop-up box. After successful publishing, traffic will be routed according to the permissions of the uploading user.
-
If the uploading user has the permission to “publish Skills to tenant SkillHu without review”: the Skill will be launched directly once it passes the security scan; when publishing a Skill, the system will identify whether the system identifier of the Skill already exists (i. e., the name in SKILL.md). If it exists, the system will regard the two as the same Skill, update the Skill and generate a new version; if it does not exist, the system will create and publish the Skill from scratch.
-
If the uploading user has the permission to “apply for publishing/cancel application to tenant SkillHub”: after submission, it will enter the review queue, the Skill remains in “Draft” during the review period, and when the review is approved, it will be set to “Launched” with the draft at that time as the version.
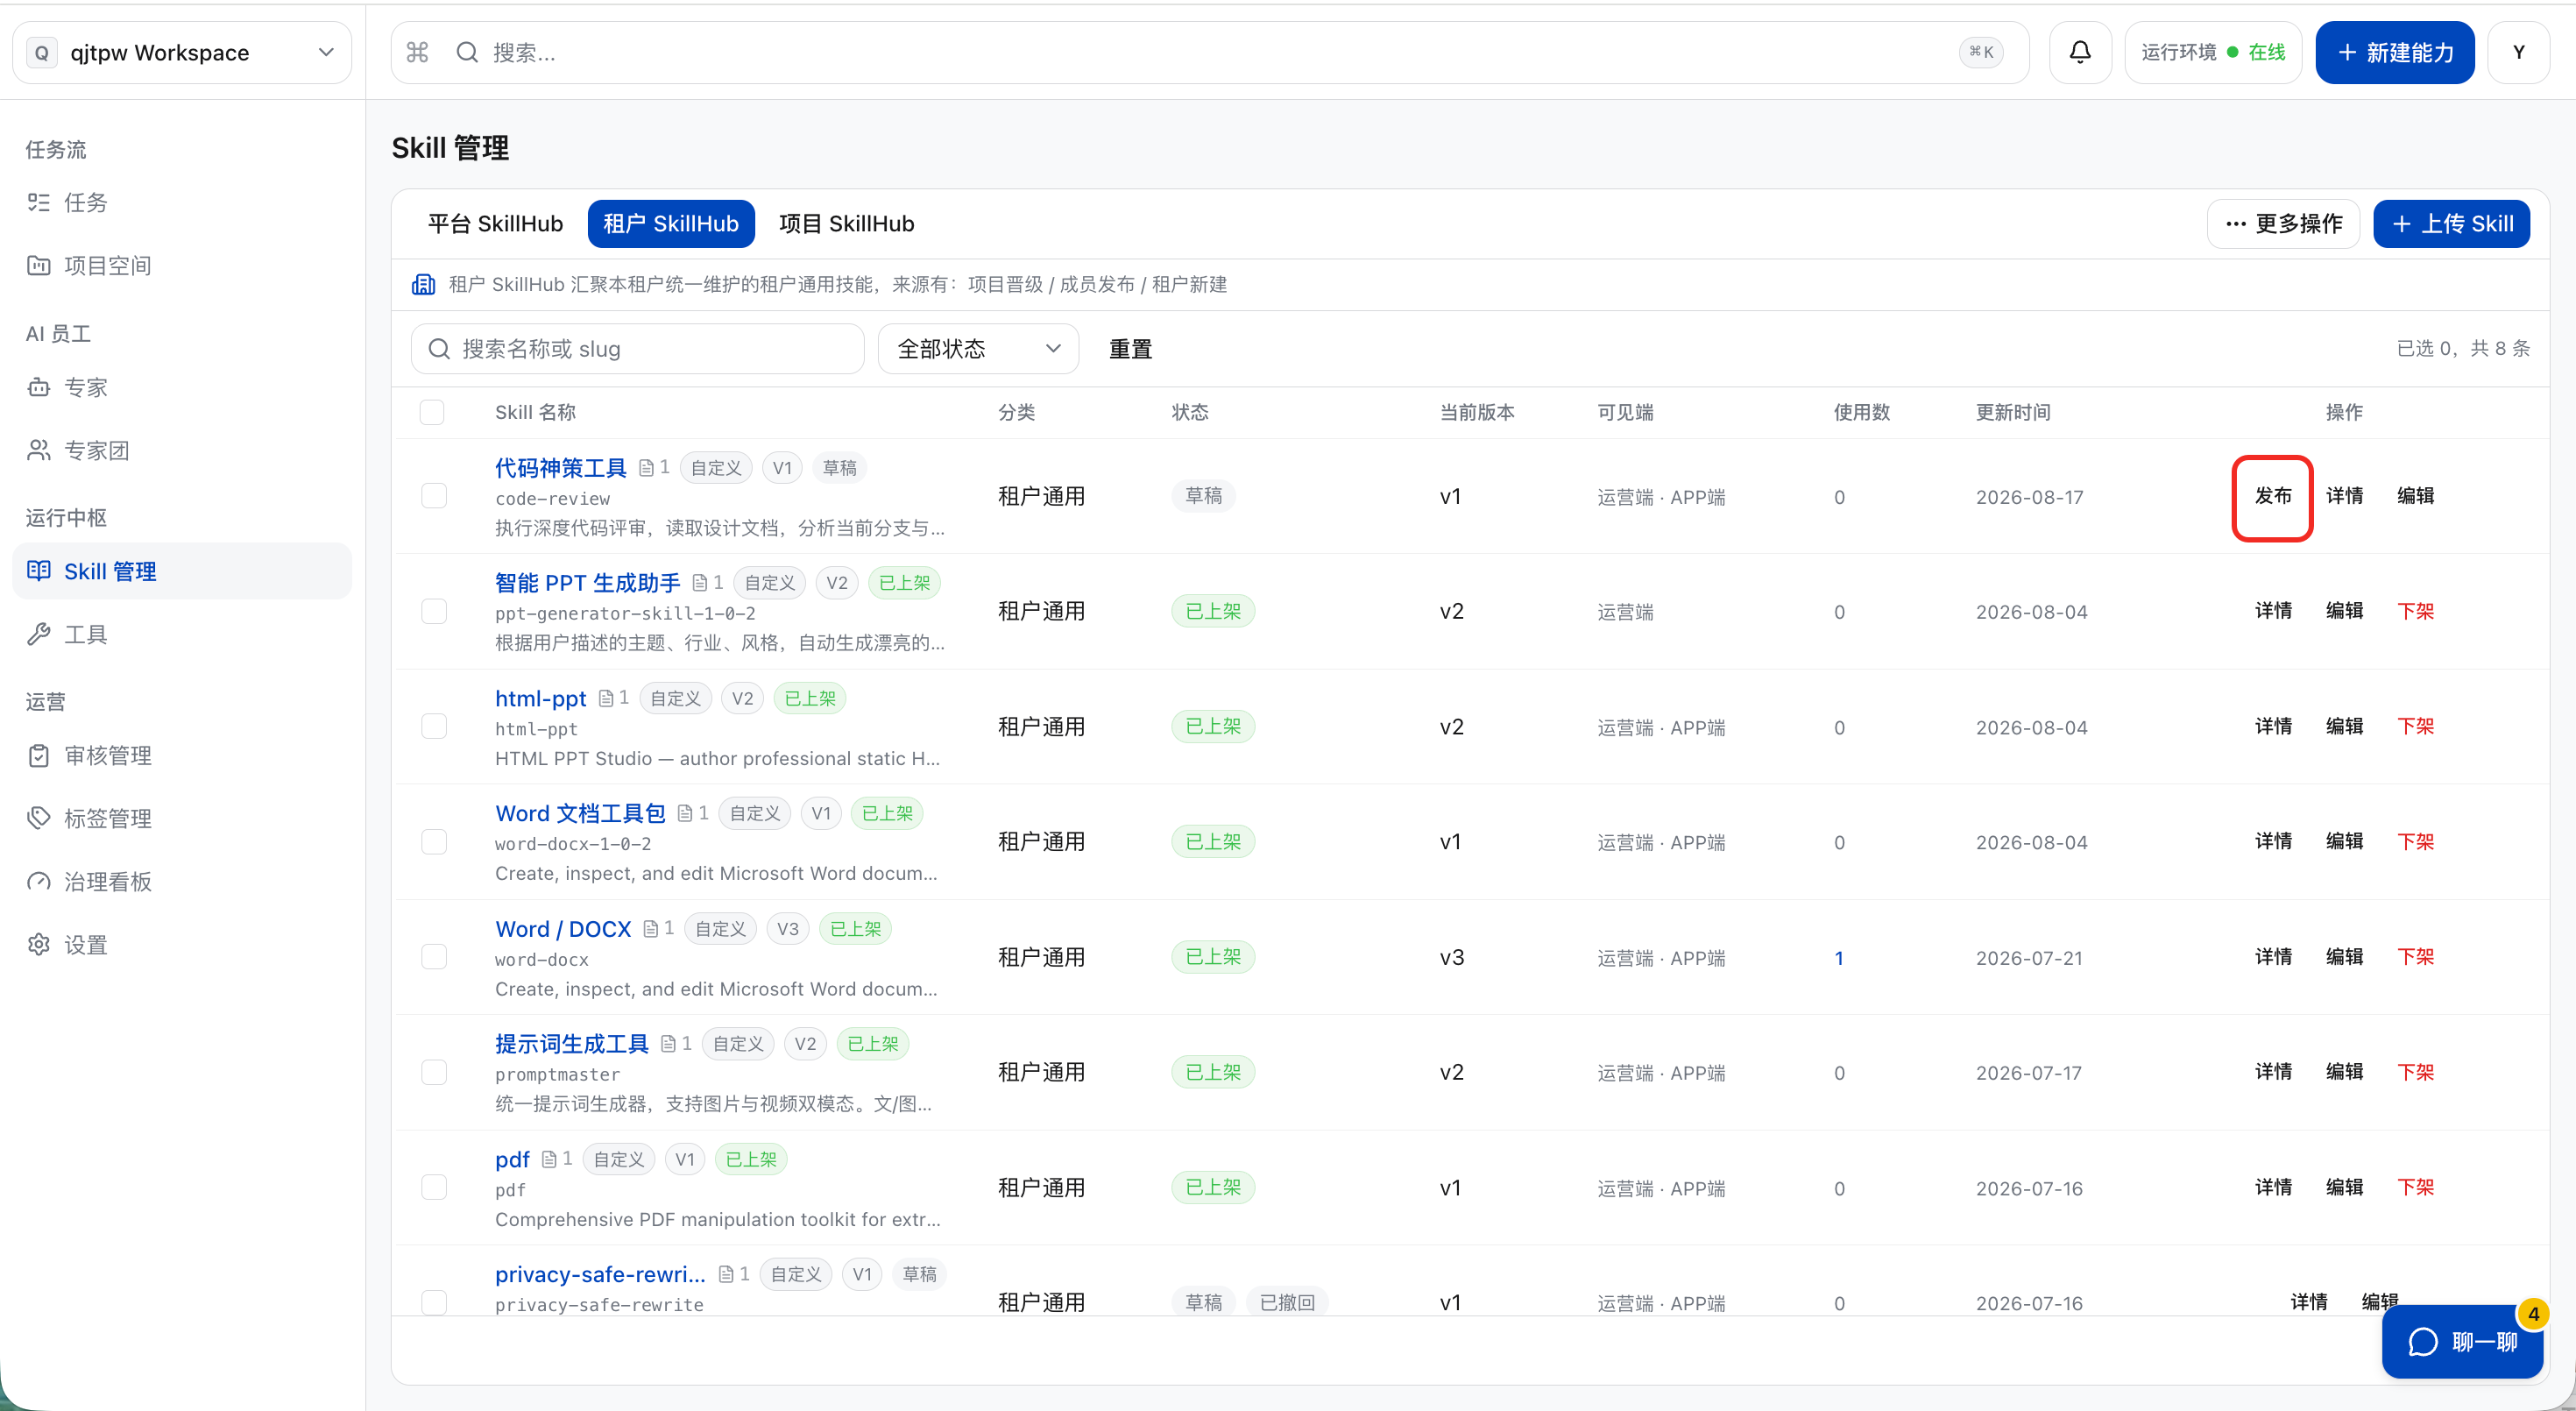
Knowledge Center Web Release
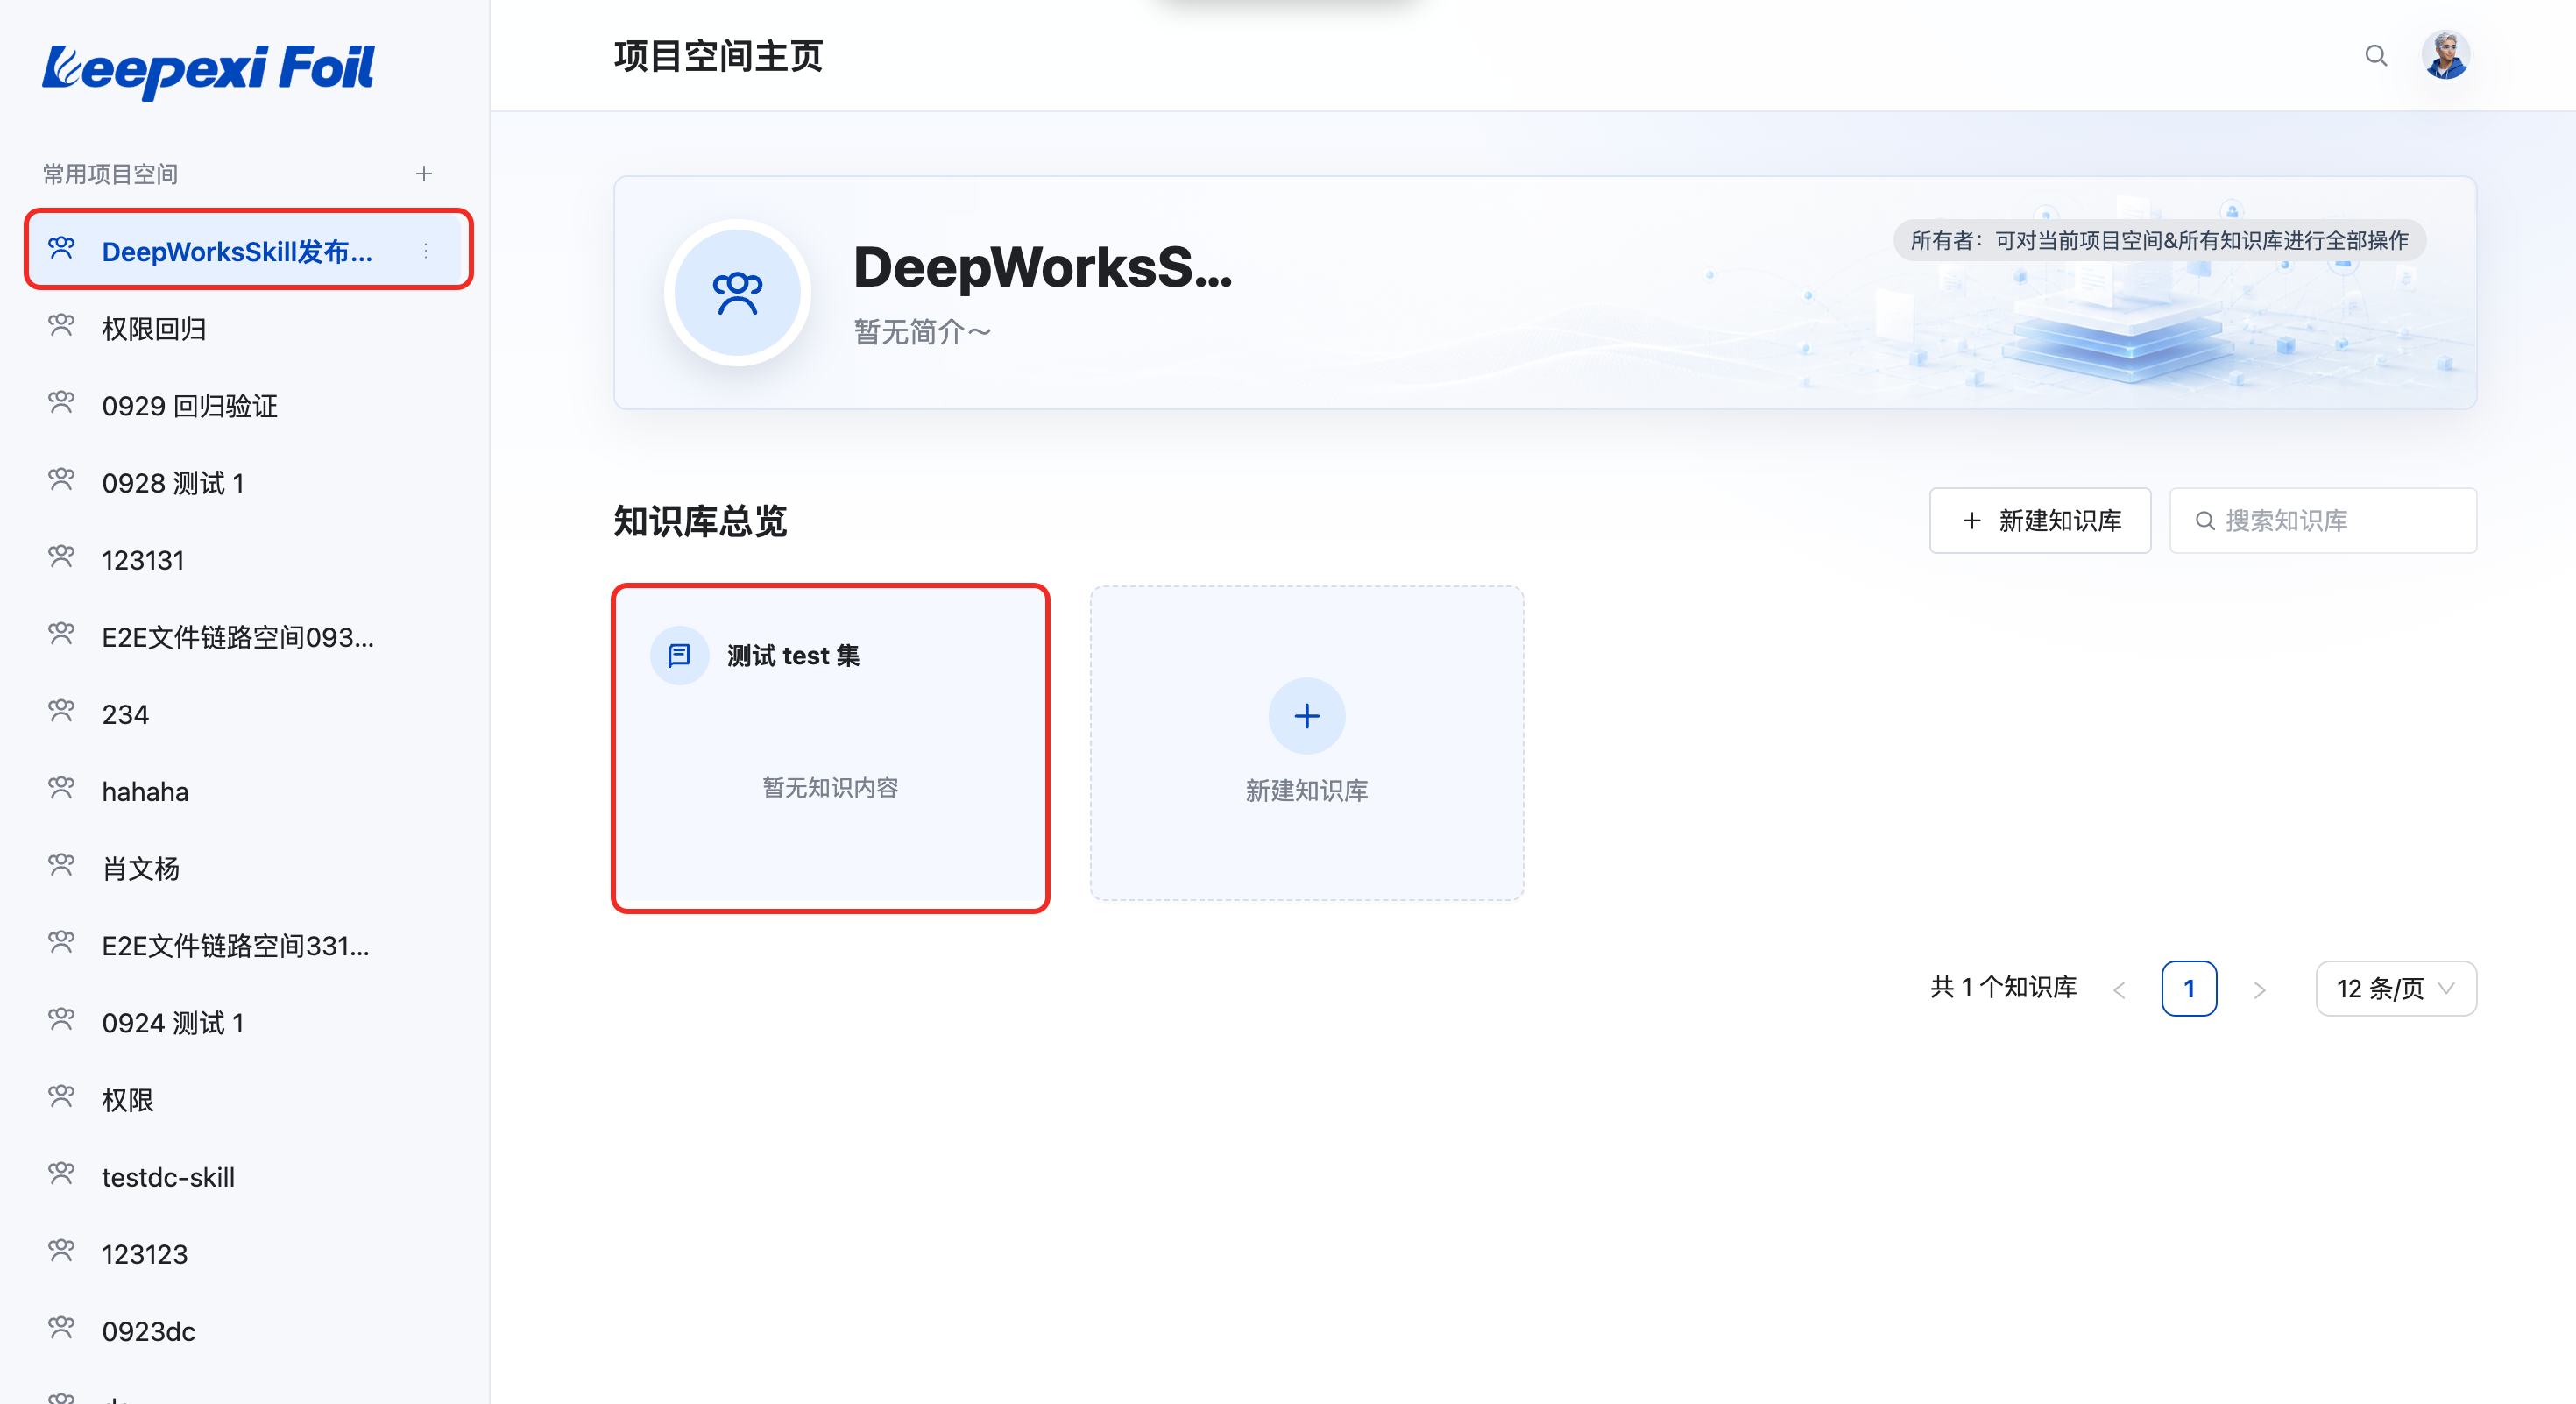
a. Log in to the Knowledge Center web version, click “Project Space” in the left sidebar, and then click “Knowledge Base”.
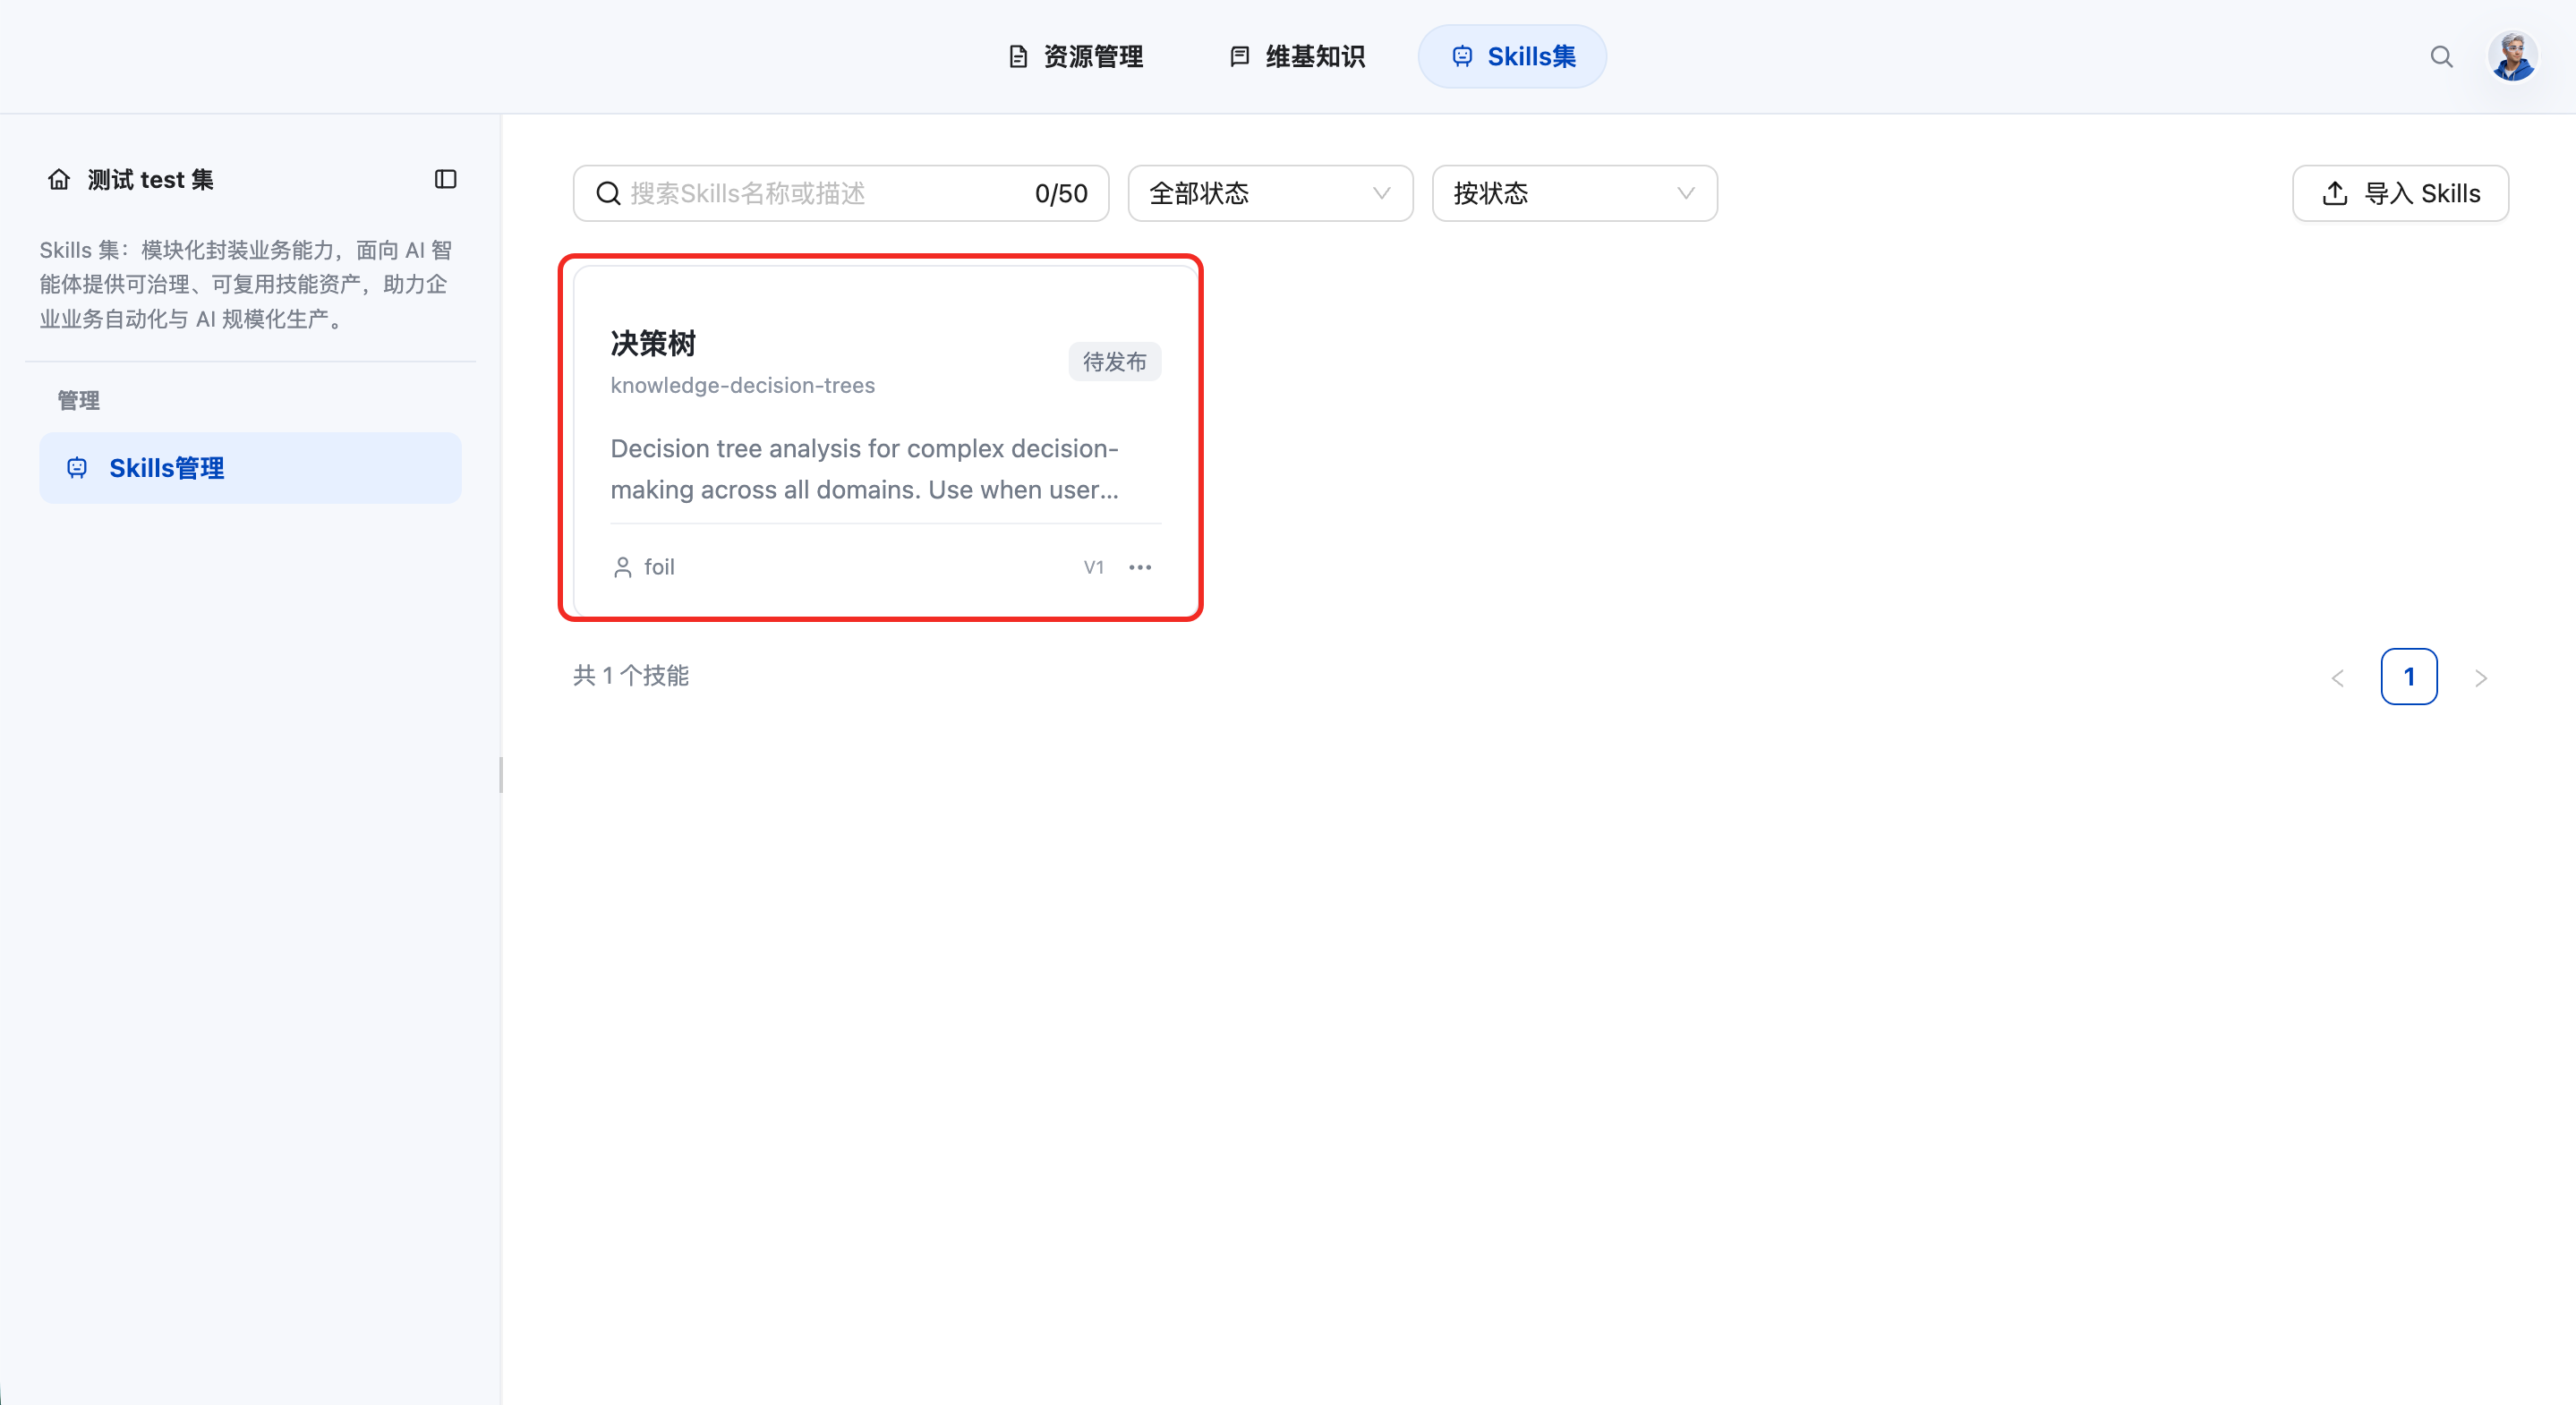
b. Step 2: Click the target Skill.
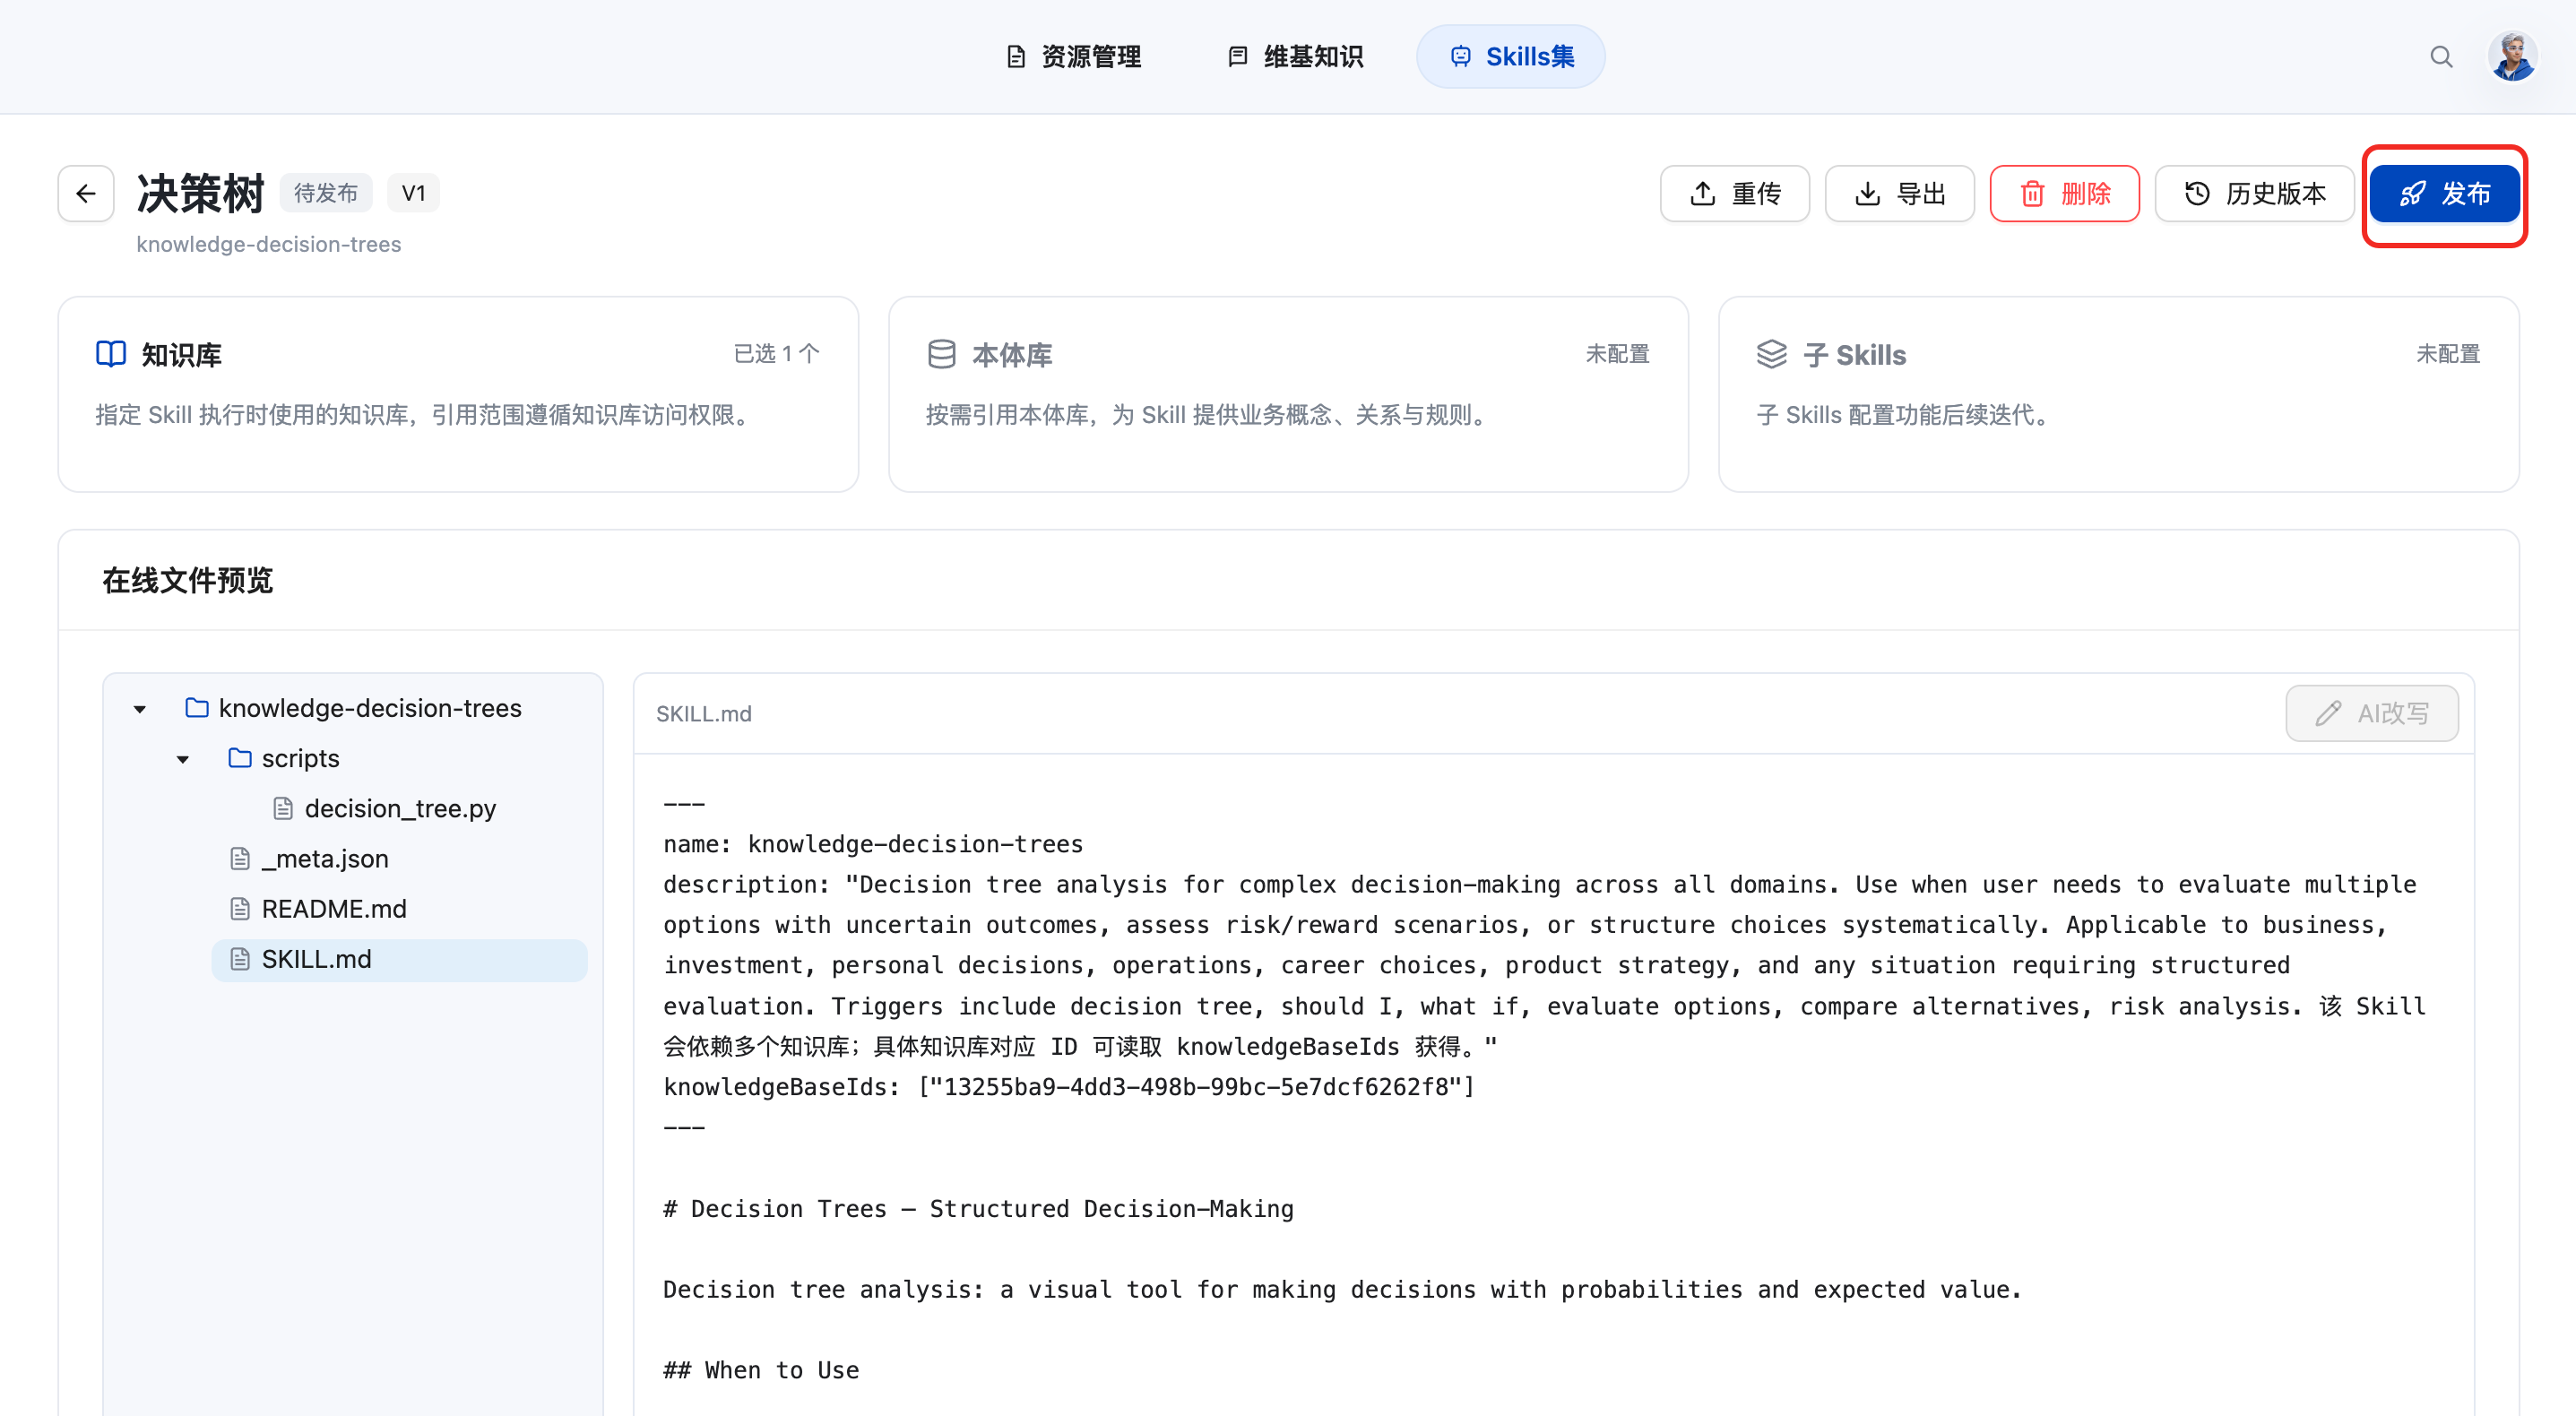
c. Step 3: Click “Publish”. Note: When publishing a Skill, the system will check whether the system identifier of the Skill (i. e., the name in SKILL.md) already exists. If it does, the system will recognize the two as the same Skill, update the Skill and generate a new version; if not, the system will create and publish the new Skill.
Unlist the Skill
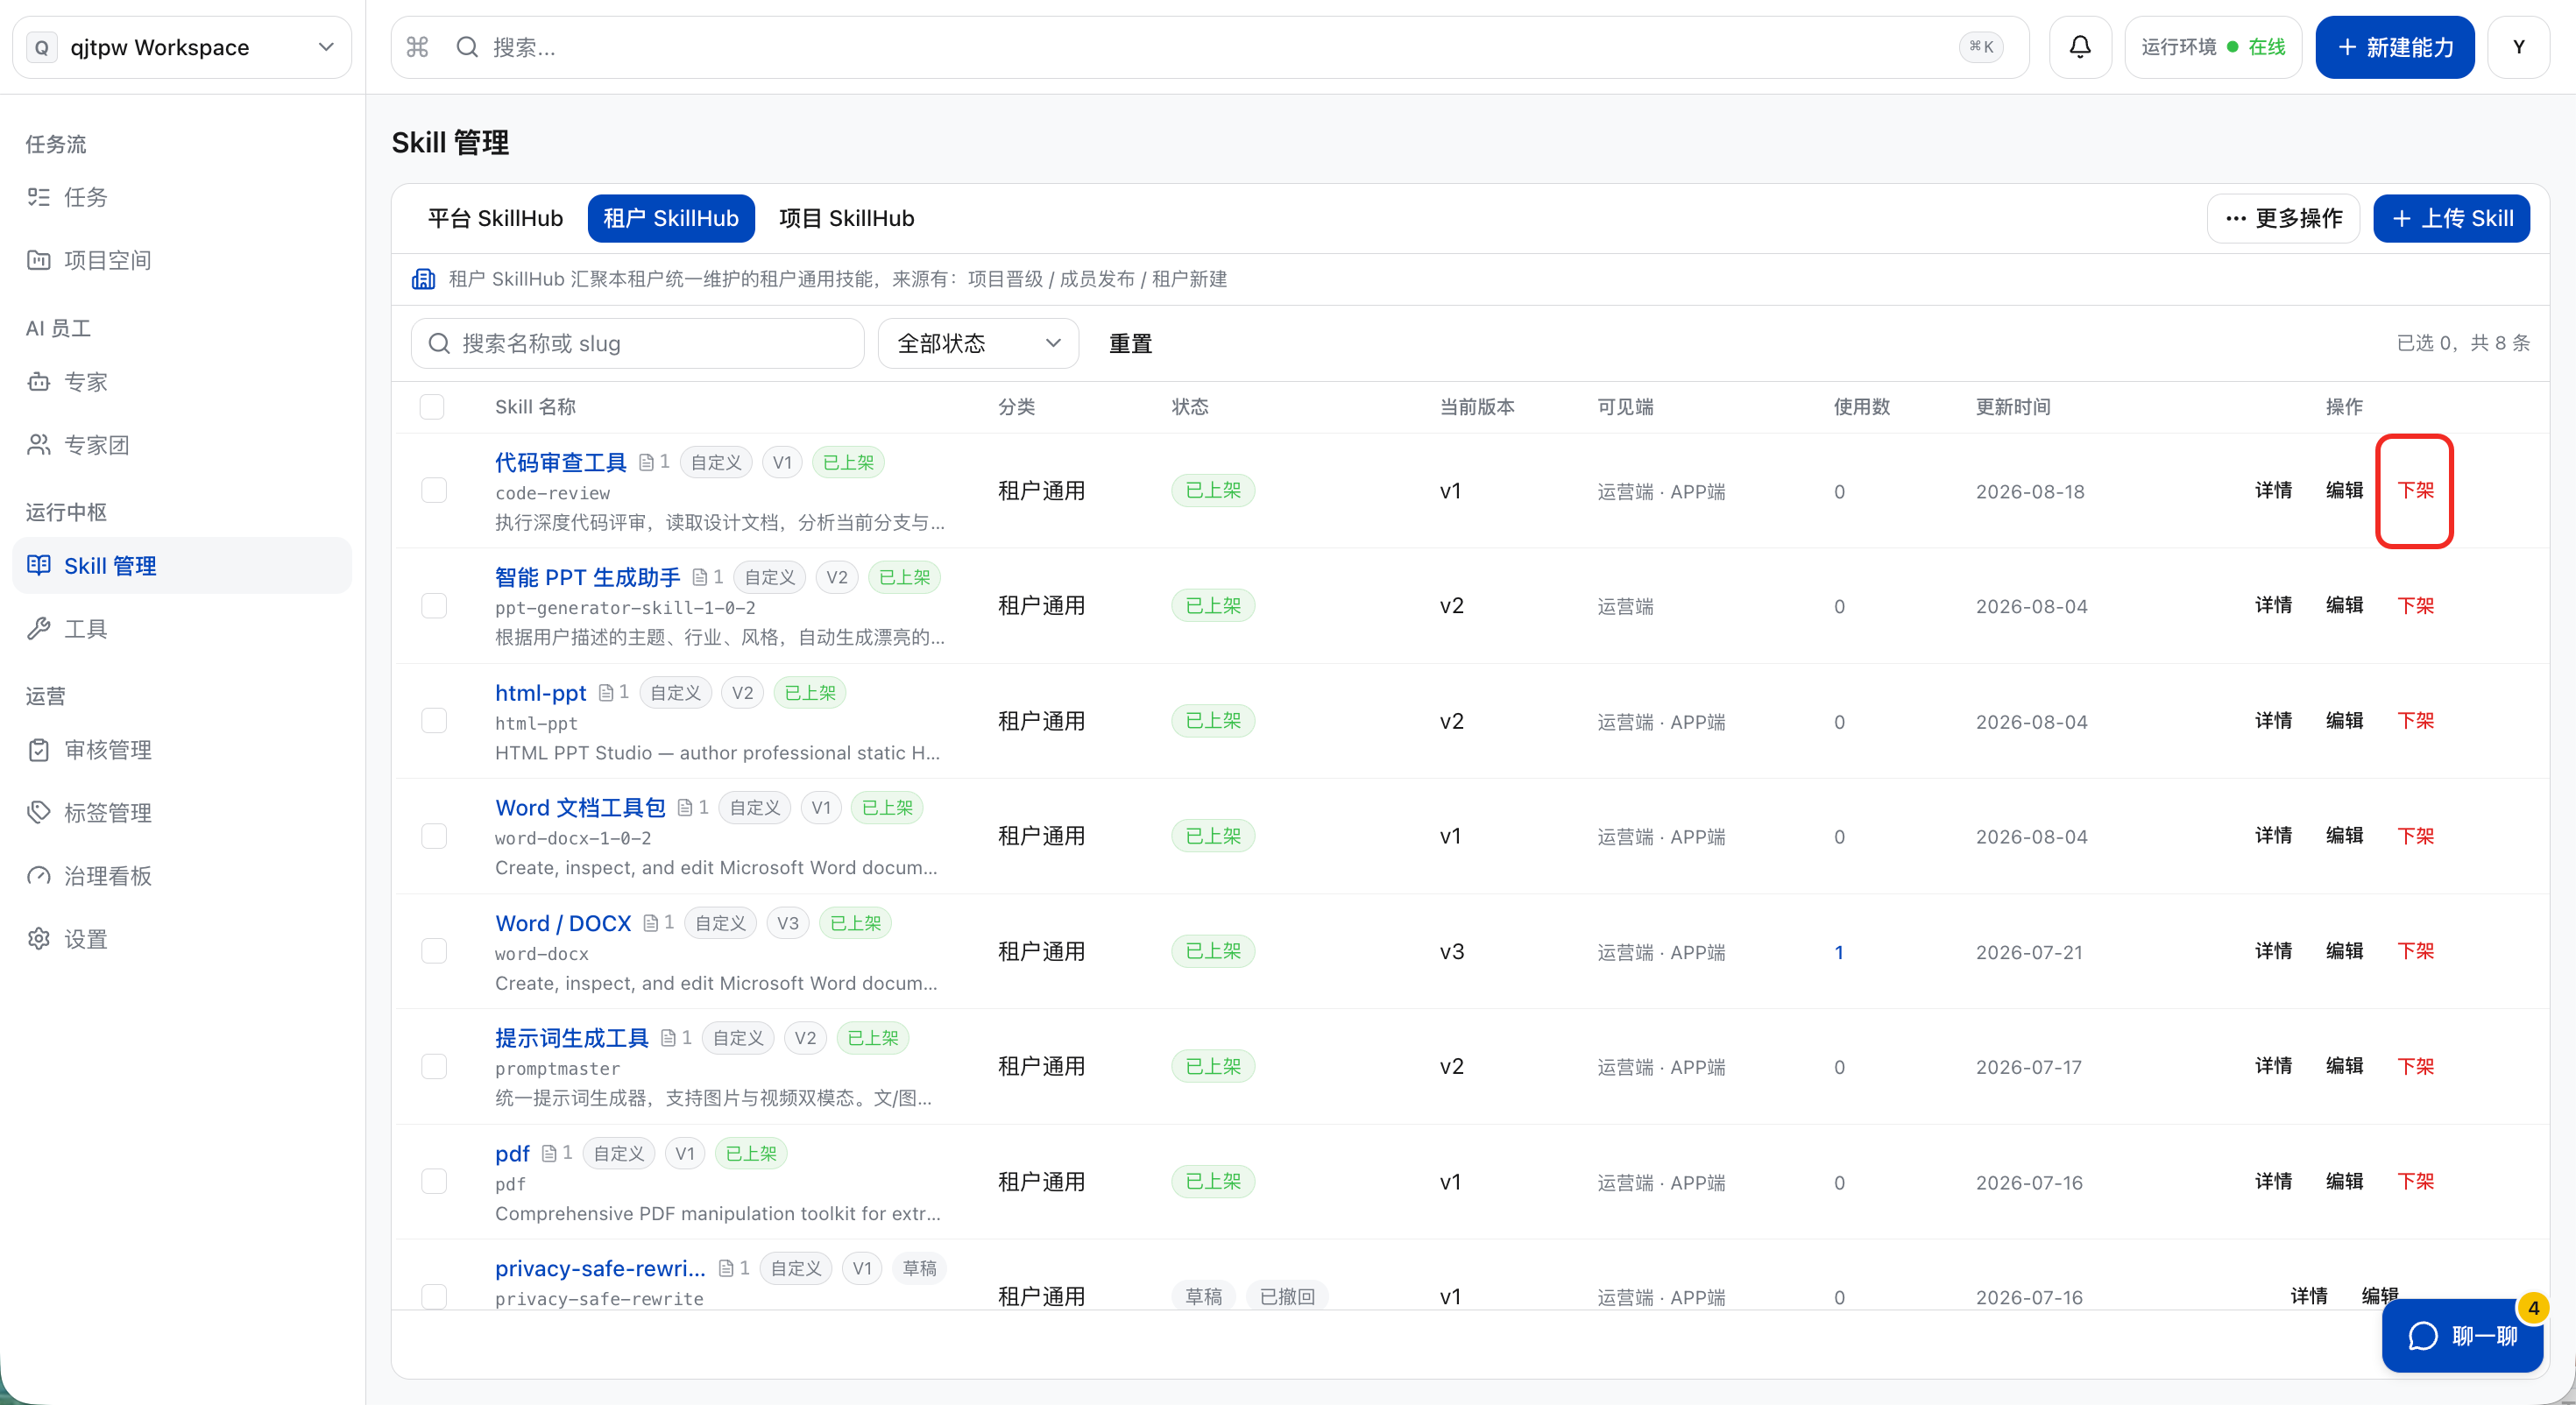
a. For Skills that are already listed, click “Take Off Shelf”.
Note: Only members of the category to which this Skill belongs can see the “Unpublish” button.
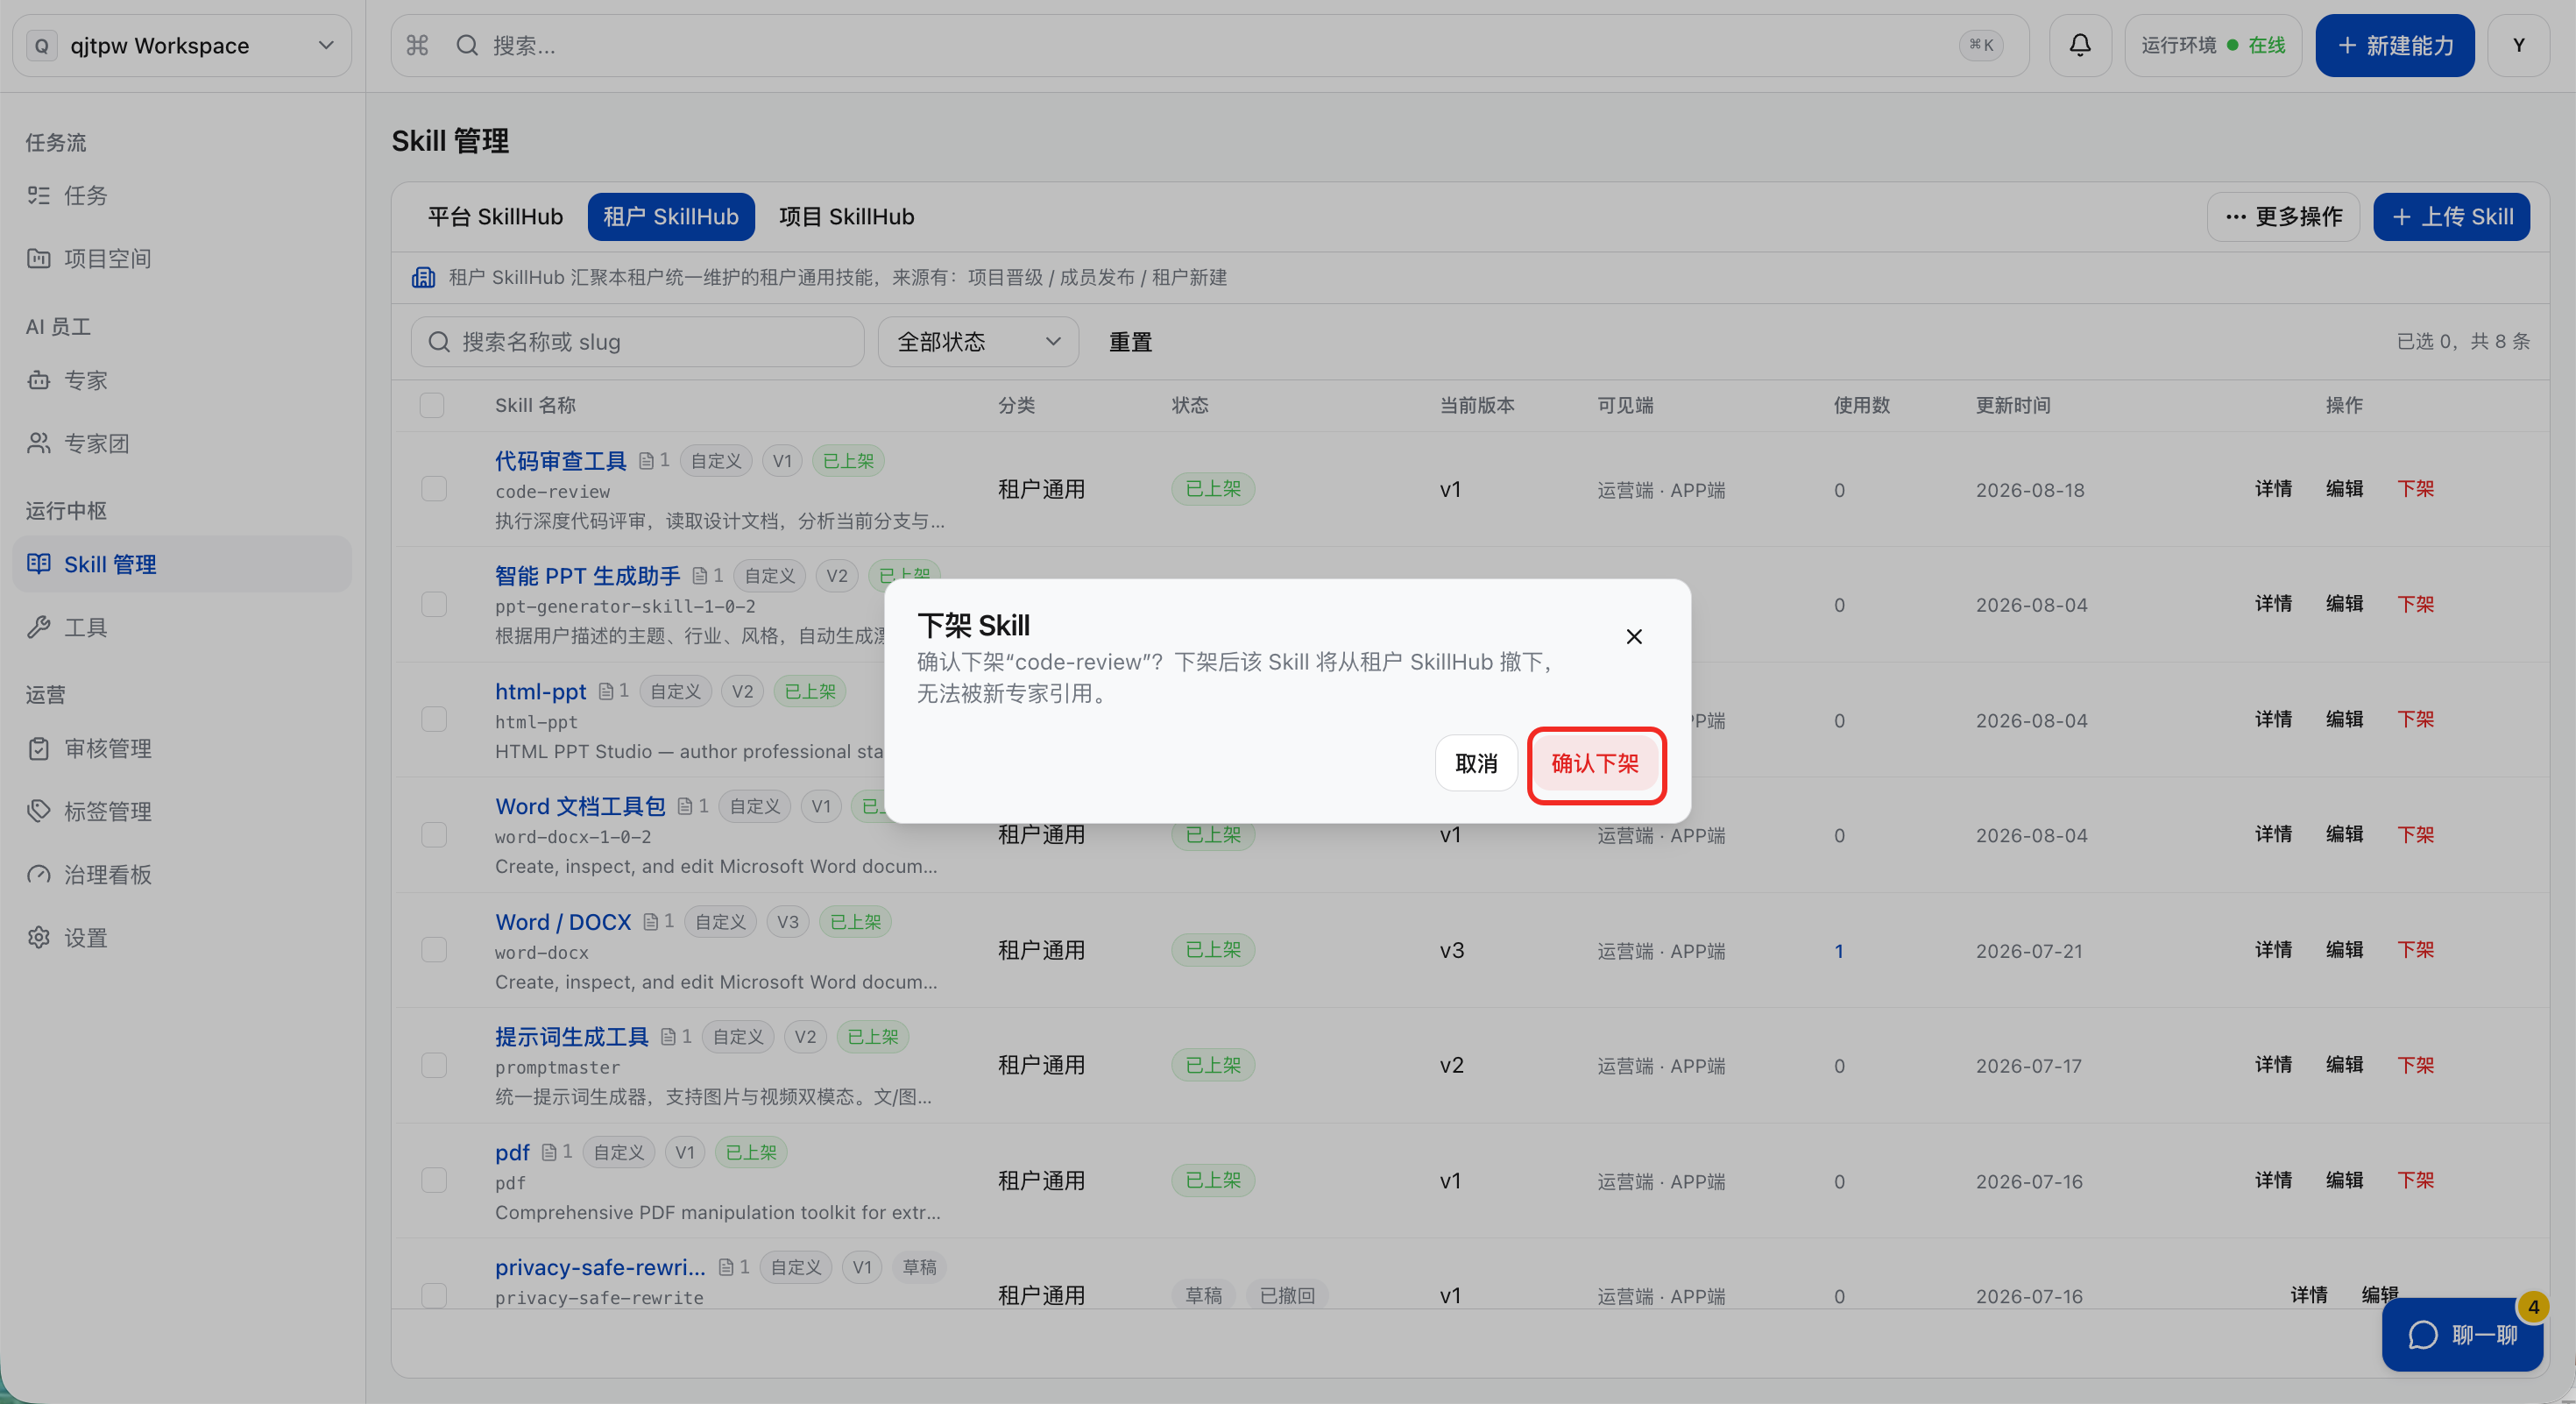
b. In the secondary confirmation pop-up, click “Confirm Unpublish”. After unpublishing, the content will be removed from SkillHub, and new clones will be prohibited; existing cloned copies will not be affected.
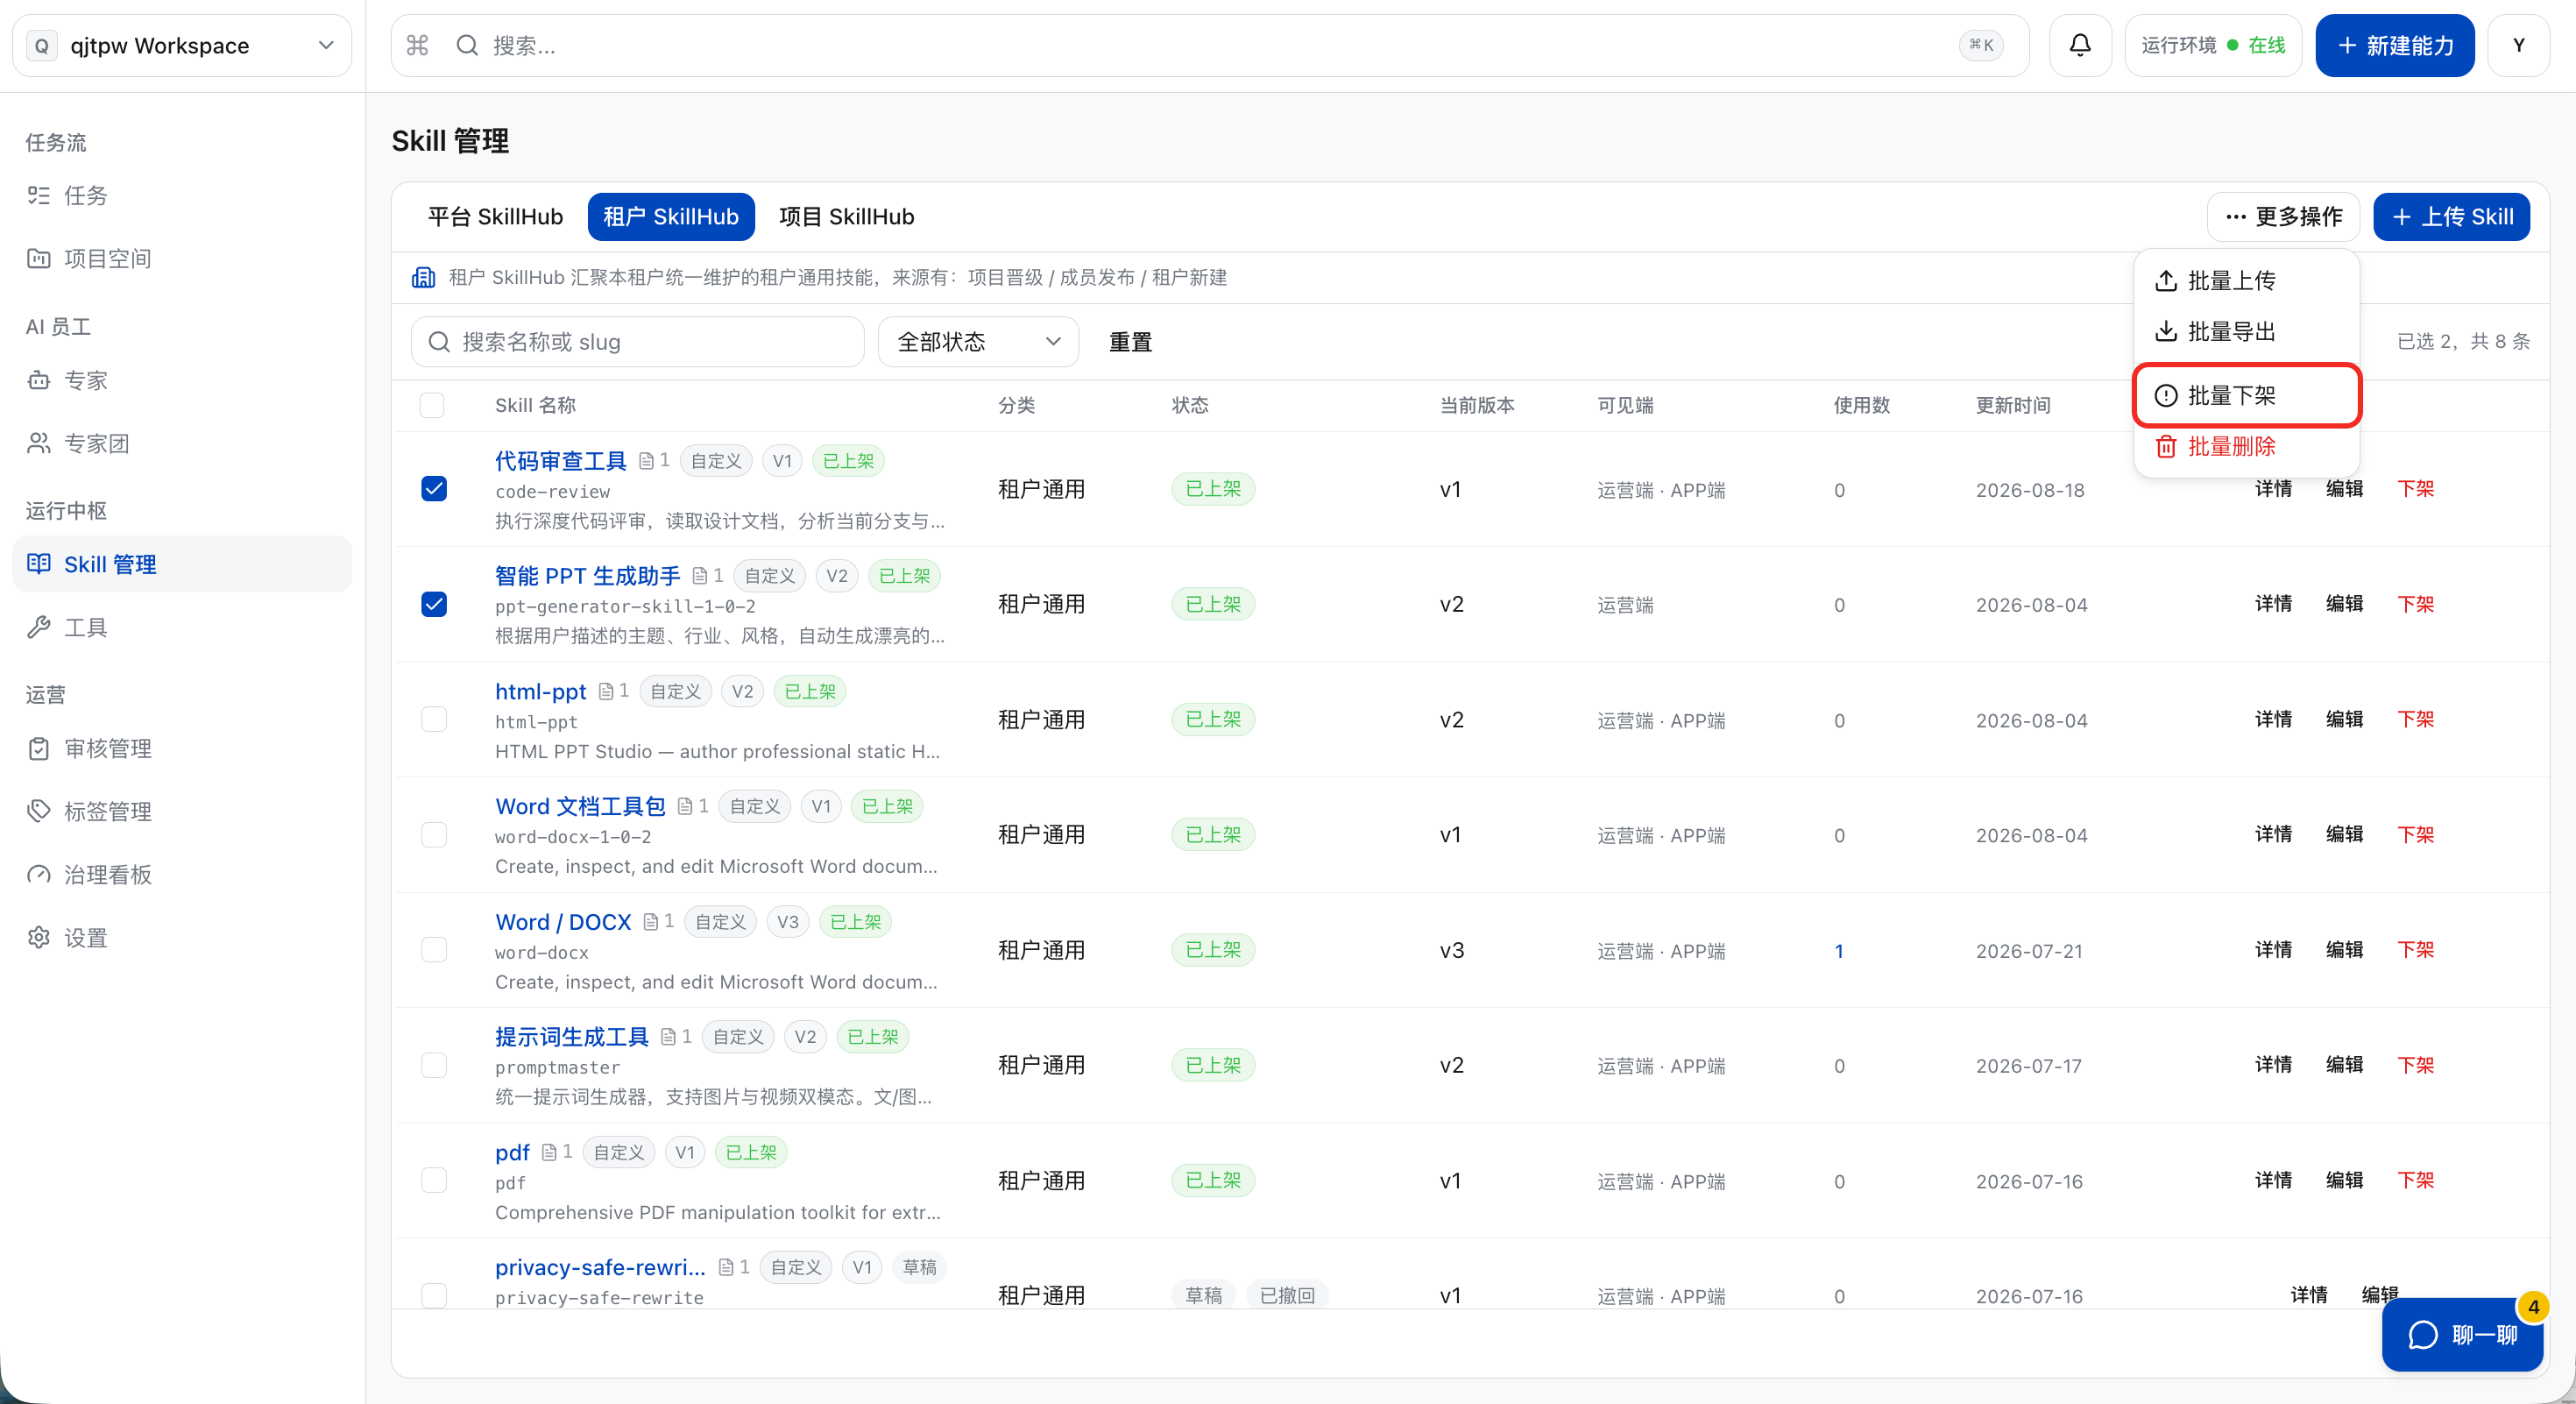
c. If you need to quickly take down a large number of Skills, click “More Actions” > “Batch Take Down” in the list.
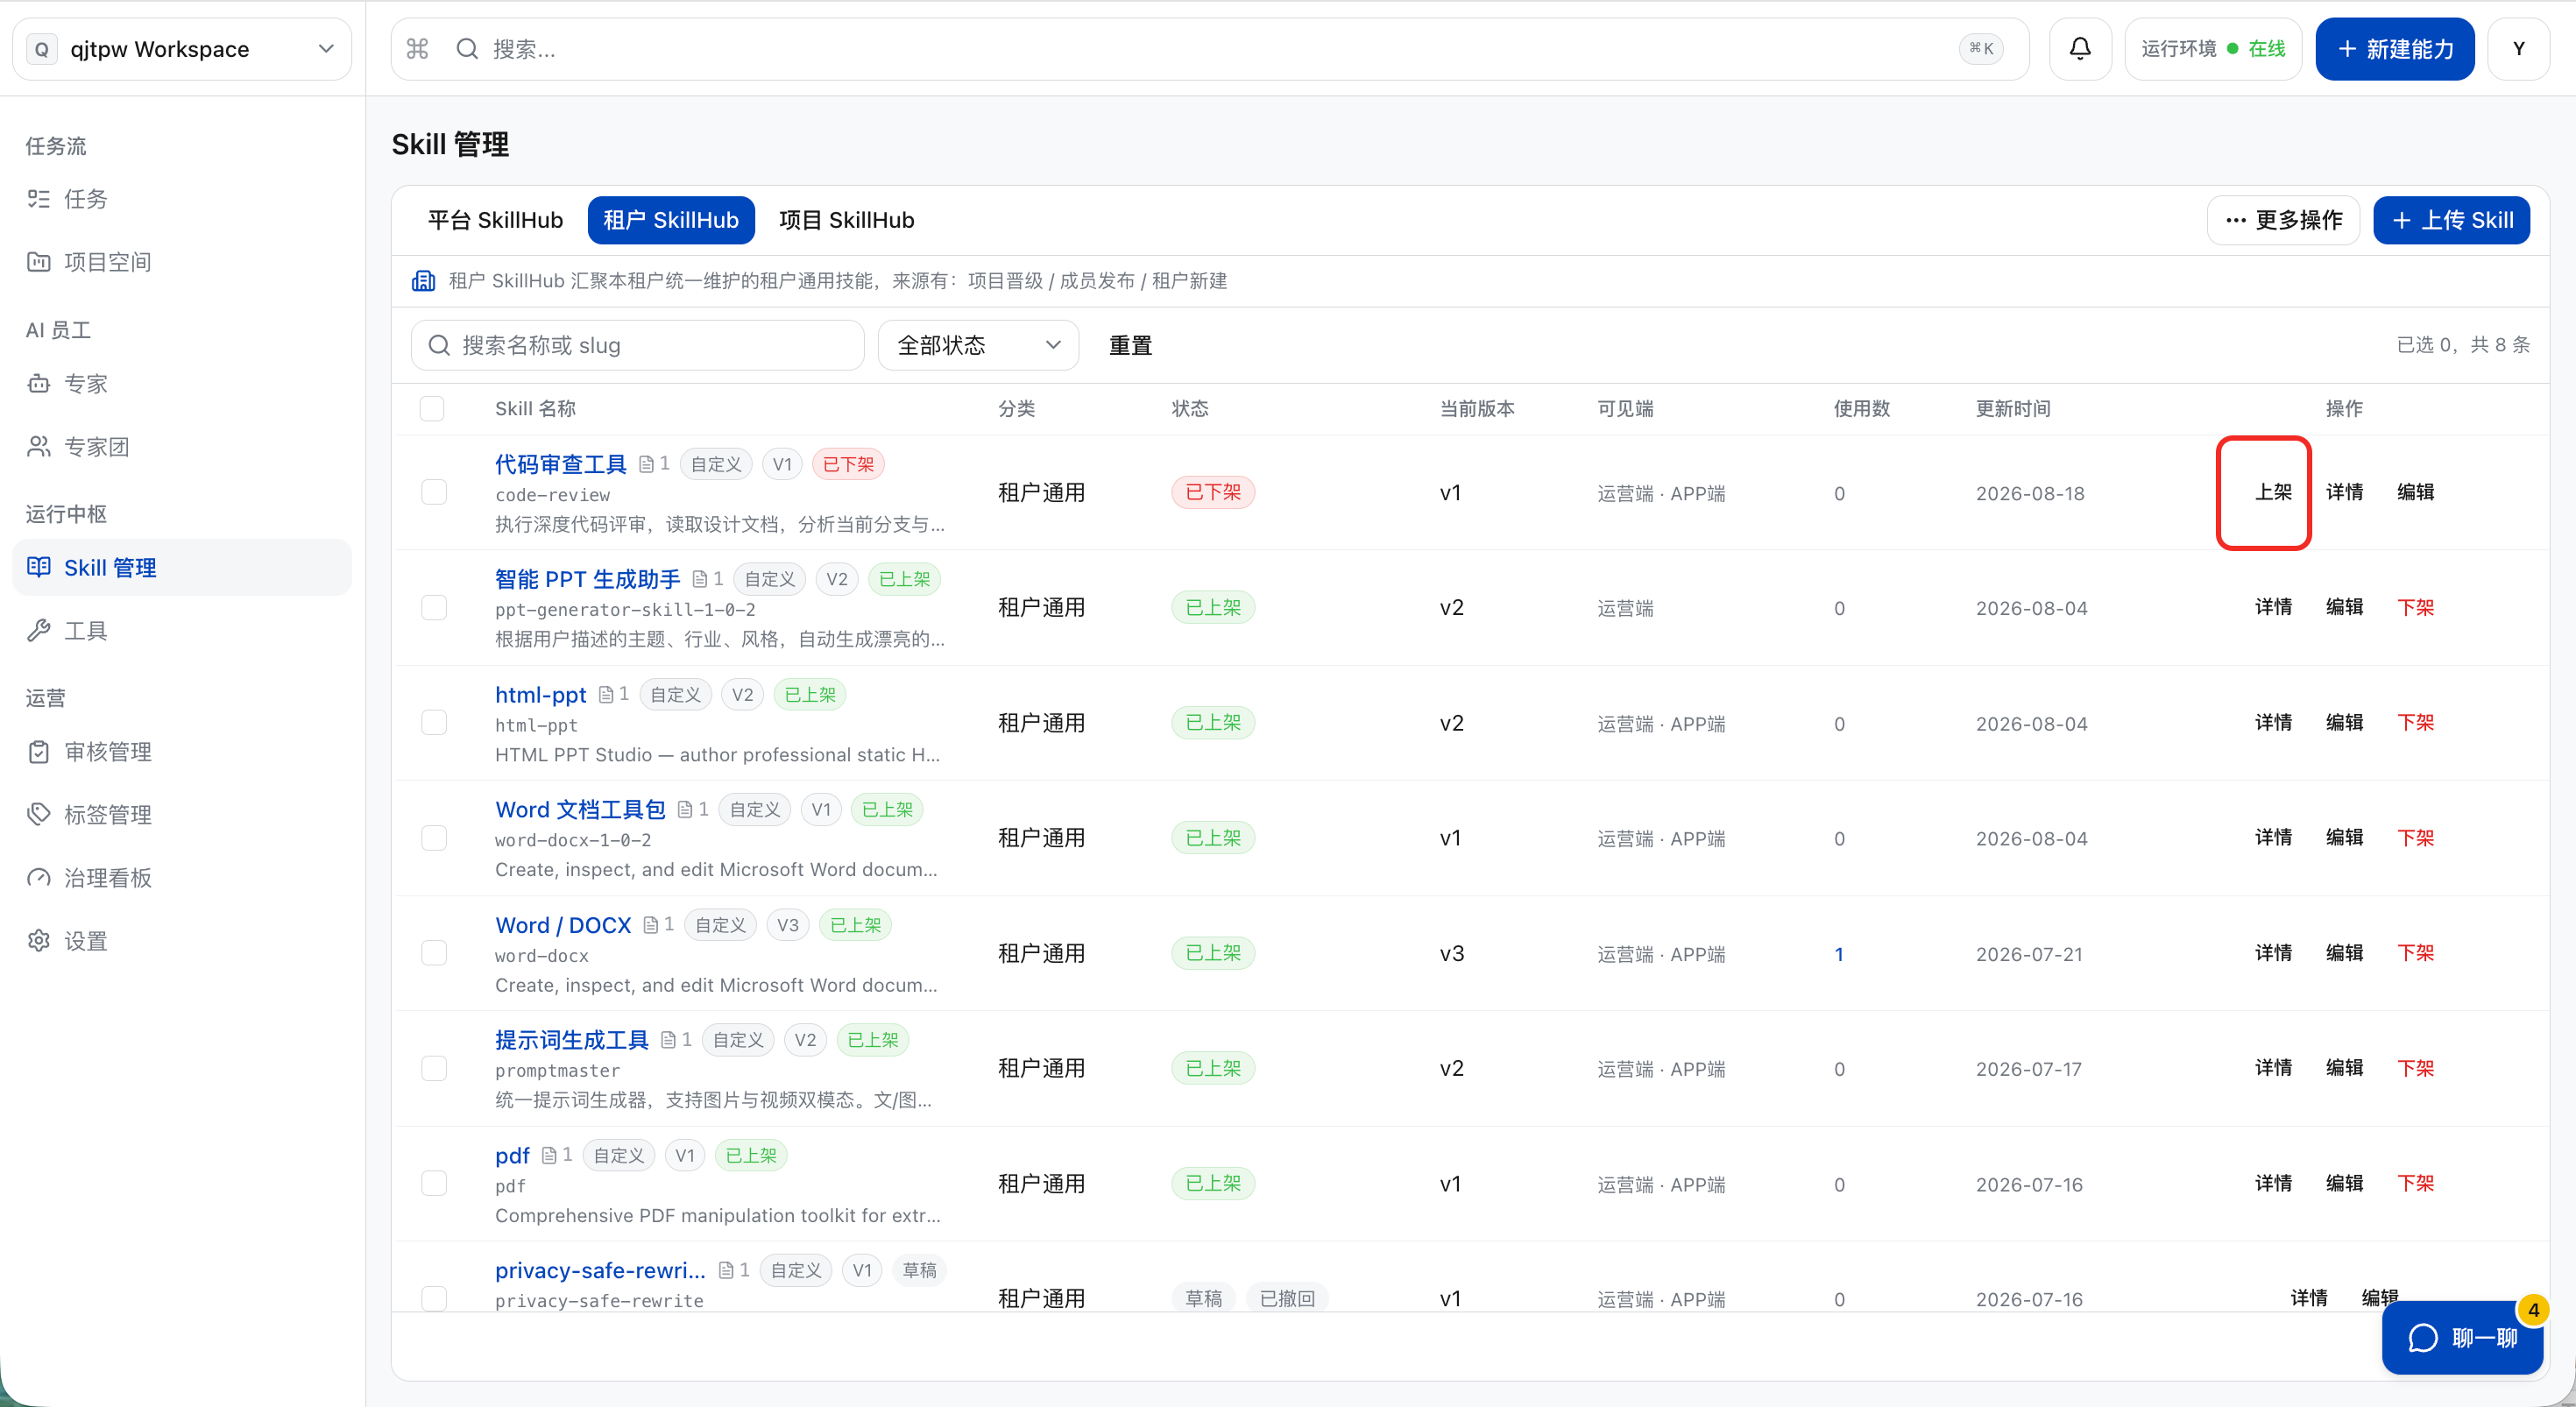
Republish (List) Skill
Skills that have been “taken down” can be put back online by clicking the “Put on Shelf”(“Republish”) button.
Note: Only members of the category to which this Skill belongs can see the “Launch” button.
Edit Skill
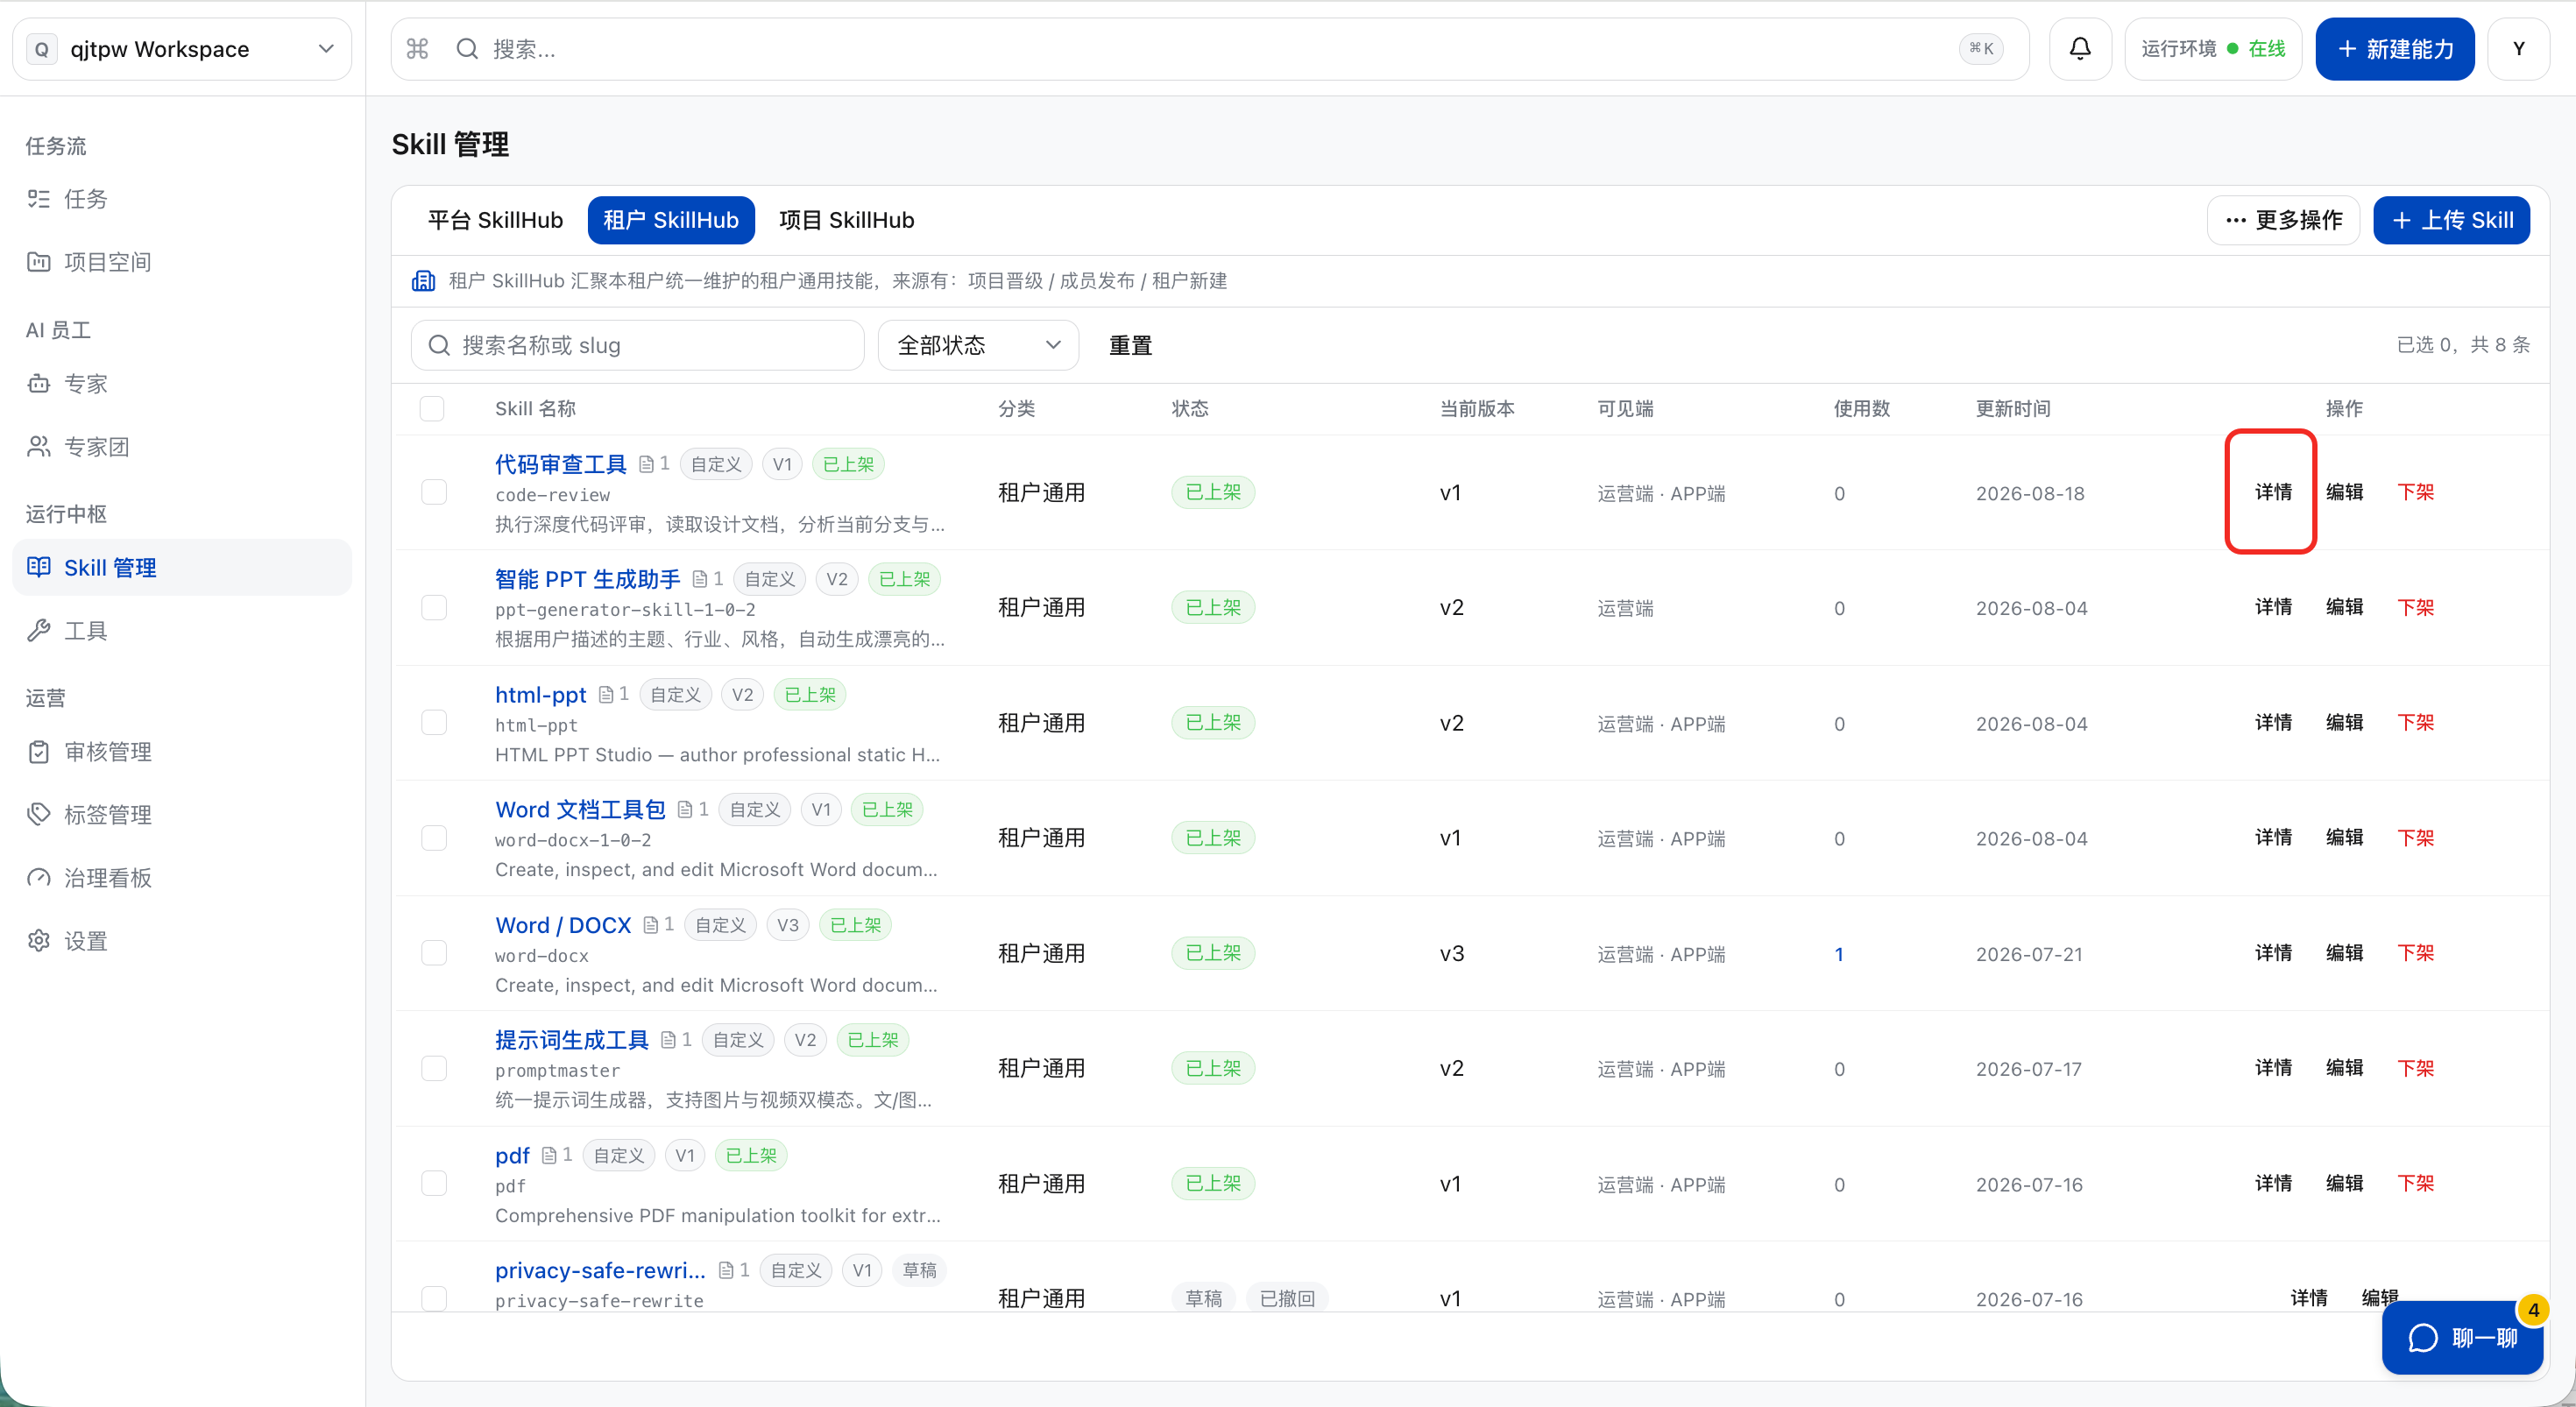
a. Click “Details”. Permission Description: Only members of the category to which the Skill belongs can edit the Skill.
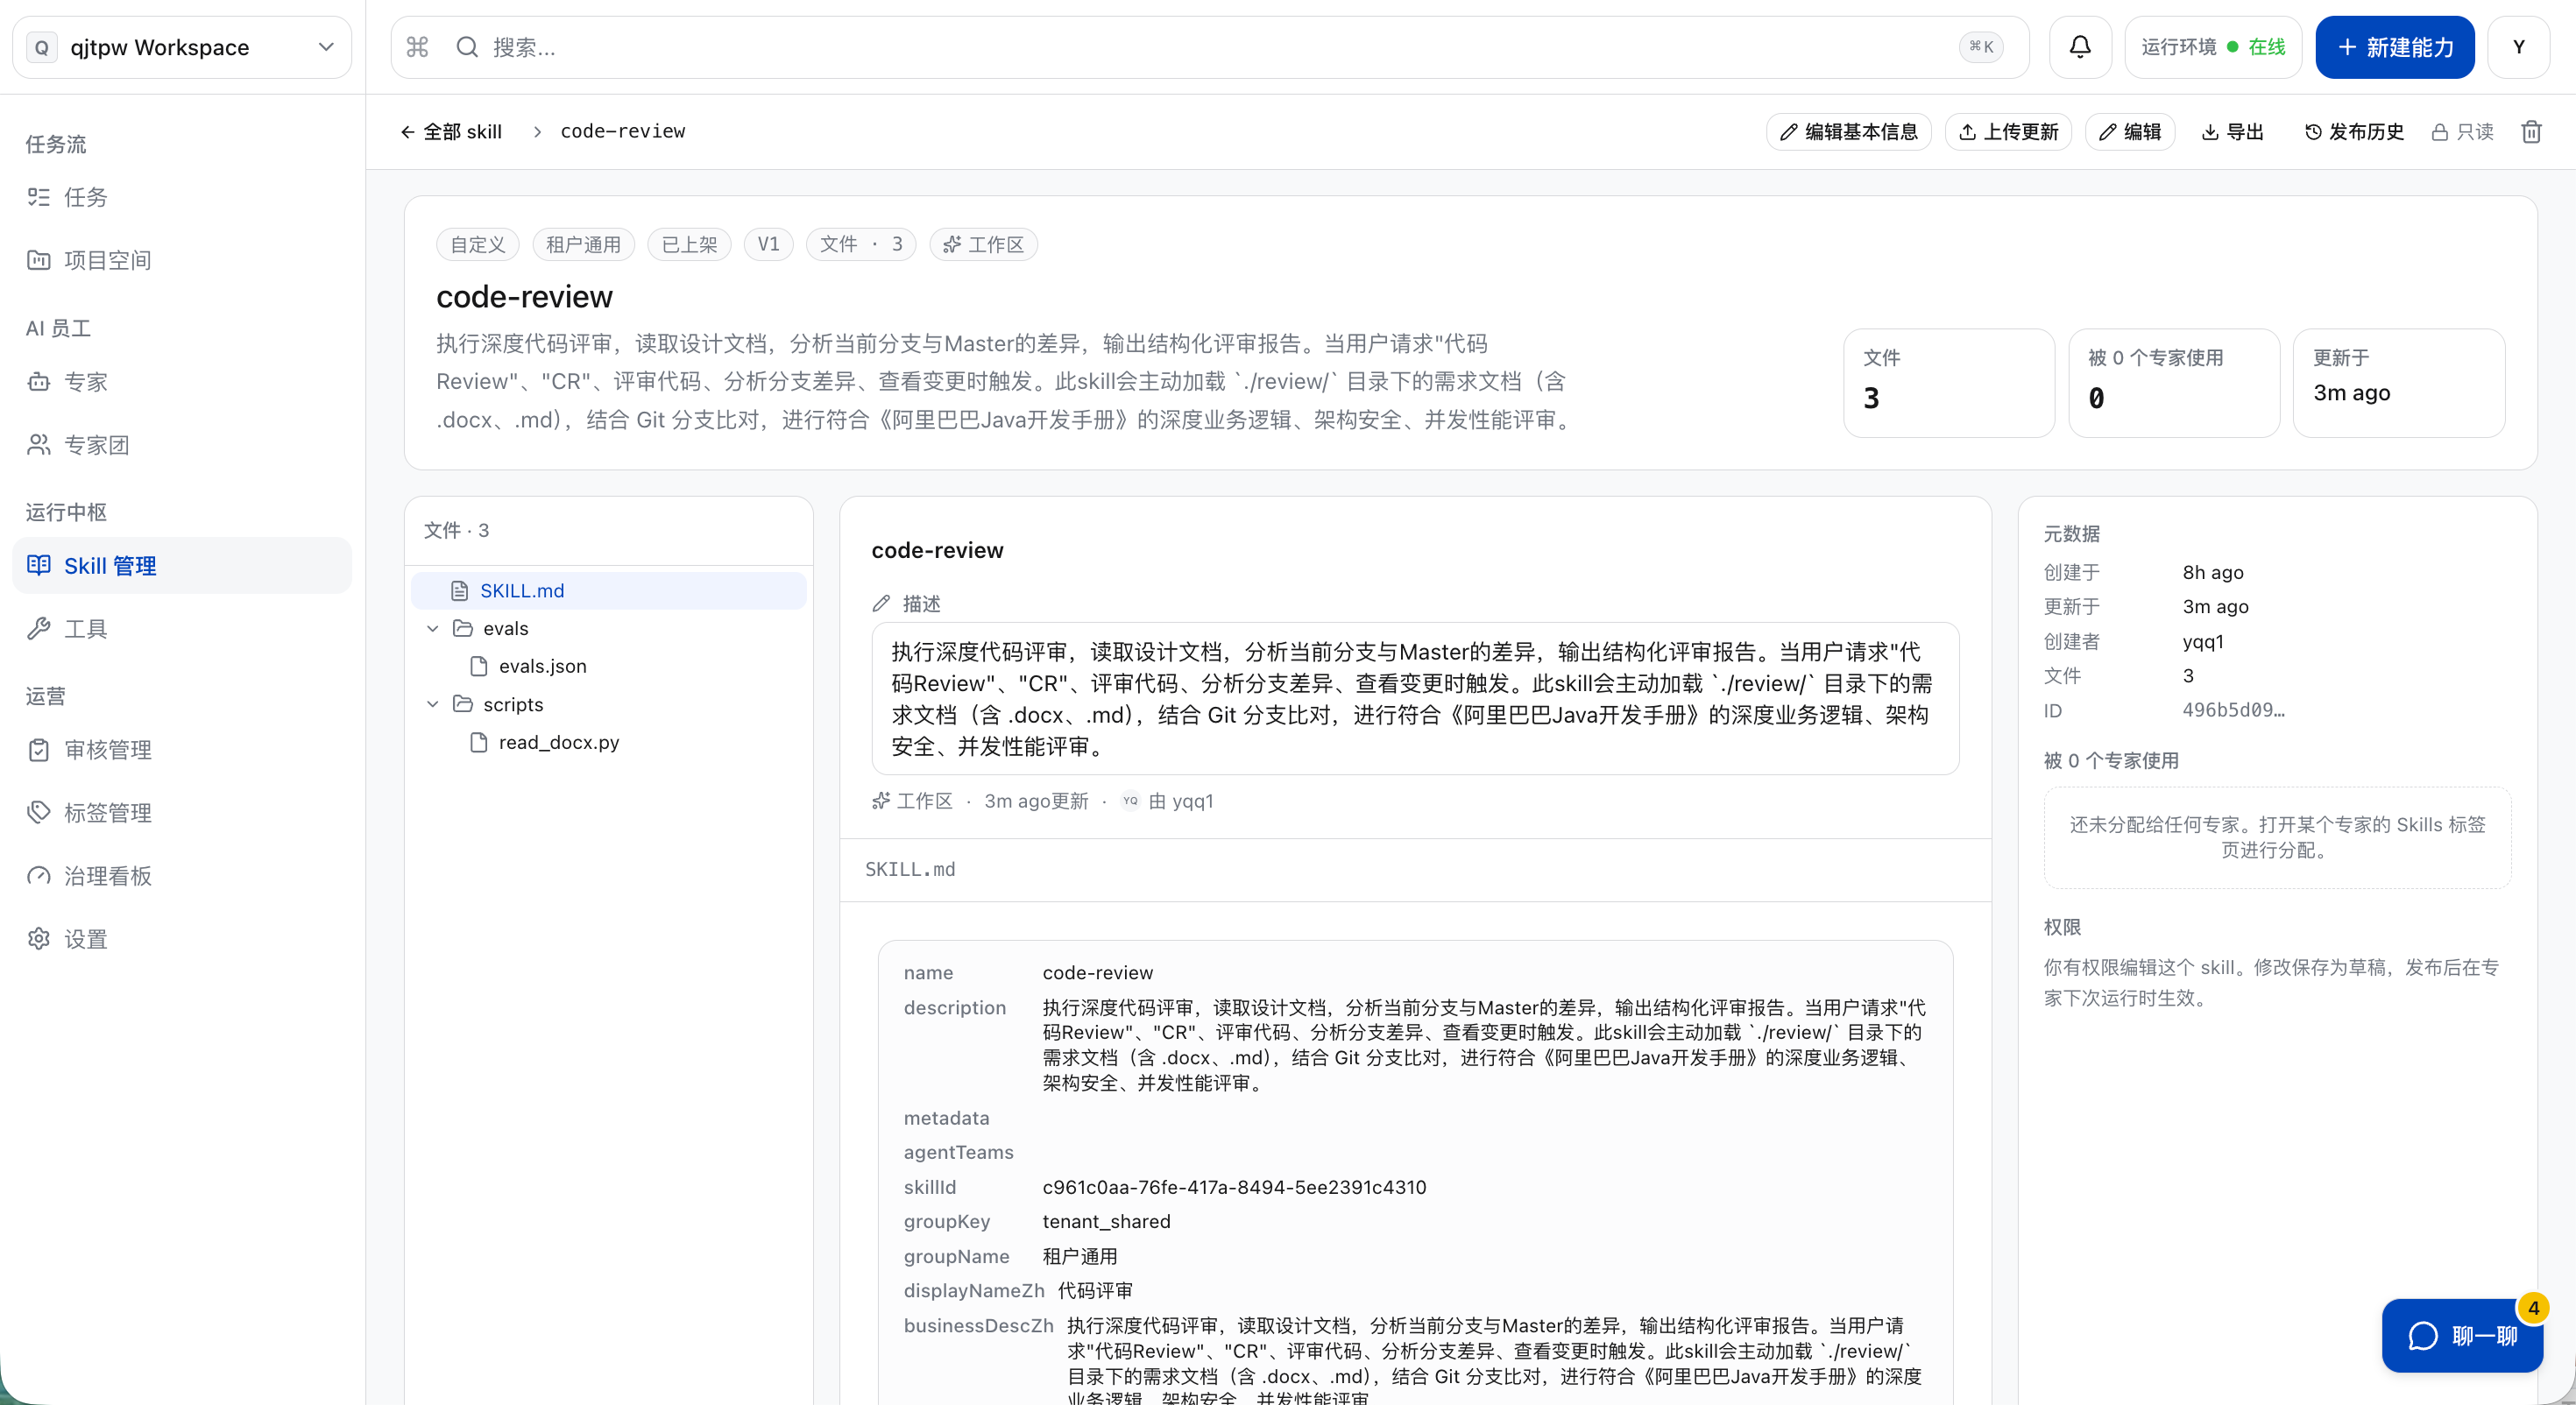
b. View Skill information and content.
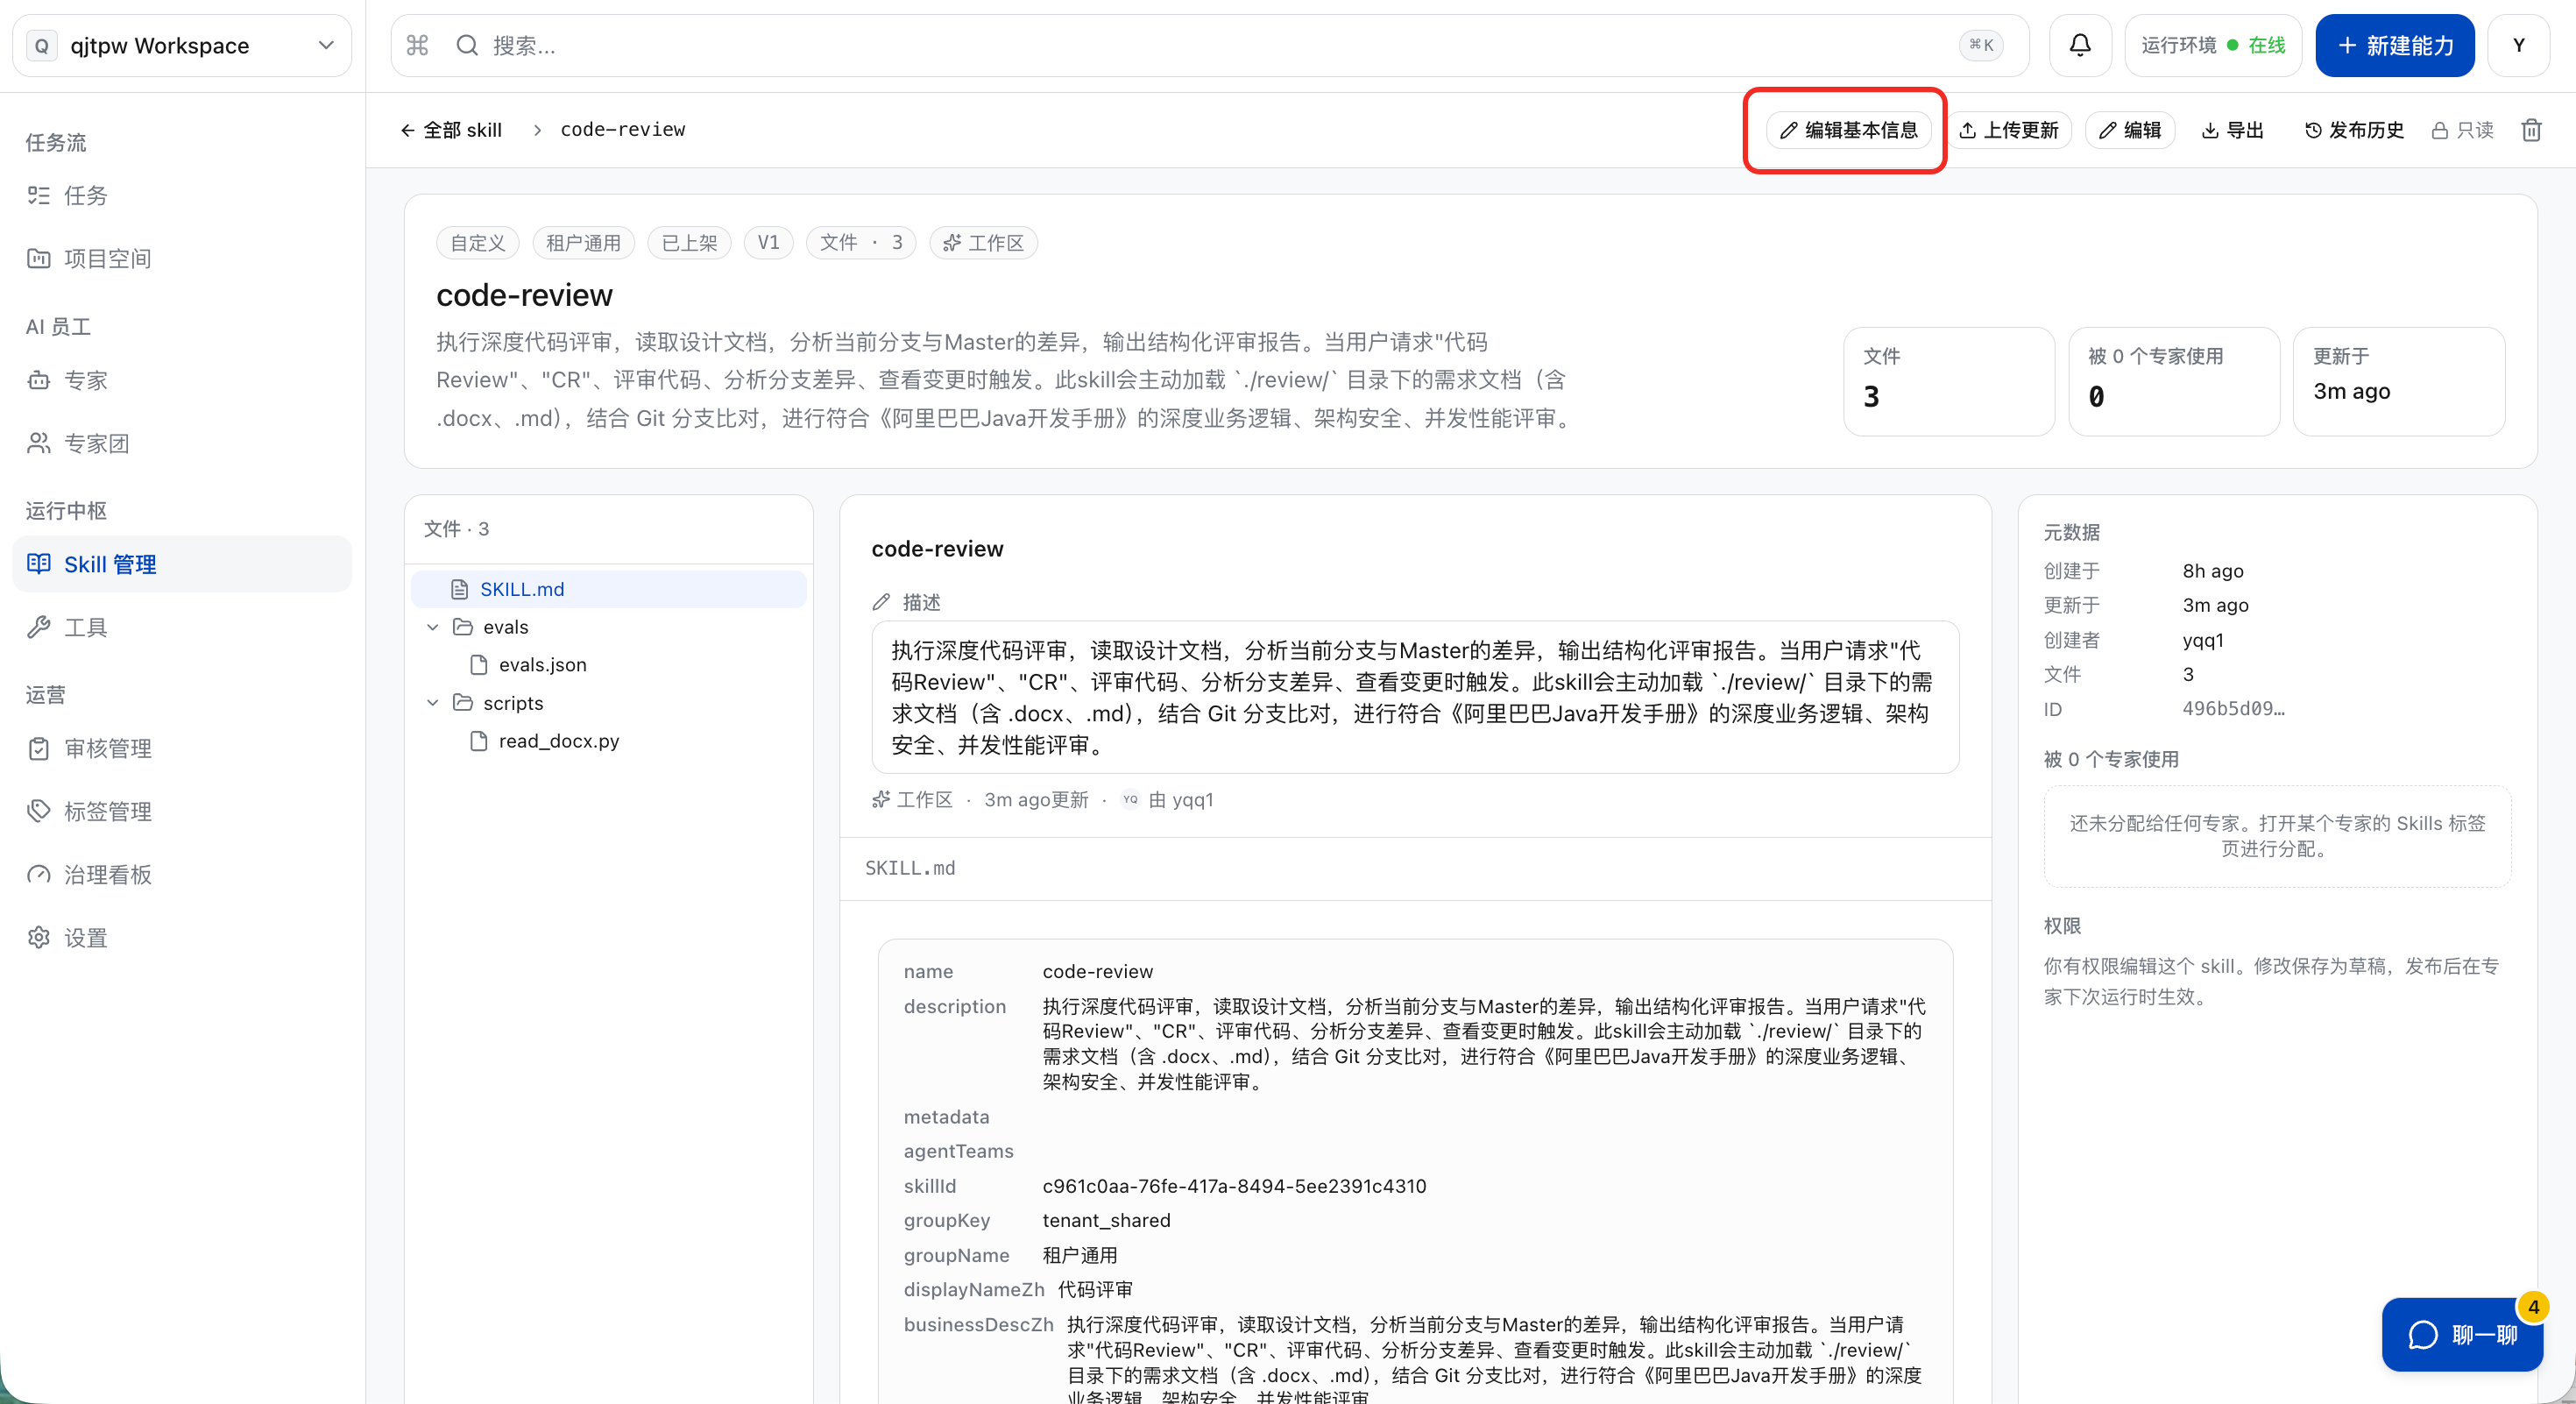
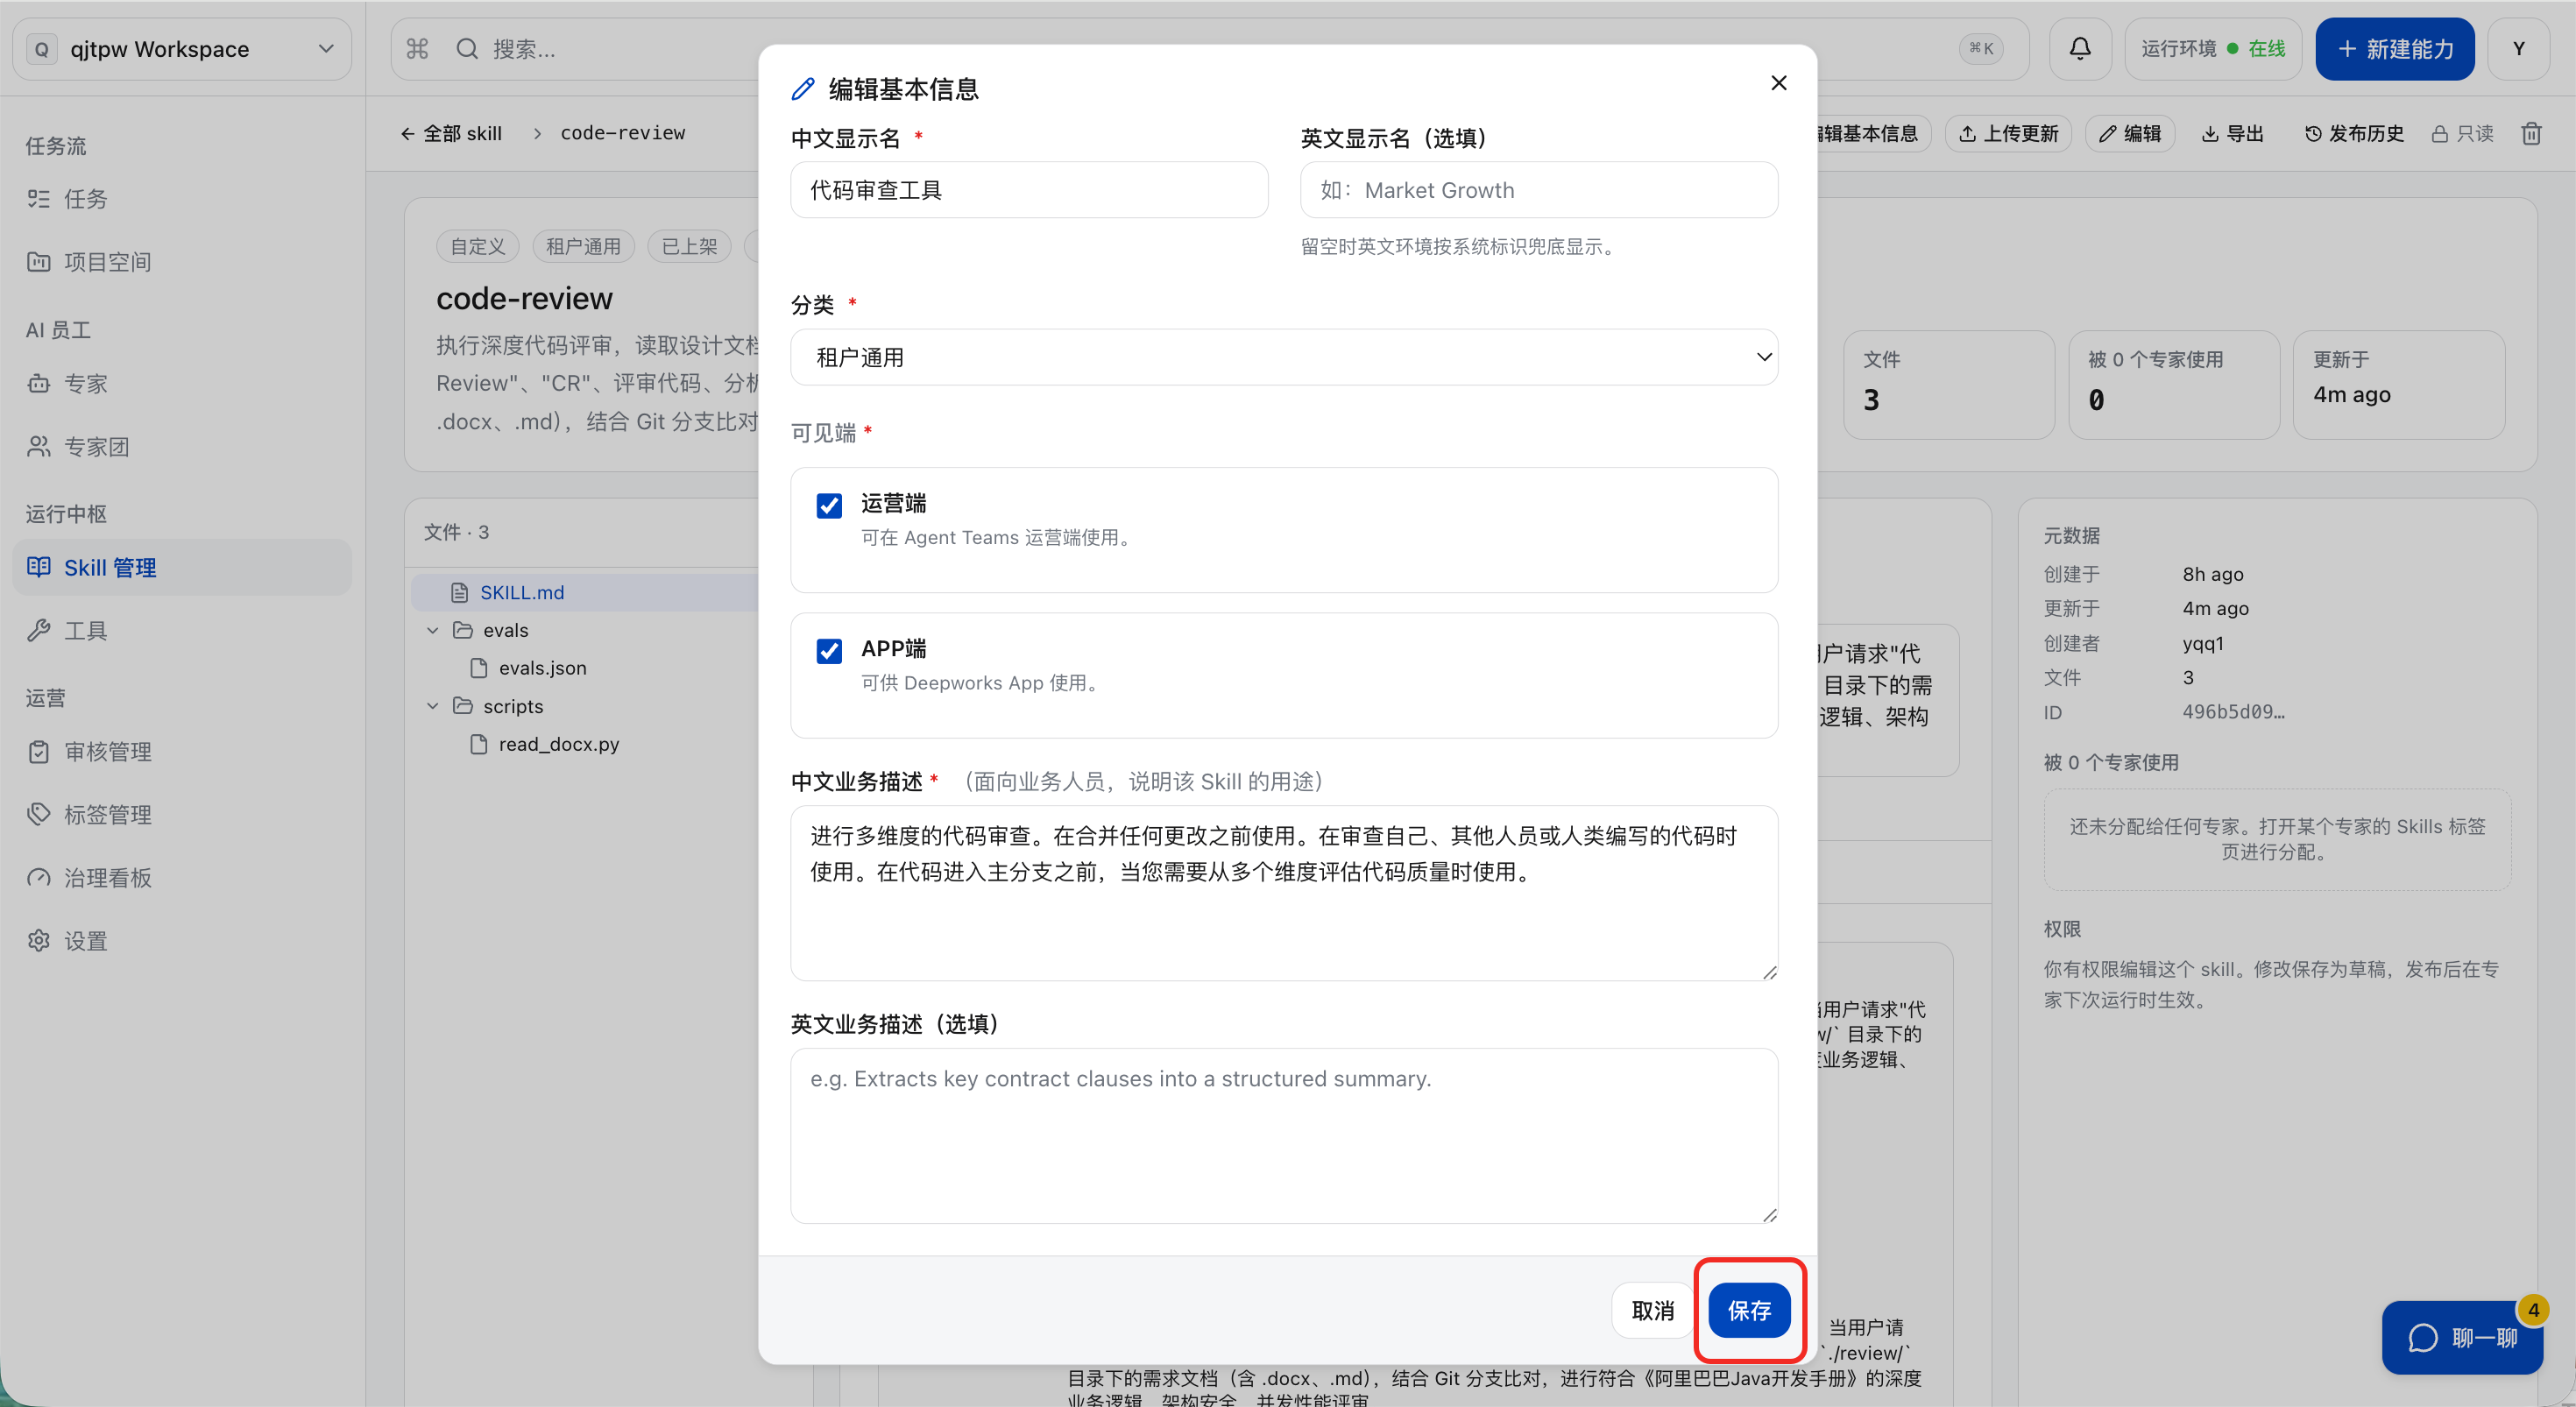
c. To modify the basic information, click “Edit Basic Info”. After updating the information, click “Save”. The modified basic information will take effect immediately without generating a new version.
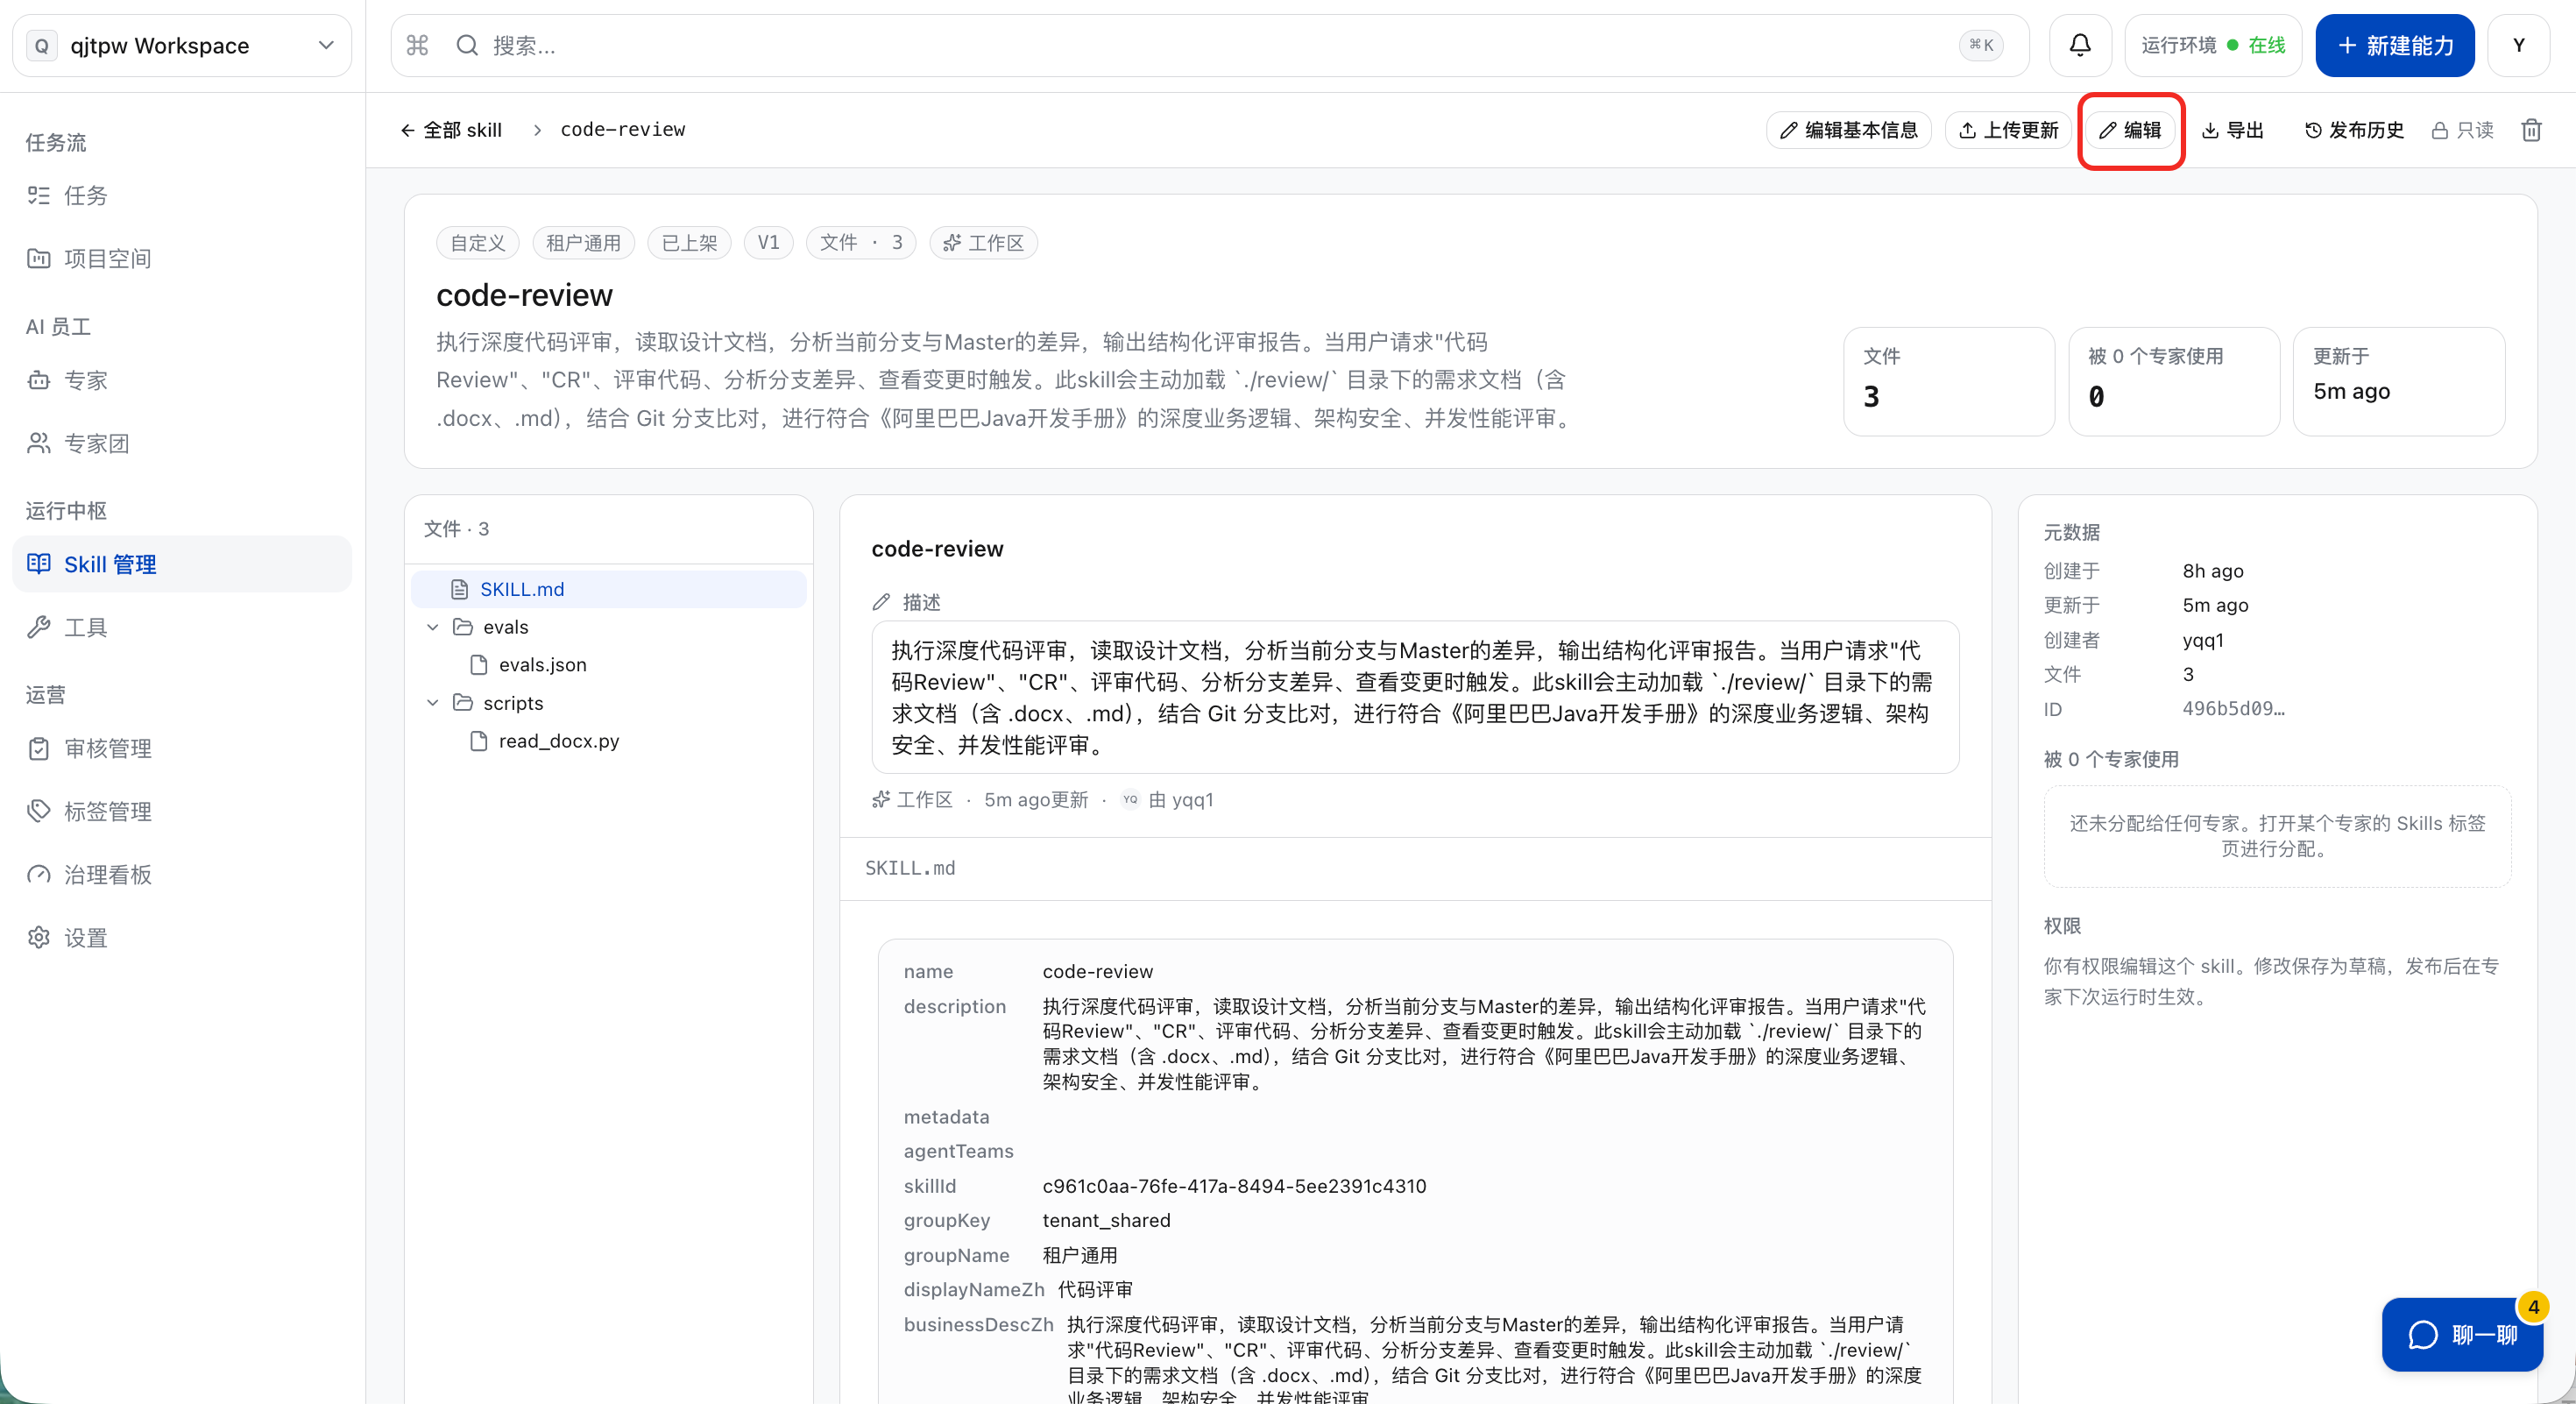
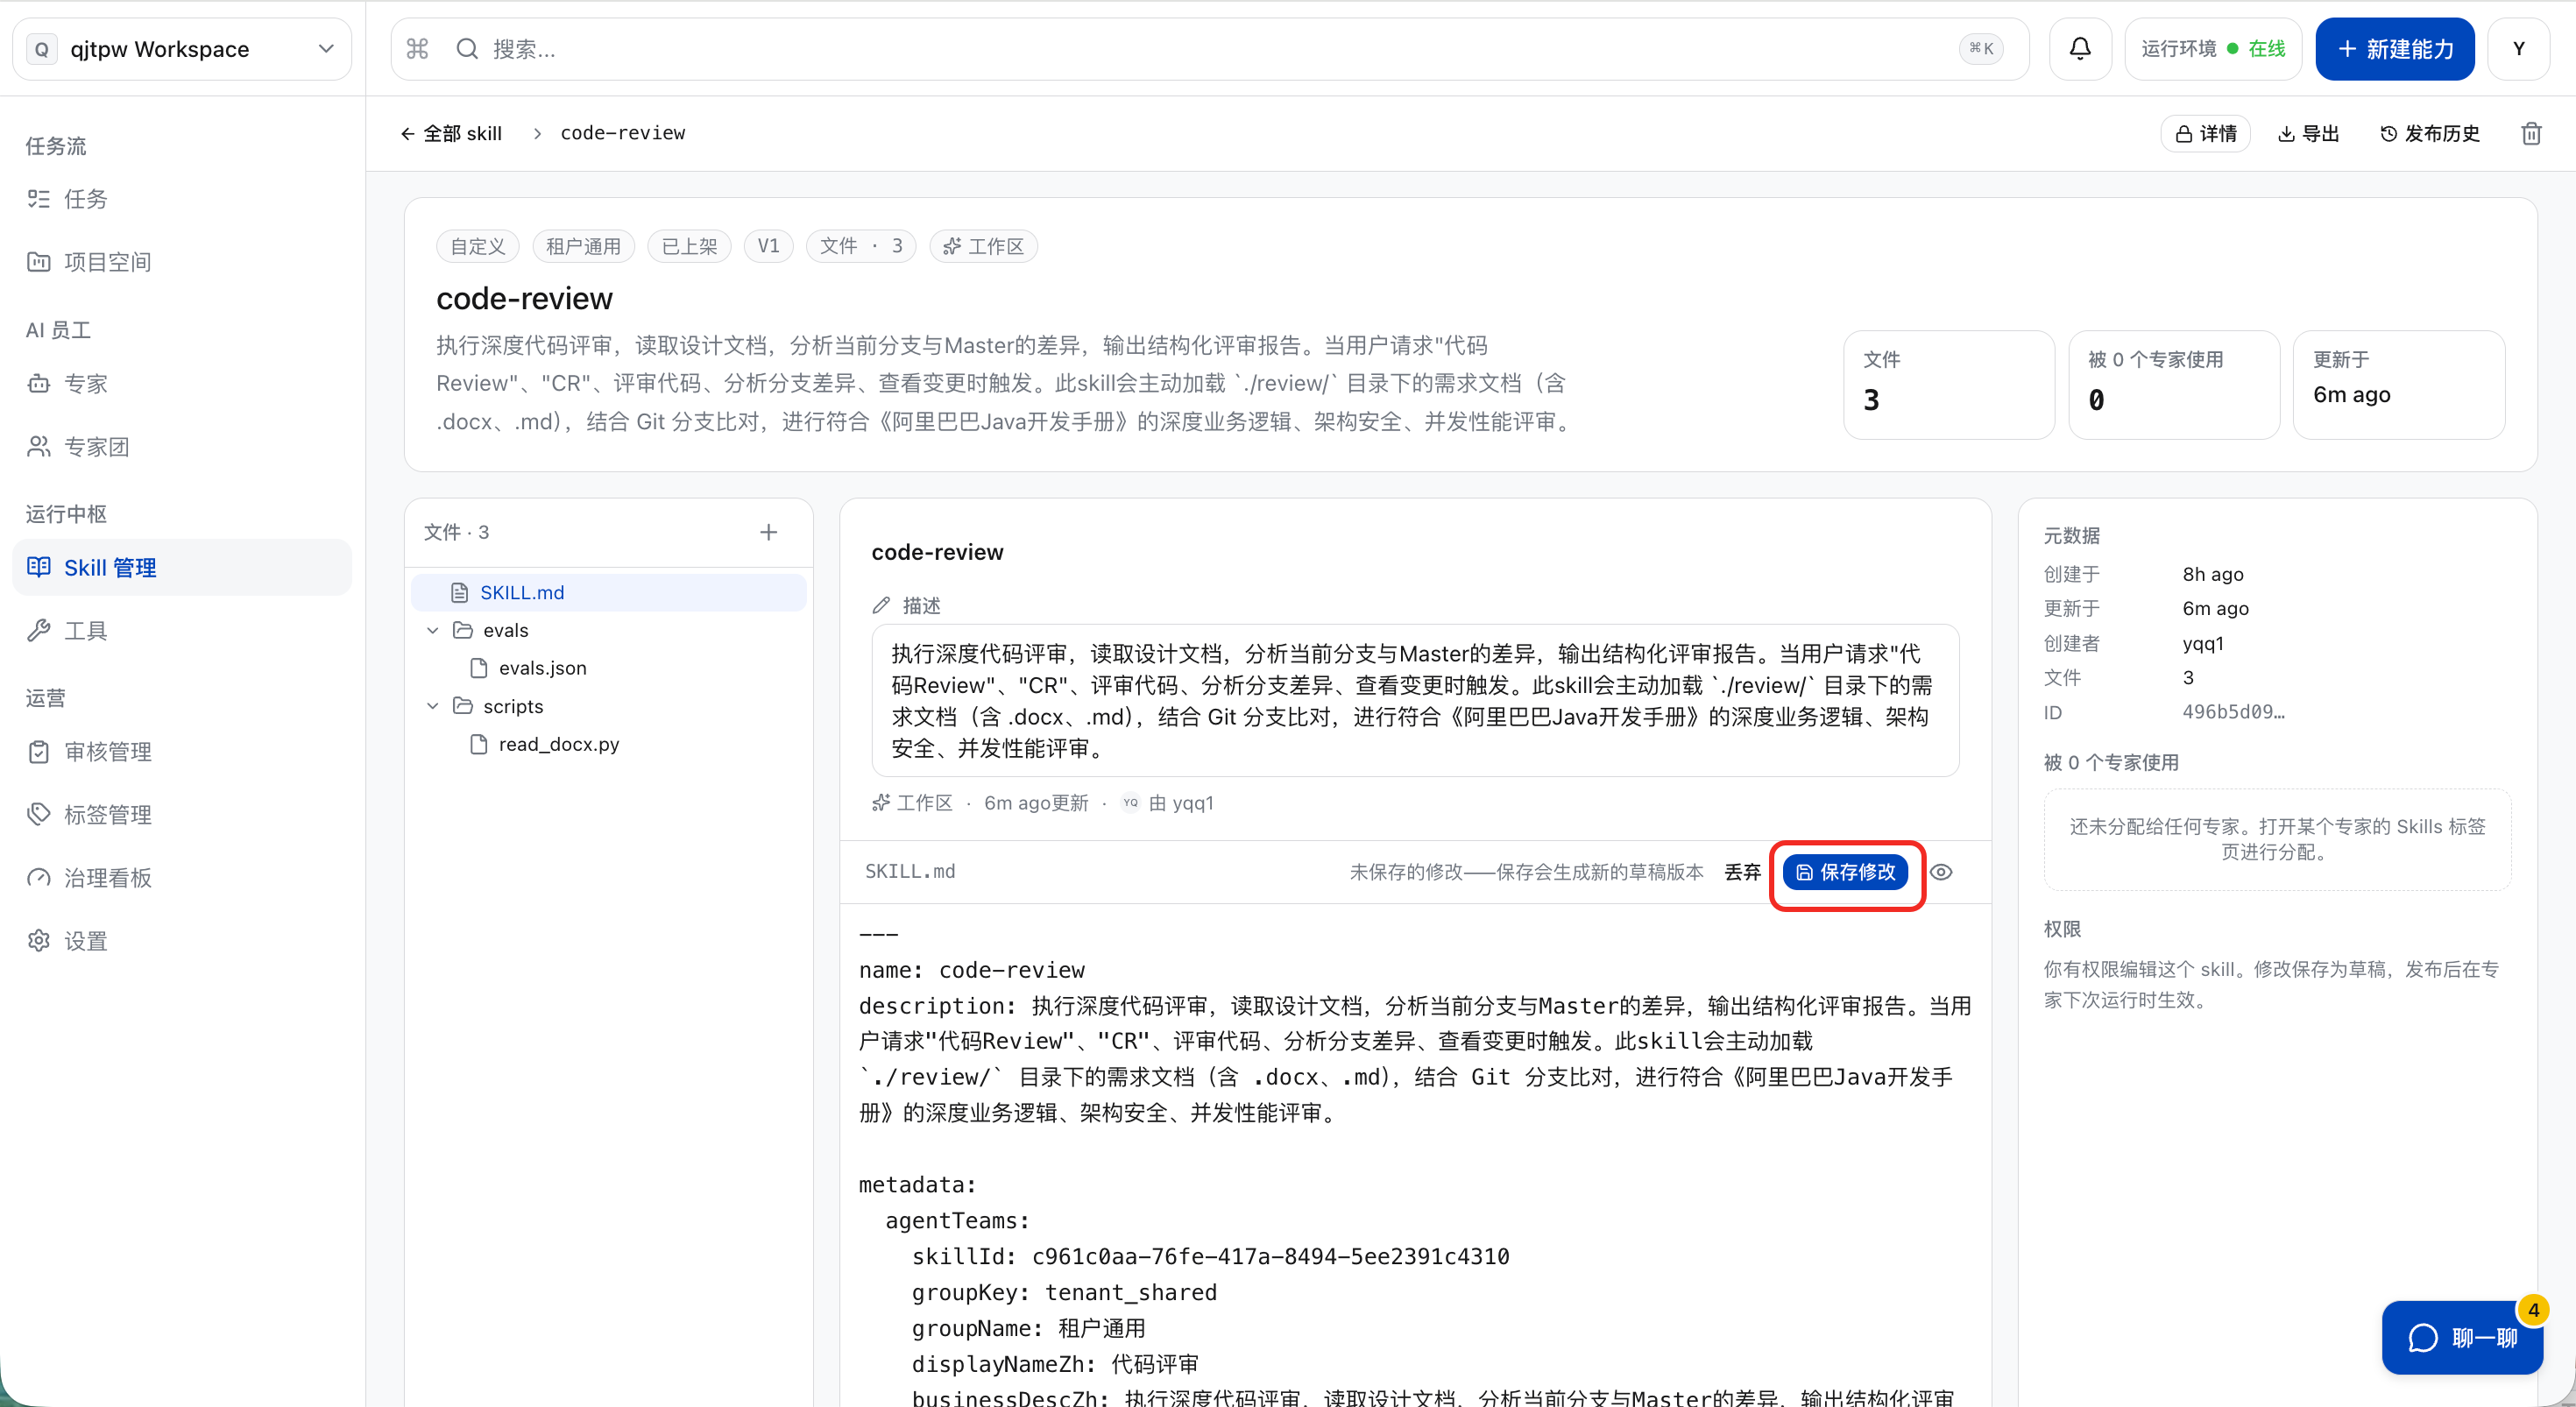
d. To modify the Skill content, you can click “Edit”. The file tree is on the left, the file preview and editing area is in the middle, and the metadata information of the Skill is on the right. You can upload files and modify content online. After the modification is completed, click the “Save Changes” button.
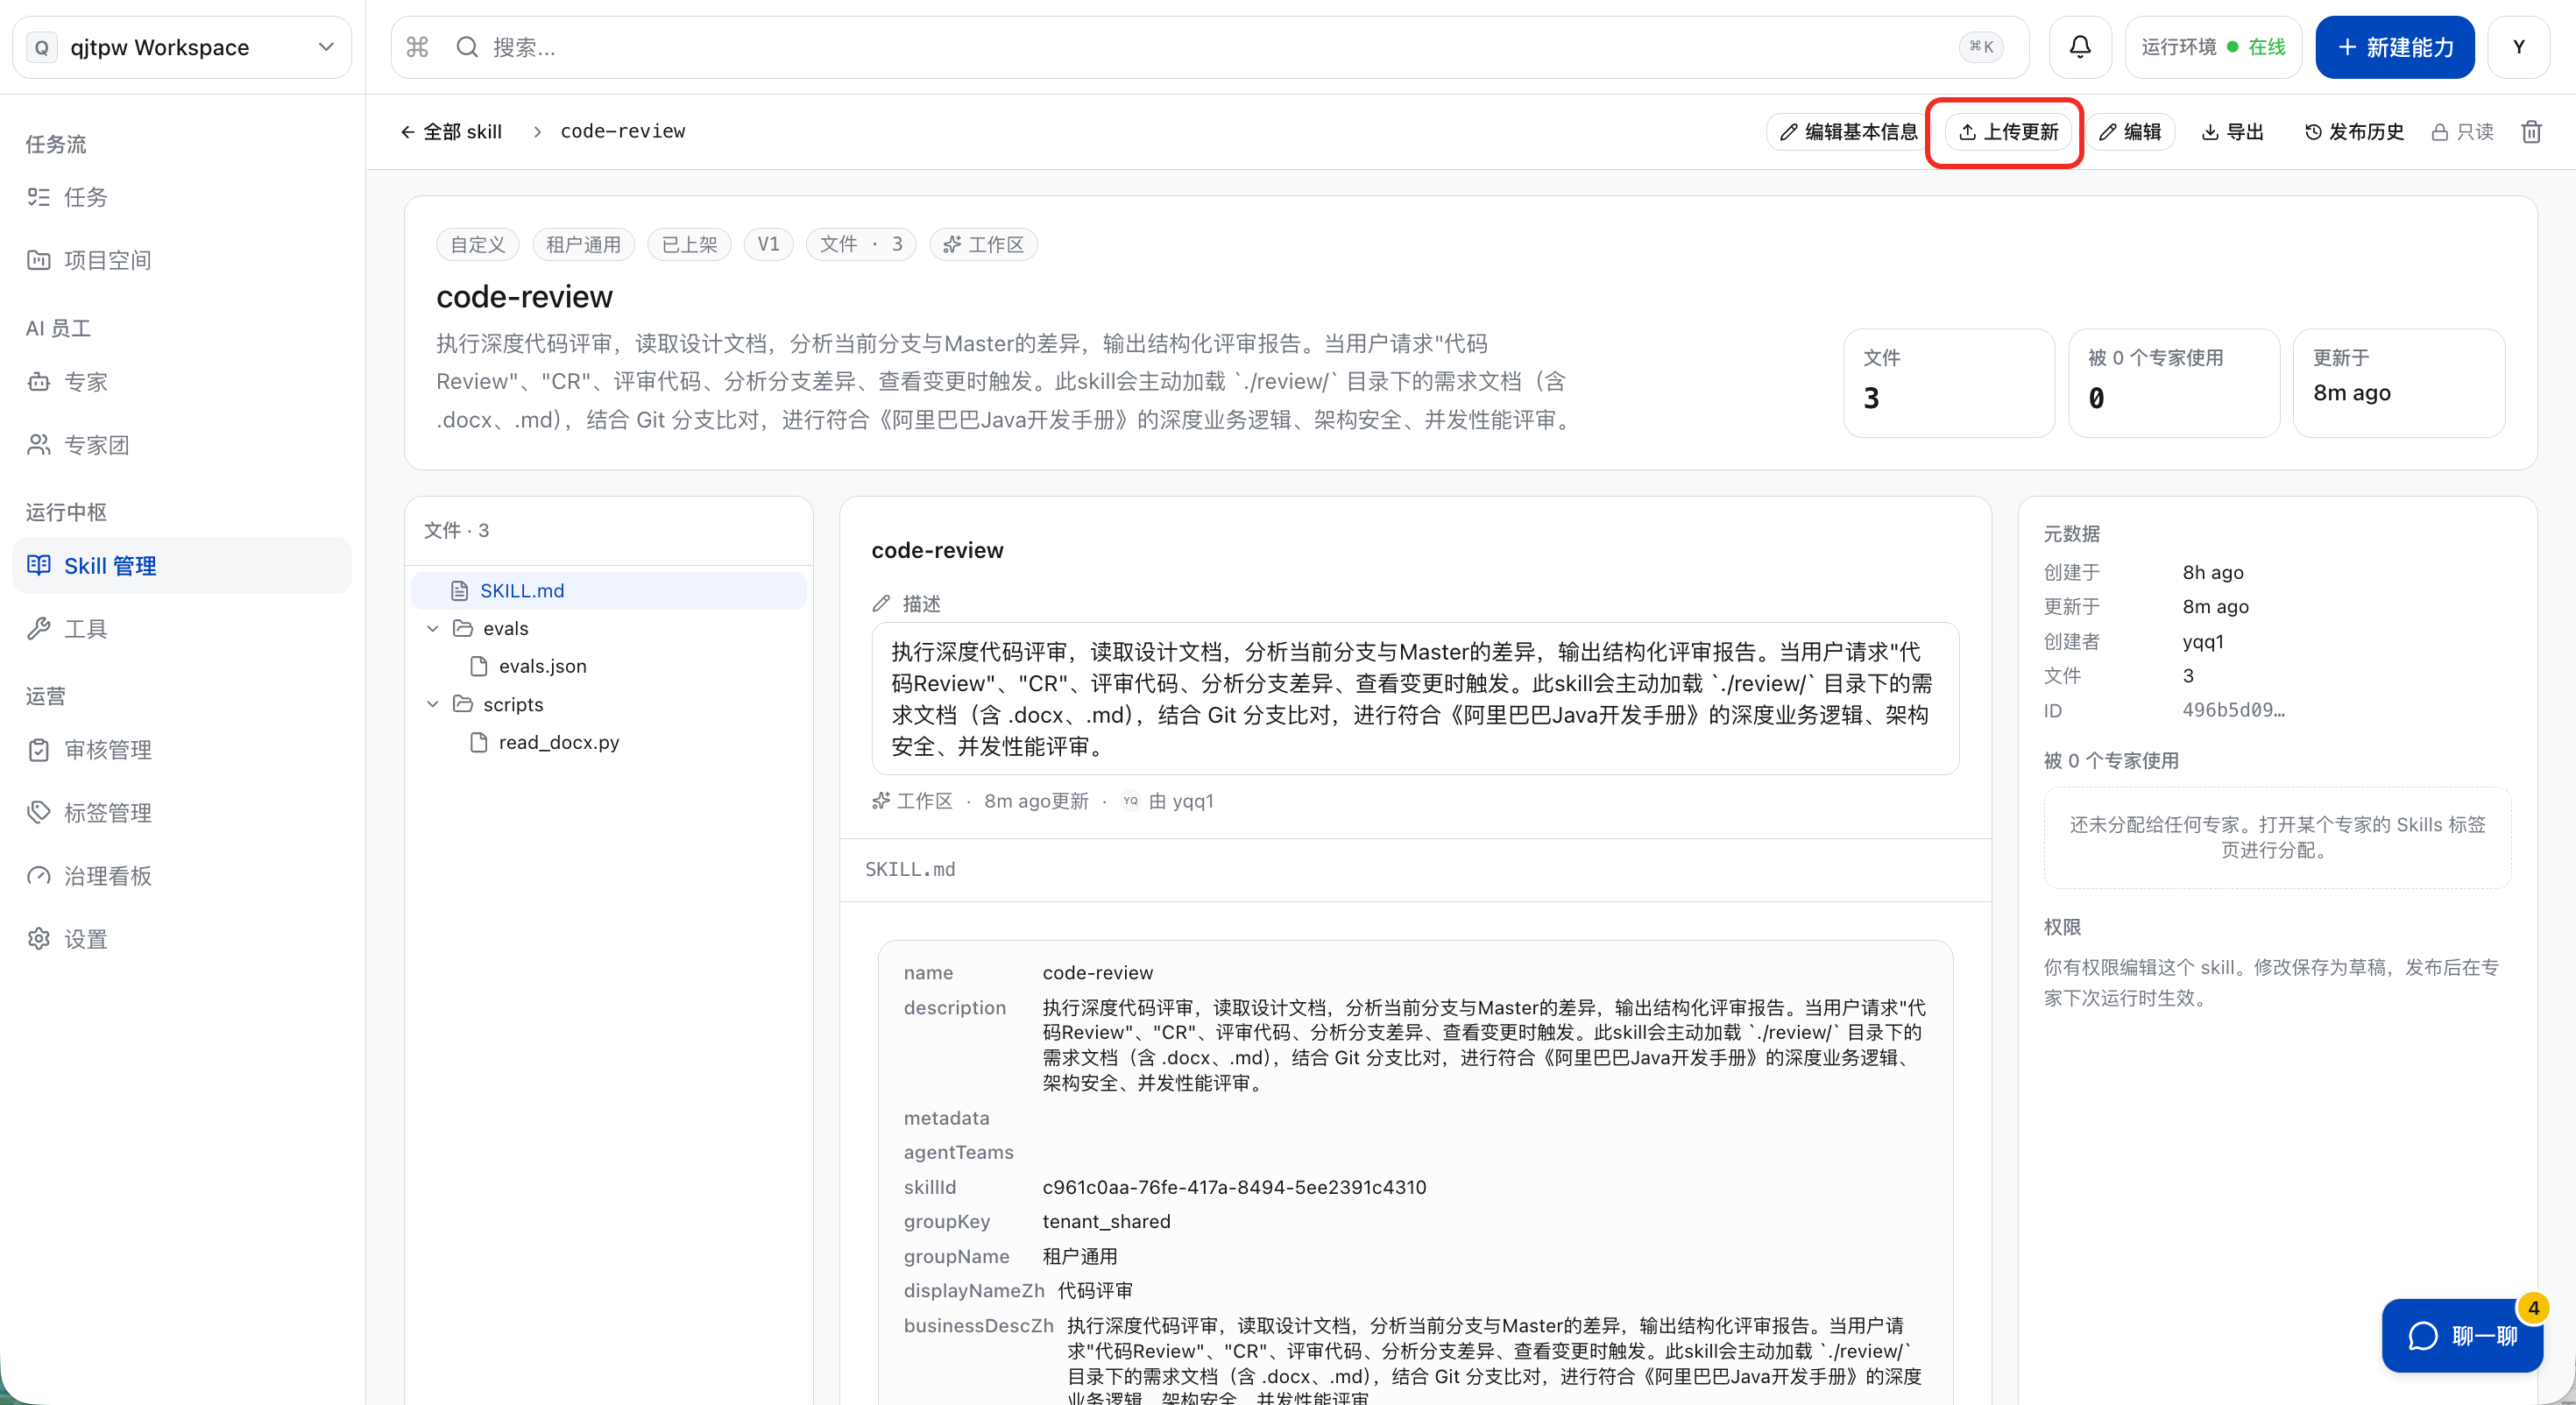
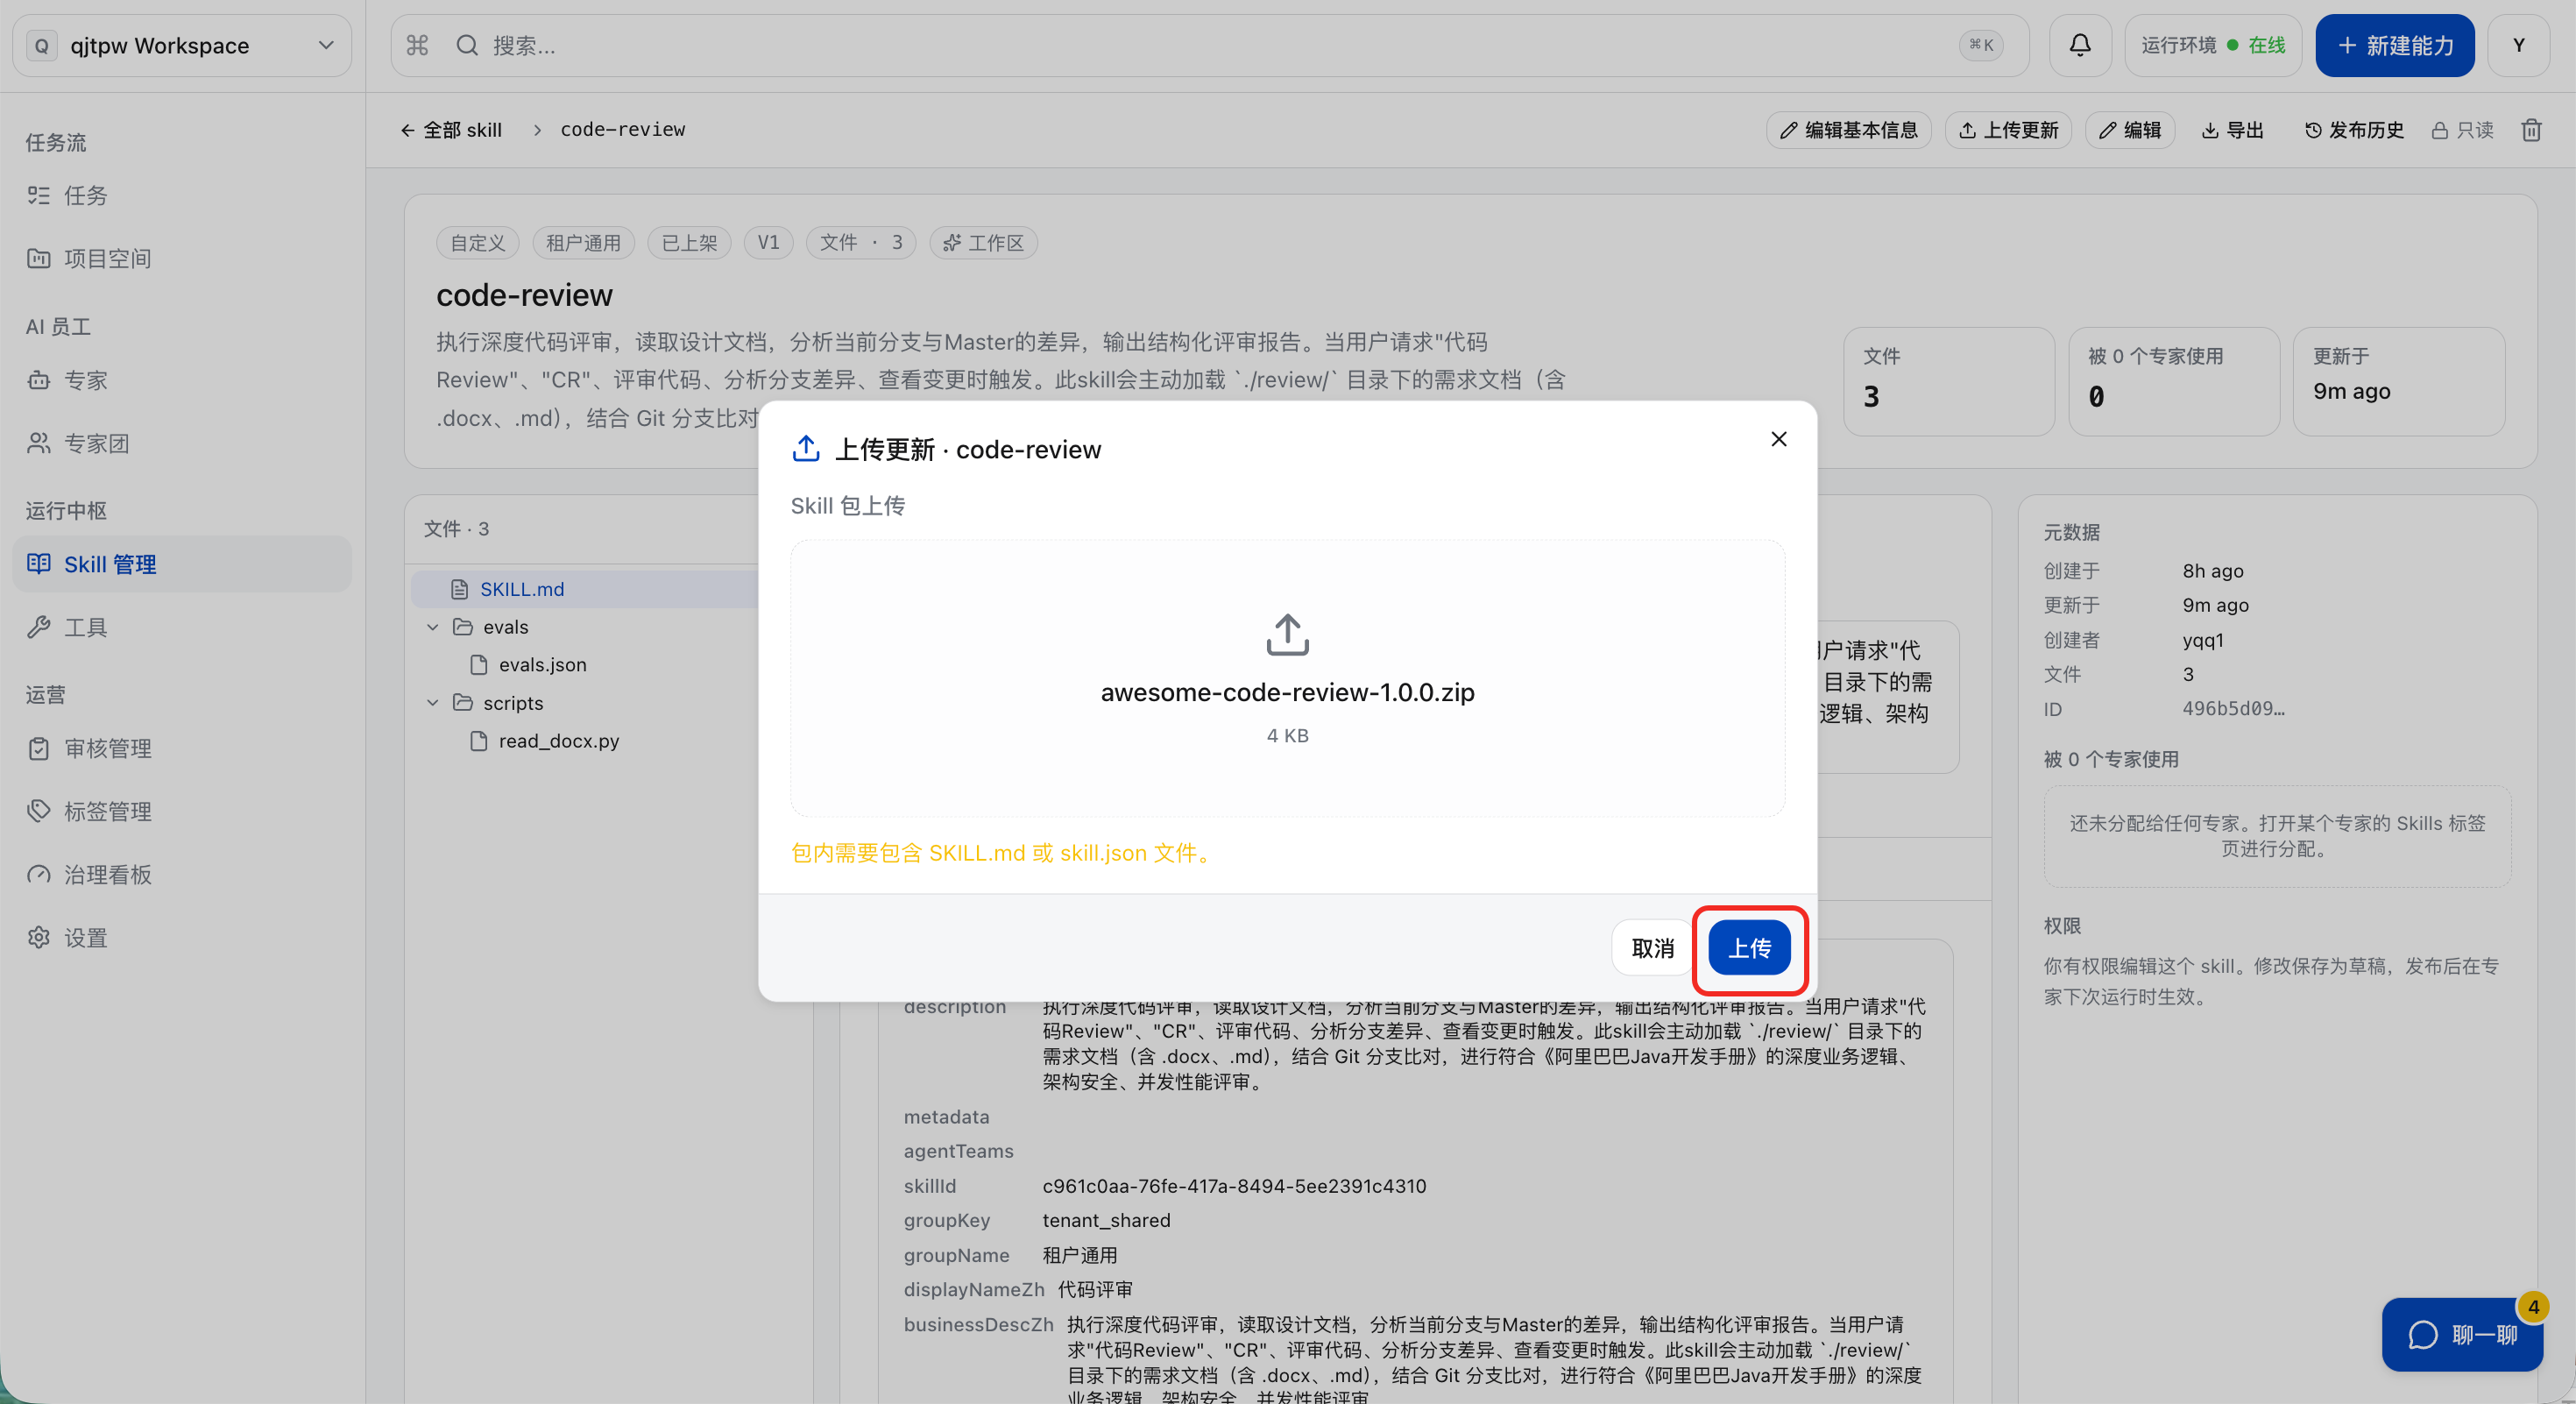
e. If there is an updated Skill package available locally, you can click “Upload Update”. Upload the new Skill package (please ensure that the `name` in the SKILL.md file is consistent with the system identifier of the current skill), then click “Upload”; once the upload is successful, the content of this Skill will be overwritten.
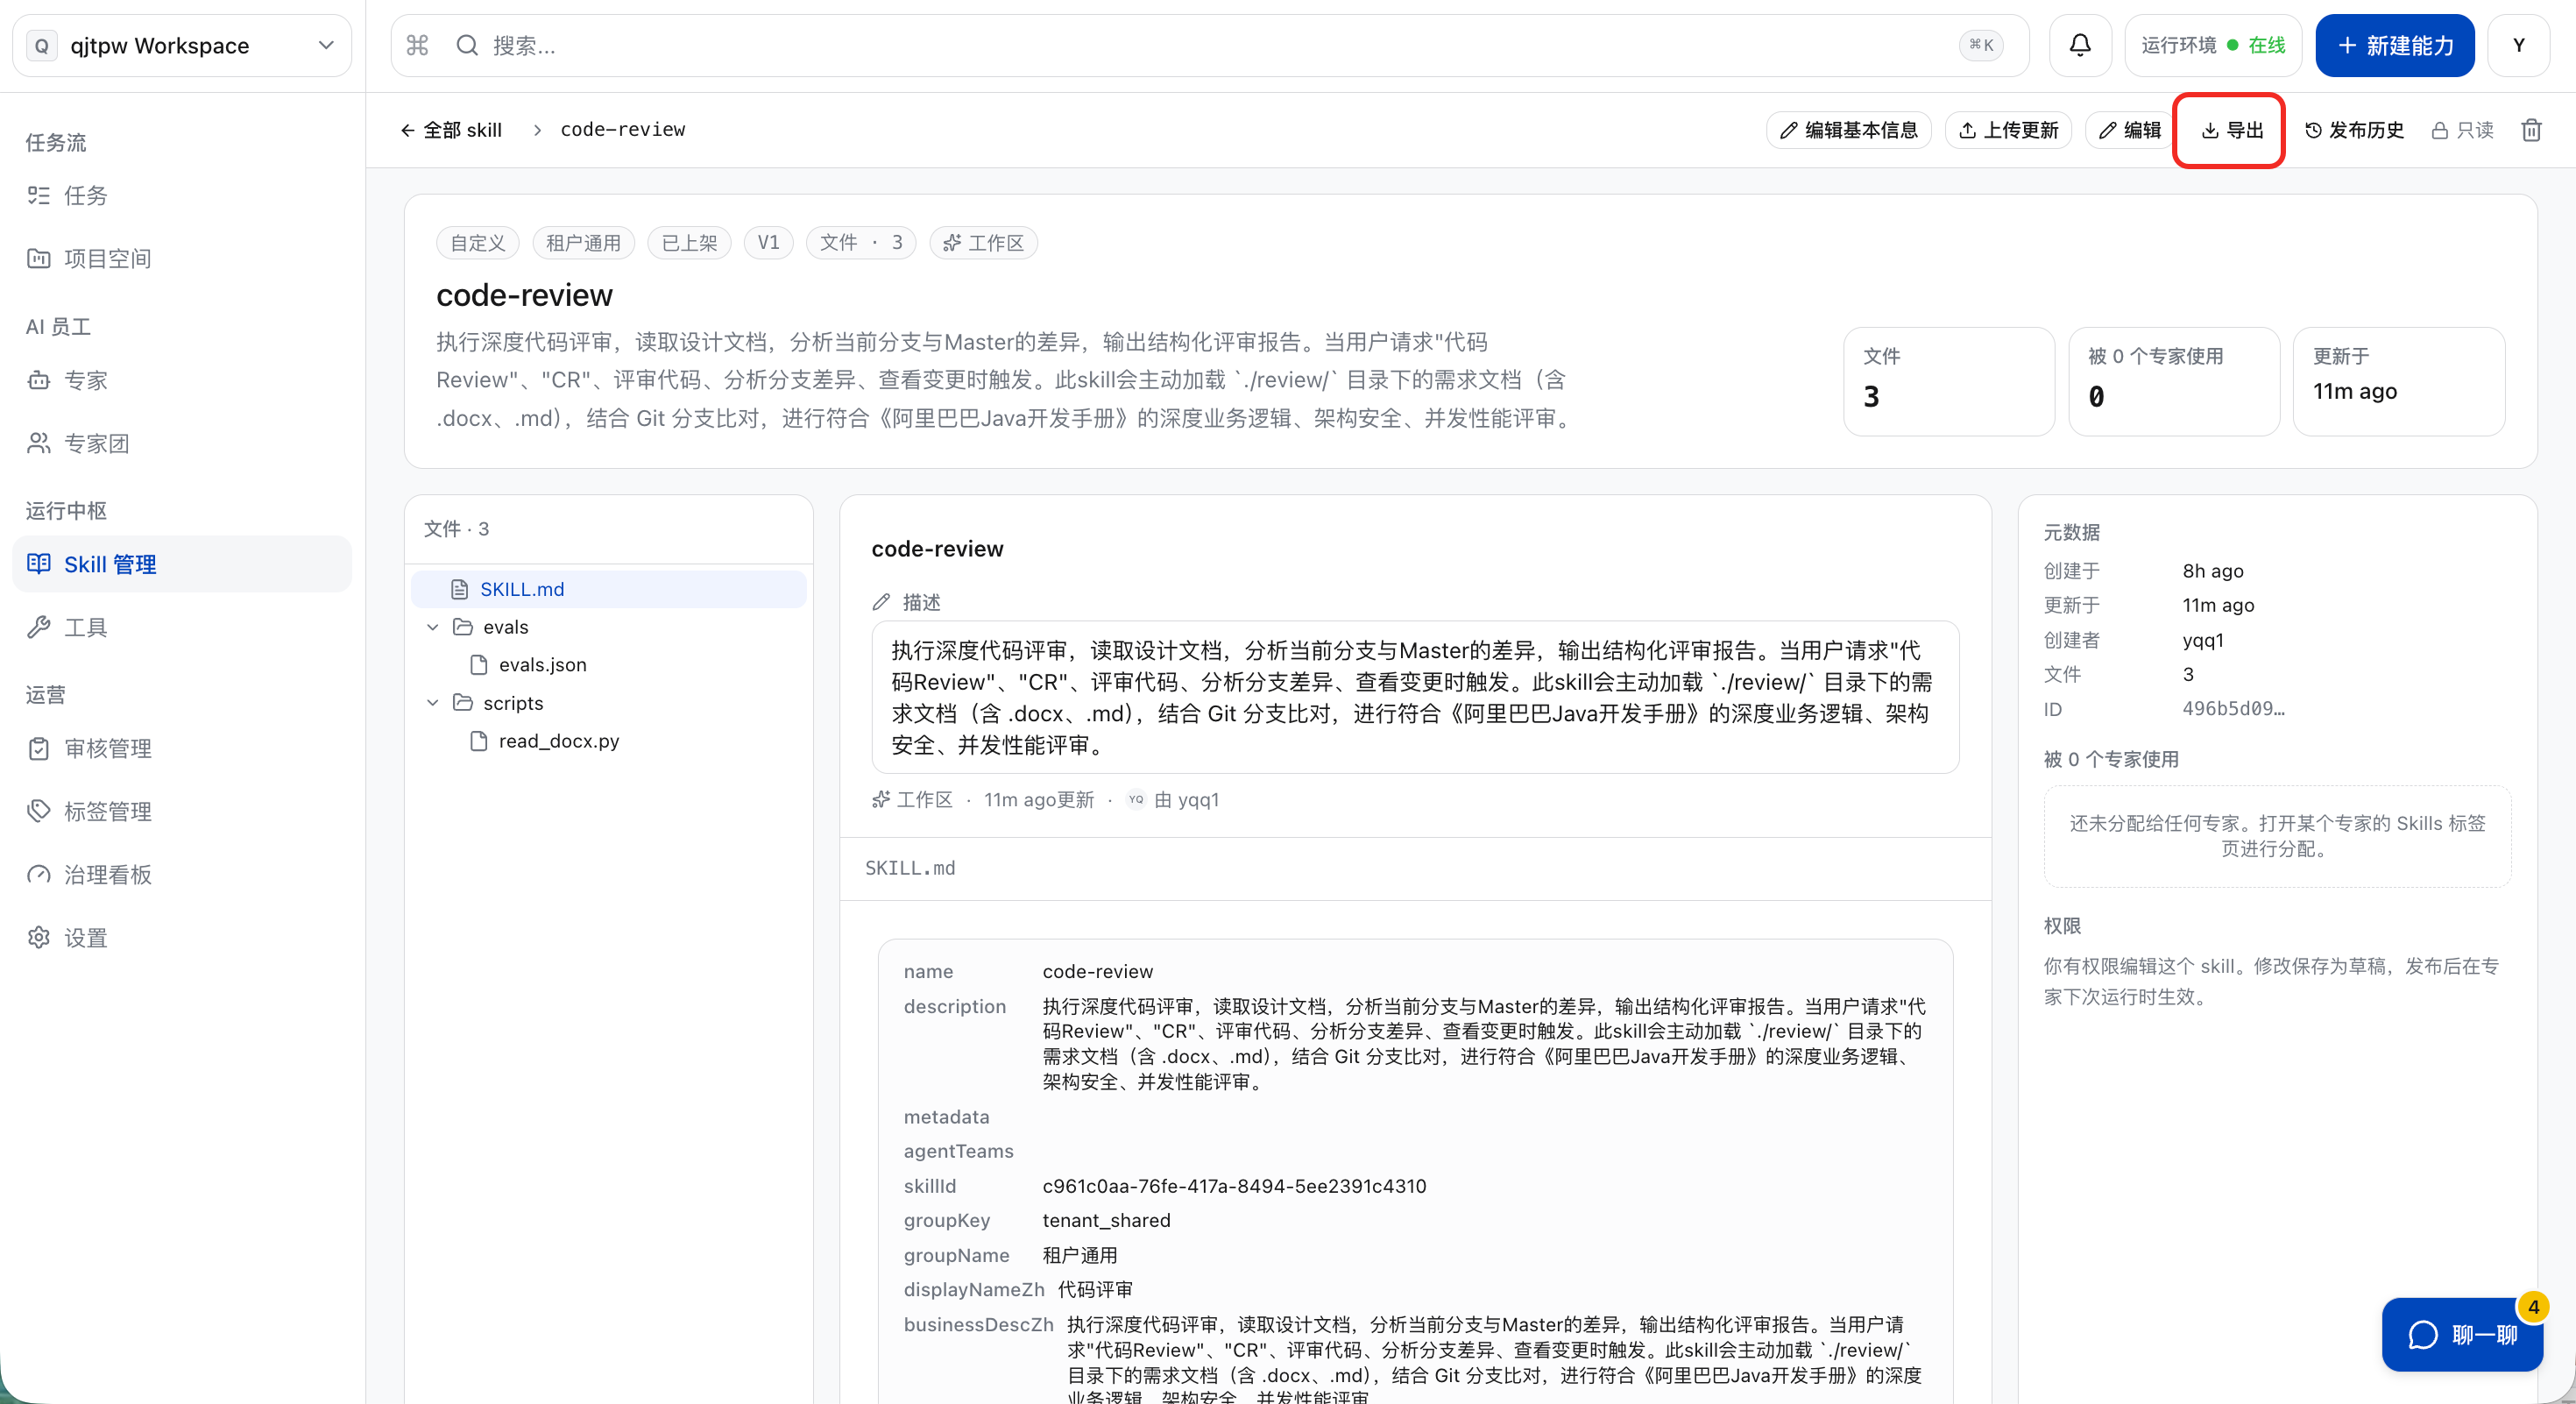
Export Skill
a. In the Skill details page, click “Export”. Note: Users granted the “Export Skills” permission item can export or batch export Skills.
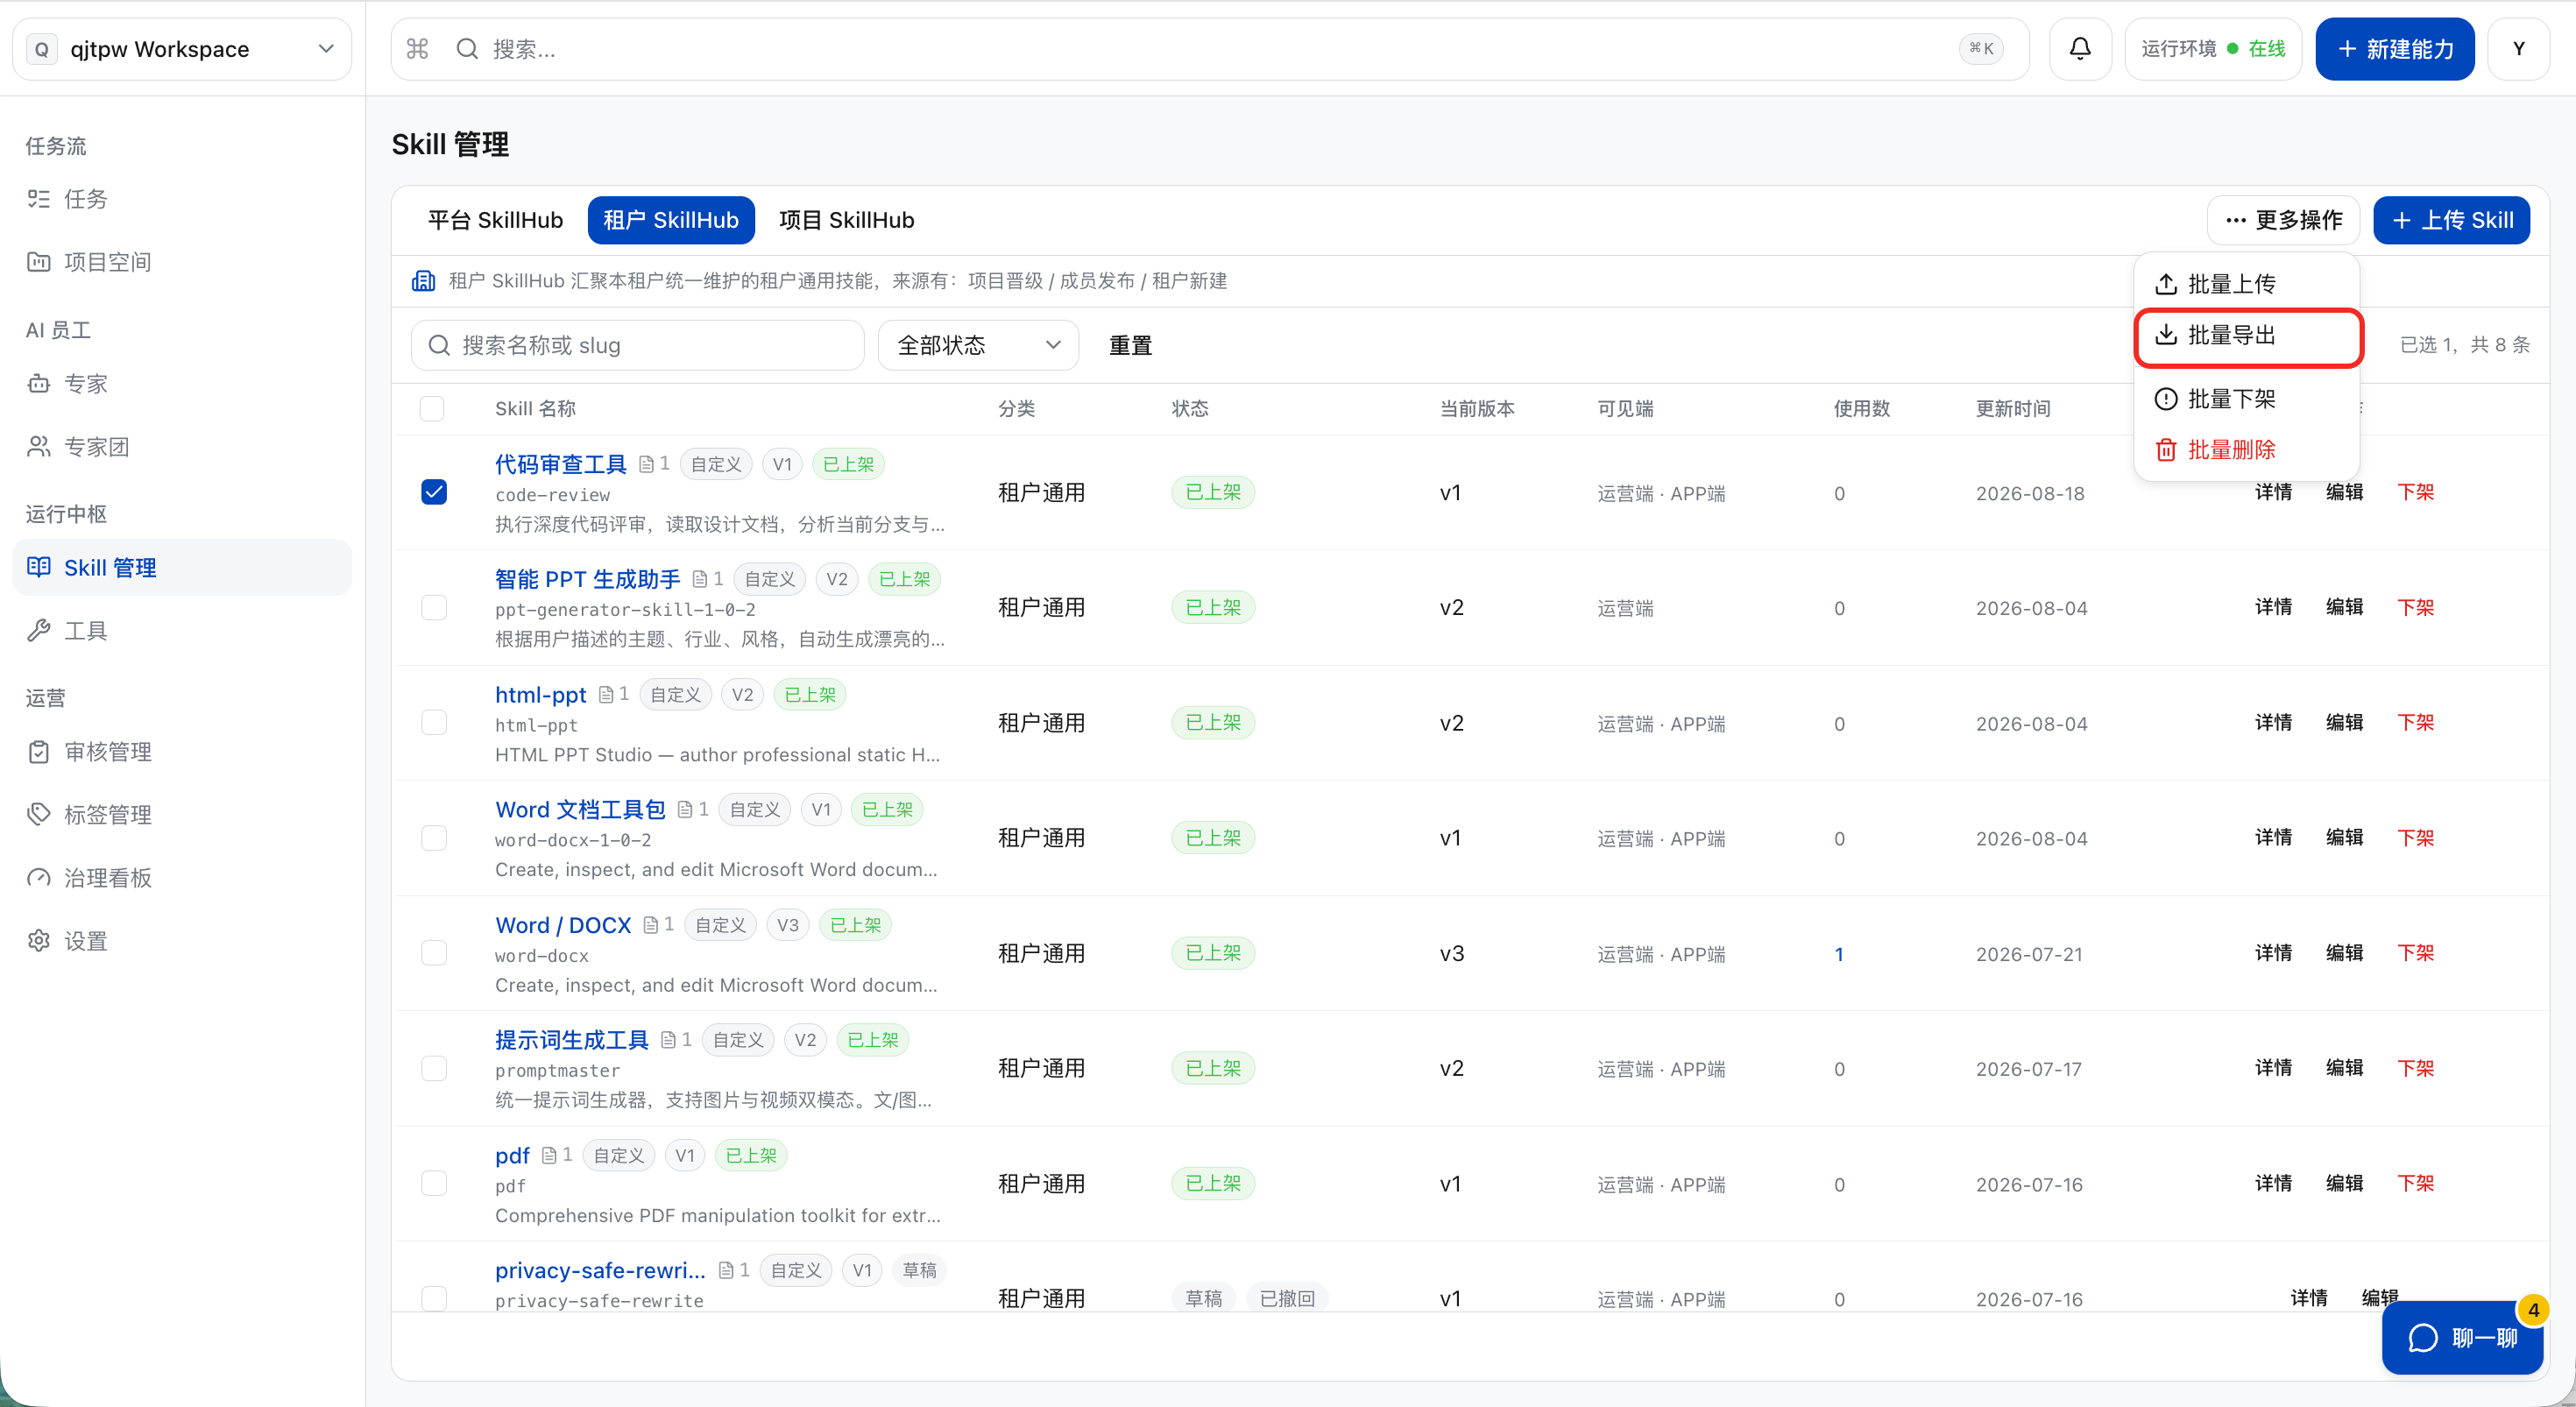
b. If you need to export a large number of Skills, click “Batch Export” in the Skill list.
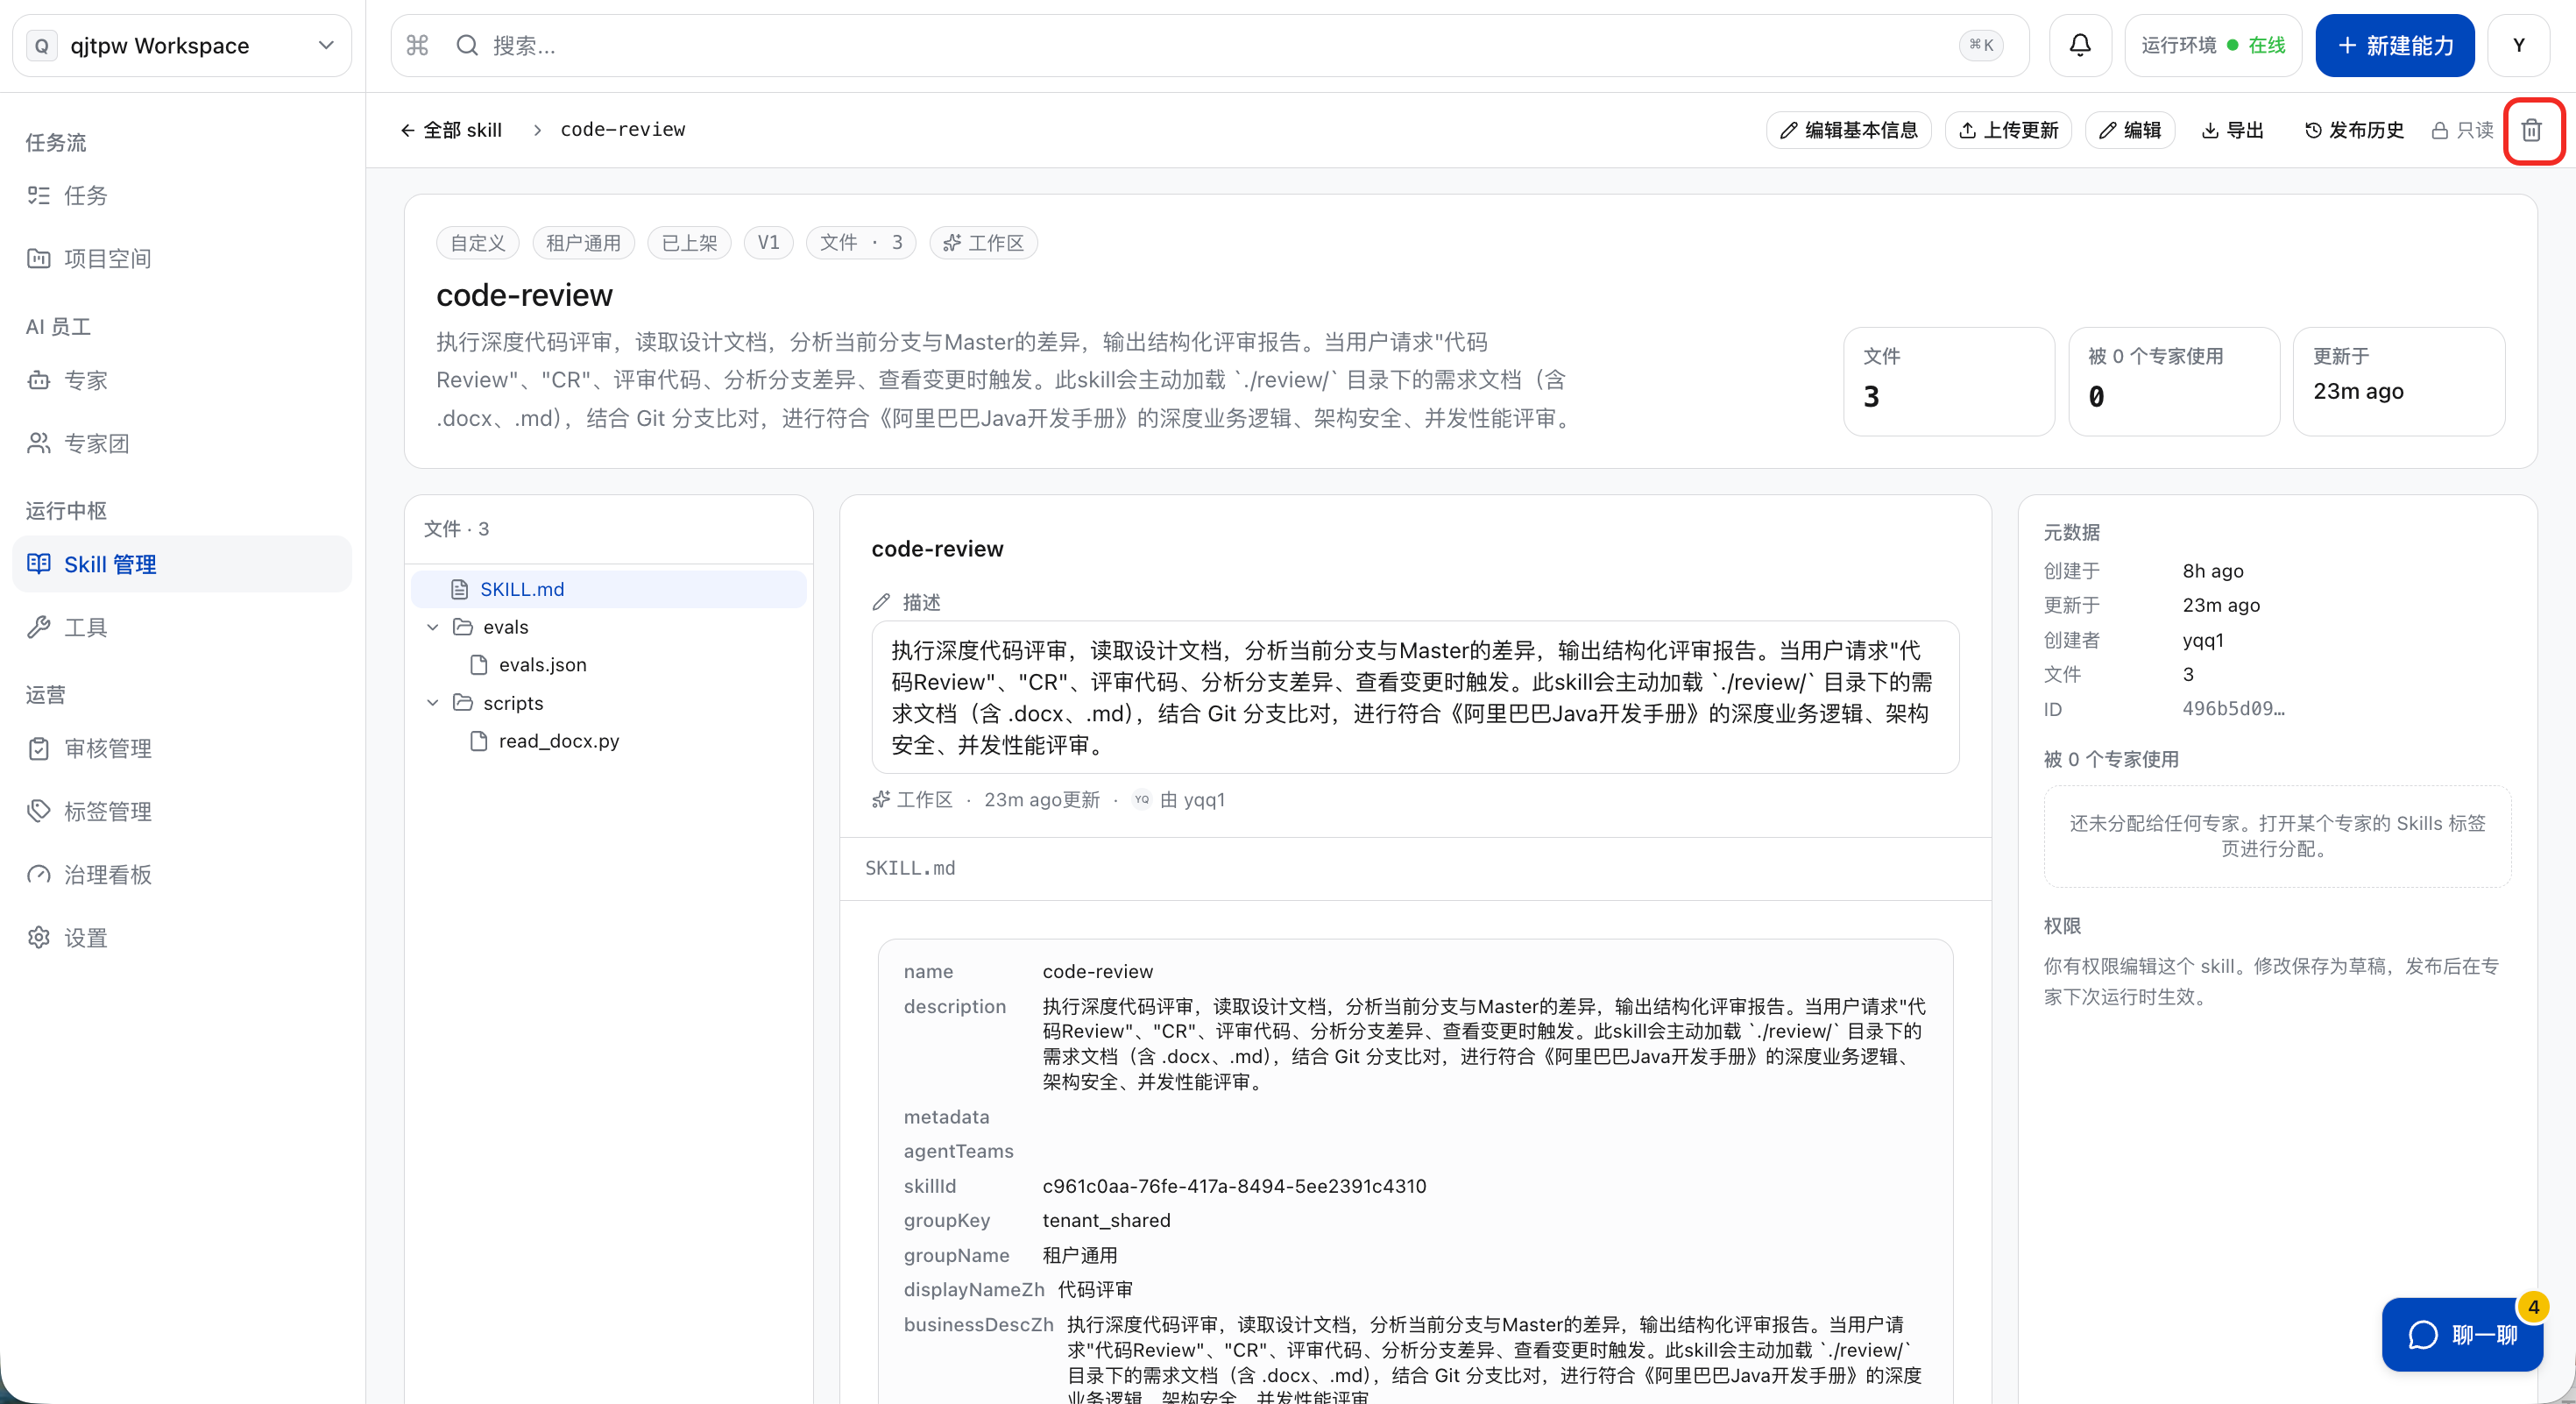
Delete Skill
a. In the Skill details page, click “Delete”. Note: If the Skill has been bound to an expert or installed by an individual, it cannot be deleted.
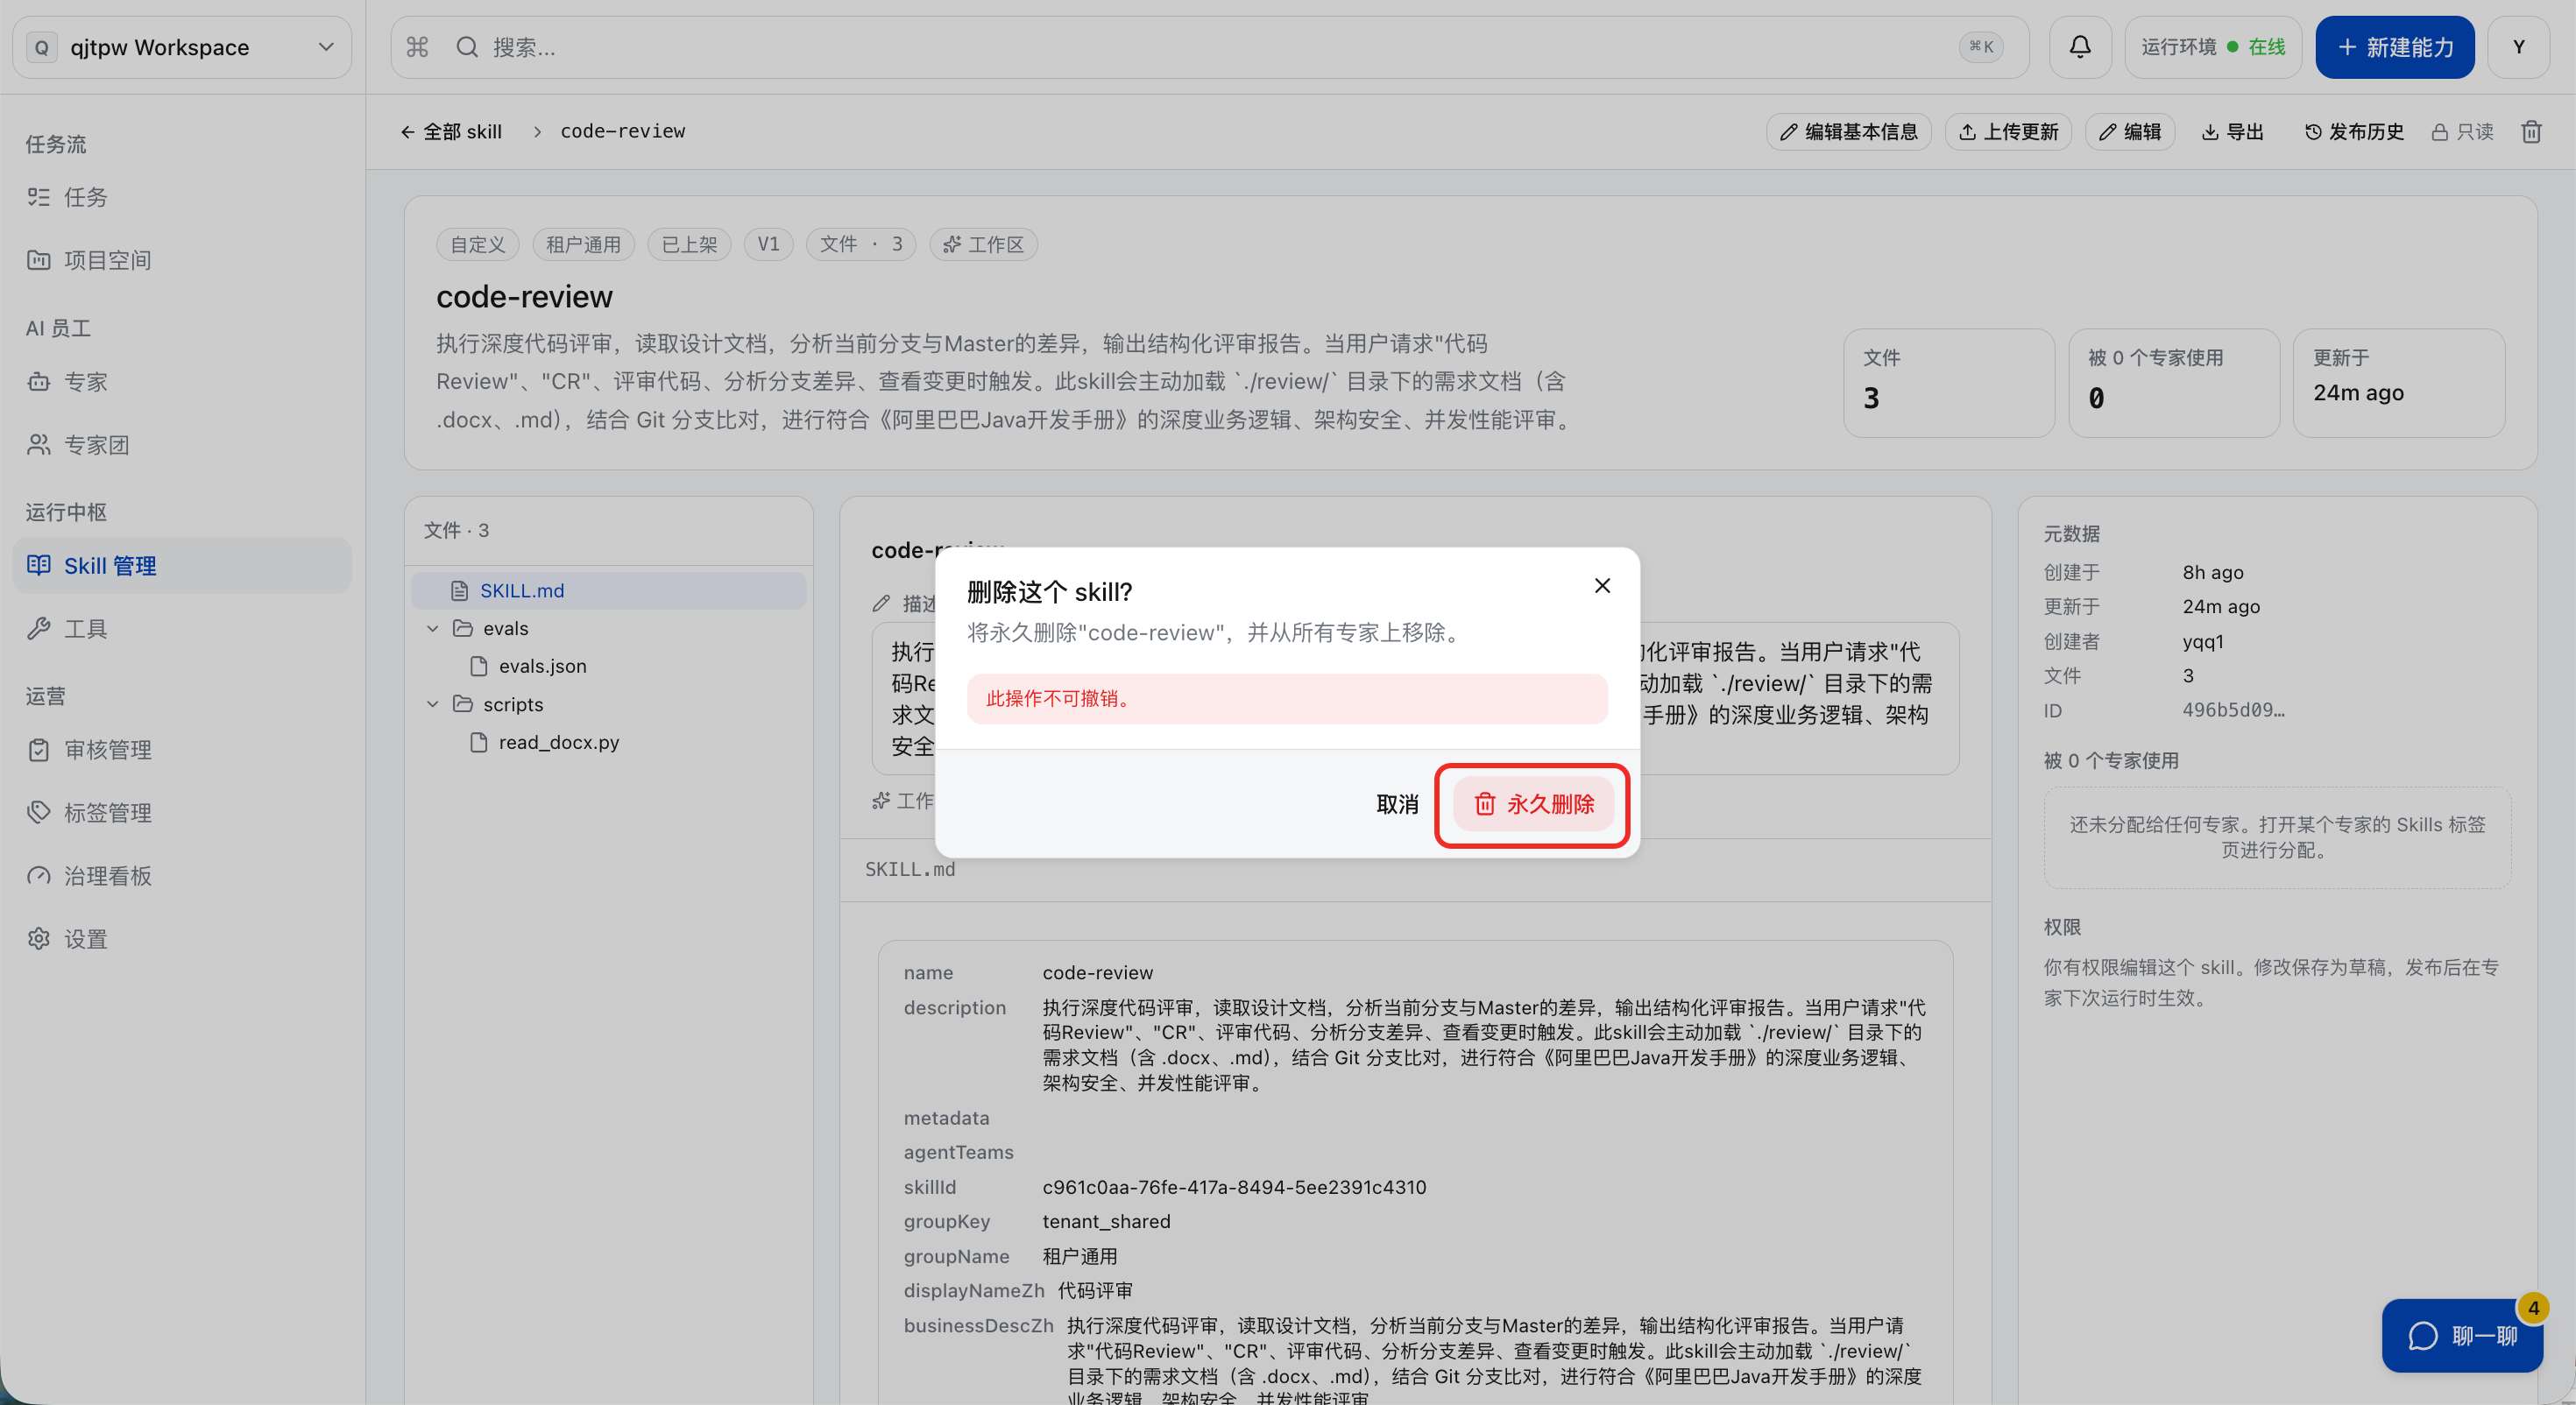
b. In the secondary confirmation pop-up, click “Permanently Delete”.
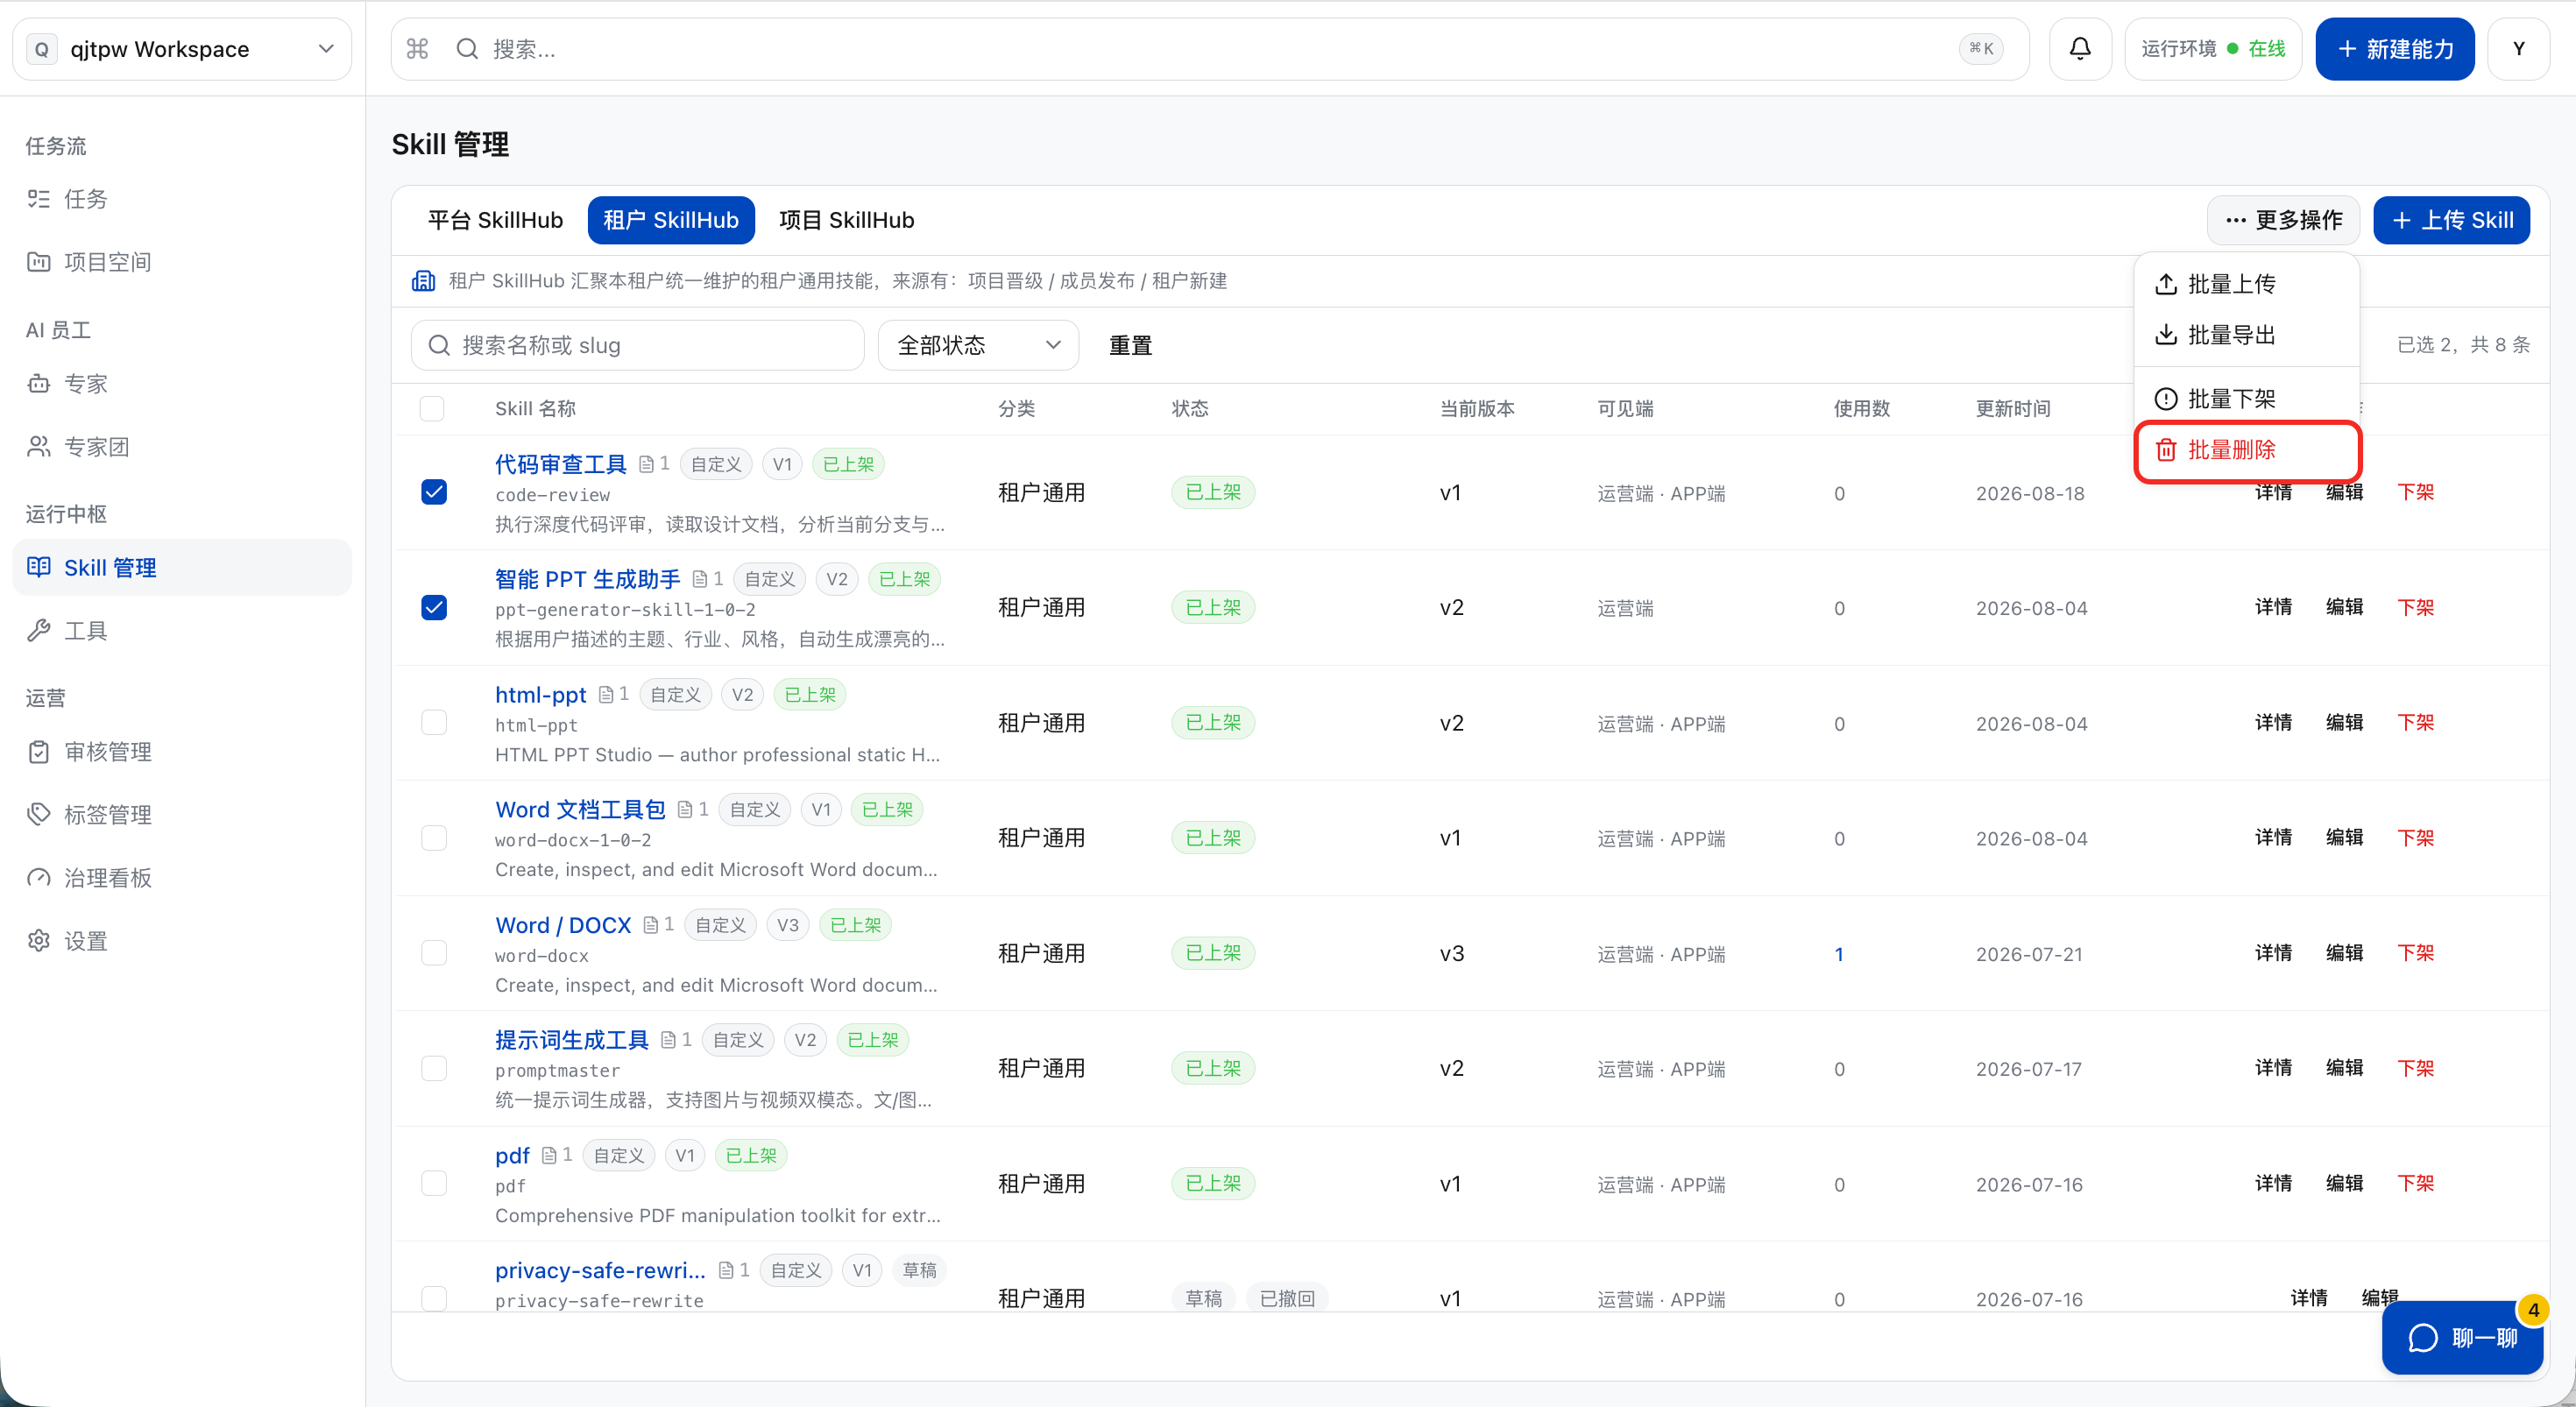
c. To quickly delete Skills in batches, you can batch-check the Skills in the list, and click “More Actions” > “Batch Delete”.
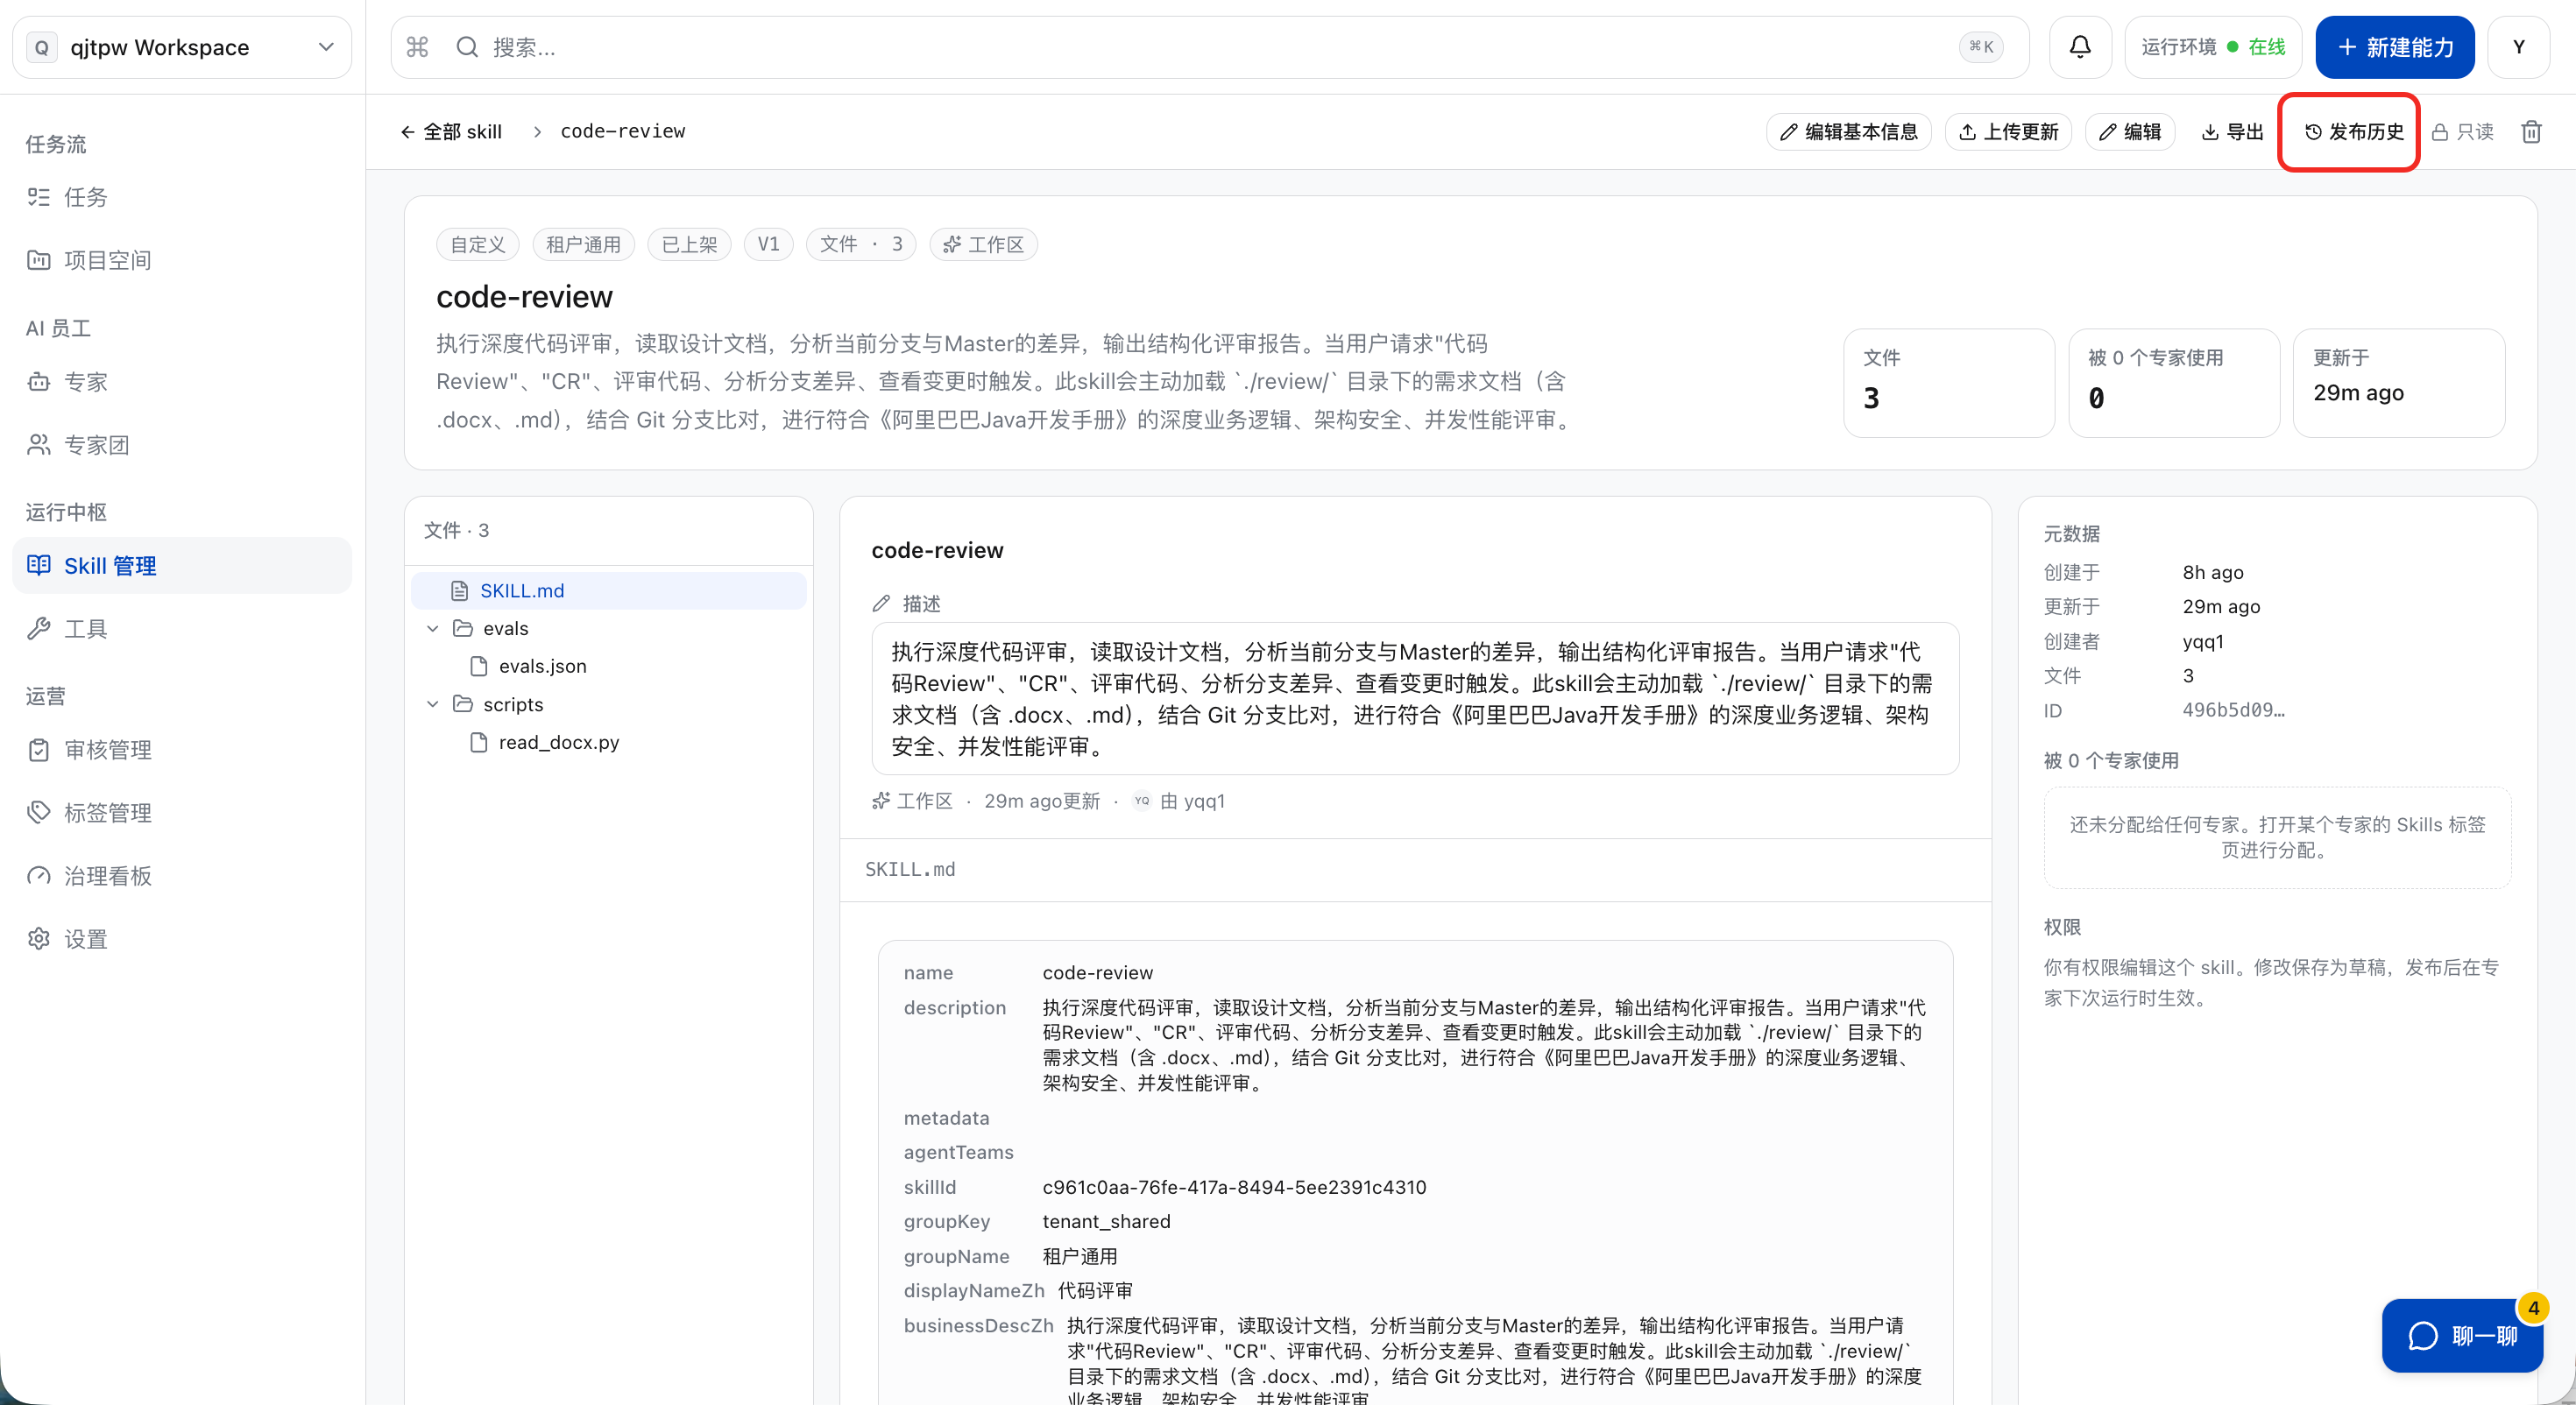
Release History
a. In the Skill details, click “Publishing History”.
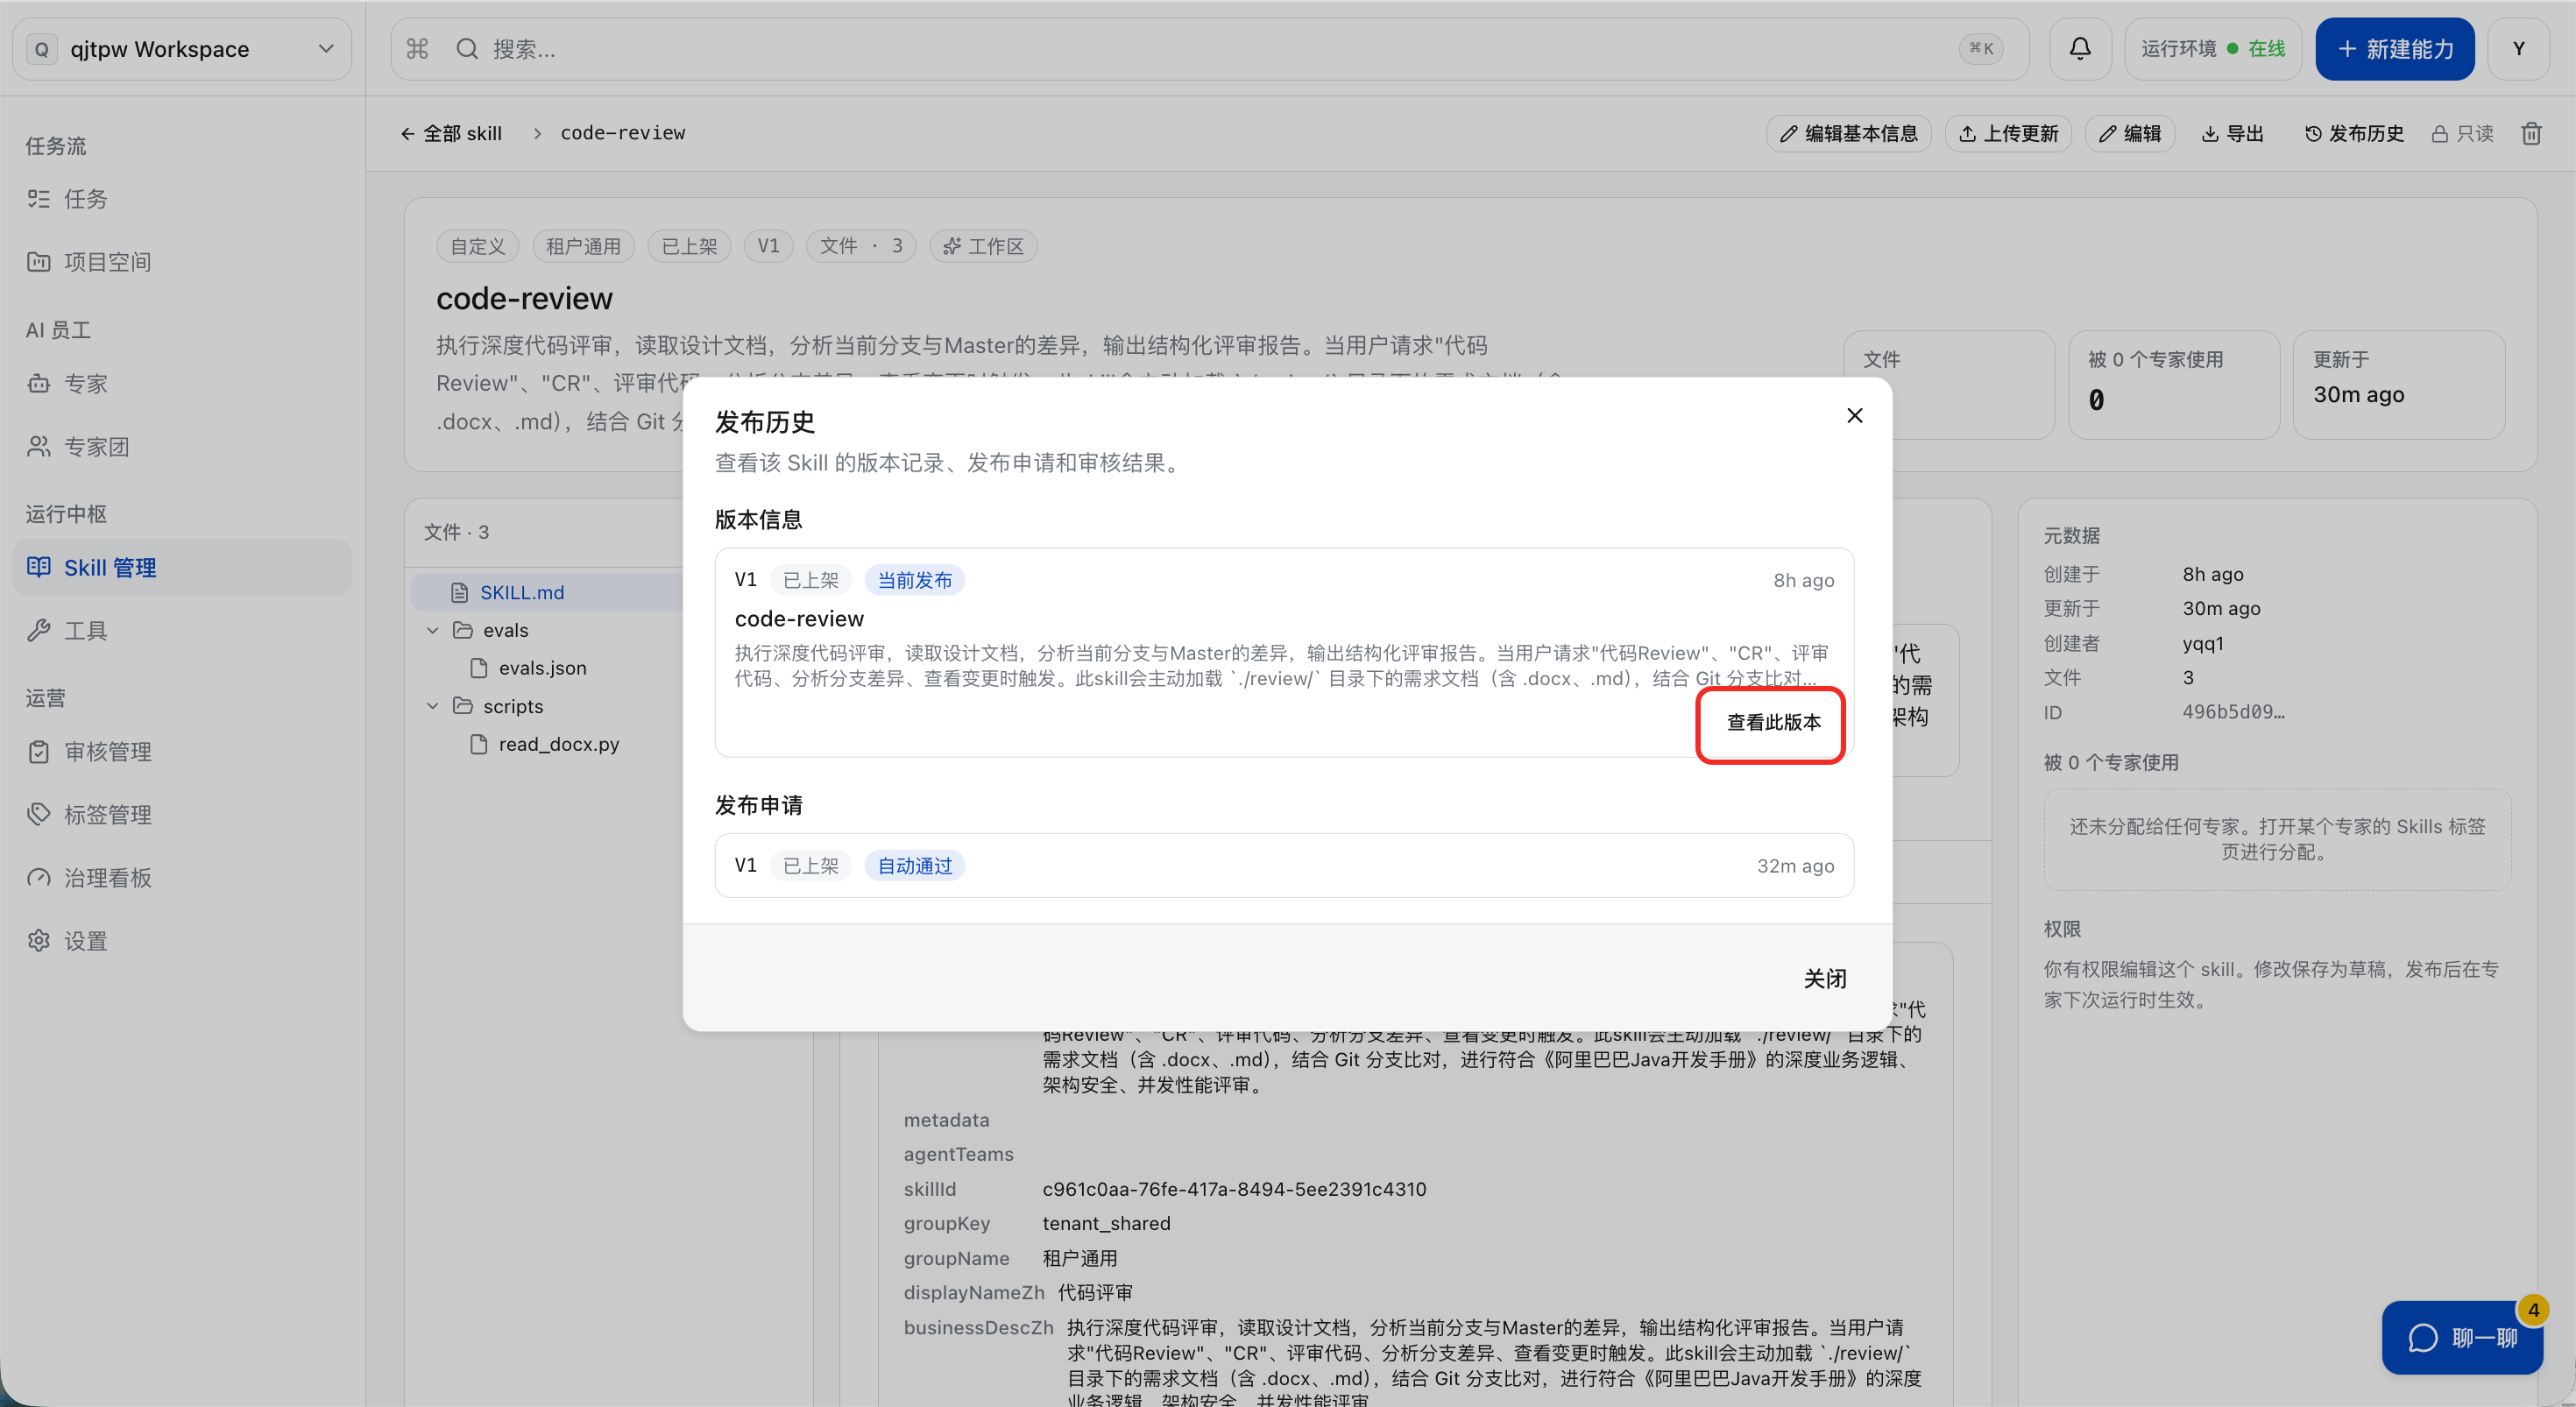
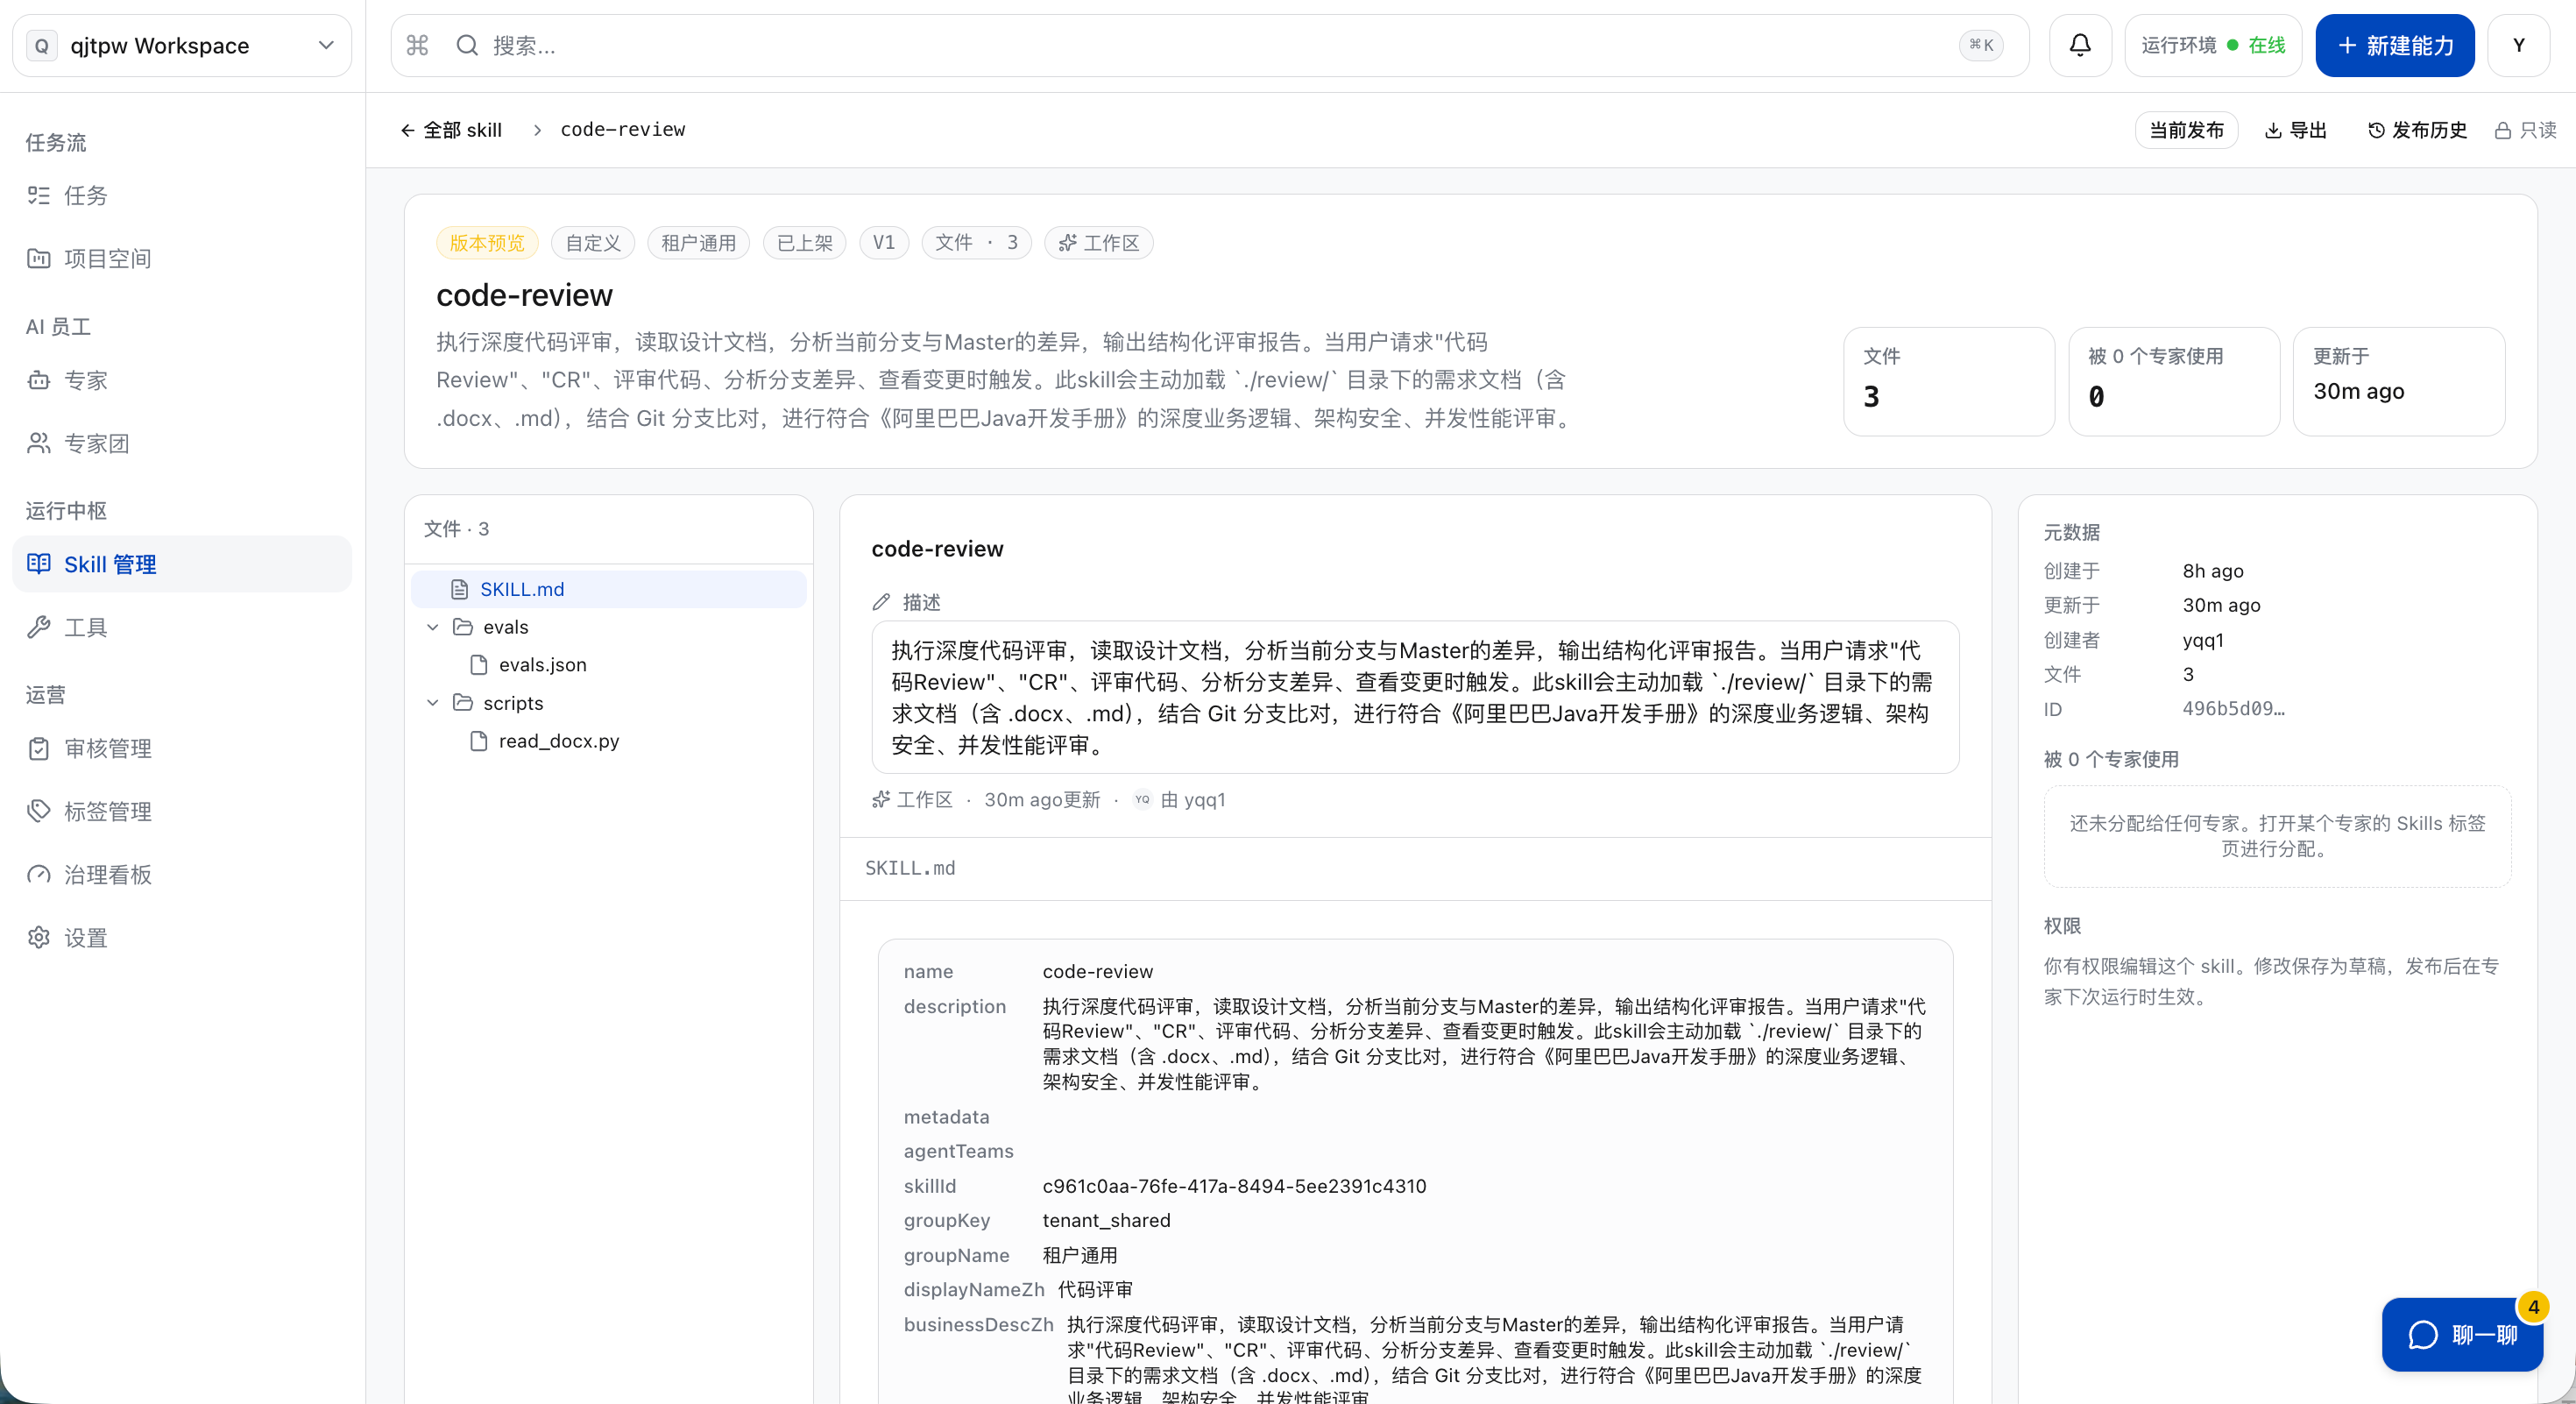
b. Click “View this version” to view the configuration information of a specific version.
Tool Management
View MCP Tools
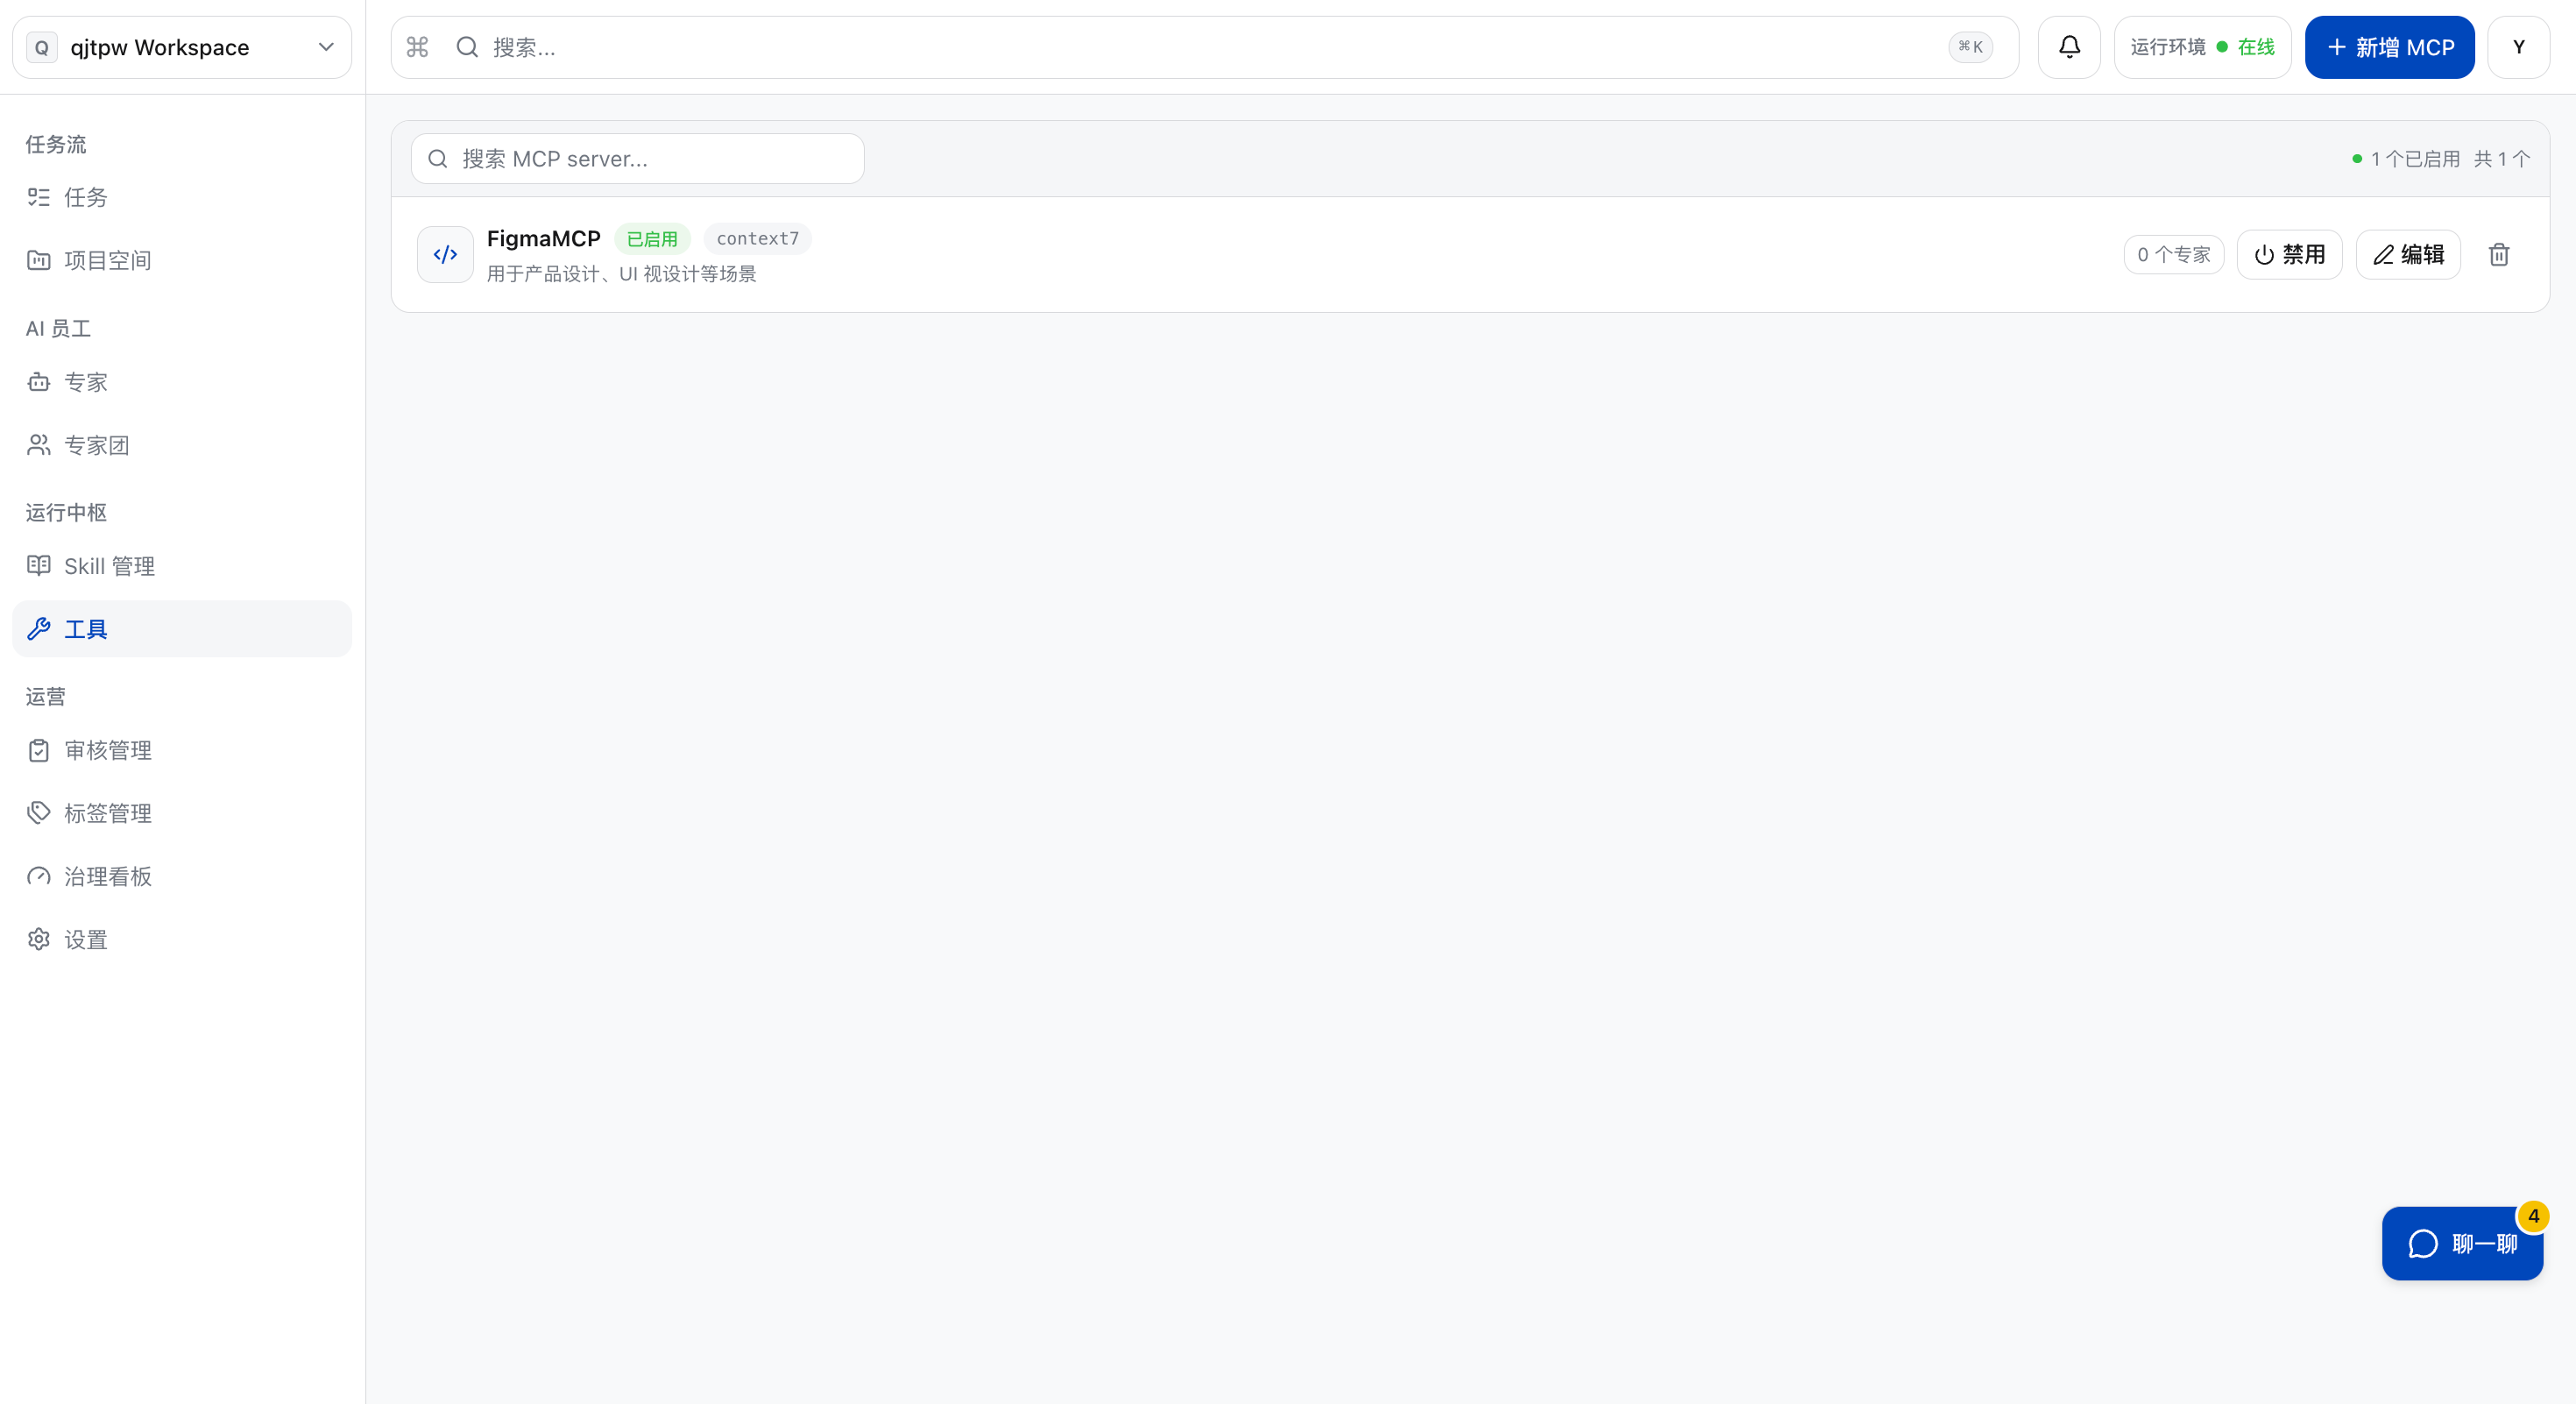
You can view the MCP tools under the tenant.
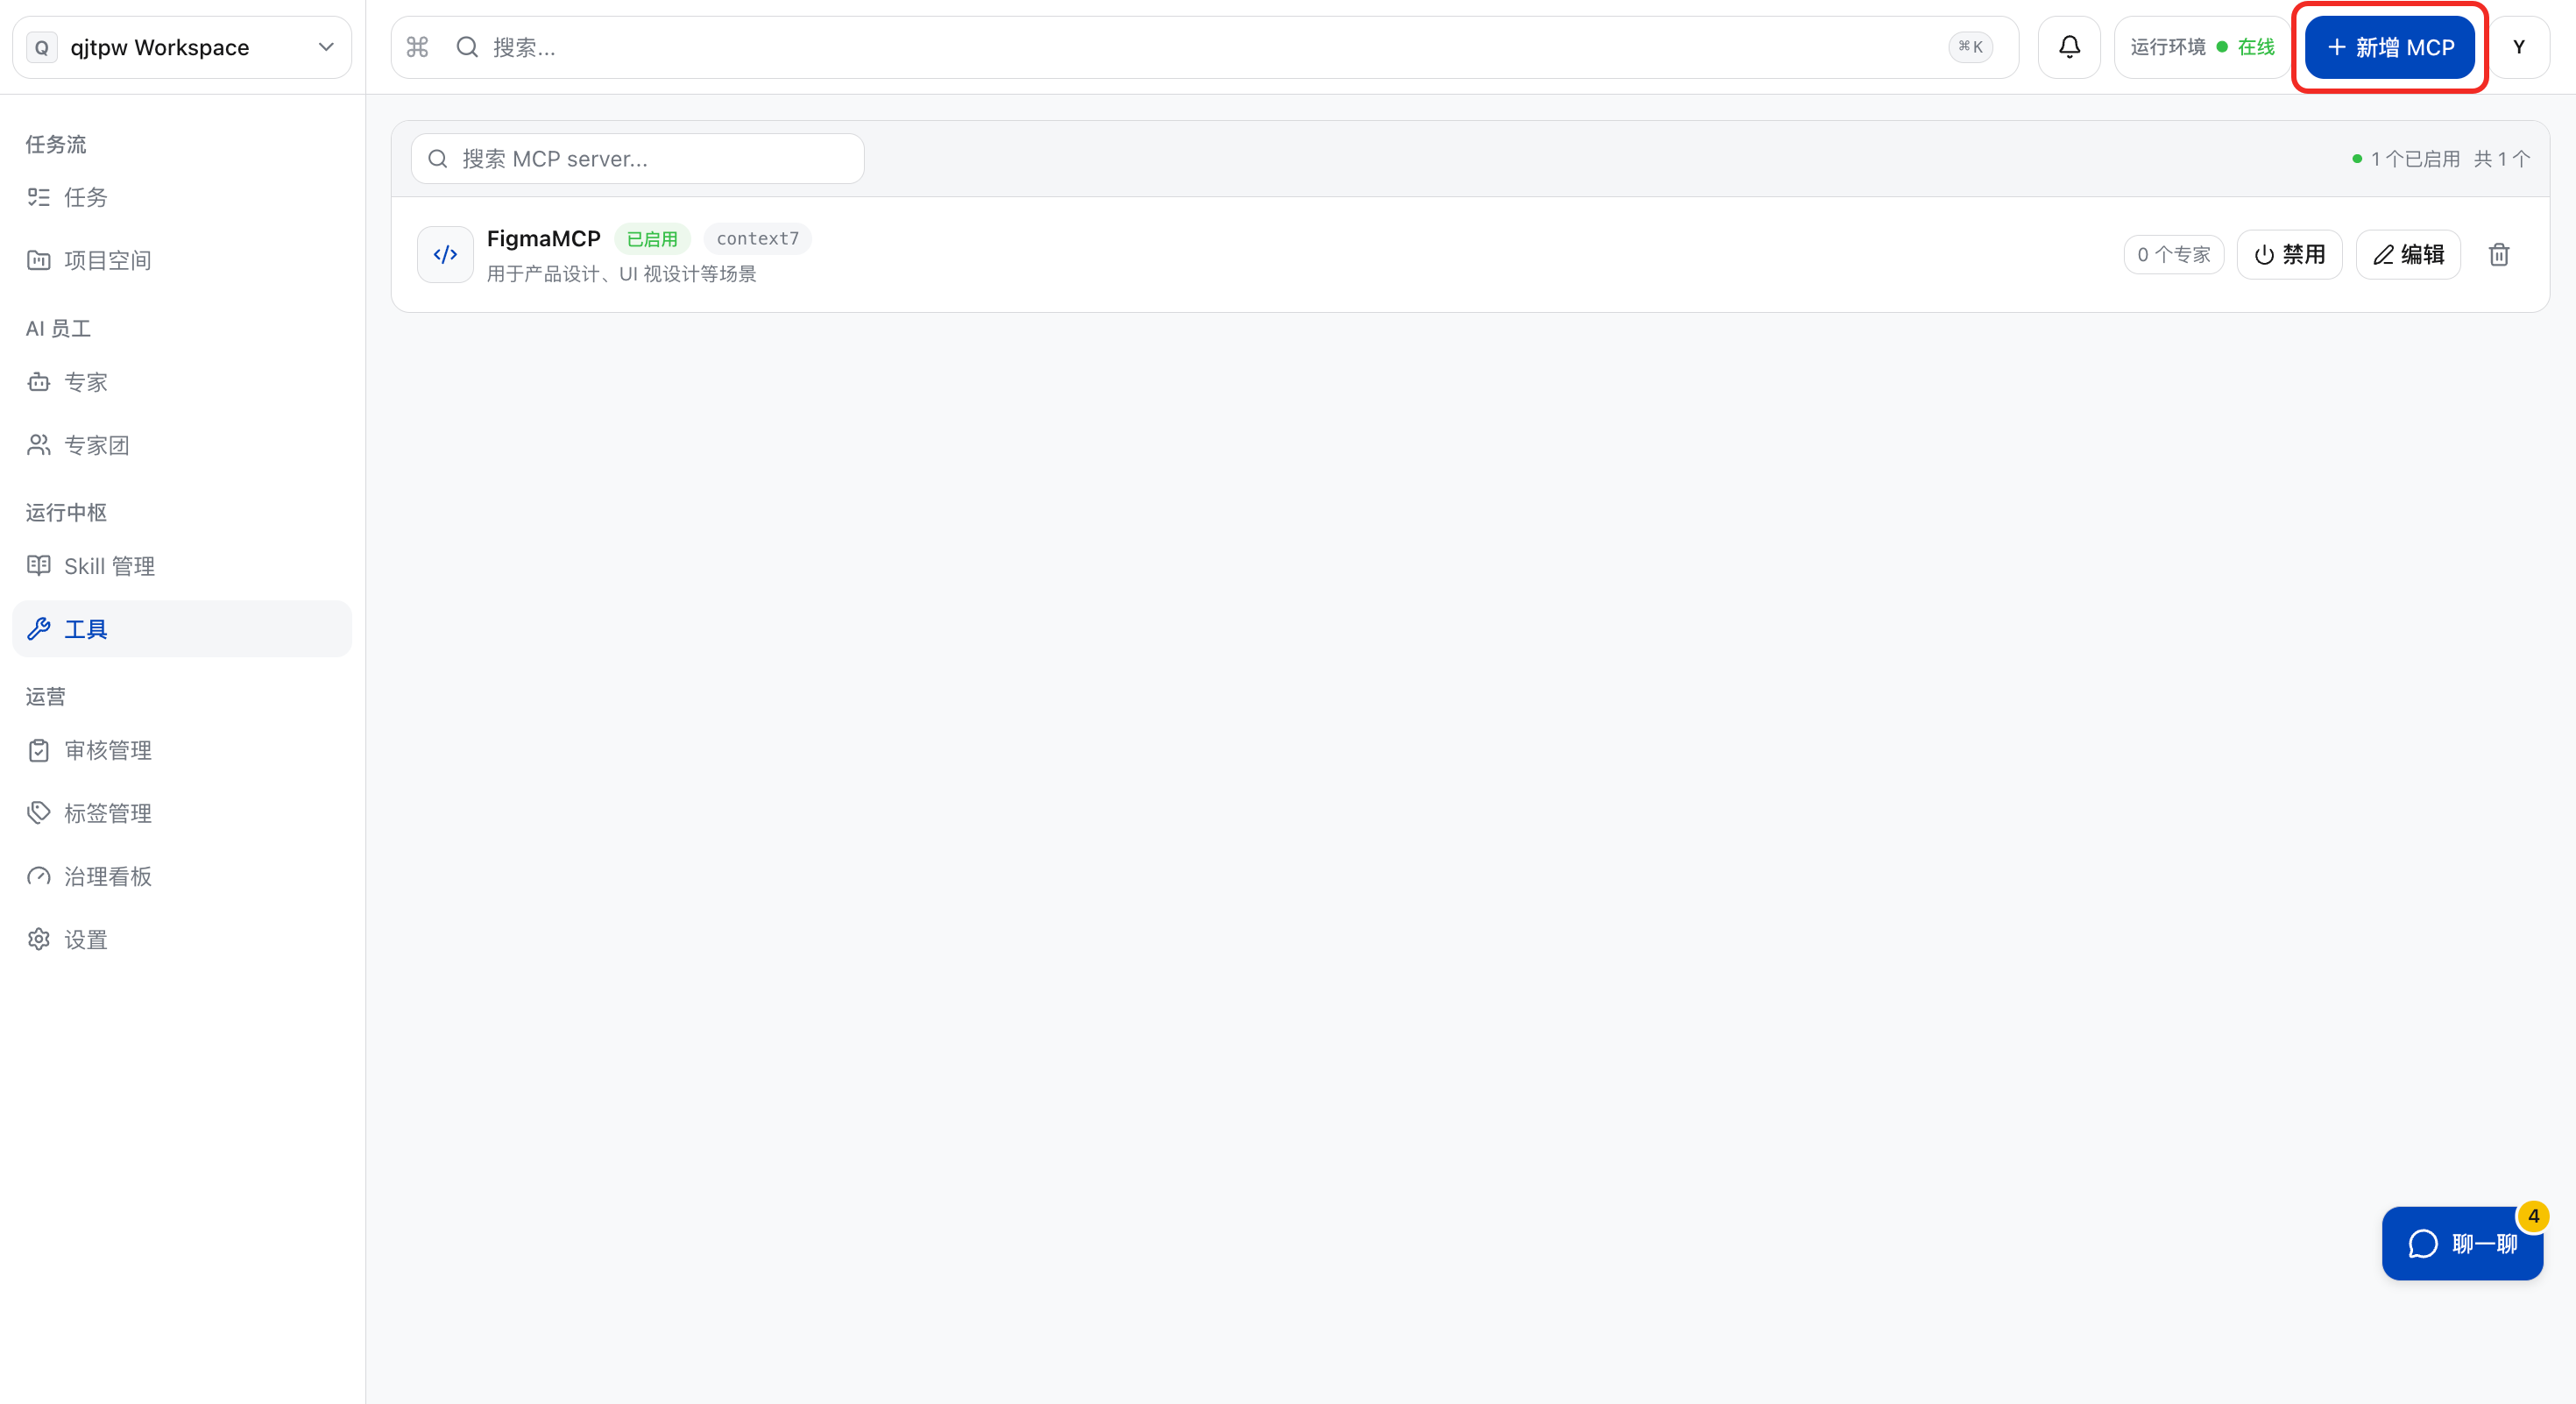
Newly Added MCP Tools
a. Click “Add MCP”.
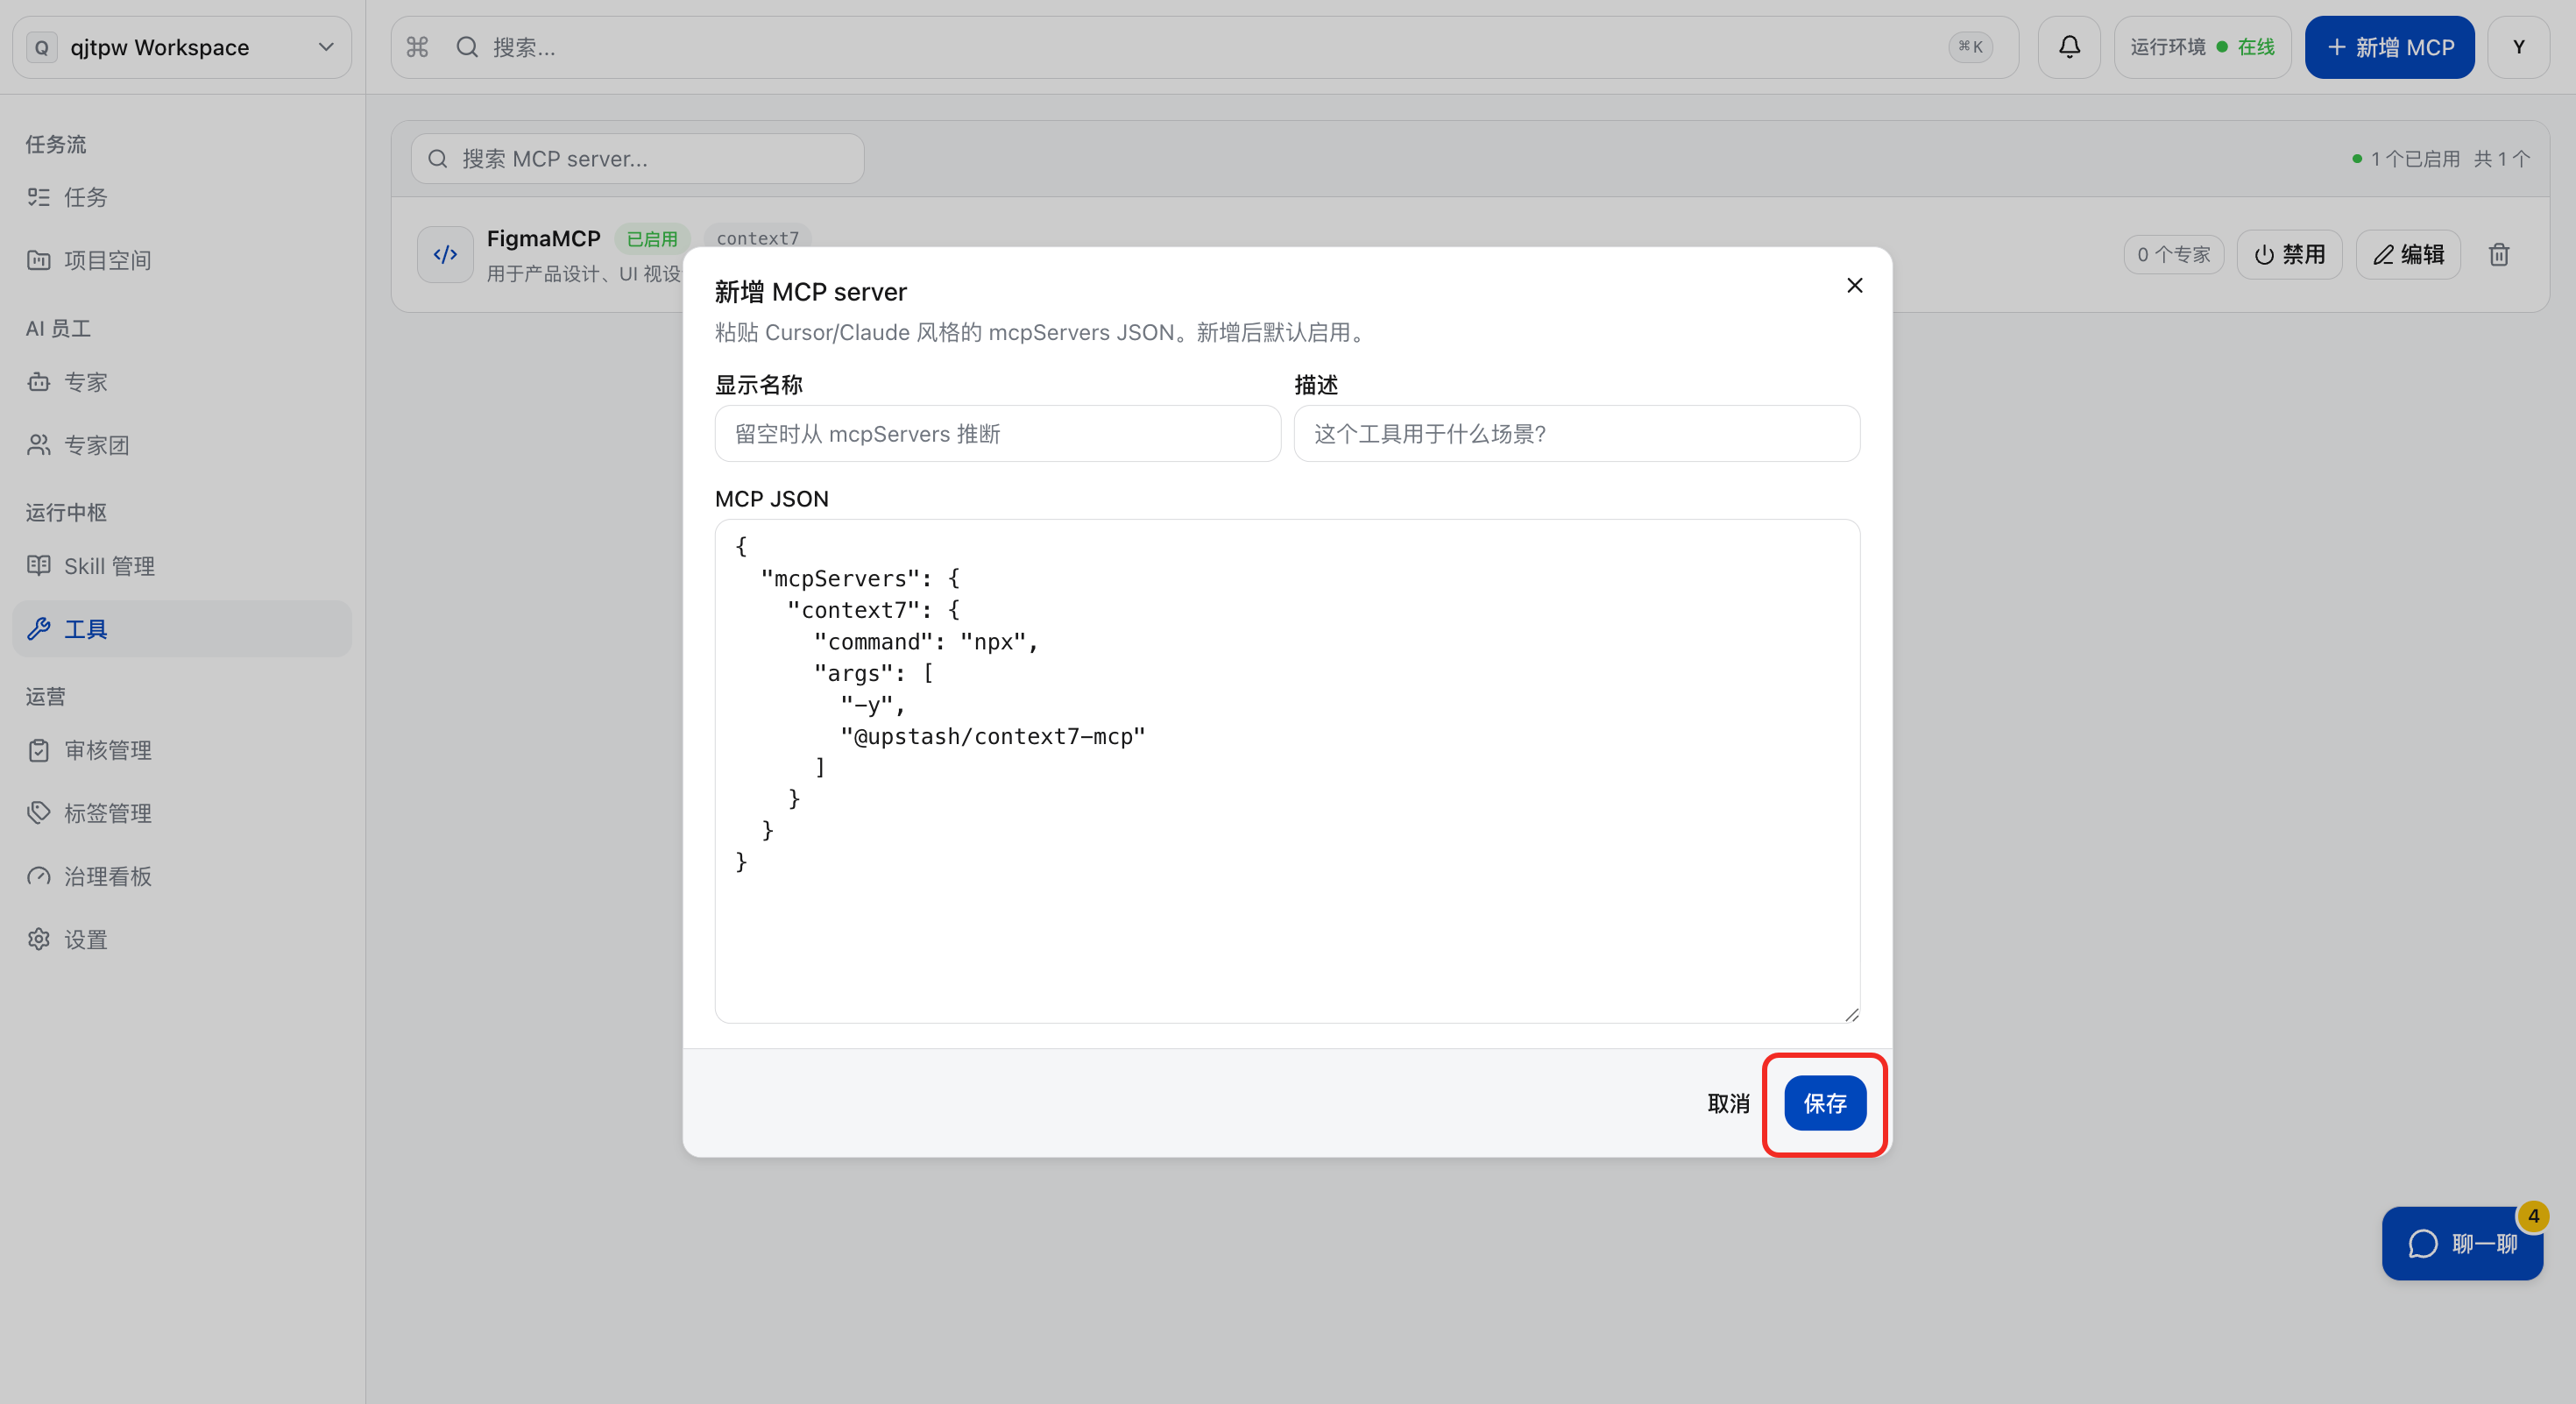
b. After filling in the information, click “Save”.
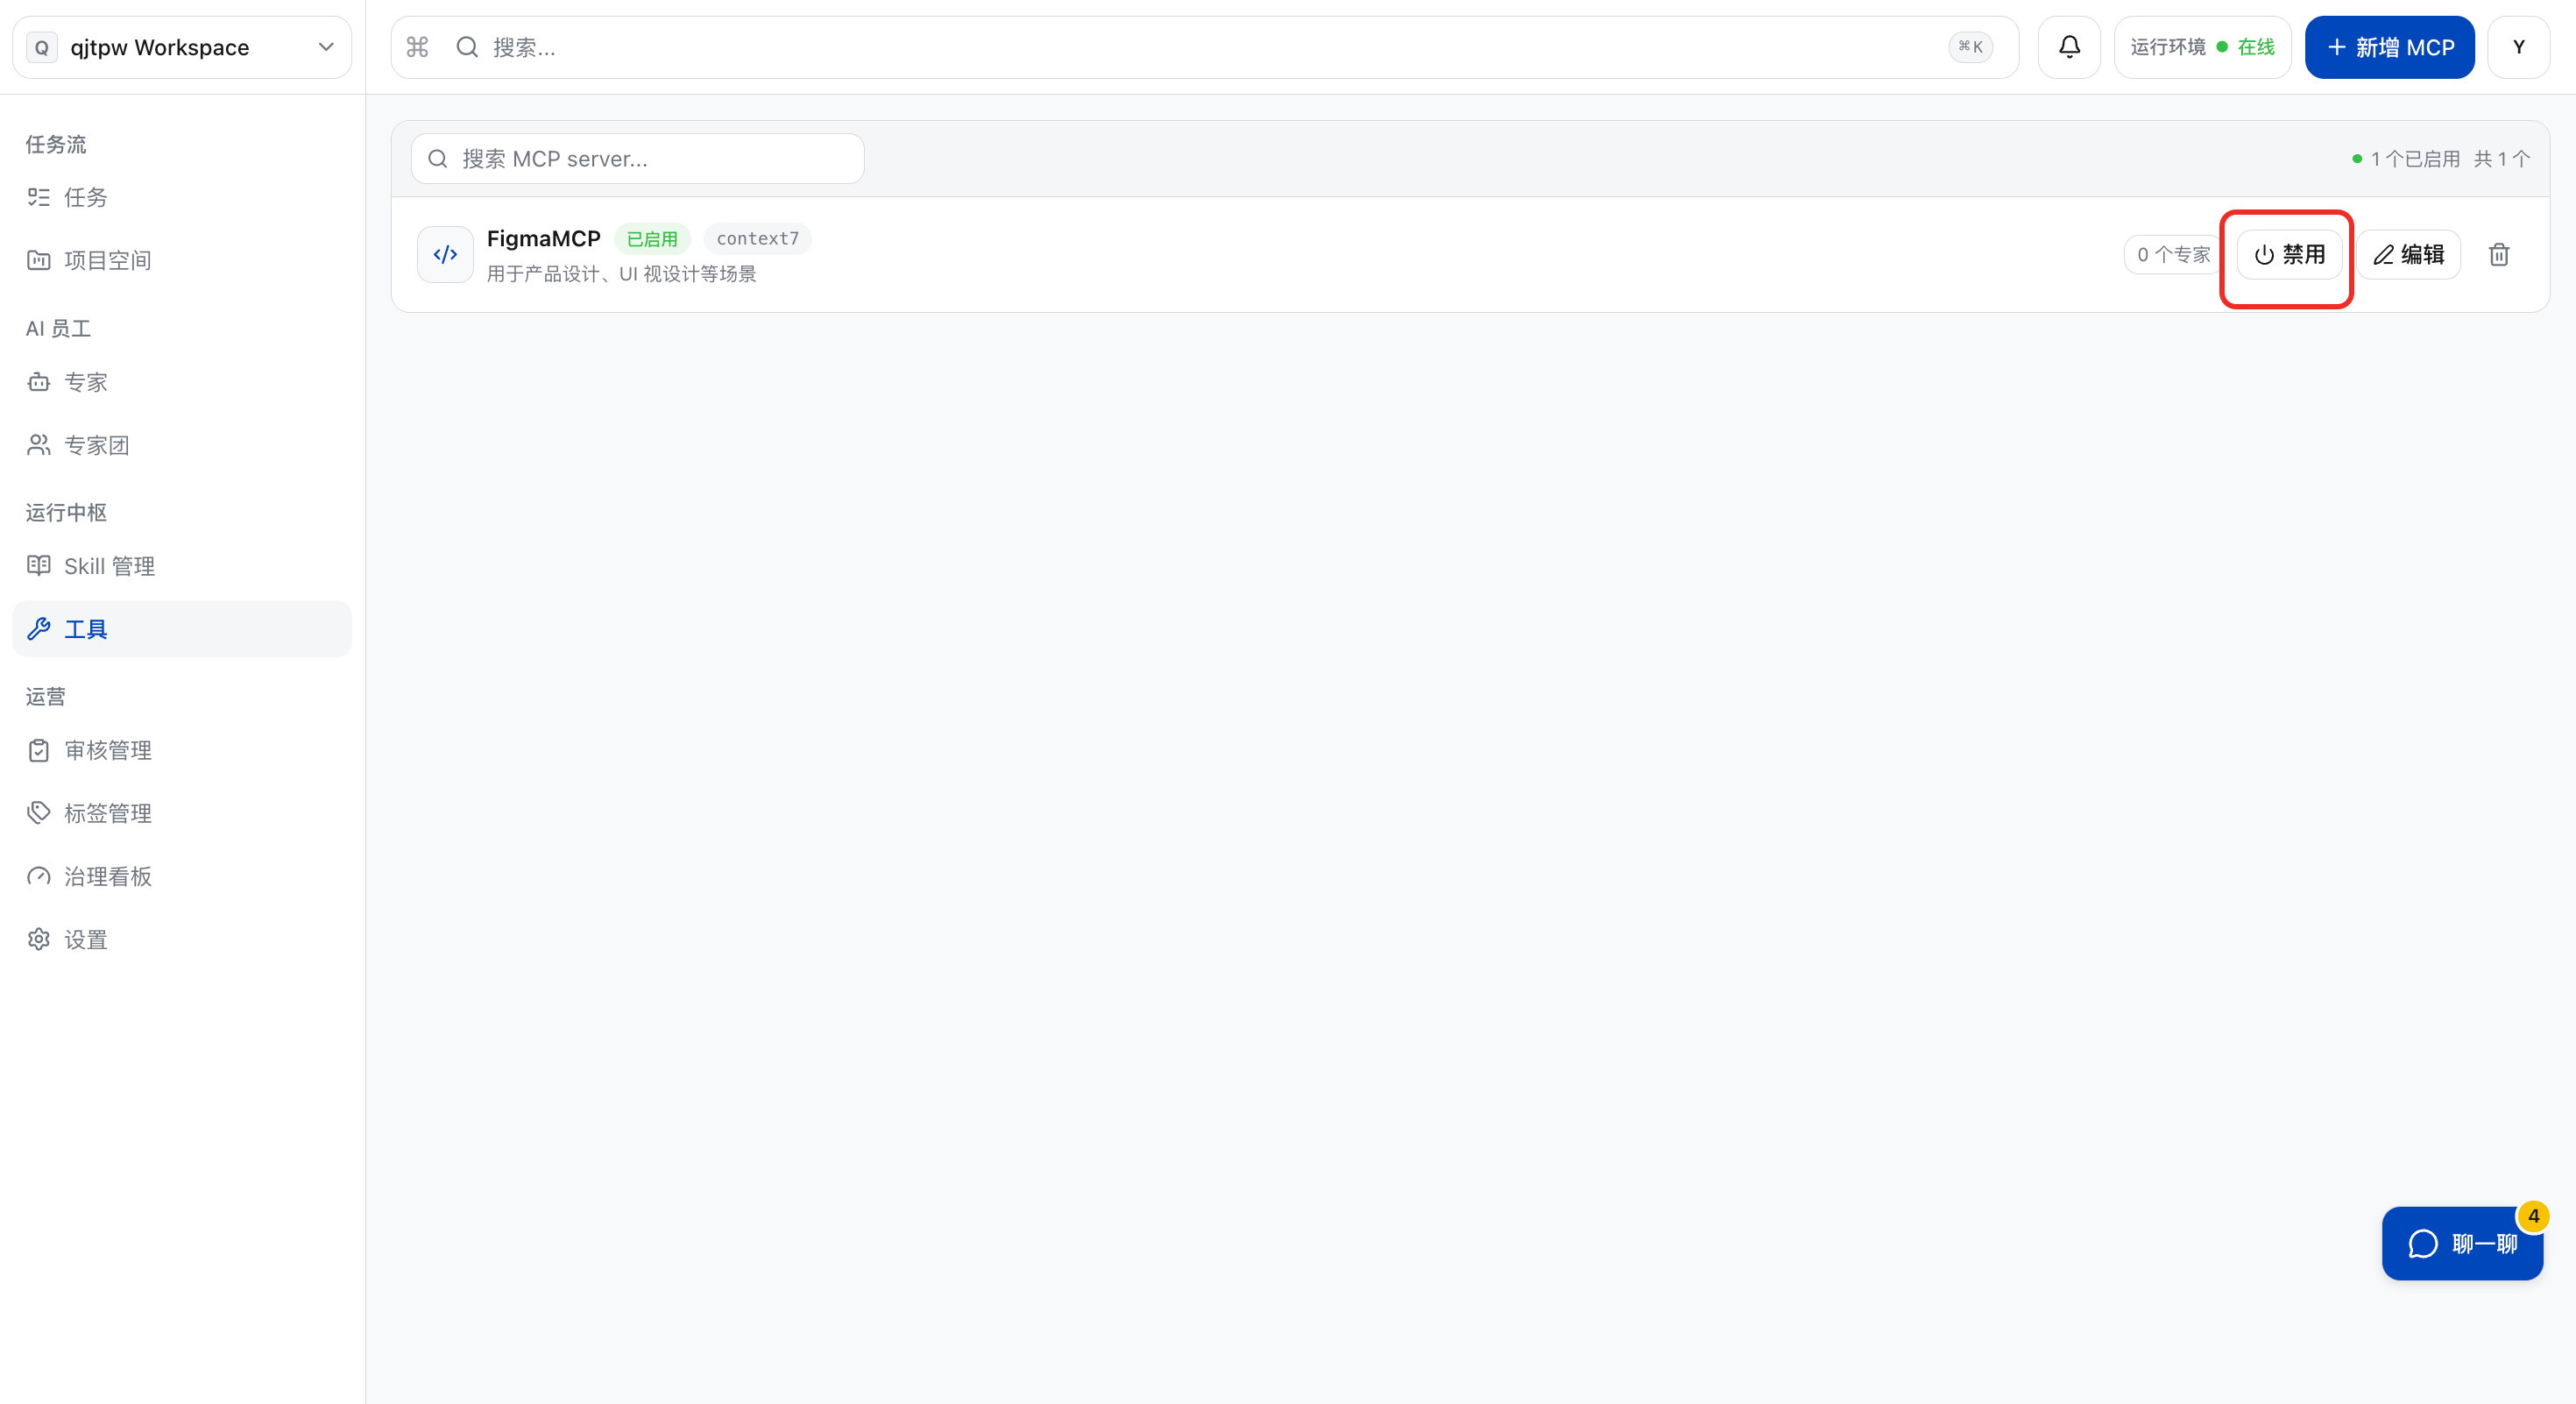
Enable/Disable MCP Tools
Click “Enable” or “Disable” to successfully enable or disable the MCP tool.
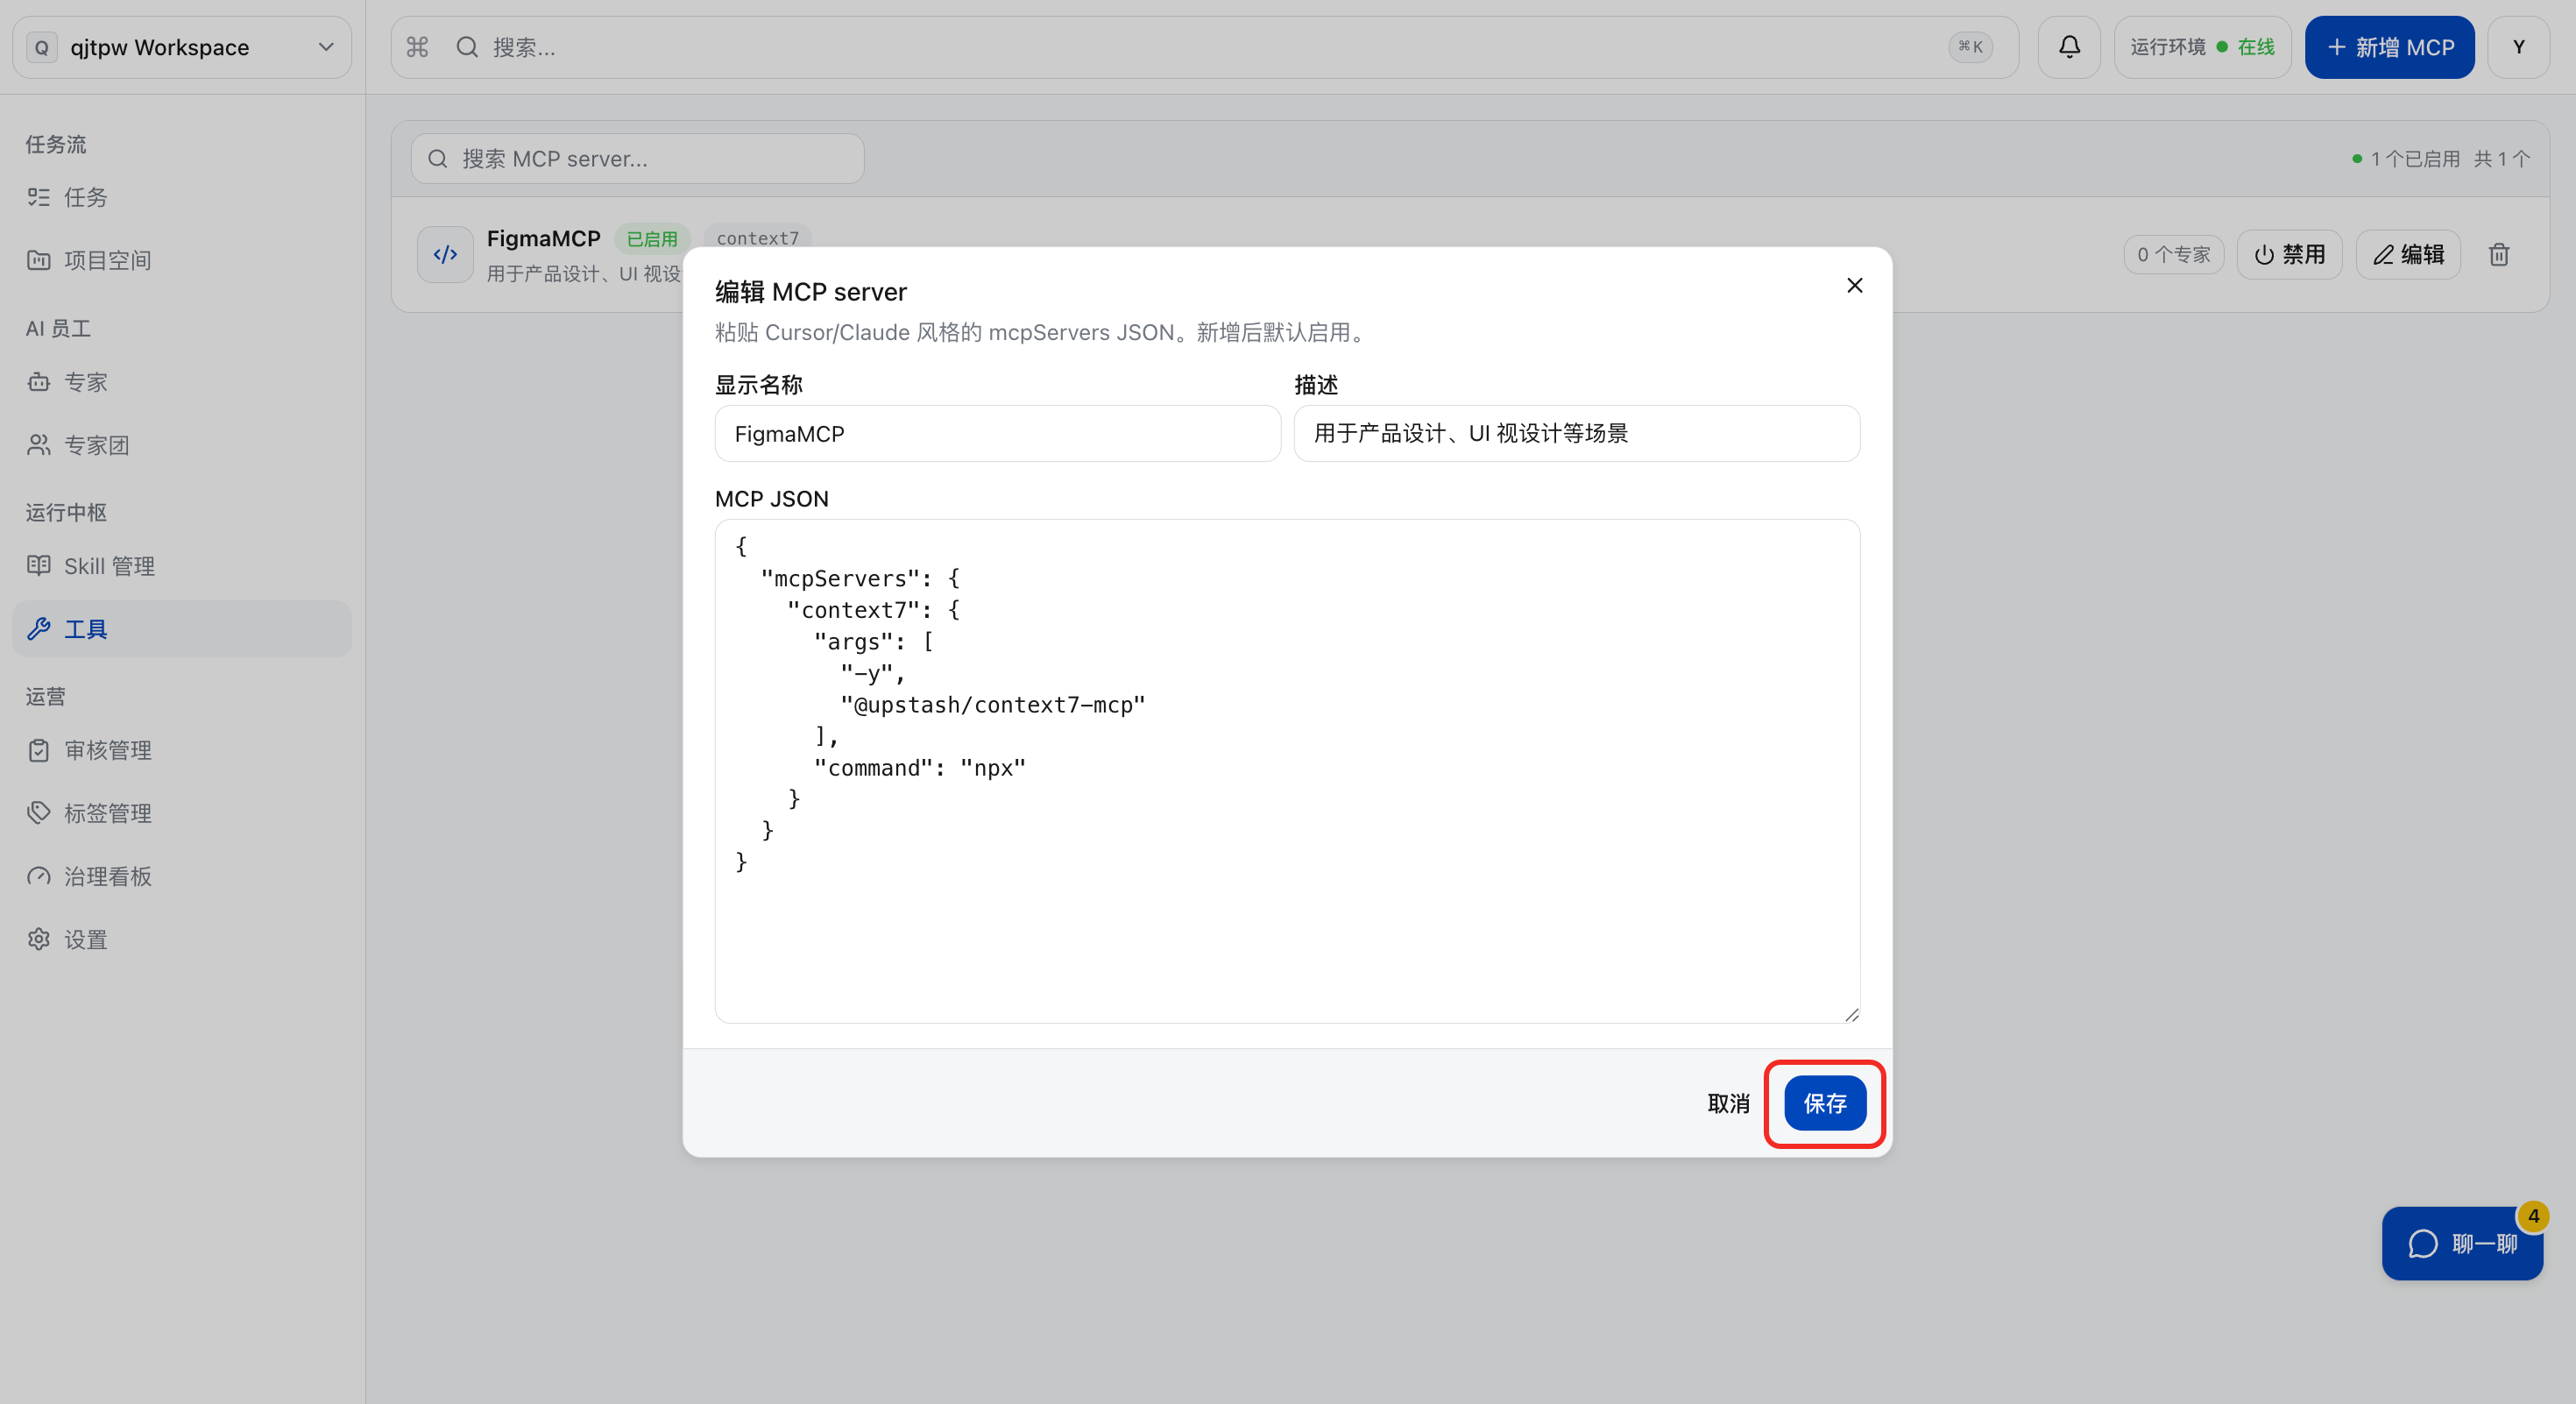
Edit MCP Tools
a. Click “Edit”.
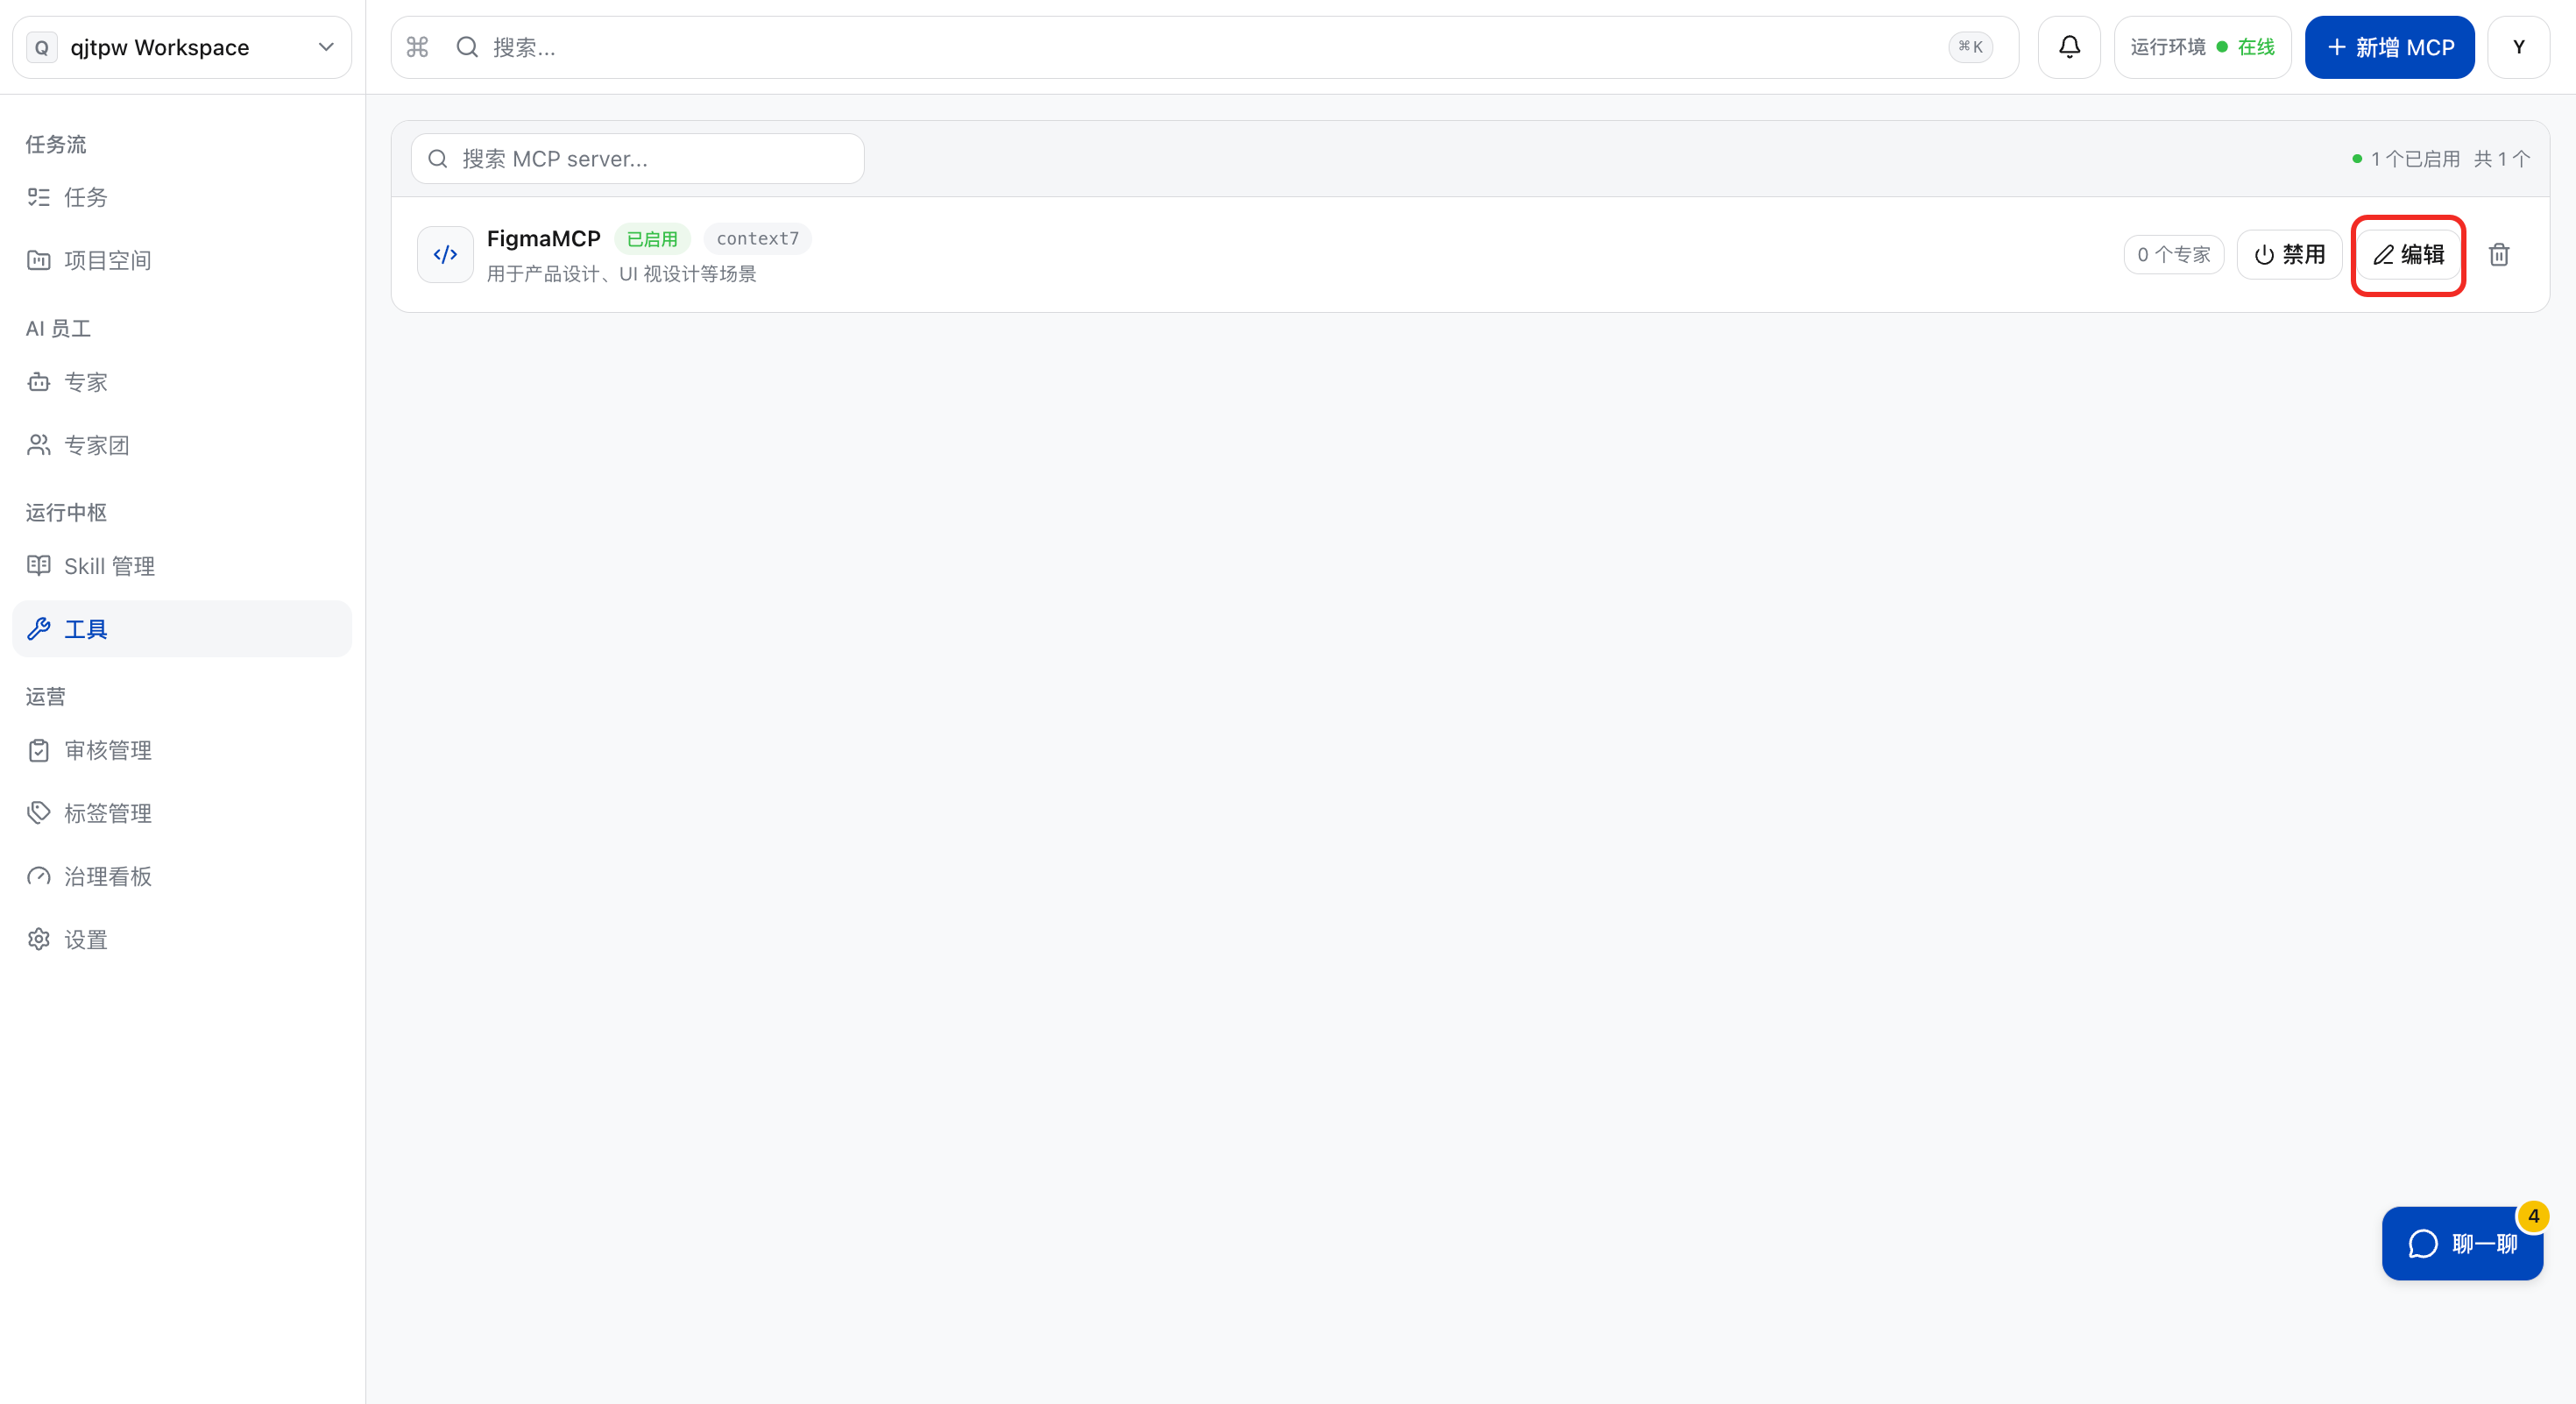
b. After updating the information, click “Save”.
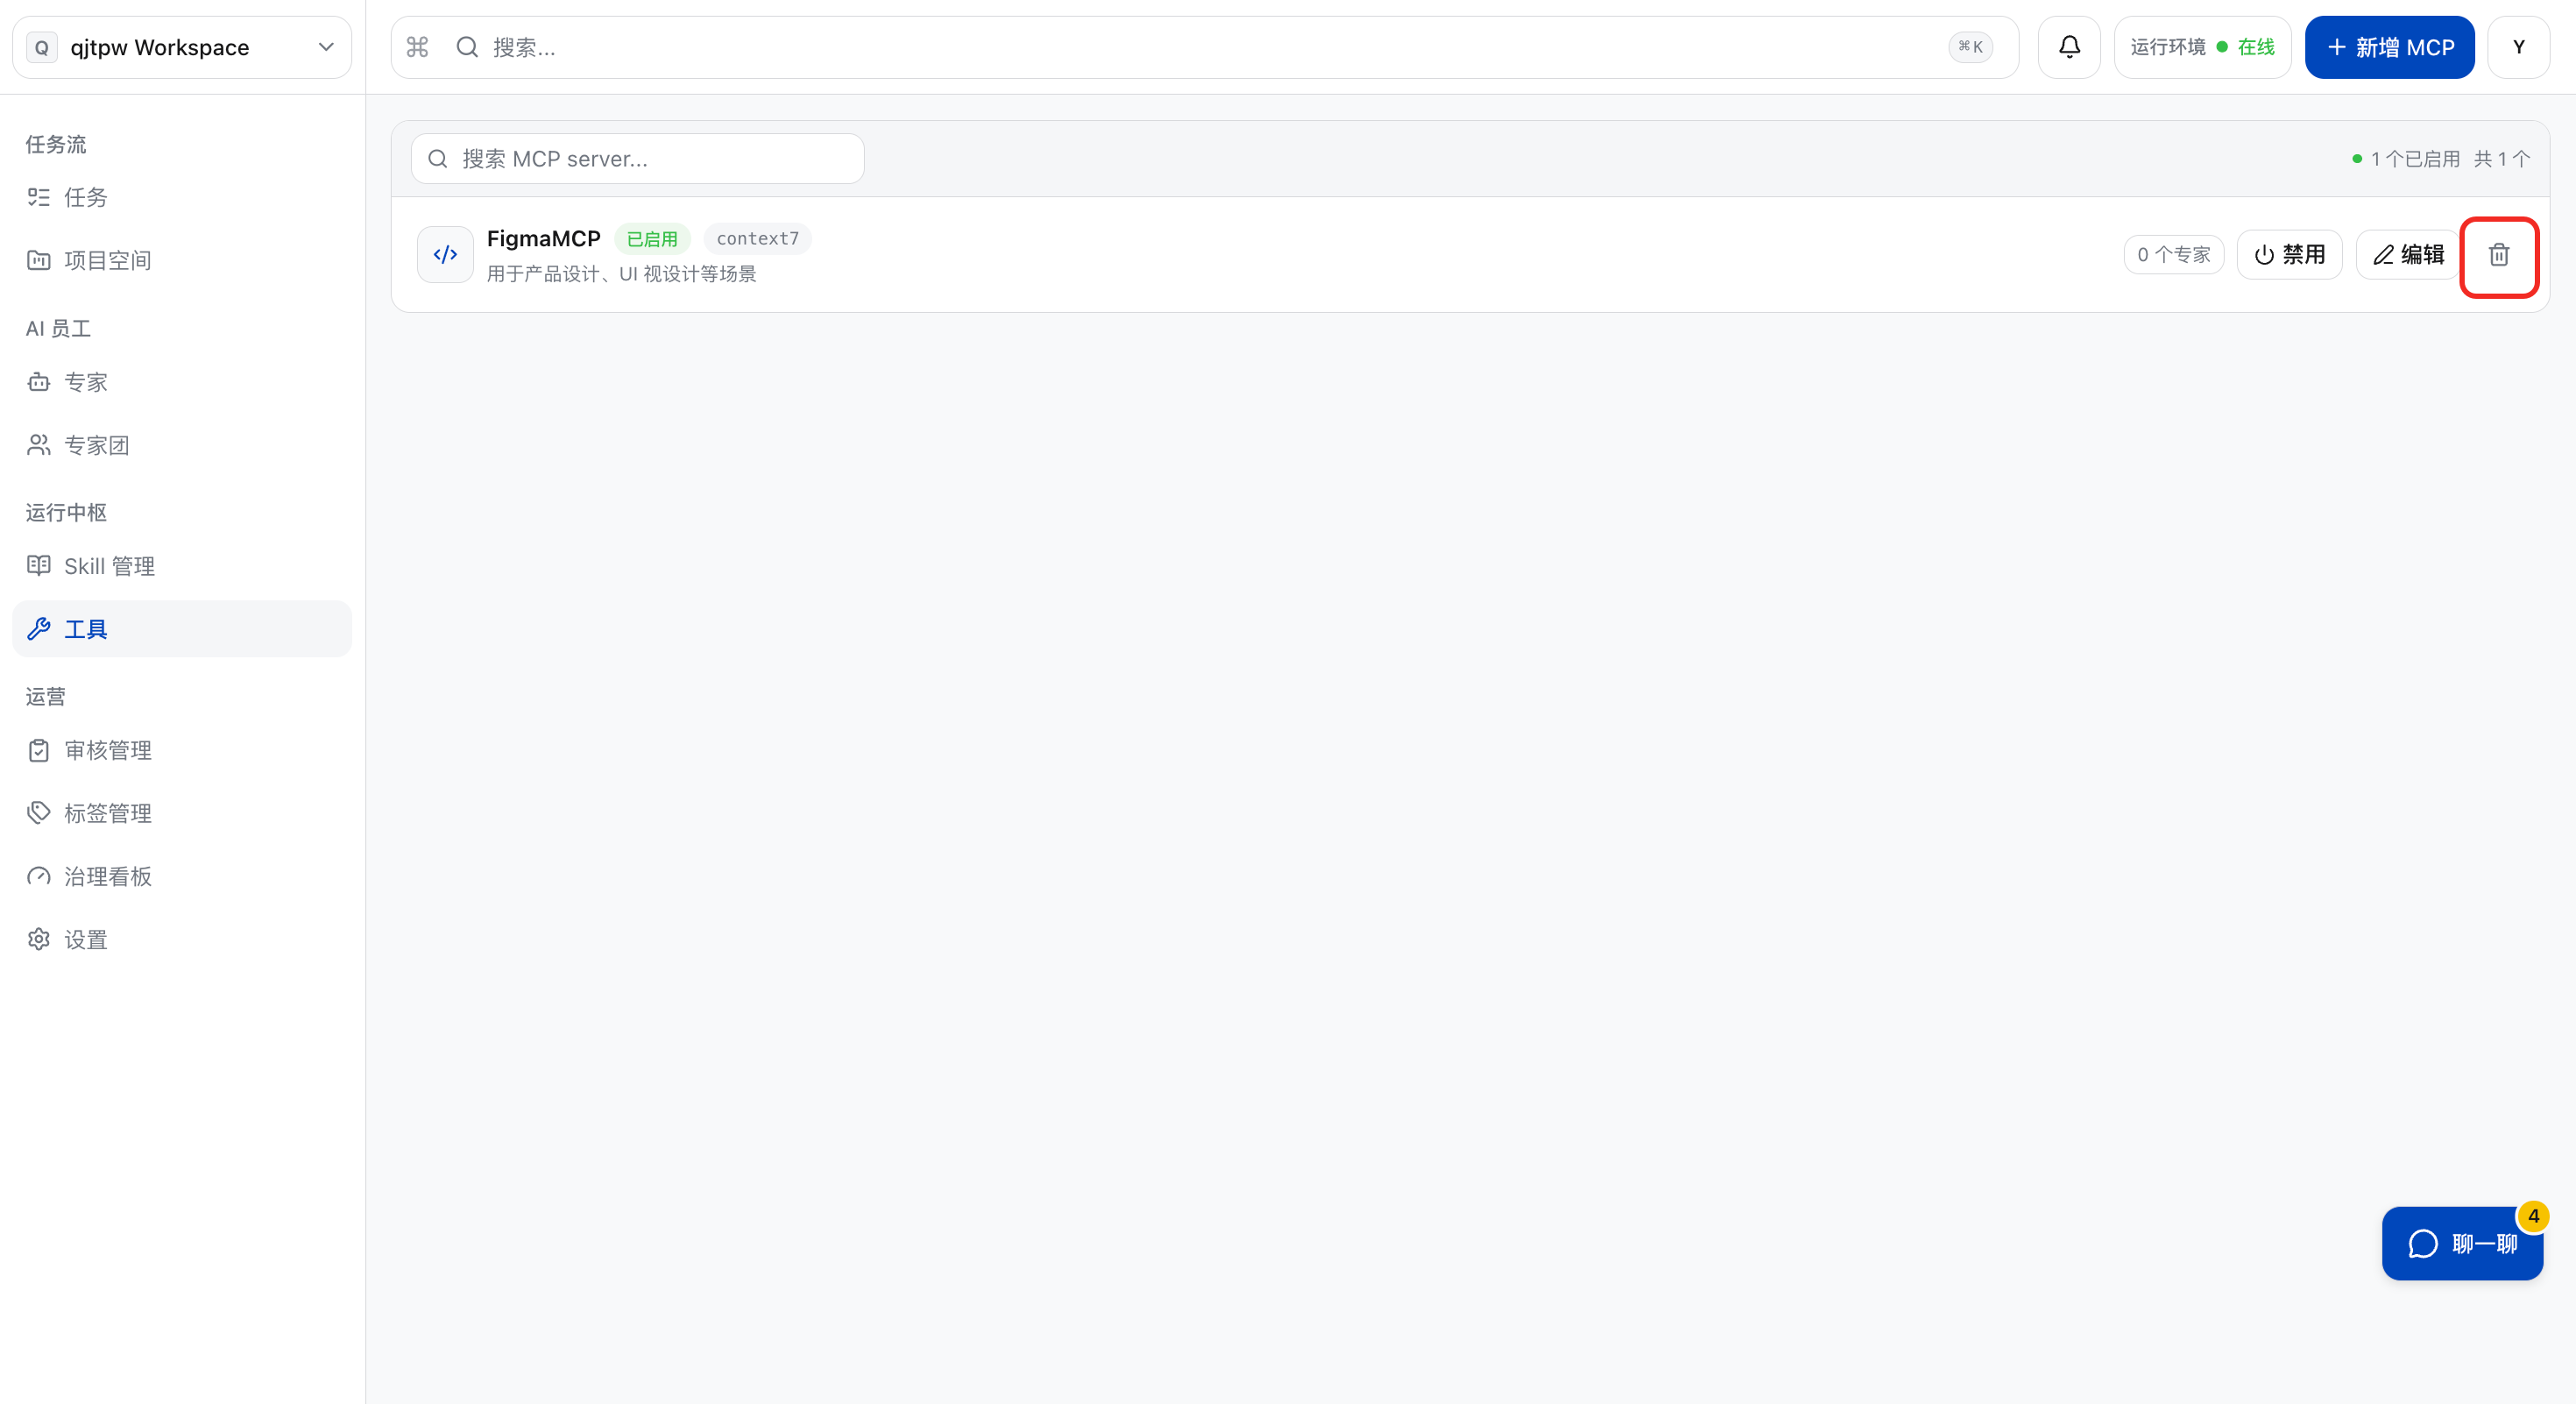
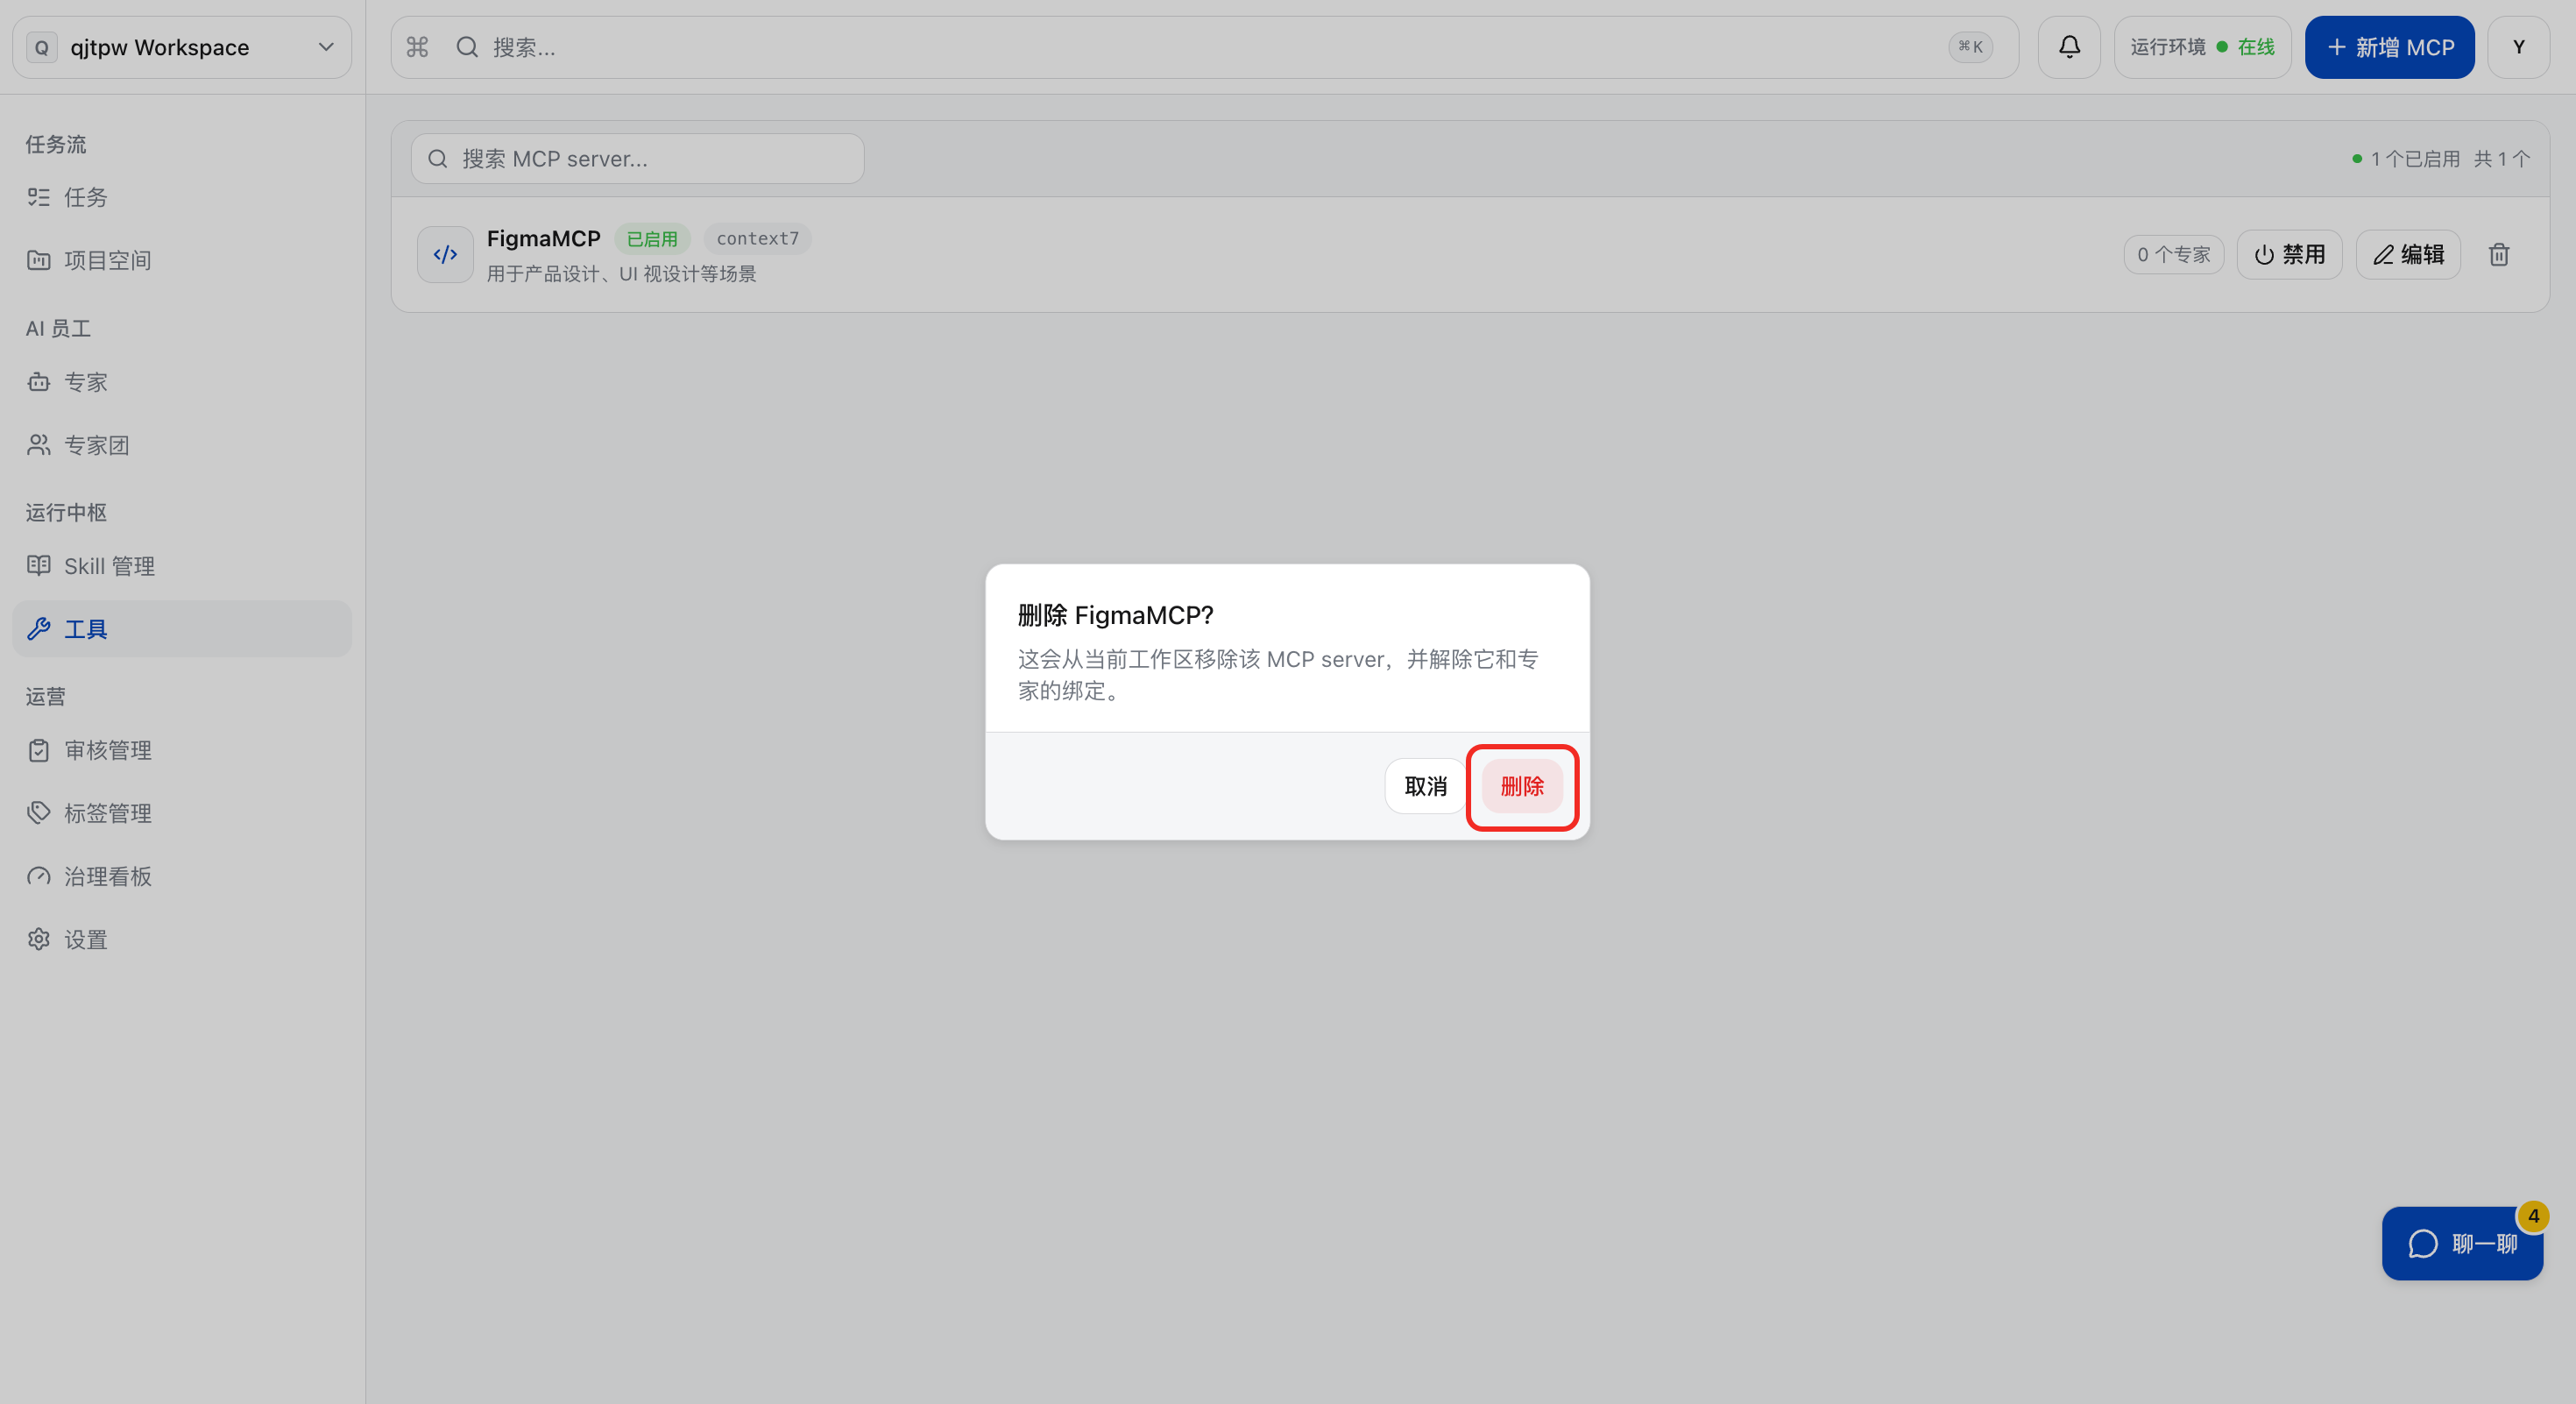
Delete MCP Tool
a. Click the “Delete” button.
b. In the secondary confirmation pop-up window, click “Delete” to complete the operation. Note: MCP tools that have been bound to experts cannot be deleted. If you need to delete such a tool, please first go to the corresponding expert configuration information to remove the MCP tool, and then perform the deletion operation.
Subscribe
Order Management
View Subscription Orders
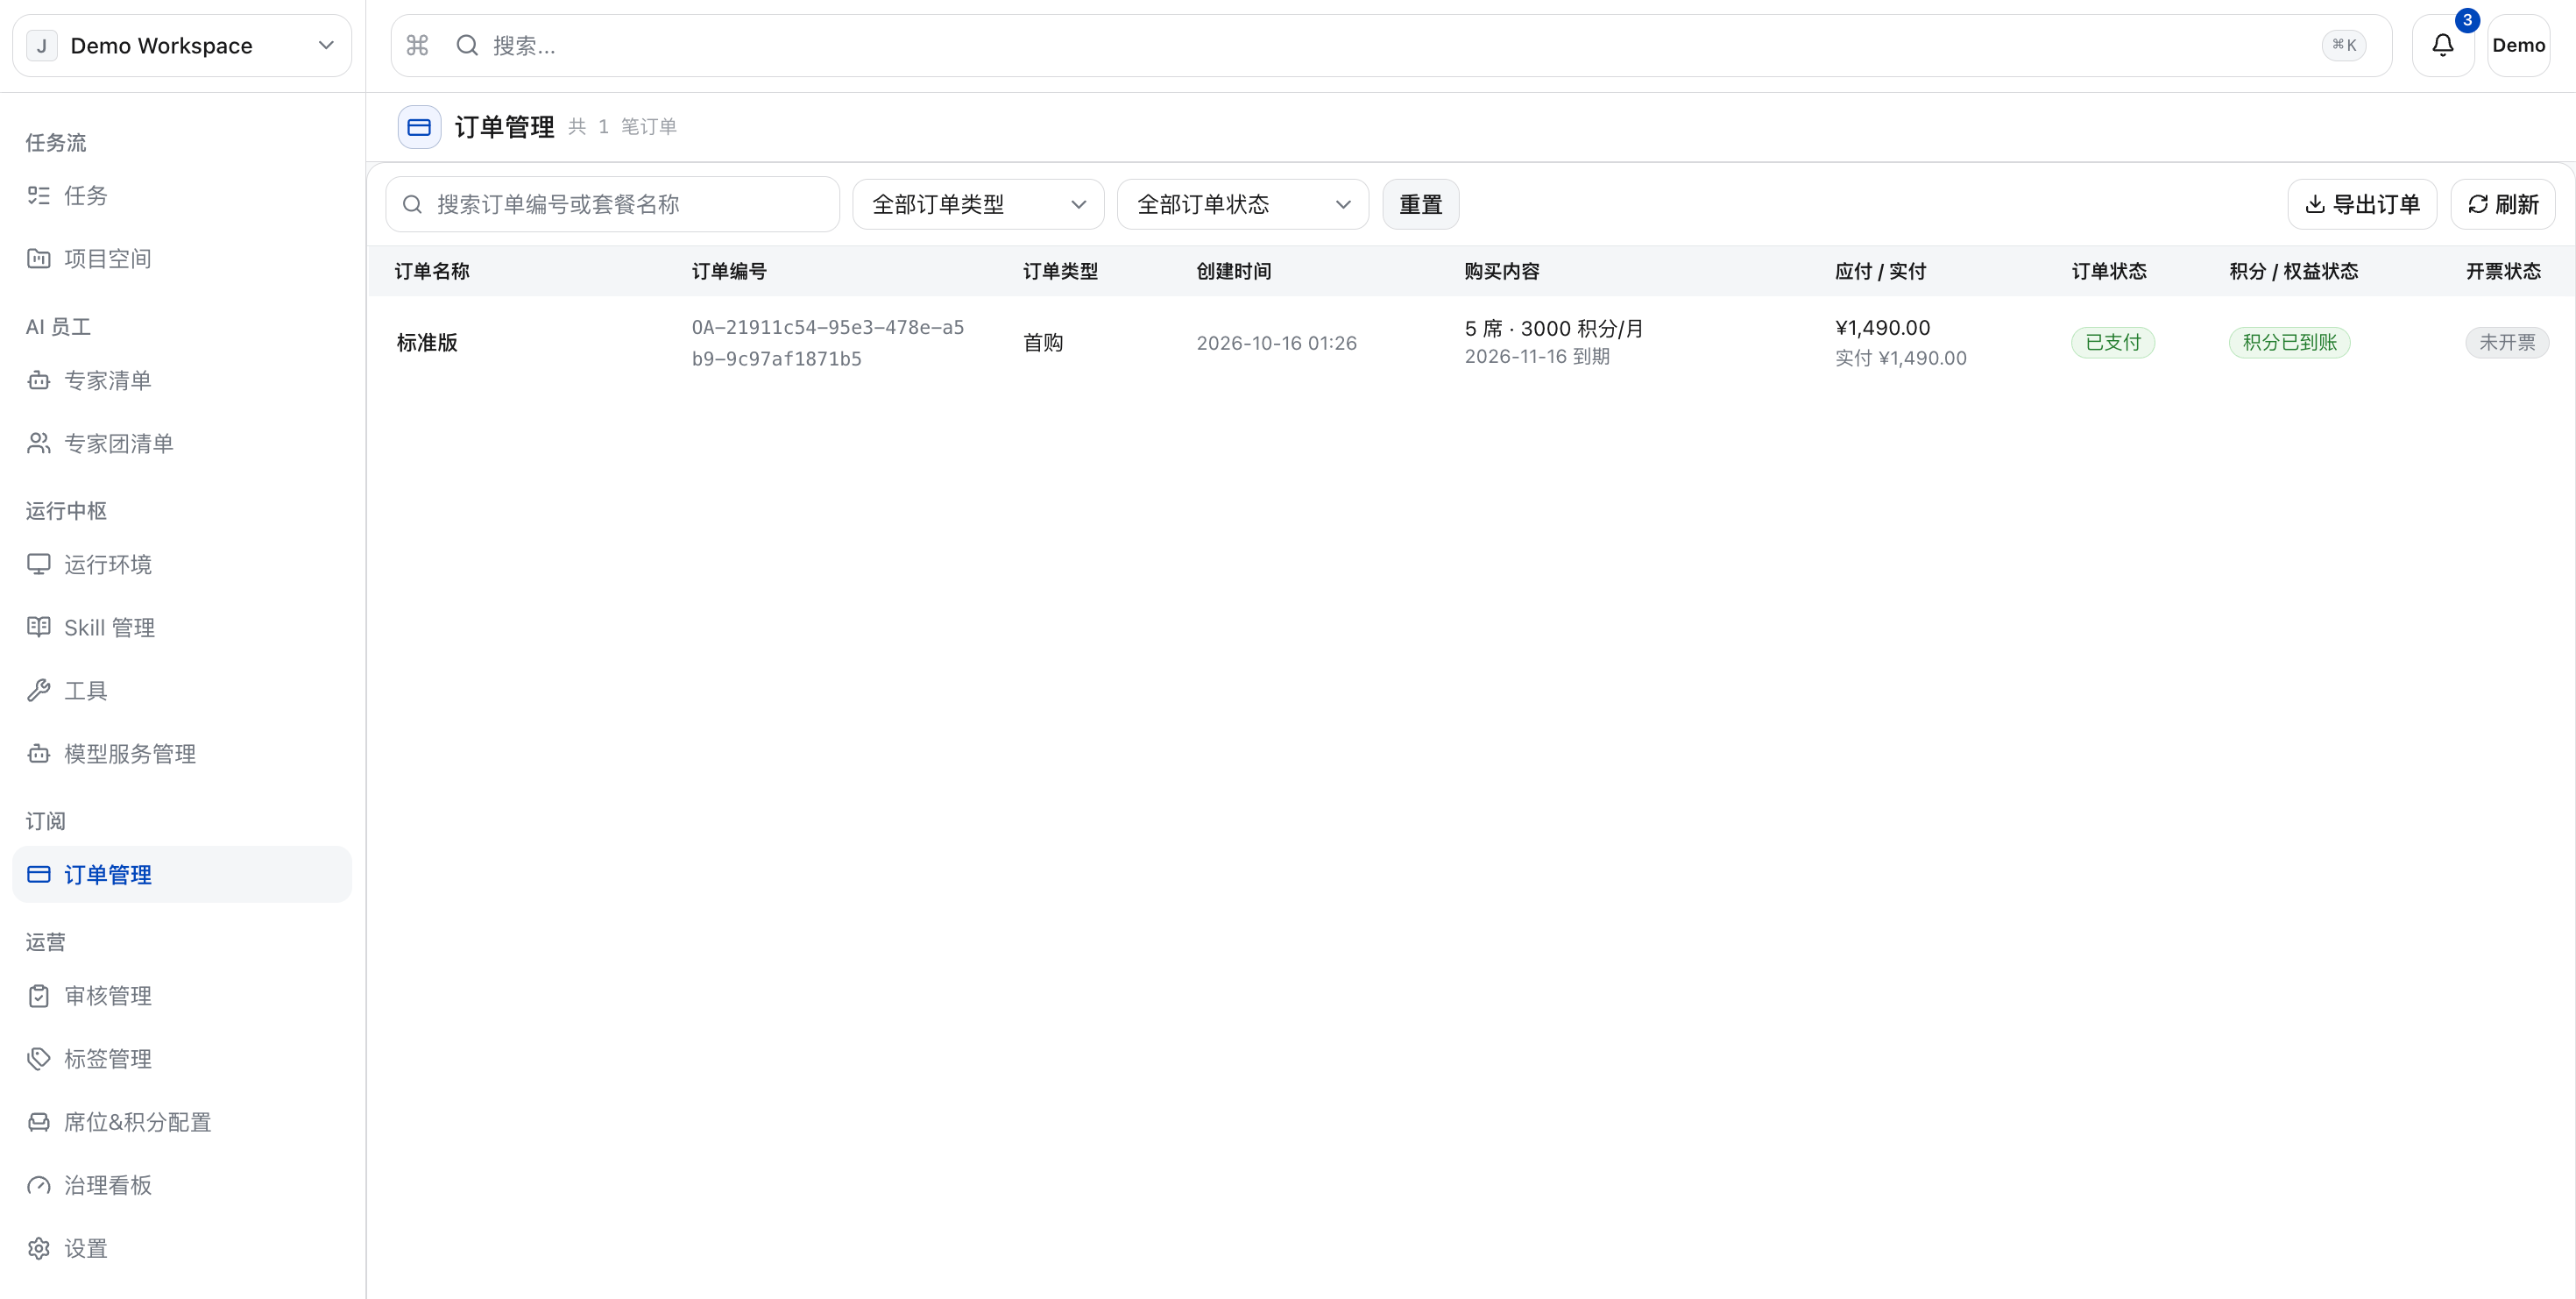
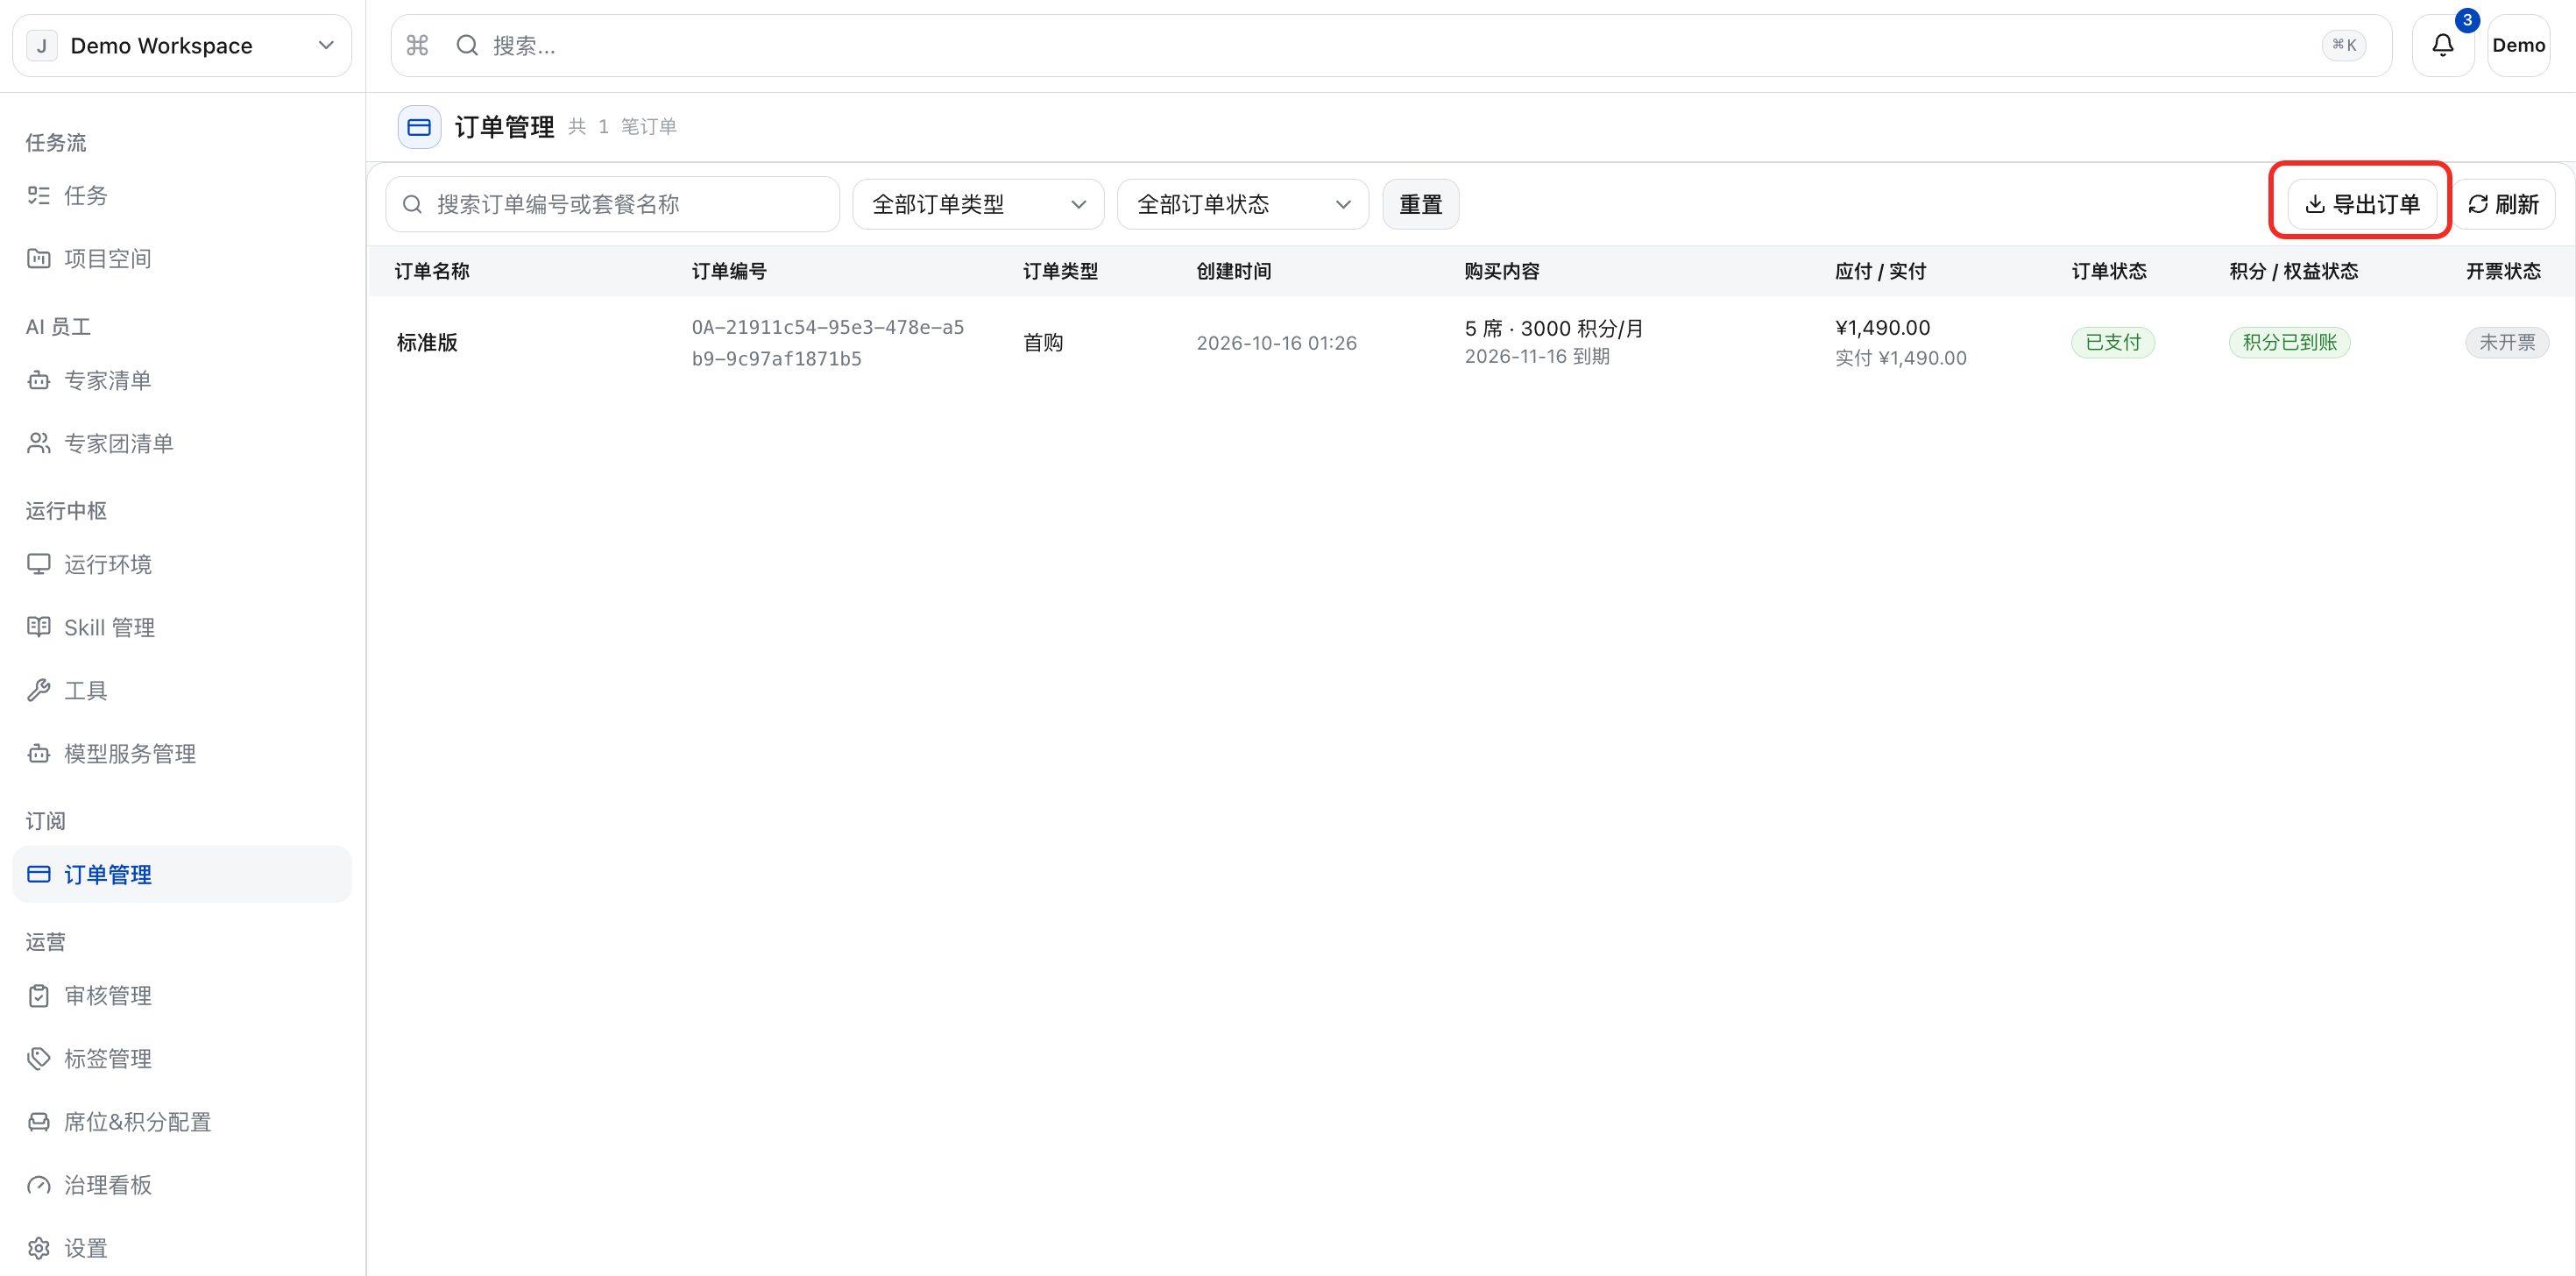
a. Click “Order Management” in the left menu to view all subscription orders of this tenant. It supports searching by order number / package name, filtering by order type (first purchase / renewal, etc.) and order status, resetting filters, refreshing the list and exporting orders; the order list displays order name, order number, order type, creation time, purchased content, payable / actual amount, order status, and points / benefit status.
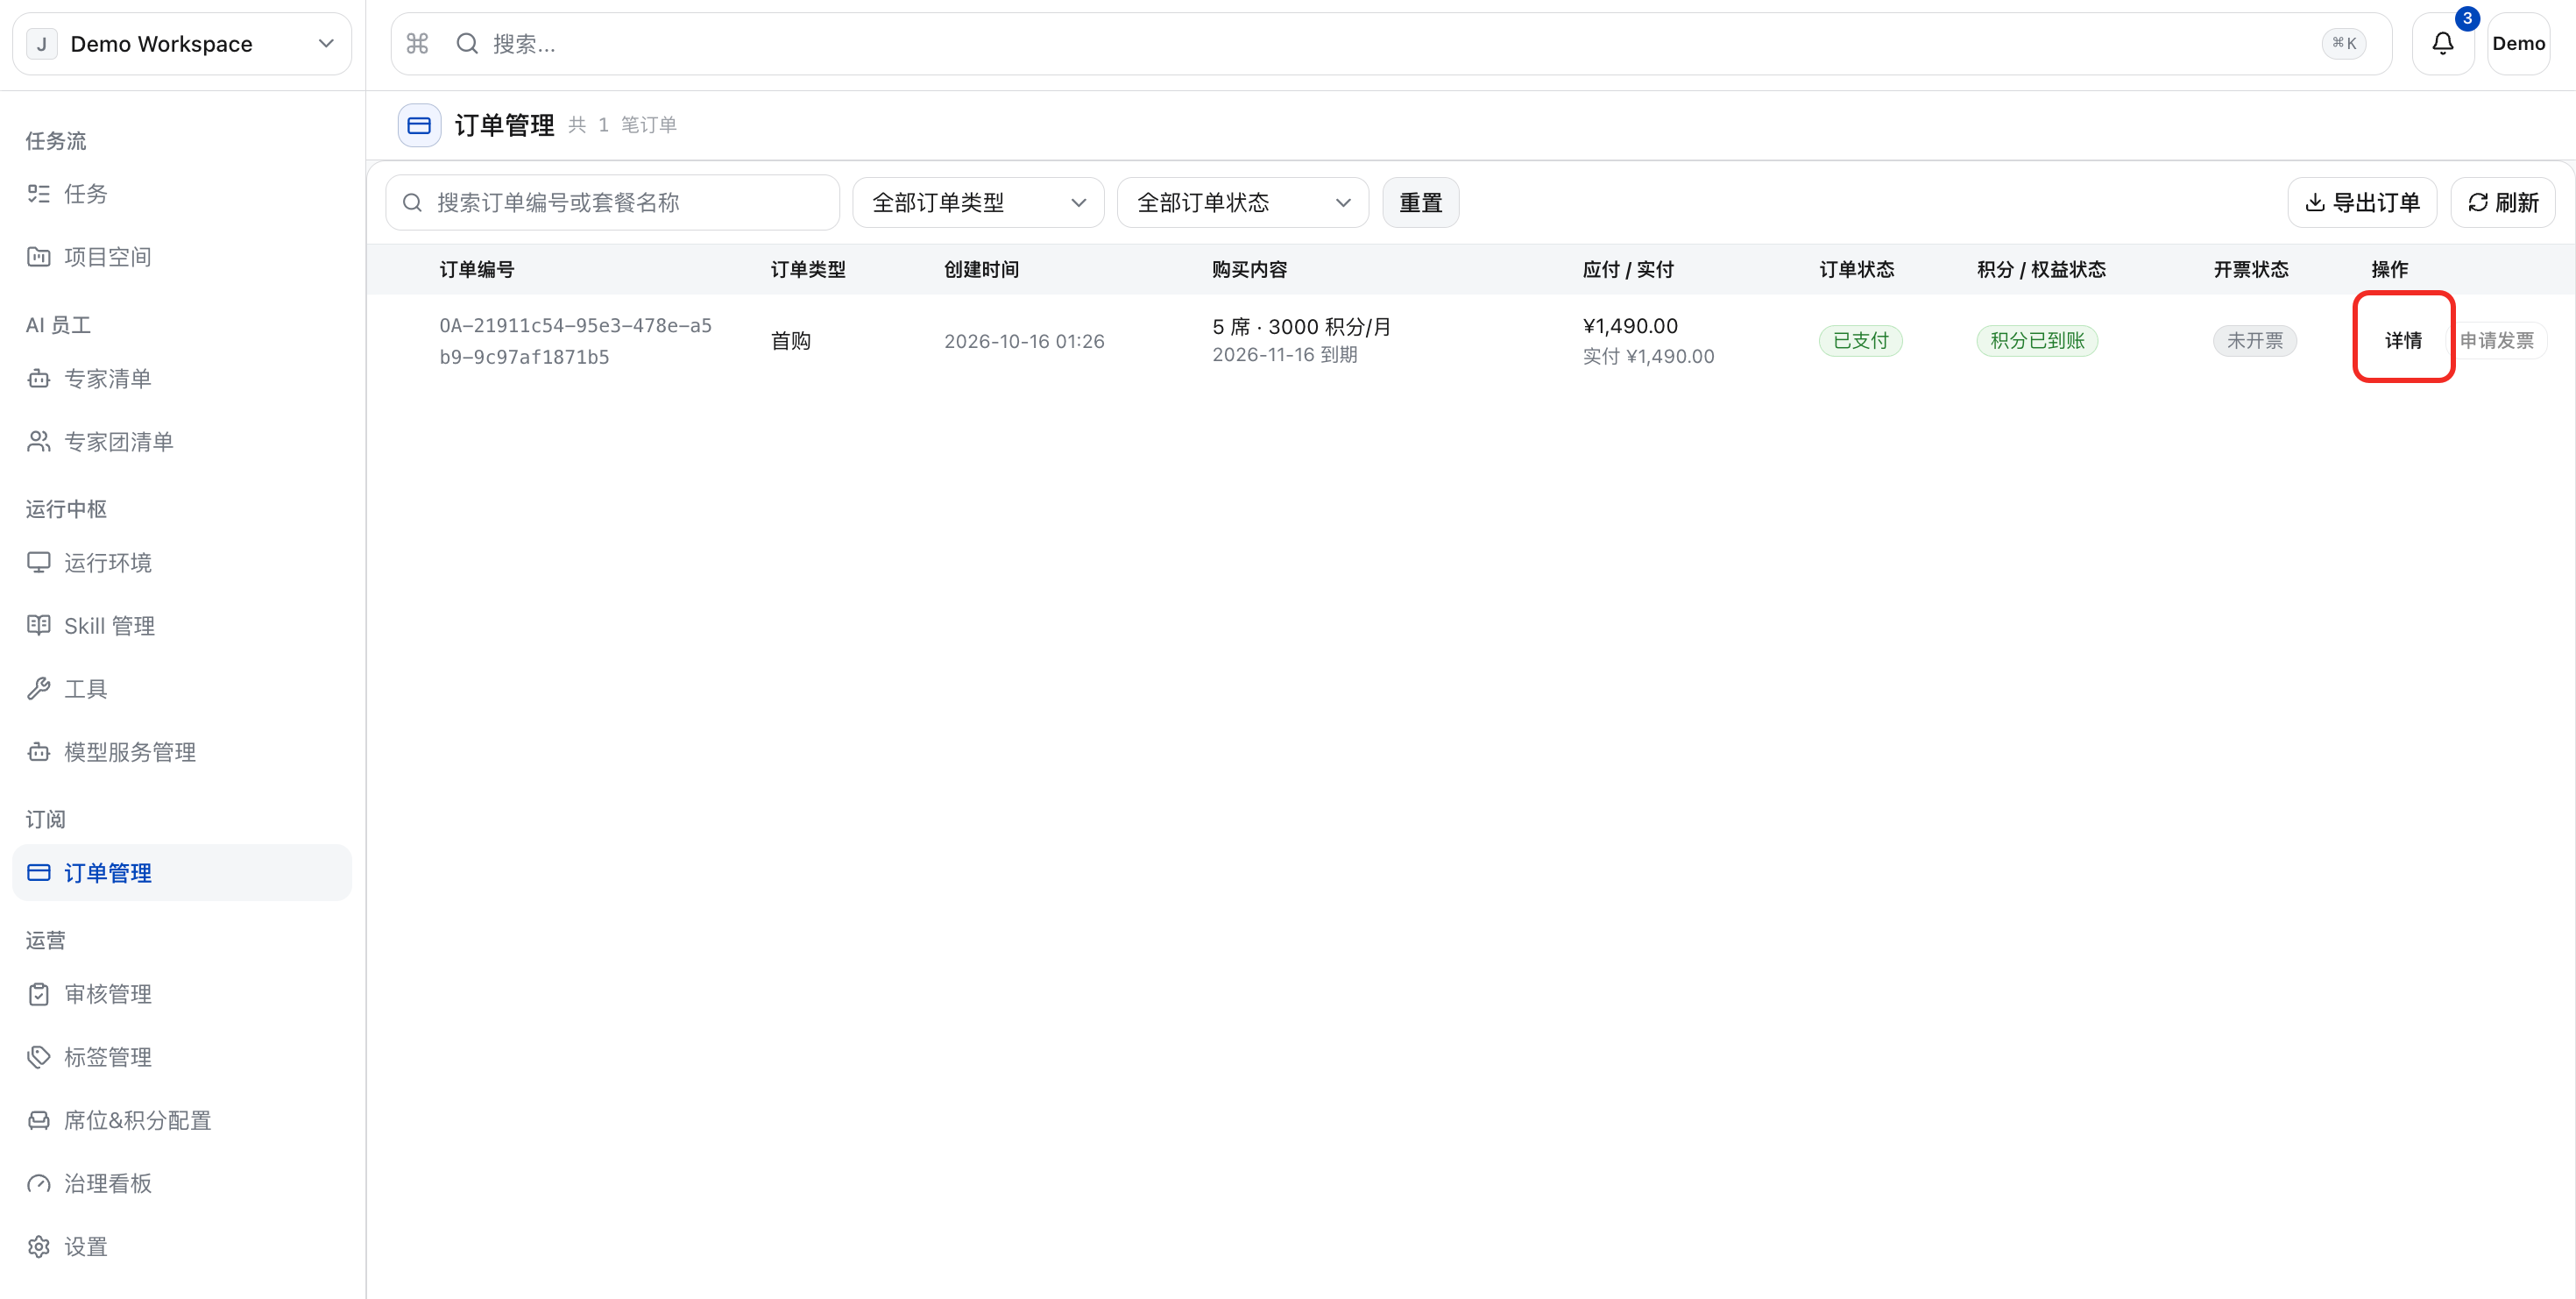
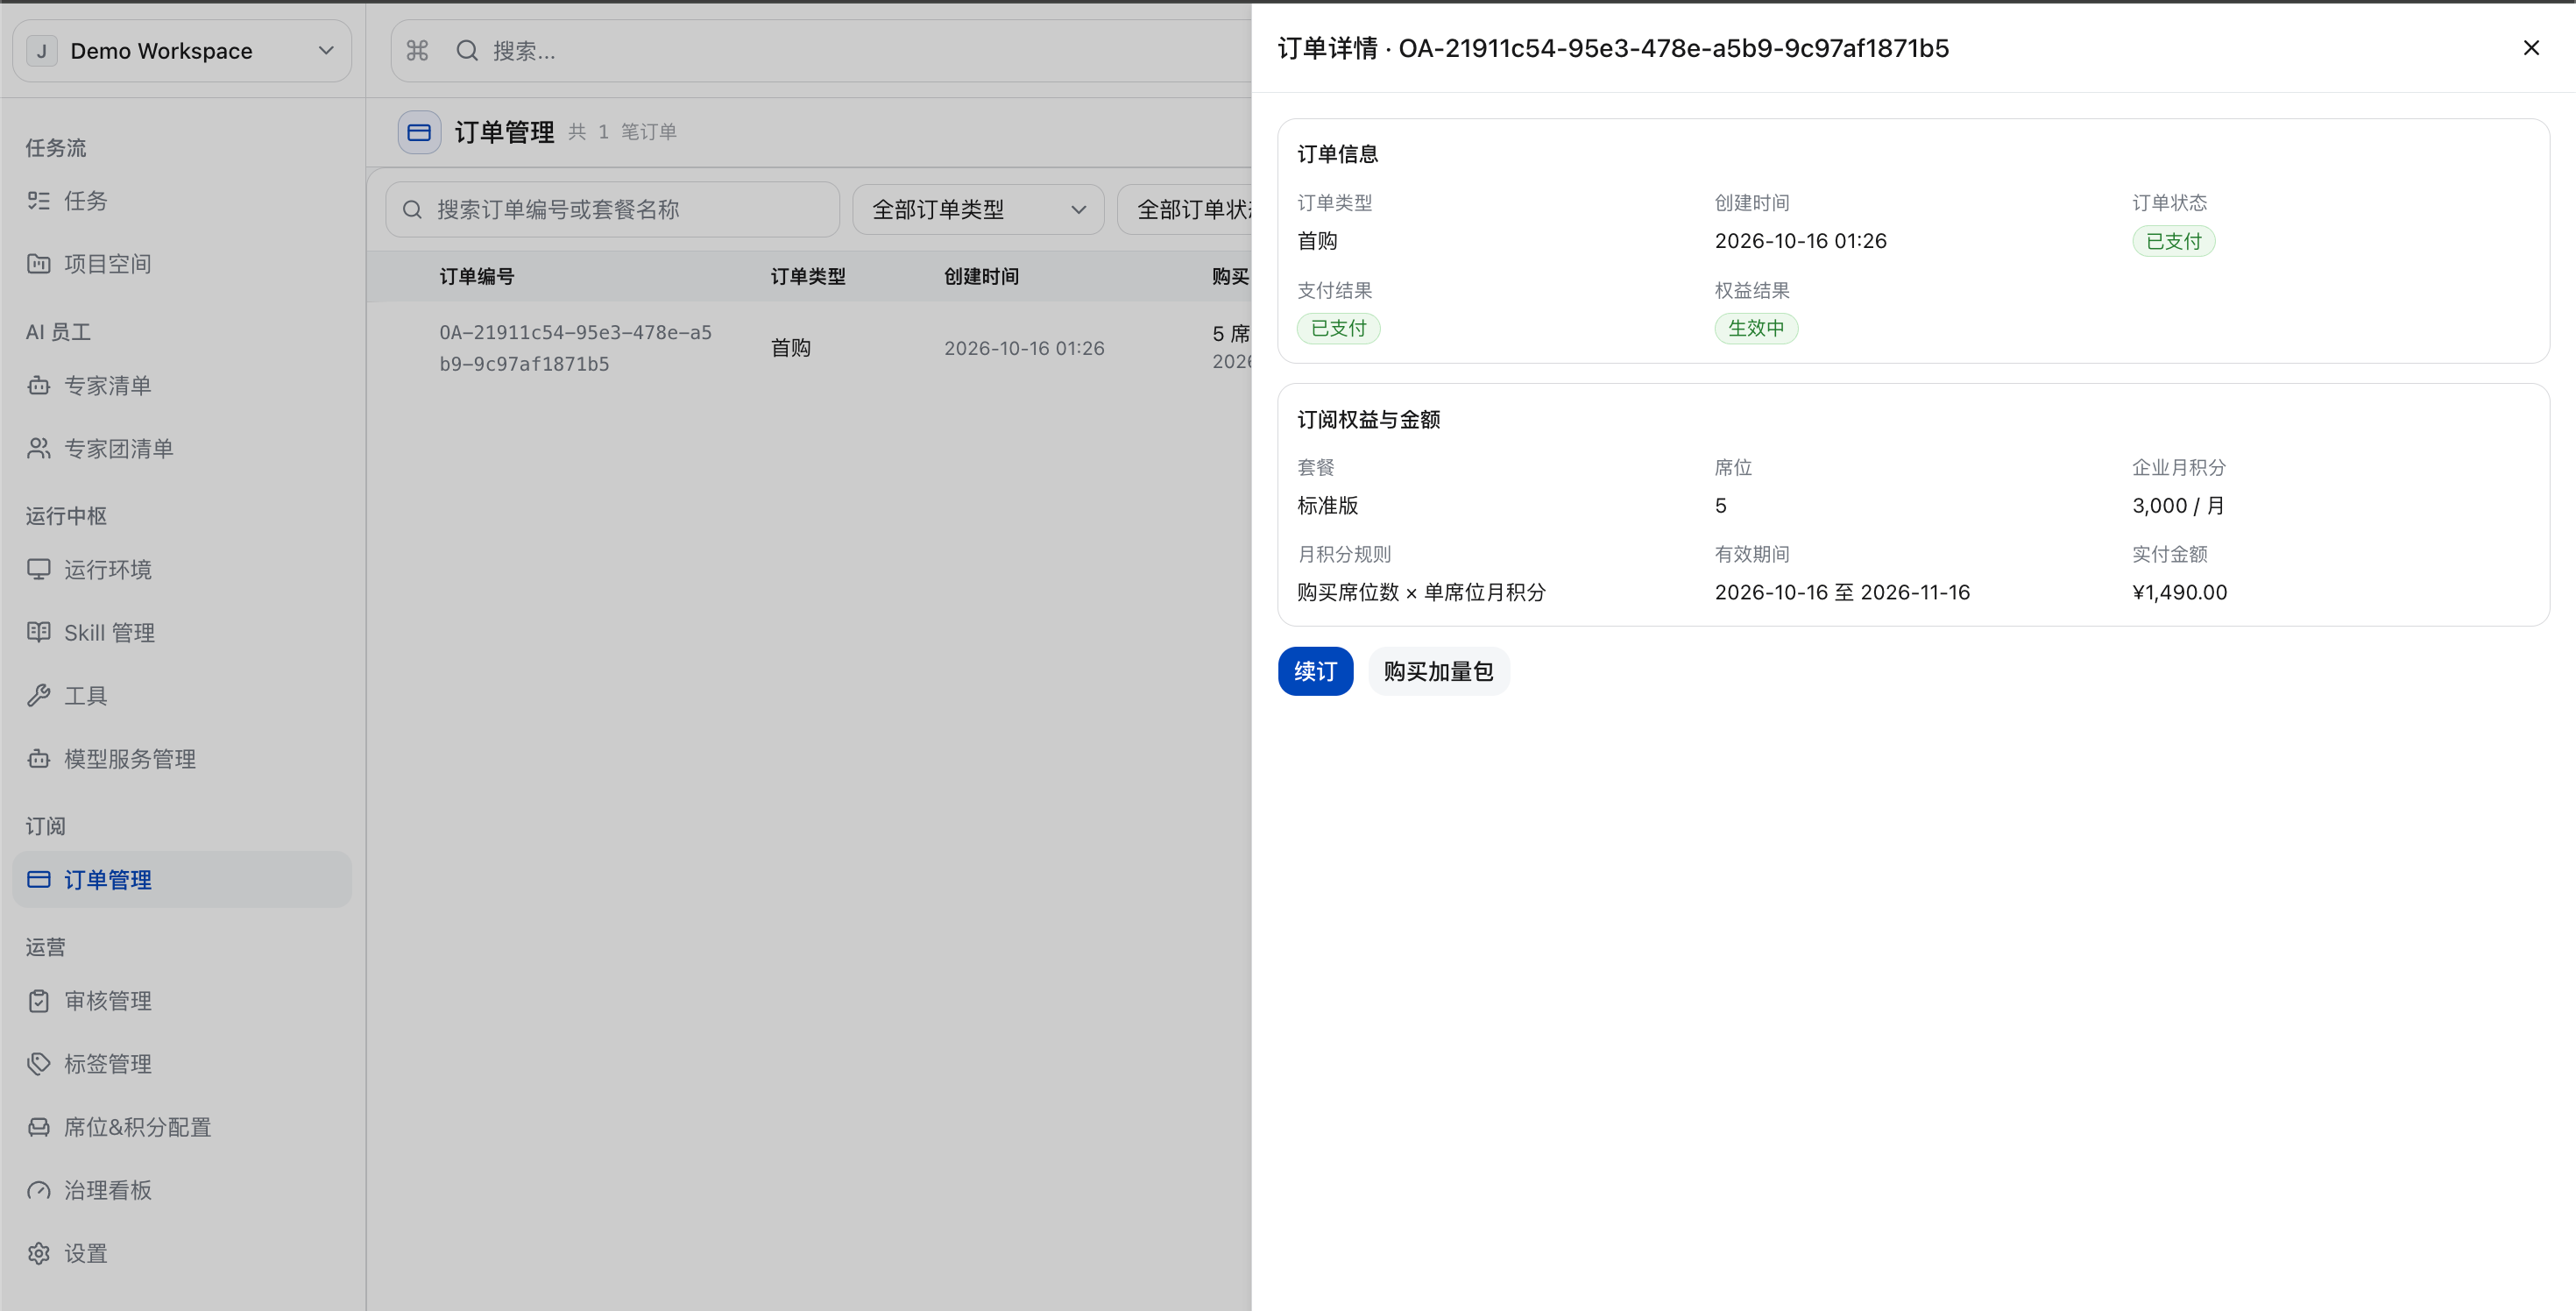
b. Click “Details” to view order information (order type, creation time, order status, payment result, benefit result) as well as subscription benefits and amount (package, number of seats, monthly enterprise points, monthly point rules, validity period, actual payment amount); the monthly point rule is “number of seats purchased × monthly points per seat”. If you need an invoice, please contact your dedicated consultant for invoice-related inquiries.
Renew Subscription
a. Click “Details”.
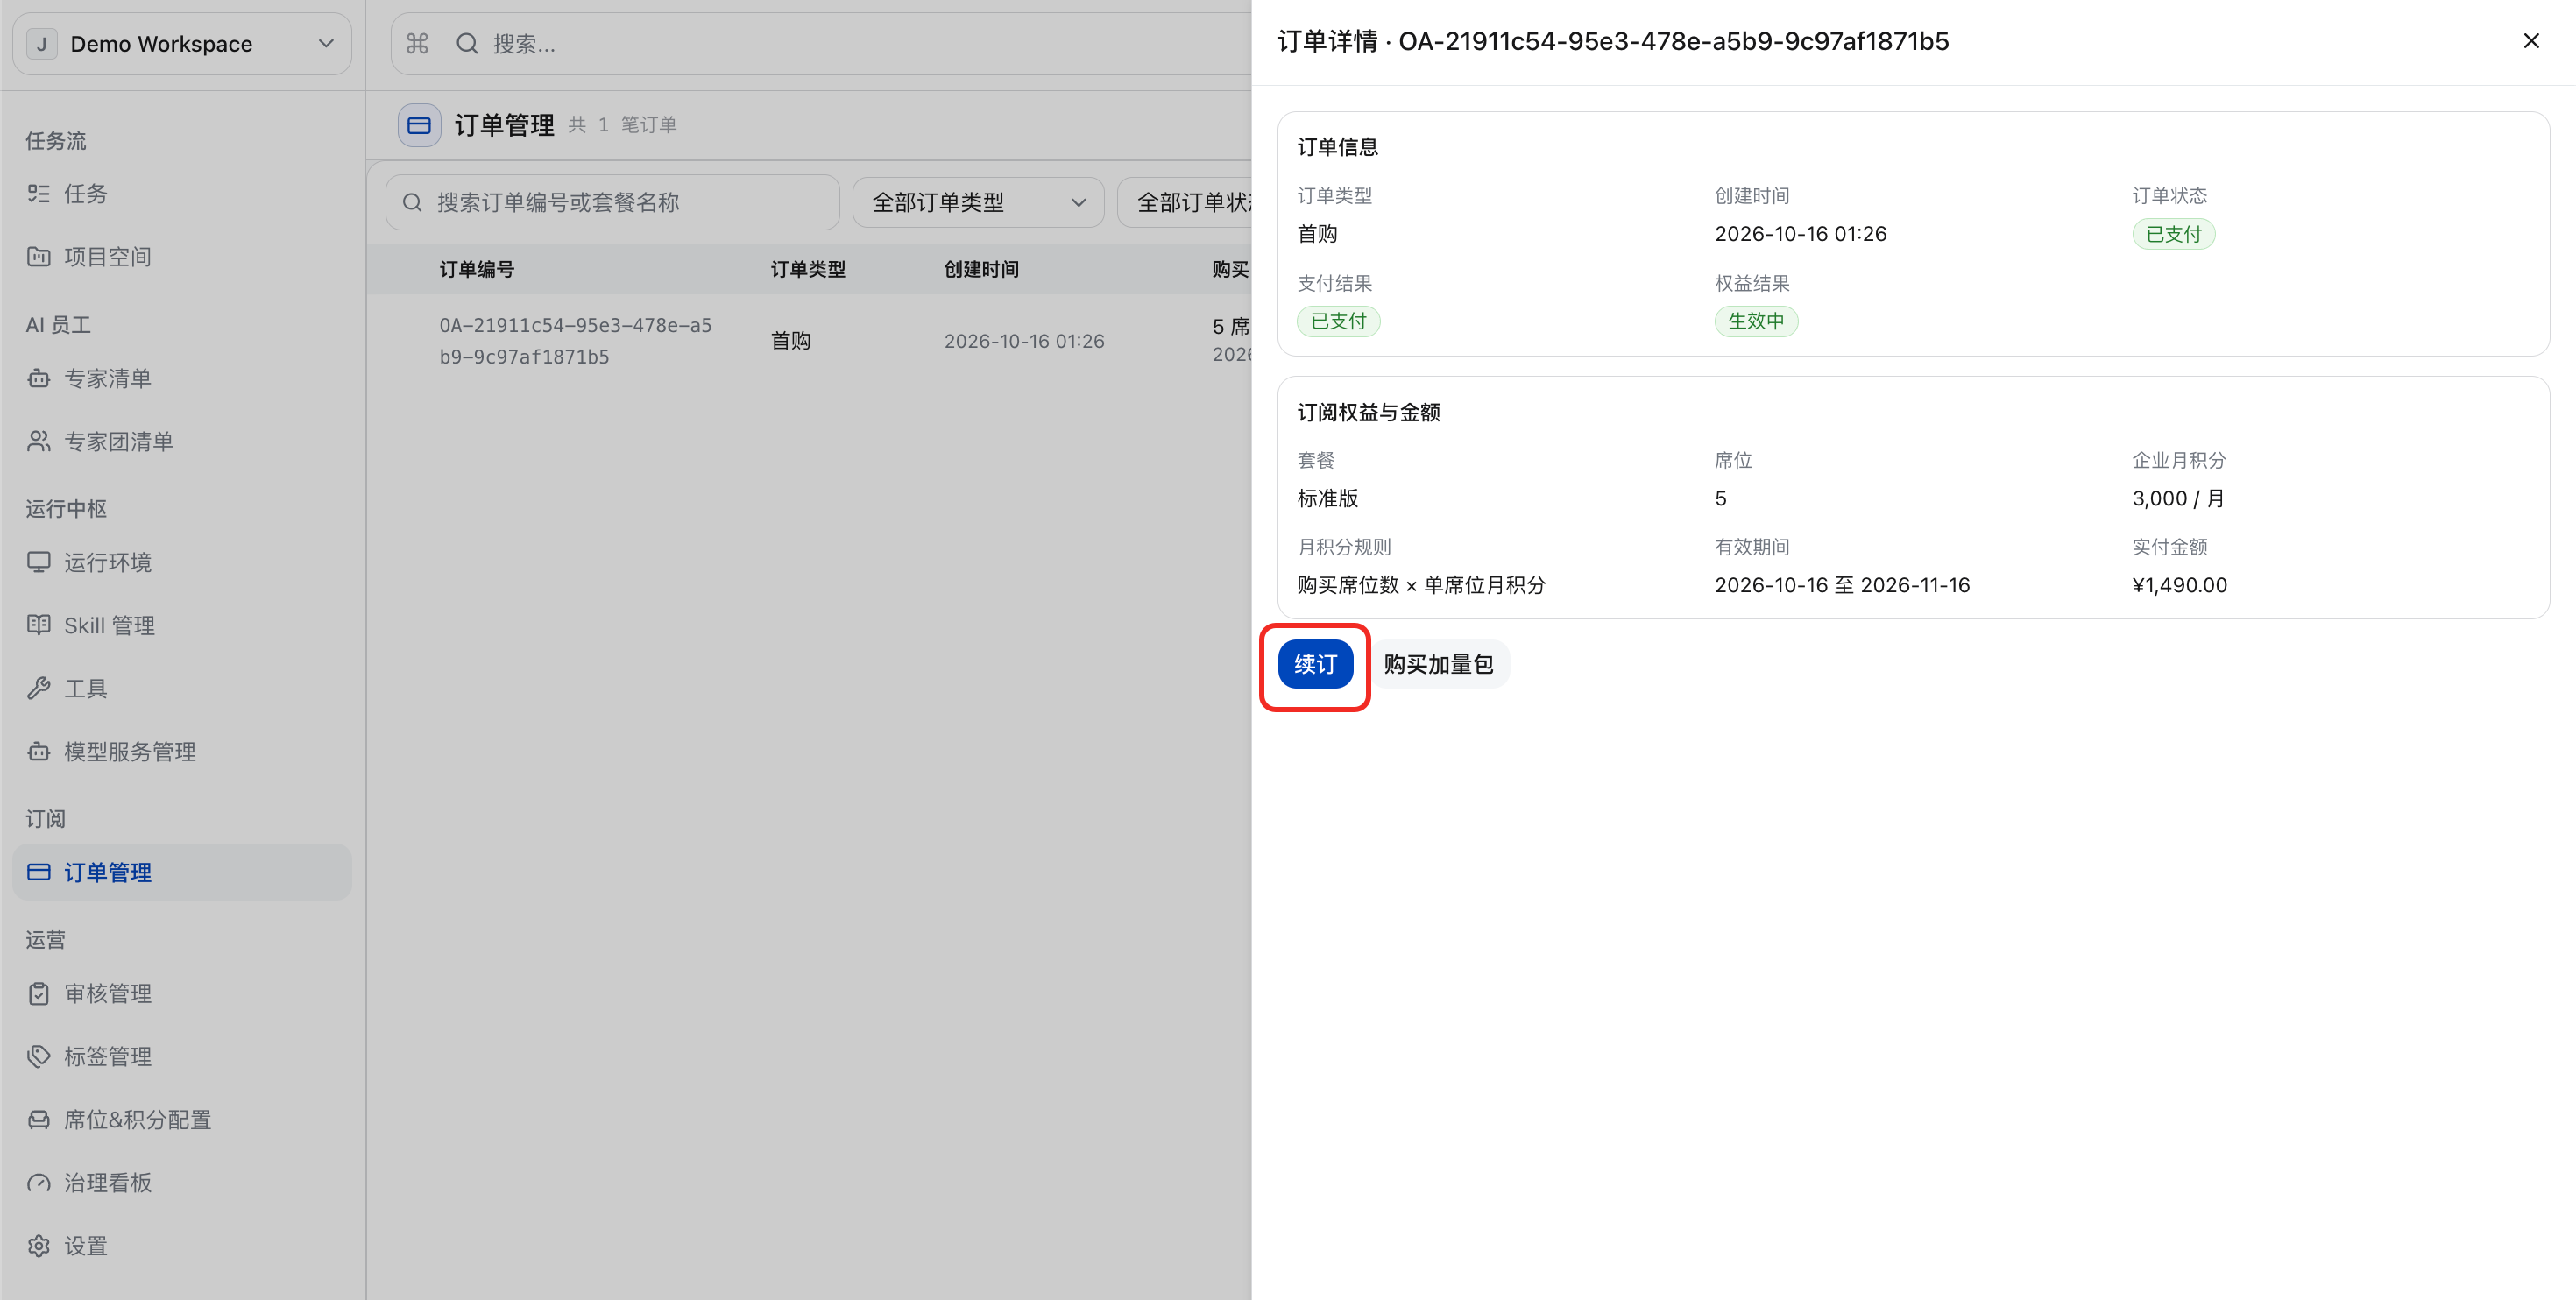
b. Click “Renew” to access the official DeepWorks website.
c. The “Pricing” page on the official DeepWorks website offers both individual and corporate plans for selection. Click “Contact Dedicated Customer Service” to scan a code and add your exclusive consultant for inquiries regarding procurement, solution selection, and invoicing.
Export Orders
Click “Export Orders” to export all current orders.
Seat & Point Configuration
View Seat and Point Configuration
Click “Seat & Point Configuration” in the left menu to uniformly manage members’ seat allocation and point quotas. The top of the page provides an overview of the number of activated accounts, purchased/allocated seats (including remaining seats), monthly point pool, and distributable points in the current period for this tenant; it supports filtering members by organization tree, username/login account, and seat status.
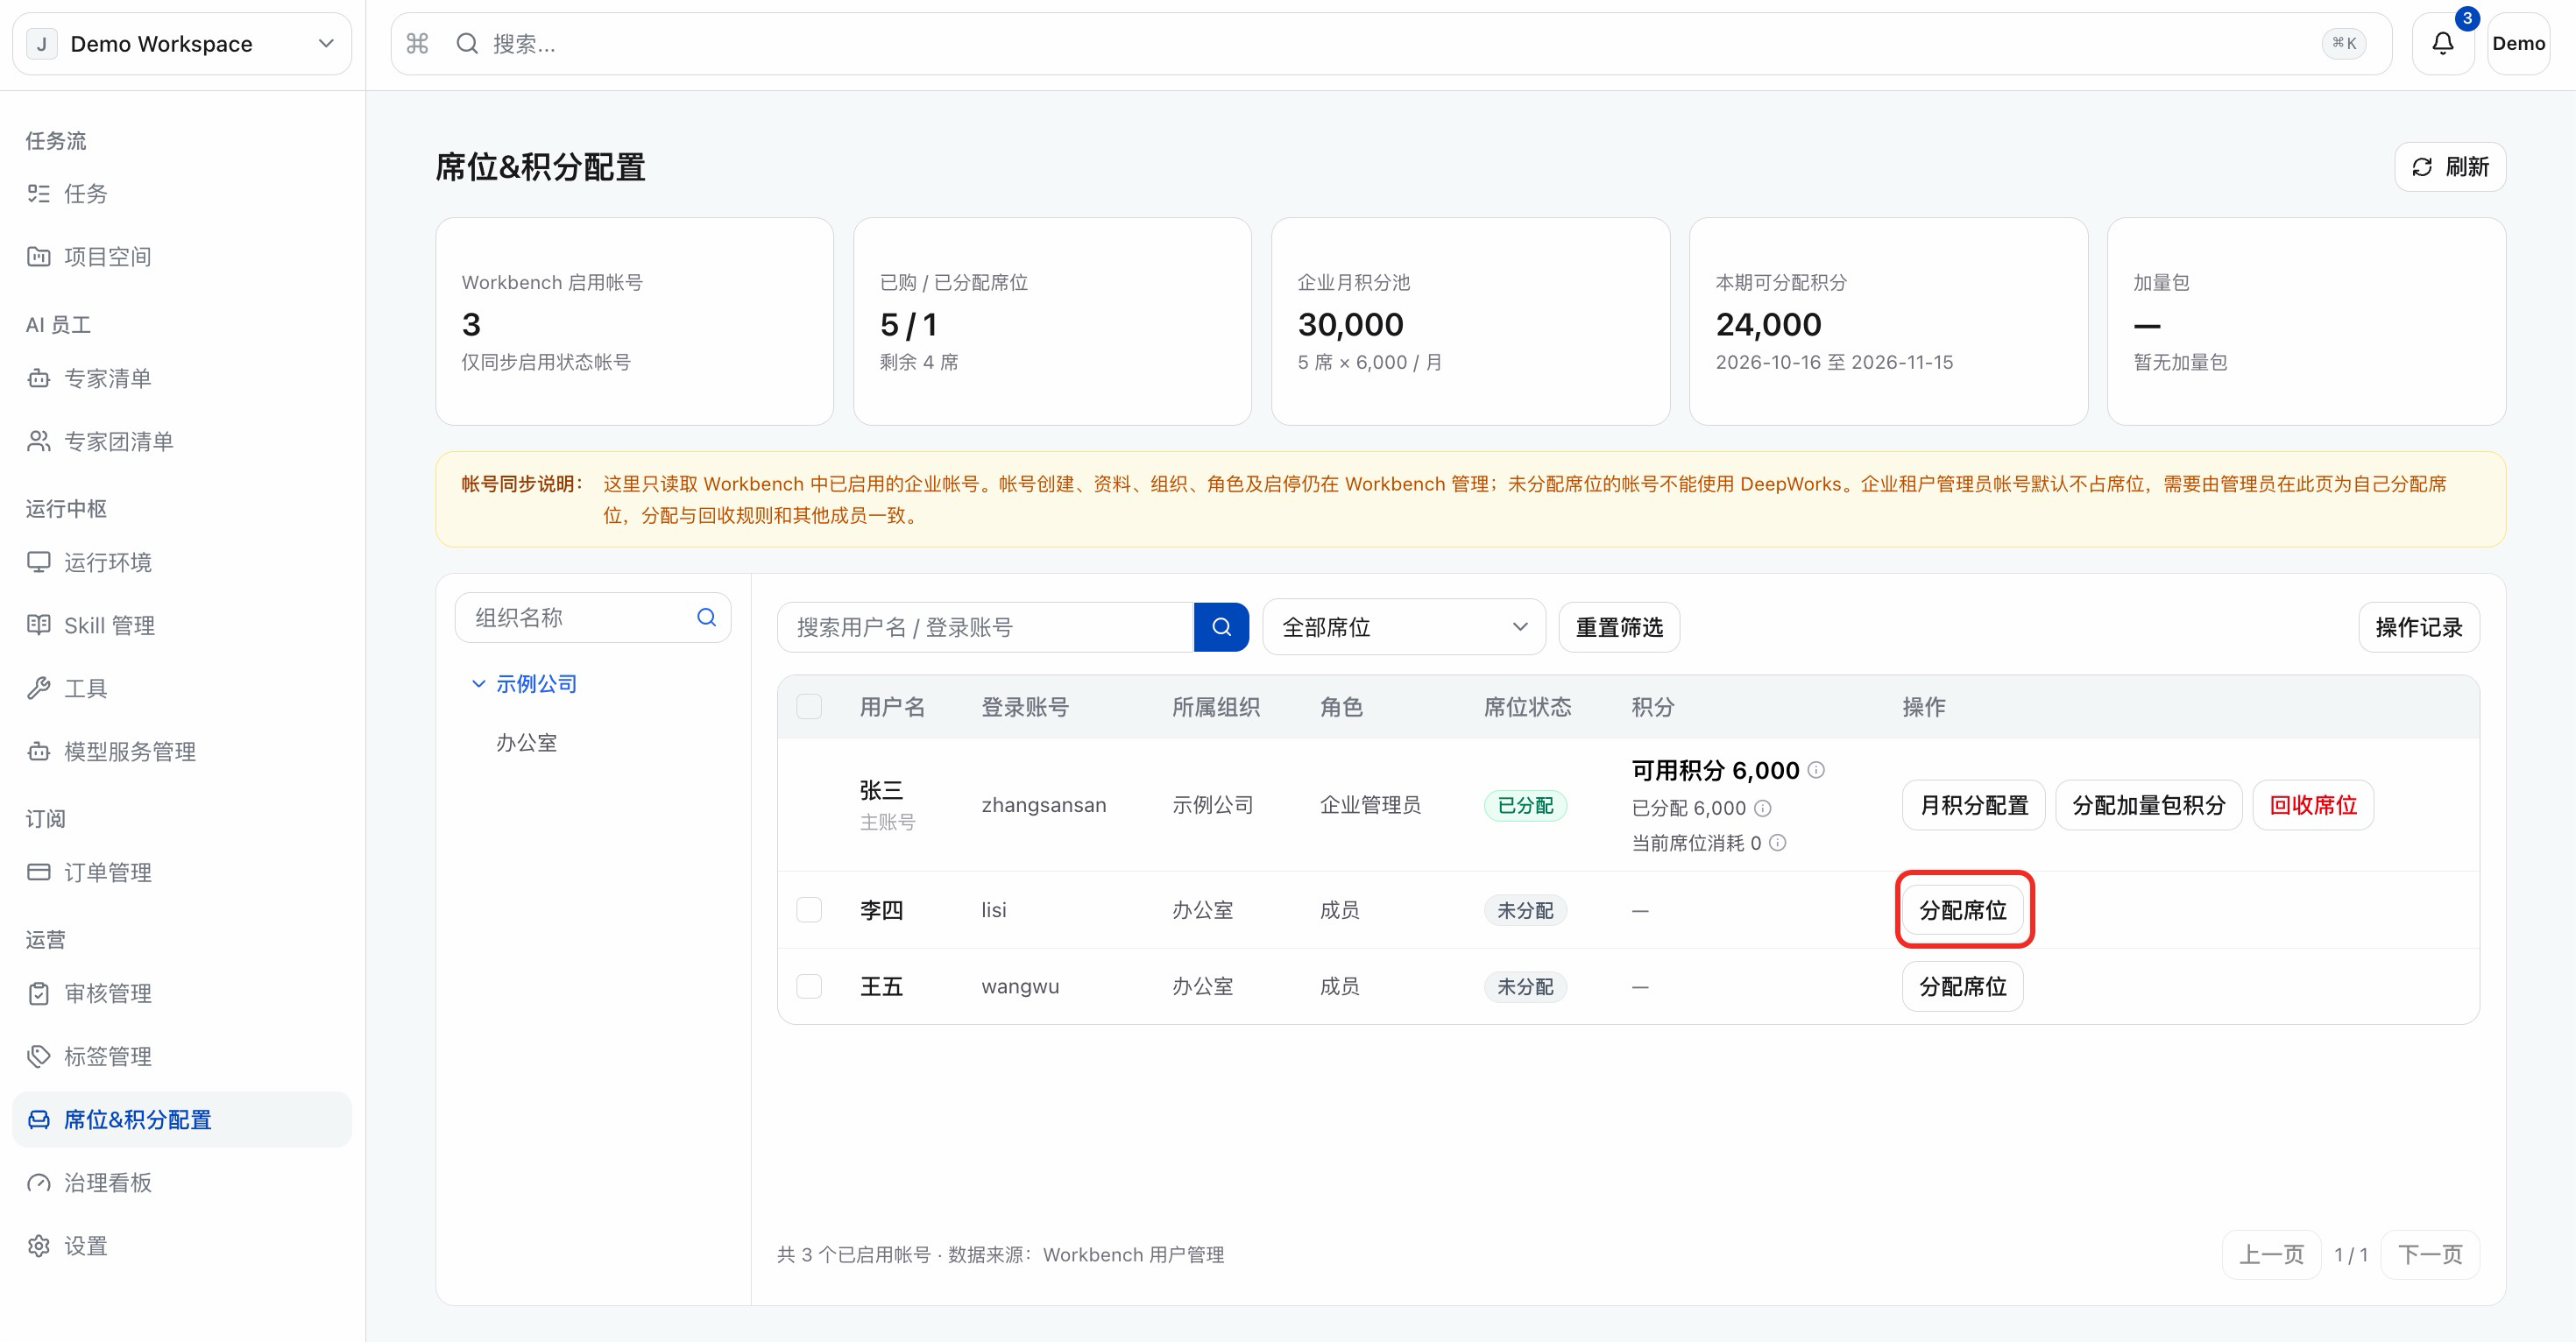
allocate seats
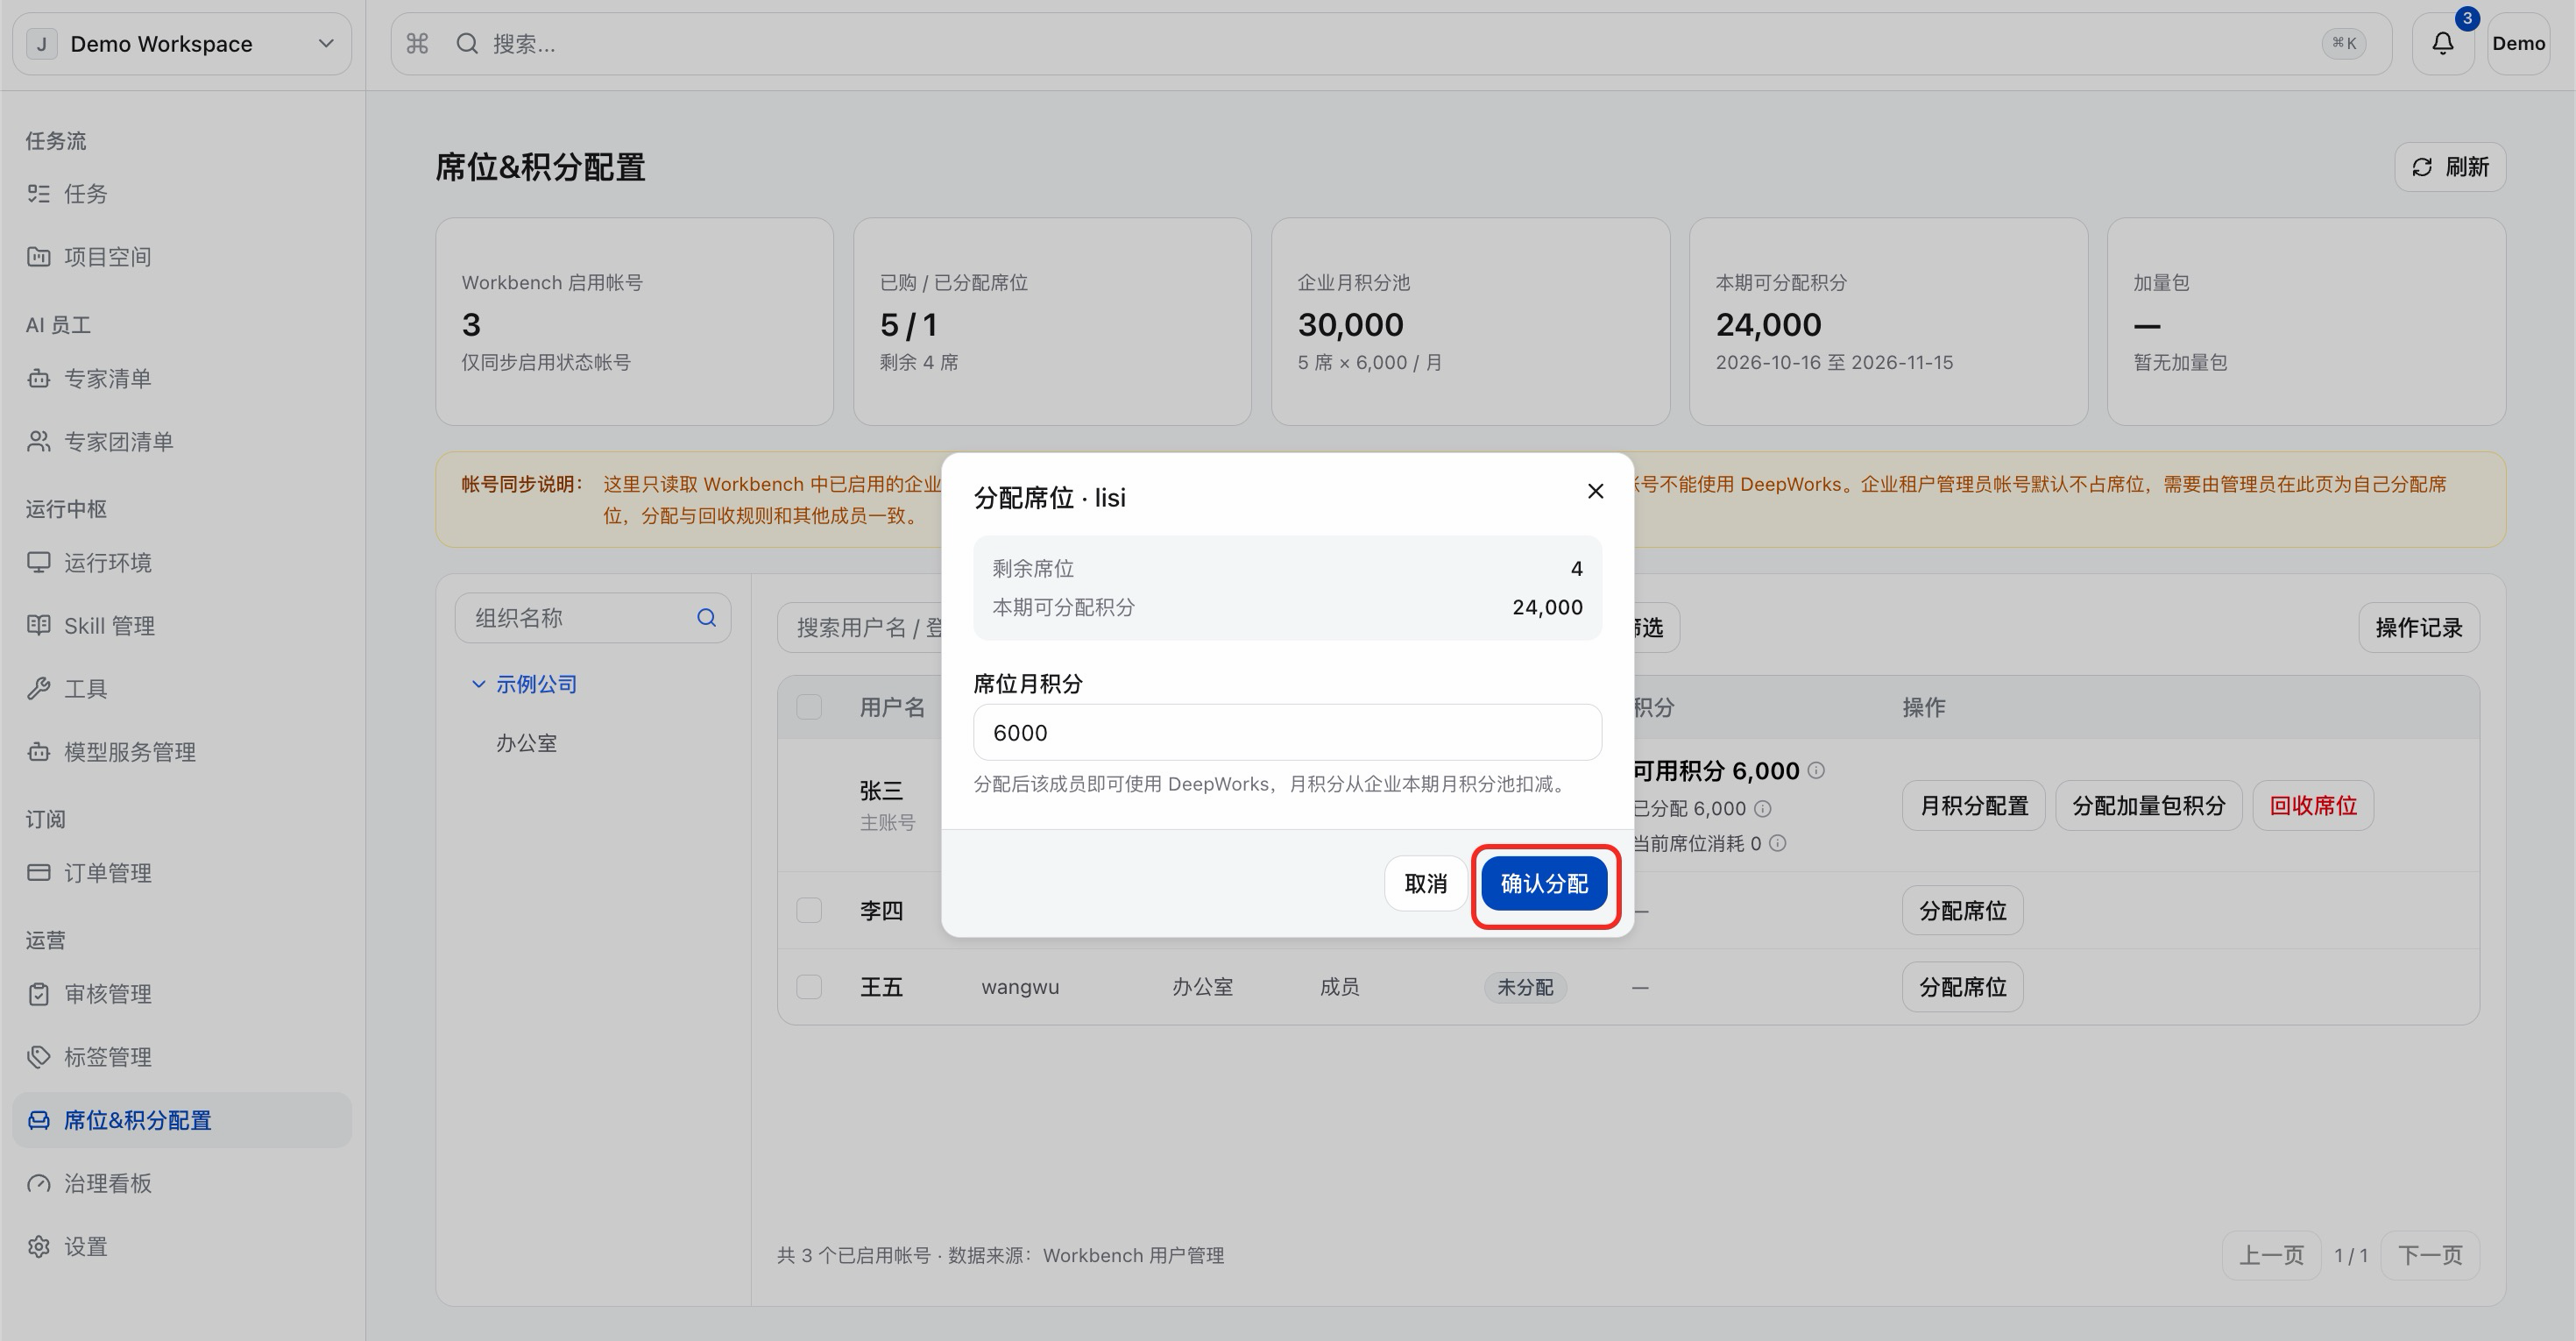
a. Click “Assign Seats”, then click “Assign Seats” for members marked as “Unassigned” to grant them access privileges.
b. Set seat points and click “Confirm Allocation”. Once the allocation is completed, the member can use DeepWorks, and the monthly points will be deducted from the enterprise’s current monthly point pool.
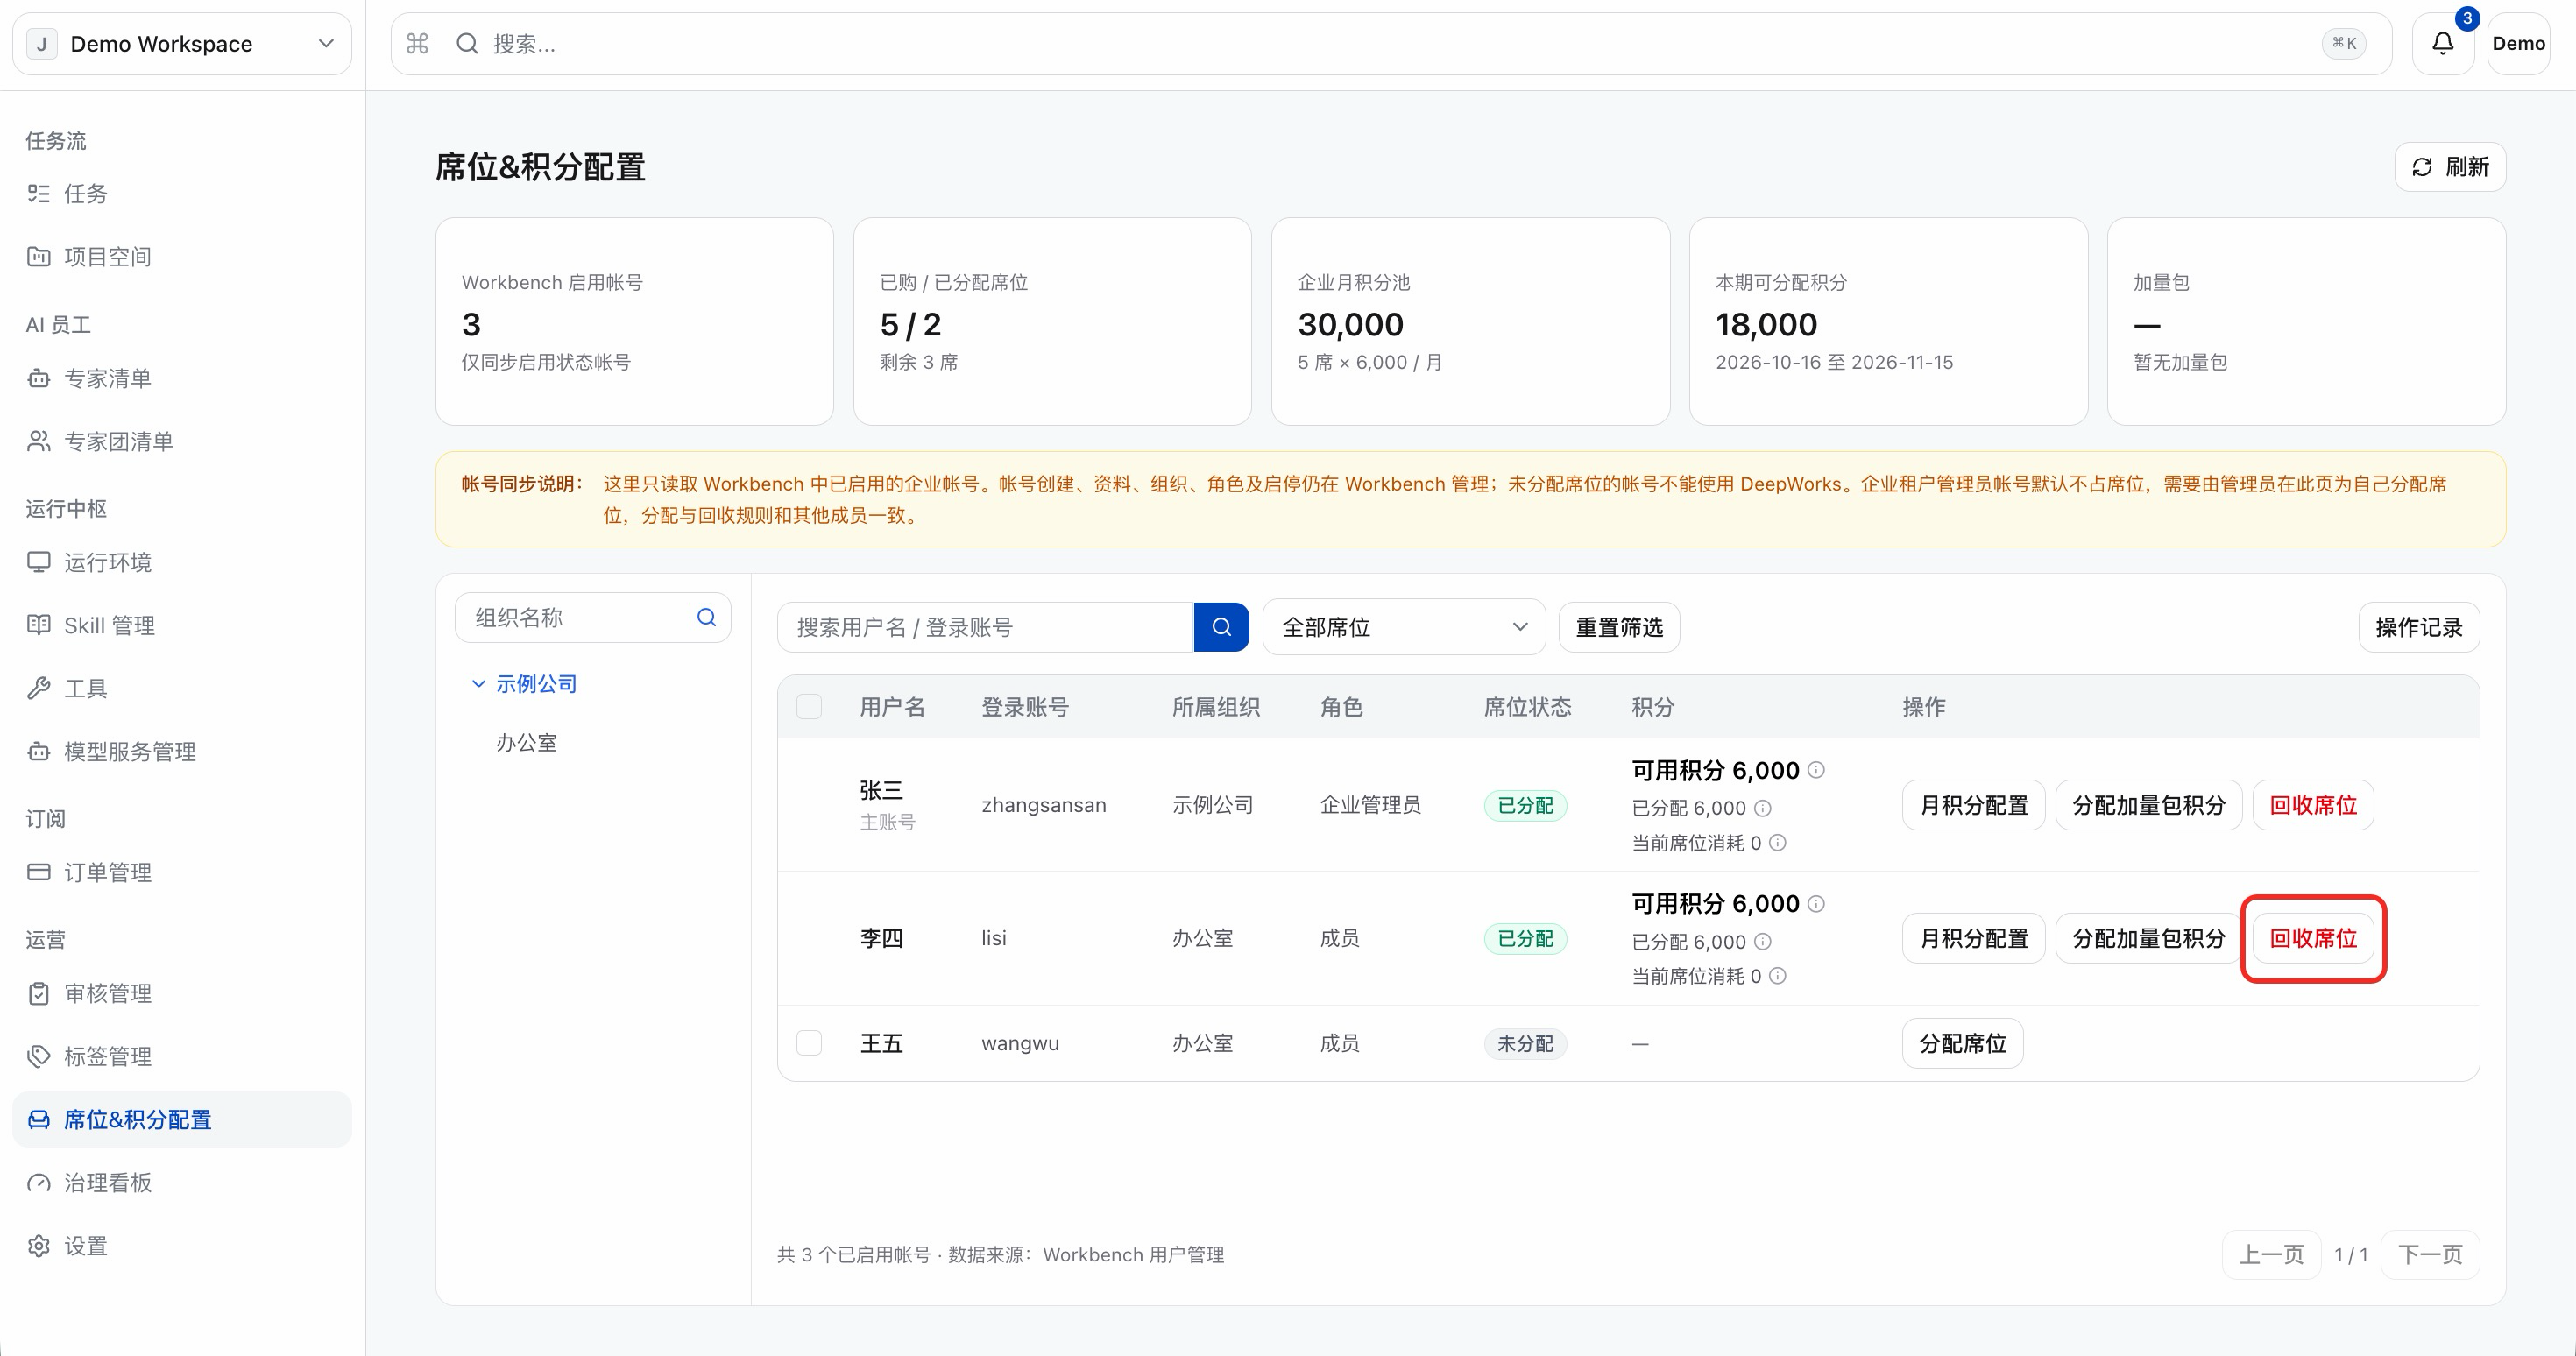
Recycle Seat
a. Click “Reclaim Seat”; for assigned members, you can click “Reclaim Seat” to take back the seat.
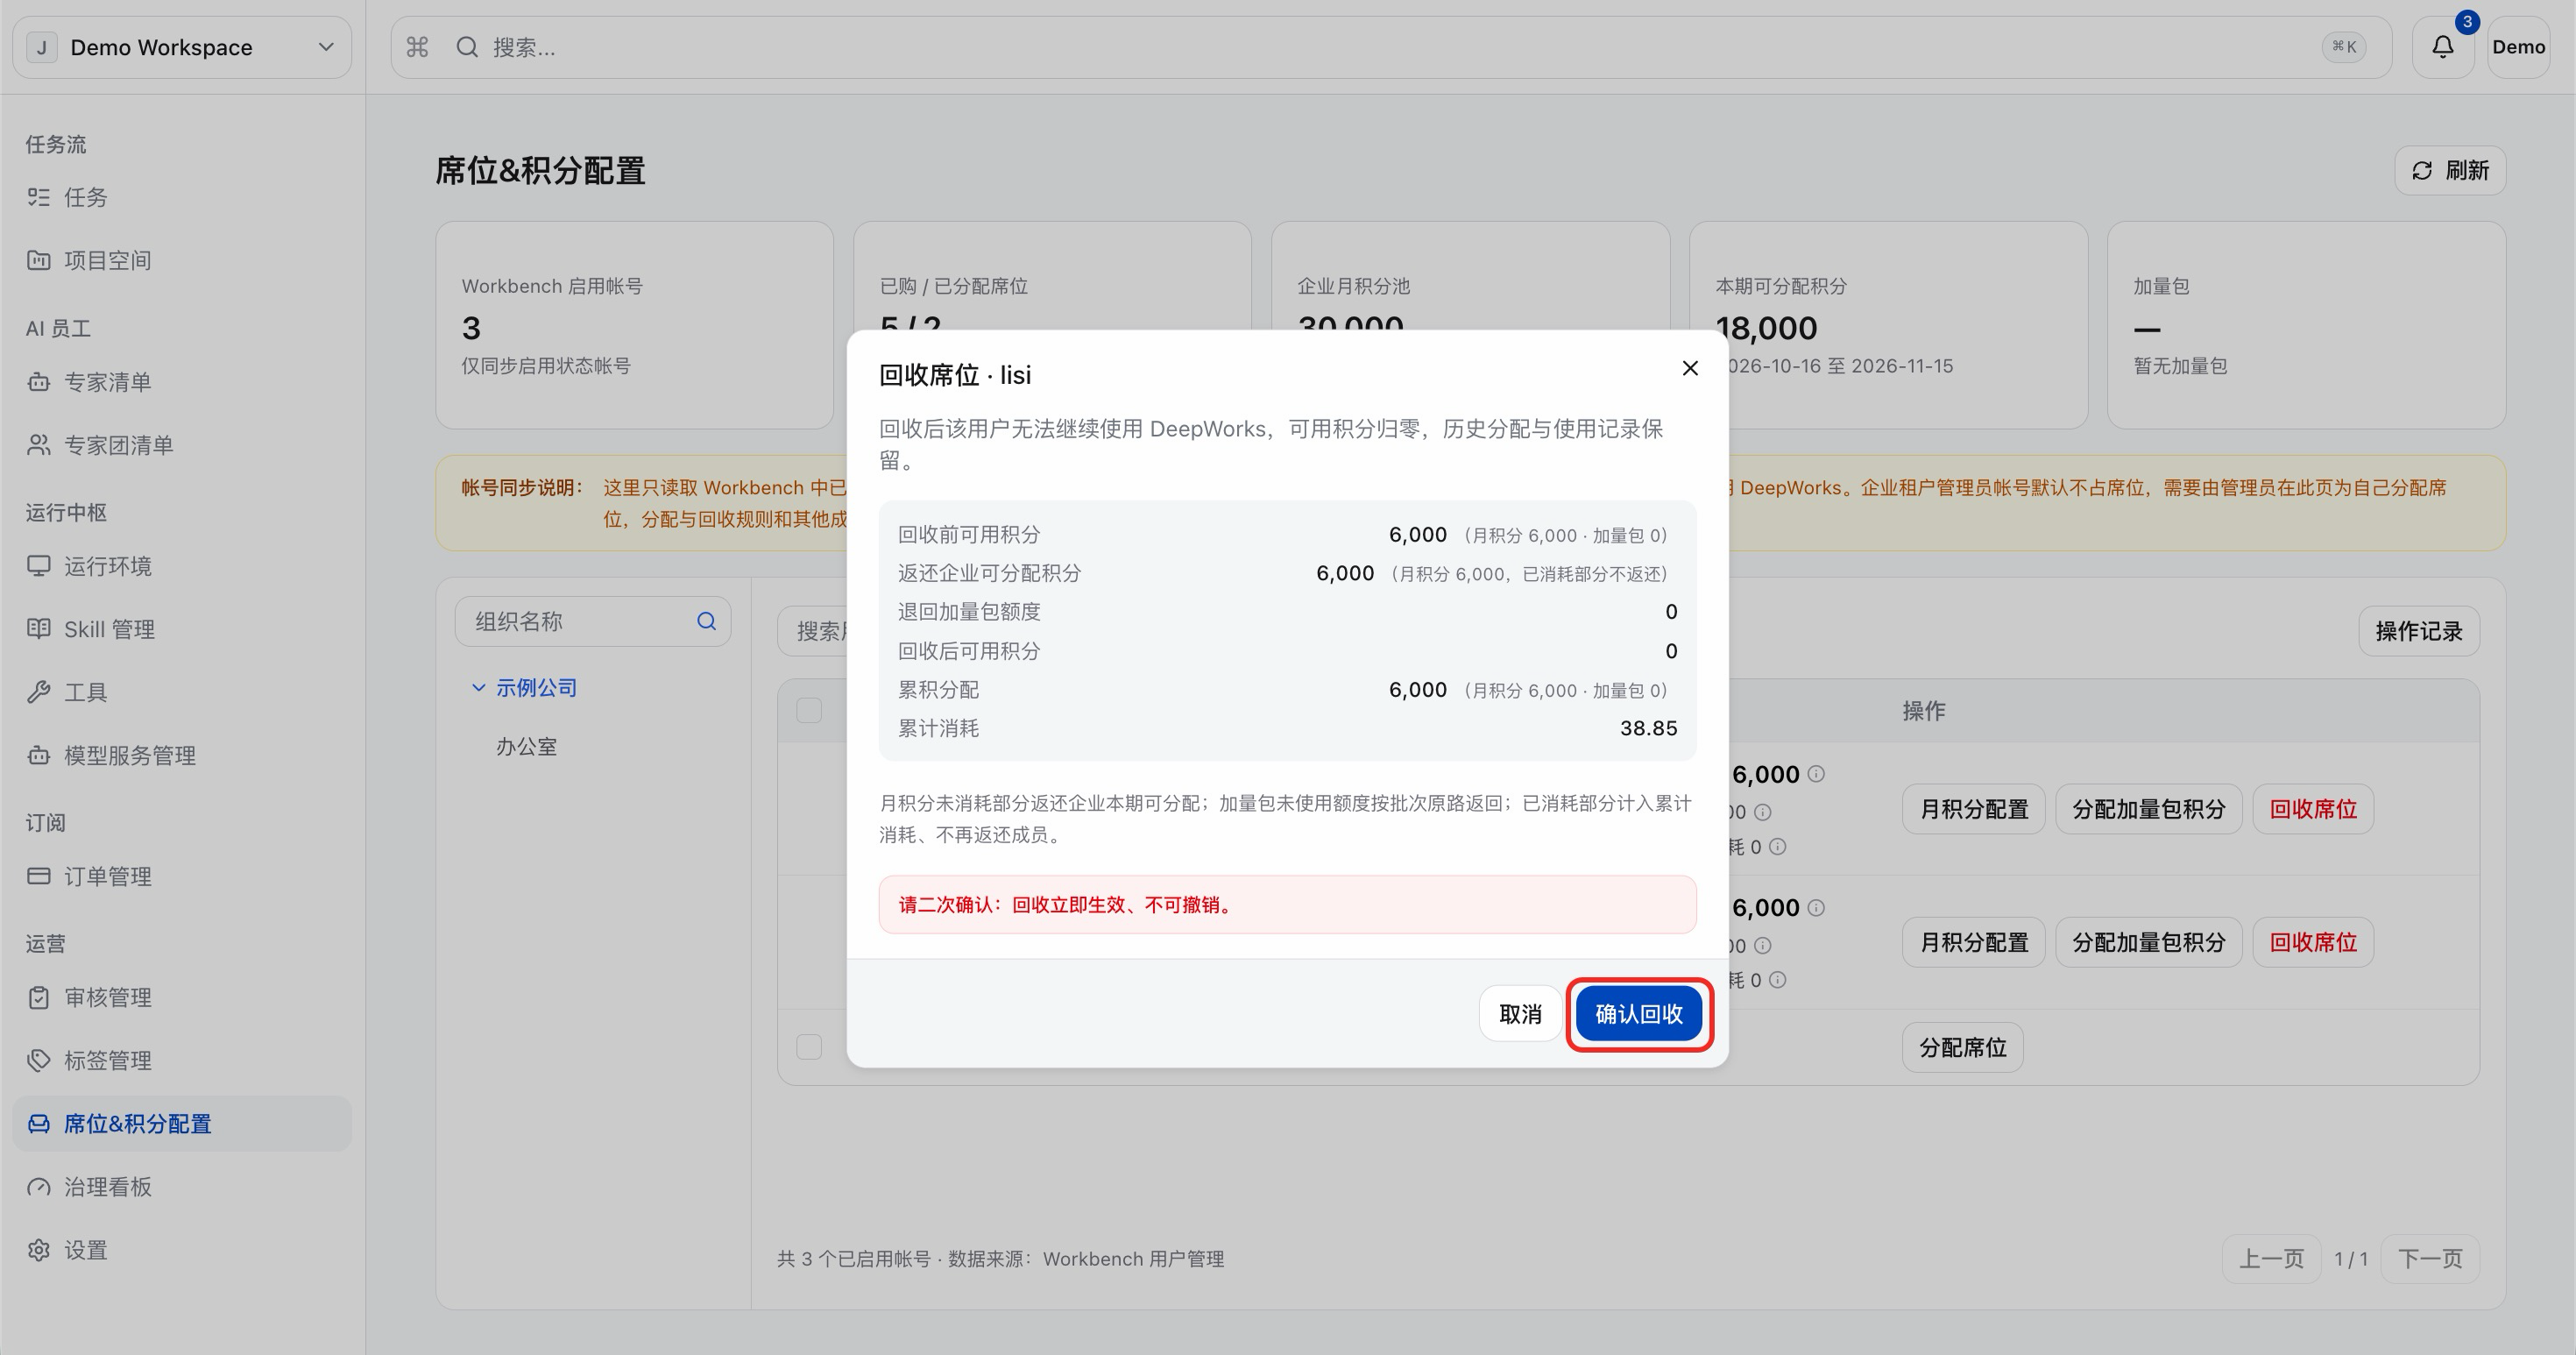
b. Click “Confirm Recovery”. After the recovery is completed, the member will no longer be able to use DeepWorks, their available points will be reset to zero, and their historical allocation and usage records will be retained. The unconsumed portion of the monthly points will be returned to the enterprise’s distributable pool for the current period; the already consumed portion will be counted towards the cumulative consumption and will not be returned to the member.
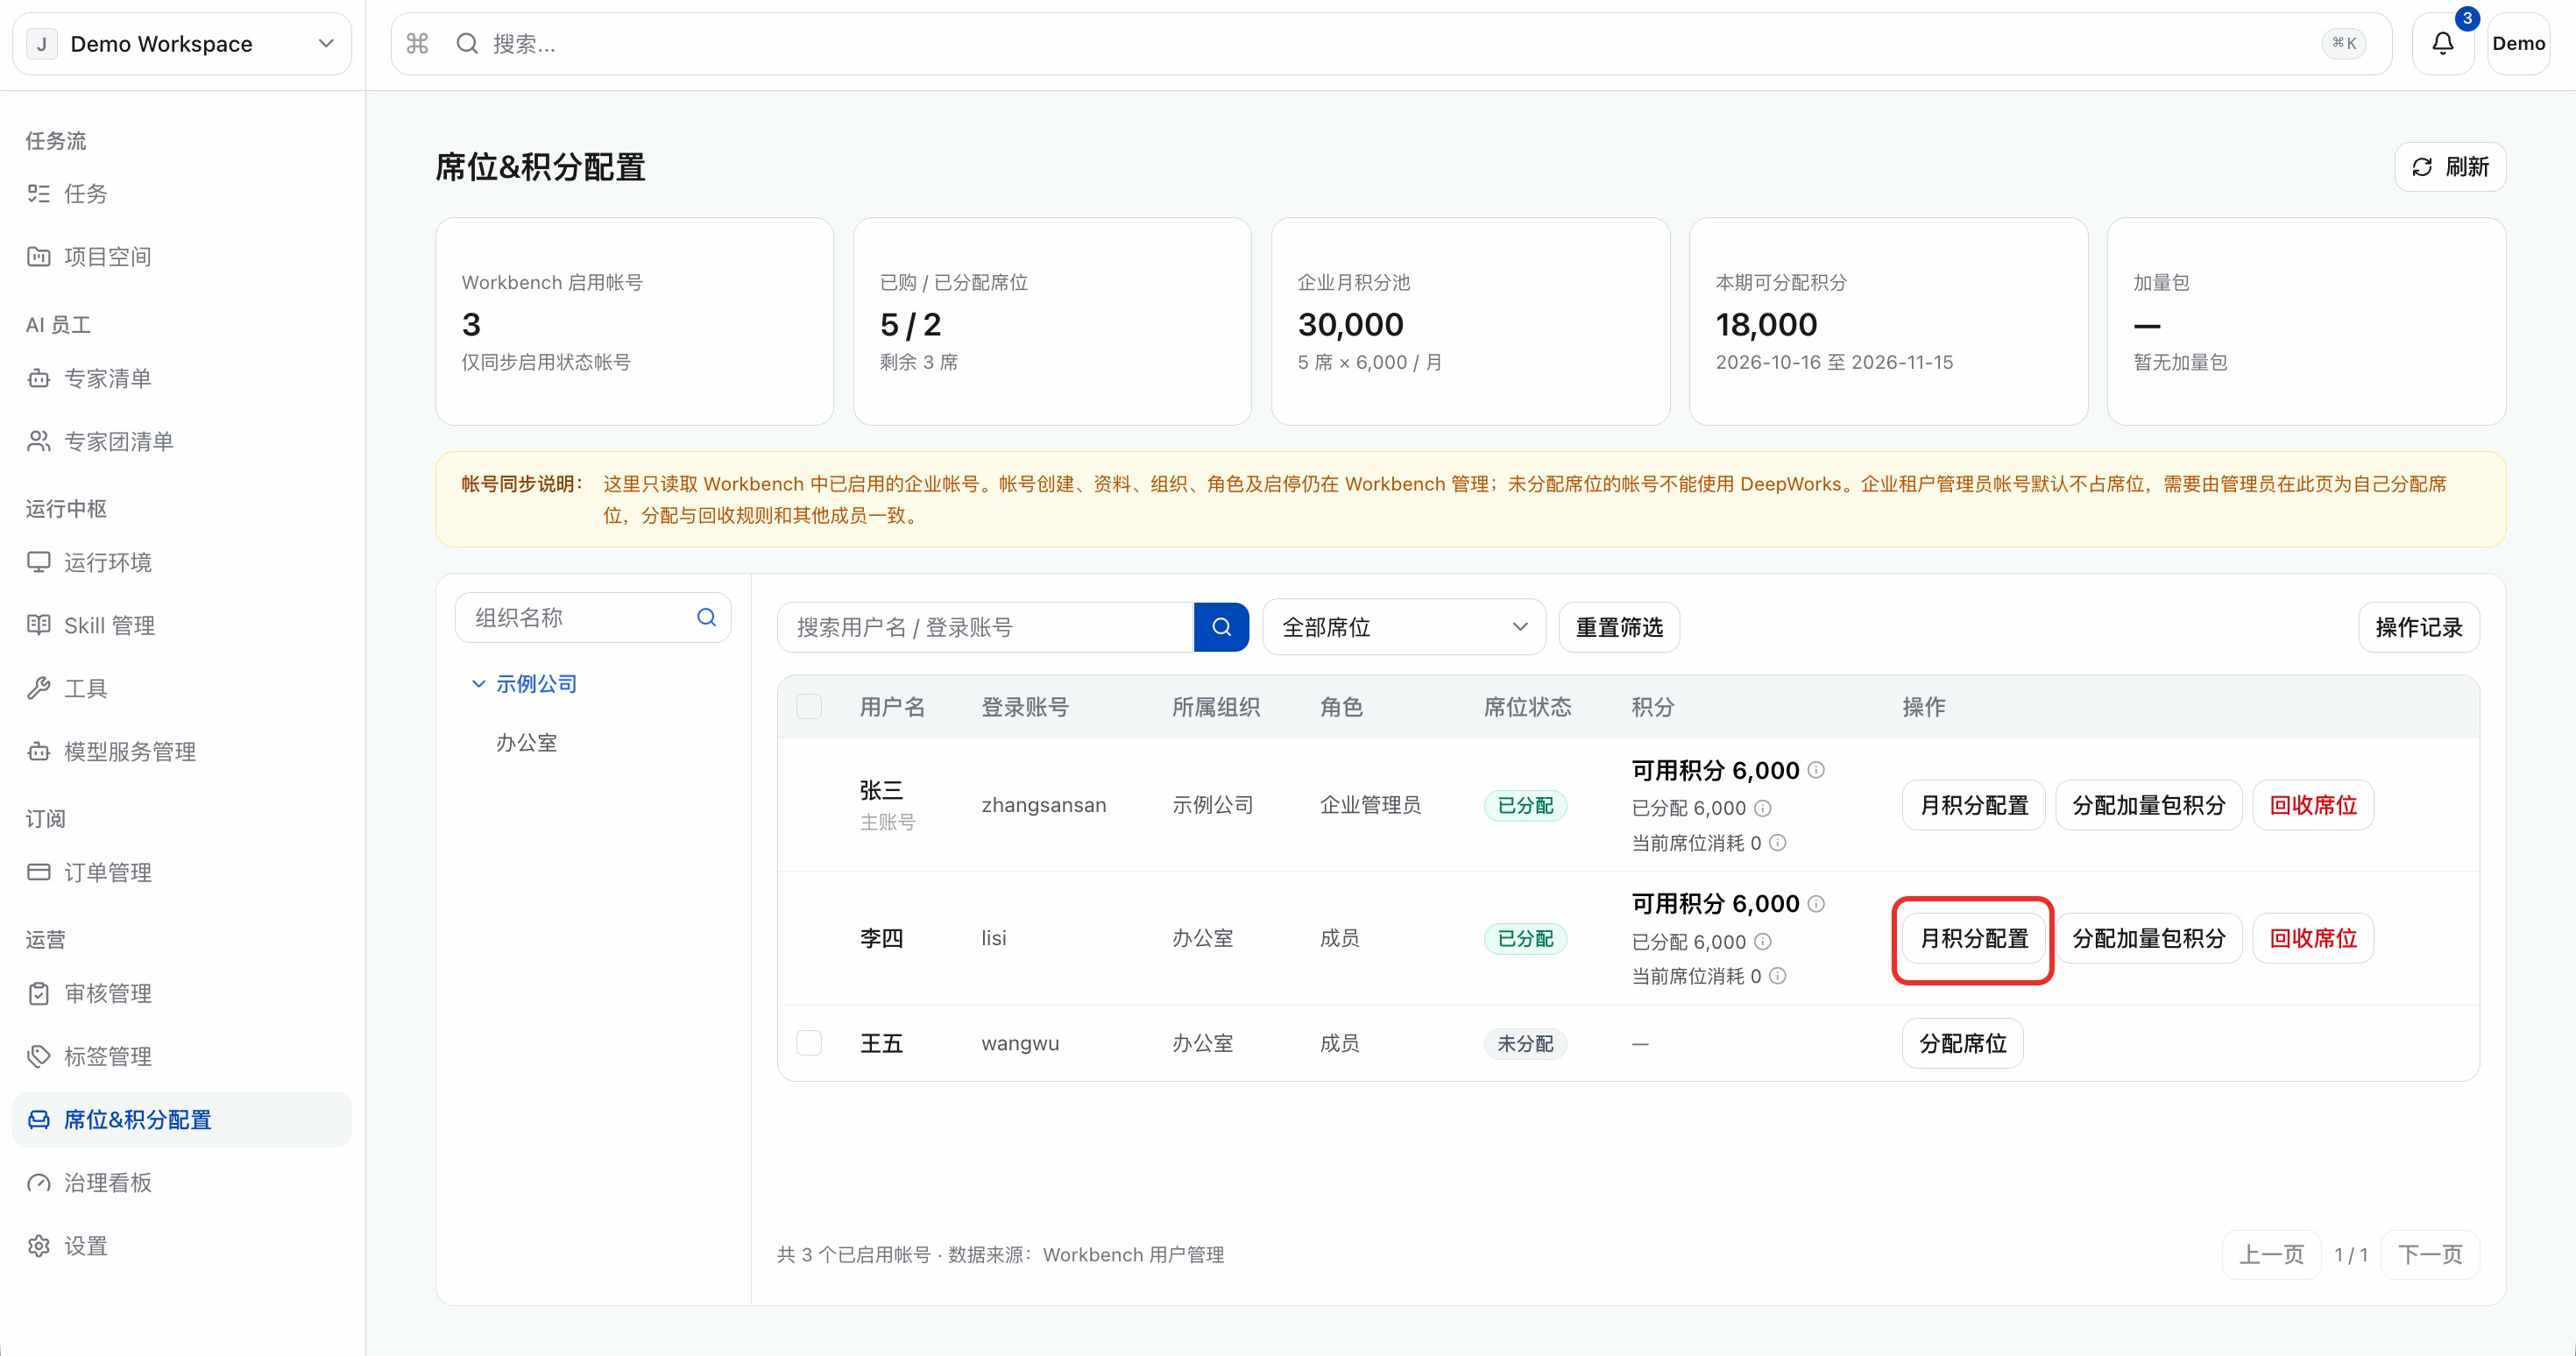
Monthly Points Configuration
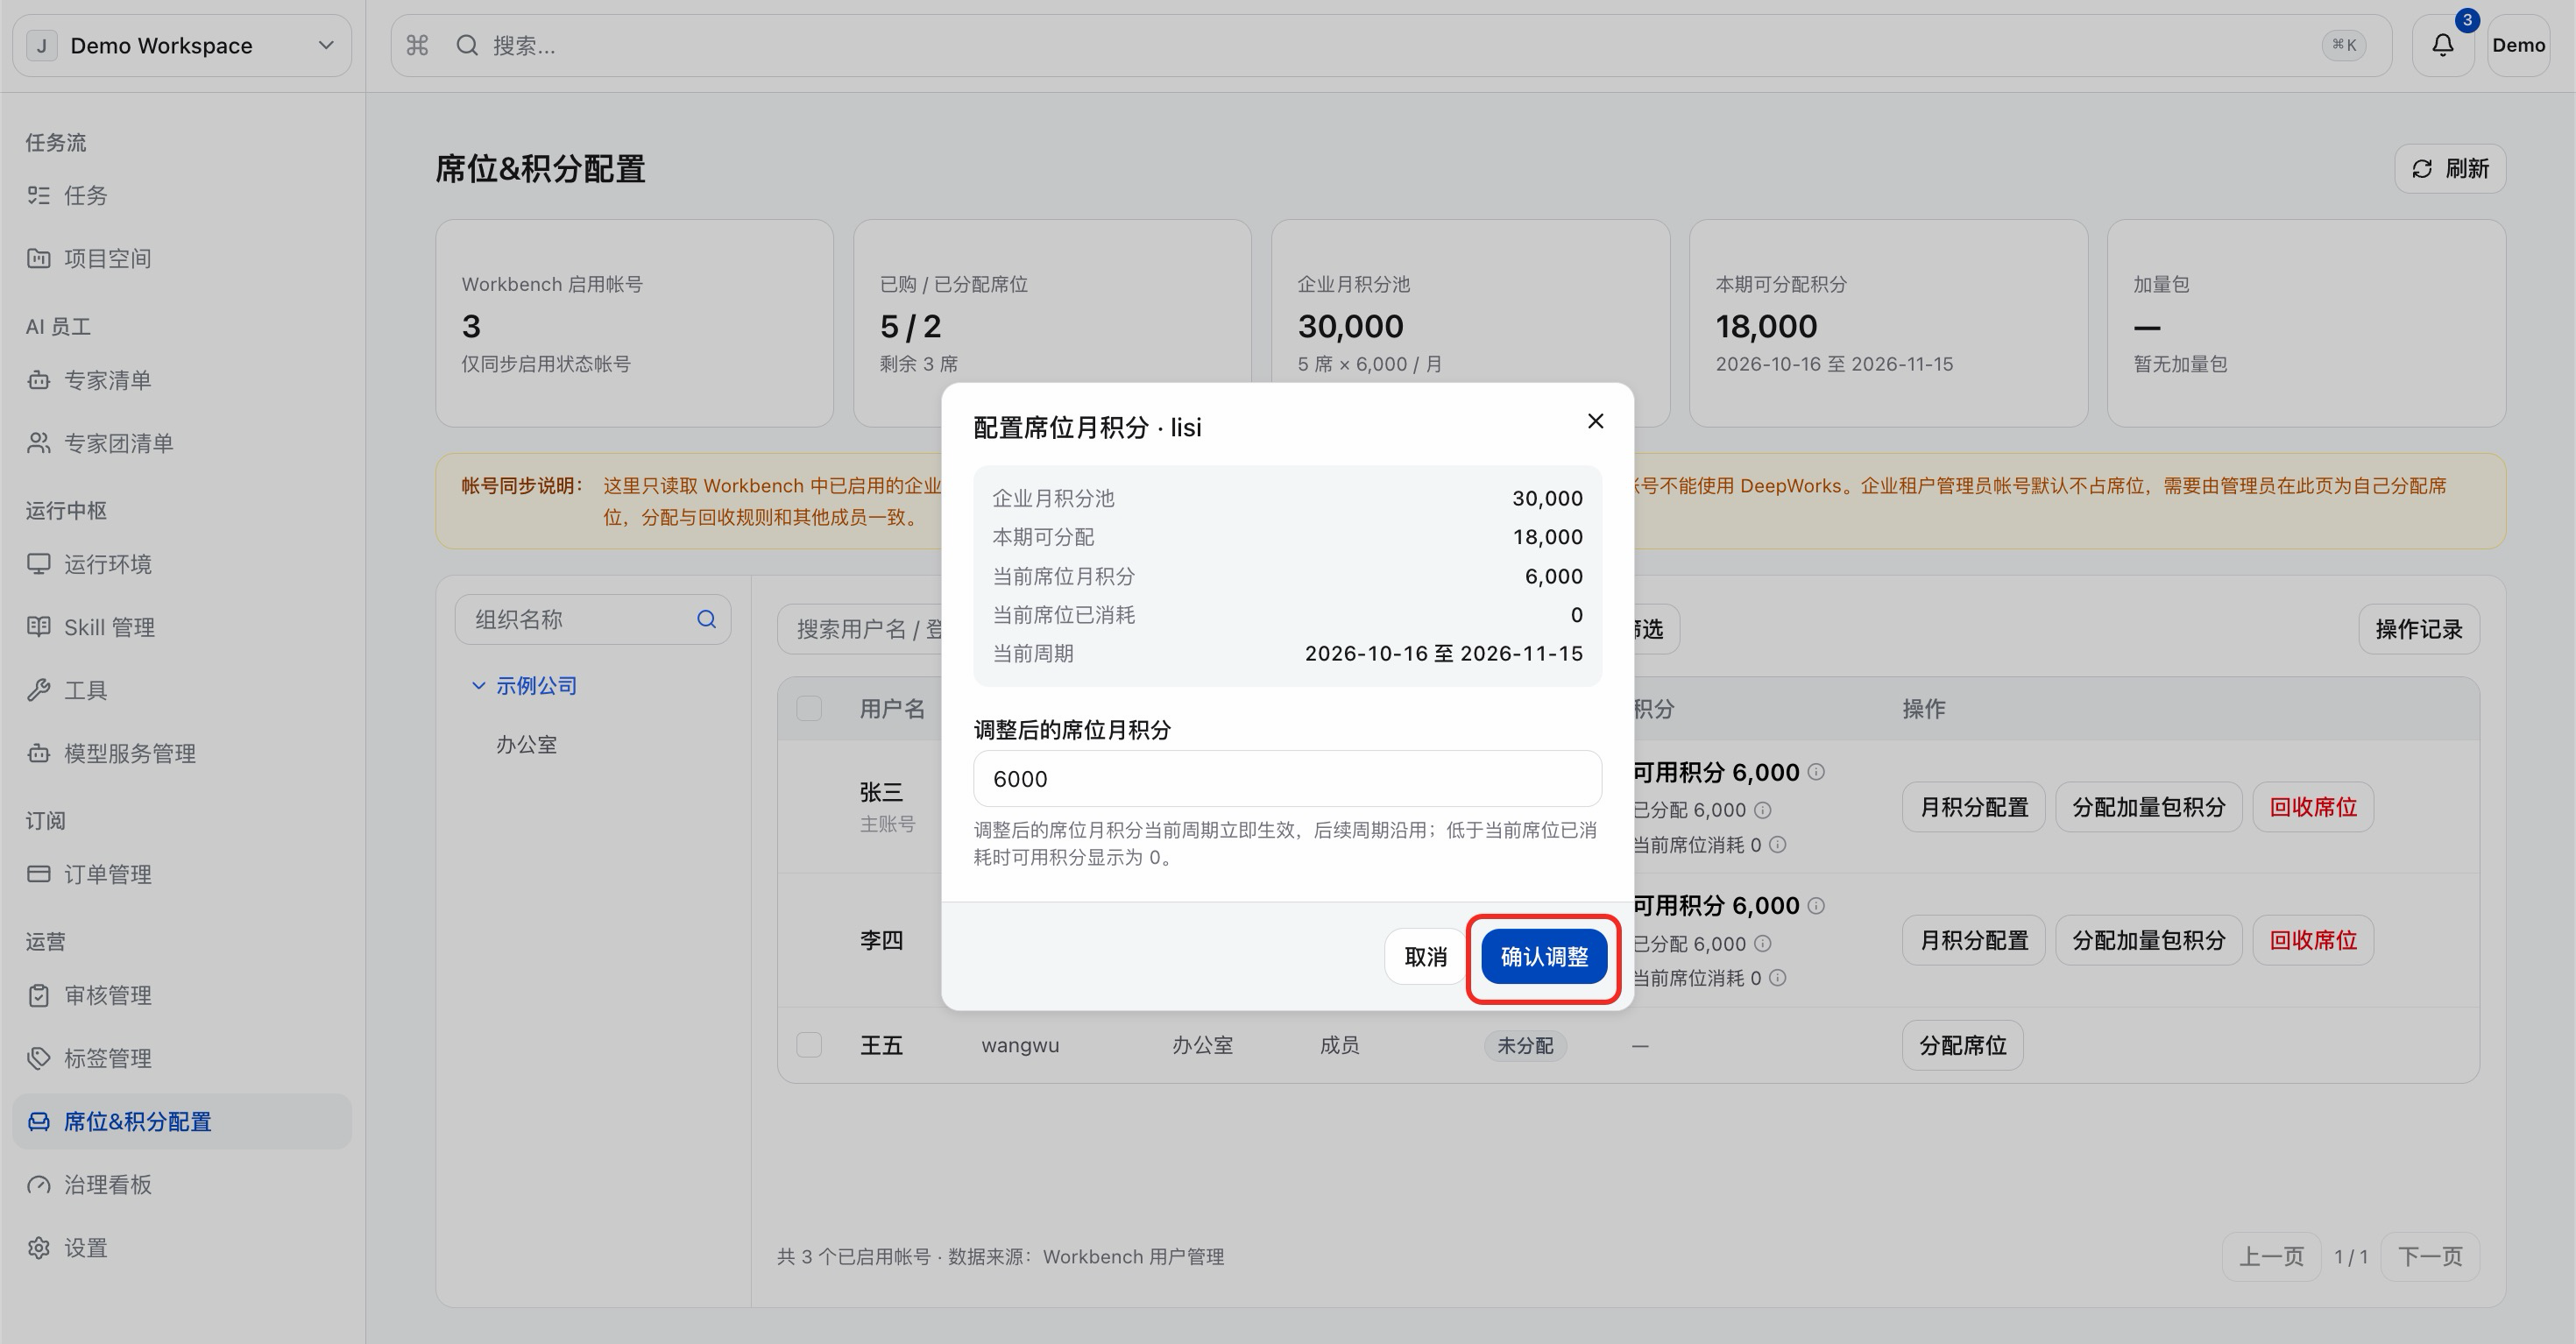
a. Click “Monthly Points Configuration” and view the enterprise monthly points pool, distributable amount for the current period, monthly points of the current seat, consumed points of the current seat and the current cycle in the pop-up box.
b. After filling in the “Adjusted Monthly Seat Points”, click “Confirm Adjustment”. Note: The adjusted monthly seat points take effect immediately for the current cycle and will be applied to subsequent cycles; if the adjusted value is lower than the points already consumed by the current seat, the available points will be displayed as 0.
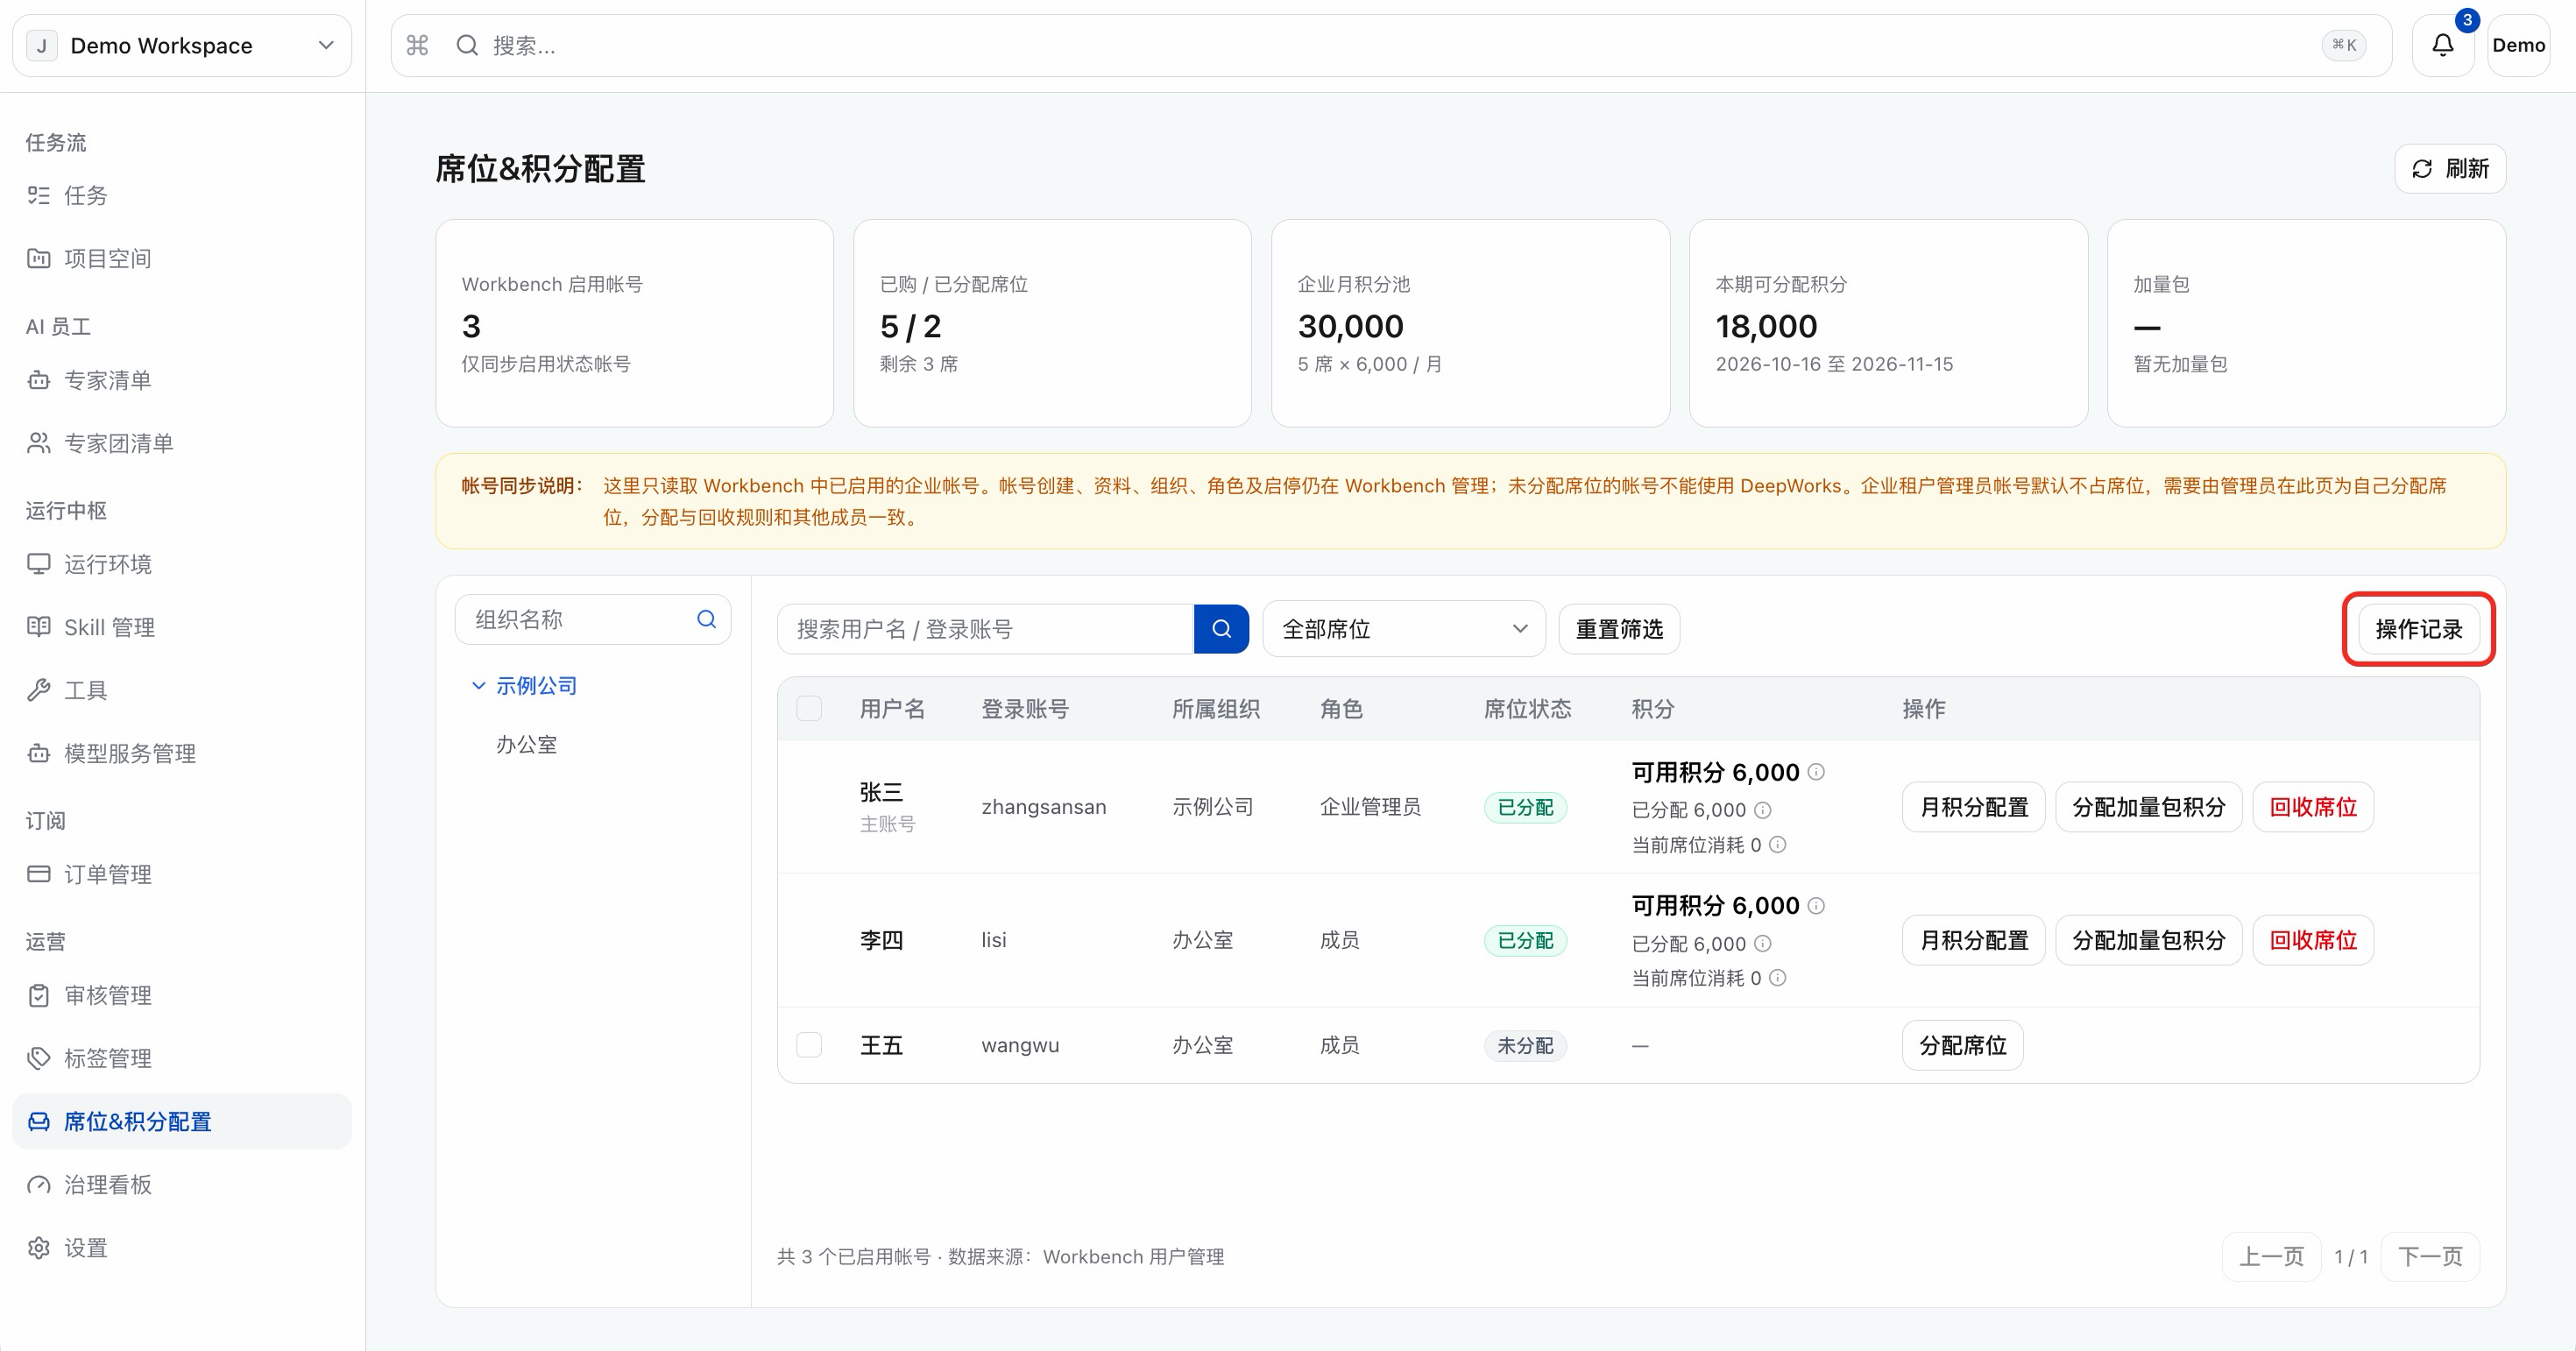
View operation records
a. Click “Operation History”.
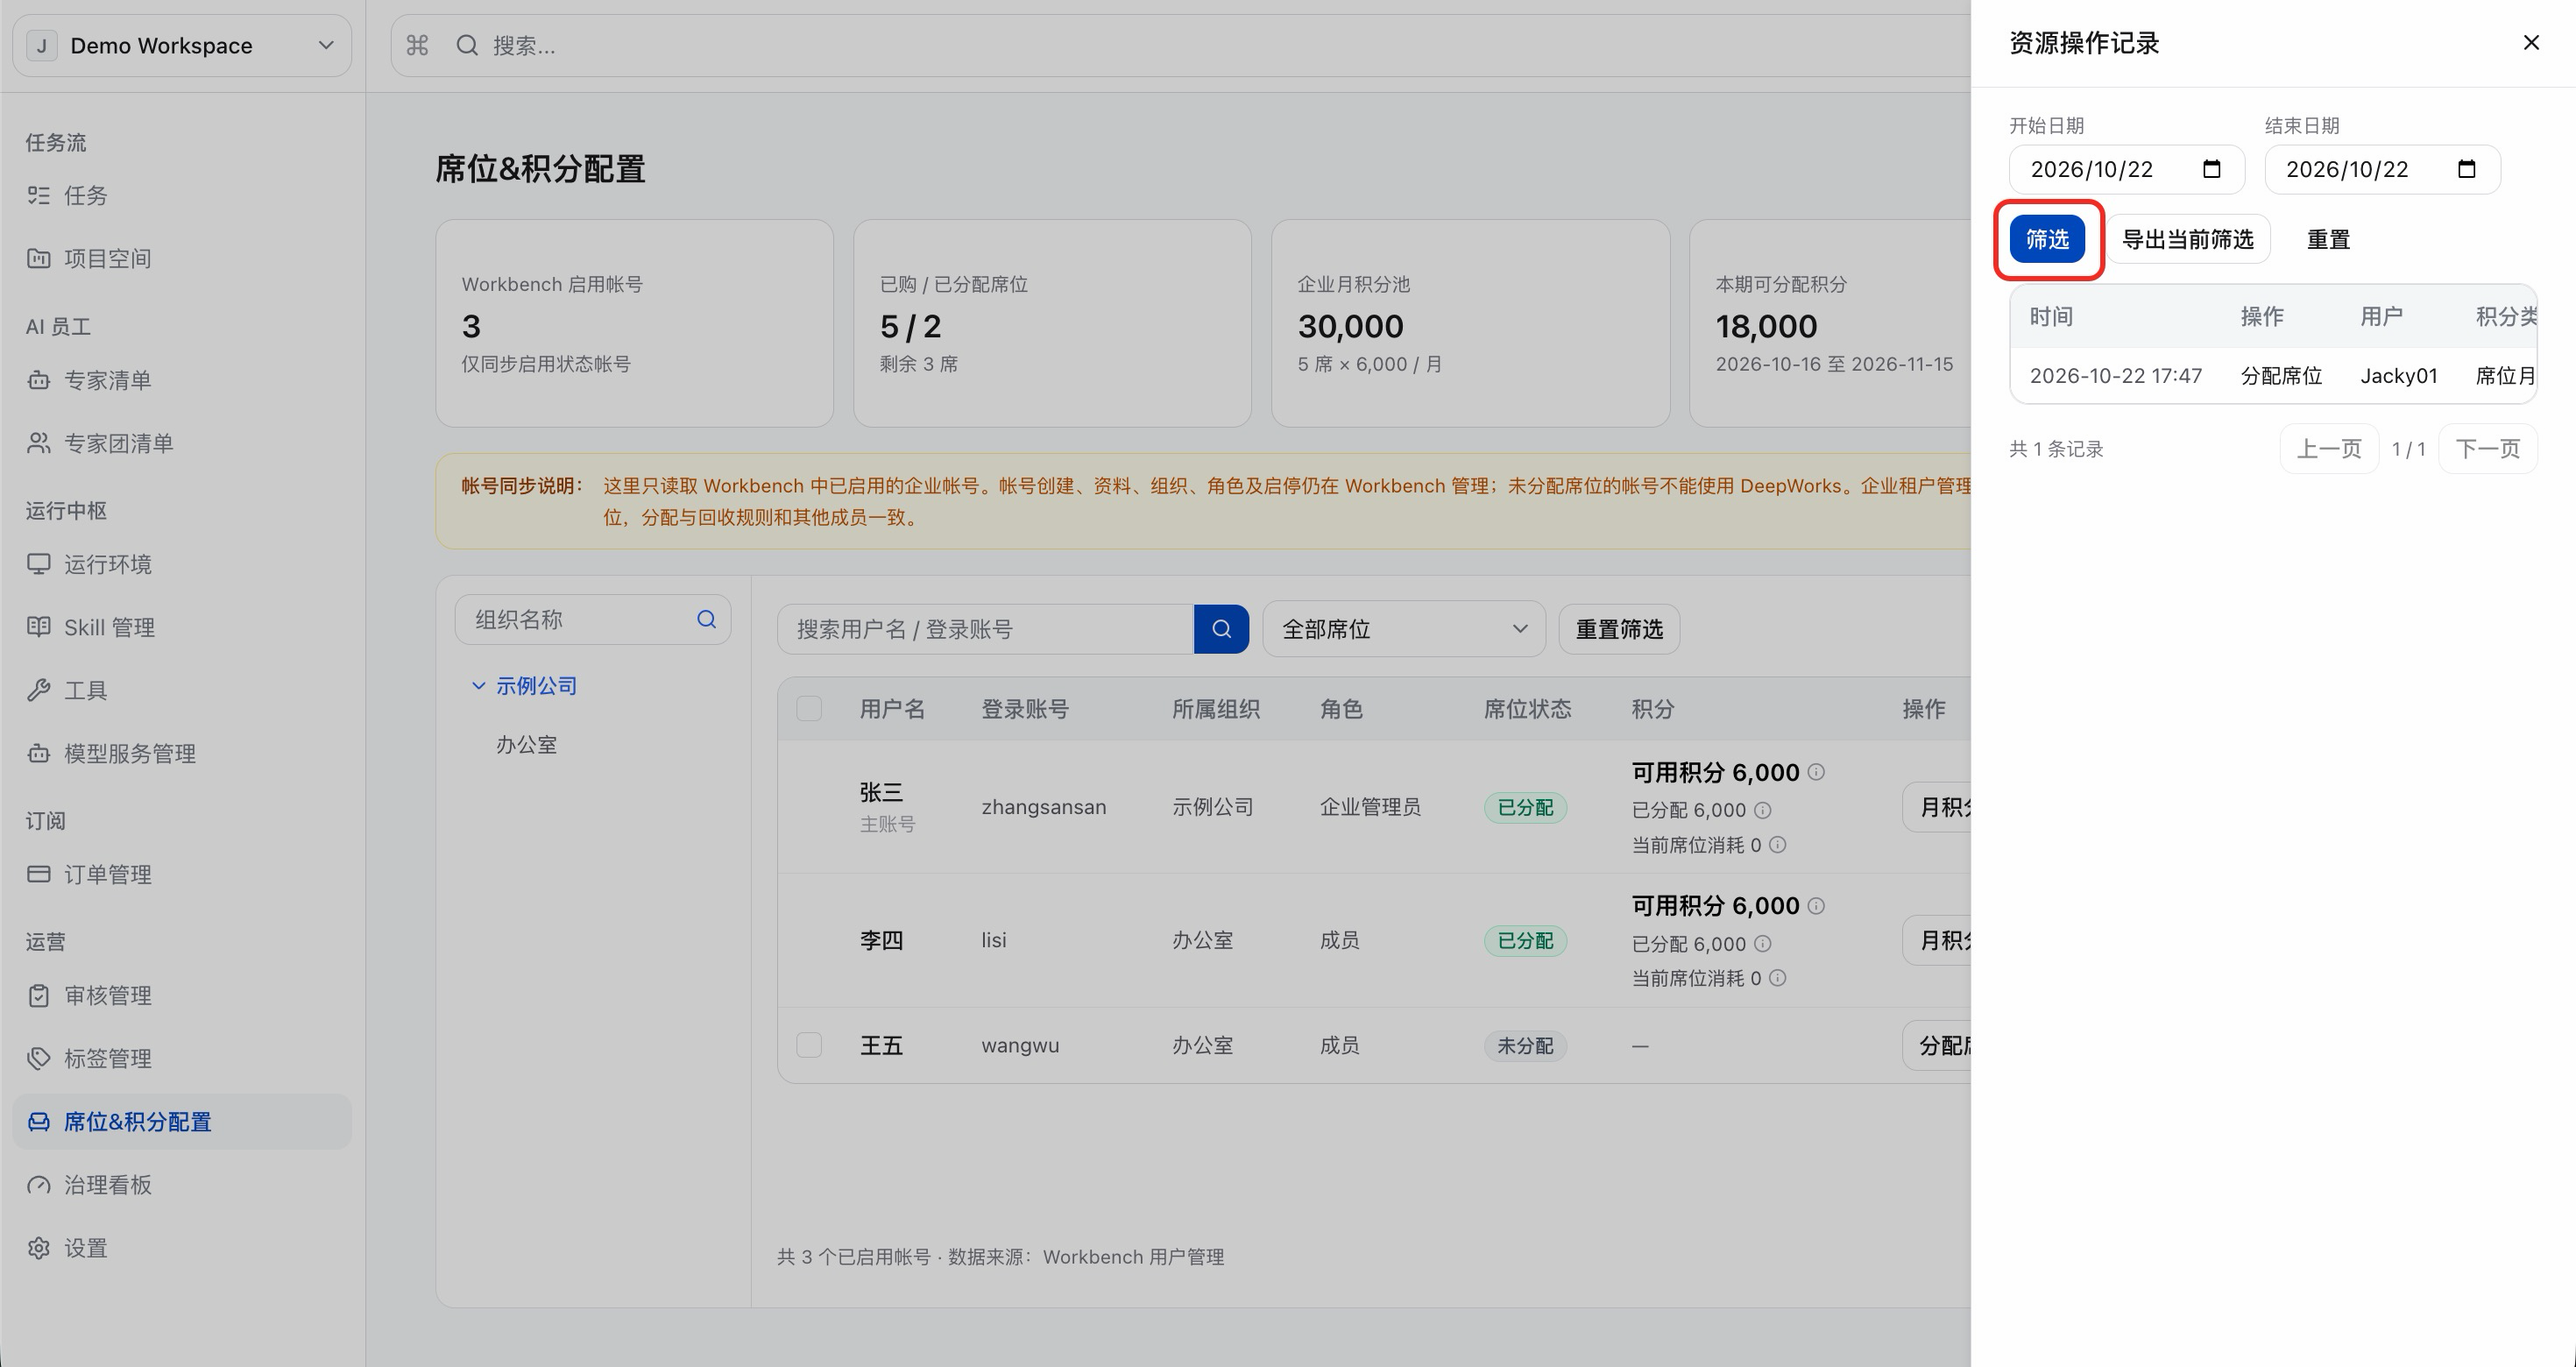
b. Query operation records by time to trace allocation changes.
Operations
Tag Management
Skill Classification
Browse Categories
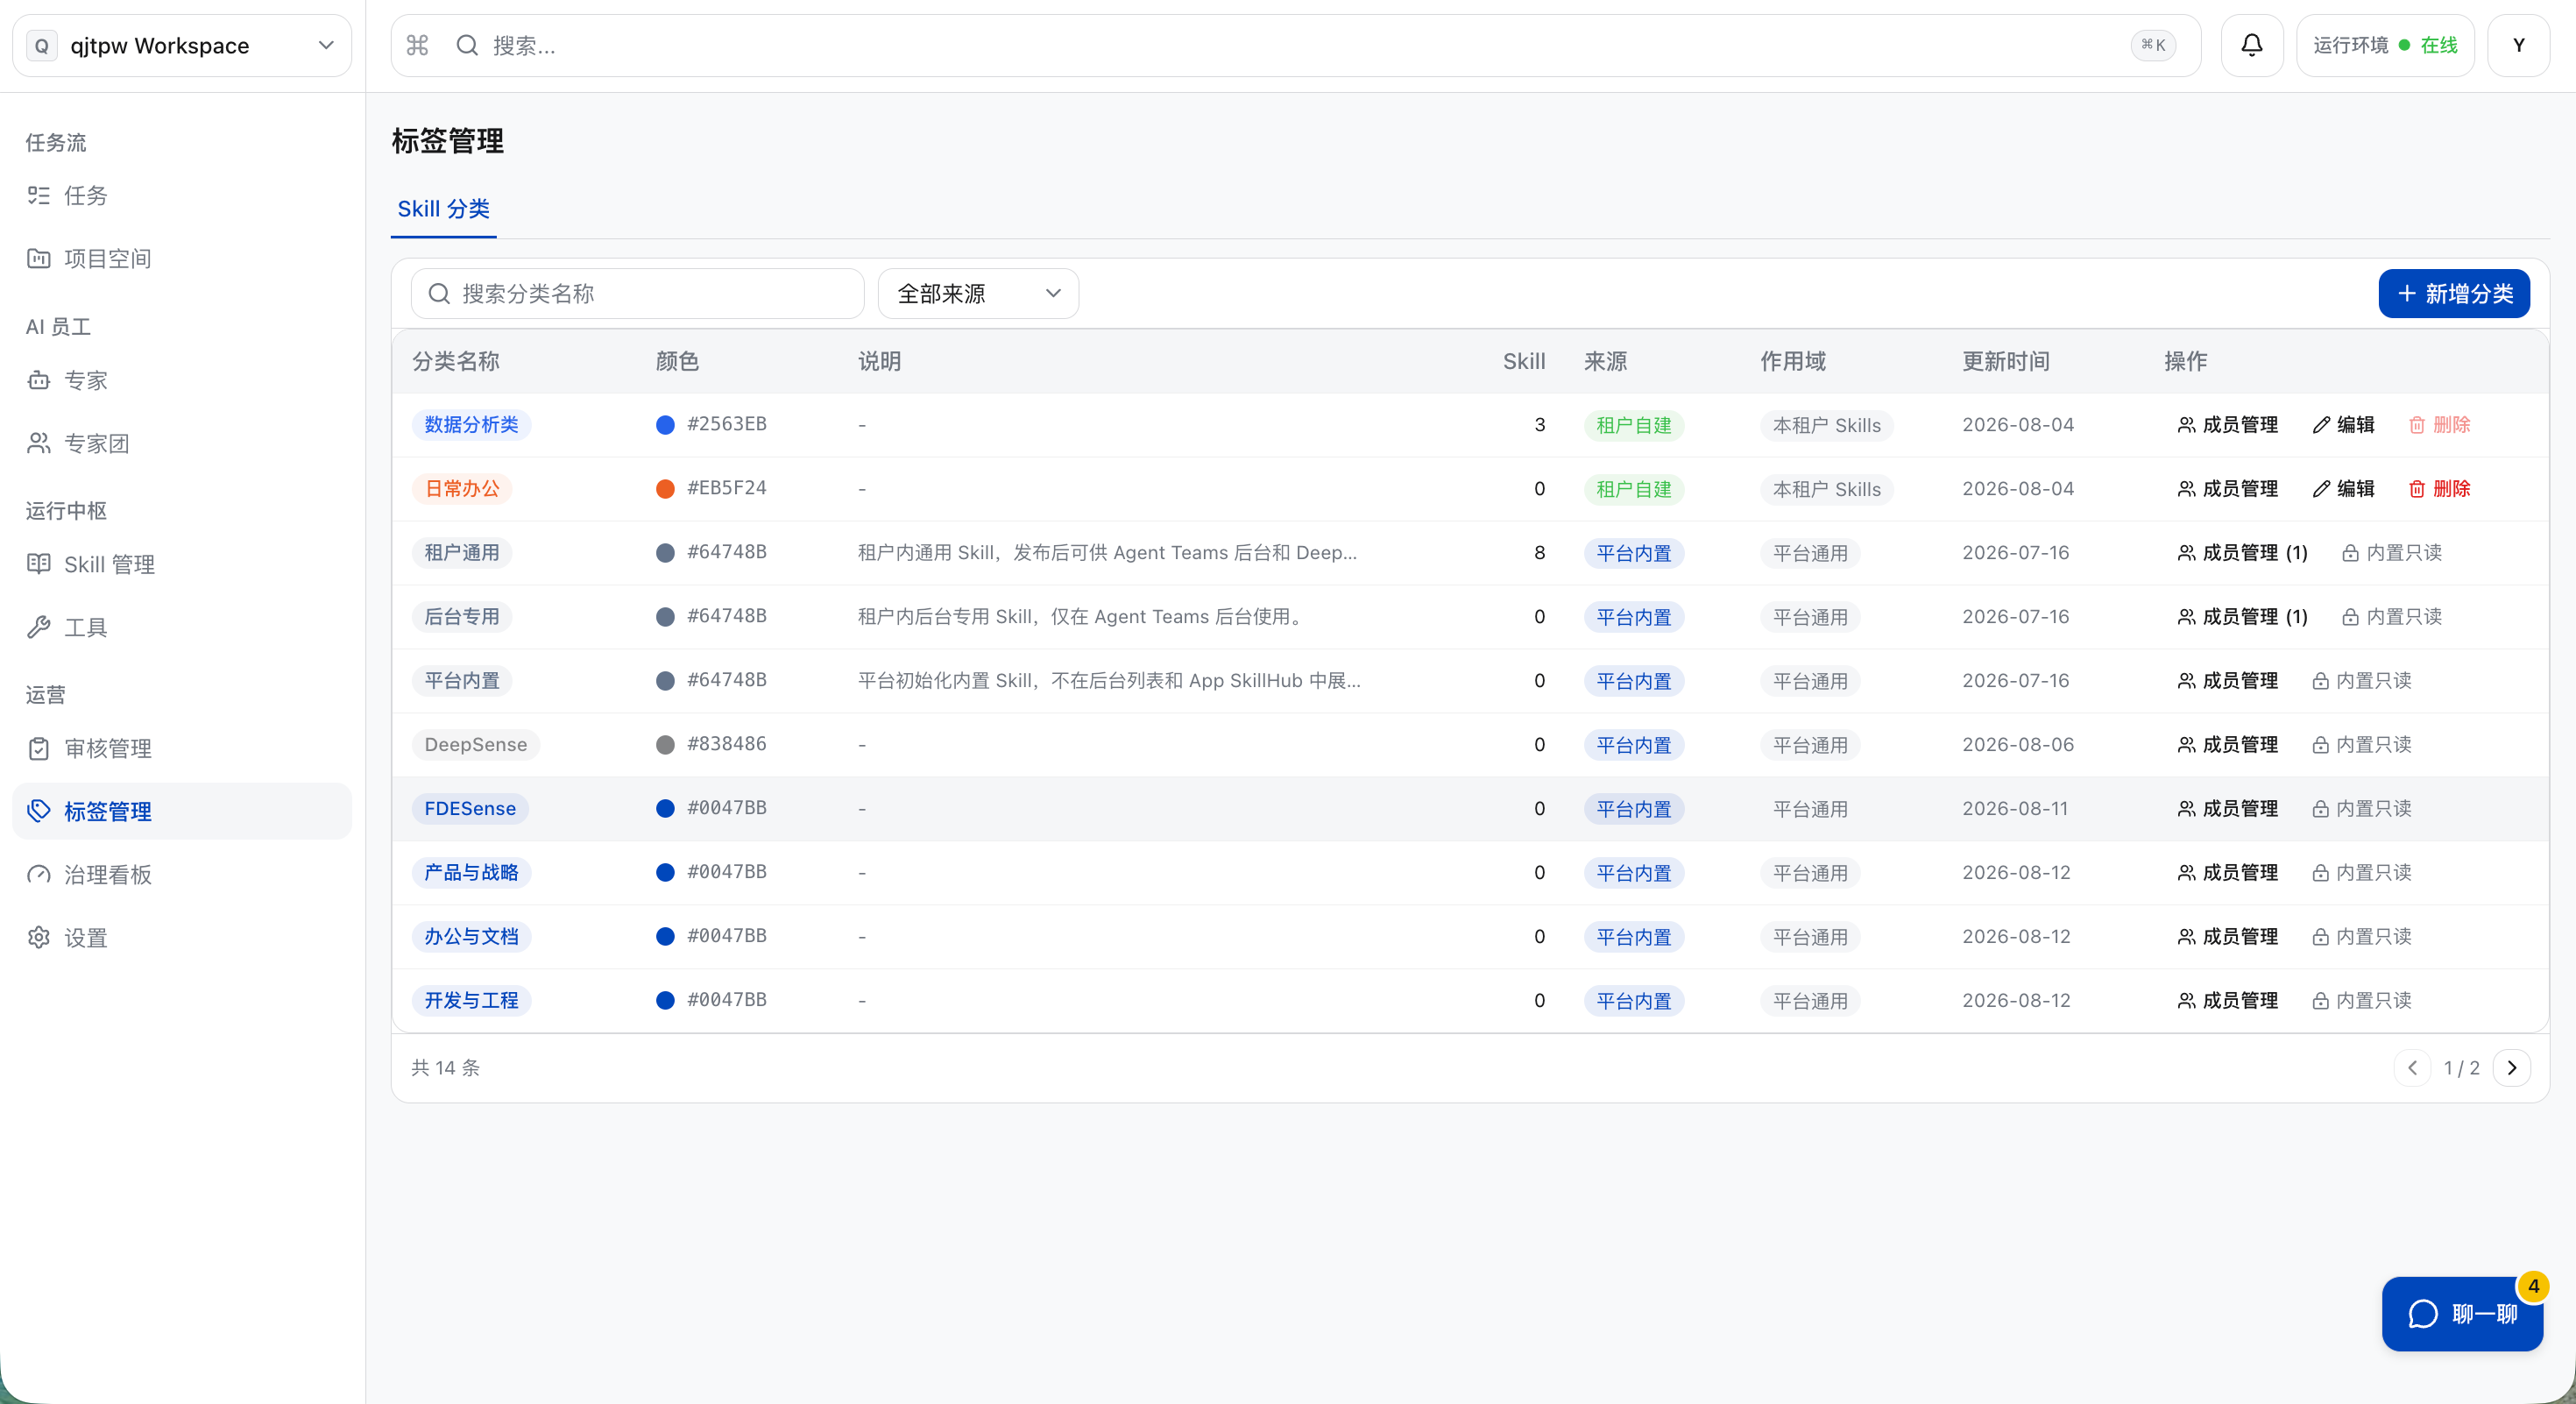
Click “Tag Management” in the left menu, and you will see the “Skill Category” list. There are two types of Skill Categories: one is the platform-built-in category, which refers to the built-in category provided and uniformly maintained by the platform; the other is the tenant self-built category, which refers to the category set by the tenant according to its own business.
Add Category
a. Click “Add Category”.
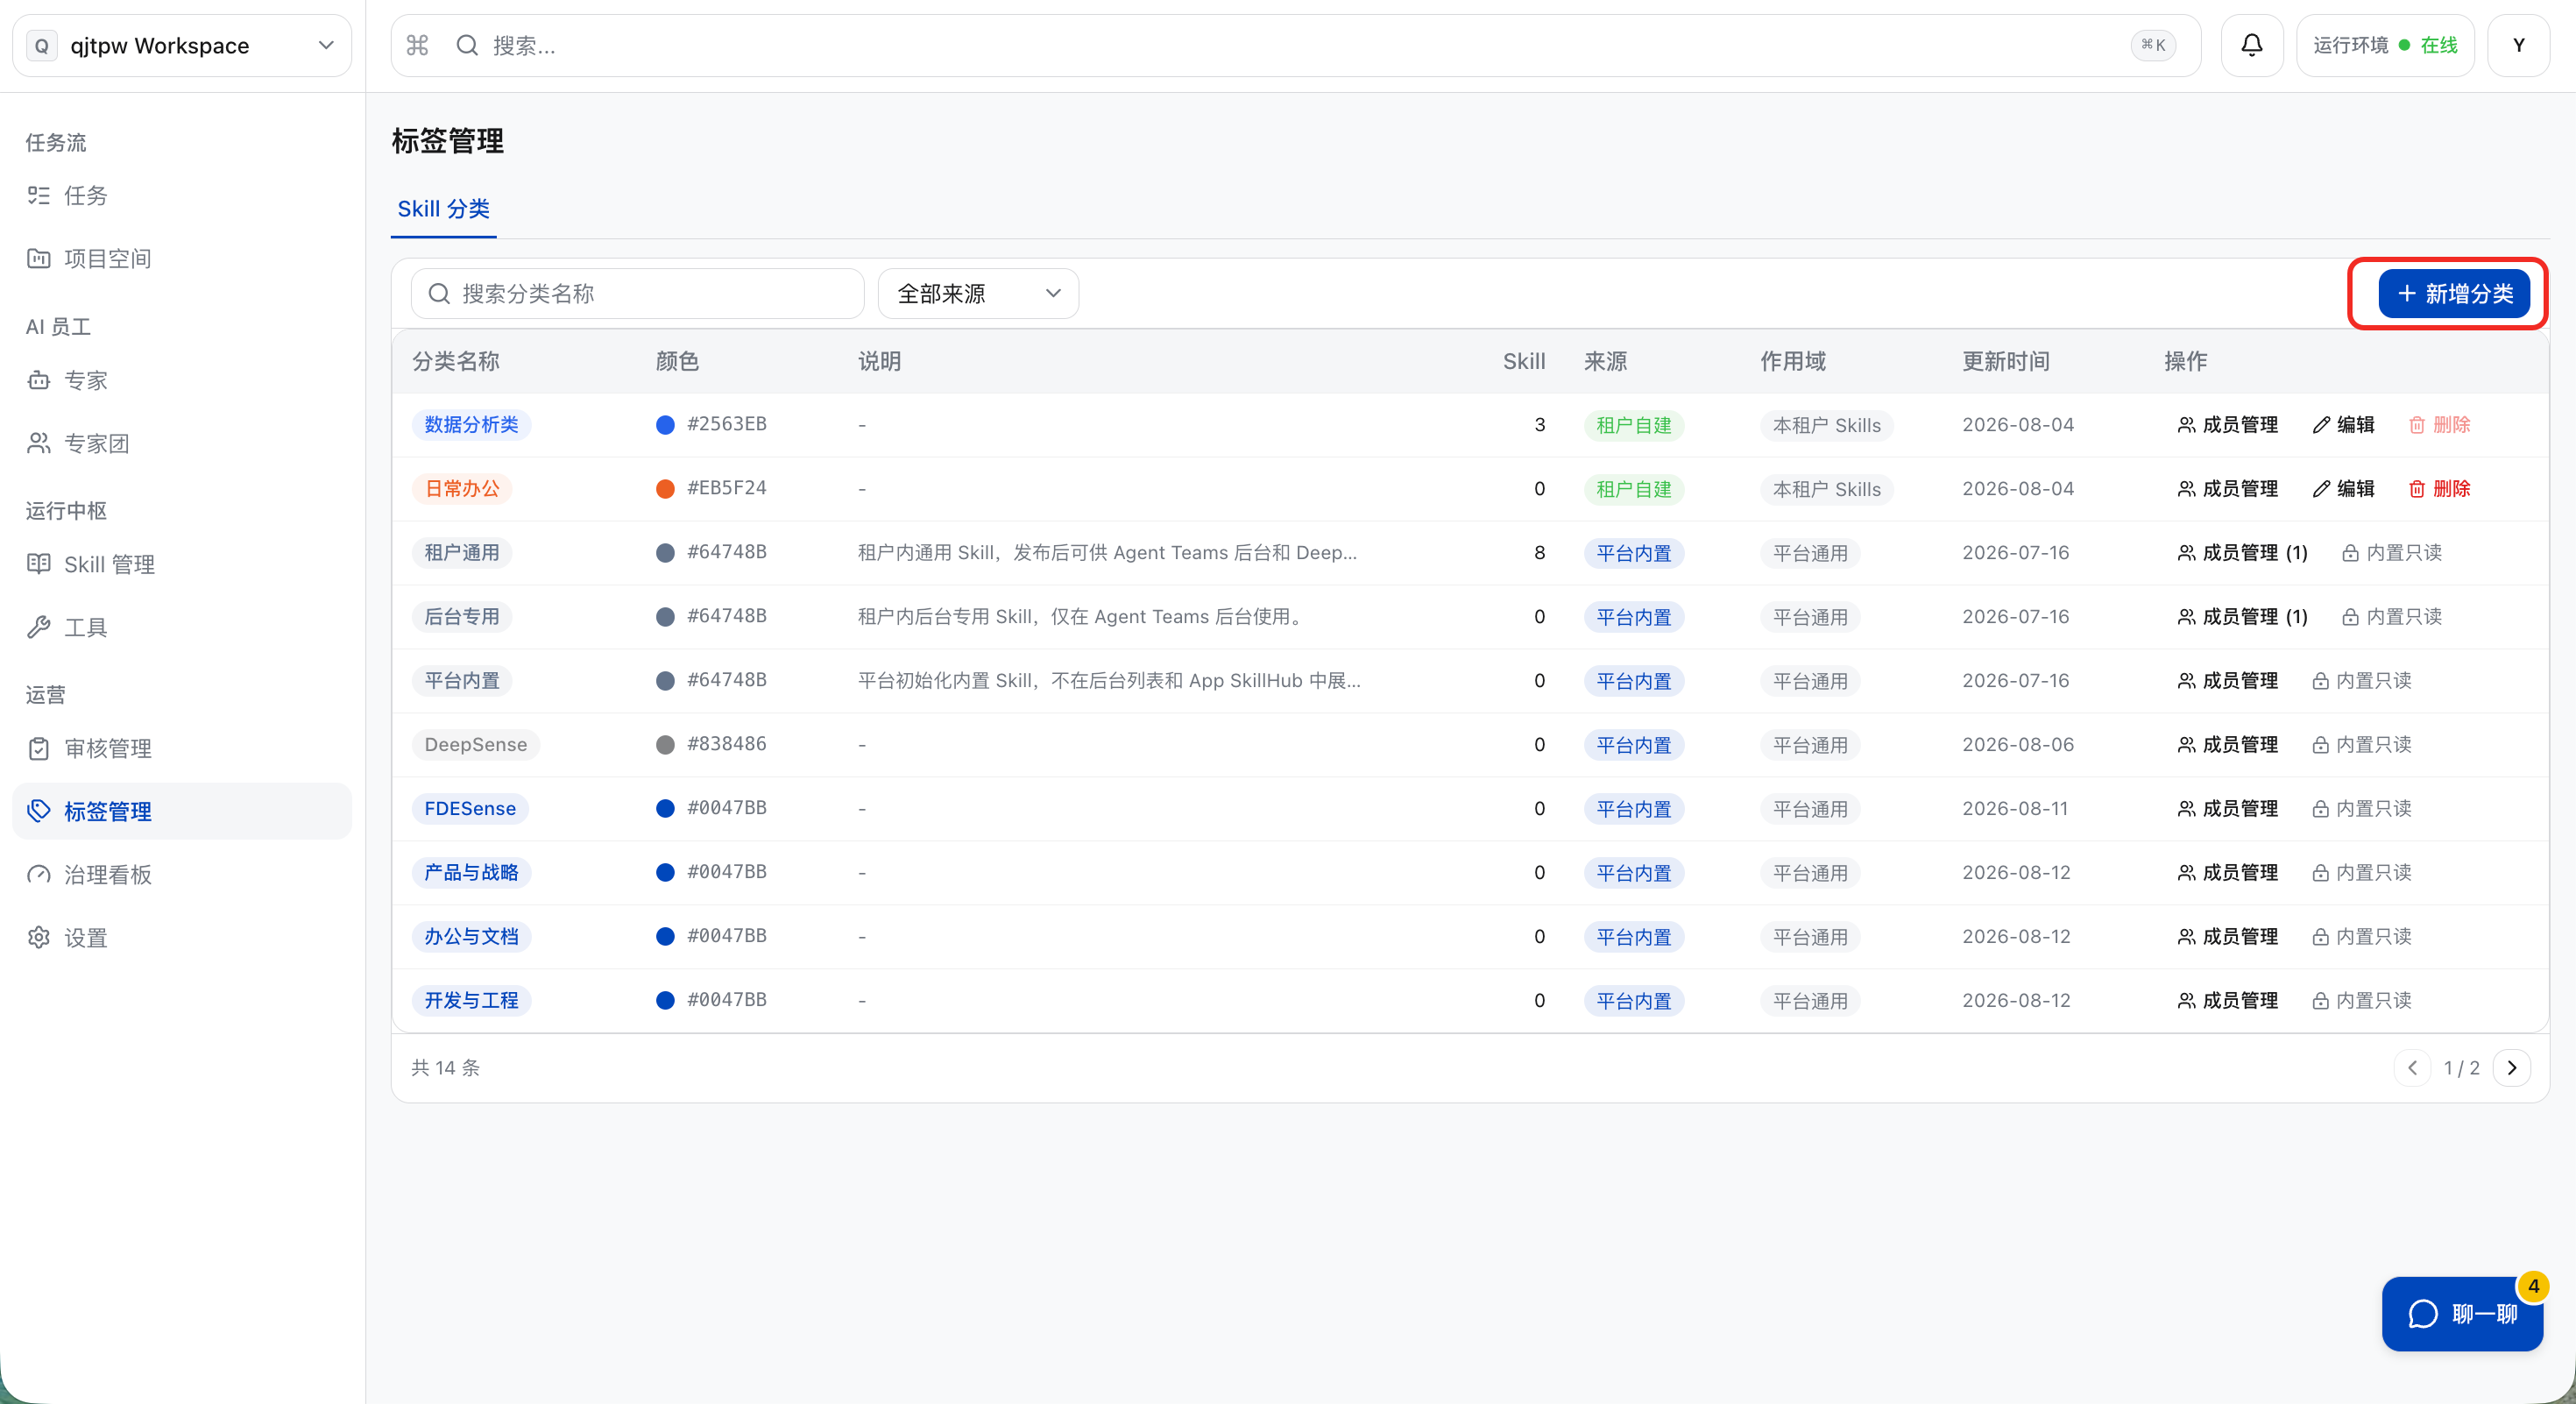
b. After filling in the information, click “Save”.
-
Category Name: The name that describes a group.
-
Color: The color used to display this tag on the management side.
-
Description: Describe the detailed information of this category.
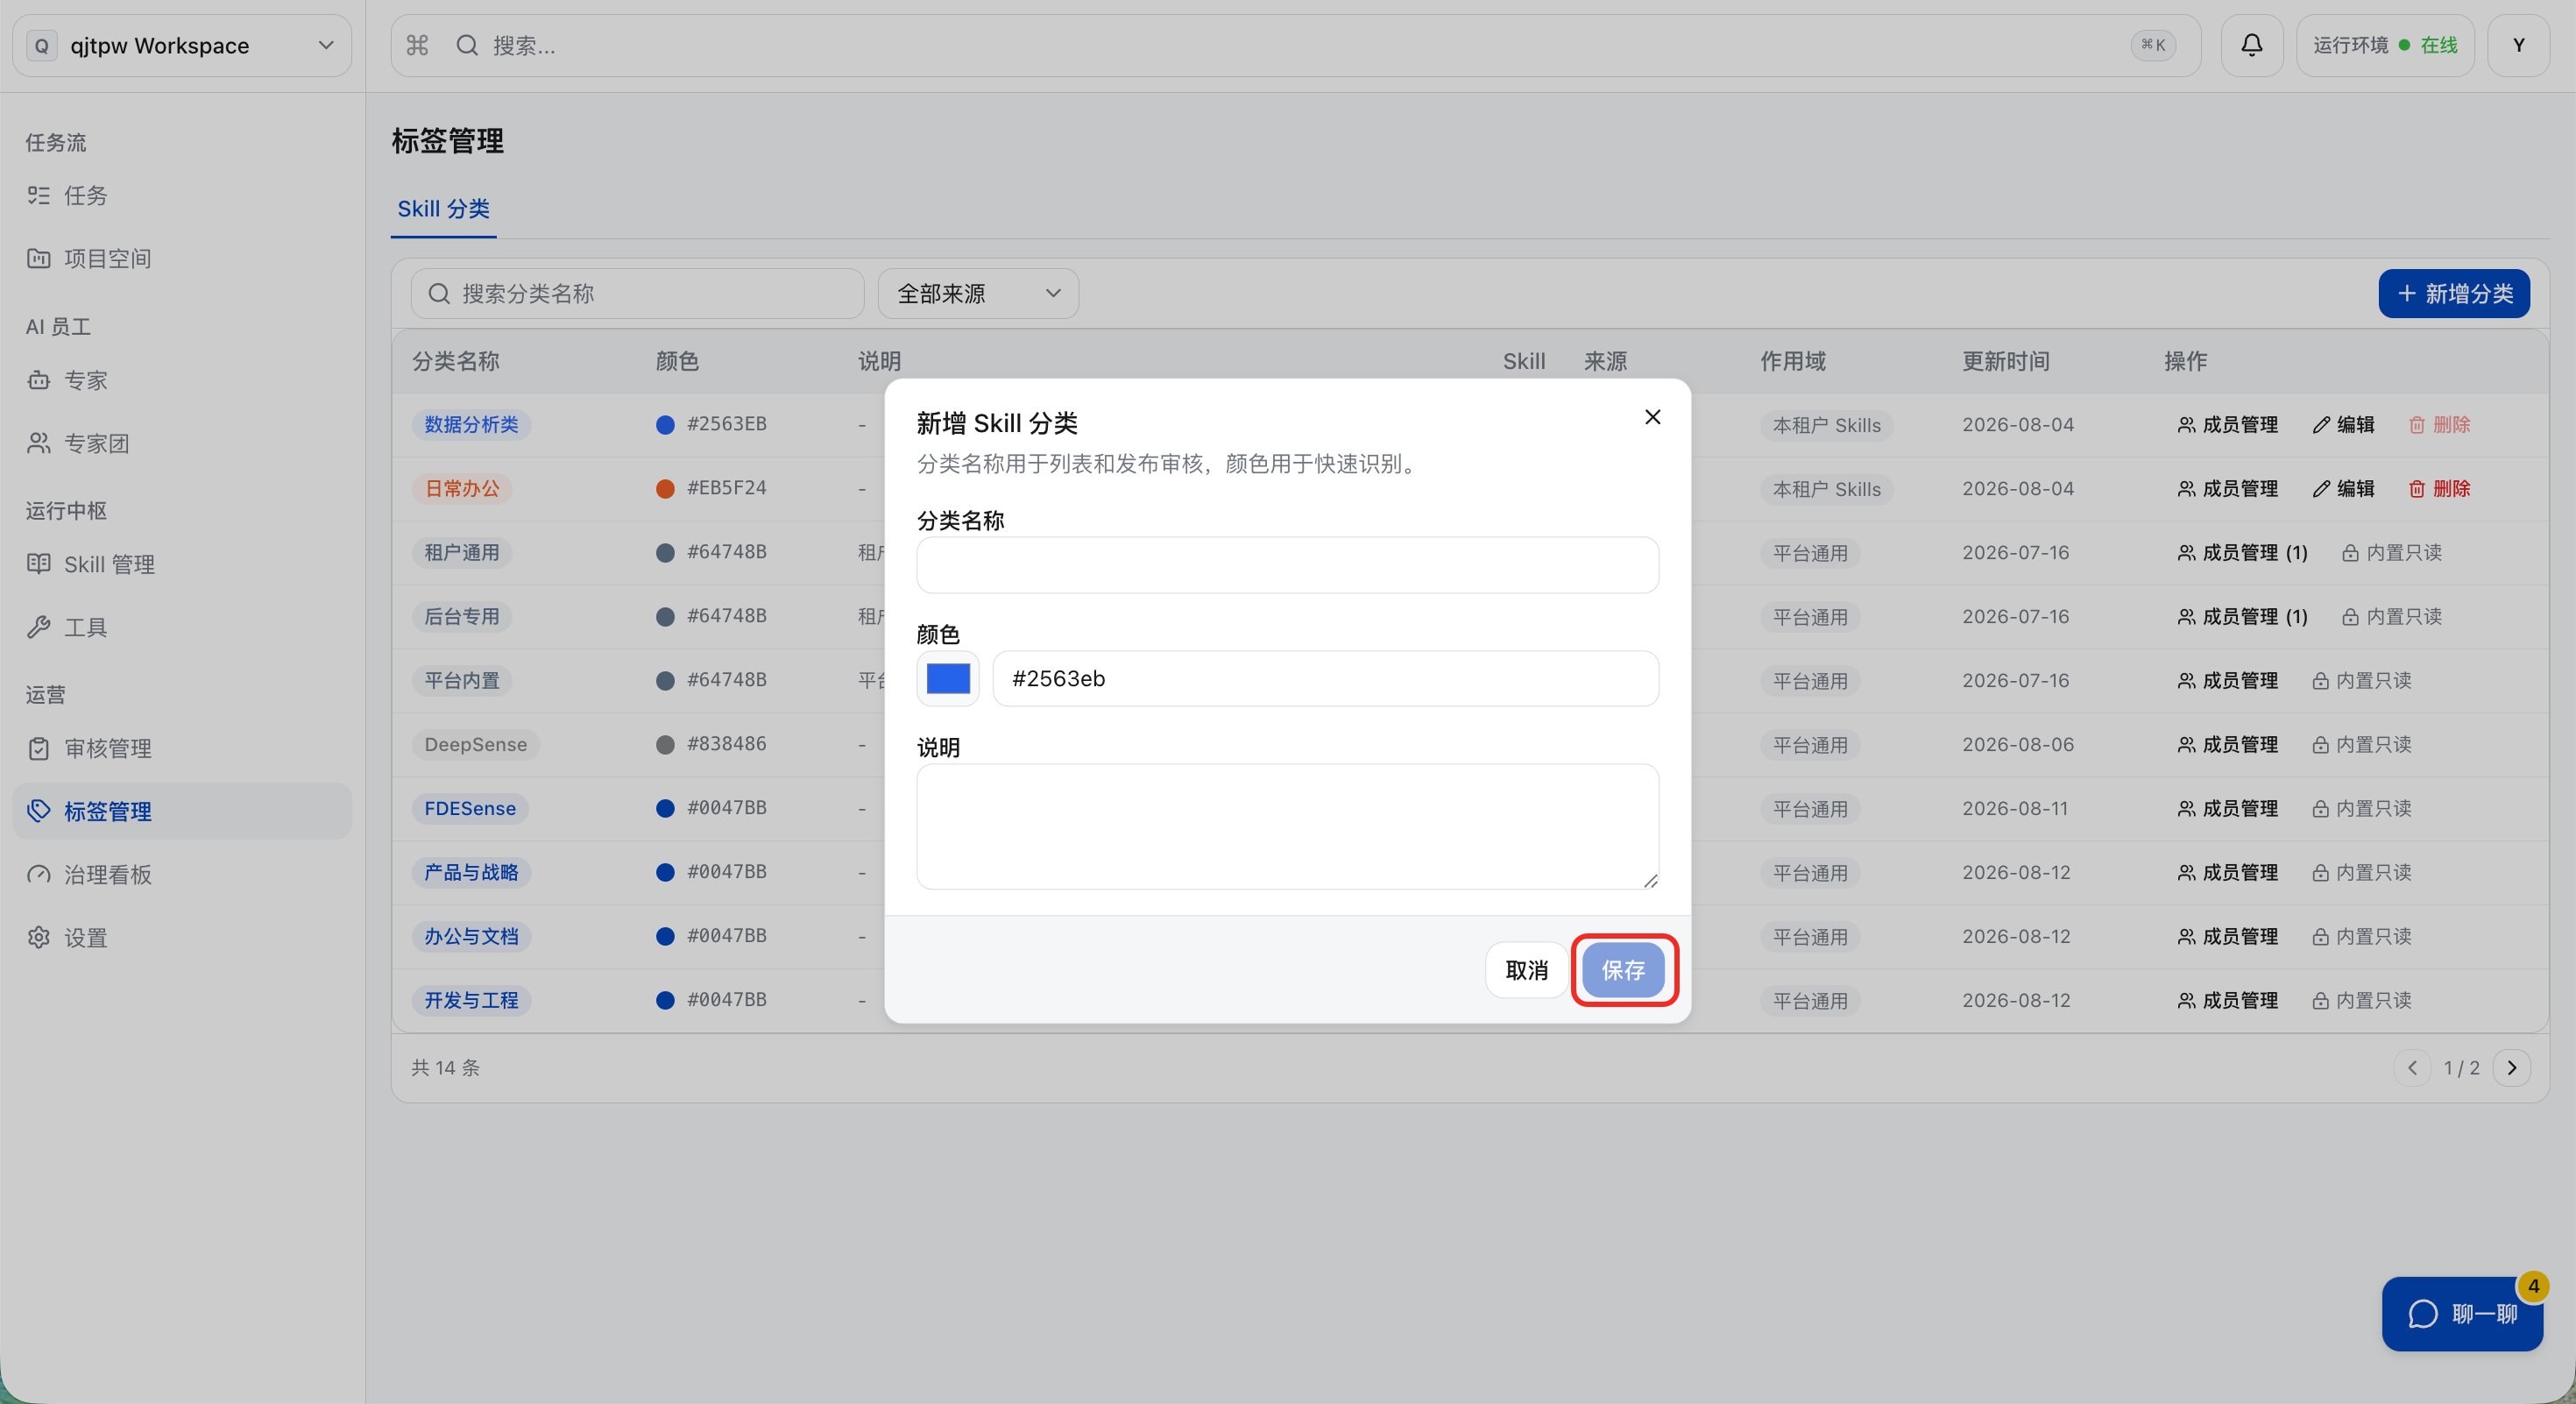
Edit Categories
a. Click “Edit”.
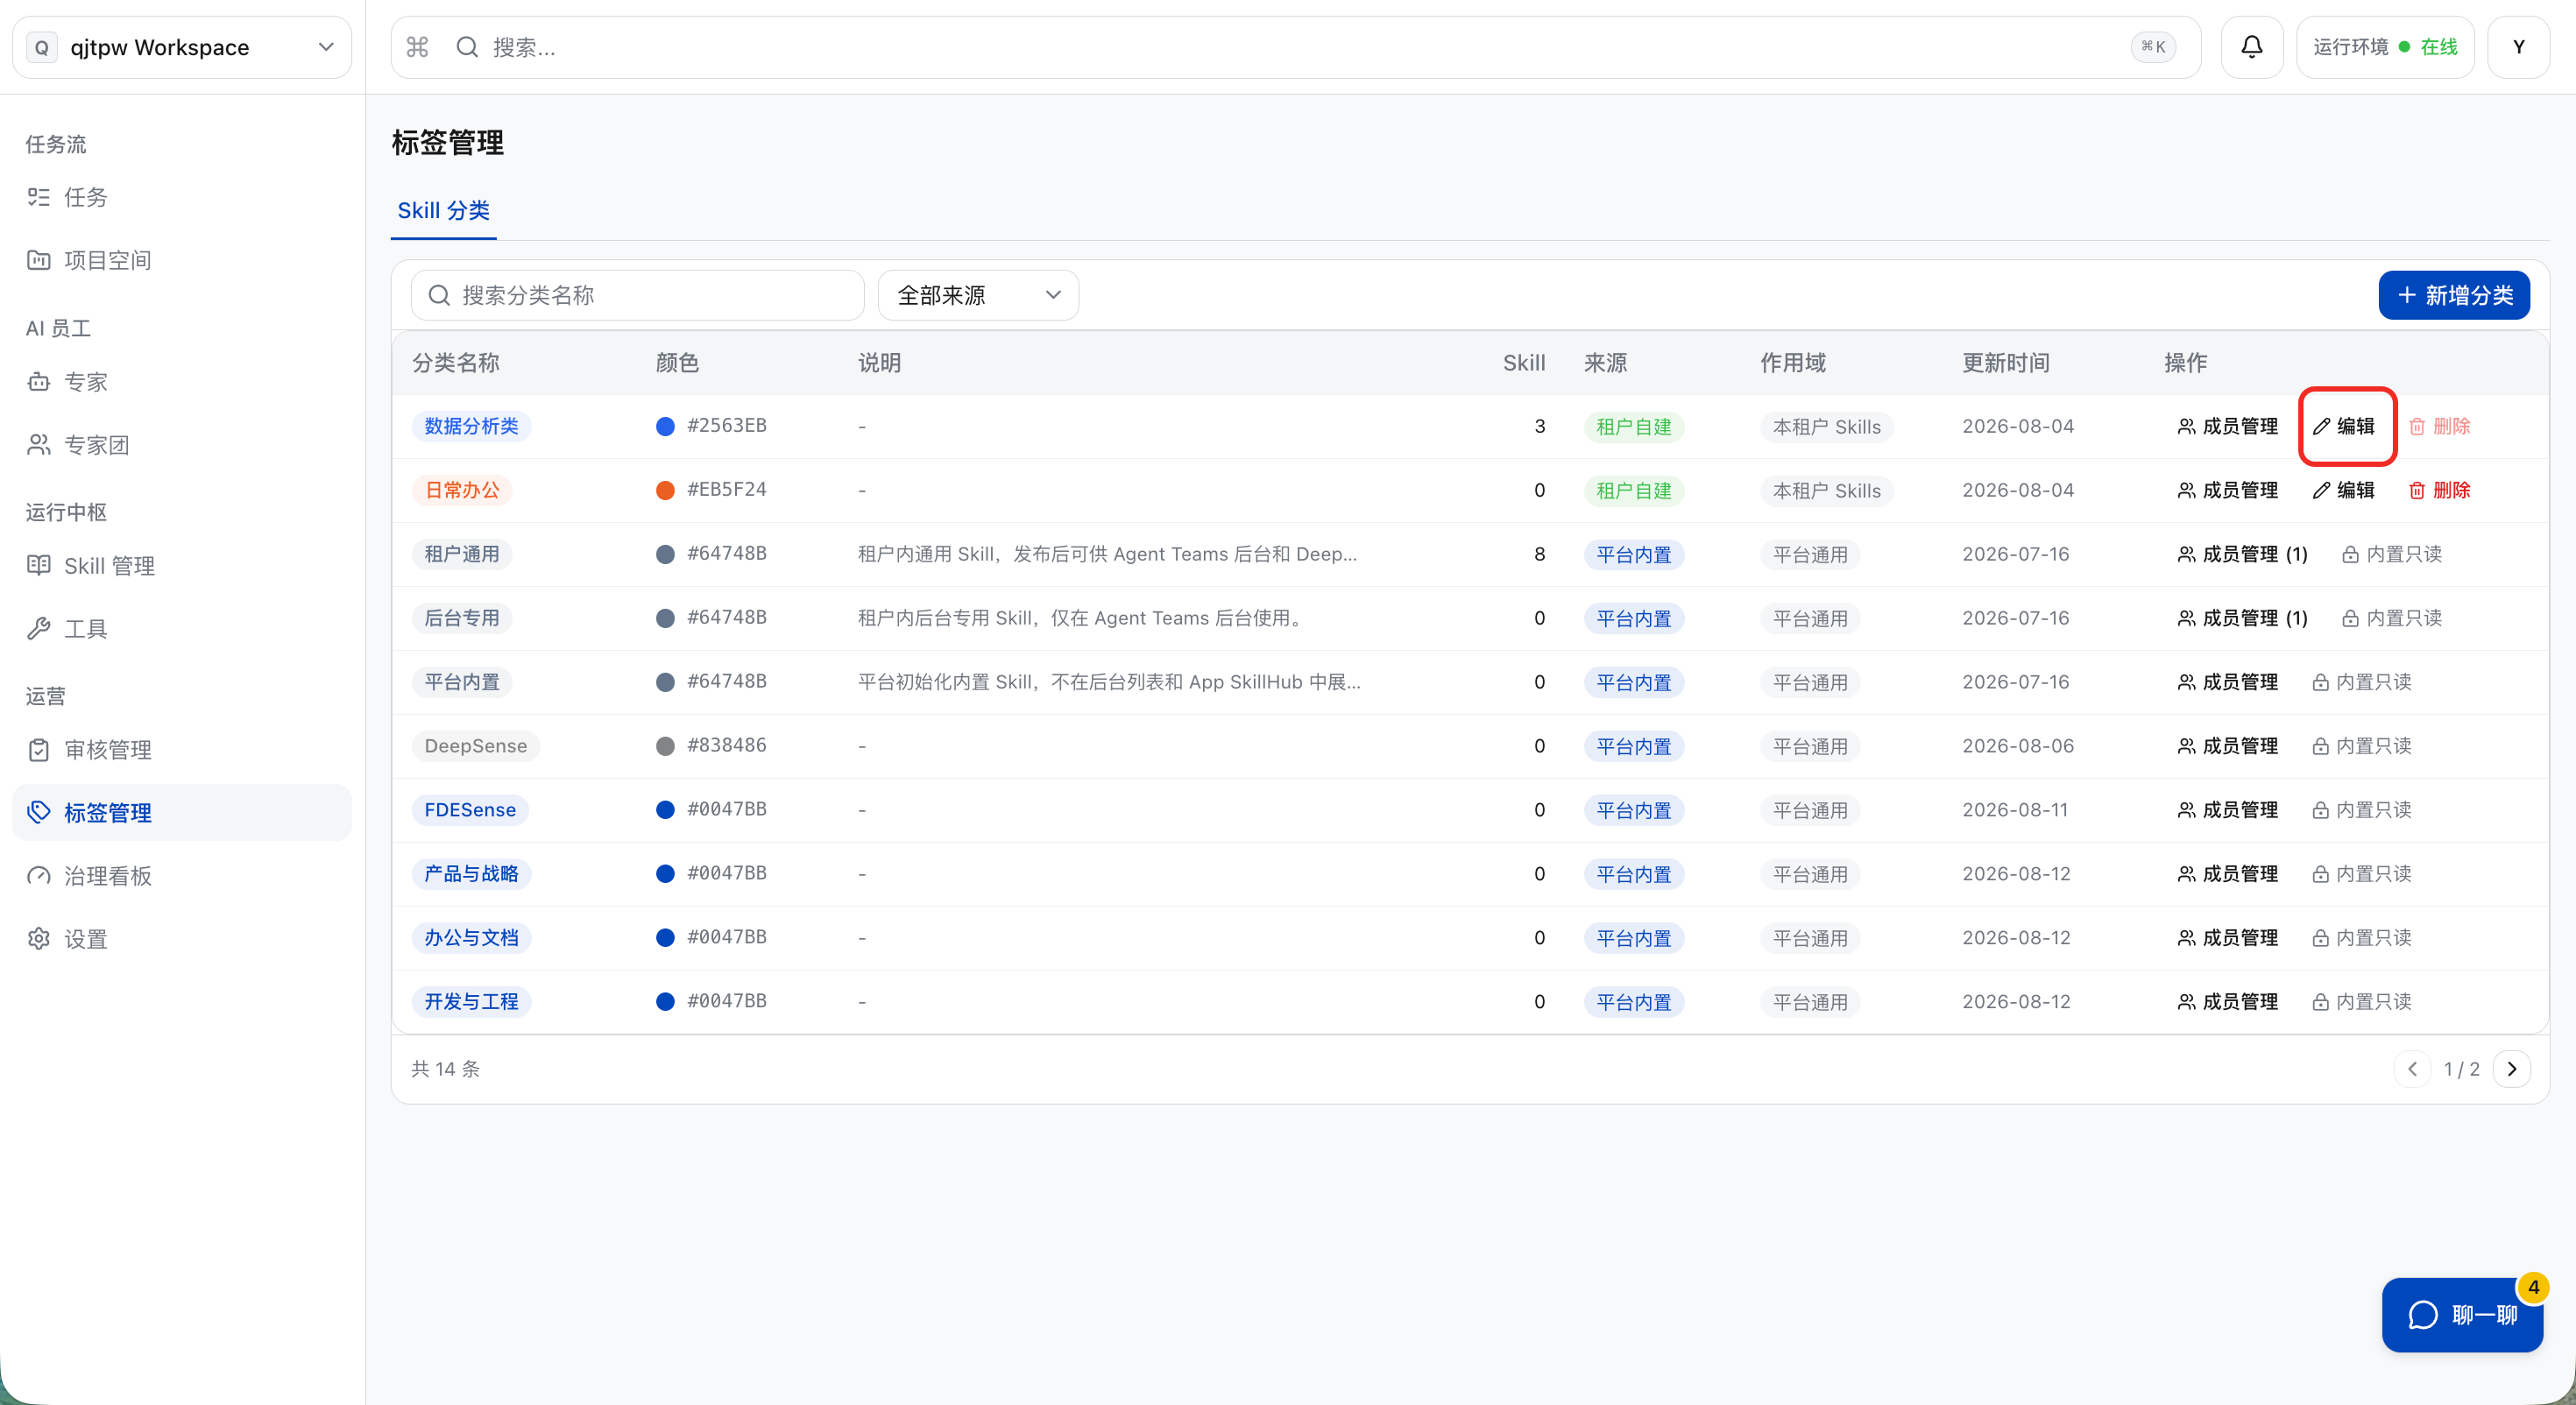
b. After updating the information, click “Save”.
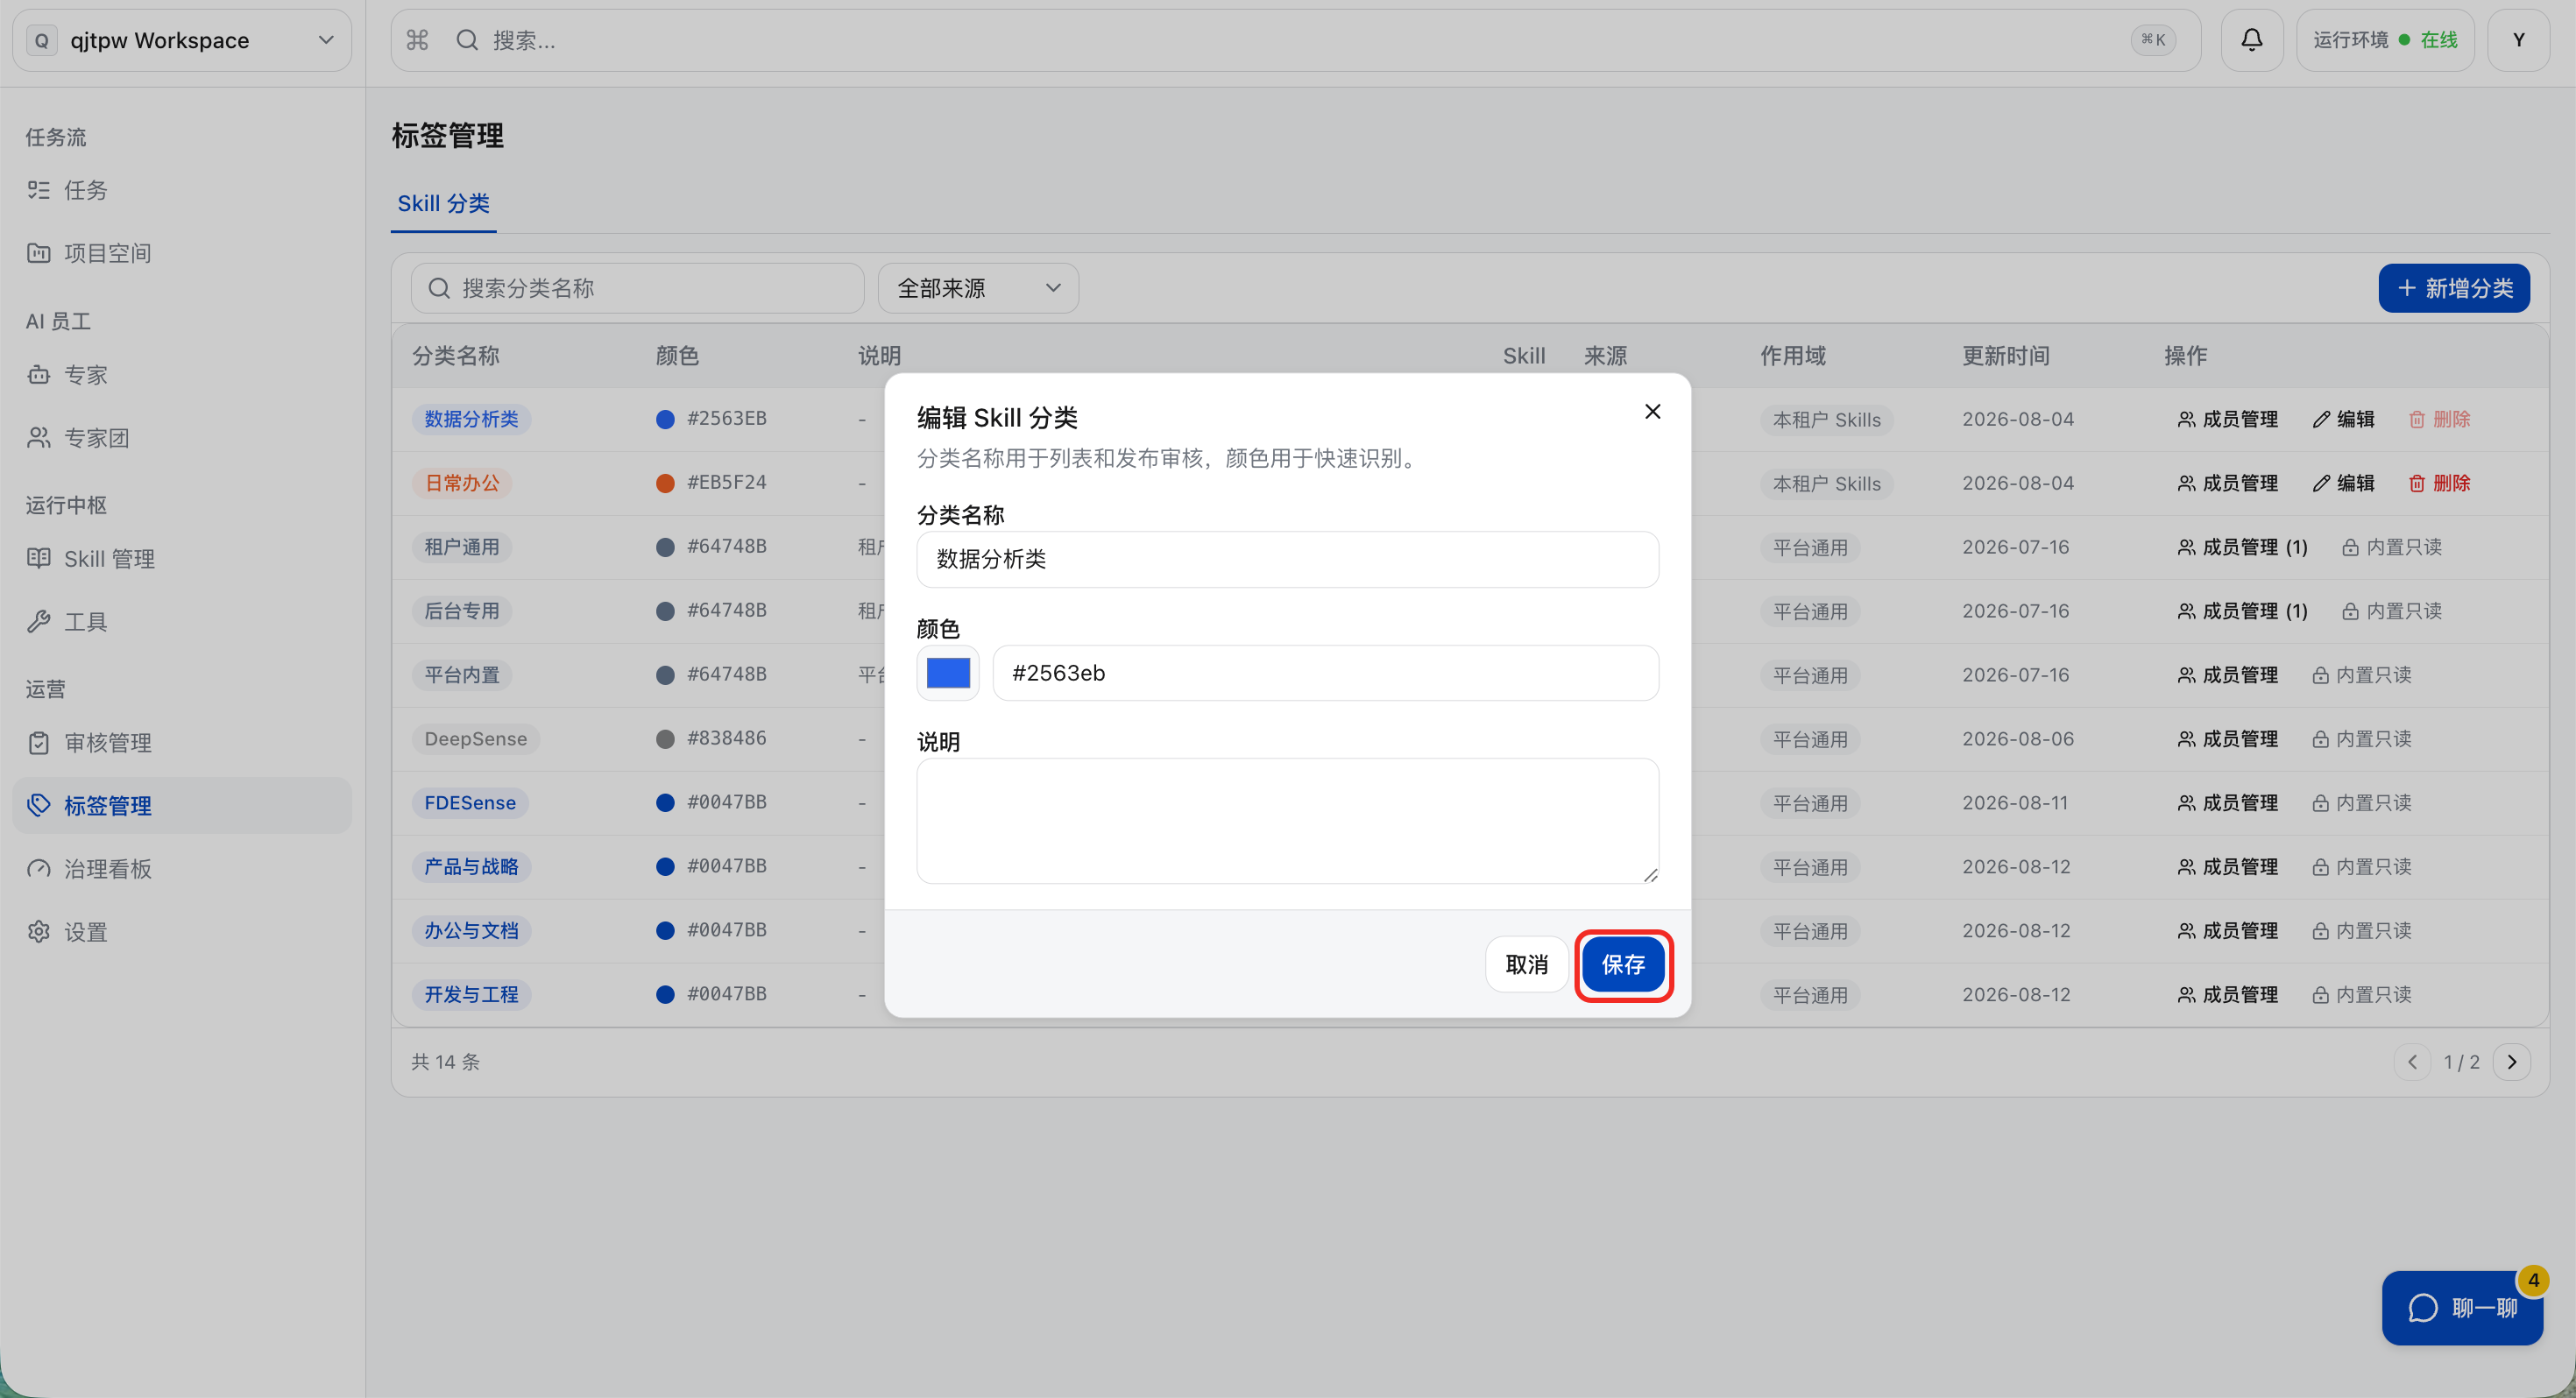
Delete Category
a. Click “Delete”. Note: Categories that have been bound to Skills cannot be deleted.
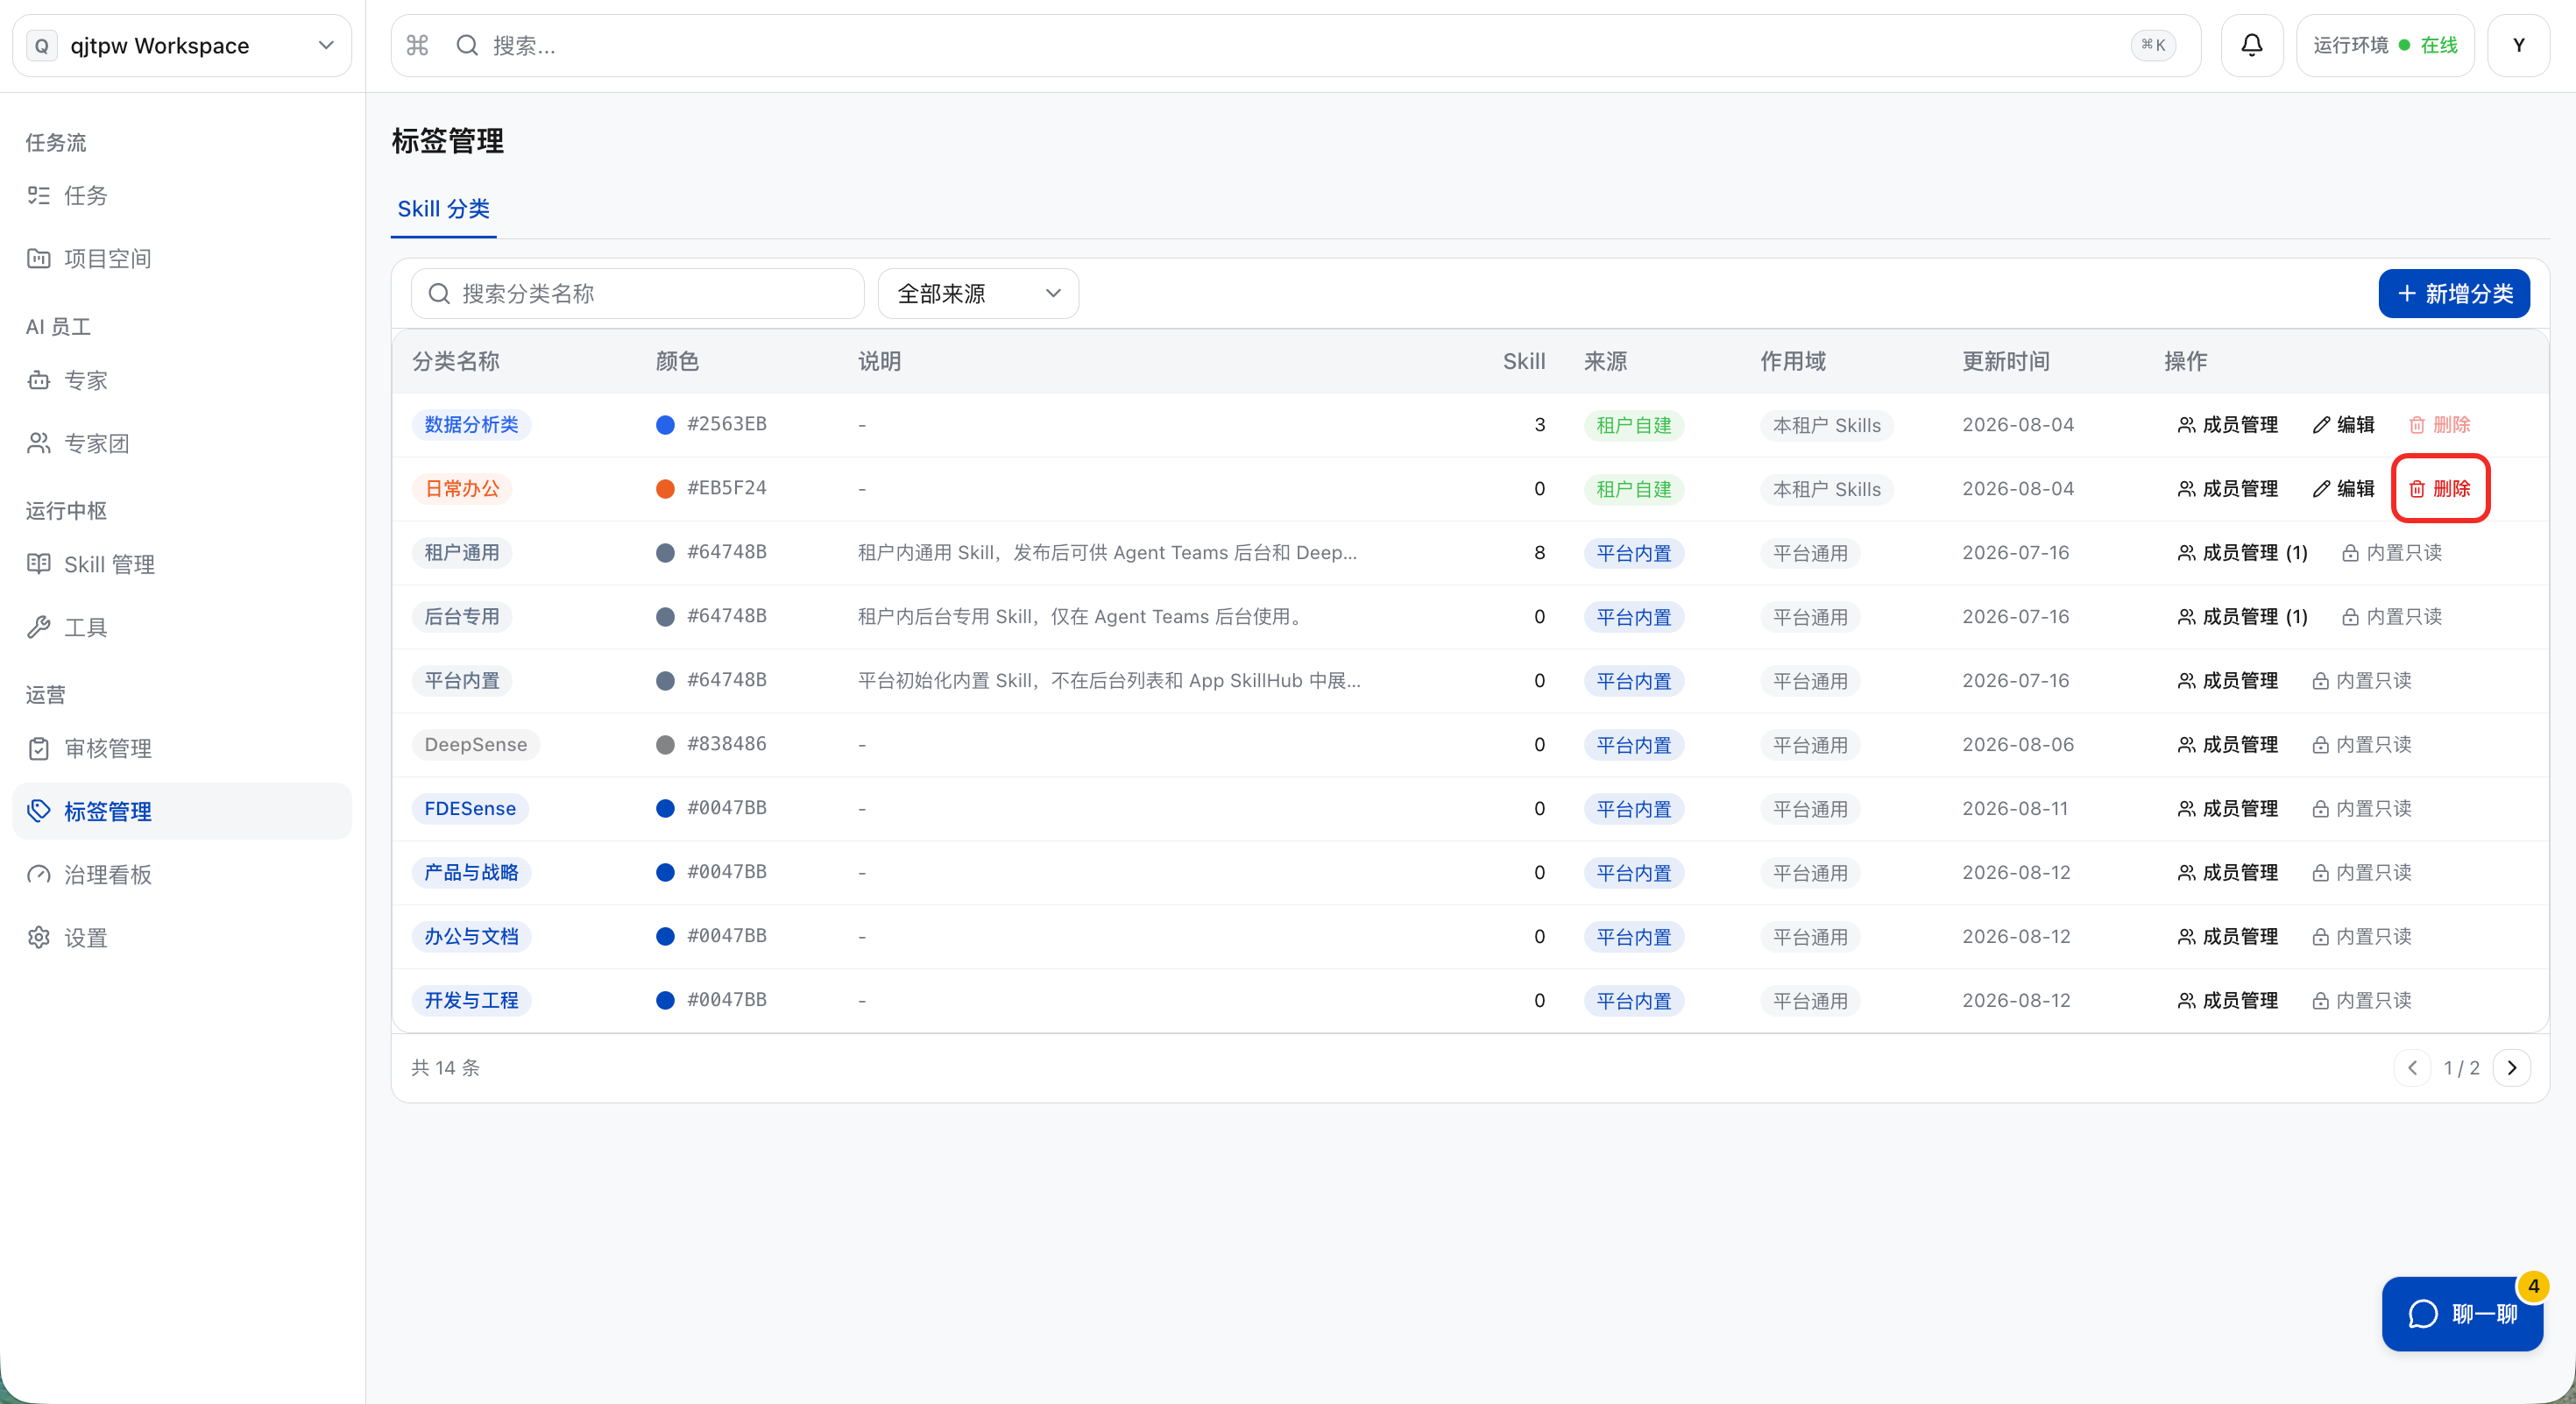
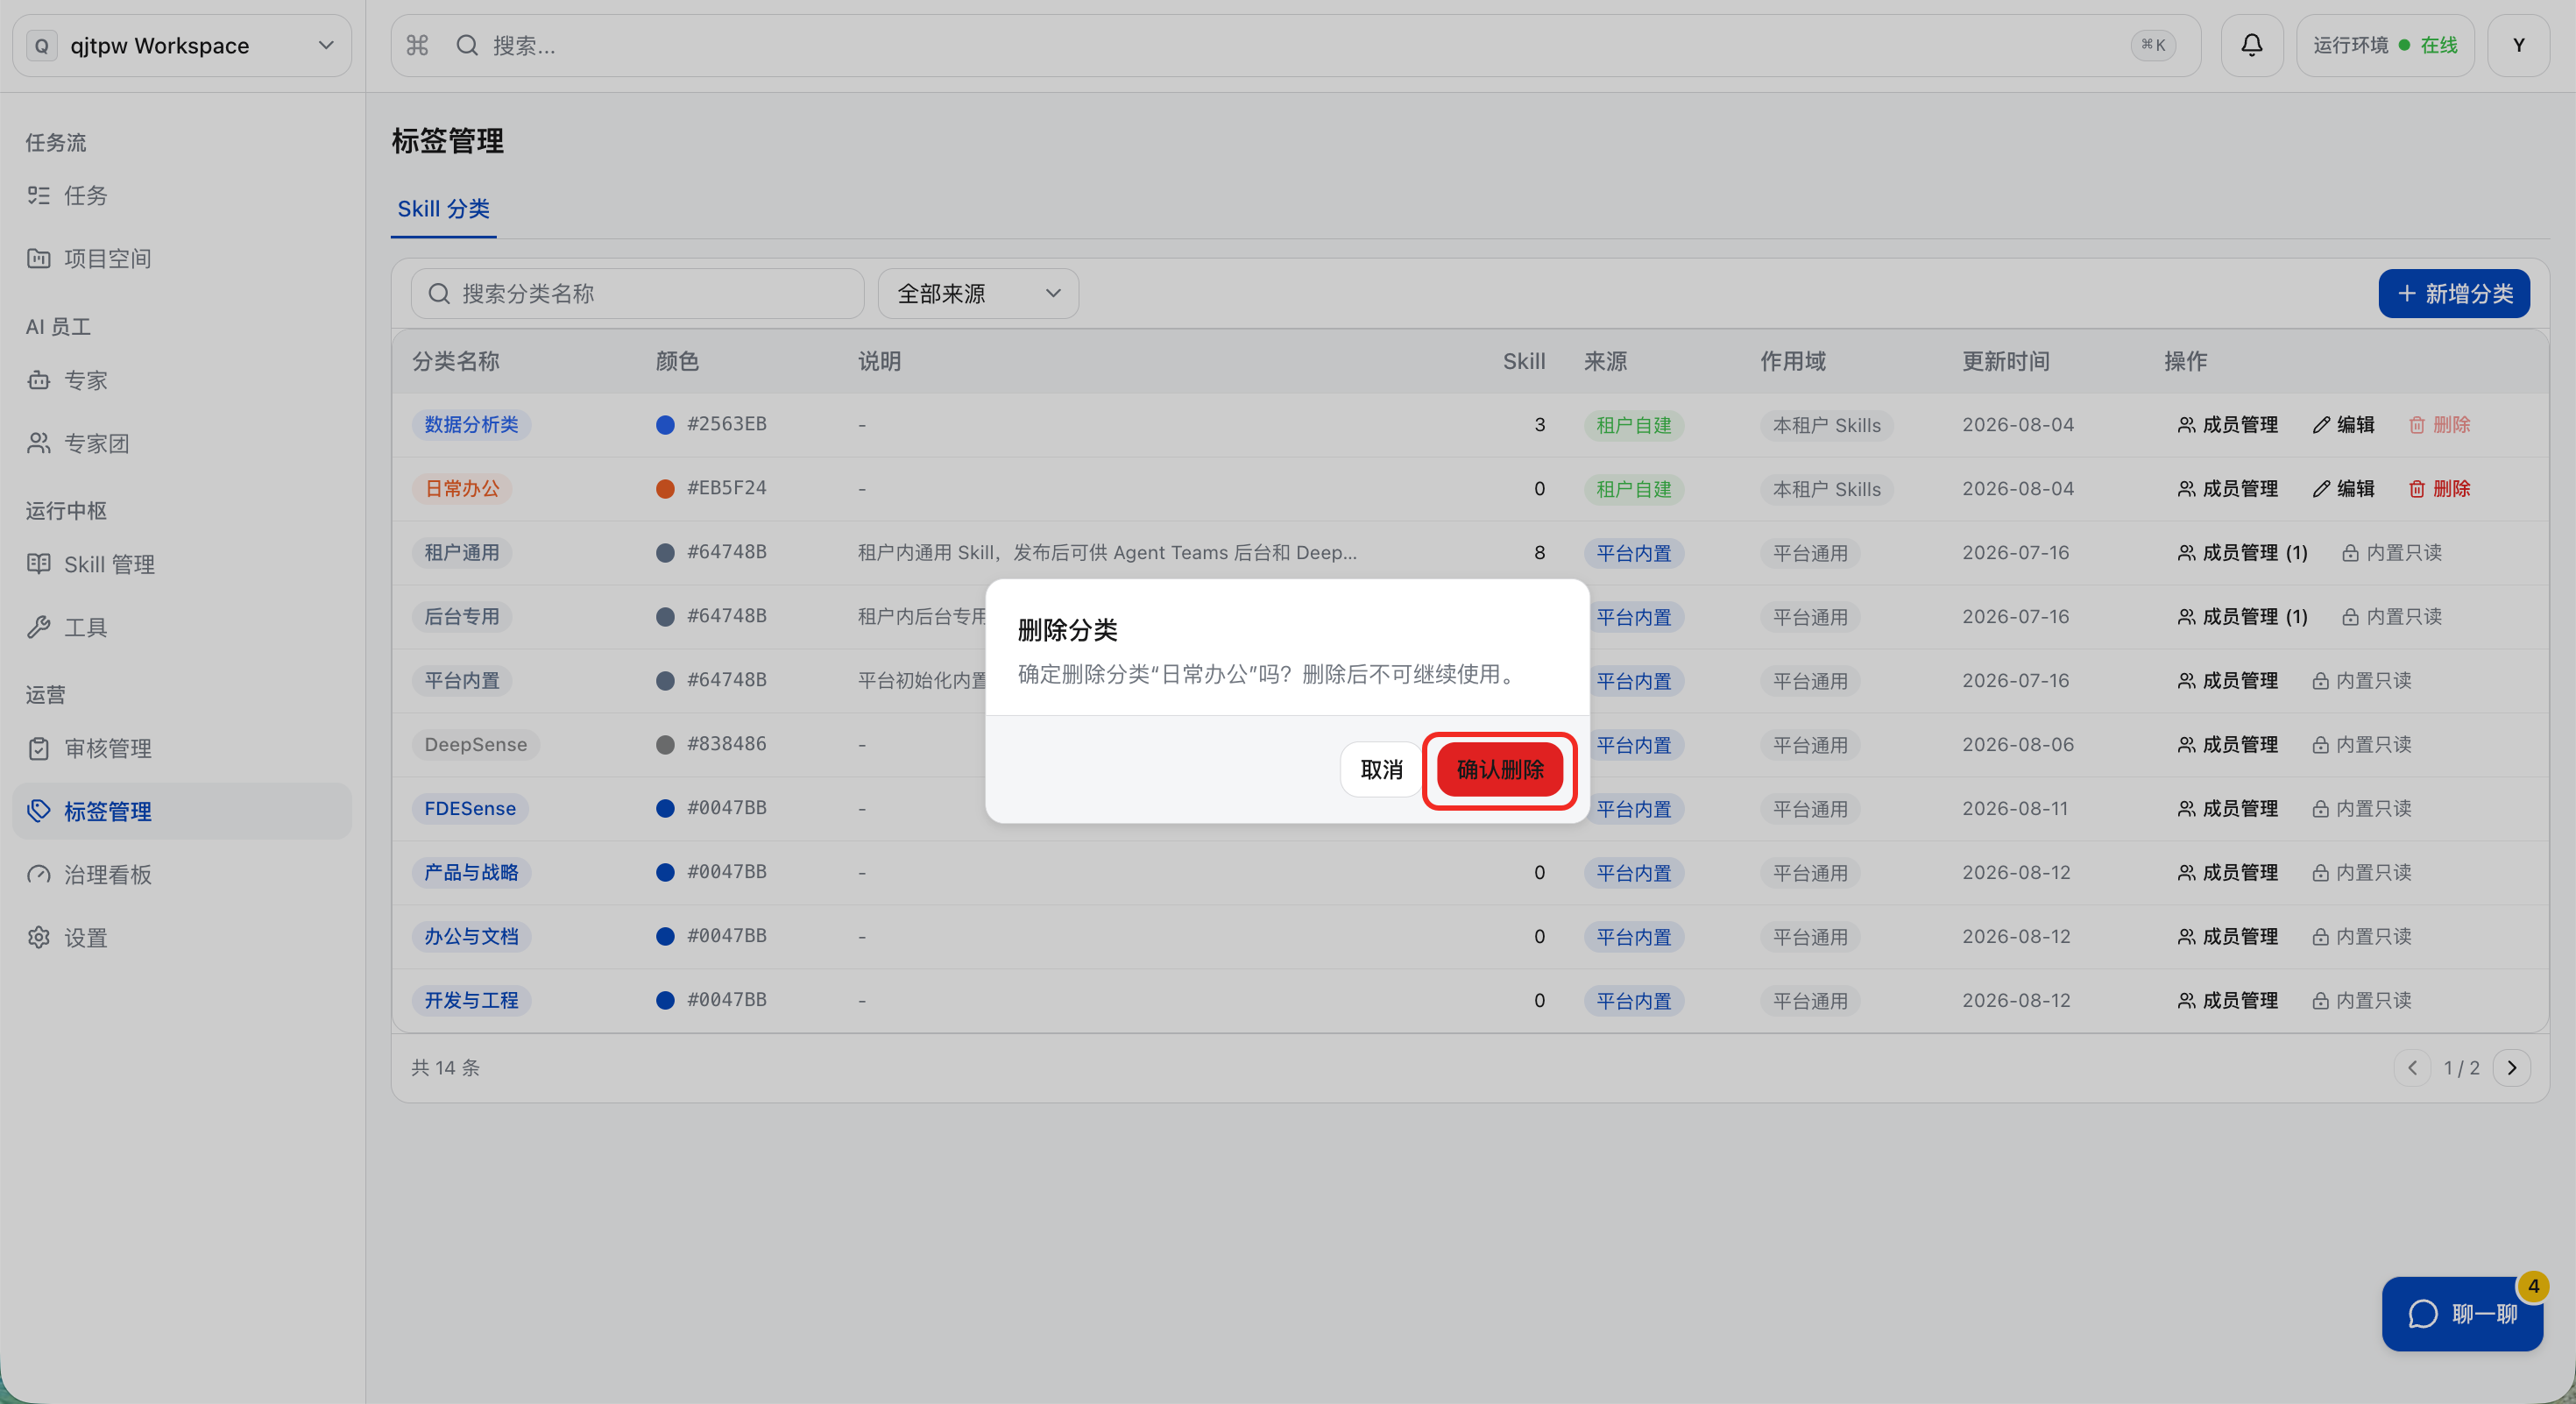
b. In the secondary confirmation pop-up box, click “OK”.
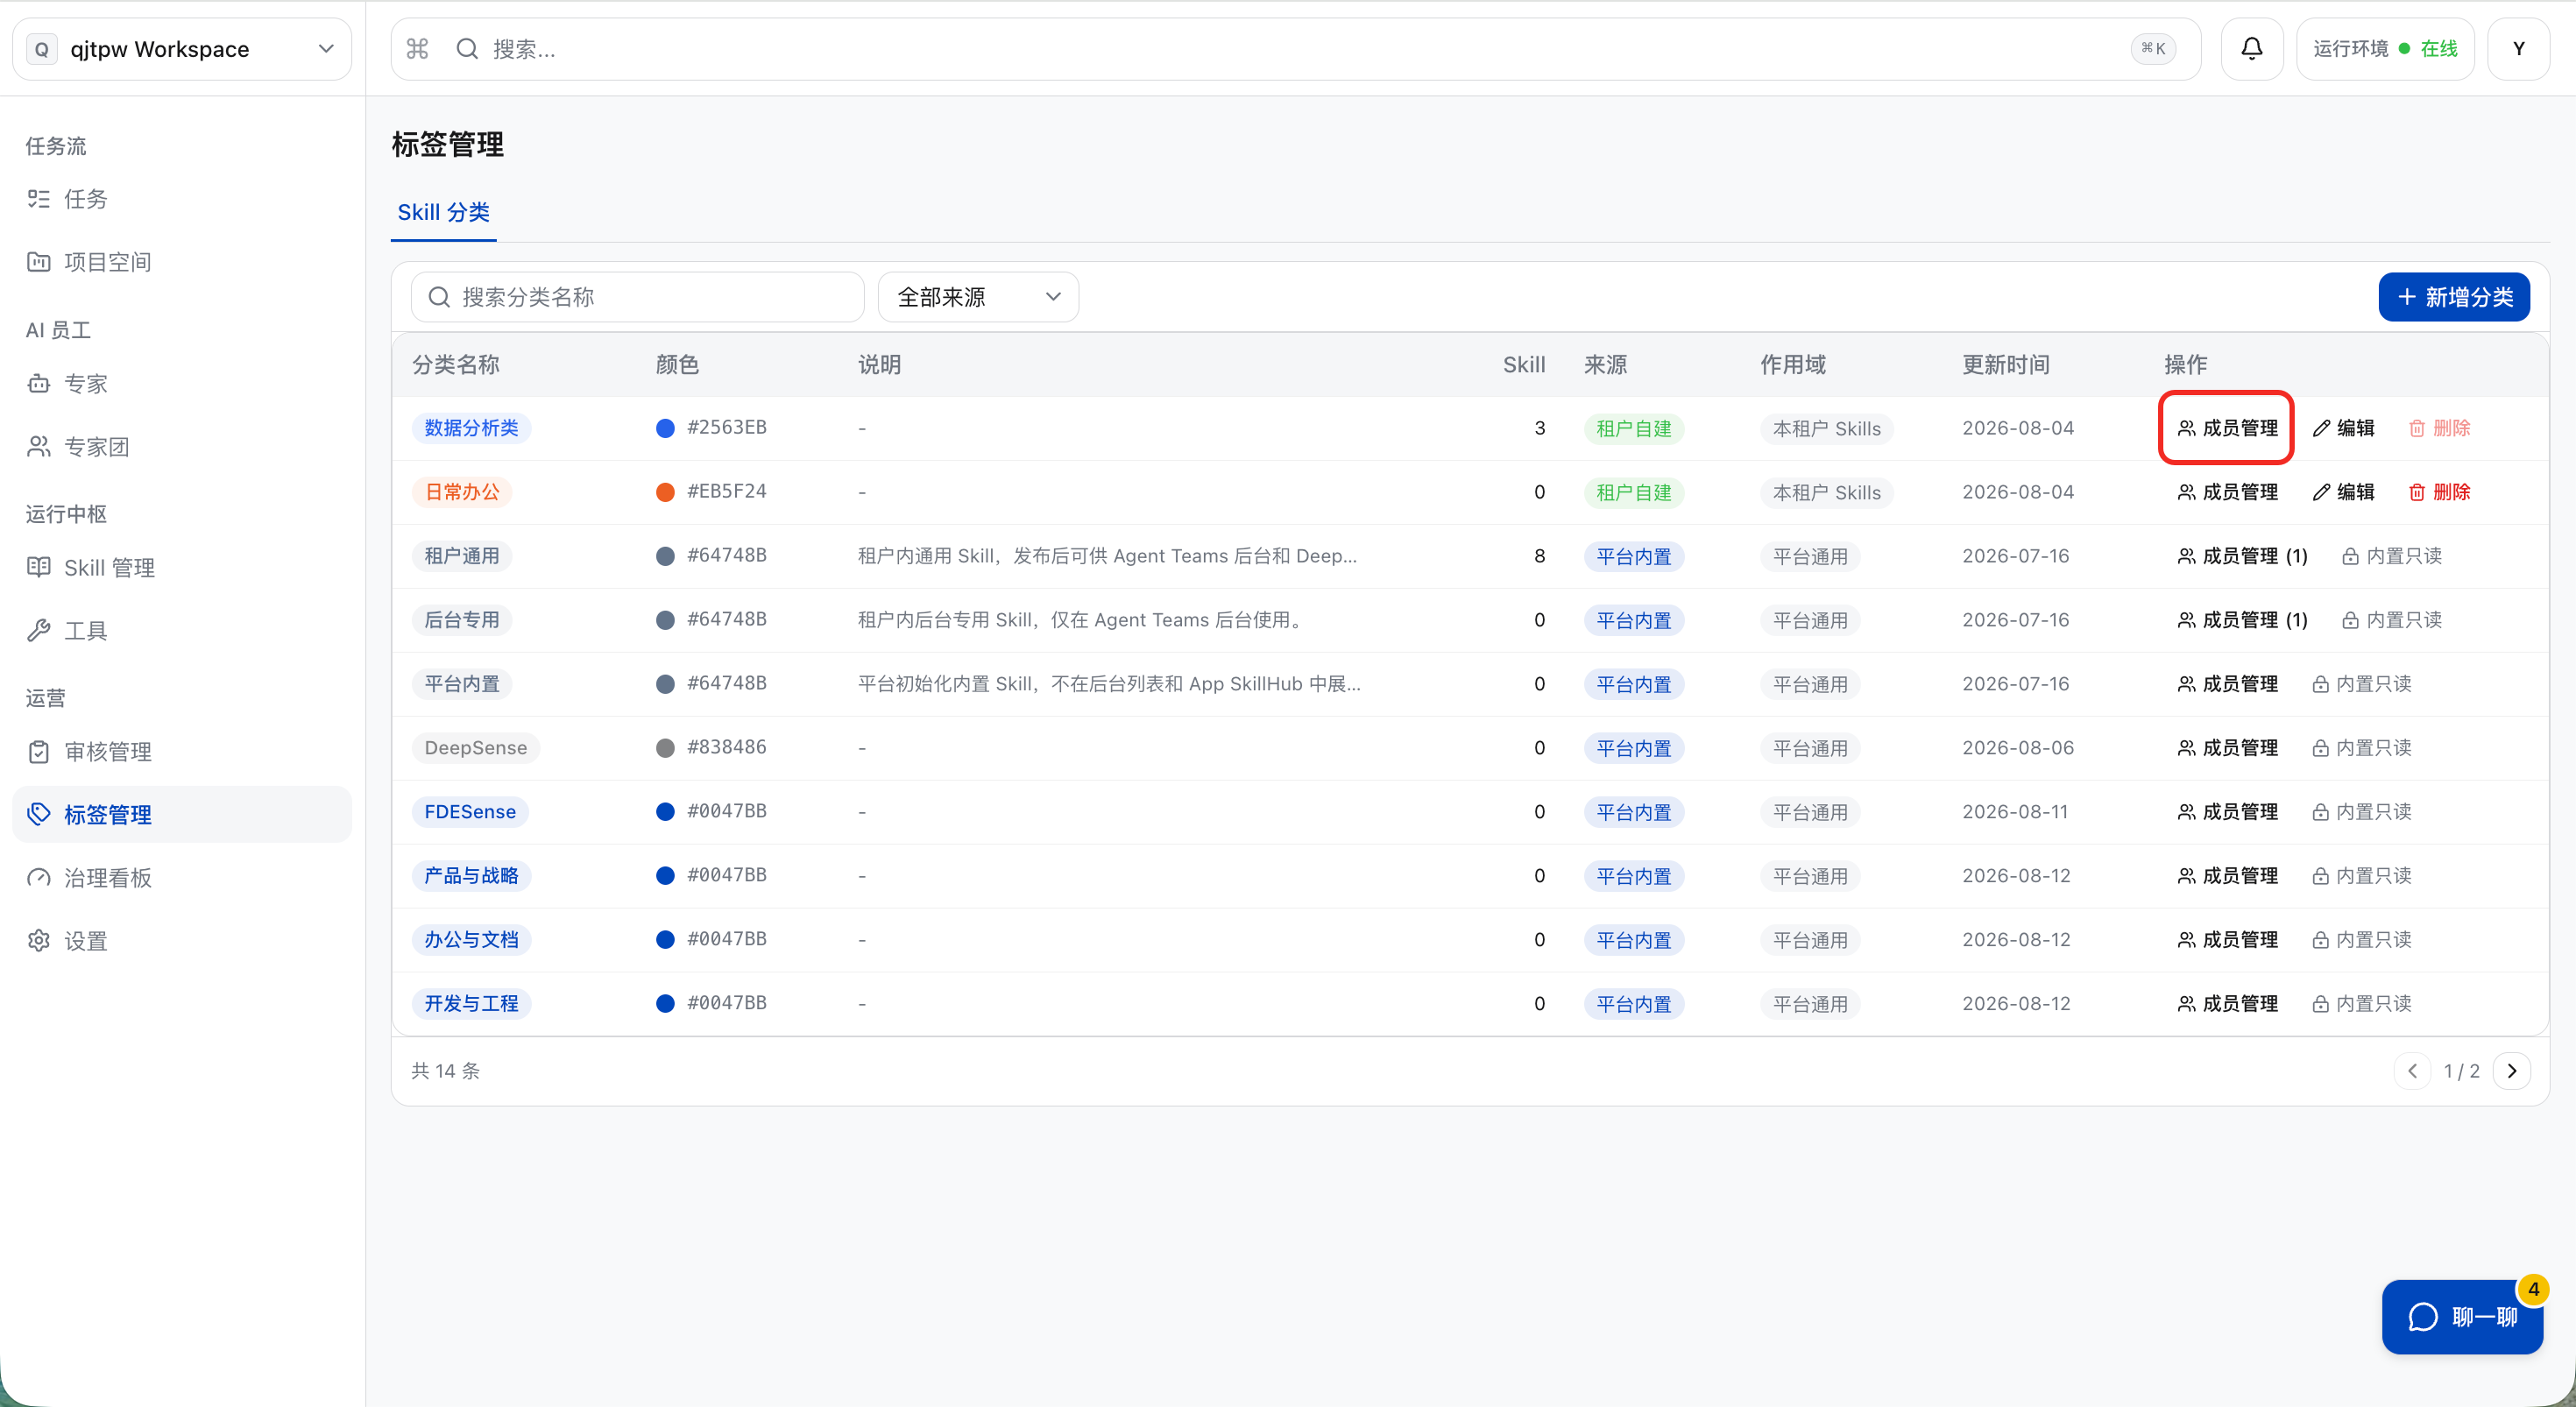
Member Management
a. Click “Member Management”. Member management can be performed for both platform-built-in and tenant self-built Skill categories.
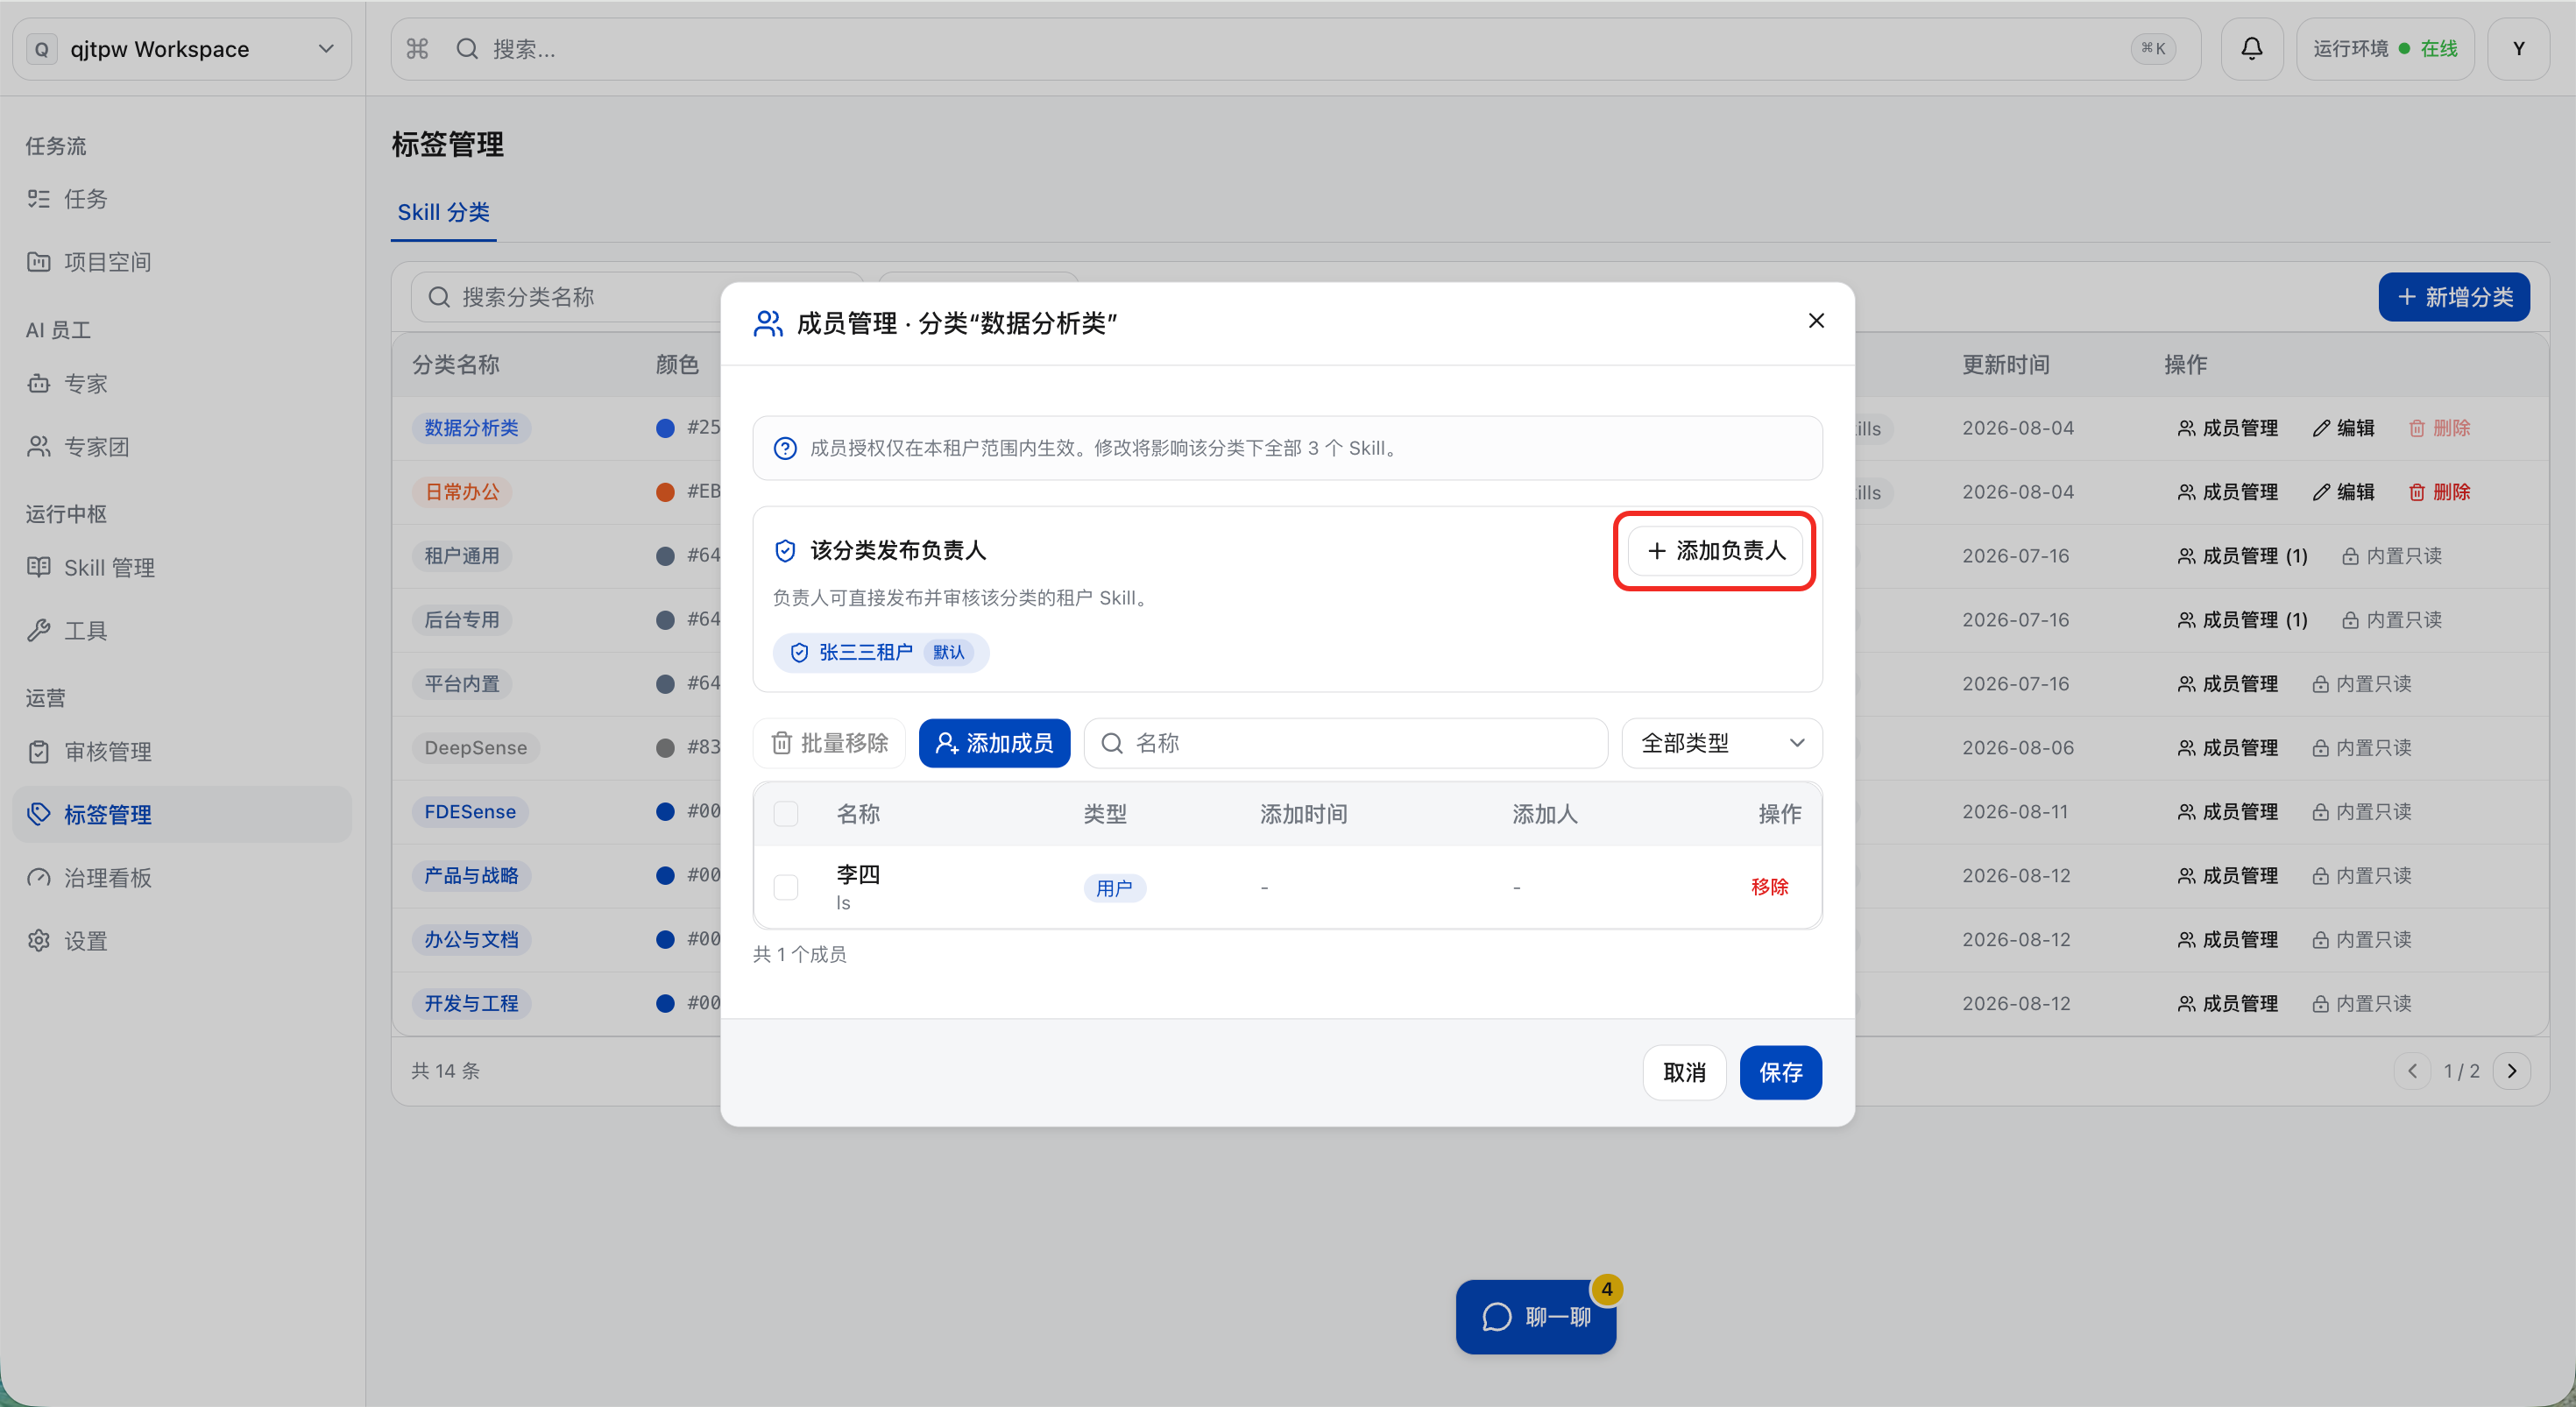
b. Check the current configuration of the release administrator and members for the respective Skill category. By default, the tenant administrator is included in the category release administrator list and cannot be removed. The “category release administrator” is designated to manage the skills under the specified category, so as to realize “professional centralized review”: for example, the Skill release application for the “compliance” category will be reviewed by the person in charge of the compliance line, instead of all applications being piled up to the tenant administrator.”Category Members” are used to control the collaborative management permissions for Skills under this category. After being added as a category member, you can perform operations such as content editing, version update, republishing, information modification, publishing/unpublishing, and deletion on the Skills under the corresponding category.
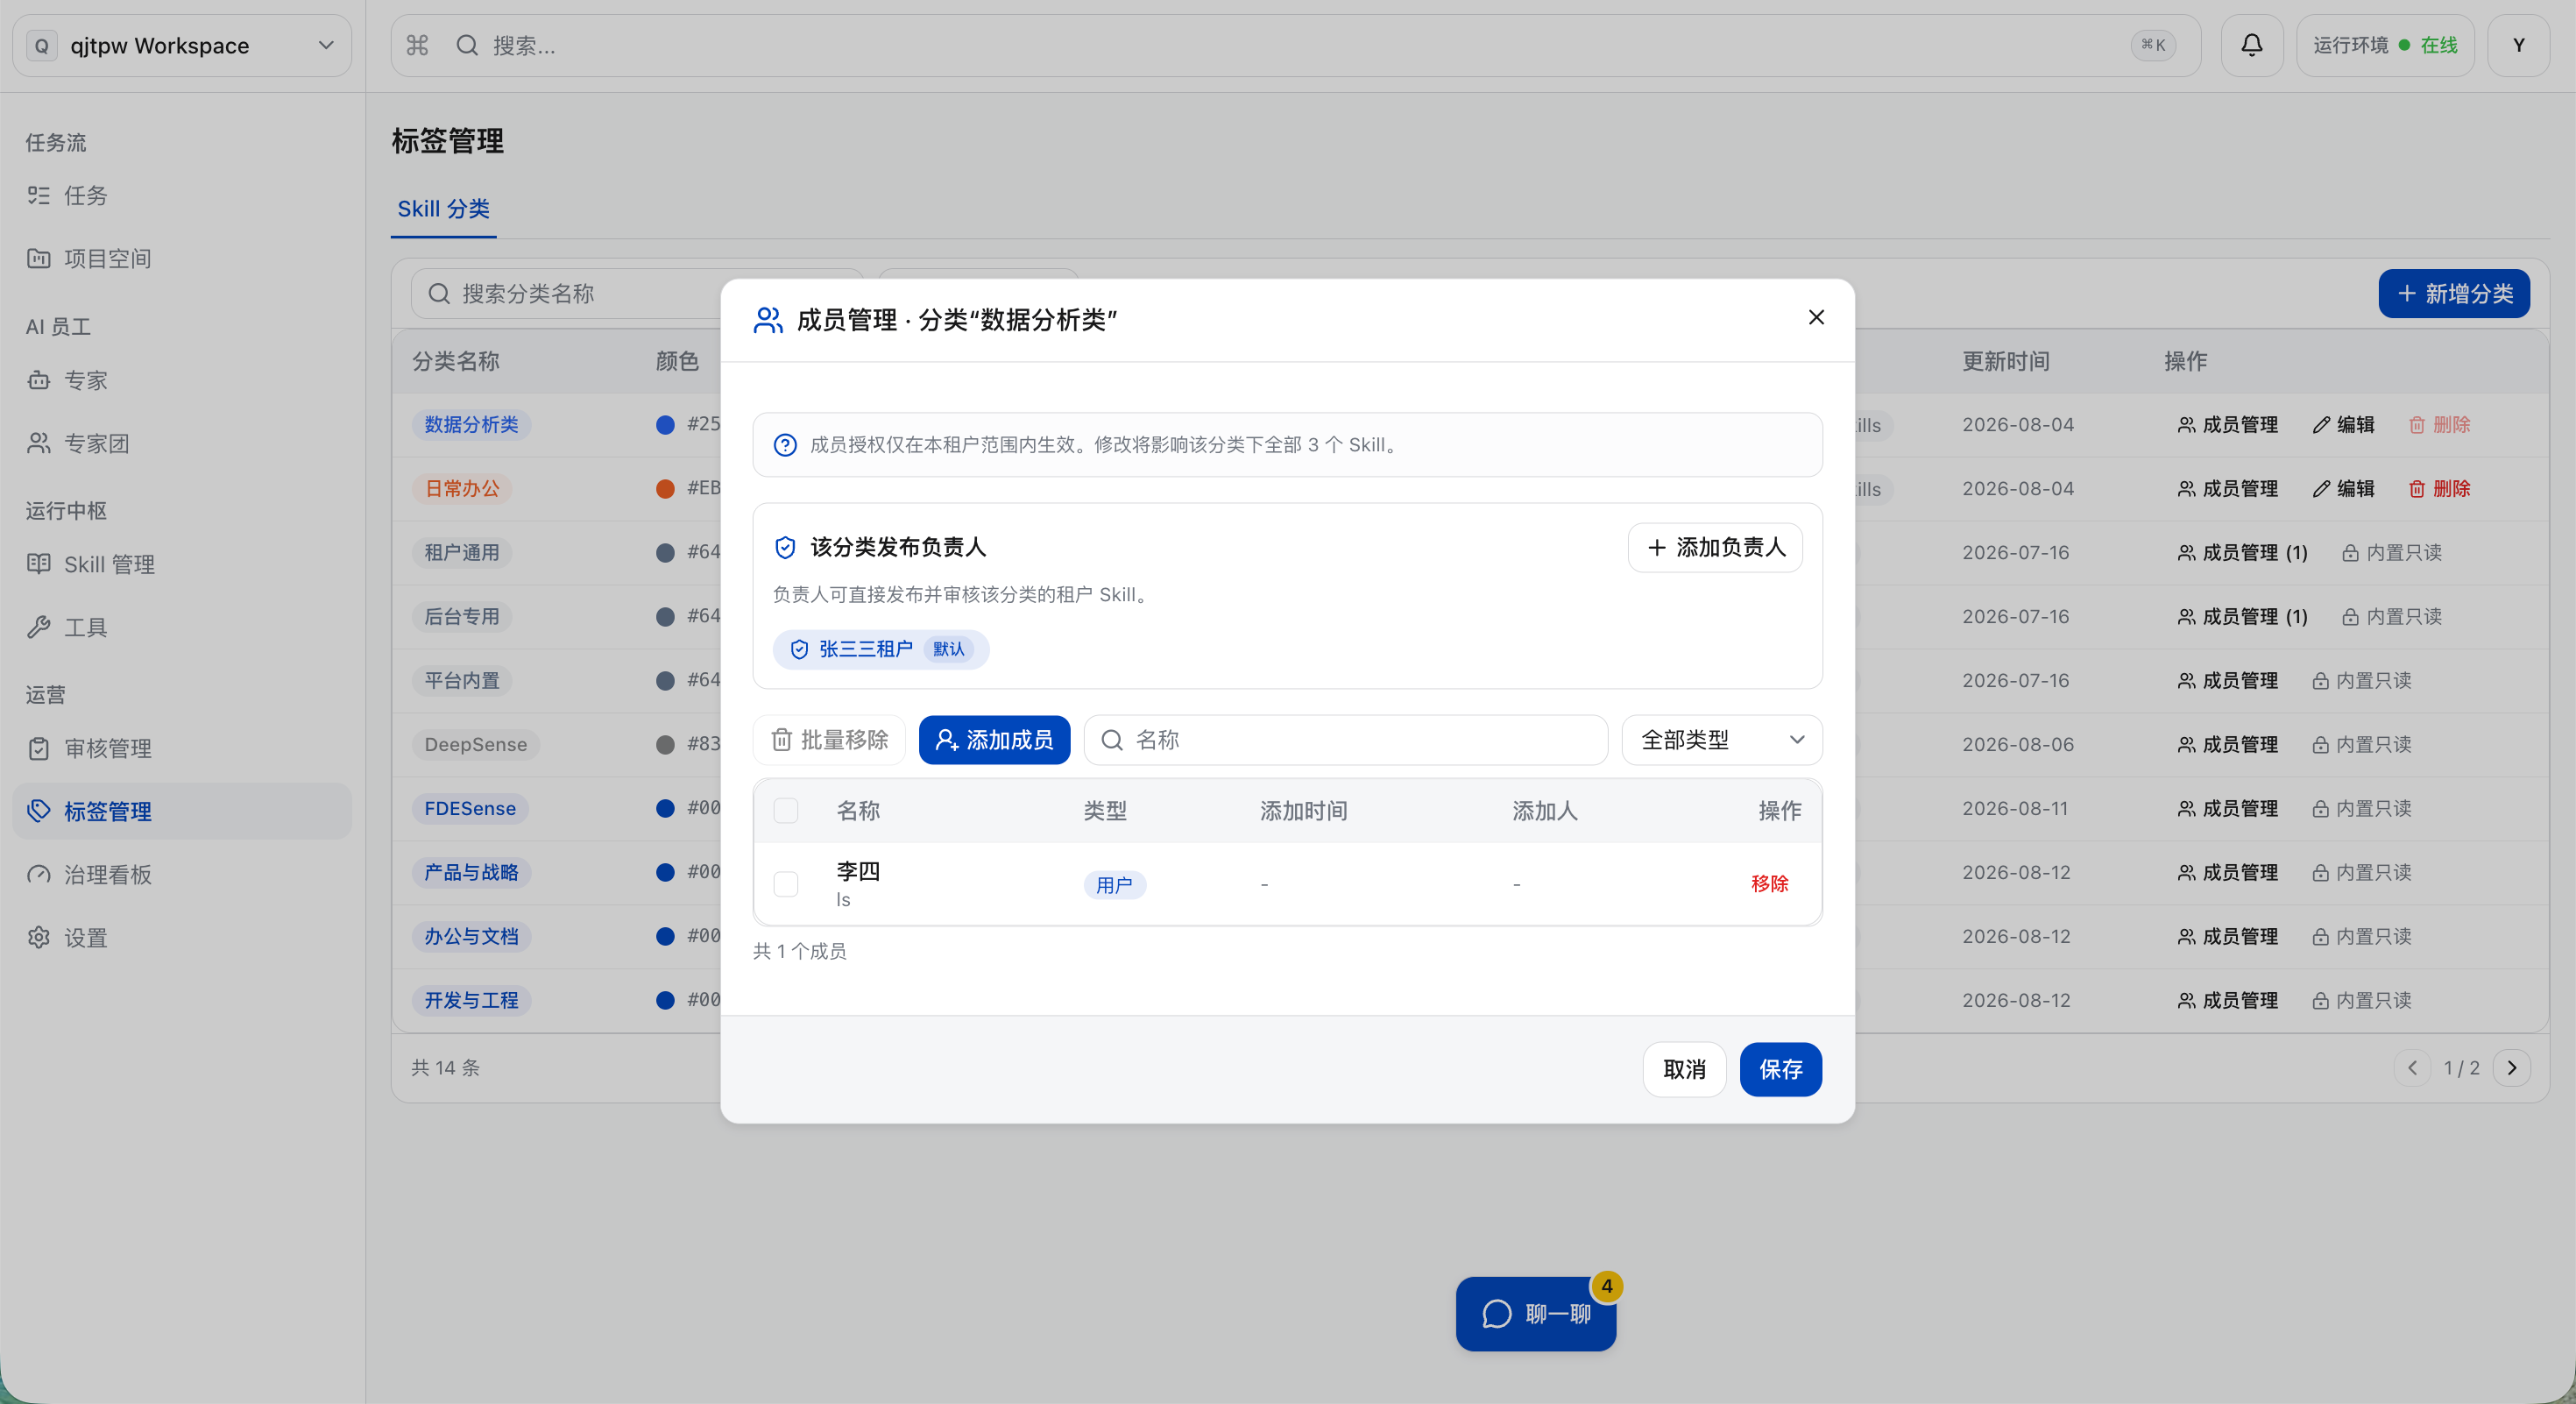
c. If you need to add other category leads, click “Add Lead”. Click the node name to expand/collapse the organizational structure tree, select the personnel and click “Confirm” to complete the operation.
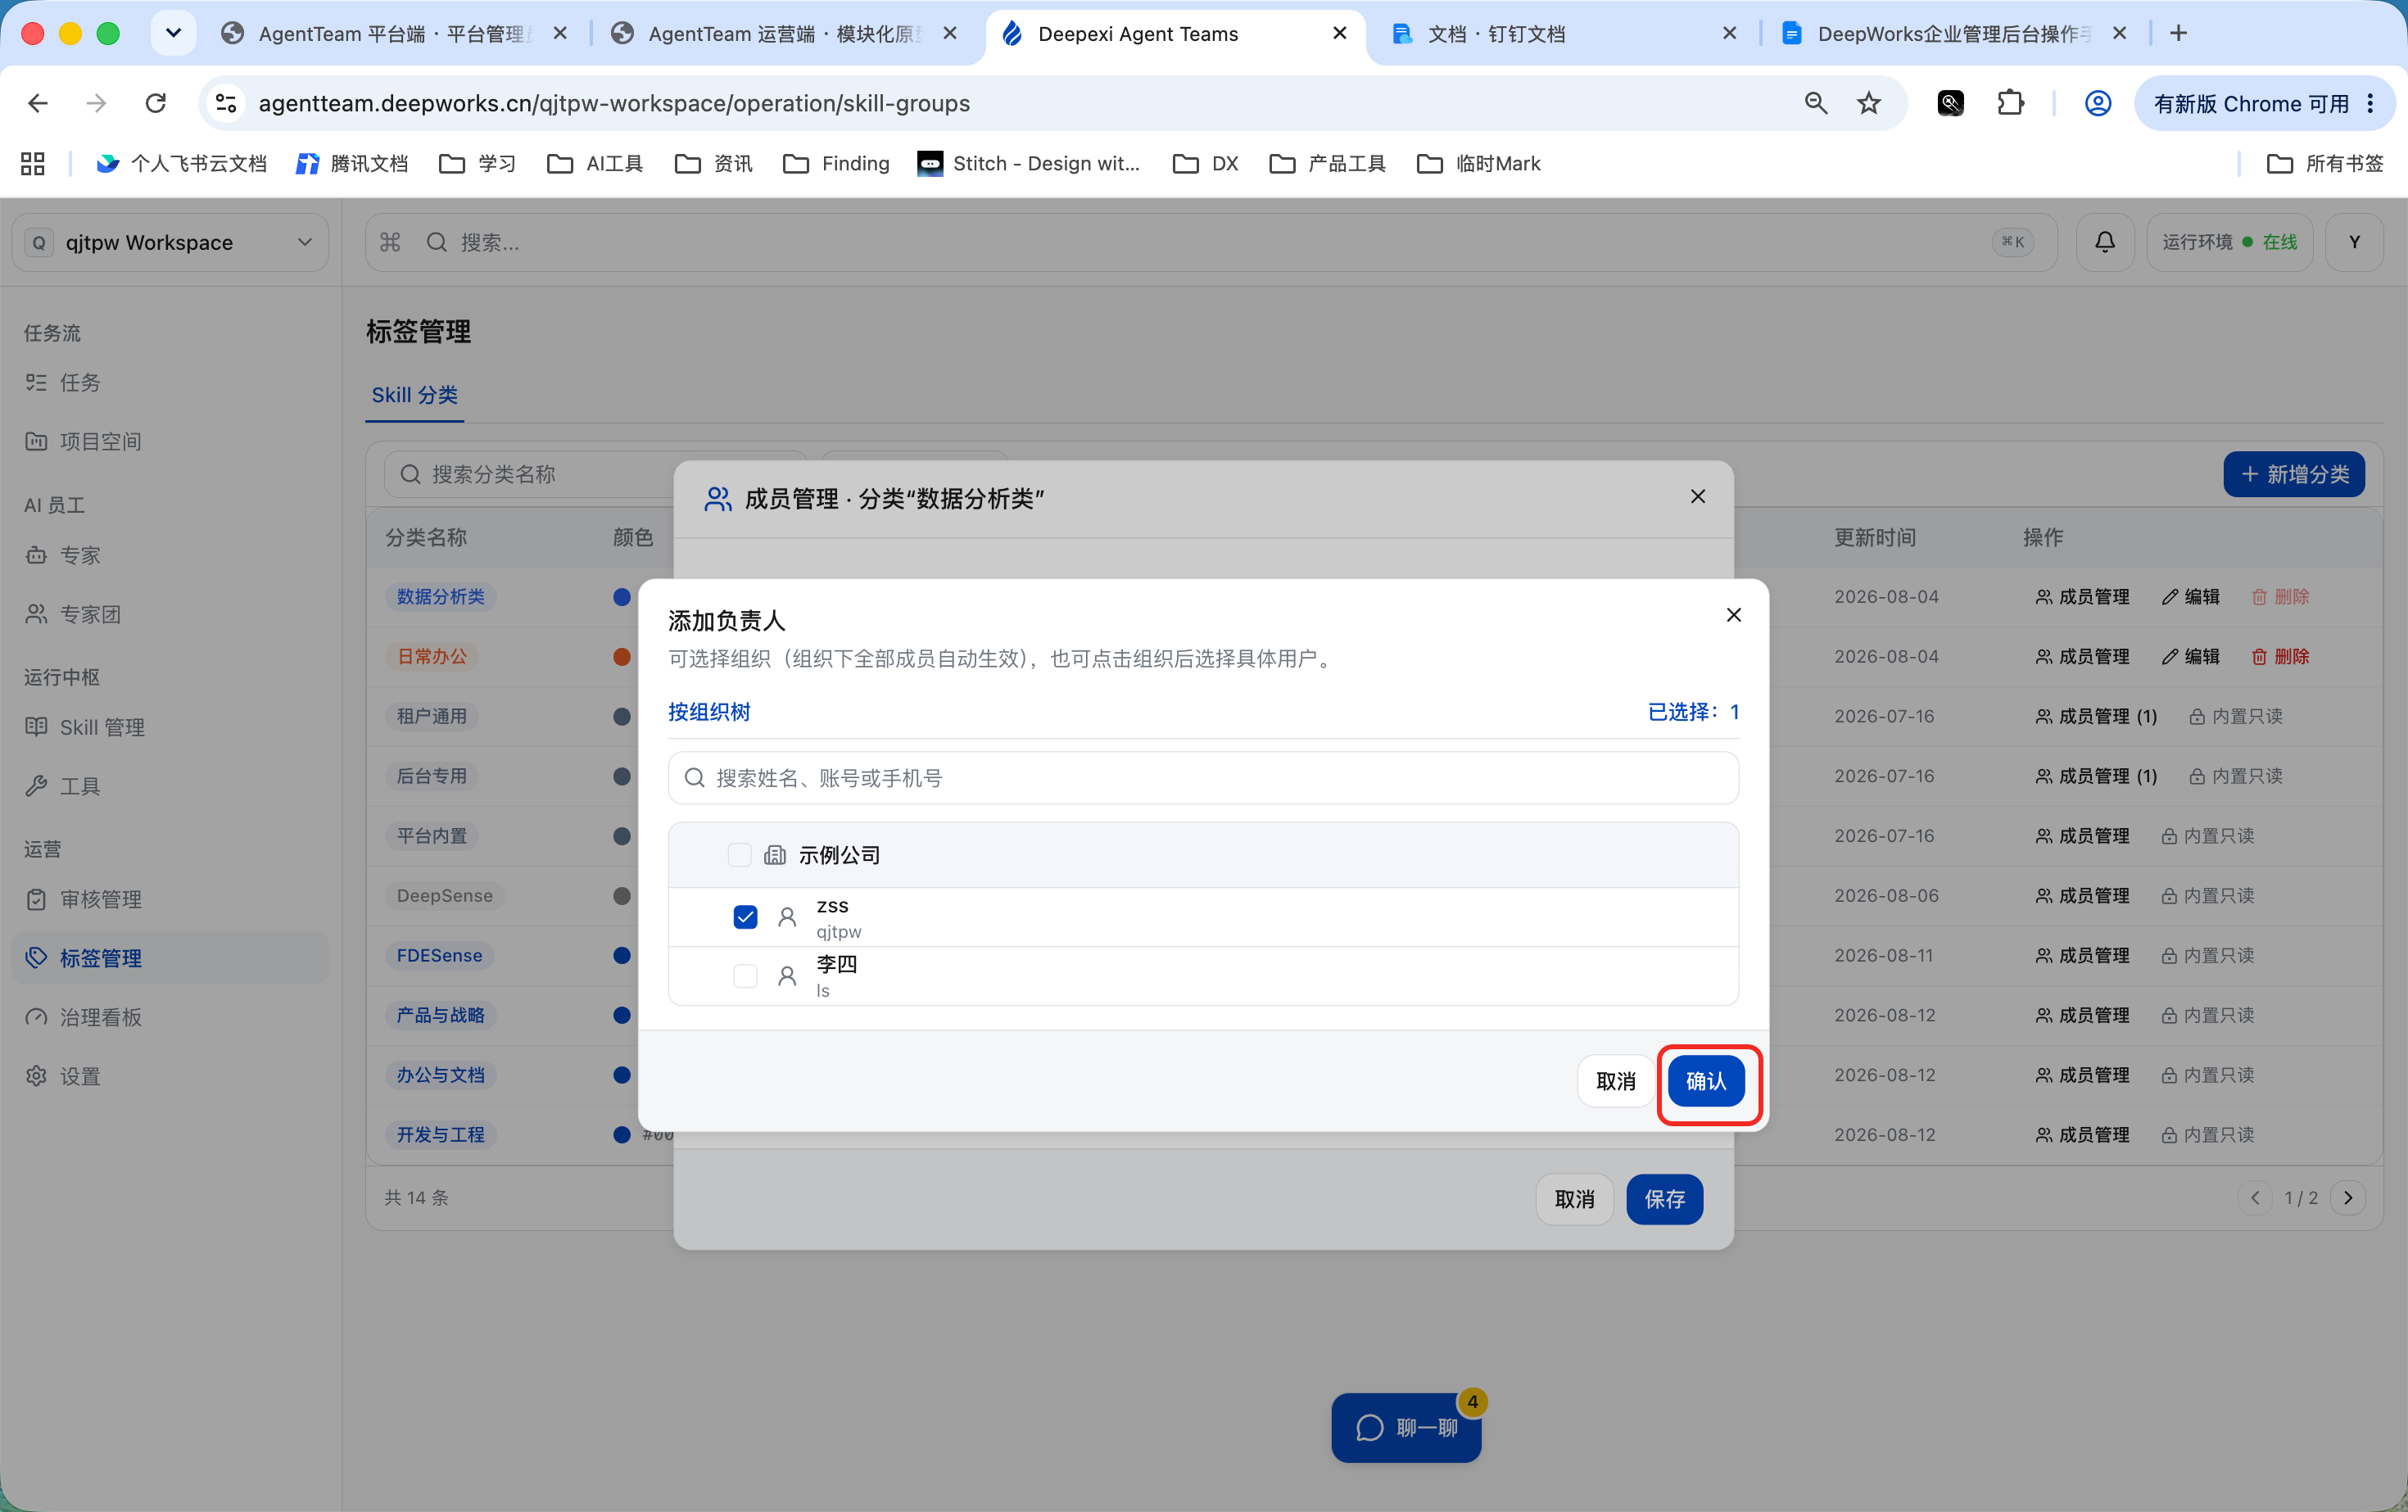
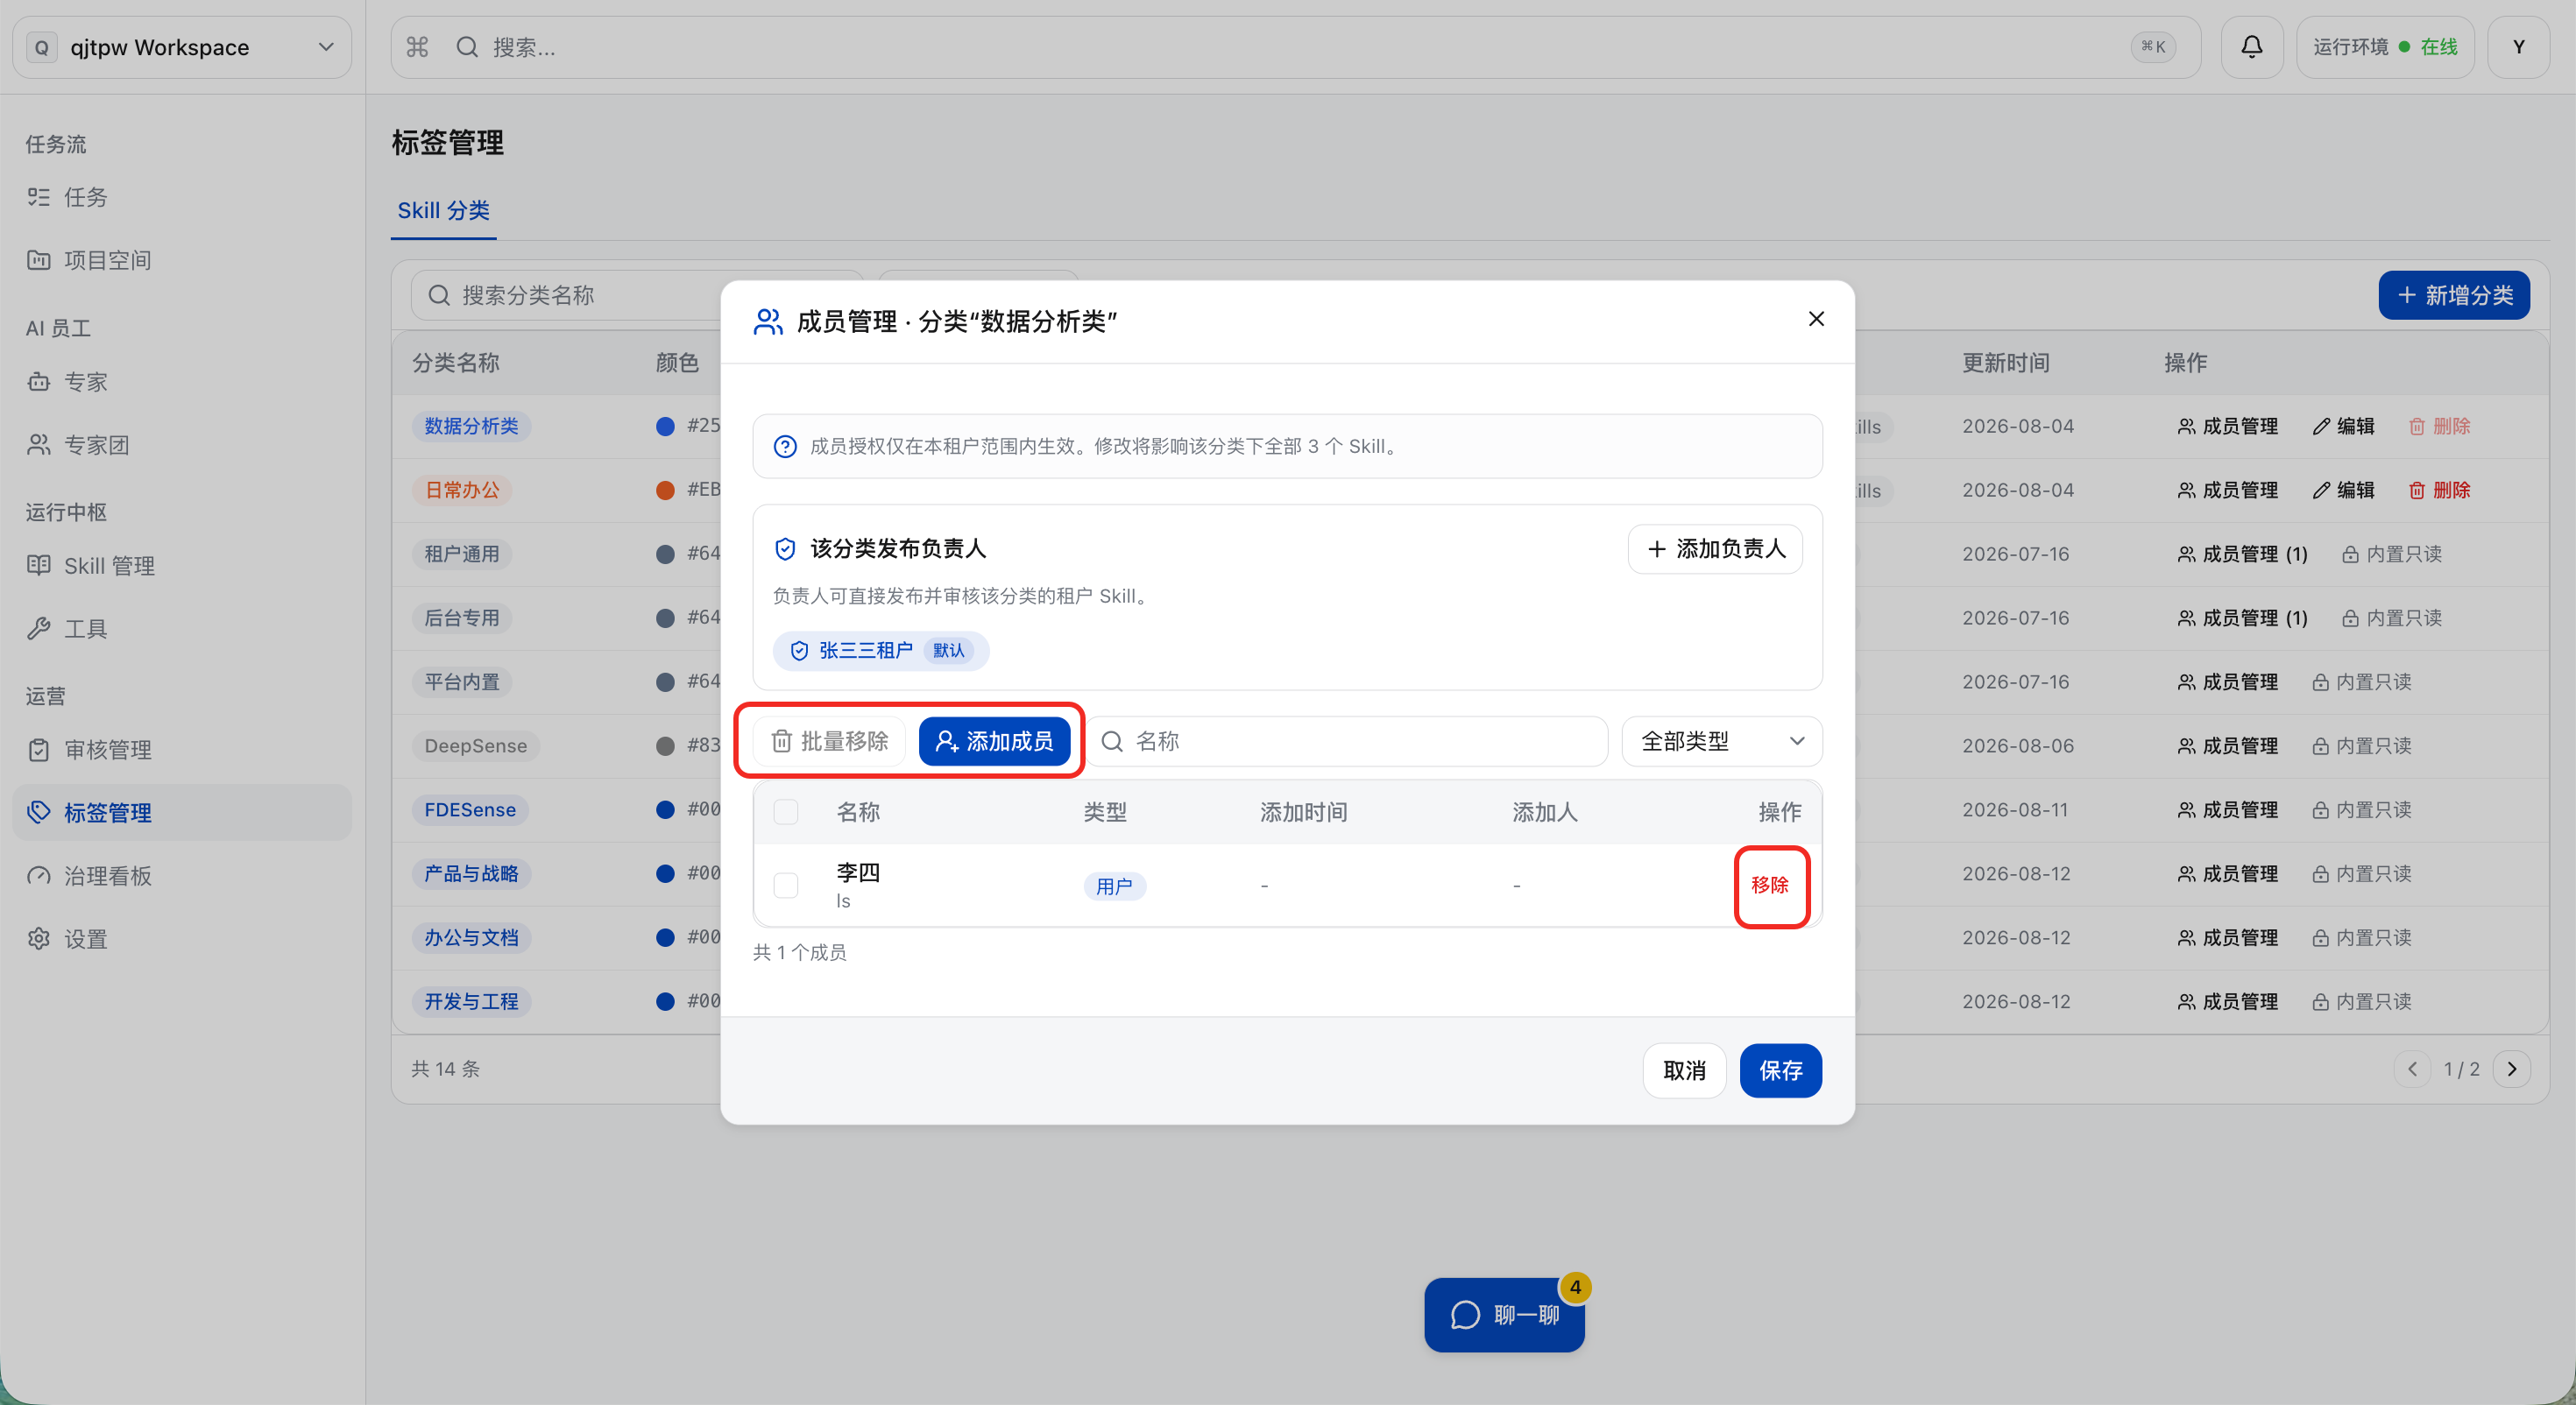
d. To add or remove category members, click “Add Members” or “Remove”. Once added as a category member, the member can perform operations including content editing, version update, republishing, information modification, publishing/unpublishing and deletion on the Skills under the corresponding category. After a member is removed, they will no longer have the collaborative management permissions for the Skills under this category.
Expert/Expert Panel Label
View Tags
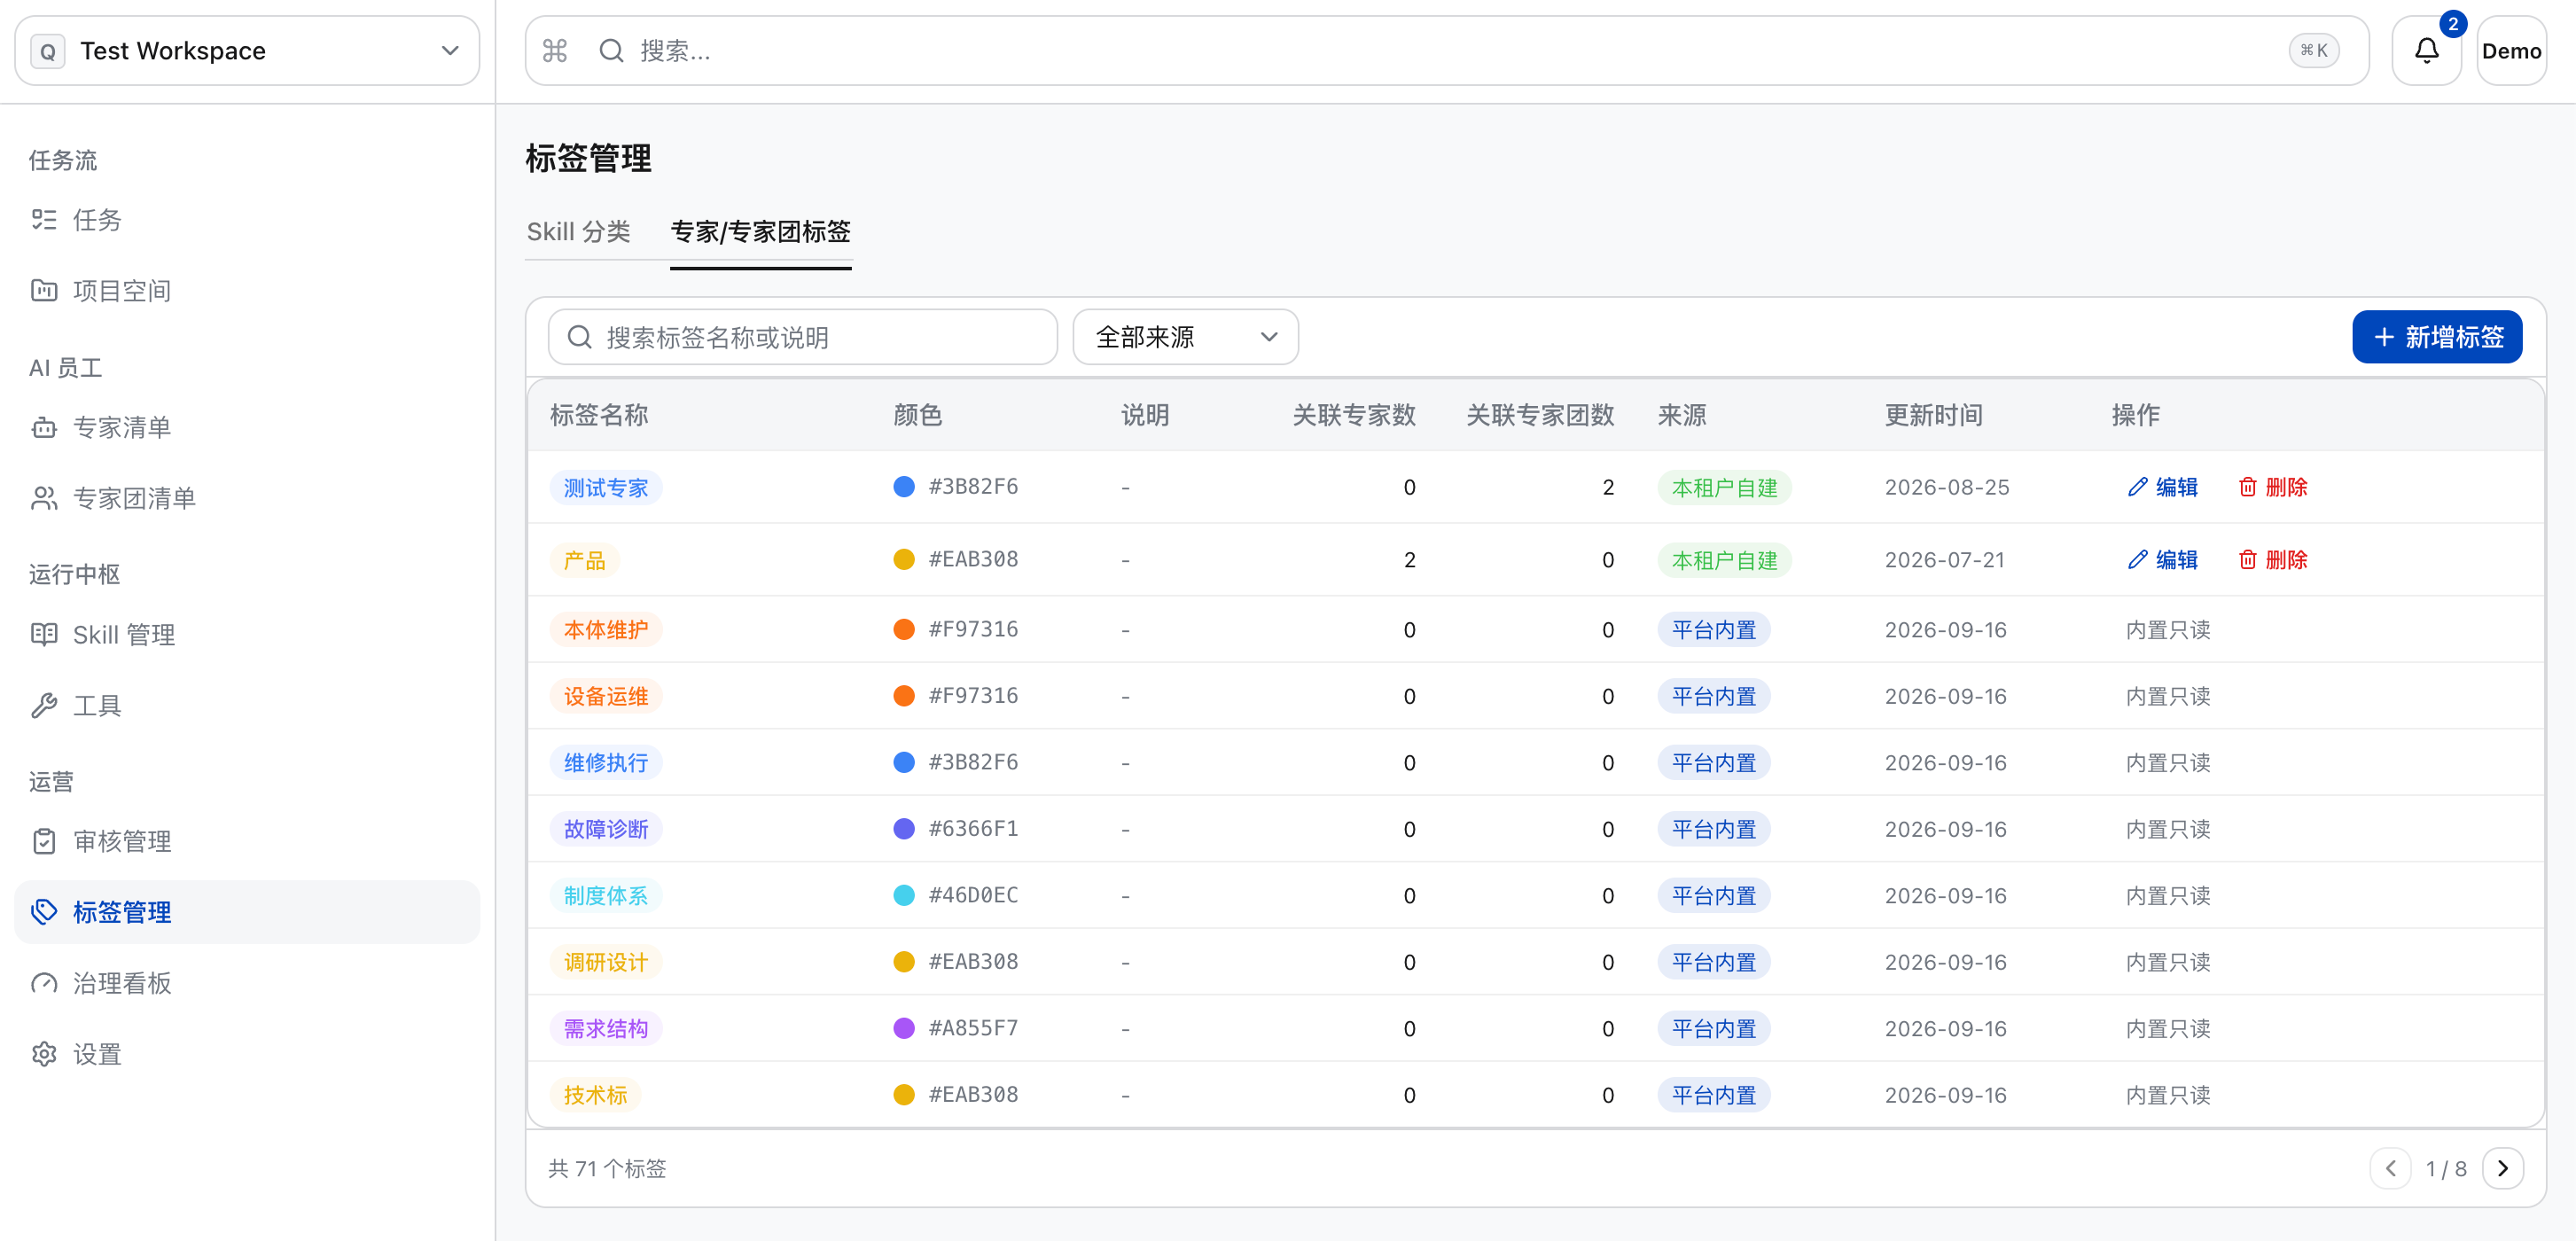
Click “Label Management” - “Expert/Expert Team Labels” in the left menu, and you will see the list of “Expert/Expert Team Labels”. There are two types of expert/expert team labels: one is platform-built-in labels, which refer to the expert/expert team labels provided and uniformly maintained by the platform; the other is tenant self-built labels, which refer to the expert/expert team labels set by the tenant according to its own business.
Add New Tag
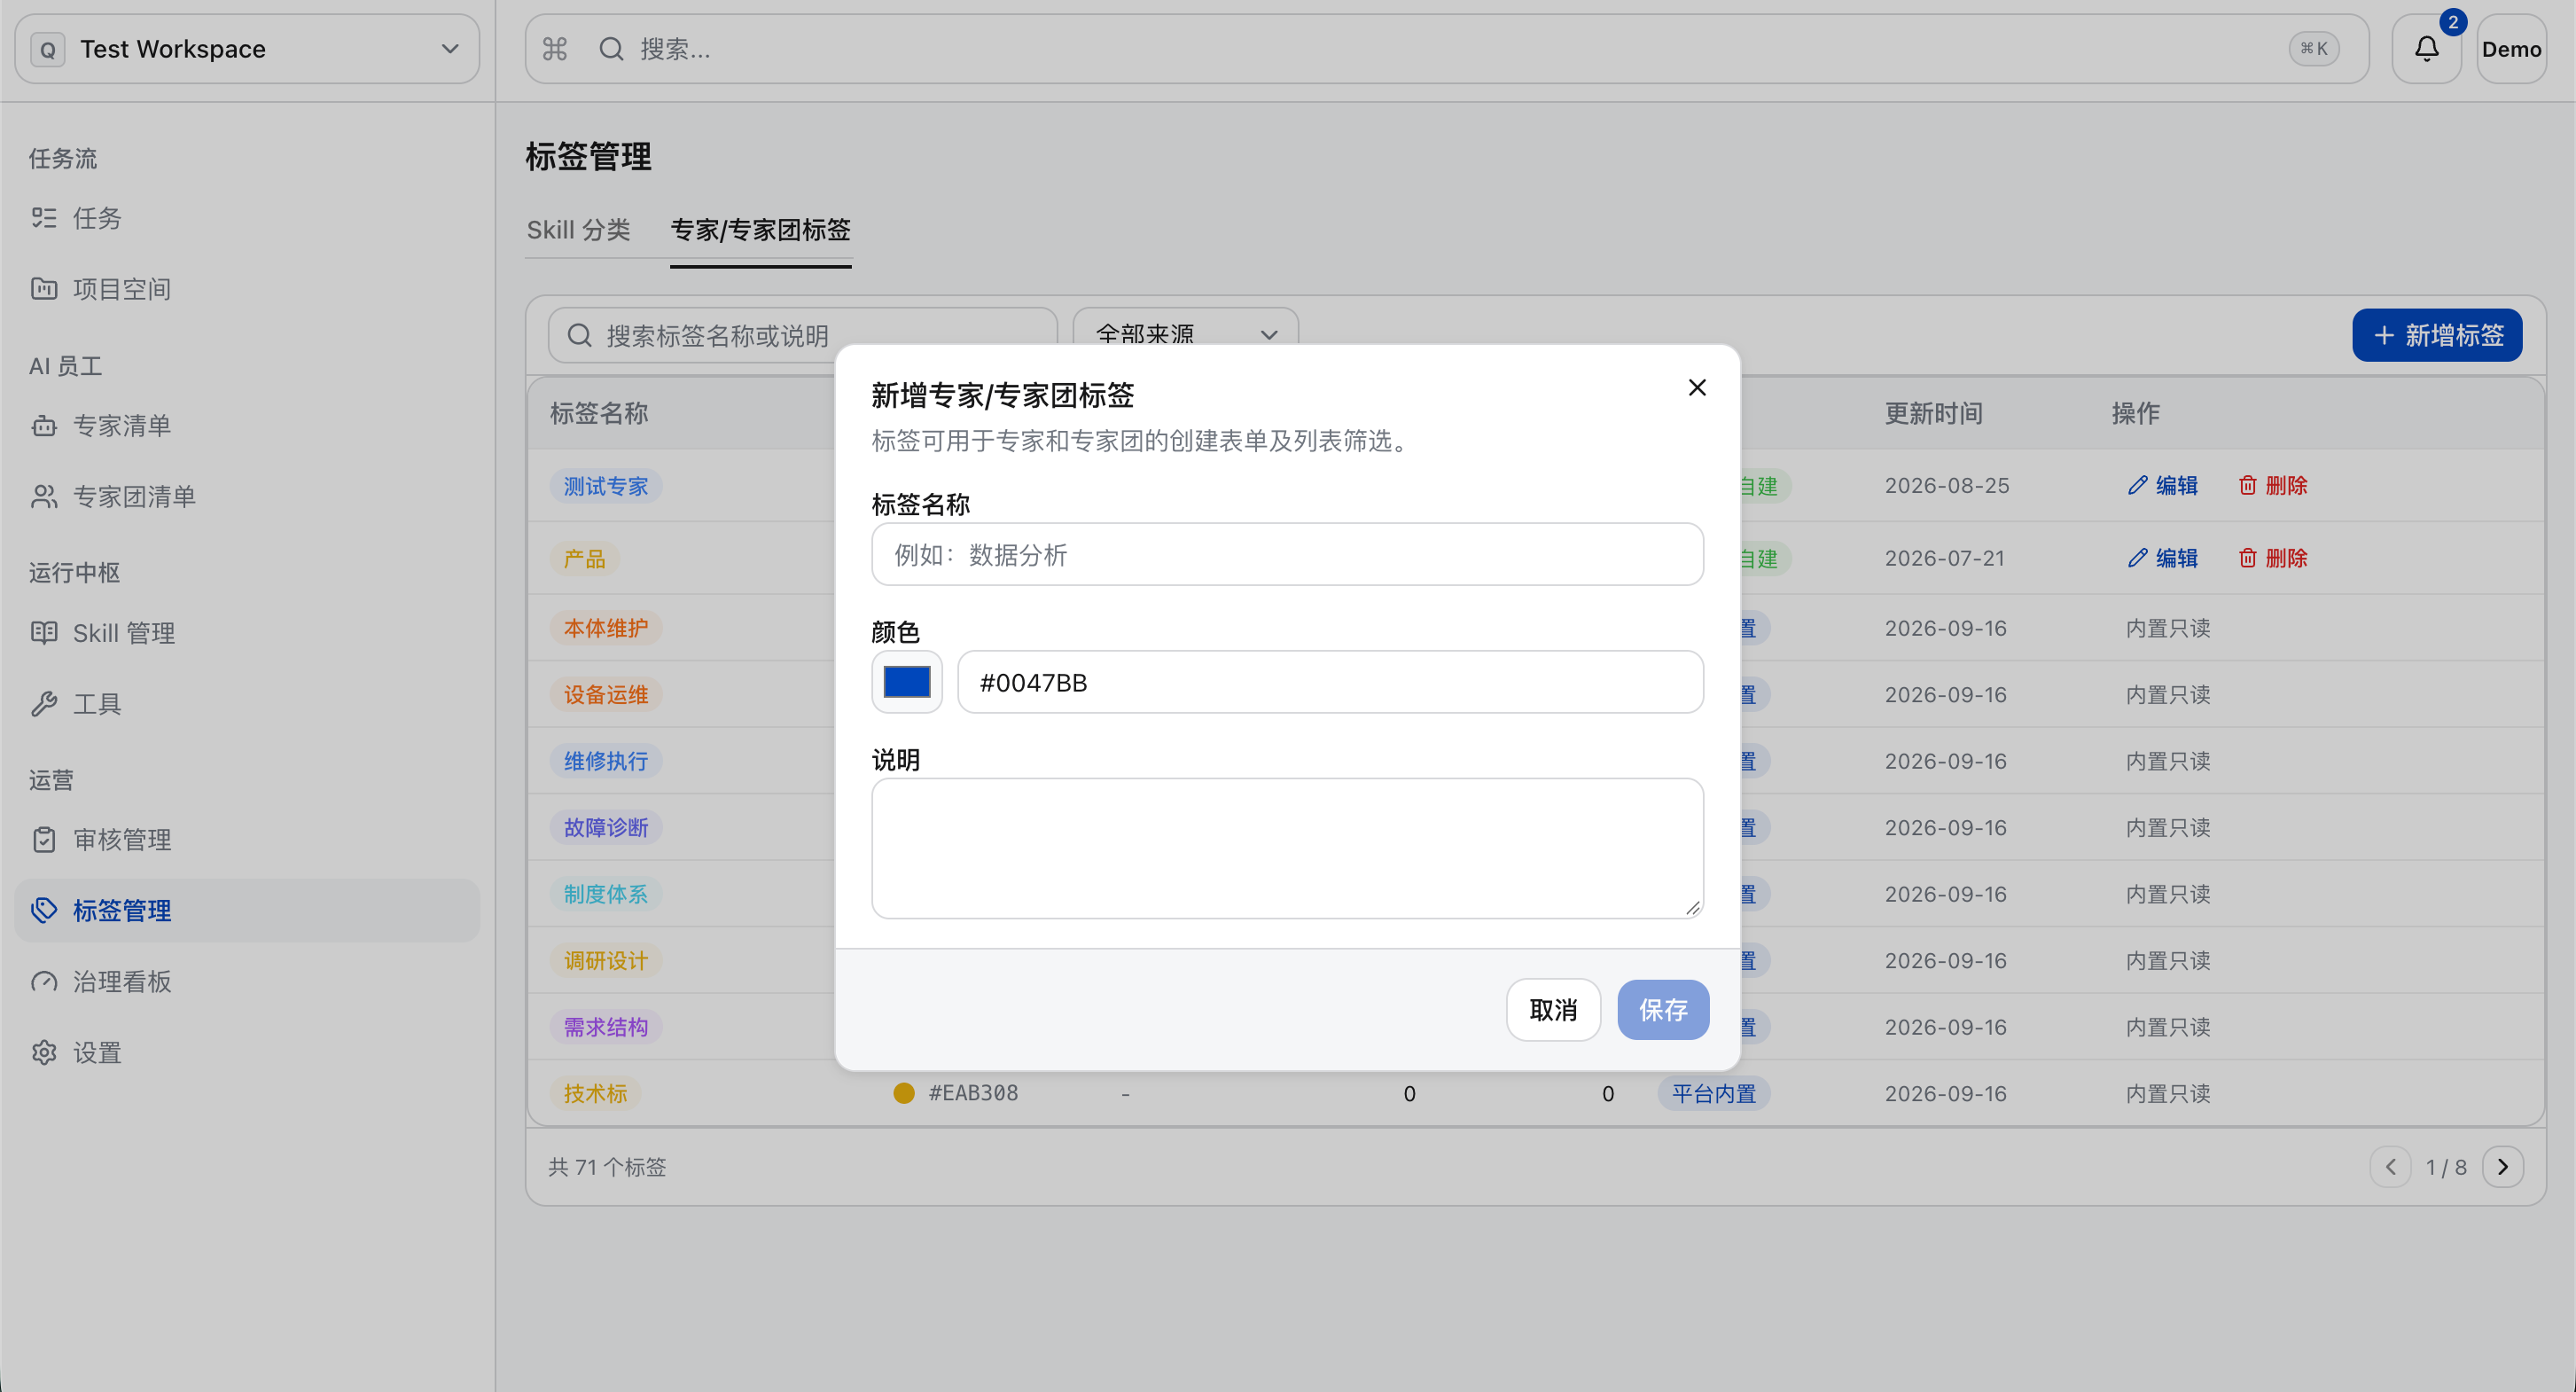
a. Click “Add Tag”.
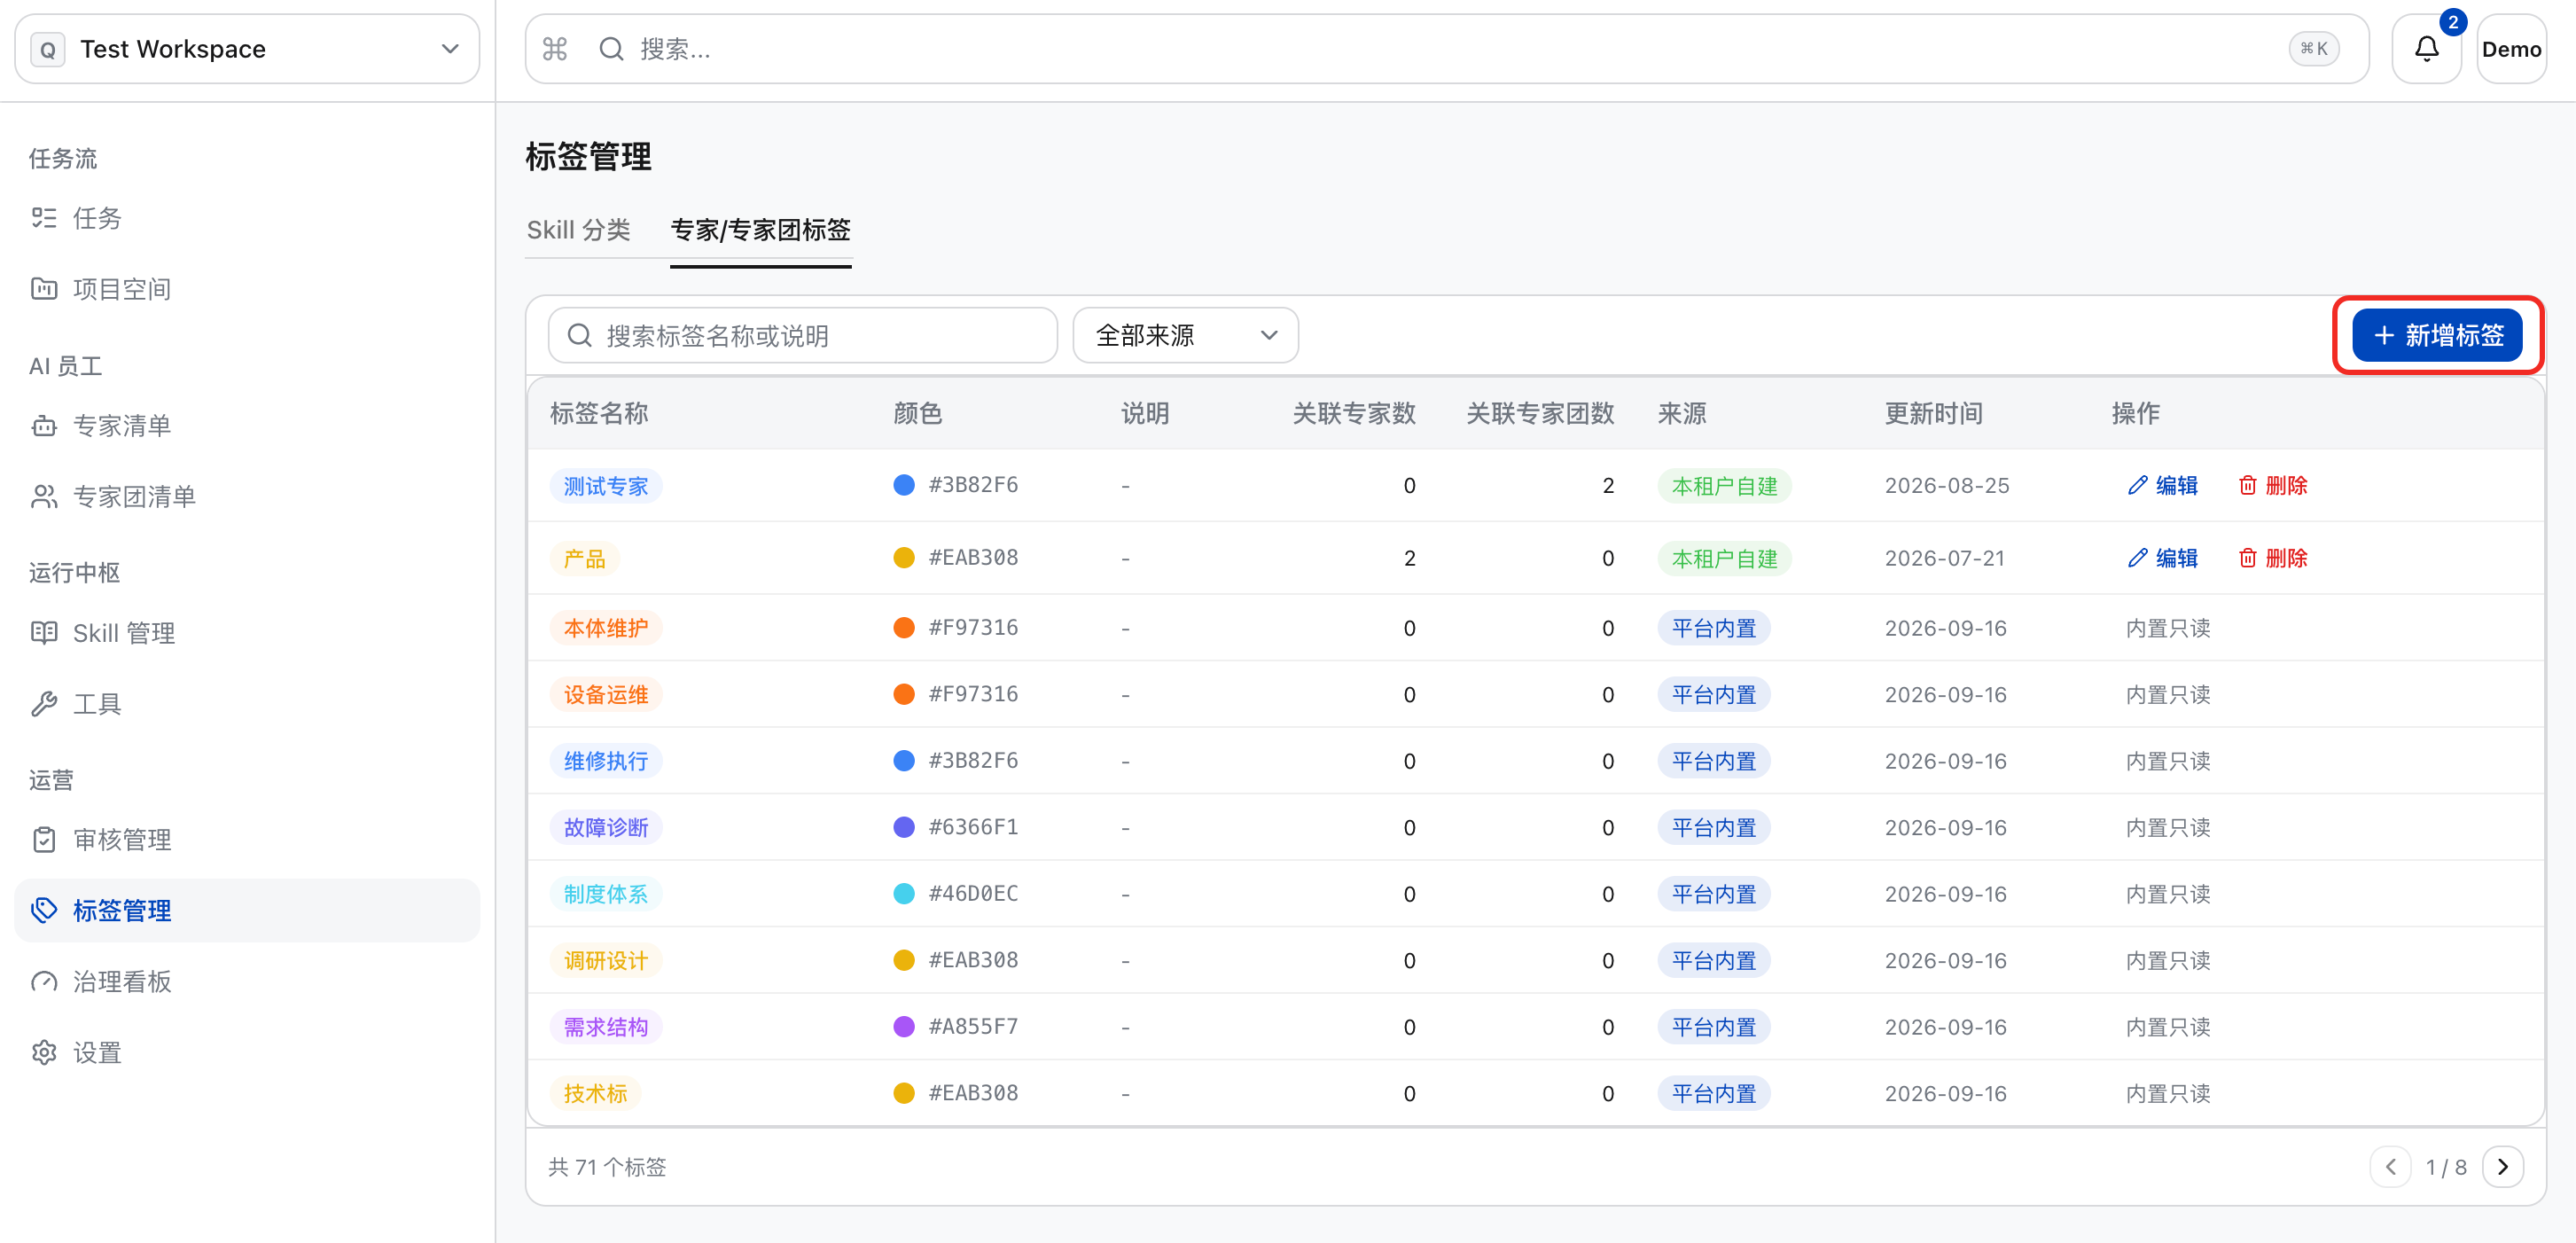
b. After filling in the information, click “Save”.
-
Category Name: The name used to describe a group.
-
Color: Specifies the color in which this tag is displayed on the management console.
-
Note: Describe the detailed information of this category.
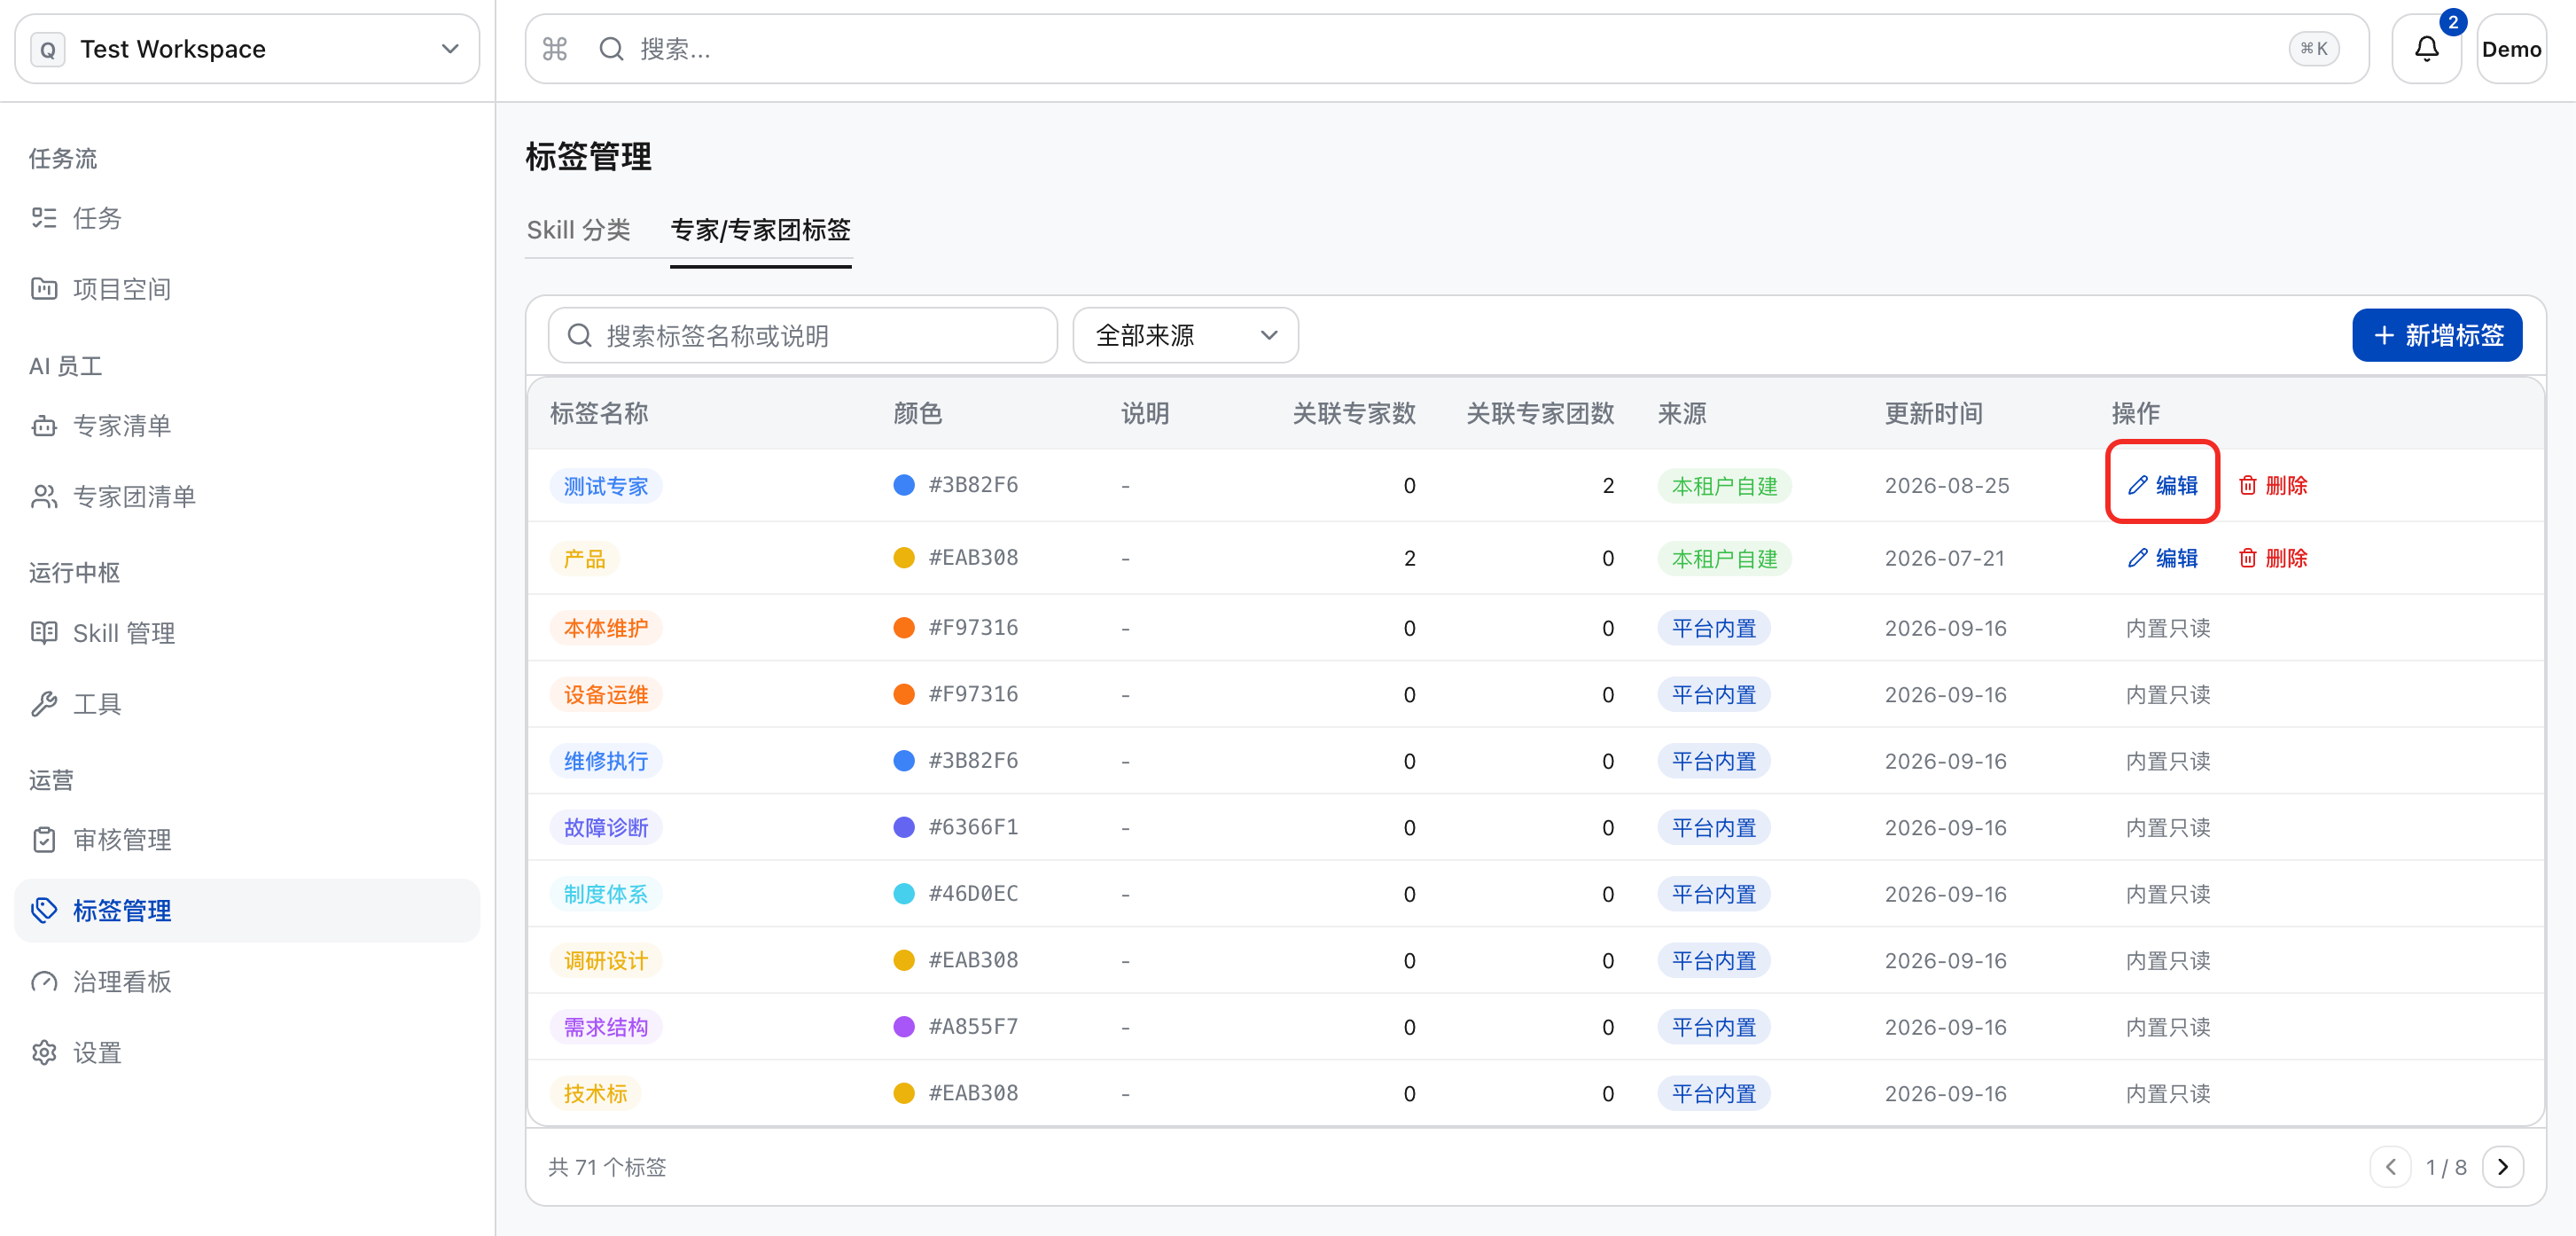
Edit Tags
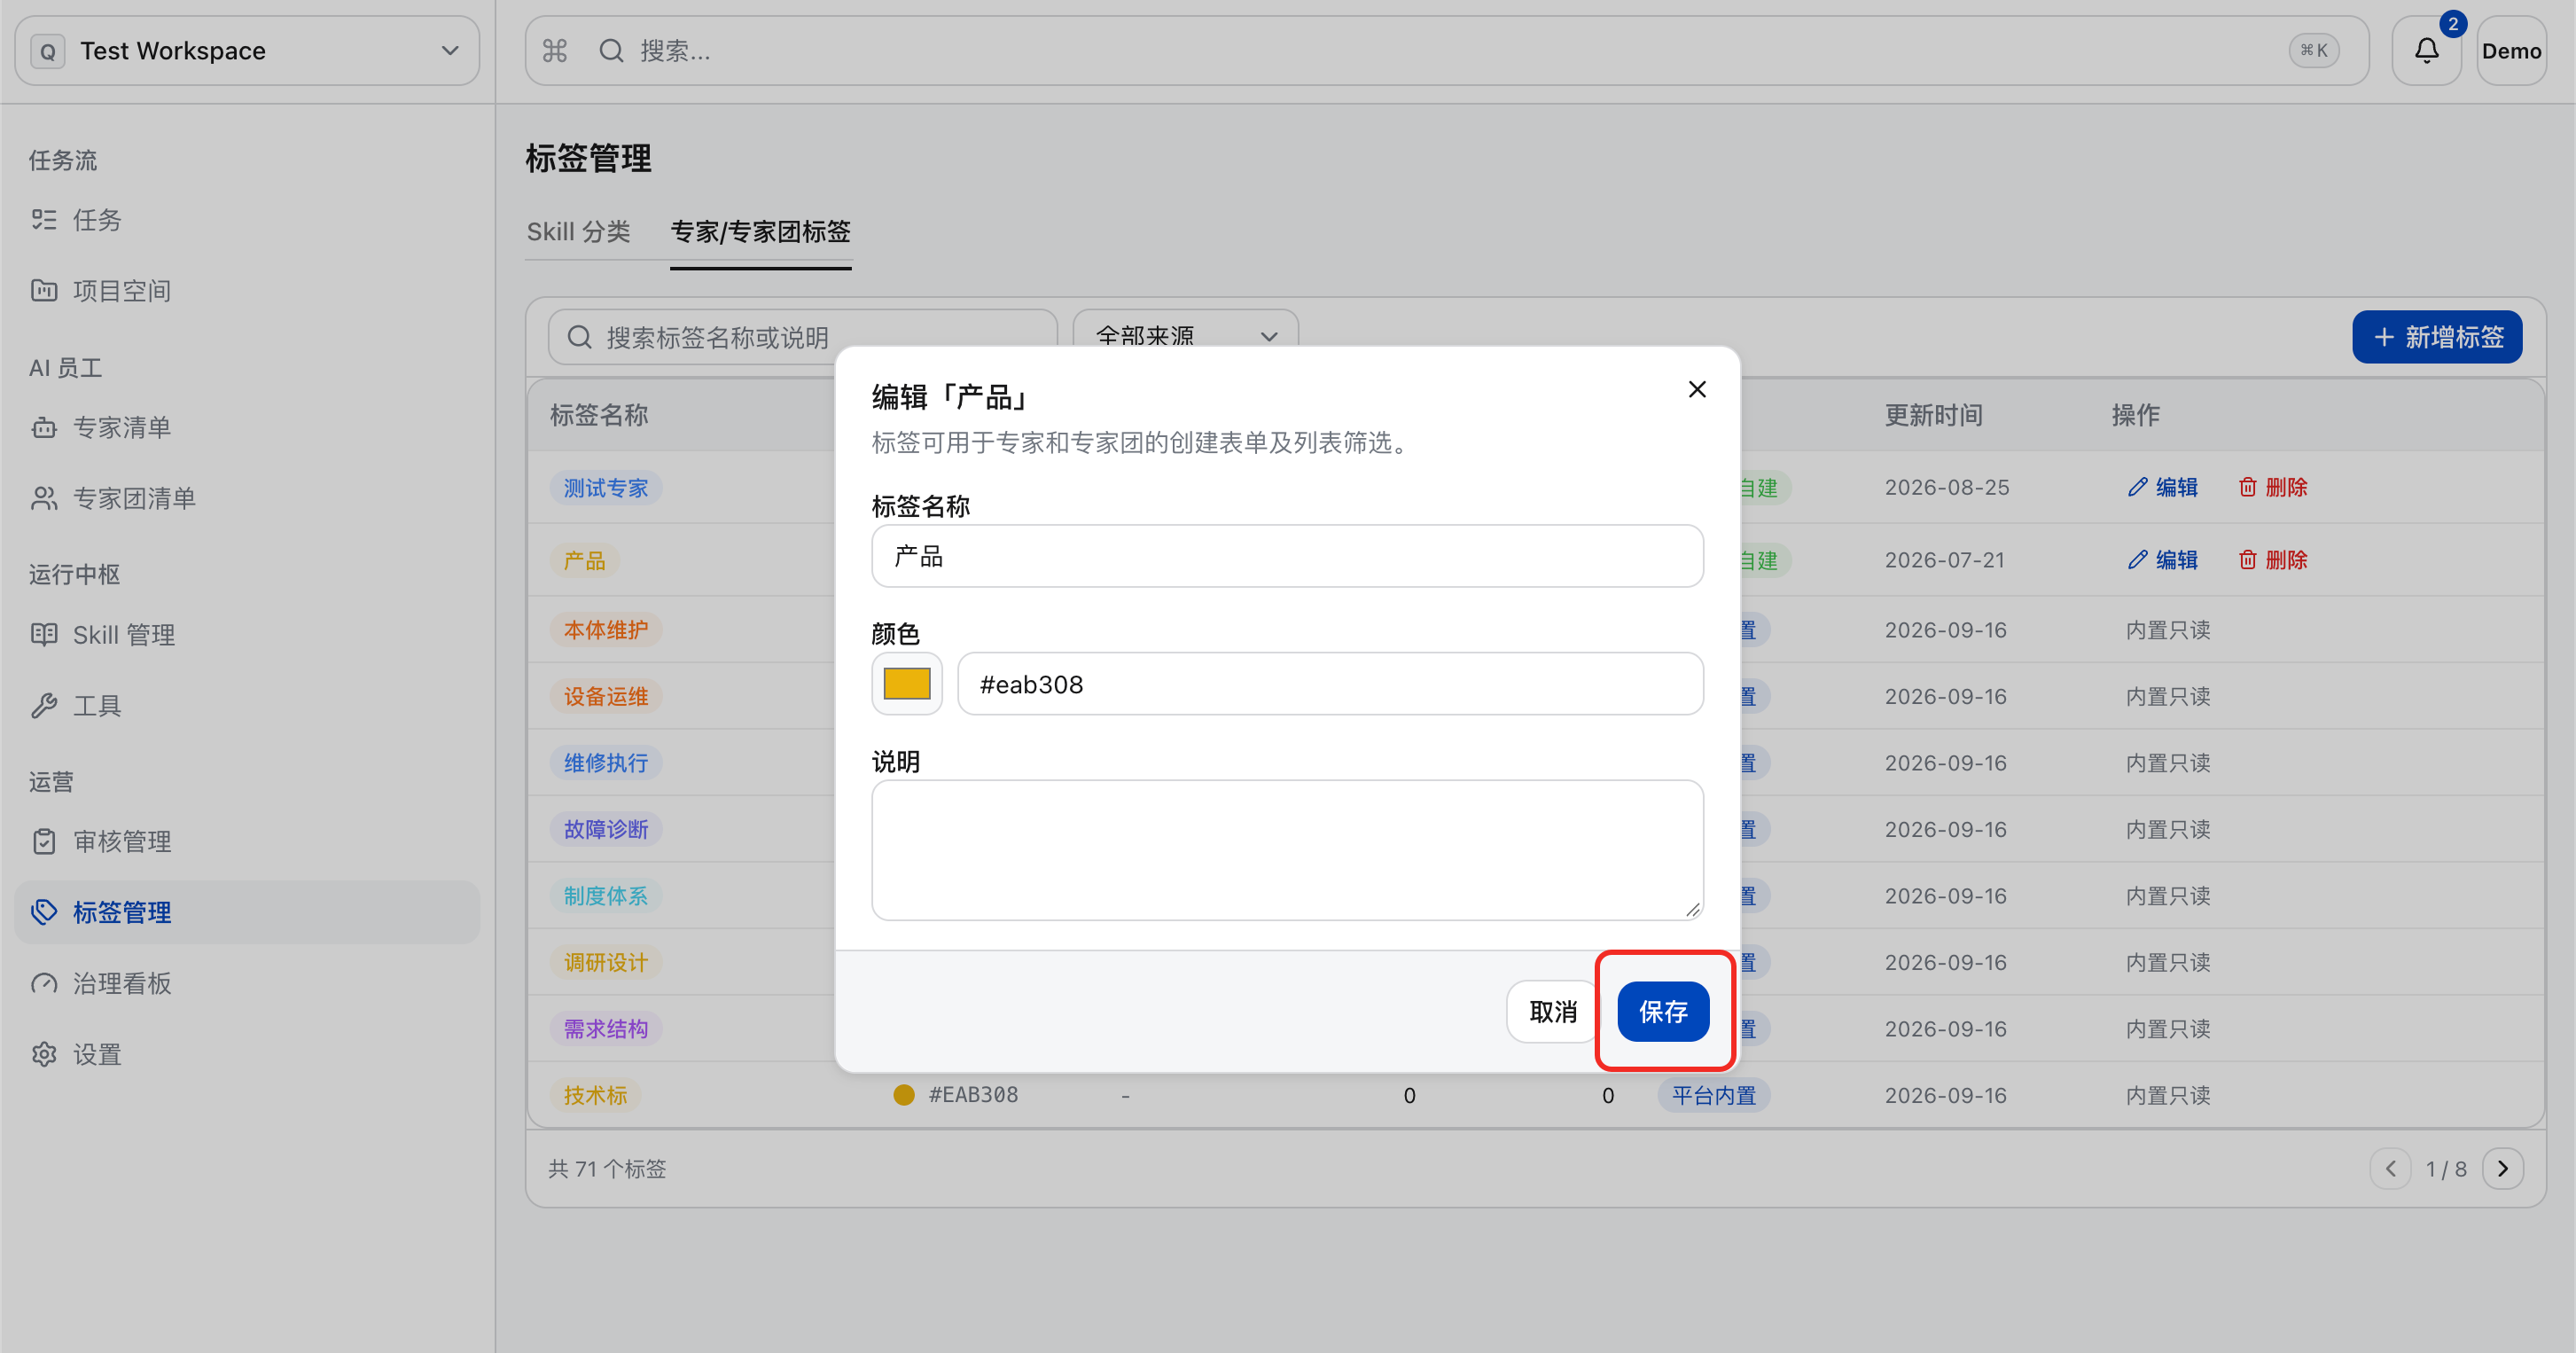
a. Click “Edit”.
b. After updating the information, click “Save”.
Delete Tag
a. Click “Delete”.
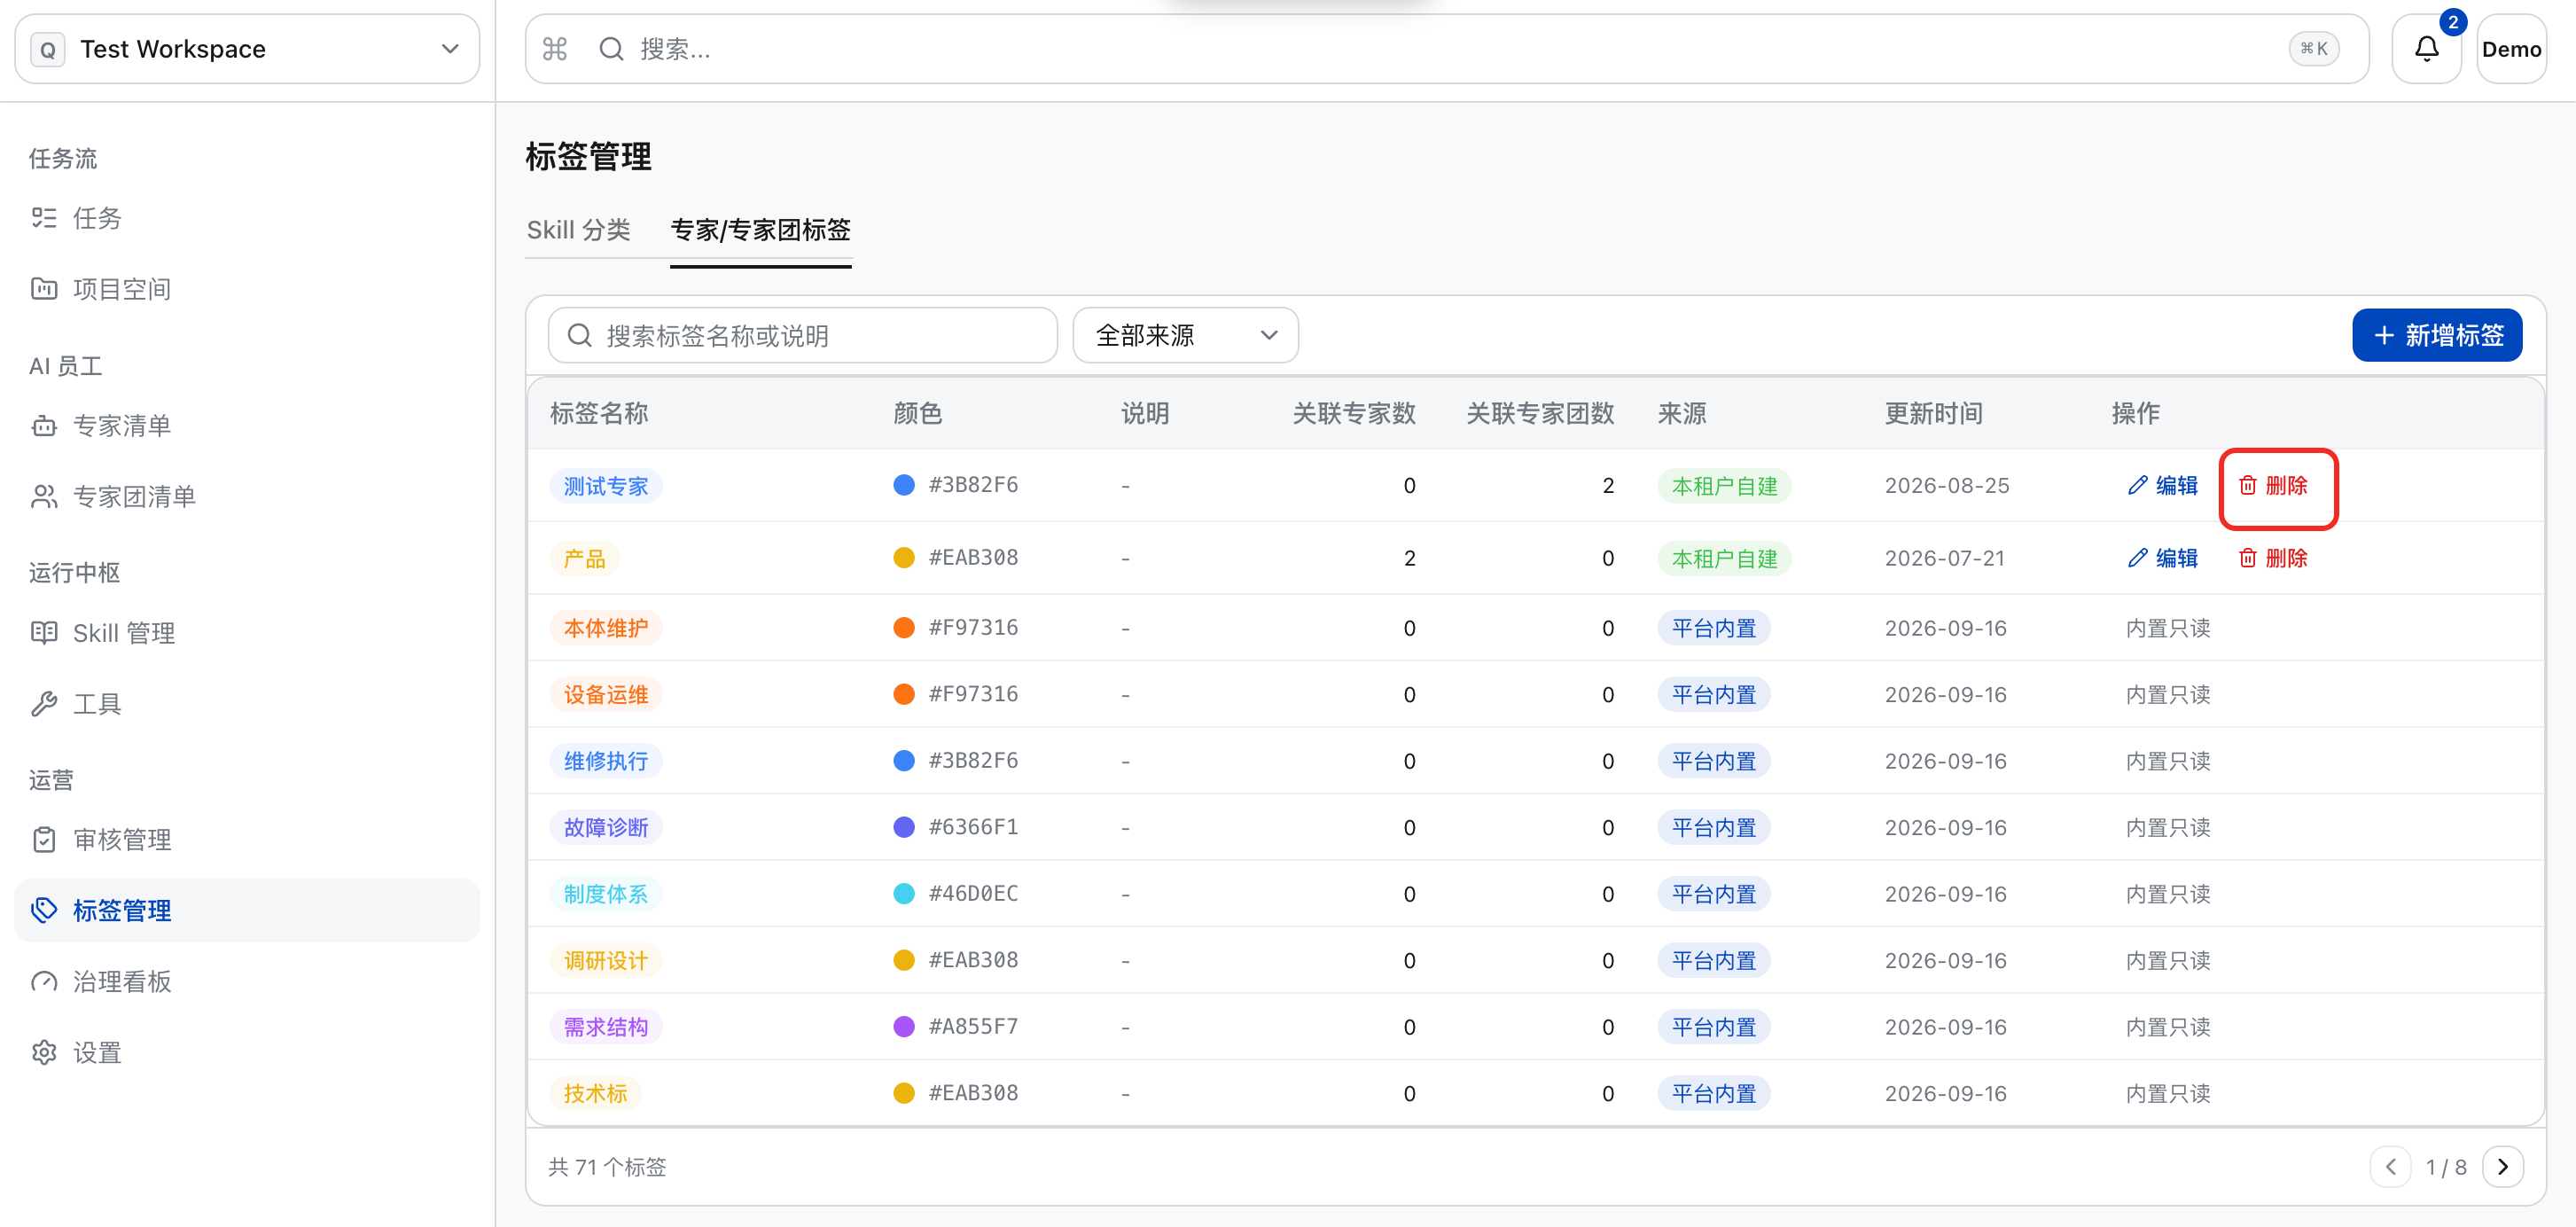
b. In the secondary confirmation pop-up box, click “OK”.
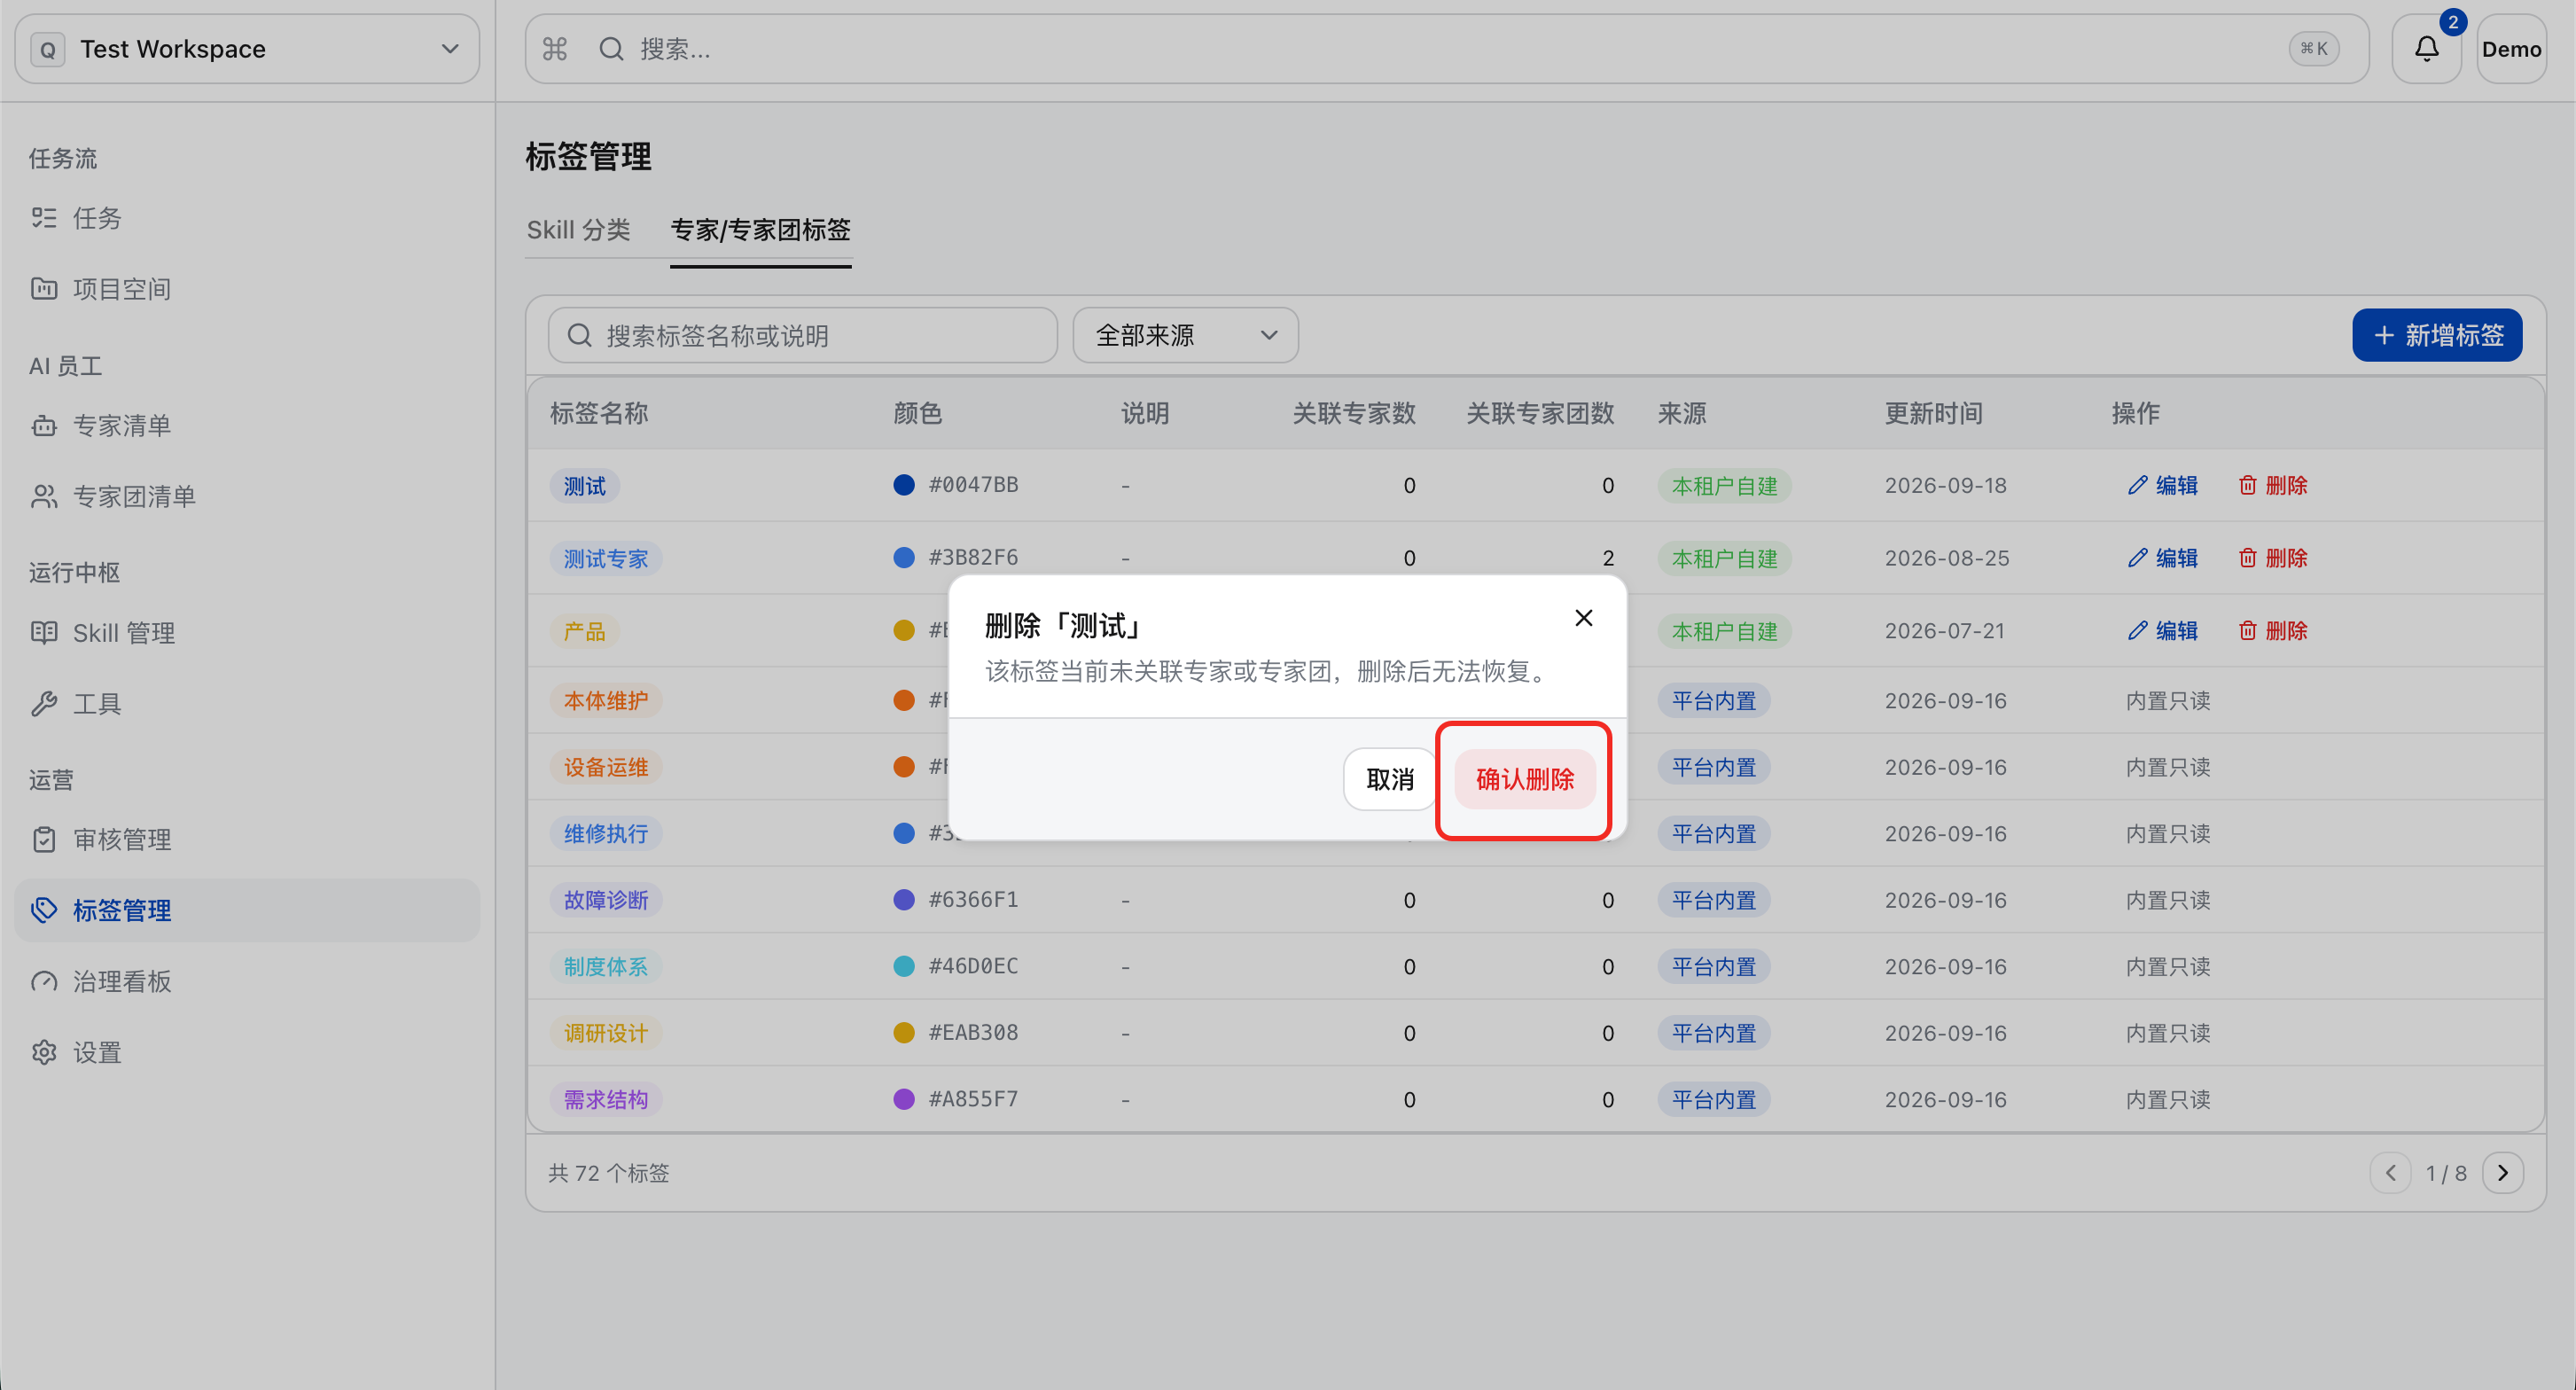
c. If the number of experts associated with the current tab is not 0, reassign the currently associated experts to other categories. After selecting a new category, click “Reassign and Delete”
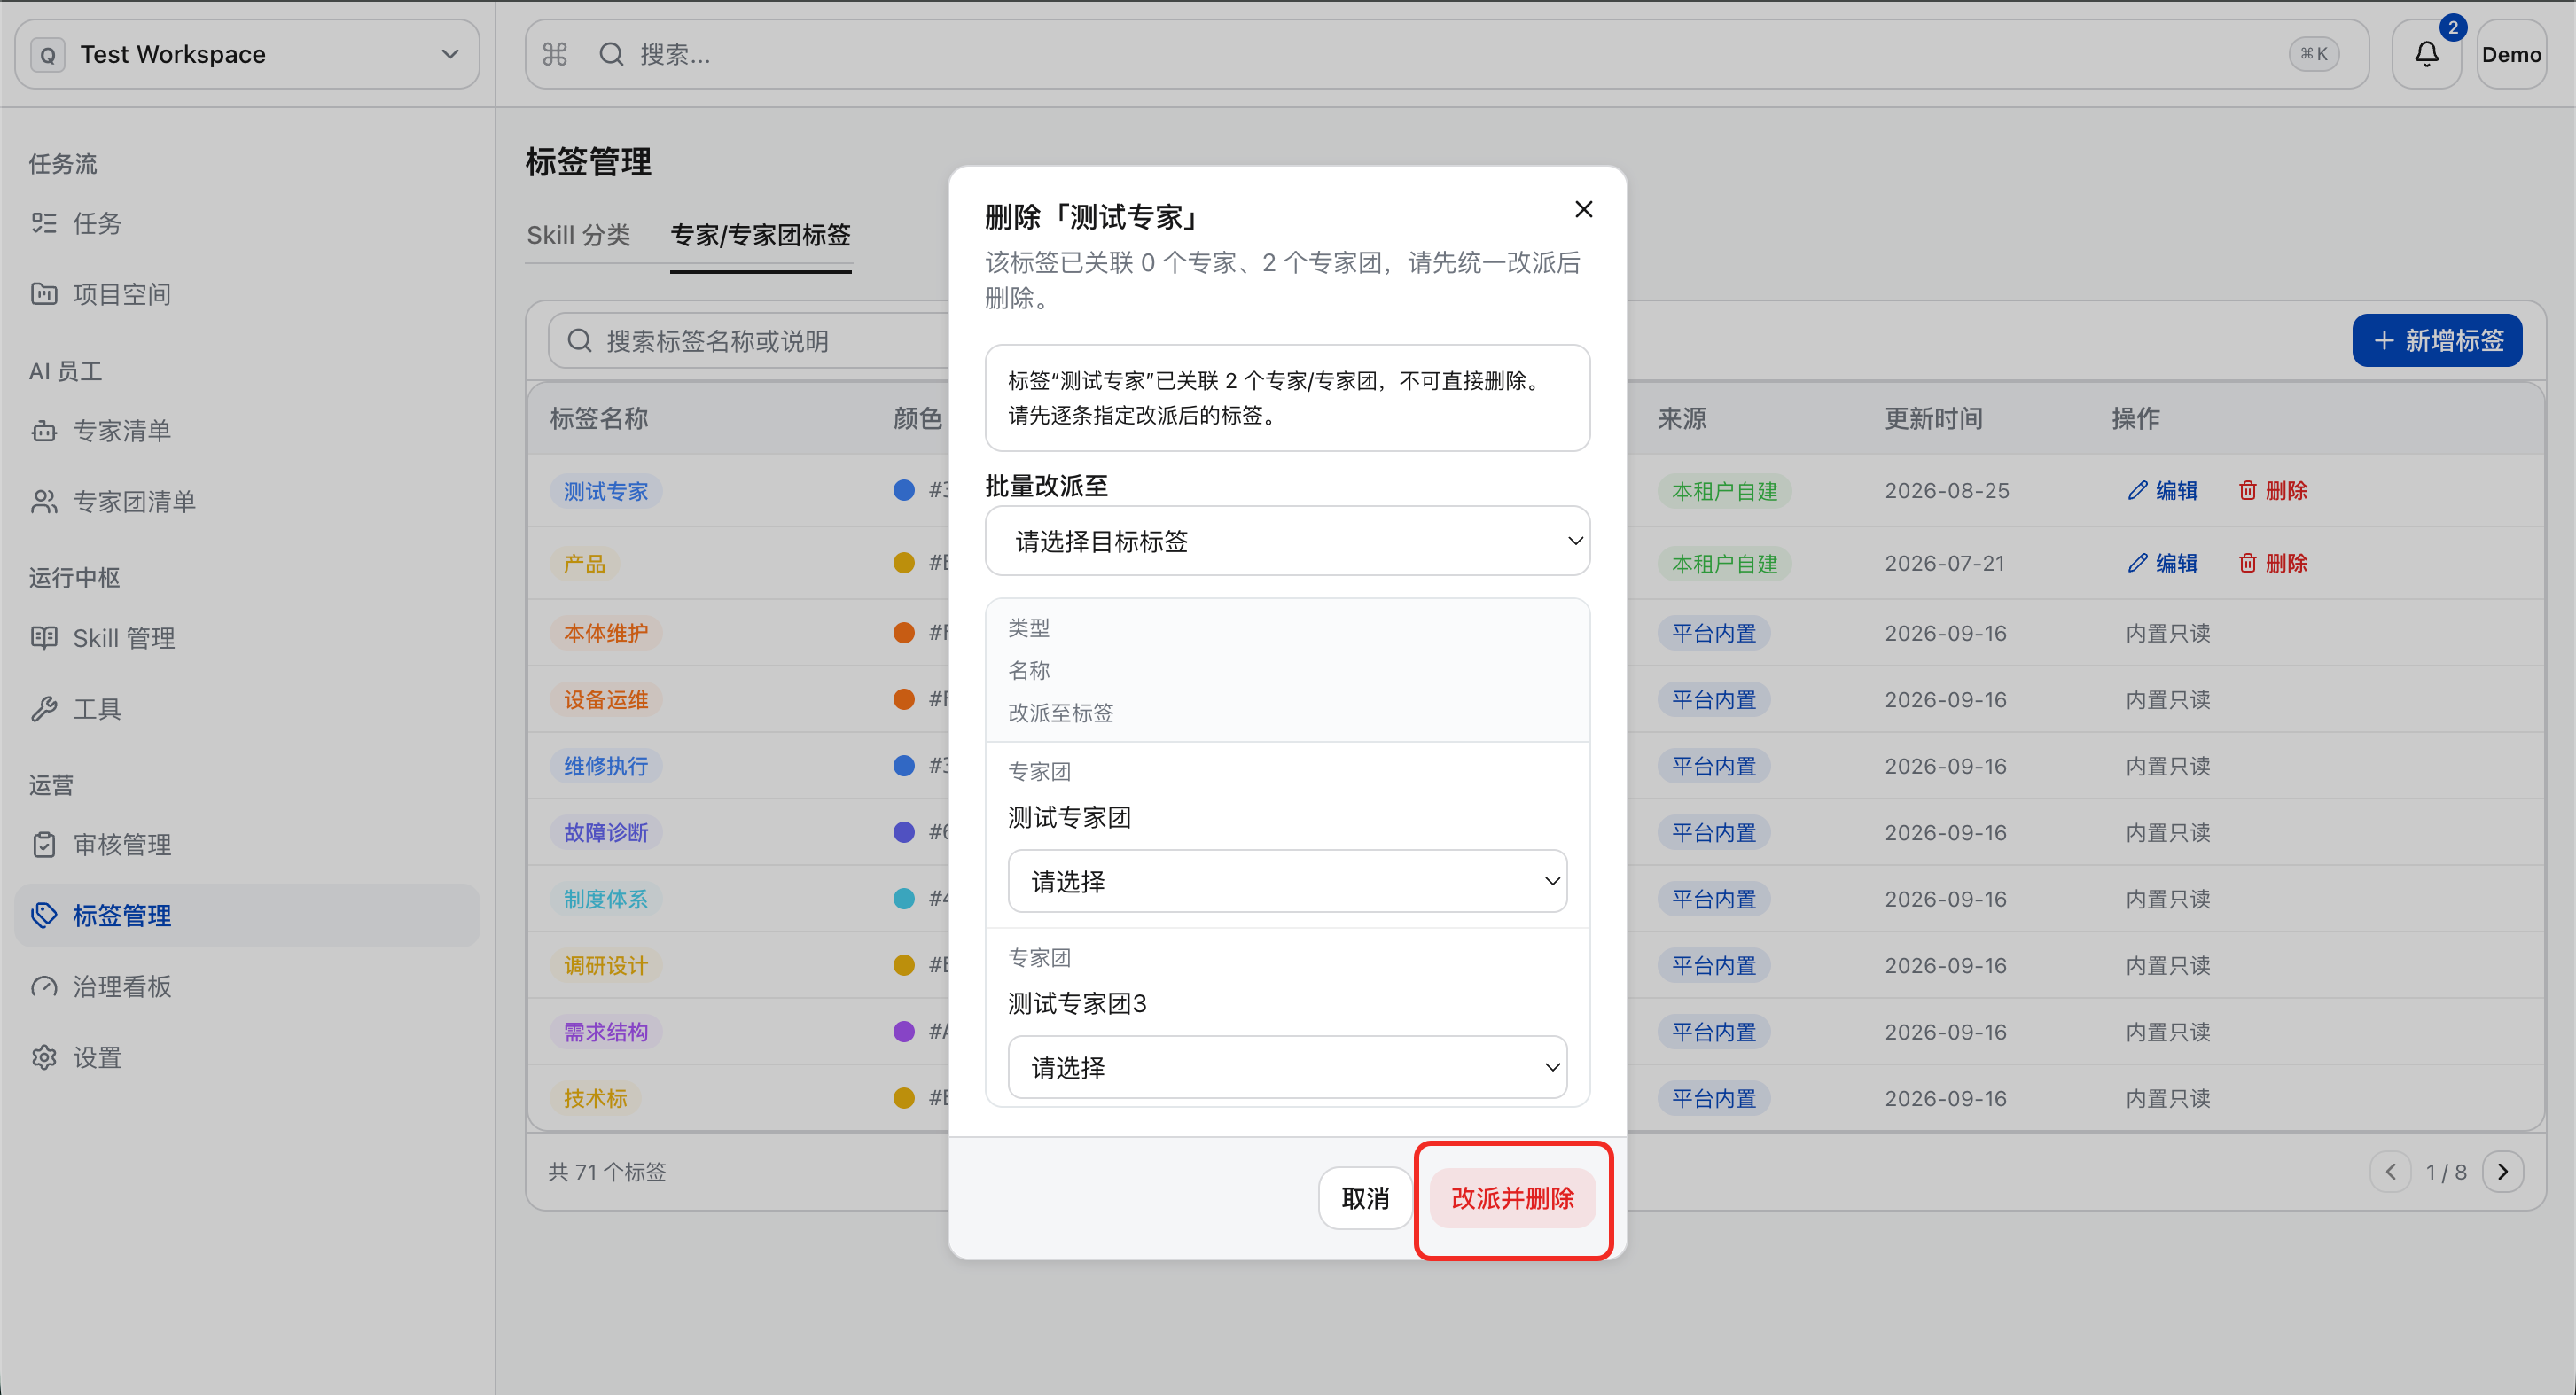
Audit Management
Click “Audit Management” in the left menu to view all pending documentation, which currently includes “SkillHub Publication Application”. Click “Approve” or “Reject”; if rejecting, you need to fill in the review comments.
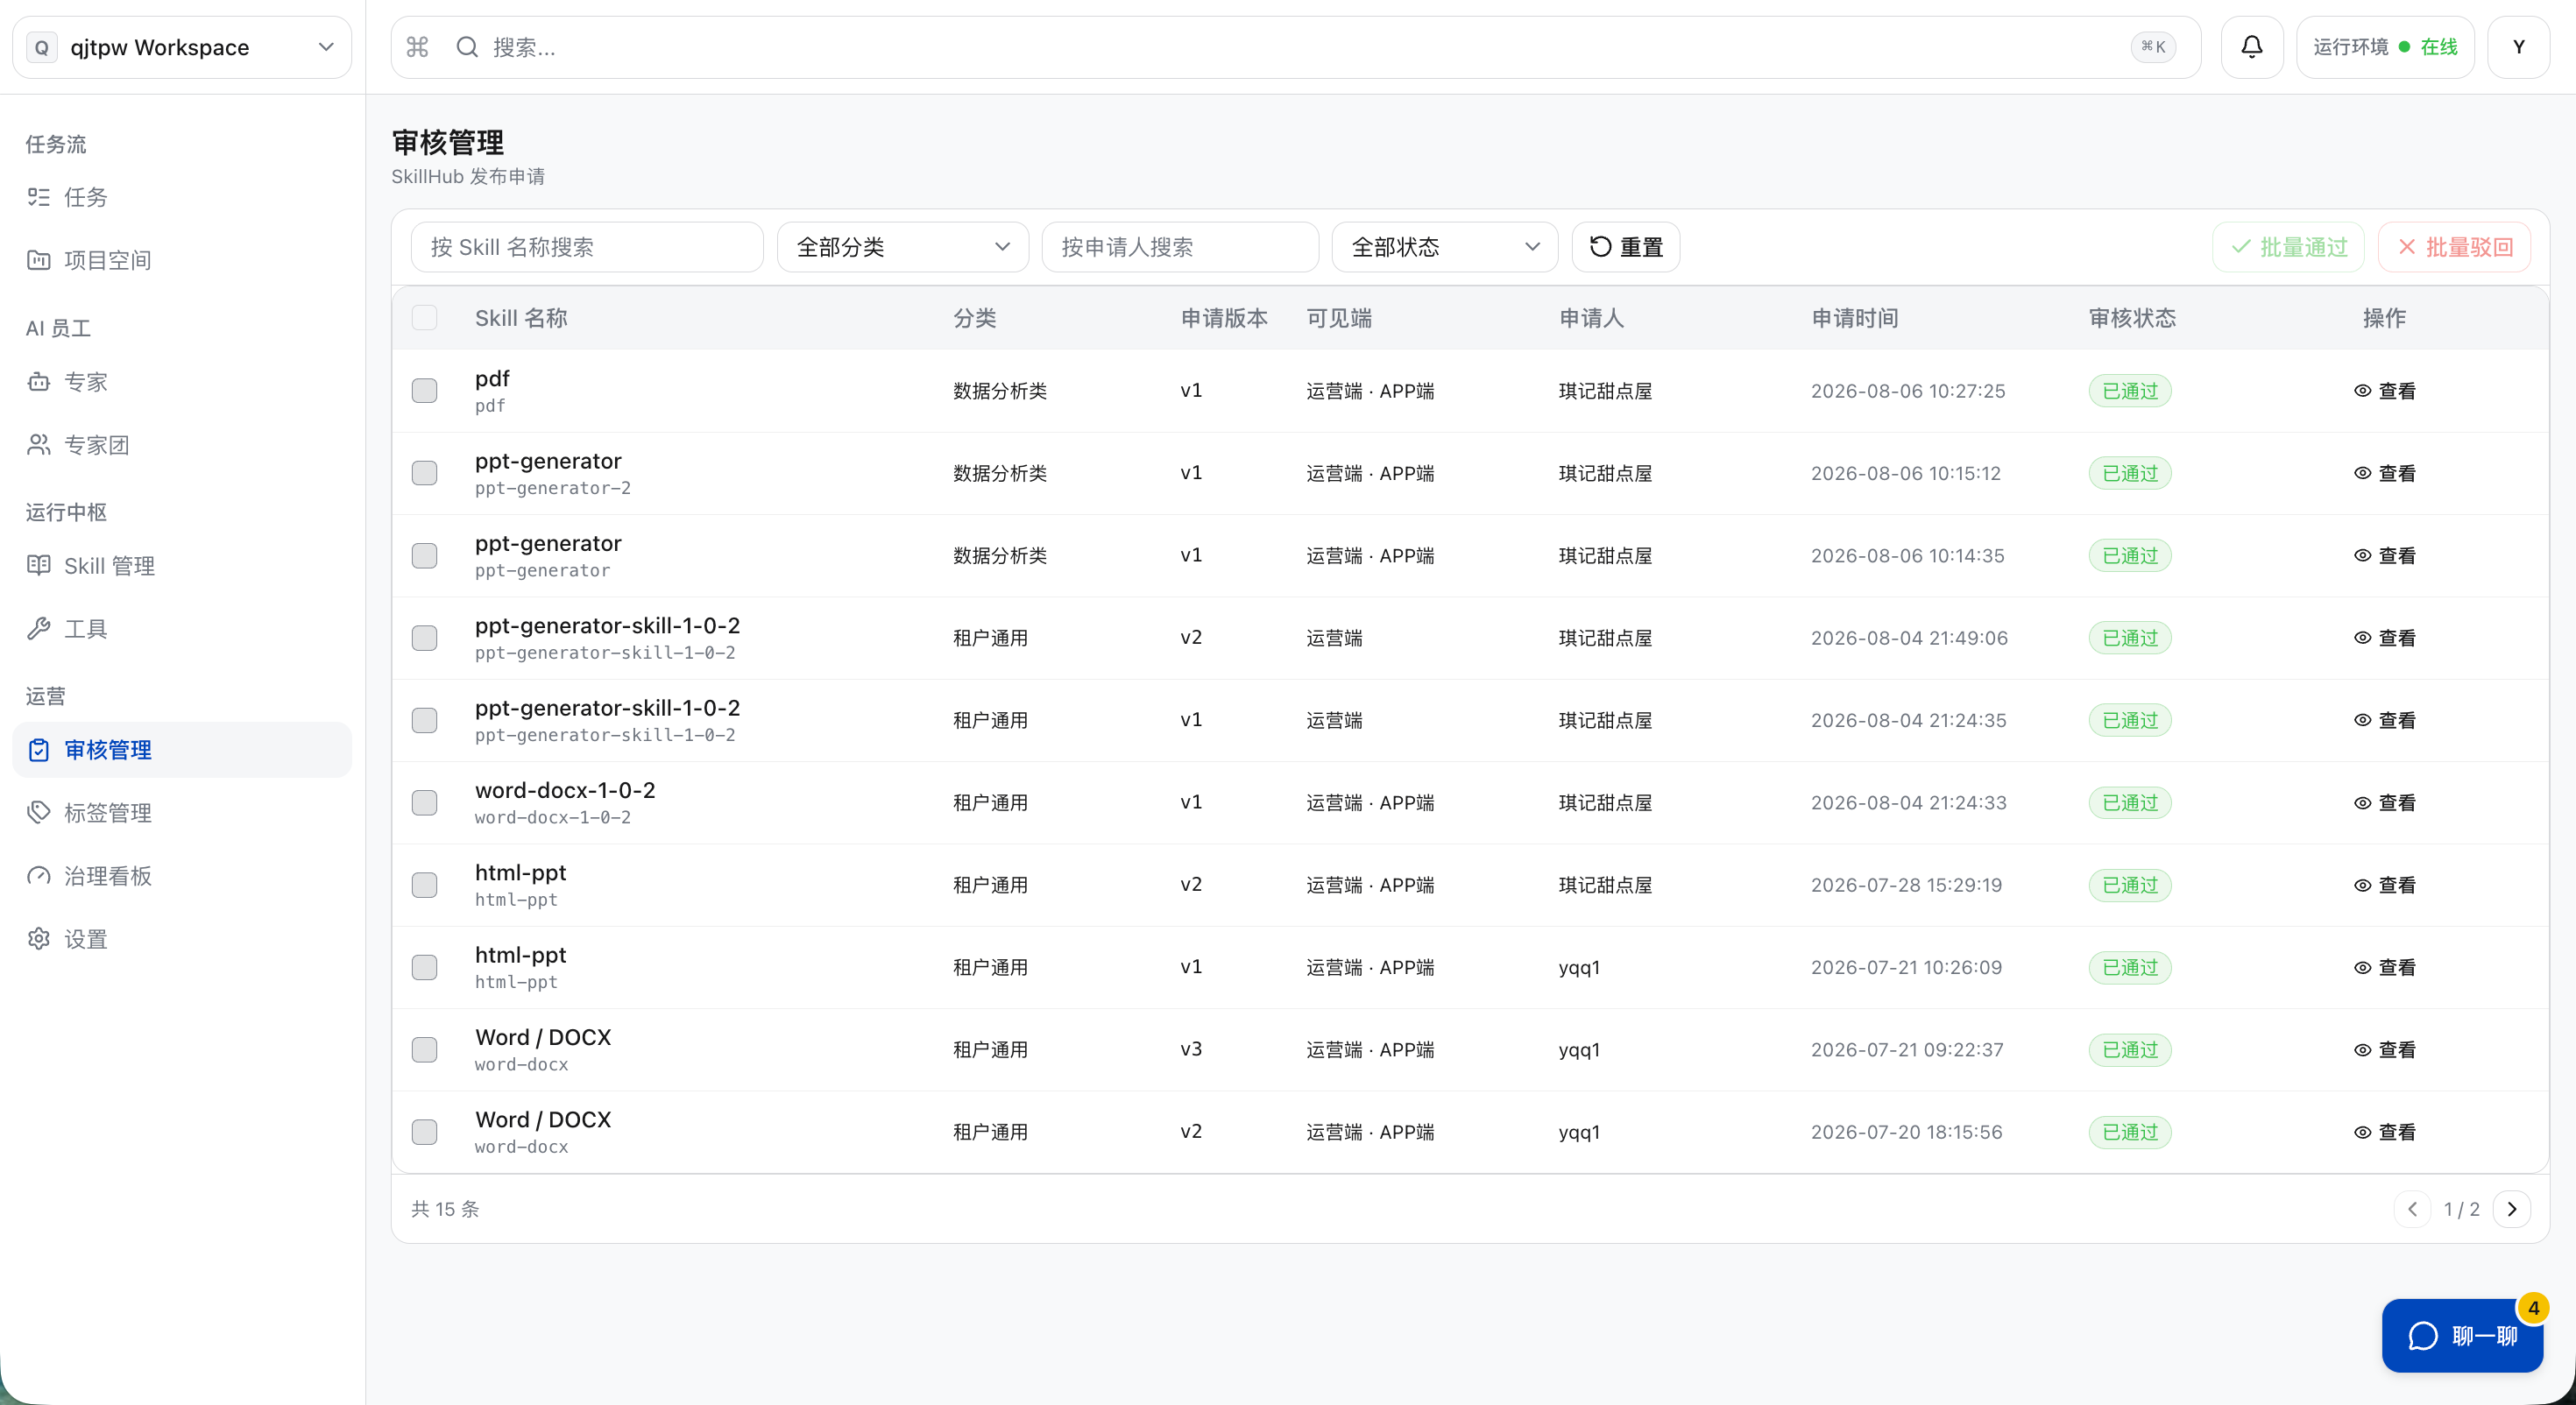
Governance Dashboard
Administrators can use this dashboard to view the workspace health status of tasks, work items, experts, runtime and usage.