Desktop
Product Overview
Product Definition
DeepWorks is a device-cloud collaborative, local-first AI employee workspace for individual and enterprise users. The product uses workspaces to hold local files and task context, Experts and Expert Teams to hold role-based capabilities, Skills, MCP, and Extensions to connect tools and enterprise systems, and supports continuous execution and organizational collaboration through the enterprise knowledge foundation, Collaboration Spaces, and Automation tasks, while connecting to instant messaging platforms through IM Channels.
The core work loop of DeepWorks is: complete work — accumulate knowledge — reuse capabilities — continuously enhance. Users can start conversations just as they would with a general-purpose AI assistant, or hand complex tasks to agents with defined job responsibilities, knowledge boundaries, tool permissions, and execution policies for continuous completion.
Key Capabilities
DeepWorks mainly provides the following capabilities:
-
Local AI conversations: multi-turn conversations, file processing, model switching, and task execution around a workspace.
-
Experts and Expert Teams: summon a single Expert or a multi-role Expert Team to handle professional tasks by business scenario.
-
Skill and Extensions: install and invoke reusable skills, and connect external capabilities through MCP or plugins.
-
Enterprise Knowledge Center: connect enterprise knowledge and business systems, with the enterprise ontology as the unified semantic foundation.
-
Automation: turn repetitive work into tasks that run on a schedule, with centralized management of run schedules, start/stop status, and execution results.
-
Collaboration: manage members, tasks, file versions, and deliverables in Collaboration Spaces, linking local execution with cloud AI processing.
-
IM Channels: connect instant messaging platforms such as DingTalk and Feishu, send tasks and receive replies through bots, and view the corresponding sessions on the desktop.
Typical Use Cases
-
Read project materials in a specified workspace and produce deliverables such as proposals, reports, PPTs, spreadsheets, or code.
-
Summon Experts or Expert Teams in data governance, equipment operations and maintenance, sales analysis, store operations, and other domains to complete professional analysis.
-
Set news curation, work briefings, or weekly reviews as Automation tasks, run them on schedule, and review the results.
-
Centrally manage project materials in a Collaboration Space, track progress through tasks, annotate documents with feedback, and keep traceable deliverables.
-
Submit work requests to a bot in DingTalk or Feishu, receive processing replies, and continue viewing and following up on the conversation on the DeepWorks desktop.
Scope of This Manual
This manual focuses on desktop operations after entering DeepWorks, covering Getting Started Tutorials, Workspace and Conversations, AI Colleagues, Skill and Extensions, Automation, IM Channels, Collaboration, and Account and System Settings. Client download and installation, enterprise provisioning and login authentication, server deployment and backend operations, as well as the underlying configuration of models, data sources, and third-party systems, are usually handled by enterprise administrators or technical support staff and are not covered in this version. For the DingTalk and Feishu bot integration configuration required by IM Channels, see the corresponding chapter. In addition, content related to the Enterprise Knowledge Center is not covered in this manual and is introduced in a separate manual.
Glossary
Workspace: the basic working environment in which DeepWorks carries out tasks. A workspace is associated with local directories, files, conversations, and permission scopes, and the AI reads or writes content only within the authorized scope by default.
Conversation: a continuous interaction record between the user and a general assistant, Expert, or Expert Team on a given topic.
Expert: a professional agent preconfigured for a specific business domain, suited to tasks completed by a single professional role.
Expert Team: an execution combination formed by multiple professional roles working together, suited to complex tasks that span disciplines or steps or require mutual verification.
Skill: a standardized, reusable capability description and execution method. During a conversation, installed Skills can be loaded and invoked as the task requires.
Plugin: a connector component that adds capabilities such as browser control, computer control, image generation, requirement summaries, and weekly reports to DeepWorks.
MCP: a standardized capability interface used to connect external systems, tools, or enterprise data services. Availability depends on the enterprise environment and connection configuration.
CLI (Command Line Interface): an interface for invoking programs or service capabilities through commands. After completing the required installation, configuration, and login authorization, users can state tasks in natural language in a session, and the AI invokes the CLI in combination with the relevant Skill, without writing commands manually.
Sandbox: an isolated environment that restricts the scope of file, system, and network access when an agent runs.
Quick Start
Getting to Know the Workbench
After entering DeepWorks, the page is mainly divided into the left navigation area, the central workspace, and the task input area at the bottom.
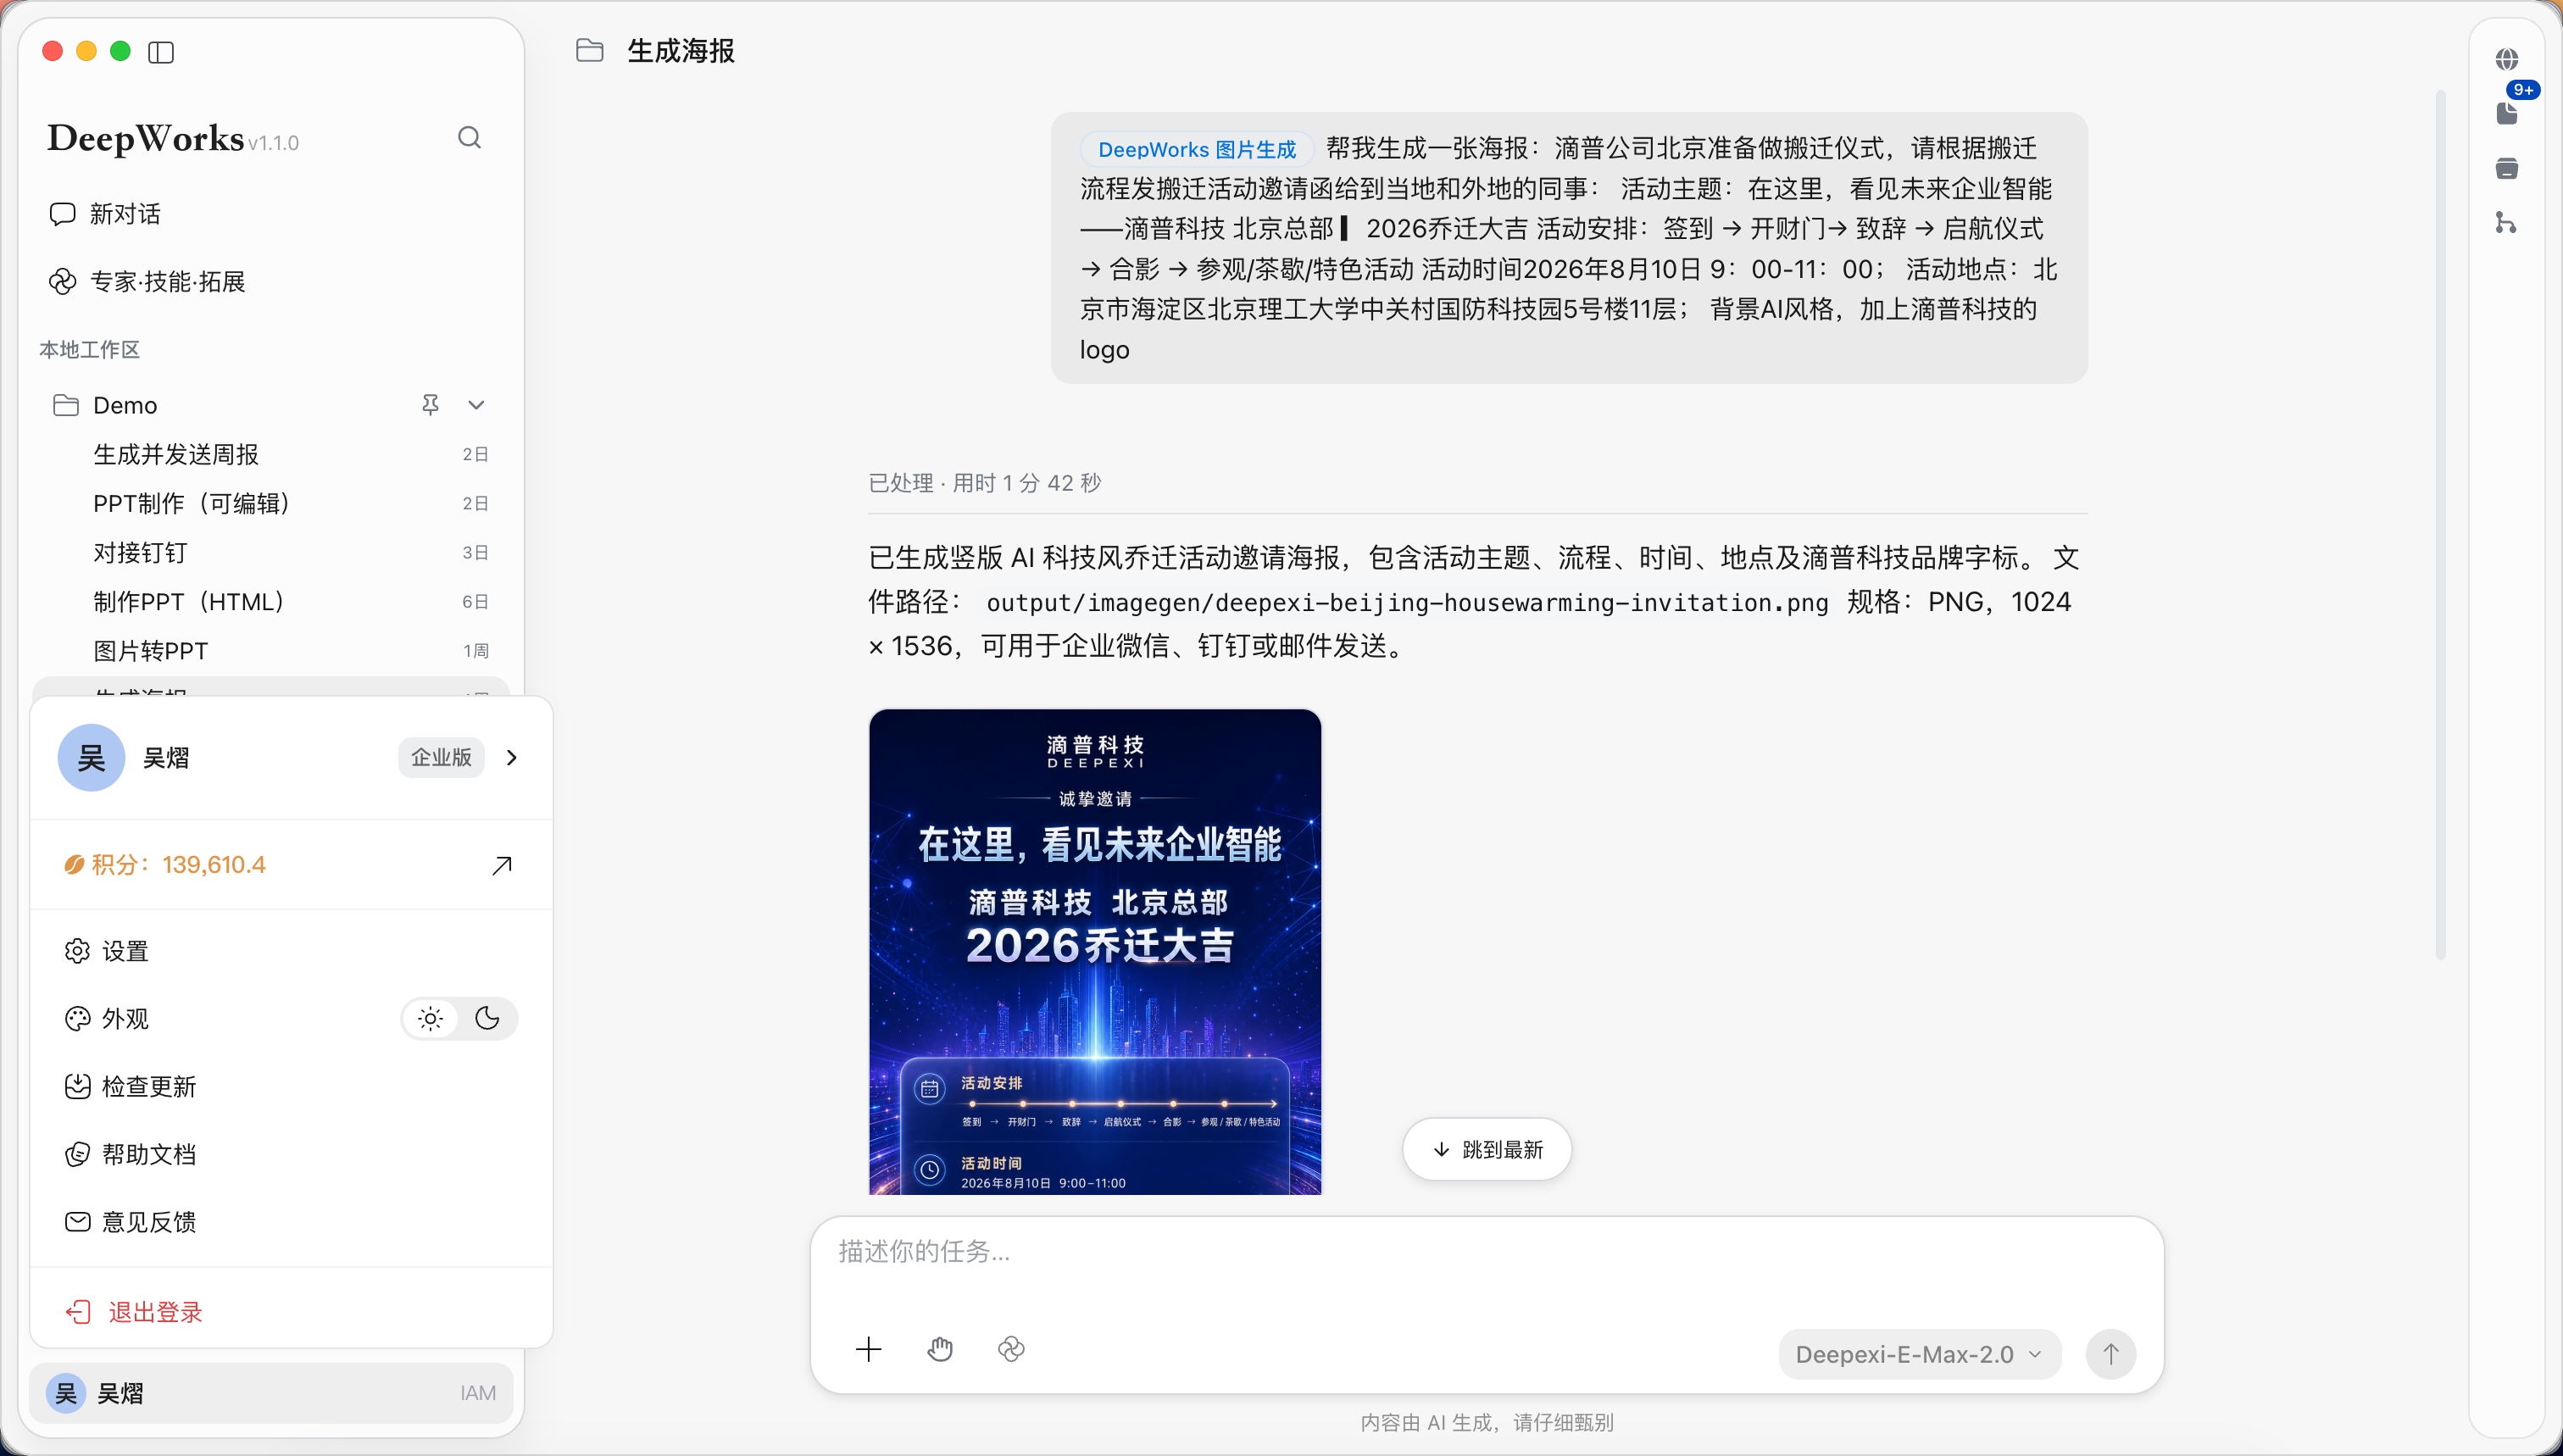
-
Left navigation area: access new conversations, agents, Experts · Skills · Extensions, Collaboration, Automation, workspaces, long-running tasks, and the Deepexi foundation.
-
Central workspace: displays the current conversation, task execution process, or feature management page.
-
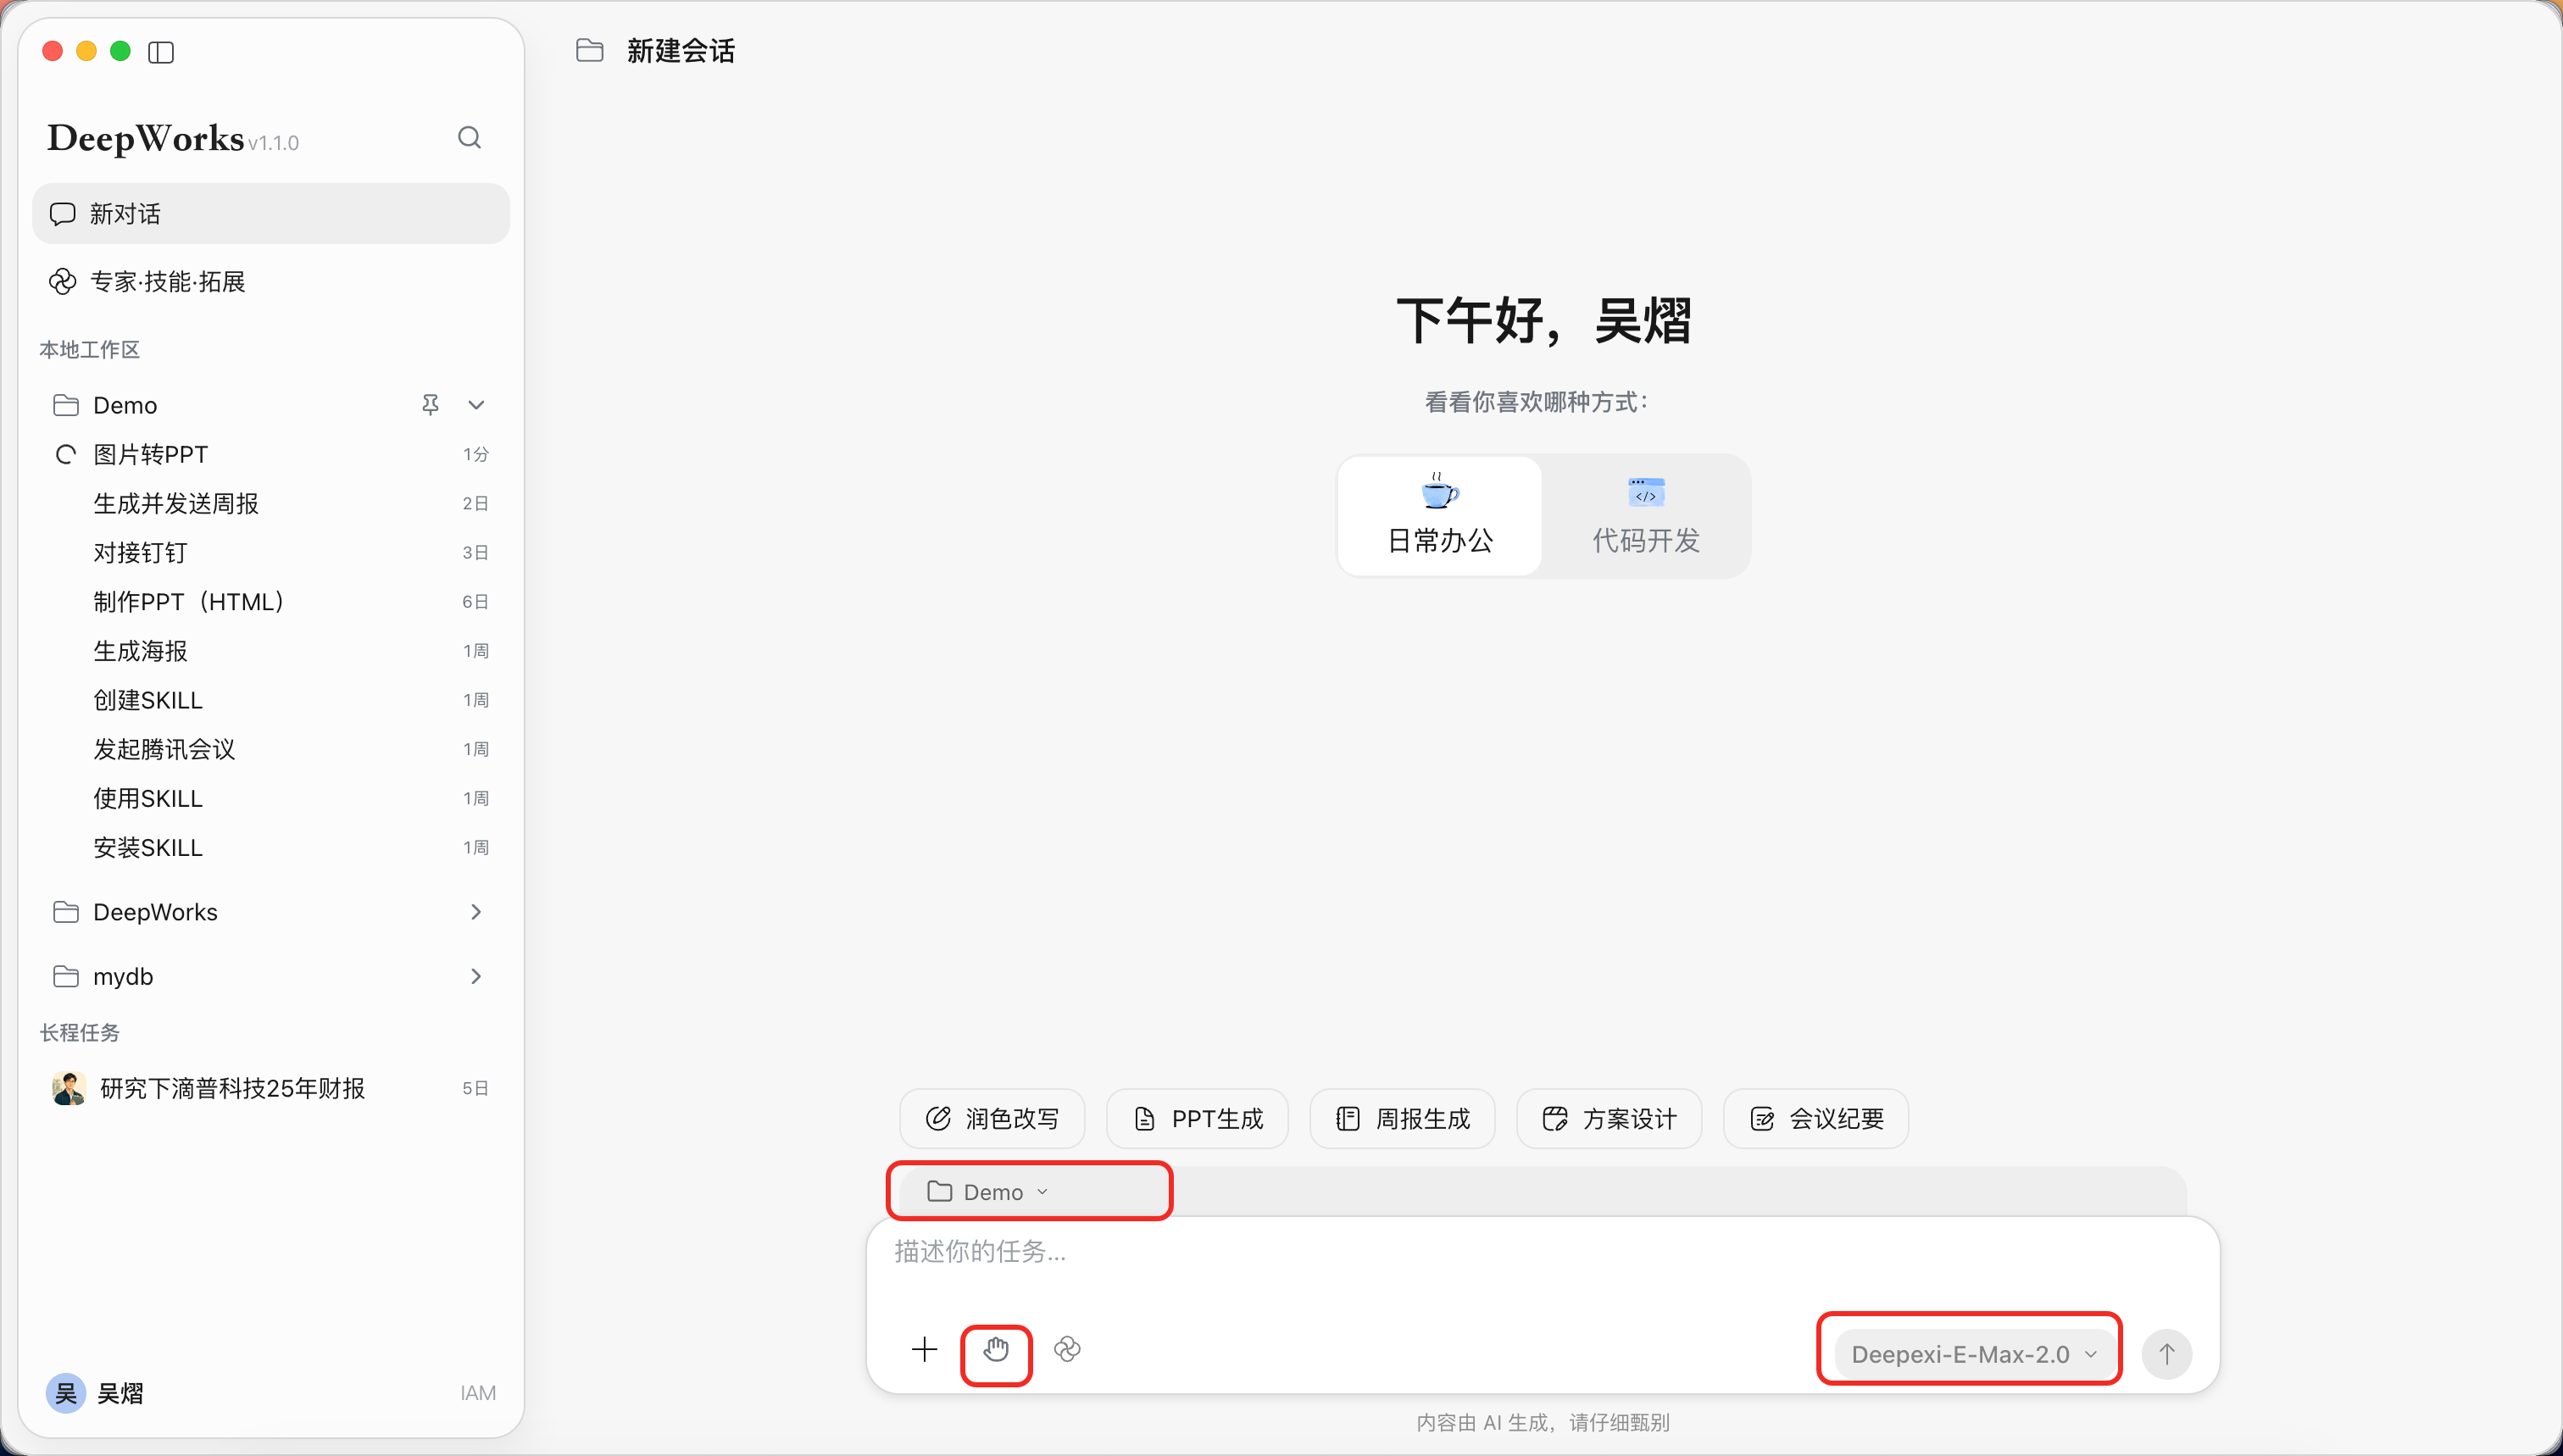
Task input area at the bottom: enter task requirements and select the model, reasoning effort, workspace, Expert, Skill, MCP, or Extension.
-
Account entry: switch accounts, set the theme, check for updates, open the help documentation, or sign out.
Completing Your First Task
It is recommended to start a task in the following steps:
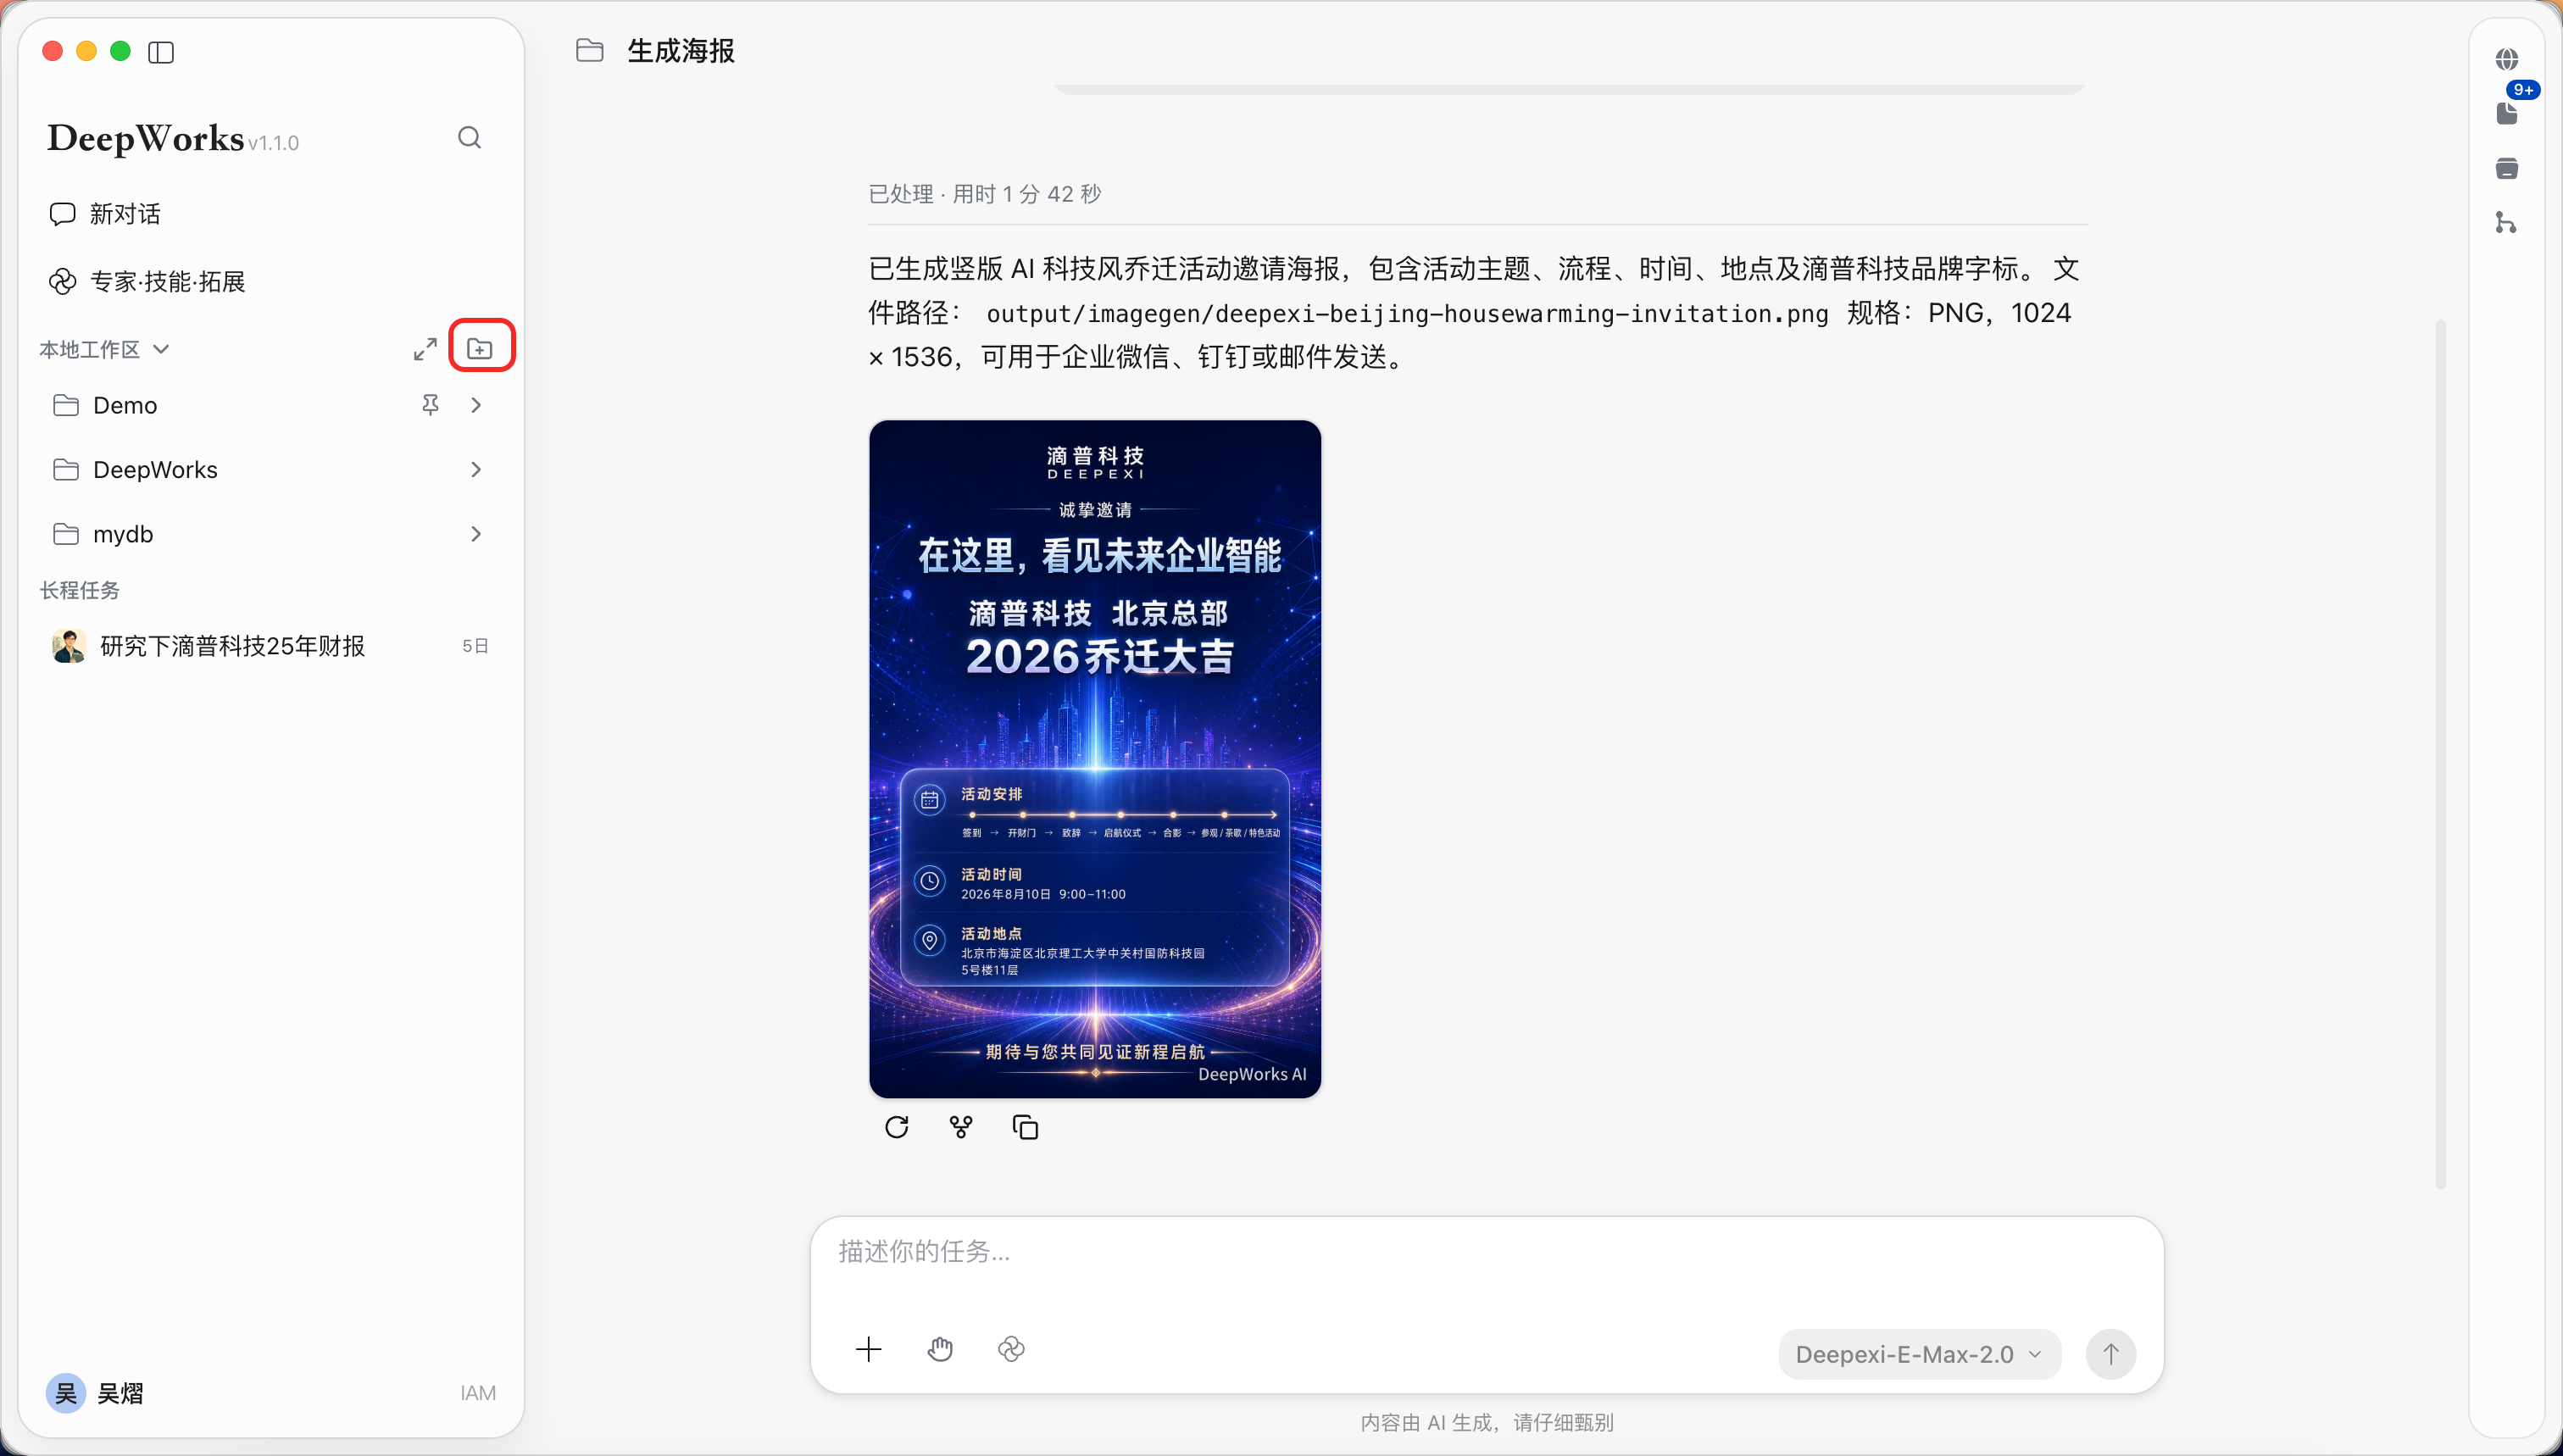
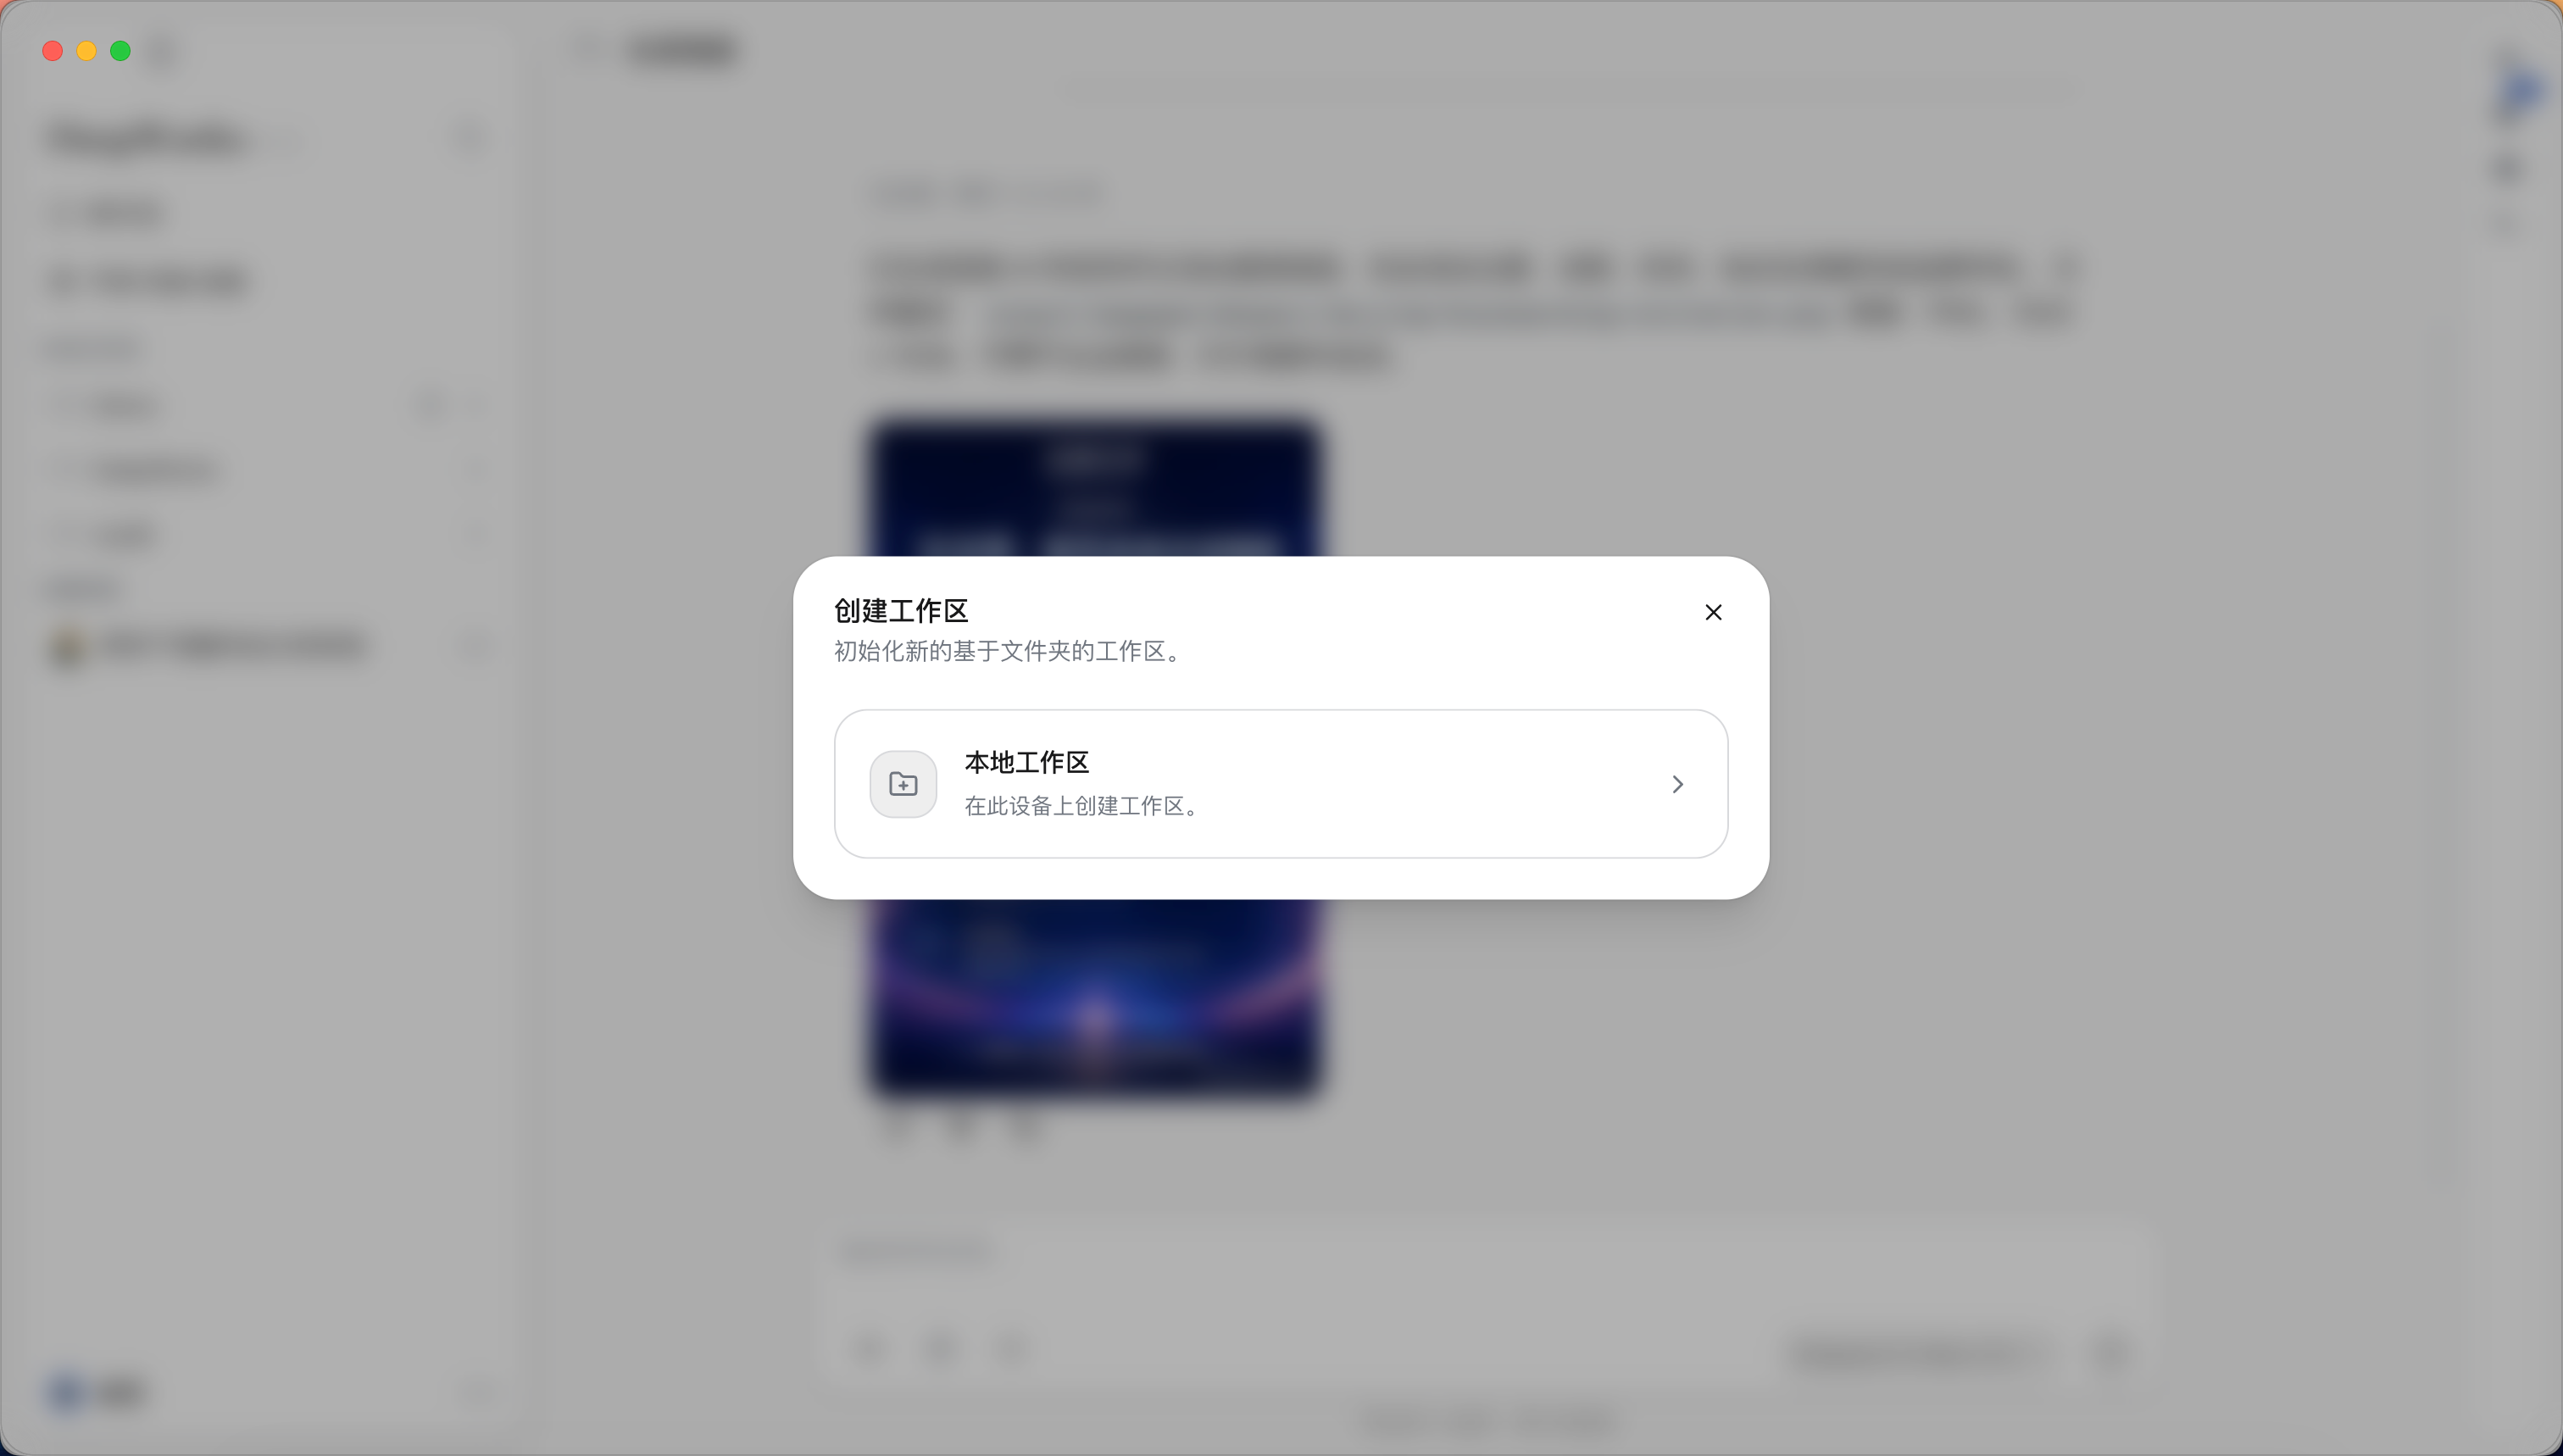
- Select an existing workspace on the left, or click Create Workspace to create a new workspace.
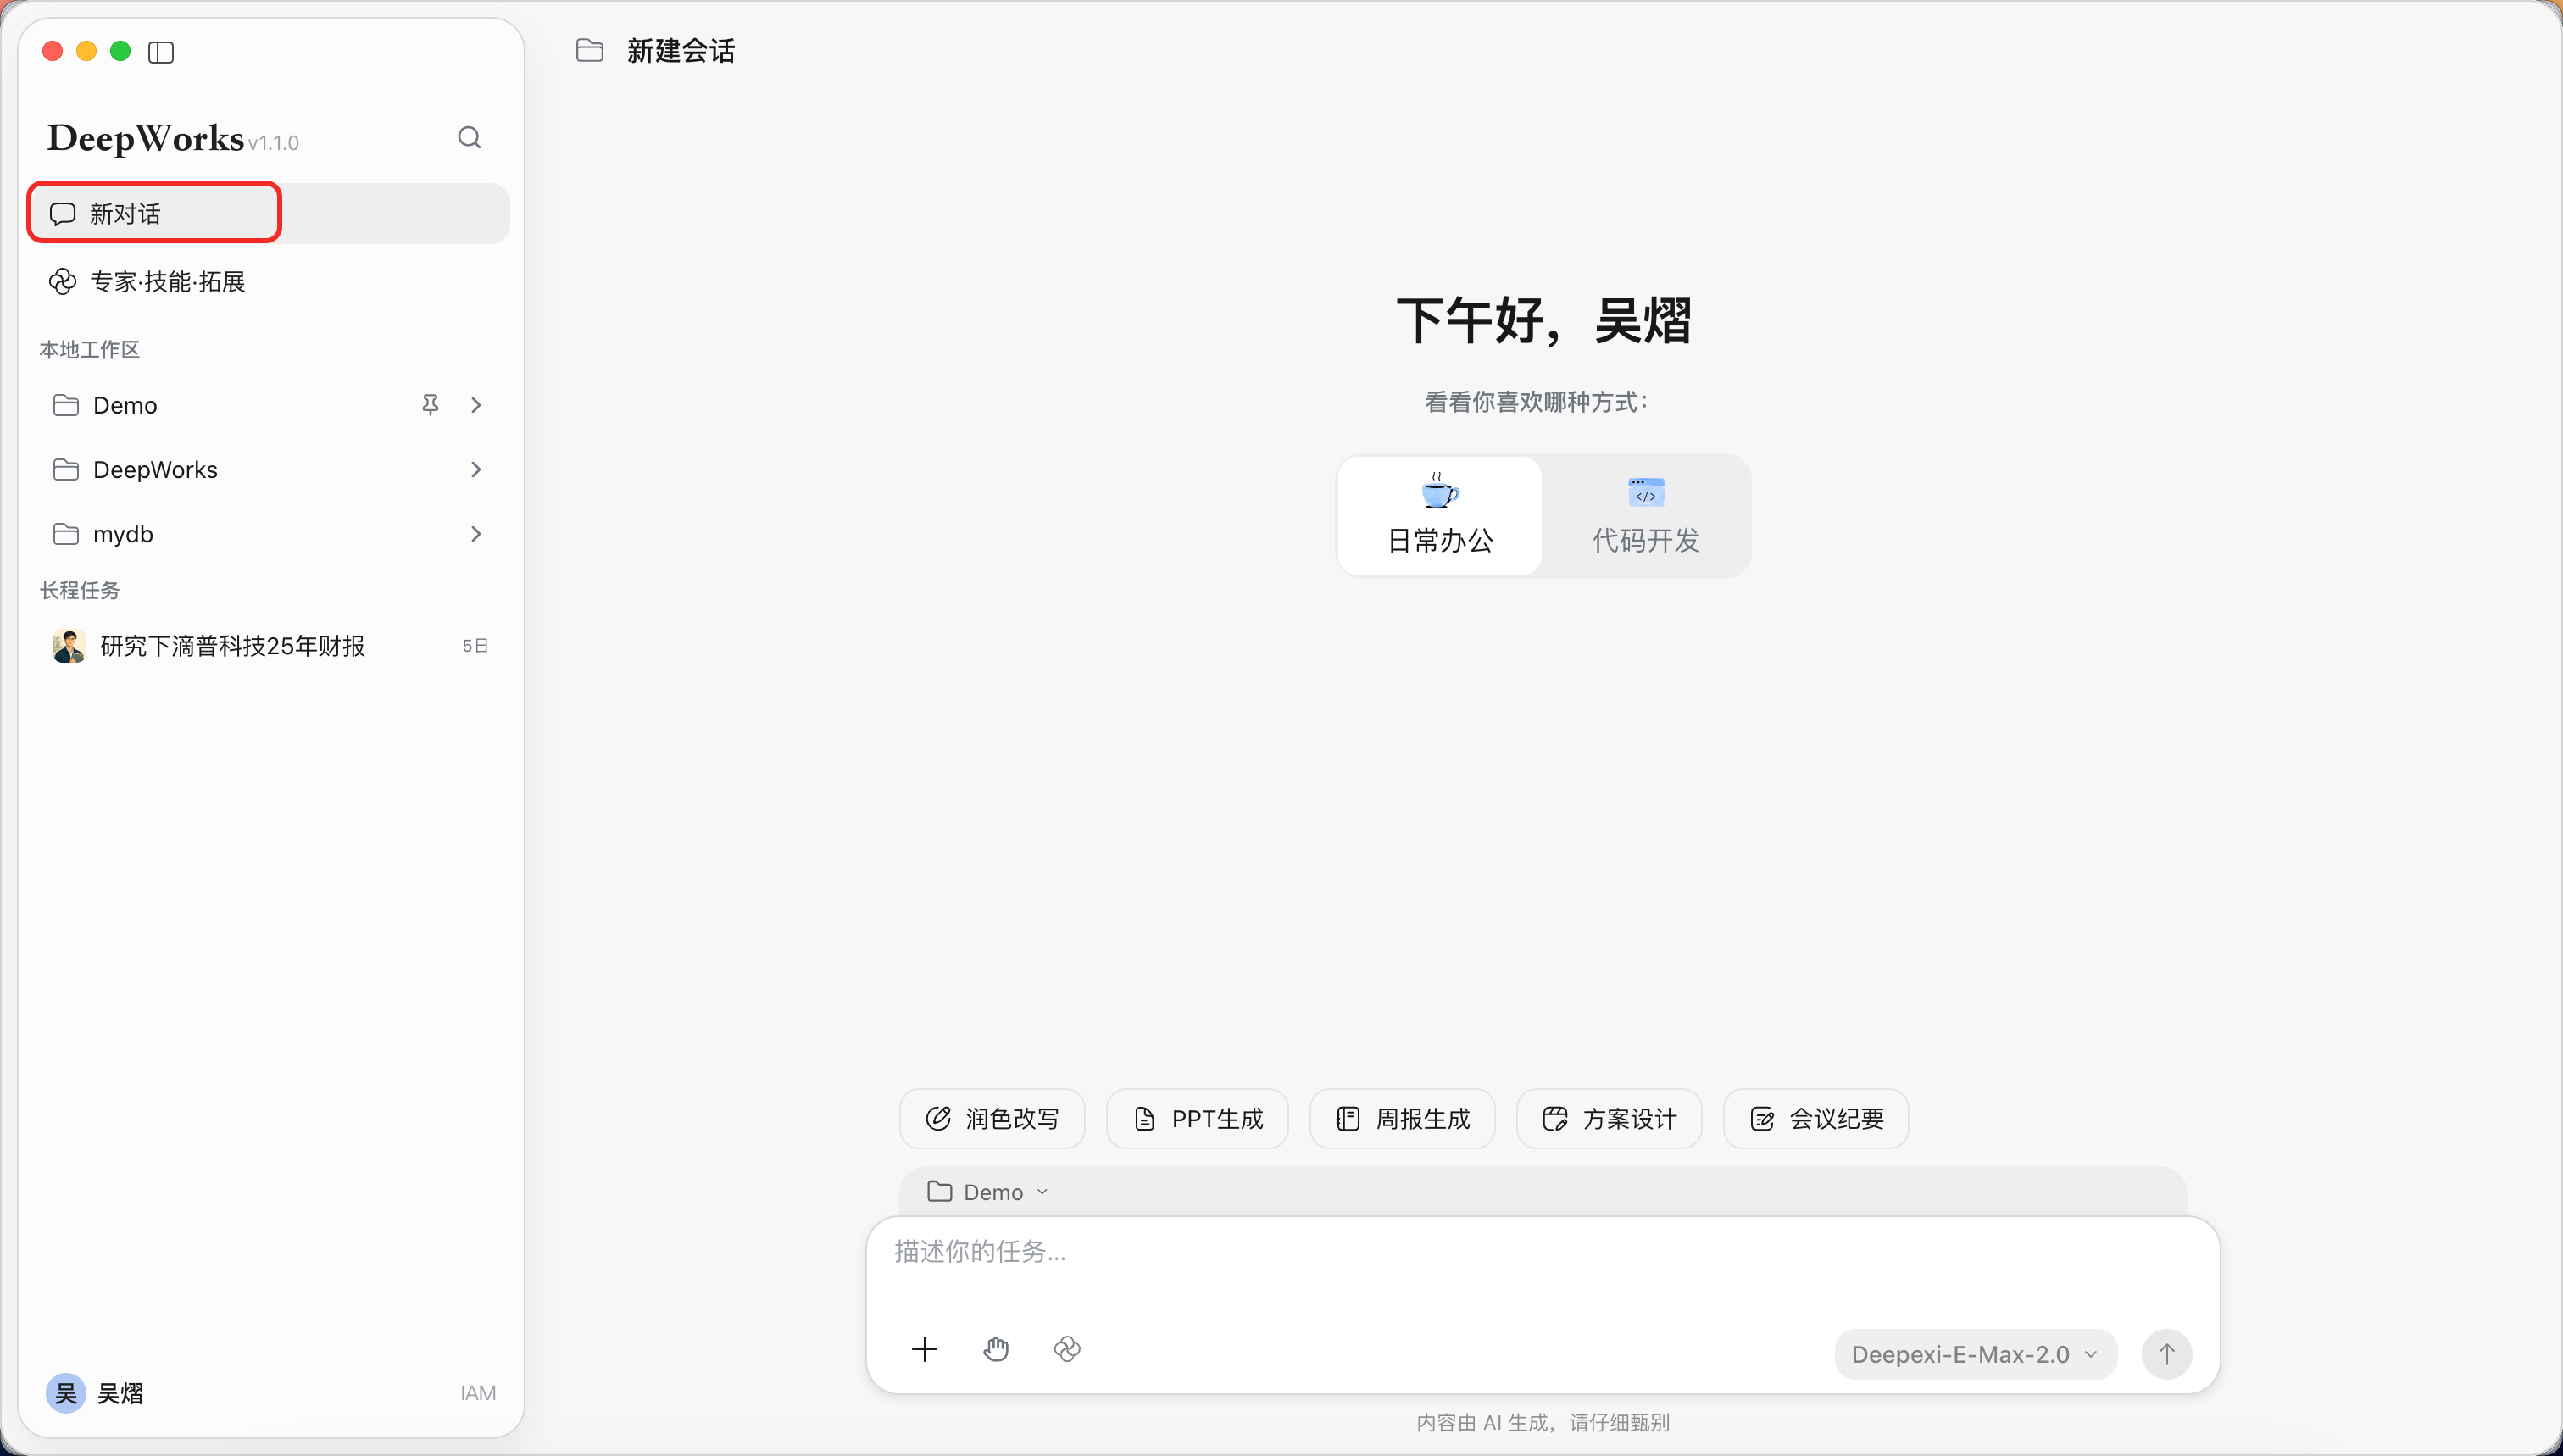
- Click New Conversation, or start a new conversation in the workspace.
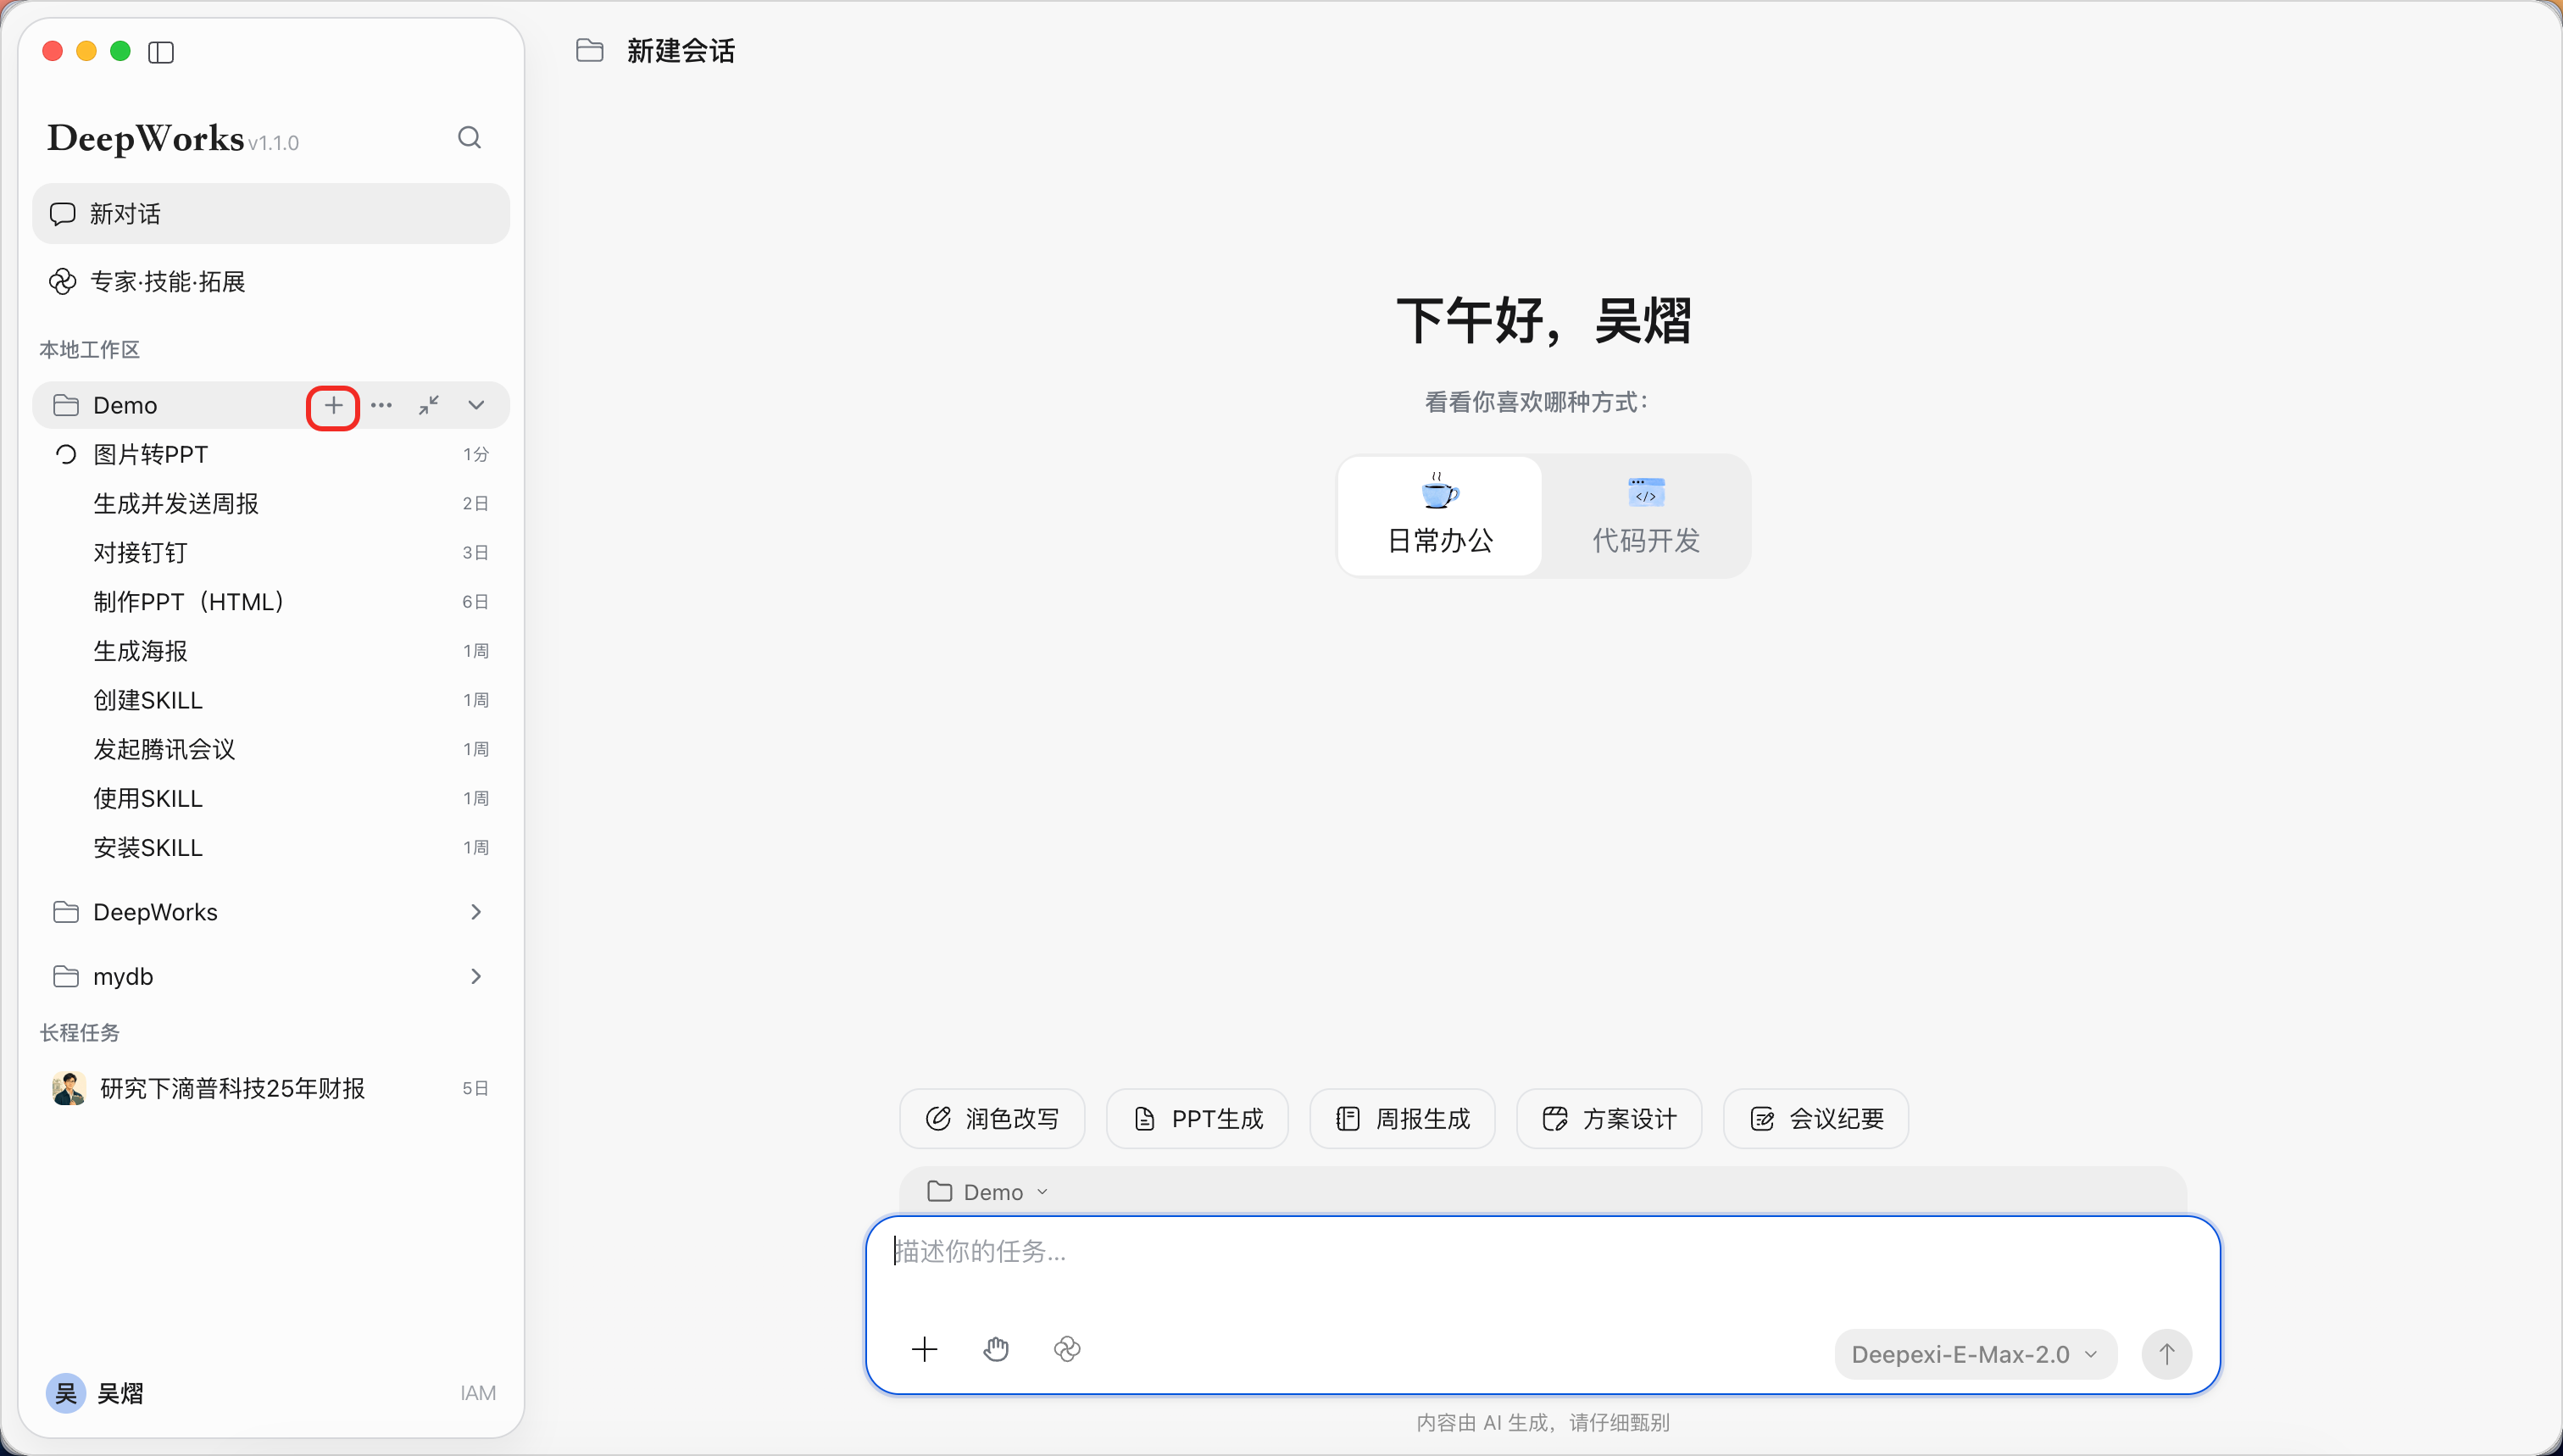
- Confirm the current workspace, execution permission, and model at the bottom.
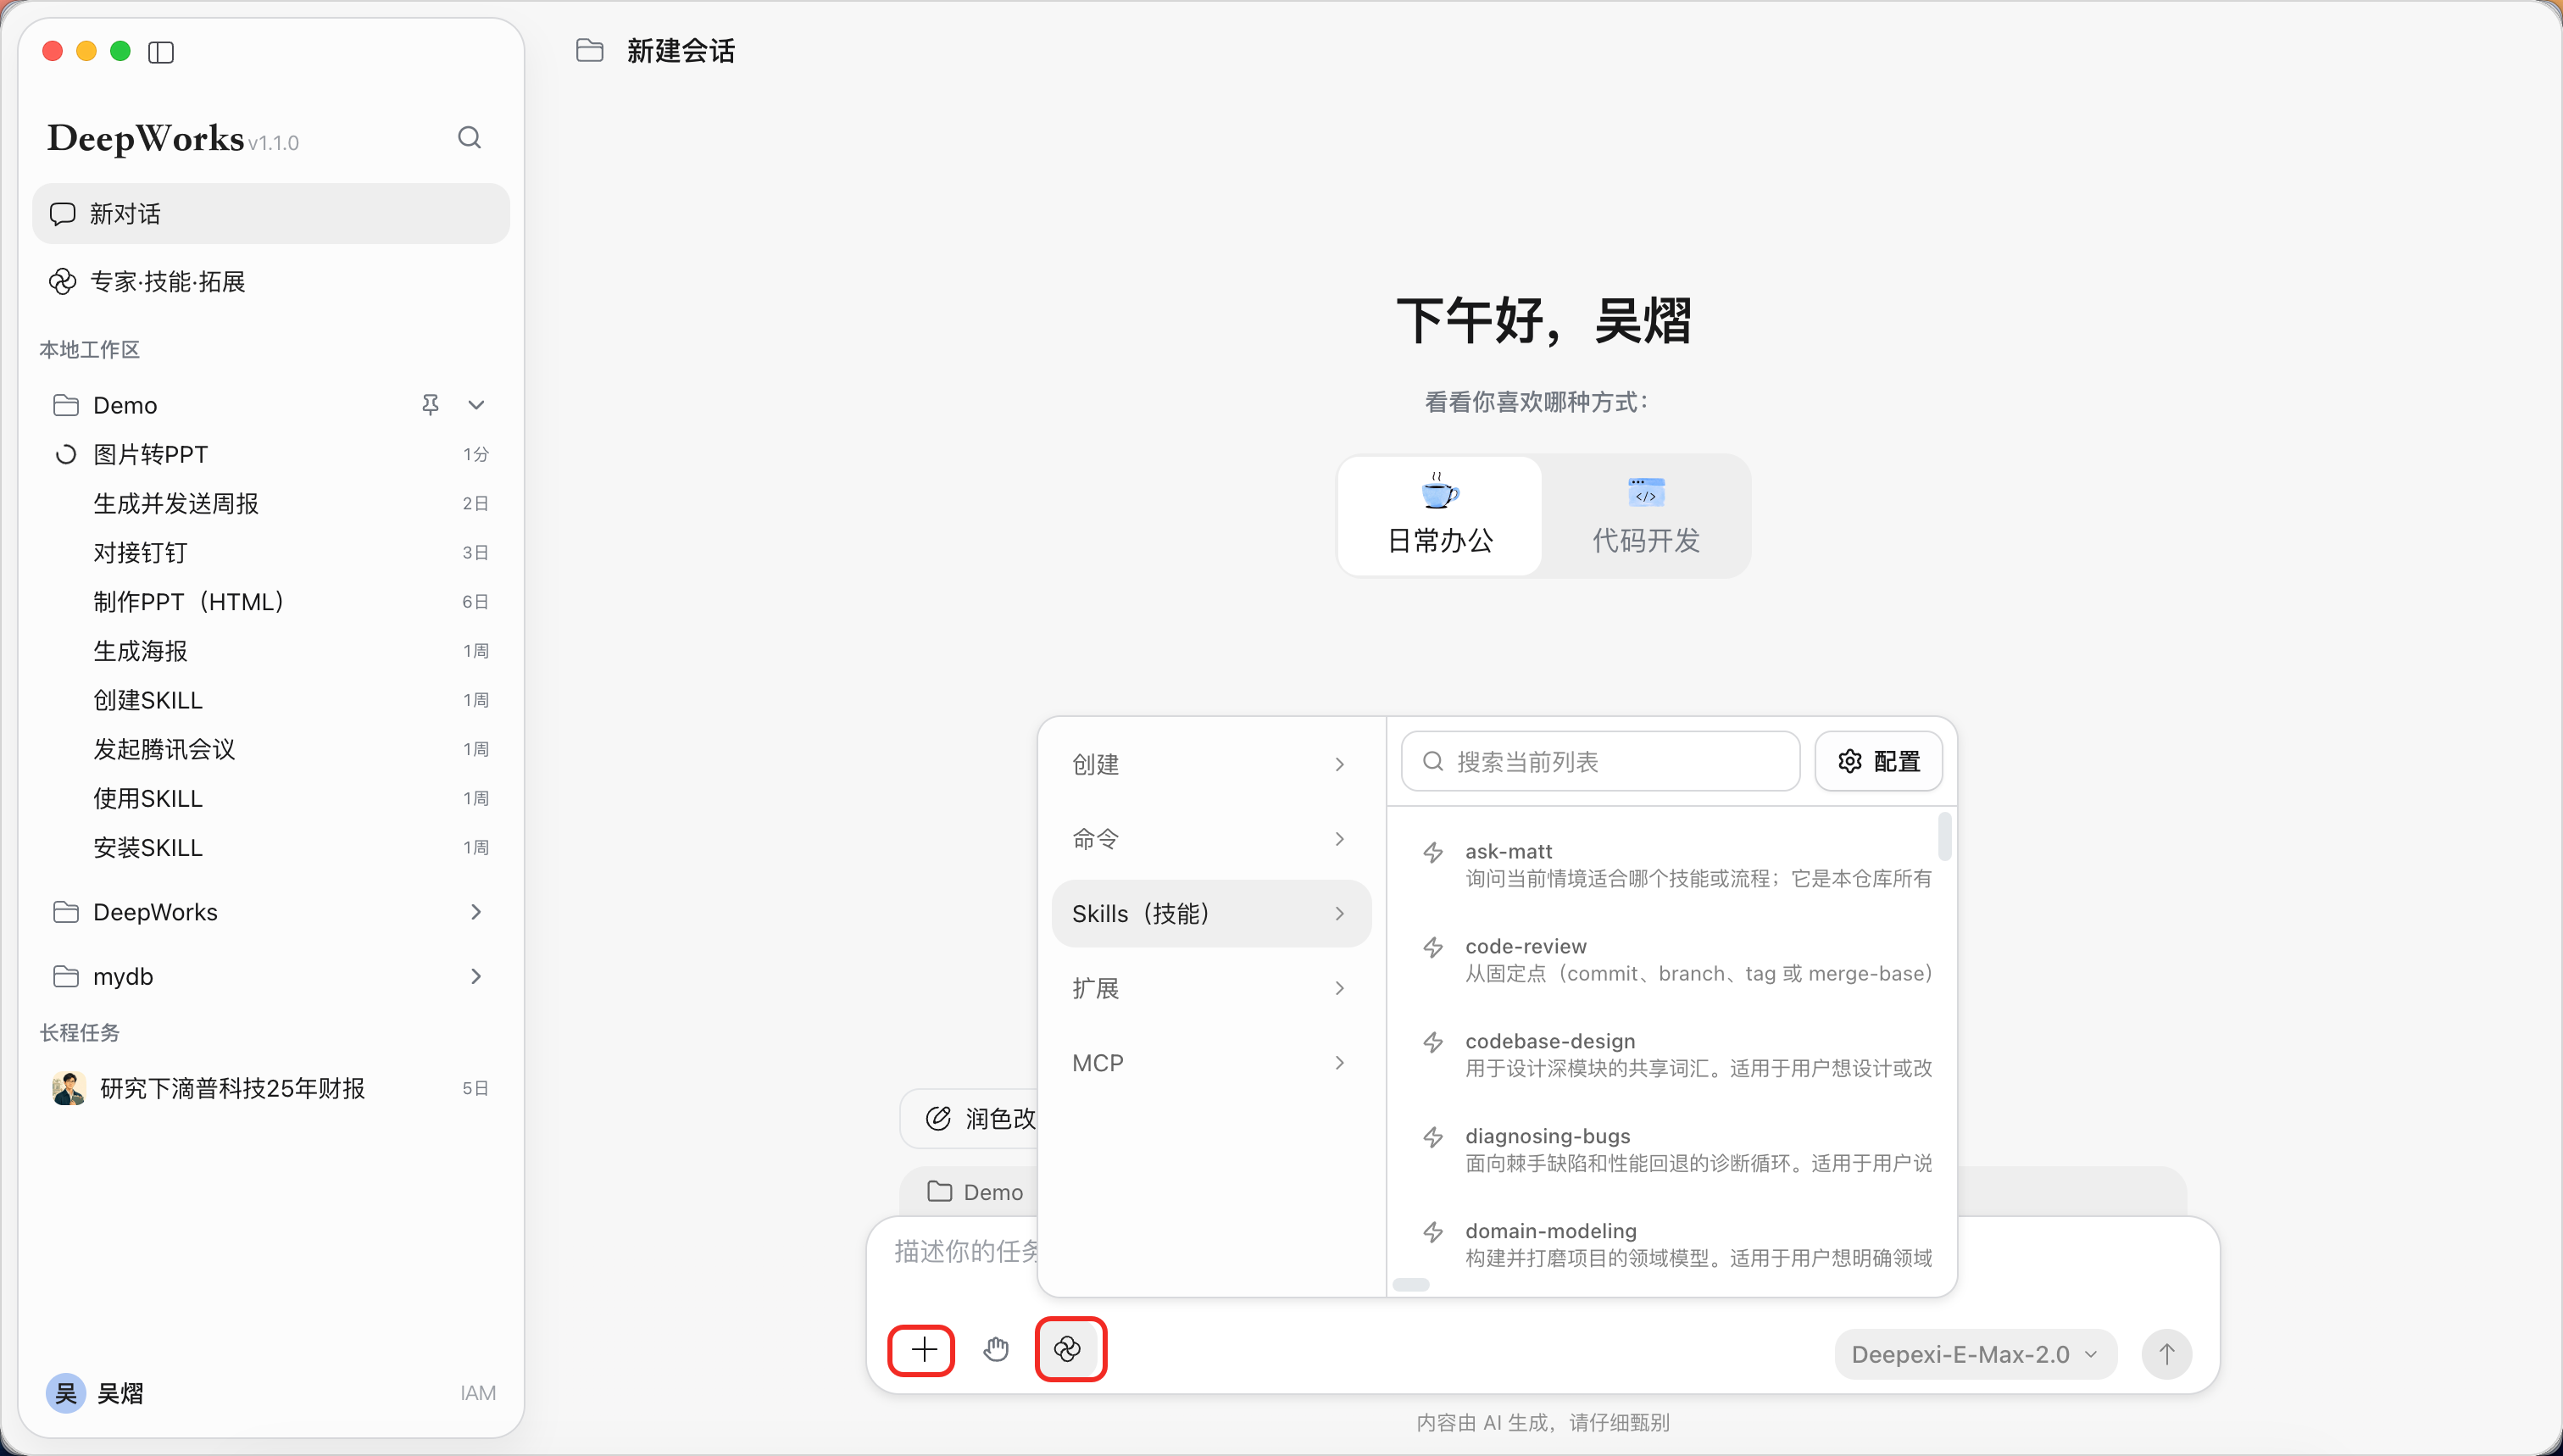
- To process materials, click the attachment button to add files; to use dedicated capabilities, open the tools menu and select a Skill, MCP, or Extension.
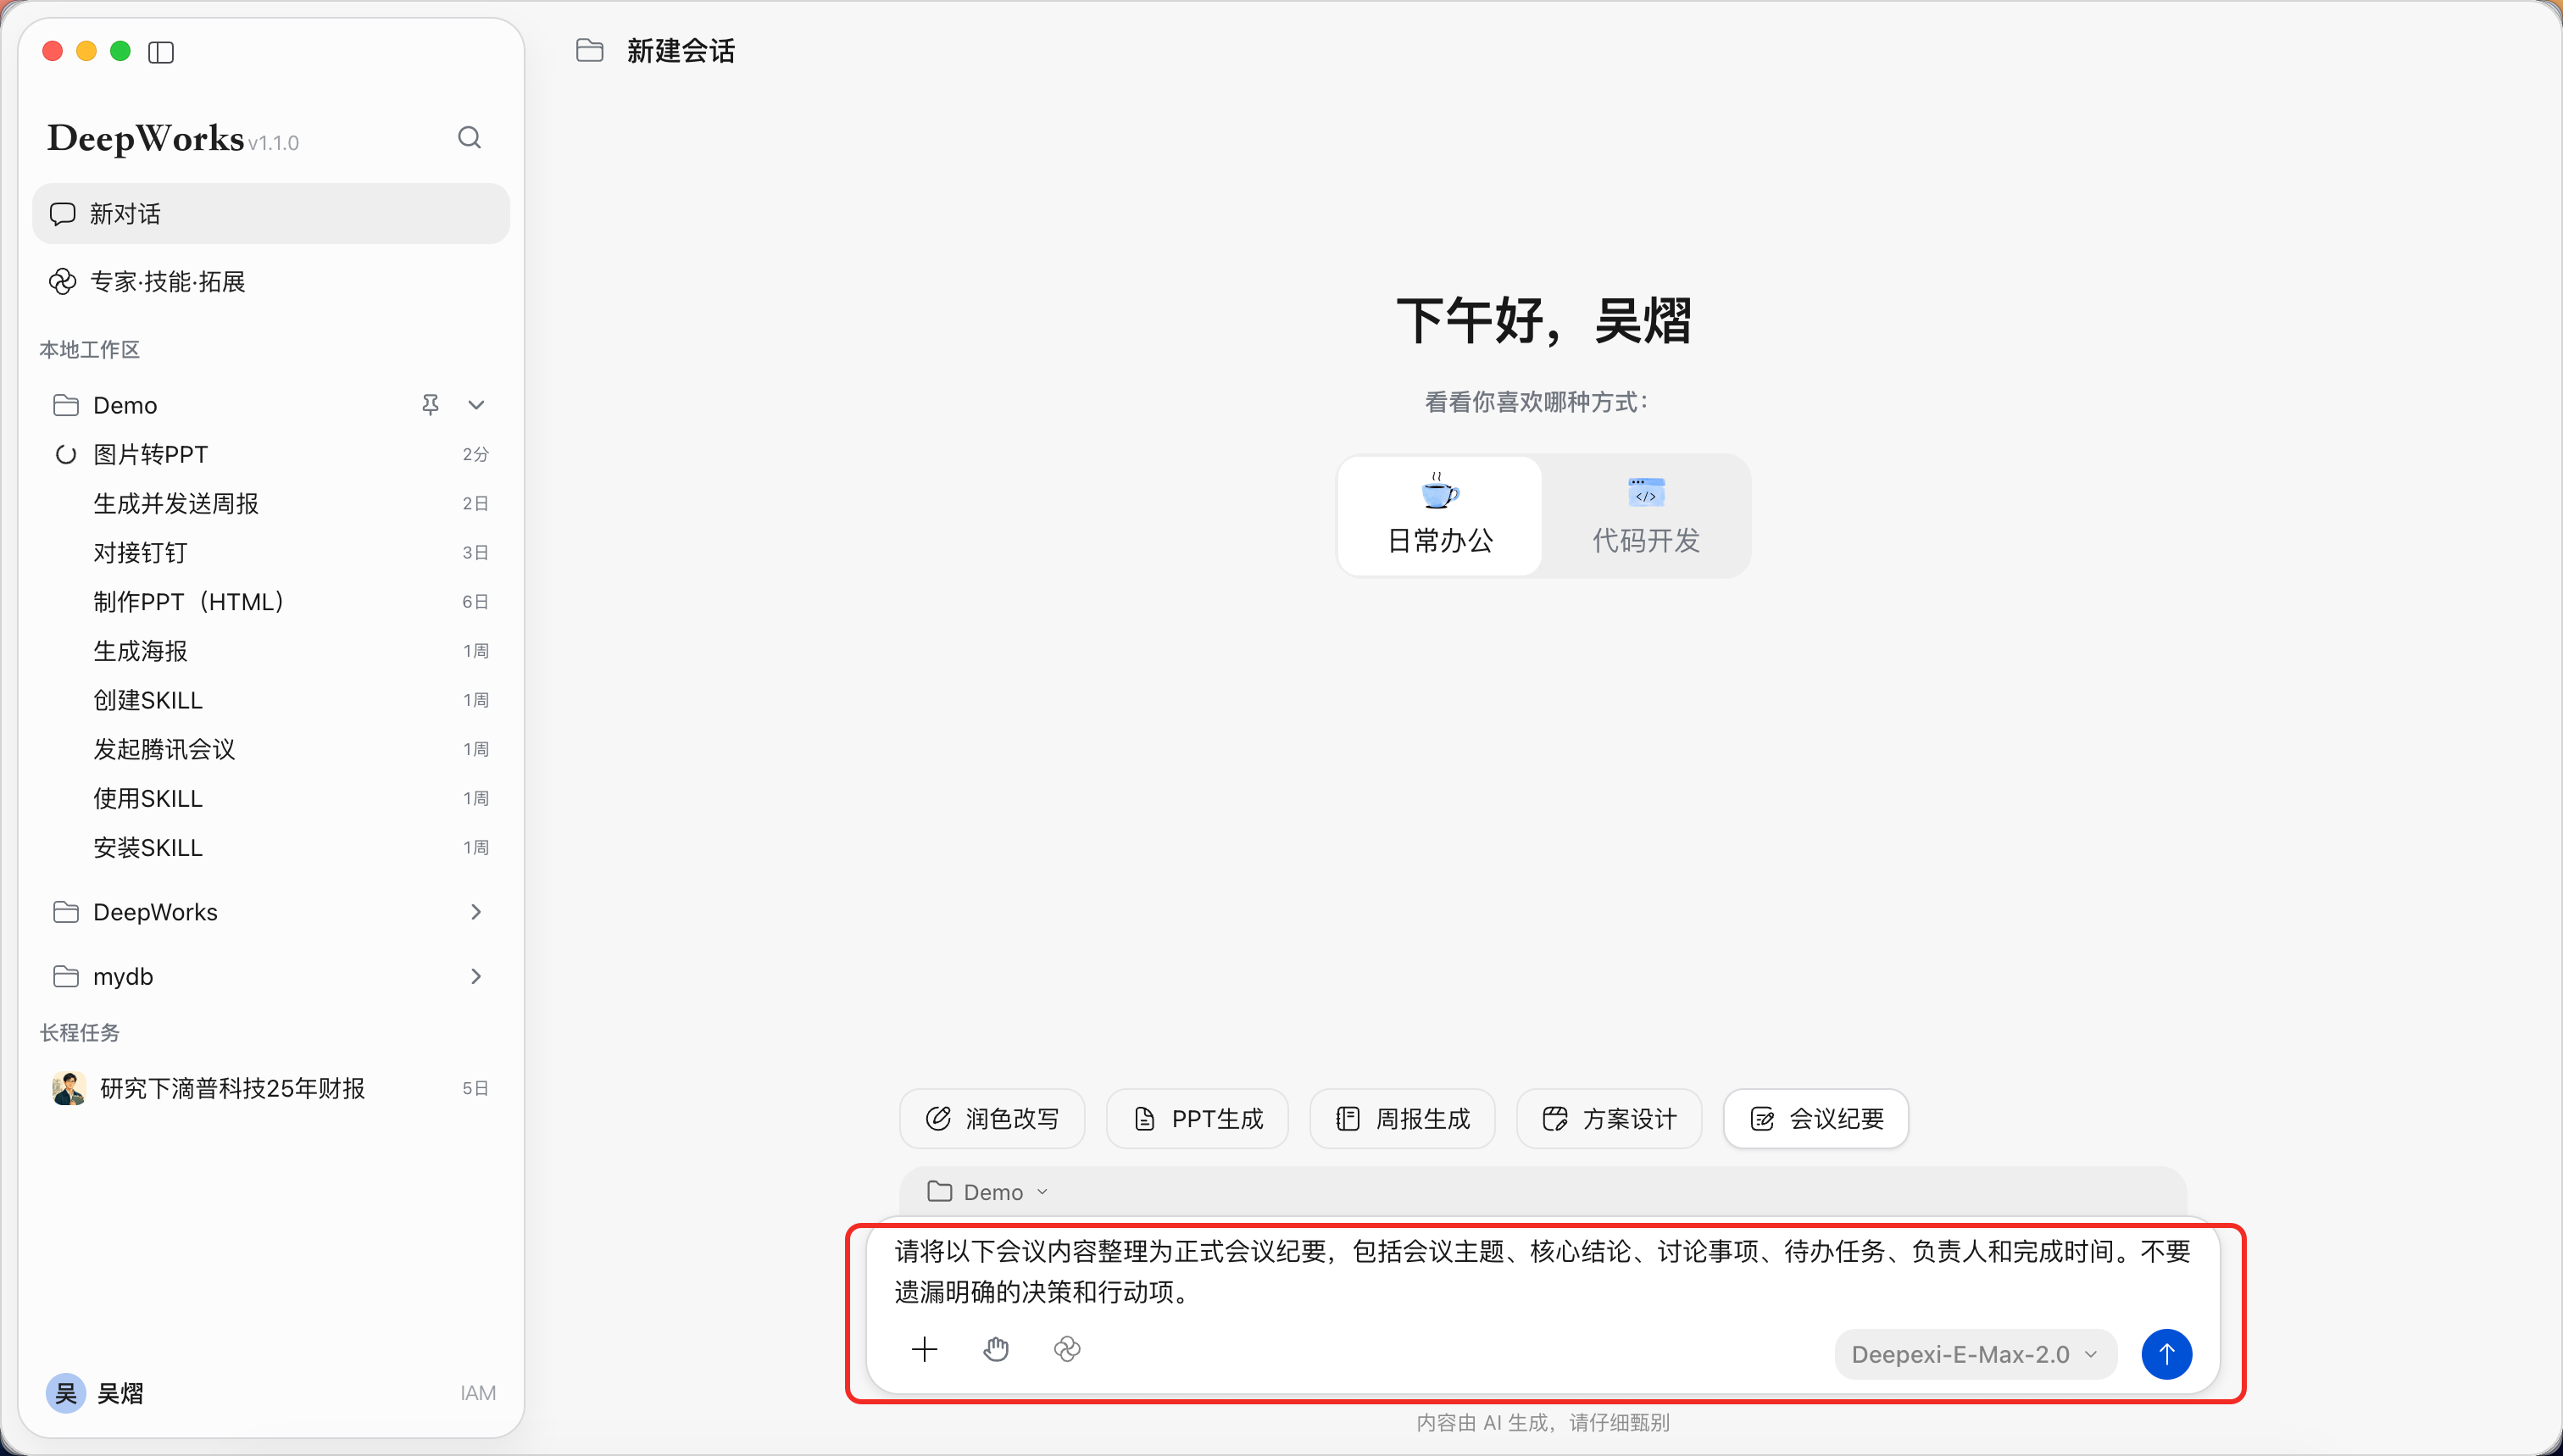
- In the input box, describe the task goal, existing materials, output requirements, and constraints, then click Send.
Getting Started Tutorials
The tutorials provide ten exercises in three stages. Preset instructions help you learn about DeepWorks, create deliverables, supply materials, and explore AI Colleagues, external tools, Automation, and reusable Skills. Work through them in order or select any exercise directly; completing the previous exercise is not required.
Opening the Tutorials
Path: Bottom of the left sidebar, above the account entry → Getting Started.
- Click
Getting Startedto open the task list. The entry shows completed exercises against the total.
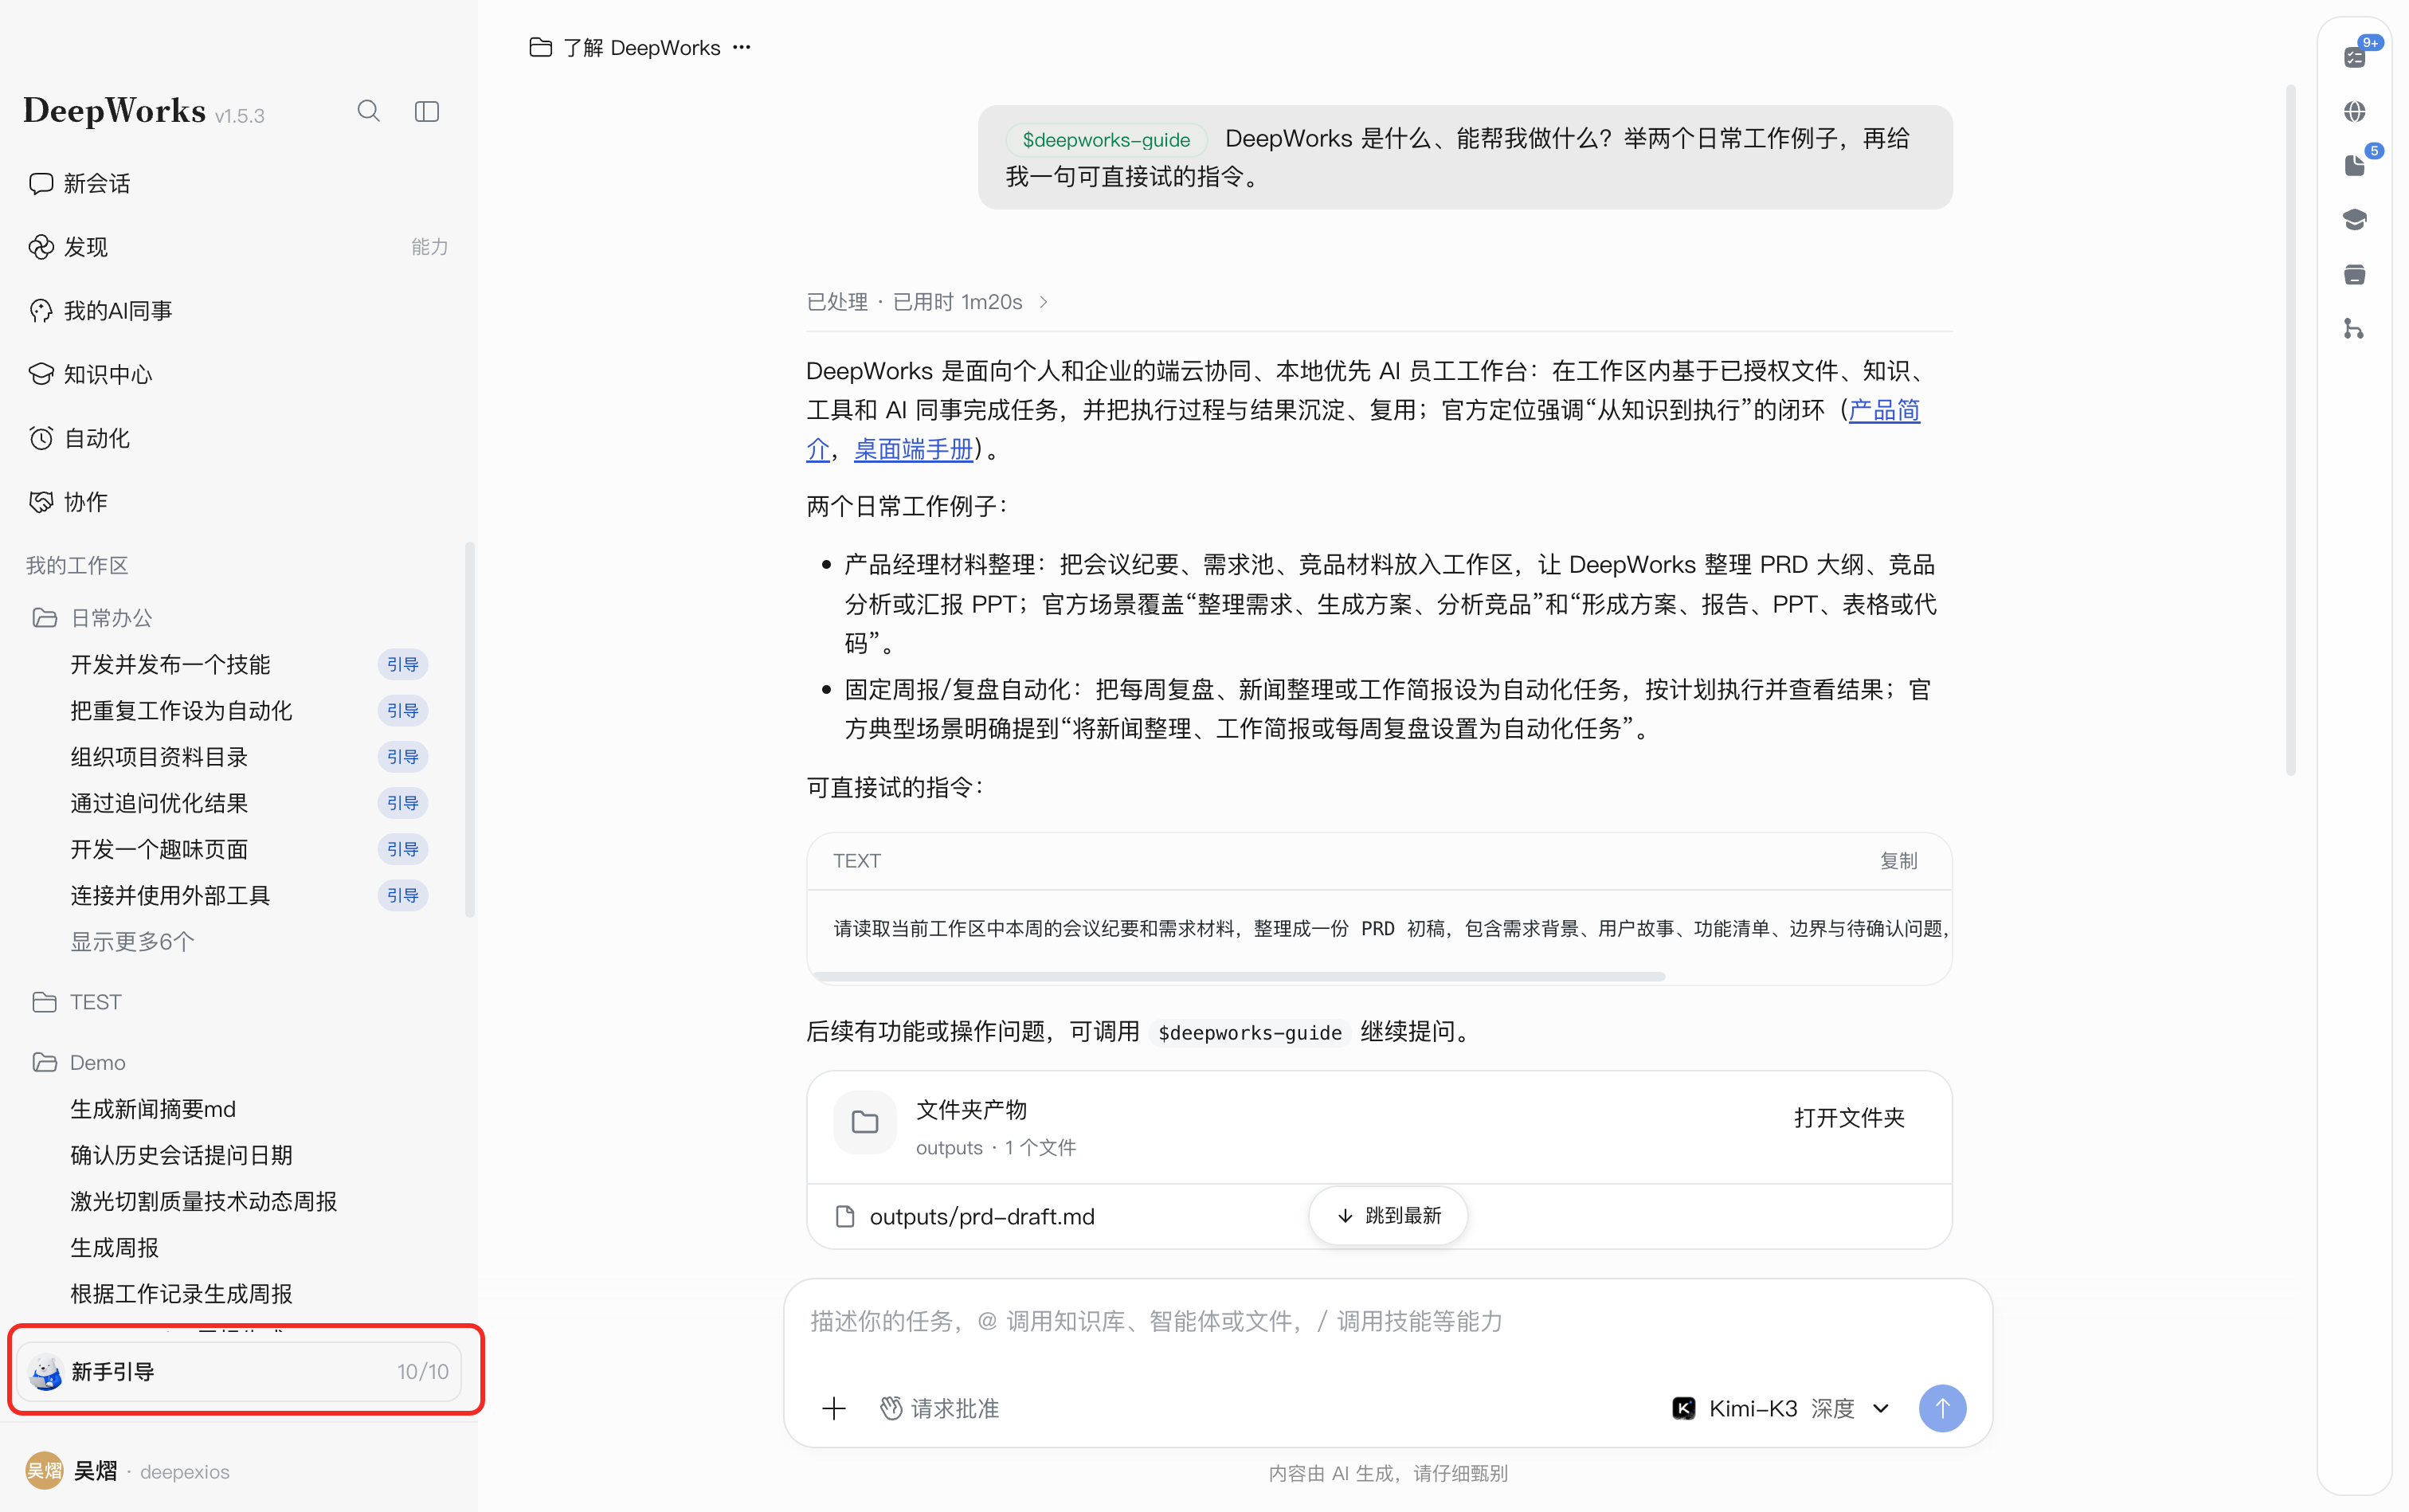
- Click a stage title or its left arrow to expand or collapse it. There are three stages:
| Stage | Tasks | Exercises |
|---|---|---|
| Break the ice: Explore what AI can do | 01–04 | Learn about the product, create deliverables, process attachments, and build a fun page |
| Use it well: Collaborate efficiently | 05–07 | Refine results through follow-up questions, collaborate with AI Colleagues, and connect external tools |
| Delegate: Keep running and reuse | 08–10 | Organize materials, create Automation tasks, and develop and publish Skills |
- Scroll to find other tasks and click
Starton the right to open the instruction confirmation dialog.
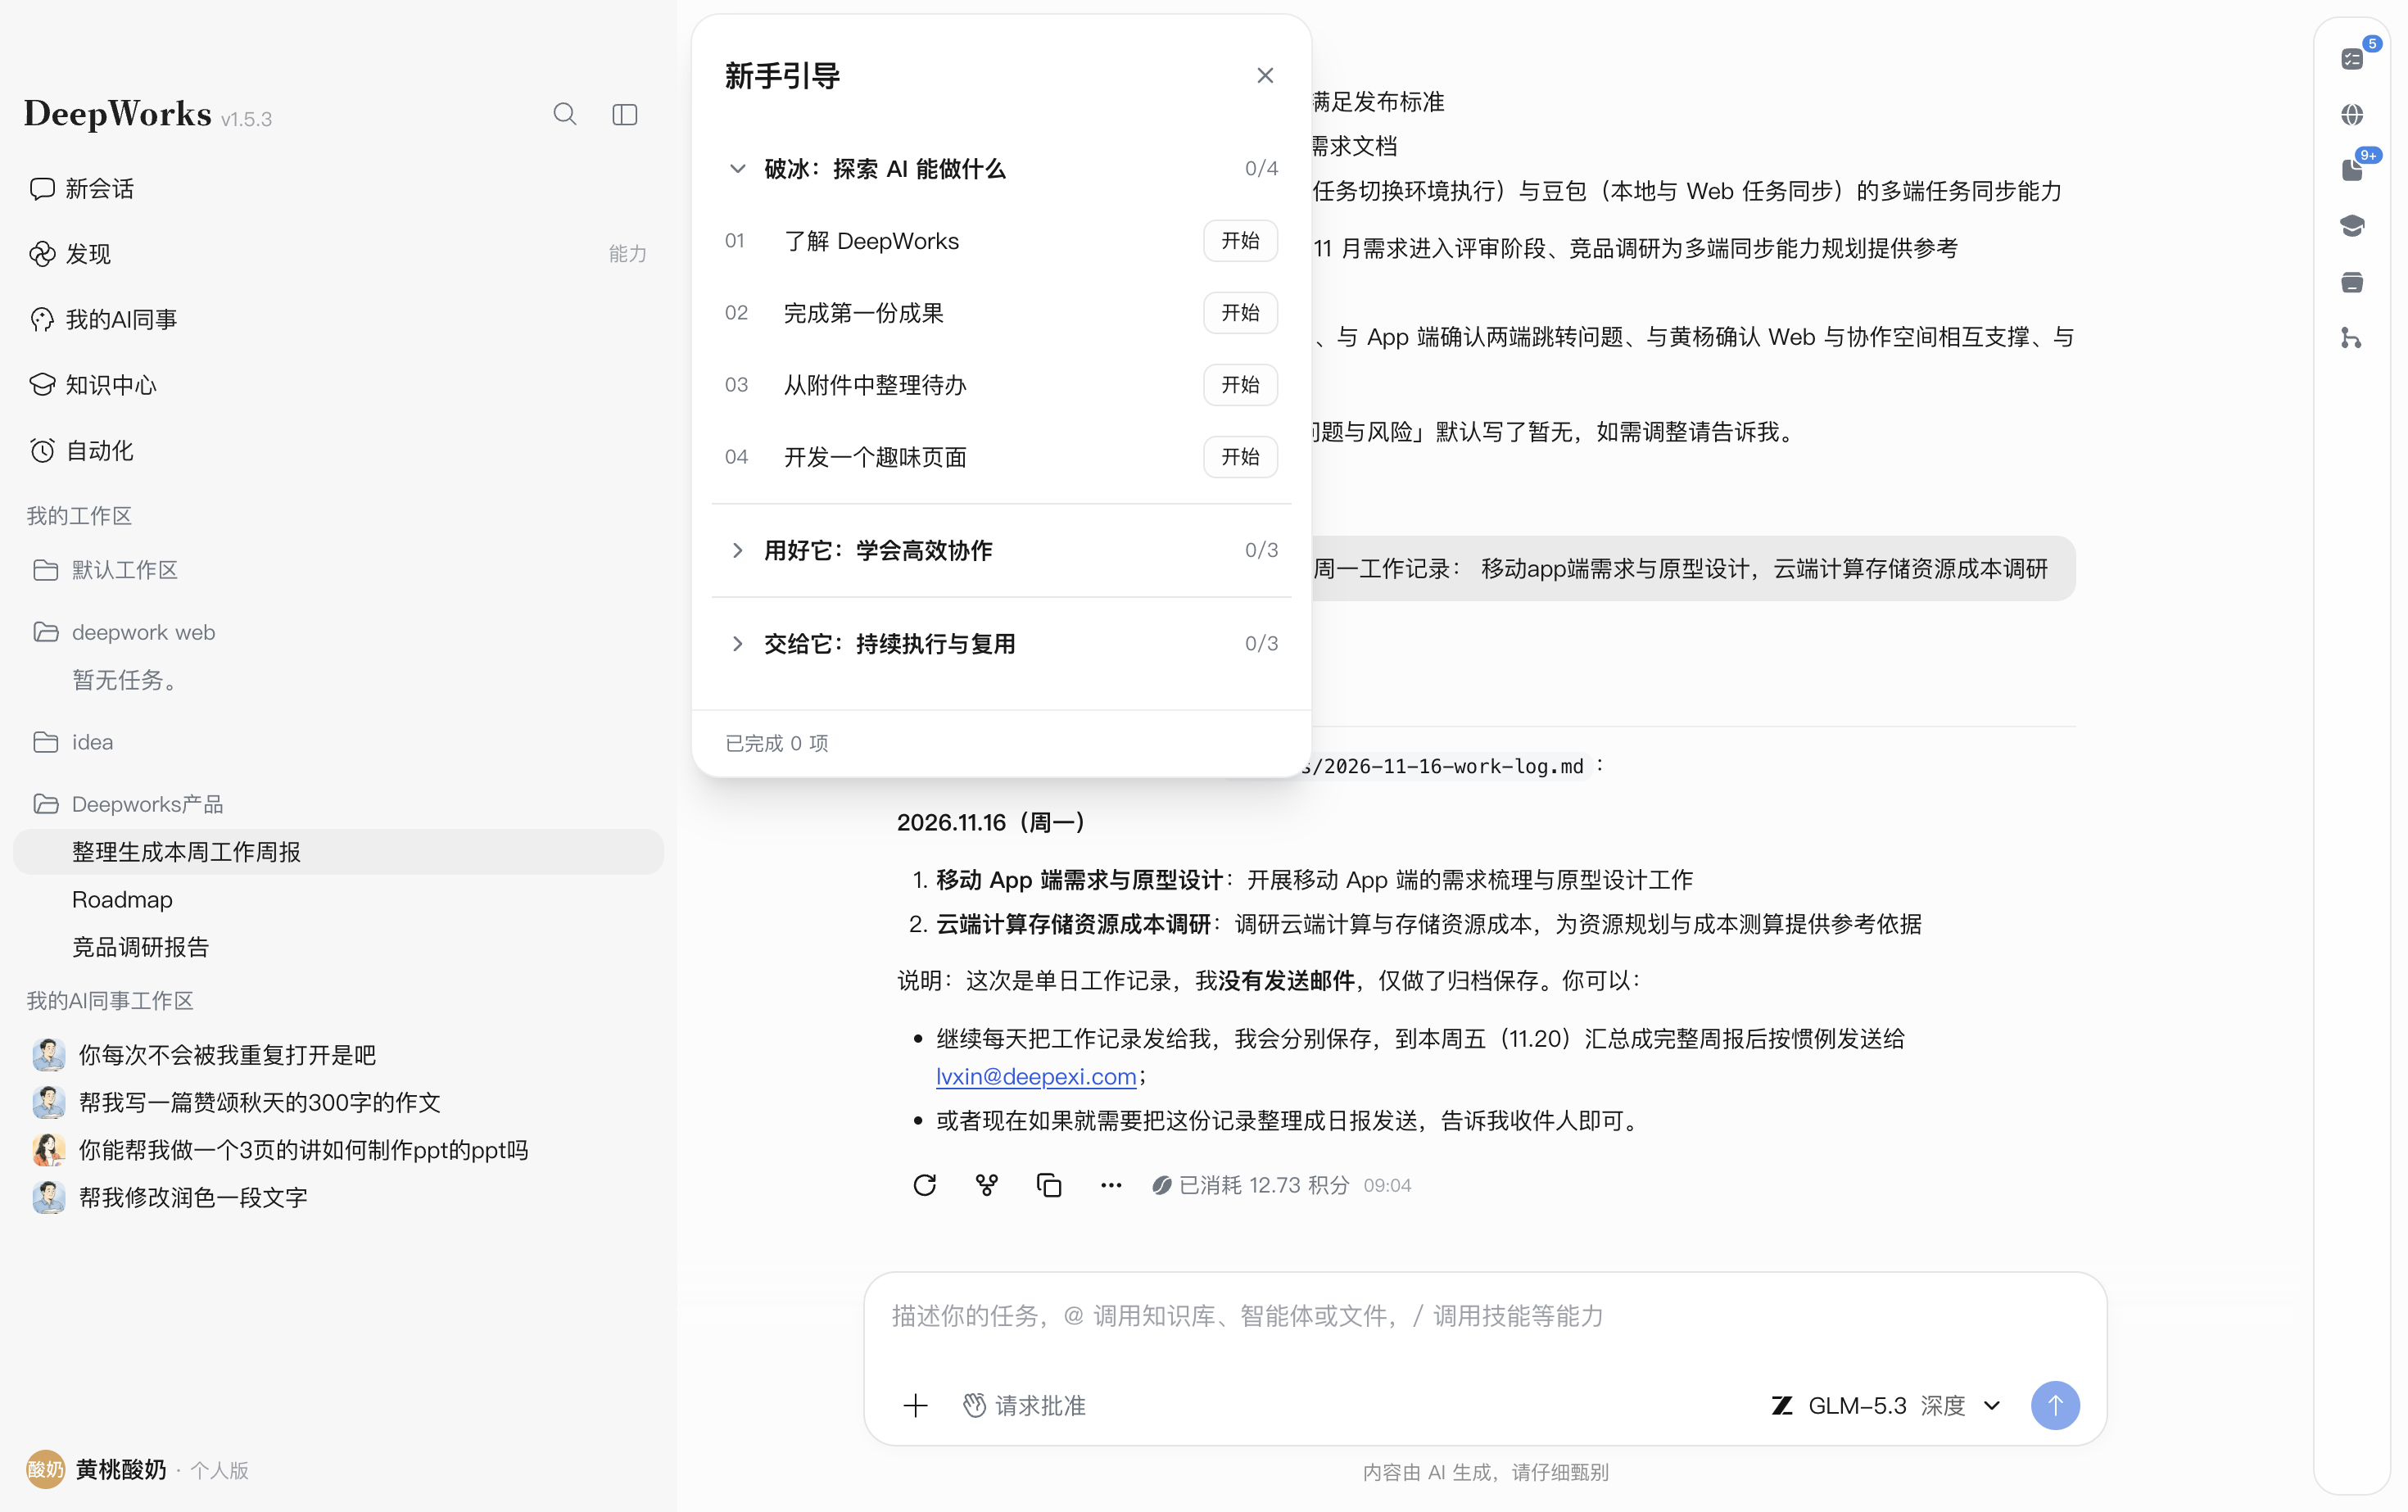
When the introduction first appears, click Start the First Task to open the confirmation dialog for “Learn About DeepWorks,” or Later to dismiss the introduction and return through the sidebar. Opening this dialog does not send the task.
If the sidebar entry is missing, follow 3.3.5 Closing, Hiding, and Restoring the Entry.
Confirming Instructions and Starting a Task
-
Read the introduction in the confirmation dialog. If the task includes a Skill, AI Colleague, or sample attachment, review its name and purpose.
-
Review
Instructions to Sendand adjust the objective, output requirements, or constraints as needed. Instructions cannot be empty. -
For example, “01 · Learn About DeepWorks” uses the
DeepWorks User GuideSkill. Use the following prompt or substitute your own product question:What is DeepWorks, and what can it help me do? Give two everyday work examples and one instruction I can try directly.
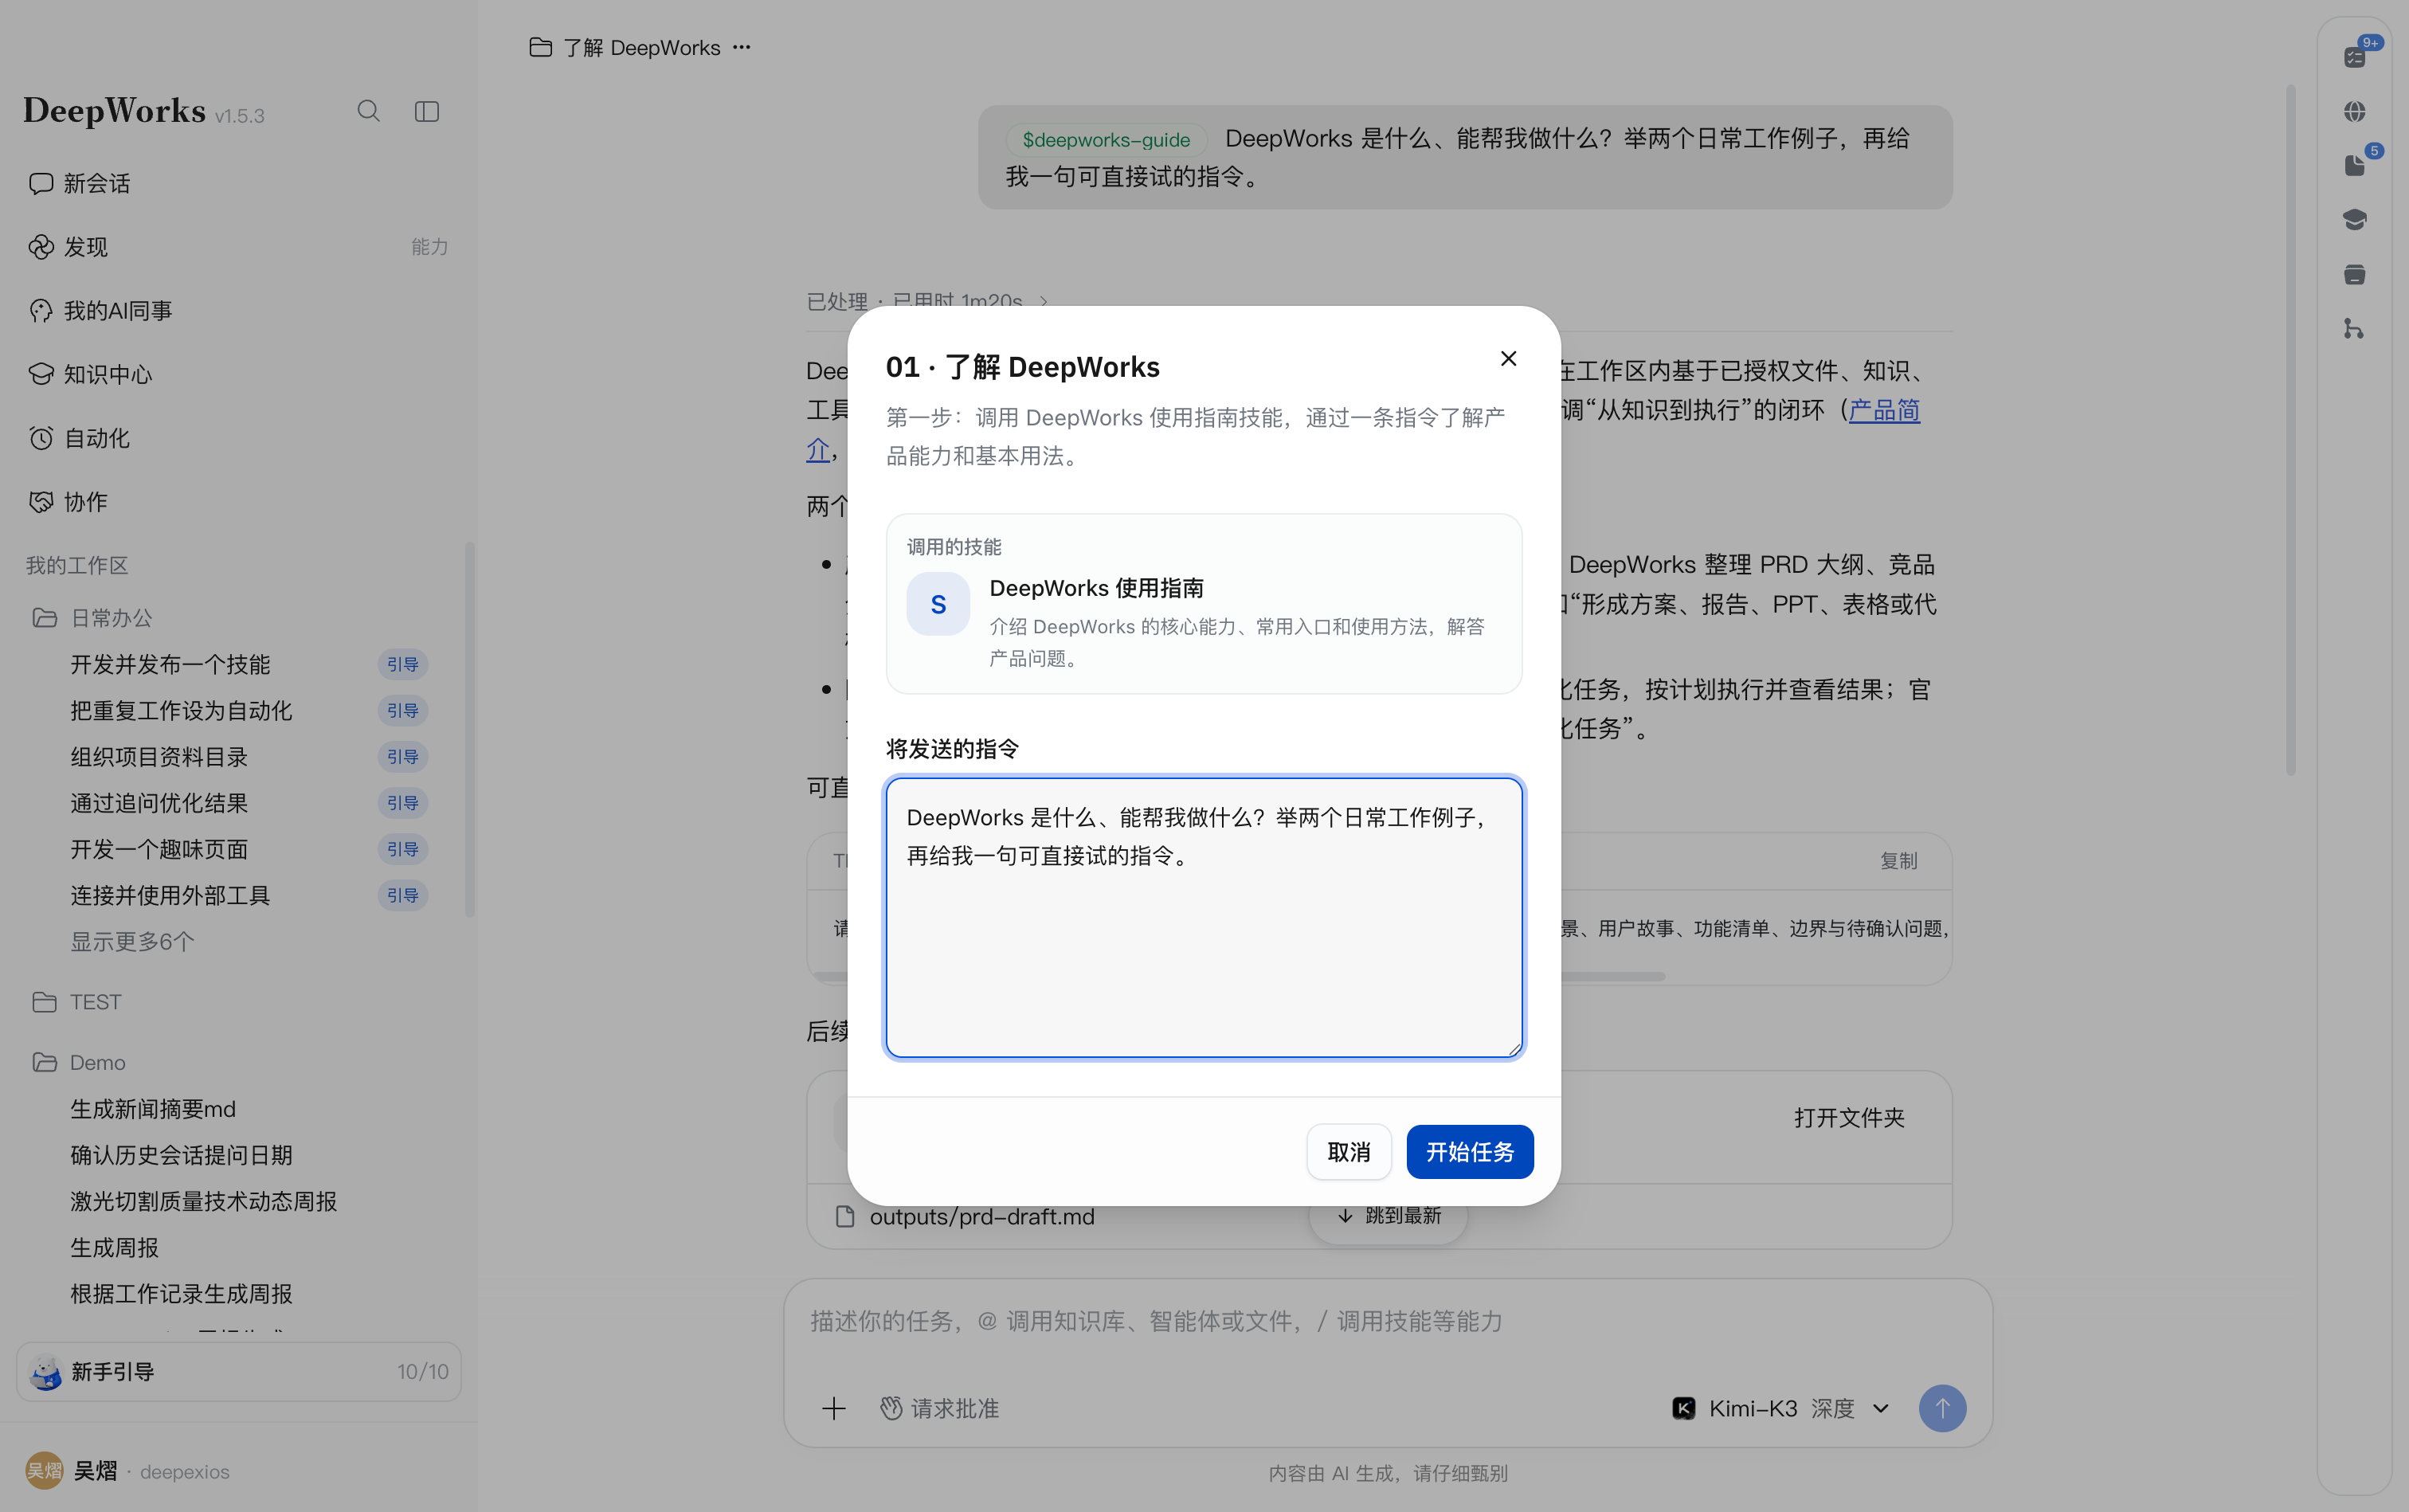
- Click
Start Task. The system creates a separate tutorial session in the default workspace, uses the task name as its title, and sends the confirmed instructions. The sidebar session list displays aTutorialbadge. - Review the replies and deliverables, answer questions, complete necessary authorization, or request changes. A designated Skill is attached automatically; you do not need to repeat its name in the instructions.
Click Cancel or the upper-right close button (×) to exit without sending instructions or recording completion. If a “First task started” message appears, click Got It and continue selecting exercises.
Selecting and Completing Exercises
For every exercise, click Start, review the instructions, then click Start Task. Continue in the session as follows:
| No. | Tutorial task | Actions and result checks |
|---|---|---|
| 01 | Learn About DeepWorks | Read the product introduction and use cases returned by the guide Skill, try a suggested instruction, and ask follow-up questions. |
| 02 | Create Your First Deliverable | Generate an everyday work efficiency checklist, review the table, and open the Markdown file at the location provided in the reply. |
| 03 | Extract To-dos from an Attachment | View or download the sample “Project Weekly Meeting Notes.md” in the dialog. It is attached automatically when the task starts. Check actions, owners, priorities, and deadlines; leave missing information as “To be confirmed.” |
| 04 | Build a Fun Page | Generate a “What Should I Eat Today?” HTML page, open its preview, and click Pick One for Me to try a random choice. Choose again or request changes. |
| 05 | Refine Results through Follow-up Questions | Answer AI questions by selecting options or adding team-event requirements, review the invitation draft, and select improvements or request revisions across multiple rounds. |
| 06 | Involve an AI Colleague | Review the designated Deep Research Expert, request research on office productivity, and check the report, source links, and conclusions. Ask follow-up questions as needed. |
| 07 | Connect and Use External Tools | Request today’s DingTalk schedule. Follow the session to install DingTalk CLI and authorize the connection, then review the results. See 7.3.3 DingTalk CLI for configuration. |
| 08 | Organize Project Materials | Review the proposed directory path for a “Quarterly Business Review” project, confirm creation of directories and README files, and check the separation of raw data, working drafts, and final deliverables. |
| 09 | Automate Repetitive Work | Run an AI news roundup once and check its output. Then ask to schedule it periodically. Verify instructions, time, time zone, and execution mode before confirming creation. Local execution requires the computer to remain online with DeepWorks running. See 8 Automation. |
| 10 | Develop and Publish a Skill | Develop an “Idea Generator,” invoke it with a test request, and check the results. After validation, review the Skill content and publication scope, confirm publication, and check the returned entry. See 6.4 Publishing Skills. |
Sample attachments contain fictional teaching material. Creating Automation tasks and publishing Skills still require review and confirmation in the session. A tutorial completion marker does not replace confirmation or checking results.
Checking Progress and Practicing Again
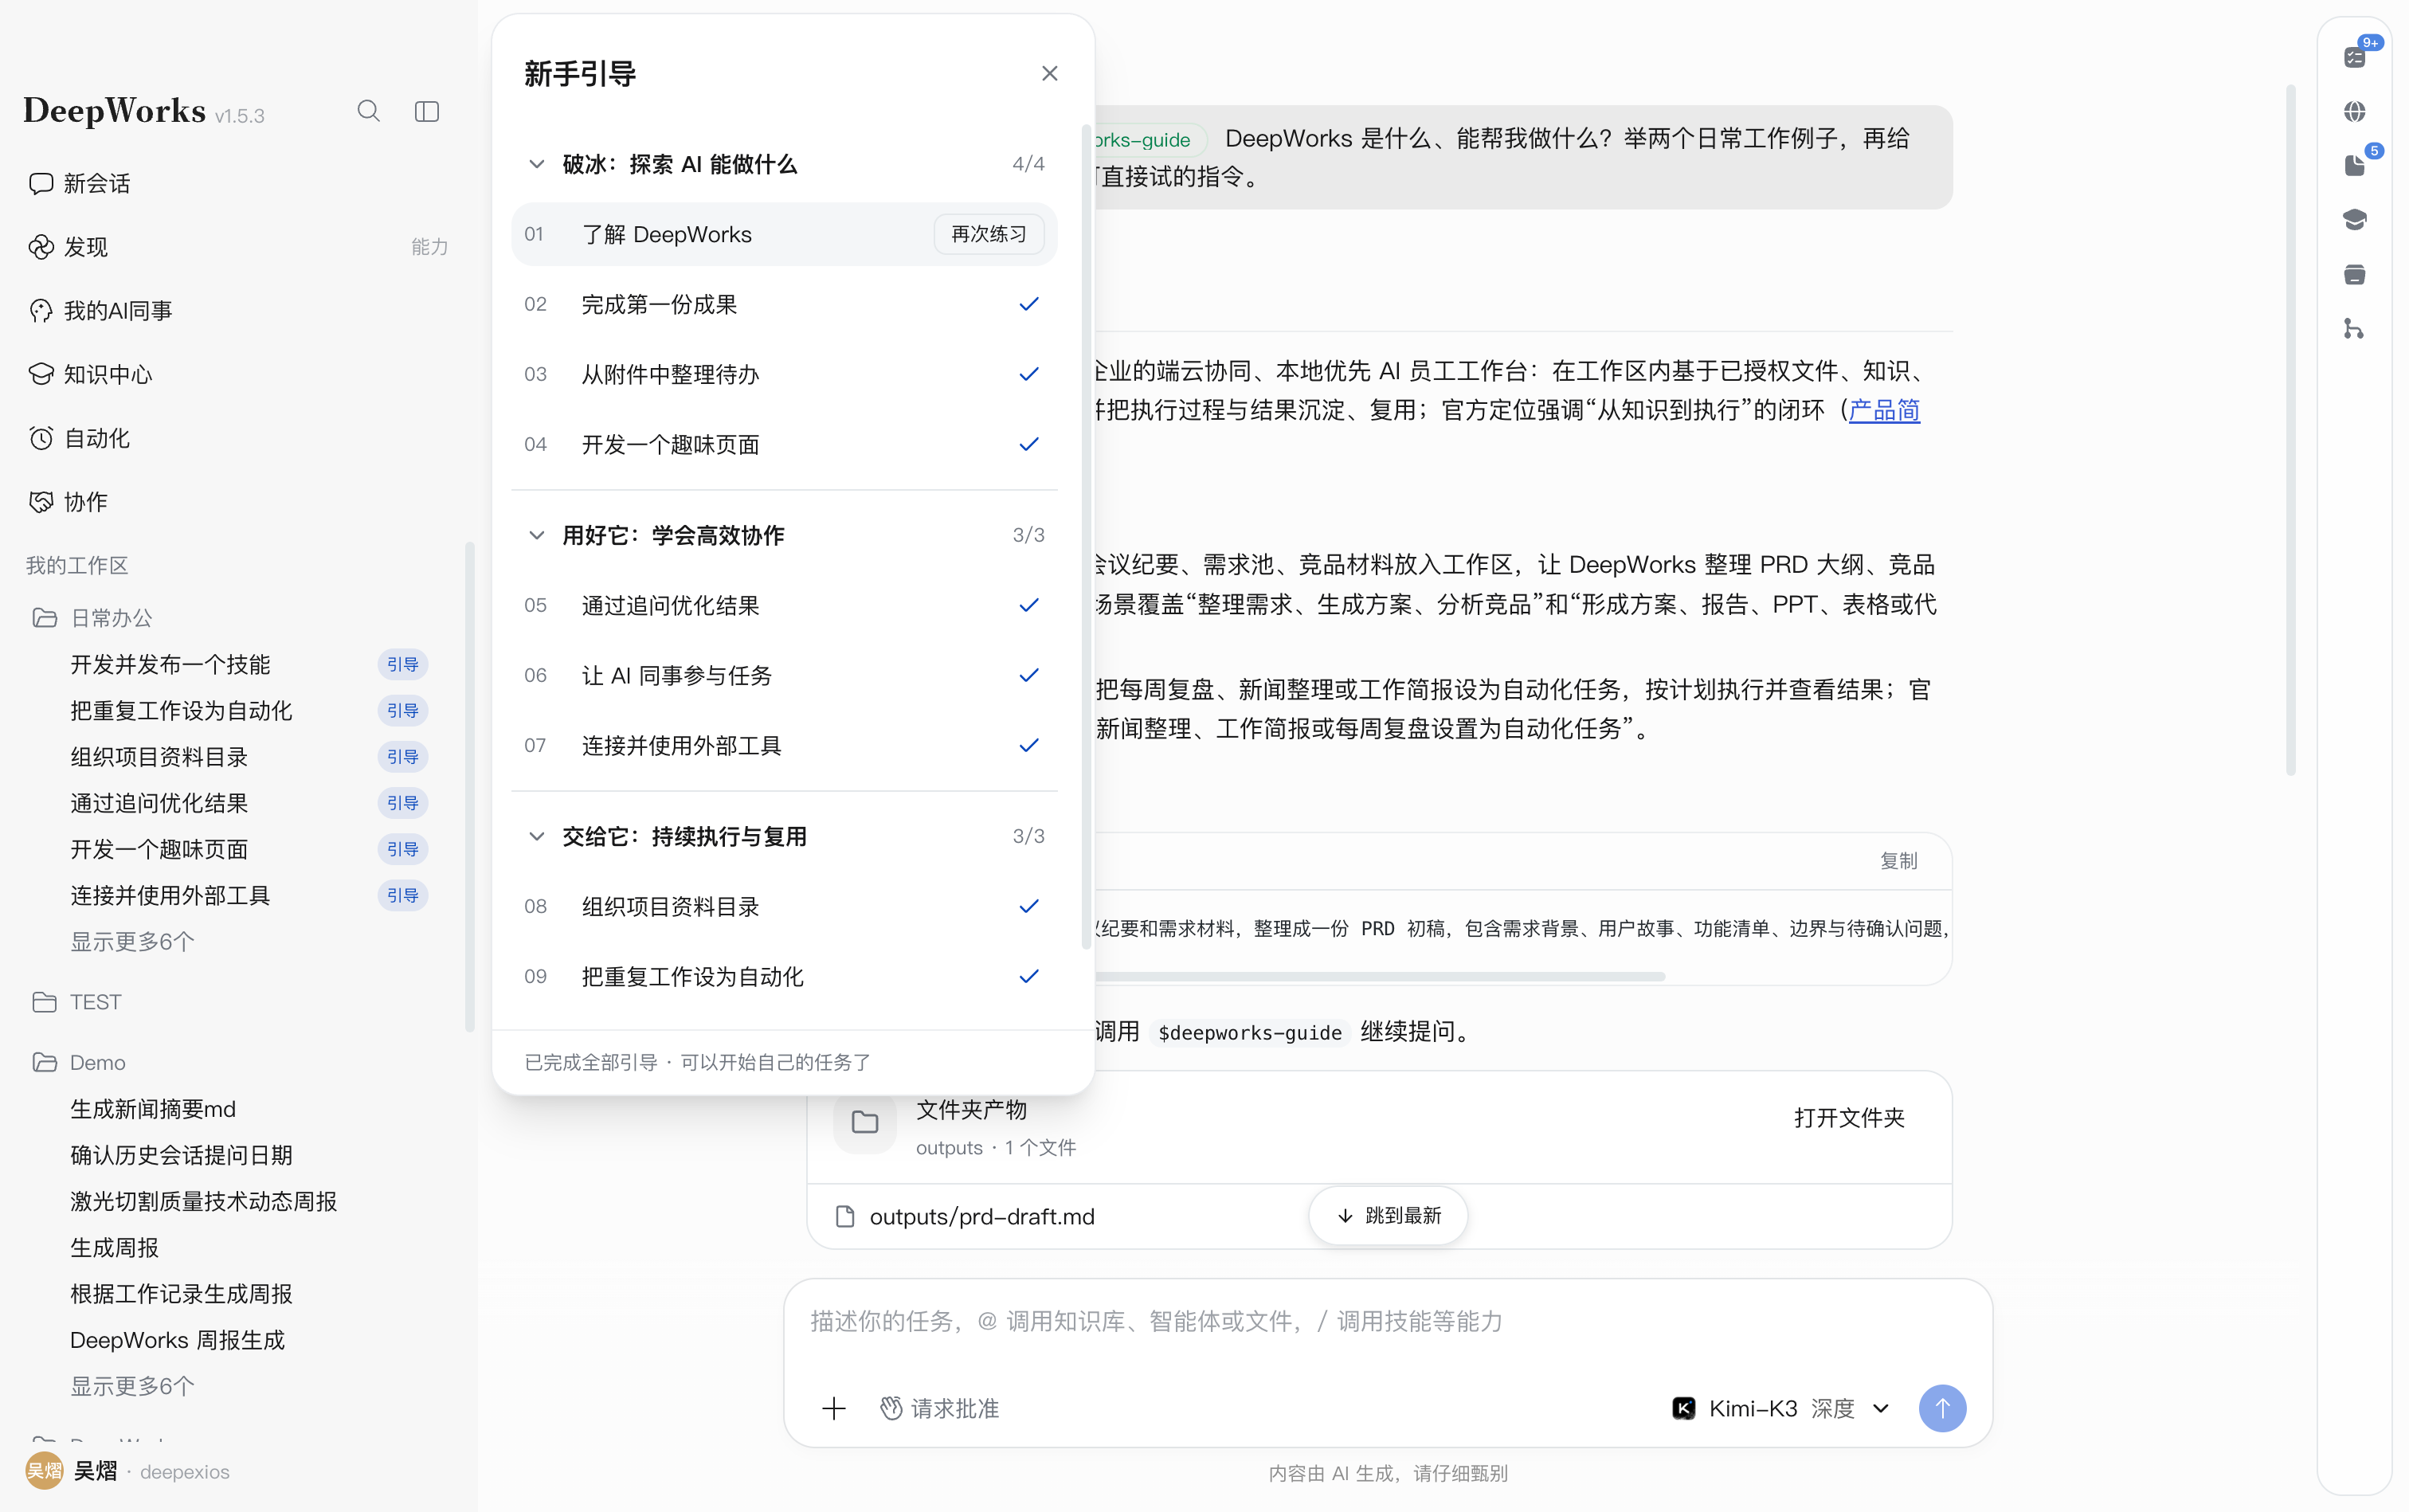
Open Getting Started to see completed/total counts beside stage titles and the cumulative total at the bottom. Completed exercises show a check mark.
Completion status: An exercise is counted as completed as soon as it starts and its instructions are sent. This means you have started trying the exercise; it does not mean AI has produced an acceptable deliverable, an external tool call succeeded, or an Automation task or Skill was successfully created or published. Check the corresponding session for actual results.
To try again:
- Hover over a completed task to reveal
Practice Again. - Click it and review or edit the instructions.
- Click
Start Taskto create a new practice session. The original session is retained and the completed count does not increase again.
To continue the original task, open its historical session marked Tutorial in the workspace instead.
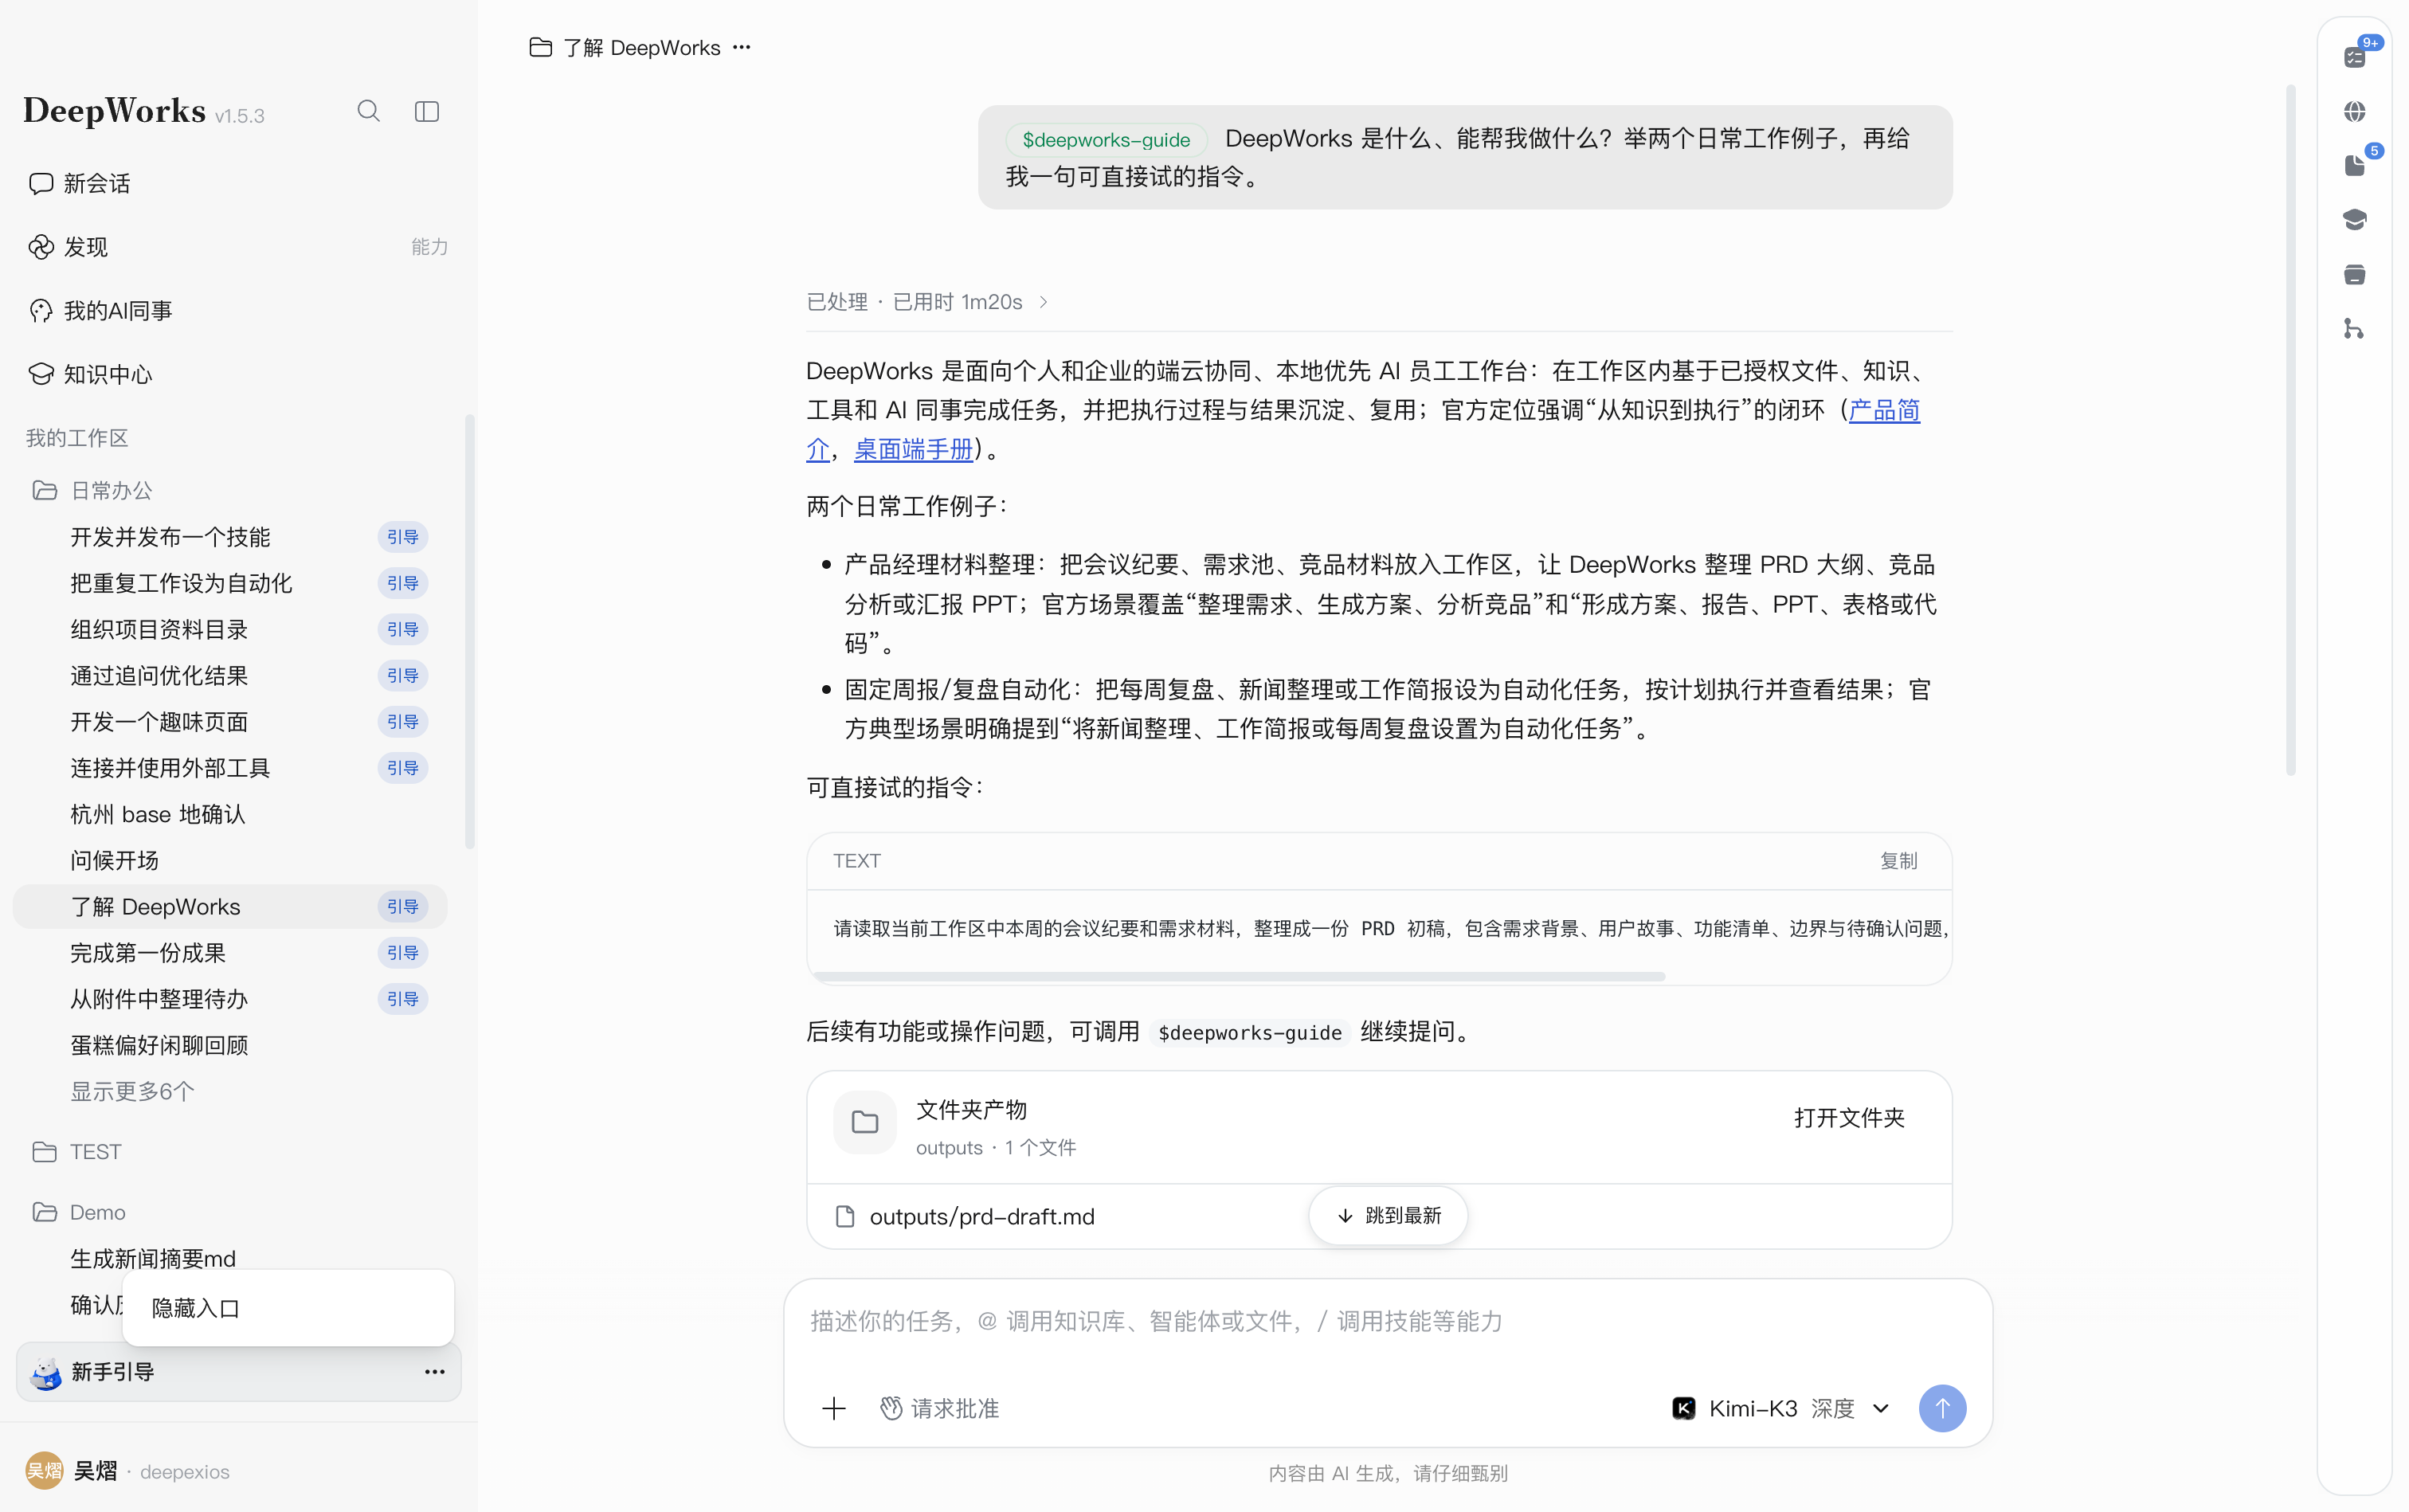
After all ten tasks are marked complete, the bottom of the list displays “All tutorials completed · You can start your own tasks.” In the completion dialog, click Start Exploring to dismiss it. Selecting 【Hide the Getting Started Entry in the Sidebar】 before clicking Start Exploring also hides the entry while retaining completion records and historical sessions.
Closing, Hiding, and Restoring the Entry
Close the list
Click the upper-right close button (×). You can reopen it from Getting Started at the bottom of the sidebar. Closing does not cancel running session tasks or clear progress.
Hide the entry
- Close the list and locate
Getting Startedat the bottom of the sidebar. - Hover over it and click
…on the right. - Click
Hide Entry.
Restore the entry
- Click the account entry at the bottom left and select
Settings. - Open
Advancedand enableShow Getting Startedunder Layout. - Click
Back to App, thenGetting Startedto resume your progress.
Hiding the entry and the Show Getting Started switch control the same visibility state. Re-enabling does not clear progress or resend tasks. See 11.5.3 Show Getting Started.
Workspace and Conversations
Creating and Switching Conversations
Creating a Conversation
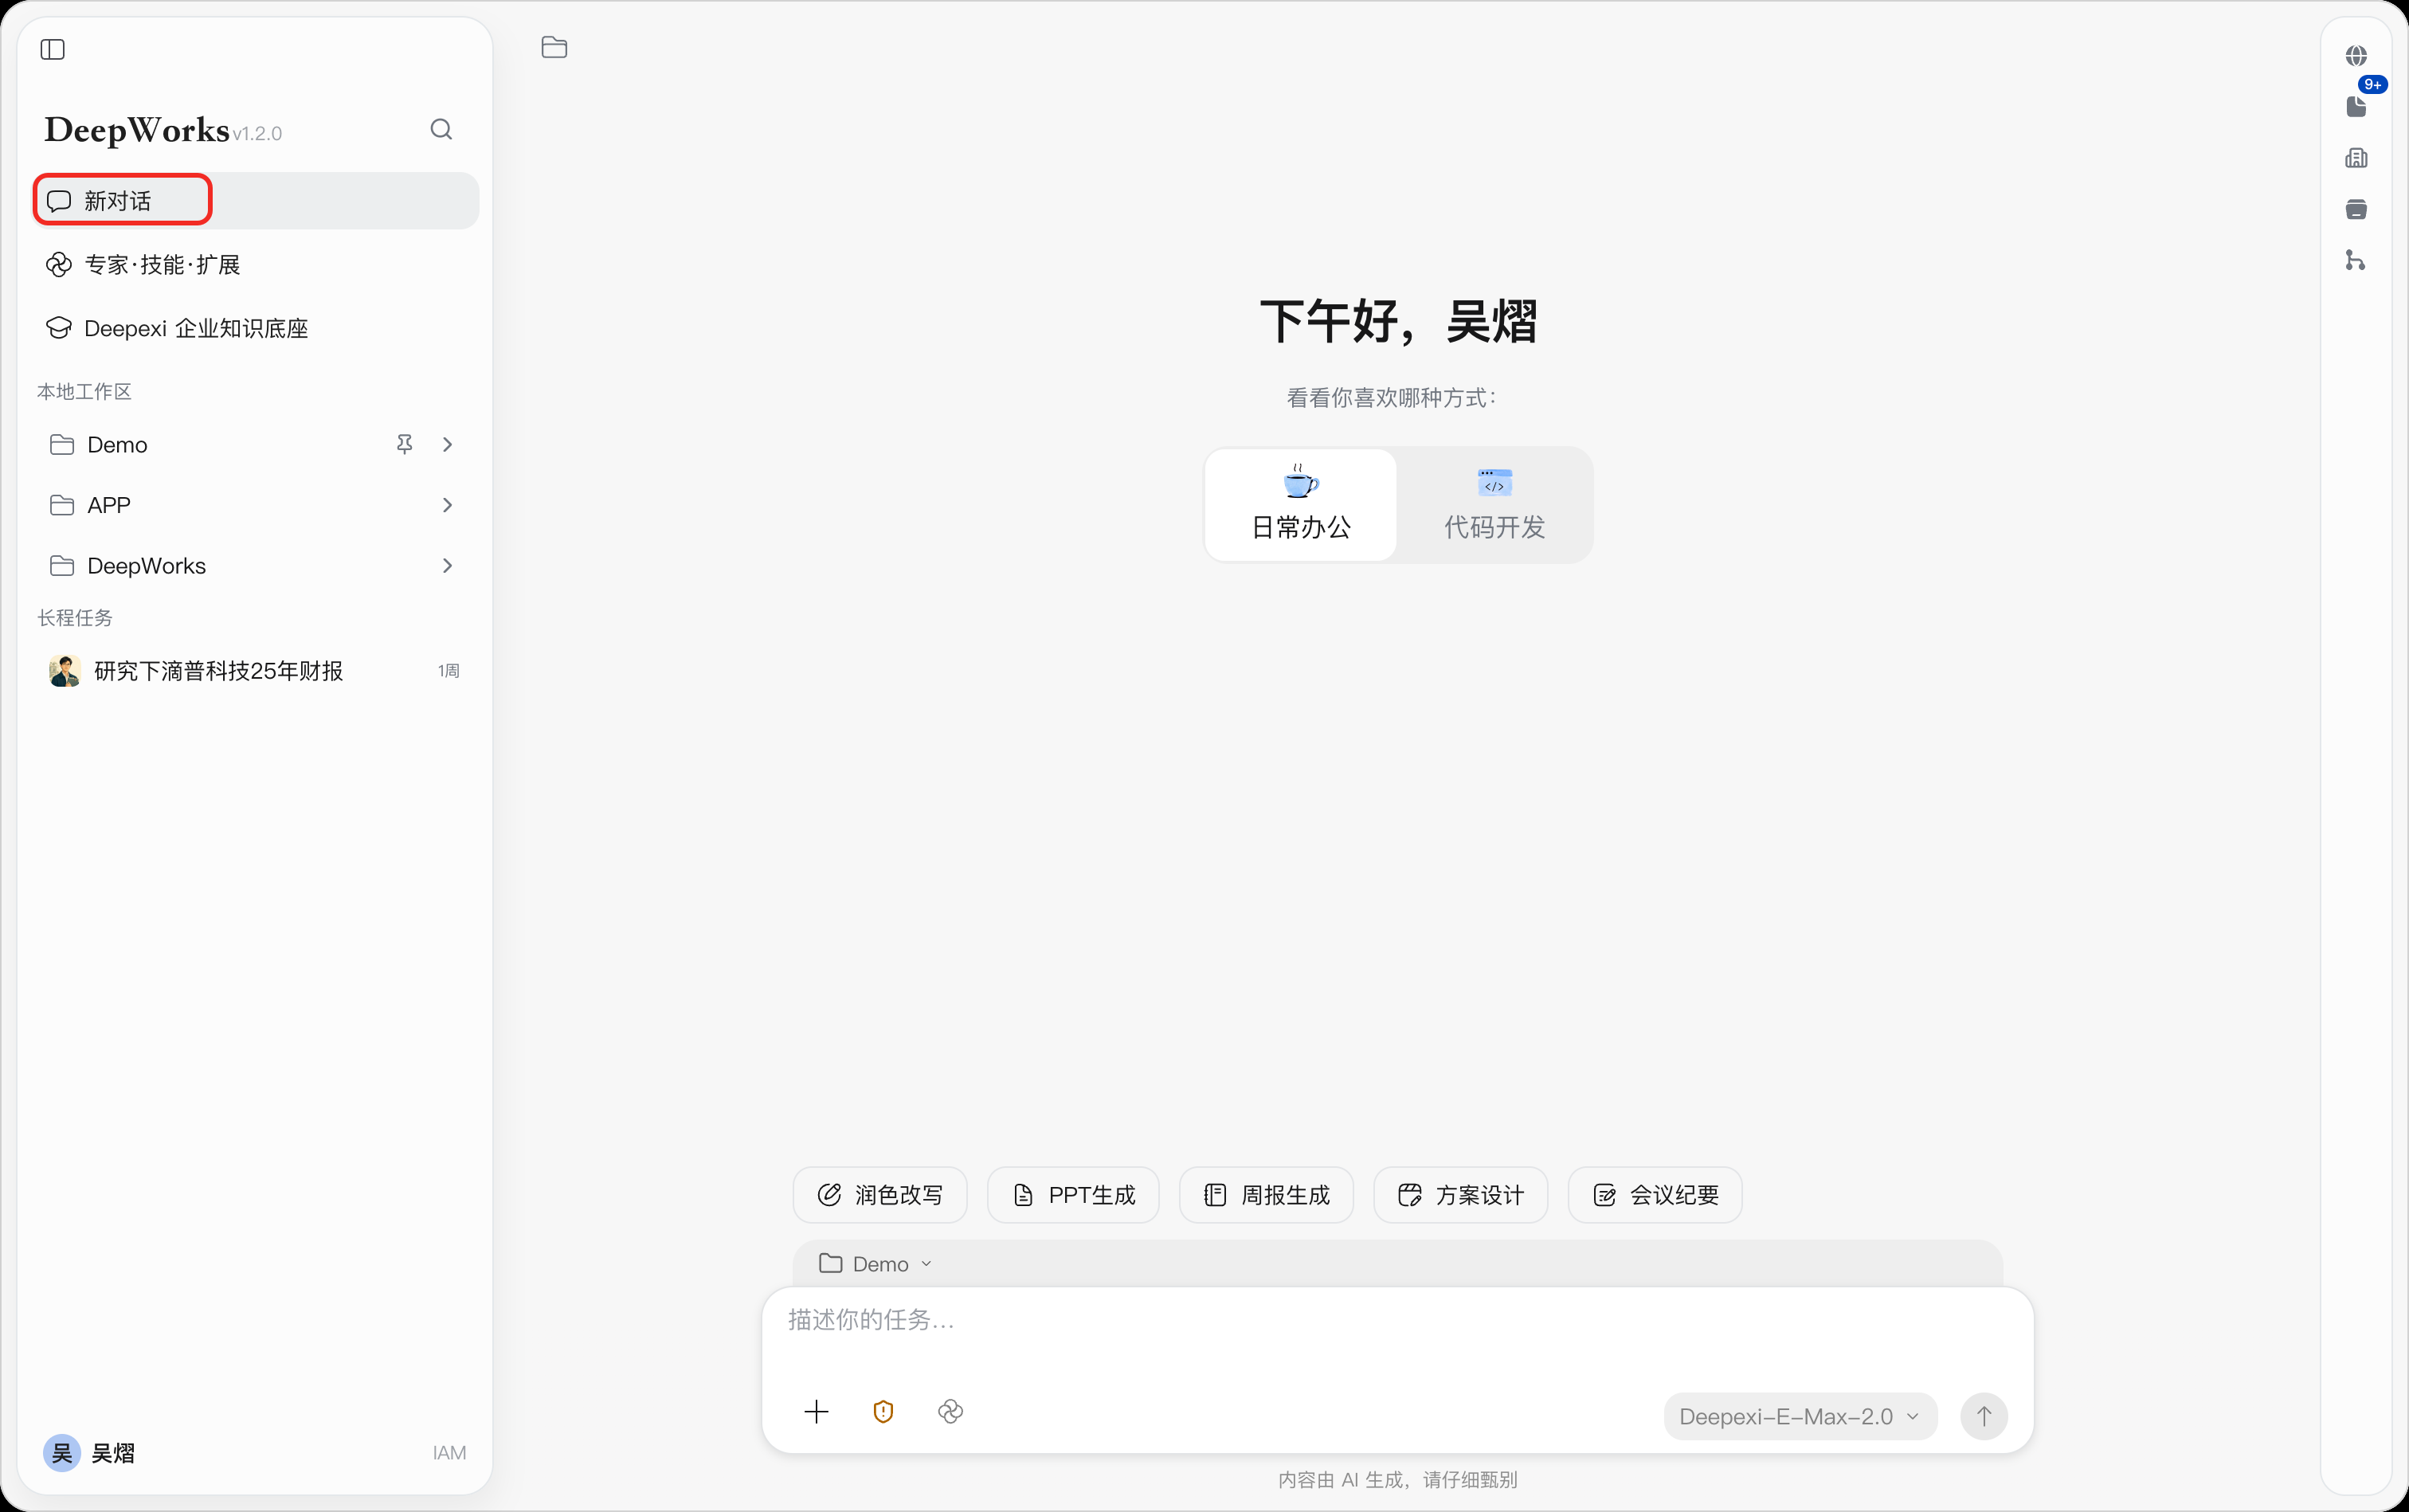
Click New Conversation at the top of the left navigation to create a new conversation in the current workspace. Creating a new conversation does not delete the existing history.
Switching to a Historical Conversation
Historical conversations of the workspace are displayed below the workspace. Click a conversation name to continue the original task. The long-running task area displays ongoing tasks and history records executed by experts and expert teams.
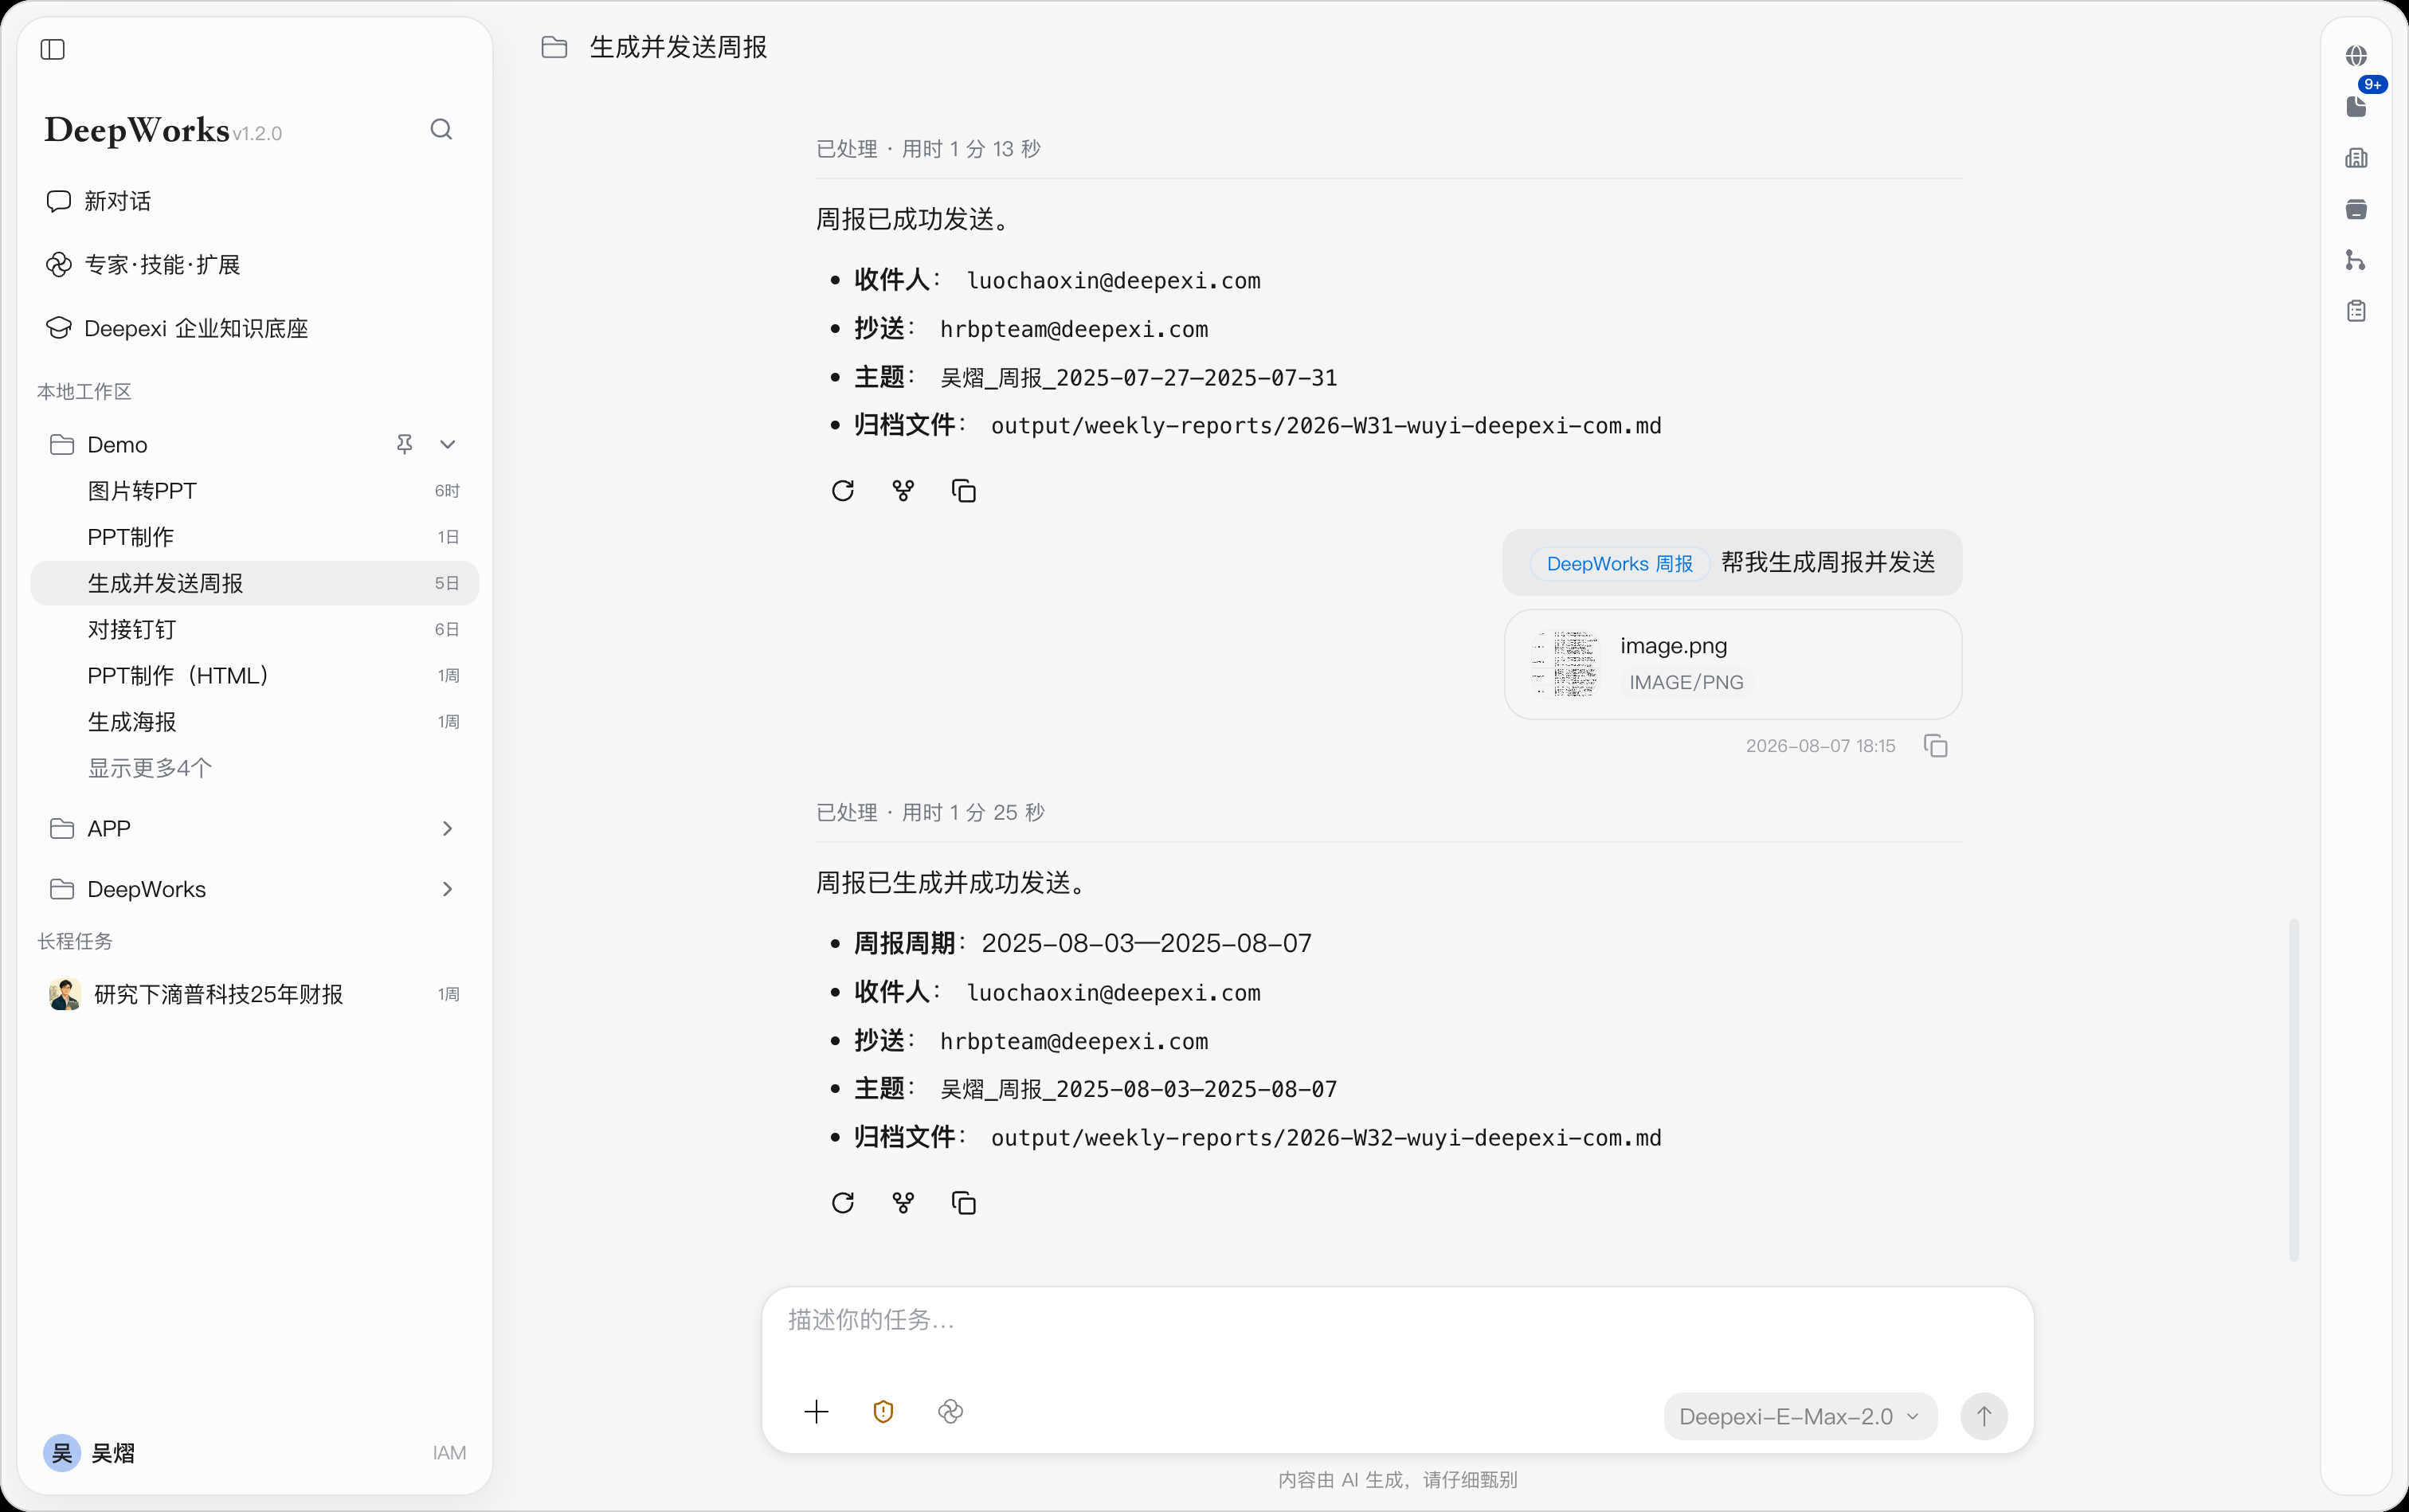
When using a historical conversation, first confirm its workspace and task topic to avoid continuing work in the wrong context.
Searching Conversations
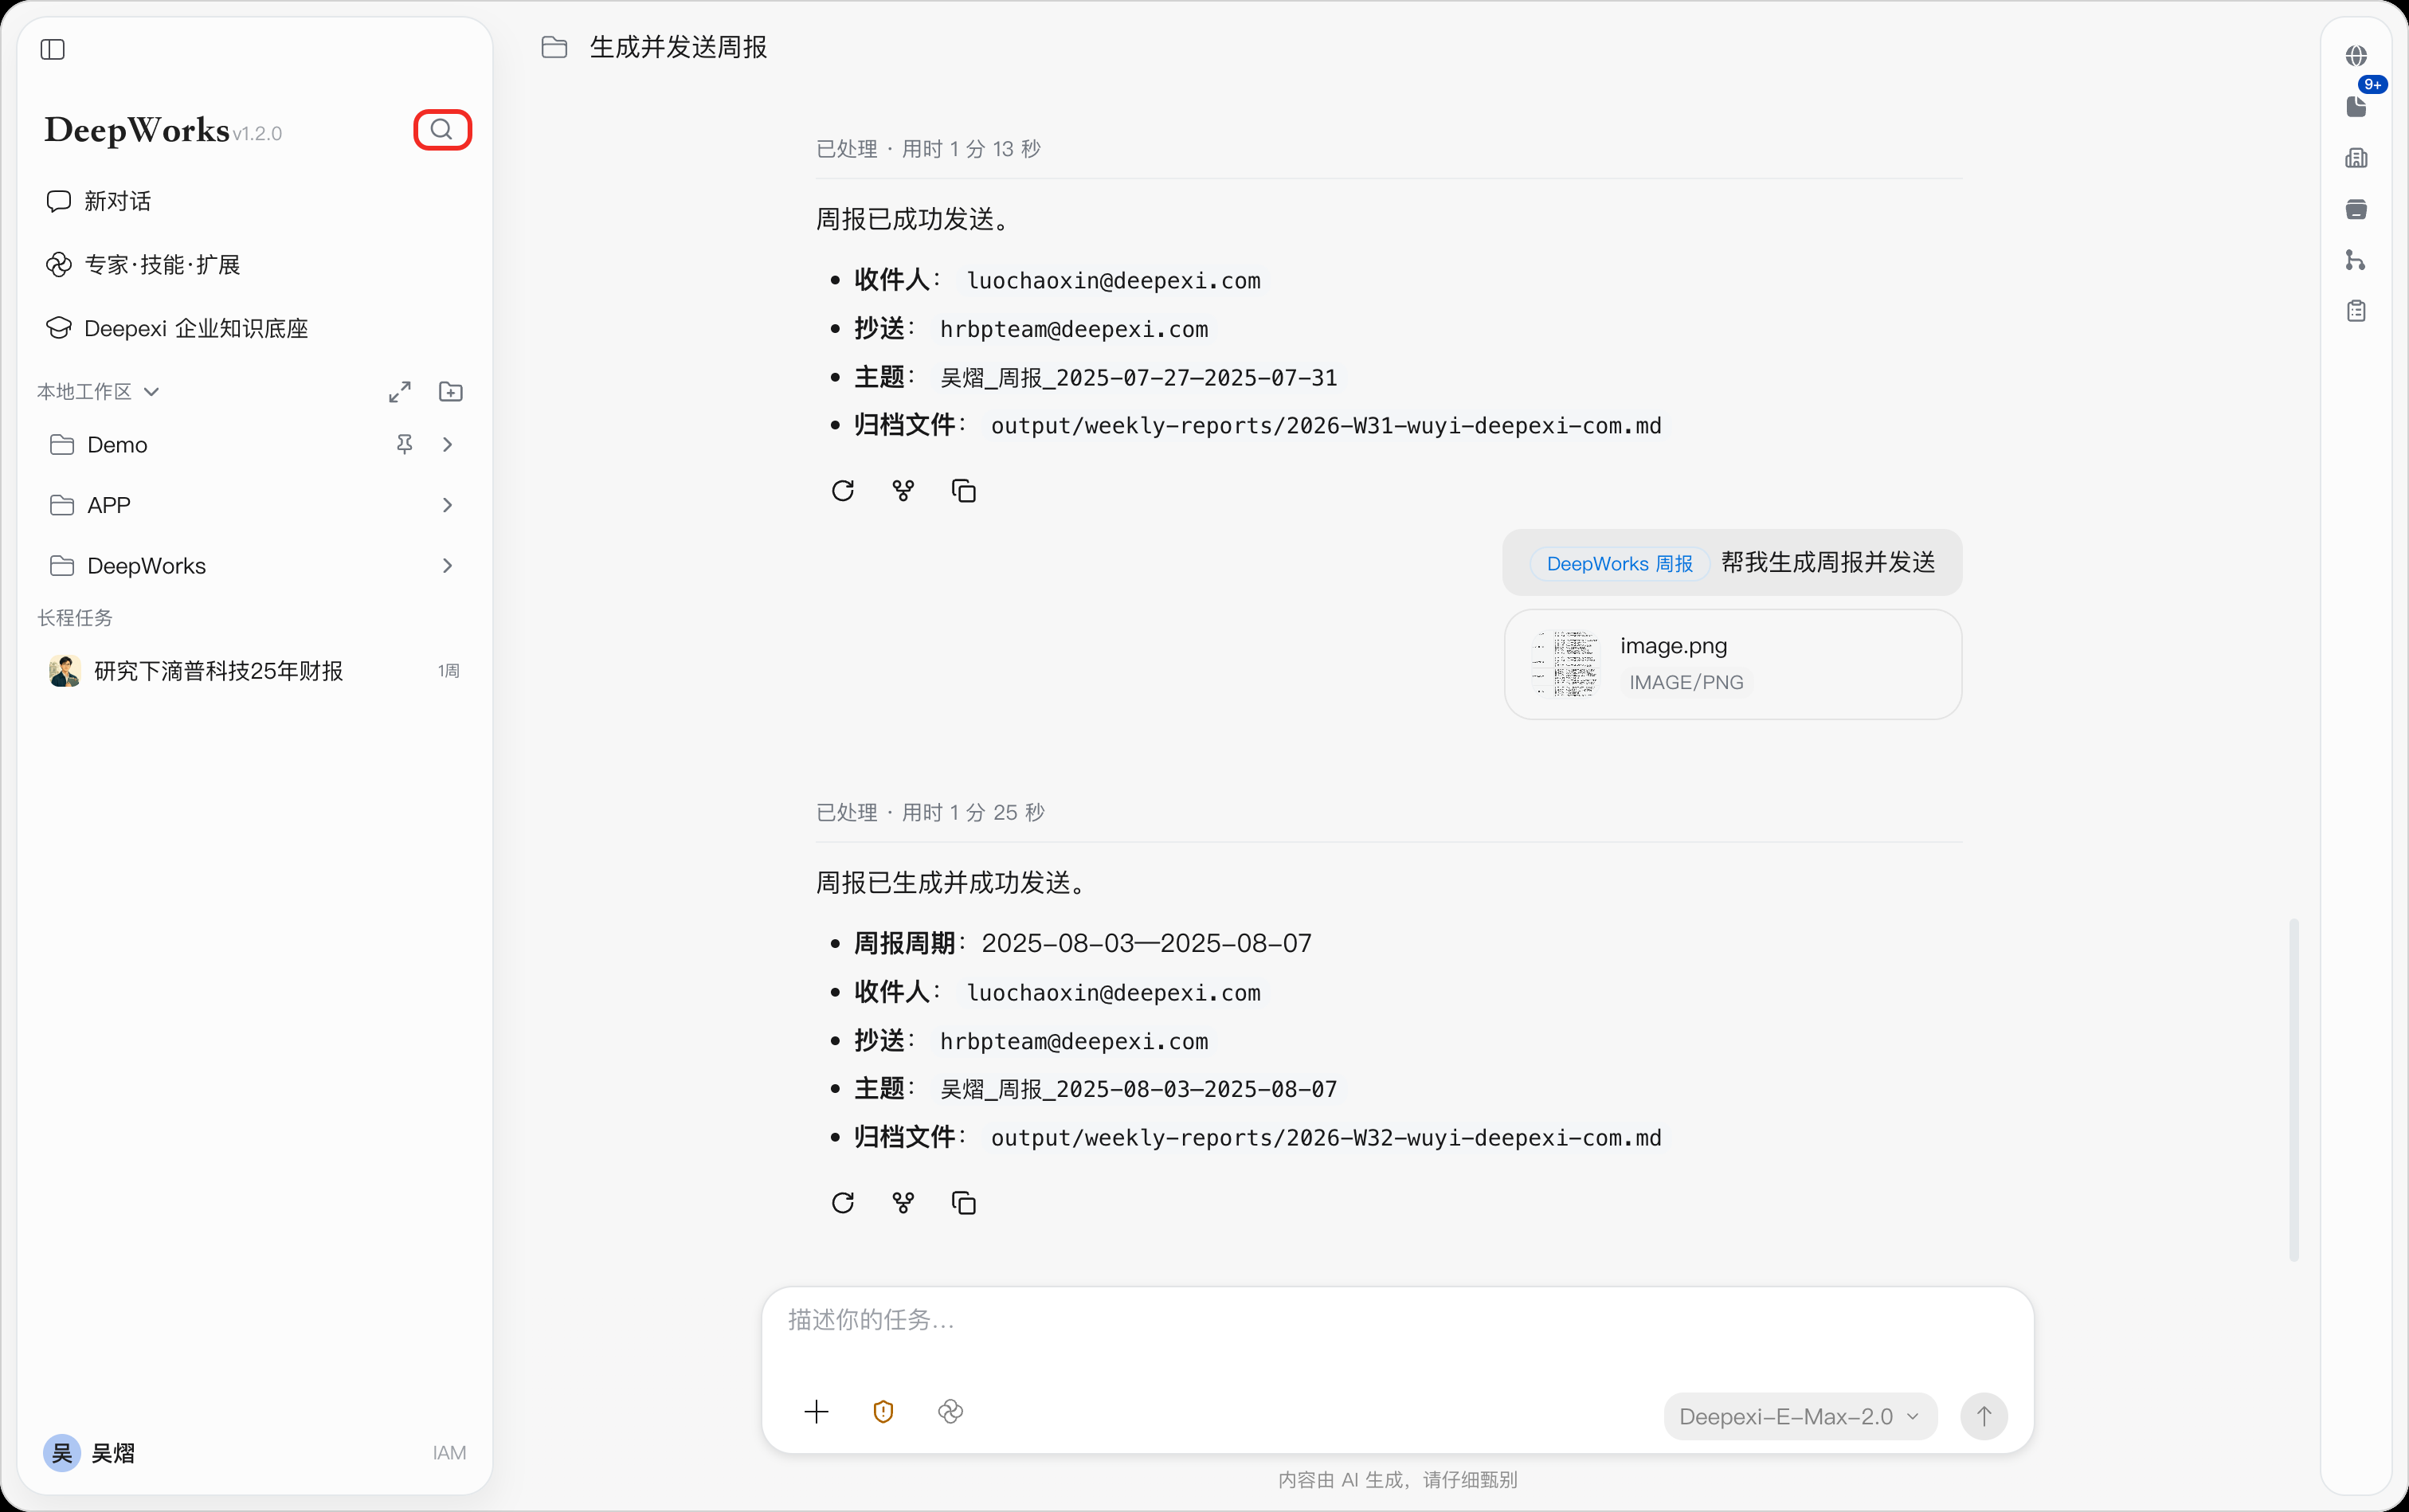
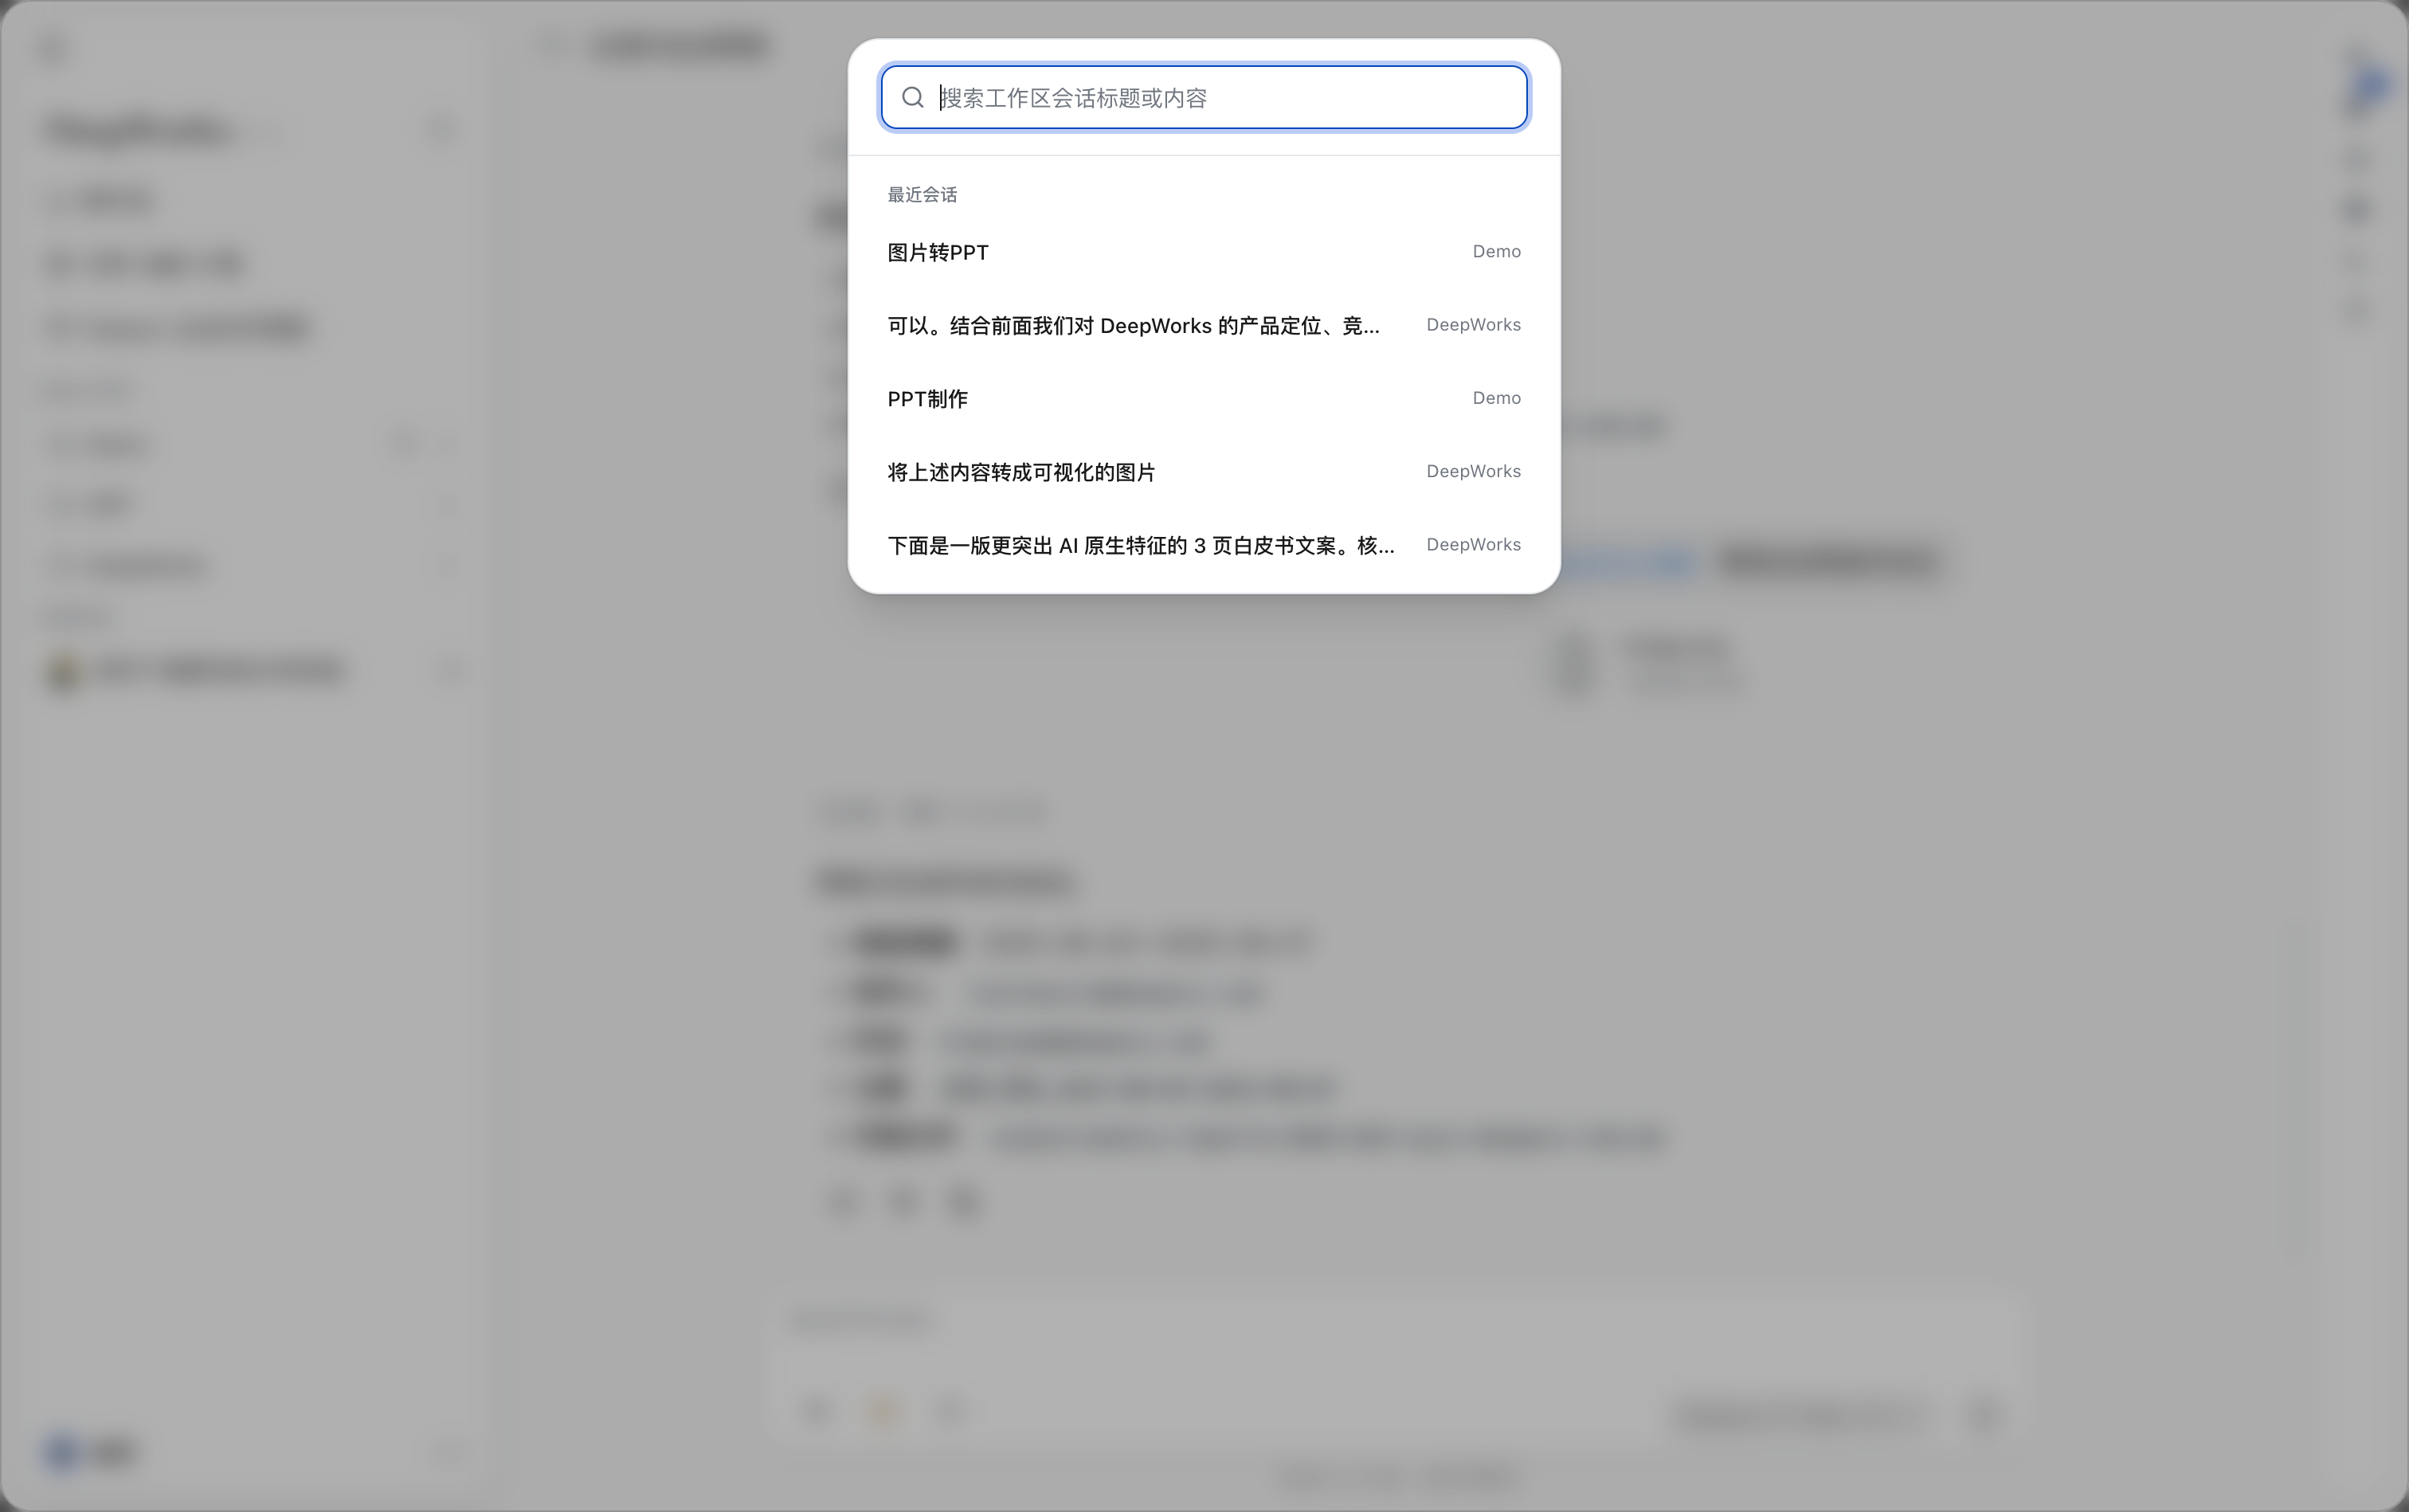
Click the search button to search by conversation or task content. This is useful for quickly locating past work when there are many conversations.
Archiving Chats
Conversations that do not need further processing for the time being can be archived for centralized management.
Path: Target conversation under the workspace on the left →… on the right →Archive Chat.
- Find the conversation to archive in the workspace on the left.
- Click … on the right of the conversation to open the conversation action menu.
- Click Archive Chat to move the conversation into archived chats.
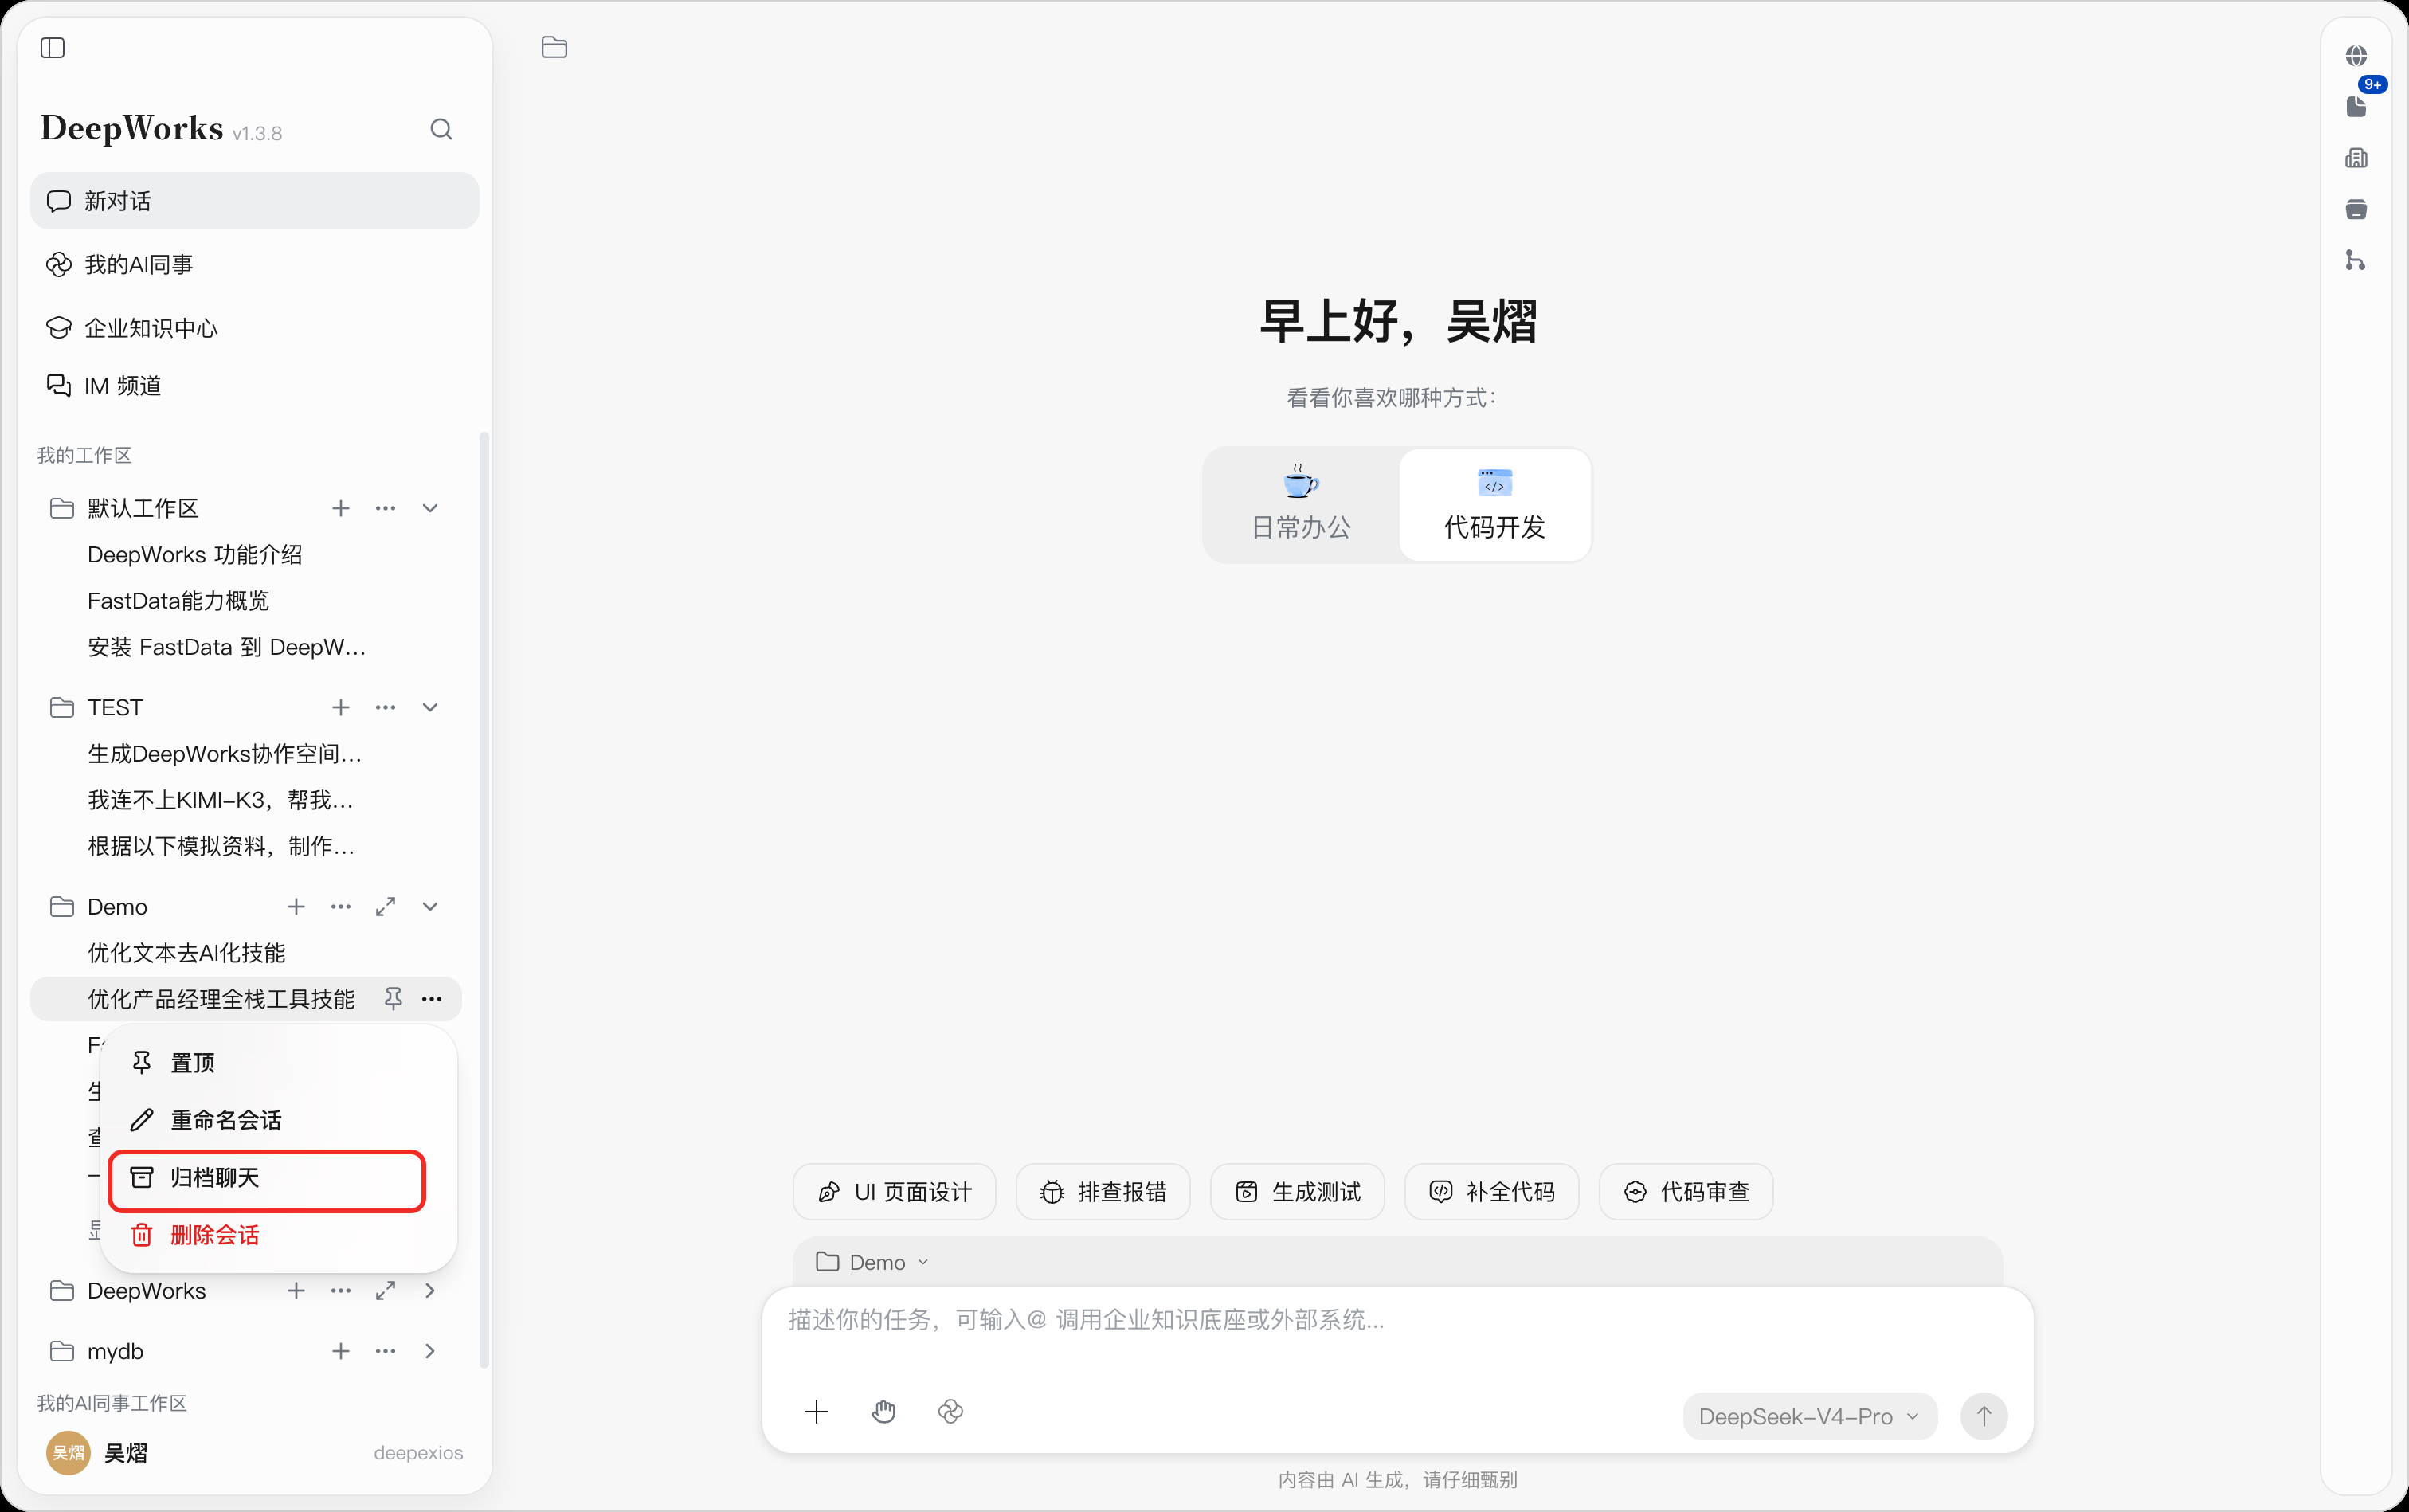
After archiving, you can go to Settings > Archived Chats to find or unarchive it. For details, see9.13 Archived Chats.
Pinning a Session
Frequently used sessions or sessions that require continuous follow-up can be pinned to the Pinned area on the left for quick access.
Path: Target session under the workspace on the left → pin buttonPin on the right of the session.
- Expand the target workspace on the left and find the session to pin.
- Hover over the session to display the action buttons on the right.
- Click the pin button (tooltip: Pin).
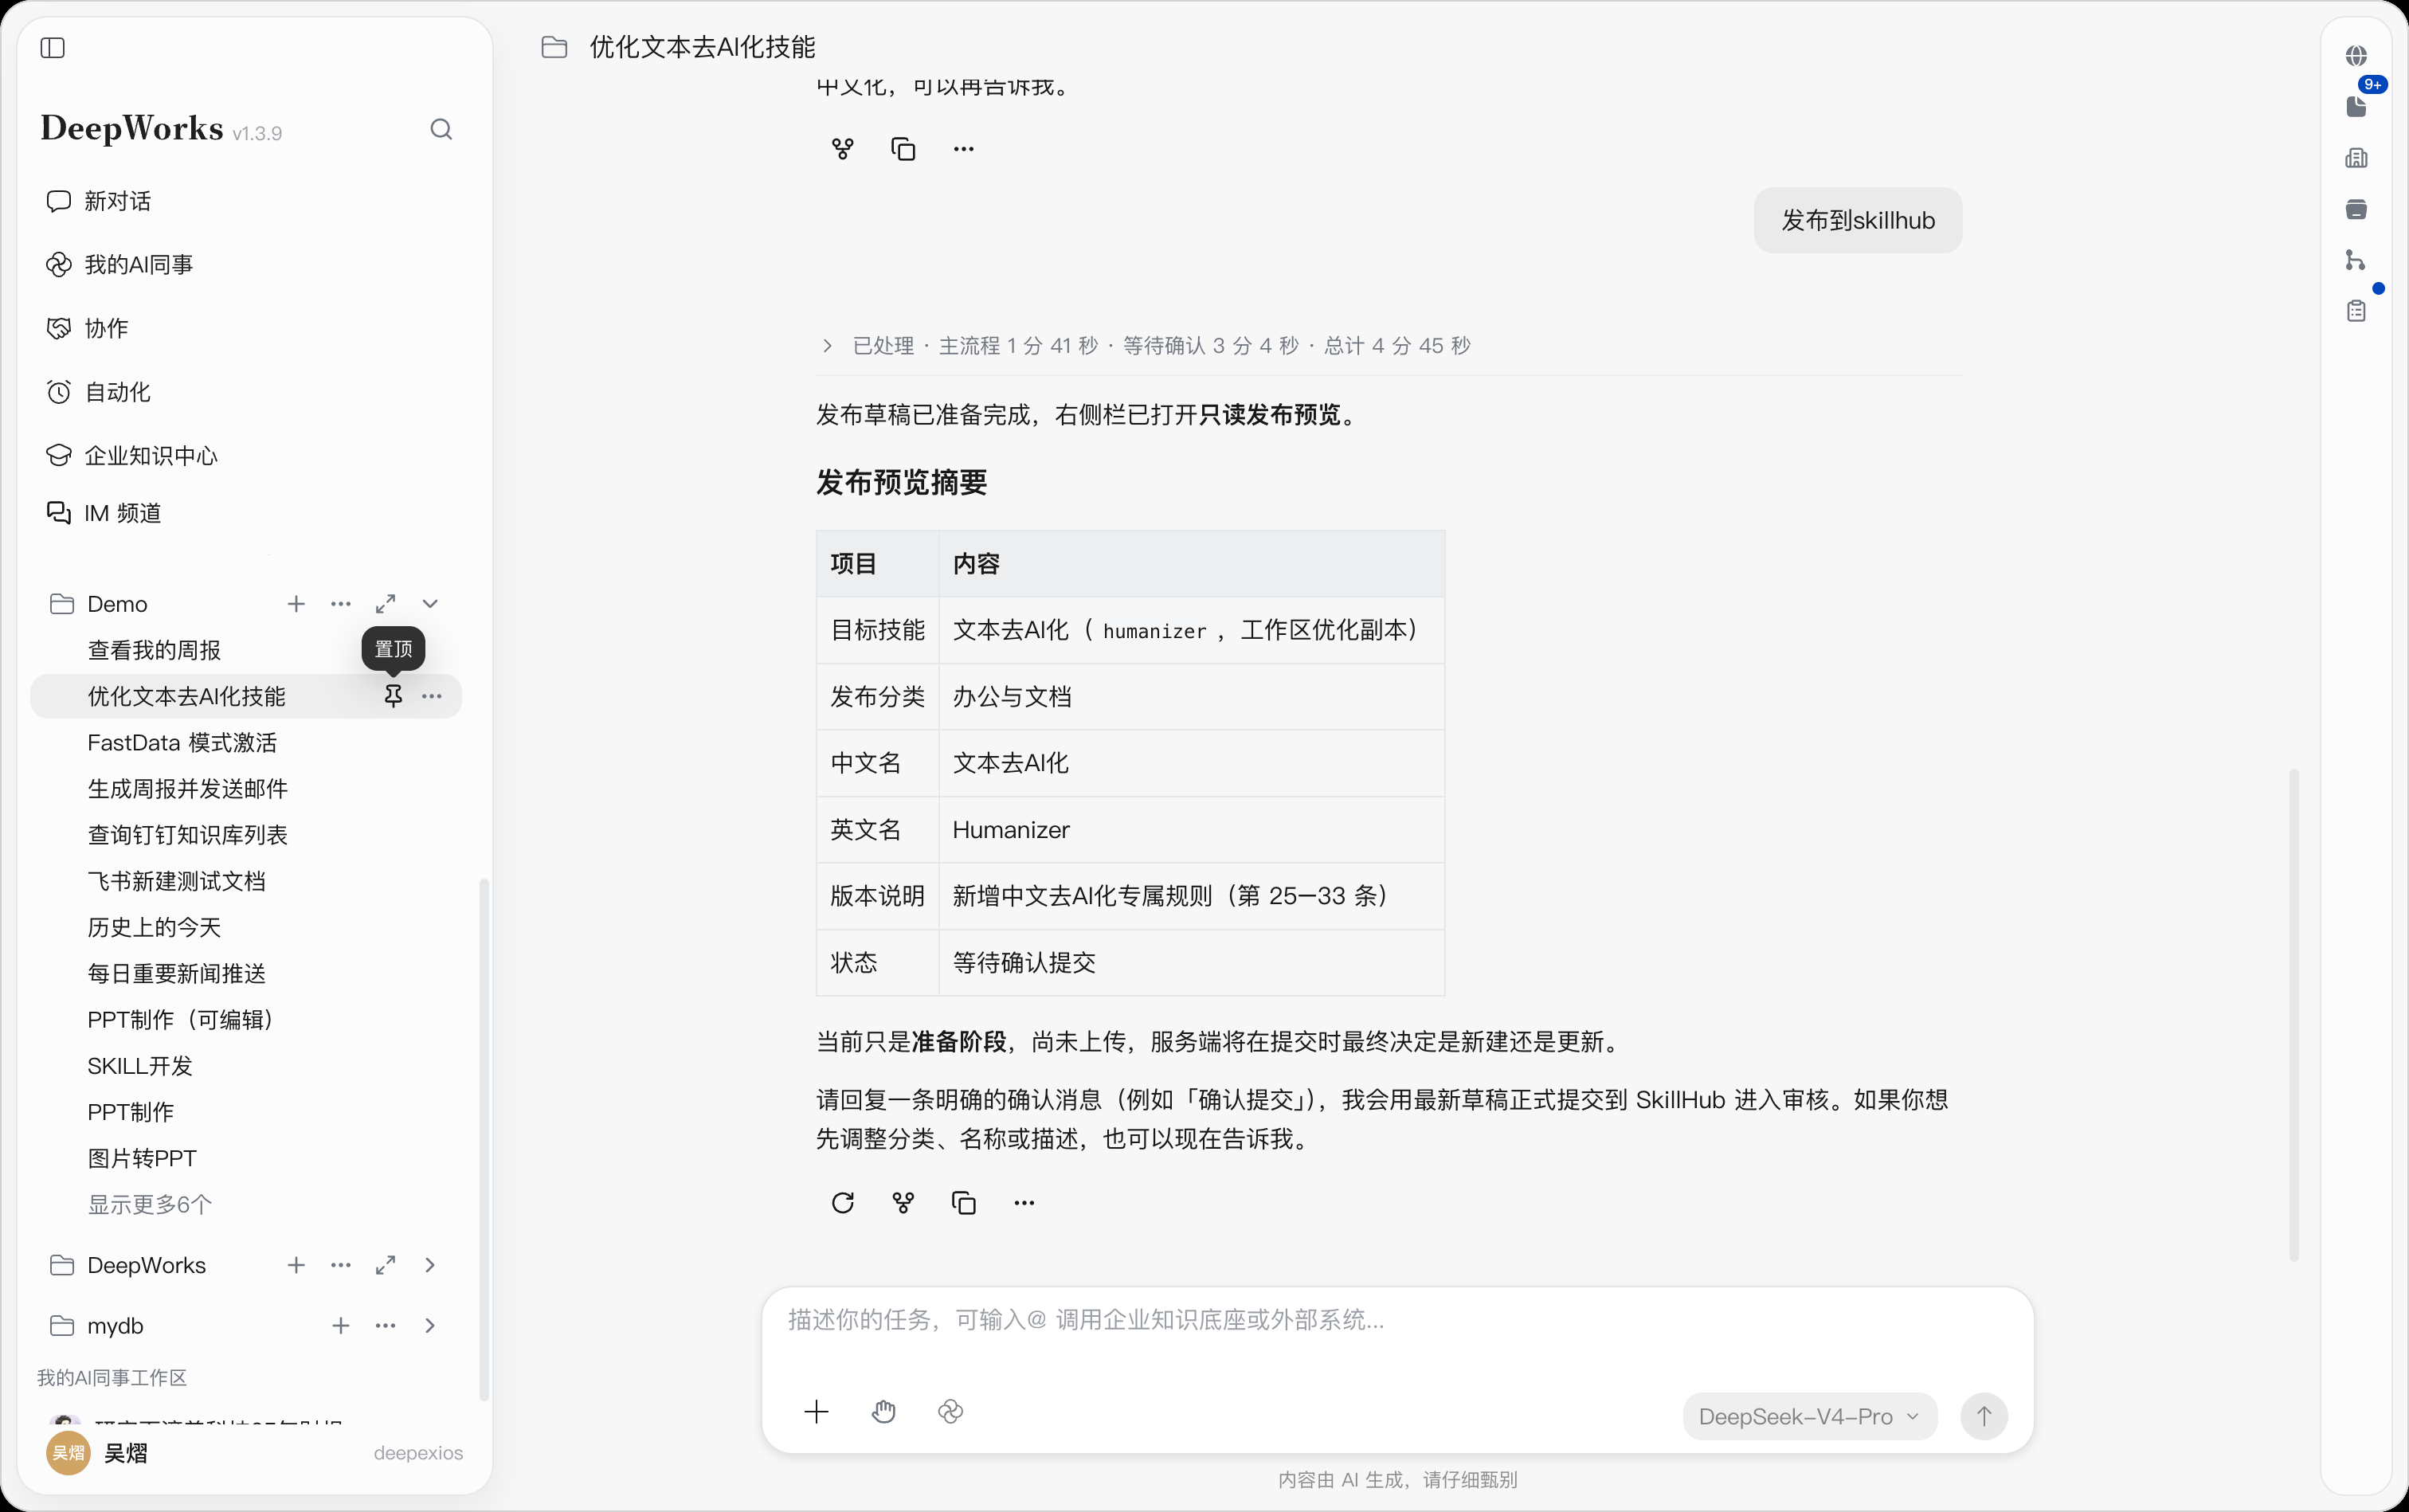
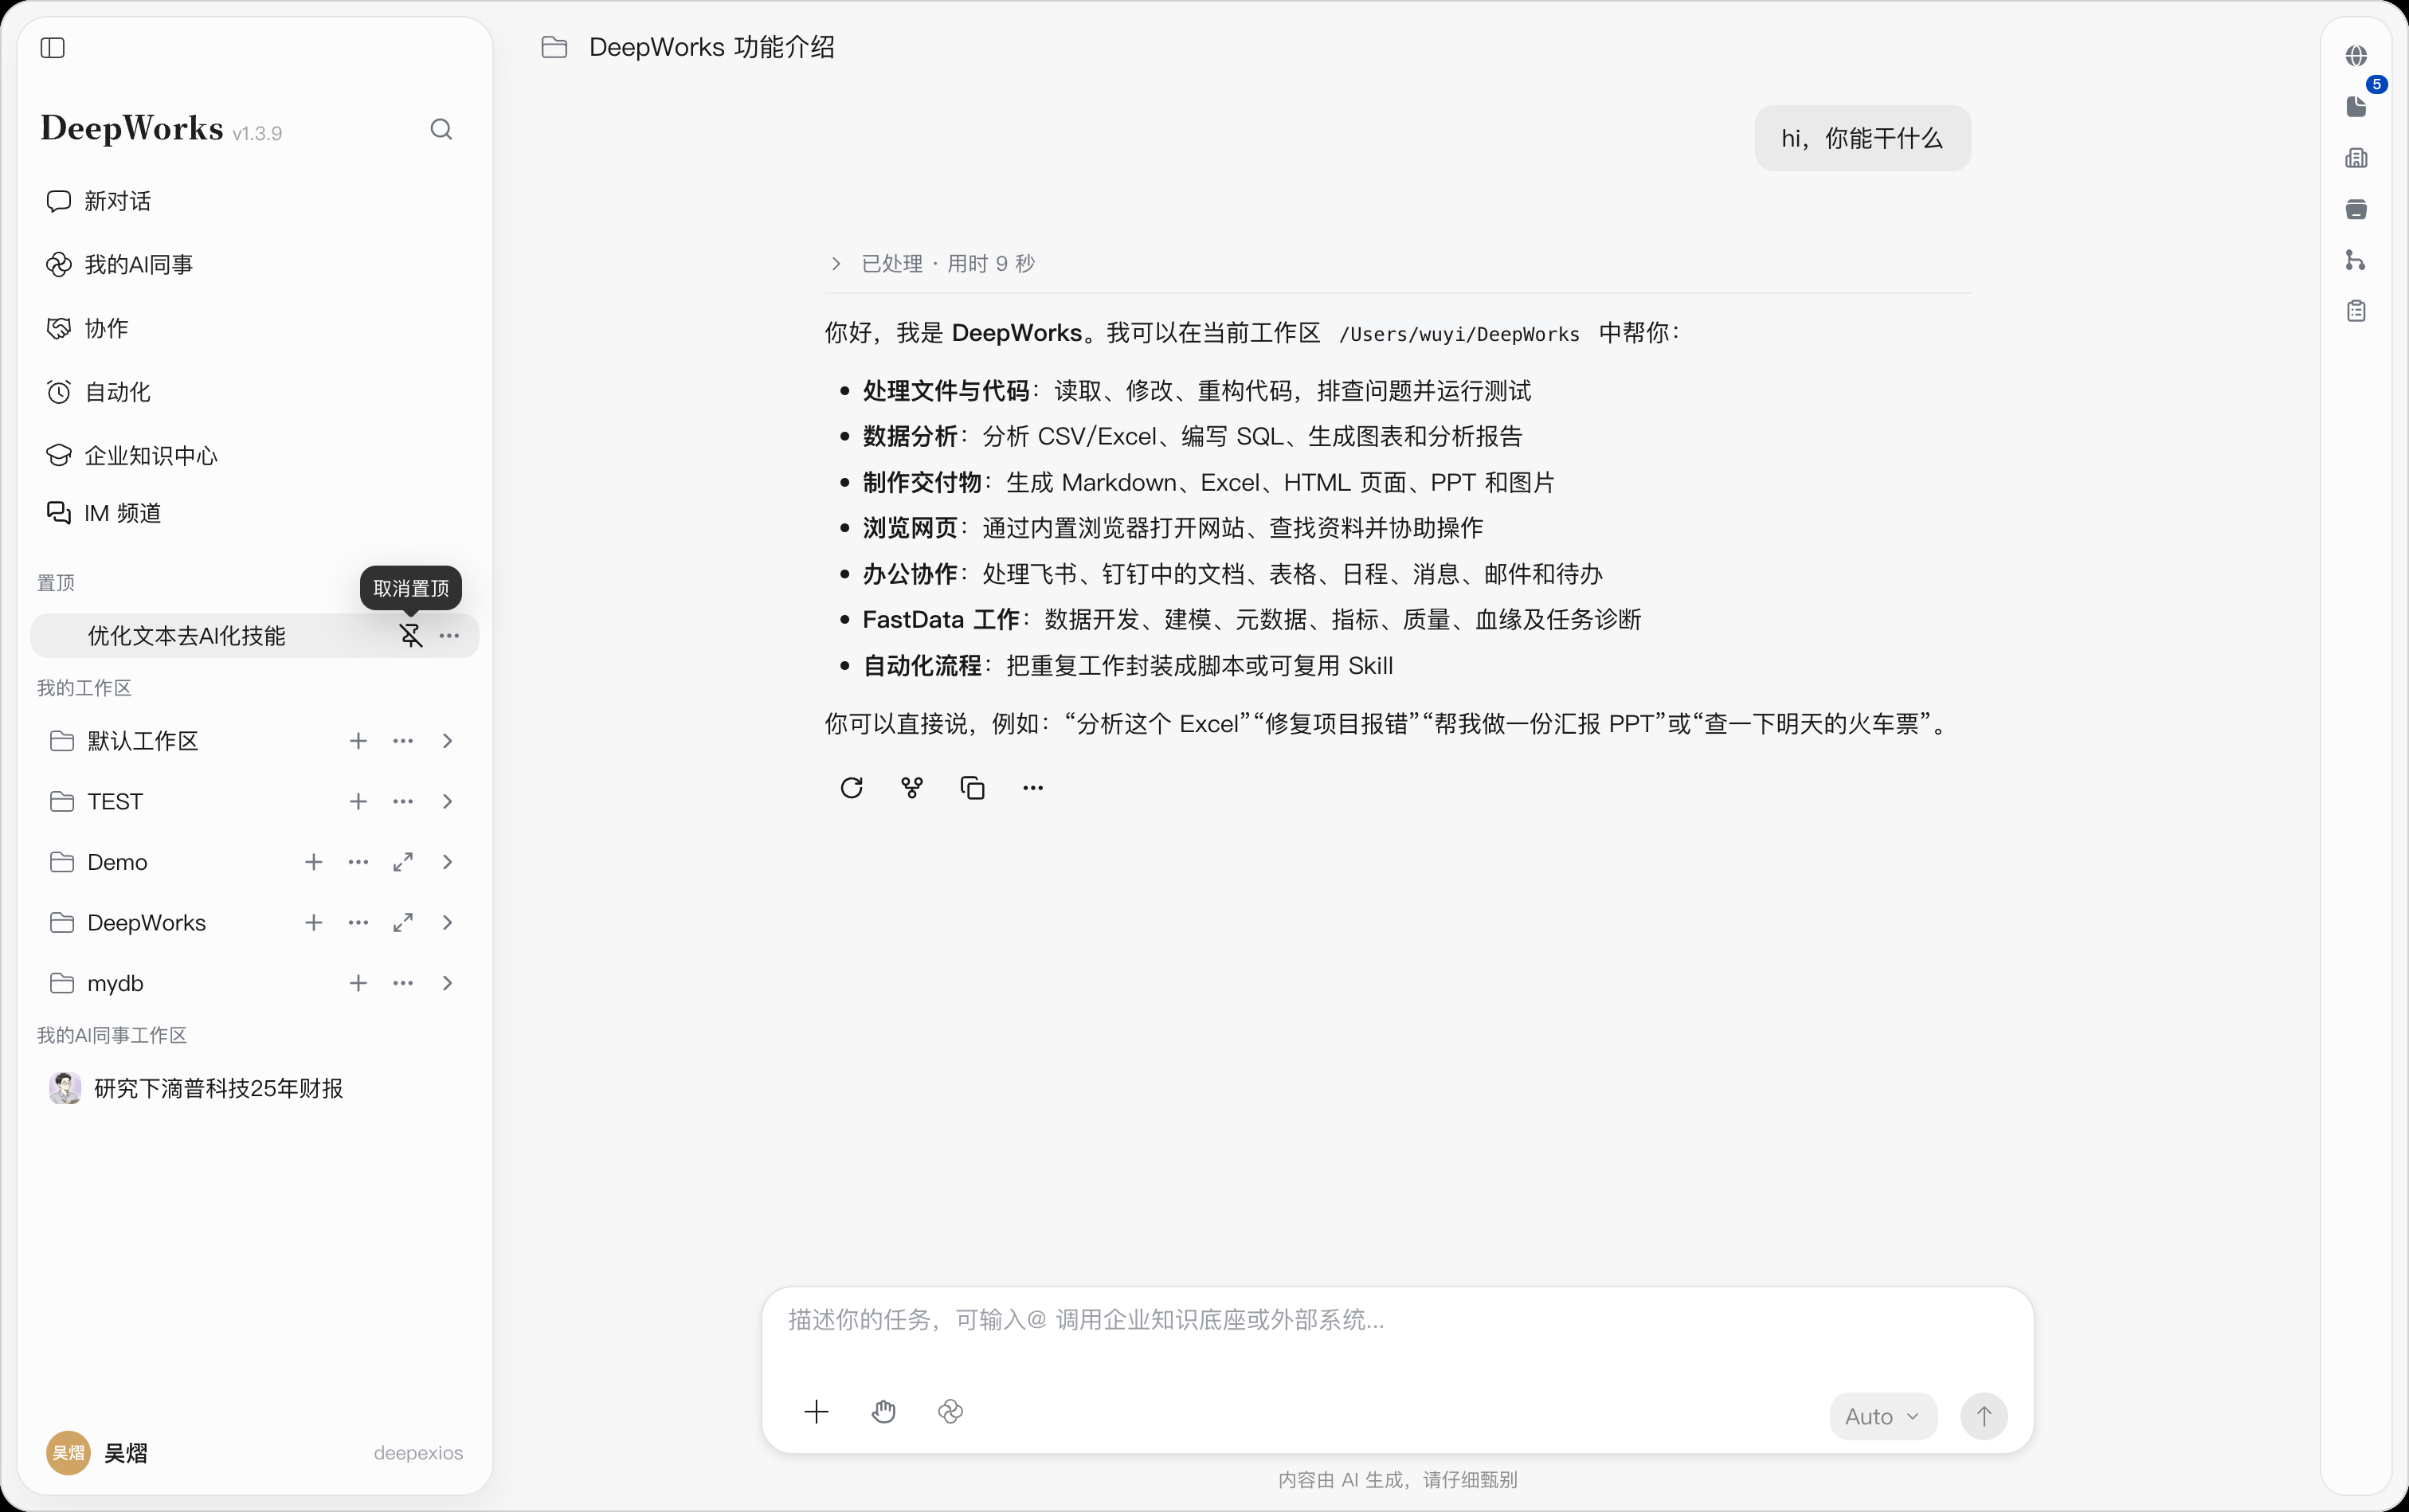
- After pinning, the session appears in the Pinned area on the left, aboveMy Workspace. Click the session name to open it and continue the conversation.
Unpin: In thePinned area, hover over the target session and click the pin button on the right (tooltip: Unpin) to remove the session from pinned status.
Session Navigation
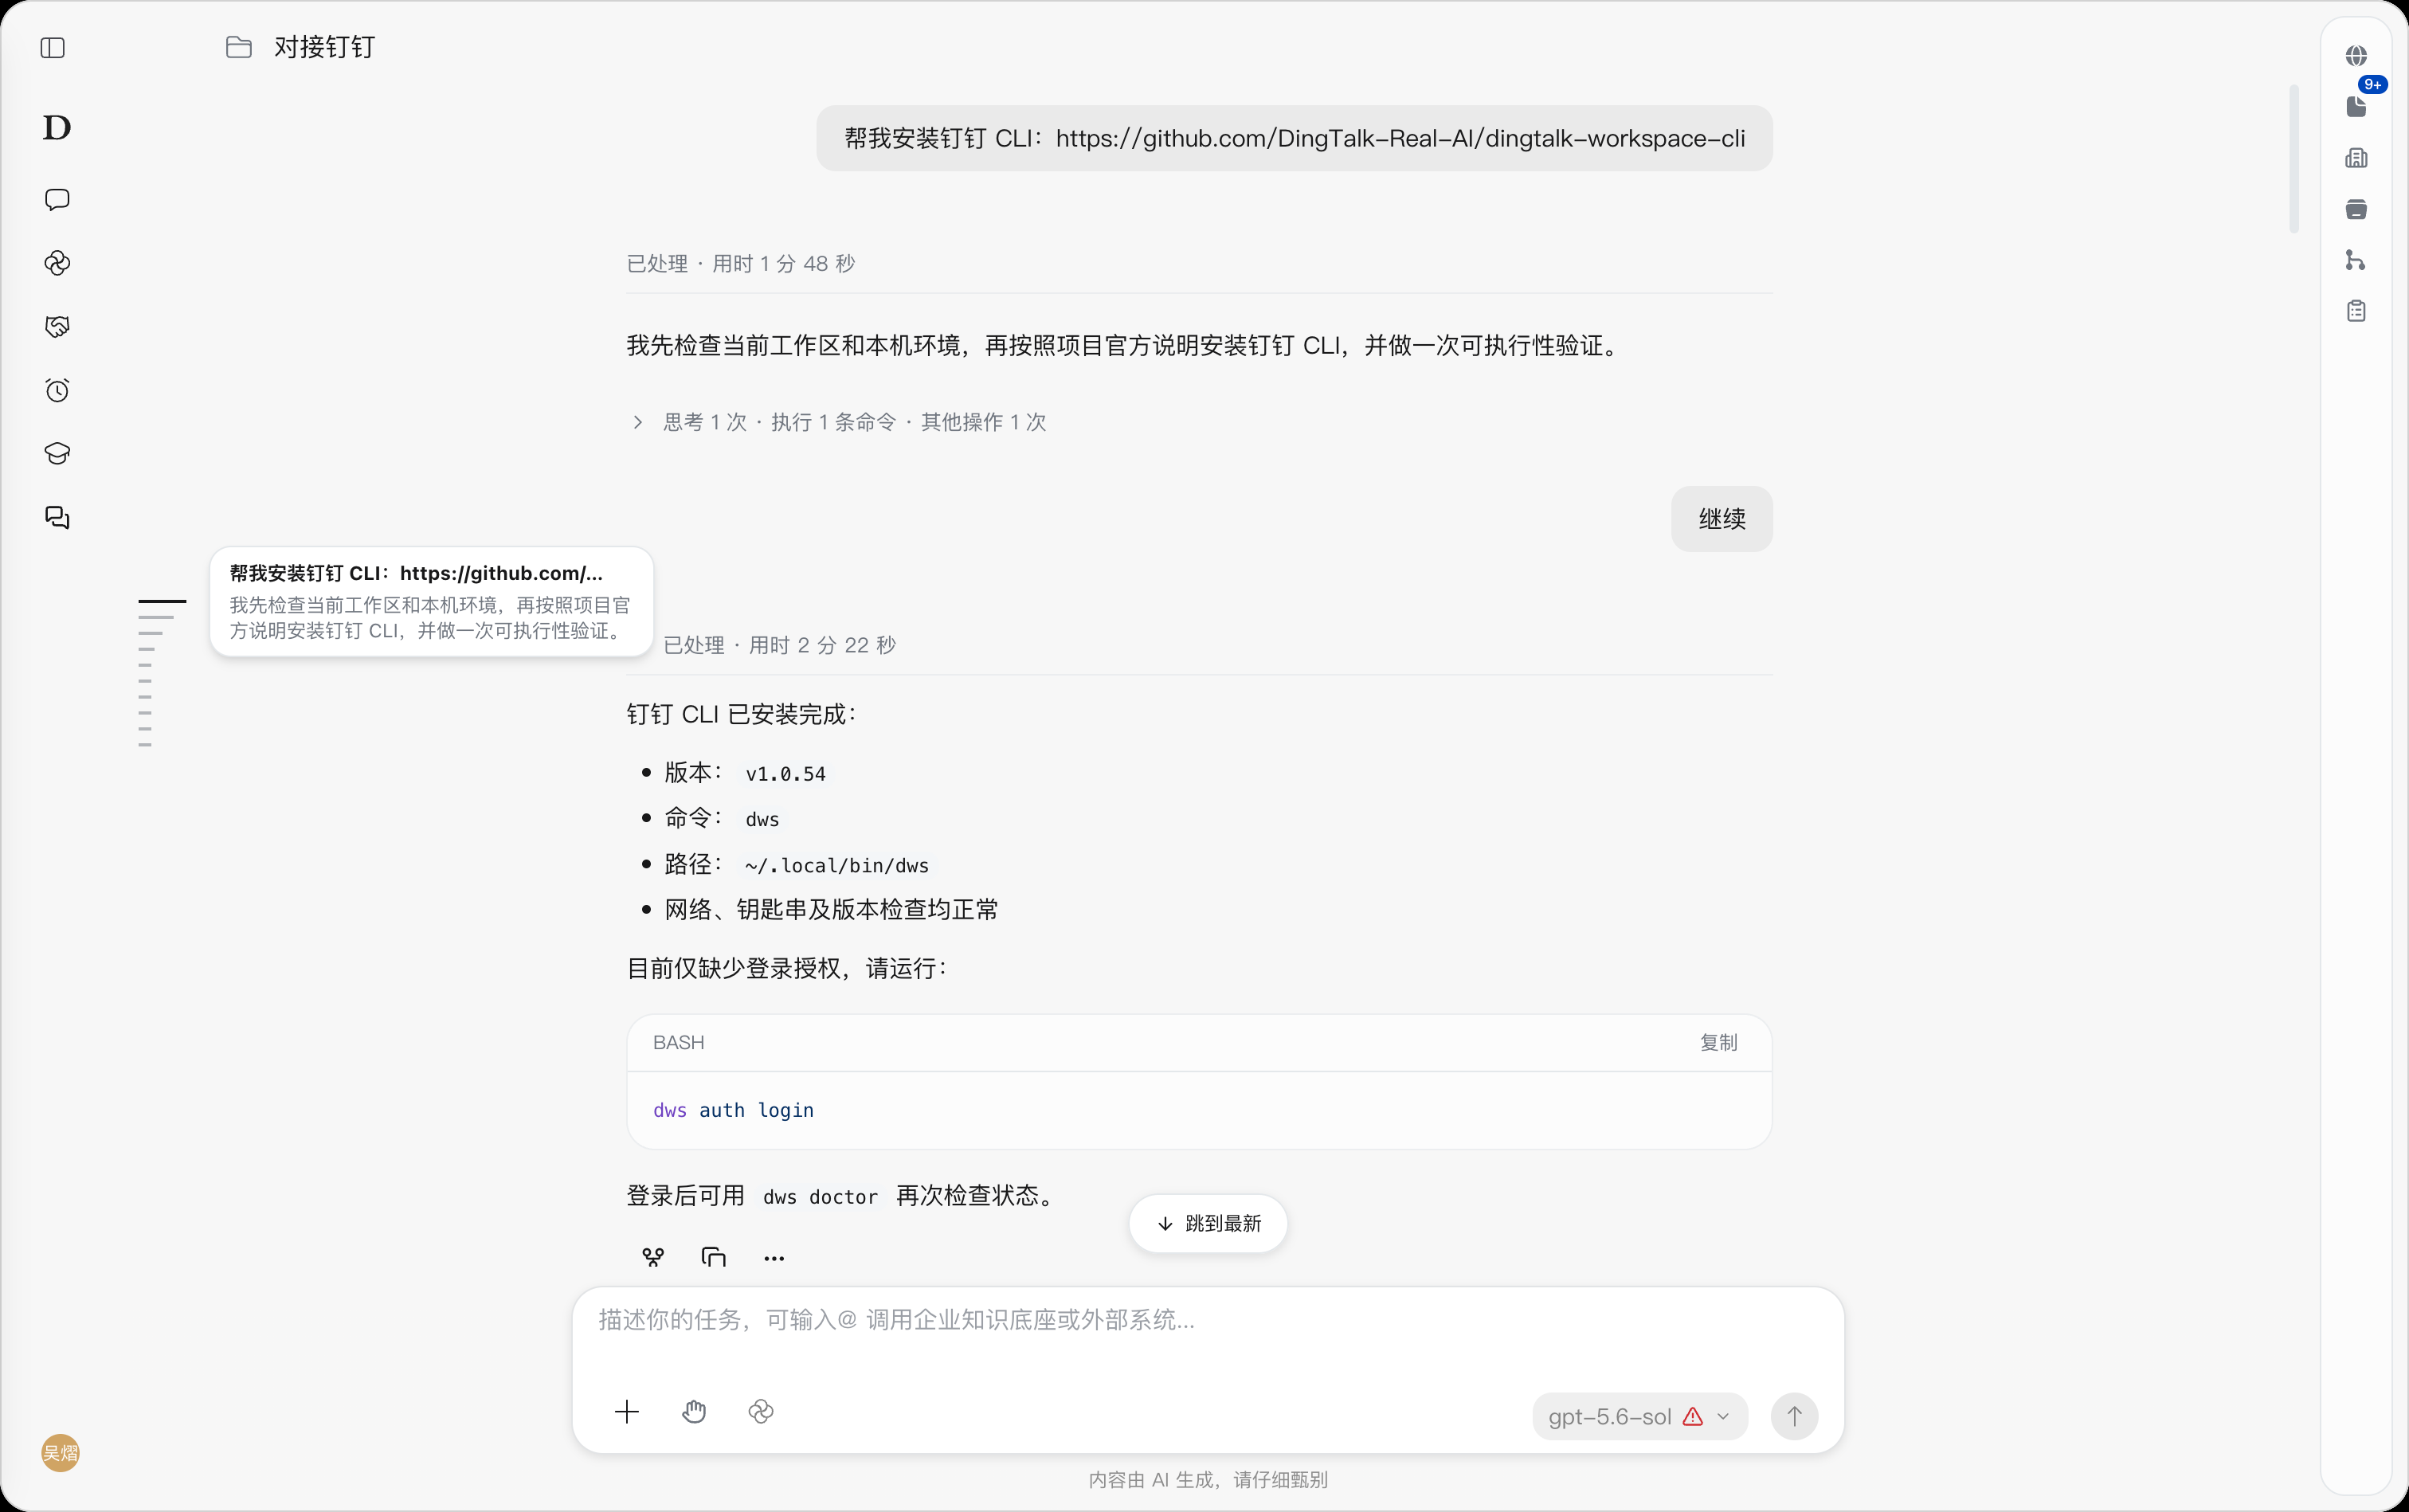
When a session is long (more than 3 conversation turns), use the navigation markers on the left side of the session content area to quickly preview and locate historical messages.
Path: Open the target session → navigation markers on the left of the session content area → hover to preview → click to locate.
- Open the session you want to view and find the navigation markers, which appear as multiple short dashes, on the left of the session content area.
- Hover over a navigation marker to view the content preview that pops up. The preview shows the corresponding user question and a snippet of the AI reply, helping you identify the content you are looking for.
- After confirming the target content, click the corresponding navigation marker to jump to that position and read the full message with its context.
- To return to the latest content, click ↓ Jump to Latest above the input box to quickly go back to the bottom of the session.
Managing Workspaces
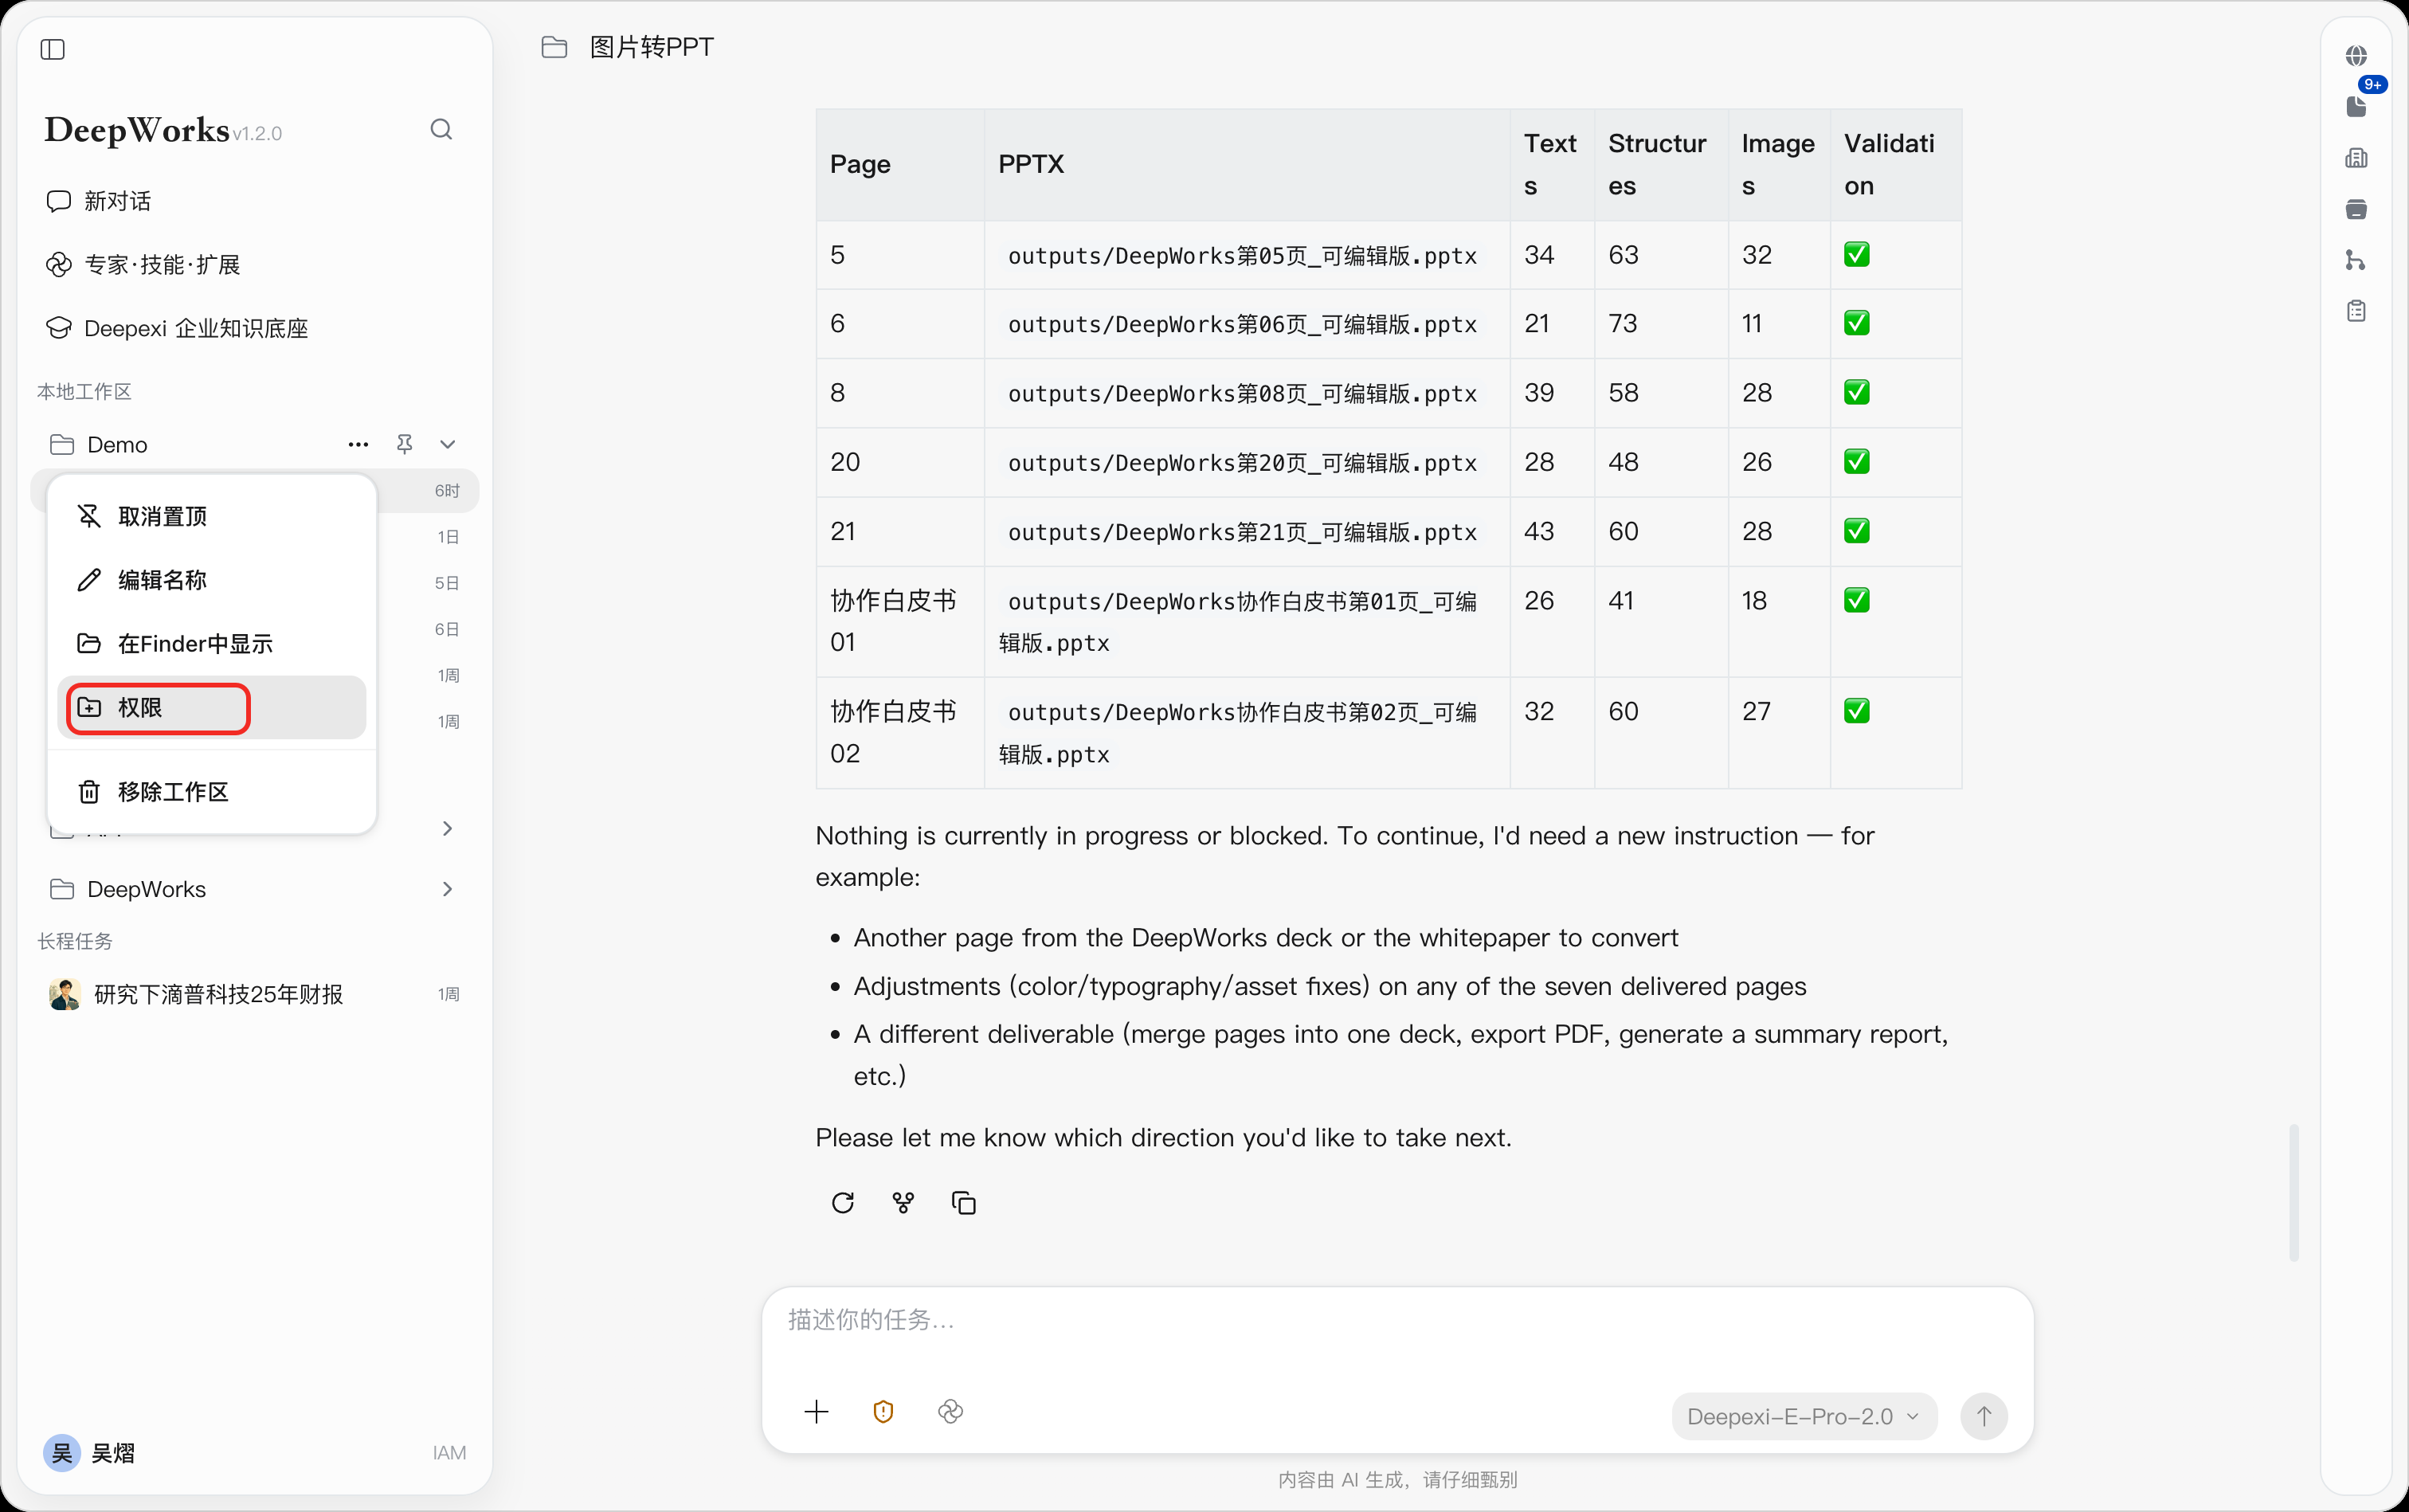
Path: Workspace on the left → more button on the right of the target workspace.
A workspace is used to bind project directories, files, and conversation context. Click the more button on the right of a workspace to open the action menu.
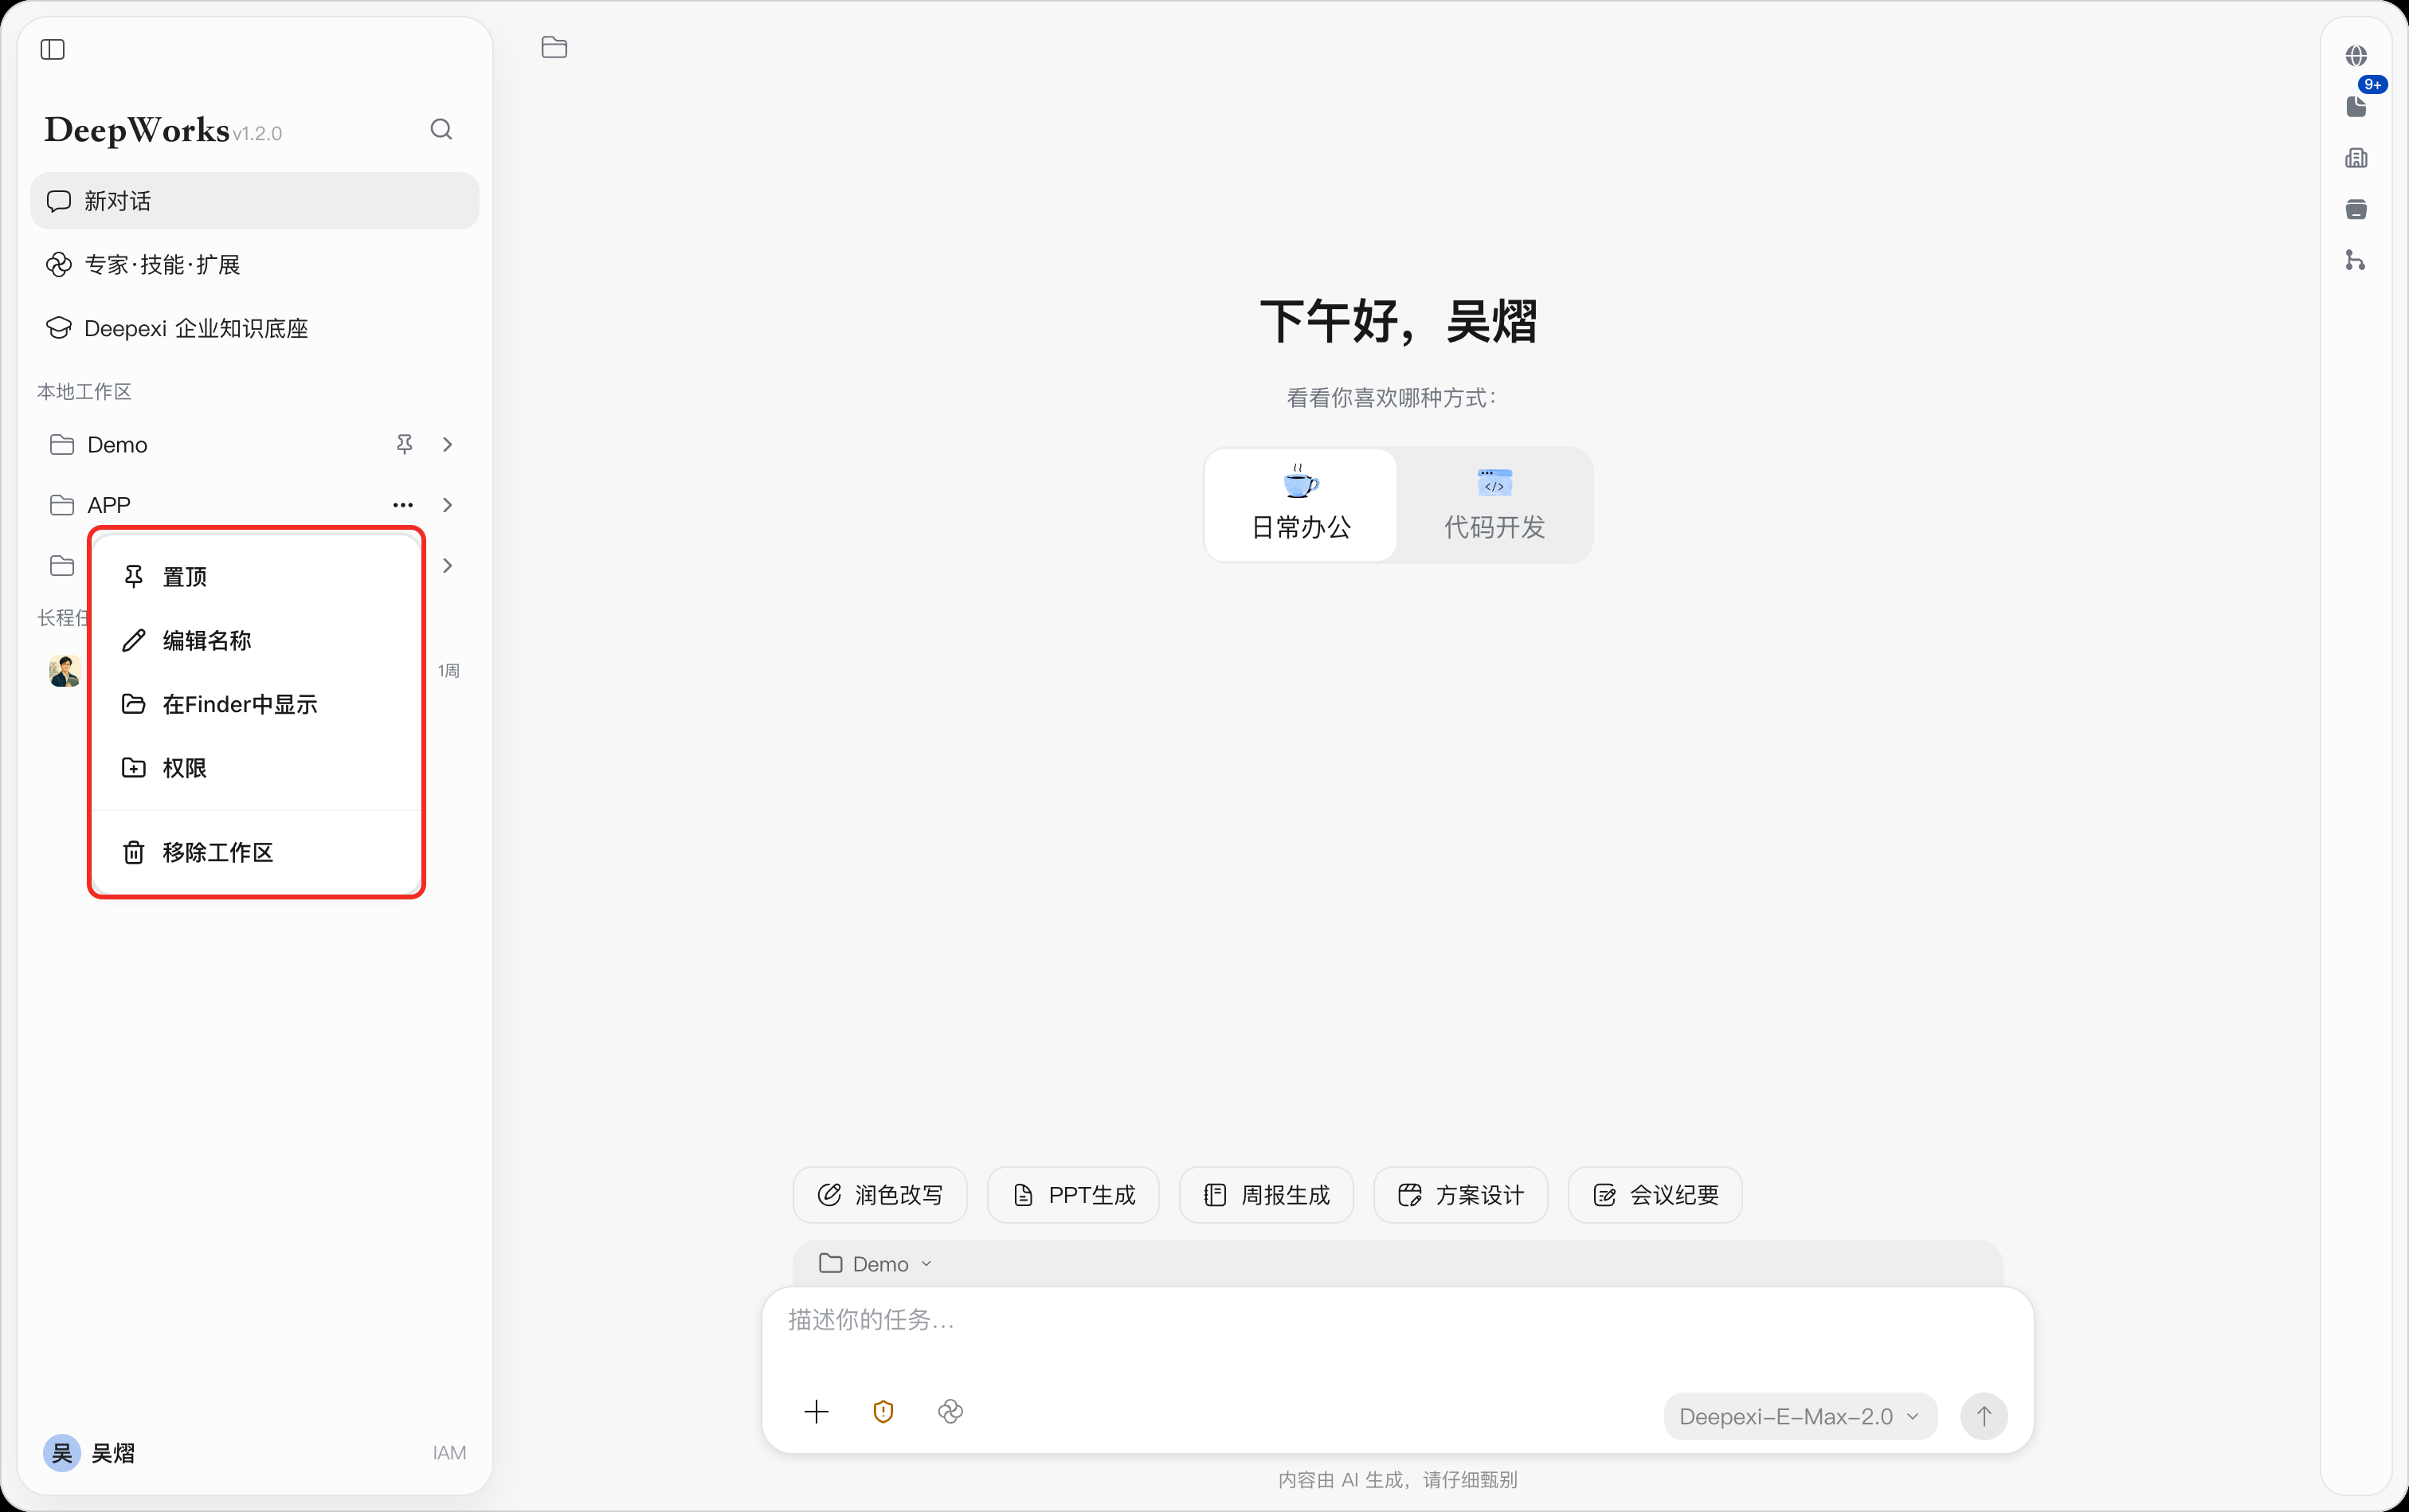 A workspace supports the following actions:
-
New Conversation: Create a new conversation in this workspace.
-
Pin: Pin frequently used workspaces to the top of the list.
-
Edit Name: Modify the display name of the workspace.
-
Permission Settings: Manage the folders the workspace can access.
-
Reveal in Finder: Open the local directory corresponding to the workspace. In Windows environments, the actual name is subject to the client.
-
Remove Workspace: Remove the workspace from the DeepWorks workspace list. Before doing so, confirm whether this affects local directories or unfinished tasks; the actual behavior is subject to the prompts in the official release.
Creating a Workspace
Path: Workspace on the left →Create Workspace.
Prerequisite: The current user has access to the local directory.
- Click Create Workspace next to the workspace title on the left.
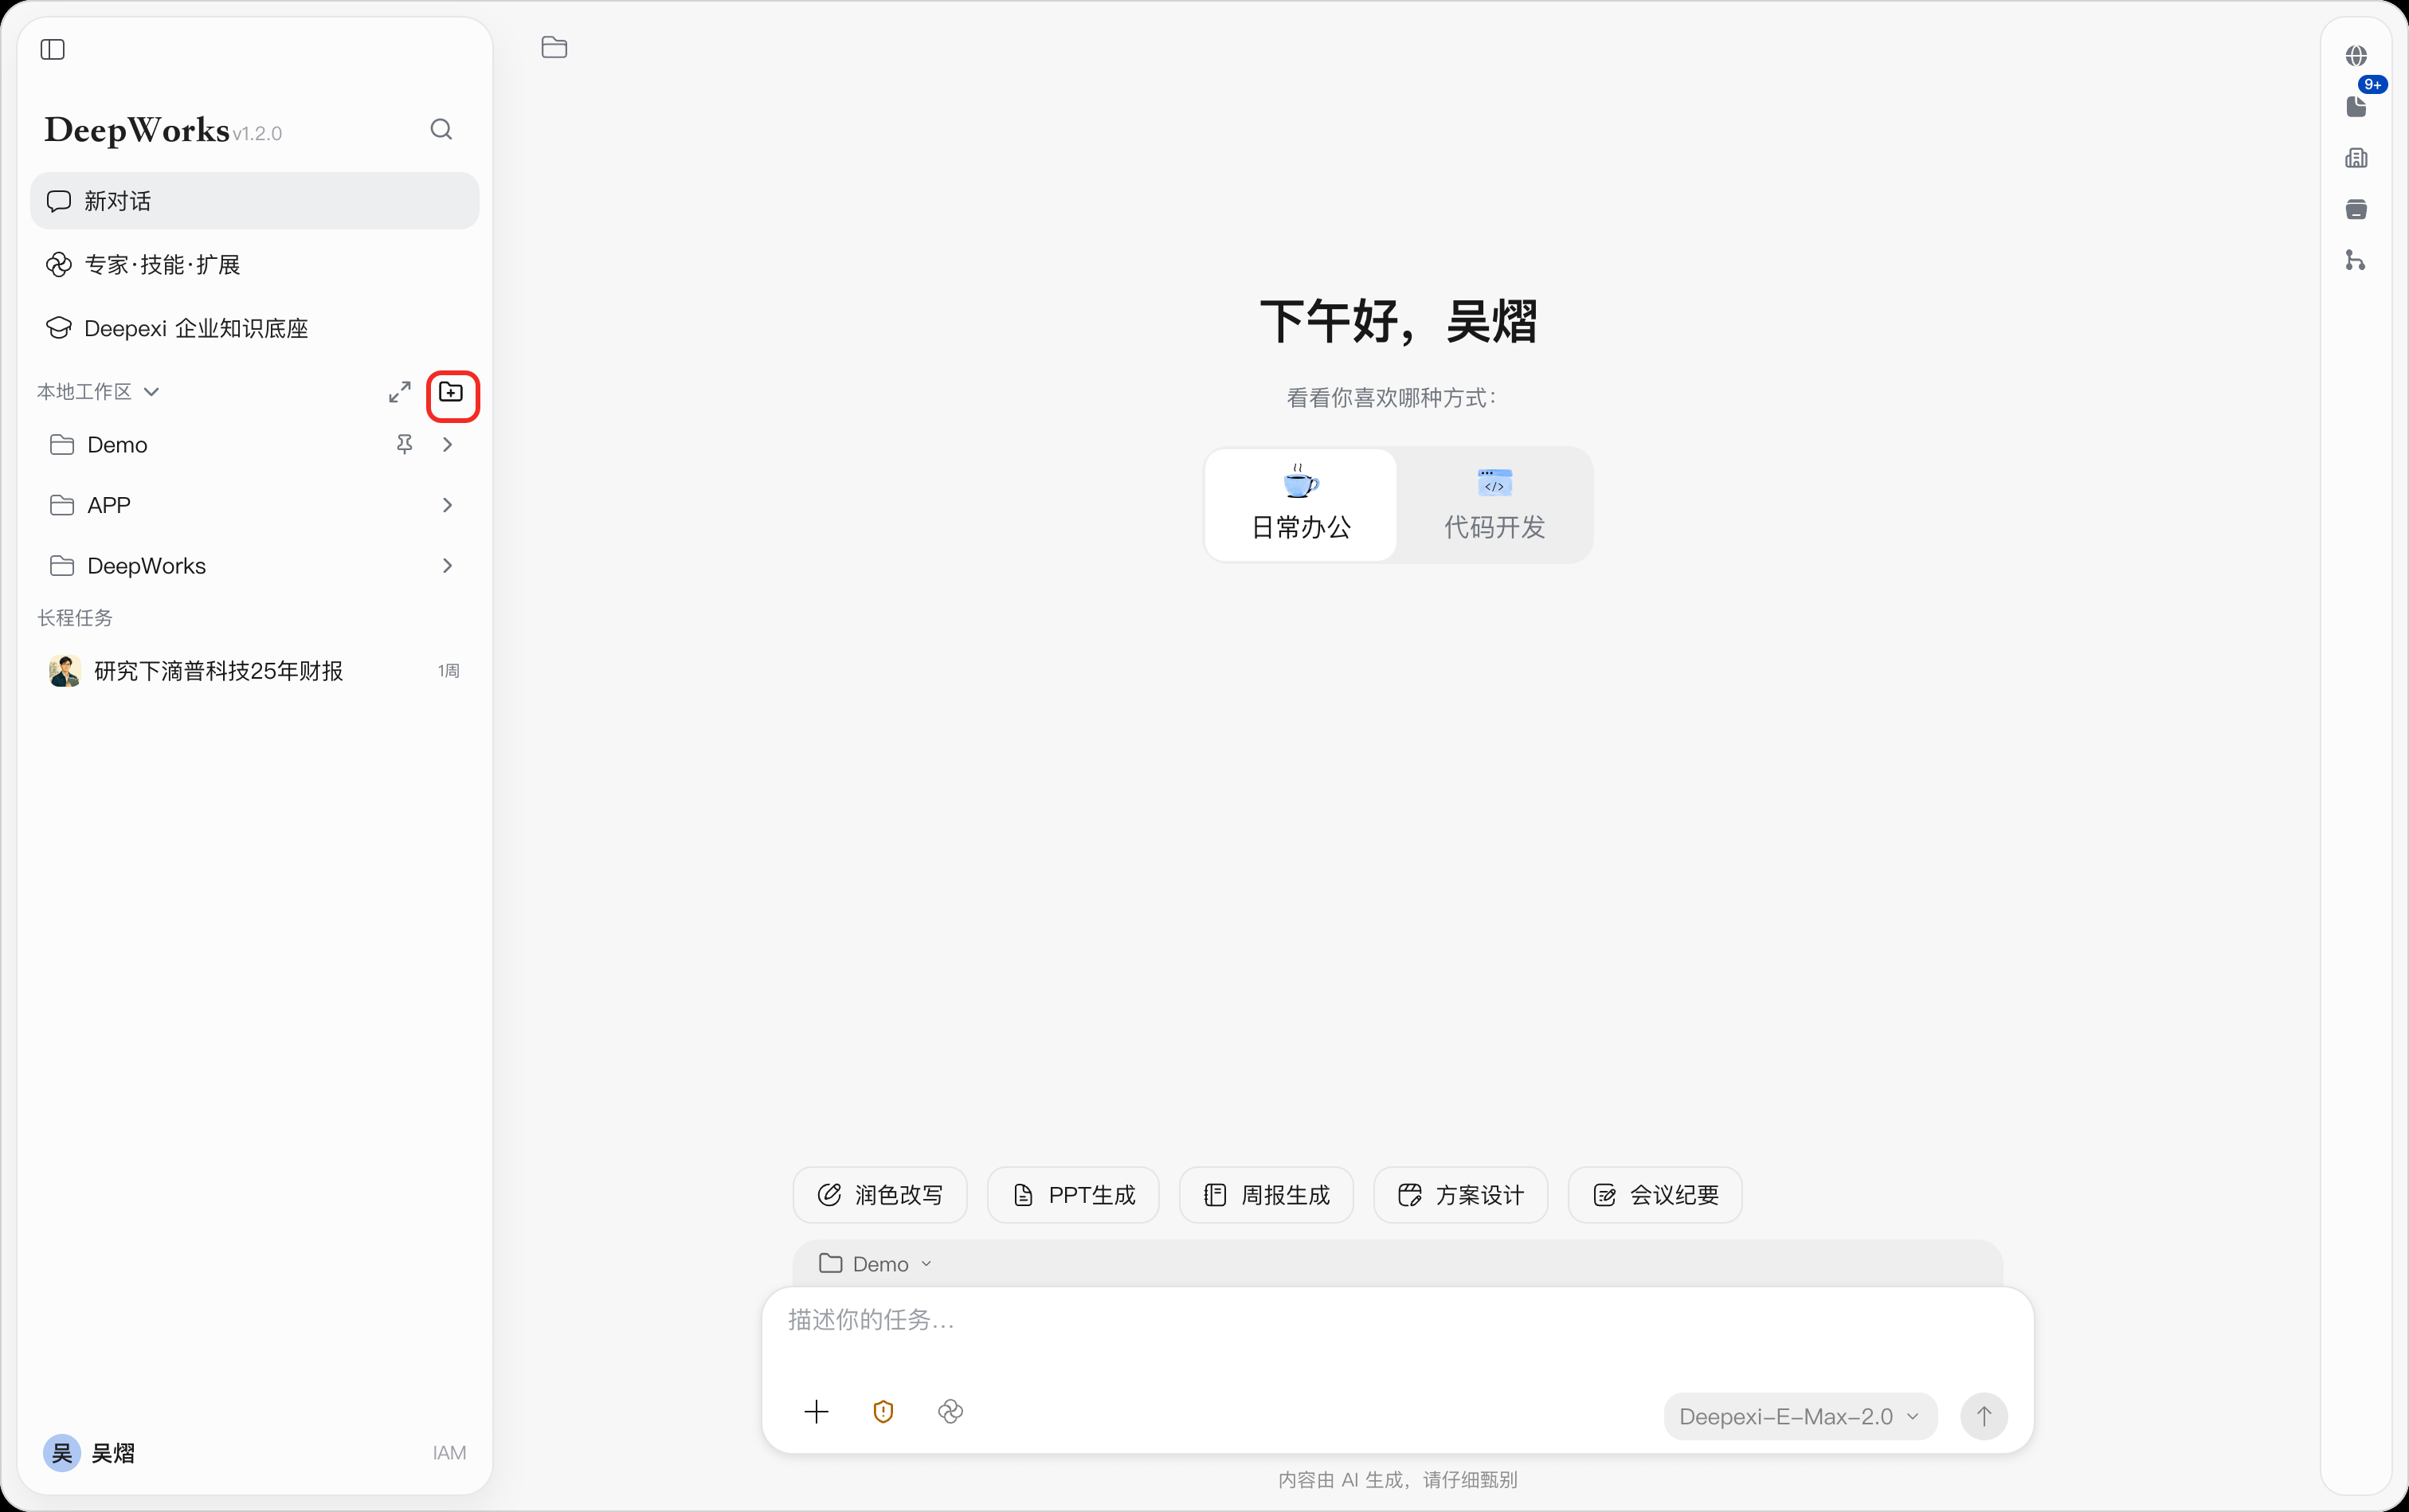
- Select the local directory to use as the workspace.
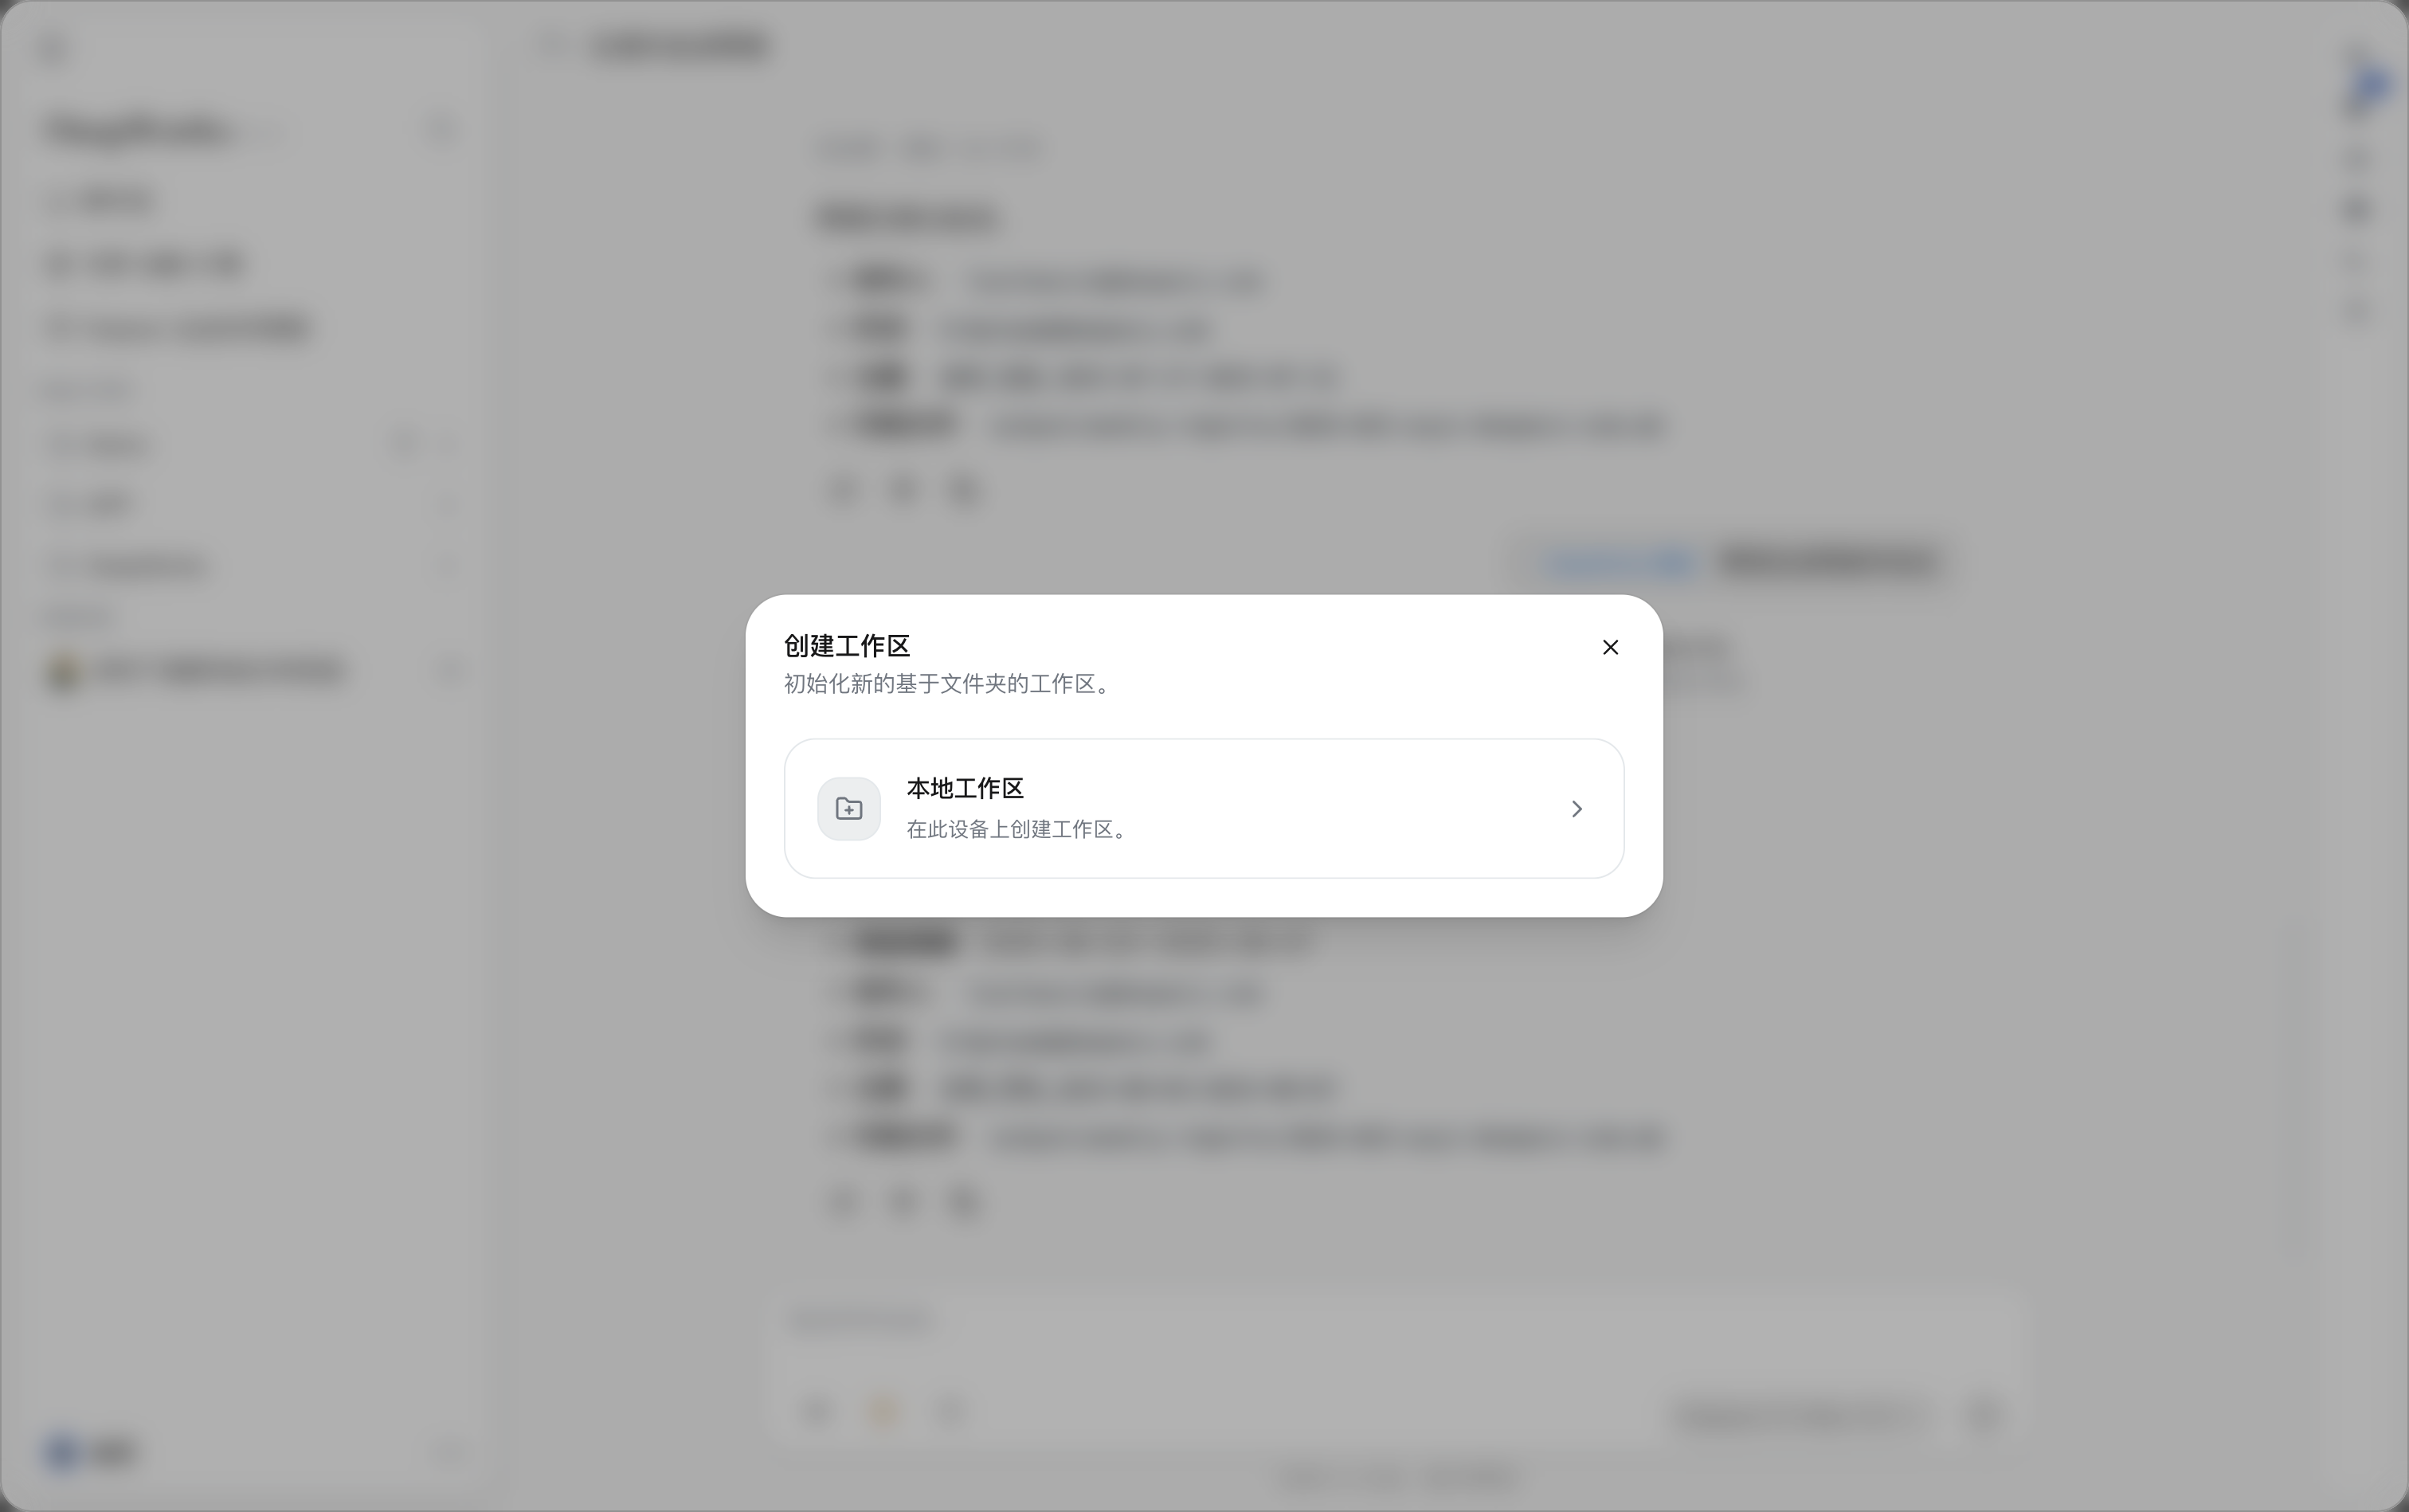
- Confirm the name and access scope as prompted on the page.
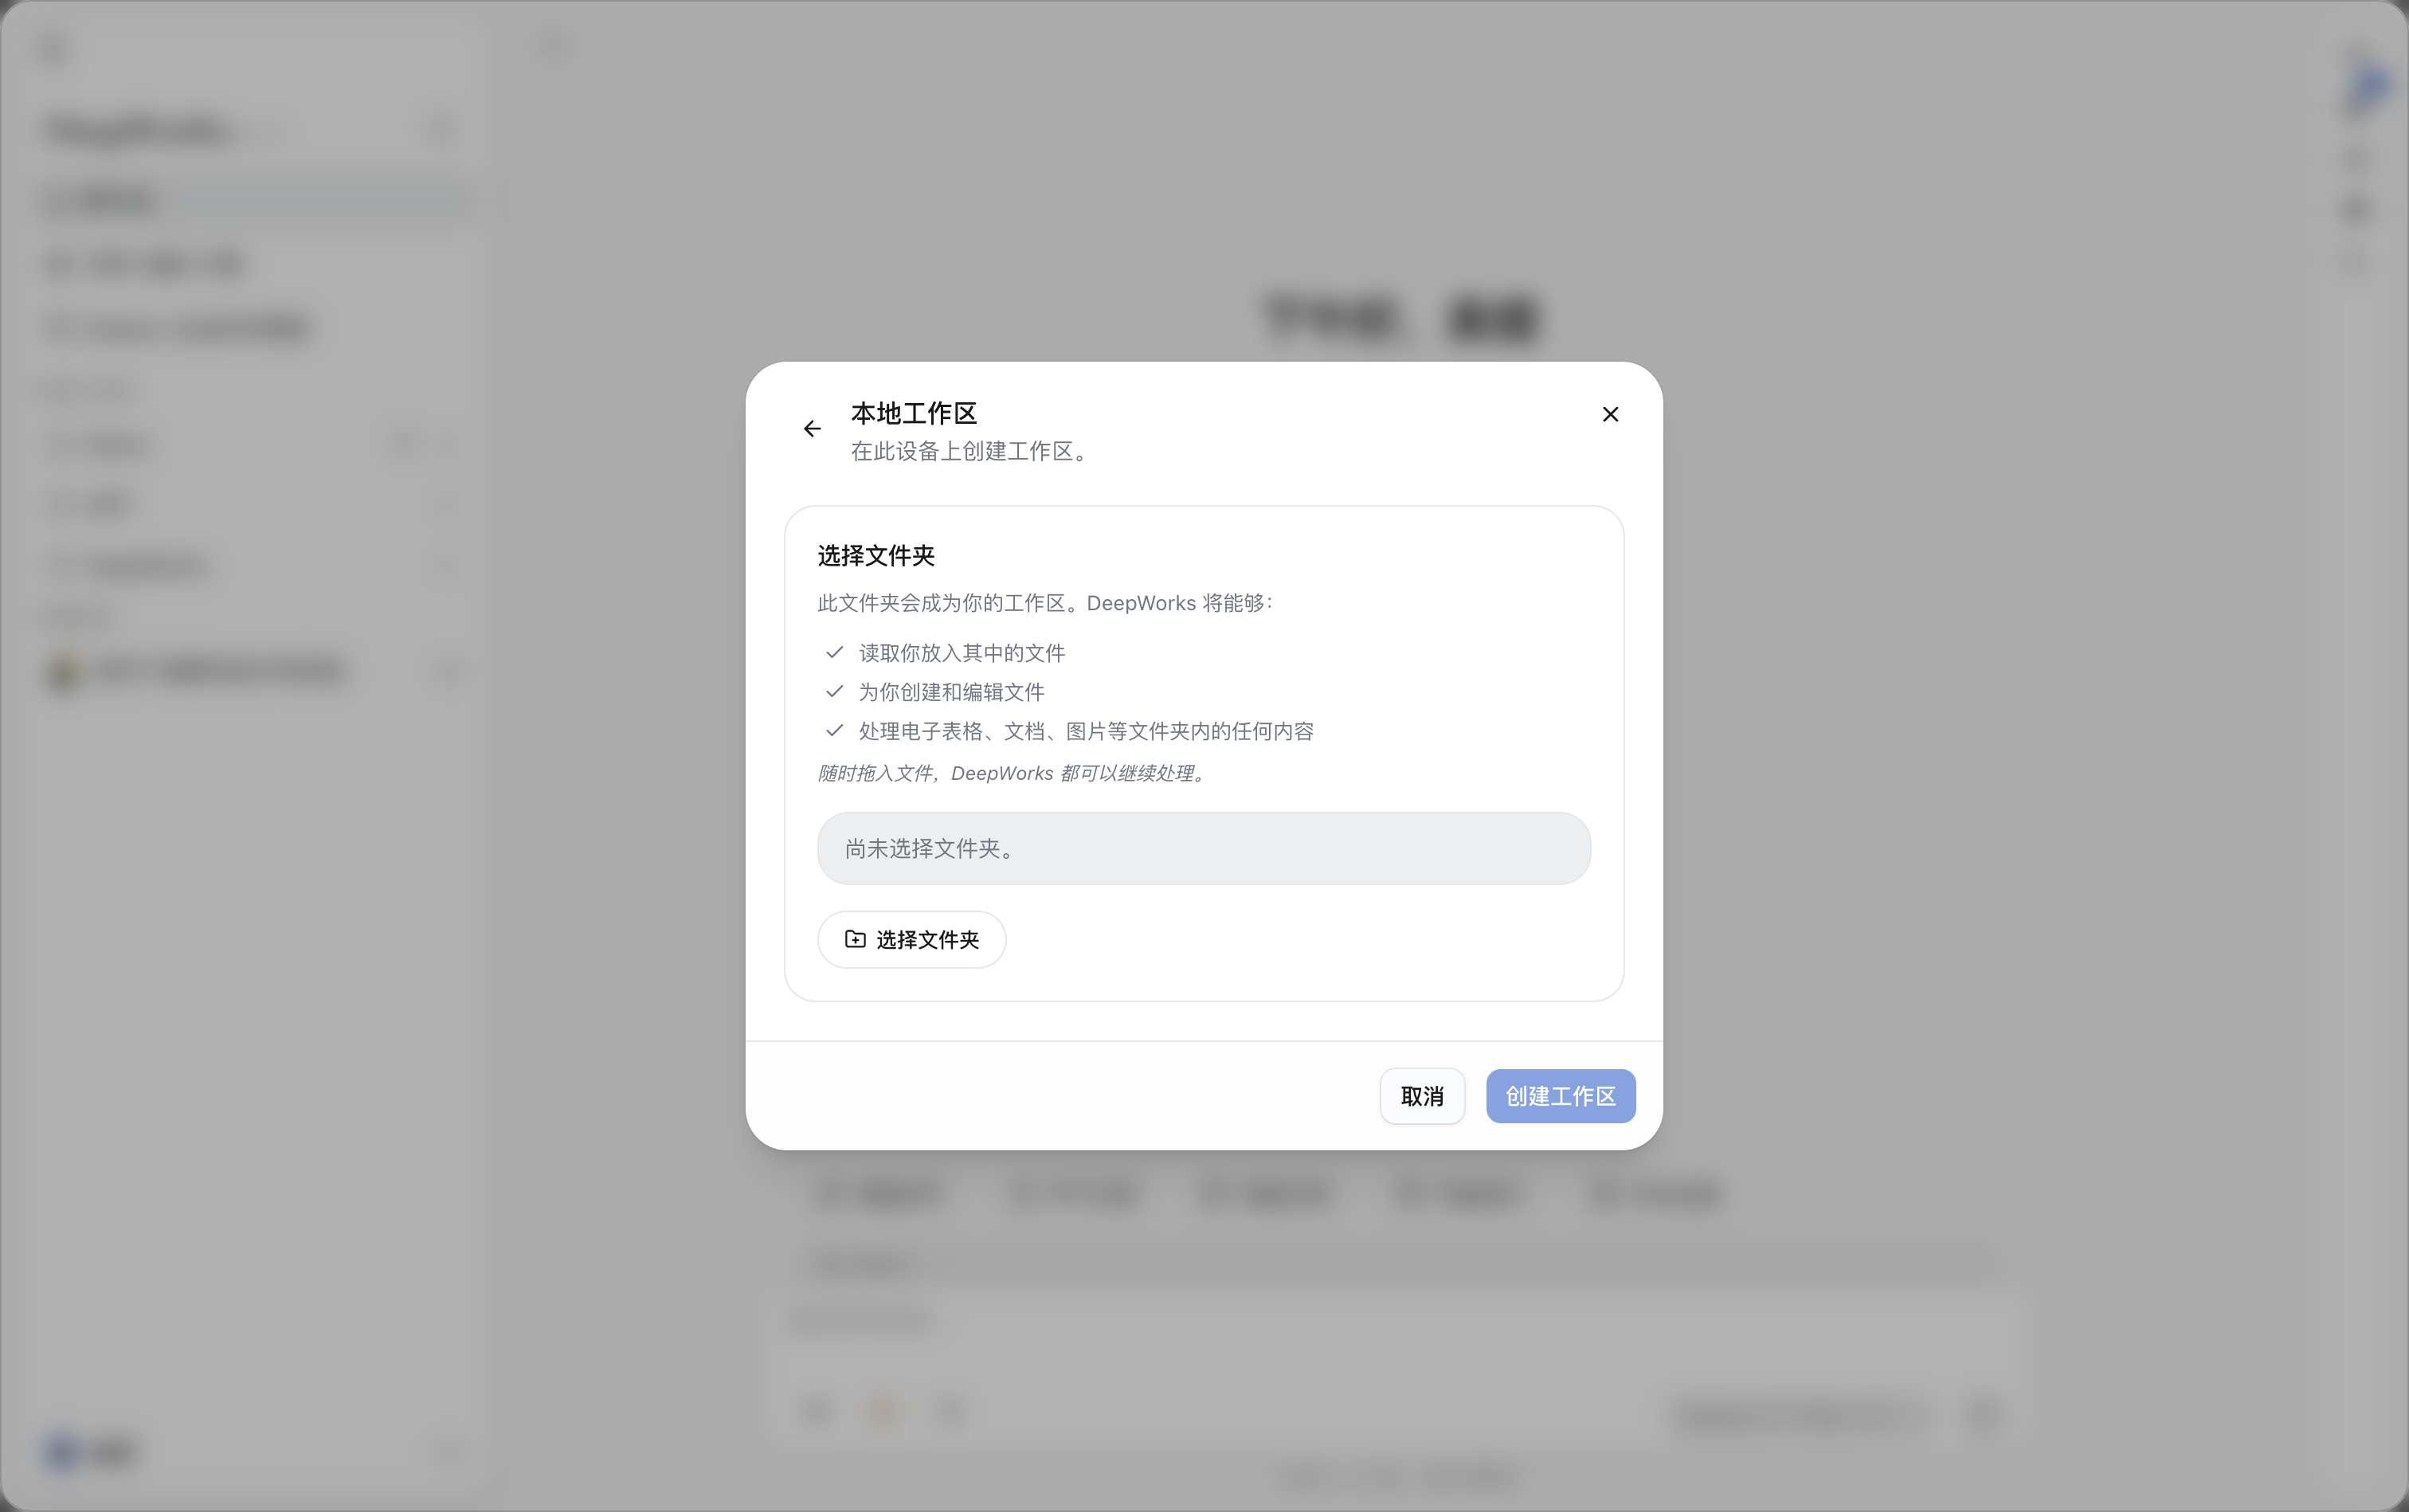
- After the workspace is created, select it in the workspace list on the left.
It is recommended that each workspace correspond to one relatively independent project, client, or long-term matter, to avoid mixing unrelated files and conversations in the same context.
Setting Workspace Permissions
Path: More button on the right of the target workspace →Permission Settings.
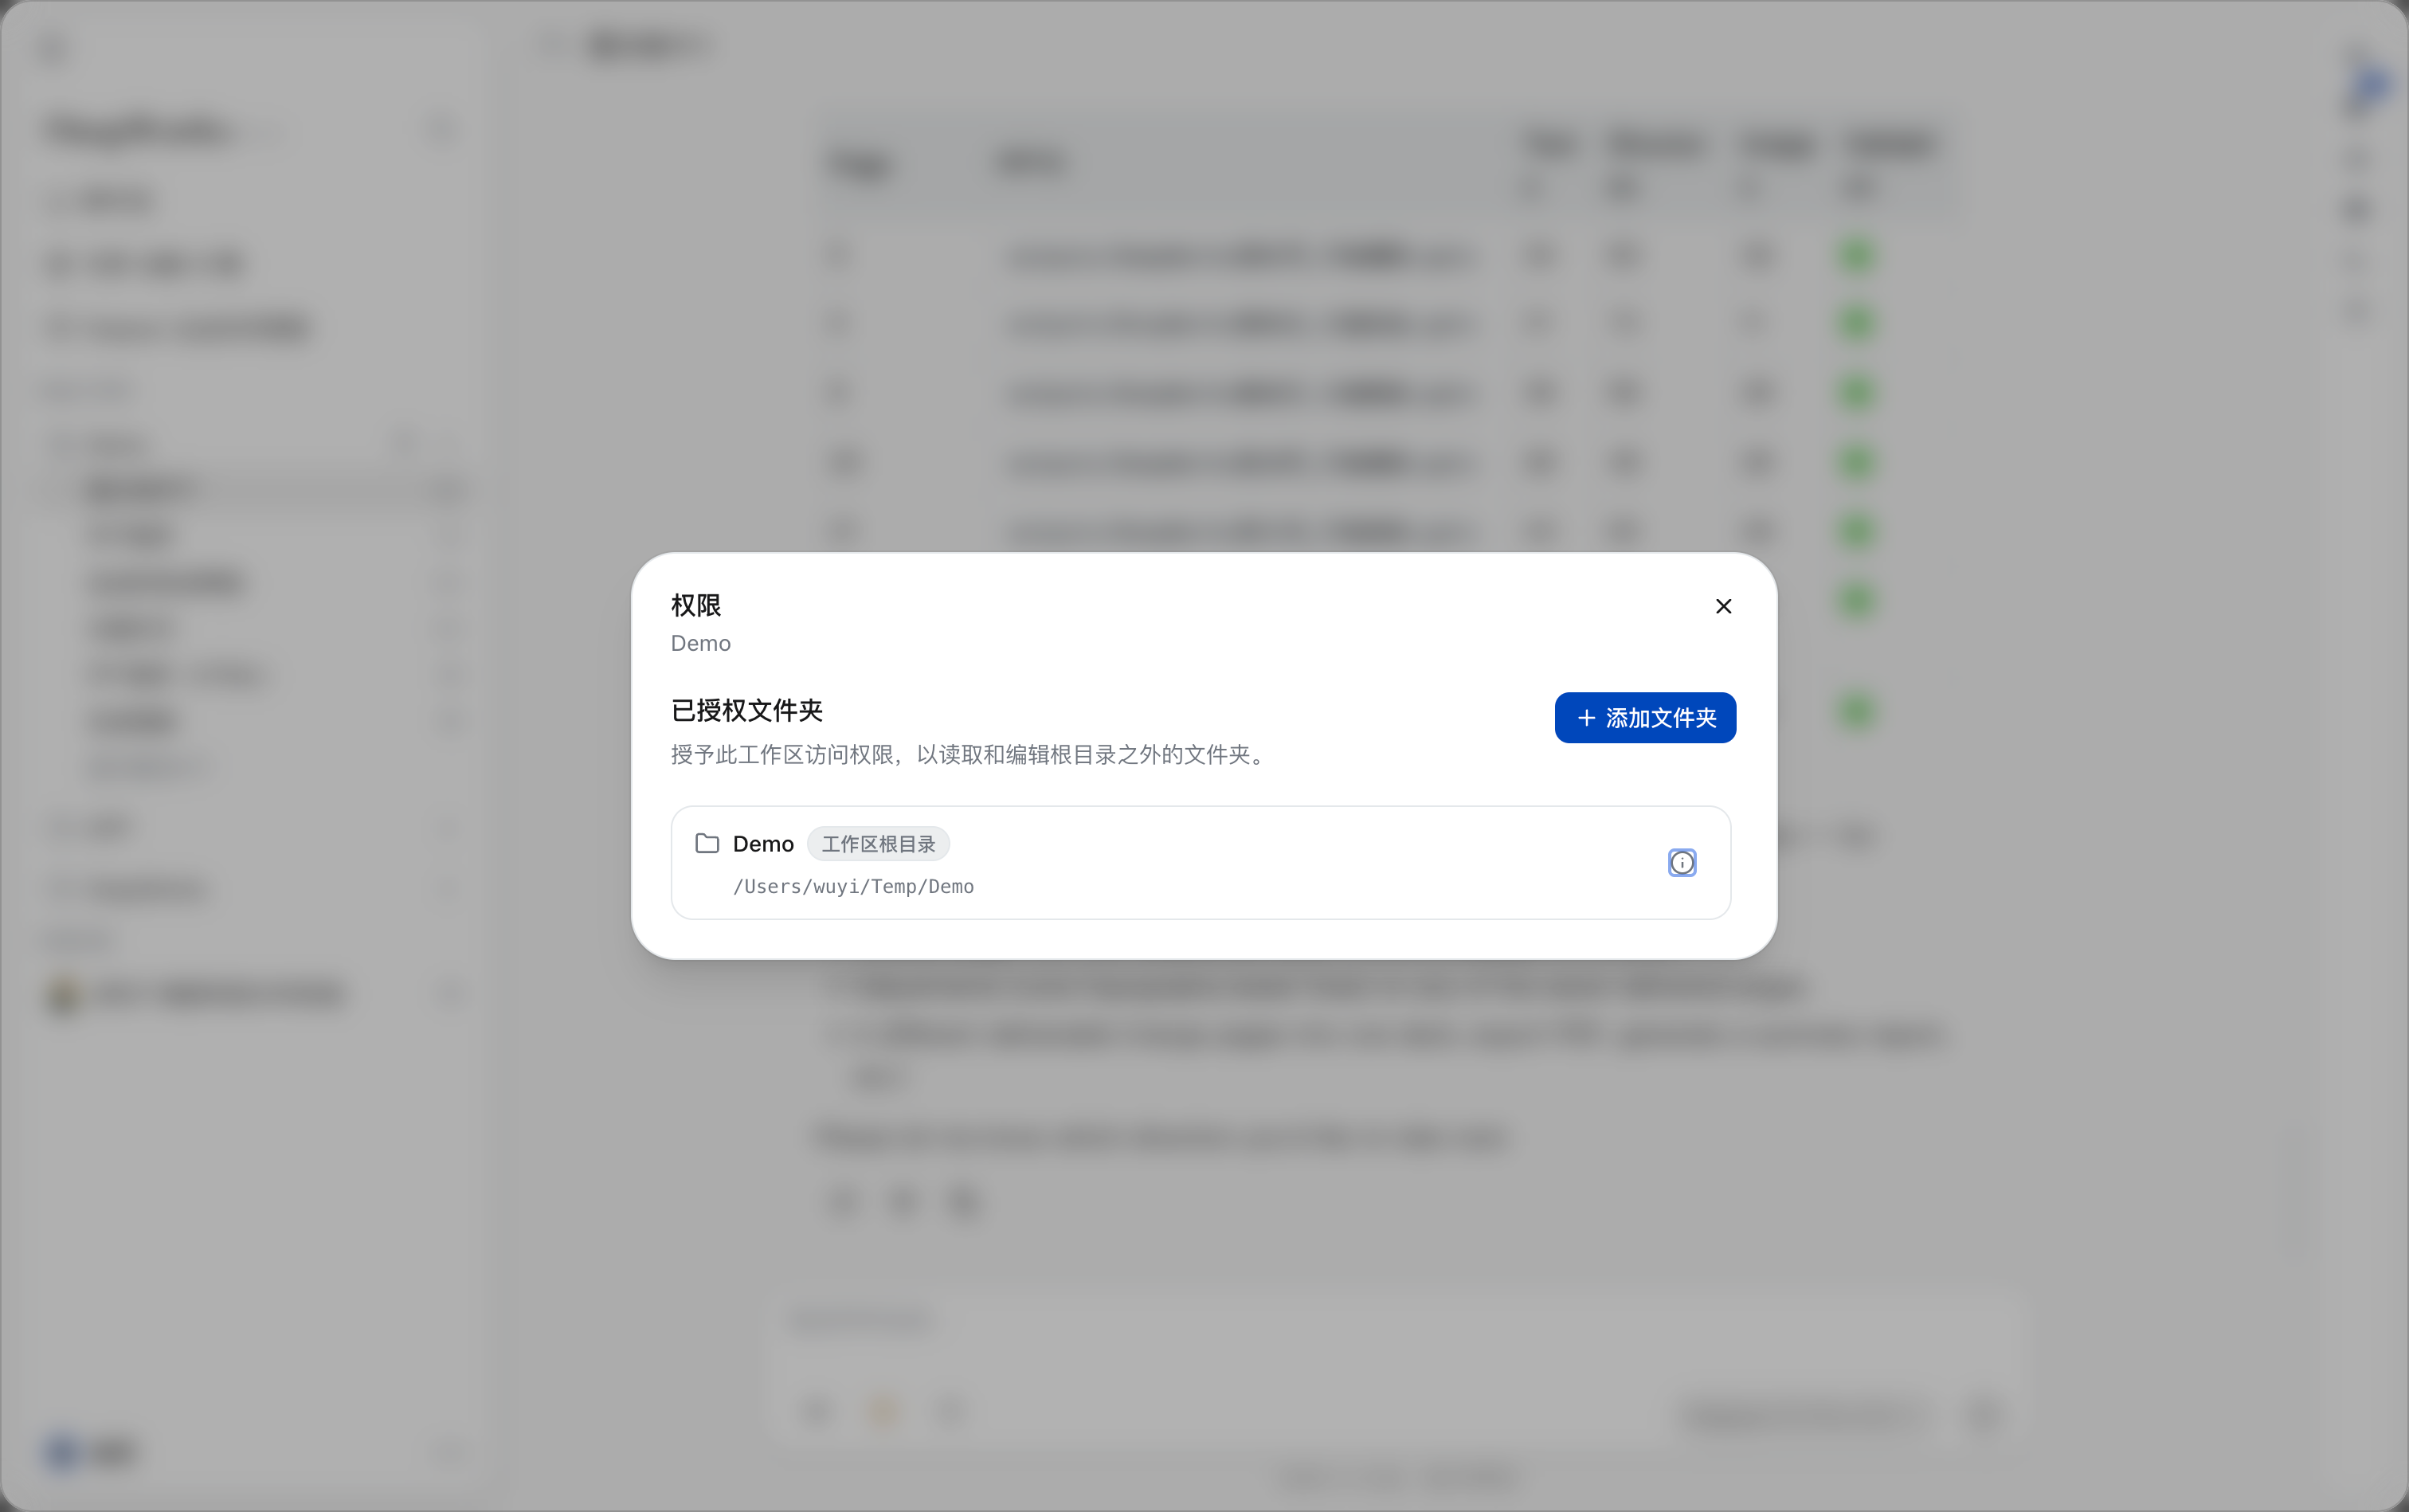
Enter the workspace menu and click Permission Settings to view and maintain the folders authorized for the current workspace.
Adding an Authorized Folder
-
Click Add Folder.
-
Select the directory to authorize in the system file picker.
-
After confirmation, the directory will appear in the Authorized Folders list.
Removing an Authorized Folder
Click Remove on the right of the authorized folder. After removal, the current workspace can no longer access the directory, but the local files in the directory will not be deleted.
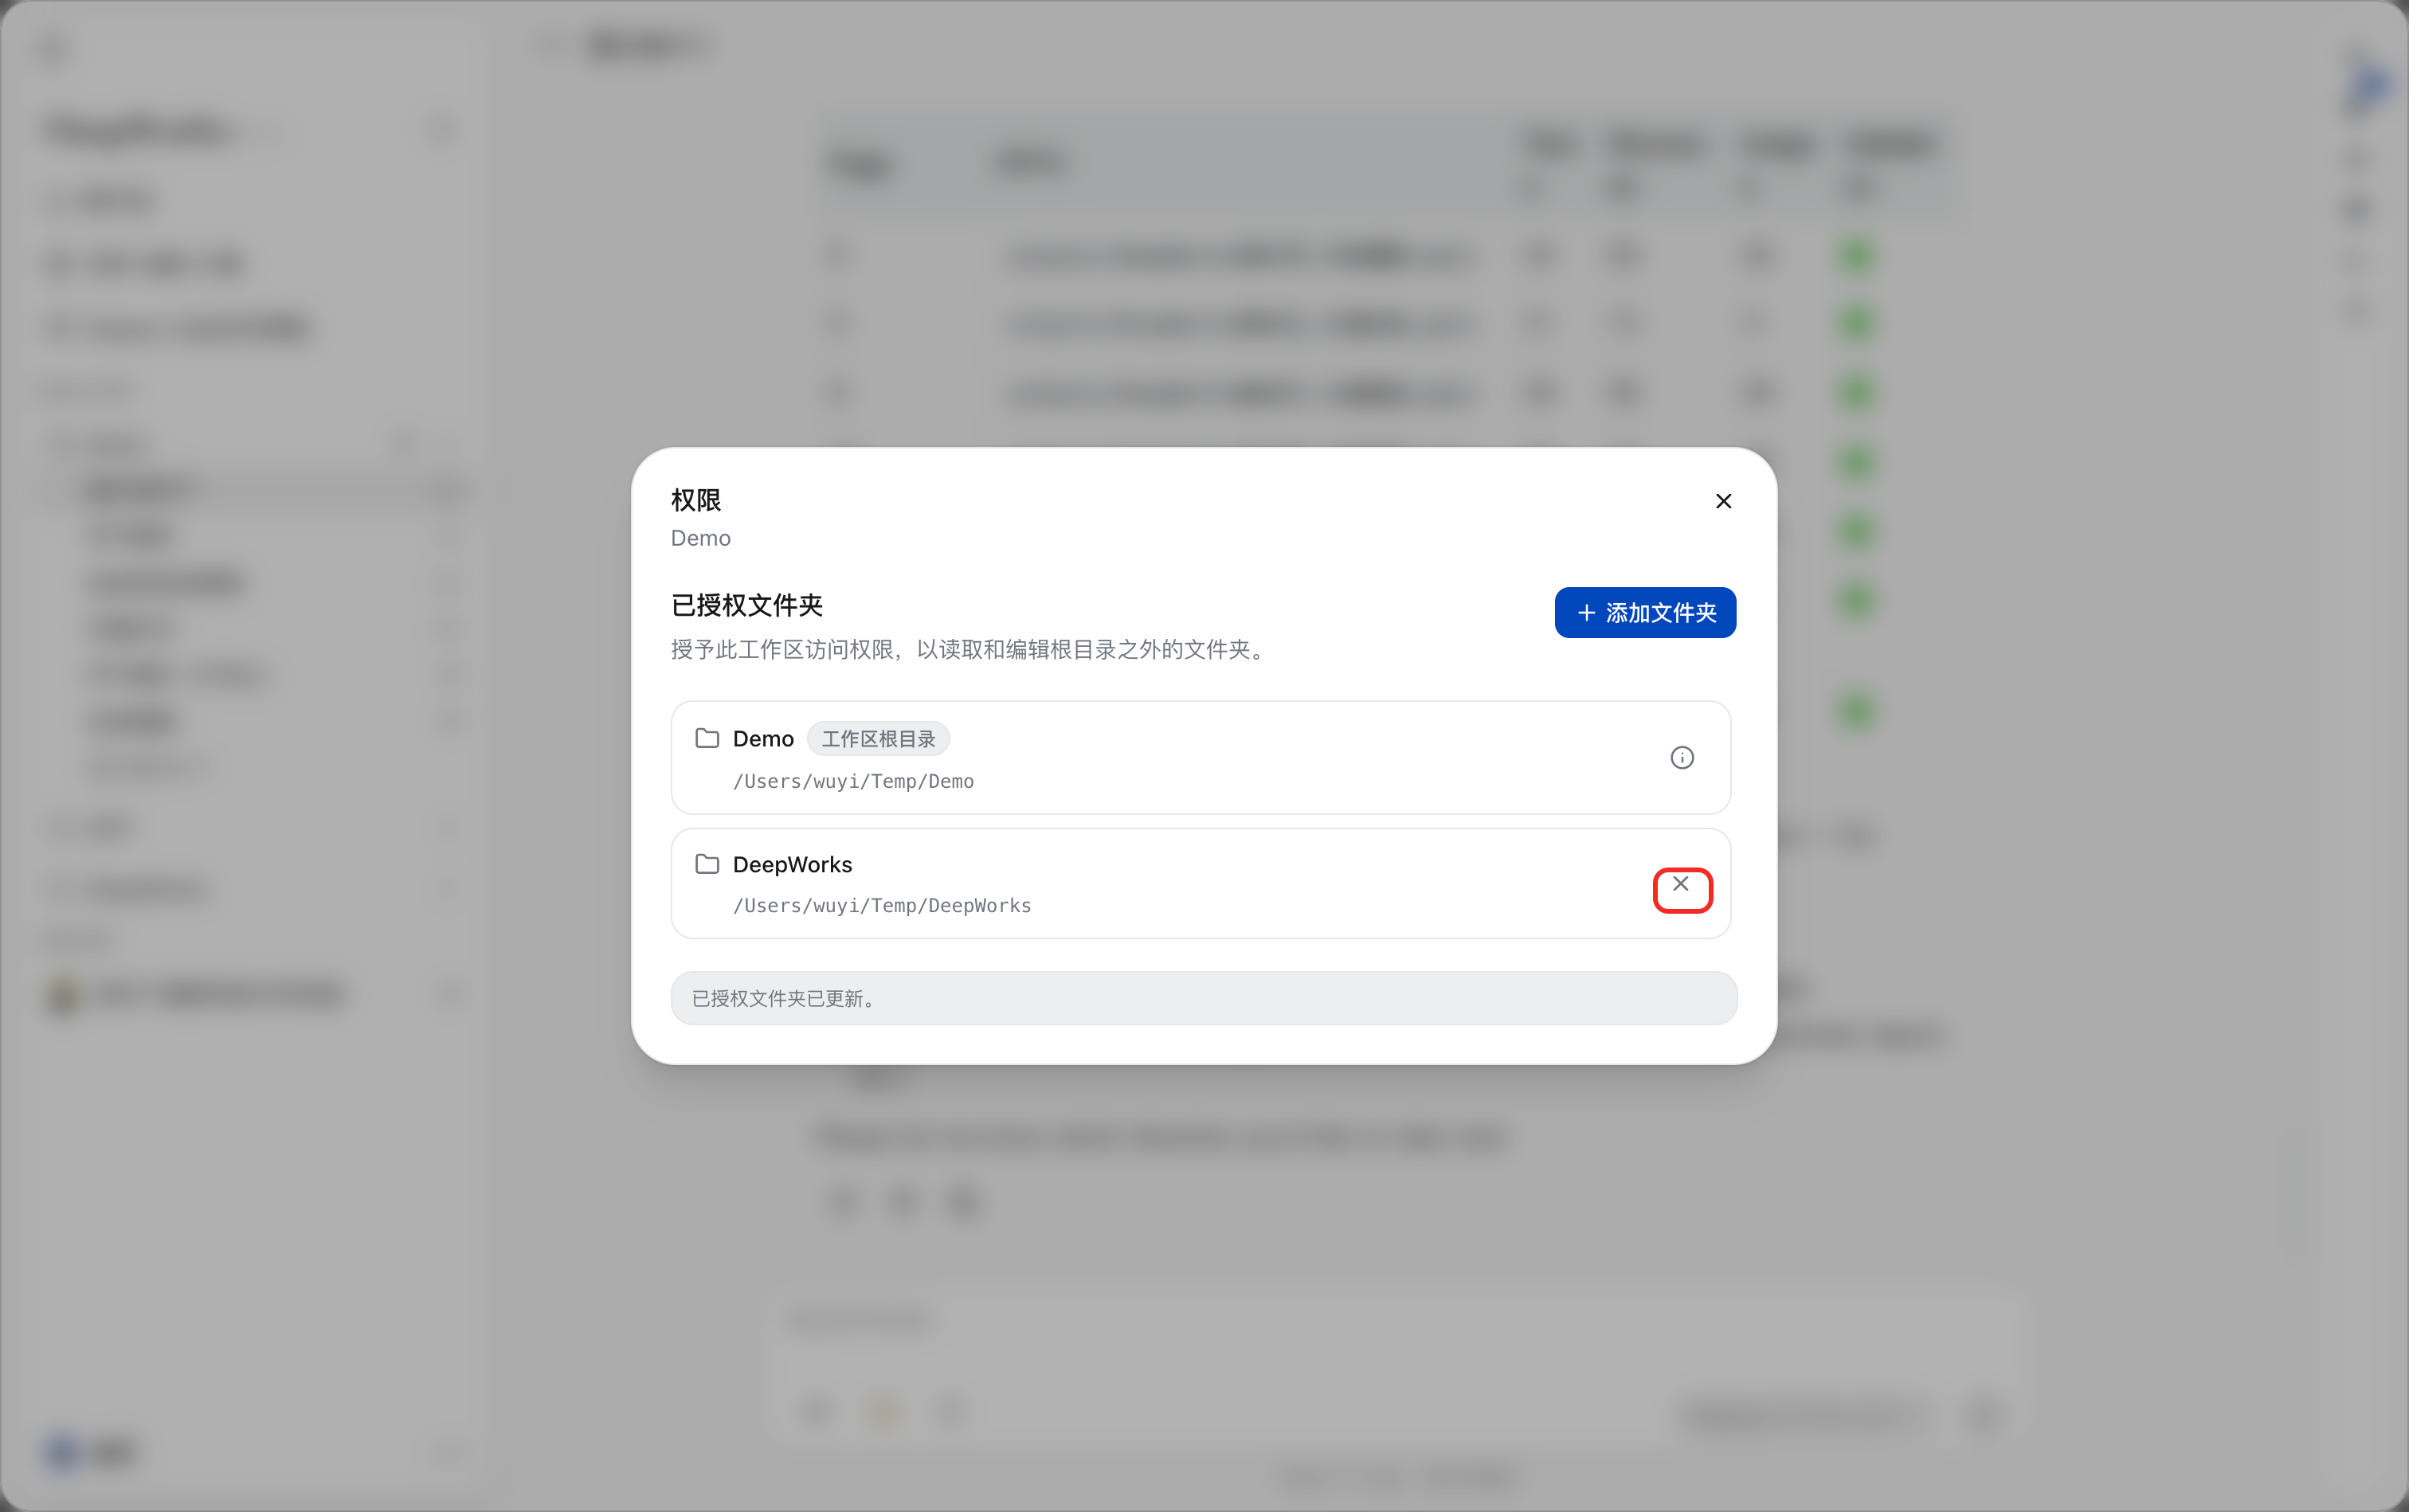
It is recommended to follow the principle of least privilege: only authorize the directories necessary for completing the task, and do not authorize all your personal files or a parent directory containing sensitive information as a whole.
Selecting a Model
Path: Bottom-right corner of the task input area → current model name.
Prerequisite: The current account has permission to use the corresponding model.
The model provider built into the platform is DeepFoundry; using its models consumes user credits. Click the current model name at the bottom-right corner of the task input area to open the model selection list, where you can select a model and its intensity.
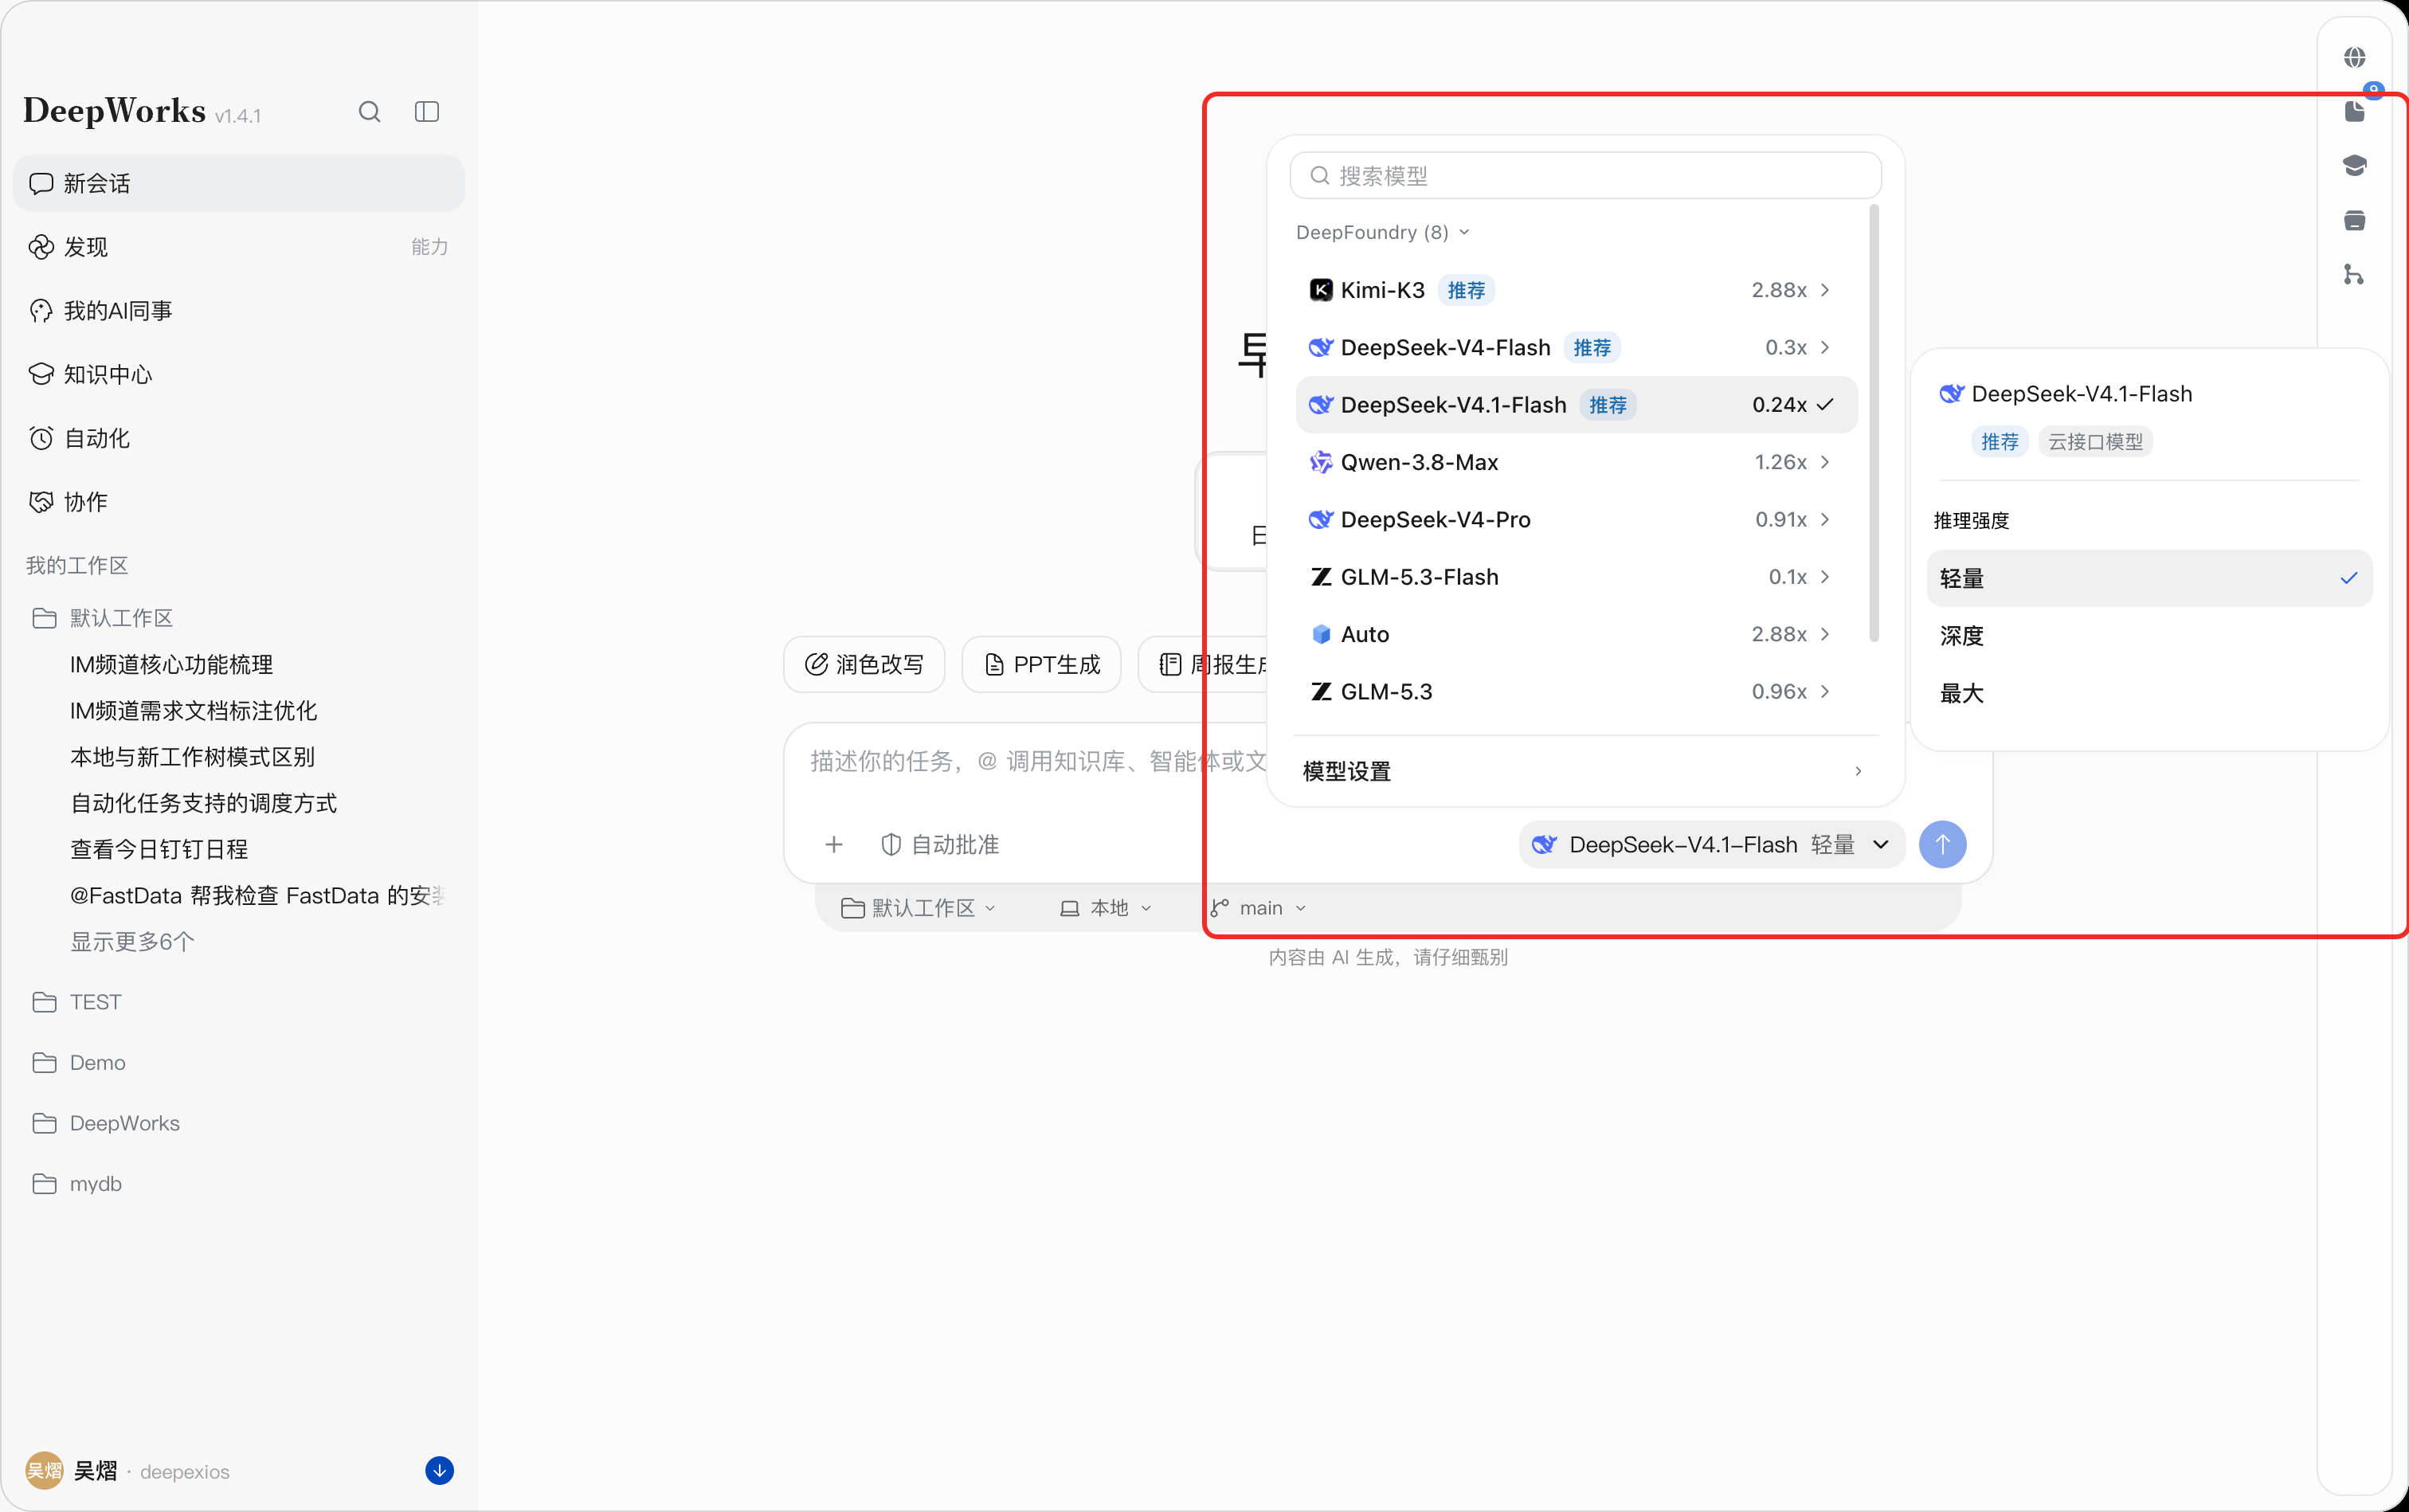
Adding Files and Invoking Tools
Adding Files
Adding files lets you attach local materials to a task, so that the AI can analyze the content, extract information, or summarize them in combination with the task requirements.
Path: + at the bottom-left corner of the task input area →Upload File.
- Click + at the bottom-left corner of the task input area to open the function menu.
- Select Upload File, choose the local file to add in the system file selection window, and confirm.
- After the file is added, describe the processing requirements in the input box, such as “Summarize the main content of this material” or “Extract the key data from the file”, and then click Send.
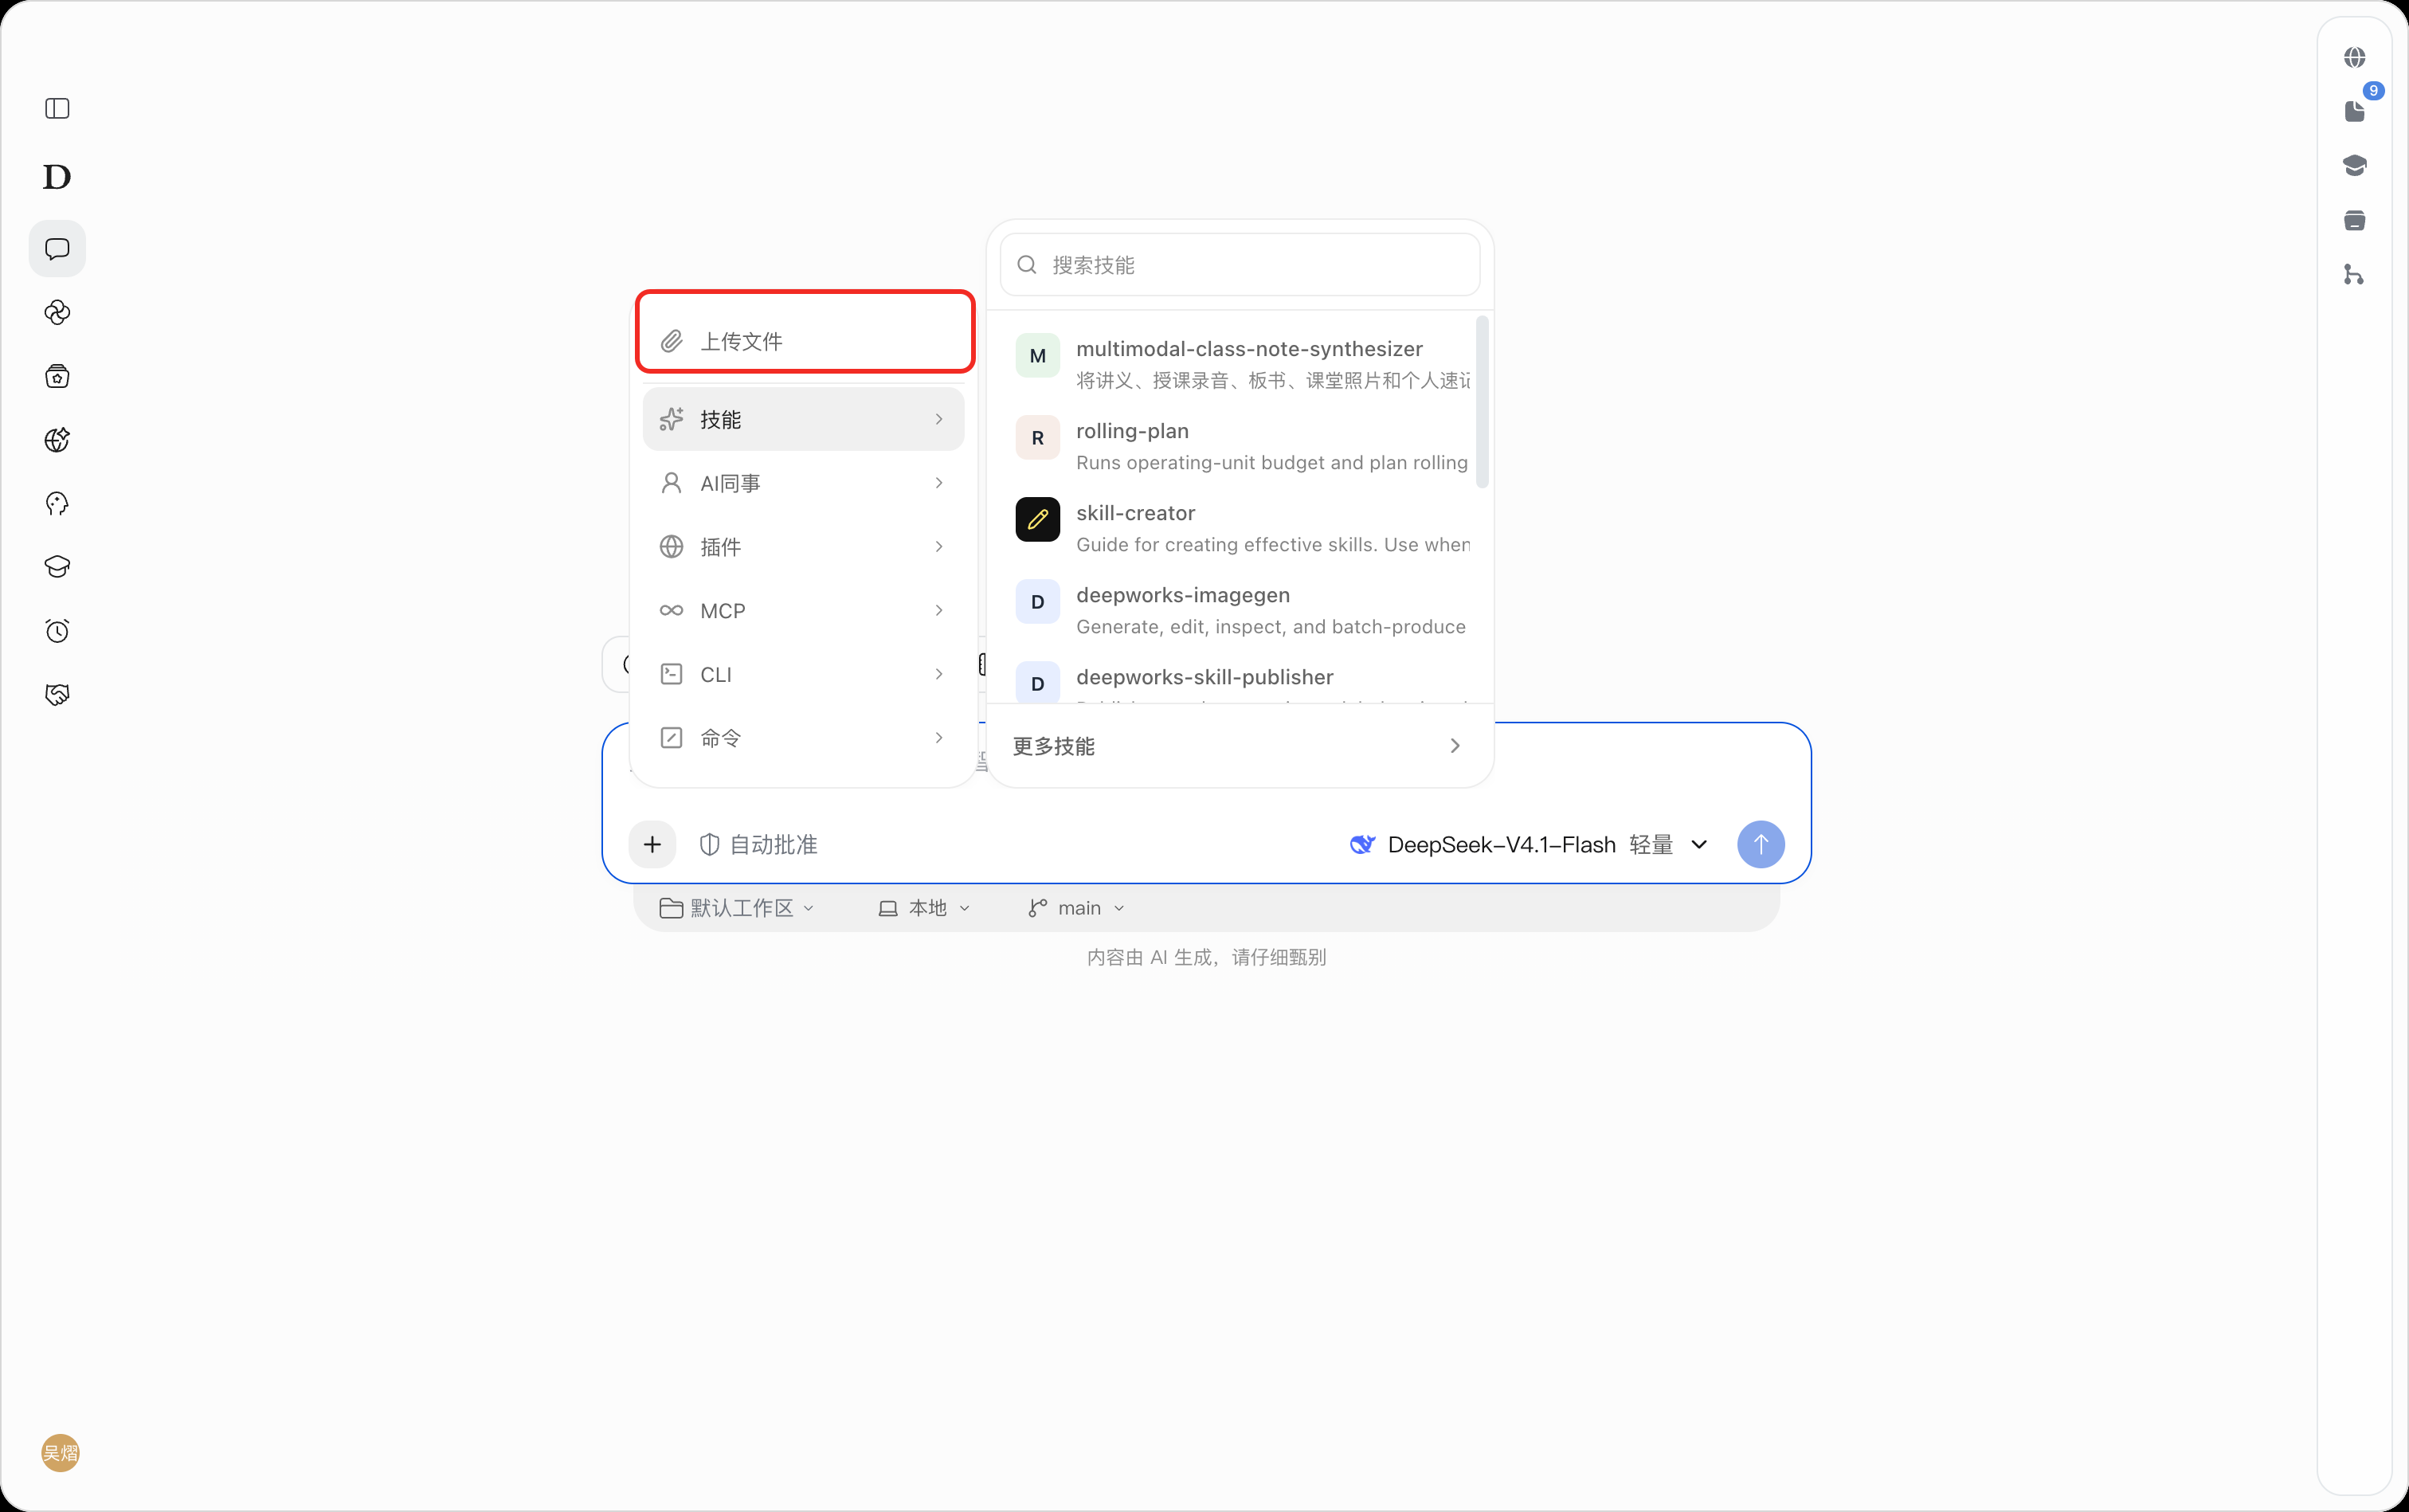
Supported file types, per-file size, and total capacity limits are subject to the prompts on the current page and the enterprise configuration.
Invoking Skills, Extensions, or MCP
Path: Task input area → tool button → selectSkills,Plugins, orMCP.
Prerequisite: The relevant capabilities have been installed, connected, or authorized.
Click the tool button to open the commands and Skills menu.
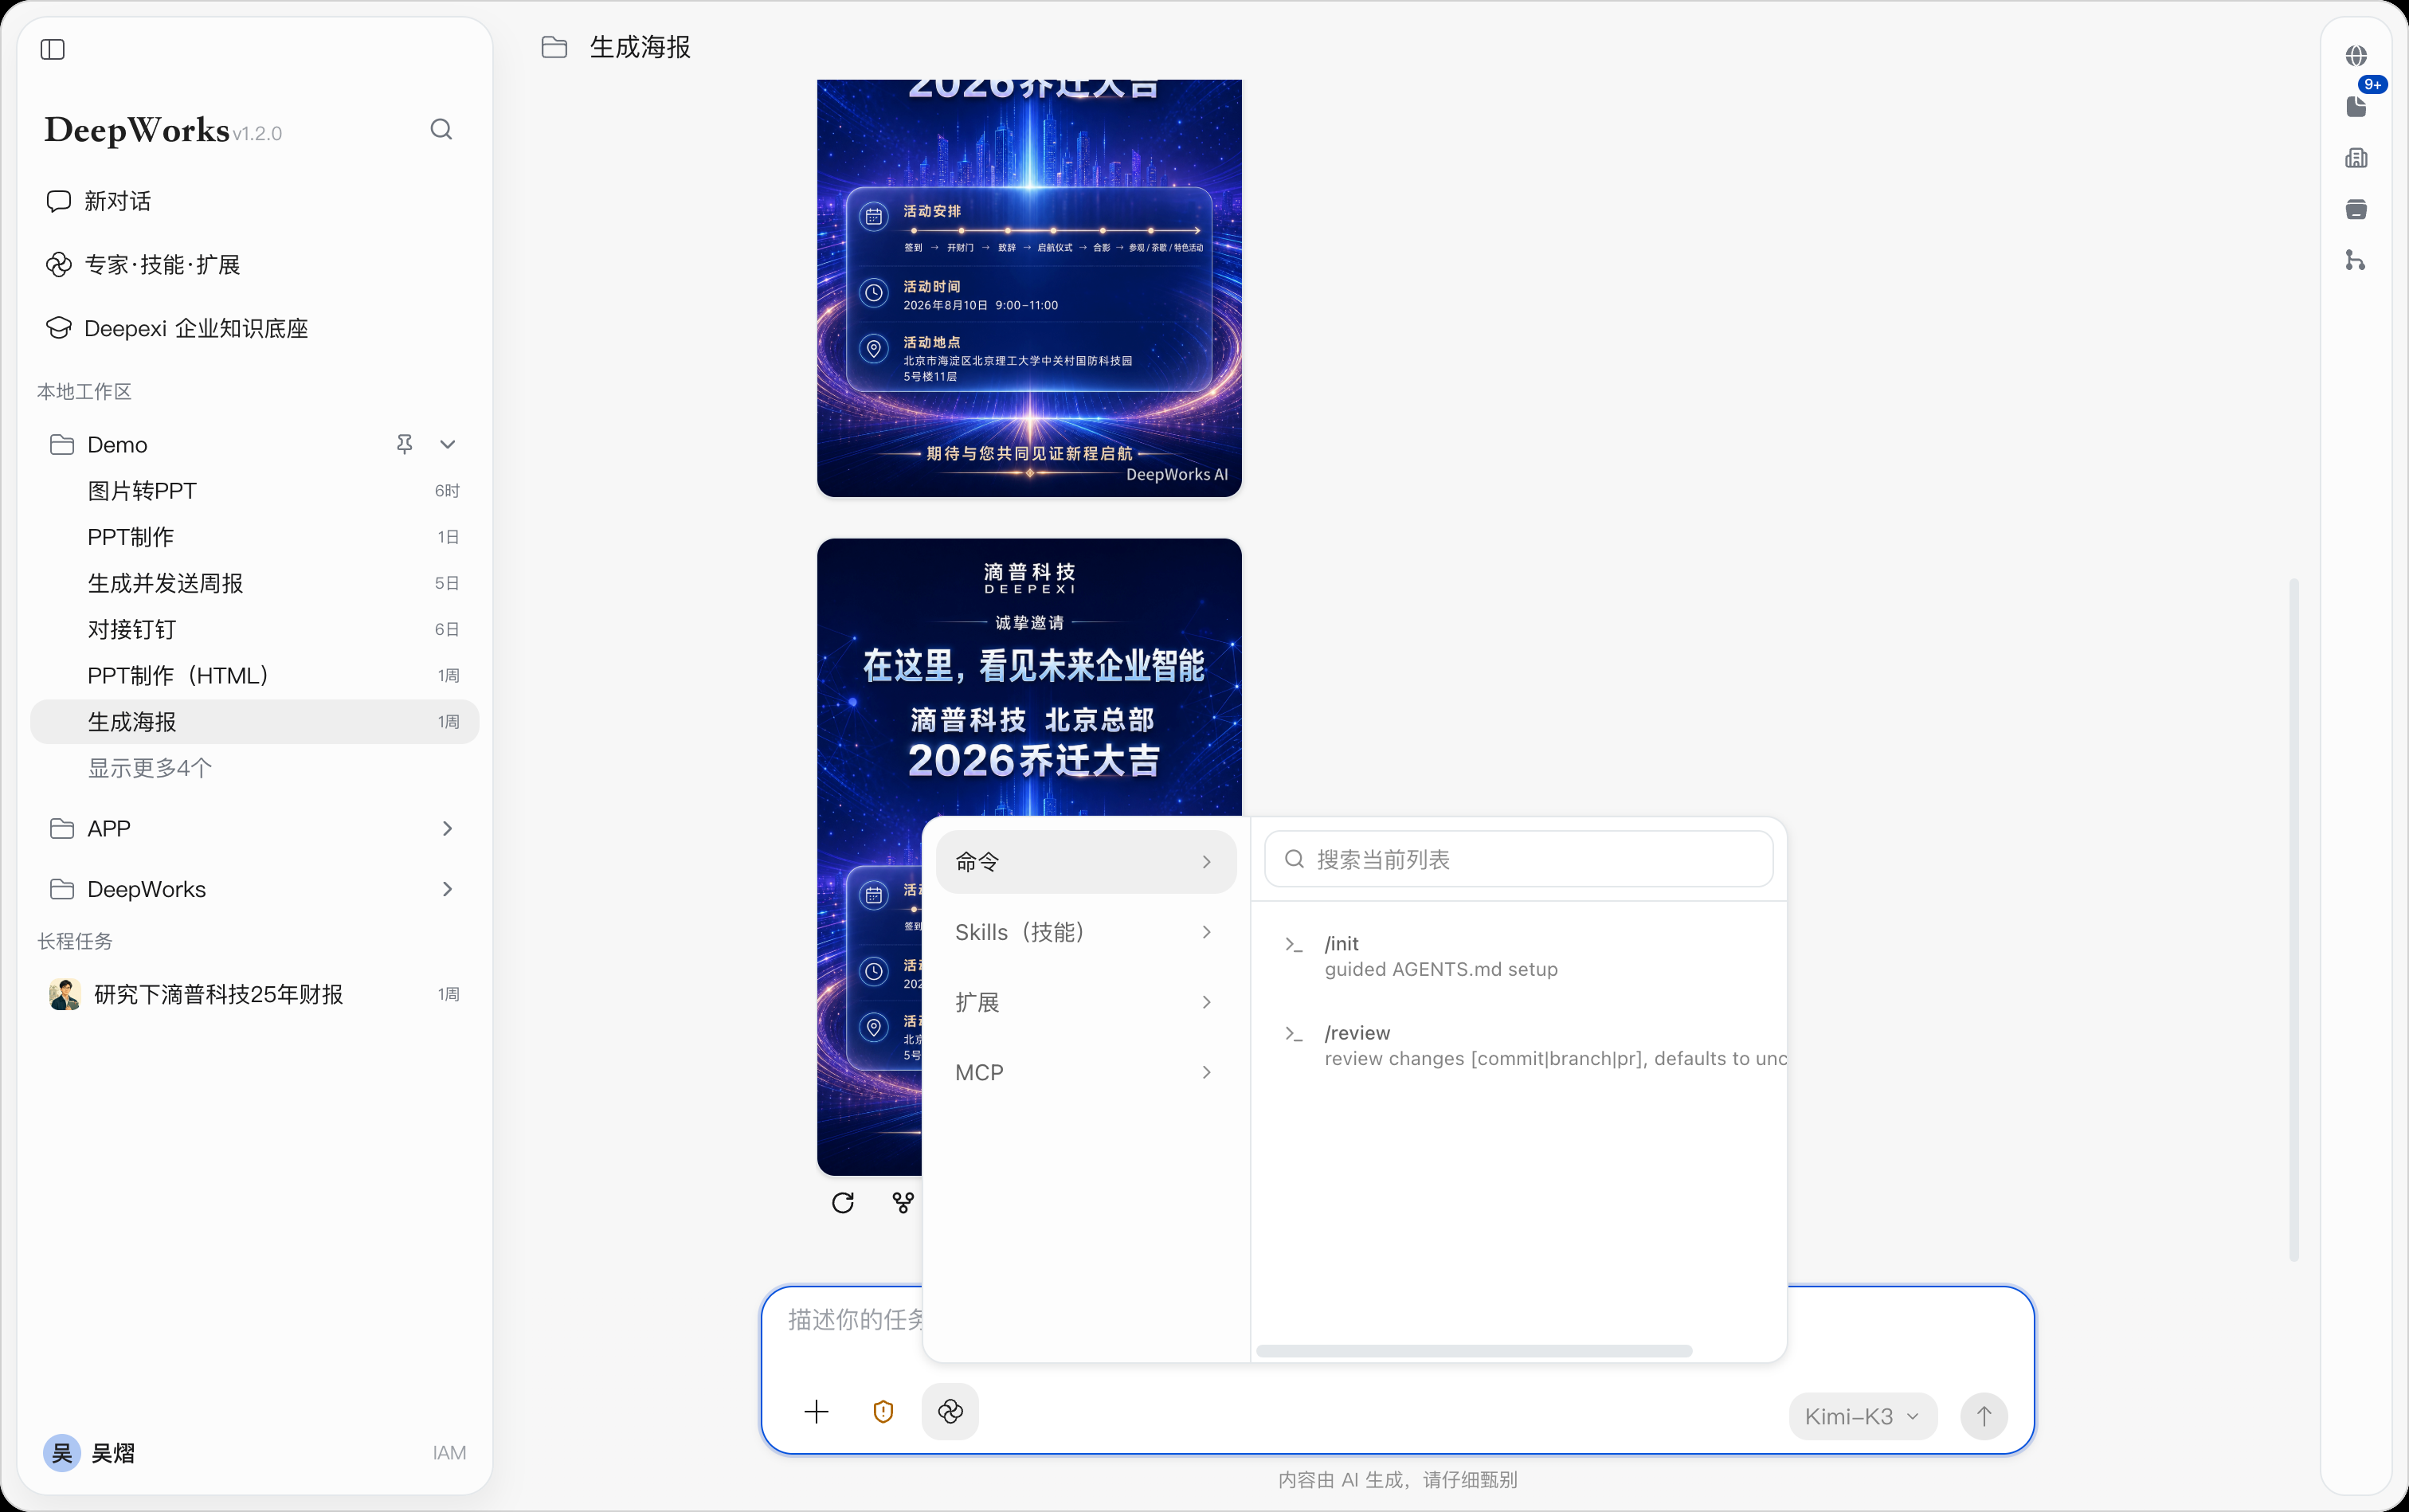
The menu allows you to view capabilities by the following types:
-
Commands: Execute preset commands;
-
Skills: Load installed standardized skills;
-
Extensions: Invoke extension capabilities such as browser control, computer control, and image generation;
-
MCP: Invoke connected external tools or enterprise services.
If the Skill you need is not found, click the Configure button to go to the Skill management page.
Sending and Running Tasks
After entering the task requirements, click Send to start a regular conversation, or to launch a task that requires tool calls and multi-step processing.
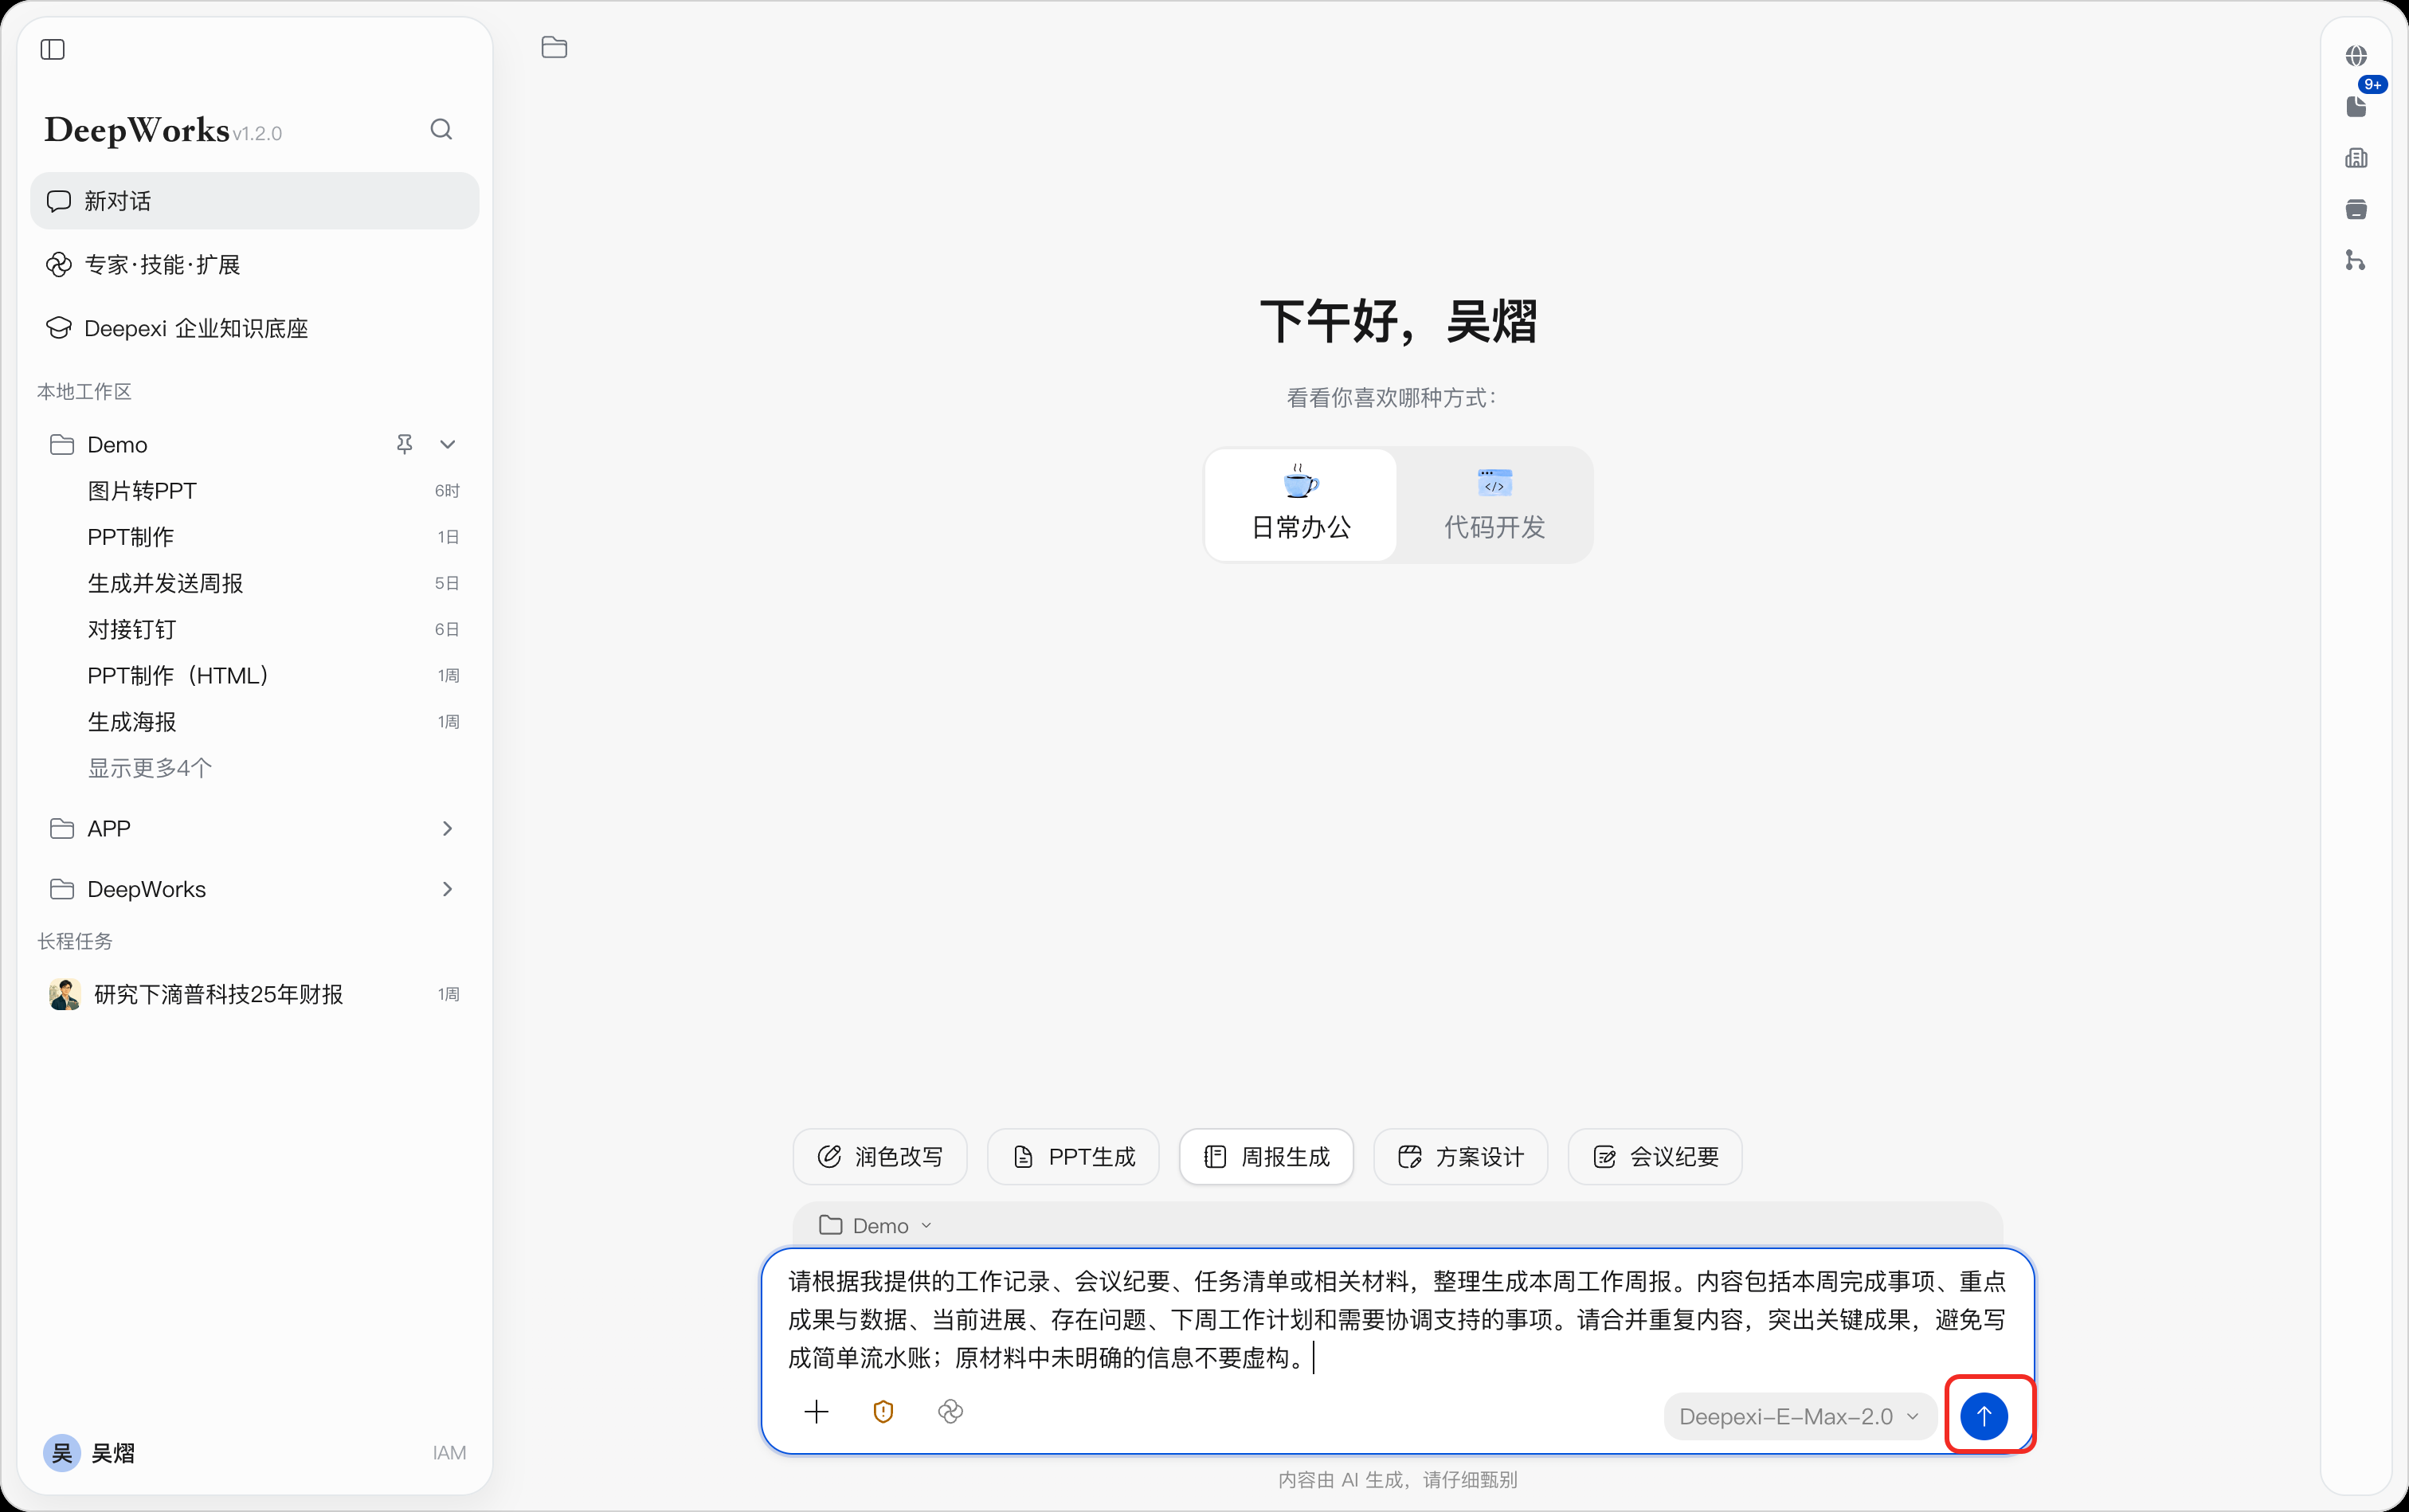
During task execution, pay attention to the following:
-
Whether the correct workspace, model, and expert are used;
-
Whether the user needs to supplement files, parameters, or confirmations;
-
Whether it involves writing to business systems, external sending, or other high-risk operations;
-
Whether the result files are saved to the expected directory.
For important tasks, it is recommended to ask the AI to list the information sources, key assumptions, unverified items, and output file locations after the results are generated.
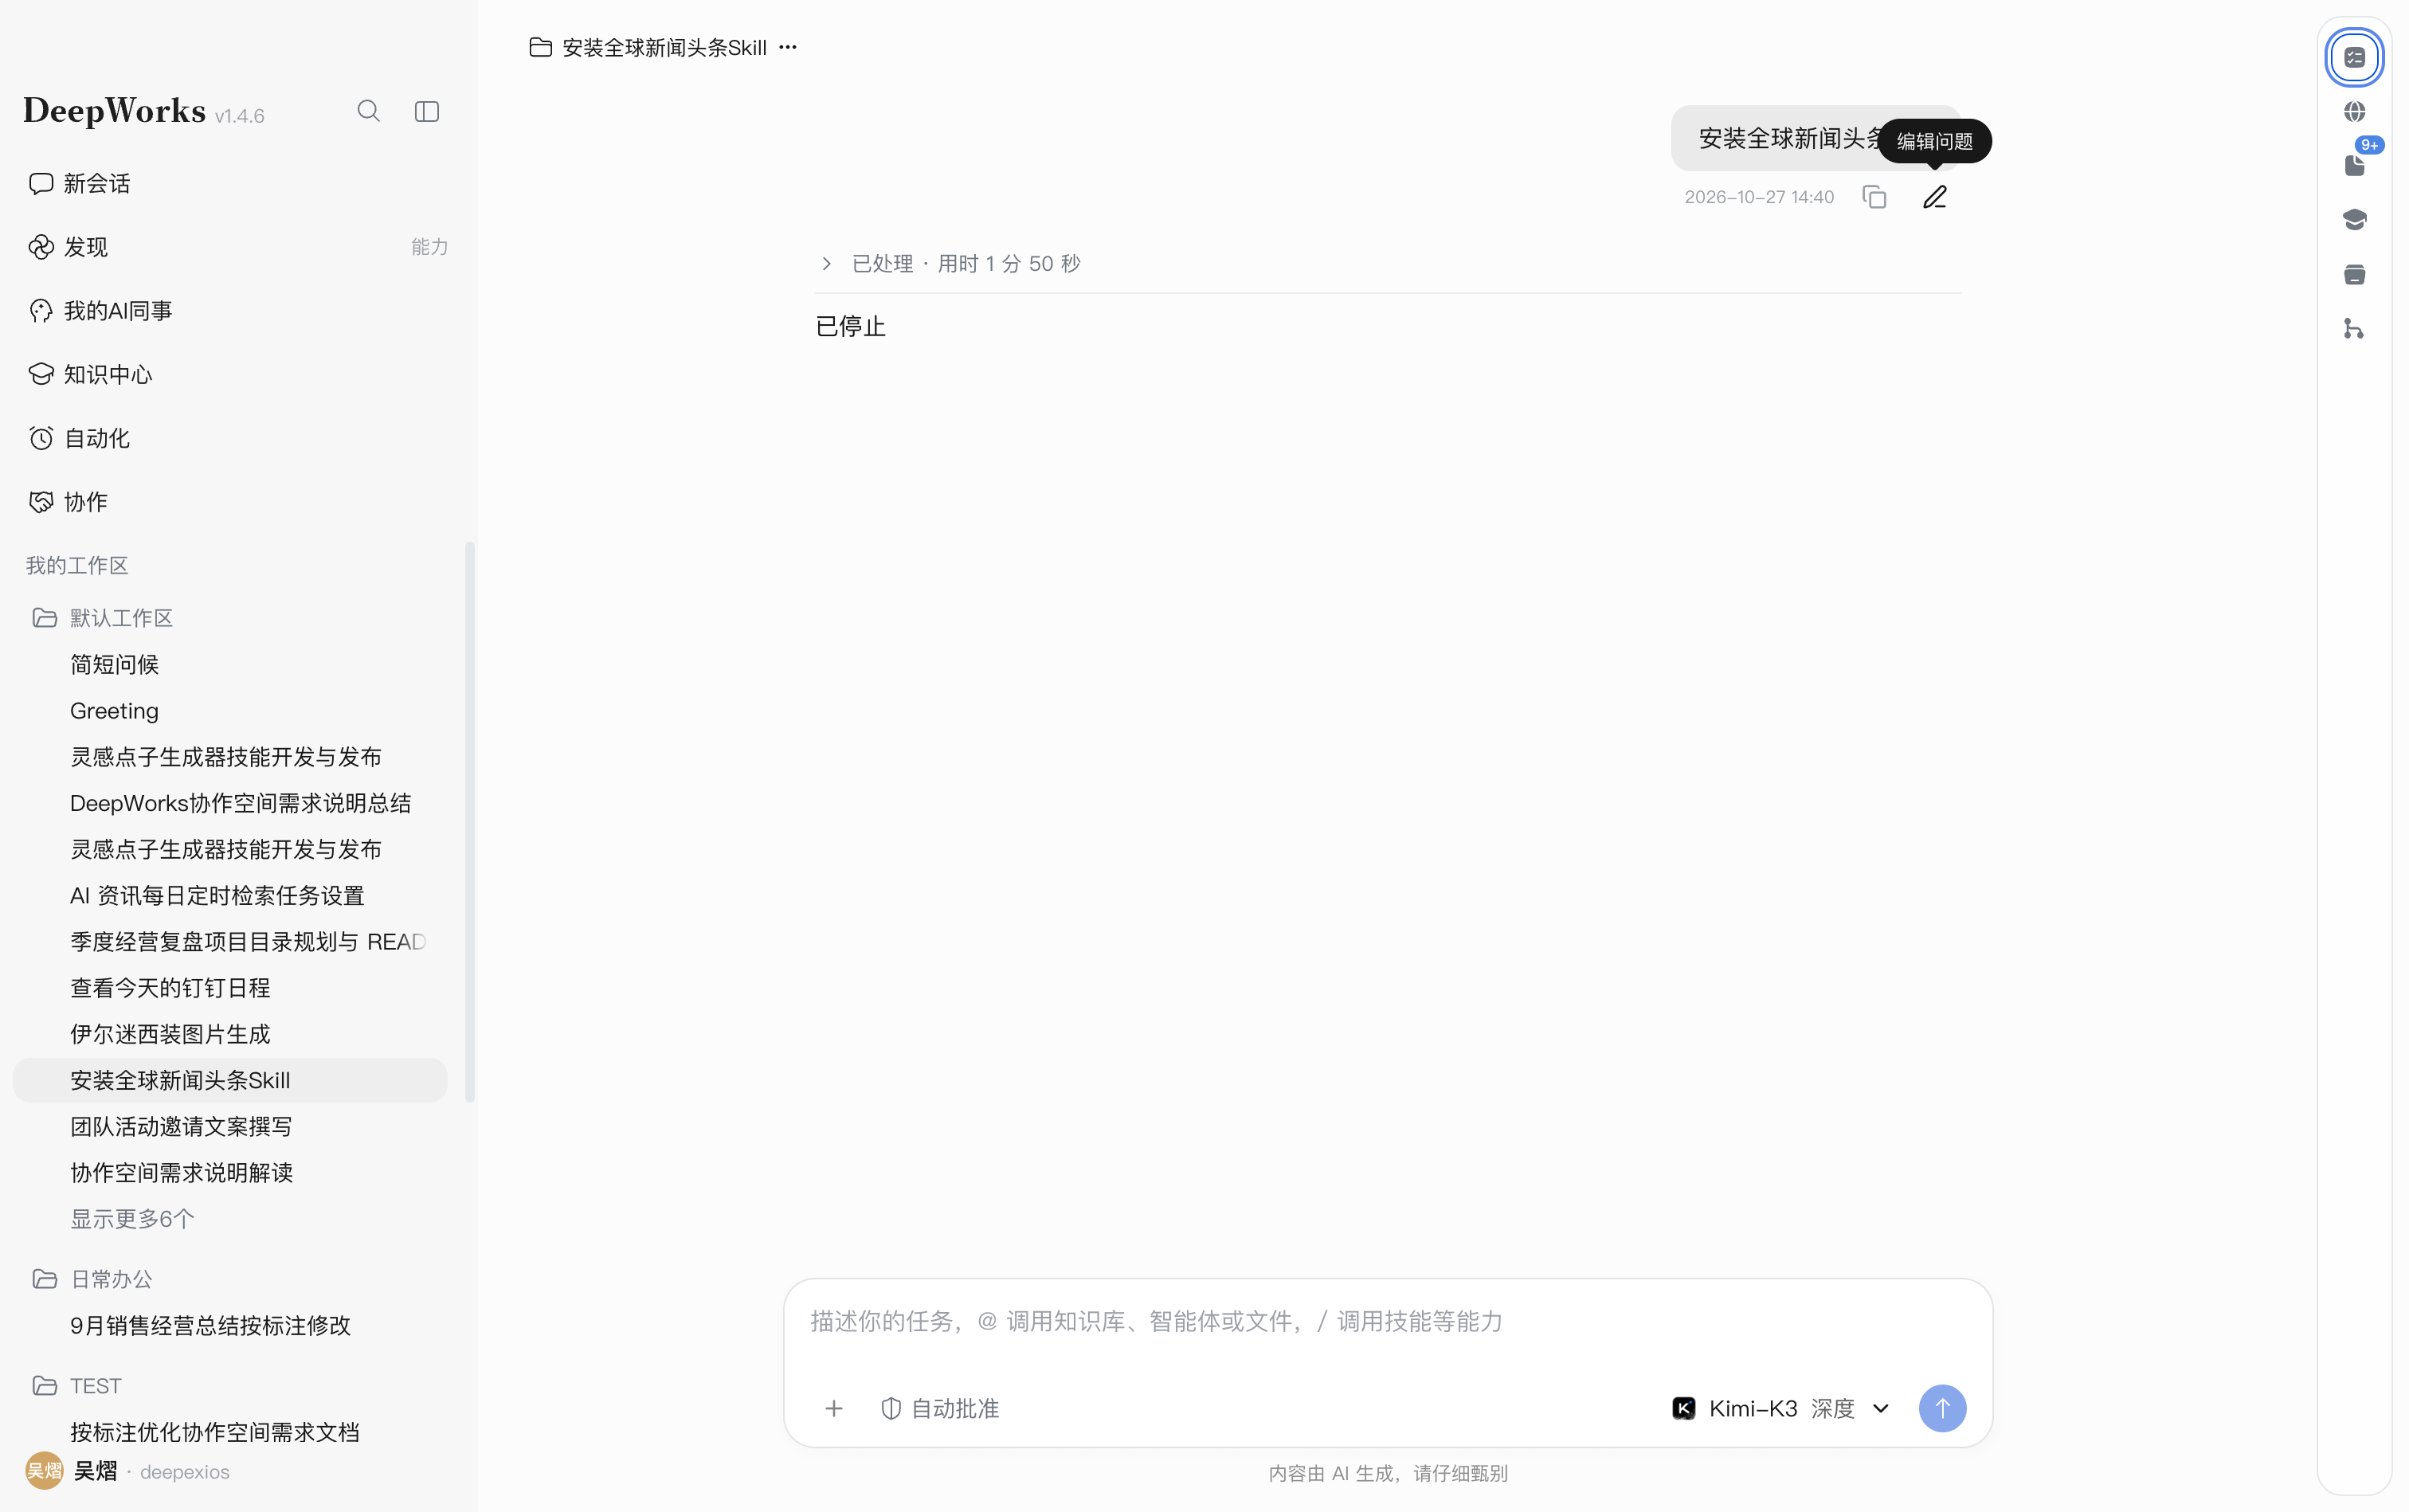
Editing a Question
After the model stops responding, edit the last question in the current conversation to correct it or add requirements and resend it.
Path: Current conversation → Edit Question (pencil icon) below the last question.
- Confirm that the model has stopped responding and locate the last question.
- Click
Edit Questionbelow it.
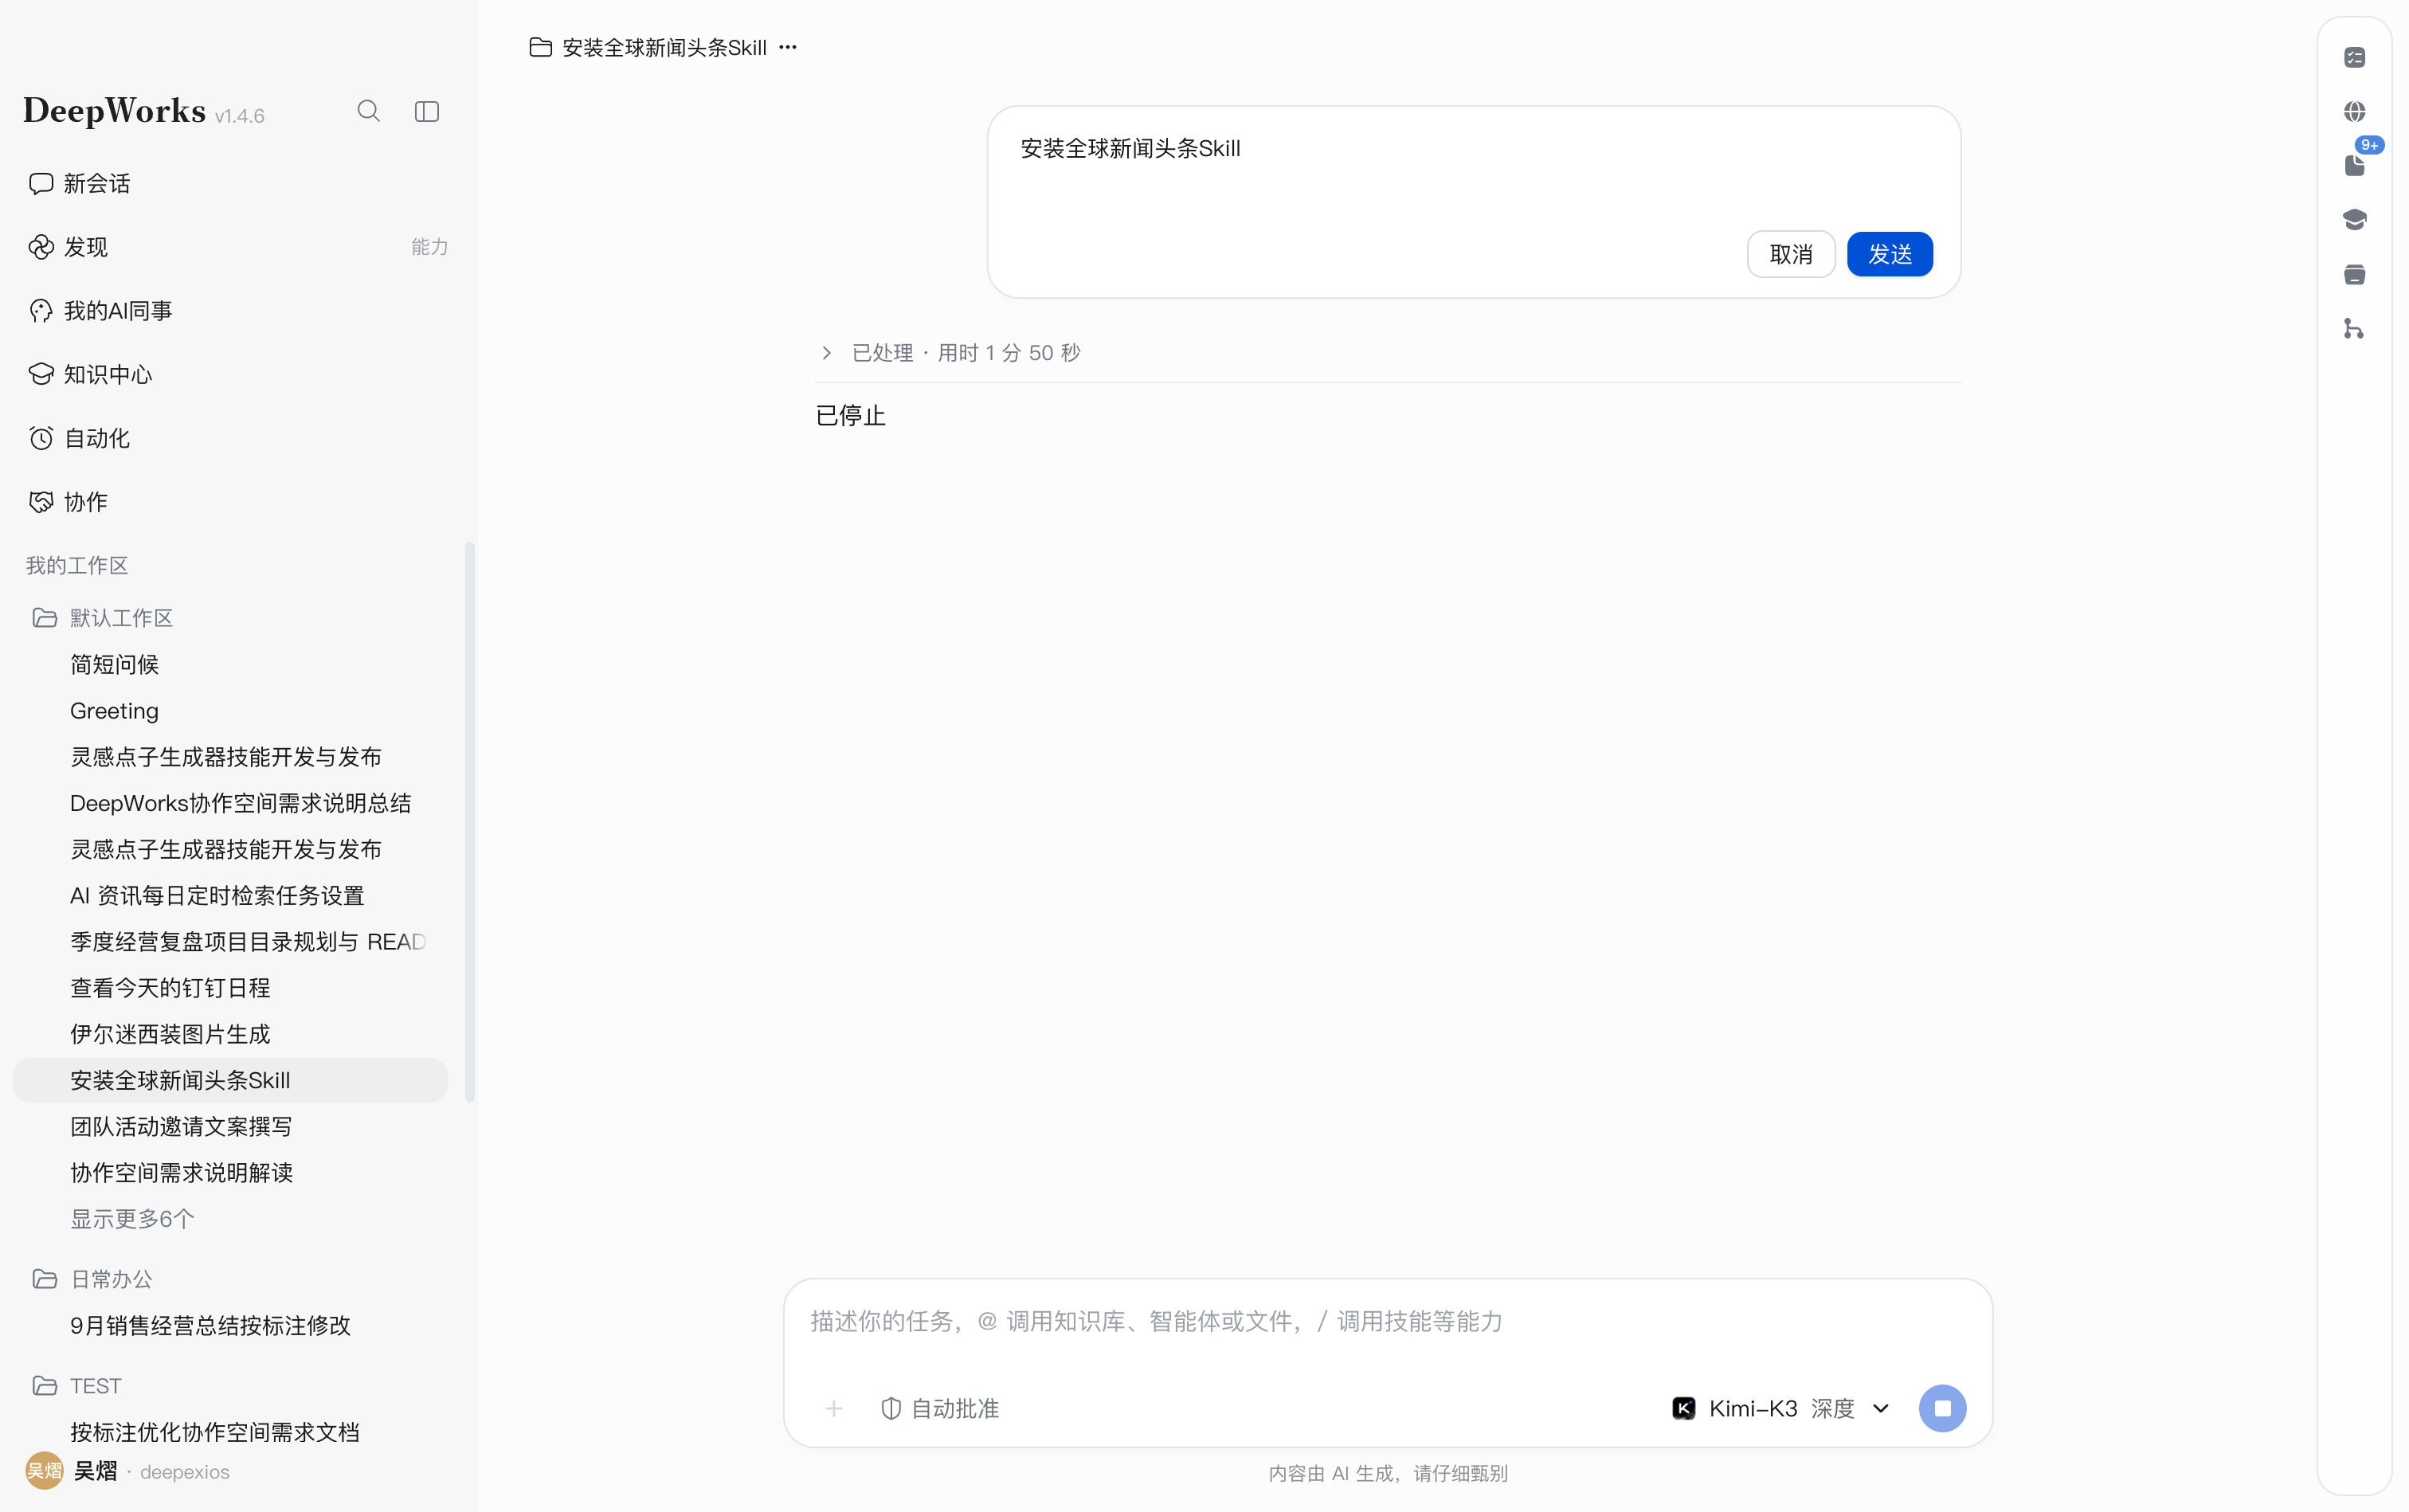
- Modify the content in the editor at the original question’s position.
- Click
Sendin the editor to submit the revised question, orCancelto exit without changes.
Referencing Conversations
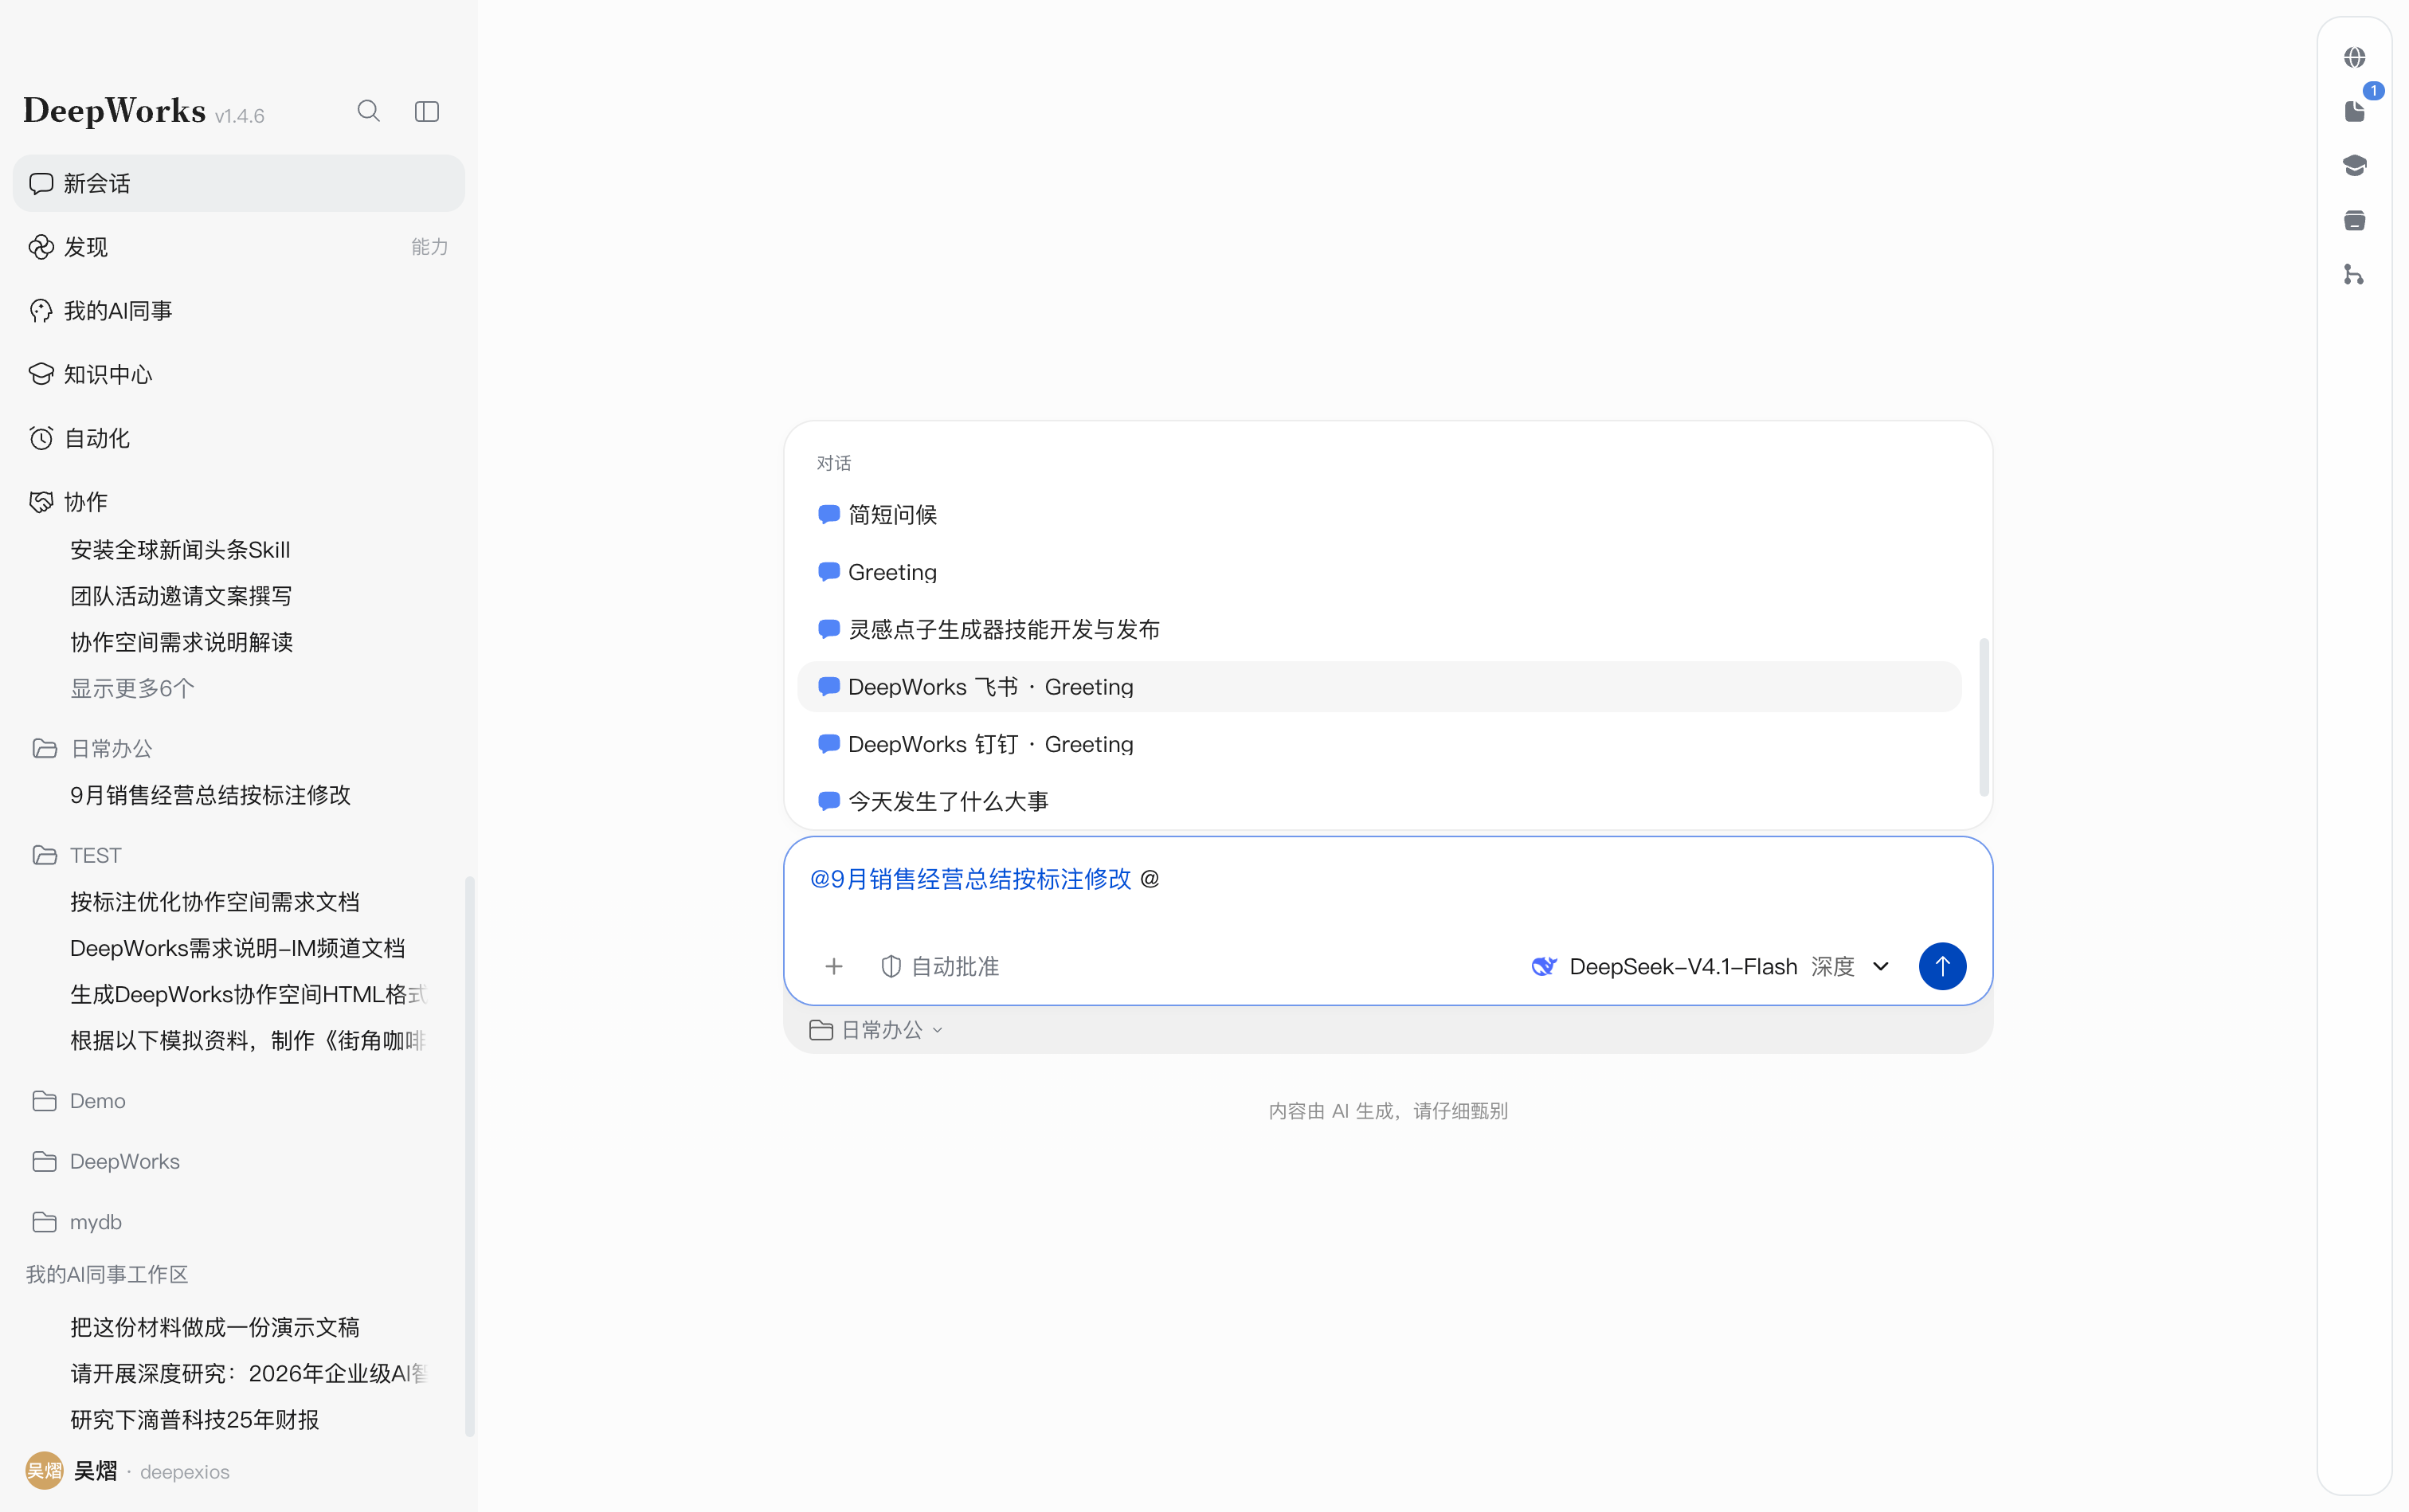
Reference existing conversations to supply relevant discussions for organizing, summarizing, or processing information. Select a conversation using @ or drag it into the task input box.
Limit: Each message can reference up to three conversations in total, including both @ selections and dragged conversations.
Method 1: Using @
- Type
@in the current task input box to open the reference list. - Select a conversation under
Conversations. Its reference appears in the input box. - Add your requirements, such as “Extract to-dos from this conversation,” and click
Send.
Method 2: Dragging a conversation
- Locate the conversation in the left-hand list.
- Drag it into the current task input box to add a reference.
- Check the referenced conversation, add your requirements, and click
Send.
AI Colleague
AI Colleagues include domain-specific experts and expert teams composed of multiple professional roles. Users can choose suitable AI Colleagues based on work needs, submit tasks and materials in a session, and receive professional analysis and deliverables.
Finding AI Colleagues by Category
Path: My AI Colleagues in the left sidebar.
Use Industry Applications to find colleagues in a business domain, or Everyday Collaboration for documents, reporting, and research. Switch between Experts and Expert Teams in each category according to the expertise required.
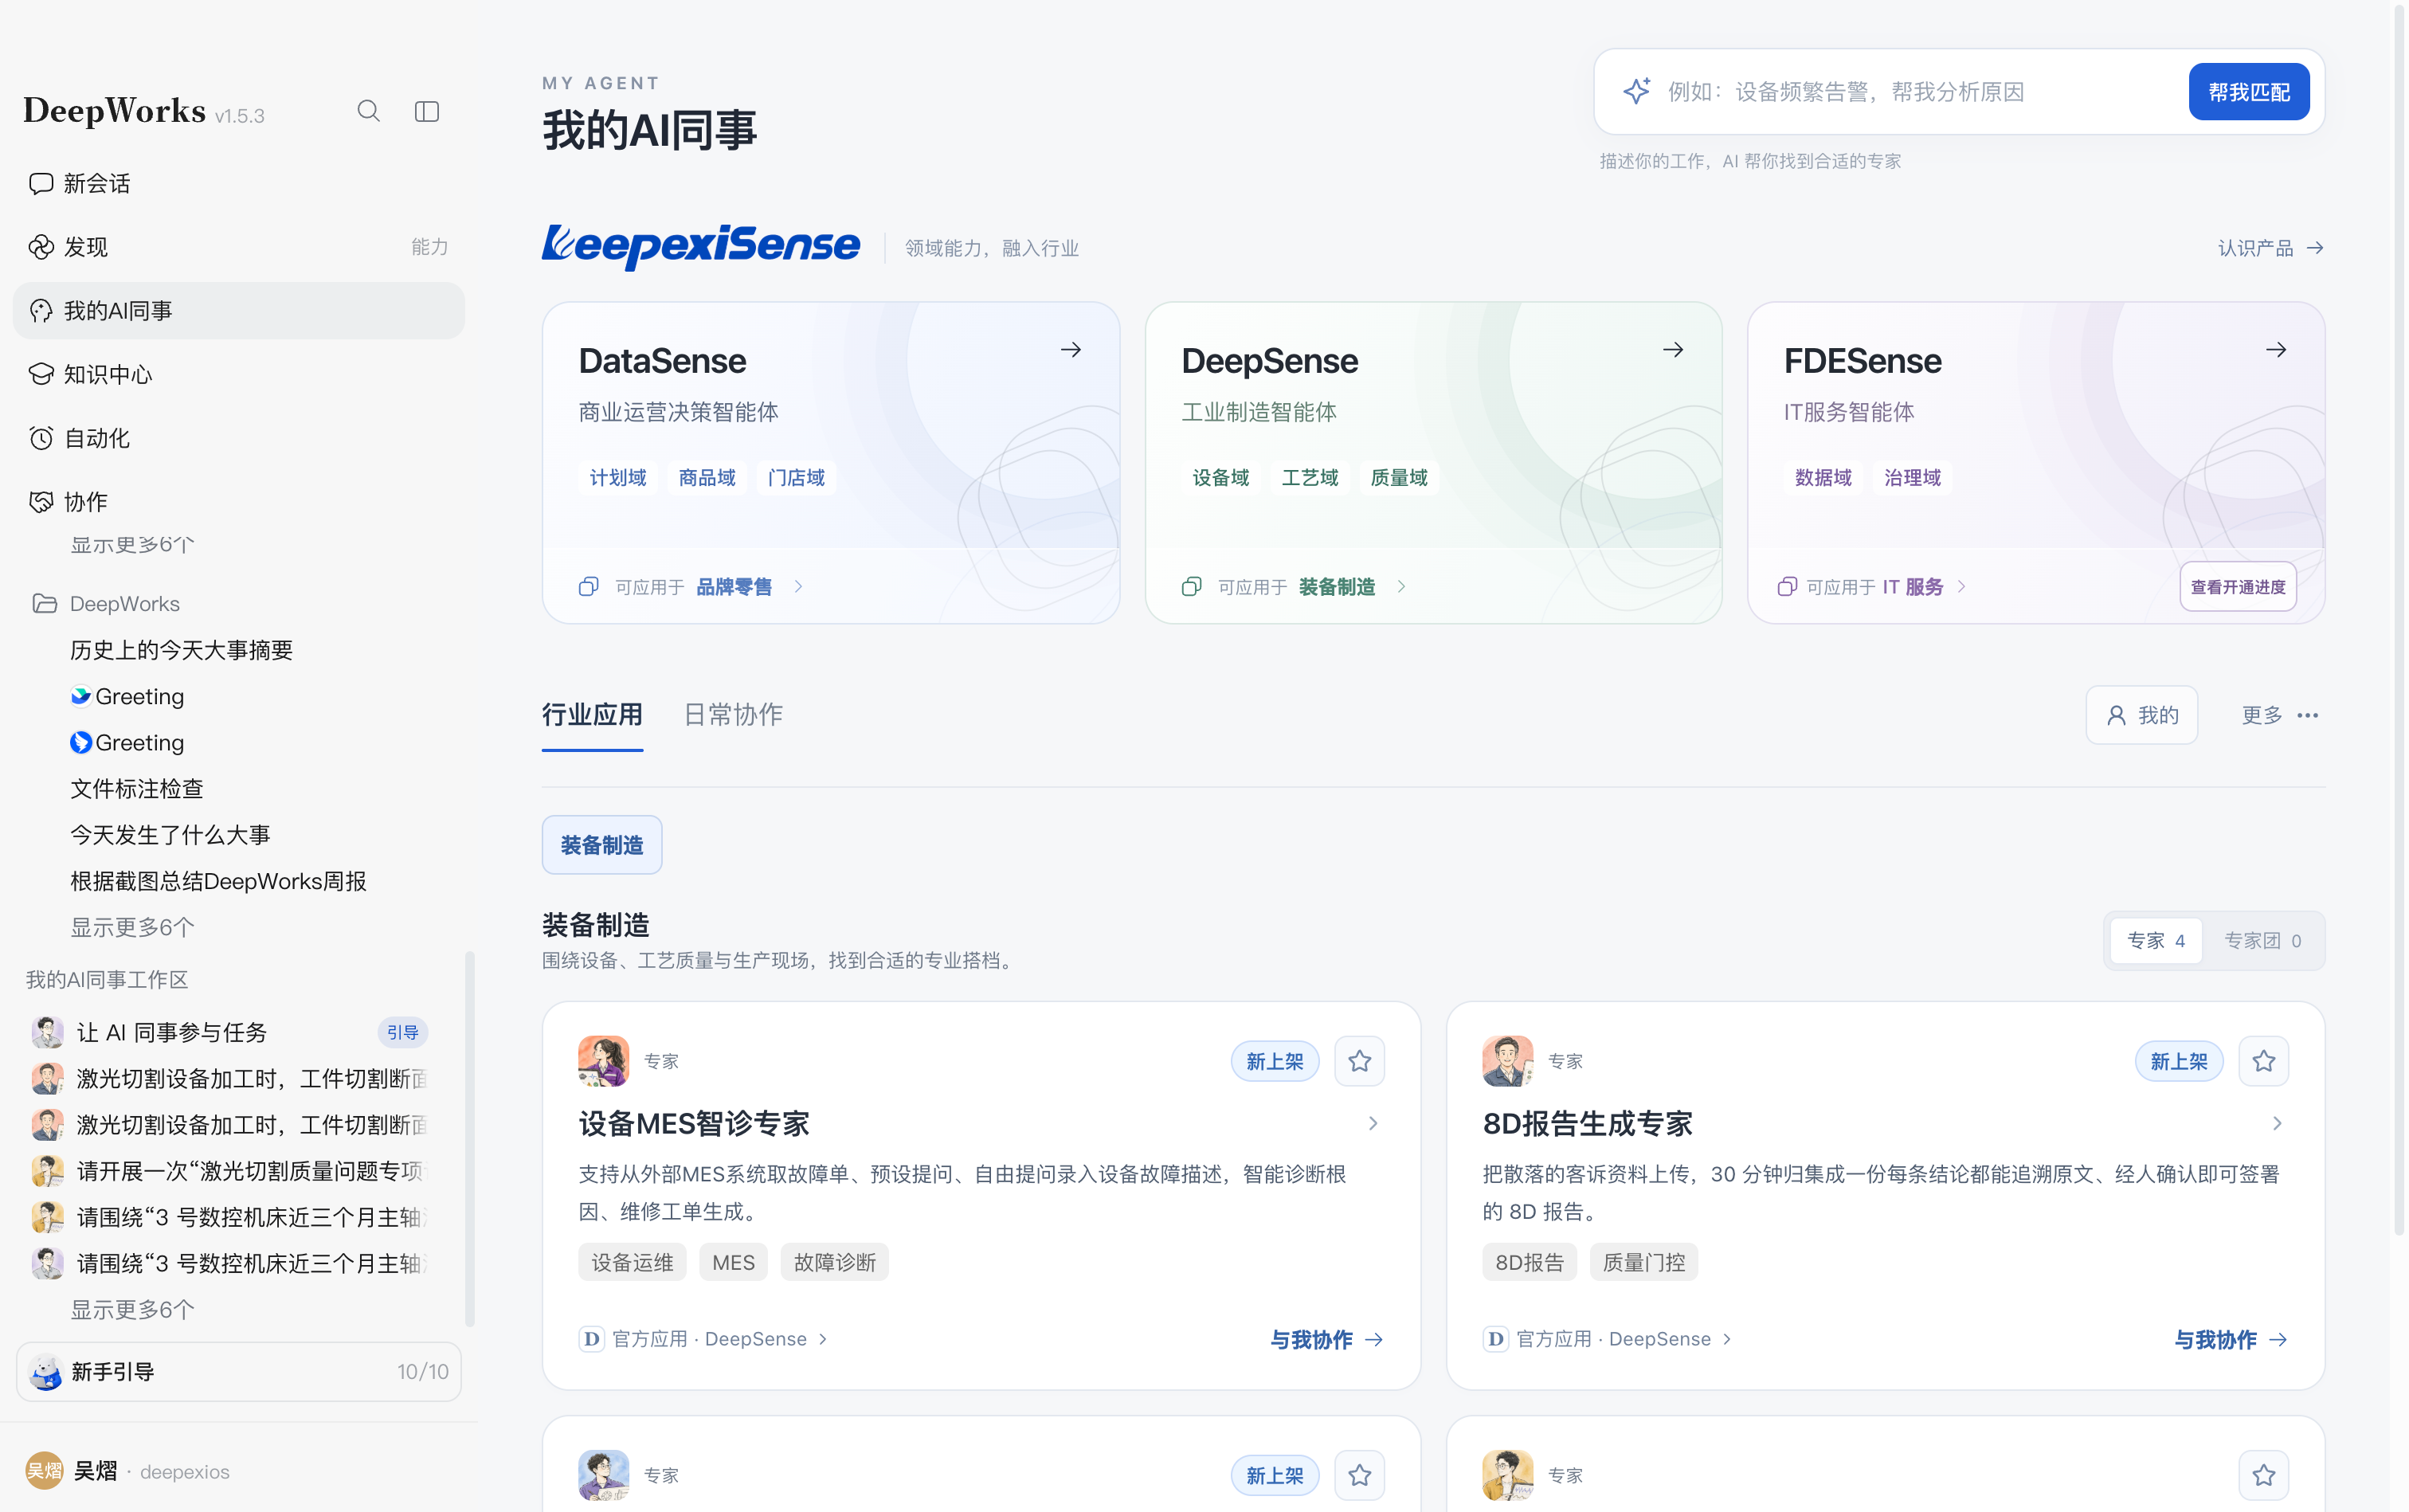
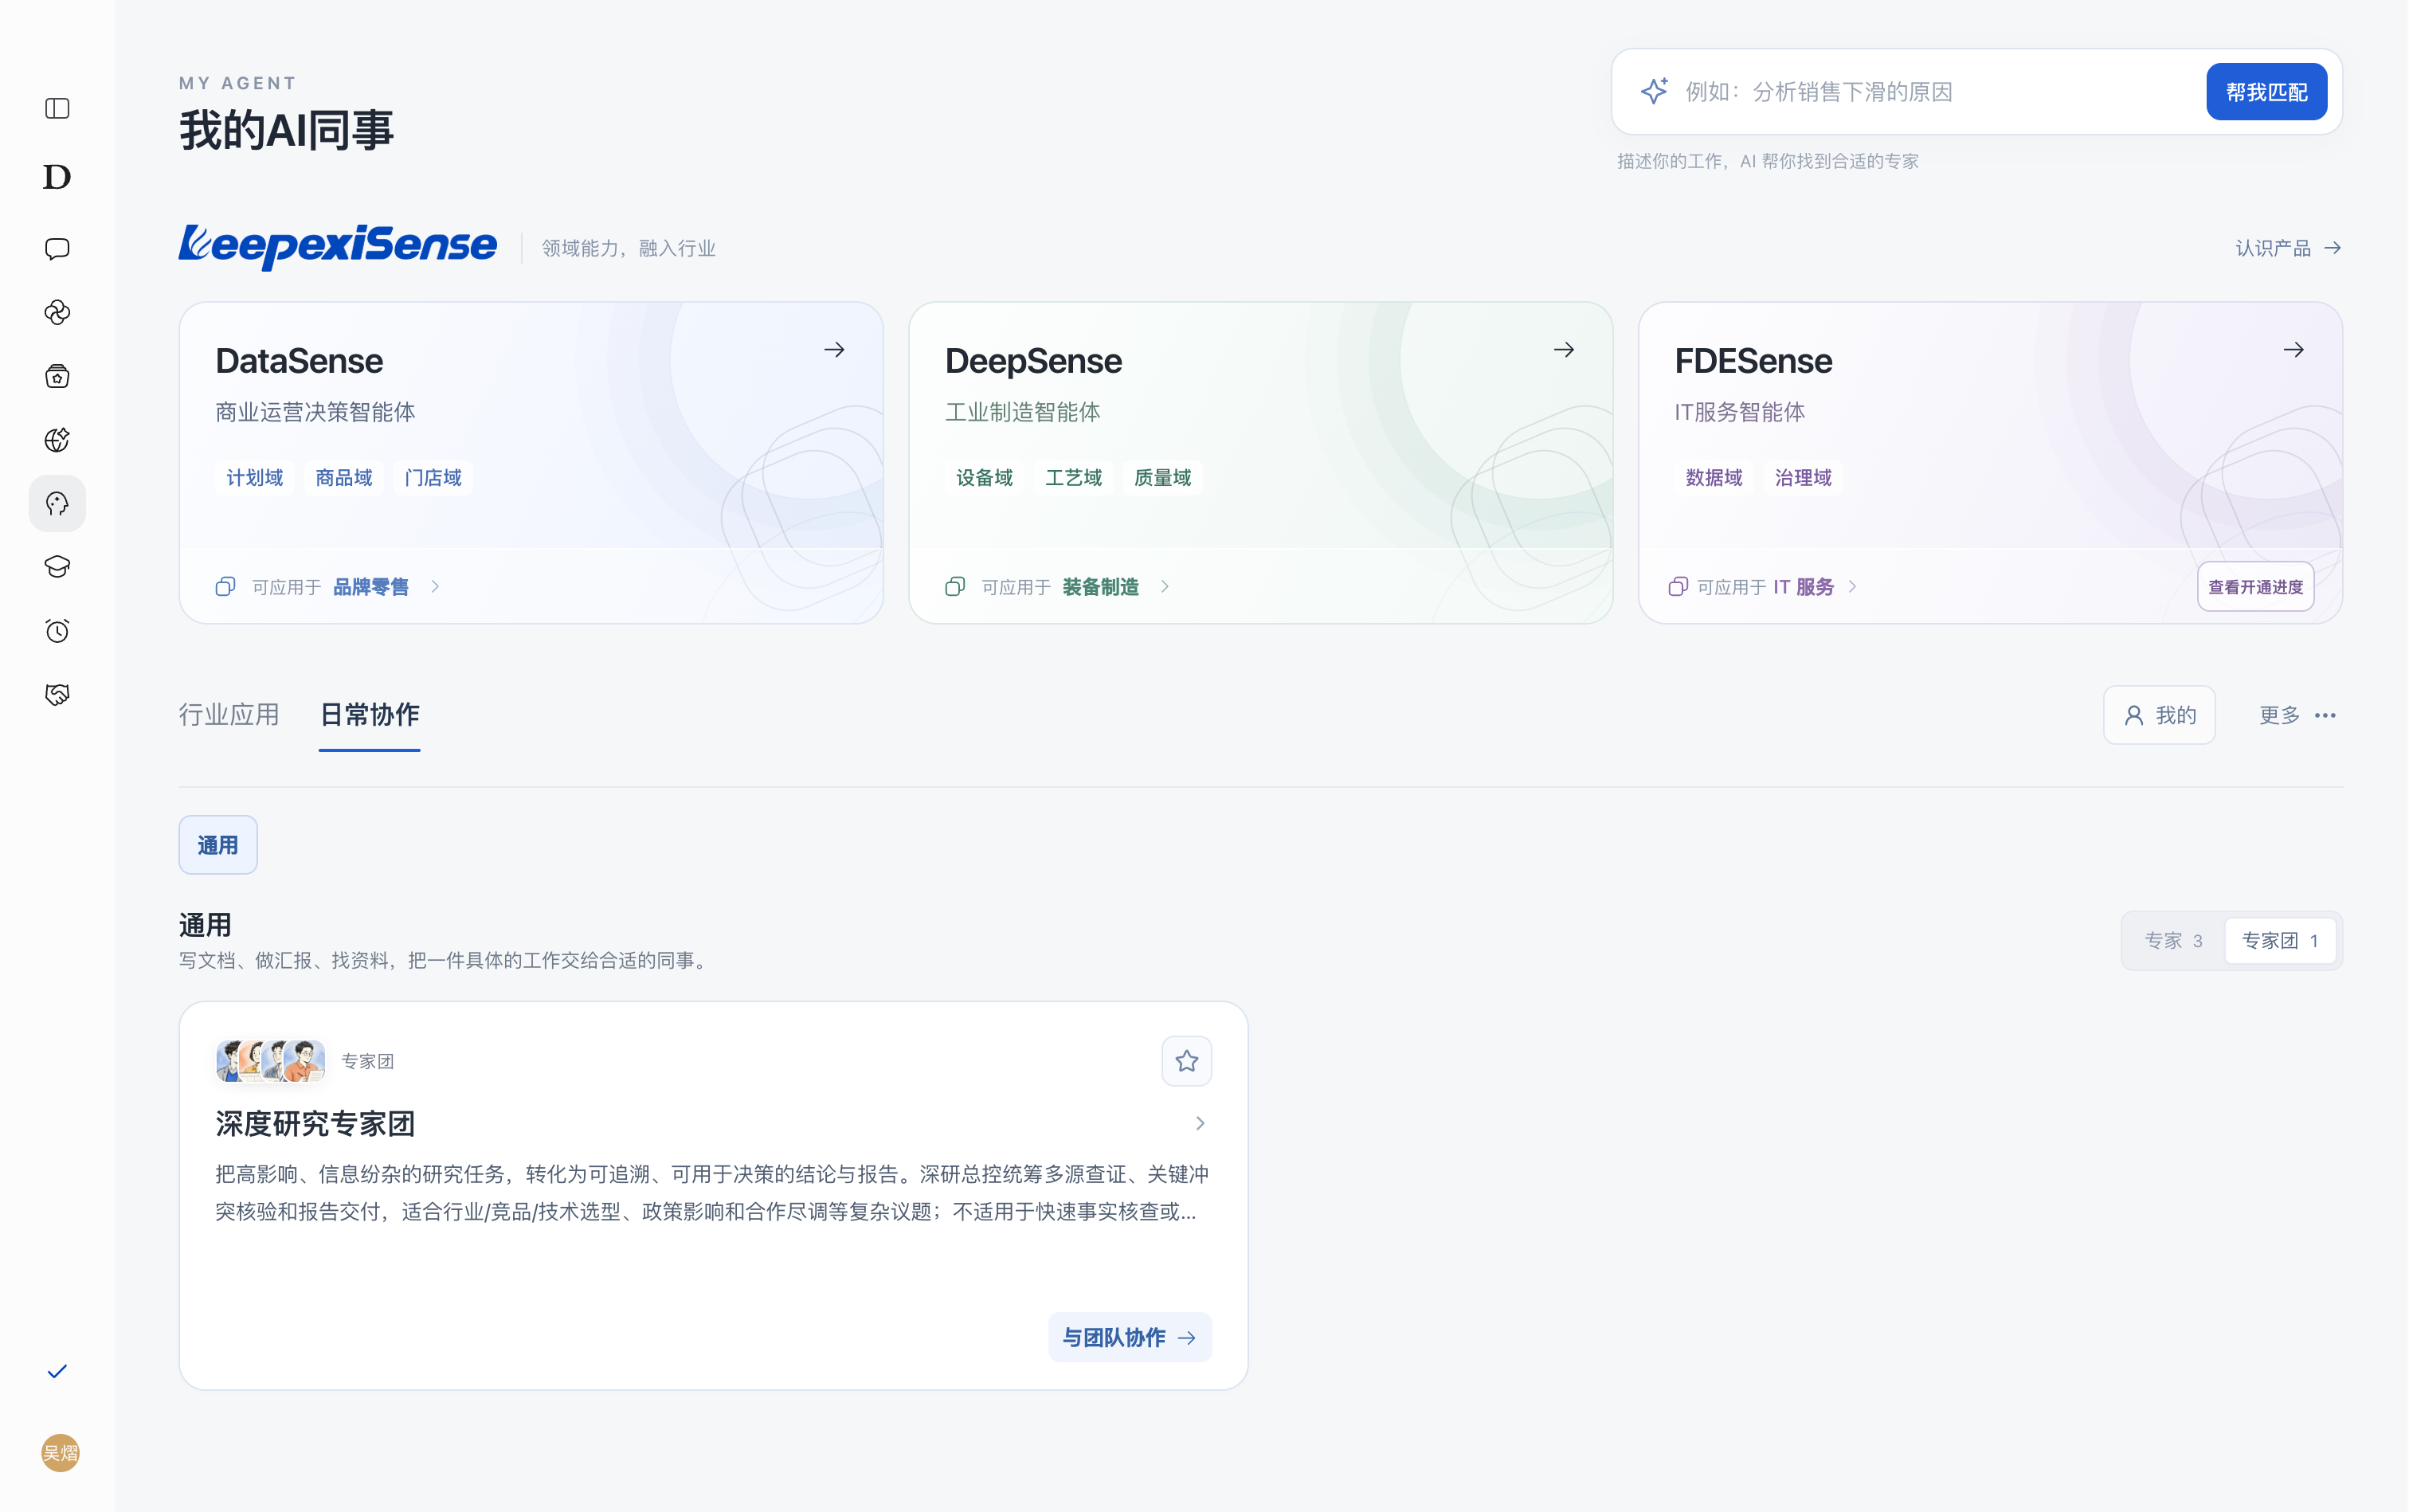
Browsing Industry Applications
The product cards at the top explain domain capabilities and applicable industries to help you choose where to look.
| Product | Positioning | Domains | Industry |
|---|---|---|---|
| DataSense | Commercial operations decision agent | Planning, merchandise, stores | Brand retail |
| DeepSense | Industrial manufacturing agent | Equipment, processes, quality | Equipment manufacturing |
| FDESense | IT service agent | Data, governance | IT services |
- Open
My AI Colleaguesand switch toIndustry Applications. - Select an industry, such as
Equipment Manufacturing. - Switch between
ExpertsandExpert Teamsto view the corresponding list and count. - Read each card’s name, responsibilities, capability tags, and source. For example, select 【Equipment MES Diagnostic Expert】 for equipment troubleshooting or
8D Report Generation Expertfor organizing customer complaints and preparing 8D reports. - Click the name or details arrow to learn about capabilities and required materials. You can also click
Collaborate with MeorCollaborate with the Team; see 5.3 Summoning an Expert or Expert Team.
Click Learn About the Product for product information. If a card offers View Activation Progress, use it to check progress. Available industries, Experts, and Expert Teams depend on the current page.
Browsing Everyday Collaboration
- In
My AI Colleagues, switch toEveryday Collaboration. - Select an available category such as
Generaland switch betweenExpertsandExpert Teams. - Read the responsibilities and open details to check suitable tasks. For research requiring multiple roles, select
Deep Research Expert Team.
Matching AI Colleagues to Your Needs
Matching recommends Experts or Expert Teams based on a natural-language request. Use it when you are unfamiliar with their responsibilities or unsure which role to choose.
Path: My AI Colleagues → request box at the top → Find a Match.
- Describe the work, such as “Analyze the reasons for declining sales.” Add the business subject, background, and desired output to clarify your needs.
- Click
Find a Matchto openSmart Matching. Matching covers Industry Applications and Everyday Collaboration; the results show relevant colleagues and your request. - Compare responsibilities, capability tags, and product sources. Open details or use a card’s collaboration entry.
- If results are unsuitable, refine the description and click
Match Again. - Click
Clearin the results area to clear the match. ClickBack to BrowseorMy AI Colleaguesat the top to return to category browsing.
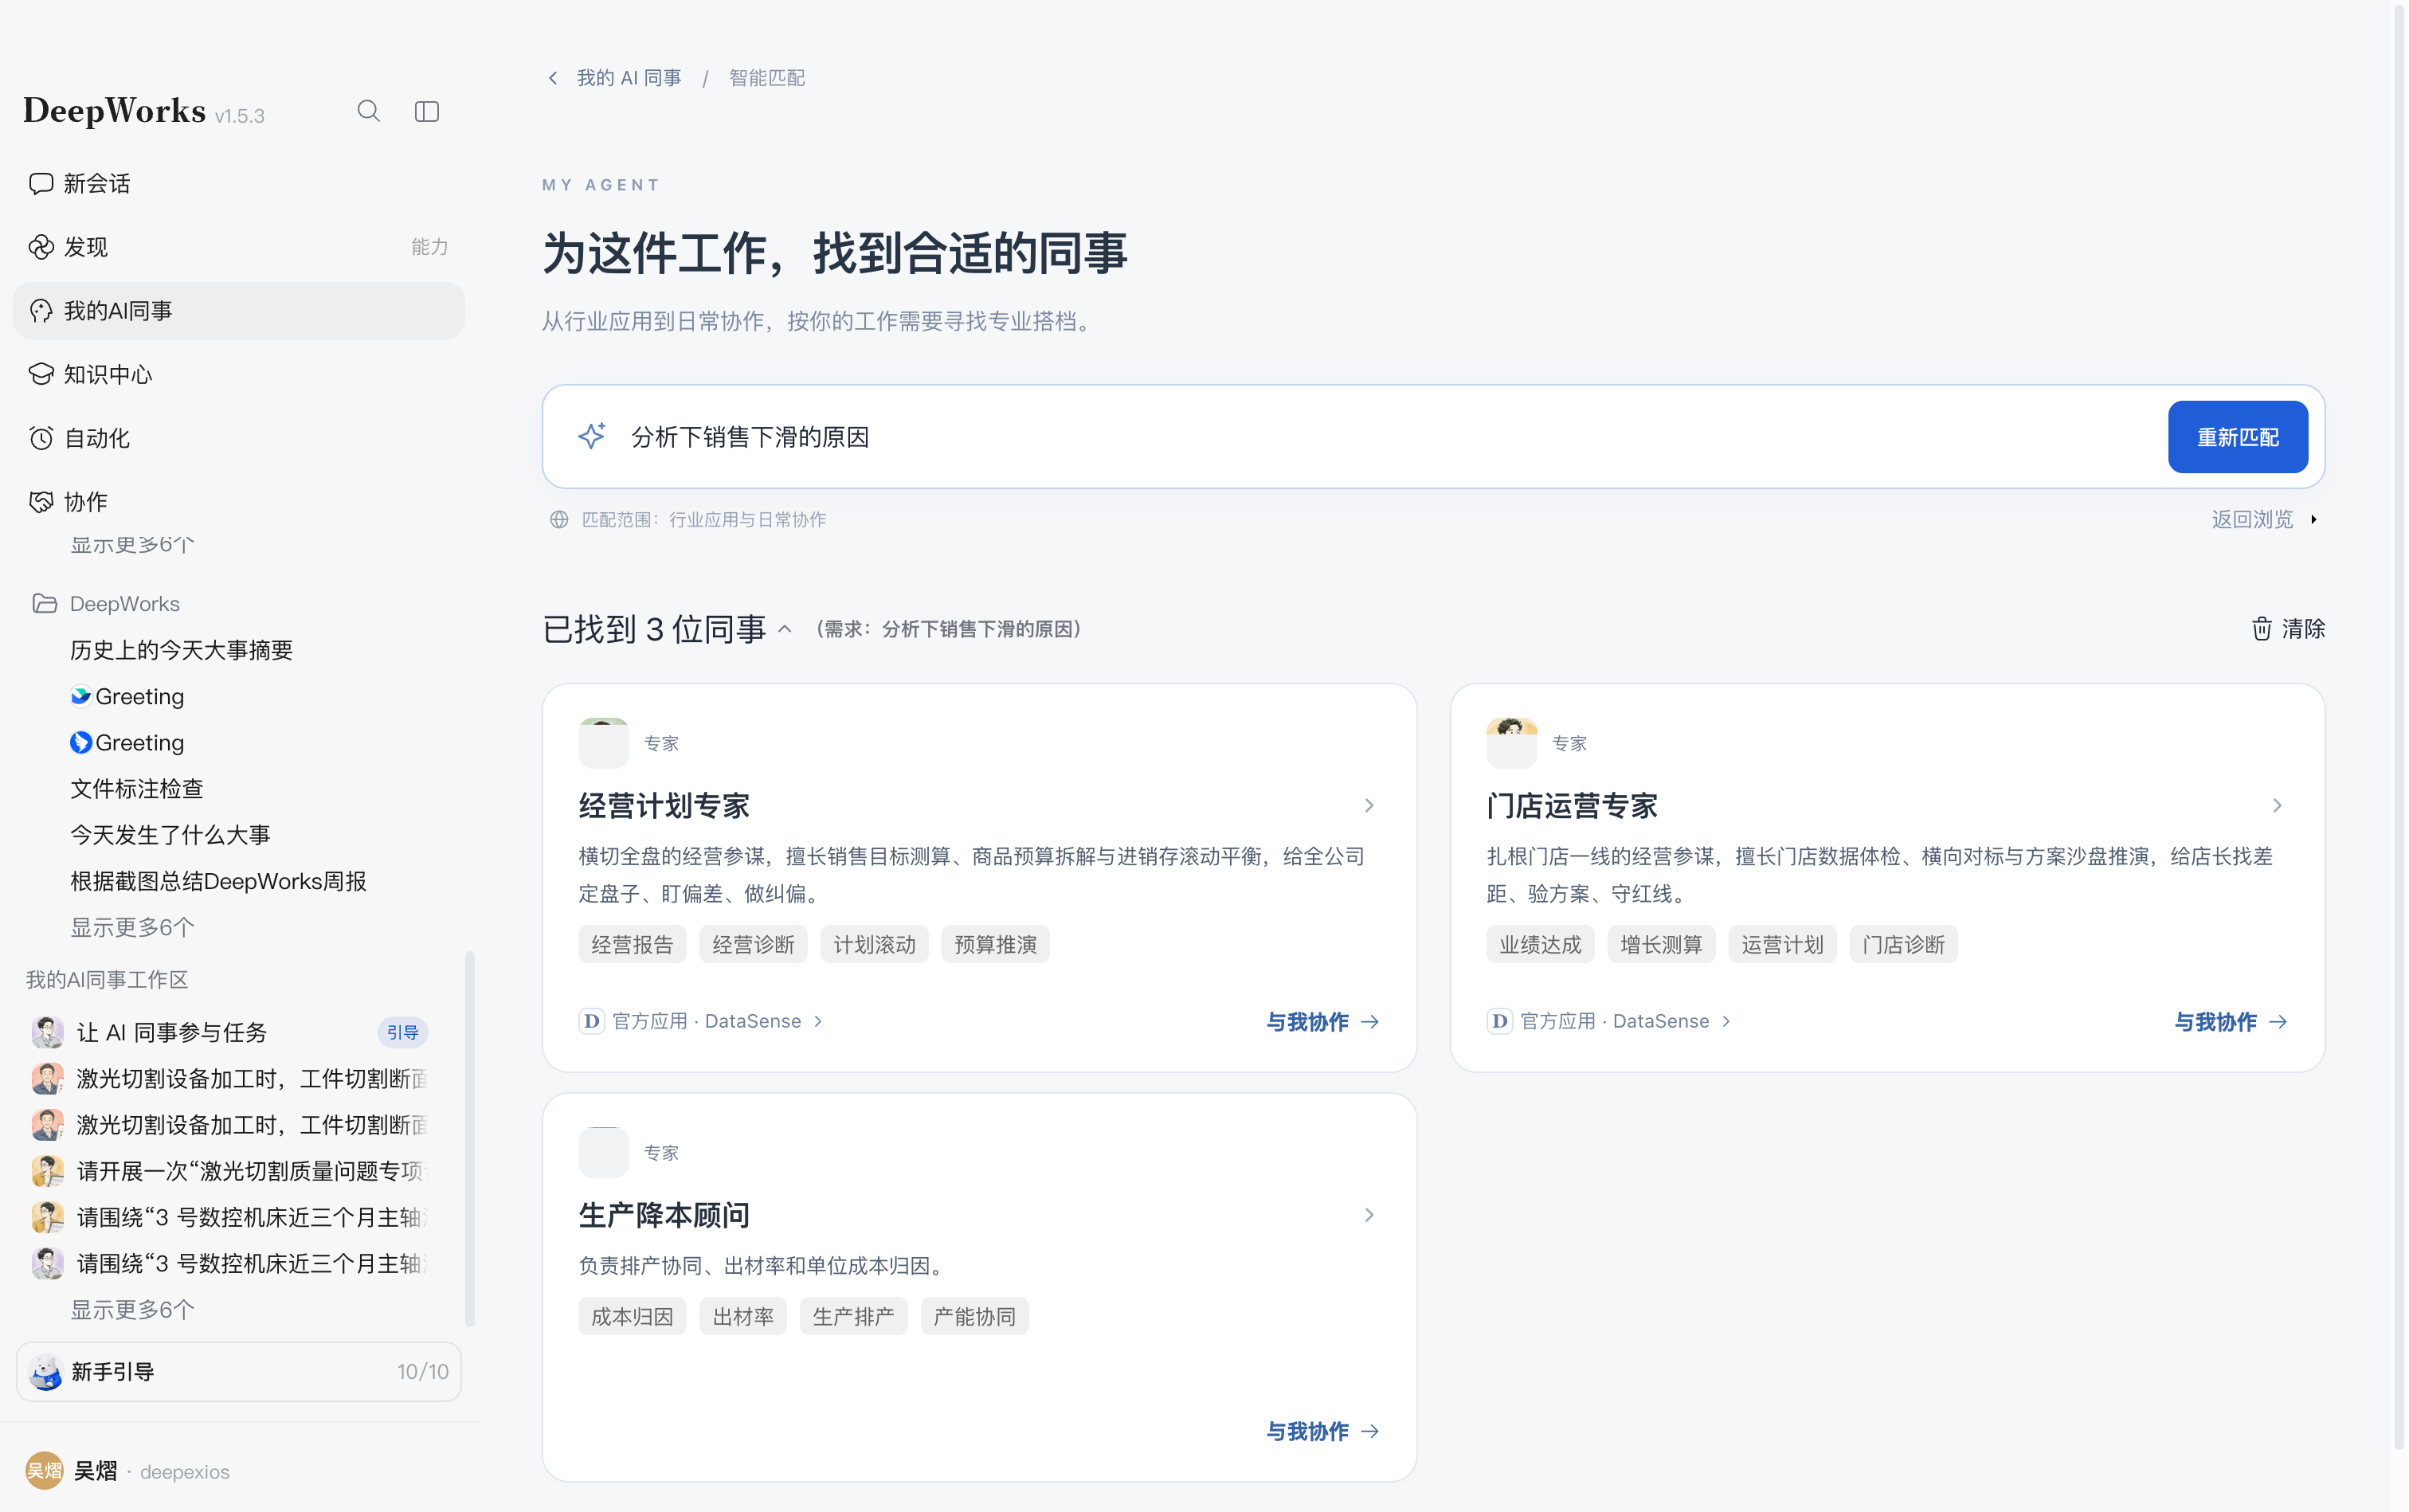
For declining sales, consider Business Planning Expert for targets, budgets, and plans, or Store Operations Expert for store data diagnosis, benchmarking, and operating plans. Recommendations and counts vary with the request and available colleagues.
Summoning an Expert or Expert Team
Using an Expert
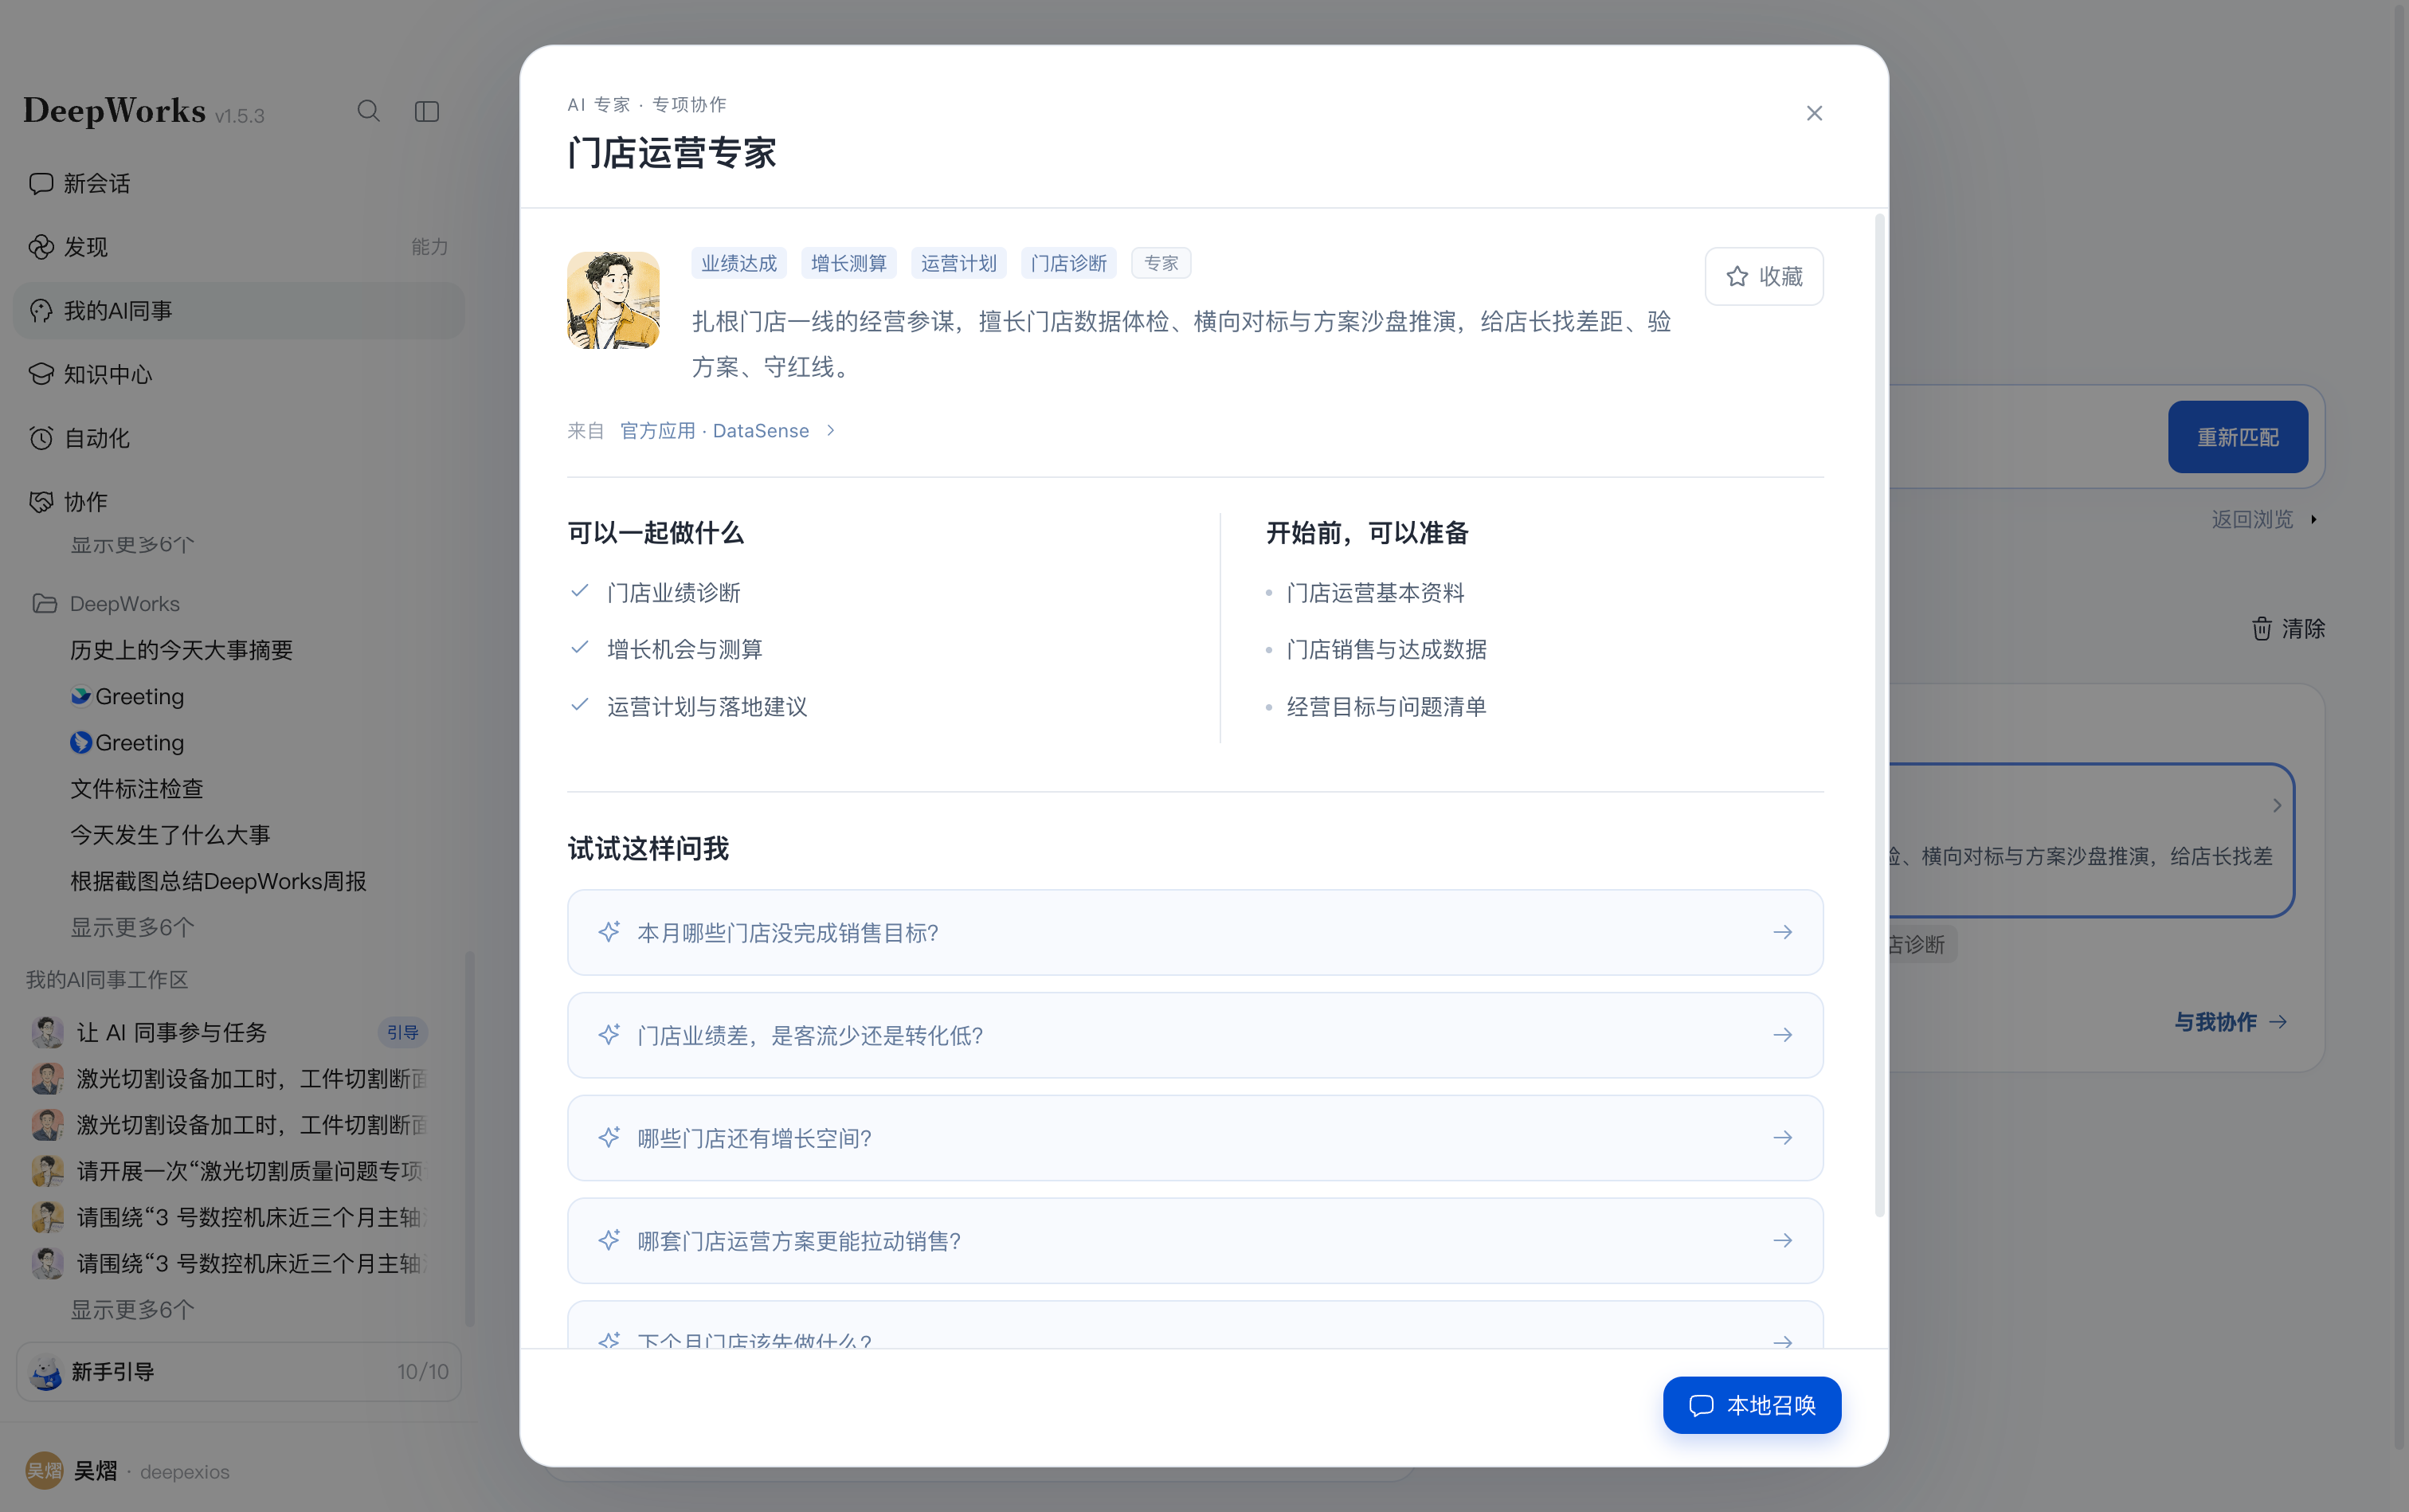
Experts suit tasks with a clear professional scope that can primarily be handled by one role.
Path: My AI Colleagues → select an Expert → open details → Summon Locally or another available summon option.
- Find an Expert through browsing or Smart Matching and click the name or details arrow.
- Read responsibilities, capability tags, and source, and review
What We Can Do Together. - Prepare materials following 【Before We Start, You Can Prepare】 and use
Try Asking Me Thisto frame your request. - Click an available summon button at the bottom. For example,
Store Operations ExpertoffersSummon Locally. You can also useCollaborate with Meon the card. - Enter the objective, business background, desired output, and constraints; attach files as needed and send. Supply further information and review the analysis and deliverables.
Using an Expert Team
Expert Teams suit complex tasks requiring joint analysis, divided execution, or cross-checking by multiple professional roles.
Path: My AI Colleagues → Everyday Collaboration → General → Expert Teams → Deep Research Expert Team → Summon in Cloud.
- Find a team through browsing or Smart Matching and open its details.
- Read its responsibilities and
What We Can Do Together. Prepare materials and delivery requirements following 【Before We Start, You Can Prepare】. - Review 【Professional Members Working Together】 to understand the participating roles.
- Frame the full task using
Try Asking Me Thisand click an available summon button. For example,Deep Research Expert TeamoffersSummon in Cloud. You can also useCollaborate with the Teamon the card. - Submit the overall objective, background, research scope, materials, and delivery requirements. The team organizes work around the complete task; provide information and confirm results as work progresses.
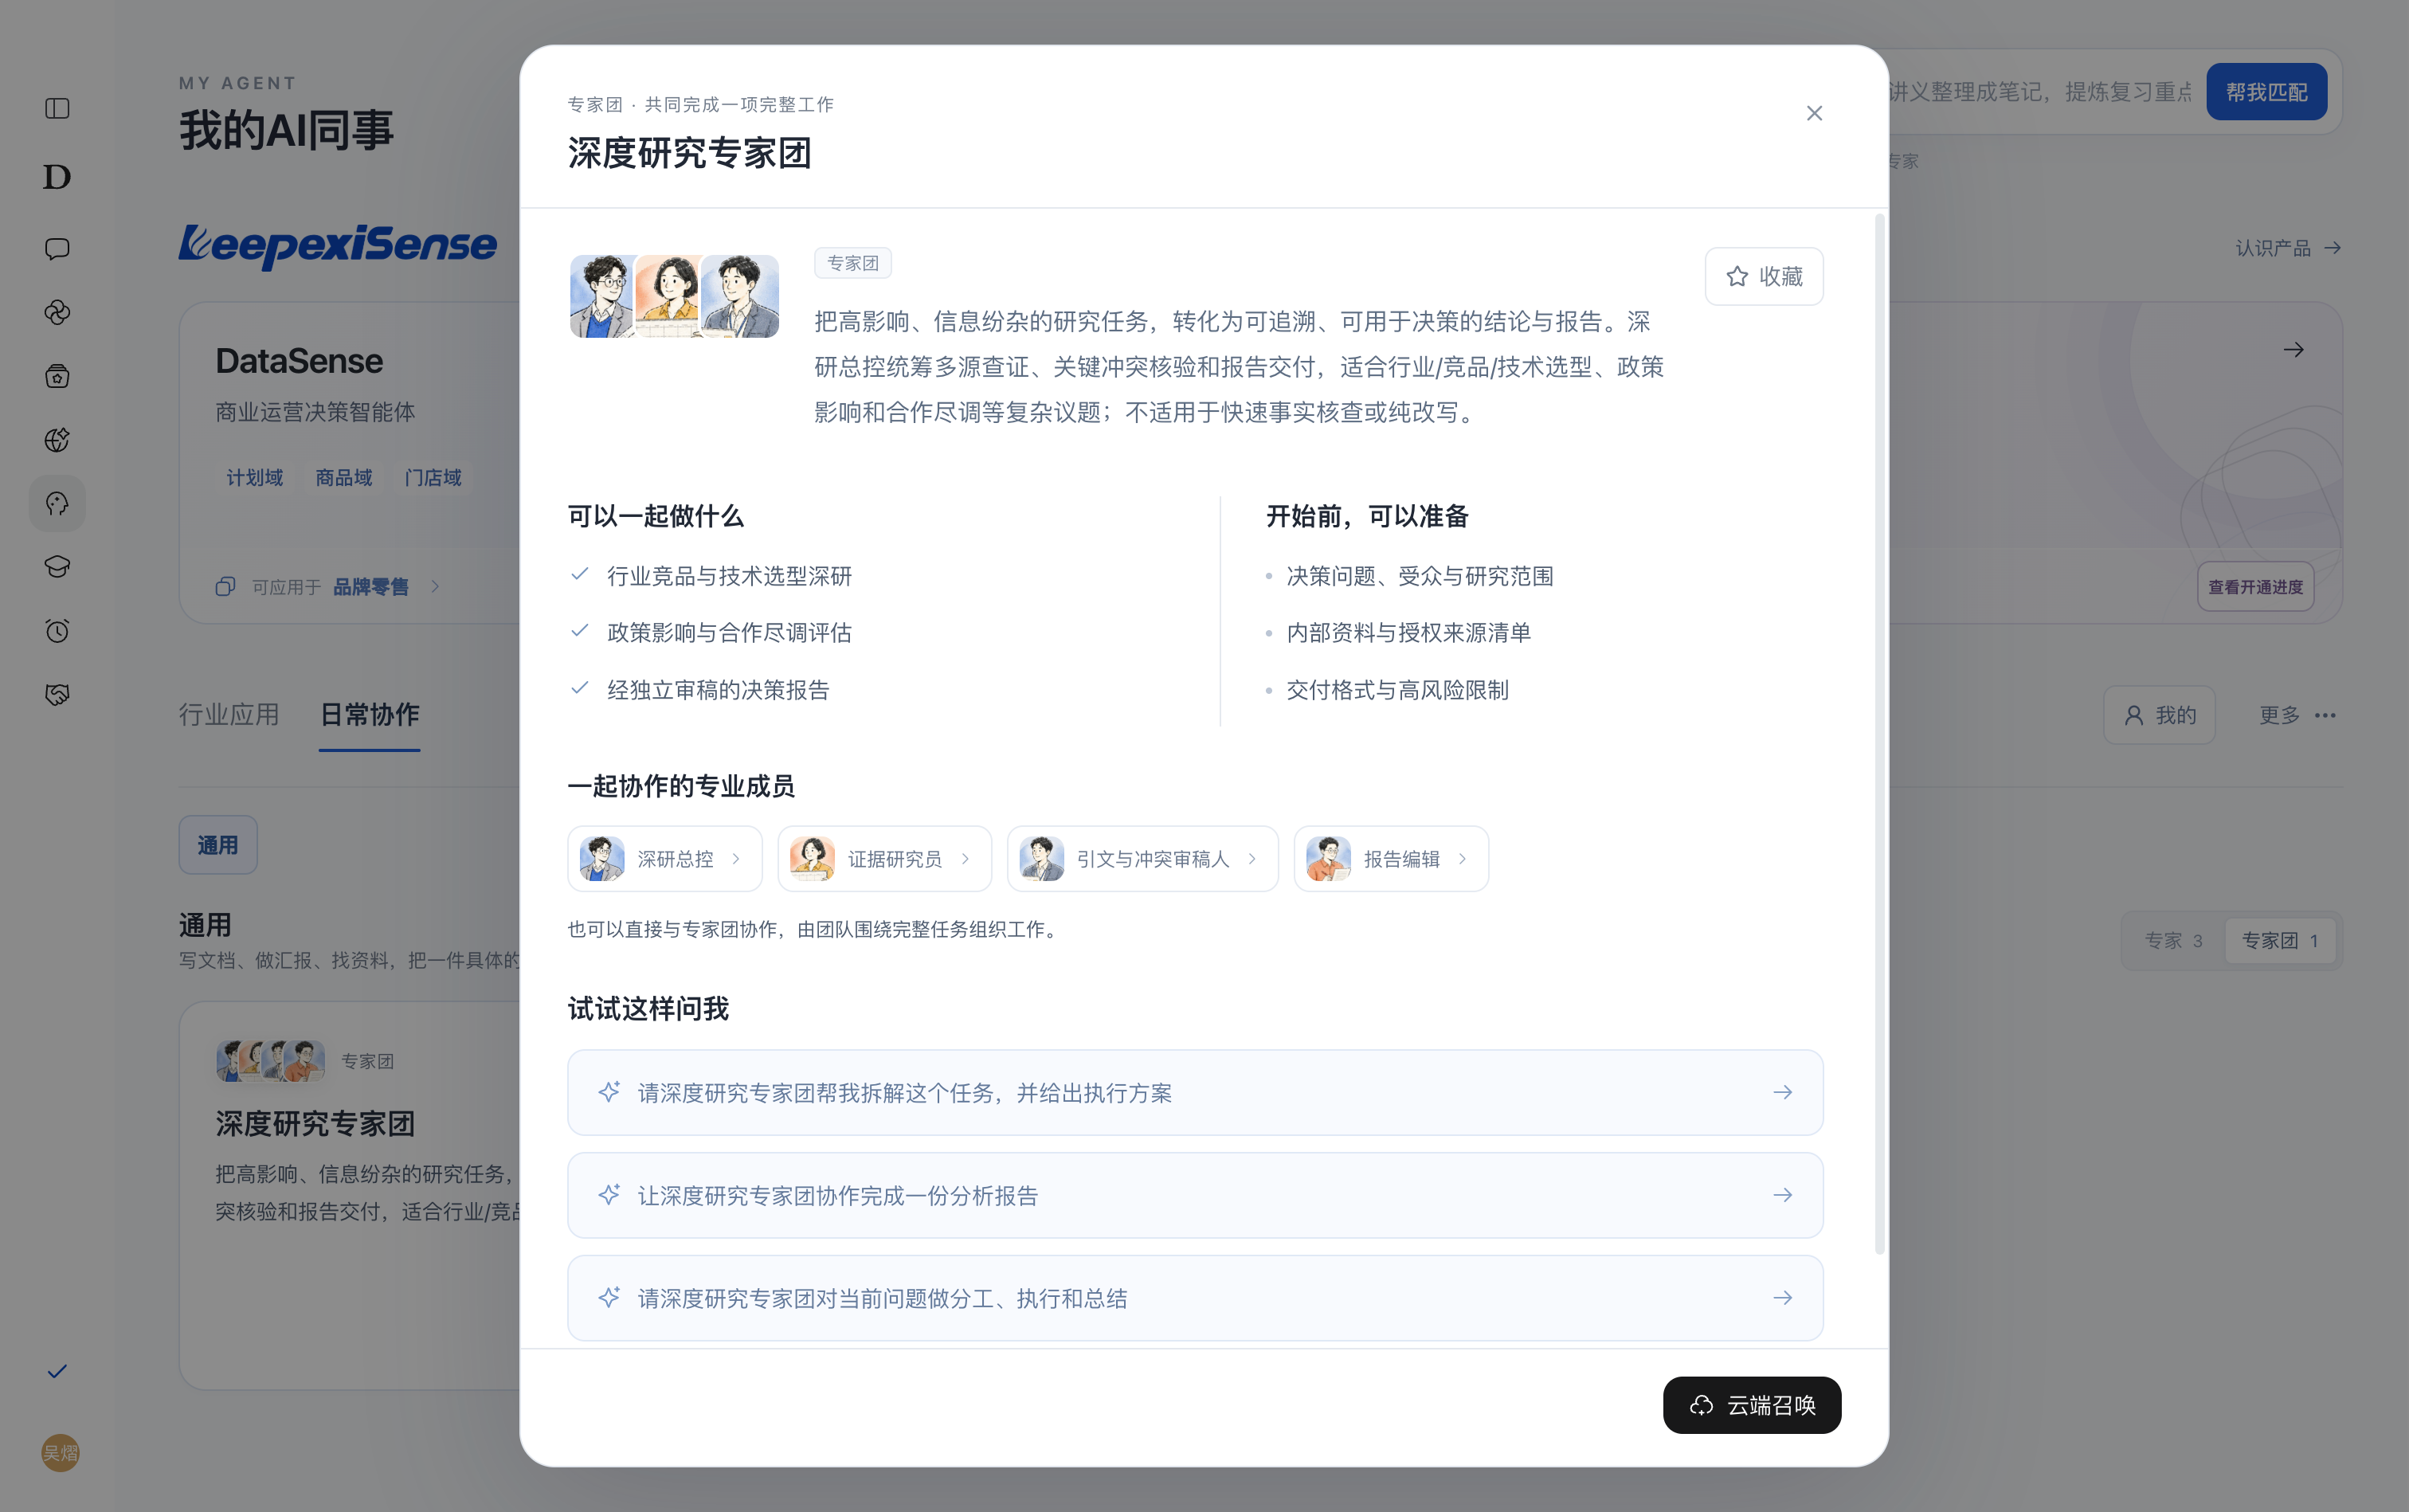
Available summon methods depend on the colleague’s details. Check whether you are using Summon Locally or Summon in Cloud.
Favoriting AI Colleagues
Add frequently used Experts or Expert Teams to favorites.
- Find a colleague in a category list and click the star at the top right of the card.
- Alternatively, open the Expert or Expert Team details and click
Favoriteat the top right.
SKILL
Skill Hub
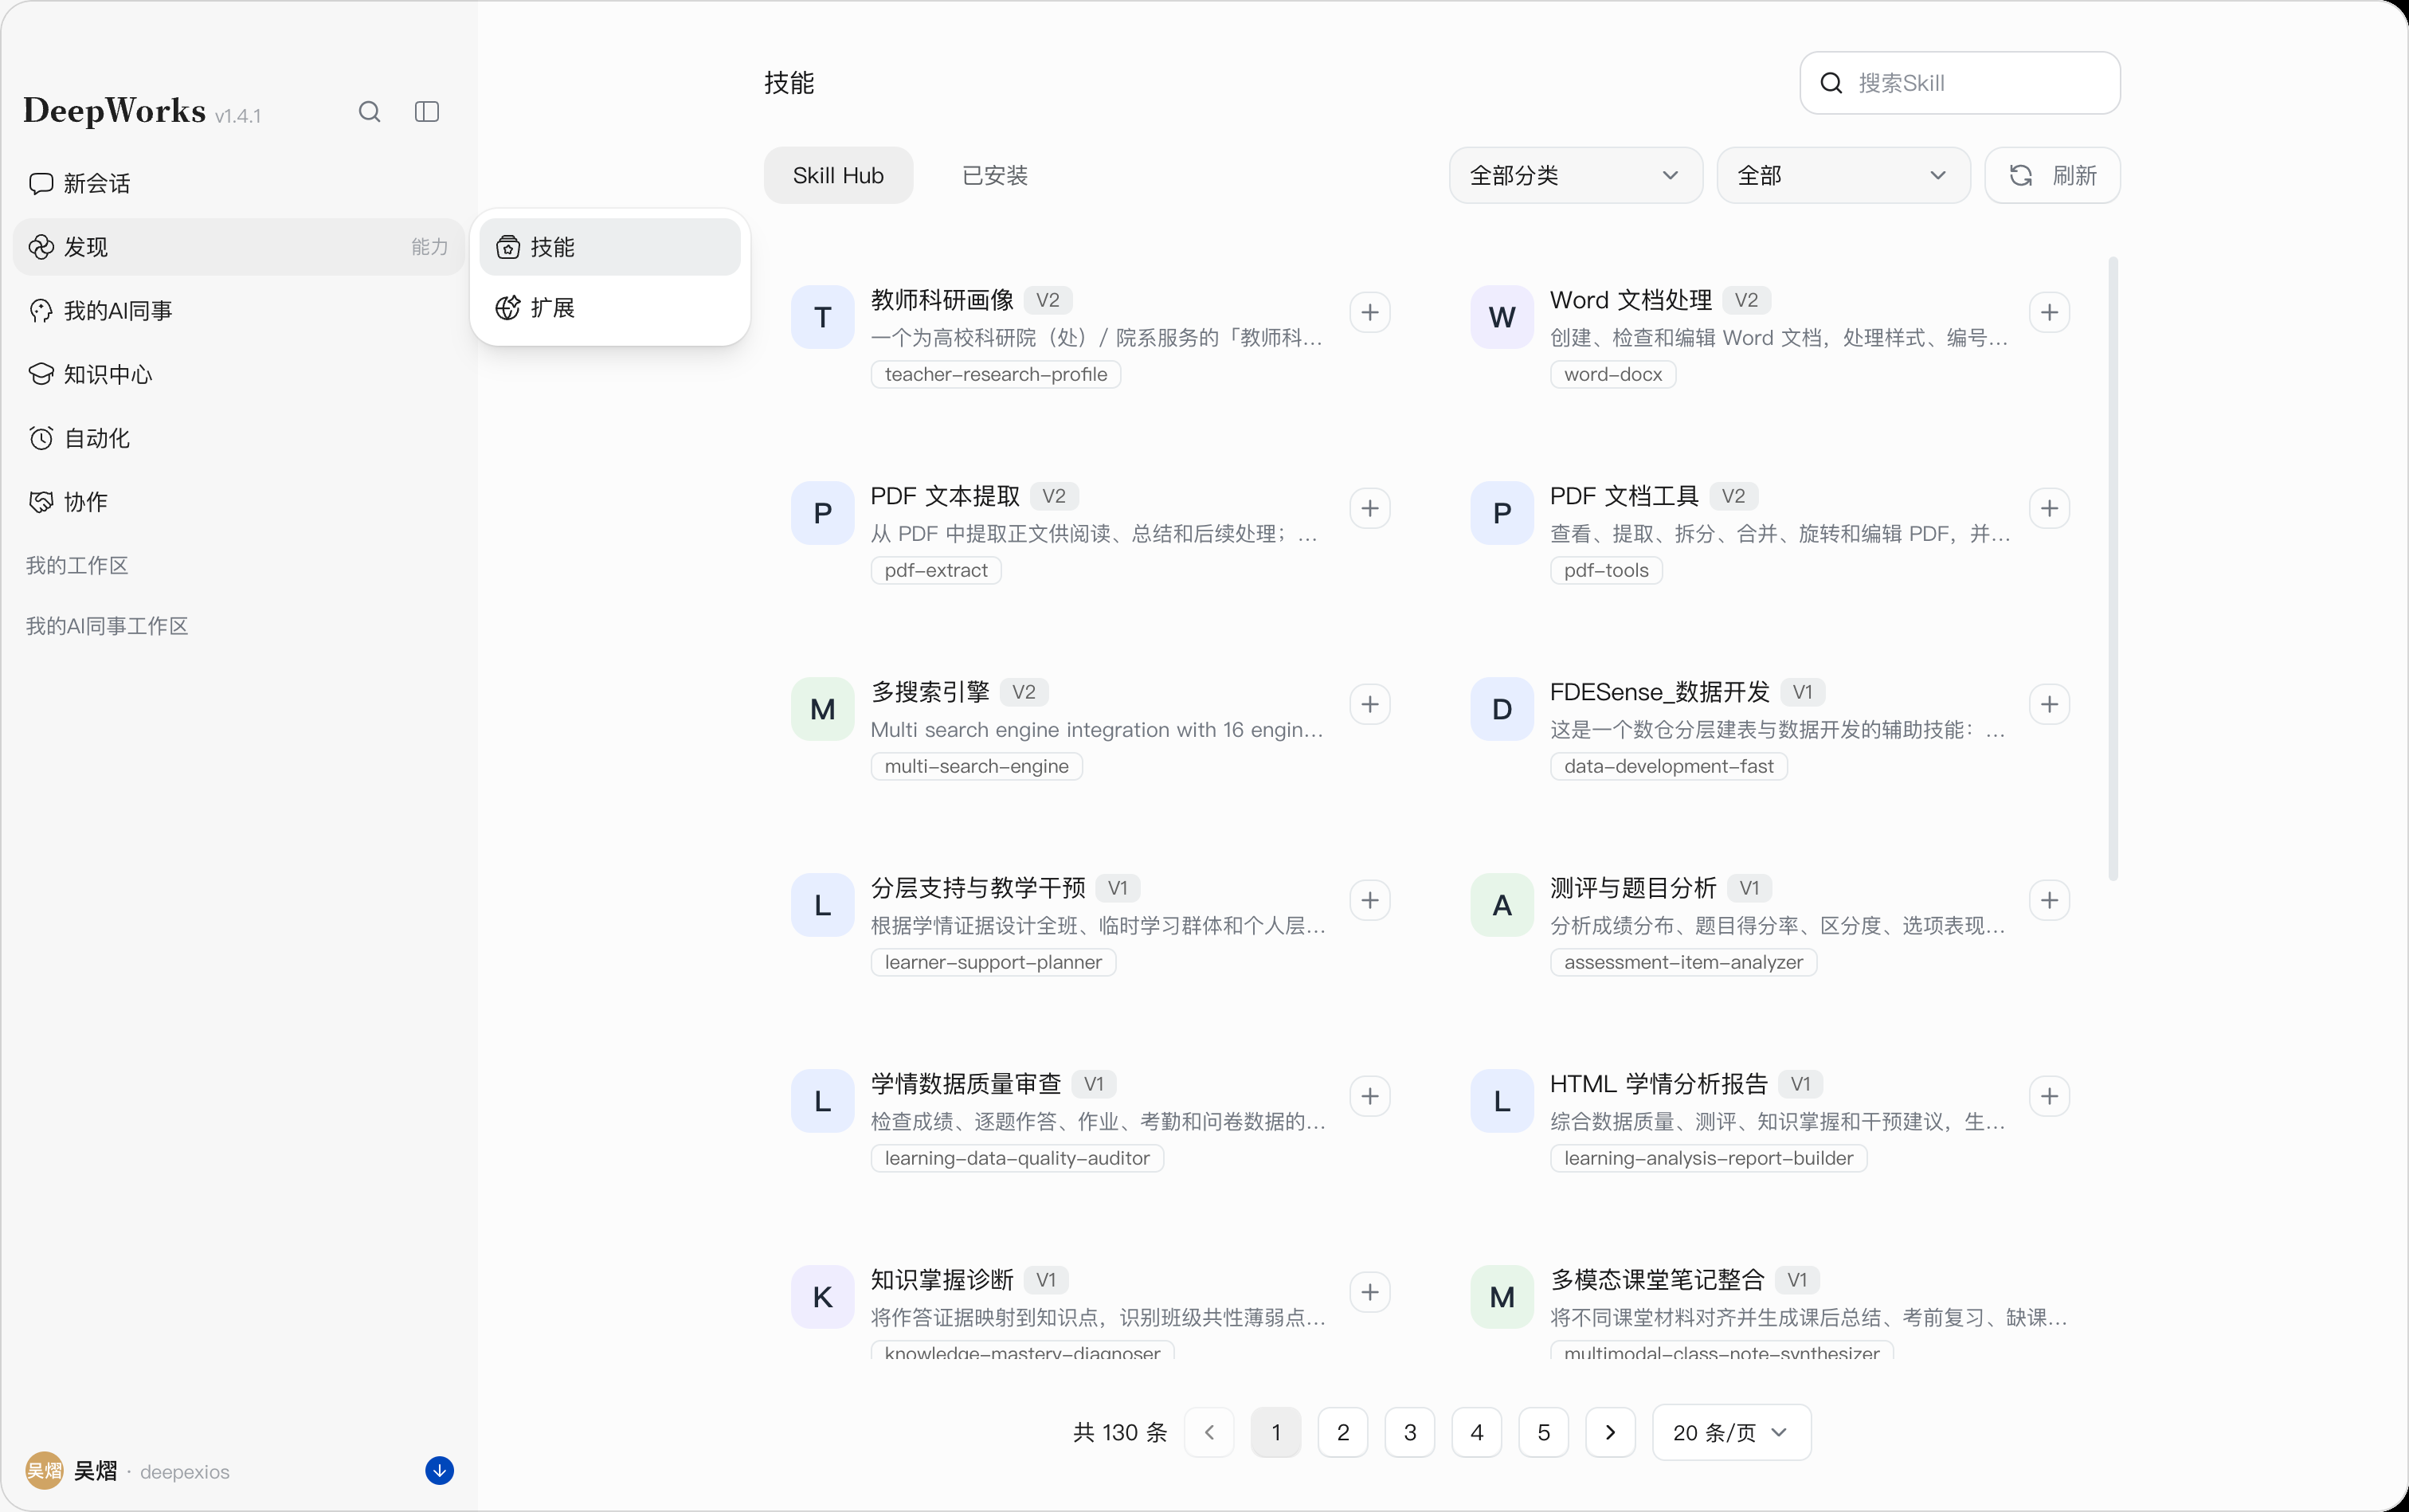
Skill Hub is used to find and install Skills provided by the enterprise or the system, helping users supplement the capabilities needed for tasks such as document processing and data analysis.
Path: Left sidebarDiscover →Skills →Skill Hub.
Finding Skills
- Enter Skill Hub, browse the available Skills, and determine whether they meet your task needs based on the name, function description, version, and Skill identifier.
- Enter keywords in the Search Skills input box to find the target Skill.
- To narrow the scope, use All Categories to filter by Skill category, or use the installation status filter to select All,Not Installed, orInstalled.
- When there are many Skills, use the page numbers or paging buttons at the bottom of the list to continue browsing, or adjust the number of items displayed per page.
Installing Skills
After finding the Skill you need, click + on the right side of the Skill to start the installation, and follow the on-screen instructions to complete the operation. Before installing, read the Skill description and confirm its purpose and the file, network, external service, and data permissions it requires.
After installation, switch to Installed to view and manage Skills. For details, see6.2 Managing Installed Skills.
To retrieve the Skill list again, click Refresh.
Managing Installed Skills
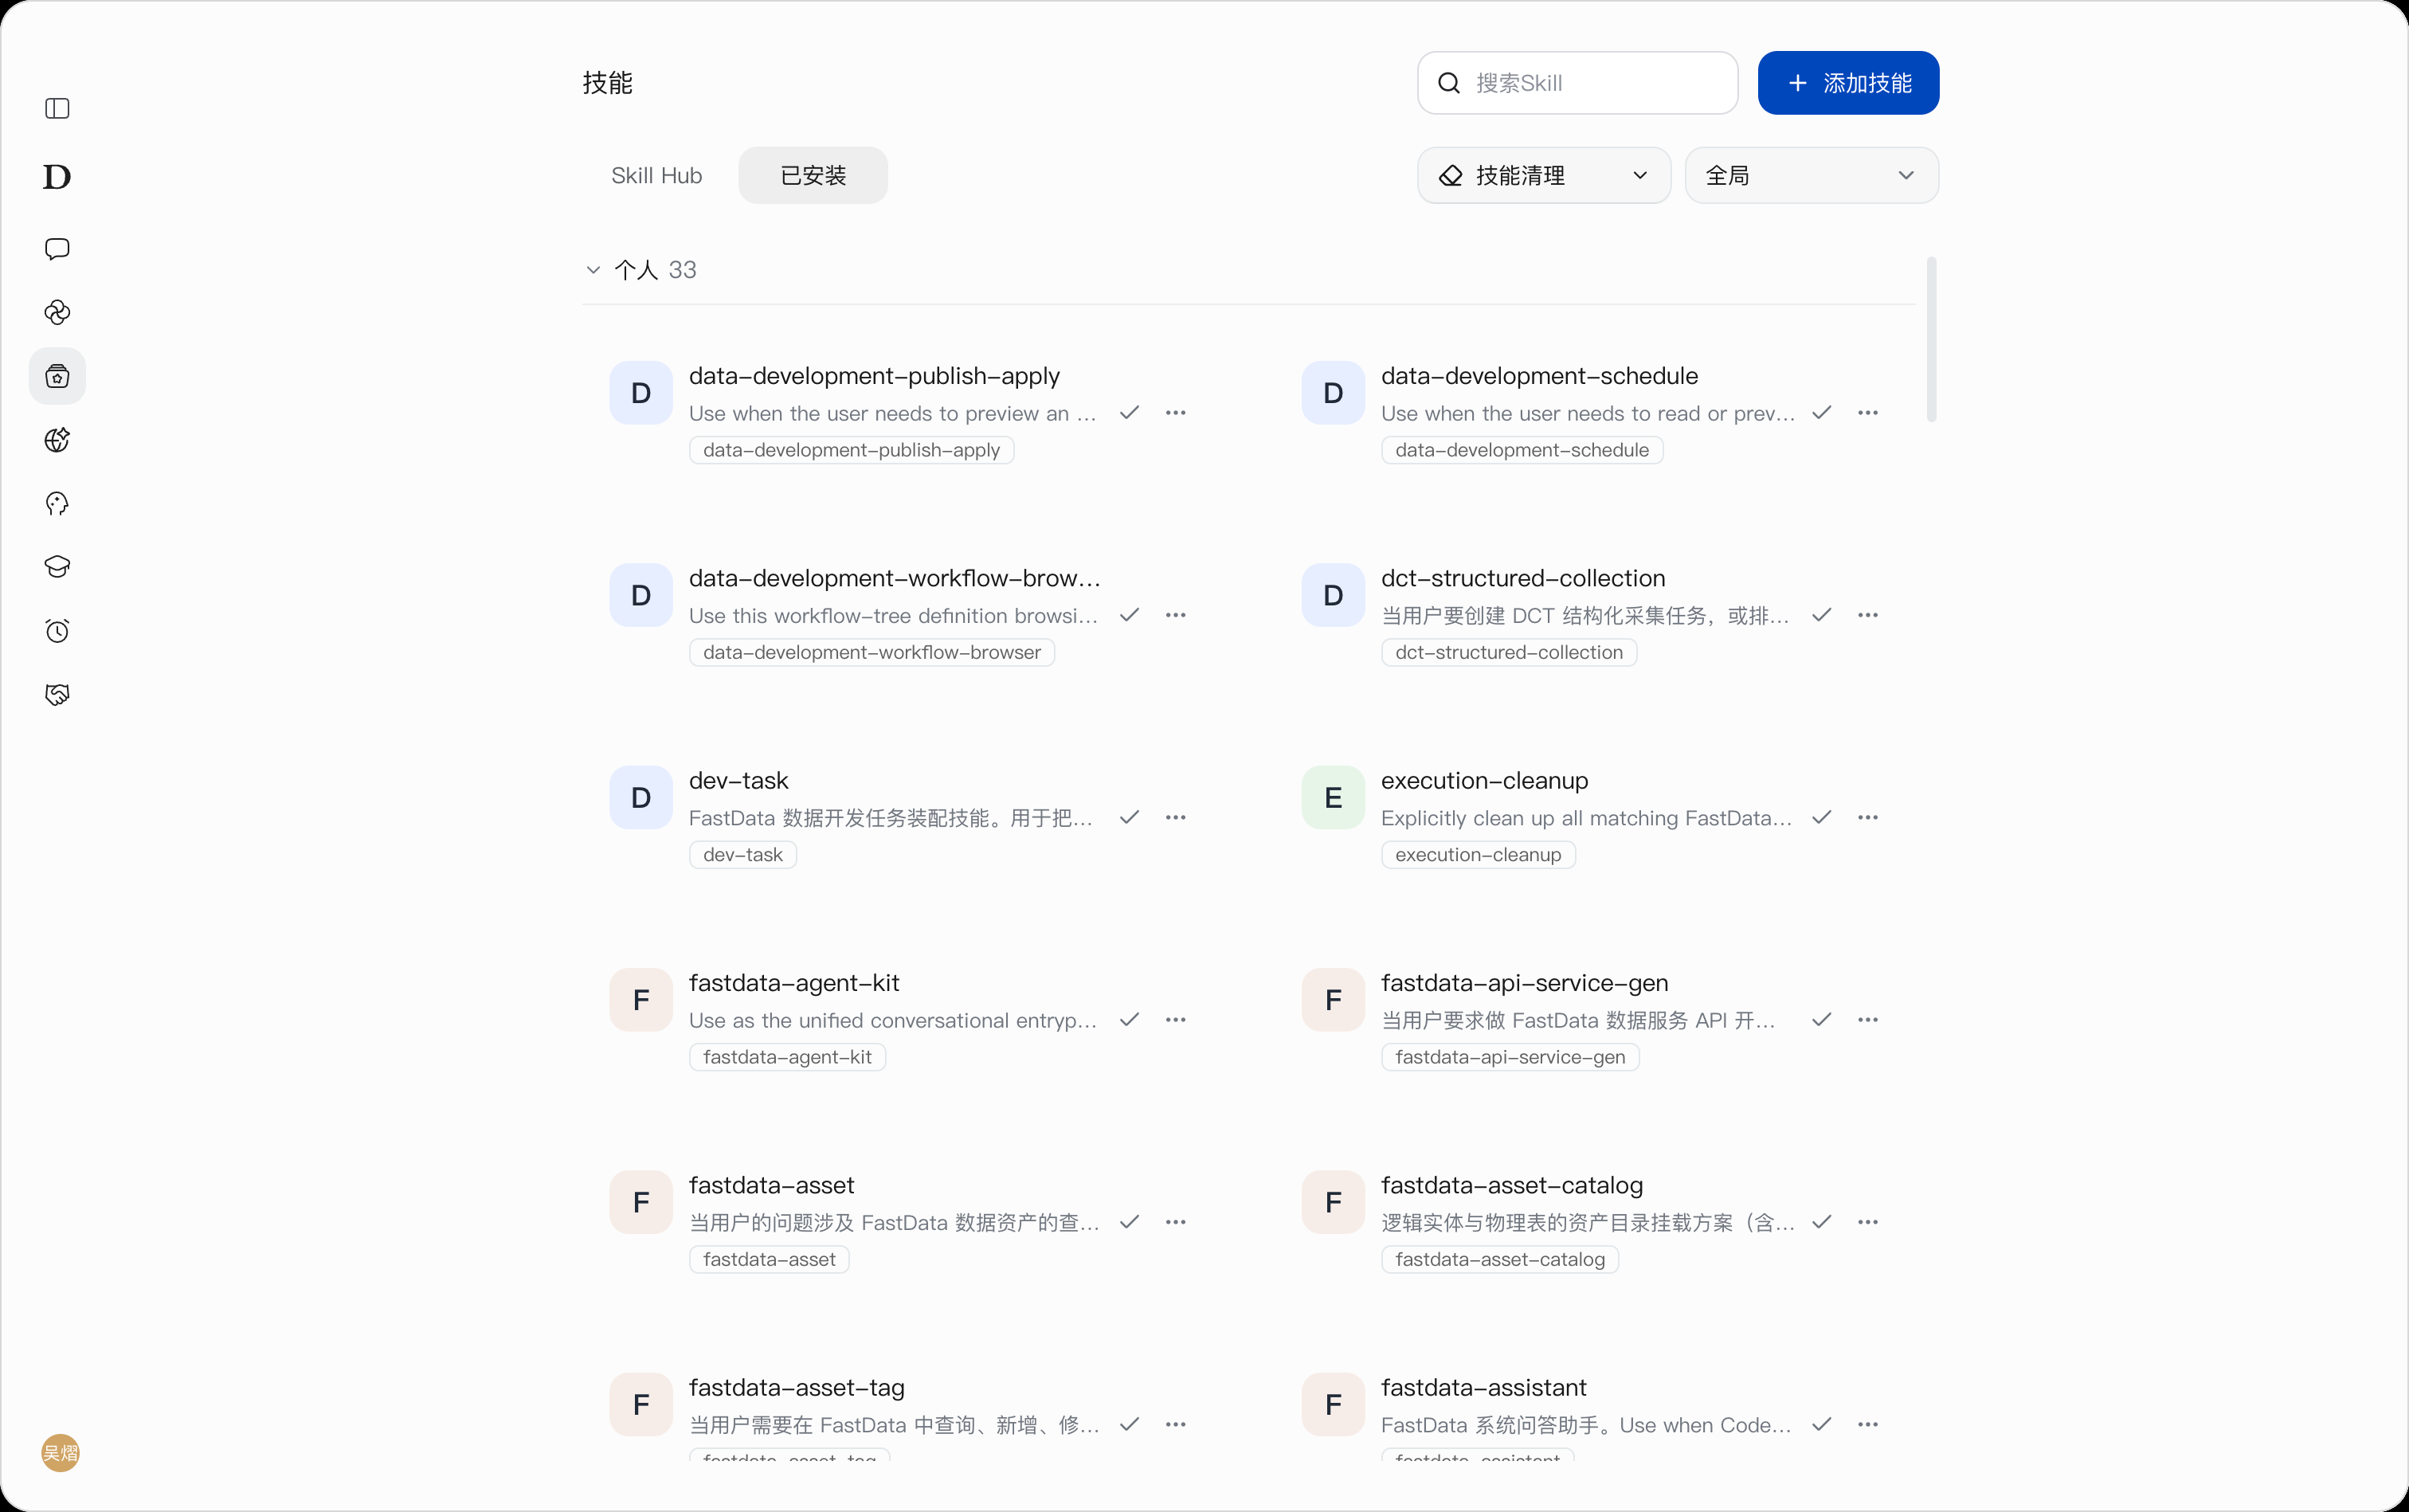
Switch to Installed to view the currently installed Skills by source: system, personal, and Skill Hub.
-
System Skills: Provided uniformly by the enterprise or the system;
-
Personal Skills: Installed or created by the current user;
-
Skill Hub Skills: Capabilities installed from Skill Hub.
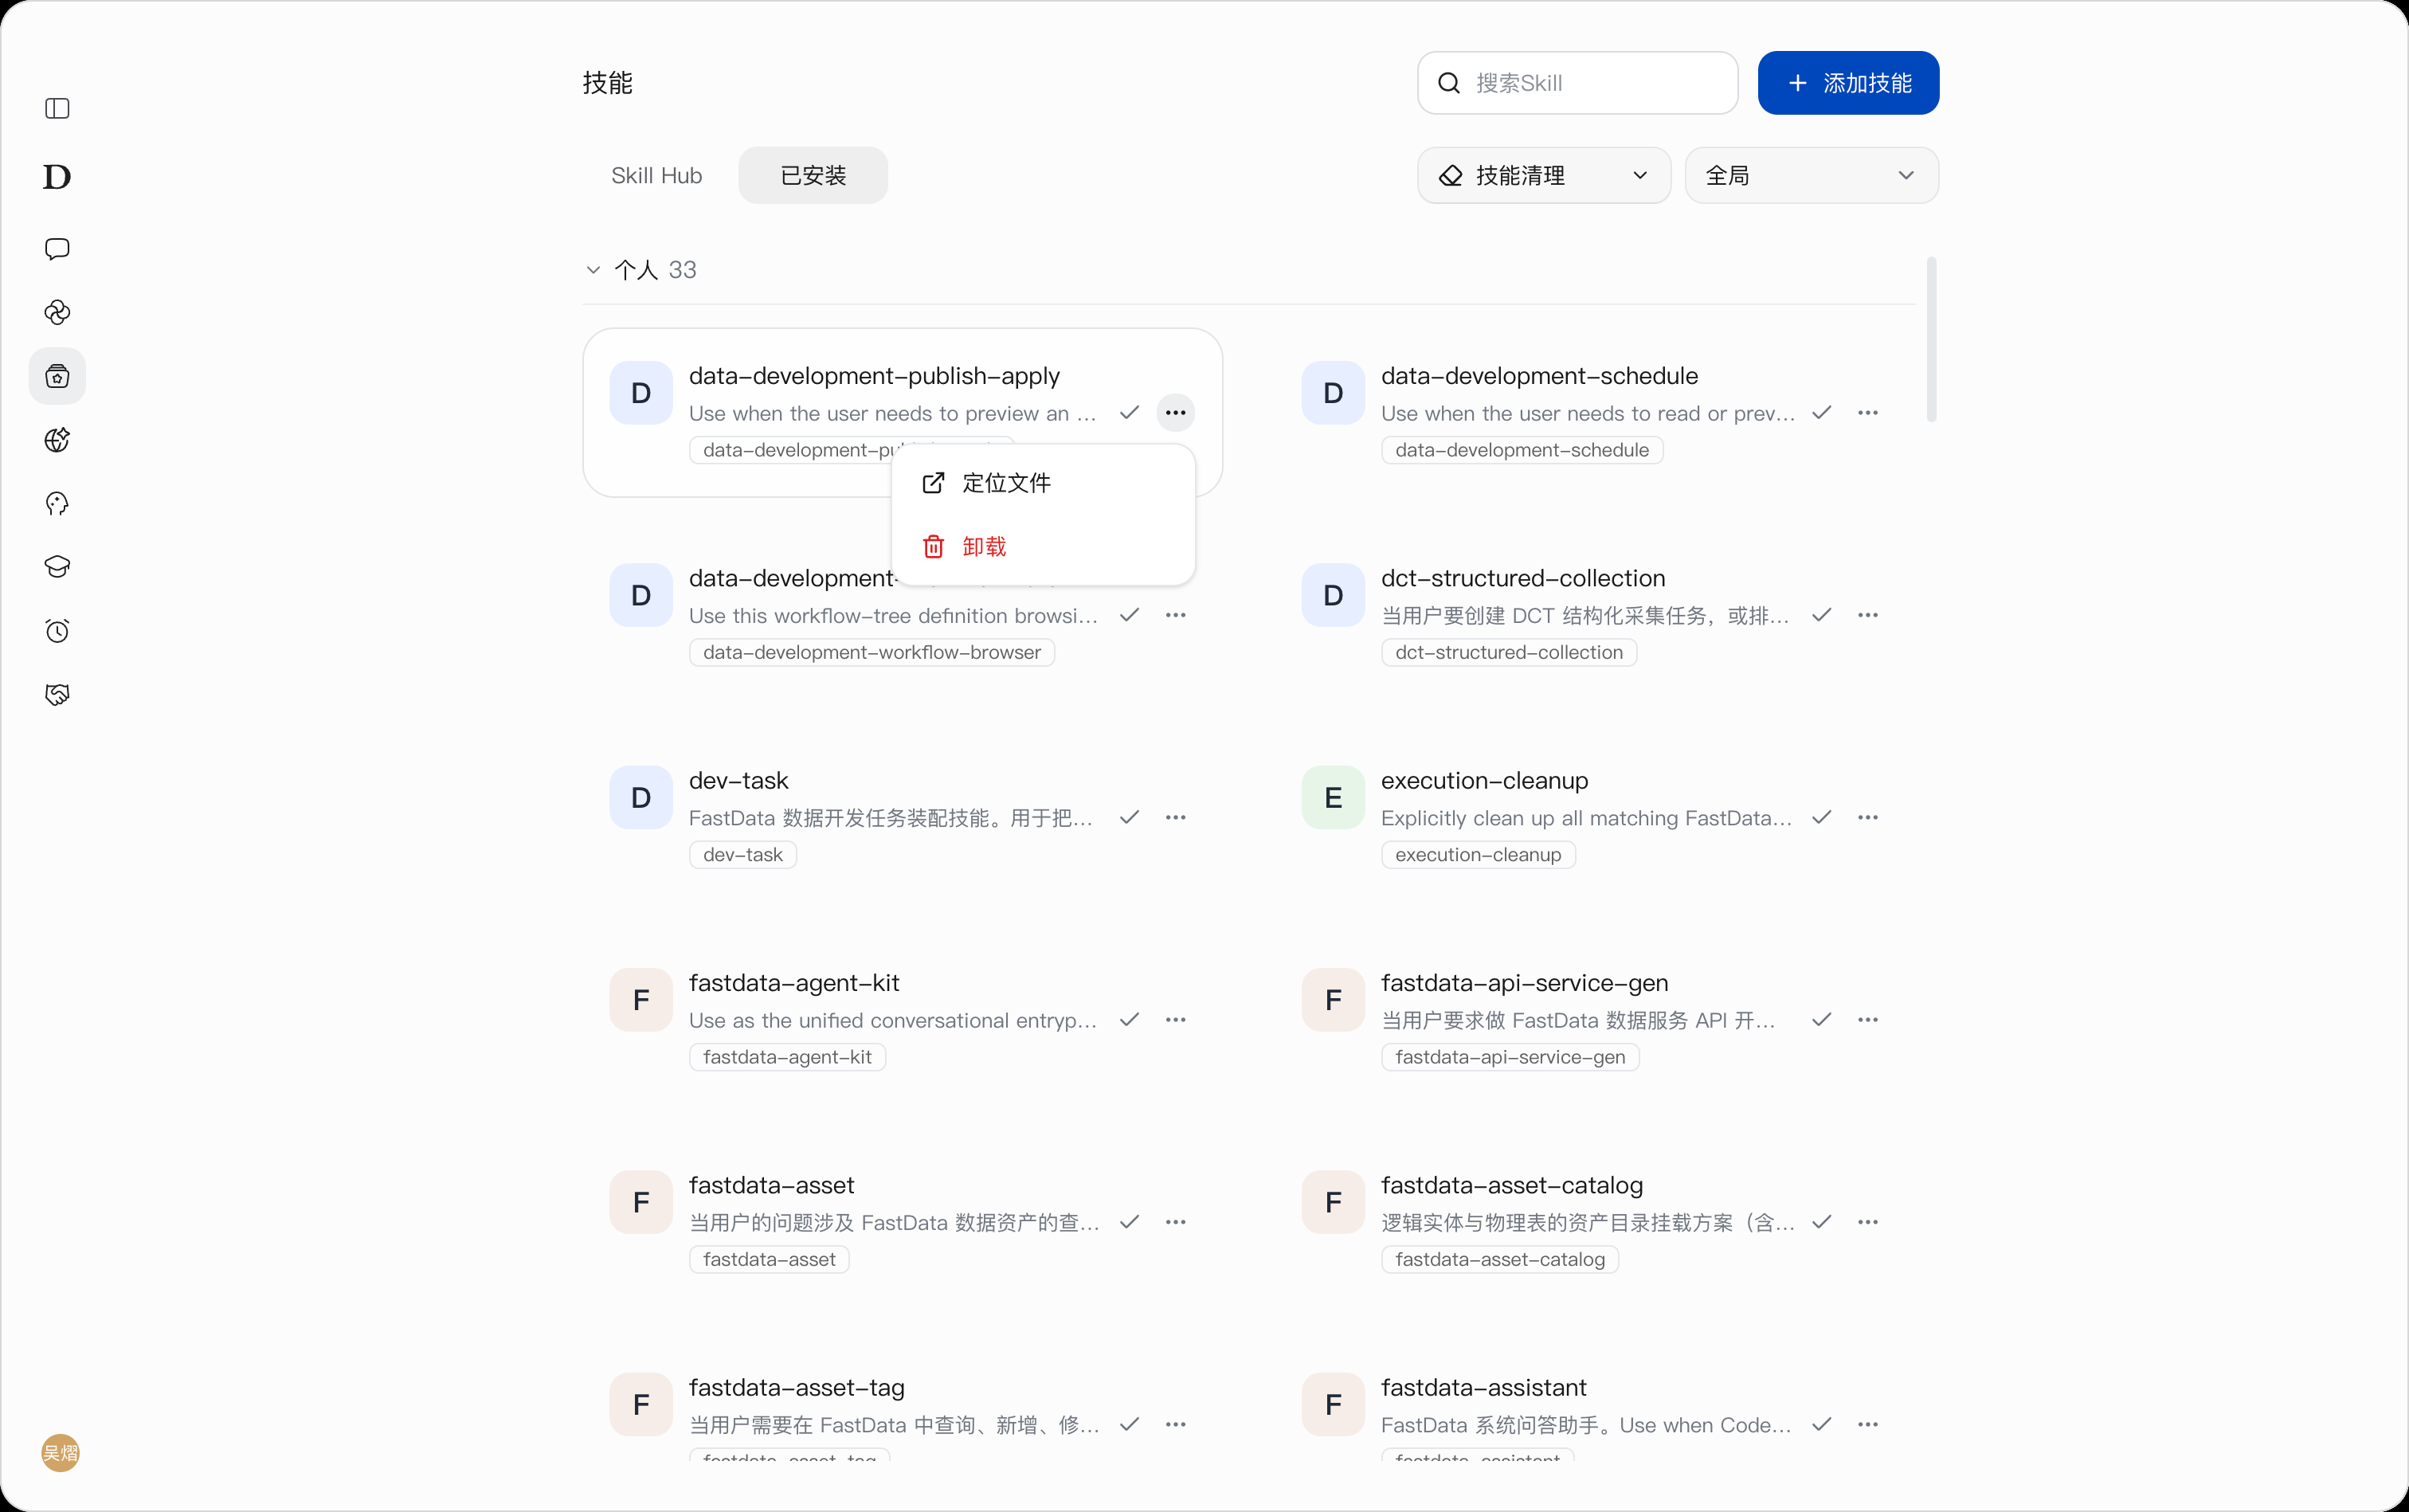
Click the more actions menu of a Skill to locate its file or uninstall it. Before uninstalling, confirm whether the Skill is referenced by Automation tasks or daily workflows.
Adding Skills
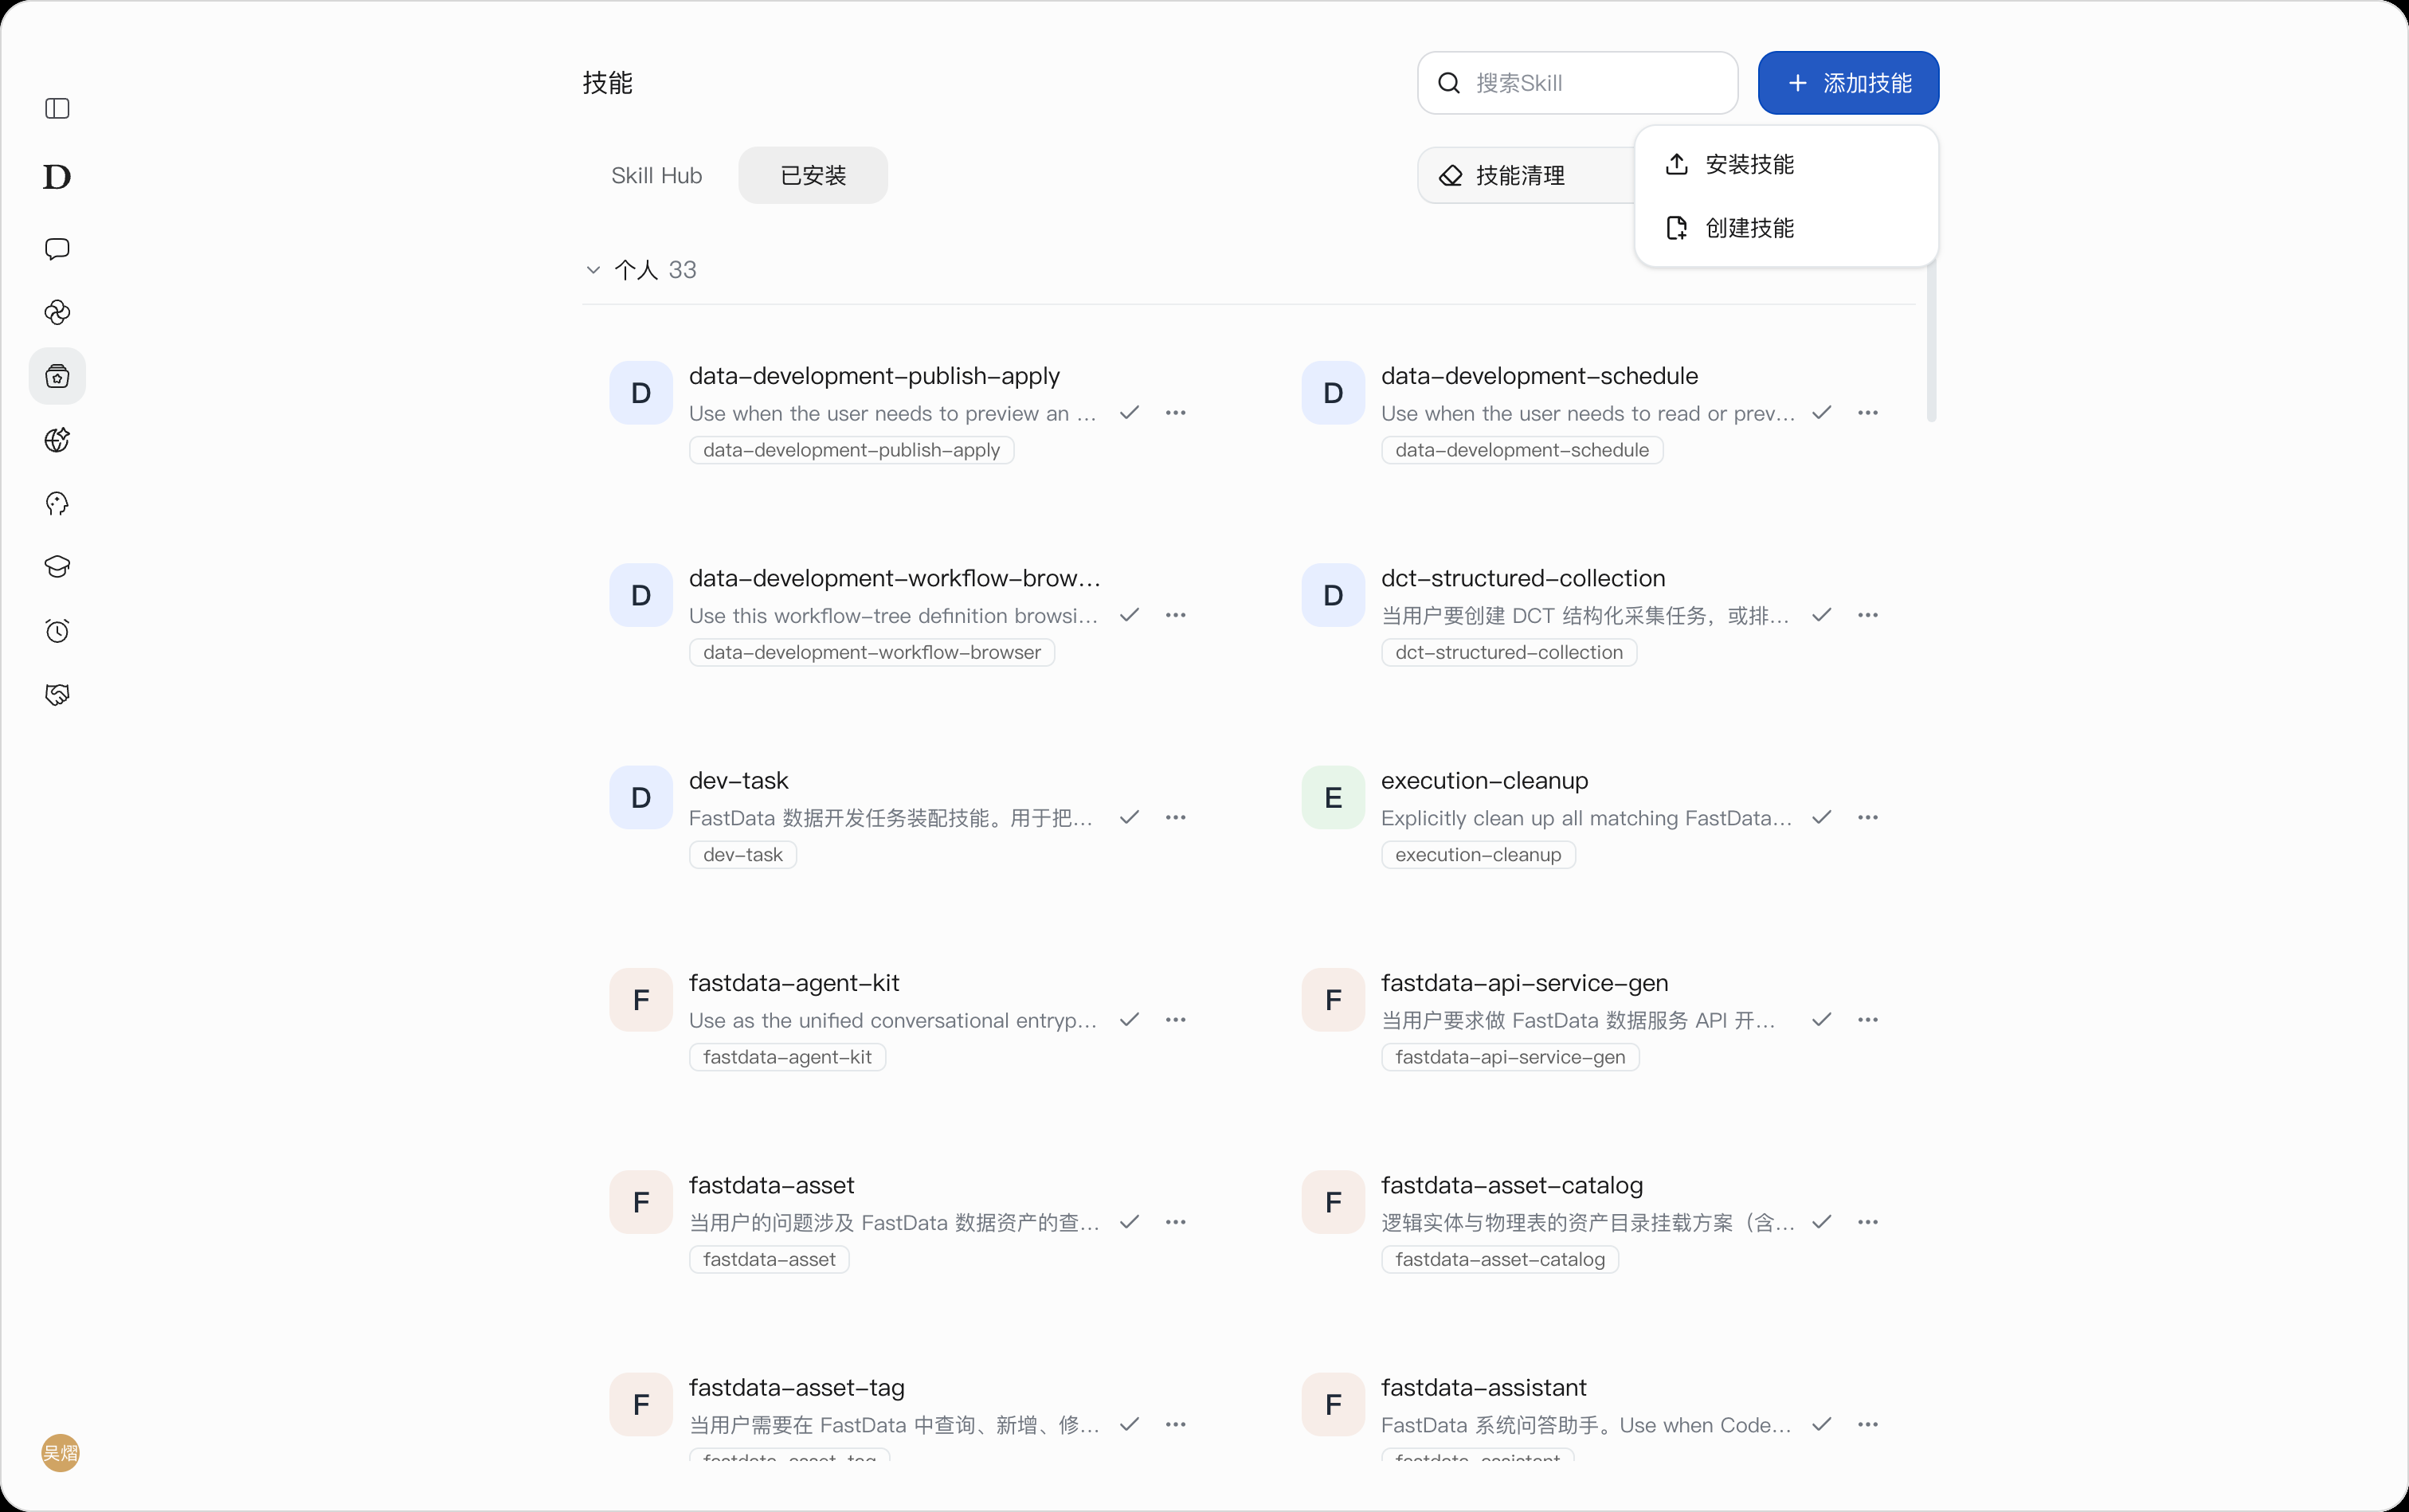
Click Add Skill to choose between installing a Skill or creating a Skill.
Creating a Skill
Click the create button to enter a session, where the skill-creator Skill is automatically invoked to create the Skill.
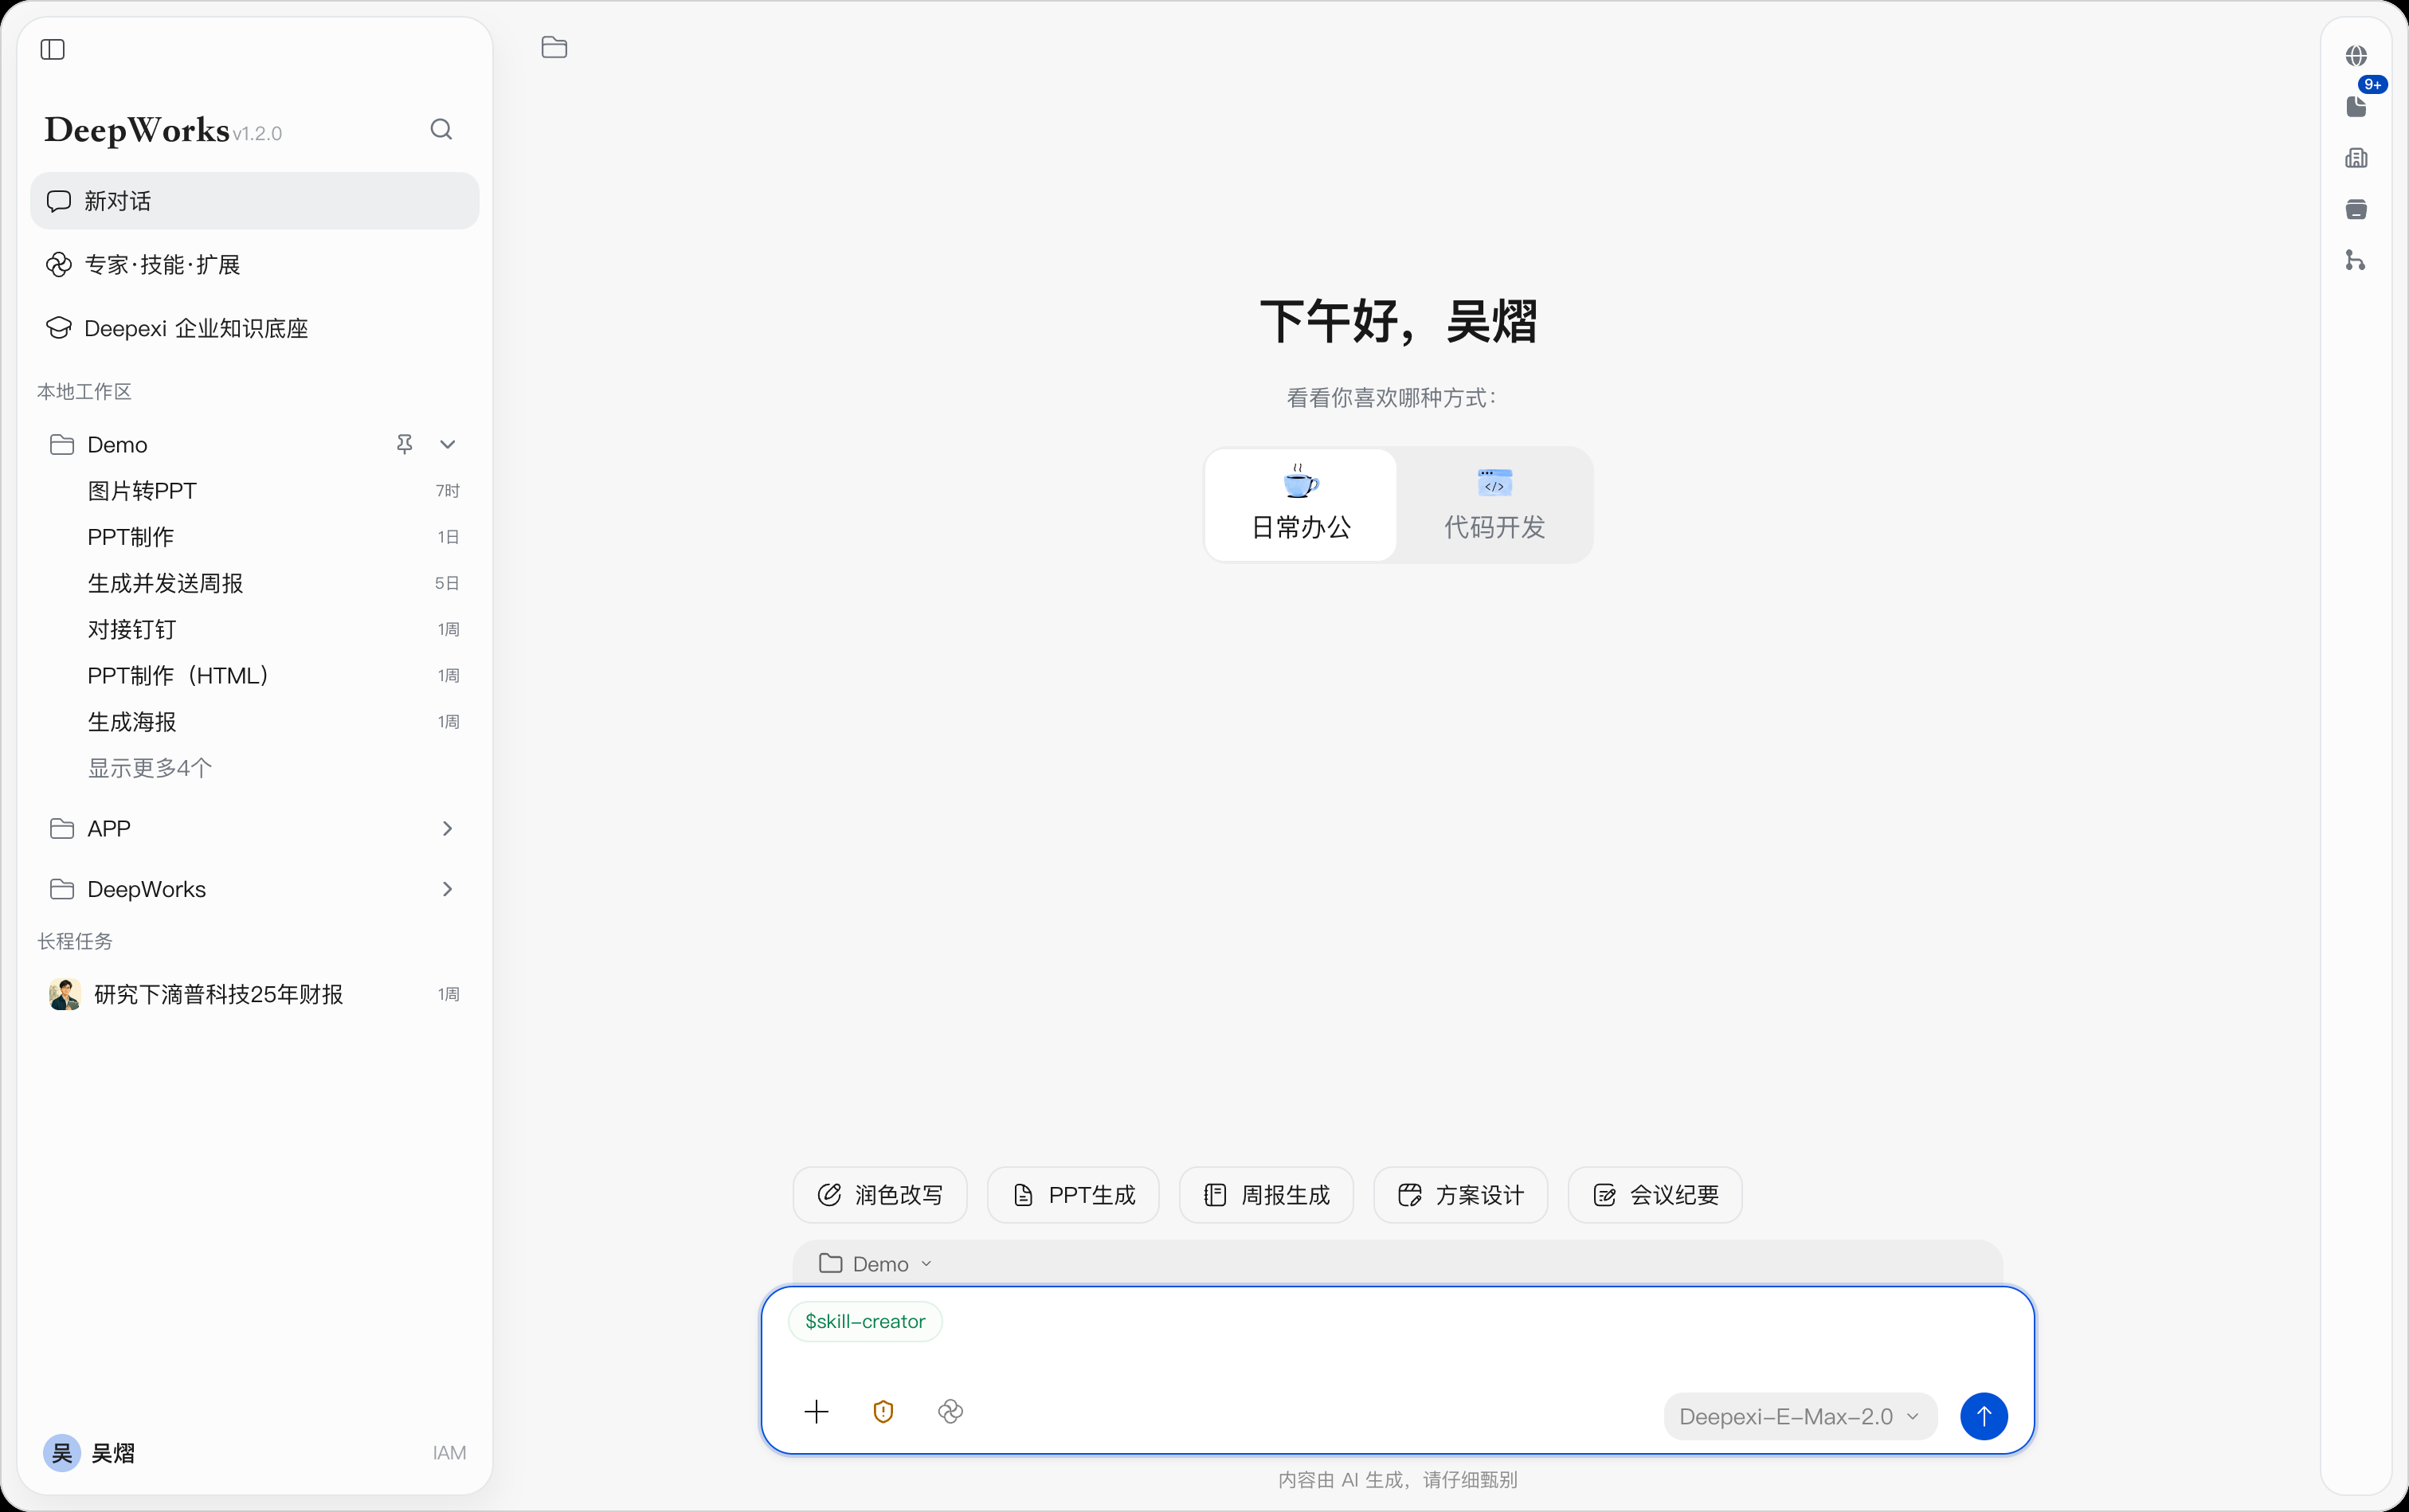
This is suitable for consolidating stable, repetitive working methods into reusable capabilities. When creating a Skill, clearly define its applicable scenarios, input materials, execution steps, output requirements, and security boundaries.
Installing a Skill
Click Install Skill to upload a Skill installation package, with support for installing it globally or to a specified workspace.
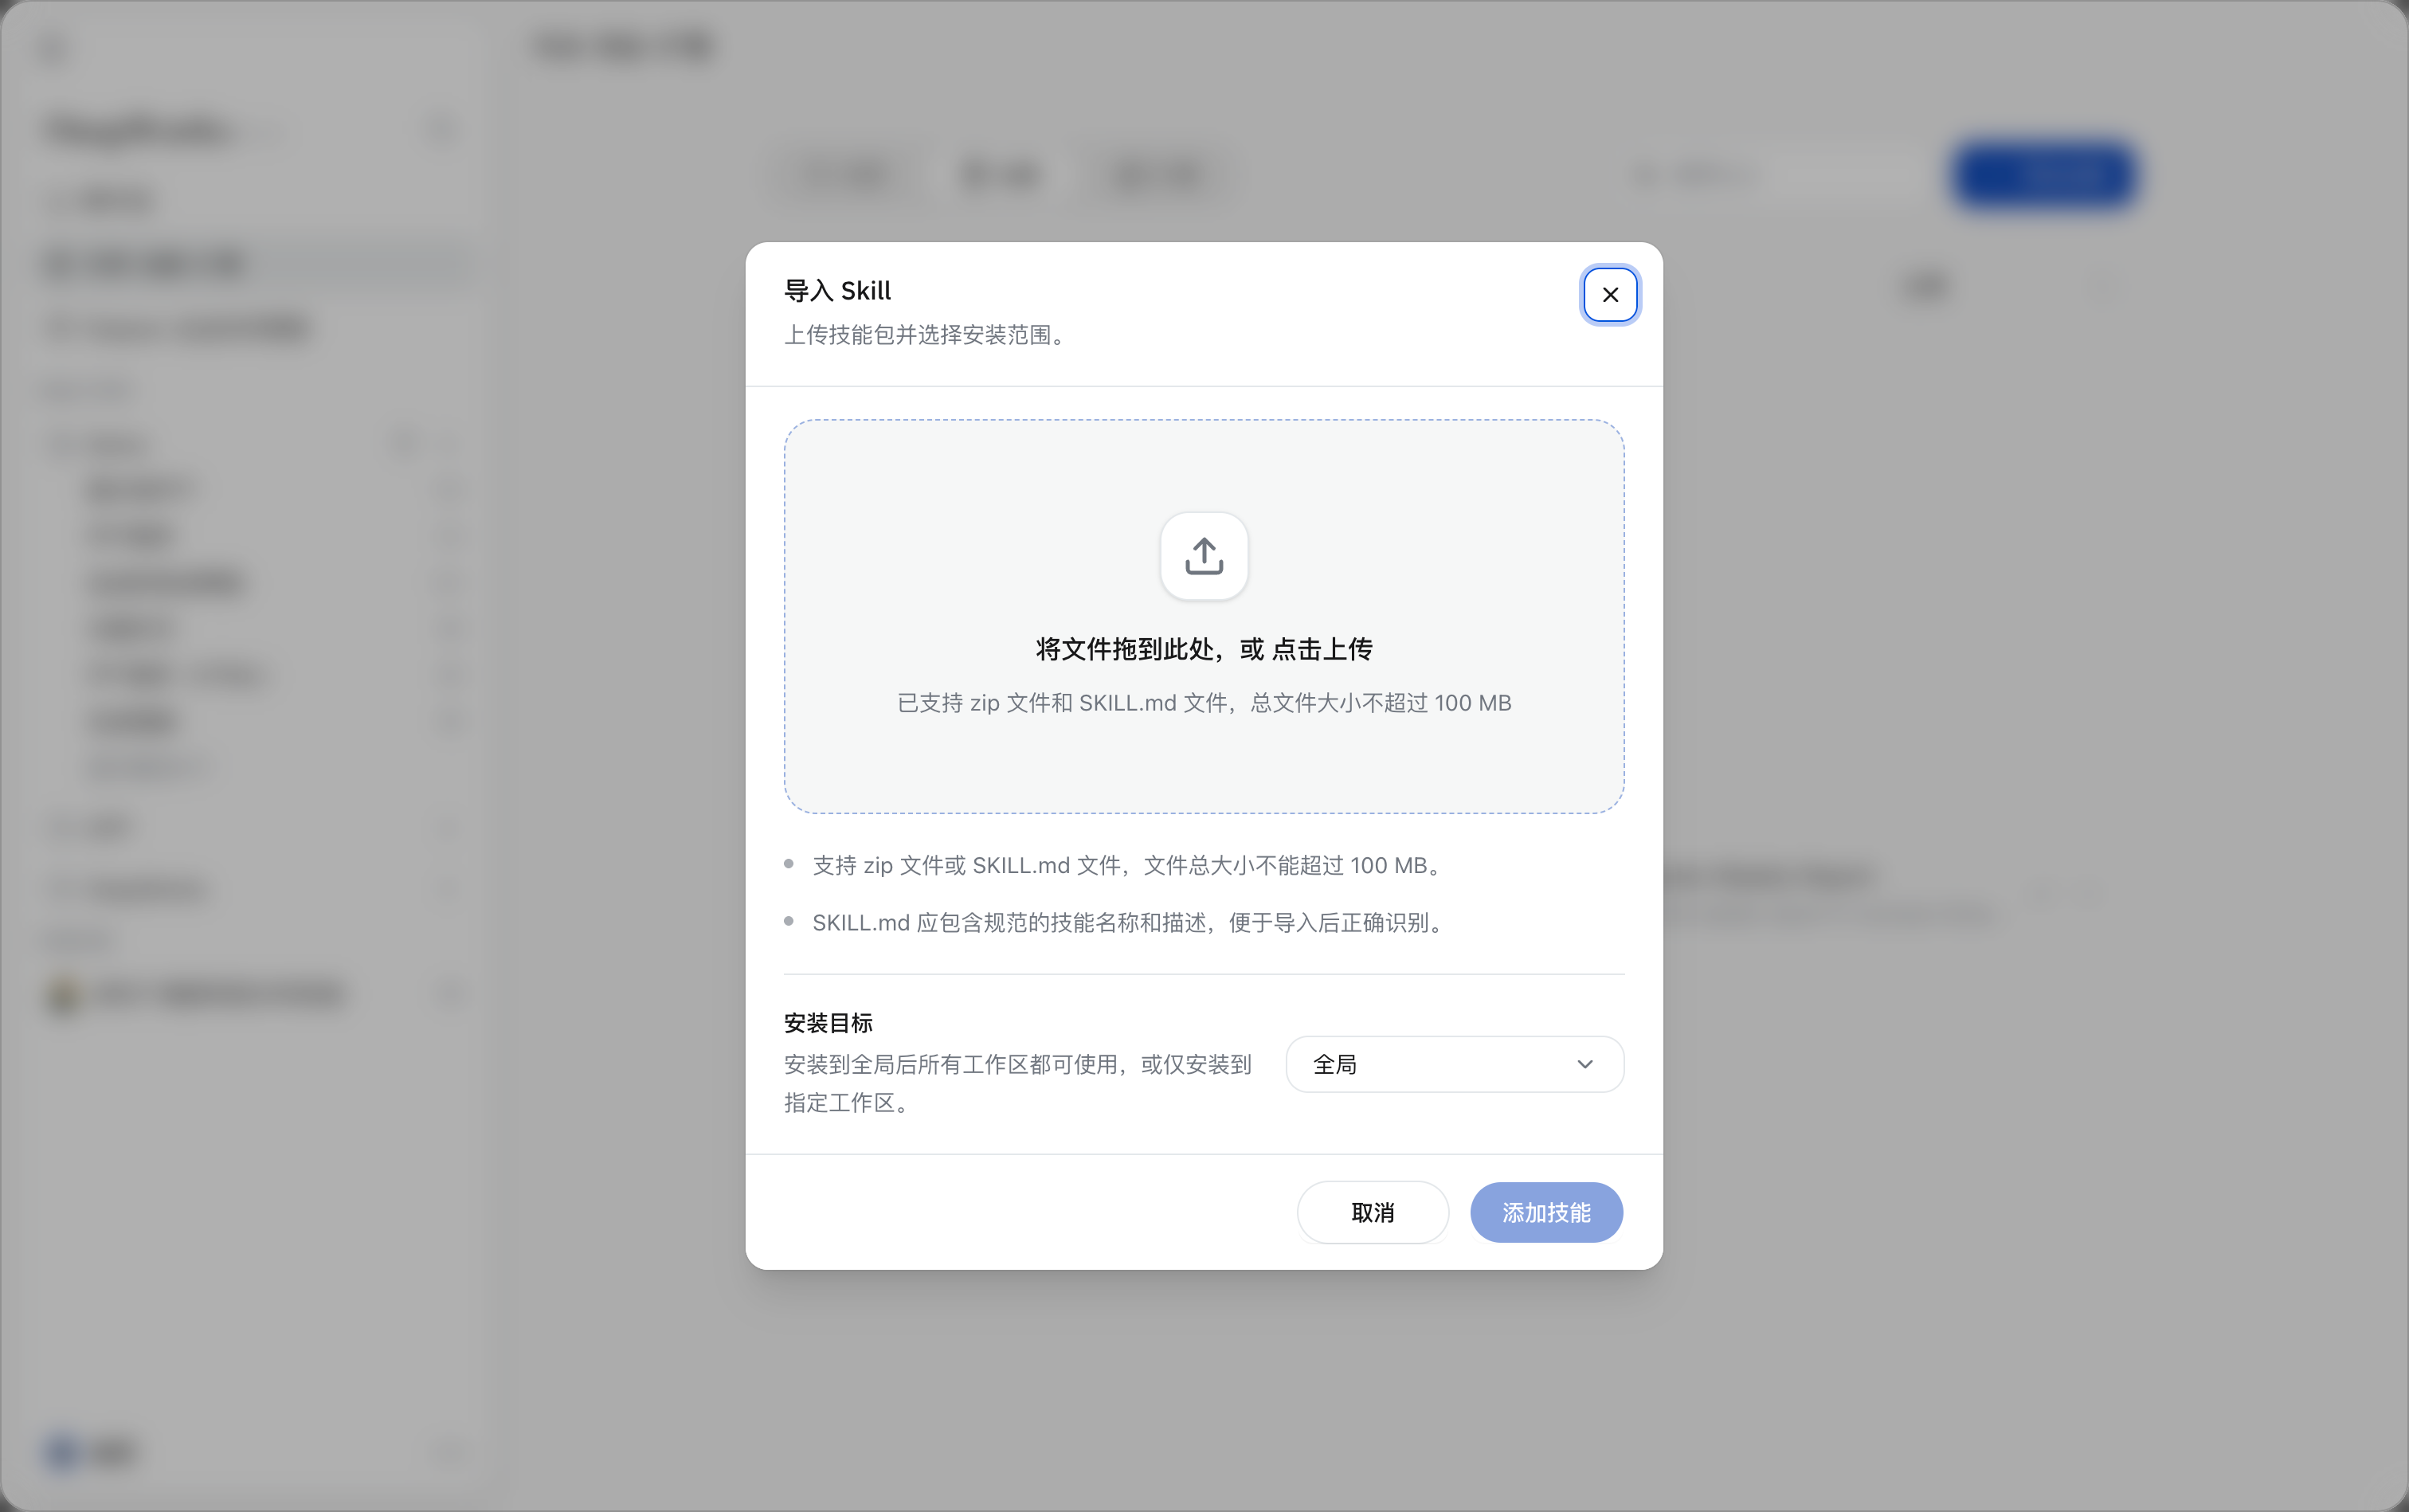 This is suitable for importing existing standard Skill packages. Before uploading, confirm that the source is trustworthy, the content is reviewable, and the package complies with enterprise security requirements.
Publishing Skills
You can submit local Skills to Skill Hub; after approval, they become available to other enterprise members. You can publish manually via the Skill management page, or initiate publishing in a session.
Publishing a Skill Manually
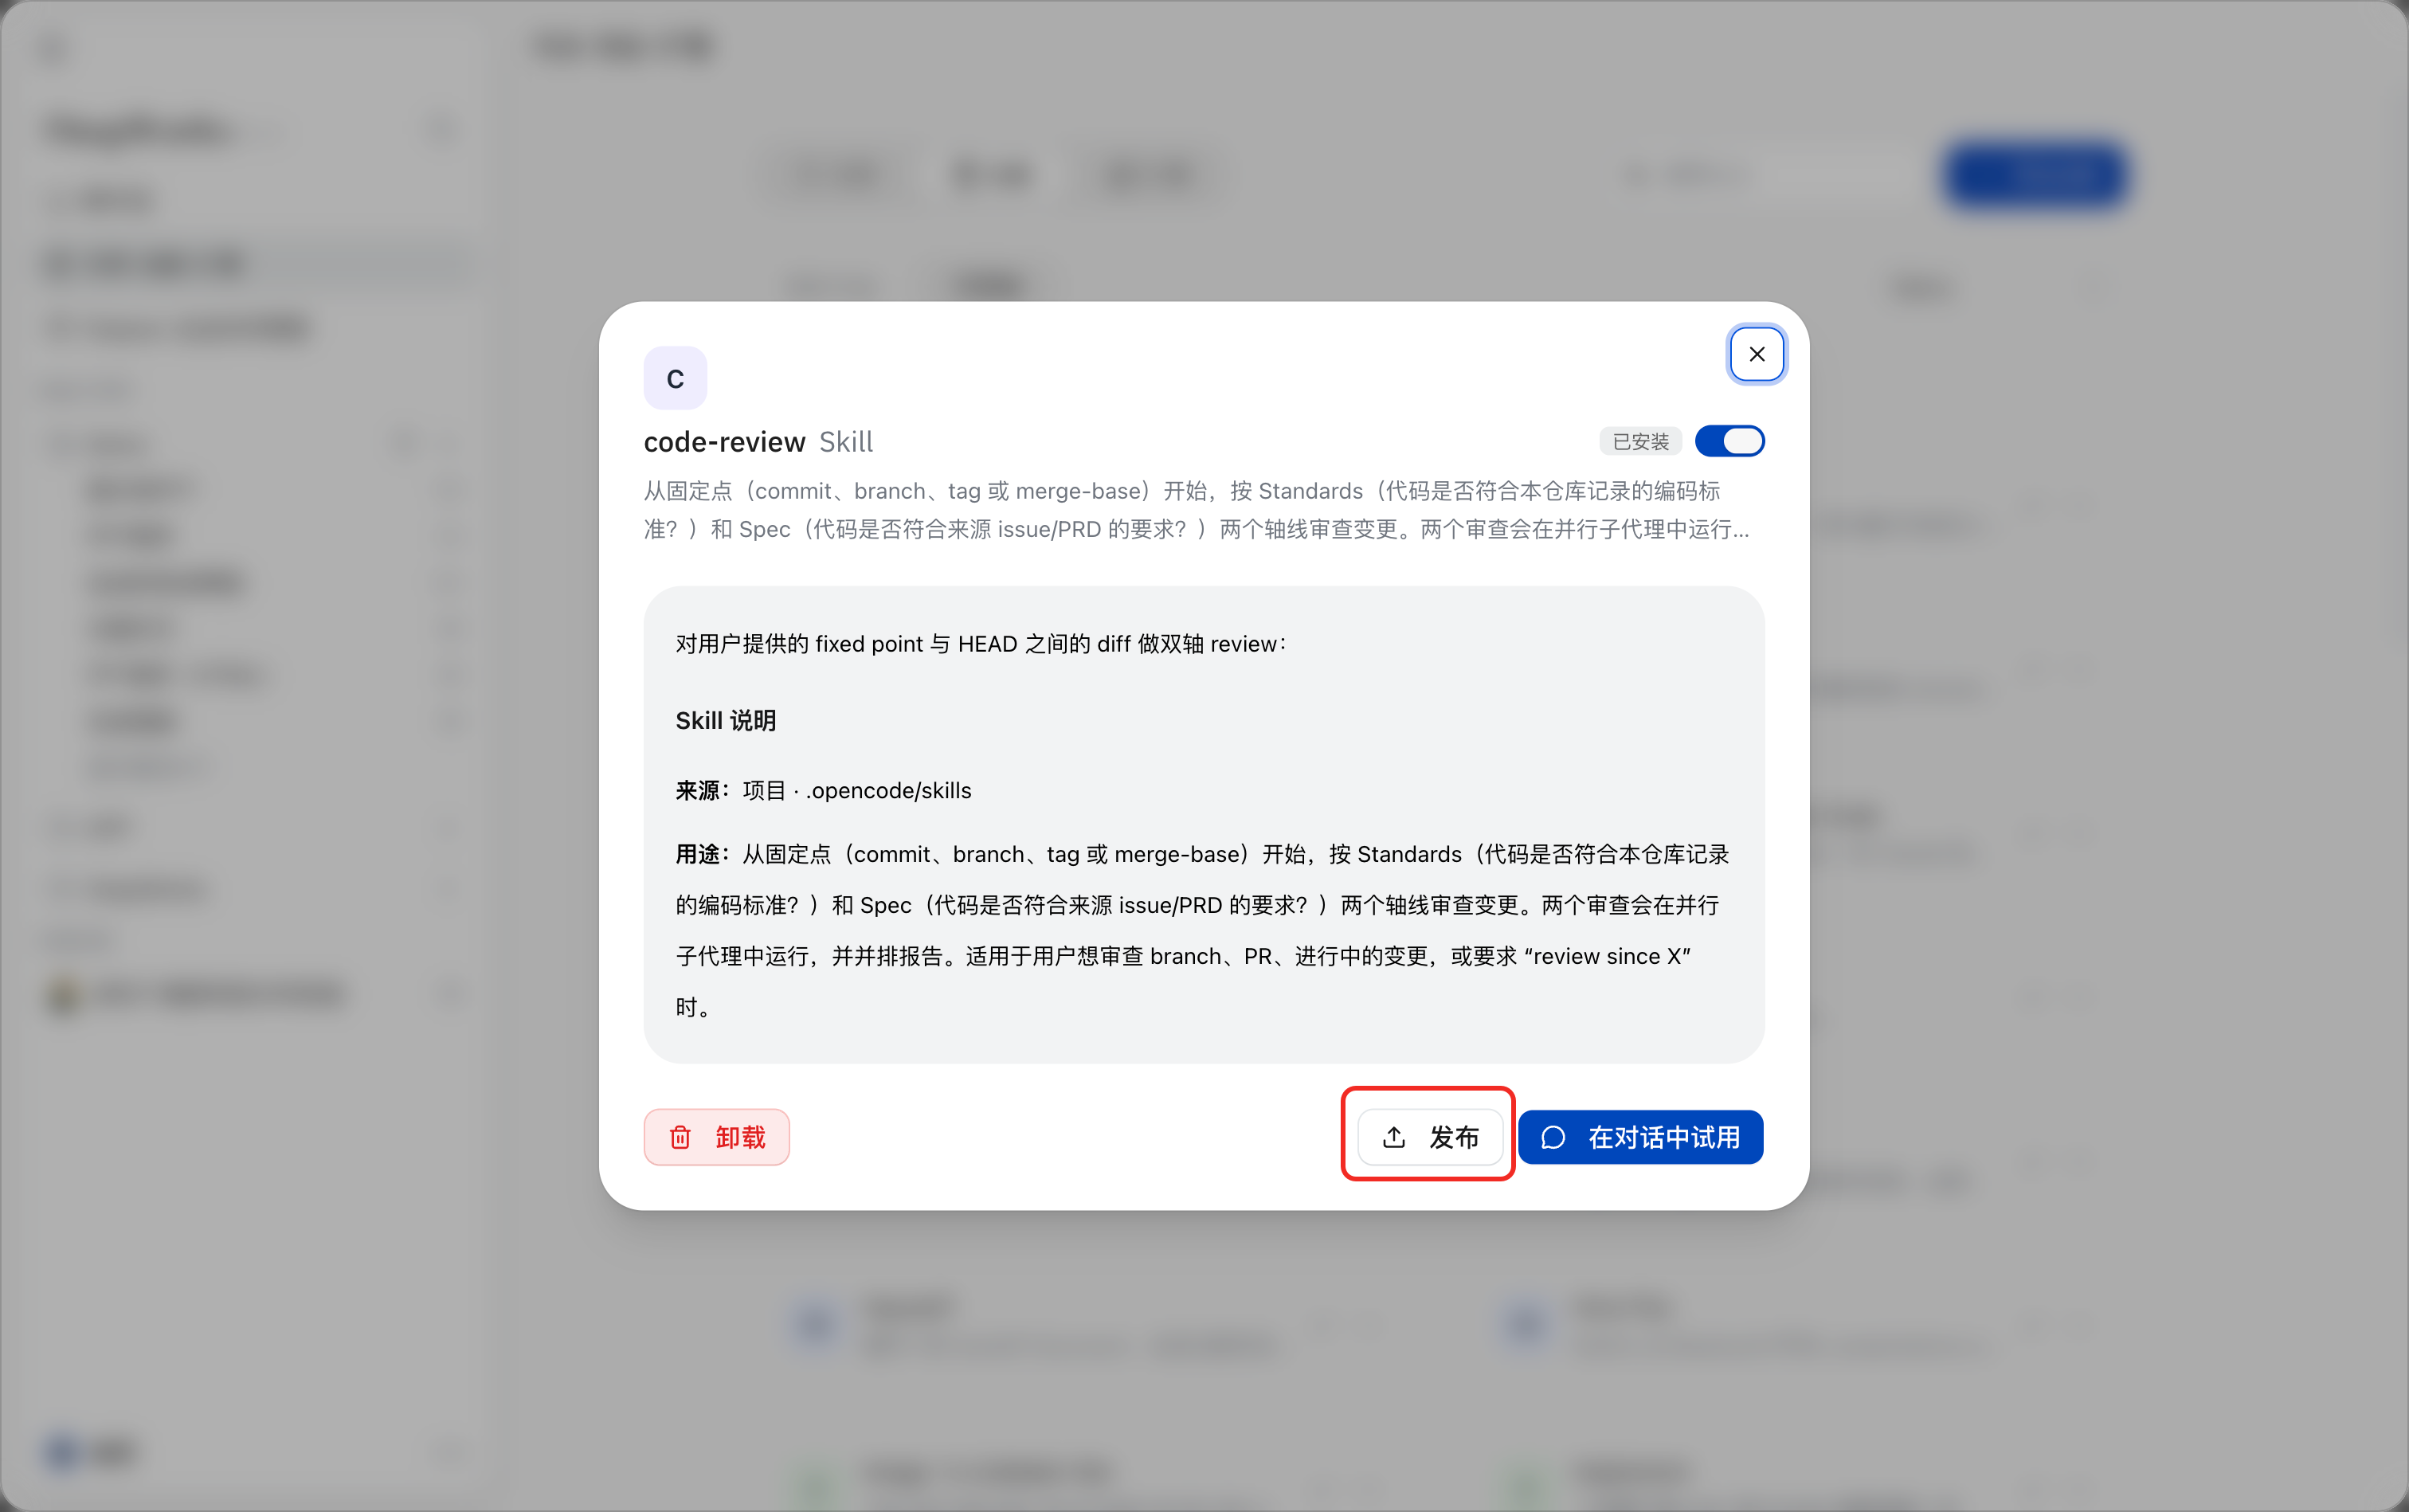
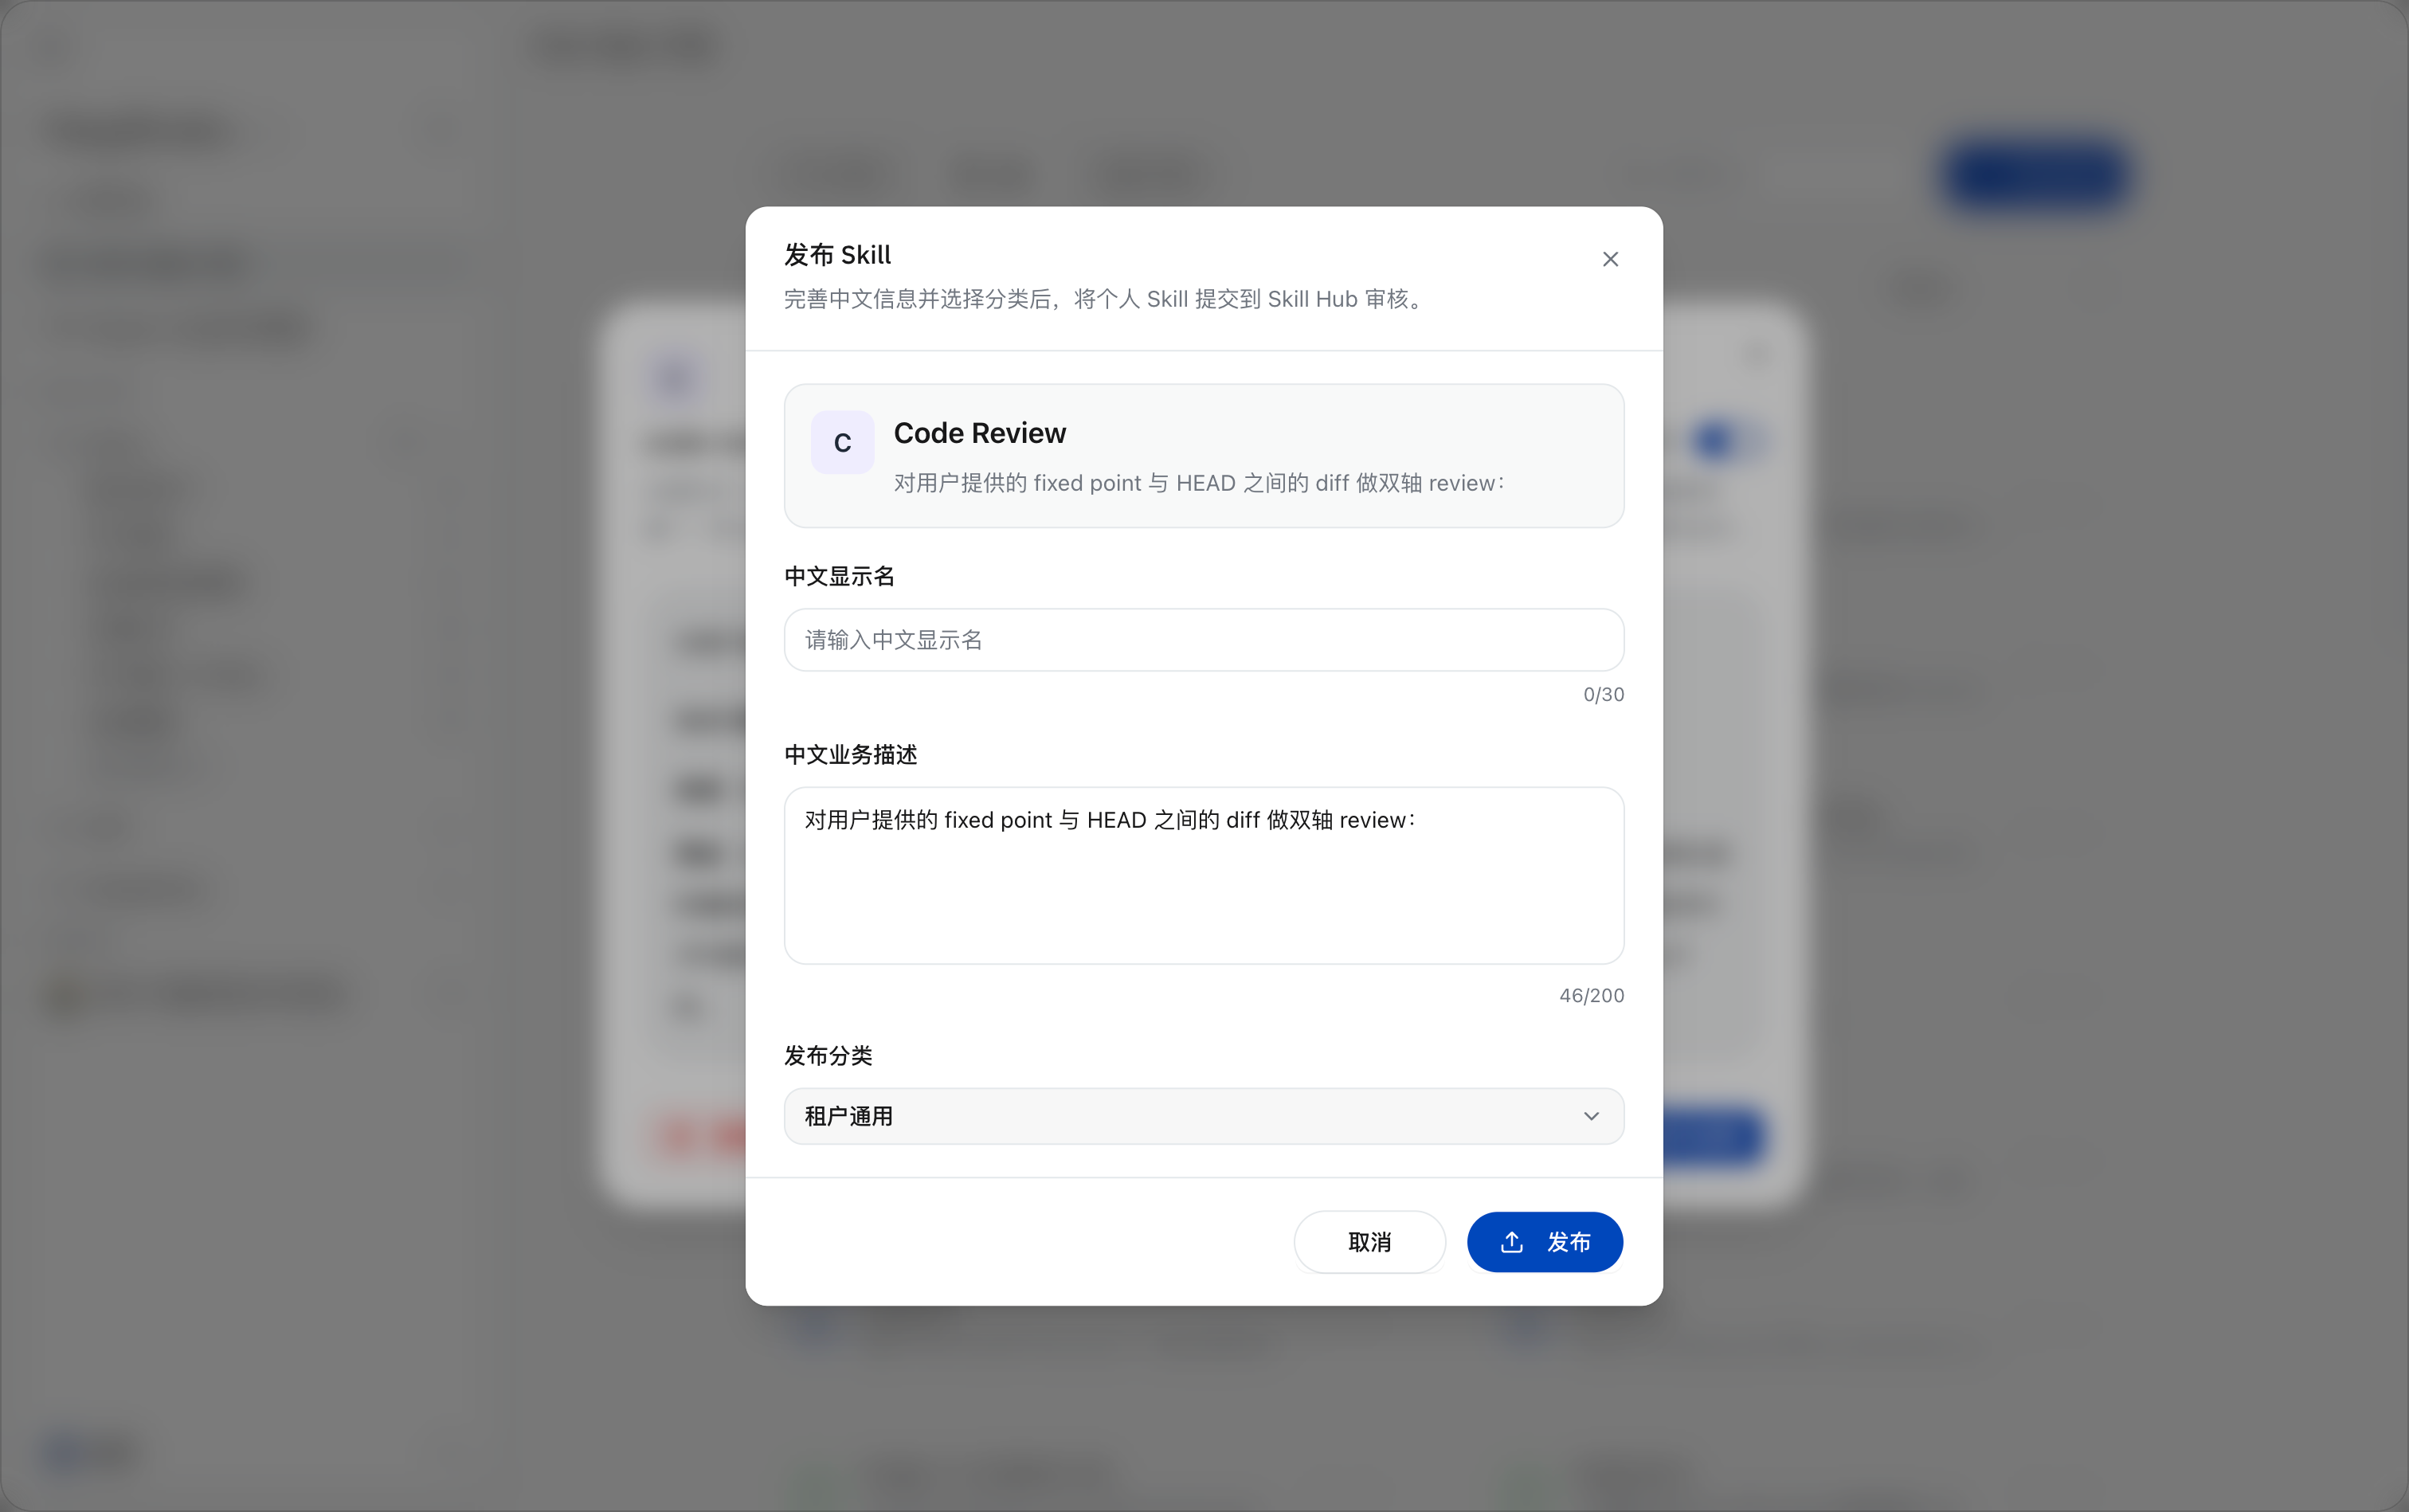
Select Installed →Personal Skills, click the publish button of the target Skill, enter a Chinese name and description, and select a category. After submission, the enterprise administrator reviews it; once approved, the Skill is published to Skill Hub.
Publishing a Skill in a Session
Path: Workspace session → send a publish instruction → confirm publishing information → view the preview → confirm submission.
Prerequisites: You are logged in to an enterprise account, and a locatable Skill exists locally; when publishing a Skill in a workspace, enter the corresponding workspace first.
Prepare the Skill to Publish
After creating or modifying the Skill, confirm that the content to be published has been saved. If you have just completed optimization in a session, you can initiate publishing in the same session without recreating the Skill.
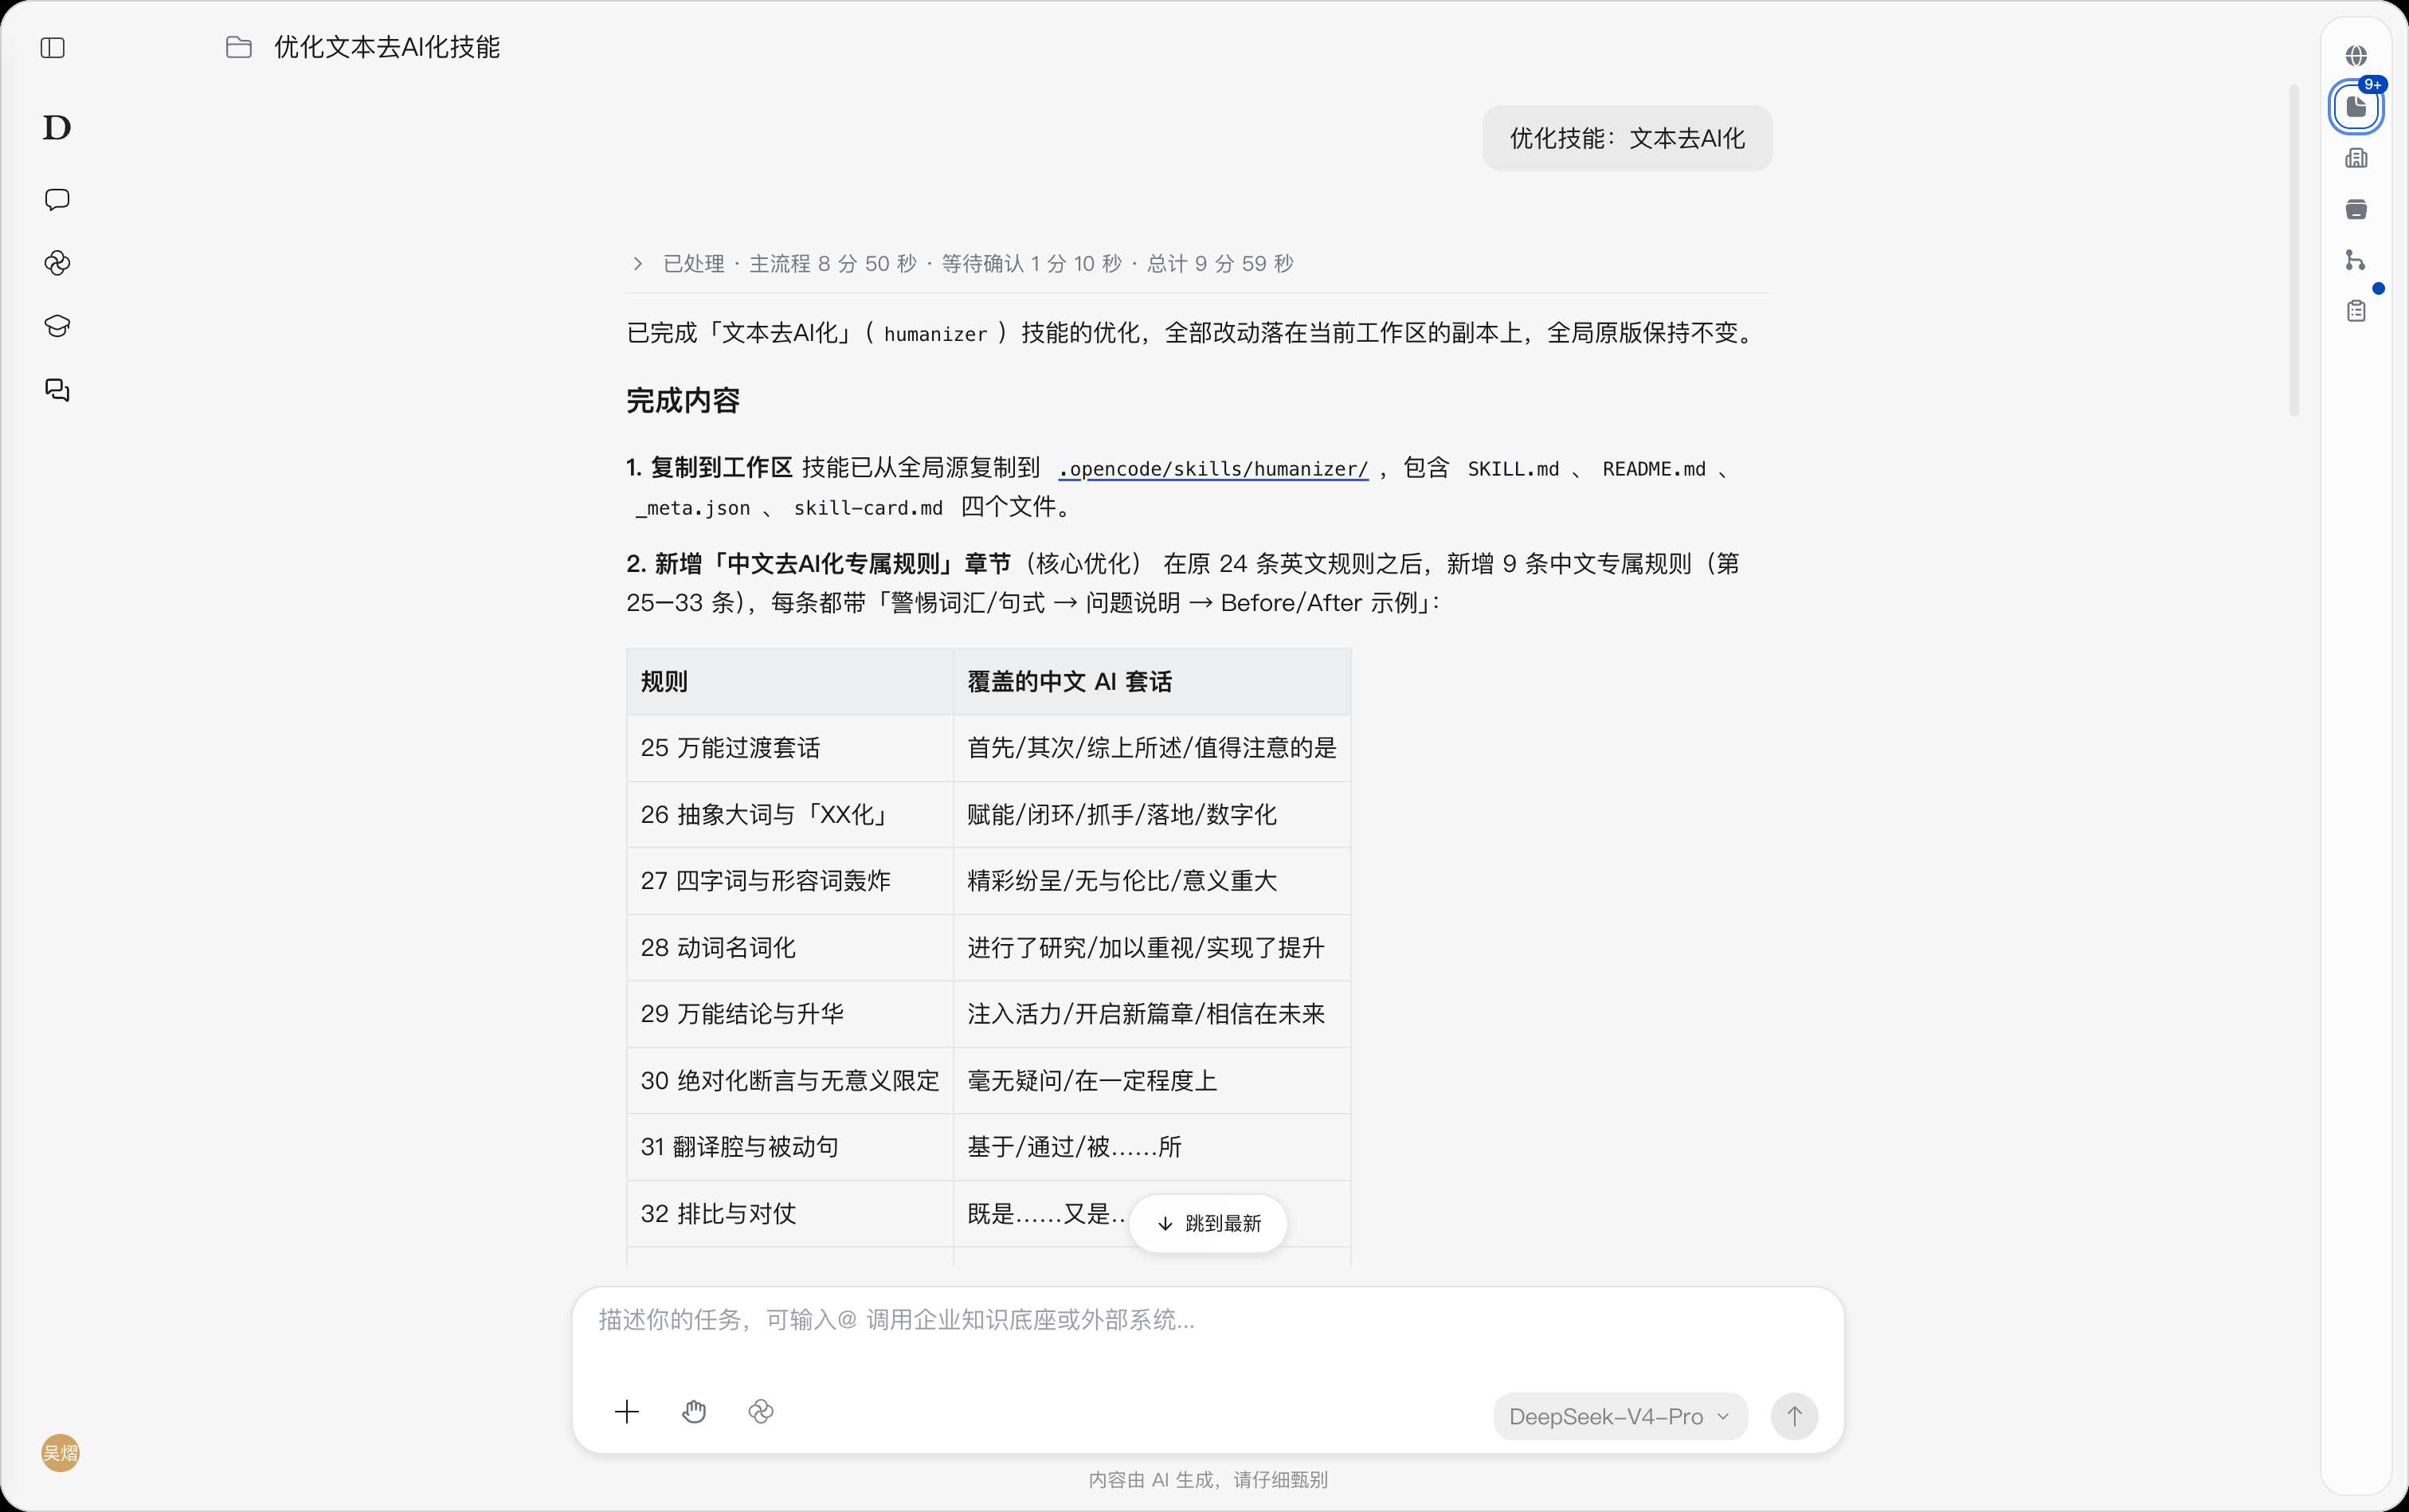
Initiate Publishing
Clearly state your publishing request in the input box and send it, for example, “Publish the Skill we just optimized to SkillHub”. If the target is not clear in the current session, also provide the Skill name.
Wait for the system to identify the target and check the publishing materials, then supply information as prompted in the session.
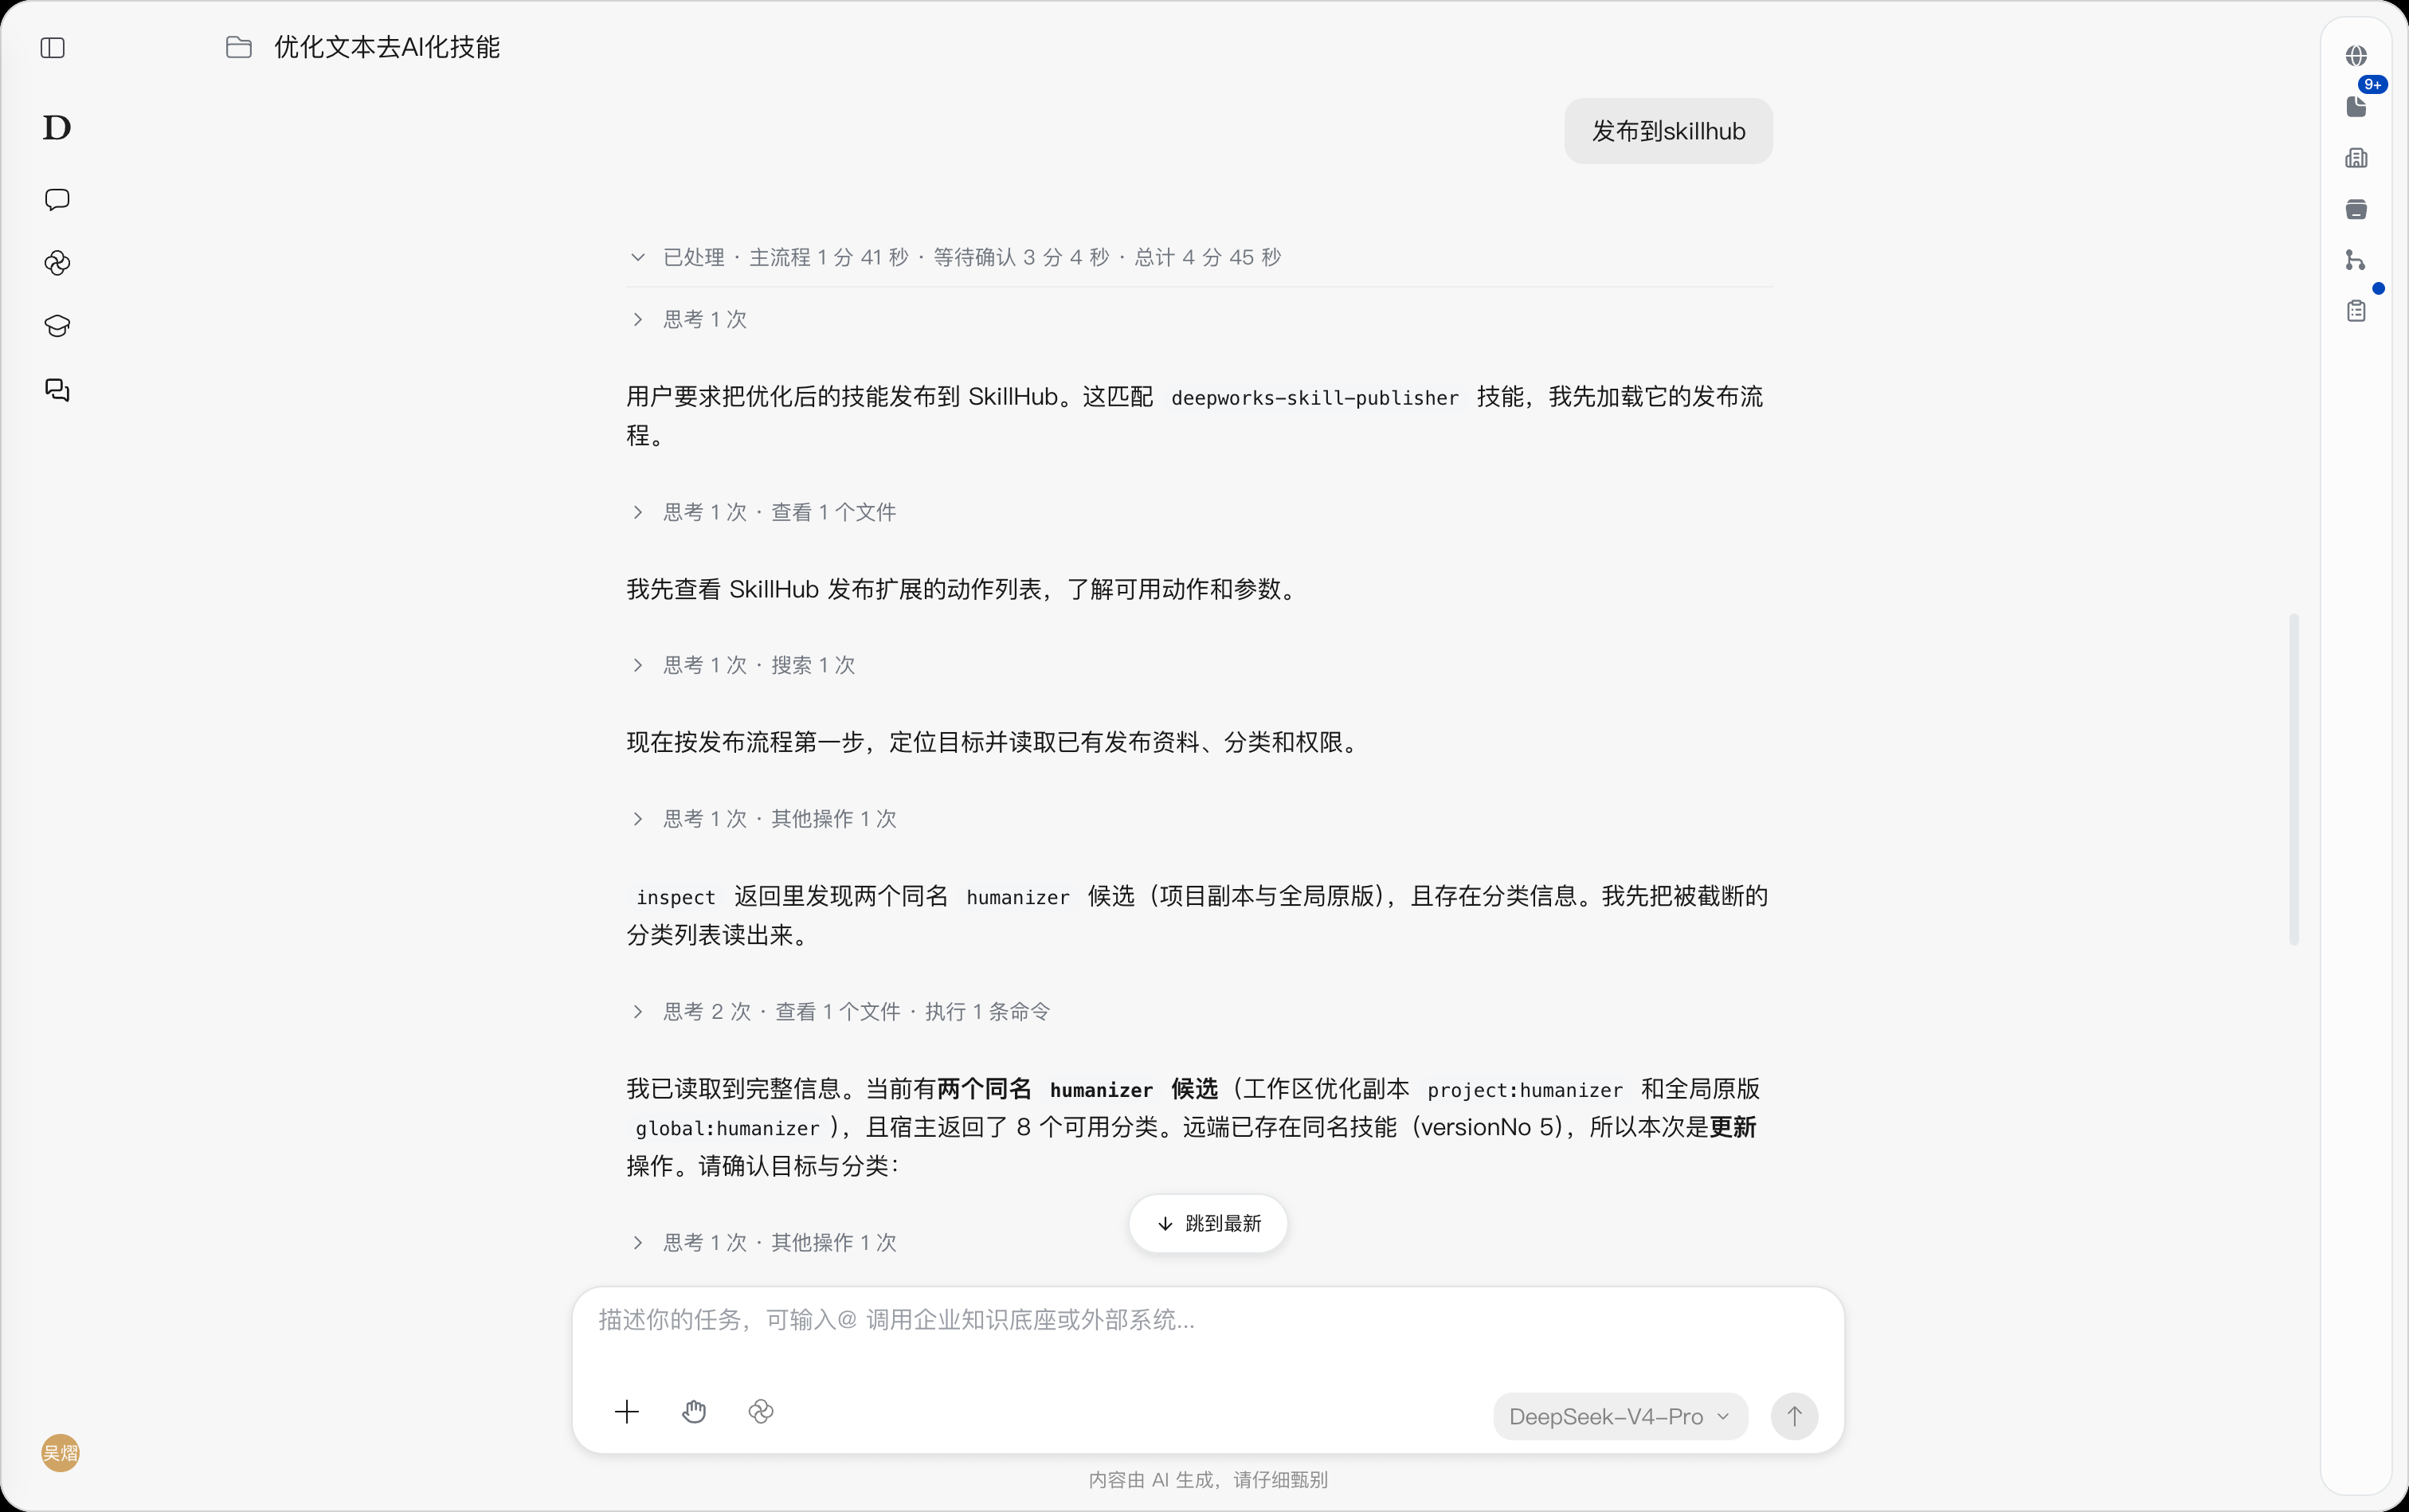
Select the Publishing Category
In the Publishing Category prompt, select the category that matches the Skill’s purpose; to view other options, scroll through the category list. Recommended items are for reference only; confirm based on the actual purpose.
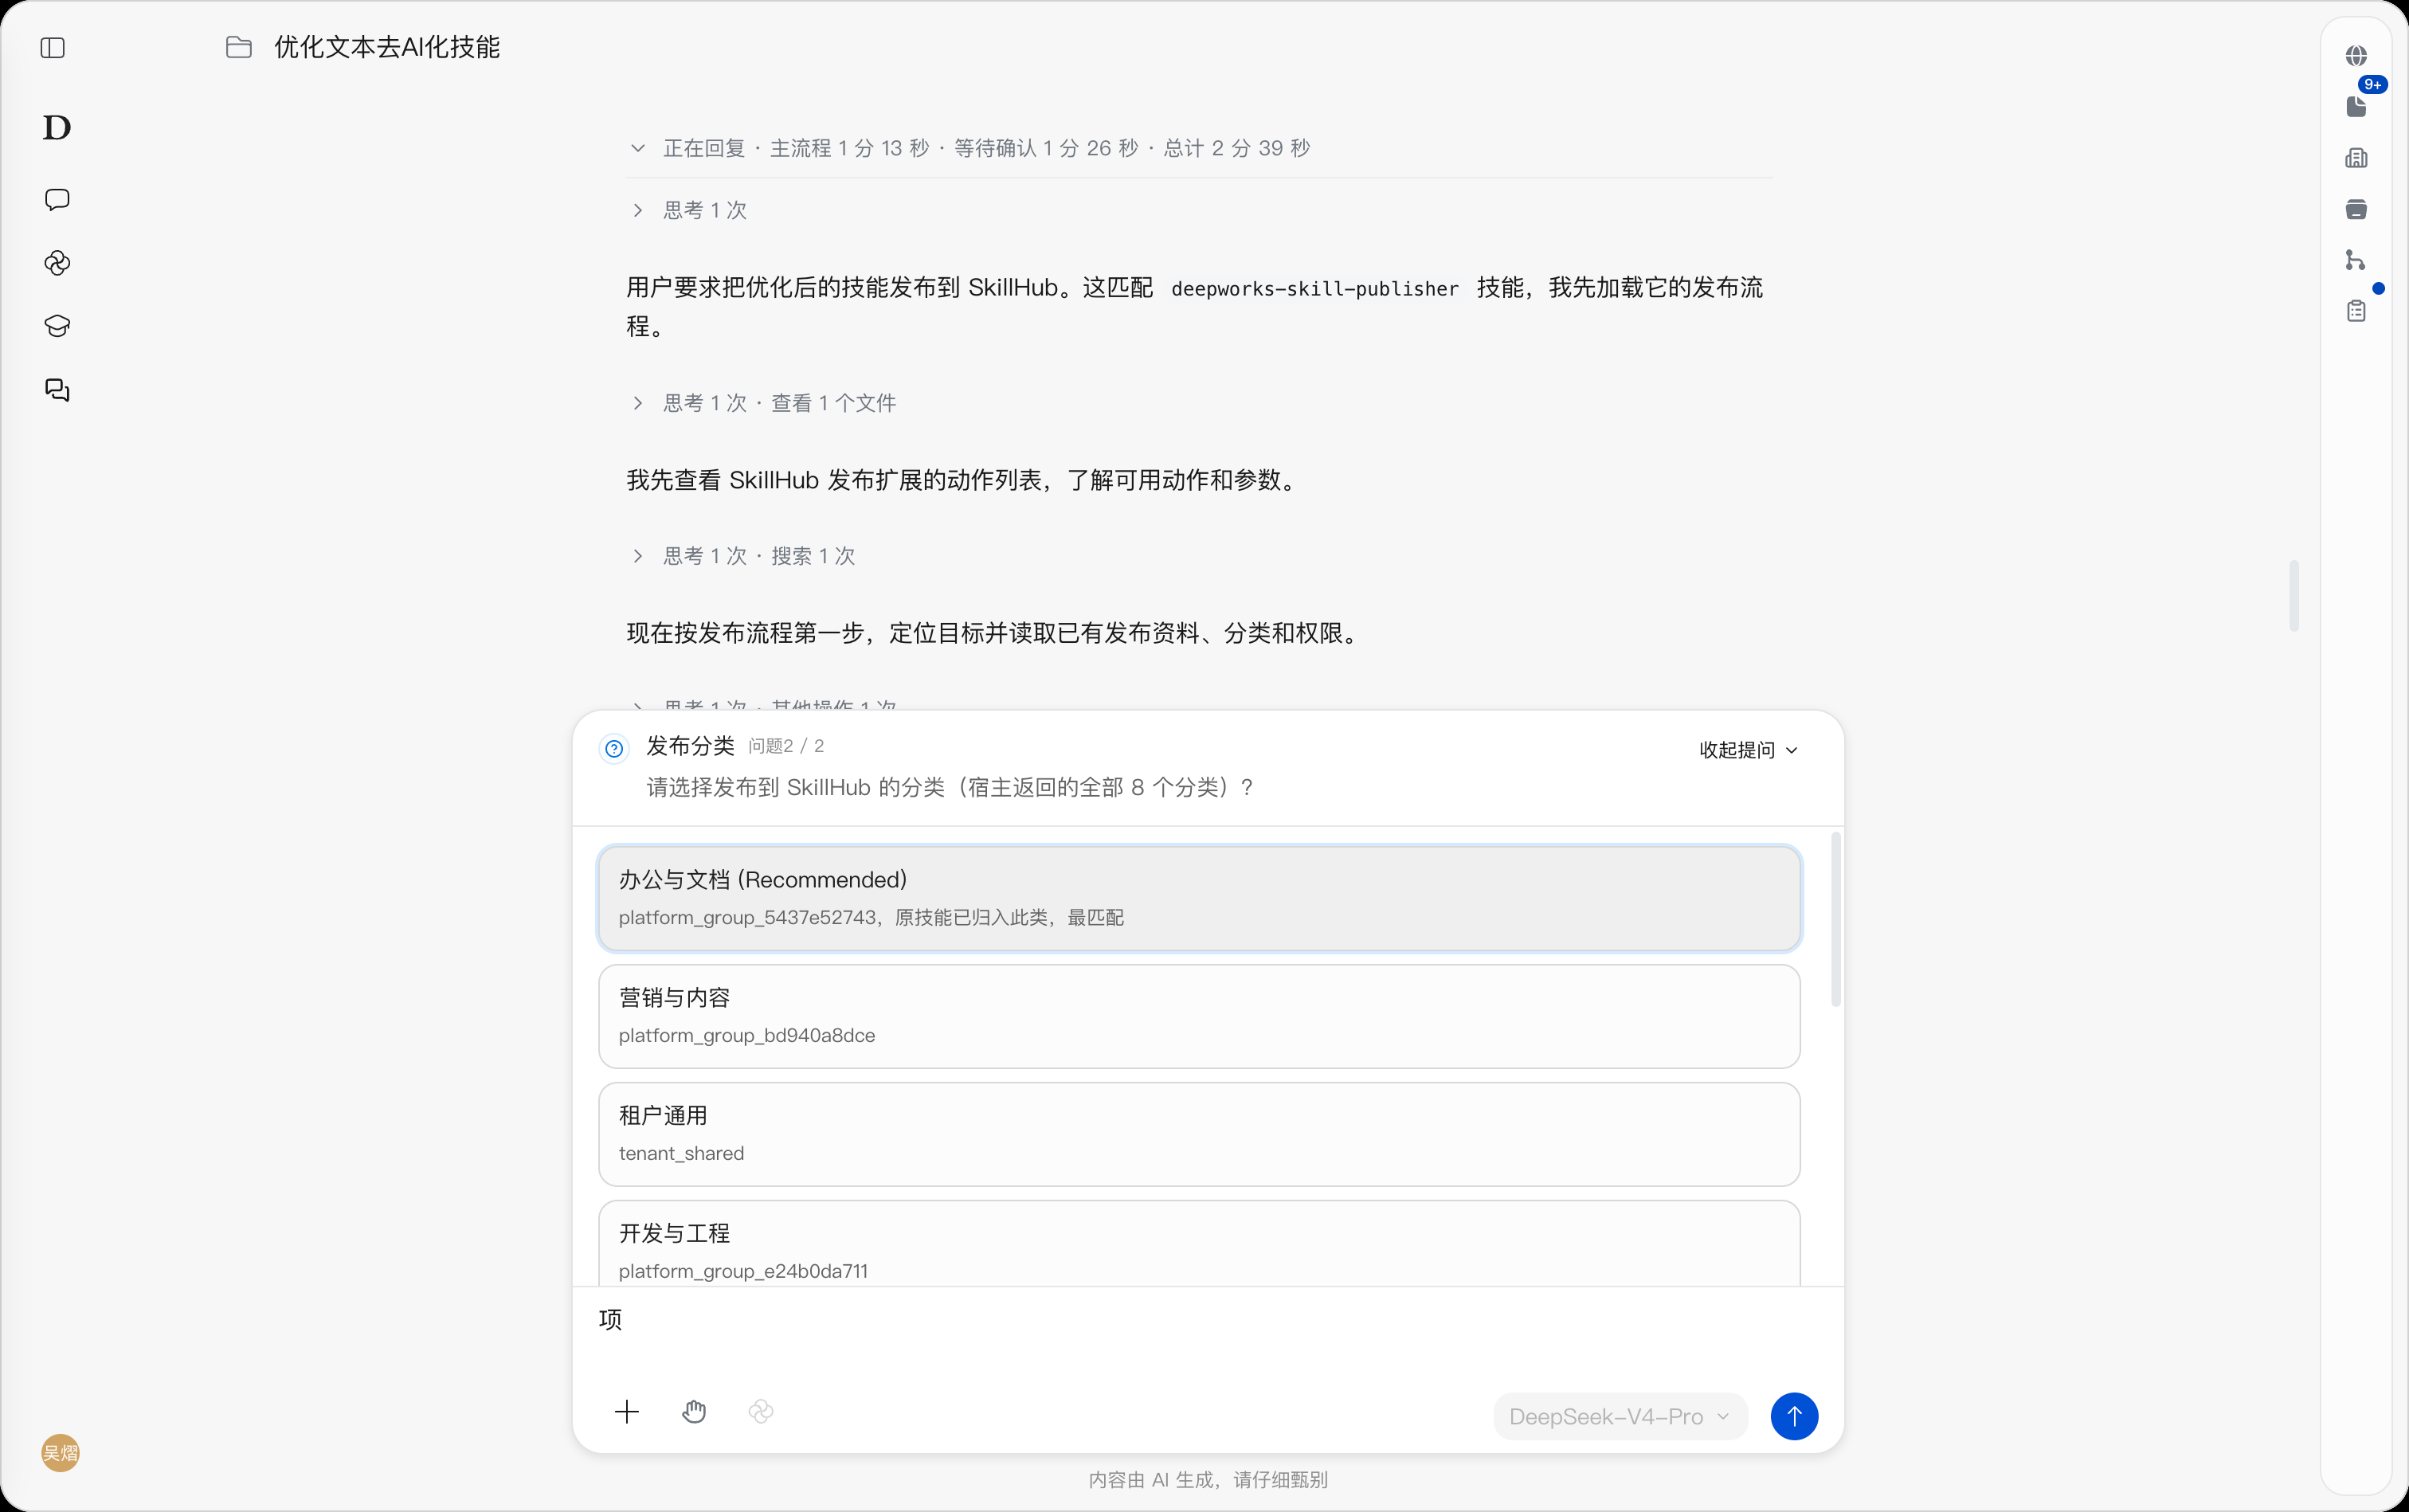
Confirm the Publishing Target
When multiple Skills share the same name, select the version to publish in the Publishing Target prompt based on the source and modification status. For example, to publish the modifications in the current workspace, select the corresponding workspace copy. If the target cannot be determined from the options, add an explanation in a custom answer.
After completing the selections for the category, target, and other questions, submit your answers to continue generating the publishing preview.
Review the Preview and Confirm Submission
In the Skill 发布预览.md file that opens on the right, review the target, name, description, category, and change notes. The preview is read-only; if adjustments are needed, state the modification request in the session and review again after the preview updates.
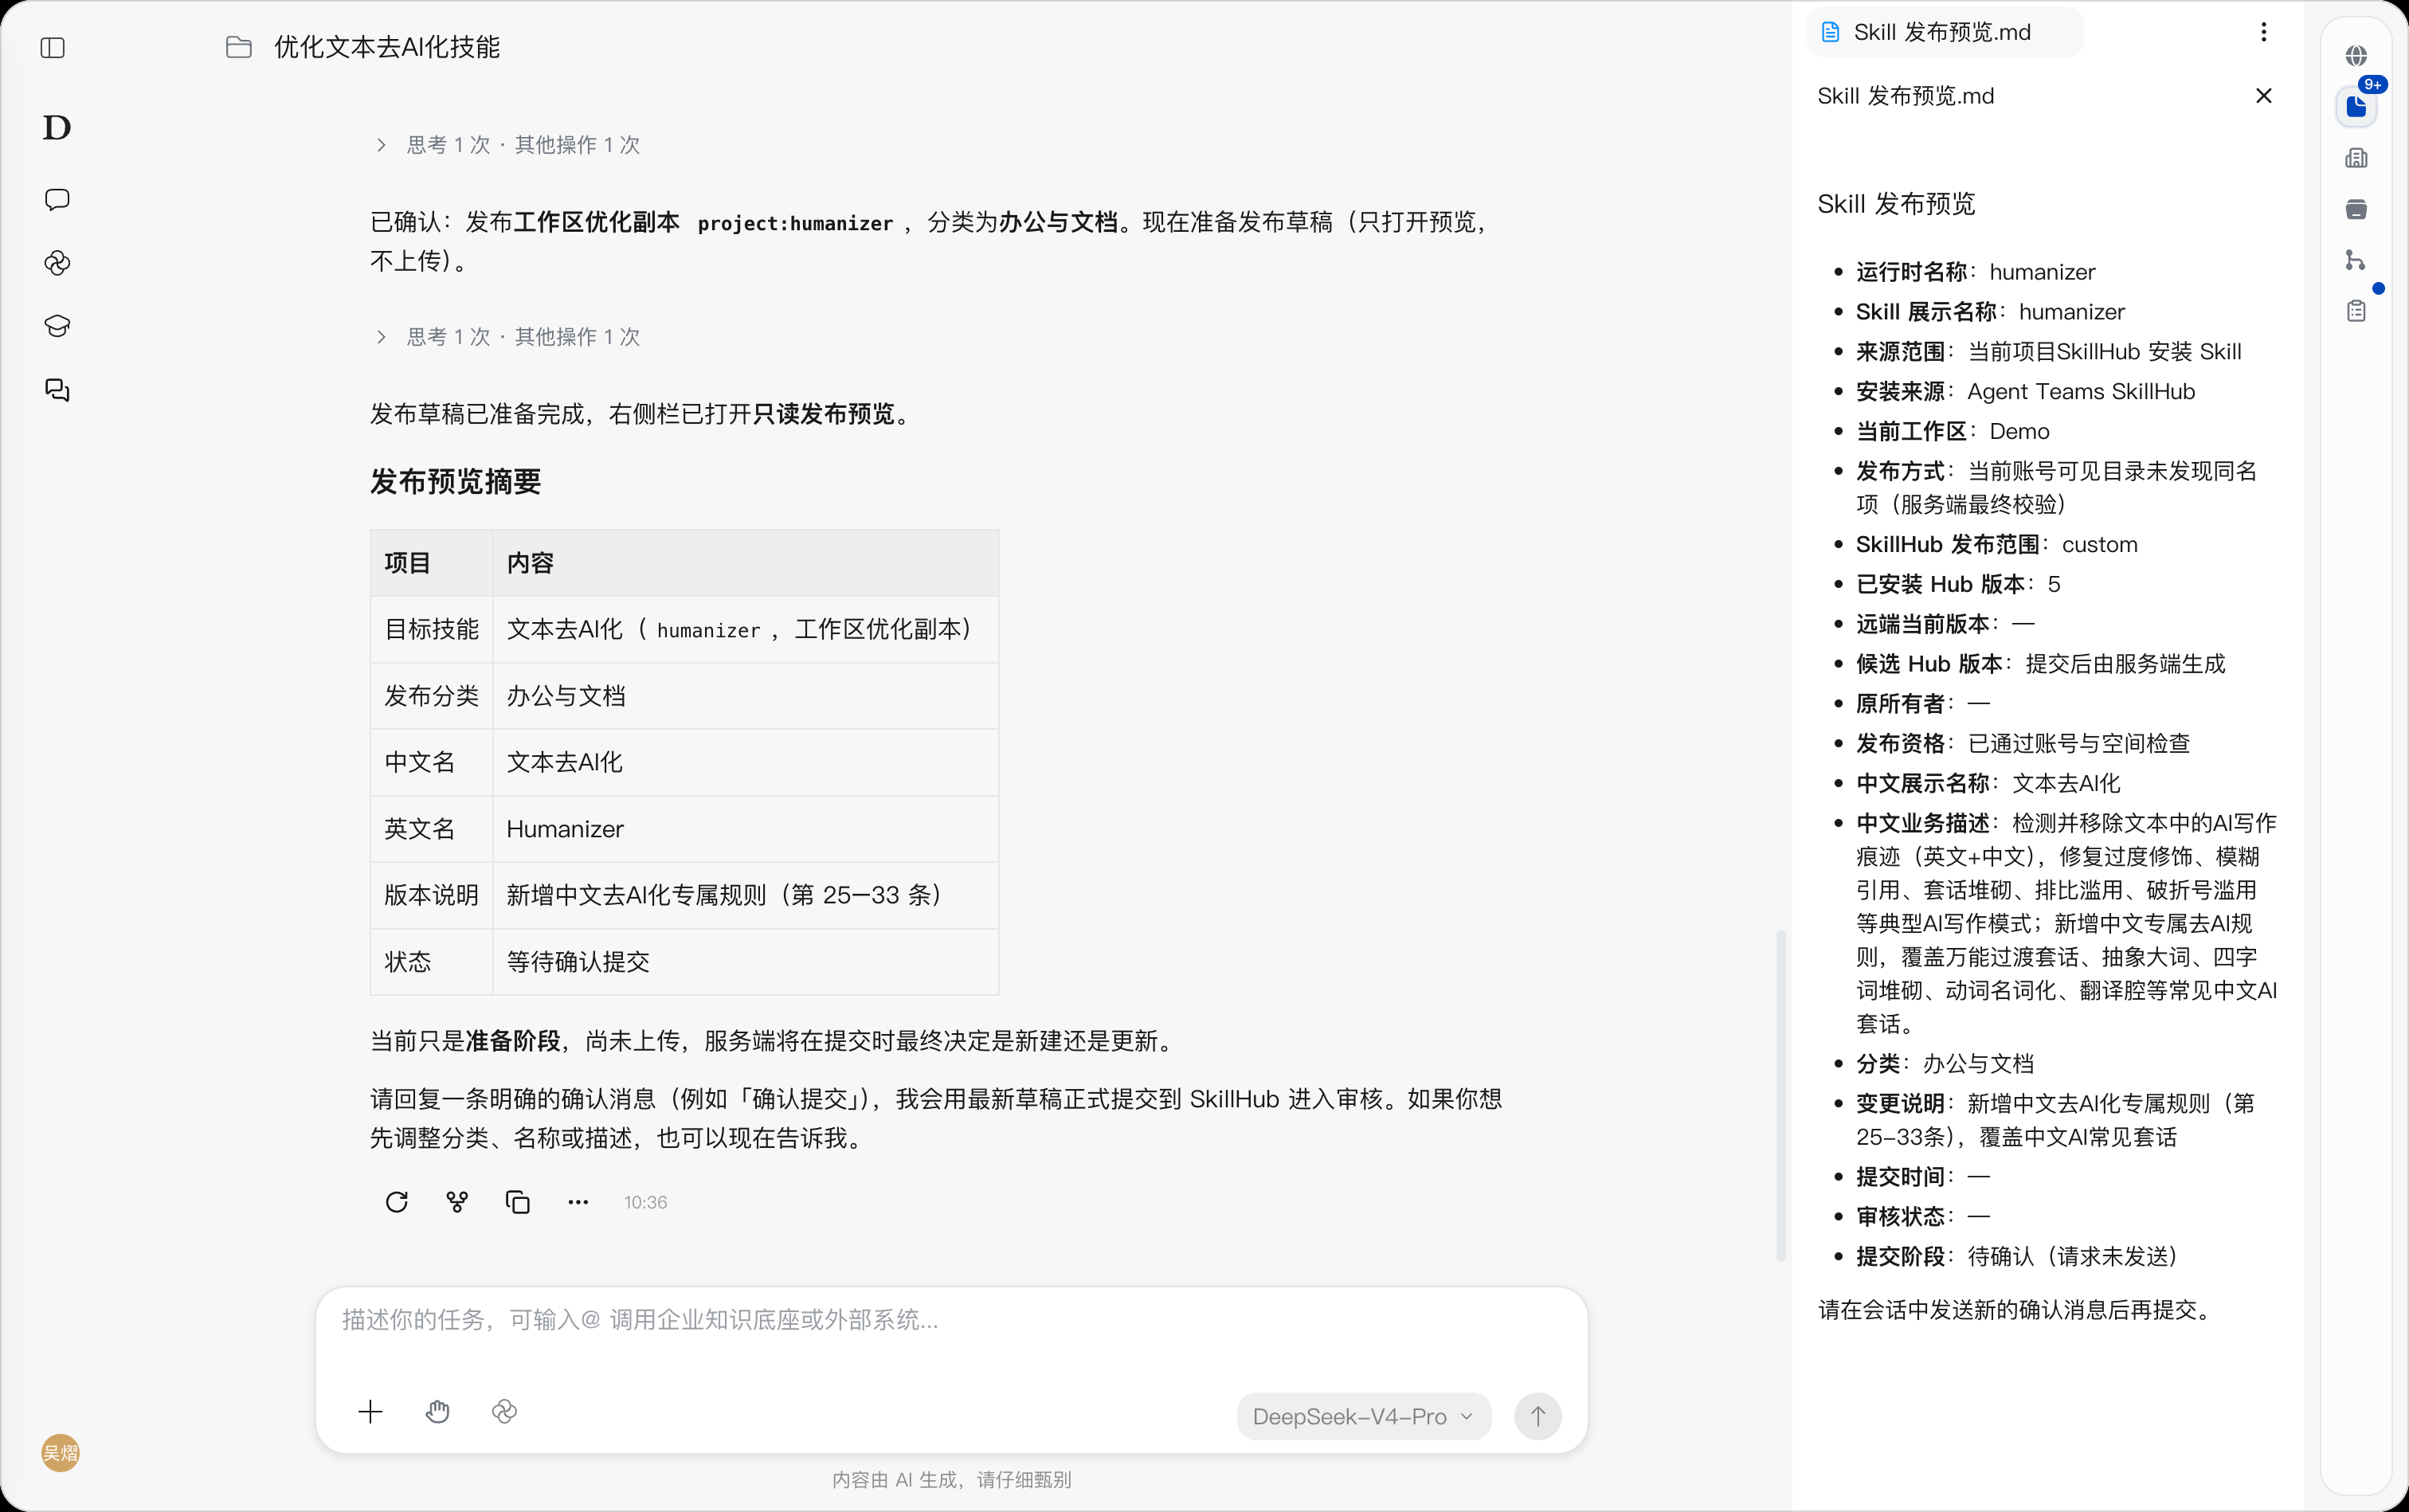
After verifying that everything is correct, send “Confirm submission” in the session to formally submit the Skill to Skill Hub for review. If further modifications are needed, complete the adjustments first, then confirm submission against the latest preview.
Nothing has been uploaded when the preview is generated. Creation and updates are finally validated by the server at submission time, and the candidate Hub version is generated by the server, so no manual entry is required. After submission, rely on the actual result returned in the session; entering review does not mean the Skill has been published—it becomes available in Skill Hub only after approval.
Skill Cleanup
Path: Left sidebarMy AI Colleague →Skills →Installed →Skill Cleanup.
When you need to organize installed Skills, you can choose Batch Cleanup to clean up specified Skills, or chooseUninstall All to clean up all personal and Skill Hub Skills across all local workspaces and the user’s global scope. Personal Skills are deleted locally; Skill Hub Skills are only uninstalled locally, with their online content and publishing records retained; system Skills are not included in cleanup.
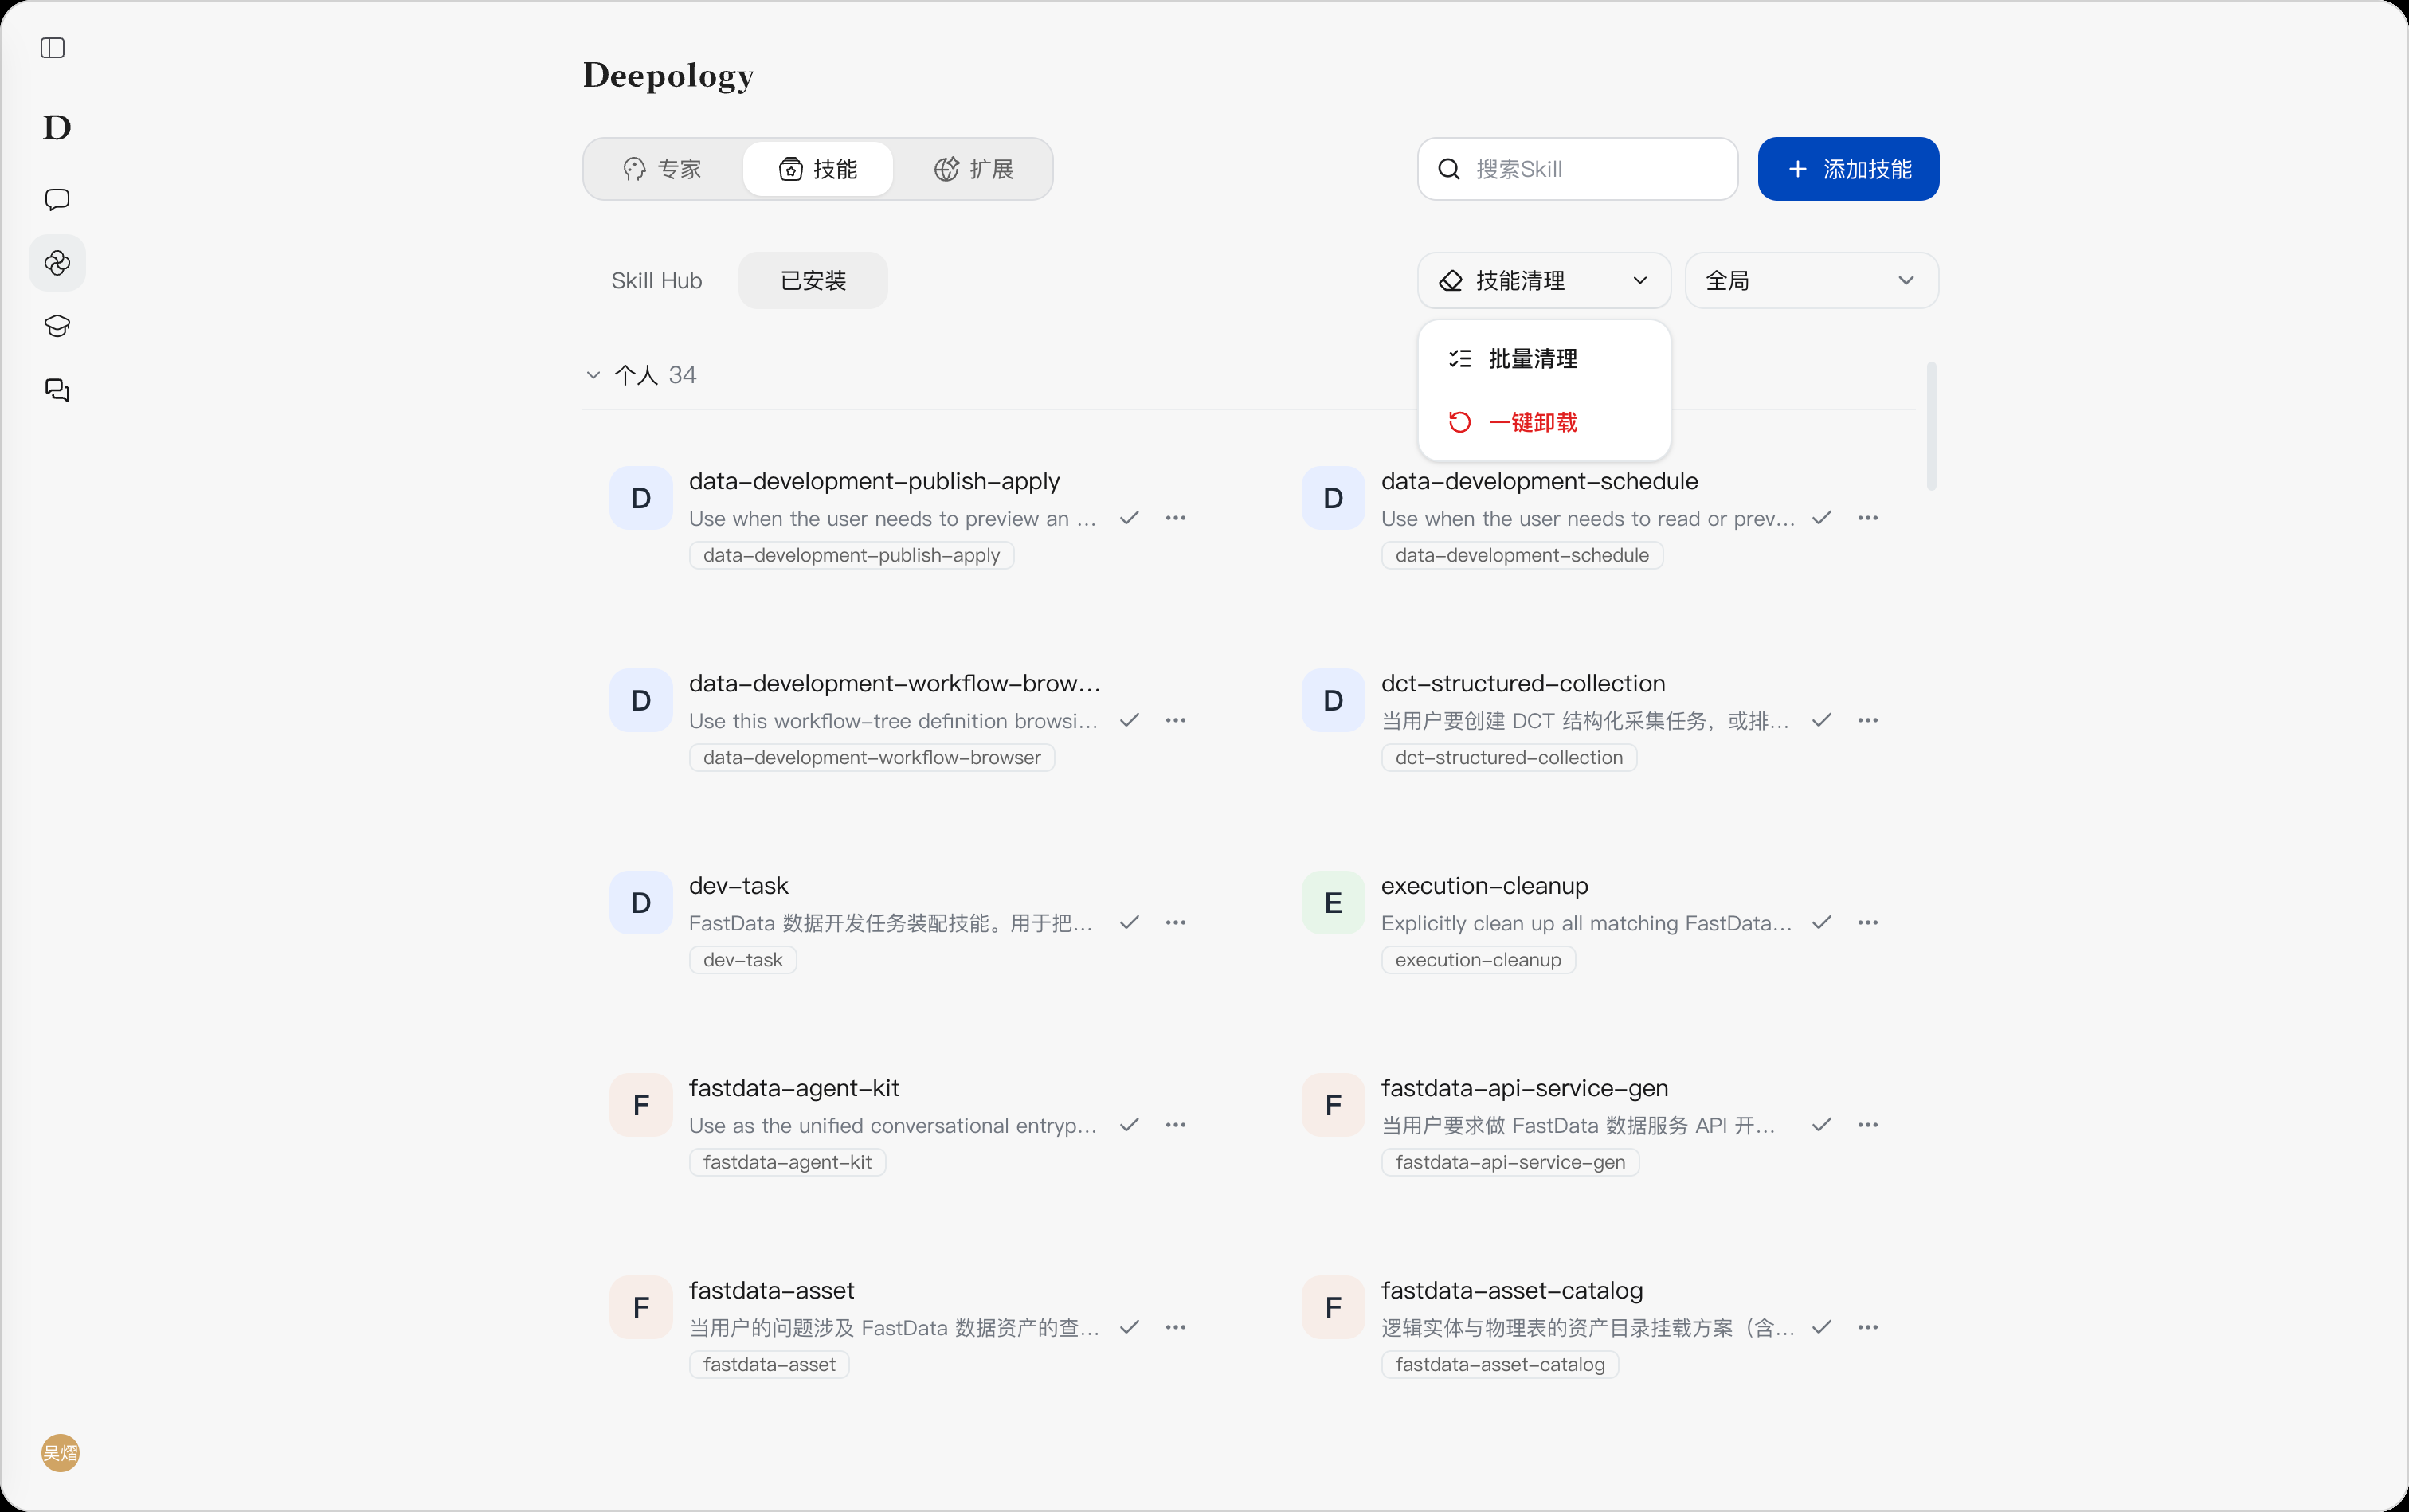
Batch Cleanup
- On the Installed page, first set the search keywords and select the global scope or a specified workspace to define the scope of this cleanup.
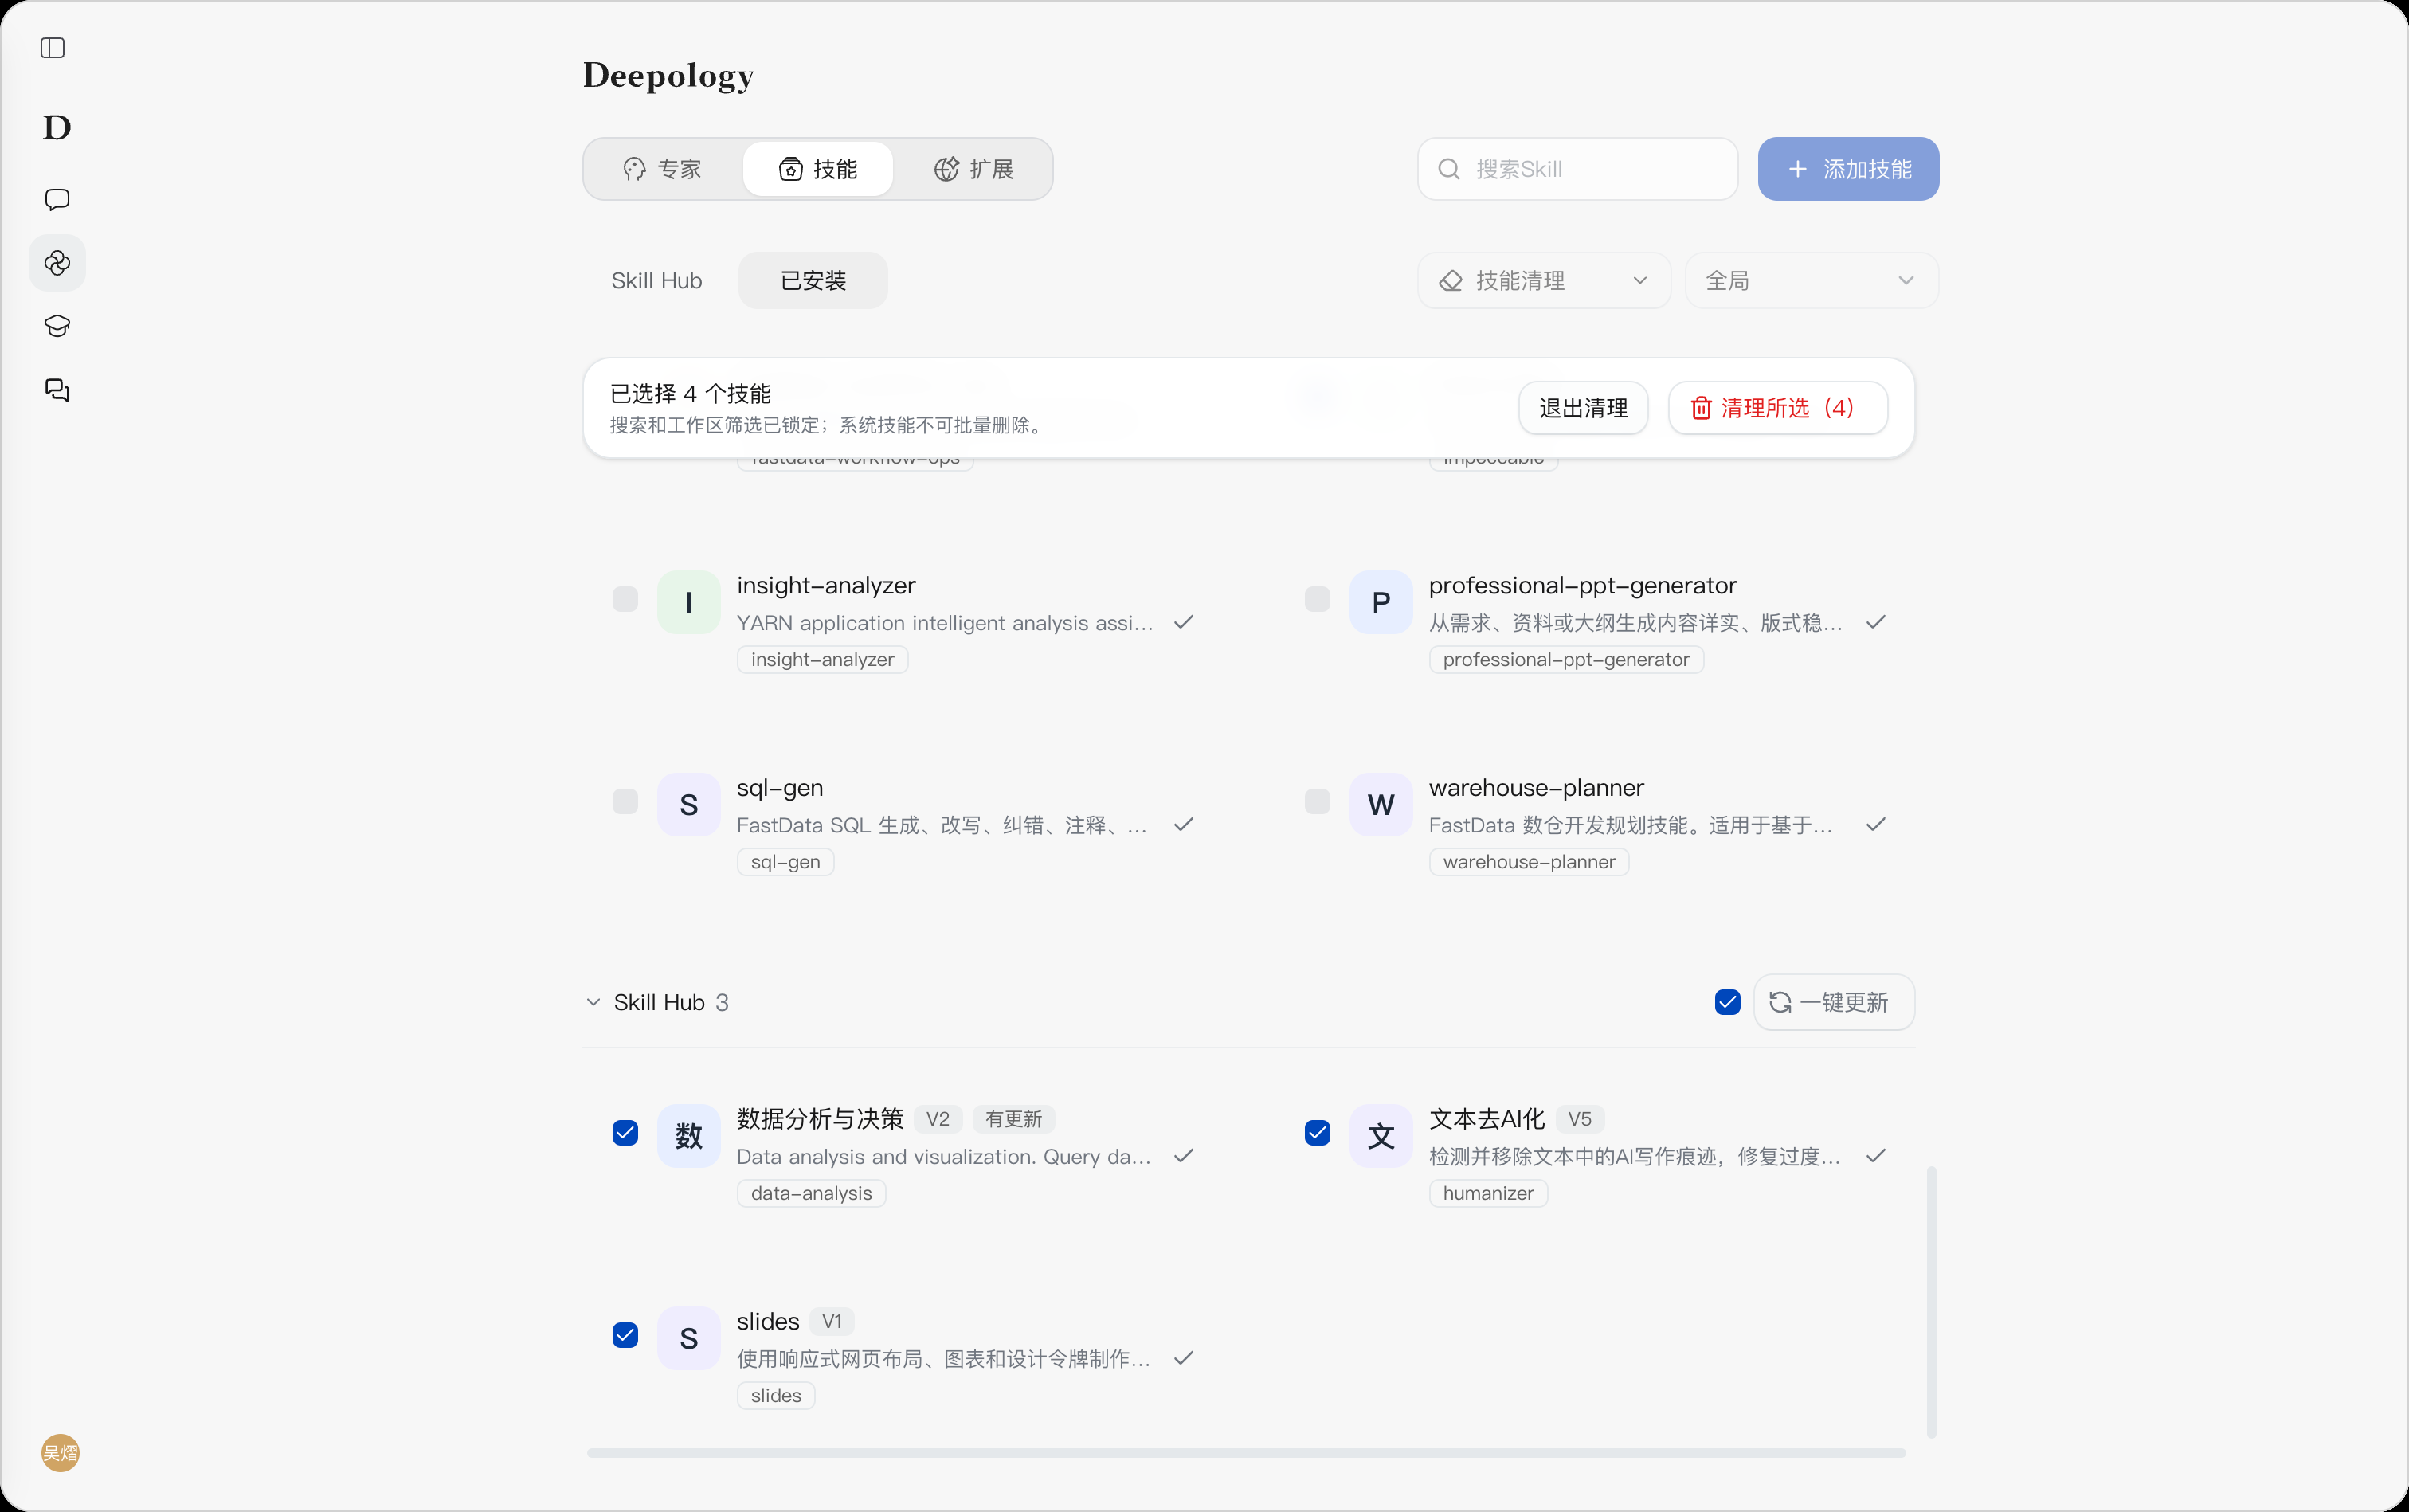
- Click Skill Cleanup →Batch Cleanup to enter selection mode. The cleanable personal and Skill Hub Skills in the current filtered results are selected by default; you can deselect or reselect specific Skills as needed.
- Verify the number of selected Skills and click Clean Selected (N). To change the search or workspace scope, clickExit Cleanup first, adjust the filters, and re-enter.
- In the Confirm Batch Cleanup dialog, verify the filter scope, the total number of selected Skills, and the counts by source, and confirm whether any Skills to keep are included; if adjustments are needed, click Cancel to return to the list.
- Set up backup as described in the next section, and click Start Cleanup after verifying everything is correct. If no backup directory is selected, you also need to confirm again as prompted.
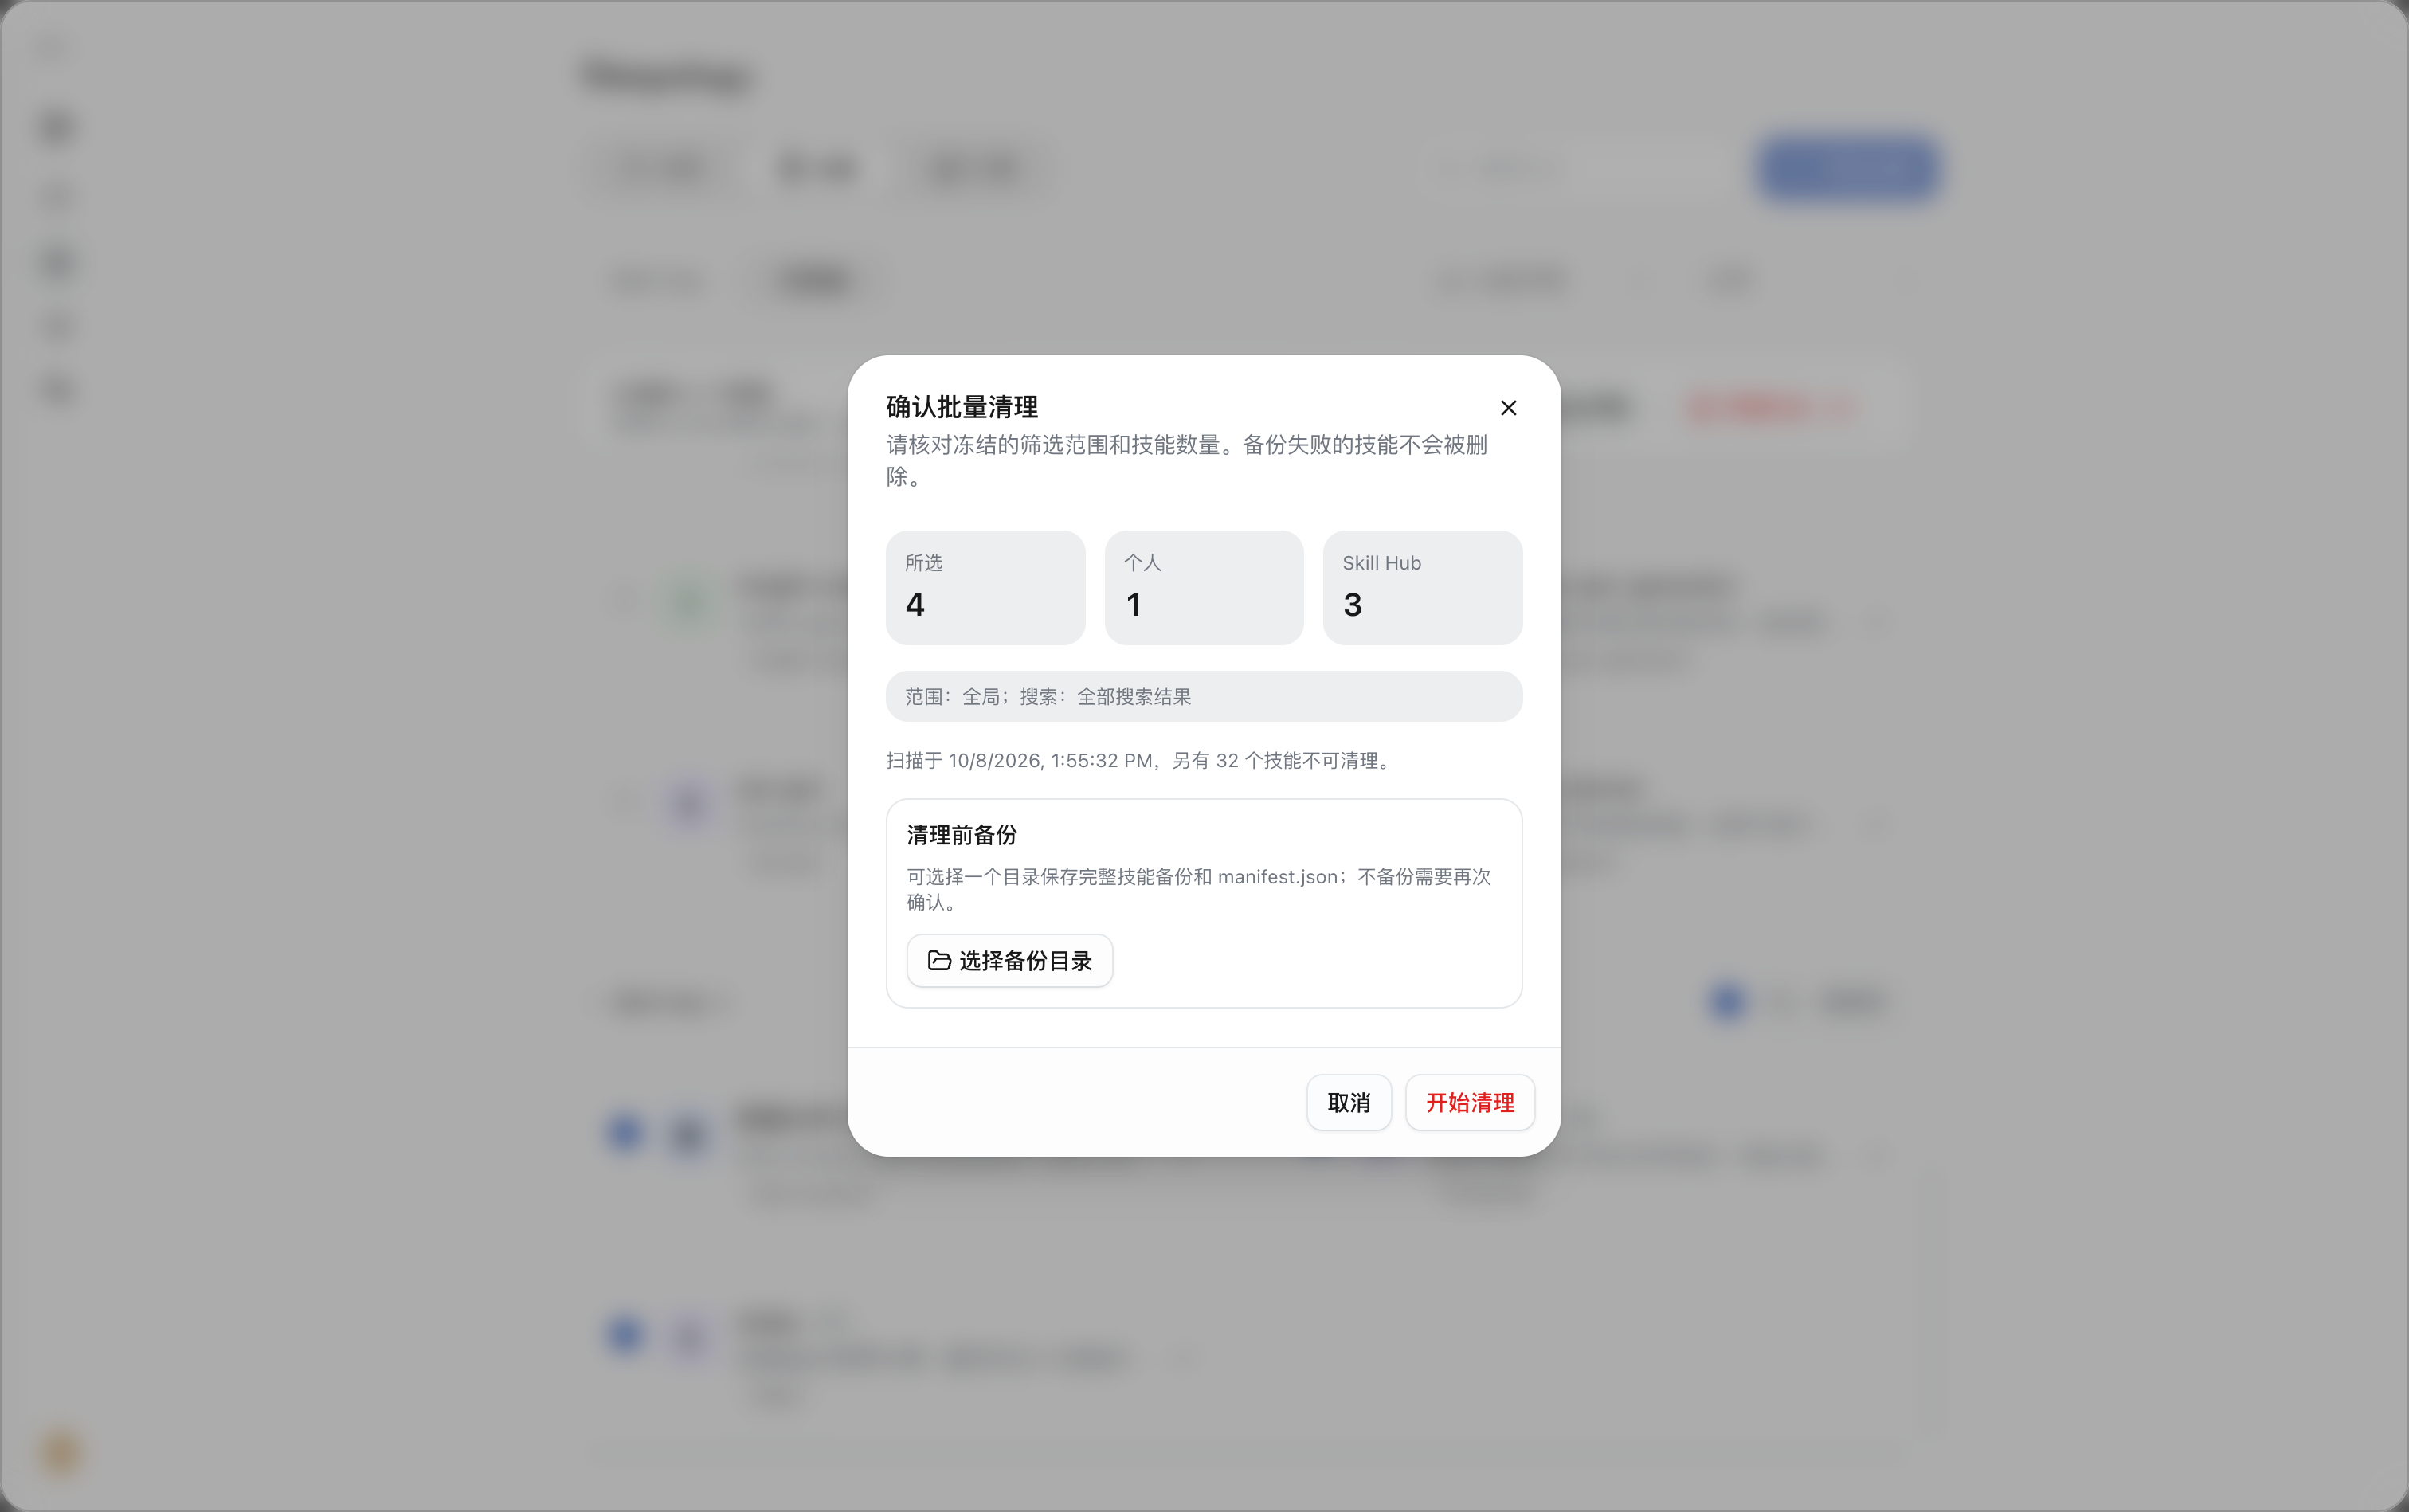
After entering Batch Cleanup, the search and workspace filters are locked. System Skills and other non-cleanable items are not included in this cleanup; the actual cleanup targets are subject to the confirmation dialog.
Backup Before Cleanup
Both Batch Cleanup and Uninstall All allow you to set up backup in the confirmation dialog. To keep Skill content, click Select Backup Directory and choose a local folder. Personal and Skill Hub Skills share the same backup directory, where the full Skill backups and the backup manifest file manifest.json are saved.
After selection, verify the directory path; to change it, click Change Backup Directory; to skip backup, clickCancel Backup. The backup directory should have write permission and sufficient space, and must not be located inside the Skill directories to be cleaned up.
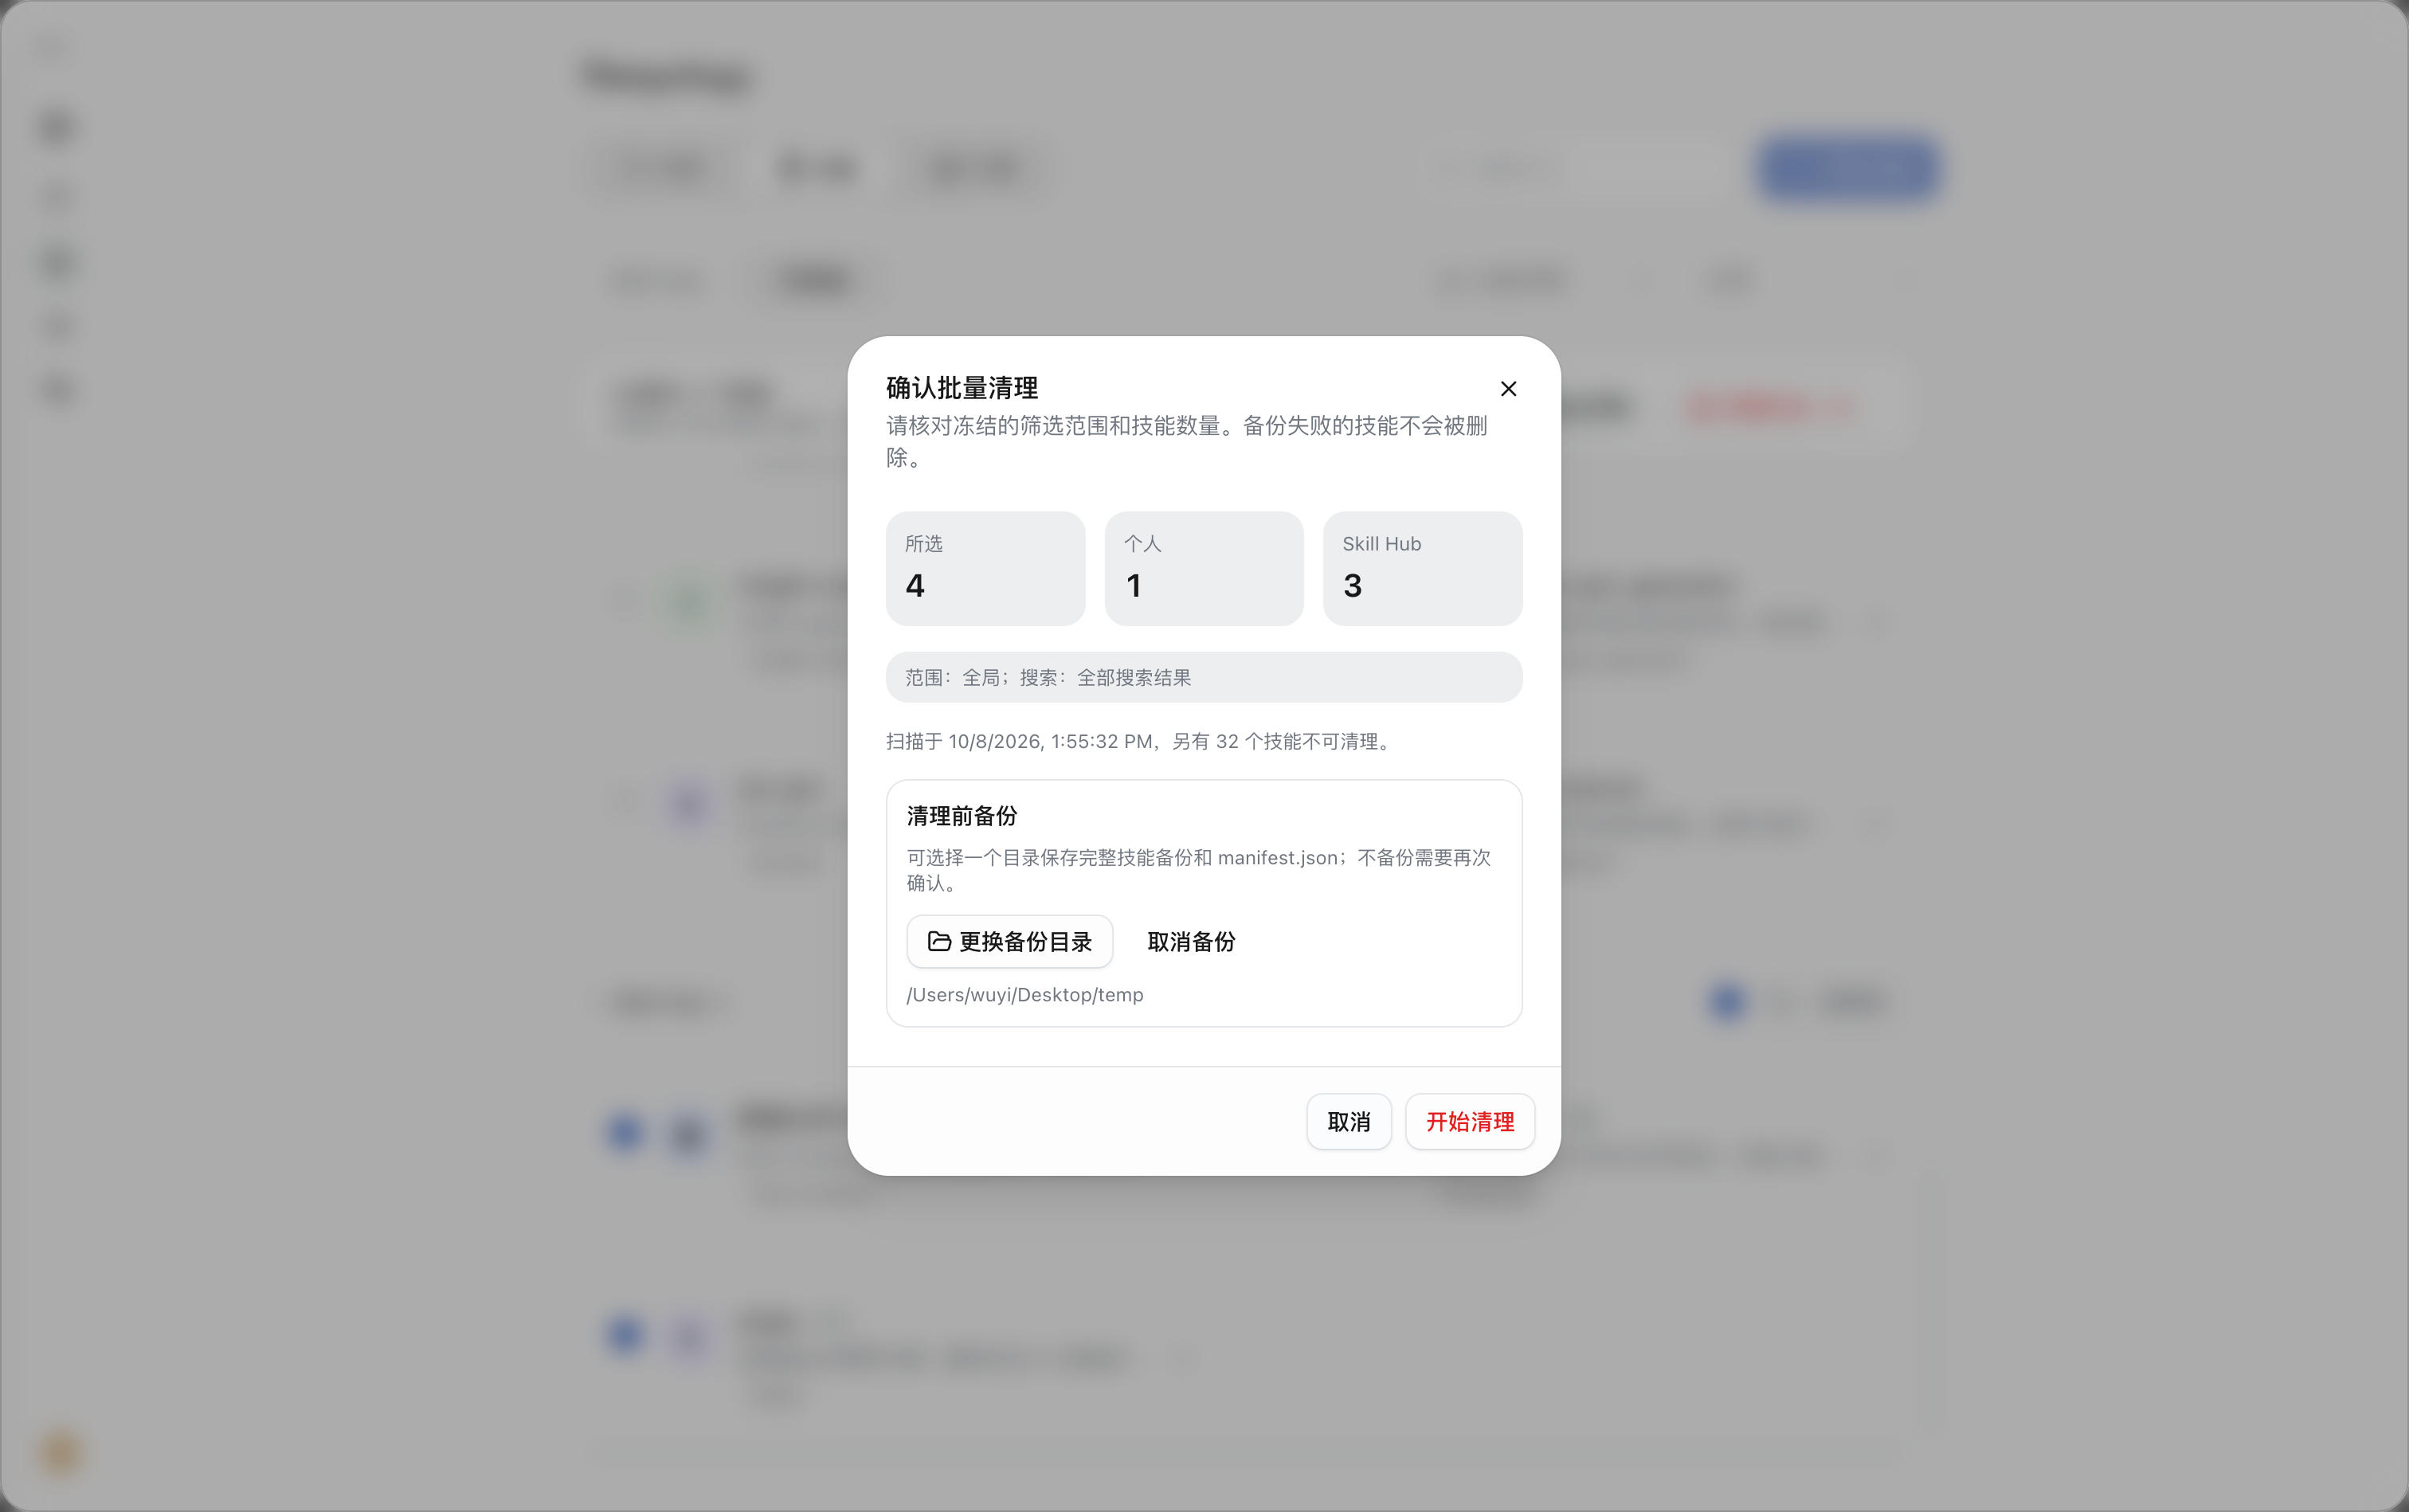
When backup is selected, the system backs up first and then cleans up; Skills whose backup fails are not deleted or uninstalled. When no backup directory is selected, cleanup proceeds directly only after a second confirmation, and cannot be recovered through this feature—make sure important content has been properly saved first.
Uninstall All
- On the Installed page, clickSkill Cleanup →Uninstall All to go directly to the confirmation dialog without selecting items one by one.
- Verify the number of Skills to be cleaned up and the scope of impact. Uninstall All covers all local workspaces and the user’s global scope, is not limited by the current search keywords or workspace filters, and retains system Skills.
- If needed, click Select Backup Directory to set up backup, then clickConfirm Uninstall All; if no backup directory is selected, confirm again as prompted. To abort, click Cancel or close the dialog.
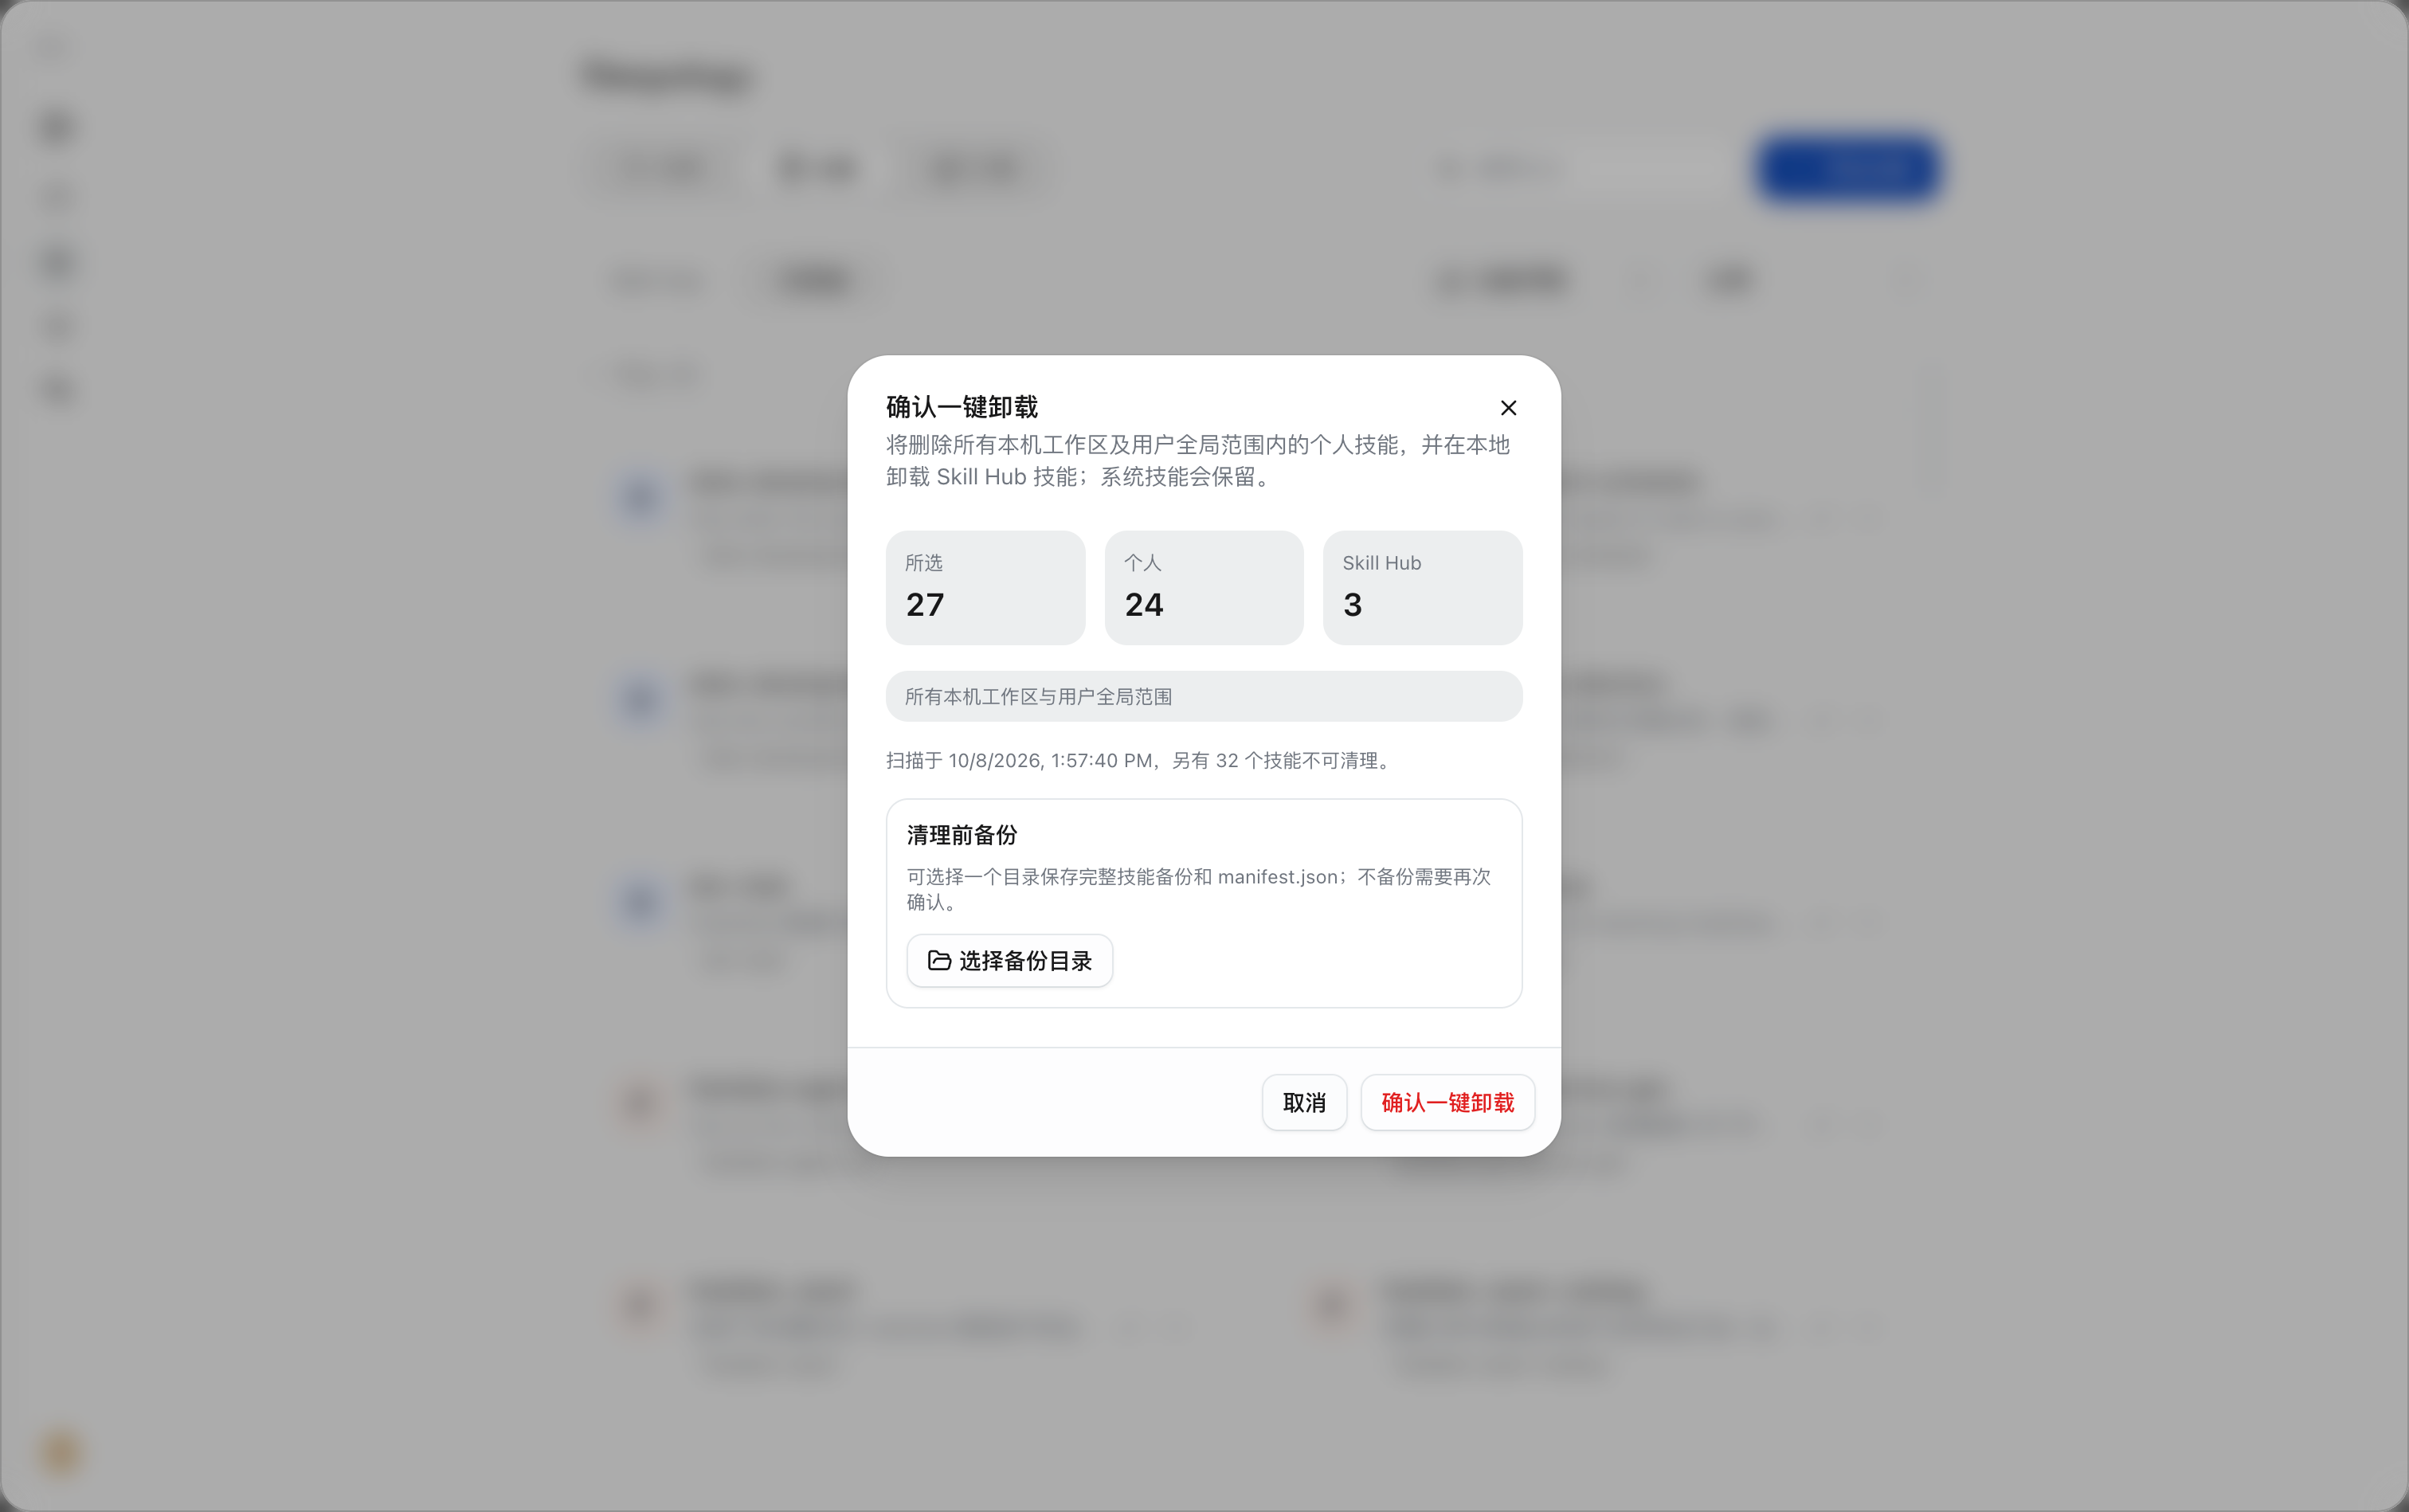
Viewing Cleanup Results
After cleanup finishes, verify the counts of succeeded, skipped, and failed items. If there are skipped or failed items, check whether those Skills remain in the Installed list, handle them according to the on-page prompts, and then decide whether to retry.
If backup was configured, you can click Open Backup Folder to check the backup content. ClickDone to return to the Skill list and confirm the cleanup results.
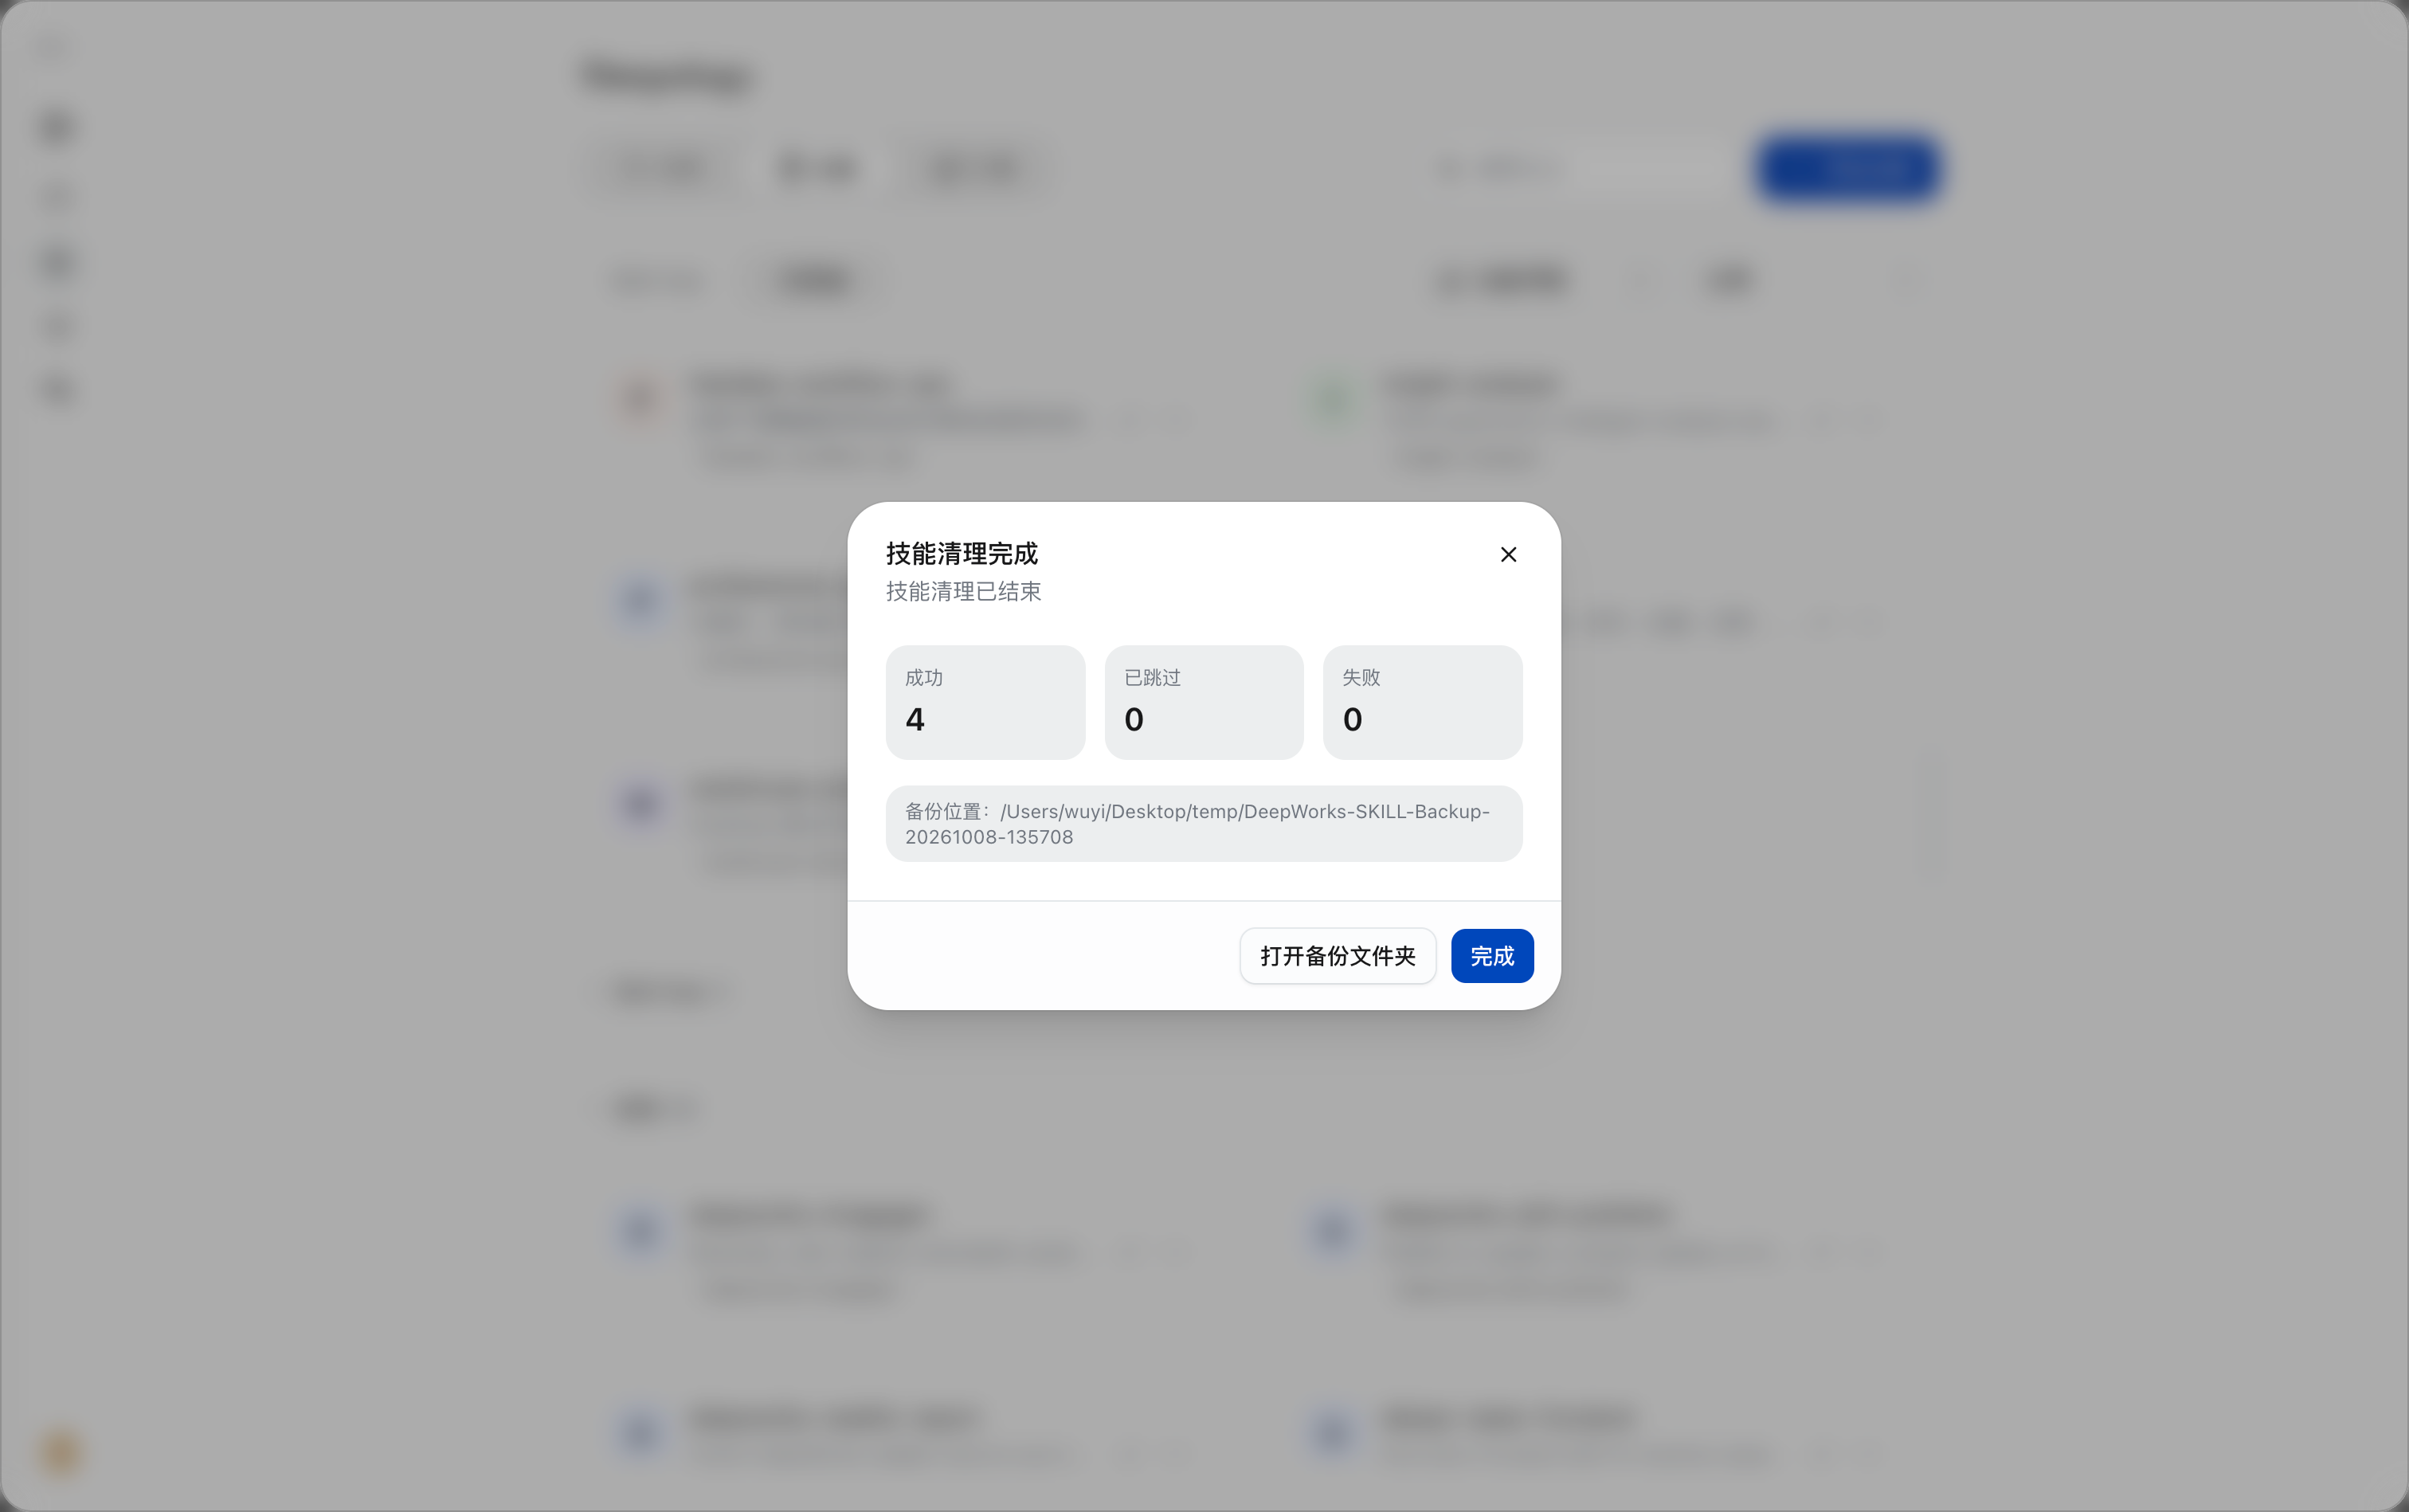
Extension
Managing Plugins
Plugins are used to bring additional capabilities into AI tasks. Through the Extension page, you can access the plugin list, find the plugins you need, and complete connection or authorization.
Path: Discover →Extension →Plugins on the left sidebar.
- Click Discover on the left sidebar, selectExtension, and enter the Extension management page.
- Click the Plugins tab to view available plugins. The Extension page manages different types of capabilities under the MCP,Plugins, andCLI tabs; switch to the appropriate tab as needed.
- Enter keywords in the Search Extensions… input box to find the target plugin; clickRefresh to update the list when needed.
- Read the functional description of the target plugin. After confirming it meets your task needs, click Connect, and follow the on-screen prompts to complete the required authorization or enterprise environment configuration.
When using browser, computer control, or external sending plugins to perform operations, pay attention to authorization and confirmation prompts.
To connect to or manage MCP services, switch to MCP. For details, see7.2 Managing MCP.
Managing MCP
MCP Connection
MCP is used to connect to external tools and services. Through the MCP management page, you can find configured services, view connection methods and status, and add new MCP services.
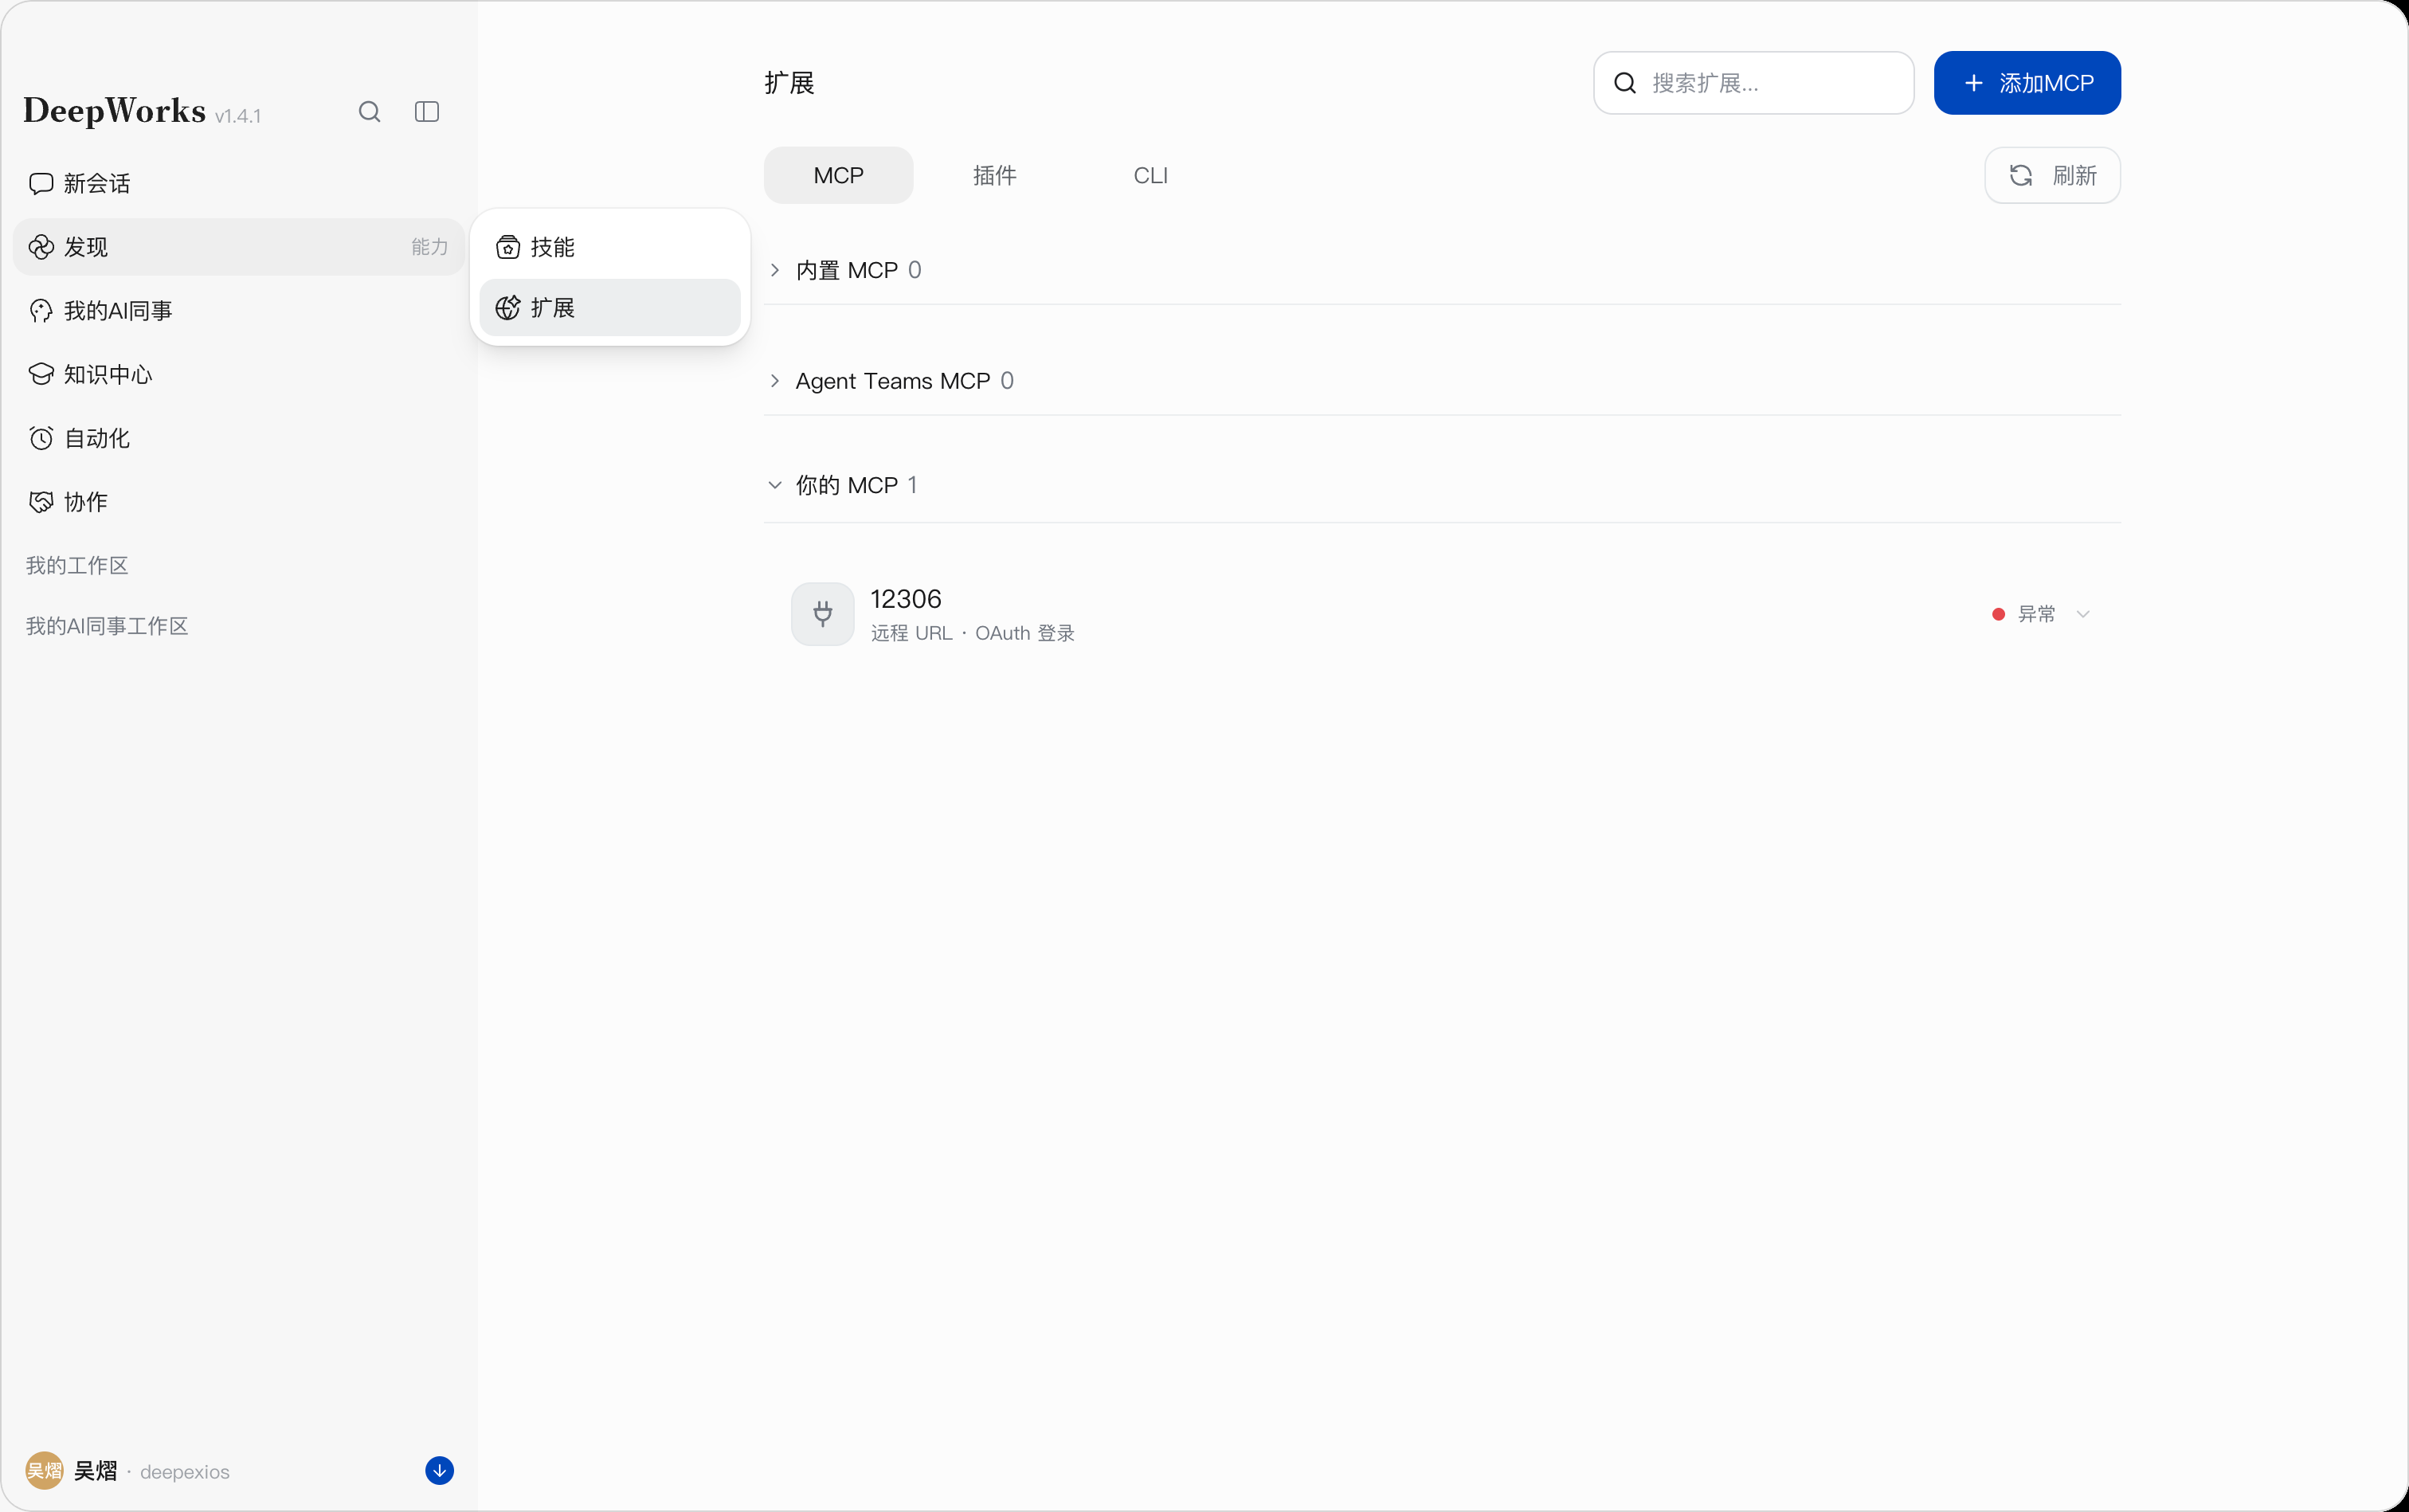
Path: Discover →Extension →MCP on the left sidebar.
Prerequisites: Before adding or connecting to a service, you have obtained the corresponding connection information and usage authorization.
- Click Discover on the left sidebar, selectExtension, and switch to theMCP tab.
- View the connection method, login method, and connection status of the target service. The connection method and login method help you confirm the service’s access configuration, such as a remote URL and OAuth login; the specific information is subject to that service’s configuration.
- If the service status is Abnormal, first check the connection configuration, authorization status, and service availability. Do not assume the connection is successful merely because the service appears in the list. Click Refresh to re-fetch the list and status.
- To connect to a new service, click Add MCP in the upper-right corner and complete the configuration as described in 7.2.2 Adding MCP.
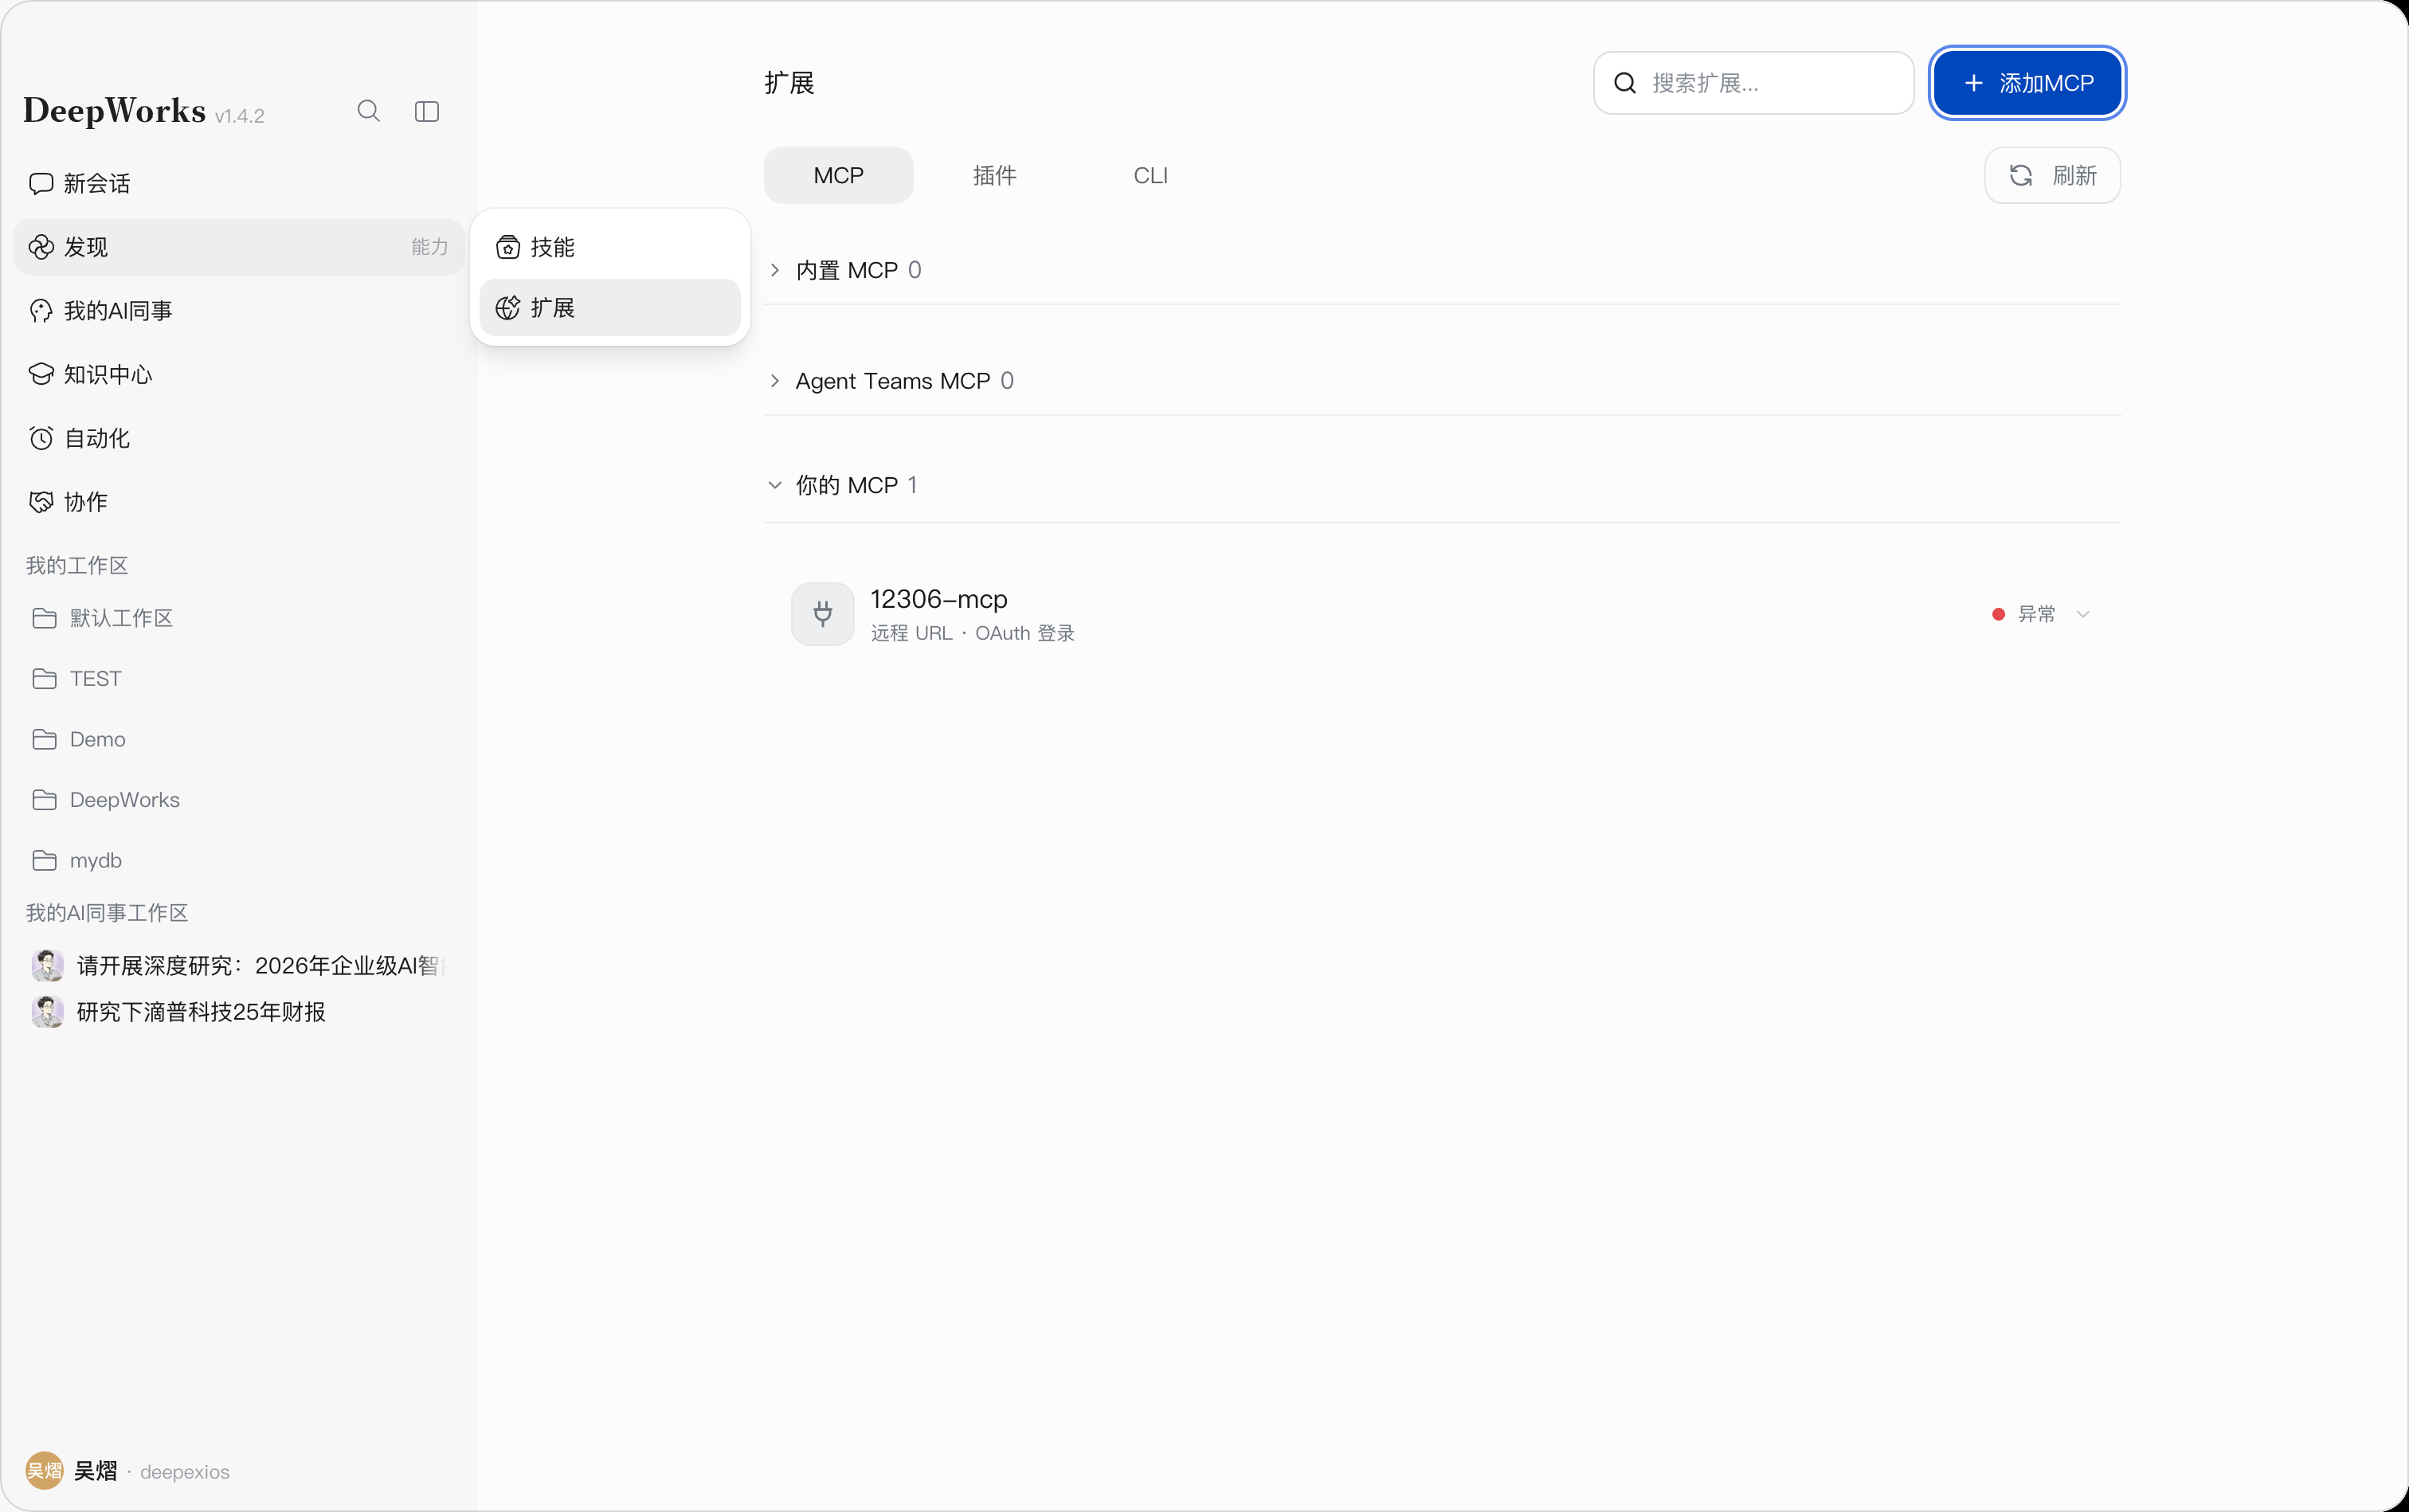
Before connecting to a service, confirm the service source, the scope of data it is allowed to access, and how credentials are stored, and understand the operations the service can perform and the impact of disconnecting from it.
Adding MCP
DeepWorks supports connecting to custom MCP (Model Context Protocol) services. You can add MCP via form configuration orJSON configuration, and connect to a remote MCP service or a local MCP service depending on the service type.
Click Add MCP
Go to the MCP management page and click Add MCP to open the MCP configuration window.
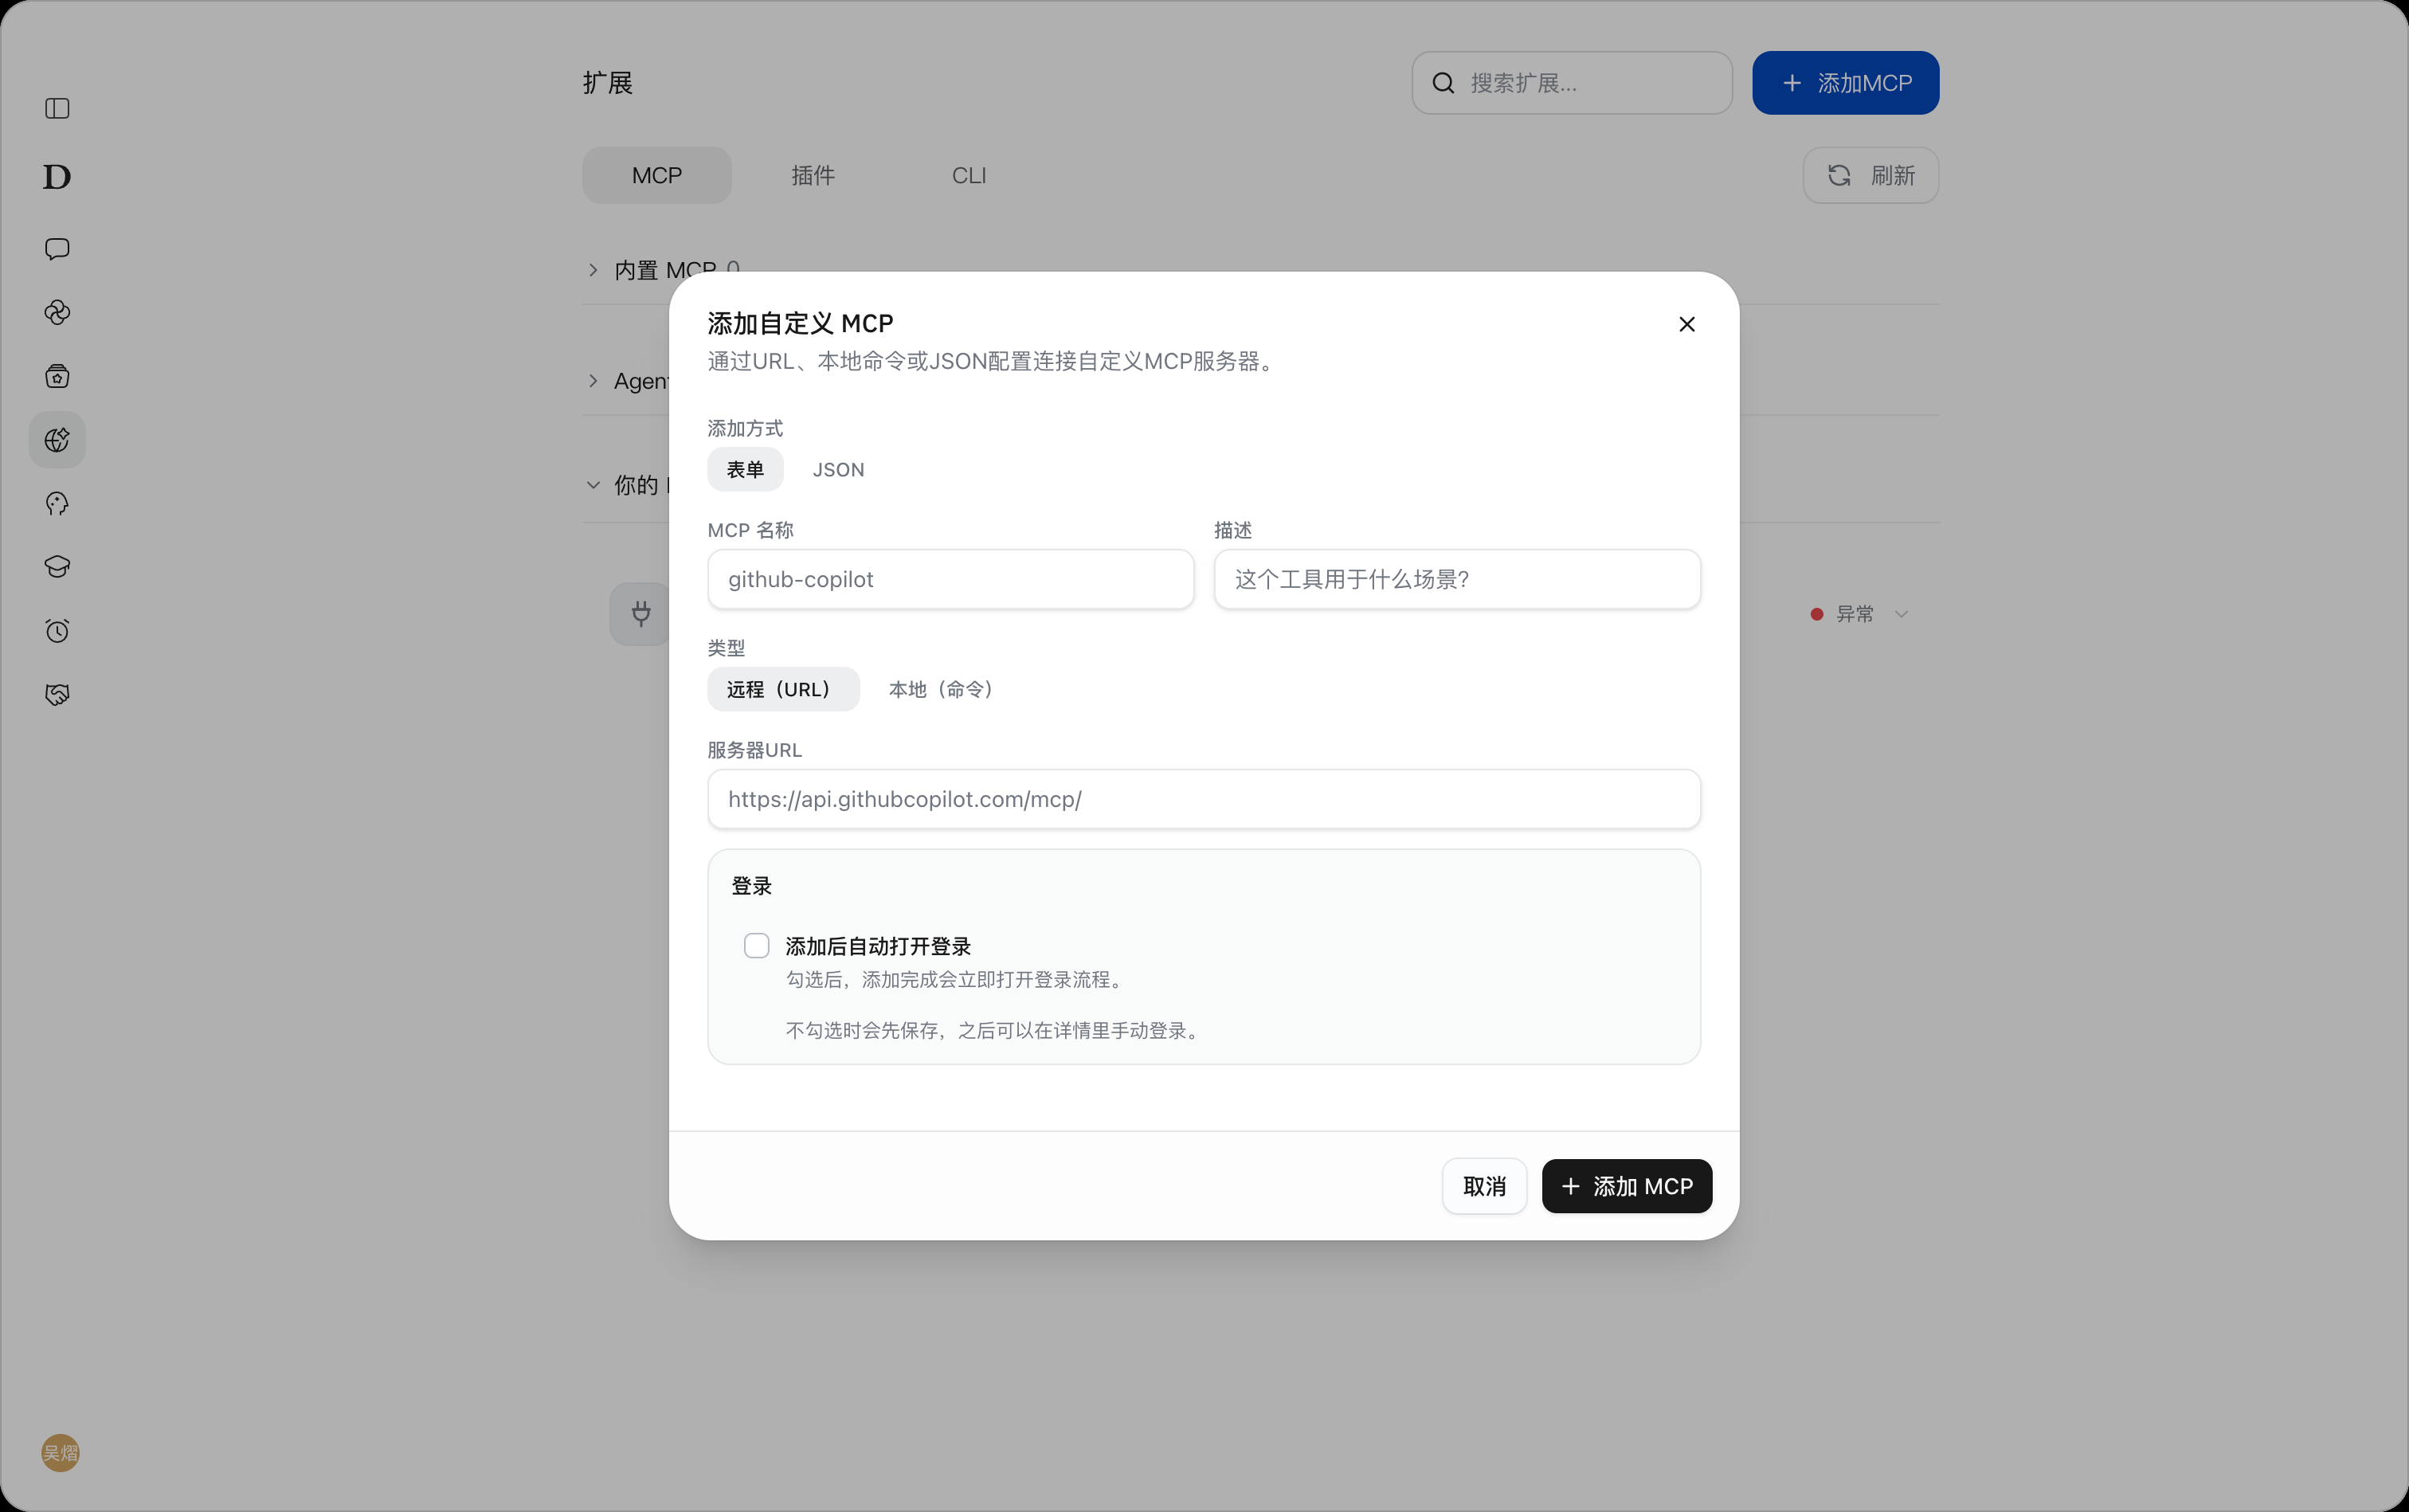
Two adding methods are available:
-
Form: Fill in the MCP configuration information through a visual form, suitable for connecting to regular MCP services.
-
JSON: Paste the MCP JSON configuration directly, suitable for scenarios where you already have a configuration file or need to fill in parameters in batch.
Add MCP via Form
Select Form under “Adding Method” and fill in the configuration information according to the actual situation of the MCP service.
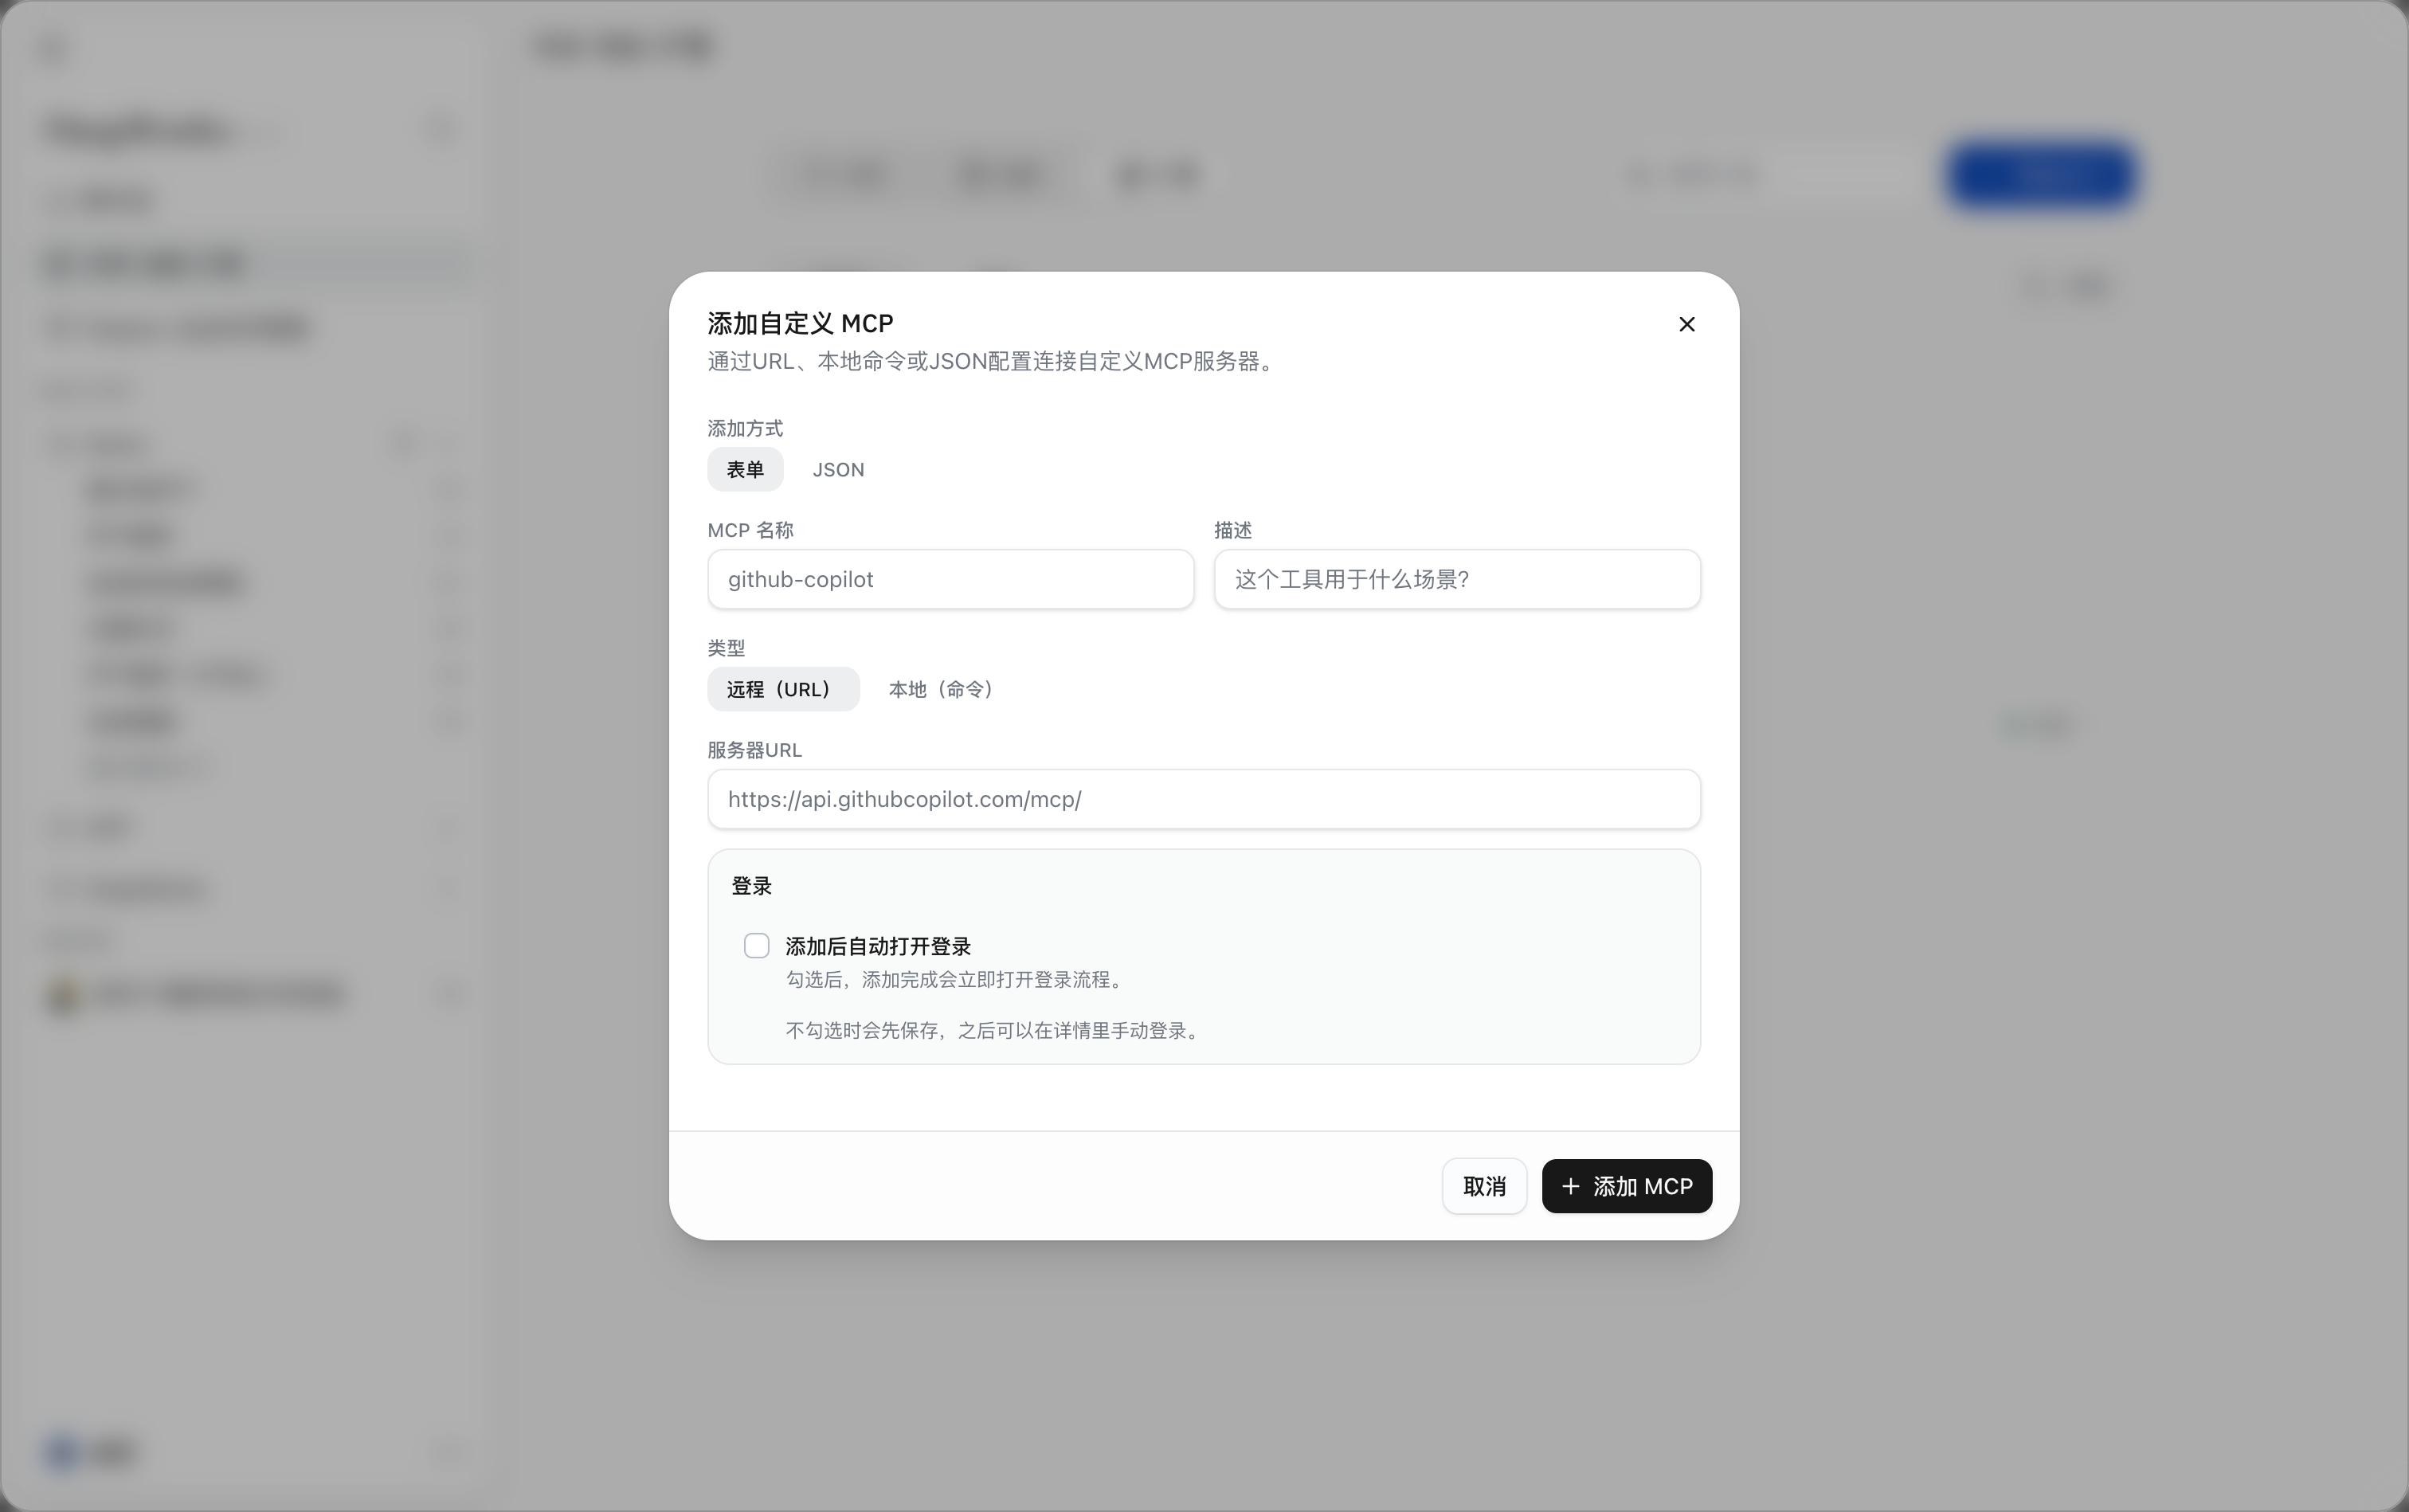
Basic Information
| Configuration Item | Description |
|---|---|
| MCP Name | The name displayed for the MCP in DeepWorks, used for later identification and management. |
| Description | Briefly describe the capabilities or applicable scenarios of the MCP. It is recommended to provide a purpose description that is easy for users to understand. |
| Type | Supports two connection methods: Remote (URL) andLocal (Command). |
Remote MCP
After selecting Remote (URL), fill in the access address provided by the MCP service in “Server URL”, for example:
https://api.example.com/mcp/
If the MCP service requires account authorization through a browser, you can check Auto-open login after adding.
-
Checked: After the MCP is added, the system automatically enters the login or authorization flow.
-
Unchecked: The system saves the MCP configuration first, and you can later go to the MCP detail page to complete the login manually.
After completing the form, click Add MCP to save the configuration.
Local MCP
After selecting Local (Command), configure the local startup command and related parameters of the MCP service as prompted on the page.
Local MCP is typically suitable for MCP Servers that need to run on the current device. After completing the configuration, click Add MCP to save.
Add MCP via JSON
If you have already obtained the MCP configuration from the MCP service provider, an open-source project, or another client, you can use the JSON method to add it quickly.
Select JSON under “Adding Method” and paste the MCP configuration into the “MCP JSON” input area.
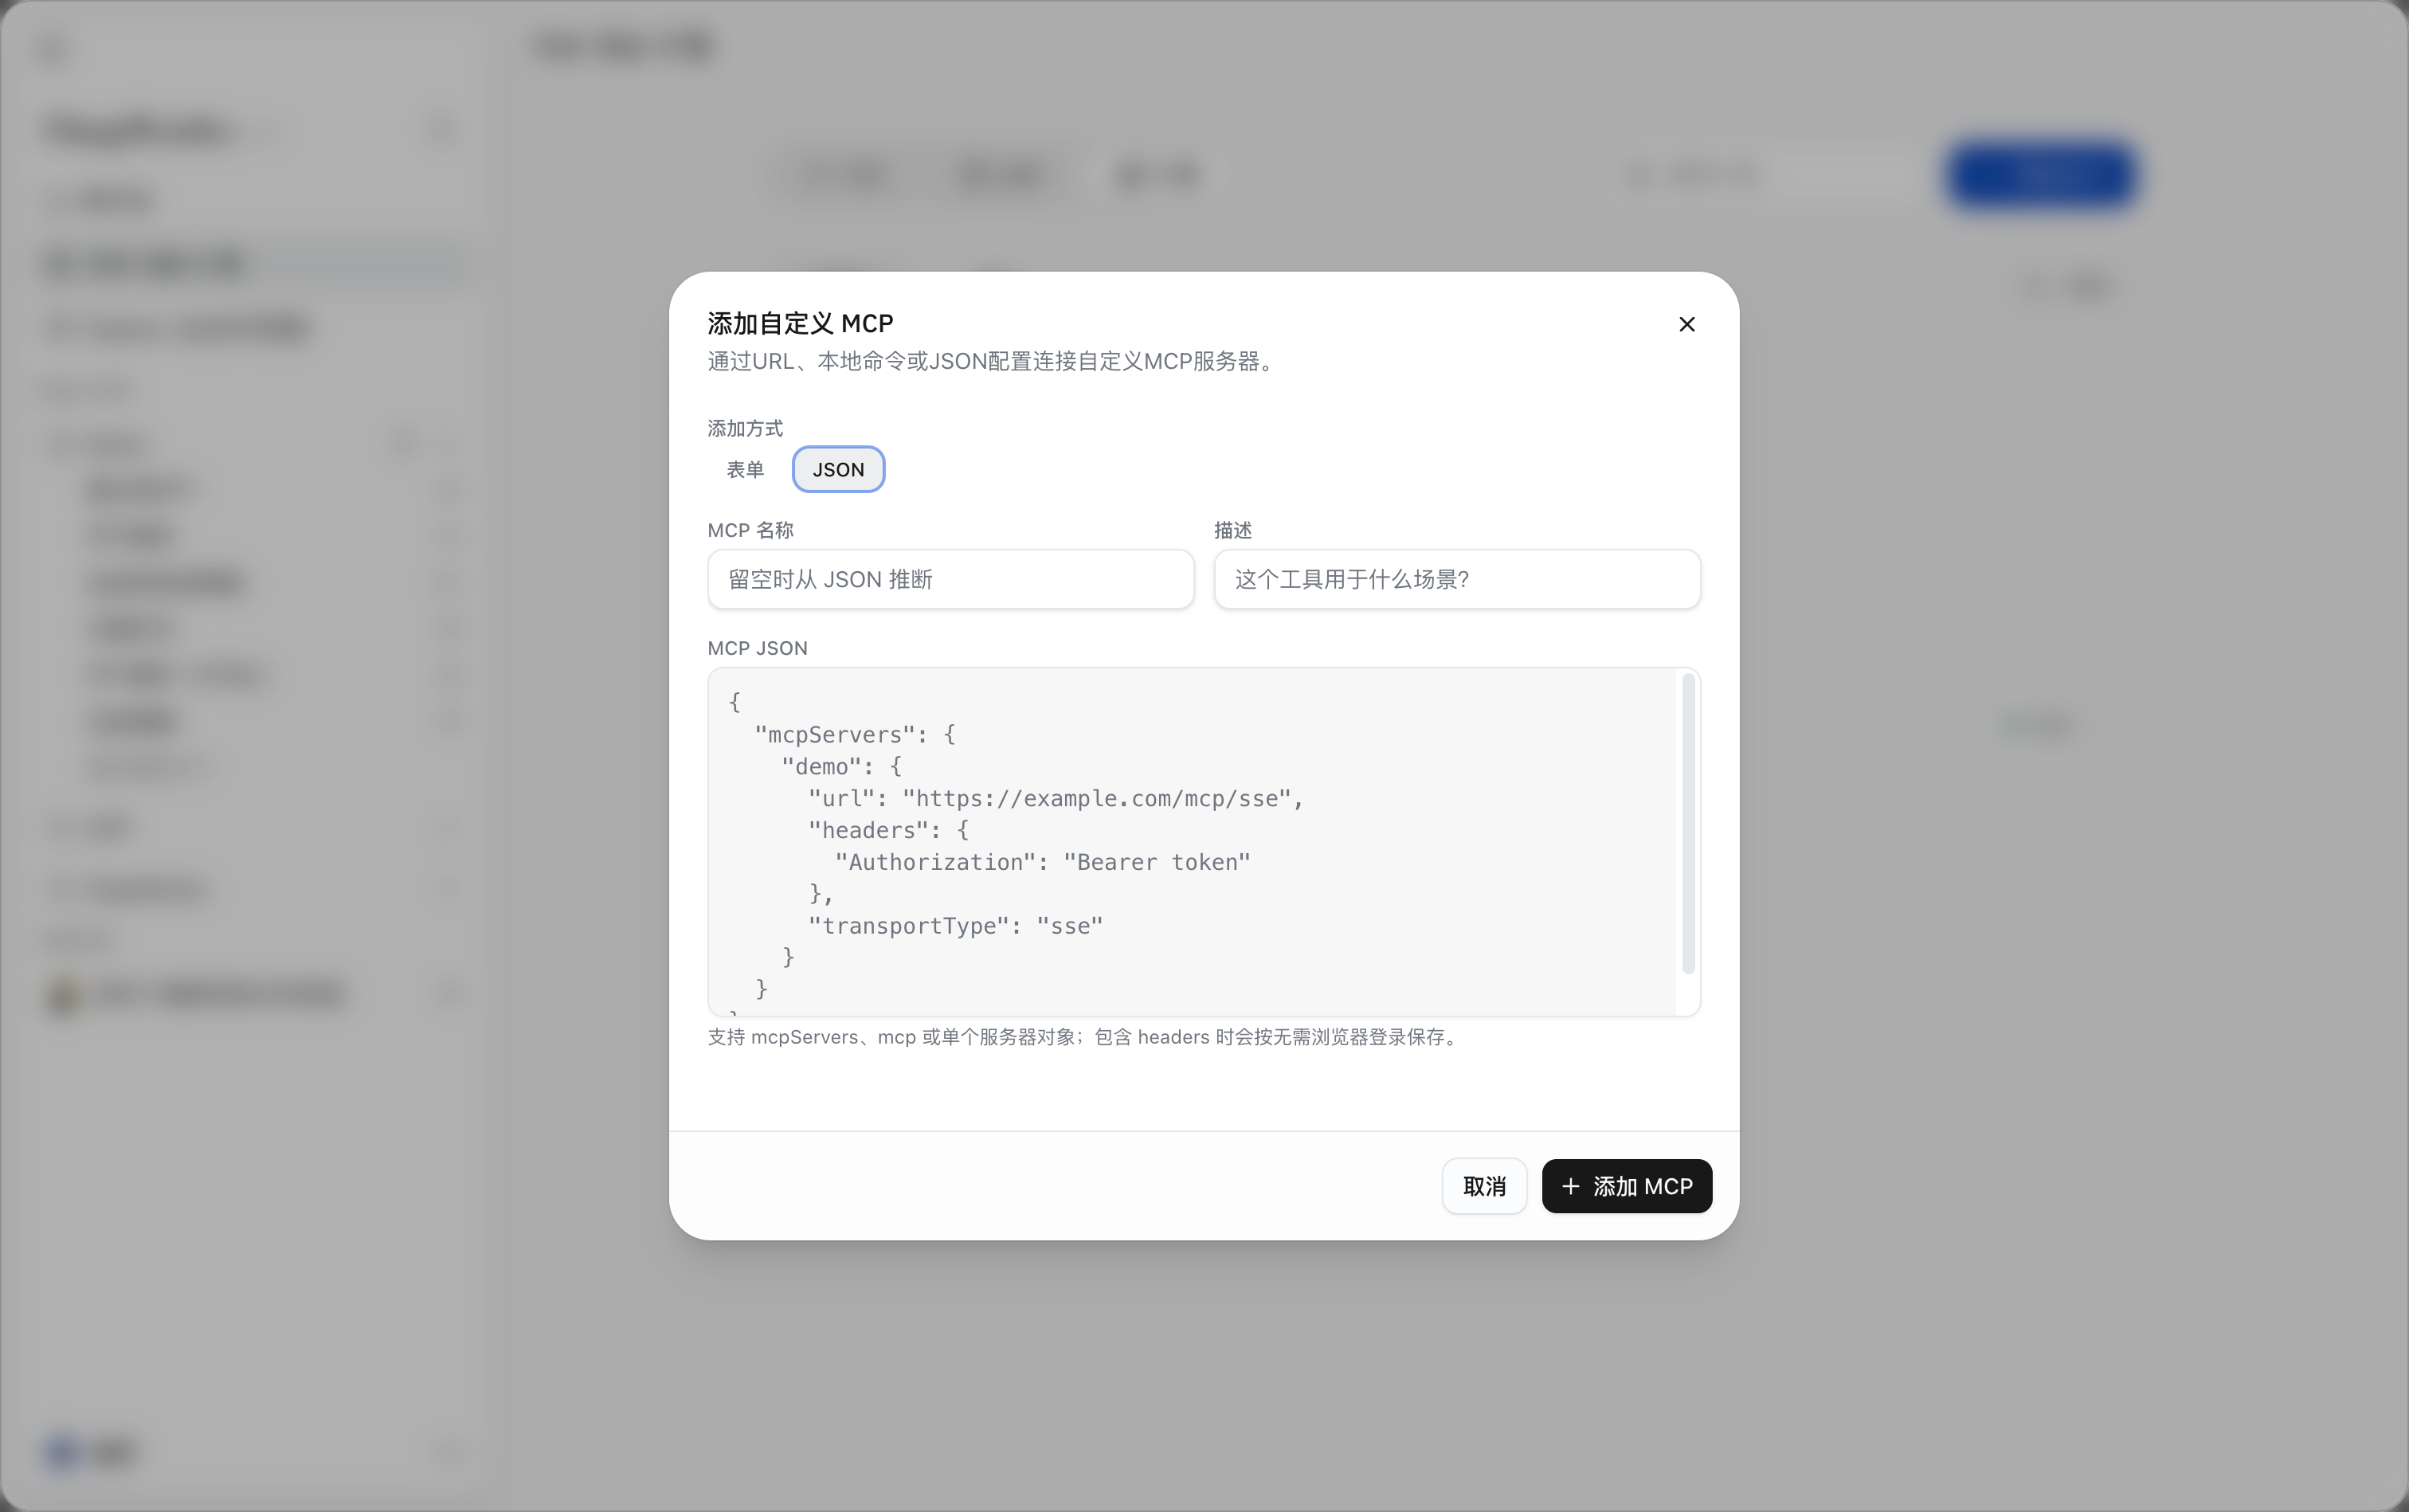
DeepWorks supports the following common JSON configuration formats:
-
The
mcpServersconfiguration object; -
The
mcpconfiguration object; -
A single MCP Server configuration object.
For example:
{
  "mcpServers": {
    "demo": {
      "url": "https://example.com/mcp/sse",
      "headers": {
        "Authorization": "Bearer token"
      },
      "transportType": "sse"
    }
  }
}
After filling in the JSON:
-
MCP Name can be filled in manually; if left blank, the system can infer the name from the JSON configuration.
-
You can add a Description explaining the main capabilities and usage scenarios of the MCP.
-
Check whether the JSON format and server configuration are correct.
-
Click Add MCP to finish adding.
For an MCP whose authentication information such as headers is already configured in the JSON, the system will save the authentication parameters according to the configuration, so there is no need to complete the login through a browser again.
Adding Completed
After the MCP is added successfully, it will appear in the MCP list. You can go to the MCP details to view the connection status, configuration information, and available capabilities.
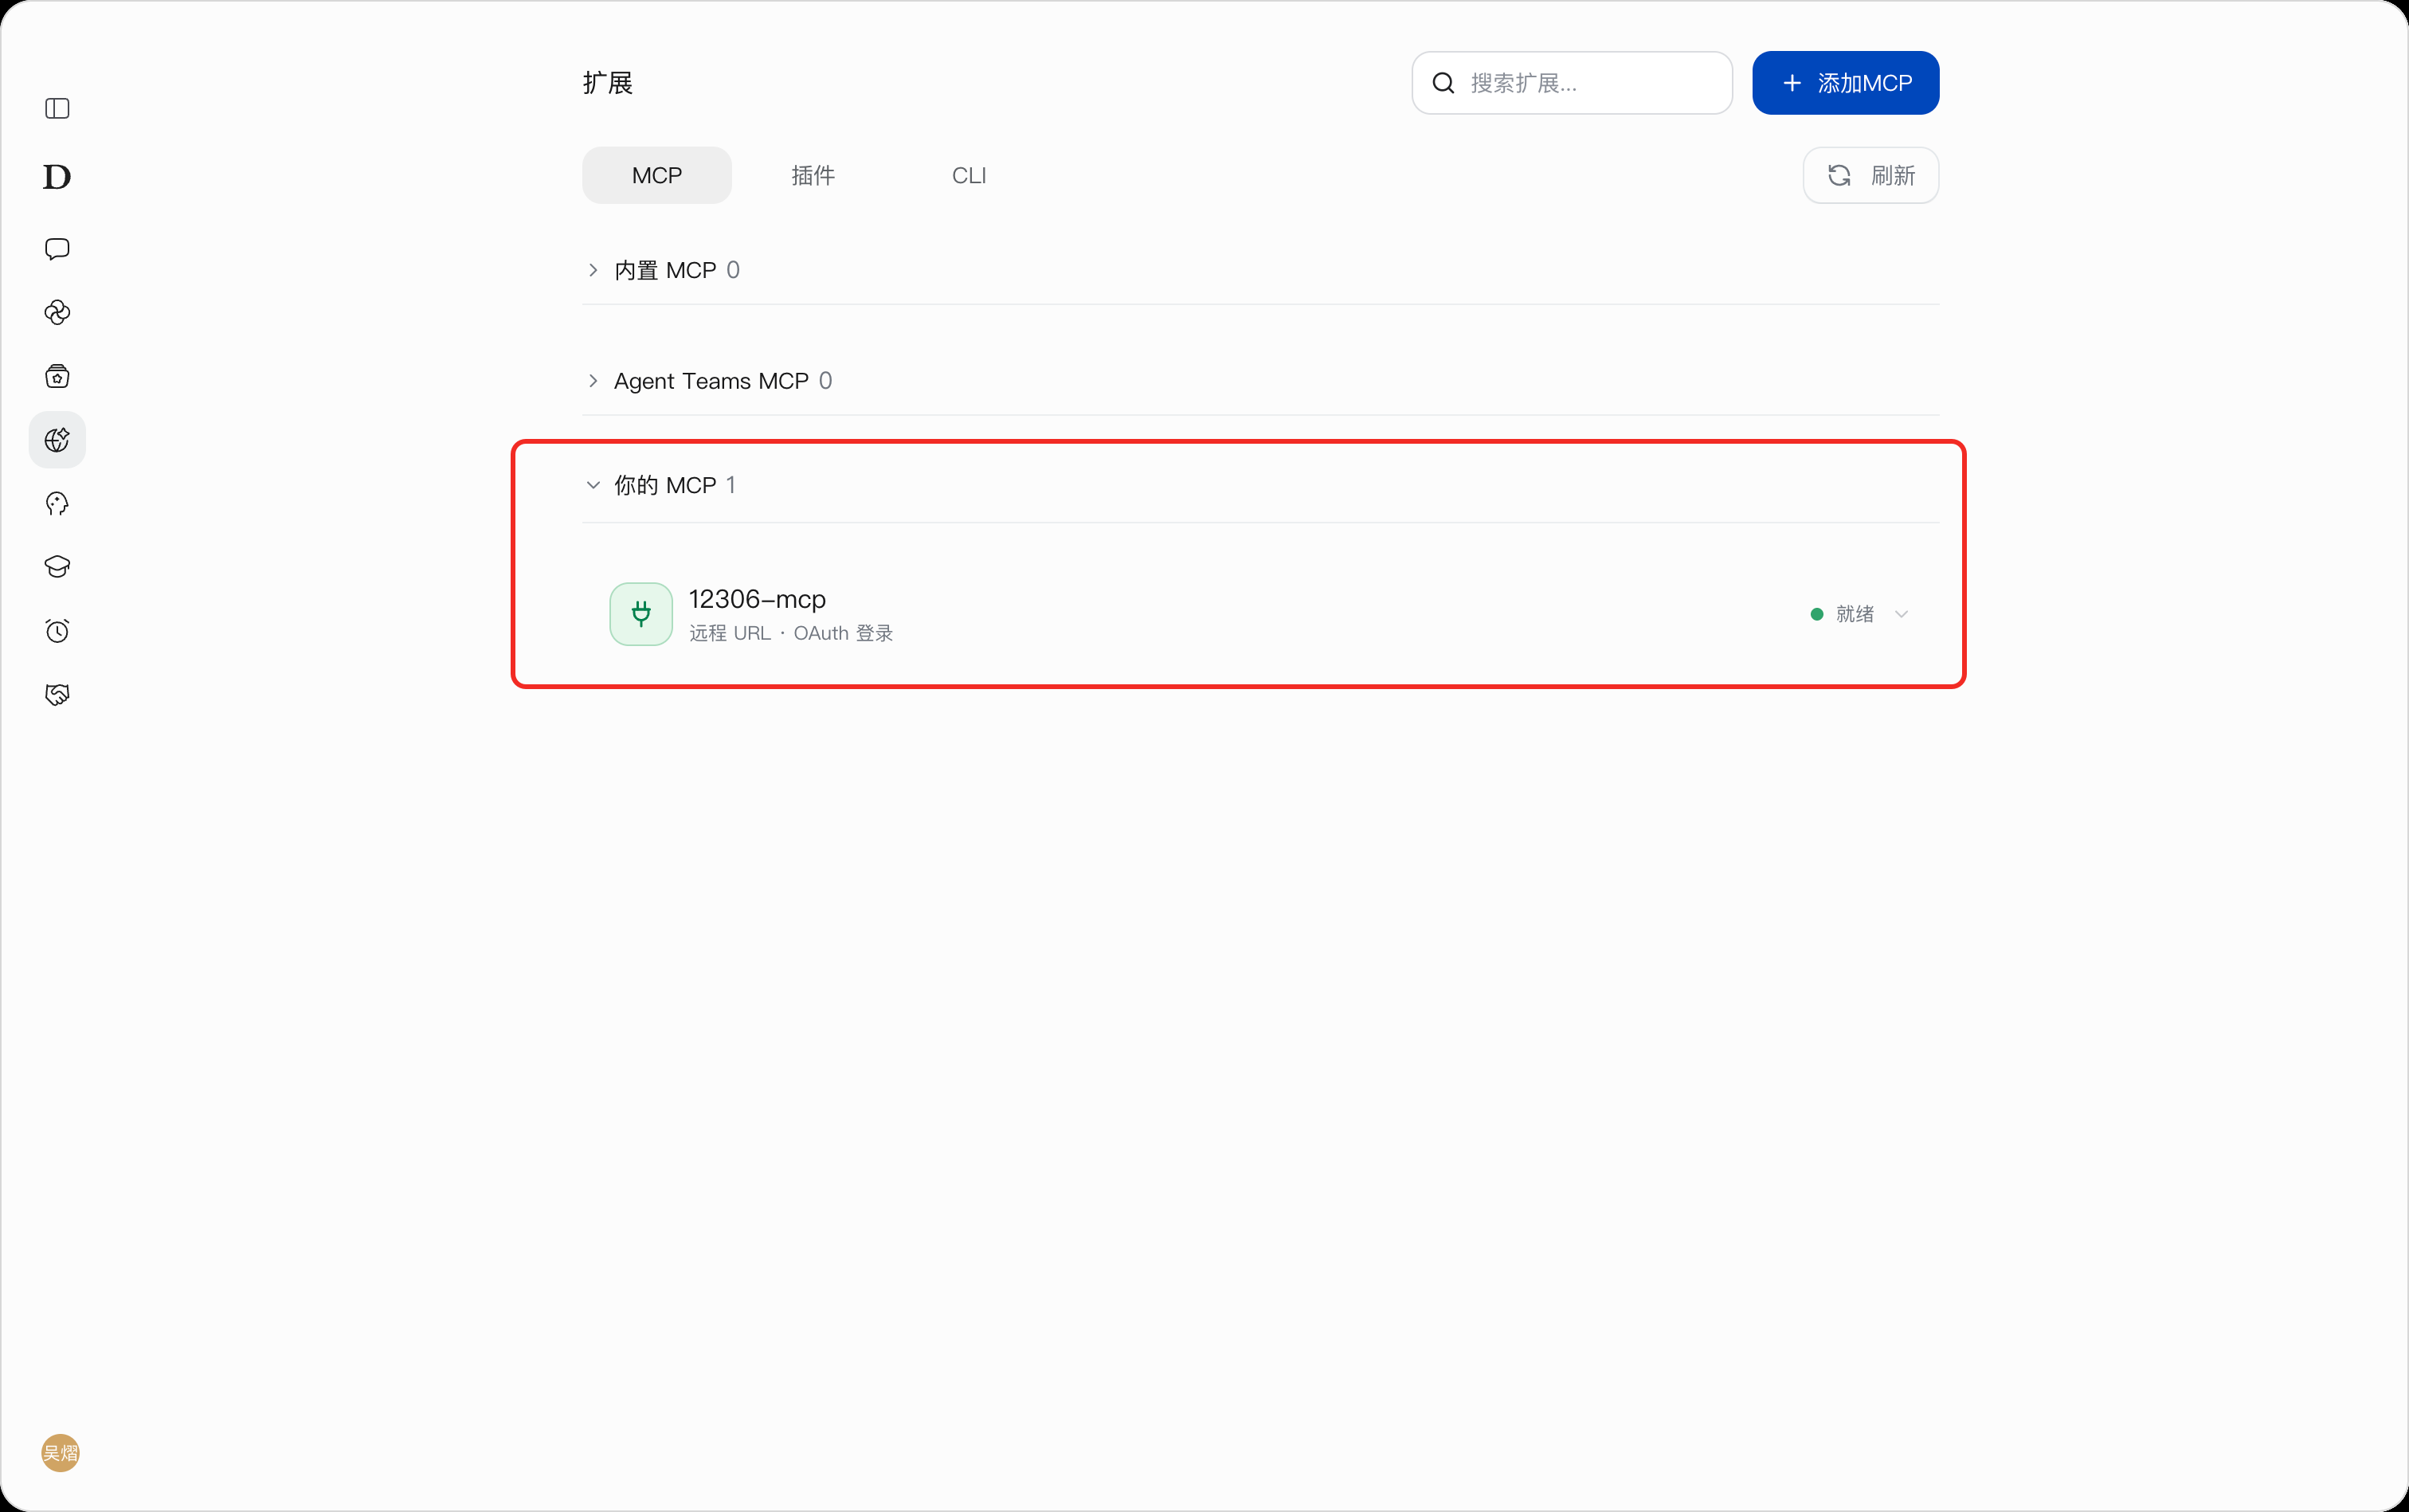
For an MCP that requires account authorization but whose login was not completed when it was added, you can go to the detail page to continue completing the login or authorization.
Once the MCP is connected normally, its tools and capabilities become available for DeepWorks to invoke in the corresponding scenarios.
Notes
-
The MCP Server address, startup command, and authentication information should be based on the configuration provided by the MCP service provider.
-
When adding via JSON, make sure the JSON format is complete and the field names are correct.
-
headersmay contain sensitive authentication information such as Tokens and API Keys. Keep it safe and avoid providing the configuration to unrelated personnel. -
If the MCP cannot connect normally, first check the server address, local startup command, network environment, and authentication status.
Managing CLI
Path: Discover →Extension →CLI on the left sidebar.
CLI (command-line tools) are used to connect to external platforms, allowing DeepWorks to invoke the corresponding services based on the user’s natural language tasks. On the CLI page, you can find tools, learn about their purposes, and check installation and connection status. After completing the required configuration, state your task in a session.
Viewing and Searching CLI Tools
- Click Discover on the left sidebar, selectExtension, and switch to theCLI tab.
- Expand the CLI Tools group and select the tool suitable for your task based on the tool name and functional description; you can also enter keywords in Search Extensions… in the upper-right corner to find the target tool.
- Check the tool status to determine whether installation or connection is needed. Click the target tool’s list item to open the details and complete the required configuration as prompted.
- After installation or connection is complete, click Refresh to re-fetch the tool information and current status.
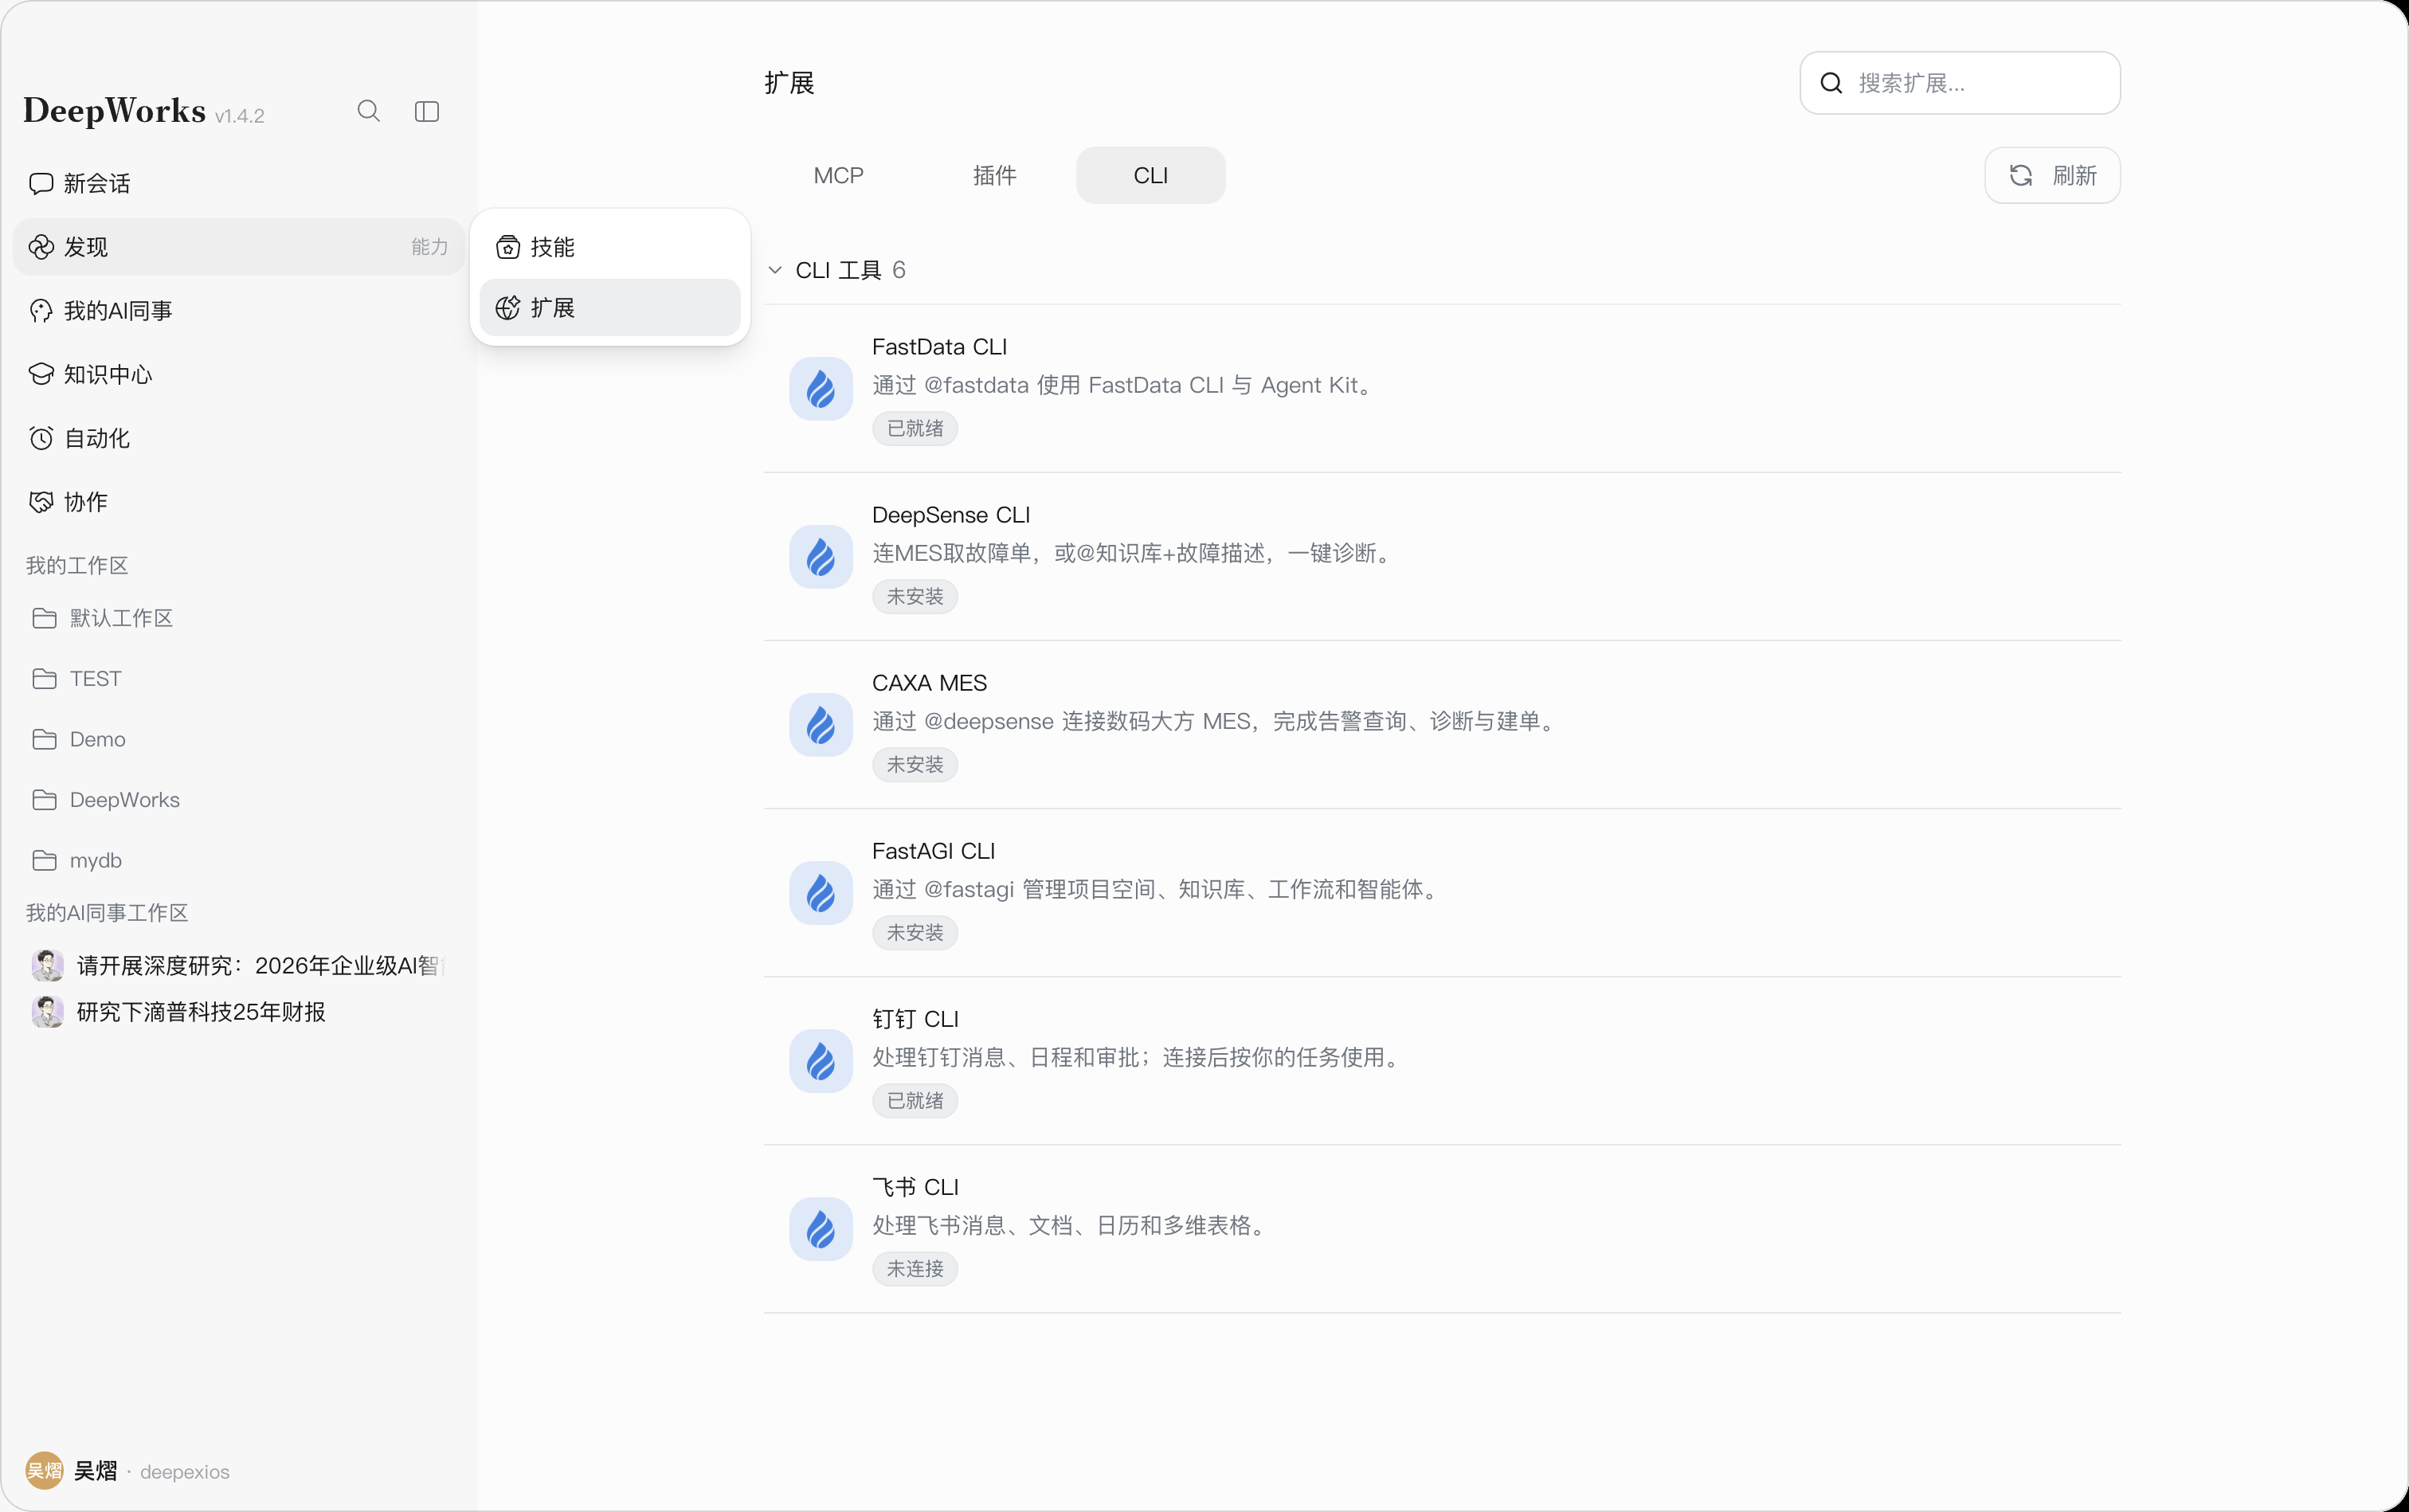
Selecting Tools by Task
| Tool Name | Main Use |
|---|---|
| FastData CLI | Use FastData CLI and Agent Kit via @fastdata. |
| DeepSense CLI | Fetch fault tickets from MES, or perform diagnosis combining the referenced Knowledge Base and fault descriptions. |
| CAXA MES | Connect to CAXA MES via @deepsense to complete alarm queries, diagnosis, and ticket creation. |
| FastAGI CLI | Manage project spaces, Knowledge Bases, workflows, and agents via @fastagi. |
| DingTalk CLI | Handle DingTalk messages, schedules, and approvals; use as needed for tasks after connection. |
| Feishu CLI | Handle Feishu messages, documents, calendars, and Base (multi-dimensional tables). |
Available tools are subject to the list provided in the current environment.
Completing Preparation Based on Status
| Status | Meaning and Follow-up Actions |
|---|---|
| Ready | The tool is ready. You can start tasks in a session according to its usage instructions; the actual scope of operations depends on account permissions. |
| Not Installed | The tool must be installed first, then configured and authorized as required. |
| Not Connected | The service connection has not been completed. Go to the tool details to check the connection or authorization configuration. |
Installation and connection steps vary by tool and are subject to each tool’s detail page. FastData CLI installation can be guided within a session; the Feishu CLI installation and authorization flow is described below.
Feishu CLI
Installing and Configuring Feishu CLI
The following uses Feishu CLI as an example to illustrate the installation and authorization flow. The configuration items of other tools are subject to their respective detail pages.
- Find Feishu CLI in the CLI list and clickInstall to open the detail popup.
- Read the tool description and the “Please confirm the Feishu data access scope” prompt. After authorization, the Agent can access Feishu data such as messages, documents, calendars, and email according to your instructions, and perform operations as you; before sending, modifying, or deleting content, DeepWorks’ confirmation requirements still apply.
- To configure a Feishu Open Platform app, fill in the App ID andApp Secret under “Feishu App Configuration (Optional)”. You can clickOpen Feishu Open Platform to obtain or view app information. This section is optional; fill it in according to your actual app integration needs.
- Click One-Click Install at the bottom of the popup to start the installation or reuse of the CLI and Skill, and follow the prompts to complete app configuration and Feishu user authorization.
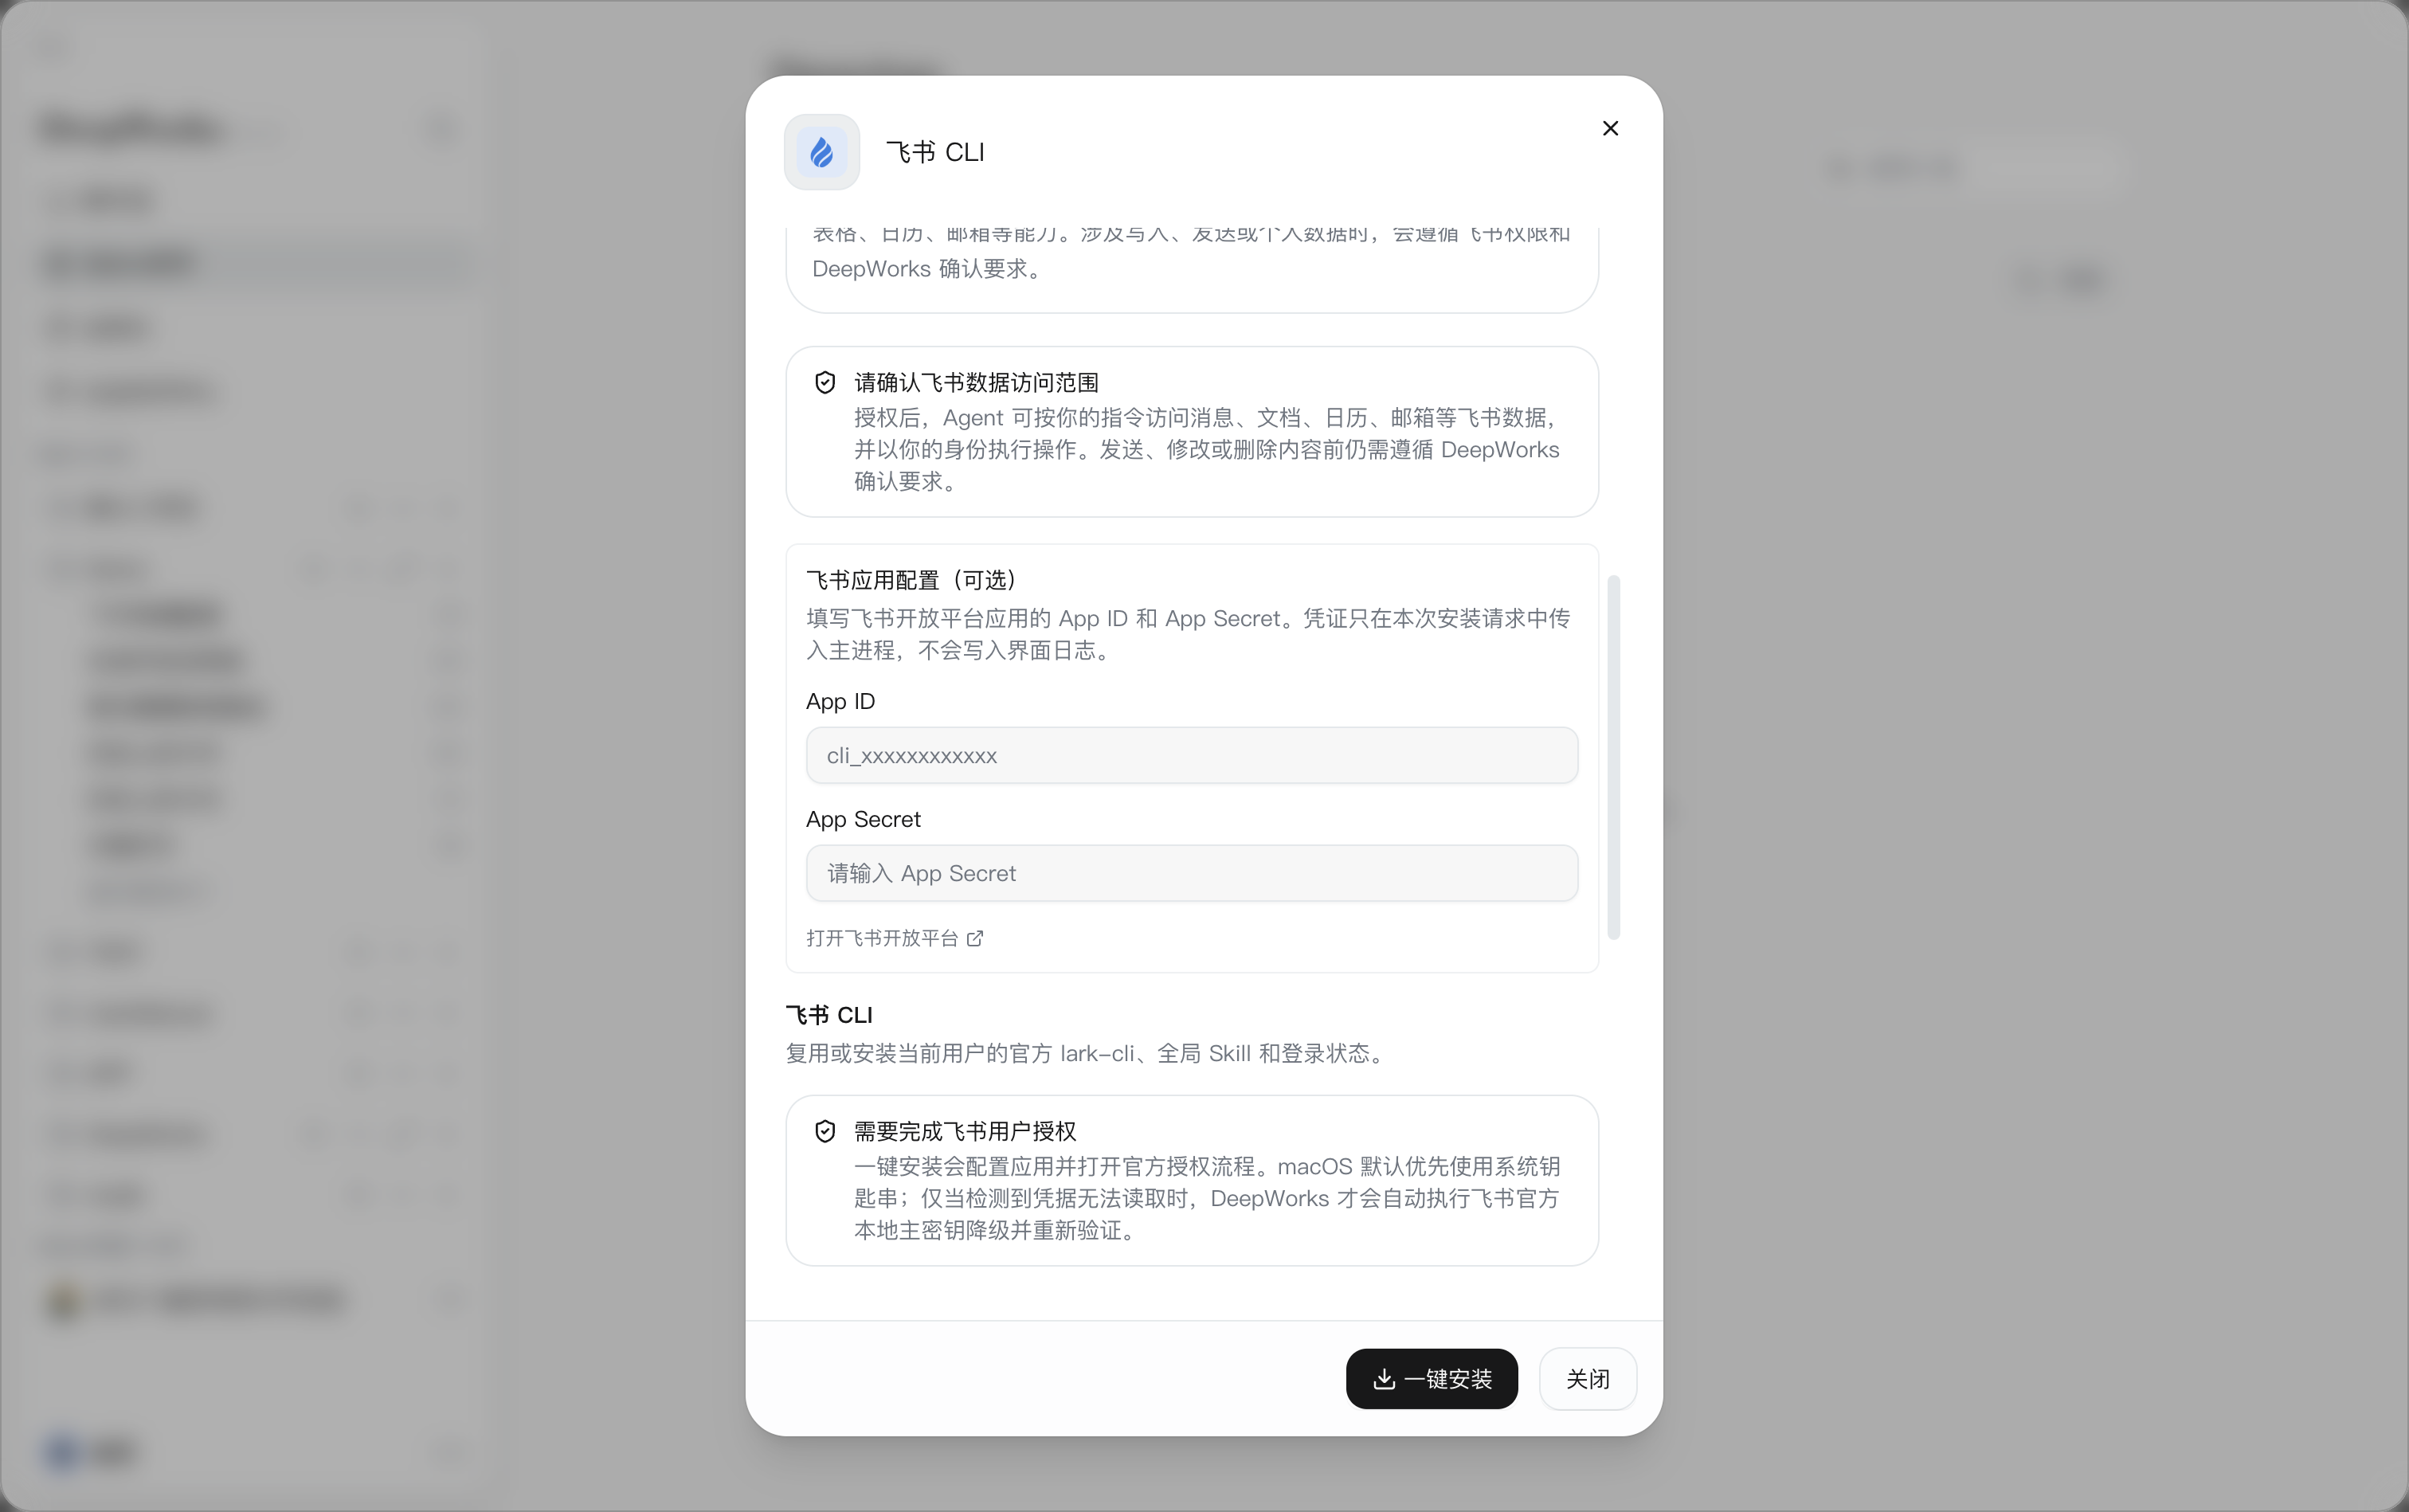
Feishu CLI reuses or installs the current user’s official lark-cli, global Skills, and login state. The App ID and App Secret are only passed to the main process in this installation request and are not written to interface logs; do not paste the App Secret into a regular session.
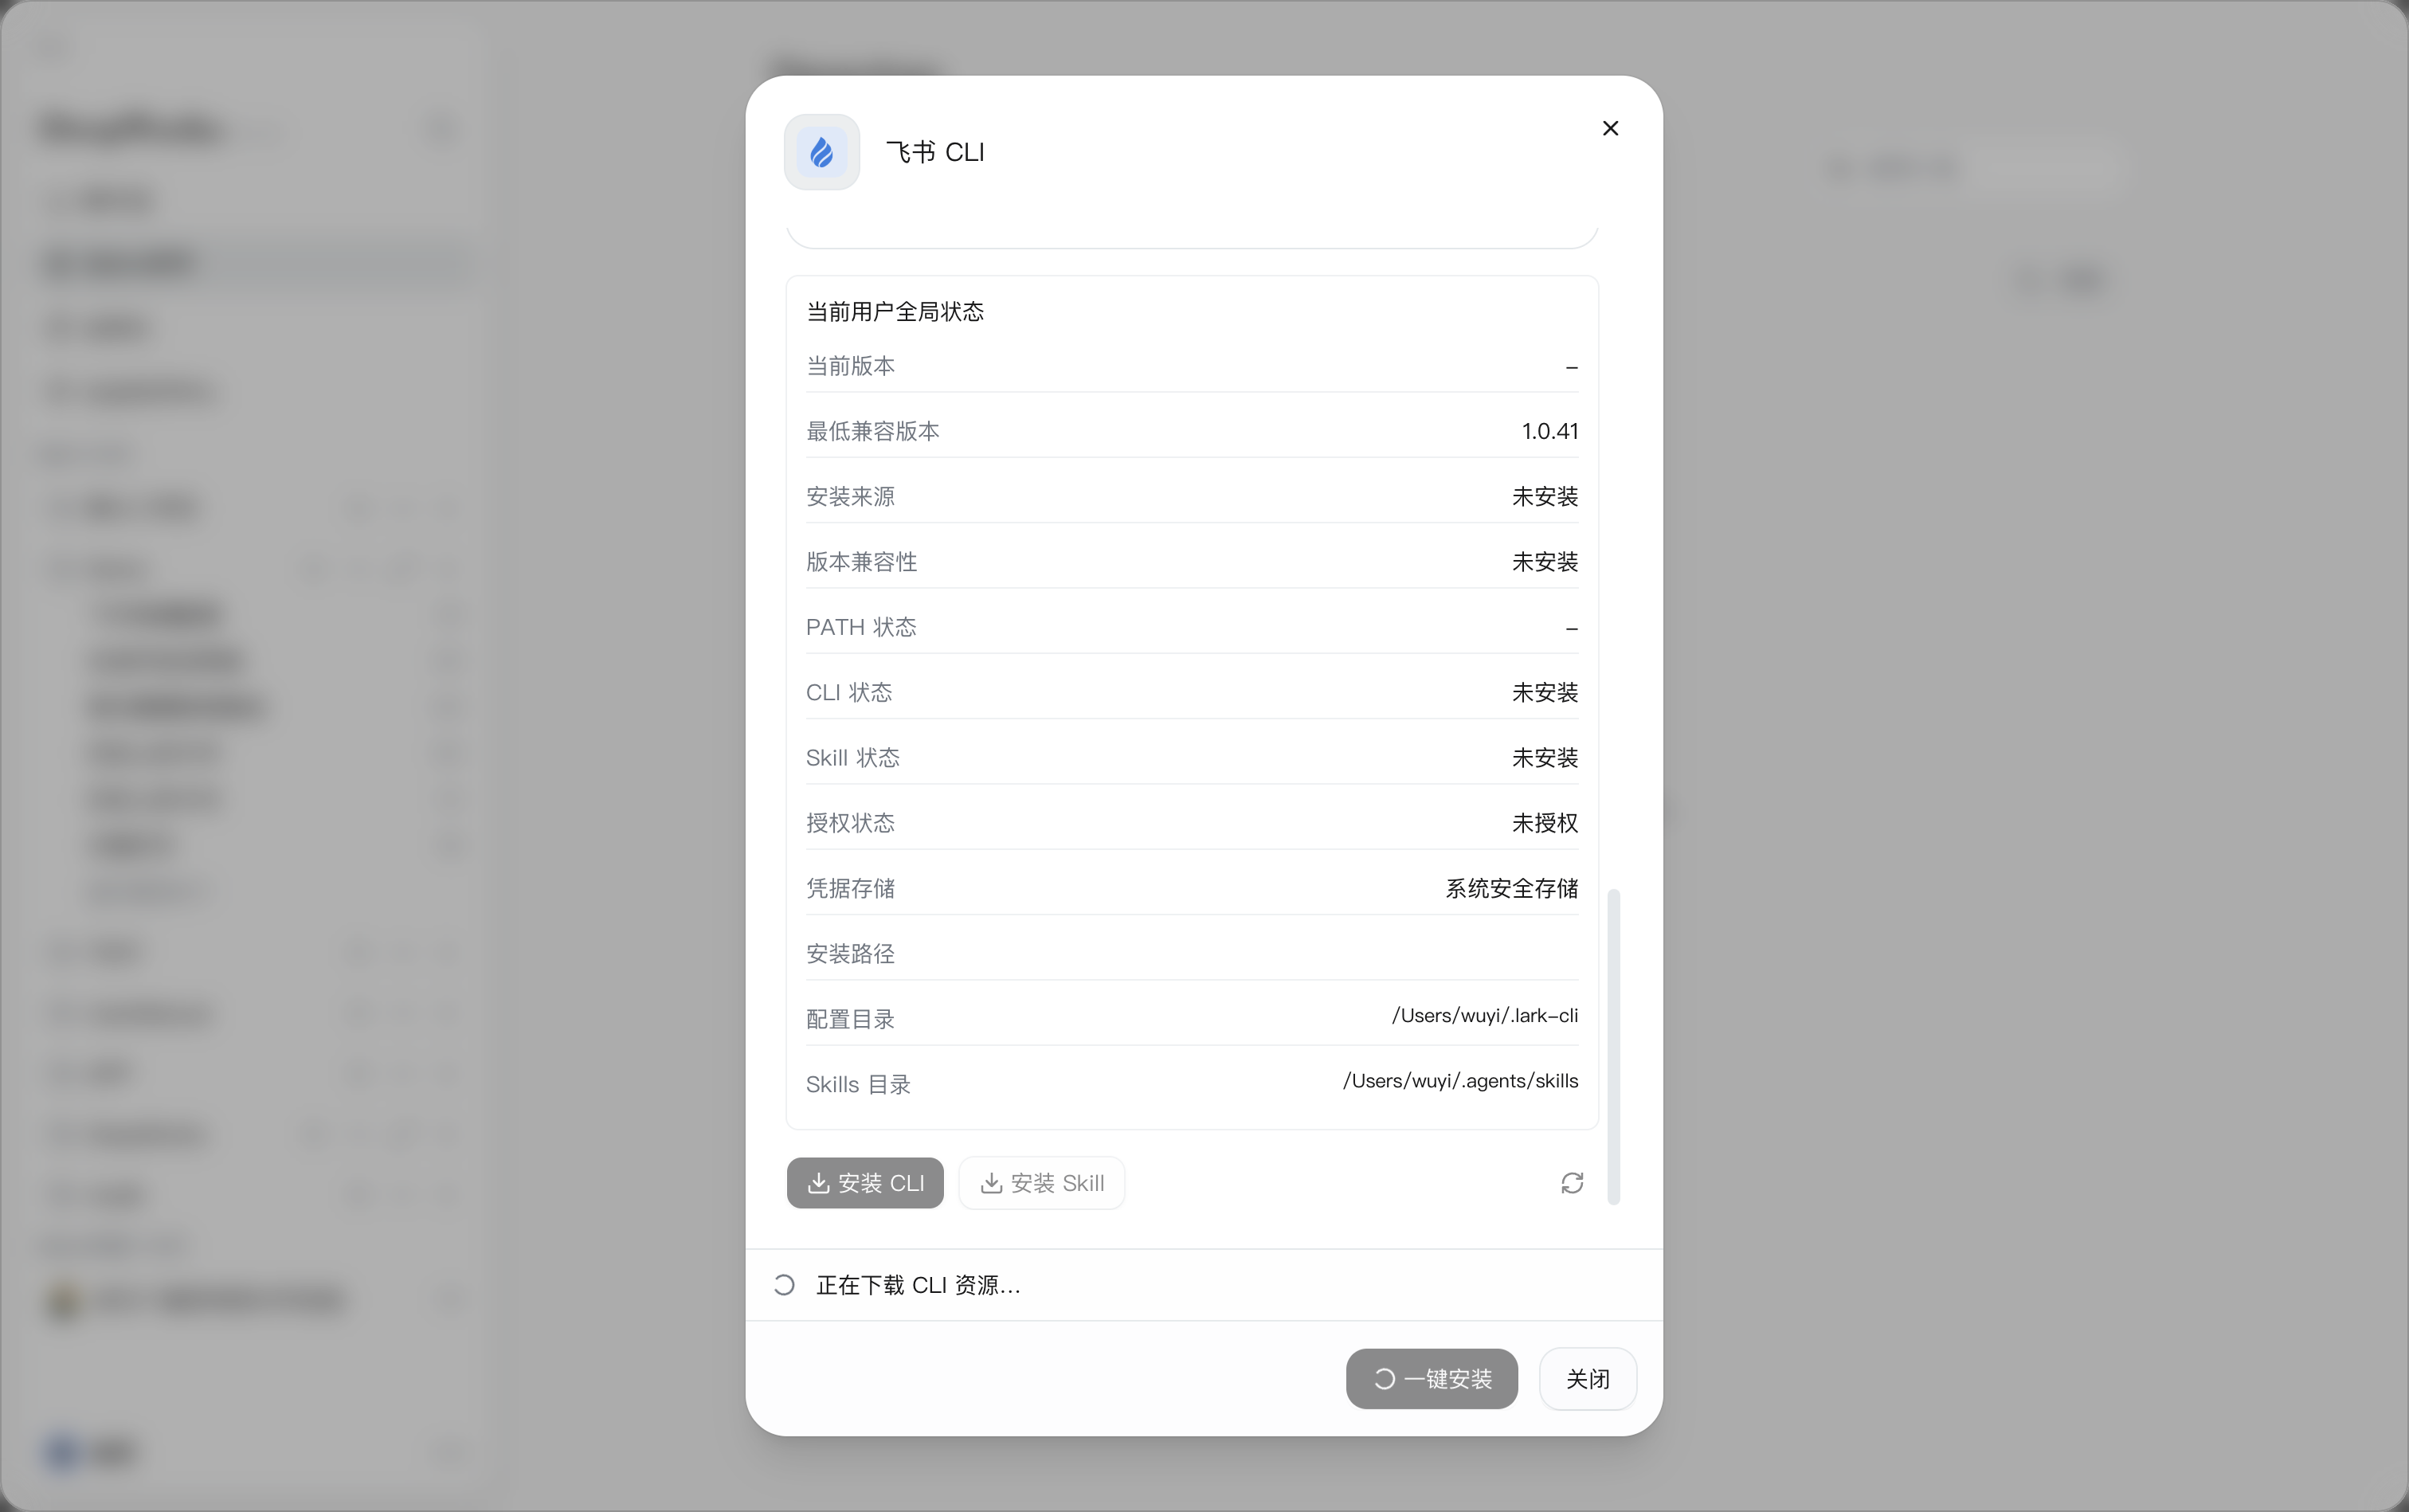
During installation, the current progress is displayed at the bottom of the popup, for example “Downloading CLI resources…”. Buttons such as One-Click Install will enter a loading or non-clickable state; simply wait for the current step to complete.
Completing Feishu User Authorization
After the installation flow opens the official Feishu authorization page, follow these steps:
- Confirm the app to be authorized and the currently logged-in account.
- Read the list of requested permissions. The page indicates that after authorization, the app will access and operate the relevant data on your behalf.
- If you also want to enable the audit-exempt permissions listed on the page, check the corresponding options; click Modify to view and adjust the authorization scope when needed.
- After confirmation, click Enable and Authorize.
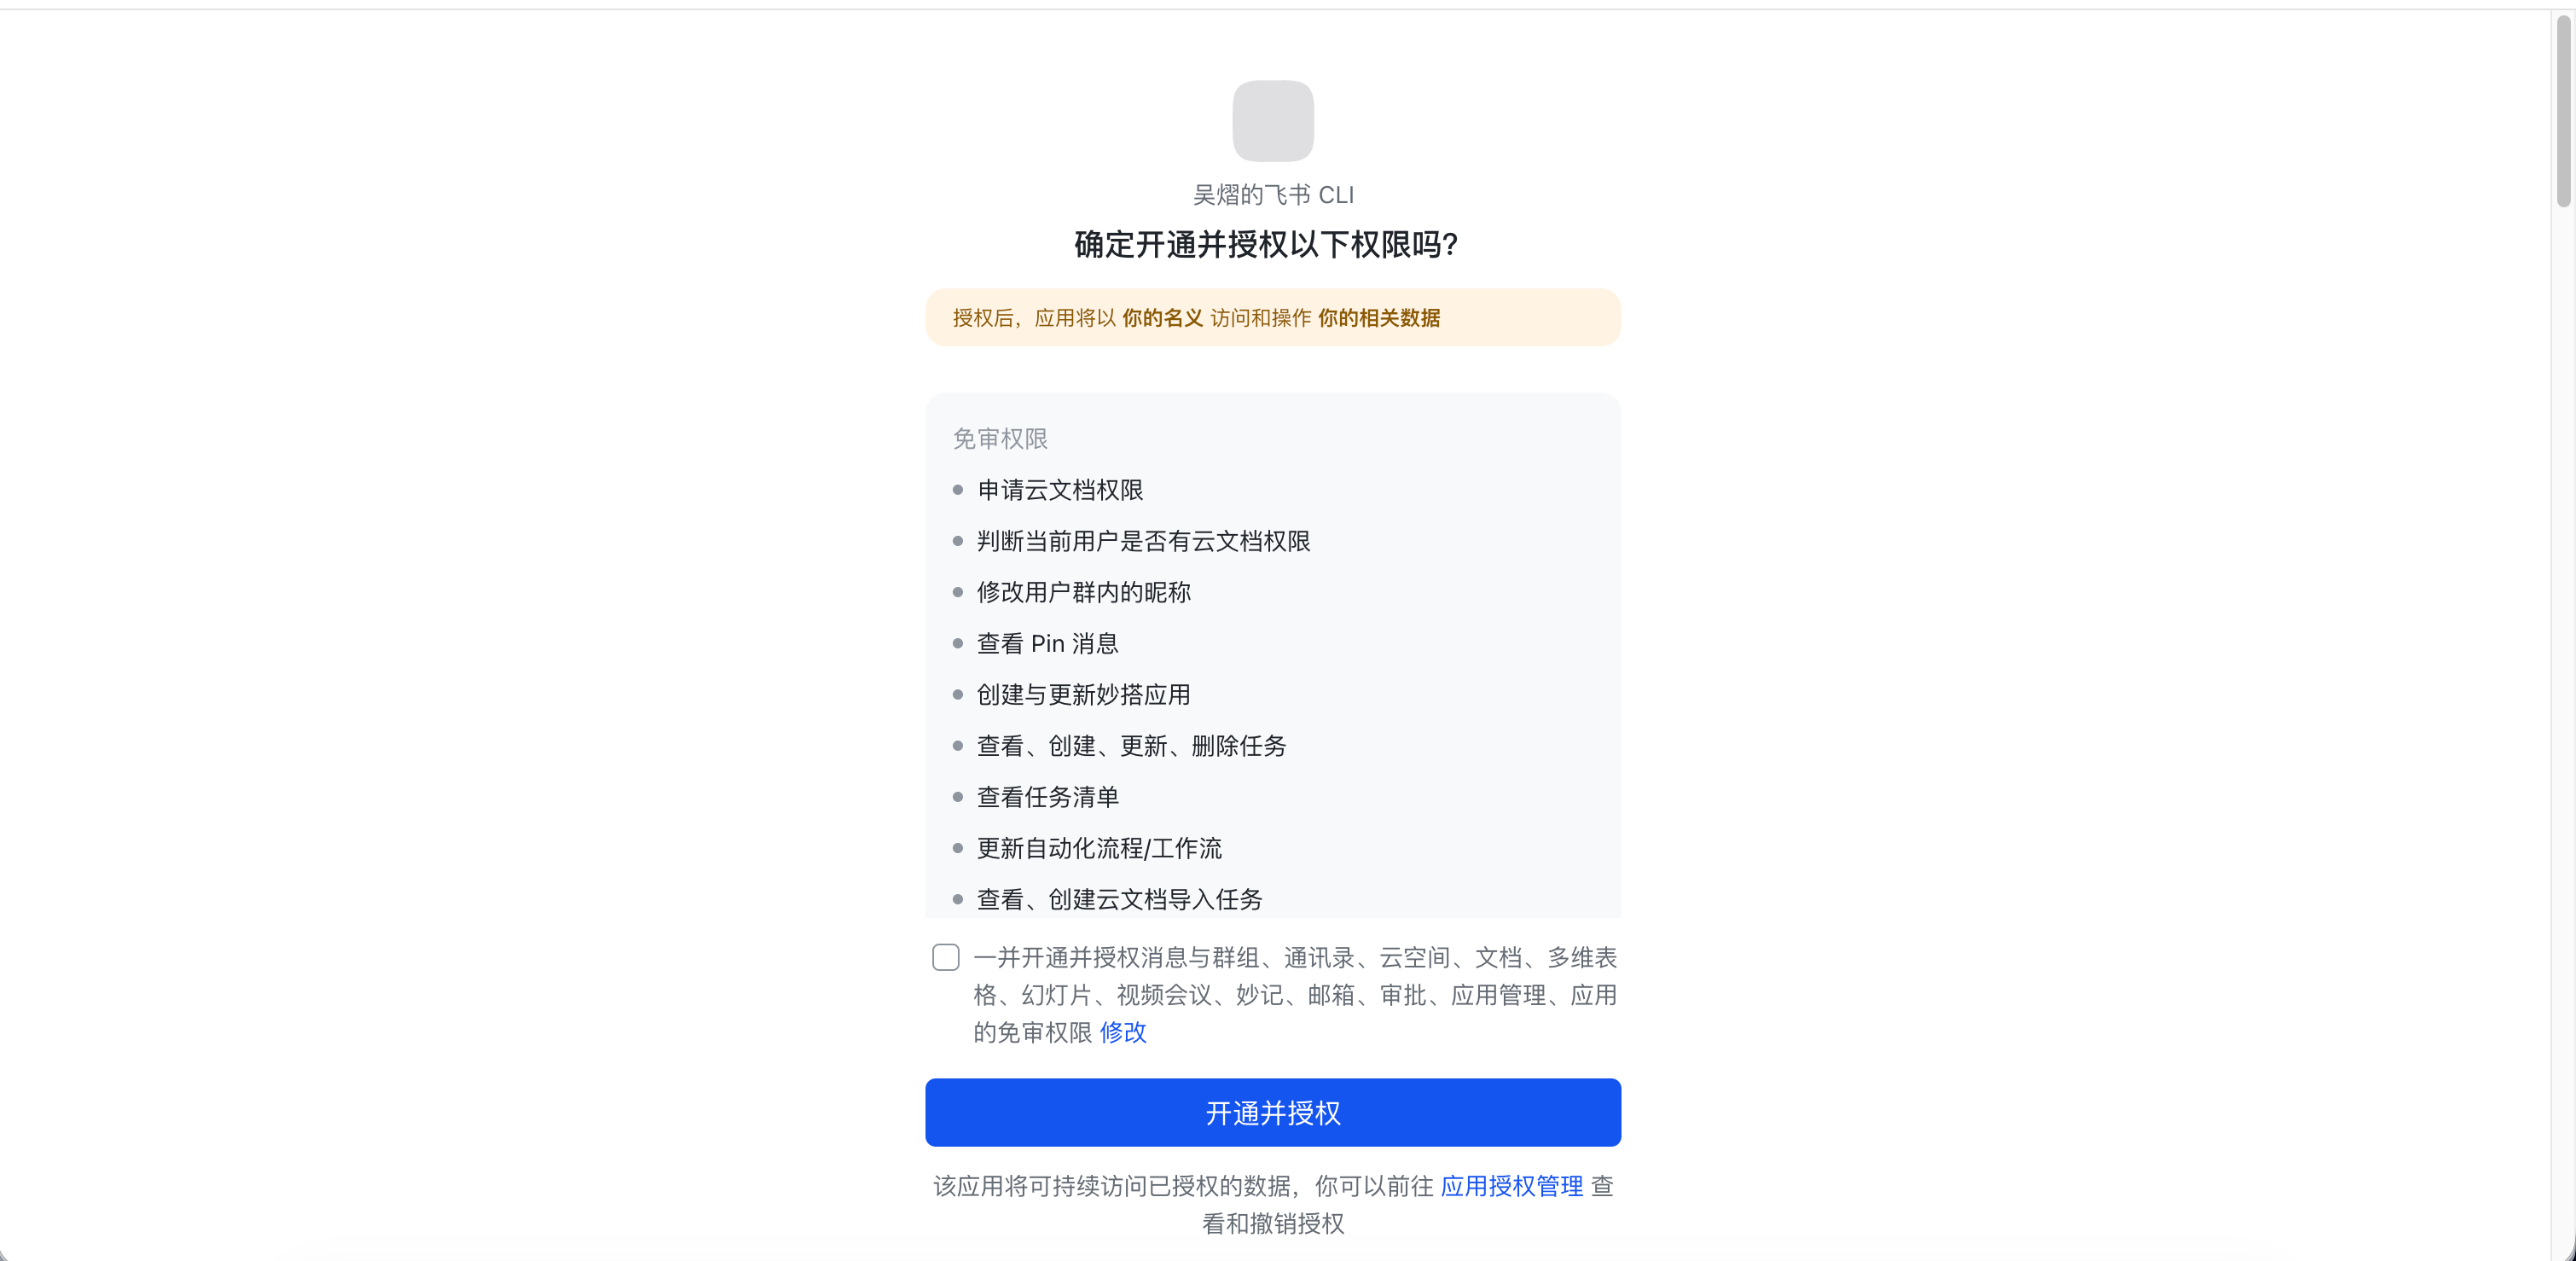
- After the page shows “Enabled and authorized successfully”, return to DeepWorks to check the final status.

The Feishu authorization page provides an App Authorization Management entry for viewing and revoking authorizations. The capabilities that can actually be invoked depend on the granted permissions and the current account’s data access scope.
Viewing Installation and Authorization Results
Scroll down in the Feishu CLI details to view the “Current User Global Status”.
| Status Item | Description |
|---|---|
| Current version, minimum compatible version | View the detected CLI version and compatibility requirements; ”–” may be displayed when no current version is detected. |
| Installation source | View the installation source of the CLI, for example “npm global package”; “Not Installed” is displayed when it is not installed. |
| Version compatibility | View whether the current version is compatible. |
| PATH status | View whether DeepWorks can find the CLI command, for example “Completed by DeepWorks for the current session”. |
| CLI status | View whether the CLI program is installed. |
| Skill status | View whether the accompanying Skill is installed. |
| Authorization status | View whether the current user has completed authorization. |
| Credential storage | View how credentials are stored, for example “System secure storage”. |
| Current user | After authorization, the account currently in use is displayed for identity confirmation. |
| Installation path, configuration directory, Skills directory | View the locations of the CLI program, configuration, and skills on the current device. |
After both installation and authorization are complete, the popup shows “Feishu CLI, Skill, and authorization are all complete.”, both CLI status and Skill status show “Installed”, the authorization status shows “Authorized”, and the bottom actions switch to One-Click Uninstall andClose.
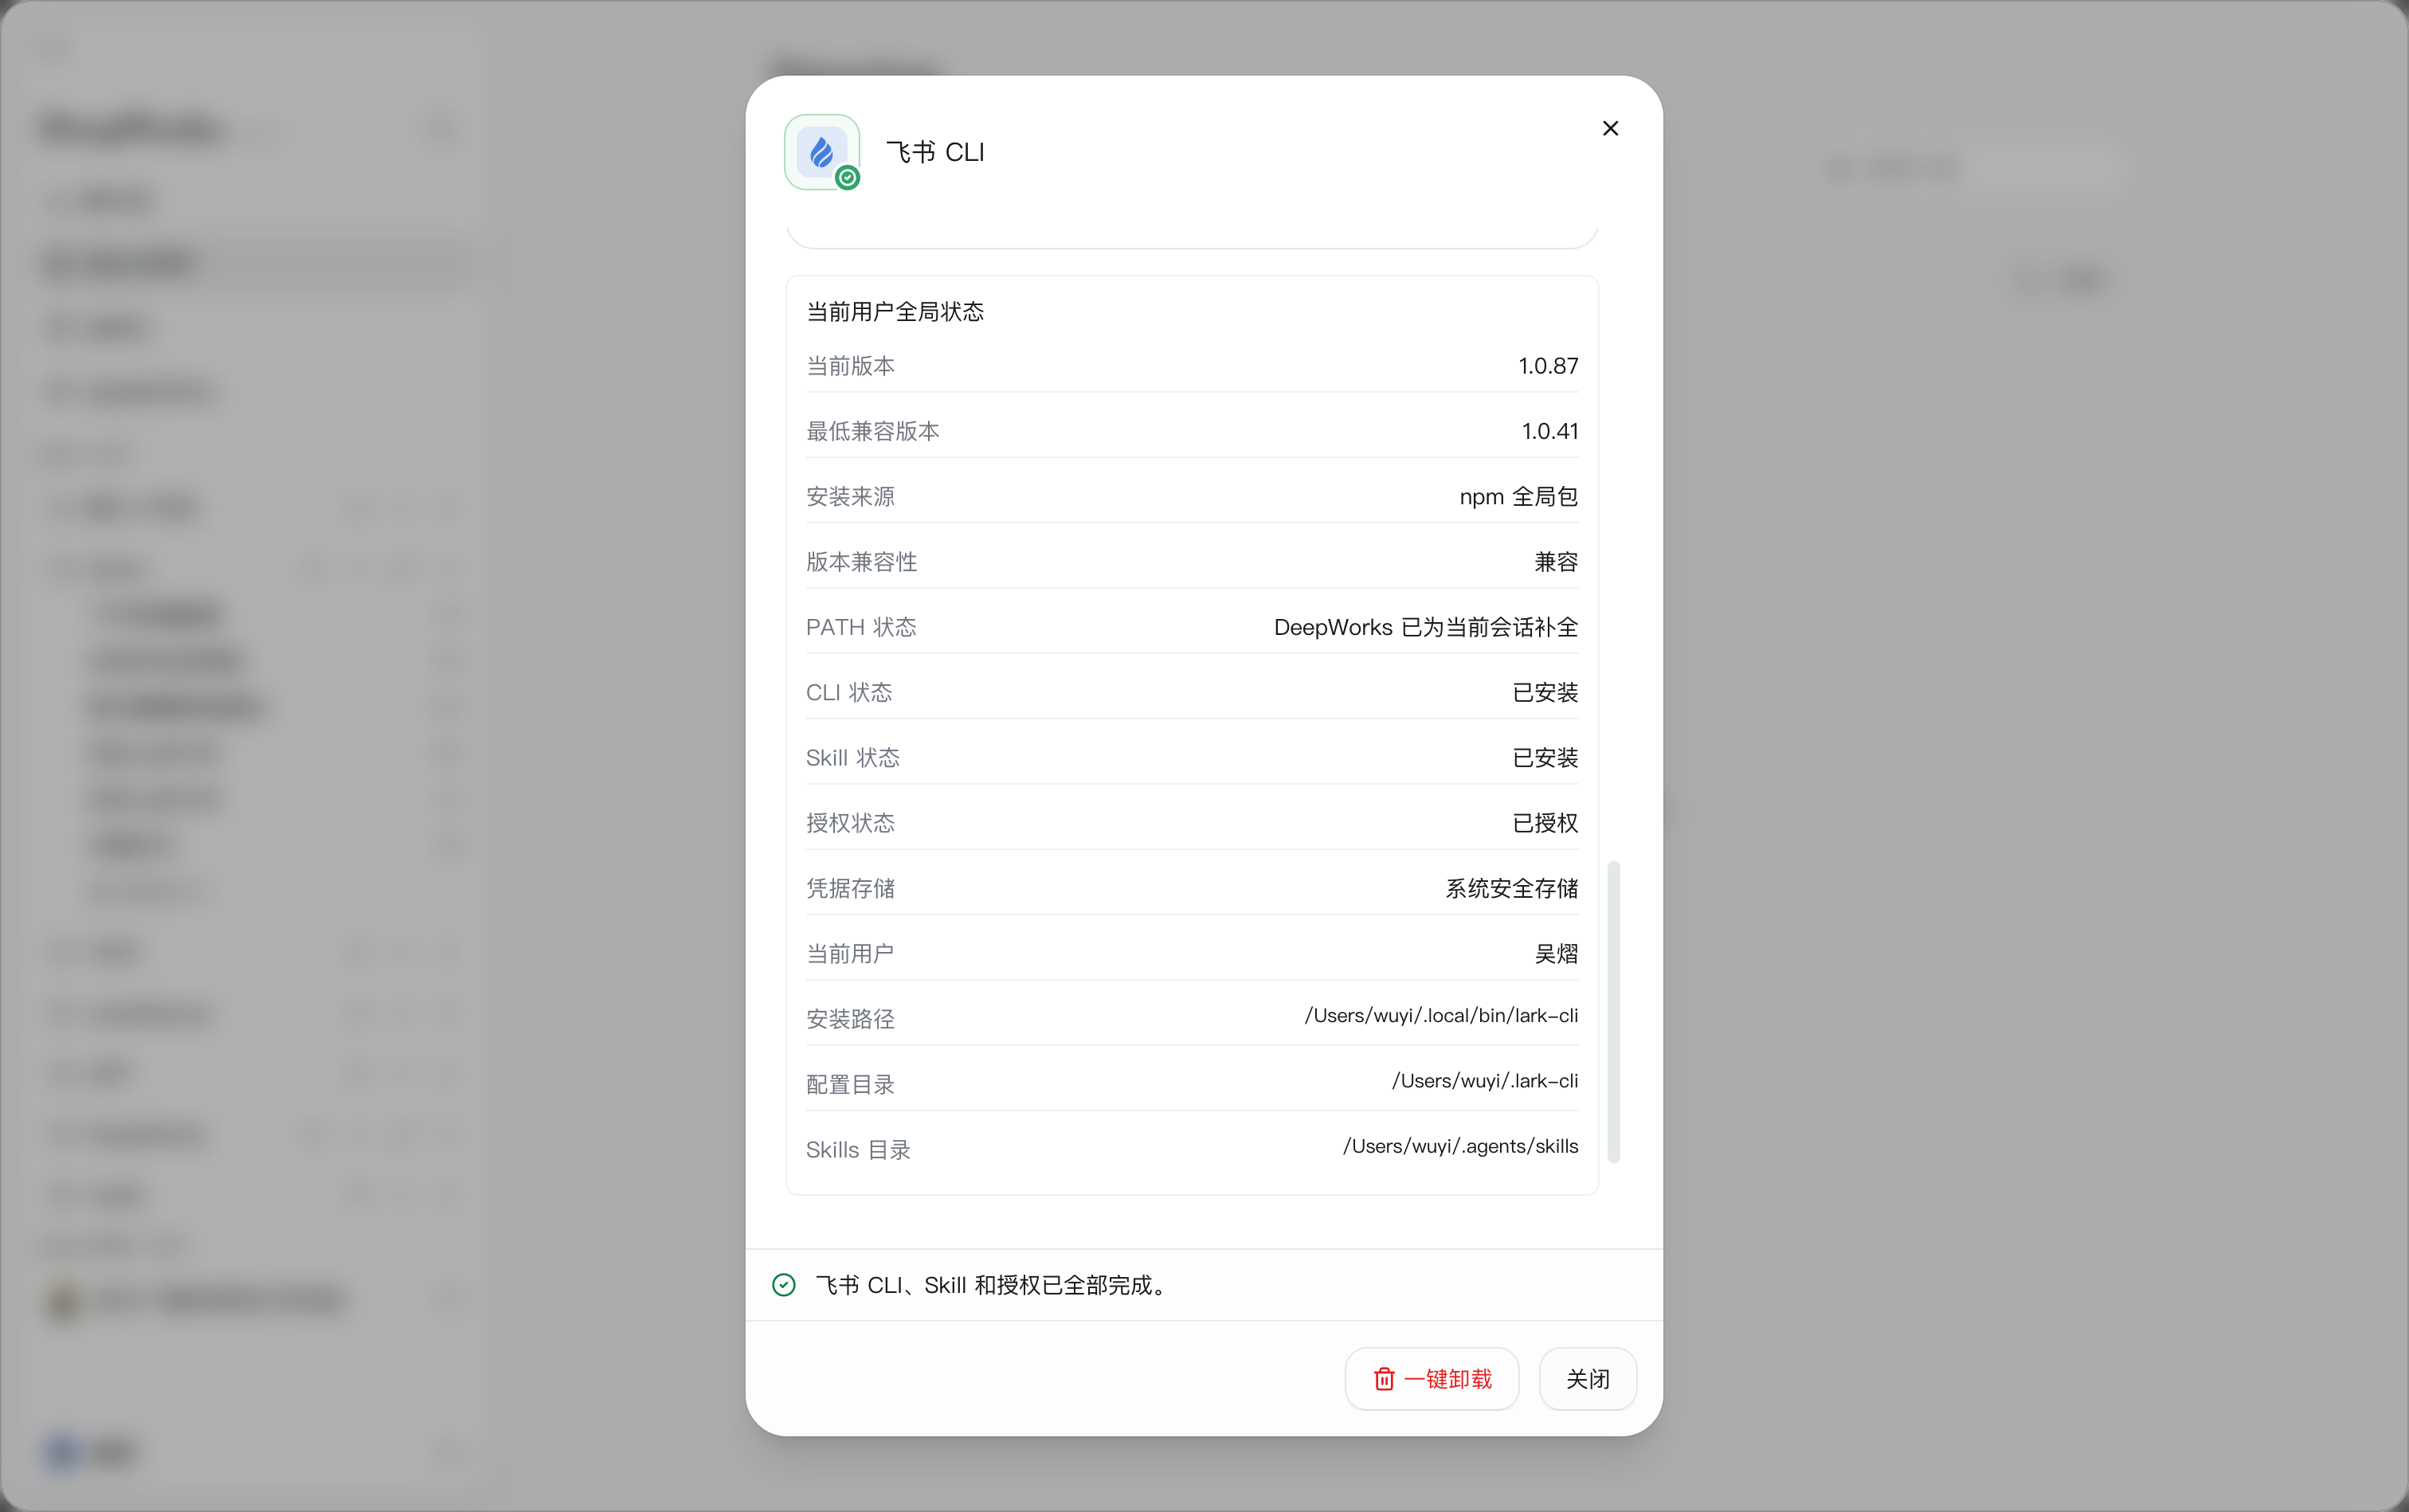
On macOS, the system Keychain is preferred by default for storing credentials. Only when credentials are detected as unreadable will DeepWorks automatically perform the official Feishu local master key downgrade and re-verification.
After the browser shows that authorization succeeded, you should still return to DeepWorks to confirm that the CLI, Skill, and authorization are all complete; a successful CLI installation alone does not mean all configuration is ready.
Using the CLI in a Session
After installation and authorization are complete, create or open a conversation in the workspace and directly state your task; there is no need to manually write command-line instructions.
For example:
Help me create a new test document in Feishu.
DeepWorks will load the relevant Skills based on the task, invoke the CLI to perform the operations, and display the process and results in the session. When sending, modifying, or deleting content is involved, confirm the relevant operations as prompted in the session; if the task information is insufficient, provide the necessary parameters and continue.
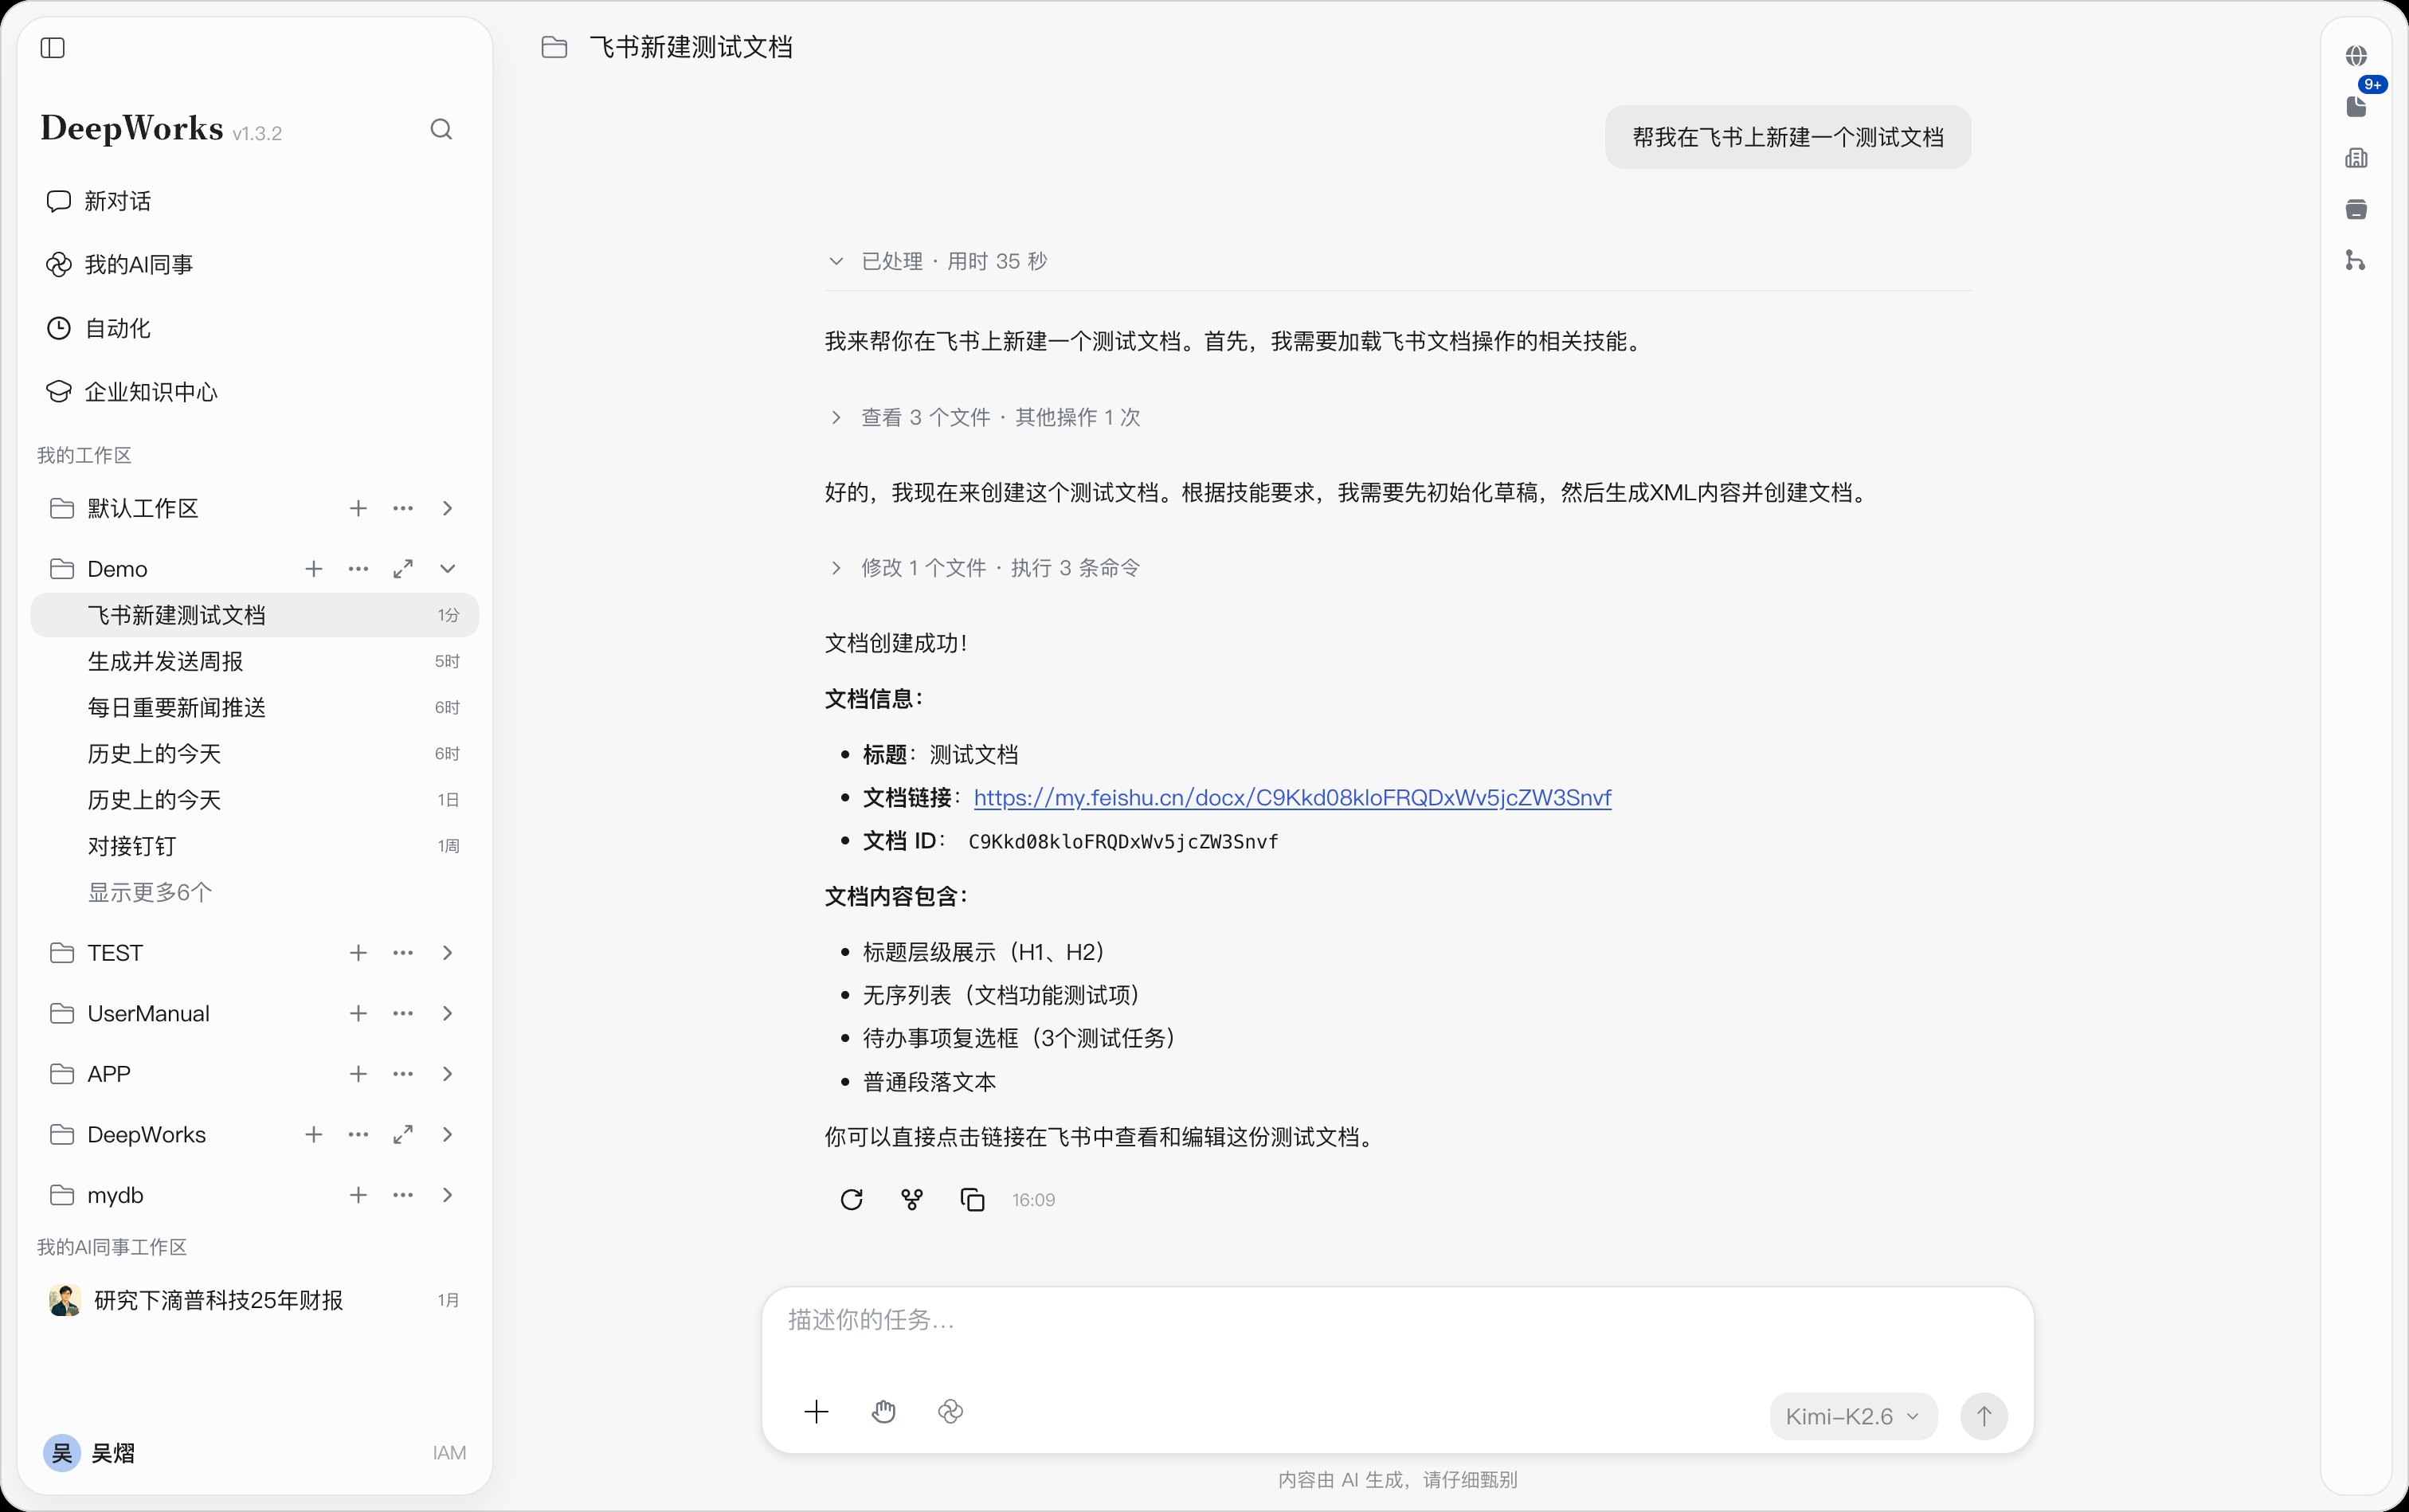
In the above example, after creation, the document title, document link, document ID, and content summary are returned. Click the document link to go to Feishu to view and edit the document.
You can also directly state tasks such as “Show my Feishu schedule for today” or “Query the to-do items in the Requirements Management Base”. The executable scope depends on the corresponding CLI, Skill, and account permissions. If prompted that the tool is not yet installed or authorization is incomplete, go to My AI Colleague →Extension →CLI, open the corresponding tool’s details to complete the configuration, and then continue the task.
Uninstalling Feishu CLI
When the Feishu CLI is no longer needed, open its detail popup, click One-Click Uninstall at the bottom, follow the on-screen prompts to complete the operation, and then refresh to check the status. This entry is for uninstallation; first confirm whether other tasks still need the current user’s CLI and global Skills. To revoke the Feishu app authorization, use App Authorization Management in Feishu.
DingTalk CLI
Installing DingTalk CLI
Path: My AI Colleague →Extension →CLI →DingTalk CLI on the left sidebar.
Prerequisites: The enterprise administrator has enabled CLI permission for your DingTalk organization, and the current user can log in to and authorize the corresponding organization.
DingTalk CLI reuses or installs the current user’s official dws CLI, global Skills, and login state. After installation and authorization are complete, DeepWorks can query the current user, organization, and workspace information, and invoke DingTalk capabilities such as Knowledge Base, calendar, contacts, group chats, tasks, and approvals within the authorized scope. Operations involving enterprise permissions, member information, or write actions still need to follow DingTalk’s authorization and confirmation requirements.
- Go to the CLI tool list, find DingTalk CLI, and clickInstall on the right.
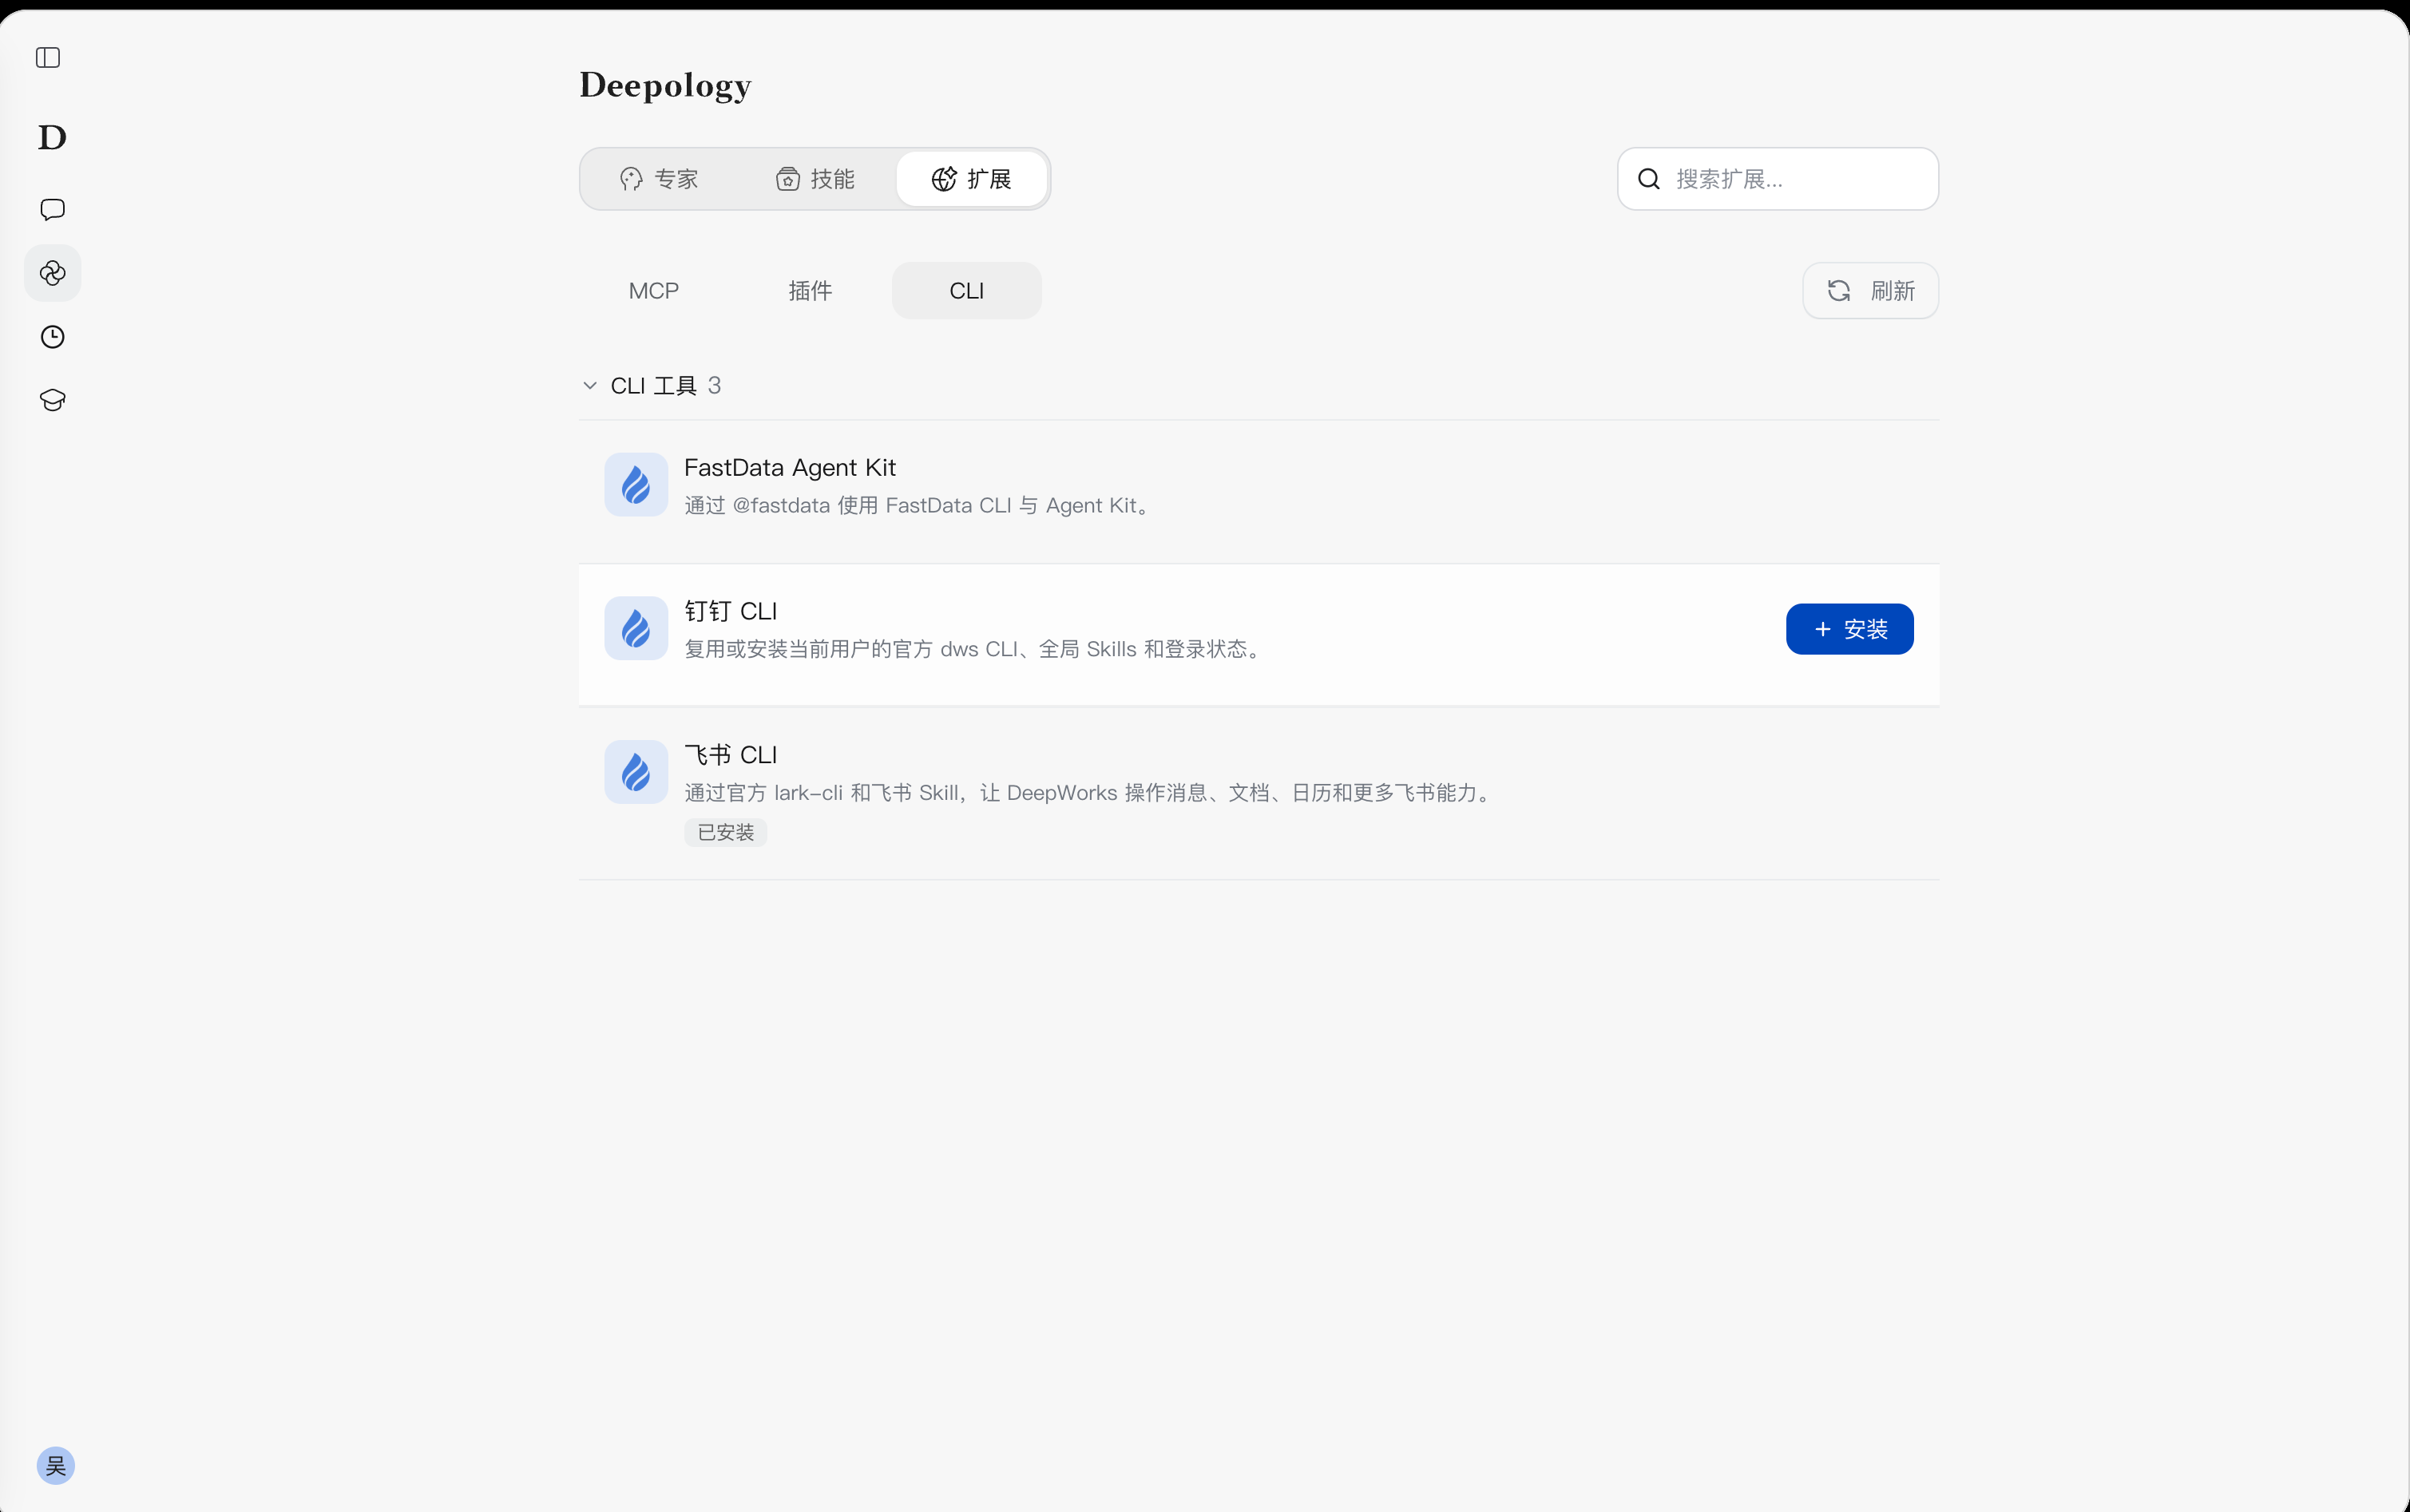
- In the detail popup, read “Settings” and “Enabled Capabilities” to confirm the installation content and authorization requirements.
- View the resources in the “Extension Manifest”.
- Click One-Click Install at the bottom, follow the prompts to install the official dws CLI and Skills, and then complete DingTalk login and organization authorization.
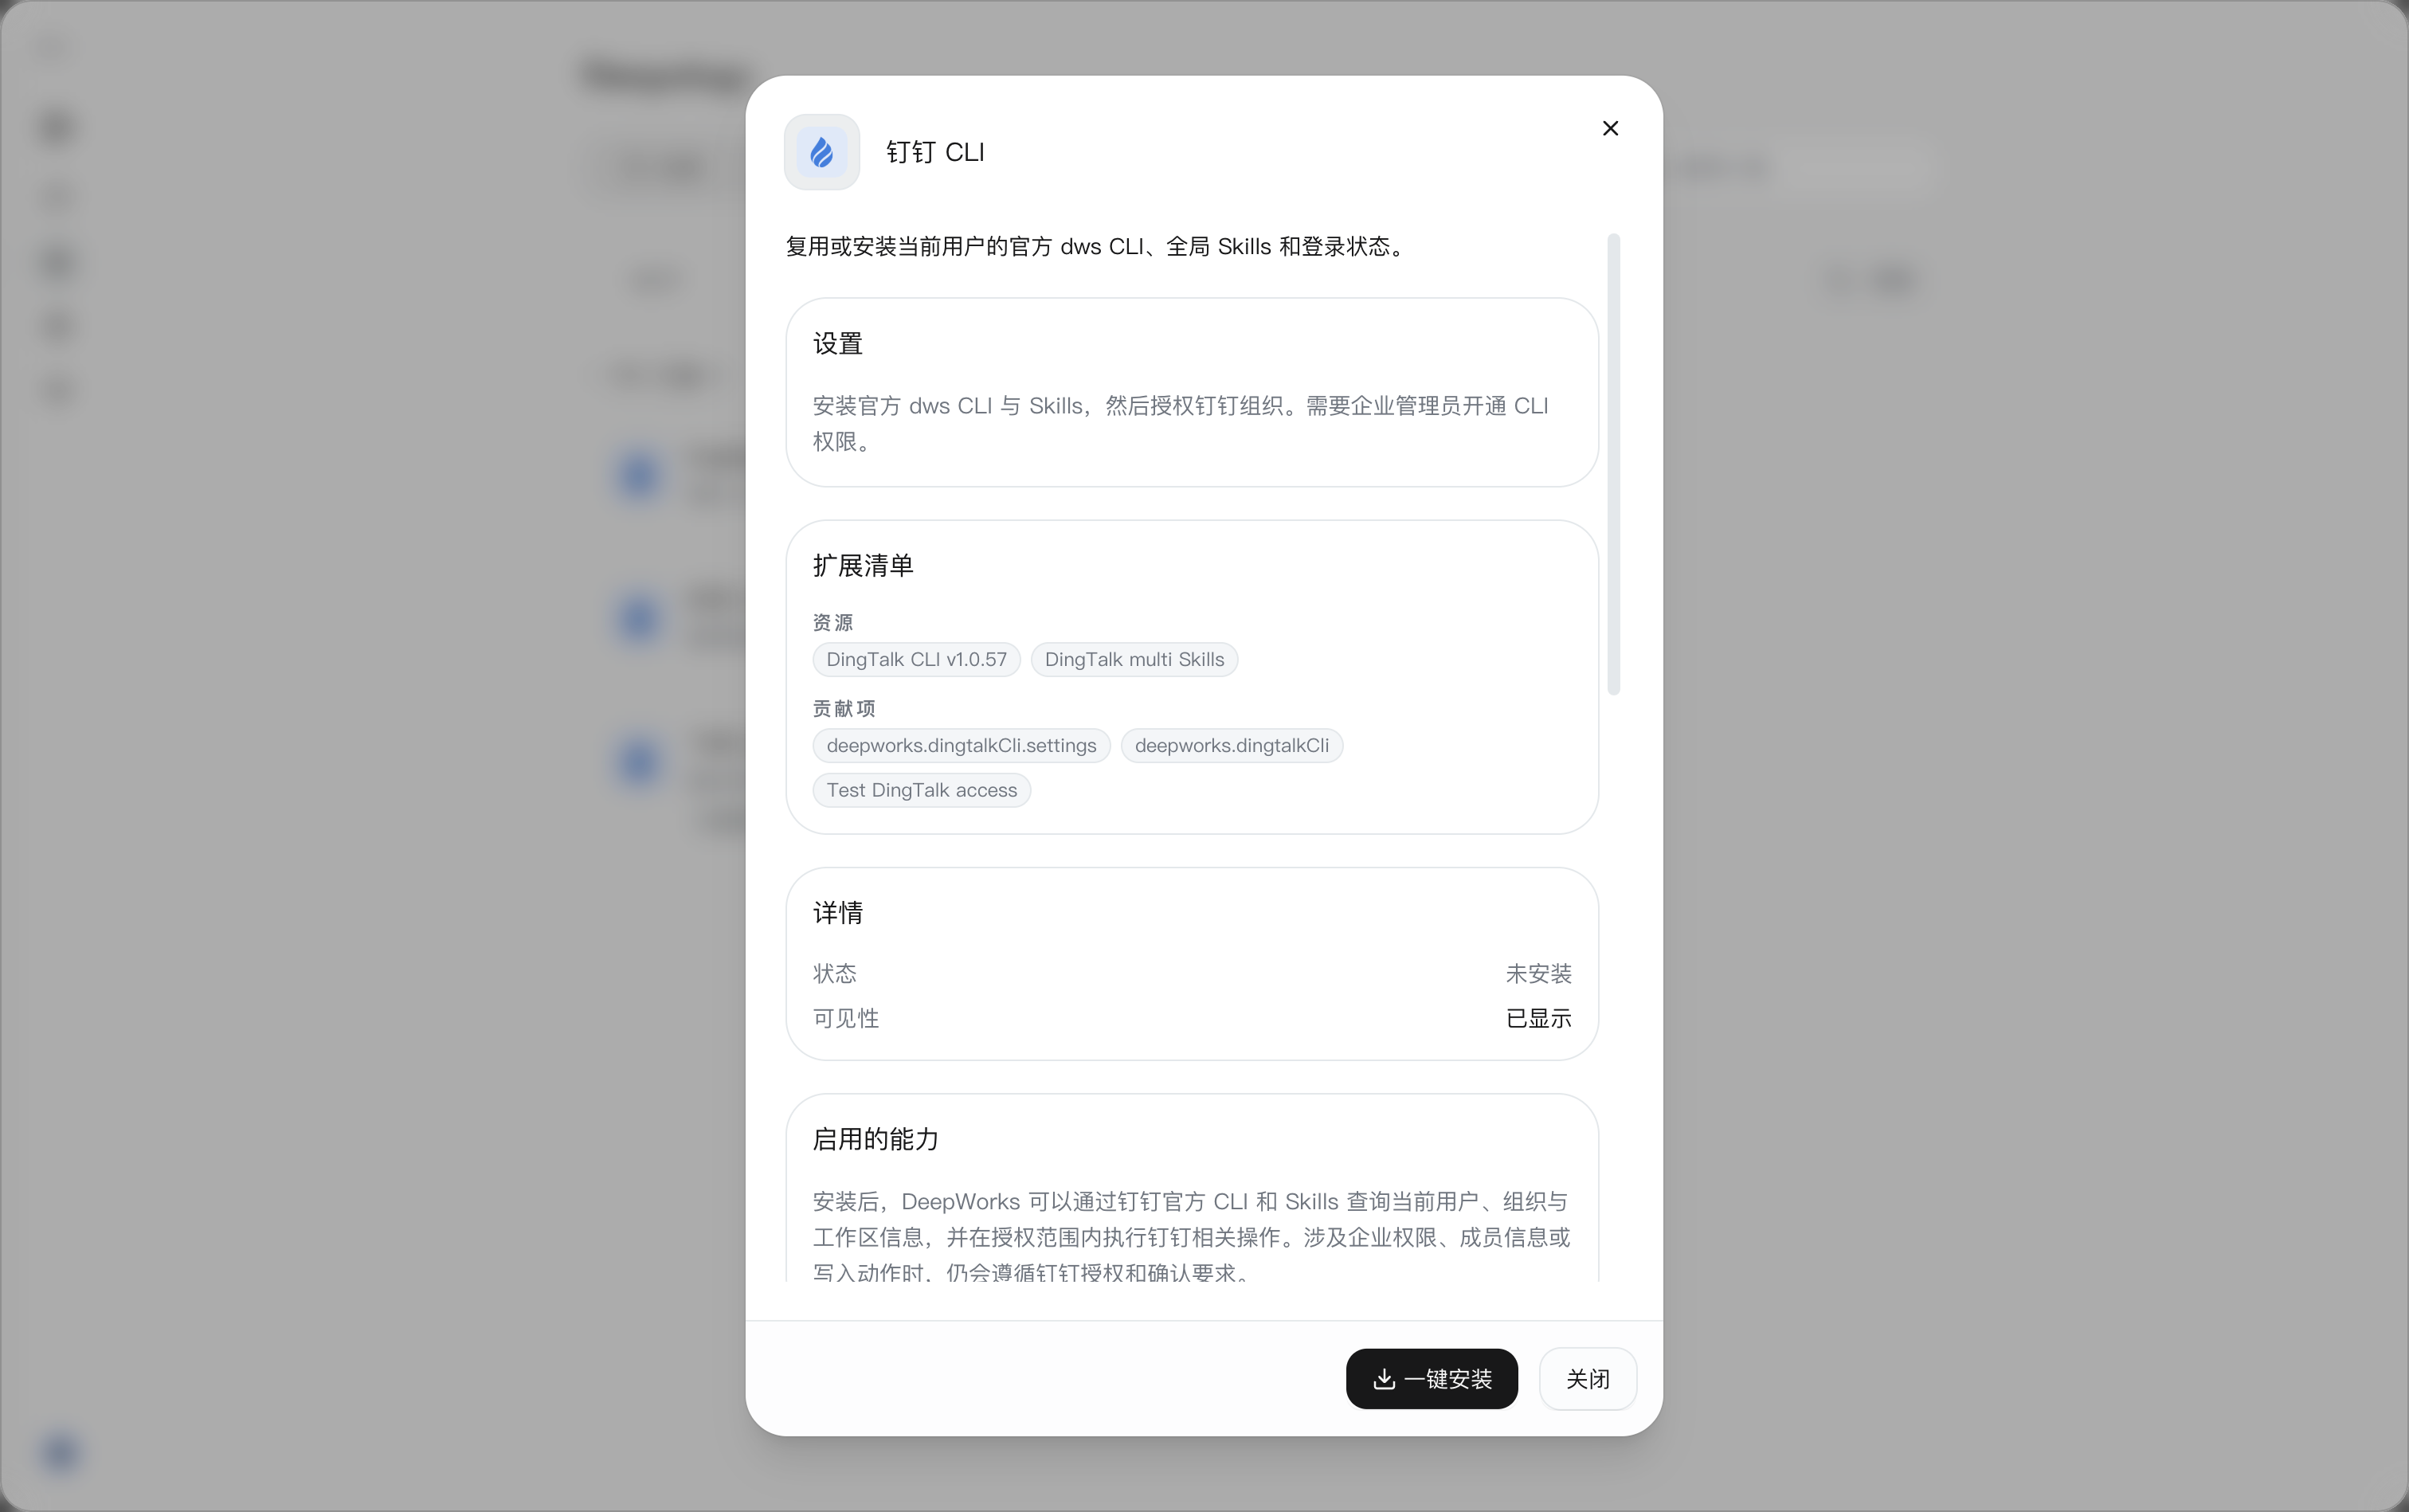
Before installation, the status in the “Details” area shows “Not Installed” and the visibility shows “Displayed”. Visibility only indicates whether the extension is displayed, and does not mean it has been installed or authorized.
Logging In and Authorizing a DingTalk Organization
- After the installation flow opens the DingTalk login page, confirm the account displayed on the page. If the page prompts “This account is already in use. You can log in to DingTalk-Workspace directly”, click Log In Now; if you are not yet logged in, follow the on-screen prompts to log in.
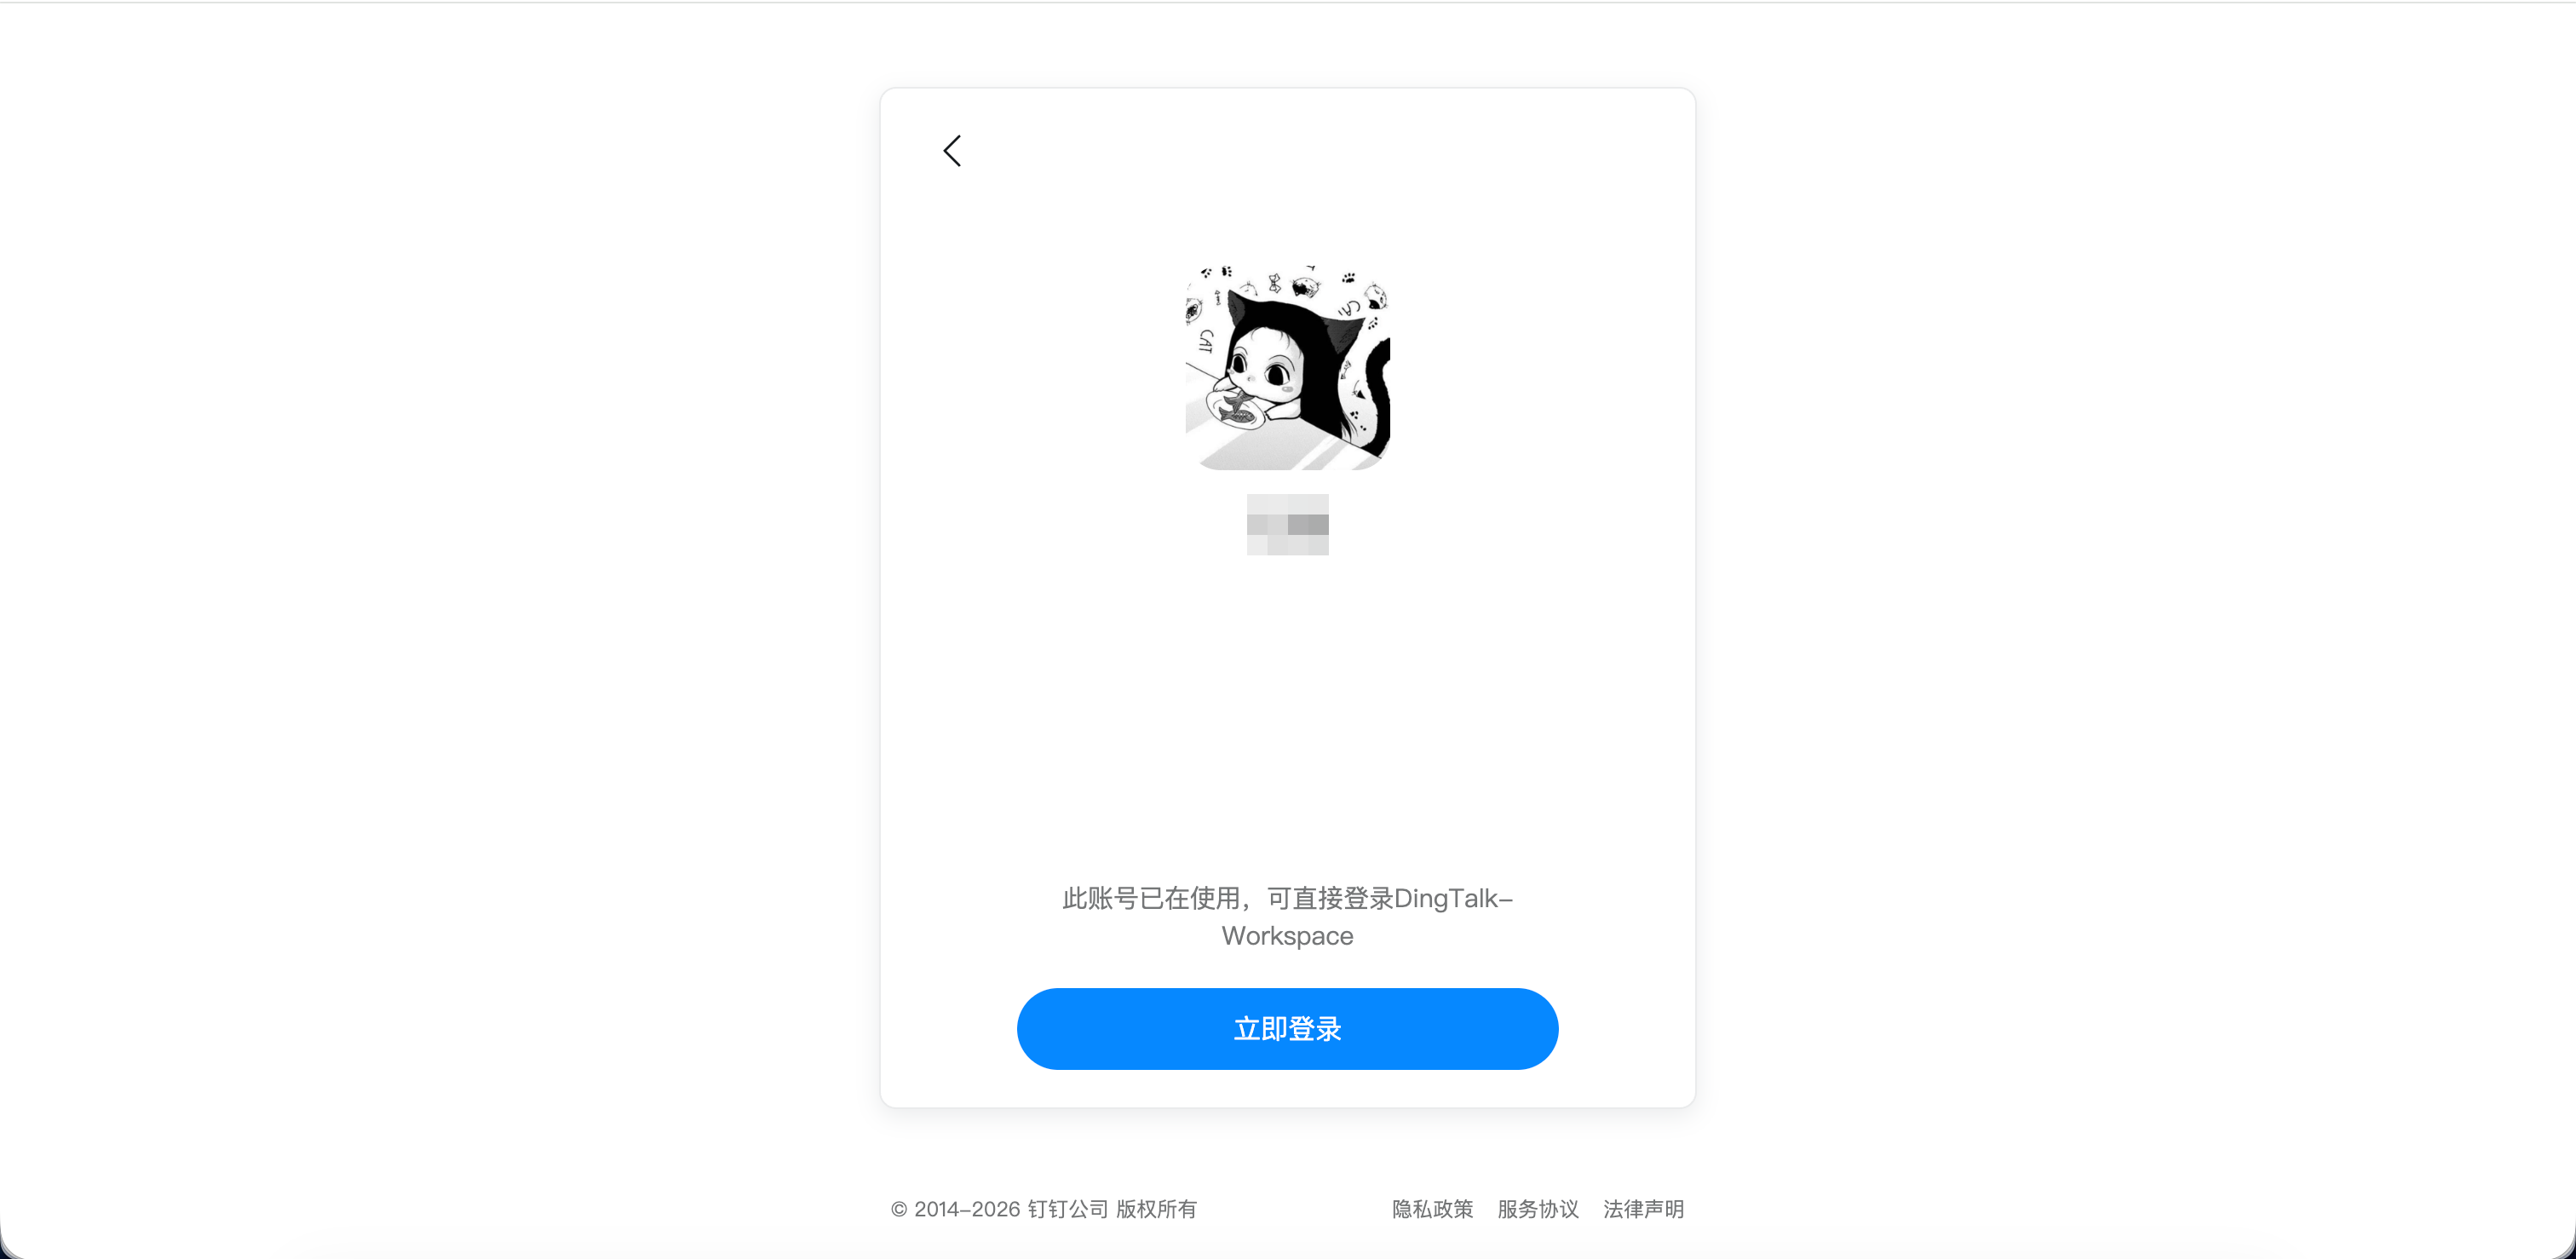
- Follow the prompts on the DingTalk page to authorize the corresponding organization. If prompted that CLI permission has not been enabled, contact the enterprise administrator to enable it before continuing.
- After the page shows “Authorization successful” and the prompt “Please return to the terminal to continue. This page can be closed.”, you can close the authorization page and return to the DeepWorks window that initiated the installation to continue viewing the result.
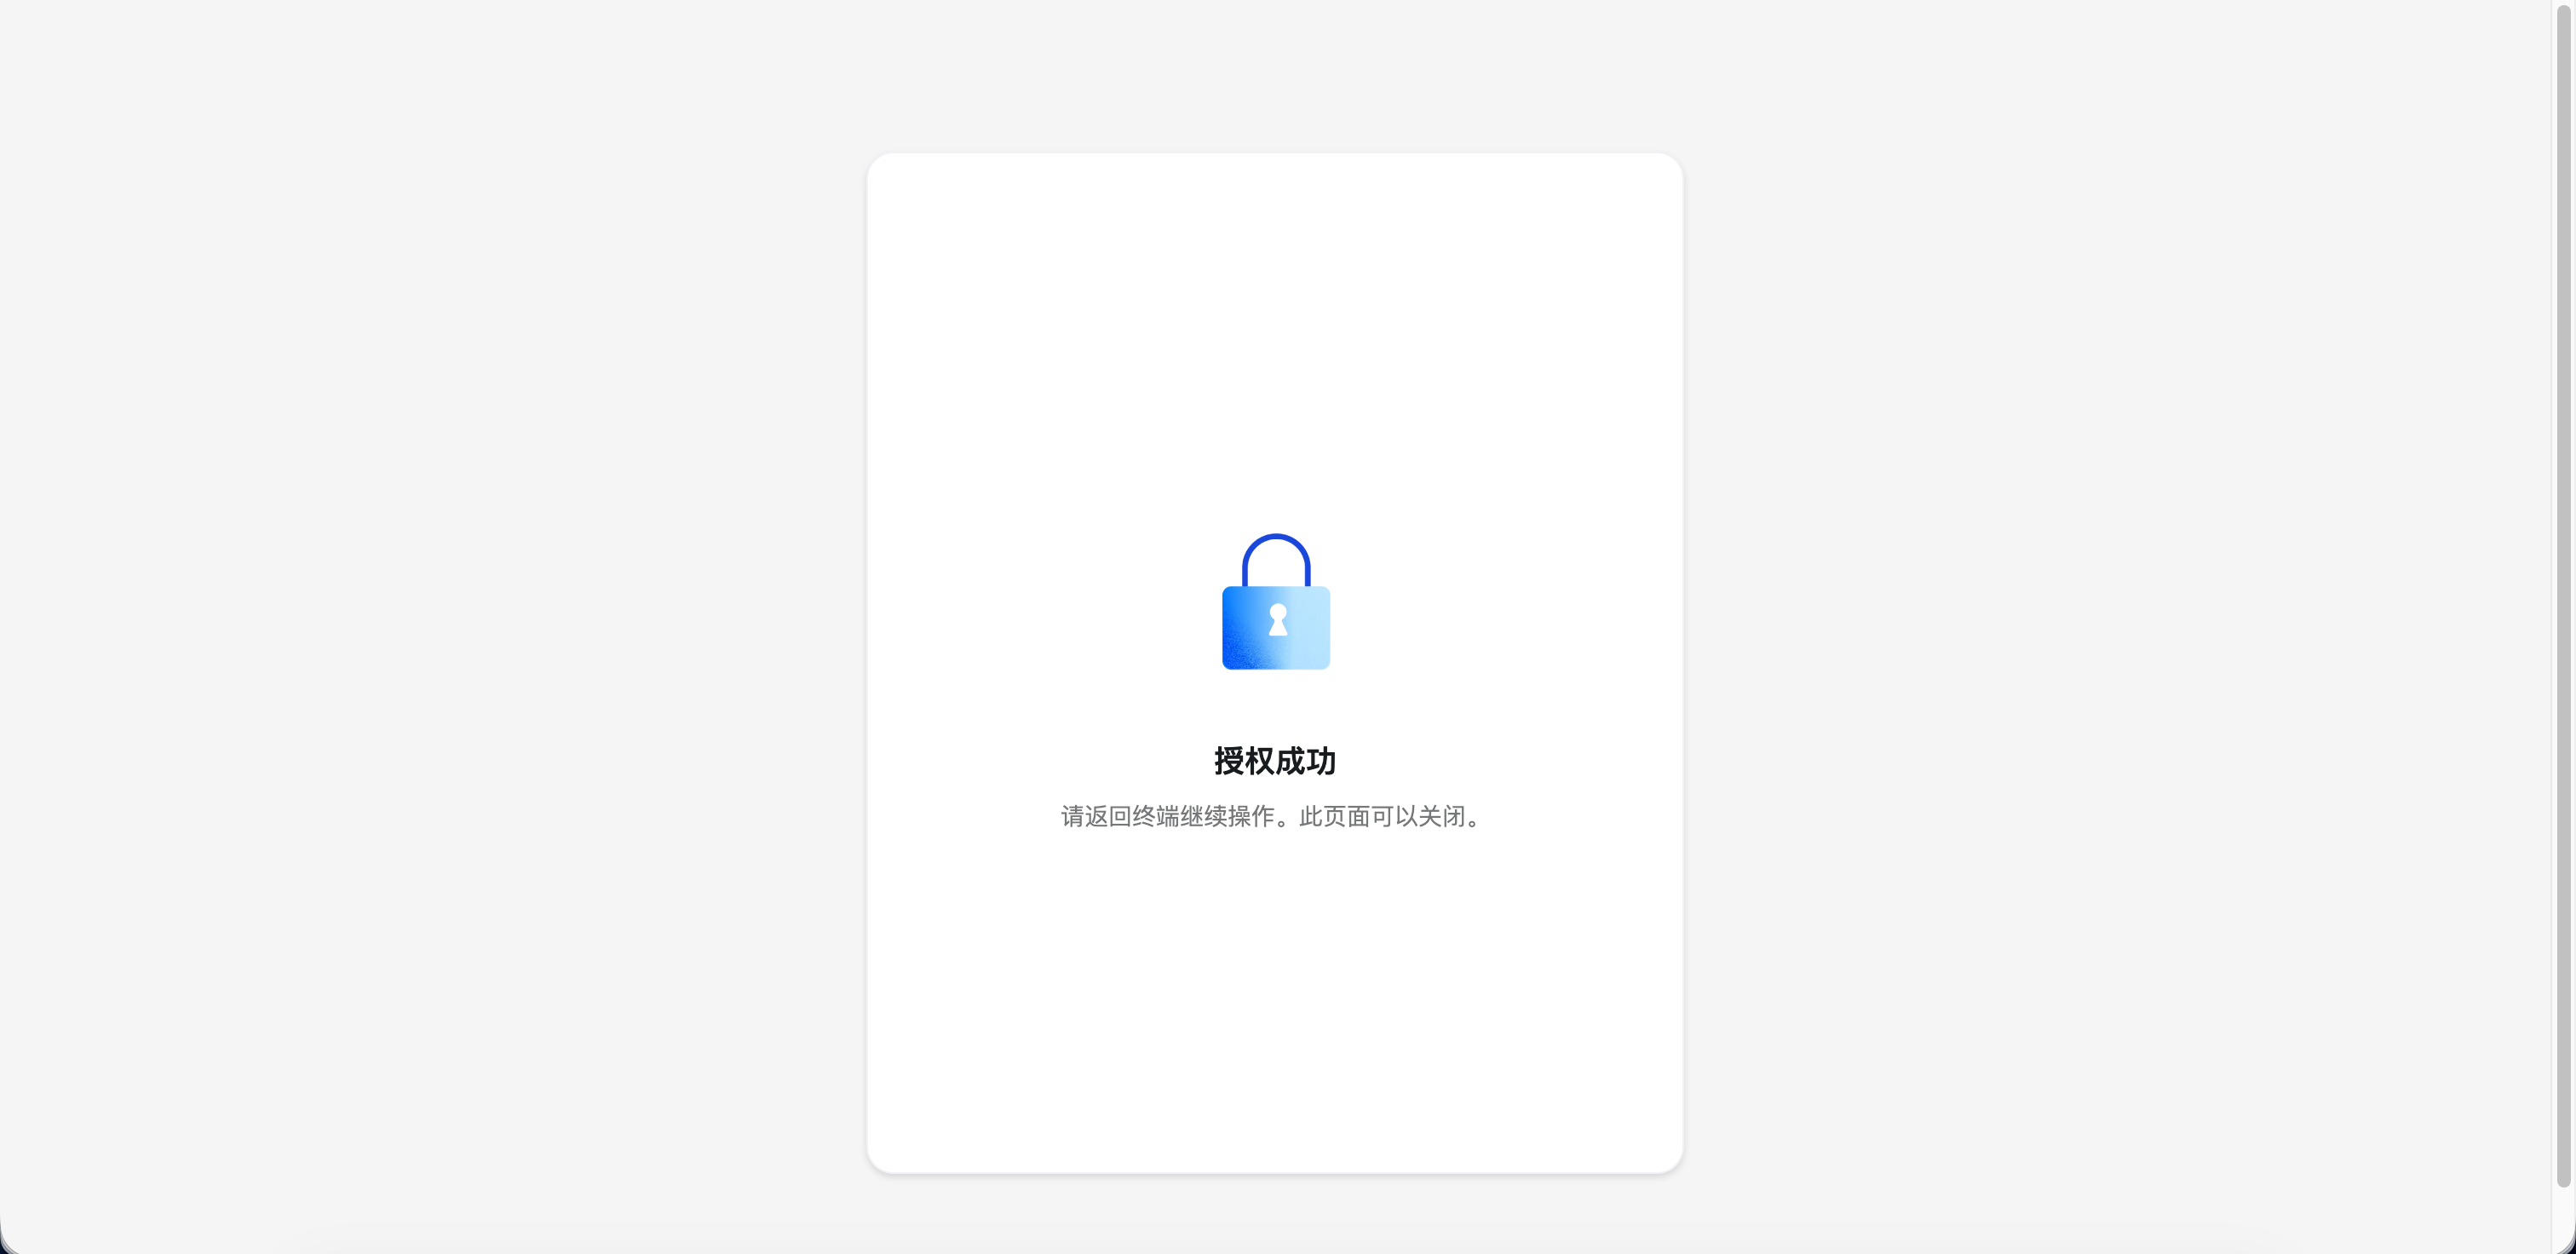
- Return to the DingTalk CLI details to confirm the installation result; if the status has not updated yet, you can return to the CLI list, click Refresh, and then open the details to check again.
Viewing DingTalk CLI Status
After installation is complete, the DingTalk CLI icon shows a green completion mark, the status in “Details” changes to green “Installed”, and the bottom buttons switch to One-Click Uninstall andClose.
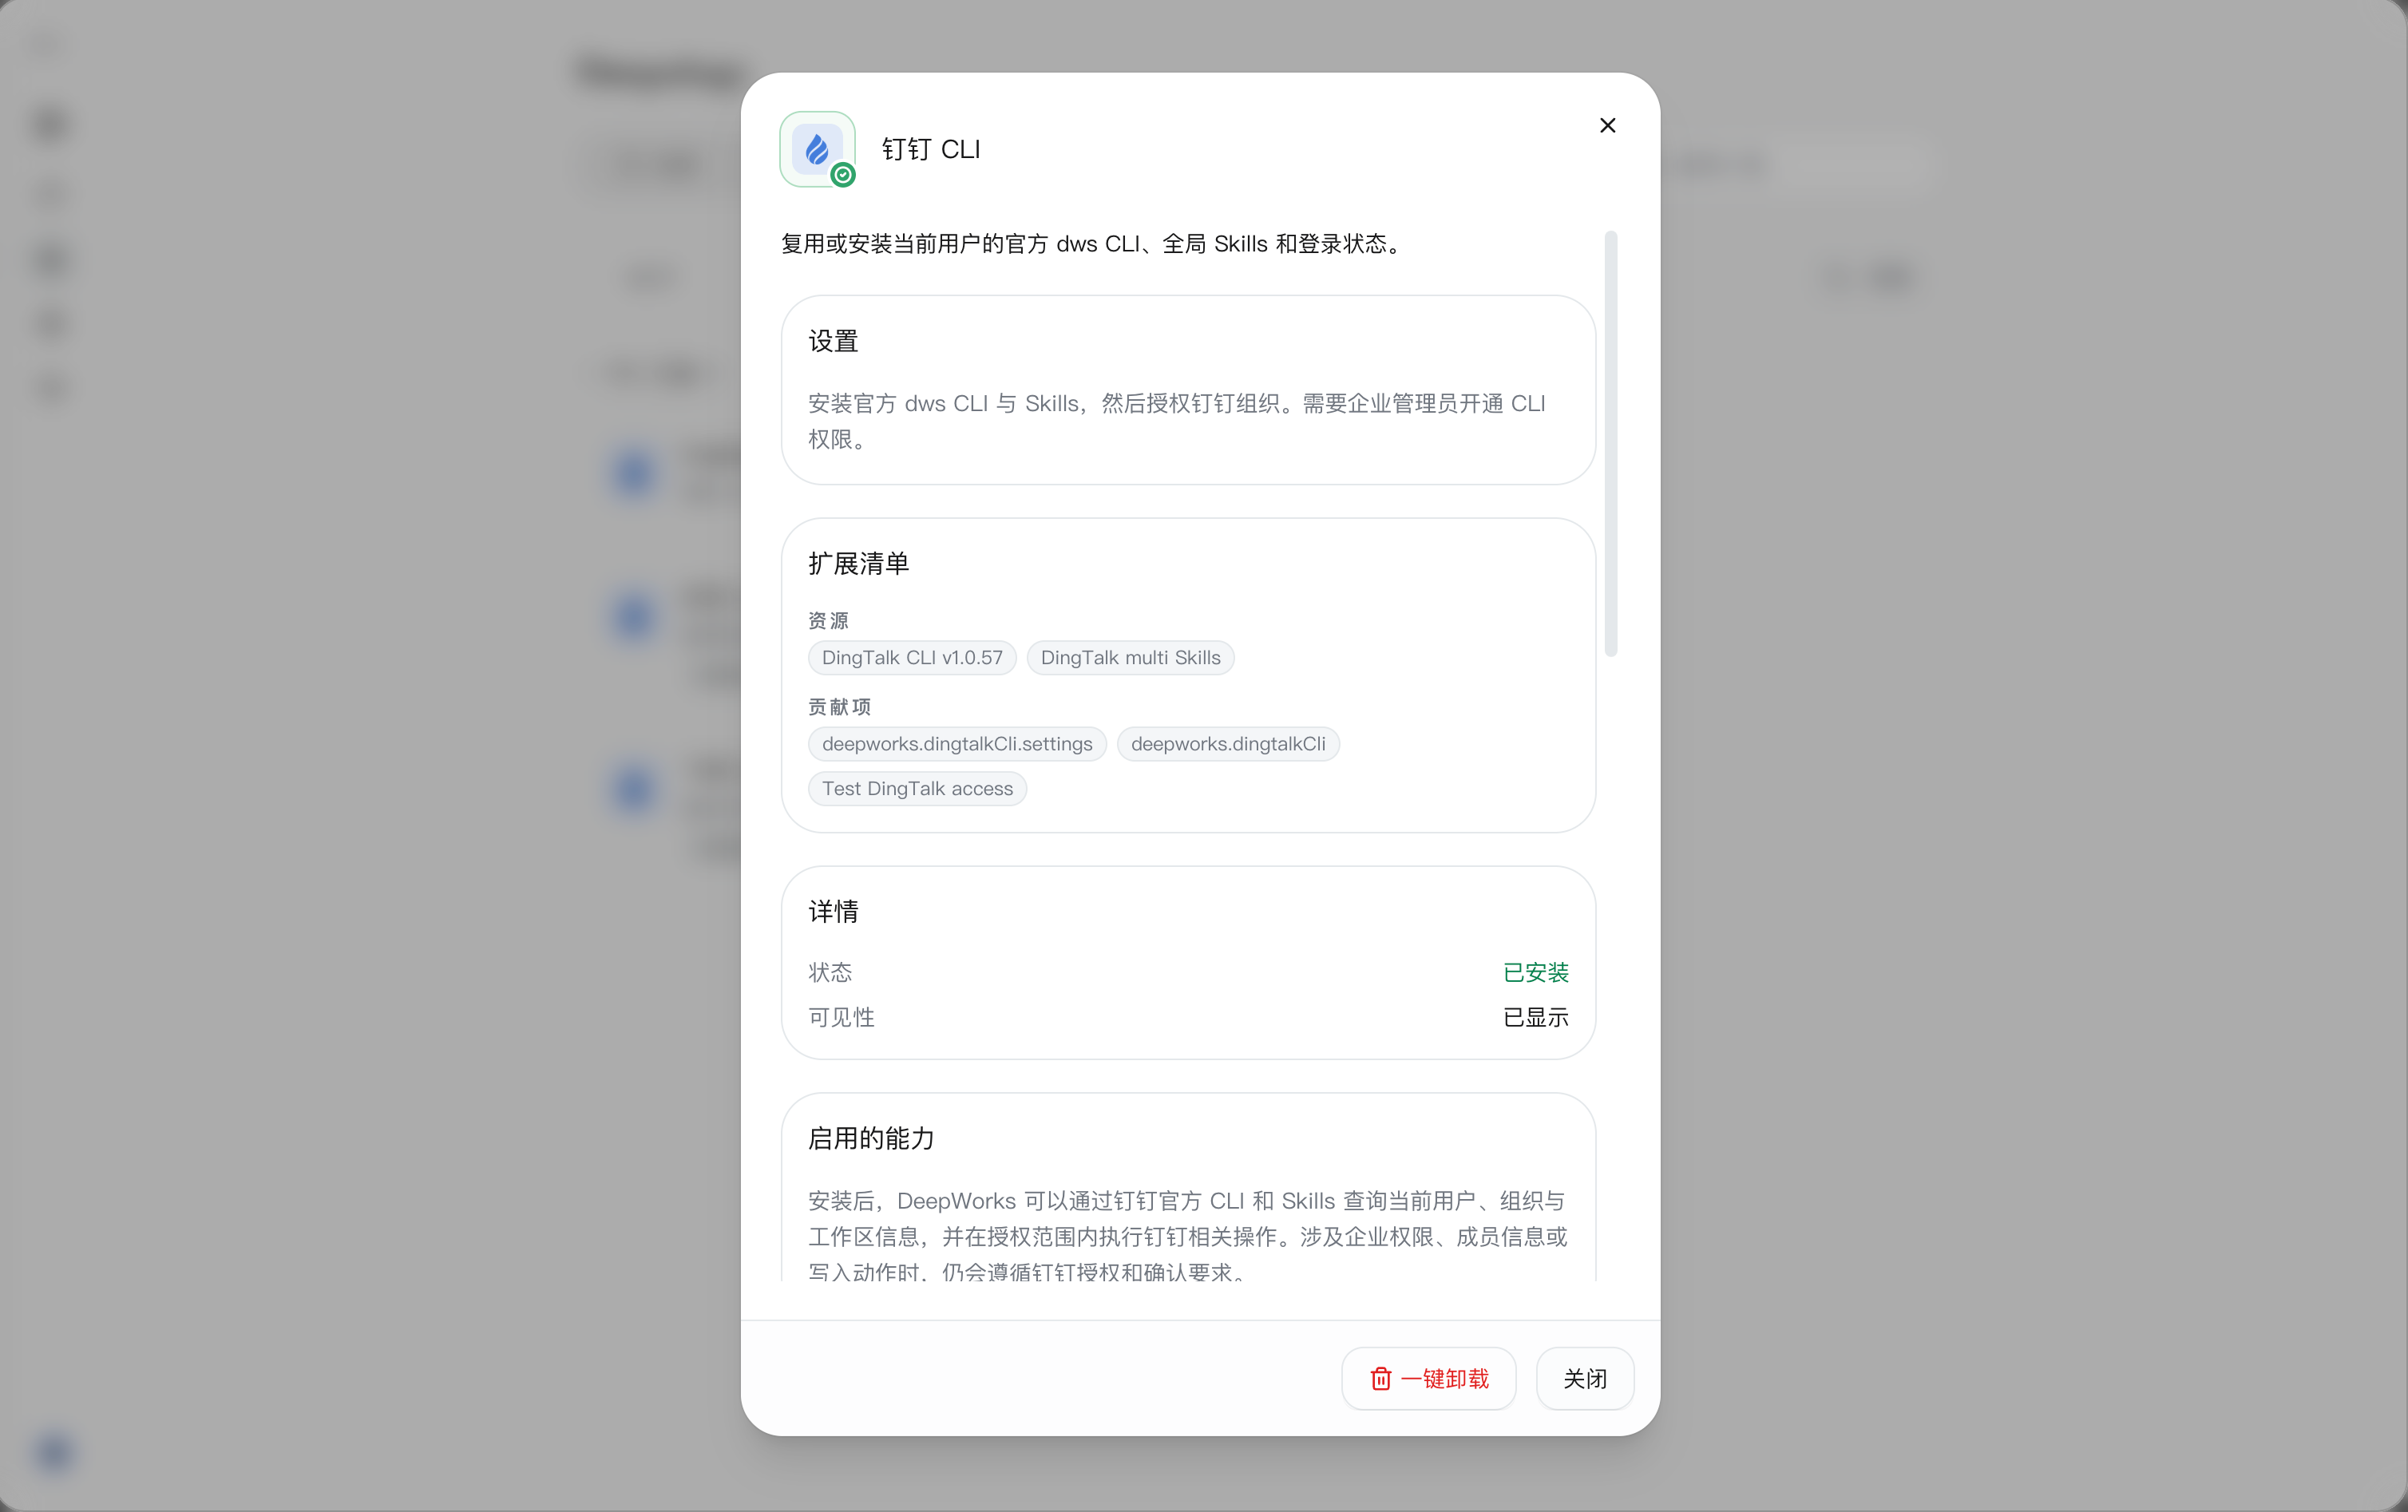
The detail popup provides the following information:
| Page Area | Description |
|---|---|
| Settings | Explains the requirements for installing the official dws CLI, Skills, and authorizing the DingTalk organization, and notes that CLI permission must be enabled by the enterprise administrator. |
| Extension Manifest | Shows the CLI, accompanying Skills, and other resources as well as extension contribution items, helping you understand what the extension contains. |
| Details | Shows the installation status and visibility. |
| Enabled Capabilities | Explains the queryable information, authorization scope, and related operational requirements. |
| Bottom Actions | Provides One-Click Install when not installed andOne-Click Uninstall after installation; clickClose or the close icon in the upper-right corner to exit the details. |
“Installed” indicates the installation status; actual business access also depends on account login, organization authorization, and the corresponding data permissions. After authorization is complete, you can check actual usage with the query tasks described below.
Using DingTalk CLI in a Session
After installation and organization authorization are complete, create or open a conversation in the workspace and directly describe the DingTalk task in natural language; there is no need to manually enter CLI commands.
Taking a Knowledge Base query as an example:
-
Enter the task in the input box and send it:
Help me check which Knowledge Bases are on my DingTalk.
-
DeepWorks loads the DingTalk Knowledge Base related skills based on the task and invokes the CLI to query the Knowledge Bases accessible to the current account.
-
View the query results in the session.
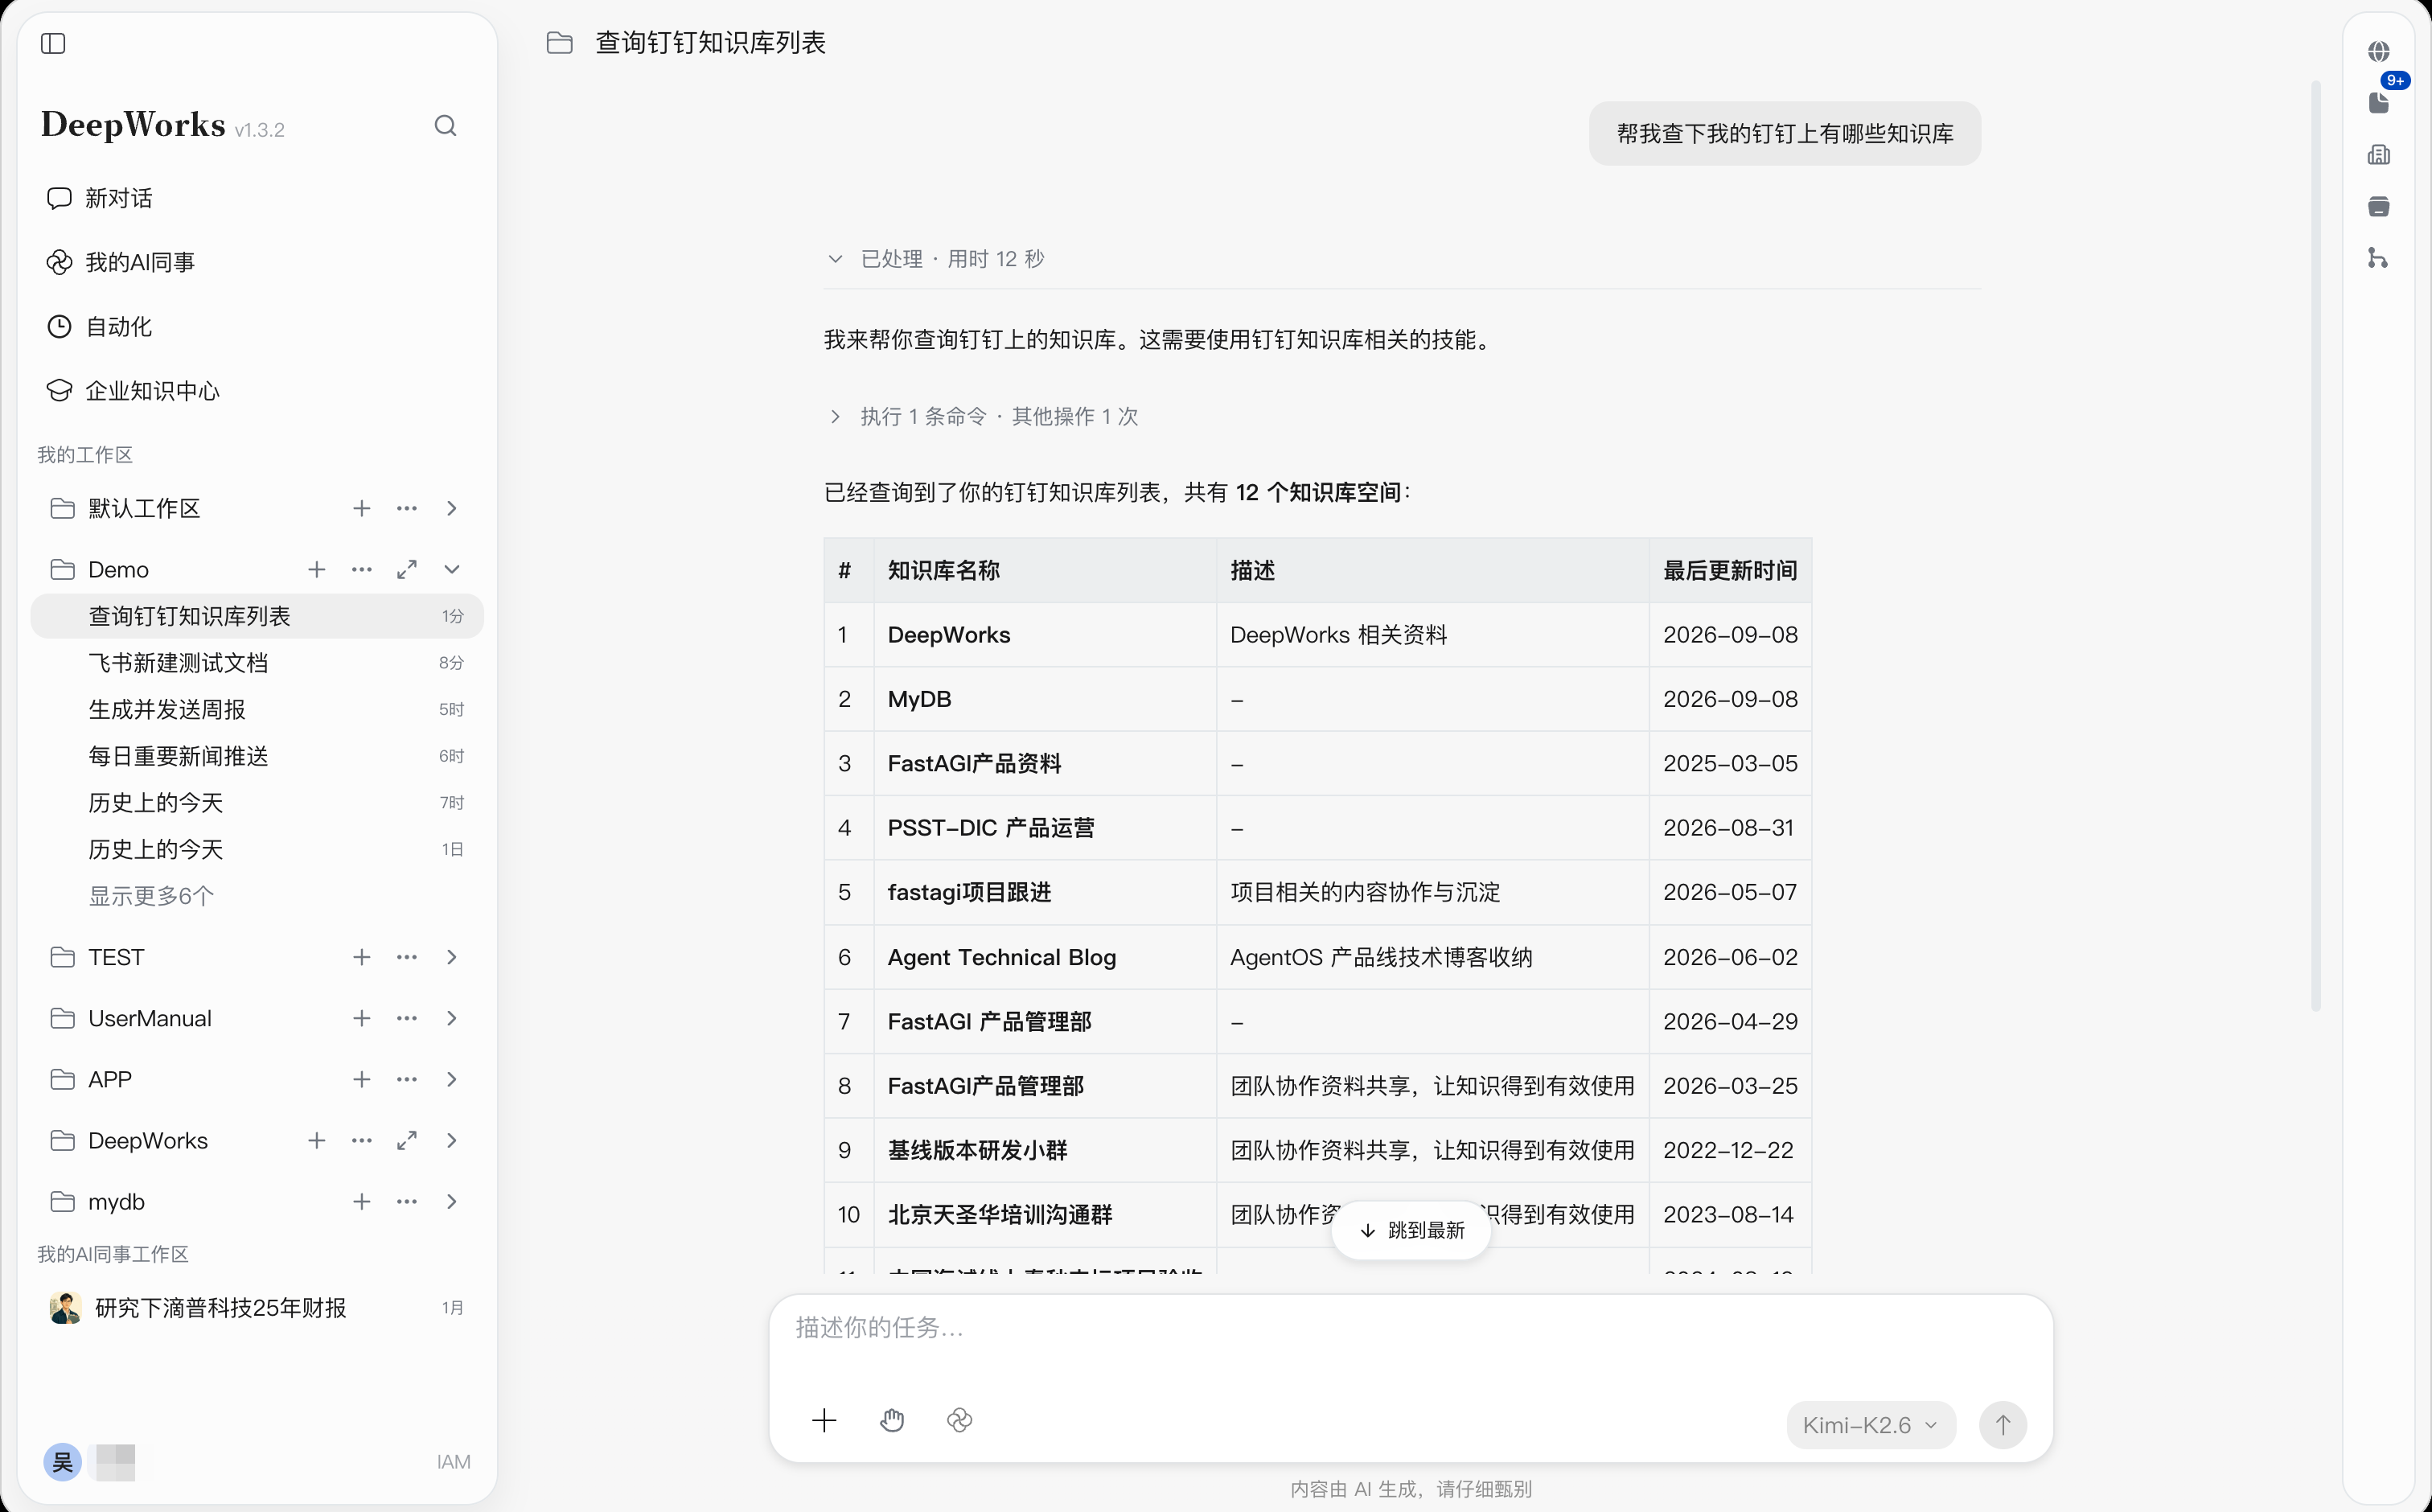
You can also enter the following tasks as needed:
- “Show my DingTalk schedule for today.”
- “Help me find the Data Platform project group.”
- “Show the approvals I currently need to process.”
- “Send a progress reminder to the project group.”
When write operations such as sending messages are involved, confirm key parameters such as the target and content as prompted in the session; if groups with the same name exist or the target is unclear, provide additional information before continuing. If the task indicates that you are not logged in or lack permissions, complete the login and authorization or contact the administrator as prompted, then continue.
Uninstalling DingTalk CLI
When the DingTalk CLI is no longer needed, open its detail popup, click One-Click Uninstall, follow the on-screen prompts to complete the operation, and then refresh to check the status. Before uninstalling, confirm whether running tasks still depend on the CLI or global Skills; the specific uninstallation scope is subject to the operation prompts.
FastData Agent Kit
Entering the FastData Agent Kit Installation Guide
Path: My AI Colleague →Extension →CLI →FastData Agent Kit →Install on the left sidebar.
FastData Agent Kit provides FastData CLI and accompanying skill capabilities in DeepWorks sessions via @fastdata, supporting data queries, task run analysis, metadata discovery, data governance, modeling, SQL, and more. Installation and login are guided by the official FastData dynamic instructions in the session.
- Go to the CLI list, find FastData Agent Kit, and click theInstall button with the session icon on the right to jump to the guided session.
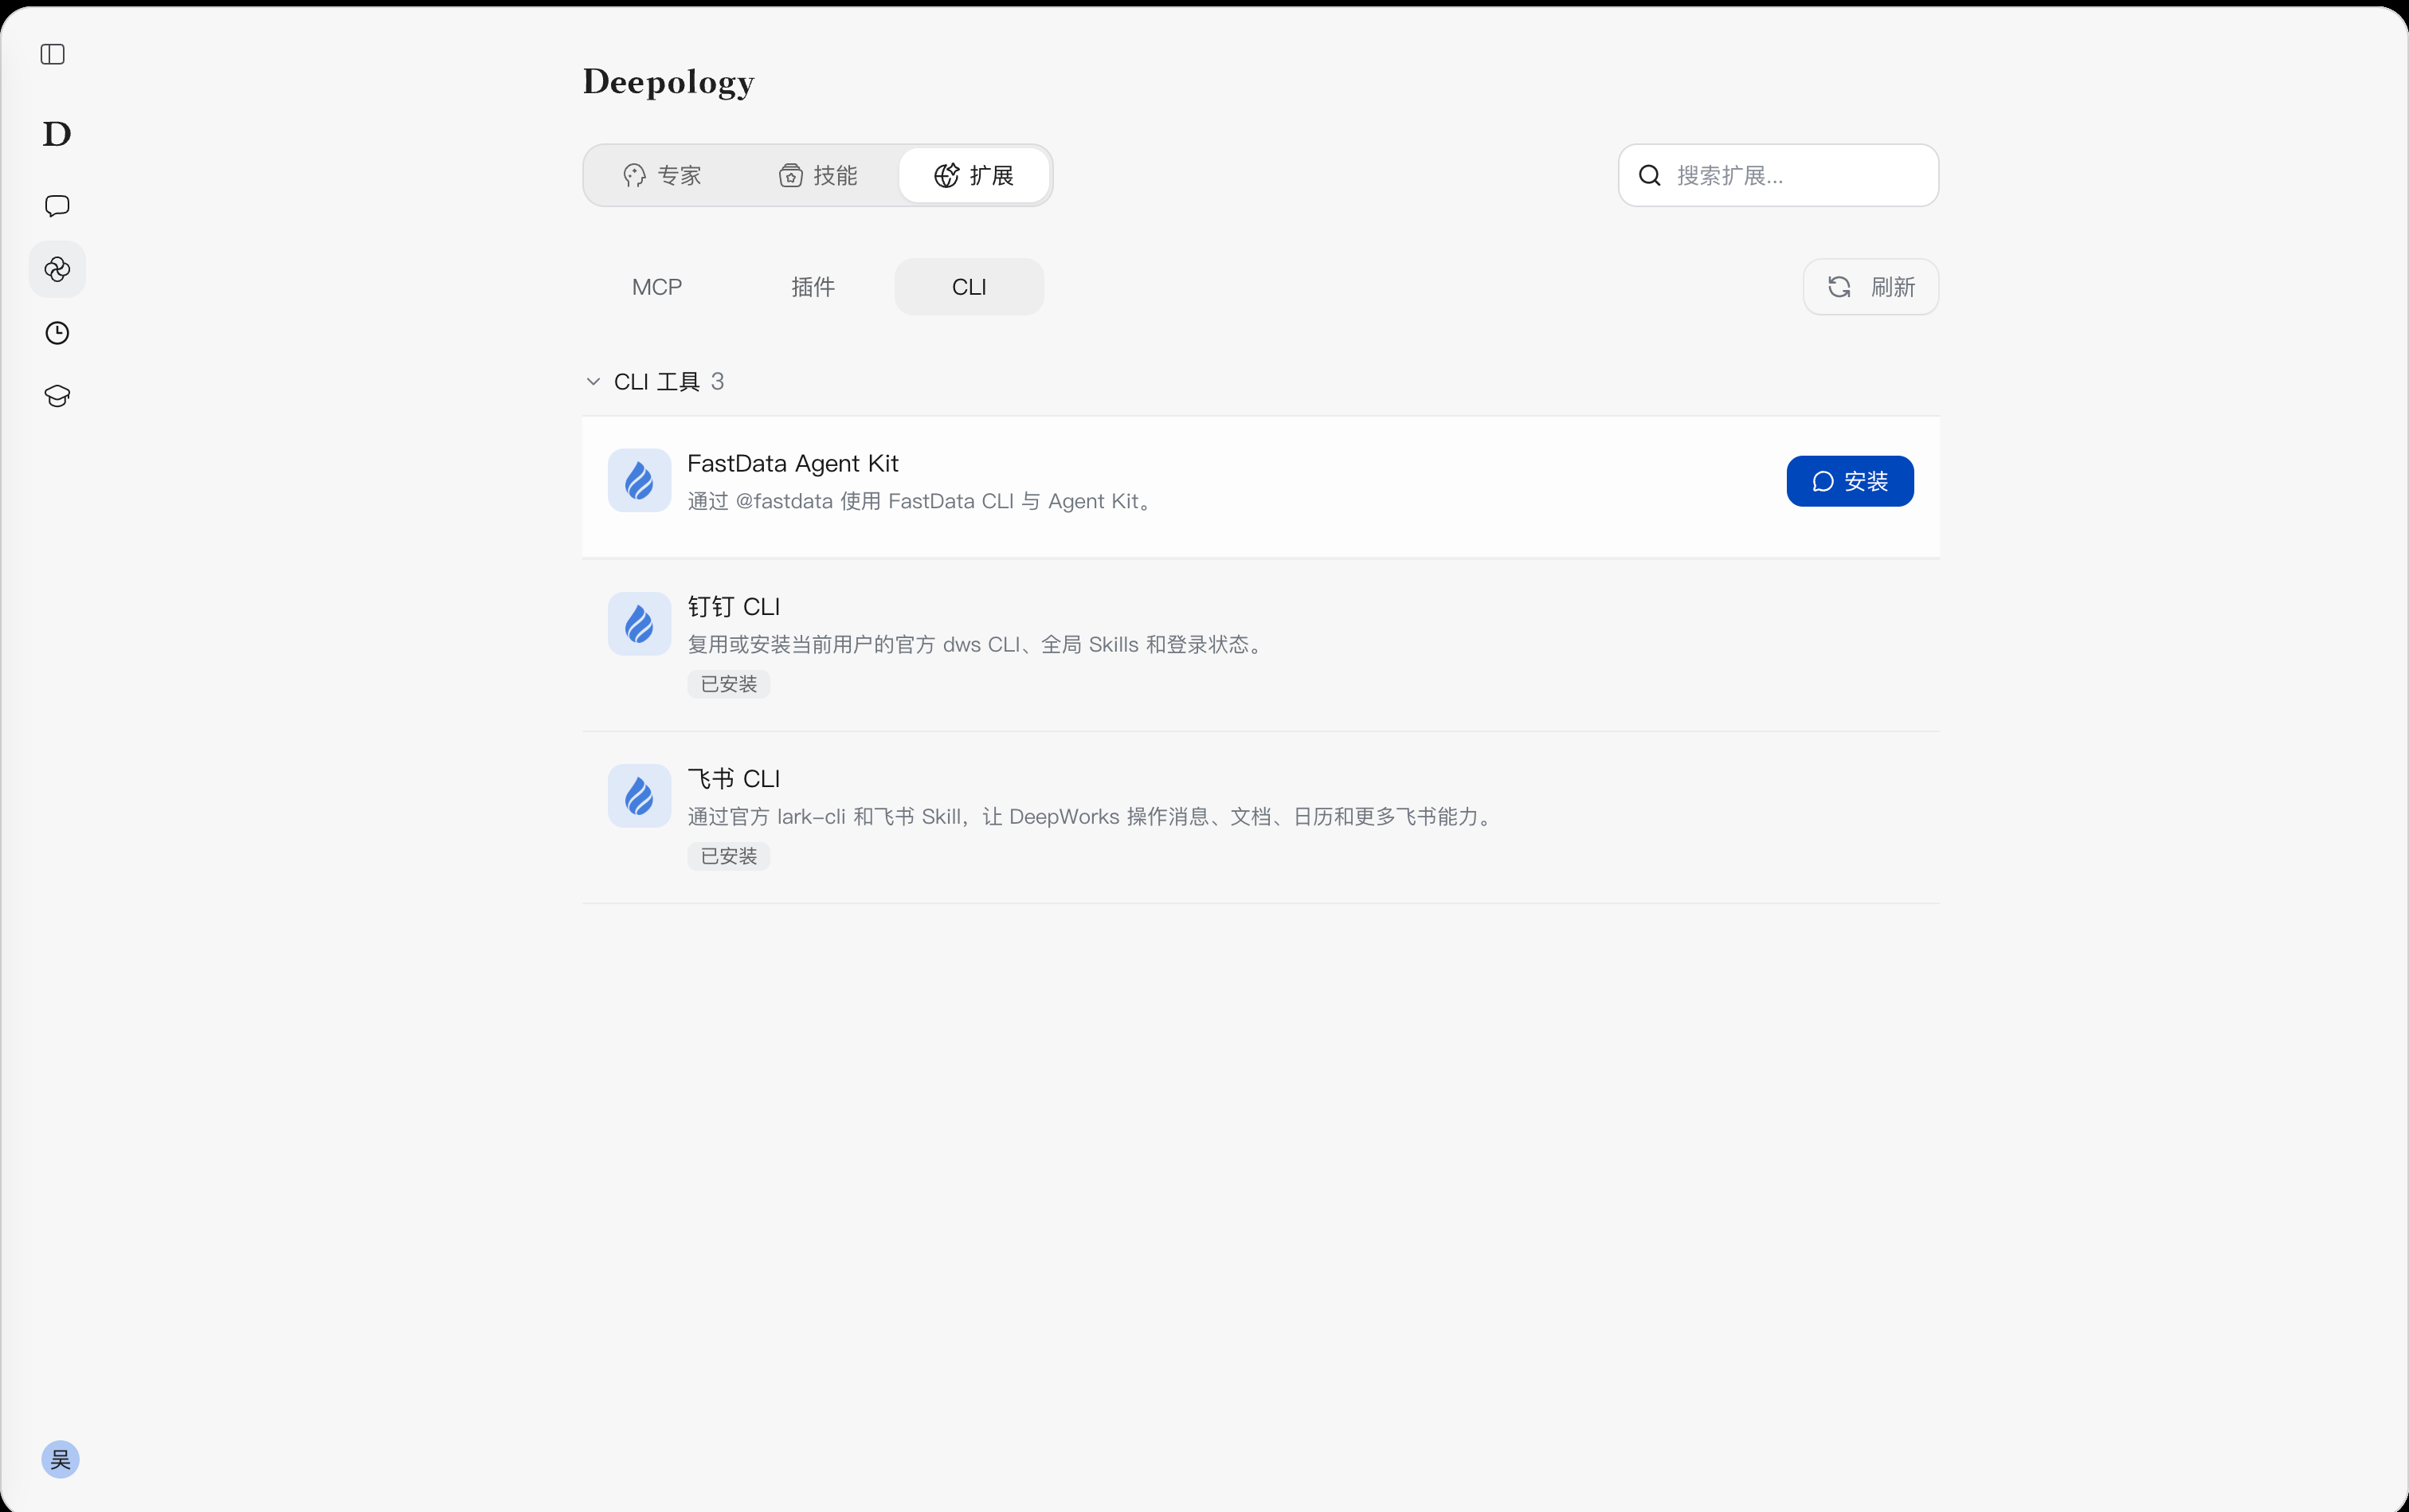
You can also first click the tool’s list item to view the details, then click Install at the bottom of the popup to enter the session.
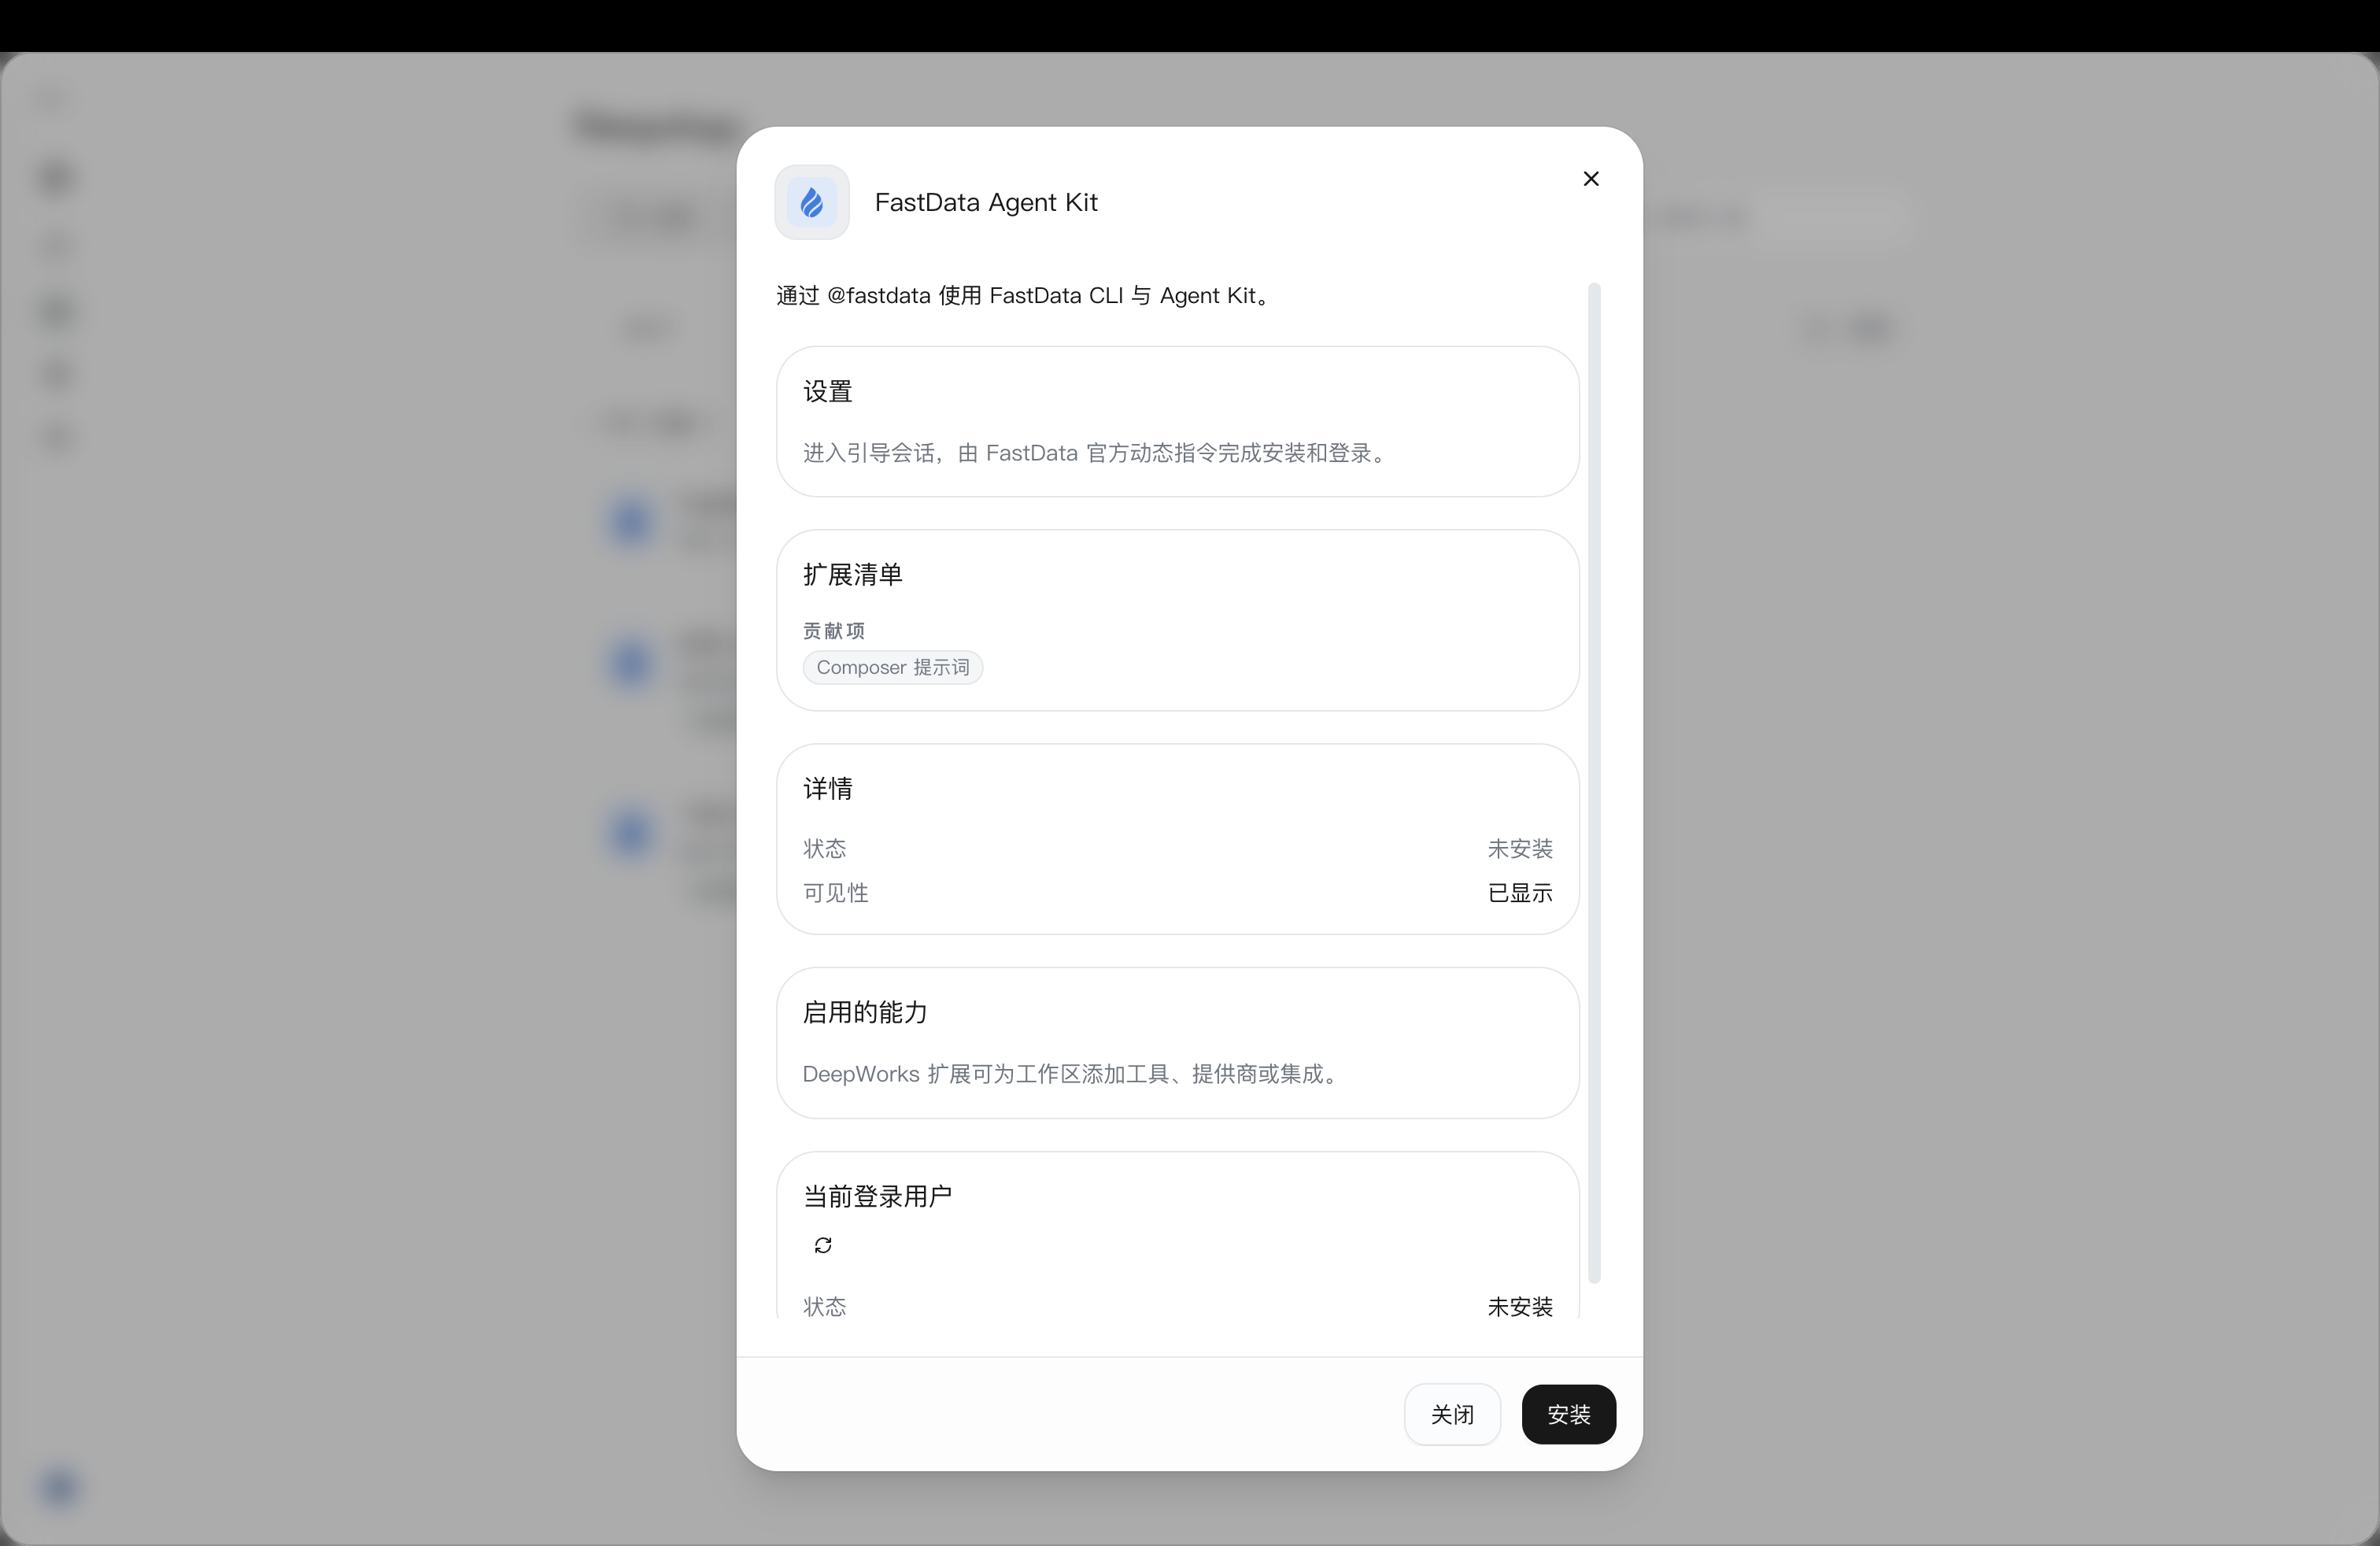
- After the jump,
@fastdatais displayed in the input box. Confirm the current workspace, append “install” after it, and then send.
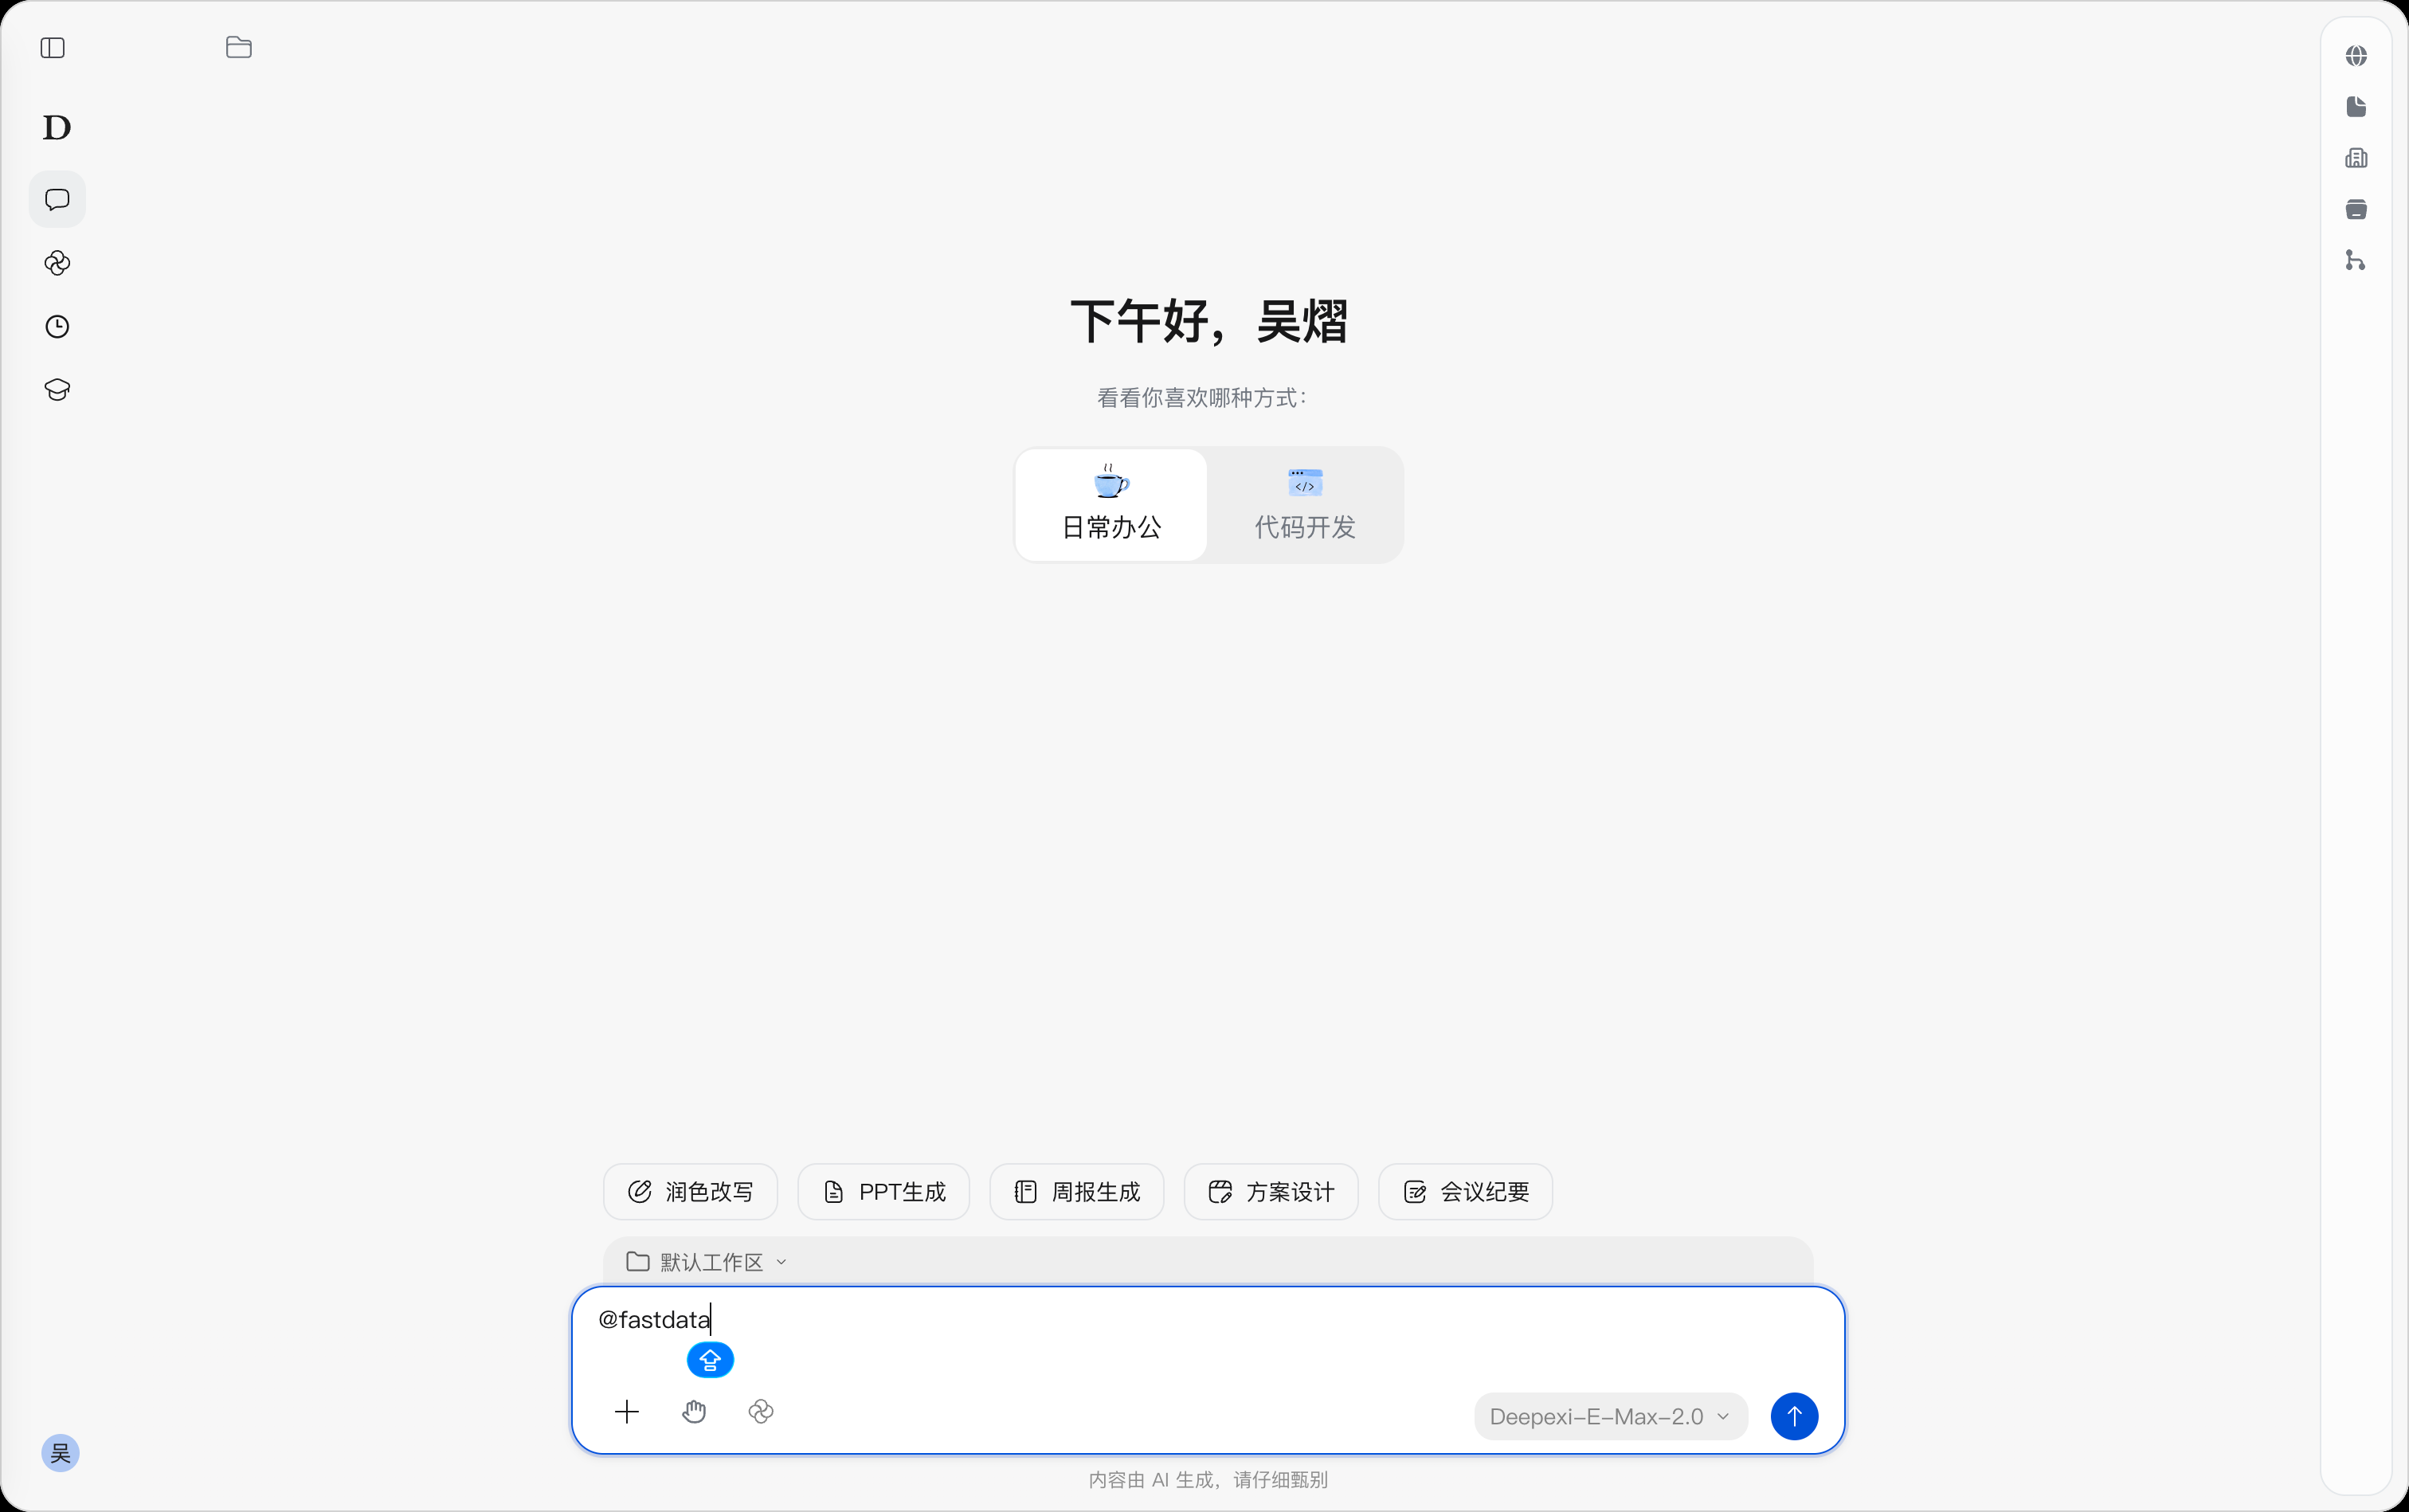
For example:
@fastdata 安装
After sending the request, follow the session prompts to complete the confirmation and installation.
Confirming and Completing the Installation in the Session
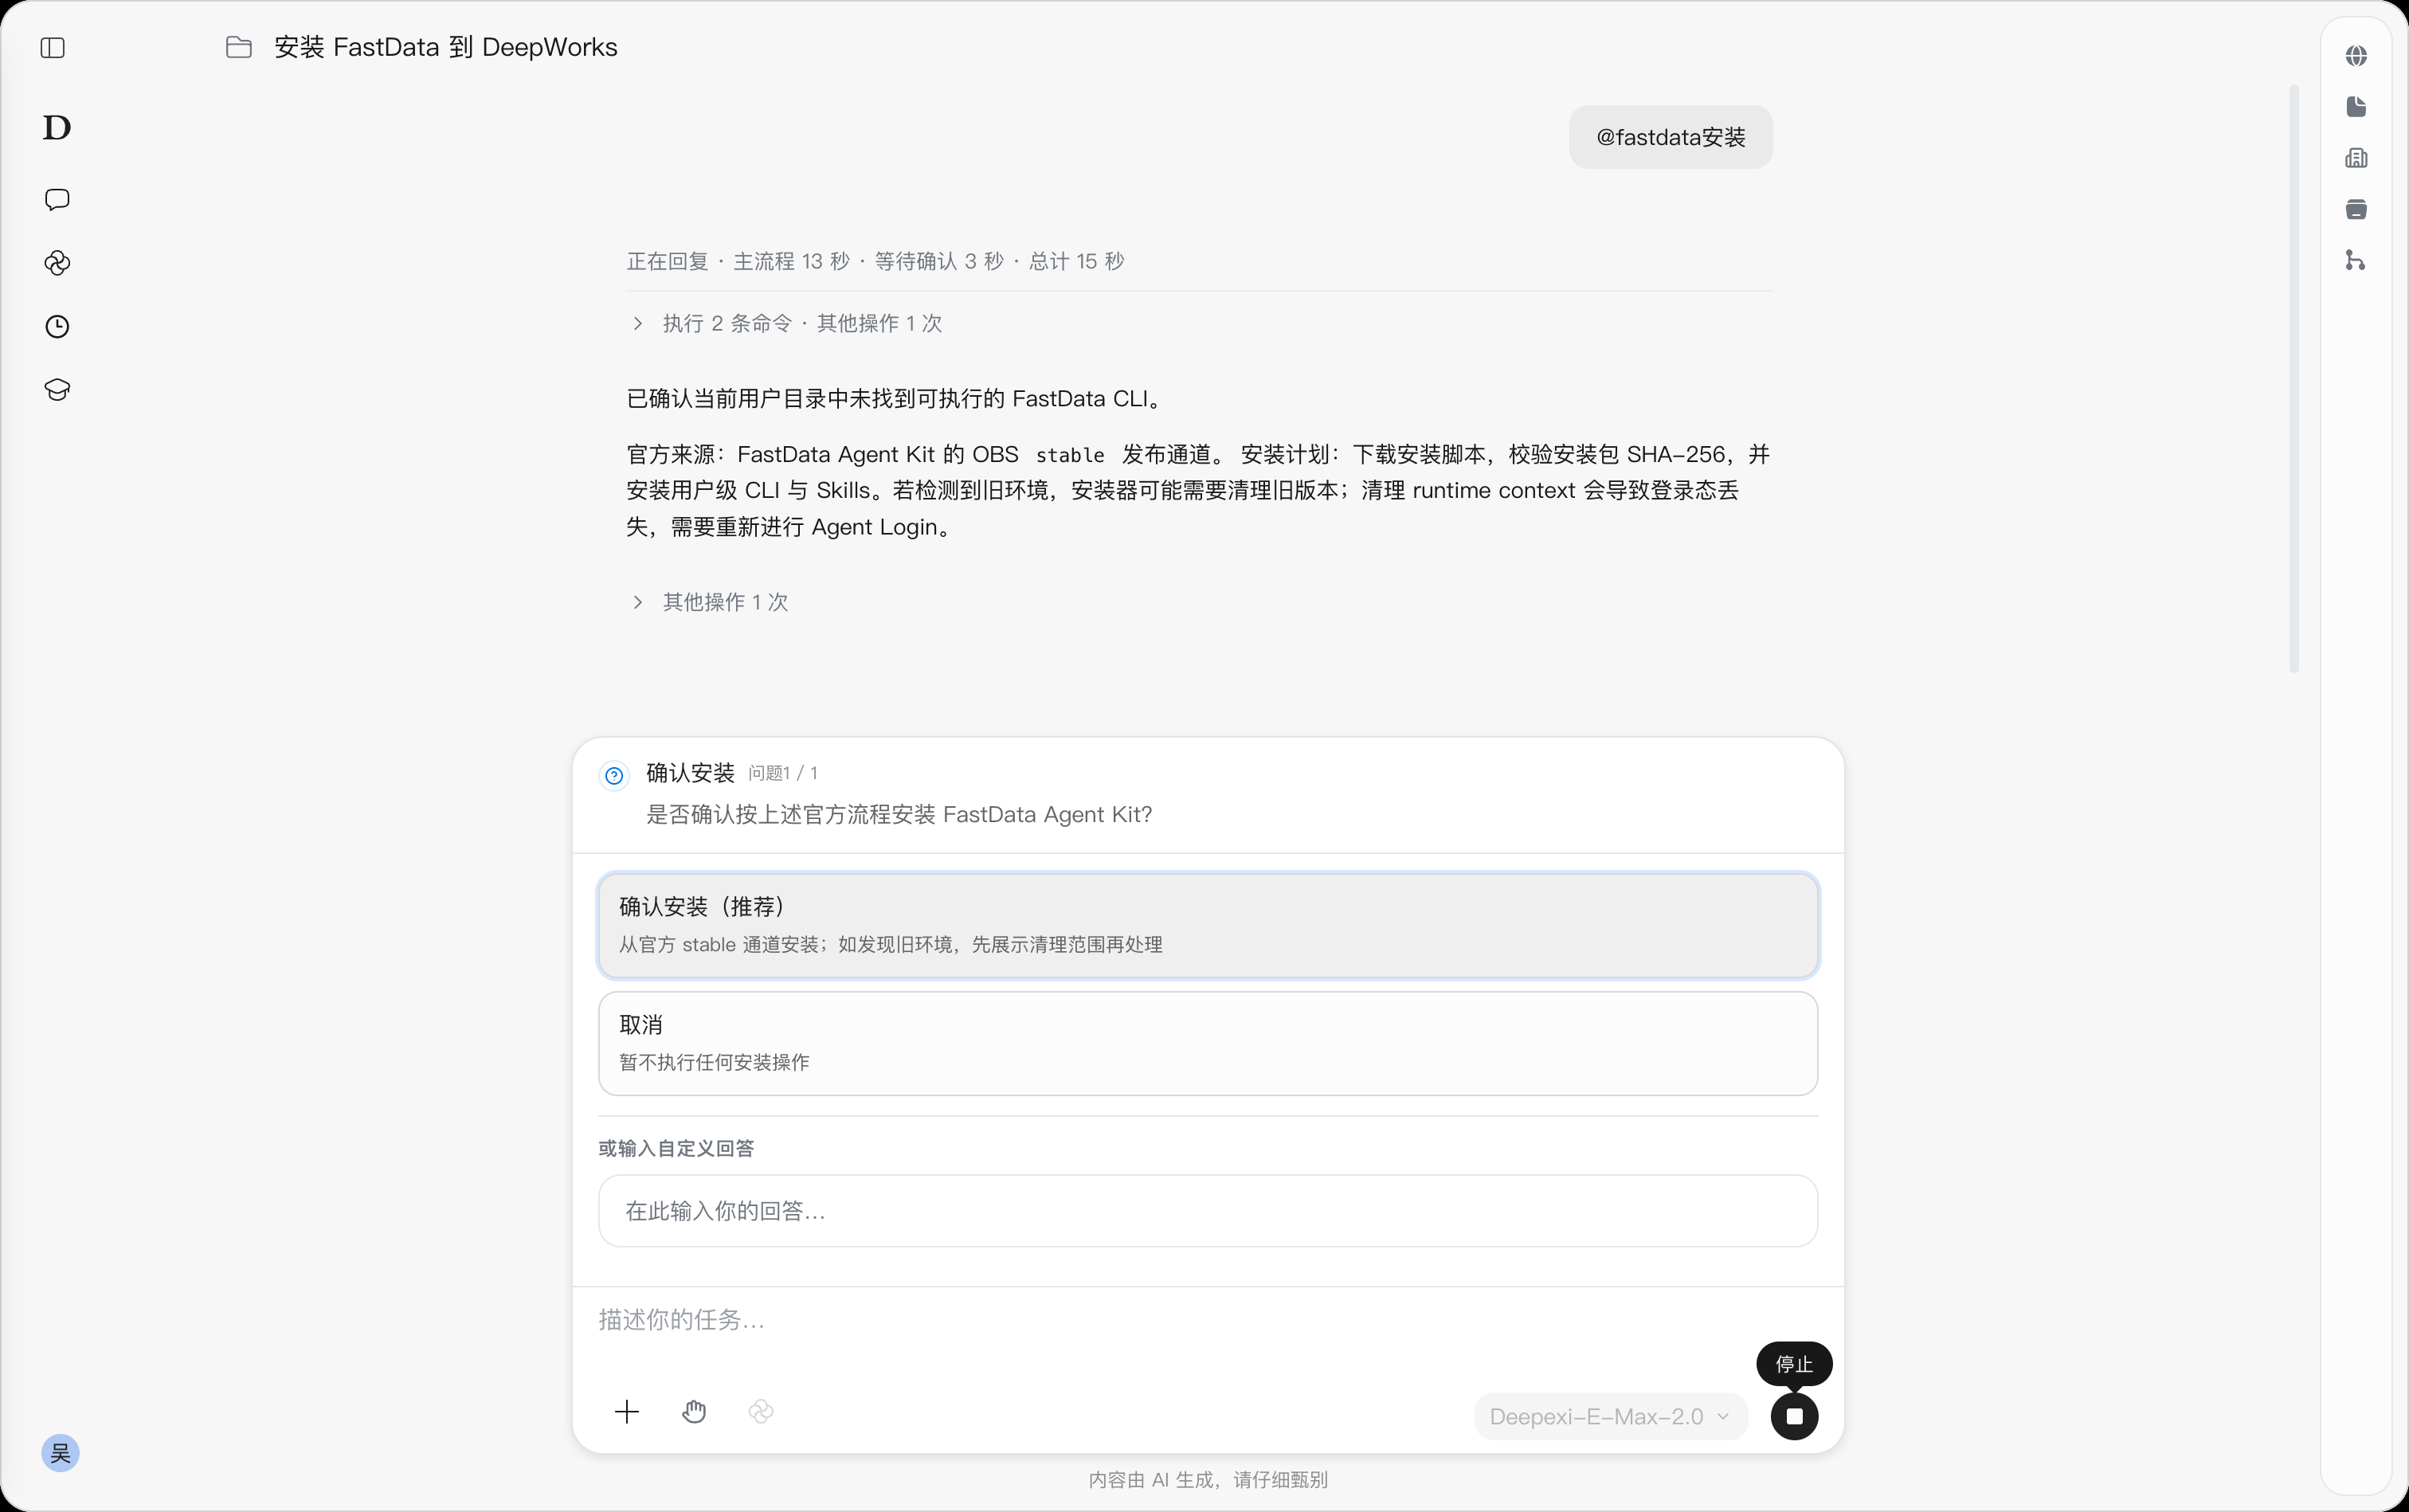
After receiving the installation request, DeepWorks checks the current user environment and explains the detection results, the official installation source, and the installation plan in the session.
It supports obtaining installation resources from the official stable release channel of FastData Agent Kit, verifying the installation package, and then installing the user-level CLI and Skills. If an old environment is detected, you will be prompted that the old version may need handling; clearing the runtime context may cause the login state to be lost, requiring you to perform Agent Login again.
- Read the installation plan shown in the session.
- In the “Confirm Installation” card, select Confirm Installation (Recommended) and submit the answer to continue; selectingCancel will postpone the installation. You can also add requirements under “Or enter a custom answer”.
- If an old environment is found, first review the cleanup scope and impact shown in the session, then handle it as prompted.
- Wait for the installation and availability verification to complete, and view the final result in the session.
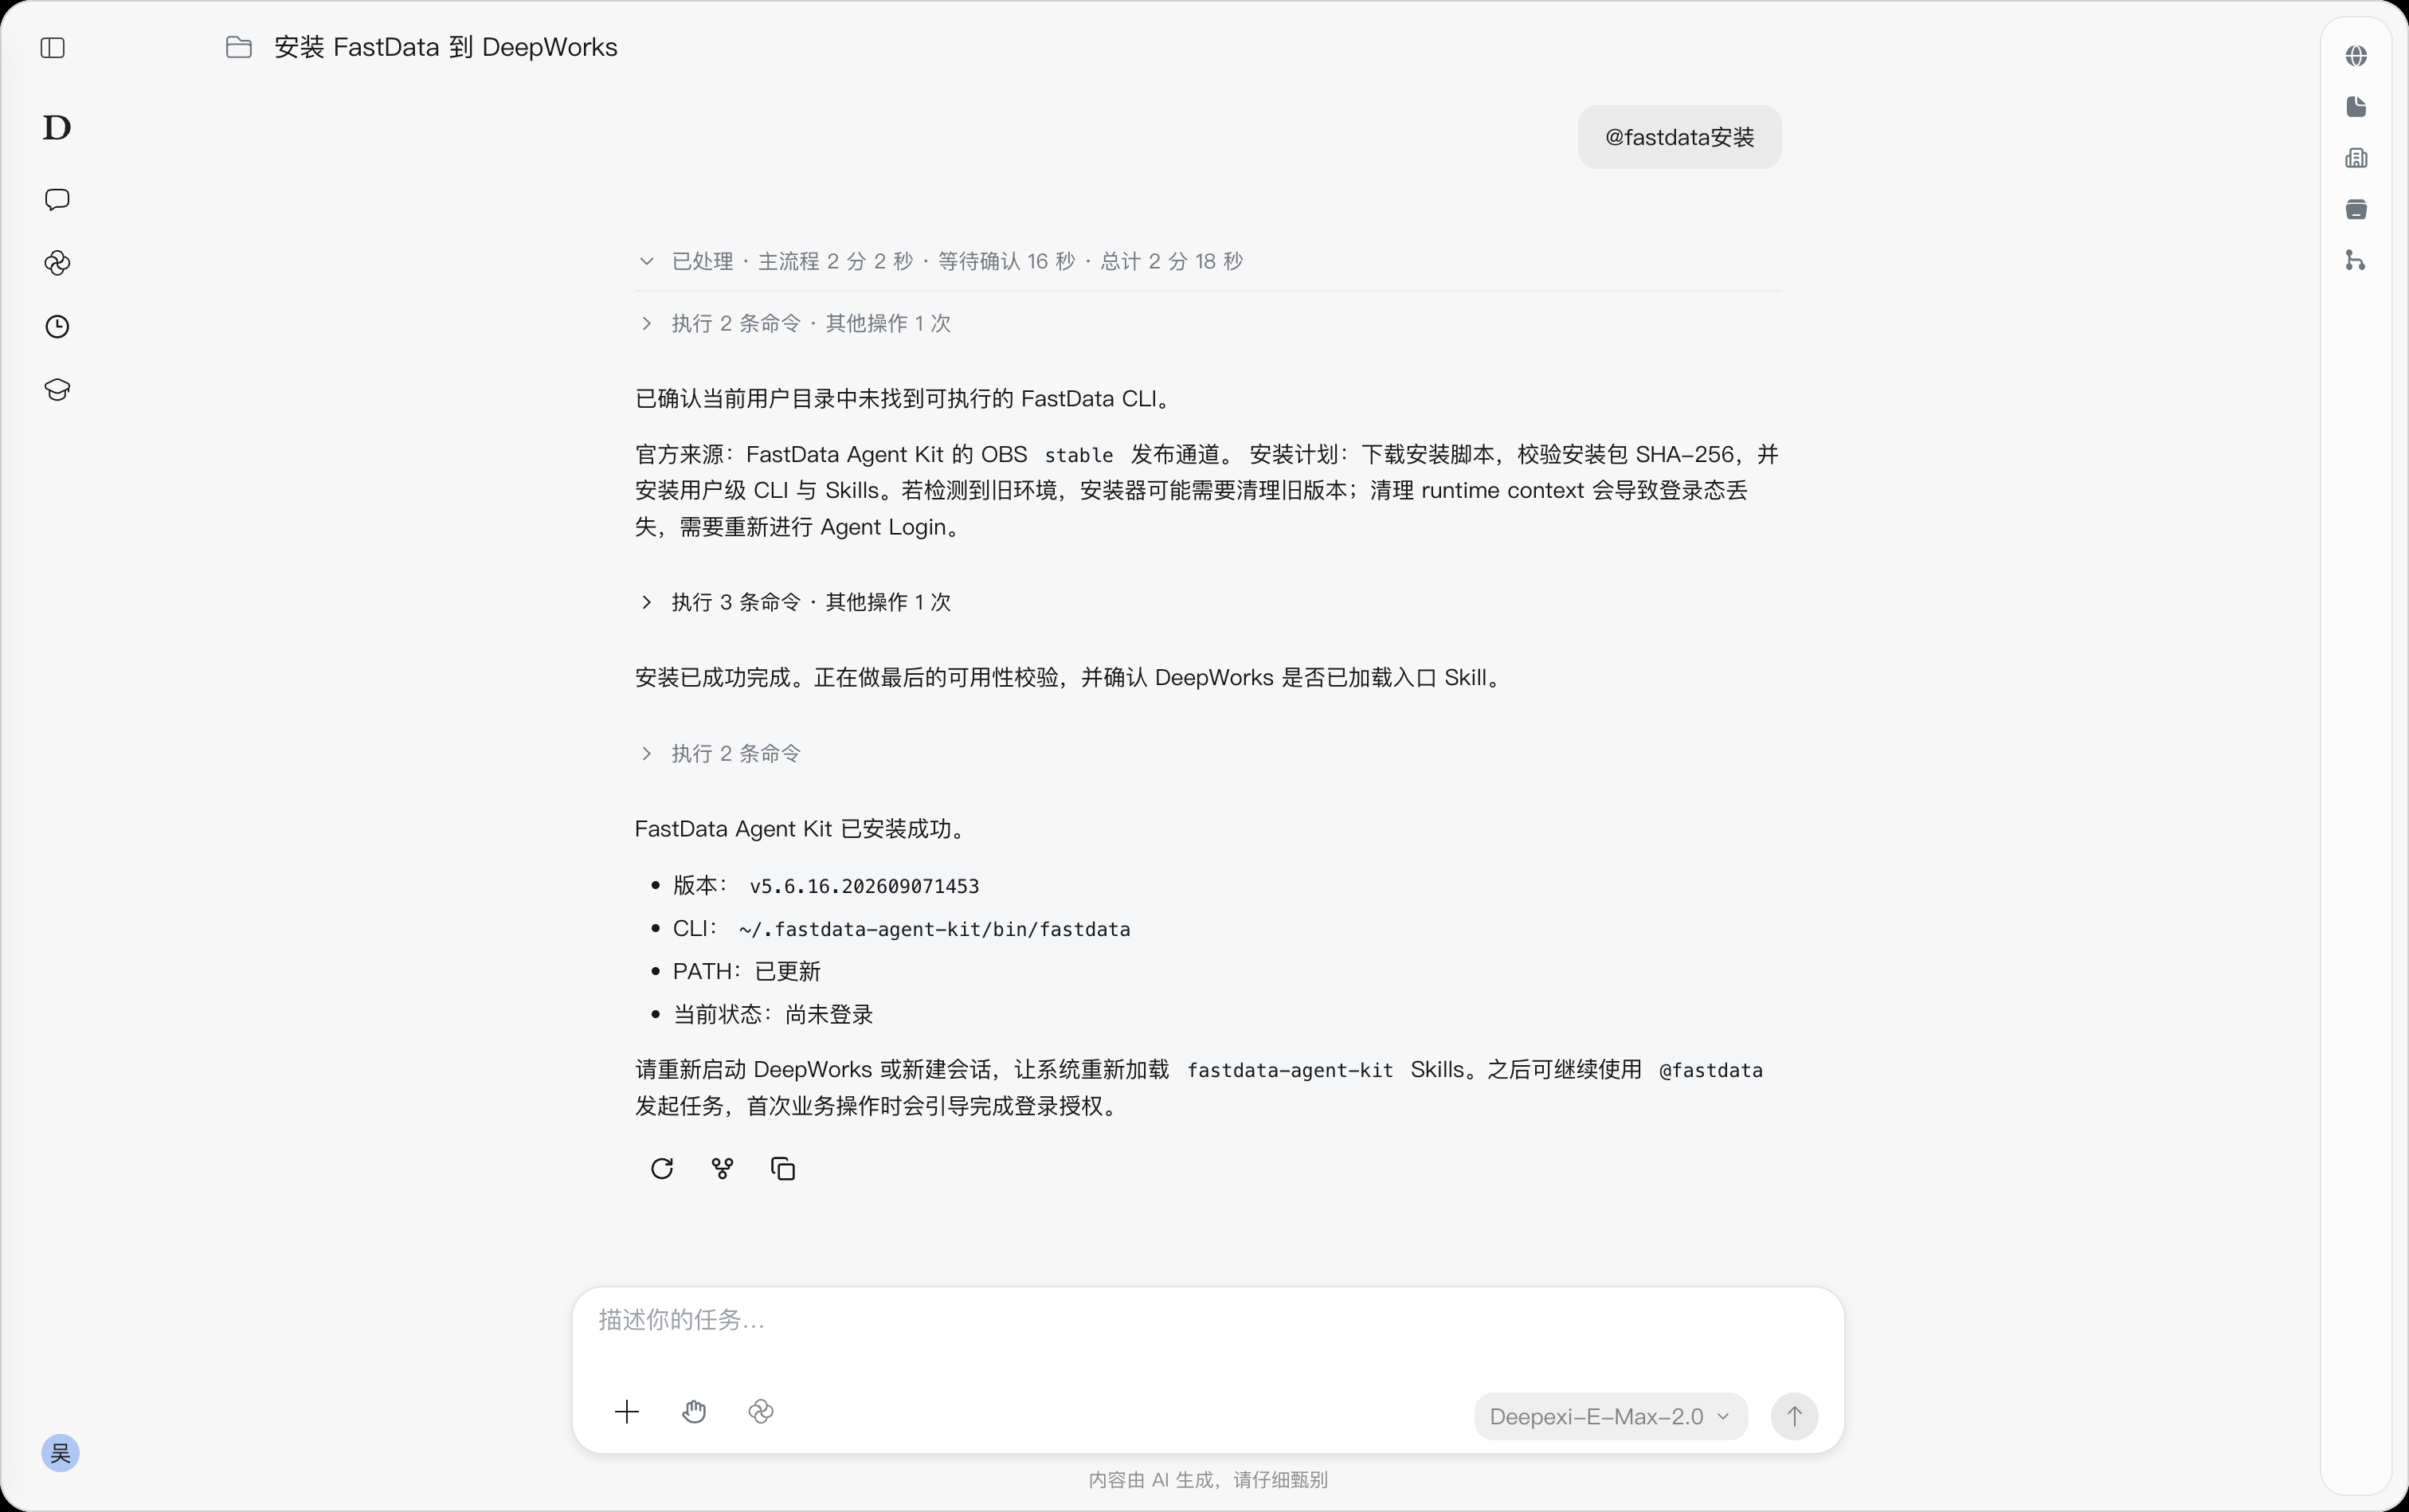
After a successful installation, the session returns the FastData Agent Kit version, CLI location, PATH update status, and current login status.
As prompted by the installation result, restart DeepWorks or create a new session so the system reloads the FastData Agent Kit Skills; you can then continue starting tasks via @fastdata.
Viewing Installation Status and Completing Login
Return to My AI Colleague →Extension →CLI, and clickRefresh if necessary. After installation is complete, the FastData Agent Kit list item shows “Installed”.
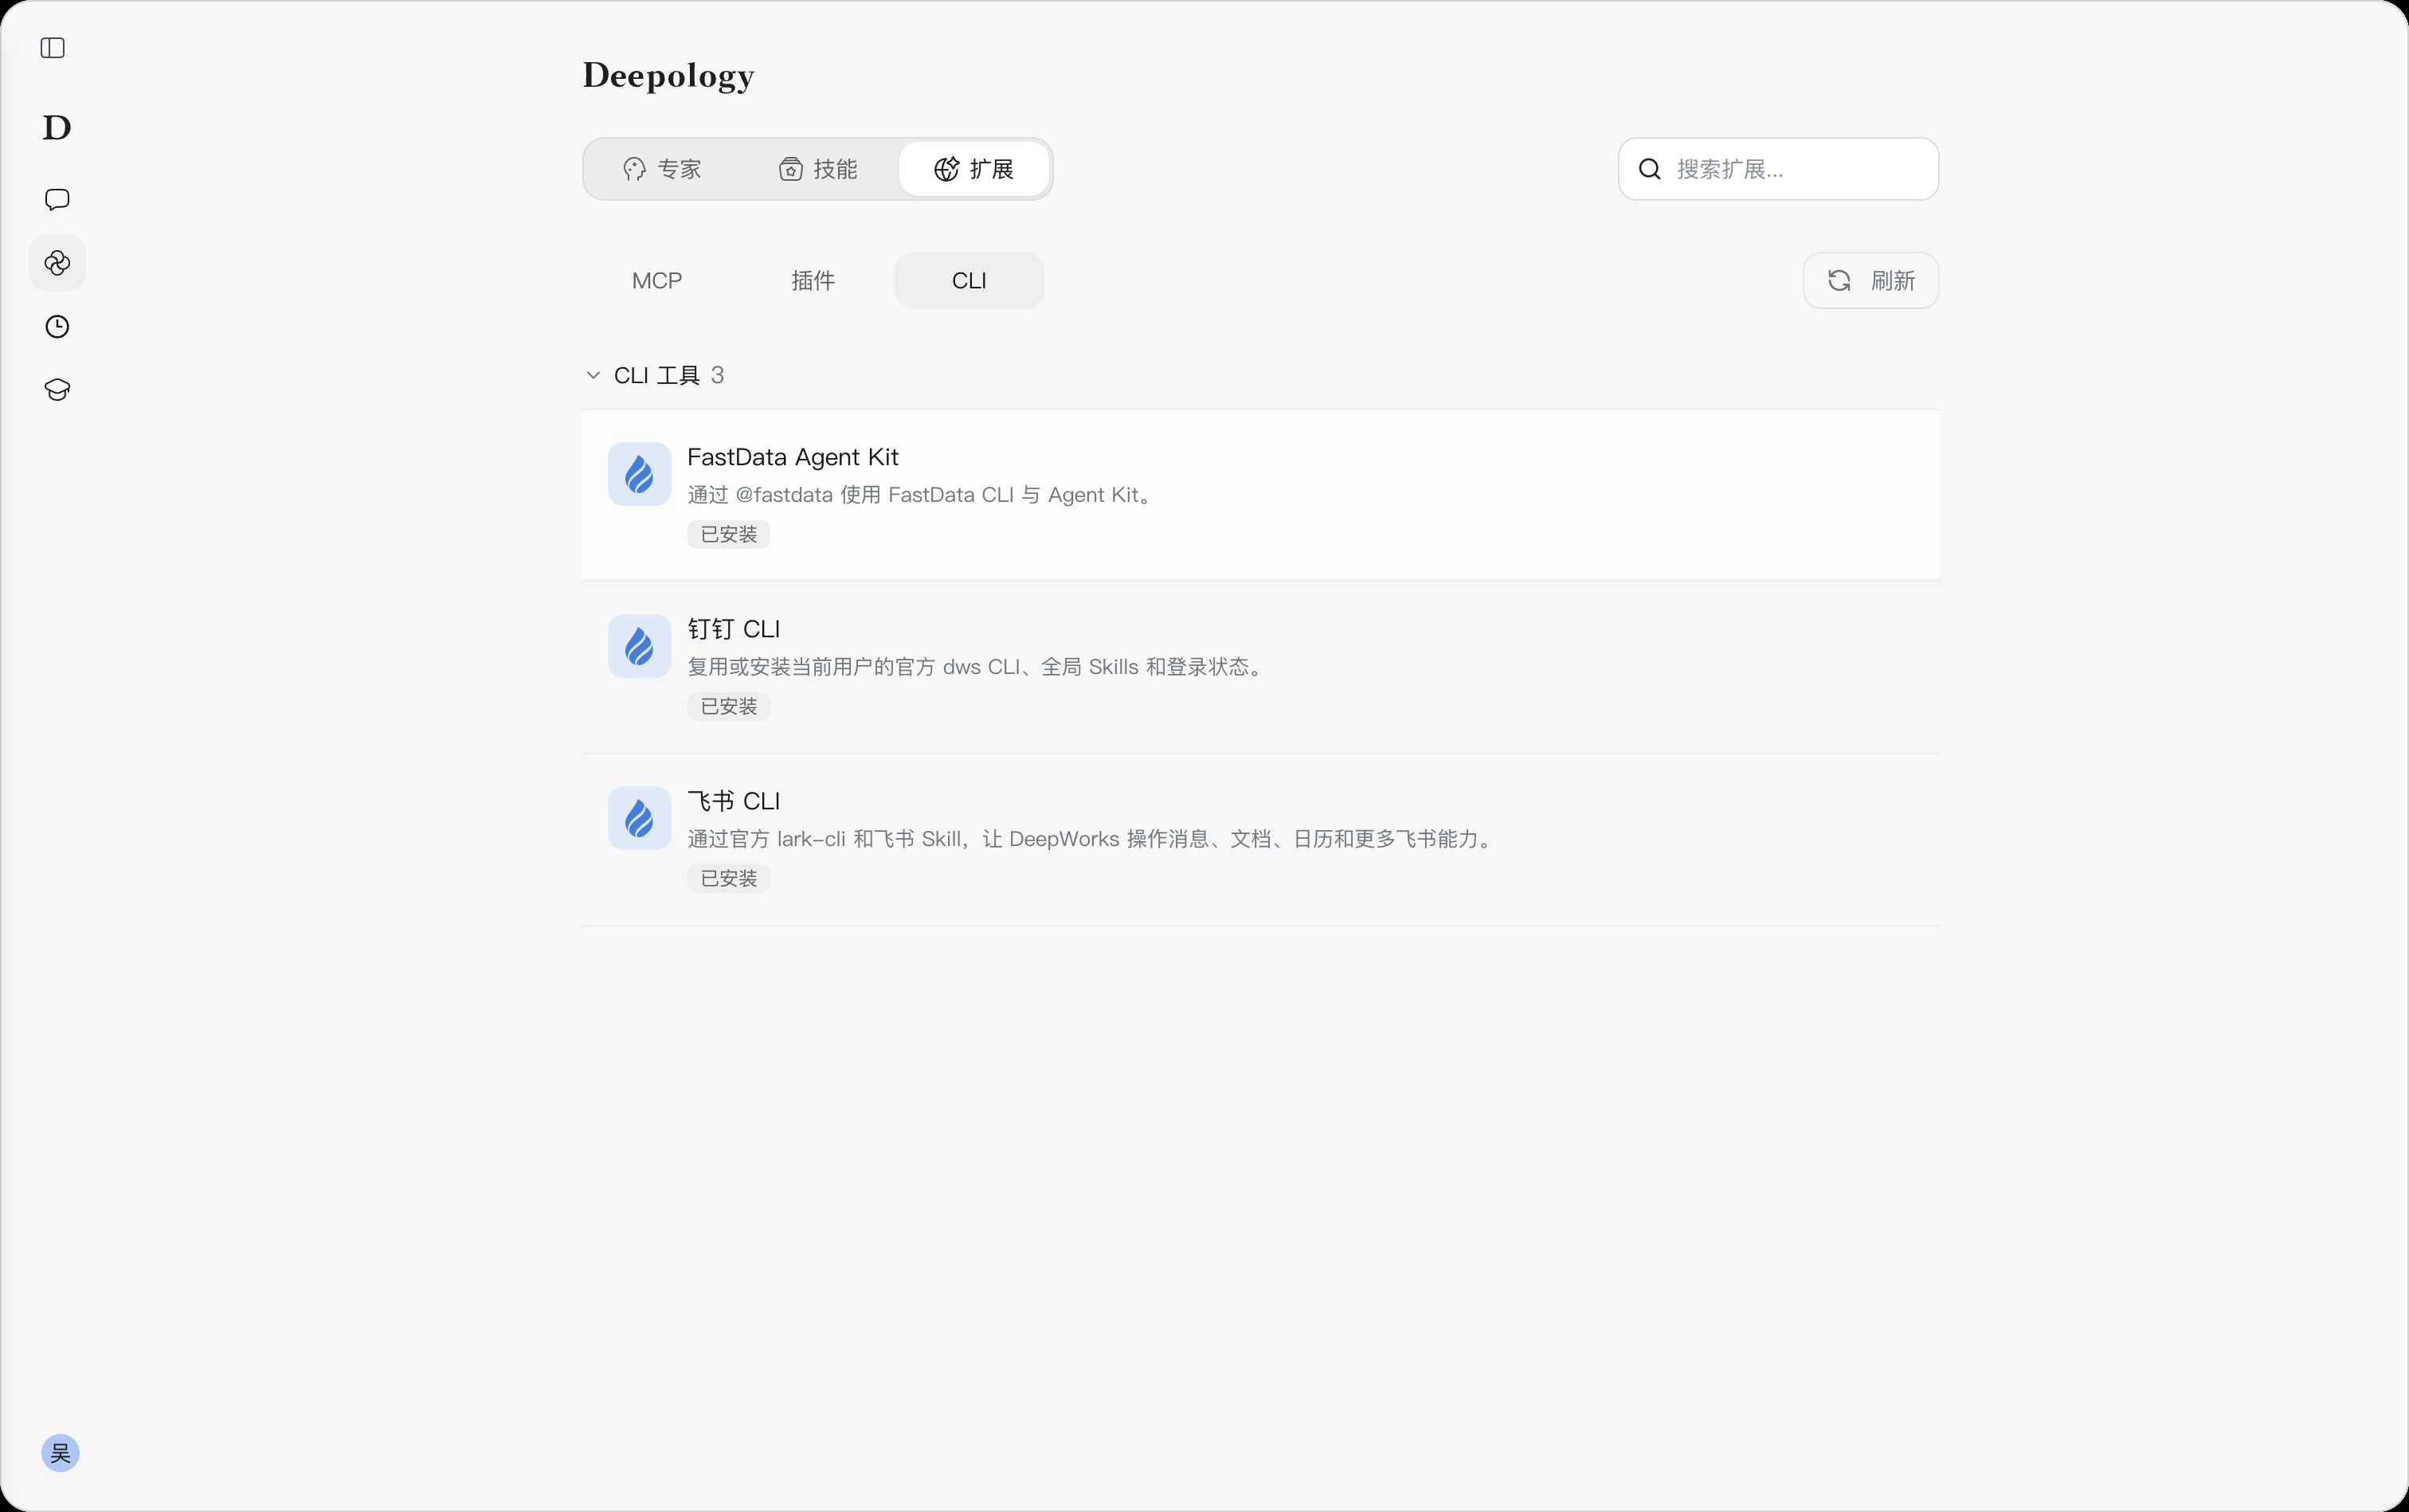
“Installed” indicates the installation status of the CLI and related components. If the session result shows “Not logged in yet”, the first business operation will guide you through login authorization; just follow the session prompts. To check the account status, open the FastData Agent Kit details, view the “Current Logged-in User” area, and click the refresh icon to update the information.
If the related capabilities are still not loaded after installation, create a new session or restart DeepWorks as prompted by the installation result; if the login state became invalid due to old environment cleanup, complete the login again.
Using FastData Agent Kit
Enter @fastdata in the session and send it to view the FastData capability overview; you can also describe a specific task directly after it. The system will load the relevant skills based on the task and process it within the current account’s authorized scope.
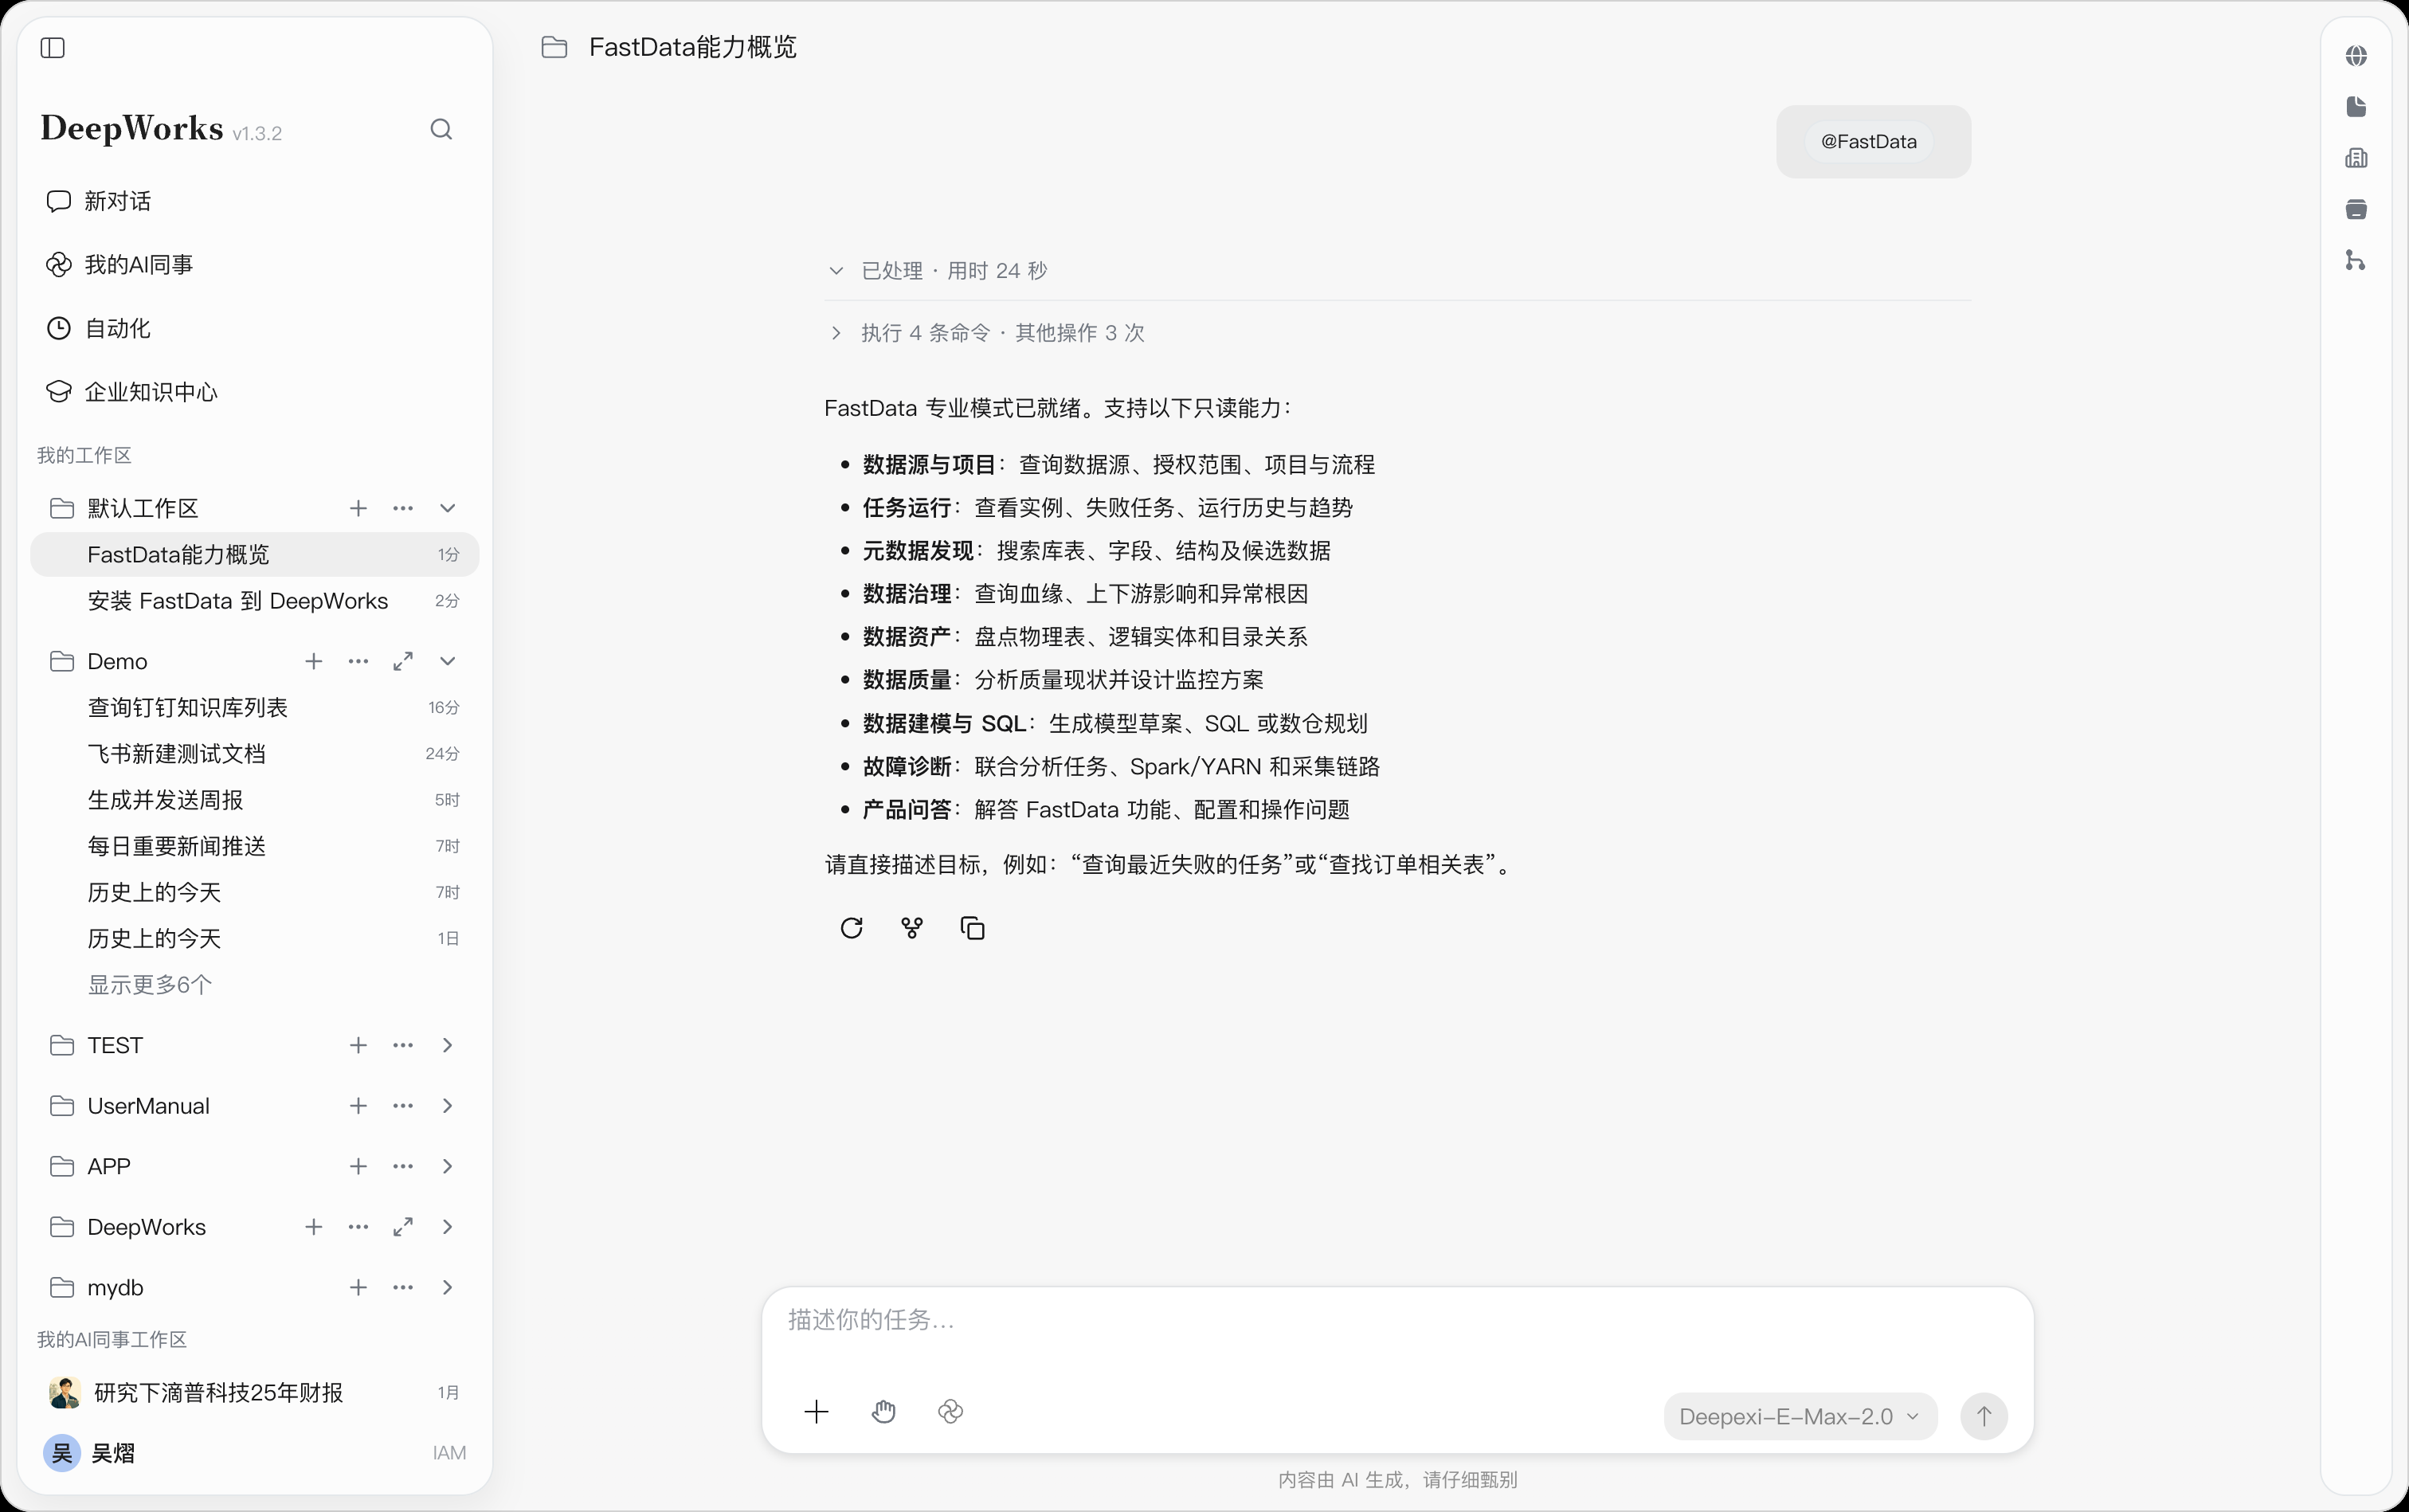
The FastData Kit capability overview covers the following query, analysis, and solution generation scenarios:
| Capability | Function Description |
|---|---|
| Data sources and projects | Query data sources, authorized scopes, projects, and workflows. |
| Task runs | View instances, failed tasks, run history, and trends. |
| Metadata discovery | Search databases, tables, fields, structures, and candidate data. |
| Data governance | Query lineage, upstream/downstream impact, and root causes of anomalies. |
| Data assets | Inventory physical tables, logical entities, and catalog relationships. |
| Data quality | Analyze the current quality status and design monitoring plans. |
| Data modeling and SQL | Generate model drafts, SQL, or data warehouse plans. |
| Fault diagnosis | Jointly analyze tasks, Spark/YARN, and collection pipelines. |
| Product Q&A | Answer questions about FastData features, configuration, and operations. |
For example:
- “@fastdata, query recently failed tasks.”
- “@fastdata, find tables related to orders.”
- “@fastdata, view the fields and data types of the order table.”
You can add the project, data source, table name, or time range to the task to help the system locate the target. When the session needs more information, continue answering as prompted; when business data access is involved, complete the required login authorization first.
Automation
Automation schedules repetitive work or one-off activities, such as daily news roundups, work briefings, weekly reviews, and meeting reminders. Create tasks from templates, configure them manually, or describe your requirements in a conversation. Configure task content, tools, approval policy, workspace, model, and execution time. Once created, centrally monitor runs or run, pause, edit, and delete tasks at any time.
Opening the Automation Page
Path: Left navigation →Automation.
Click Automation in the left navigation to enter the “Automation Tasks” page. The upper-right corner provides View Templates andCreate Task; below are the filter bar and task cards.
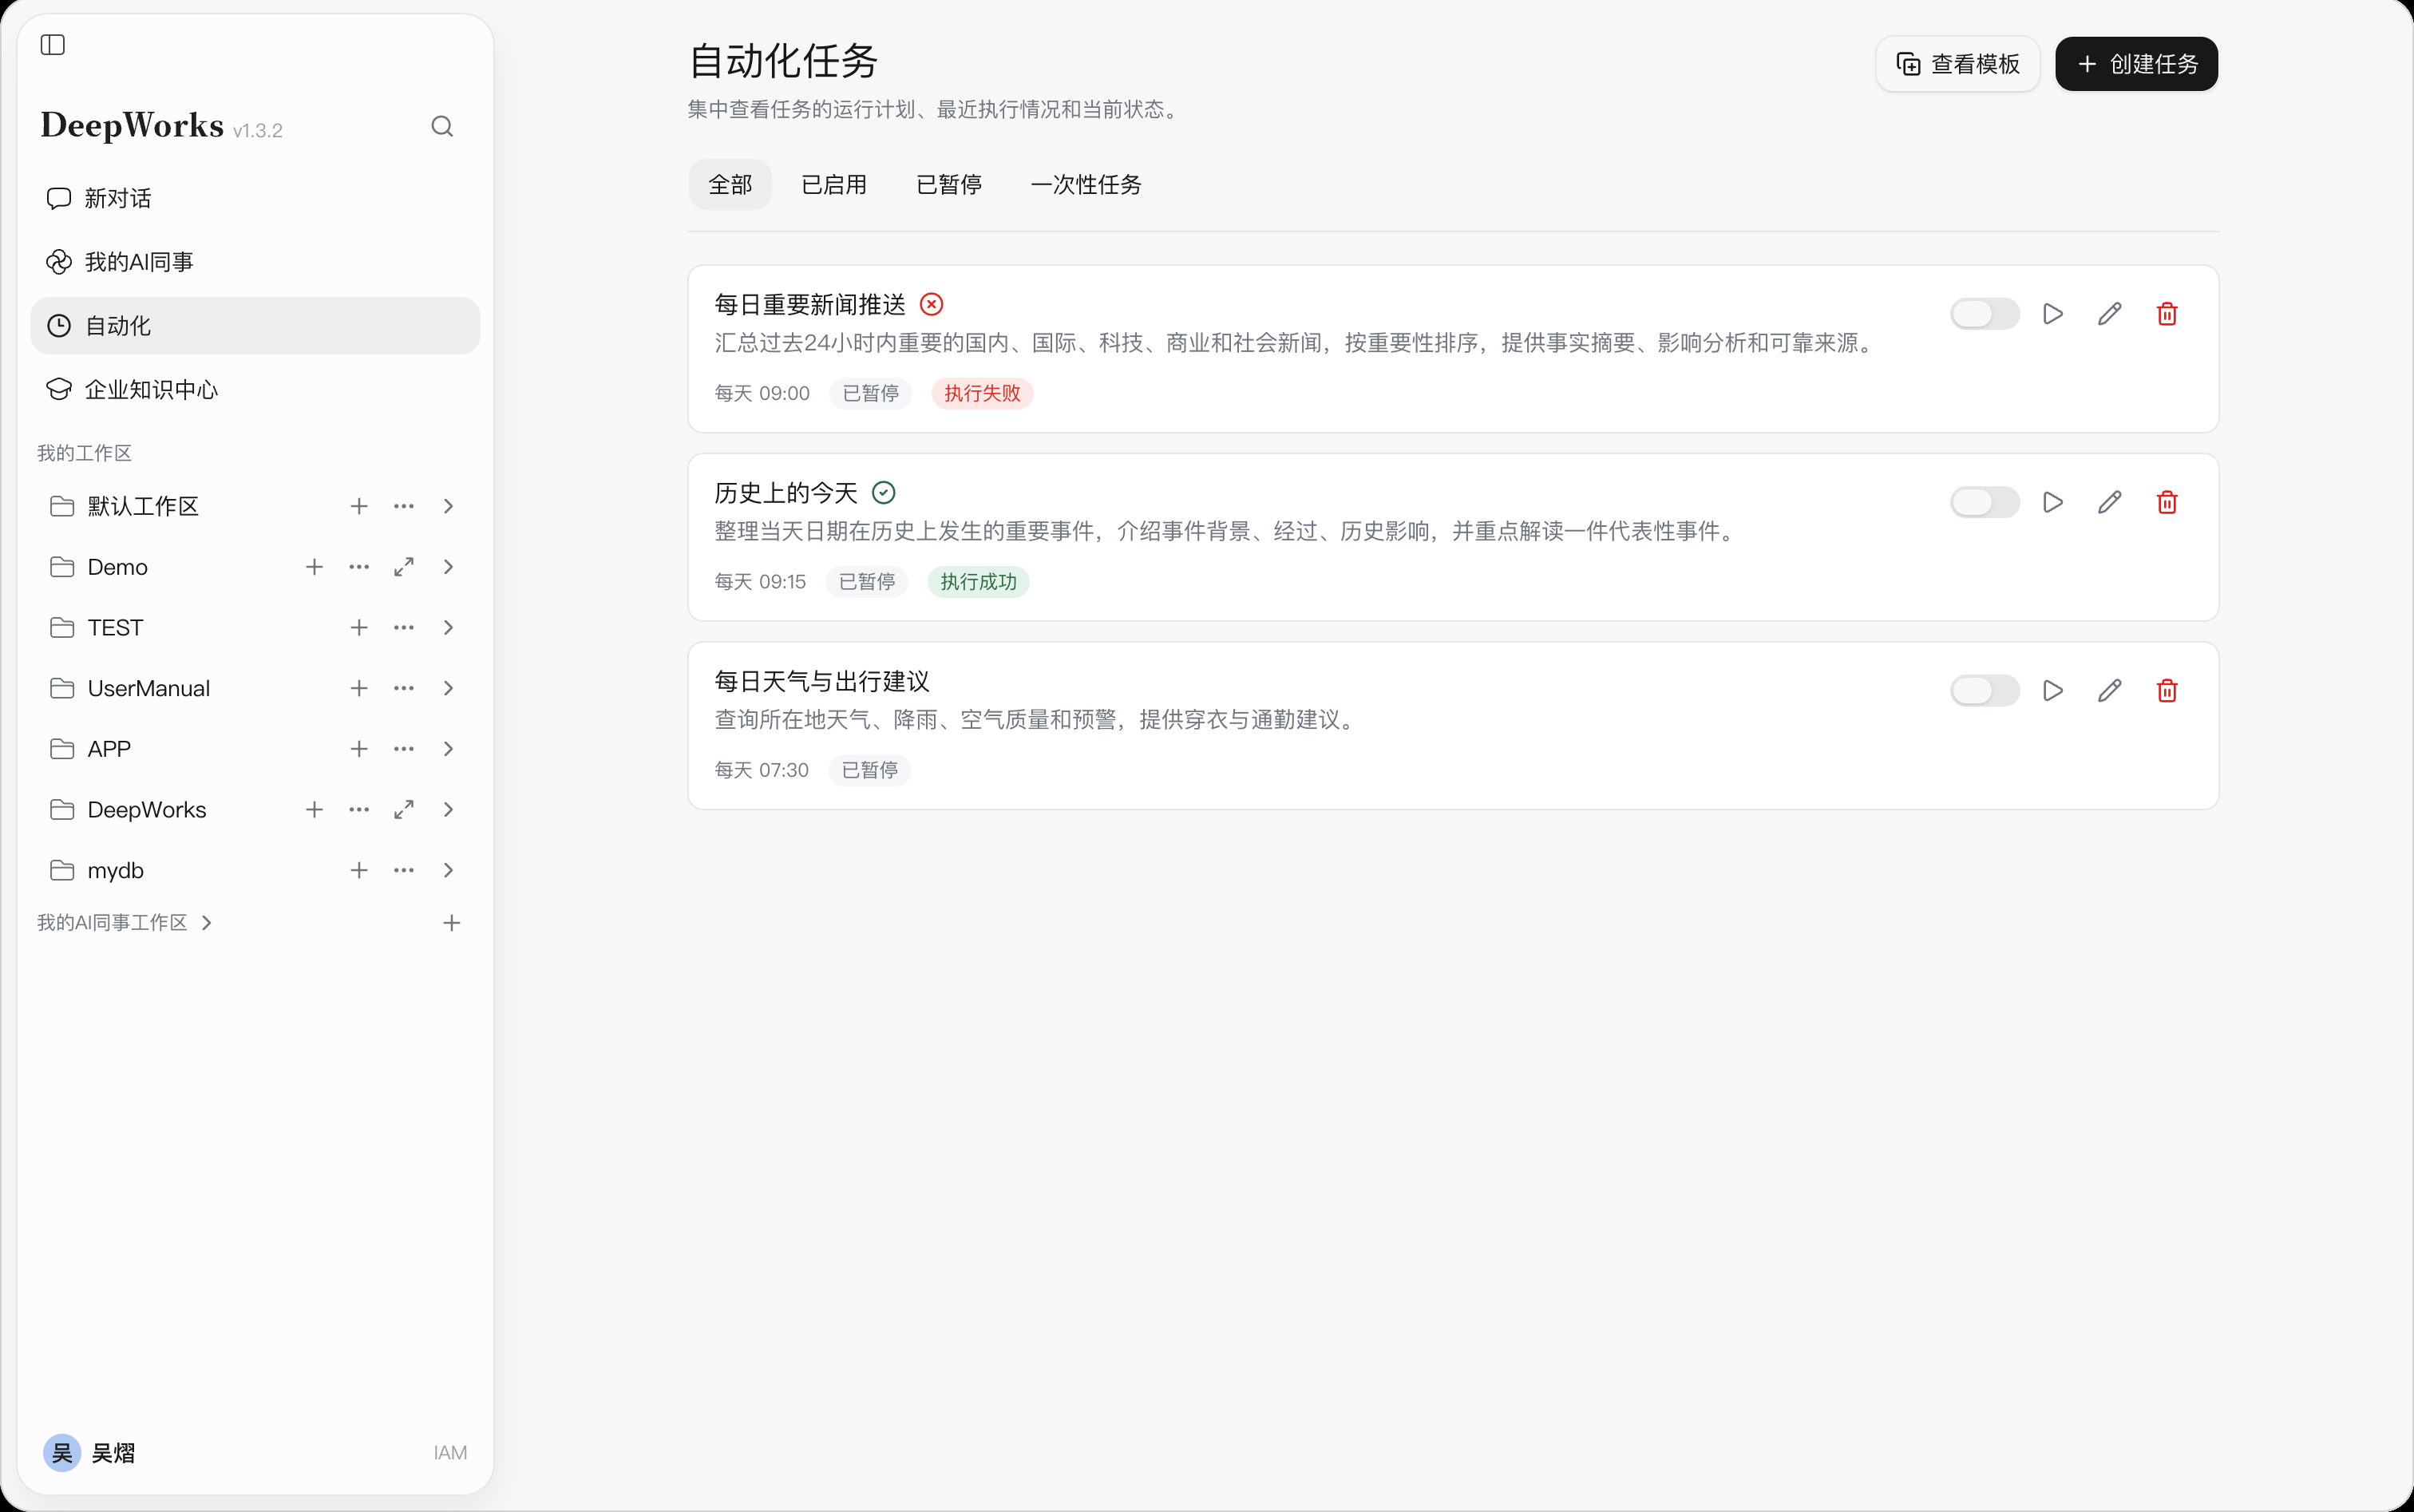
Each task card shows the task name, description, run schedule, enable/pause status, and the most recent execution result. Tasks that are enabled and have upcoming schedules also display the next execution time.
The following actions are available on the right side of each card, from left to right:
| Action | Description |
|---|---|
| Enable/pause toggle | Blue means enabled, gray means paused. Click to toggle the schedule on or off. |
| Triangle run icon | Run the task immediately once. |
| Pencil icon | Edit the task configuration. |
| Red delete icon | Delete the task and stop future schedules. |
Clicking a non-button area of a card, such as its name or description, opens the “Automation Task Details” panel on the right.
Creating a Task from a Template
Path: Automation →View Templates → select a template.
- Click View Templates in the upper-right corner to open the “Automation Templates” window.
- Select a template as needed, such as “Daily Work Briefing”, “Daily Important News Push”, “Weekly Work Review”, or “Project Meeting Reminder”. Template cards show the task name, description, and a summary of the schedule.
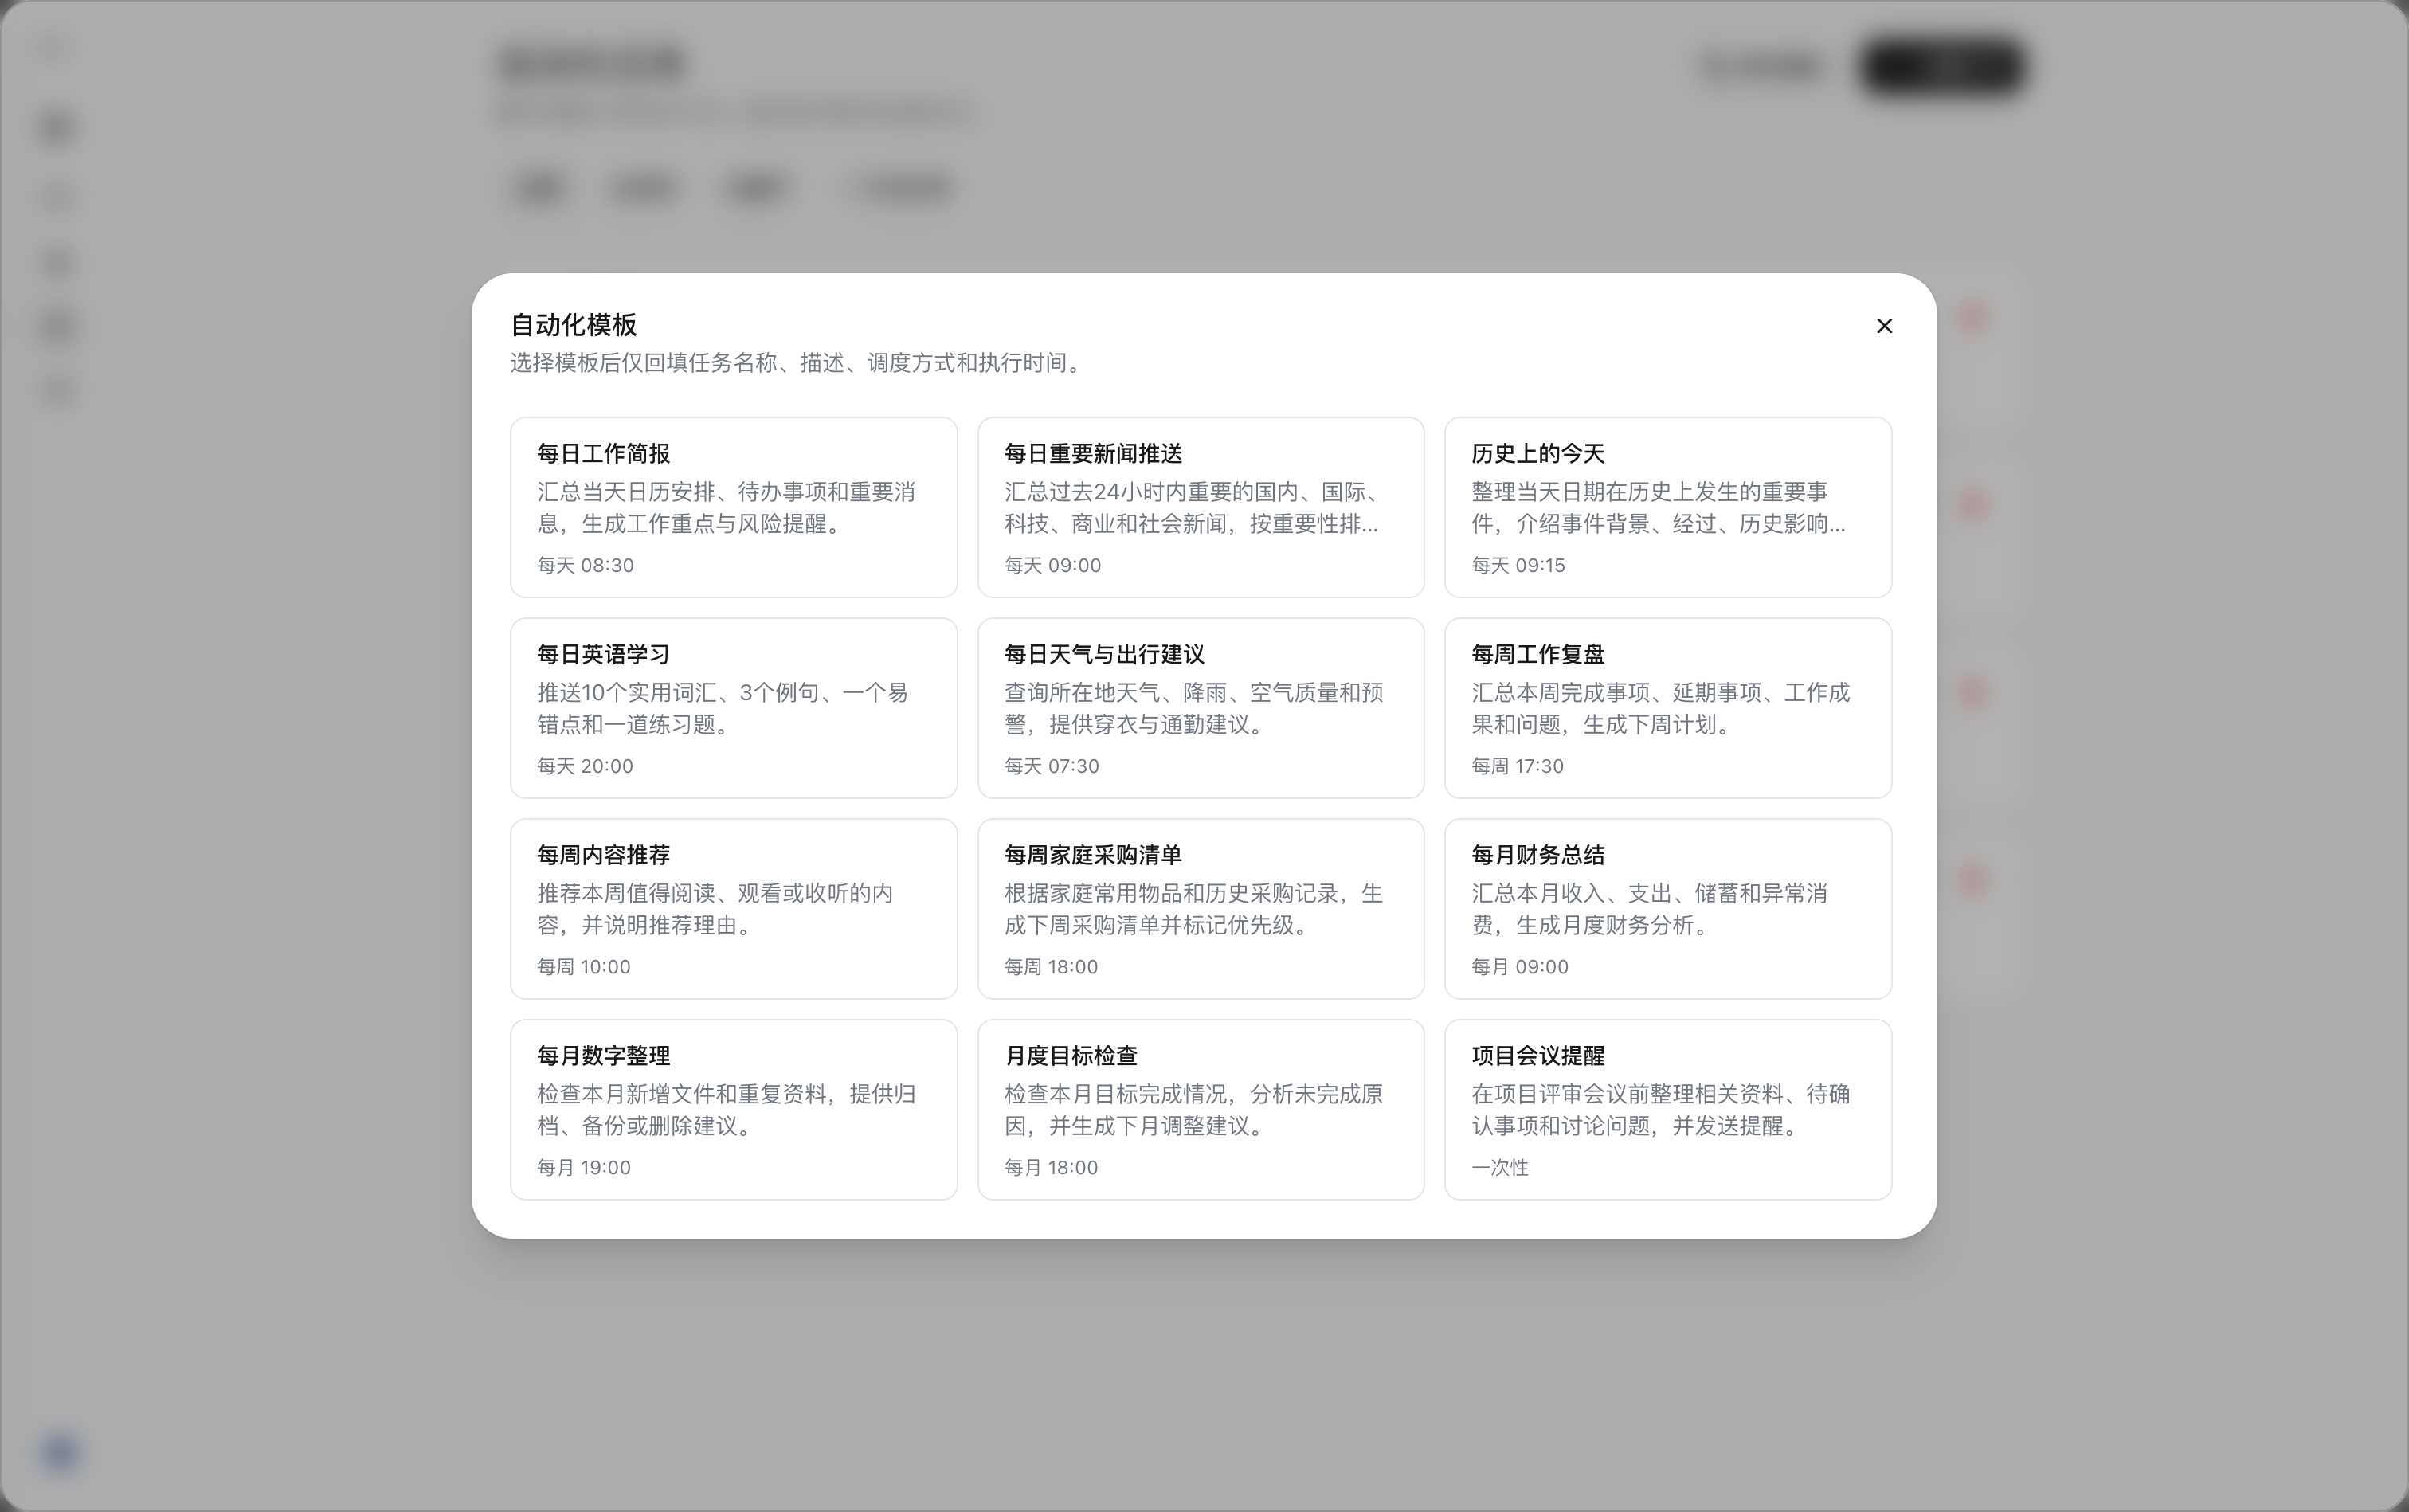
- After clicking a template, the “Create Automation Task” window opens with the task name, description, scheduling method, and execution time pre-filled.
- Review and adjust the pre-filled content, and select the workspace, model, tools, and approval policy you will actually use. Weekly, monthly, and one-time tasks also require verifying the specific execution date.
- Click Finish Creating to save the task.
Selecting a template only fills in the form; it does not create or run a task directly. The time and description in the template can both be modified. When calendar, messaging, or other external data is involved, you also need to configure tools that can access that data and complete the corresponding authorization.
Creating a Custom Task
Path: Automation →Create Task.
Prerequisites: You have an accessible workspace and an available model; the Skills, Extensions, or MCP servers required by the task have been installed, connected, and authorized.
Entering the Task Name and Description
Click Create Task to open the “Create Automation Task” window. You can also enter the same window from a template and modify the content.
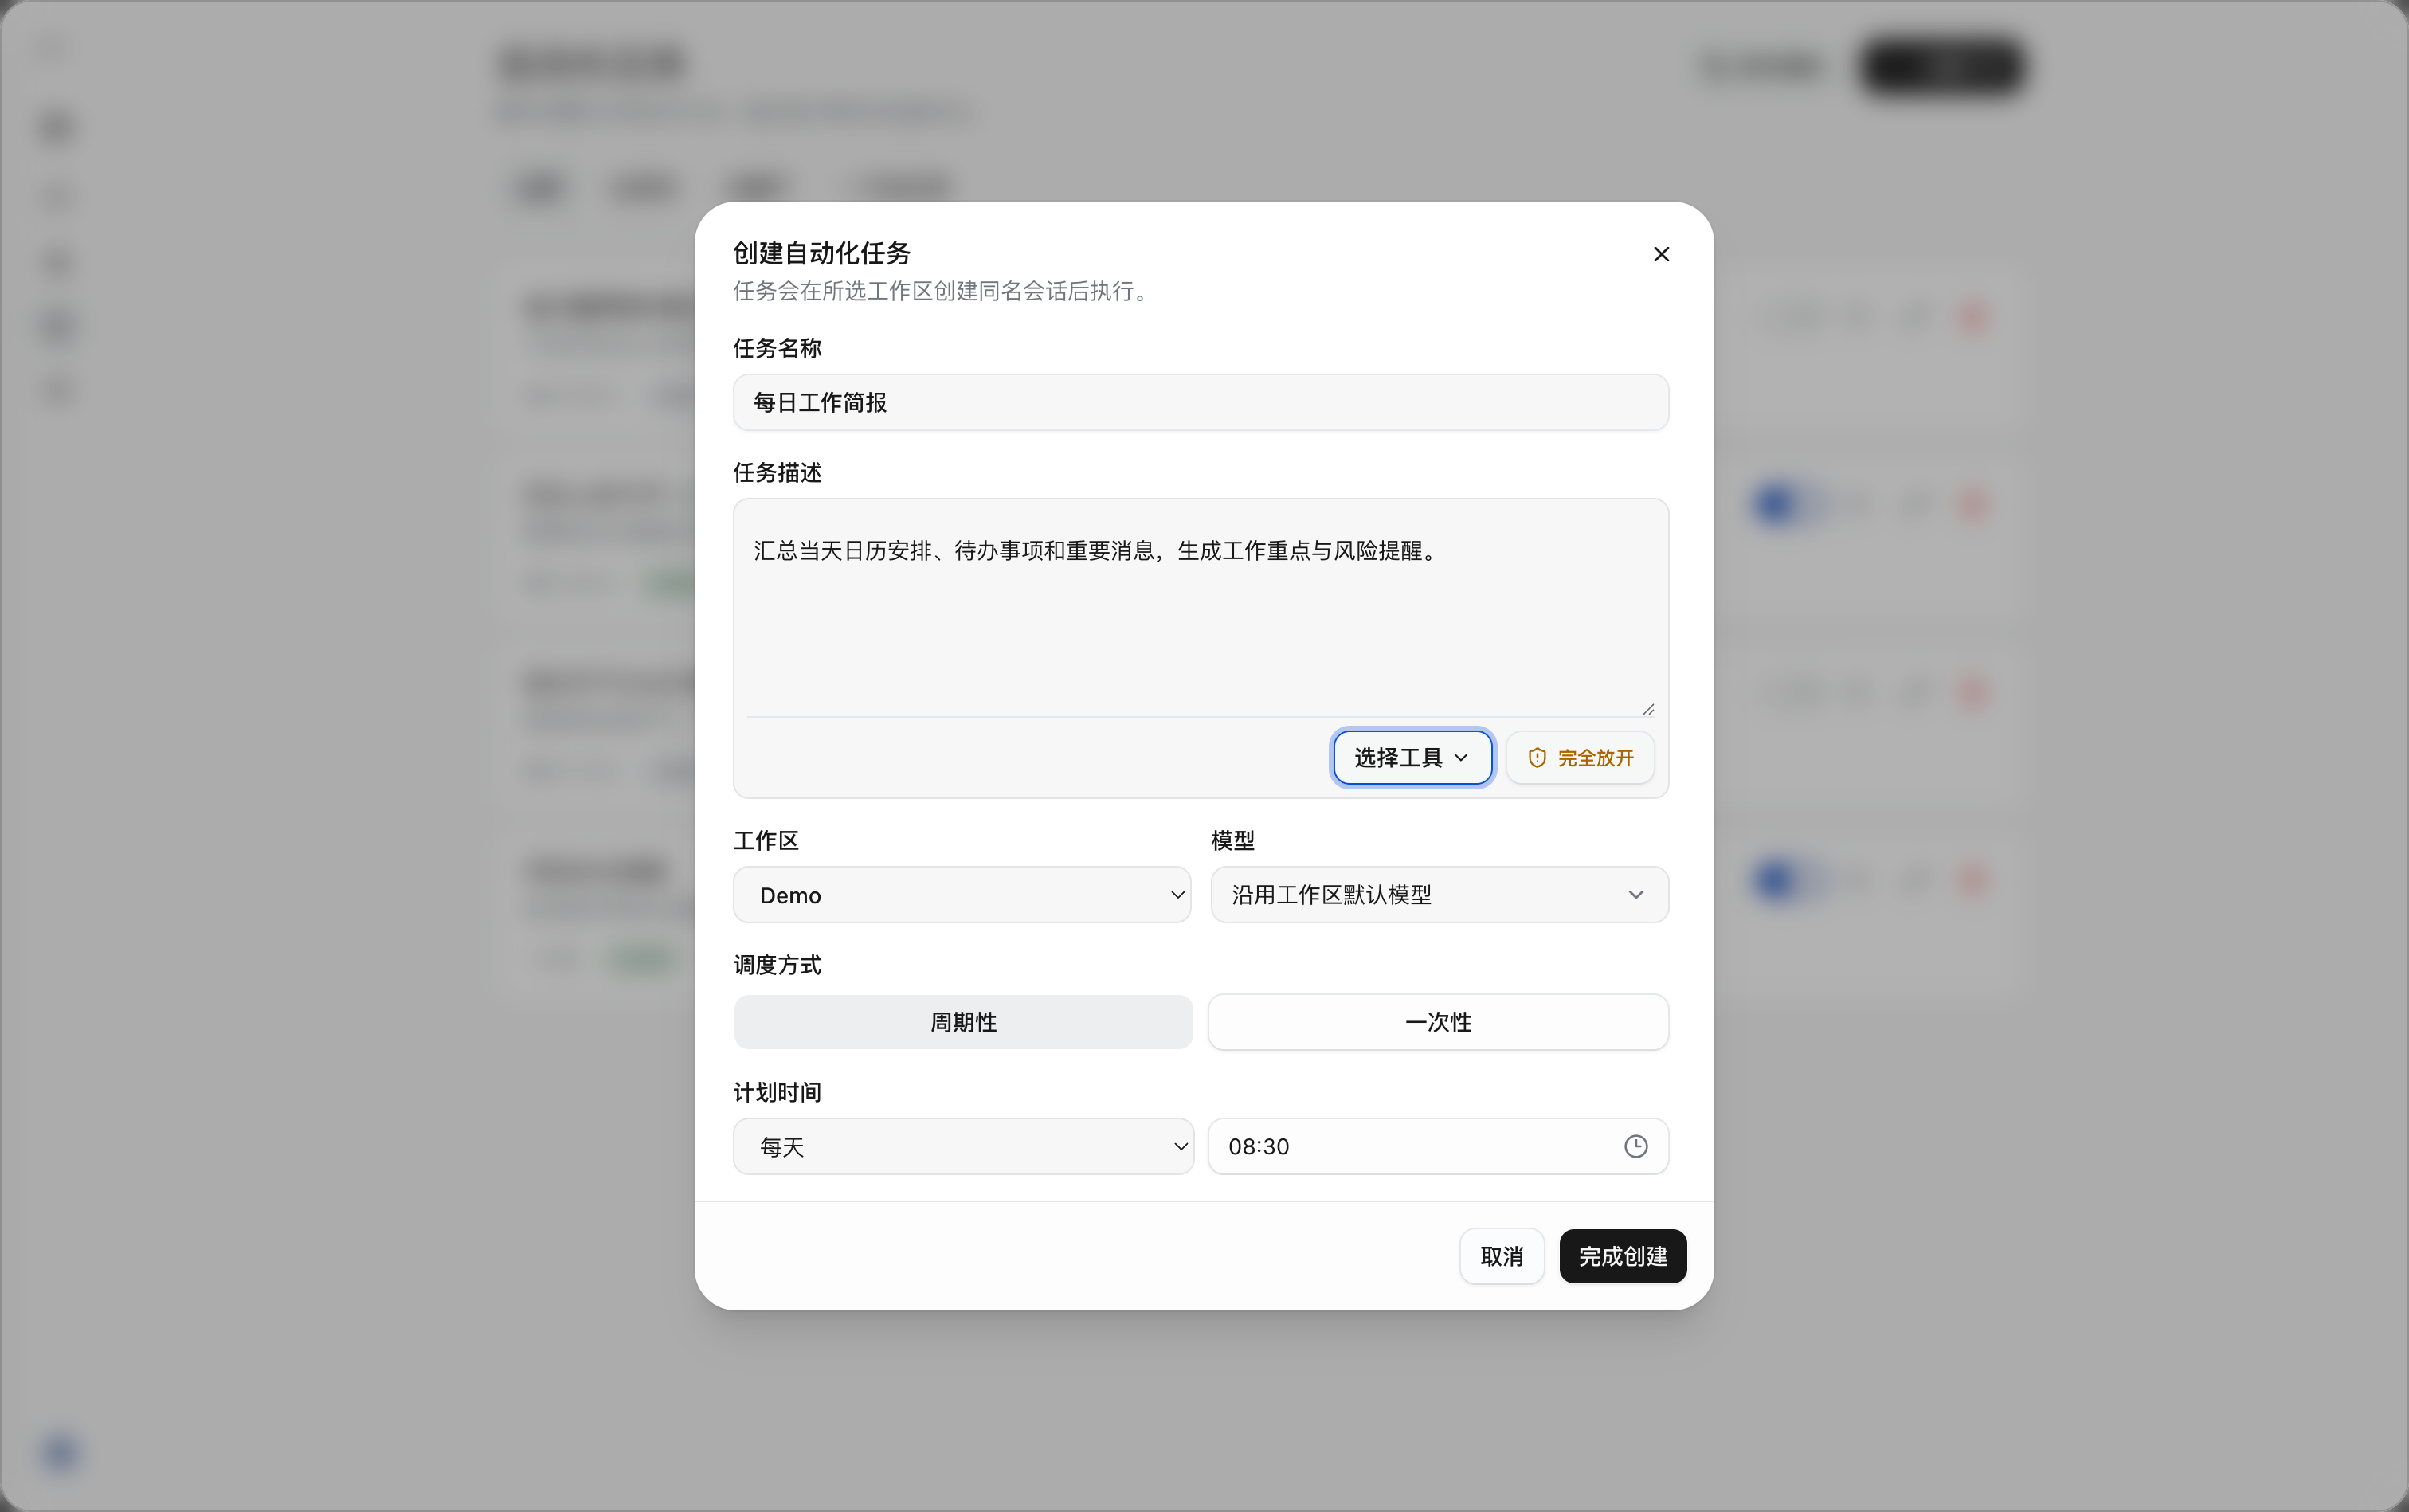
| Setting | Instructions |
|---|---|
| Task name | Required, up to 50 characters. Use an easily recognizable name, such as “Daily Work Briefing”. |
| Task description | Required, up to 5,000 characters. Describe what each run should accomplish, the data sources, and the output requirements. |
| Workspace | Select the workspace in which the task will run, and confirm that the relevant directories and materials are accessible. |
| Model | Choose Use workspace default model, or select an available model from the dropdown list. |
The task description serves as the execution instruction on every run. It is recommended to clearly state the processing scope and where results should be saved, and to avoid vague wording such as “handle it as last time”. For example:
Read the project progress and to-do list in the current workspace, organize the items to advance today, tasks approaching deadlines, and risks, generate a work briefing by priority, and save it to the “Daily Briefing” directory in the workspace with a file name that includes the current date.
Selecting Tools
Click Select Tools at the bottom of the “Task Description” area to open the tool selection menu.
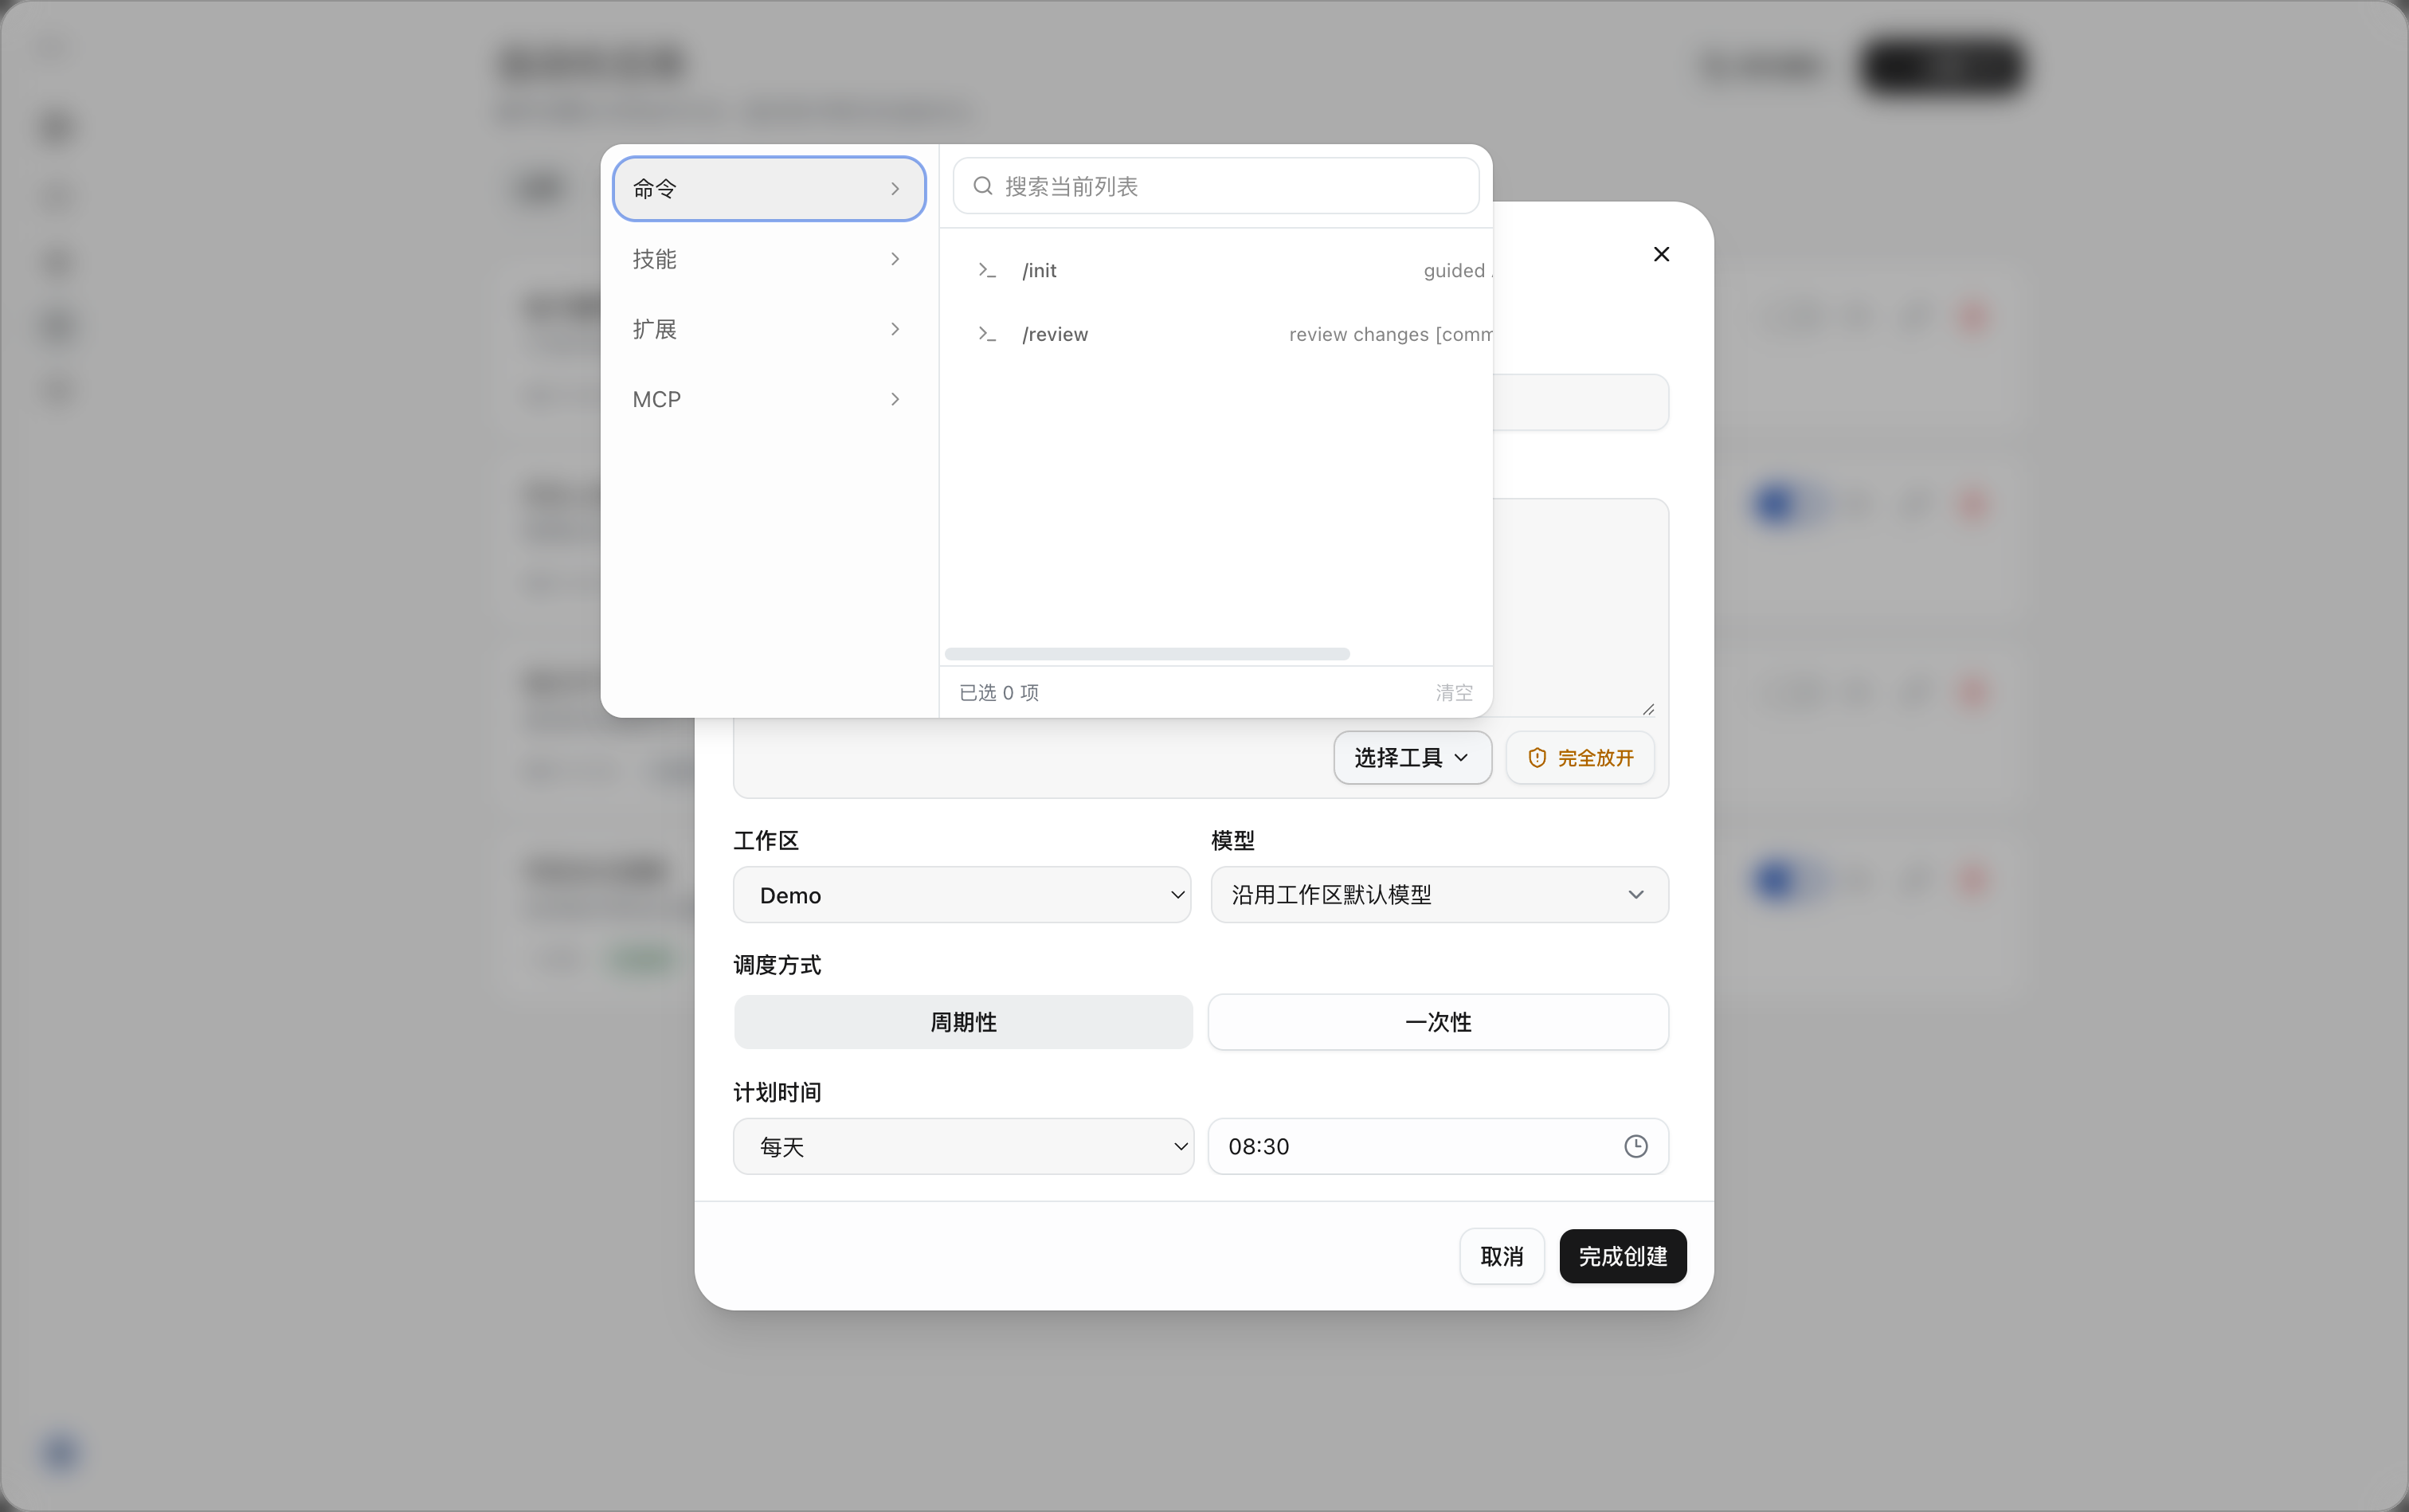
- On the left, select Commands,Skills,Extensions, orMCP.
- On the right, view the available items, or use Search current list to find the capability you need.
- Select the items the task needs, and verify your selection via the “Selected” count at the bottom; to start over, click Clear.
- After selecting, return to the creation window and continue with other settings.
Tools should match the task description. For example, before summarizing external calendars and messages, connect the corresponding services and complete authorization. If the required capability is not found, install or configure it in “My AI Colleague” first, then return to task creation.
Setting the Approval Policy
Click the button to the right of Select Tools that shows the current approval policy, and choose how permission requests are handled when the task runs. Check and select it according to the task’s needs at creation time.
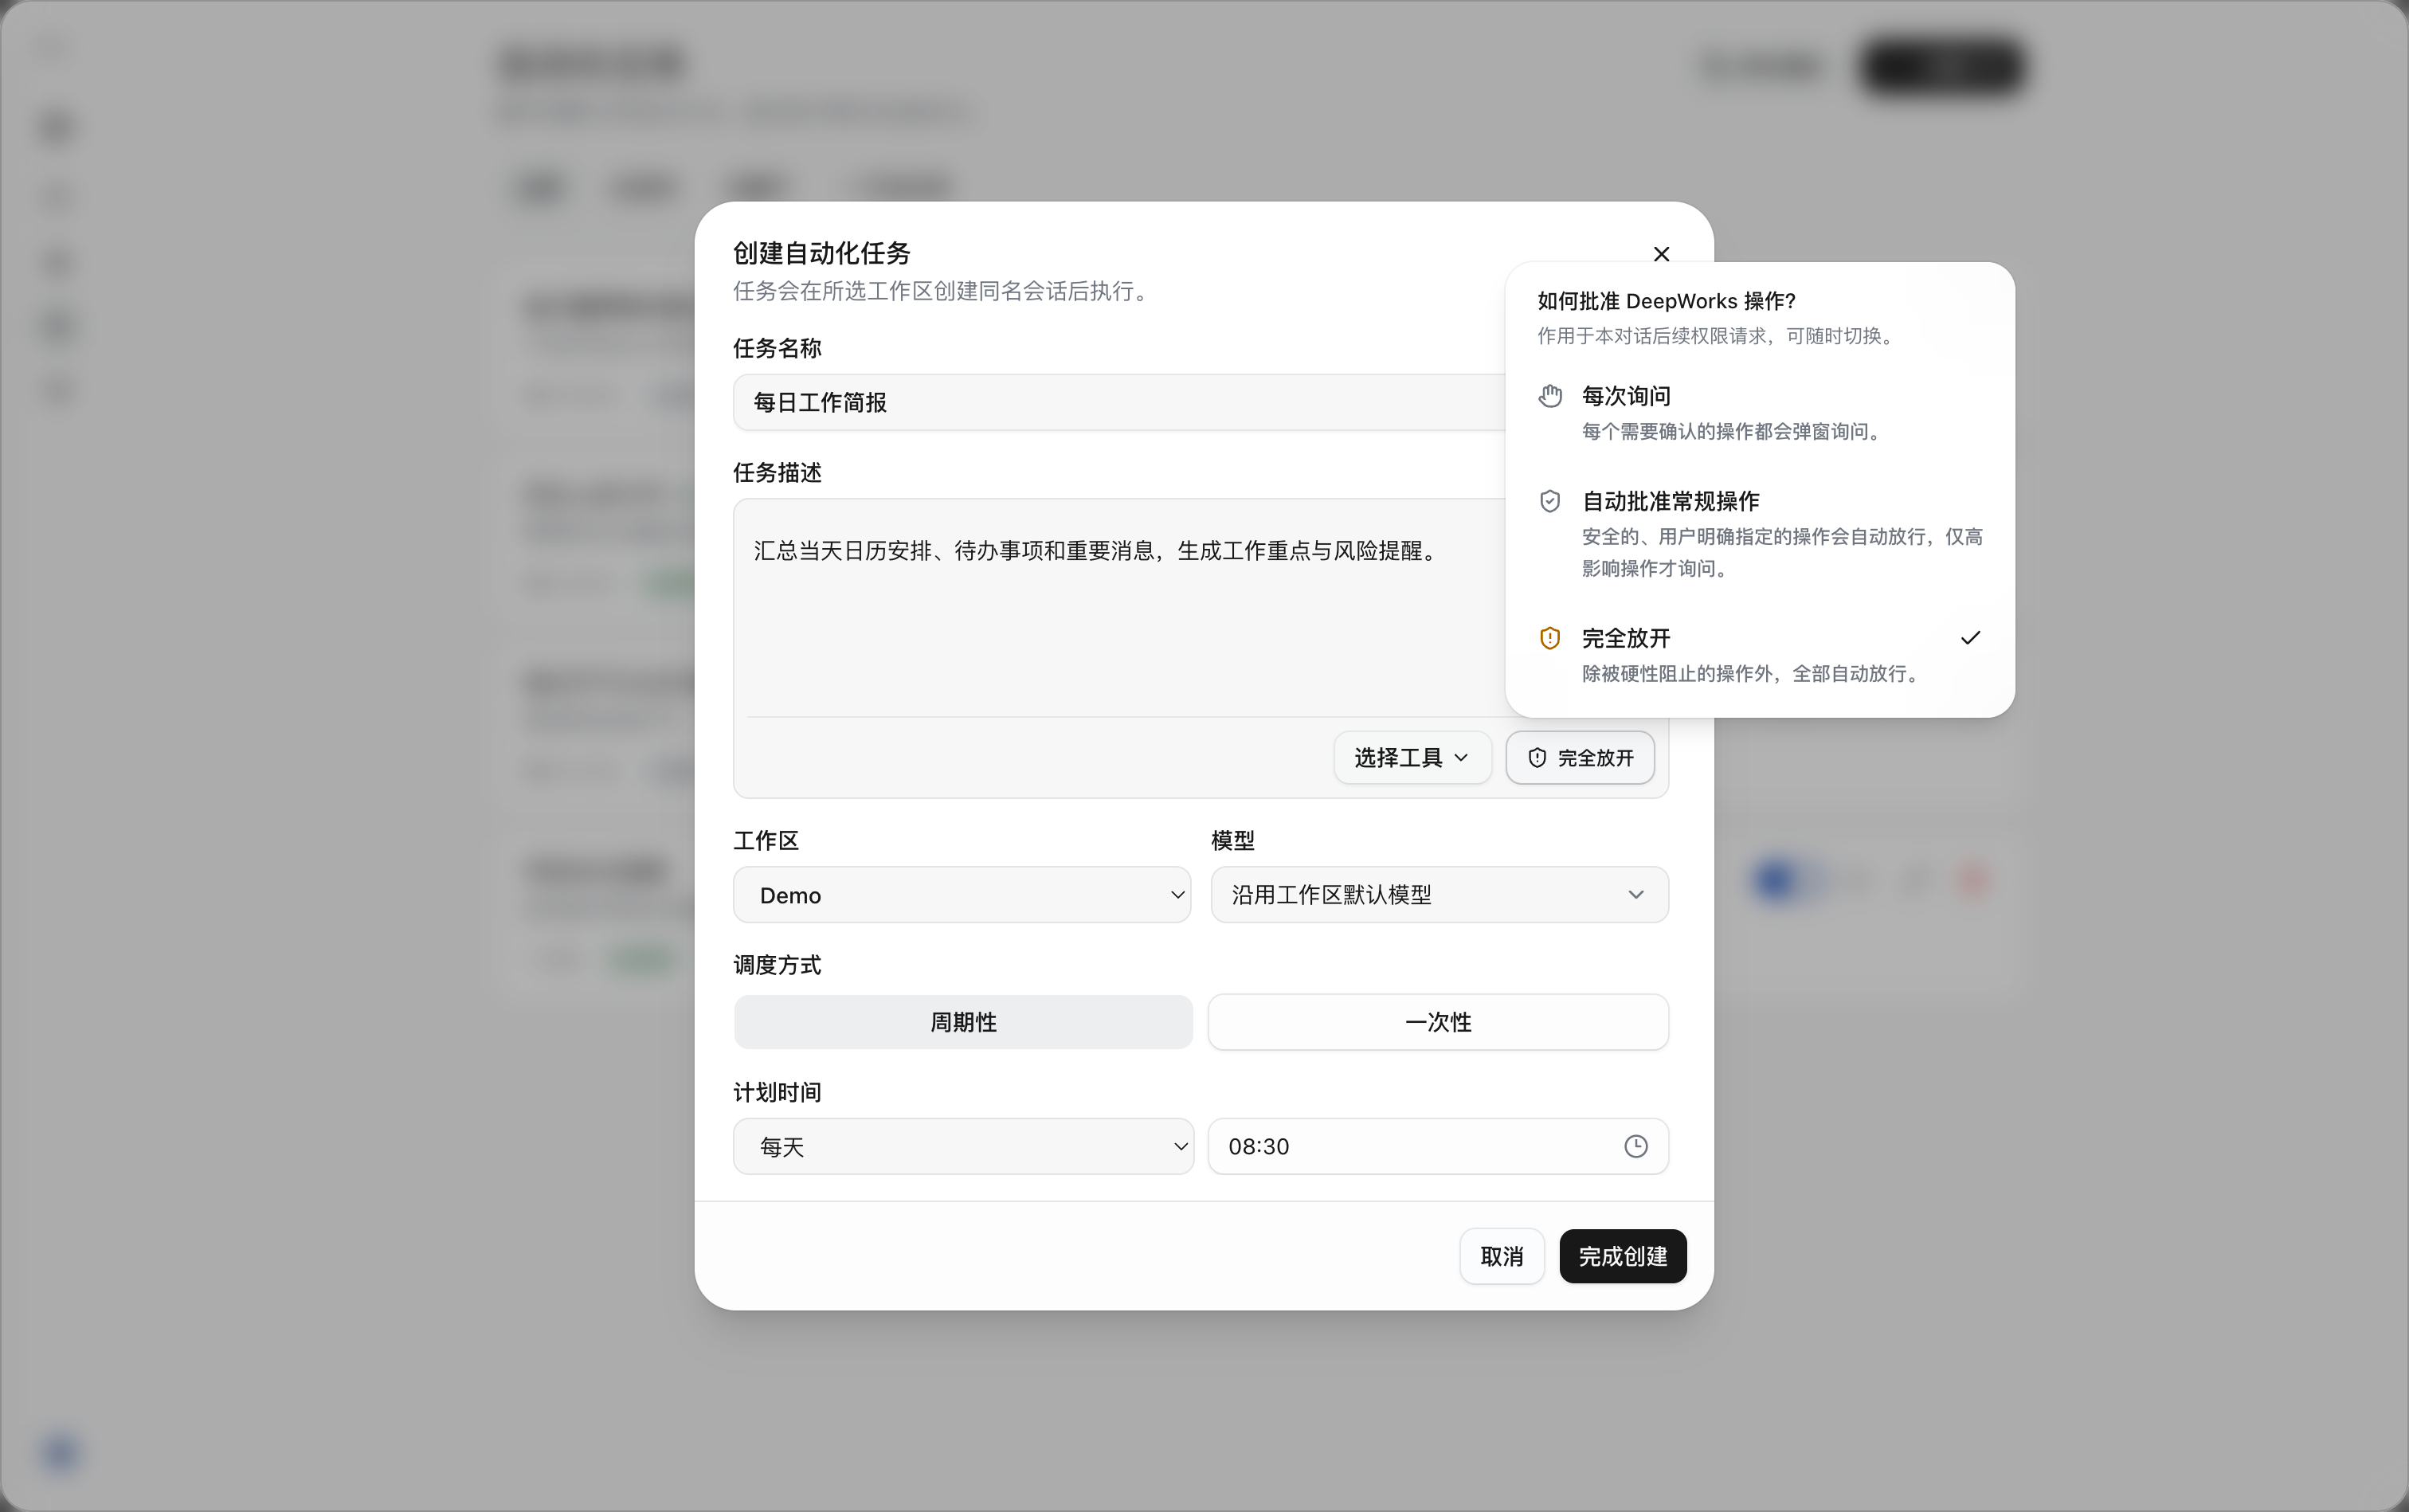
| Approval policy | Description |
|---|---|
| Ask every time | A dialog pops up for every action that requires confirmation. |
| Auto-approve routine actions | Safe actions explicitly specified by the user are approved automatically; only high-impact actions require confirmation. |
| Fully open | All actions are approved automatically, except those hard-blocked by the platform. |
The fact that Automation is triggered on a schedule does not mean all steps are free of human involvement. When a task encounters an action requiring confirmation, handle the permission request promptly. Fully open does not remove the platform’s hard restrictions or data access boundaries.
Configuring the Scheduling Method
“Scheduling method” offers two options: Recurring andOne-time.
Daily execution
Select Recurring, chooseDaily under “Schedule time”, then set the execution time. For example, “Daily 08:30” means the task runs once at that time every day.
Weekly execution
- Select Recurring, and switch the frequency toWeekly.
- Click the day-of-week selection box and select the days to run; multiple selection is supported, with at least one day selected.
- Set the execution time. Blue indicates a selected day; click again to deselect.
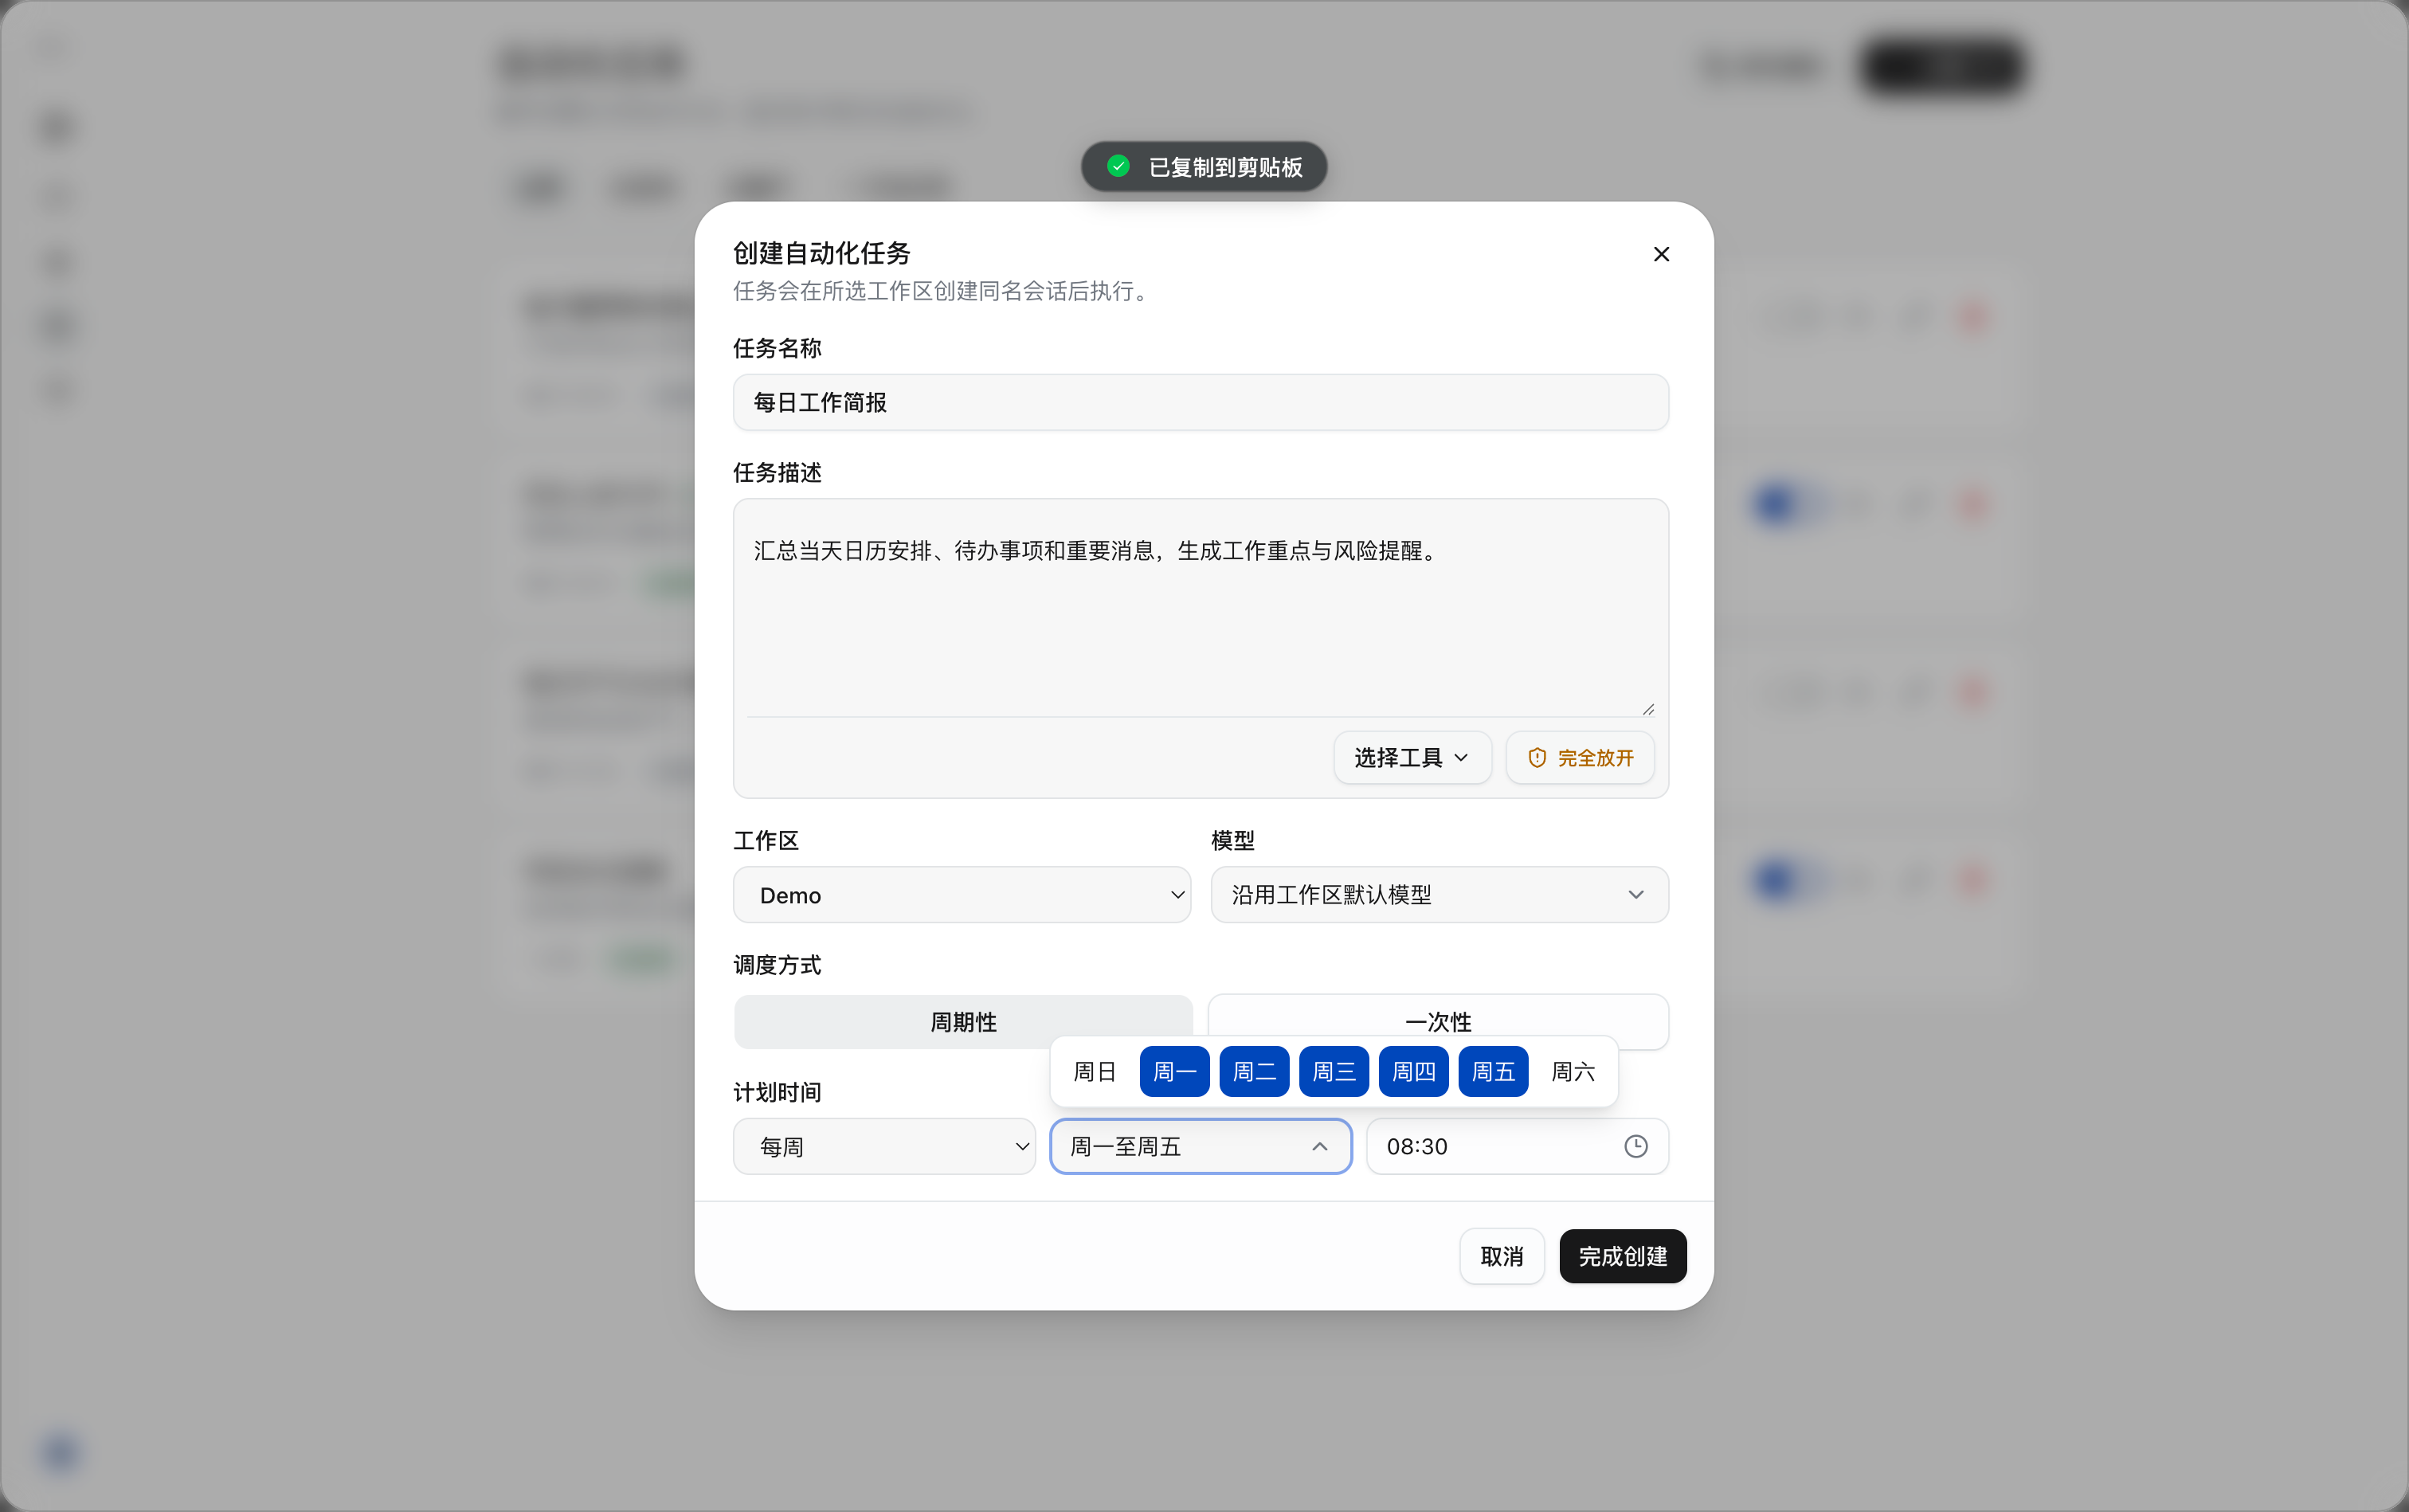
For example, selecting Monday through Friday and setting 08:30 means the task runs once at 08:30 every Monday through Friday. This setting runs by day of week and does not automatically exclude public holidays that fall on Monday through Friday.
Monthly execution
- Select Recurring, and switch the frequency toMonthly.
- Click the date selection box, choose the execution dates from the 1st to the 31st, or select Last day; multiple dates can be selected when needed.
- Set the execution time.
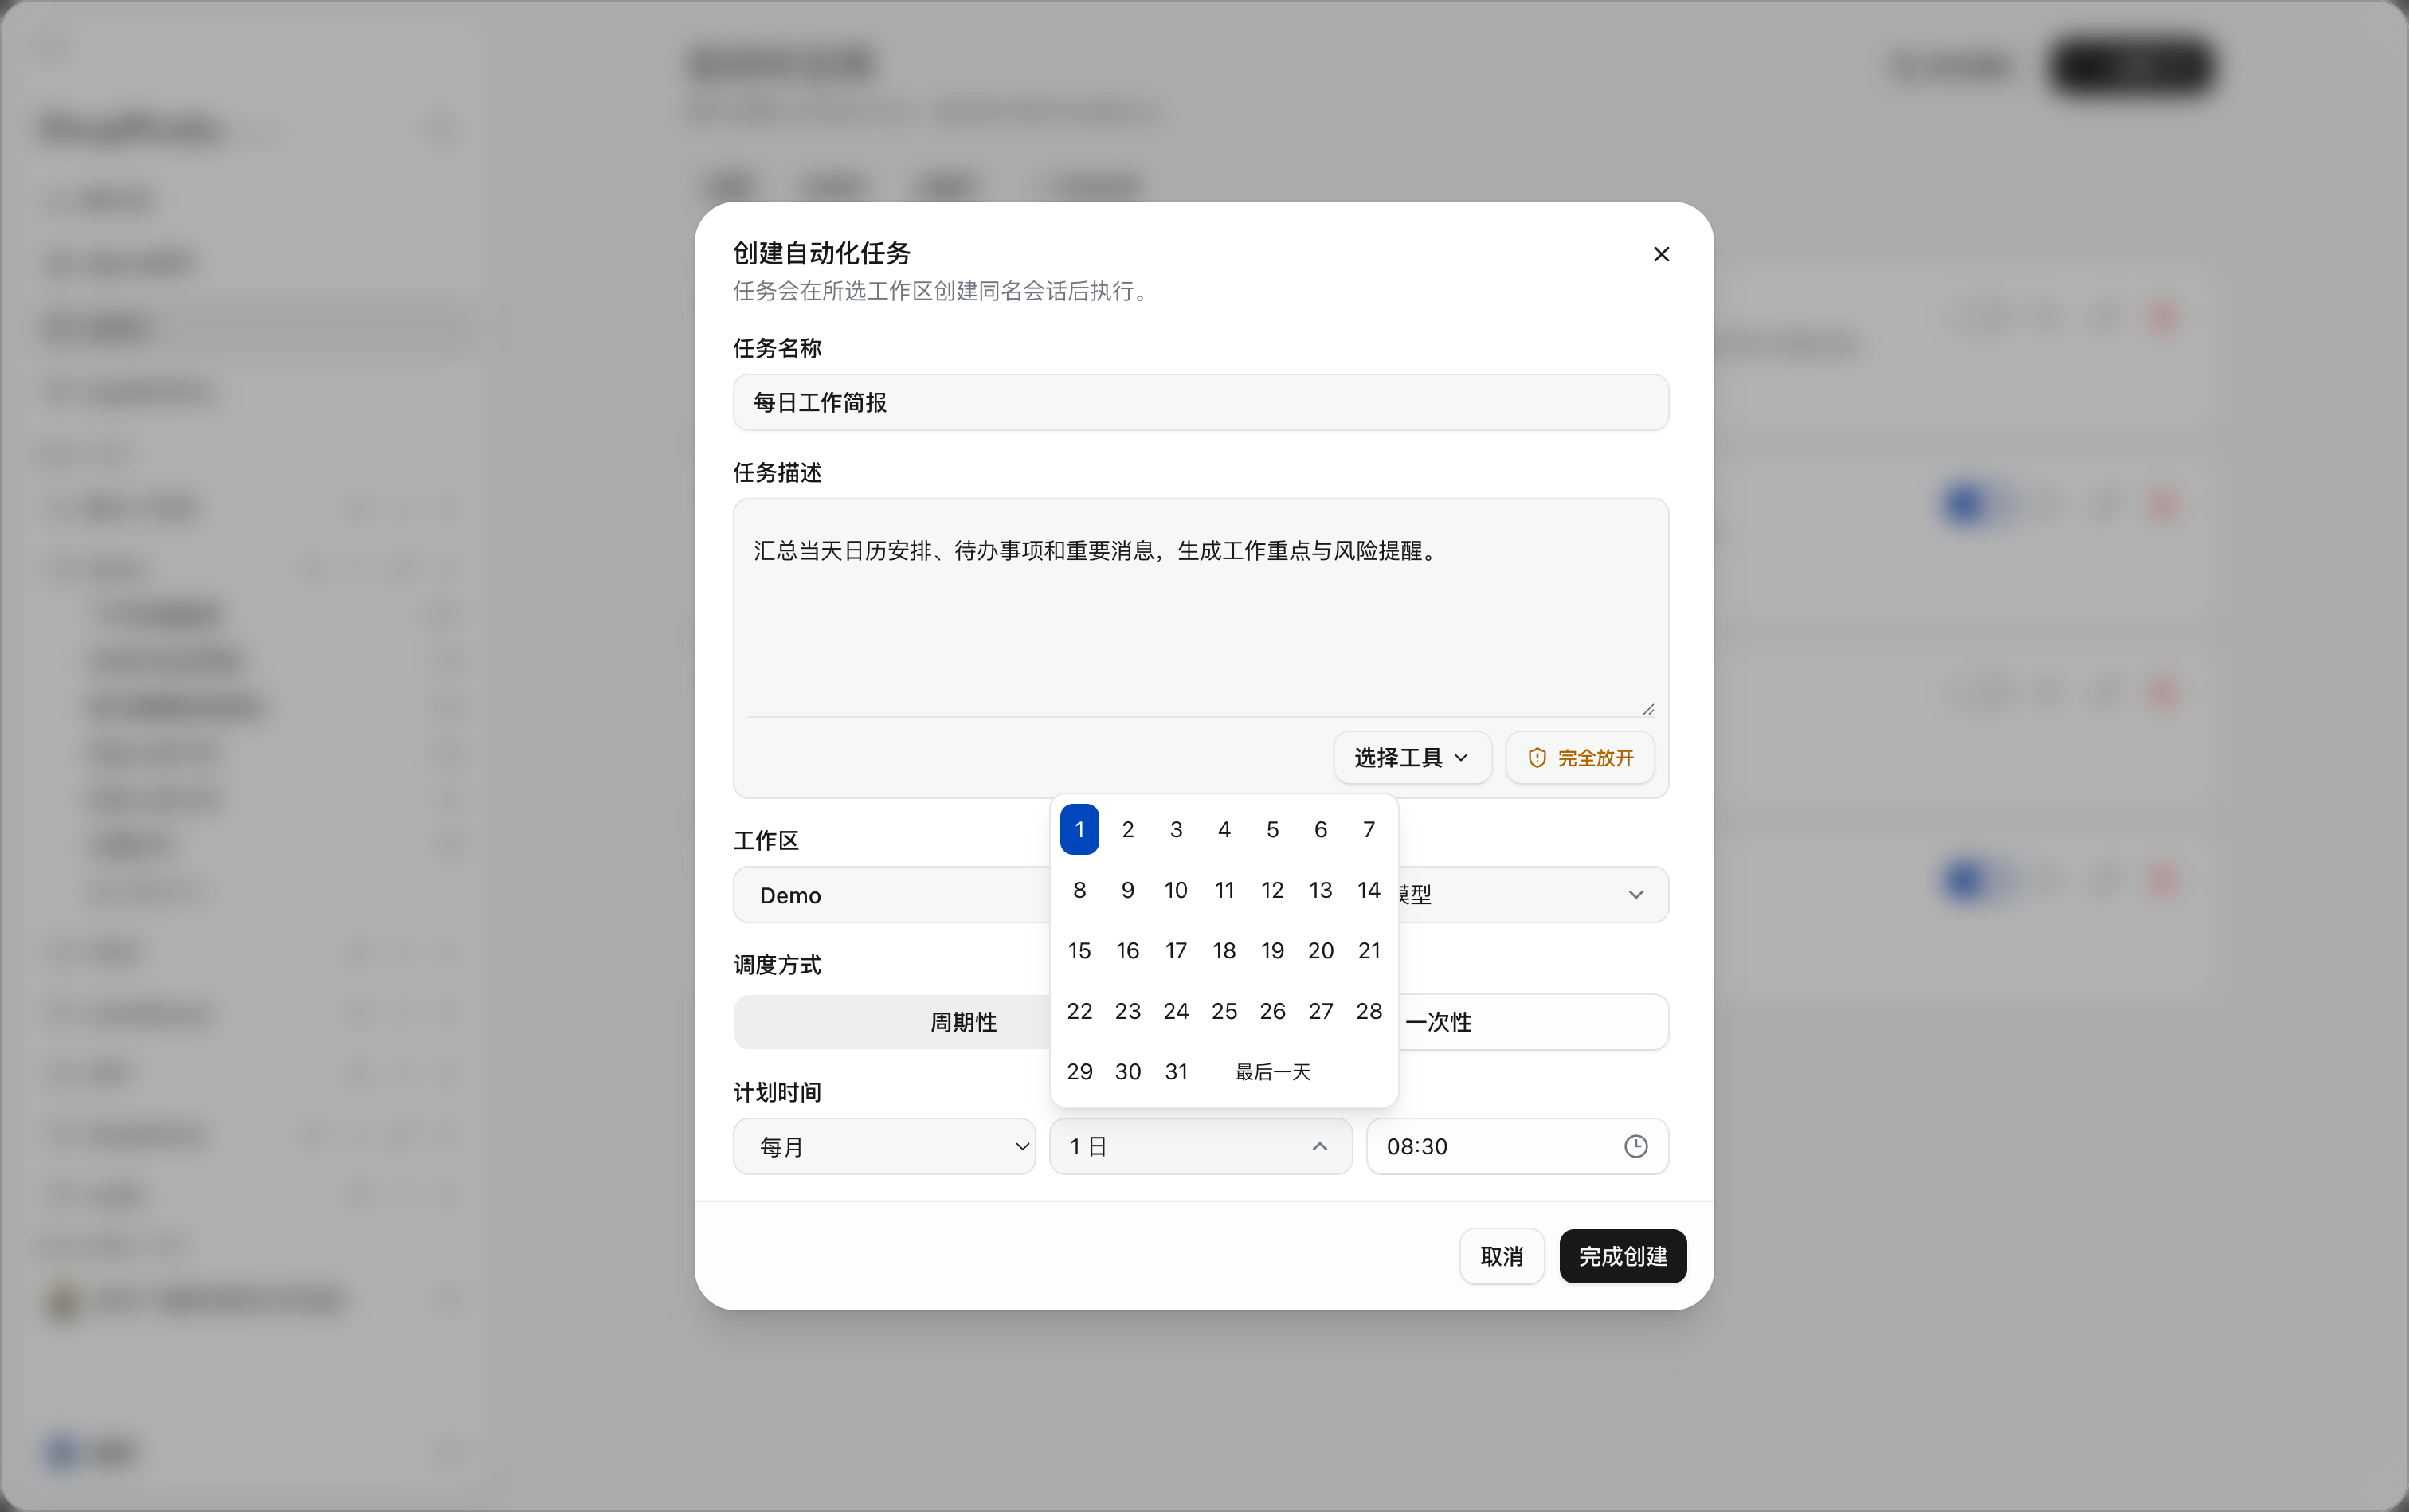
Blue numbers in the date selection panel indicate selected dates, and the selection box shows a summary of the dates. Last day runs on the actual last day of each month, suitable for tasks such as month-end summaries.
For example, selecting “the 1st” and setting 08:30 means the task runs at 08:30 on the 1st of each month. For month-end execution, select Last day. If a fixed date is selected but that date does not exist in a given month, it is skipped for that month, without being moved earlier or postponed.
Custom Cron
To set a recurring schedule using an expression, select Custom Cron.
- Under “Scheduling method”, select Recurring.
- In the left dropdown under “Schedule time”, select Custom Cron.
- Enter the Cron expression on the right. The execution time input box is no longer shown separately; the execution time is determined by the expression.
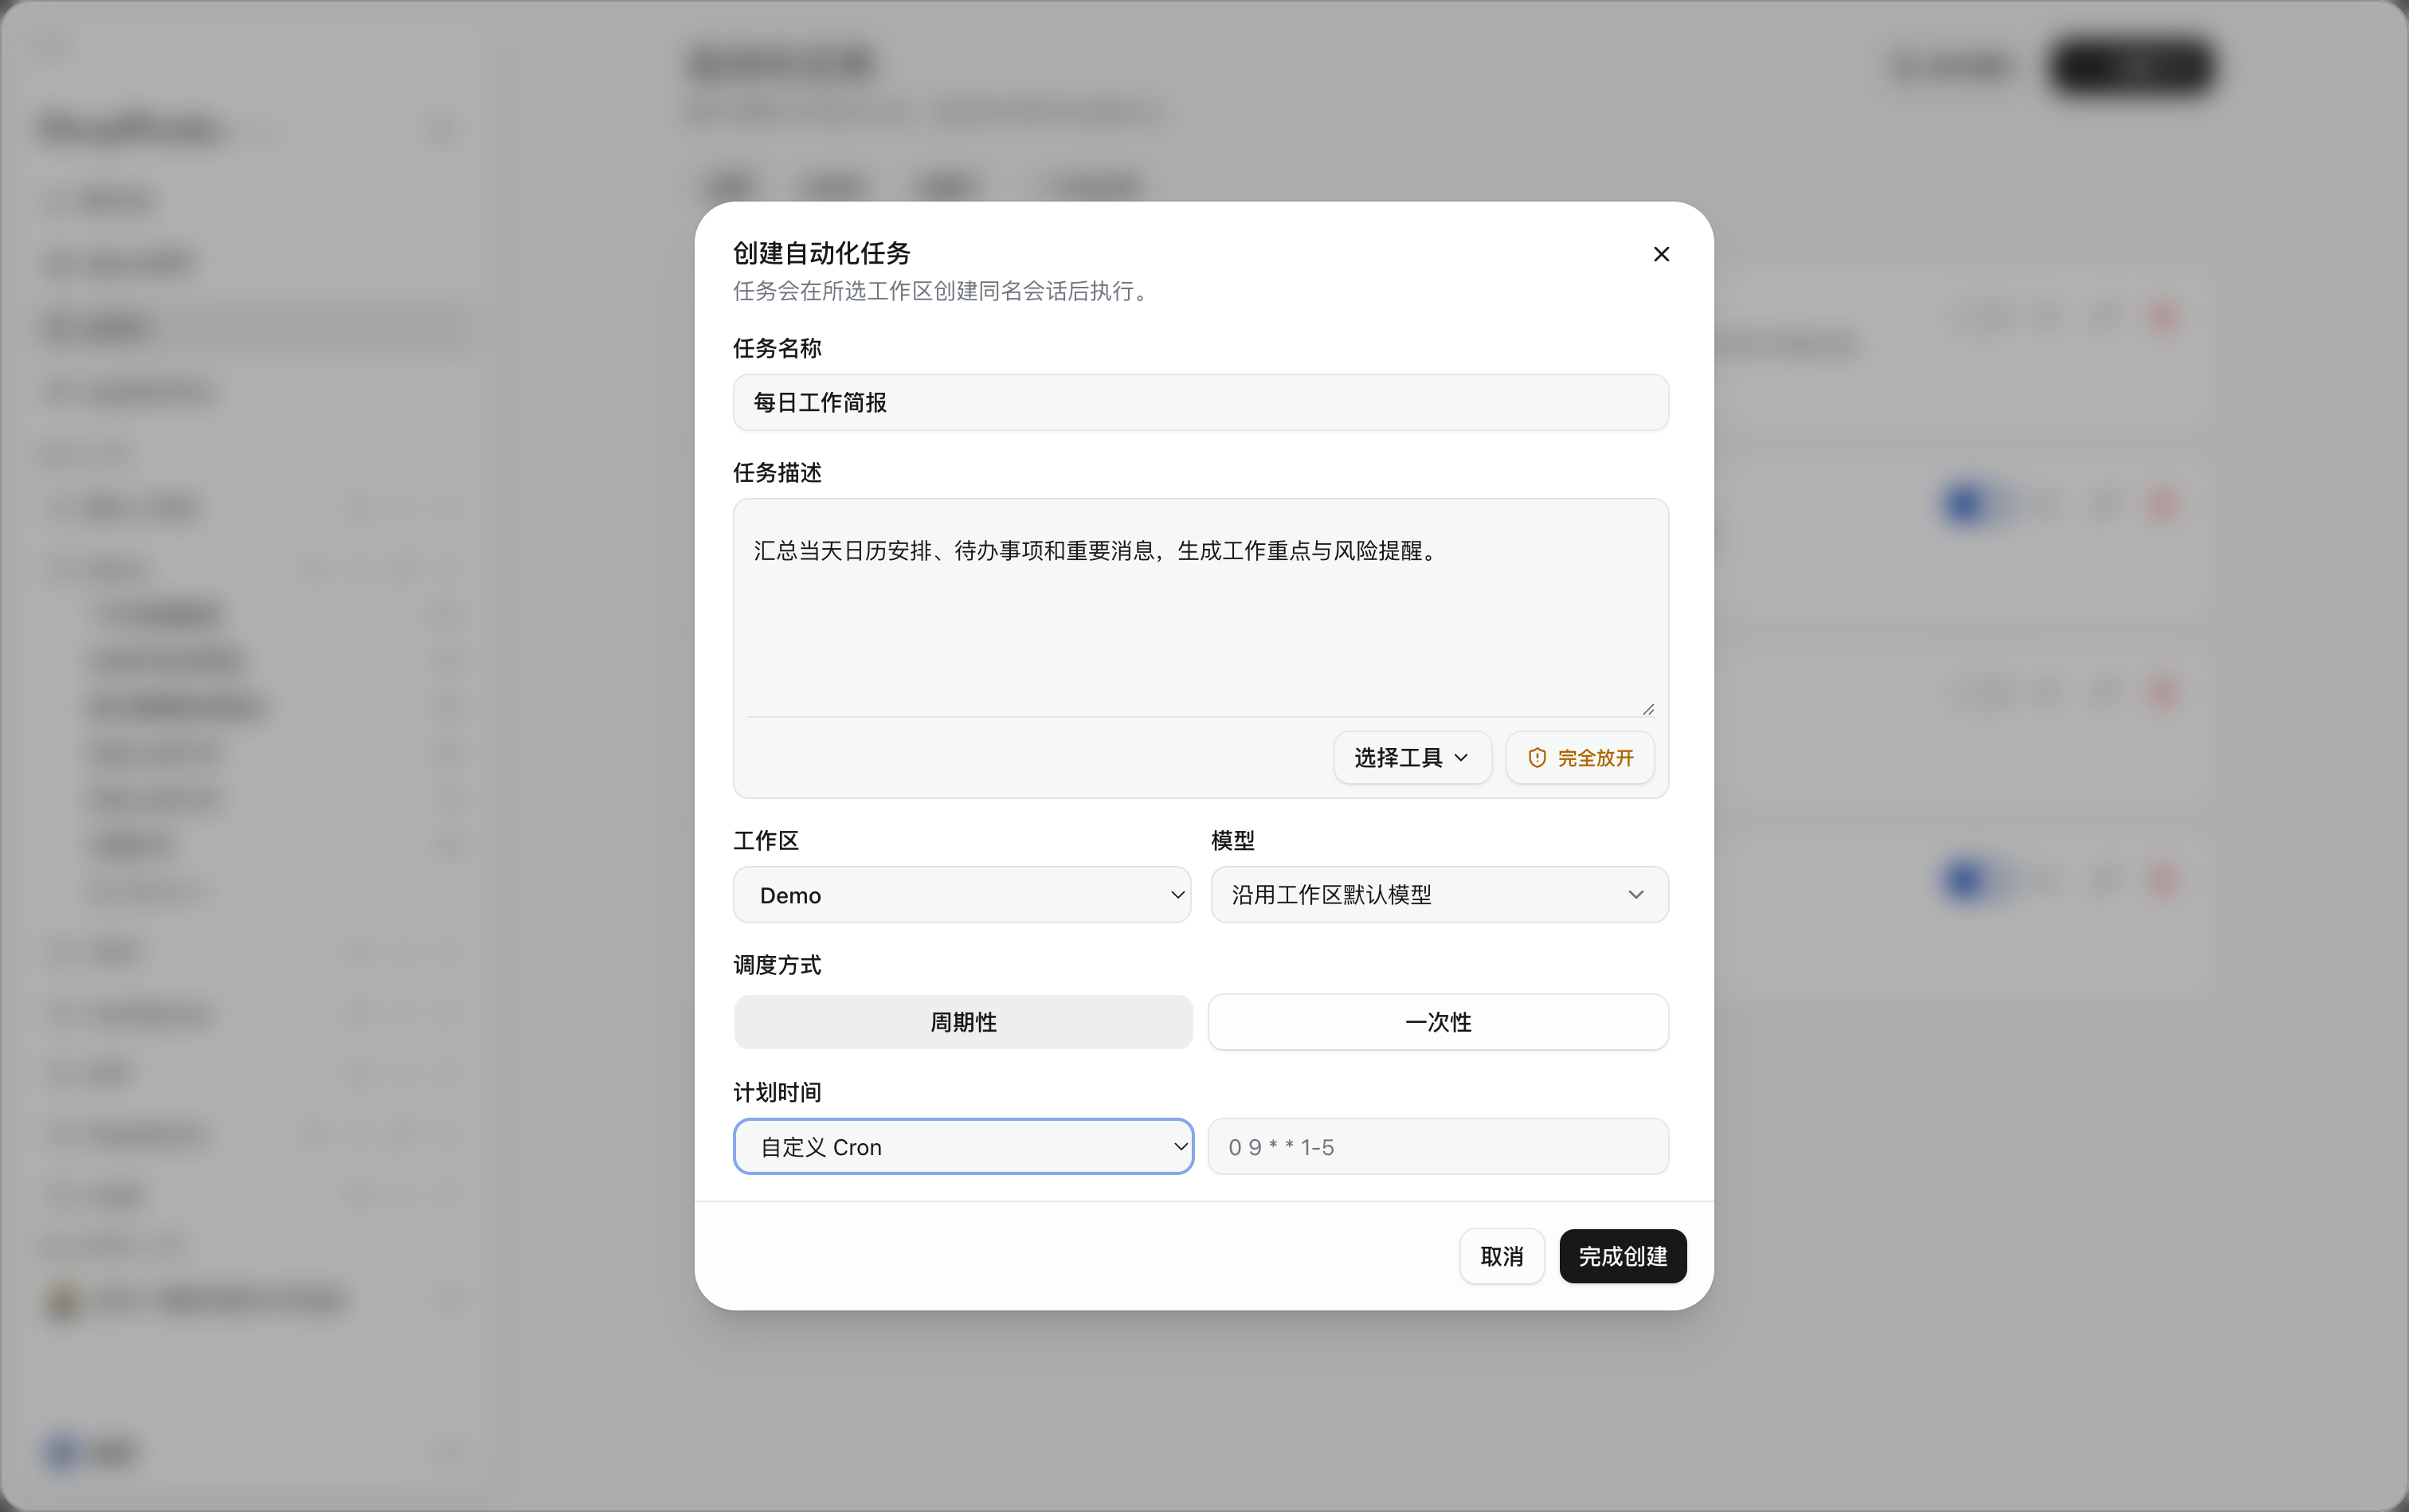
Cron uses a five-field format, with fields separated by spaces, in the order minute hour day-of-month month day-of-week; the seconds field is not used. For example, the sample shown in the interface, 0 9 * * 1-5, means execution at 09:00 every Monday through Friday.
| Expression | Execution schedule |
|---|---|
0 9 * * * | Runs at 09:00 every day. |
0 9 * * 1-5 | Runs at 09:00 every Monday through Friday; public holidays are not automatically excluded. |
30 17 * * 5 | Runs at 17:30 every Friday. |
0 9 1 * * | Runs at 09:00 on the 1st of every month. |
Here, * means the field is unrestricted, and 1-5 in the day-of-week field means Monday through Friday. After entering the expression, click Finish Creating; if the expression is reported as invalid or the next execution time cannot be calculated, correct it before submitting. After the task is created successfully, verify the next execution time in the task list.
One-time execution
Suitable for one-off scheduled items such as meeting reminders or temporary material gathering.
- Under “Scheduling method”, click One-time.
- In the date box on the left under “Schedule time”, enter the execution date, or click the calendar icon to select a date.
- In the time box on the right, set the execution time, for example
09:00; you can select the time via the clock icon. - Verify the date and time, then click Finish Creating.
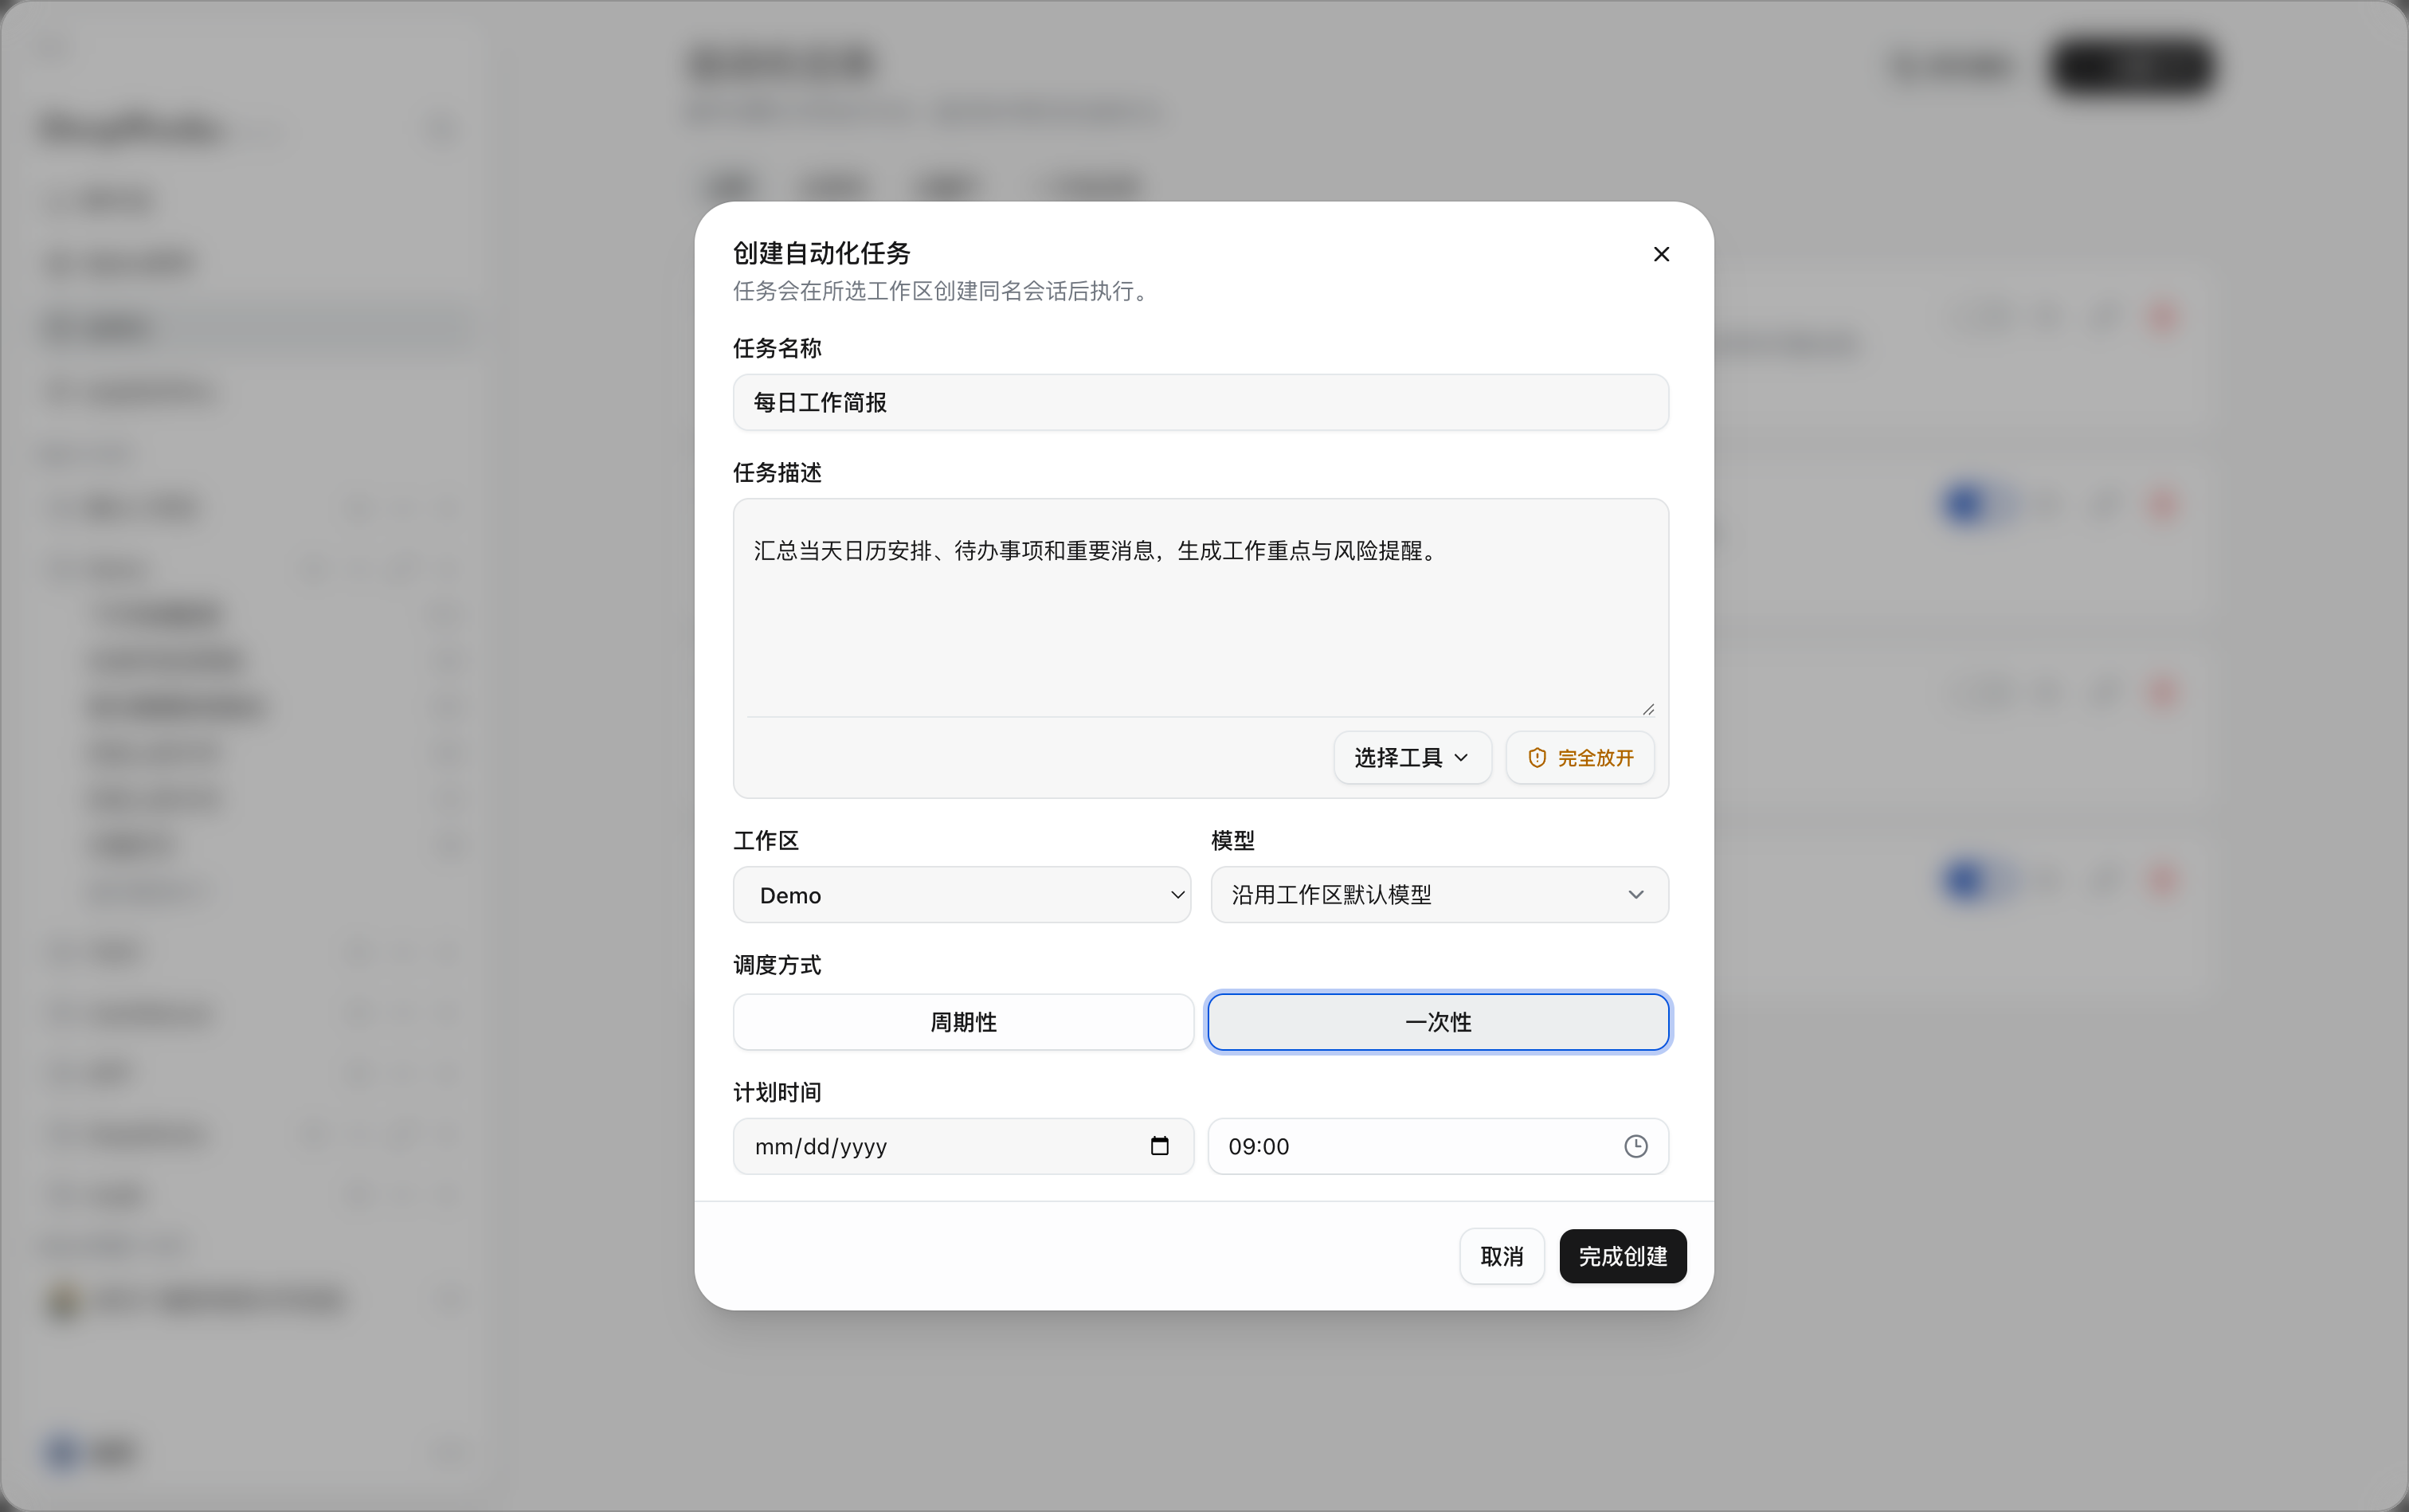
The combined date and time must be later than the current time; creation cannot be completed if only a time is set without a date. Verify again before creating, and avoid using expired dates from templates. A one-time schedule does not repeat automatically after it ends.
Finishing Creation
- Verify the task name, description, tools, approval policy, workspace, and model.
- Verify the scheduling method, execution date, and time; when Custom Cron is selected, verify the execution schedule corresponding to the expression.
- Click Finish Creating. If the page reports missing required fields, an invalid time, or an unusable configuration, correct it as prompted and submit again.
- After the task is created successfully, return to the task list, confirm the new task shows as “Enabled”, and check the next execution time.
Creating a task does not execute it immediately; to test it, click the triangle run icon on the right side of the task card. Click Cancel or the close button in the upper-right corner to exit creation; unsaved configurations will not become automation tasks. If an unsaved-changes prompt appears, follow it to choose whether to discard your changes.
Creating a Task through Conversation
Describe what should be done and when. AI organizes the task and schedule and helps create an Automation task, for example a reminder or recurring information roundup.
Path: Choose conversational creation in a session/Automation page → enter requirements → review and confirm creation → view the task in Automation.
Describing Requirements
-
Click
New Sessionon the left or open an existing session. -
State the action, time, and frequency, then send. For example:
Remind me to water the flowers every day at 9 a.m.
-
Provide any additional information requested. If your request only says “Remind me to water the flowers,” verify the time and frequency proposed by AI against your plans.
For a one-time task, specify a date and time. For recurring tasks, specify daily, weekly, or another frequency. Include the time zone when relevant.
Reviewing the Plan and Confirming Creation
AI may display a confirmation card. For “Watering Reminder,” check the content, frequency, time, and time zone, such as “Remind you to water the flowers every day at 09:00 (UTC+08:00).”
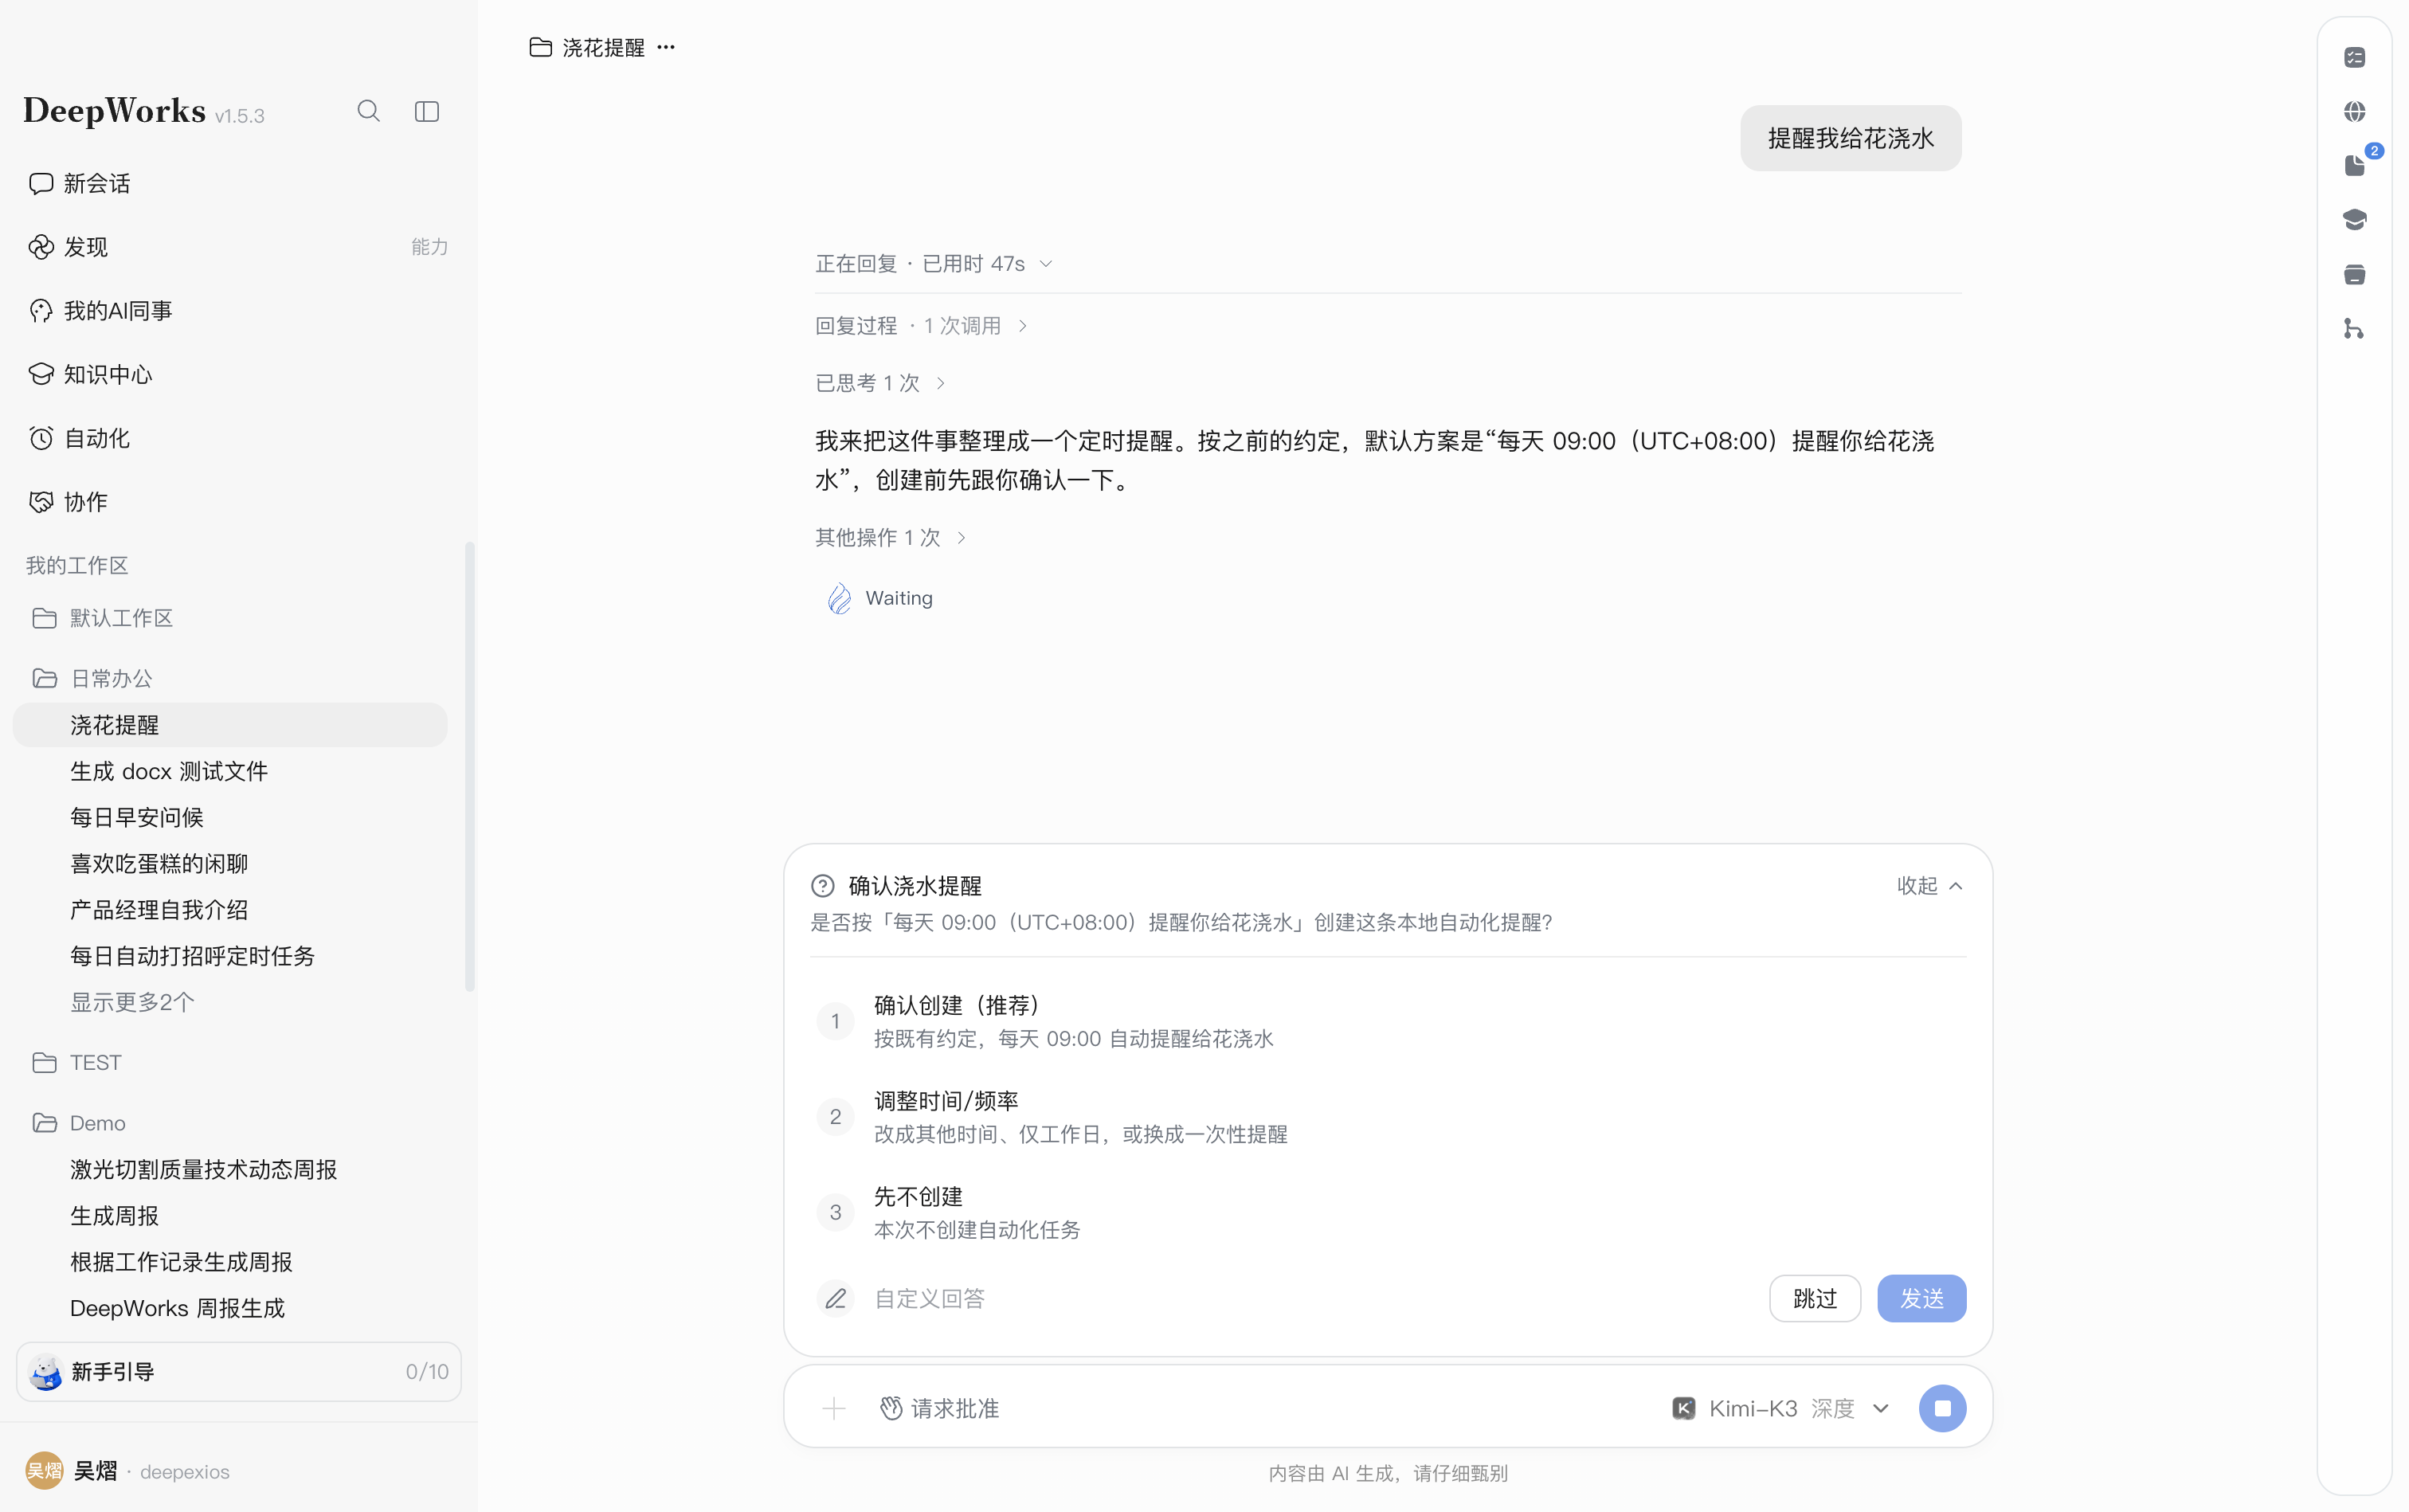
Select an option and click Send:
| Option | Action |
|---|---|
| Confirm Creation (Recommended) | Accept the task and schedule and proceed with creation. |
| Adjust Time/Frequency | Change the schedule and provide the new time or frequency, such as 9 a.m. Monday to Friday or a one-time reminder. |
| Do Not Create Yet | Do not create the task this time. |
| Custom Answer | Enter additional requirements or changes and send. |
Check the complete plan before confirming. Times inferred from the current request or earlier conversation may not suit every task; use the schedule you review and confirm for this task.
Checking the Creation Result
Wait for the creation result and check the task name, enabled status, schedule, and first trigger time. The reply may include a task ID for identification.
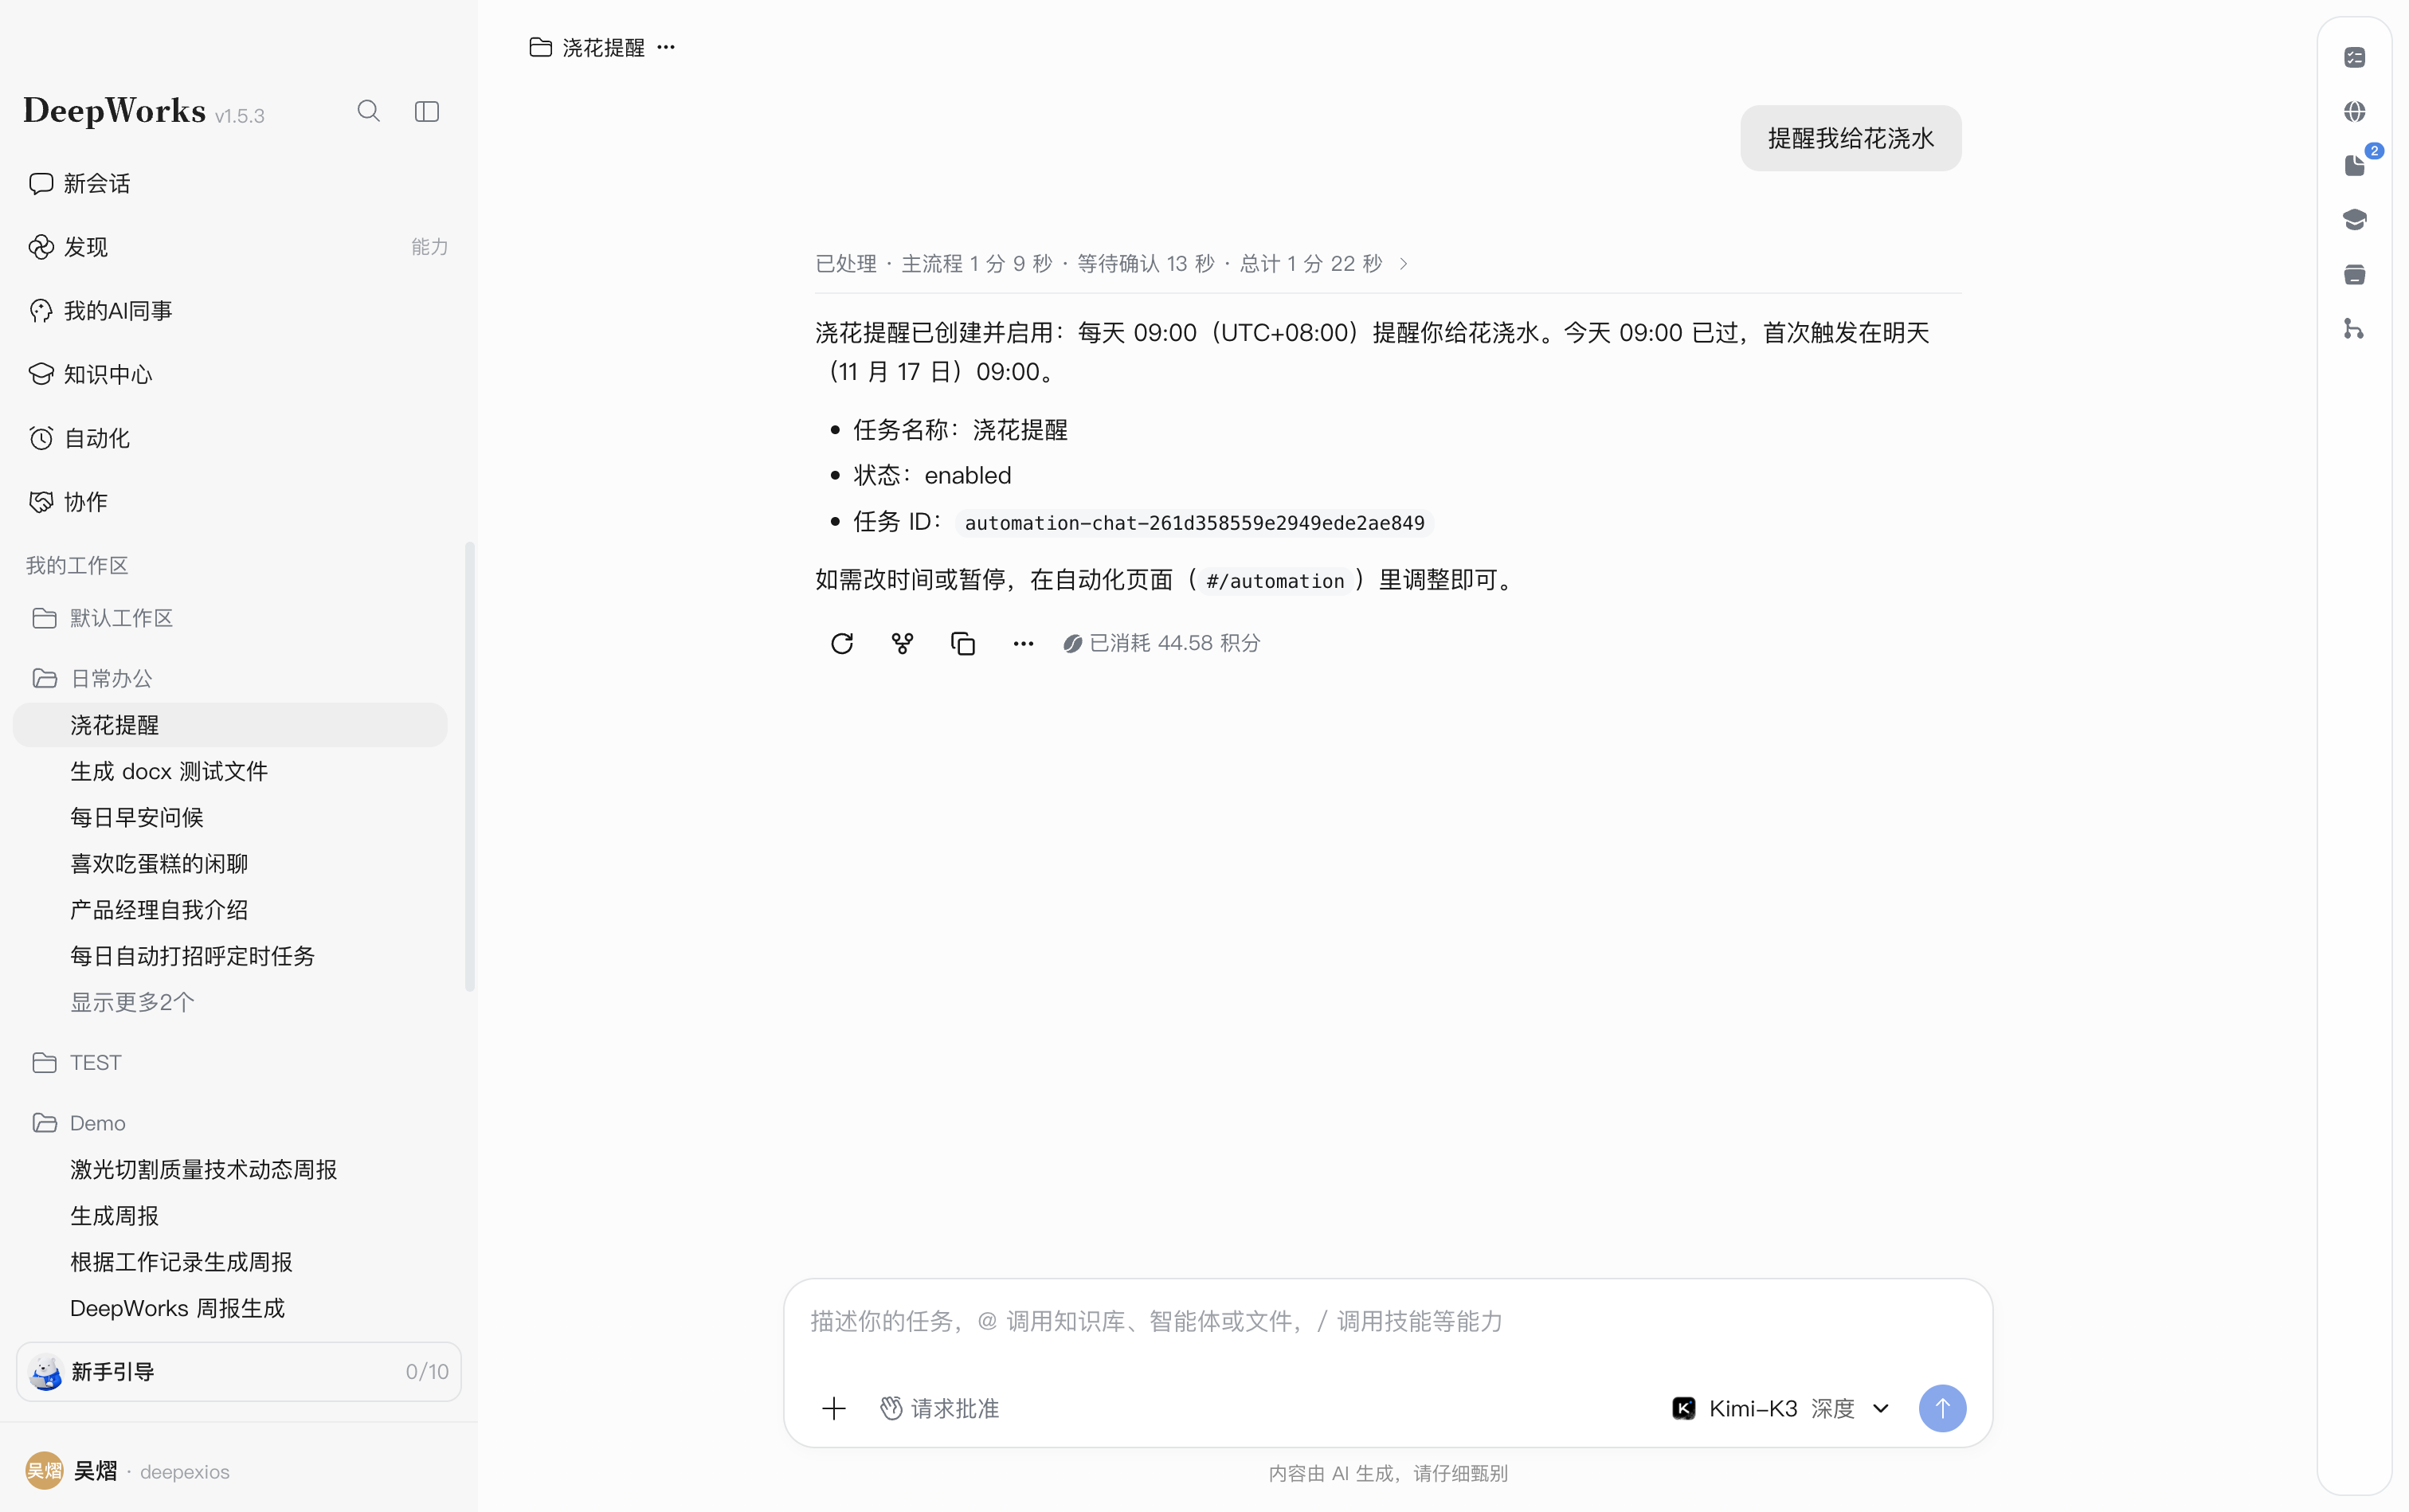
For example, an enabled daily “Watering Reminder” runs at 09:00. If today’s 09:00 has passed when it is created, the first trigger is at 09:00 the next day. Refer to the actual creation result and task list.
Successful creation means the task has been scheduled, not that the reminder has run. To verify immediately, run it manually on the Automation page.
Managing the Task and Viewing Results
- Click
Automationin the sidebar and locate the new task. - Check its name, description, schedule, enabled status, and next run time. Tasks created in conversation also support the switch and run, edit, and delete buttons on the card.
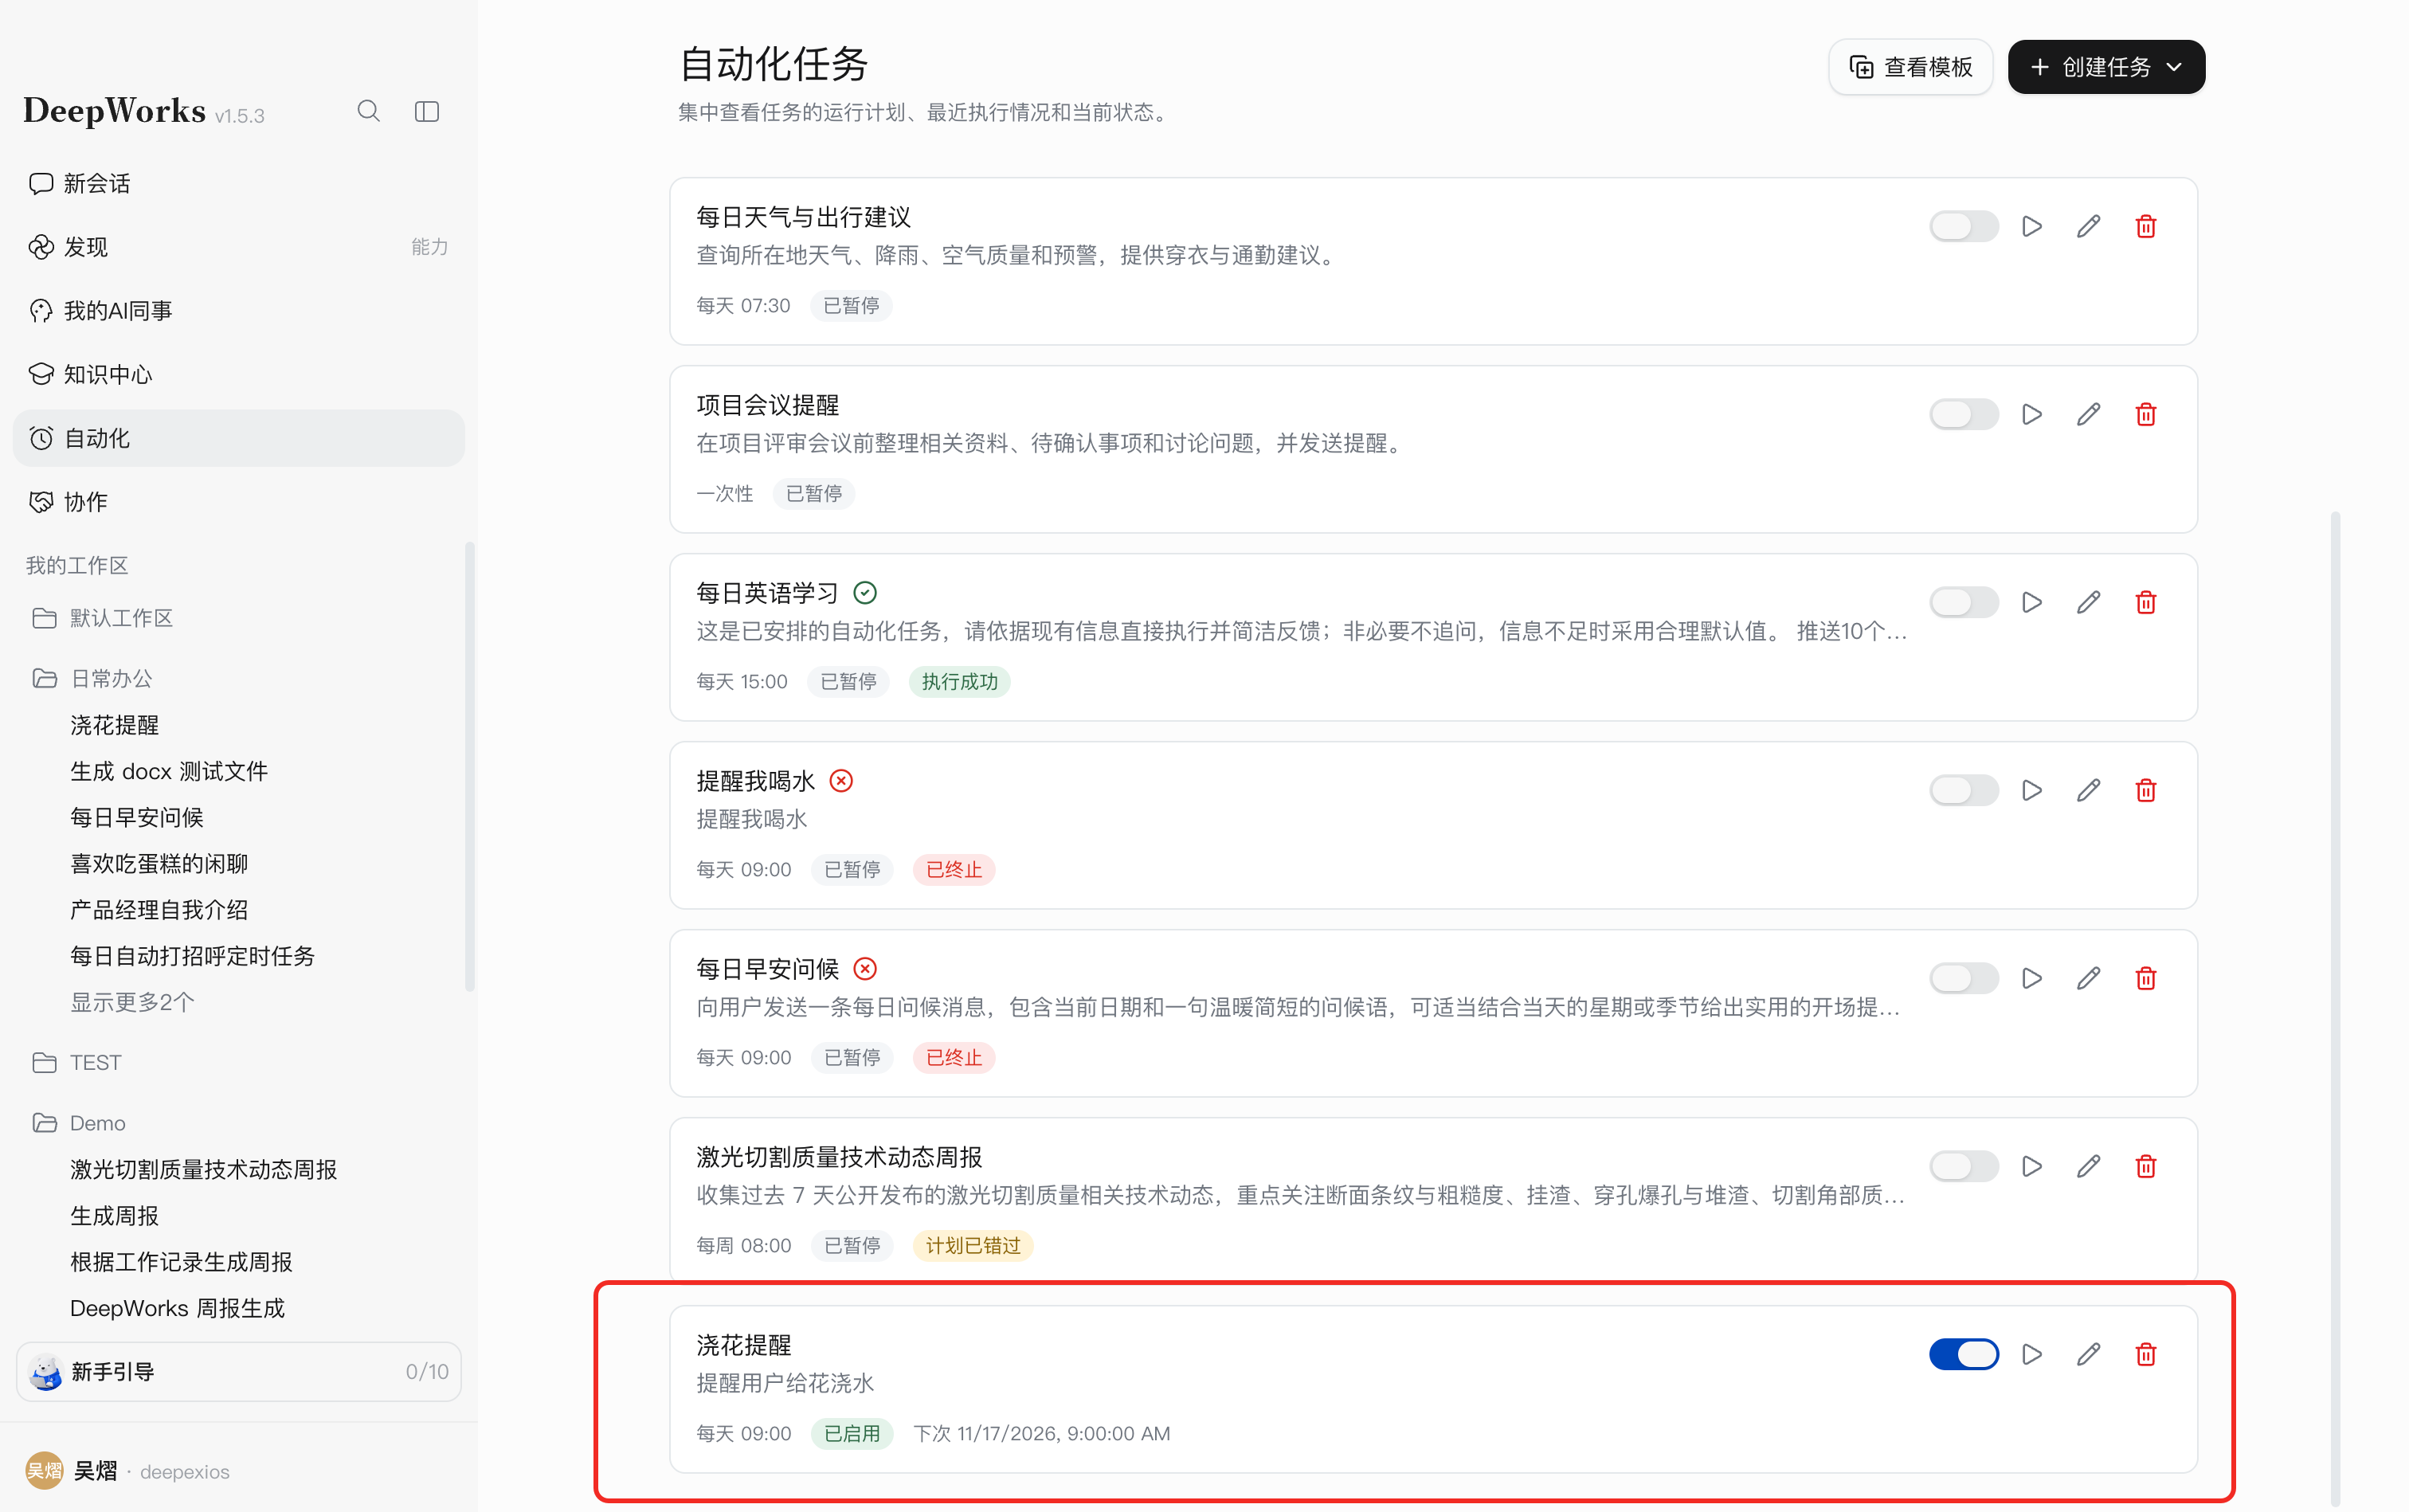
- After its scheduled run or an immediate run using the triangular run icon, open task details to review execution records.
- Open the corresponding session under
My Workspacefor complete results. A “Watering Reminder” session displays the reminder after execution.
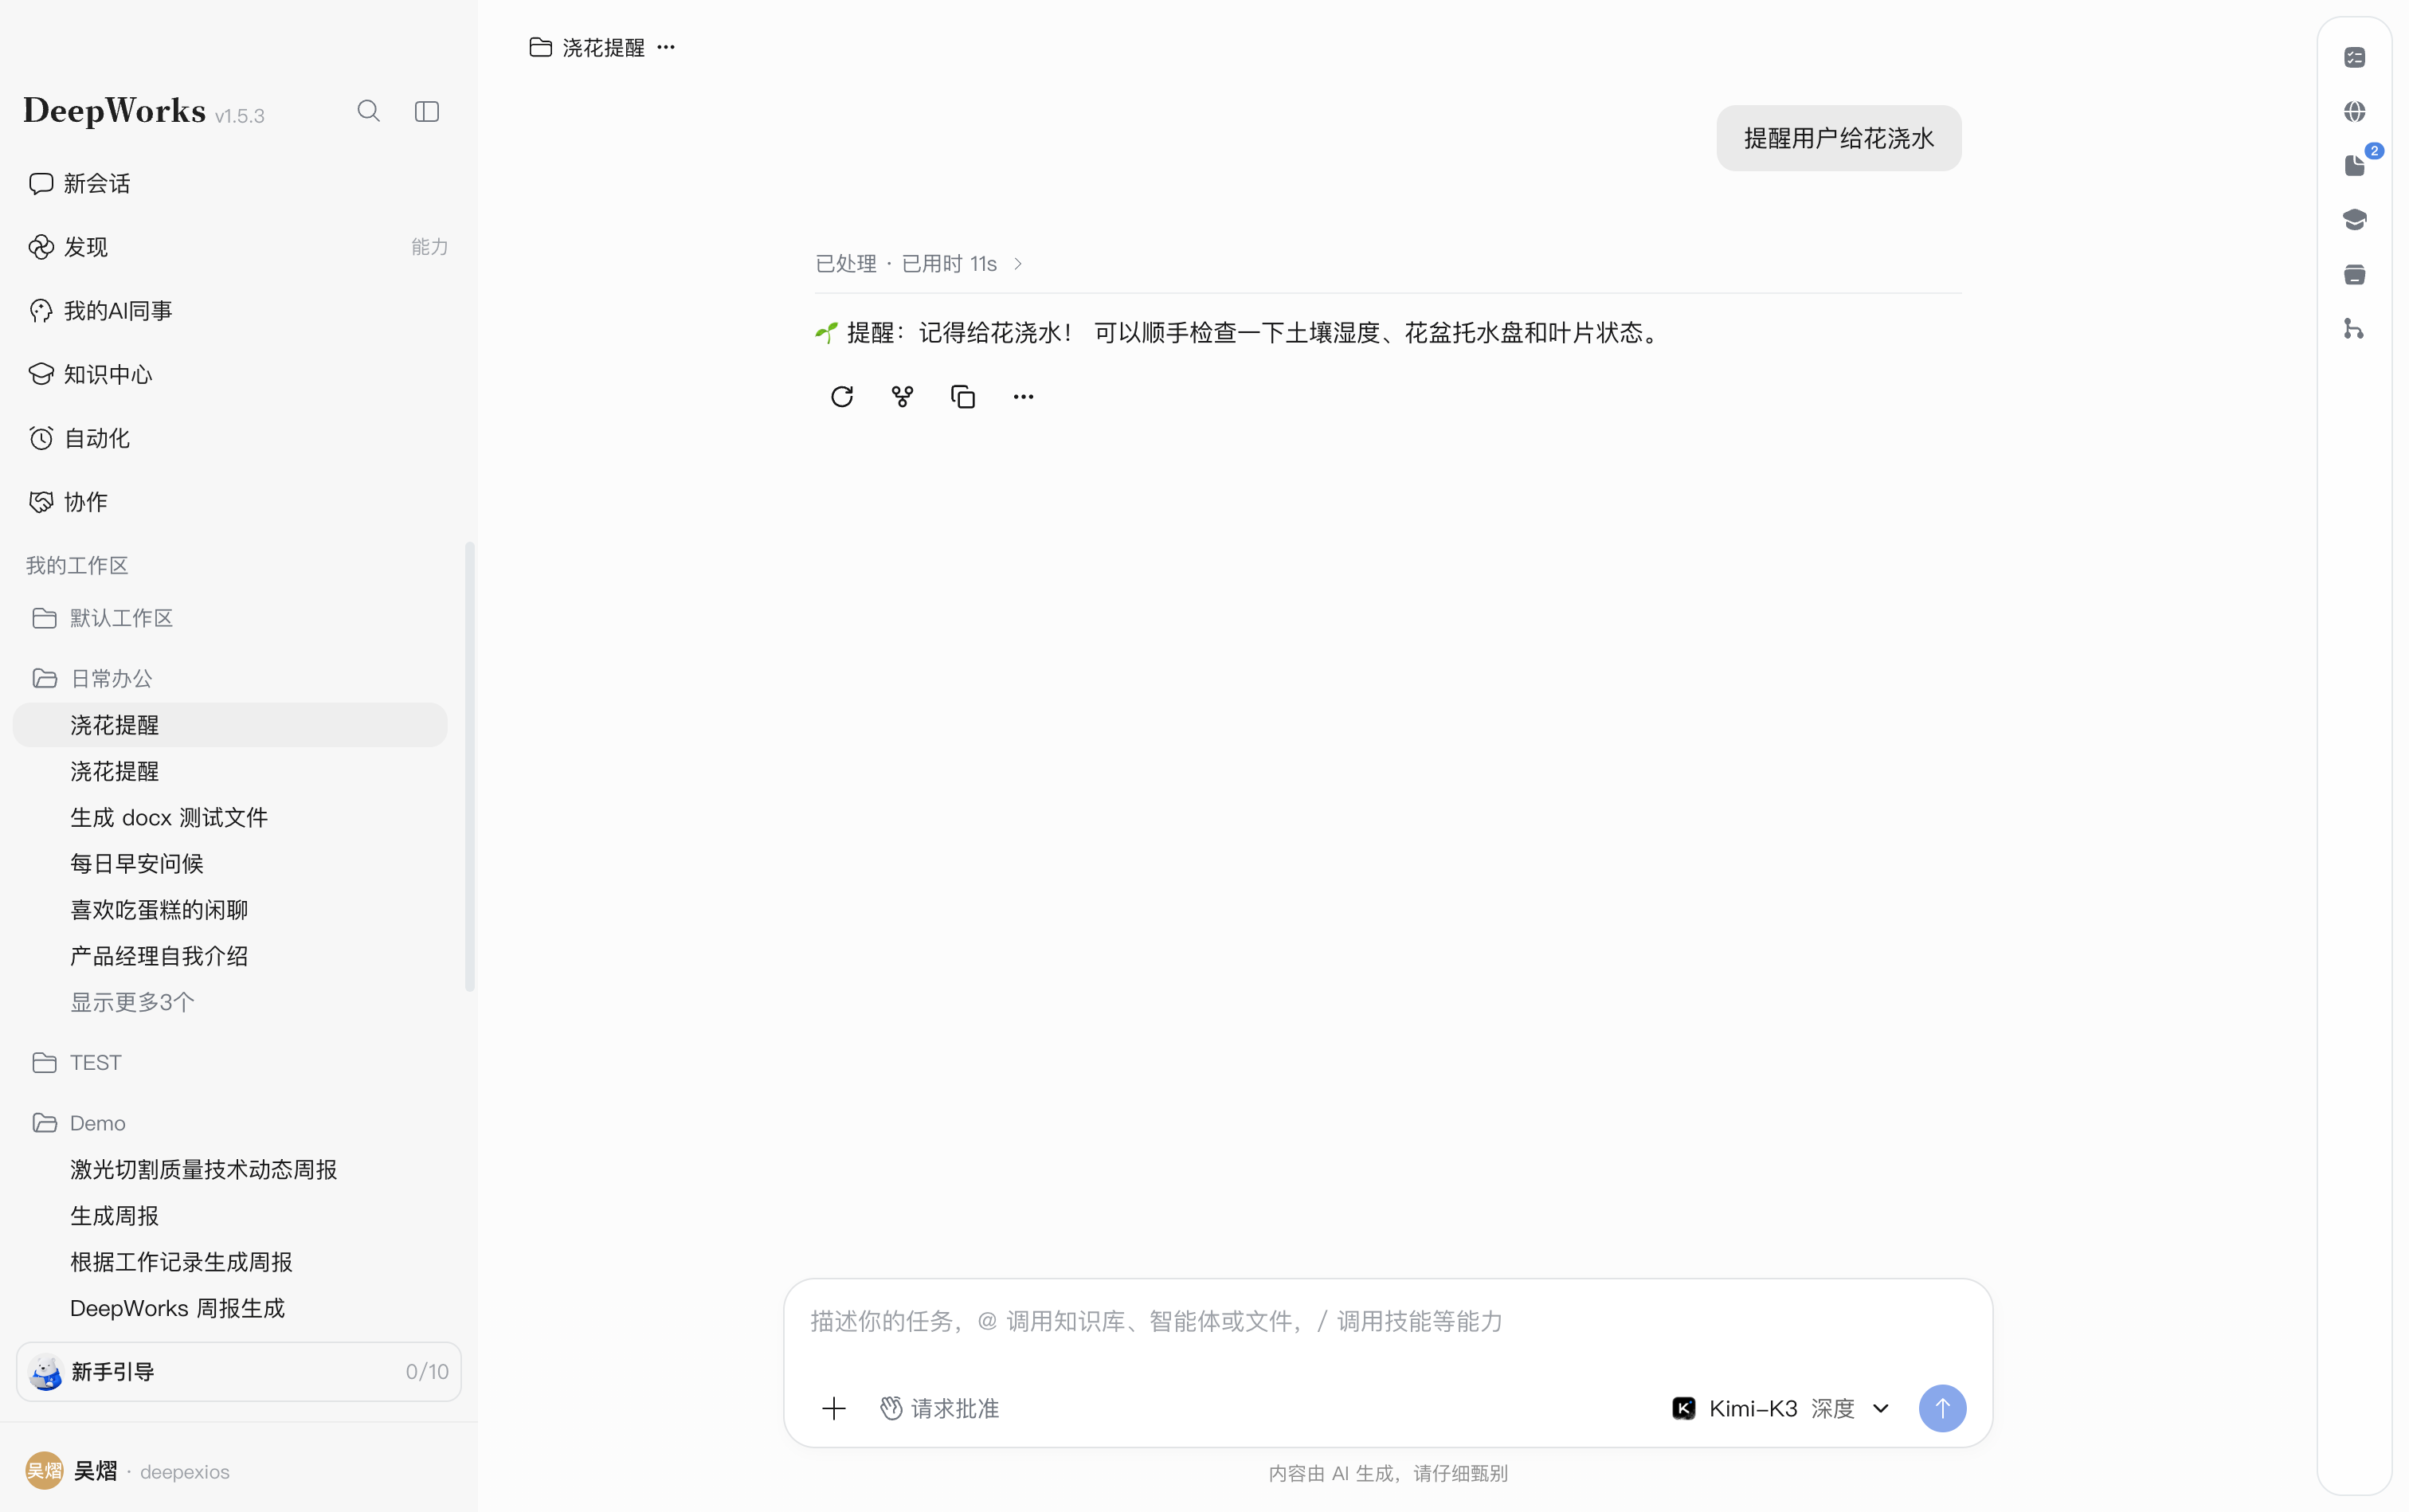
The creation conversation records requirements and creation results. Full execution output appears in the associated execution session. If multiple sessions share a name, use their instructions and replies to distinguish creation from execution. See 8.9 Viewing Task Details and Execution Results.
Filtering Tasks
Click the filters above the list to quickly find tasks by status or type.
| Filter | Description |
|---|---|
| All | View all tasks. |
| Enabled | View tasks with scheduled runs turned on, including enabled one-time tasks. |
| Paused | View tasks whose future schedules have been paused. |
| One-time tasks | View tasks whose scheduling method is one-time. |
Enabled: The card toggle is blue and shows the next execution time of the upcoming schedule.
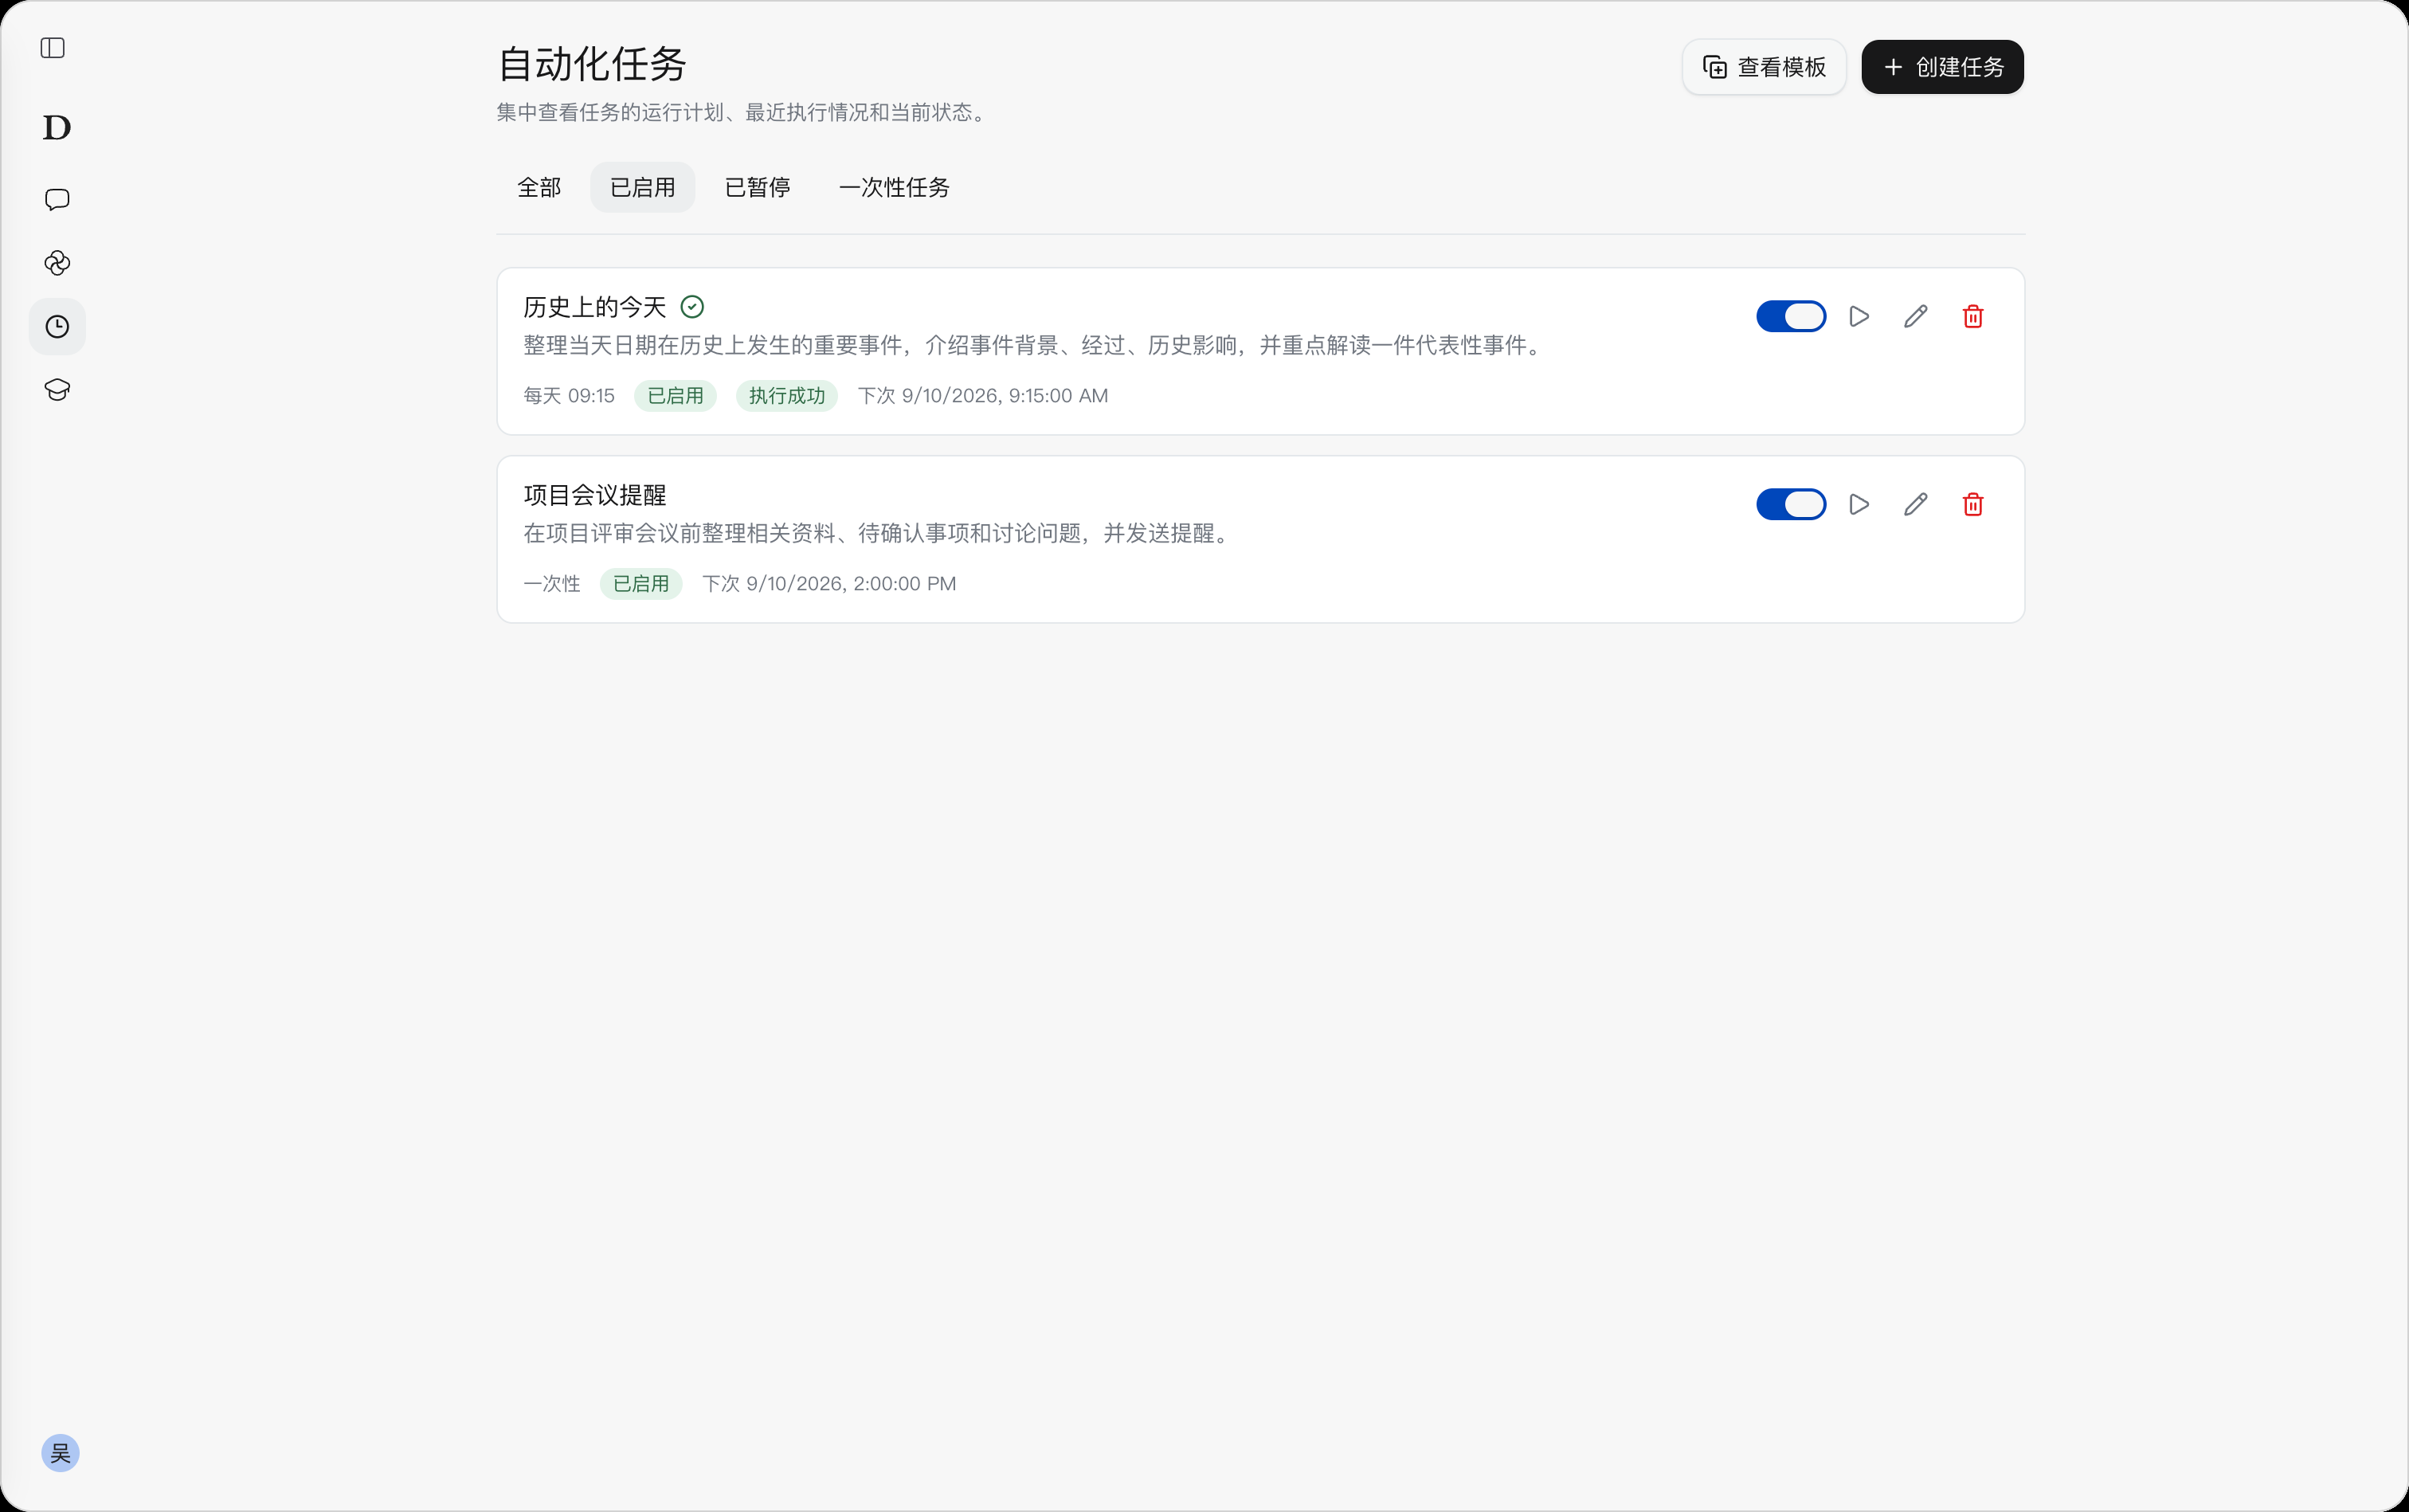
Paused: The card toggle is gray; the most recent execution result can still be viewed.
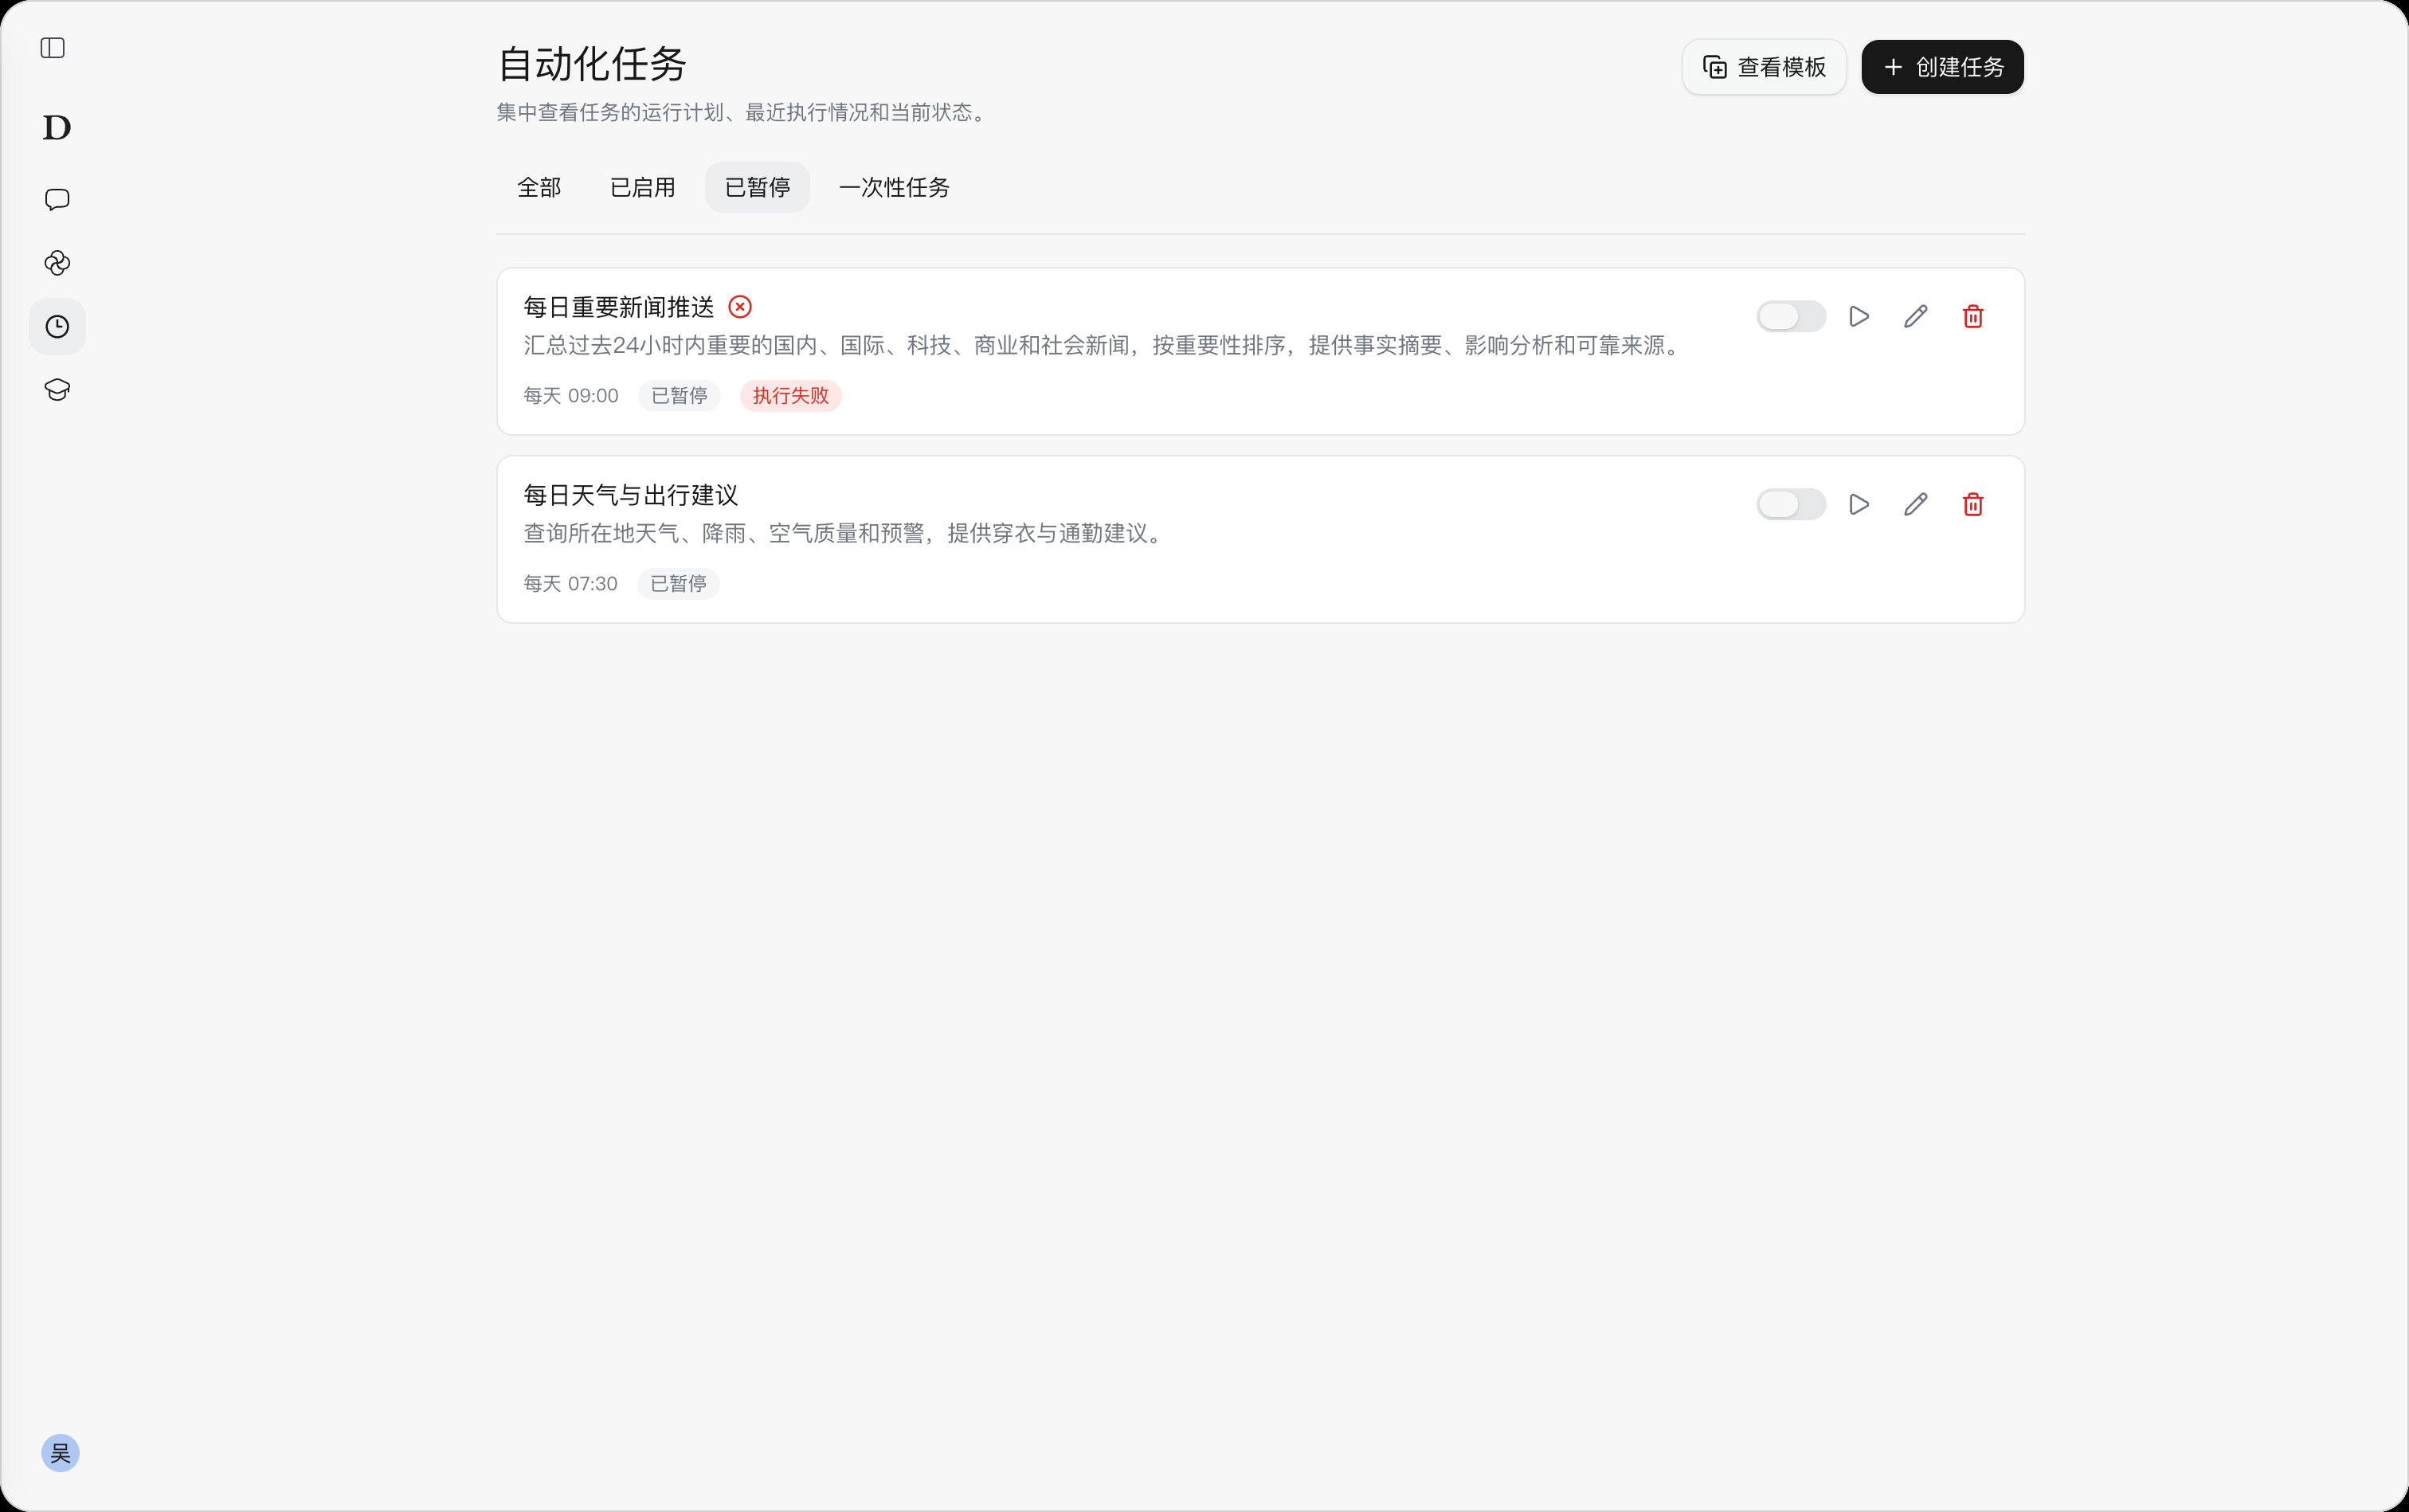
One-time tasks: View plans that run only once in one place, such as “Project Meeting Reminder”.
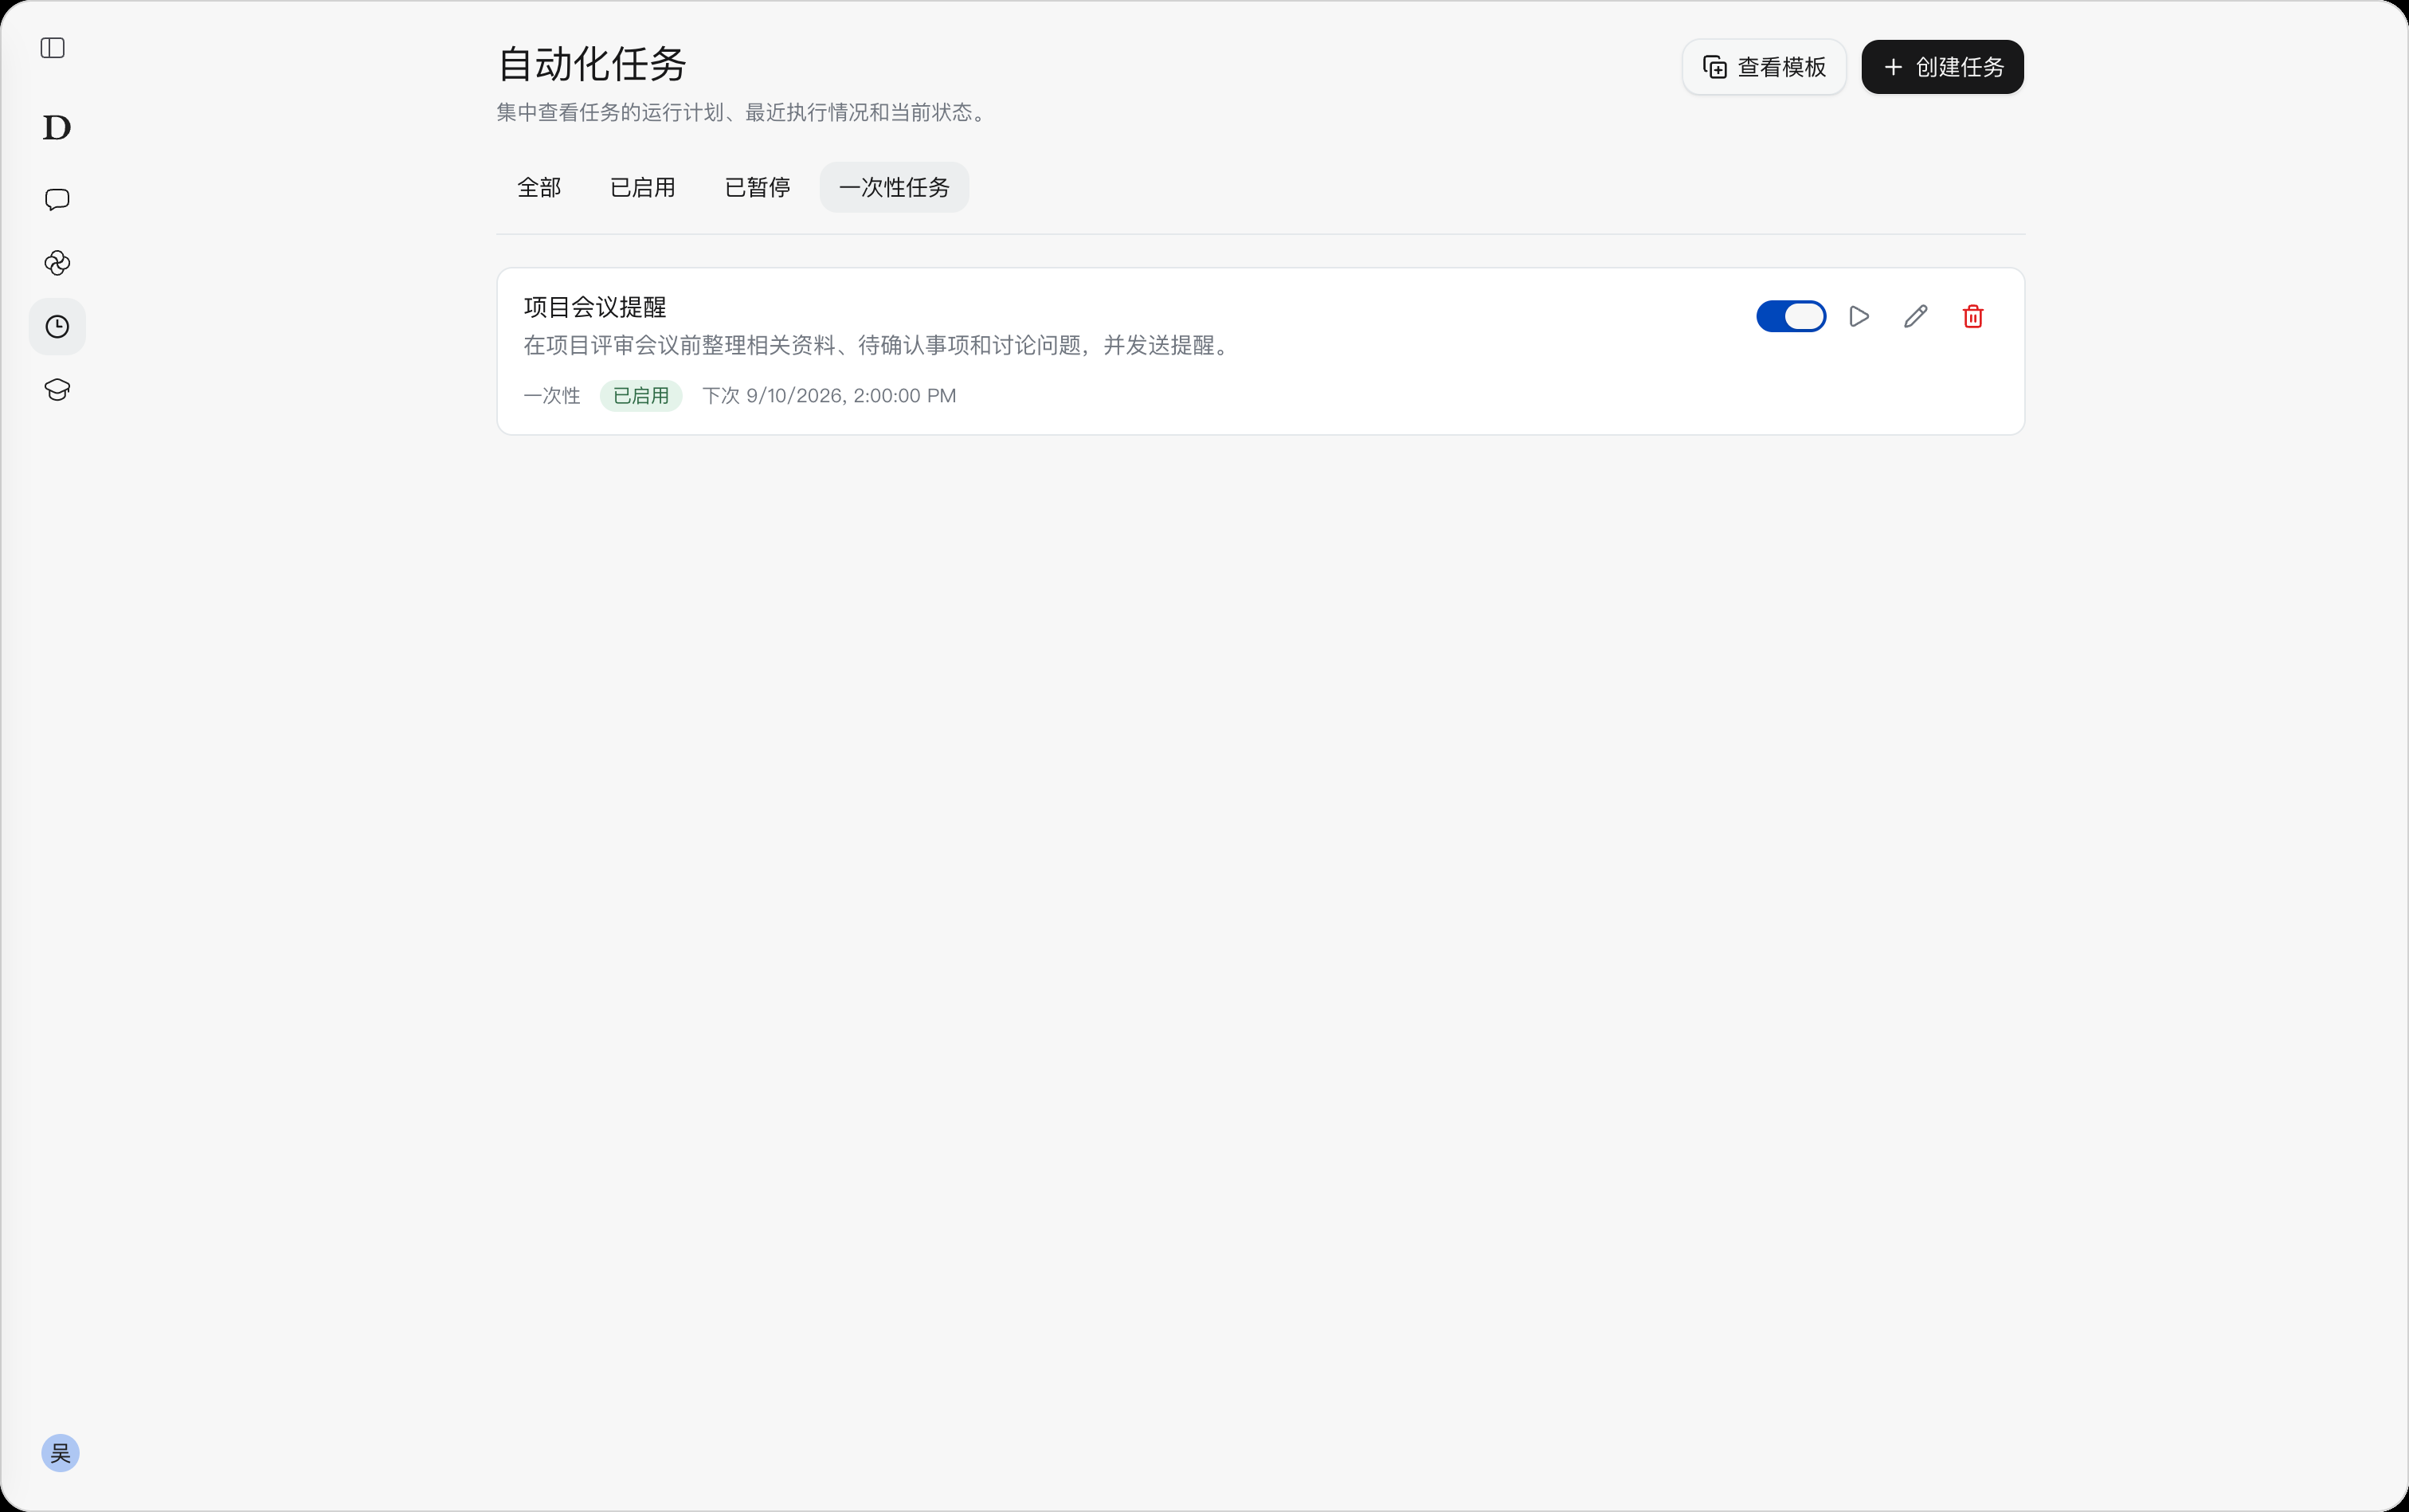
Filtering only affects the current display range; it does not modify task configurations or enable/pause status.
Enabling and Pausing Tasks
Path: Target task card → enable/pause toggle on the right.
- Pause a task: Click the blue toggle. On success, the toggle turns gray and shows “Paused”. Future schedules will no longer trigger; the task configuration and history are retained, and runs already in progress will continue to completion.
- Enable a task: Click the gray toggle. On success, the toggle turns blue and shows “Enabled”, and the next execution time is recalculated. Schedules missed during the paused period are not made up.
“Enabled/Paused” indicates whether the task continues to run on schedule, while “Execution succeeded/Execution failed” indicates the result of the most recent run; the two are independent. For example, a task can show both “Paused” and “Execution succeeded”, meaning it ran successfully previously and its future schedules are currently paused.
If enabling fails, check the schedule time, workspace, model, and tool authorization. A one-time schedule does not run again automatically after it ends; to reschedule, edit the task to a new future time and enable it.
Running a Task Immediately
Path: Target task card → run icon.
- Find the task you want to test or run on demand, and click the triangle run icon.
- The system runs the task once according to its current configuration.
- Click the task card to open the details and view the status and result of this run.
Running immediately performs one additional run and does not change the original schedule, the next execution time, or the enable/pause status. Paused tasks can also be run immediately and remain paused after the run.
While a task is already running, it cannot be run immediately again; wait for the current run to finish before trying.
Editing a Task
Path: Target task card → pencil icon.
- Click the edit button to open the “Edit Automation Task” window.
- Modify the task name, description, tools, approval policy, workspace, model, or schedule time as needed.
- Click Save Changes.
- Return to the list and verify the updated task content and next execution time.
Modified configurations take effect from the next run and do not rewrite historical execution records. If changes are saved while a task is running, the current run still uses the configuration it started with. After the schedule is modified, old untriggered schedules are canceled, and the system recalculates the next execution time according to the new schedule.
Viewing Task Details and Execution Results
Viewing Execution Records
Path: Click a non-button area of the task card →Automation Task Details.
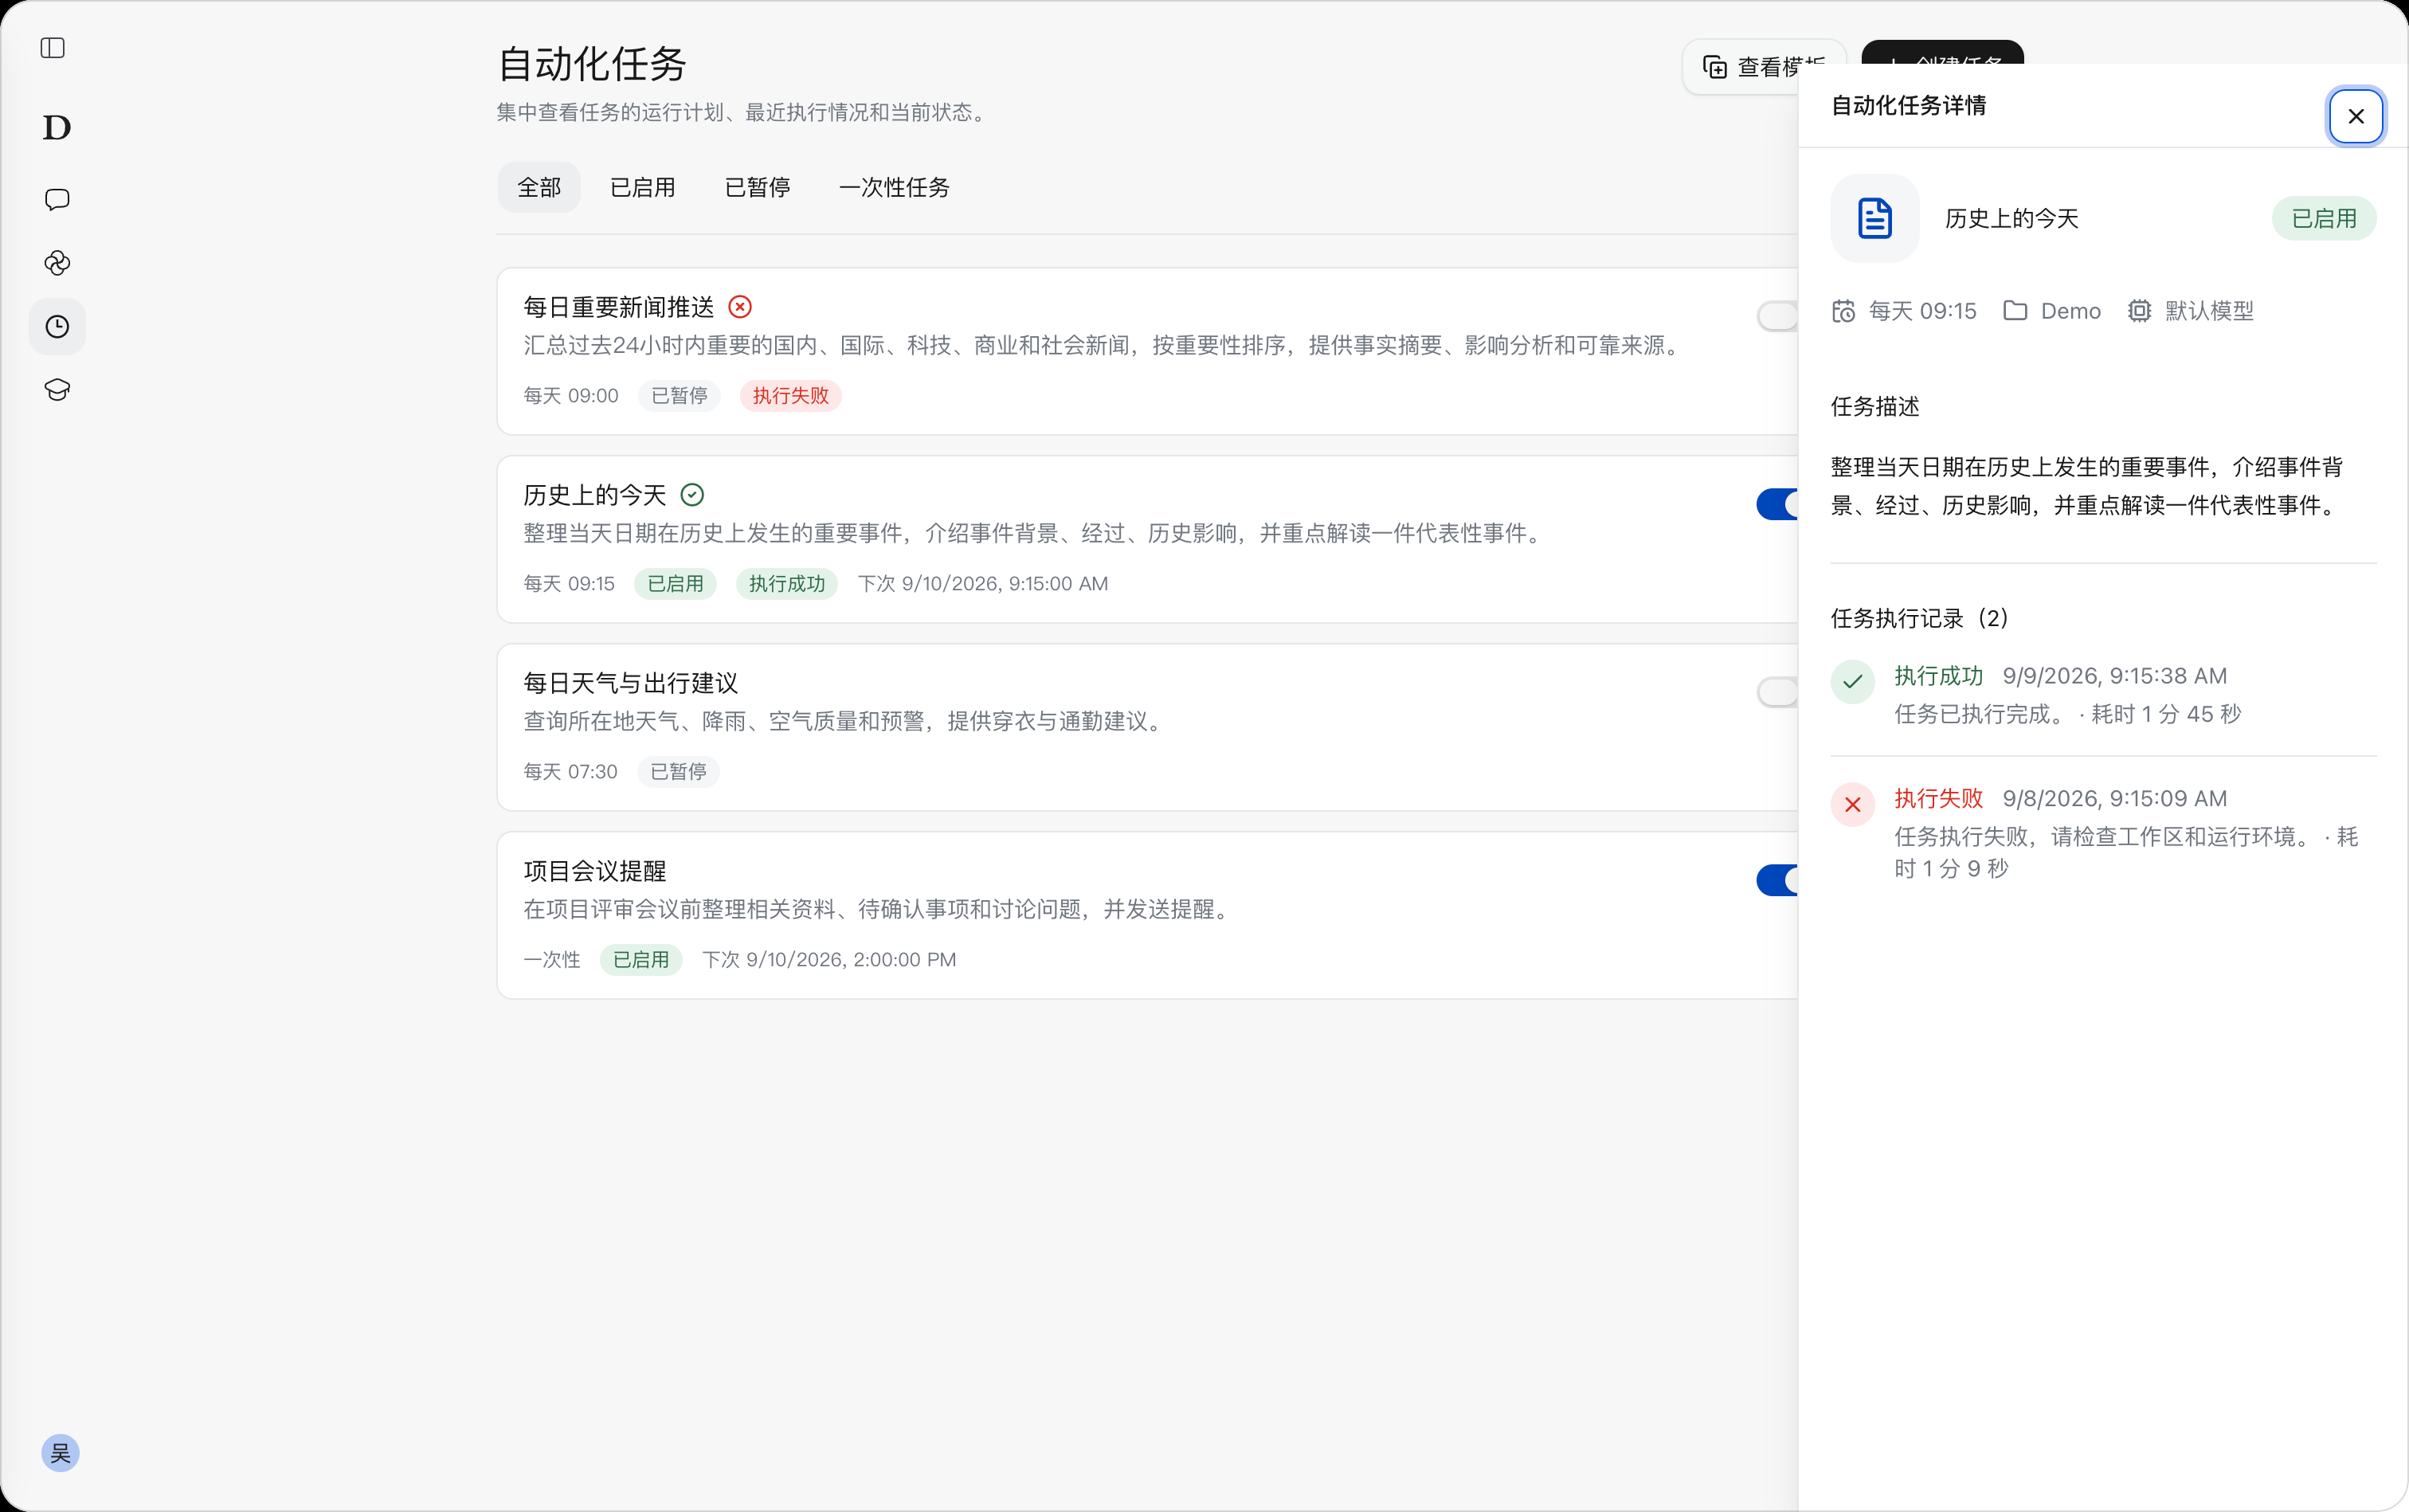
The details panel includes the task name, enable/pause status, run schedule, workspace, model, full task description, plus the “Task execution records” and the number of records.
Execution records are displayed in reverse chronological order, making it easy to review recent runs. Each record may include the execution status, time, result summary, and duration:
- Execution succeeded: Marked in green, indicating that the run completed.
- Execution failed: Marked in red; the result summary explains the cause of failure, such as checking the workspace and runtime environment.
- Running: The task has not finished yet; wait for the run to complete before viewing the final result.
Viewing the Full Result
Path: Left navigationMy Workspace → the workspace selected for the task → the corresponding task session.
- Based on the “Workspace” information in the task details, expand the corresponding workspace in the left navigation.
- In the session list, click the corresponding task name.
- In the central session area, view the task instructions and the full result generated by the AI.
- For long sessions, scroll to read, or click Jump to latest to go to the newest content. The “Processed · Duration” label above the result shows the processing details and time spent for this run.
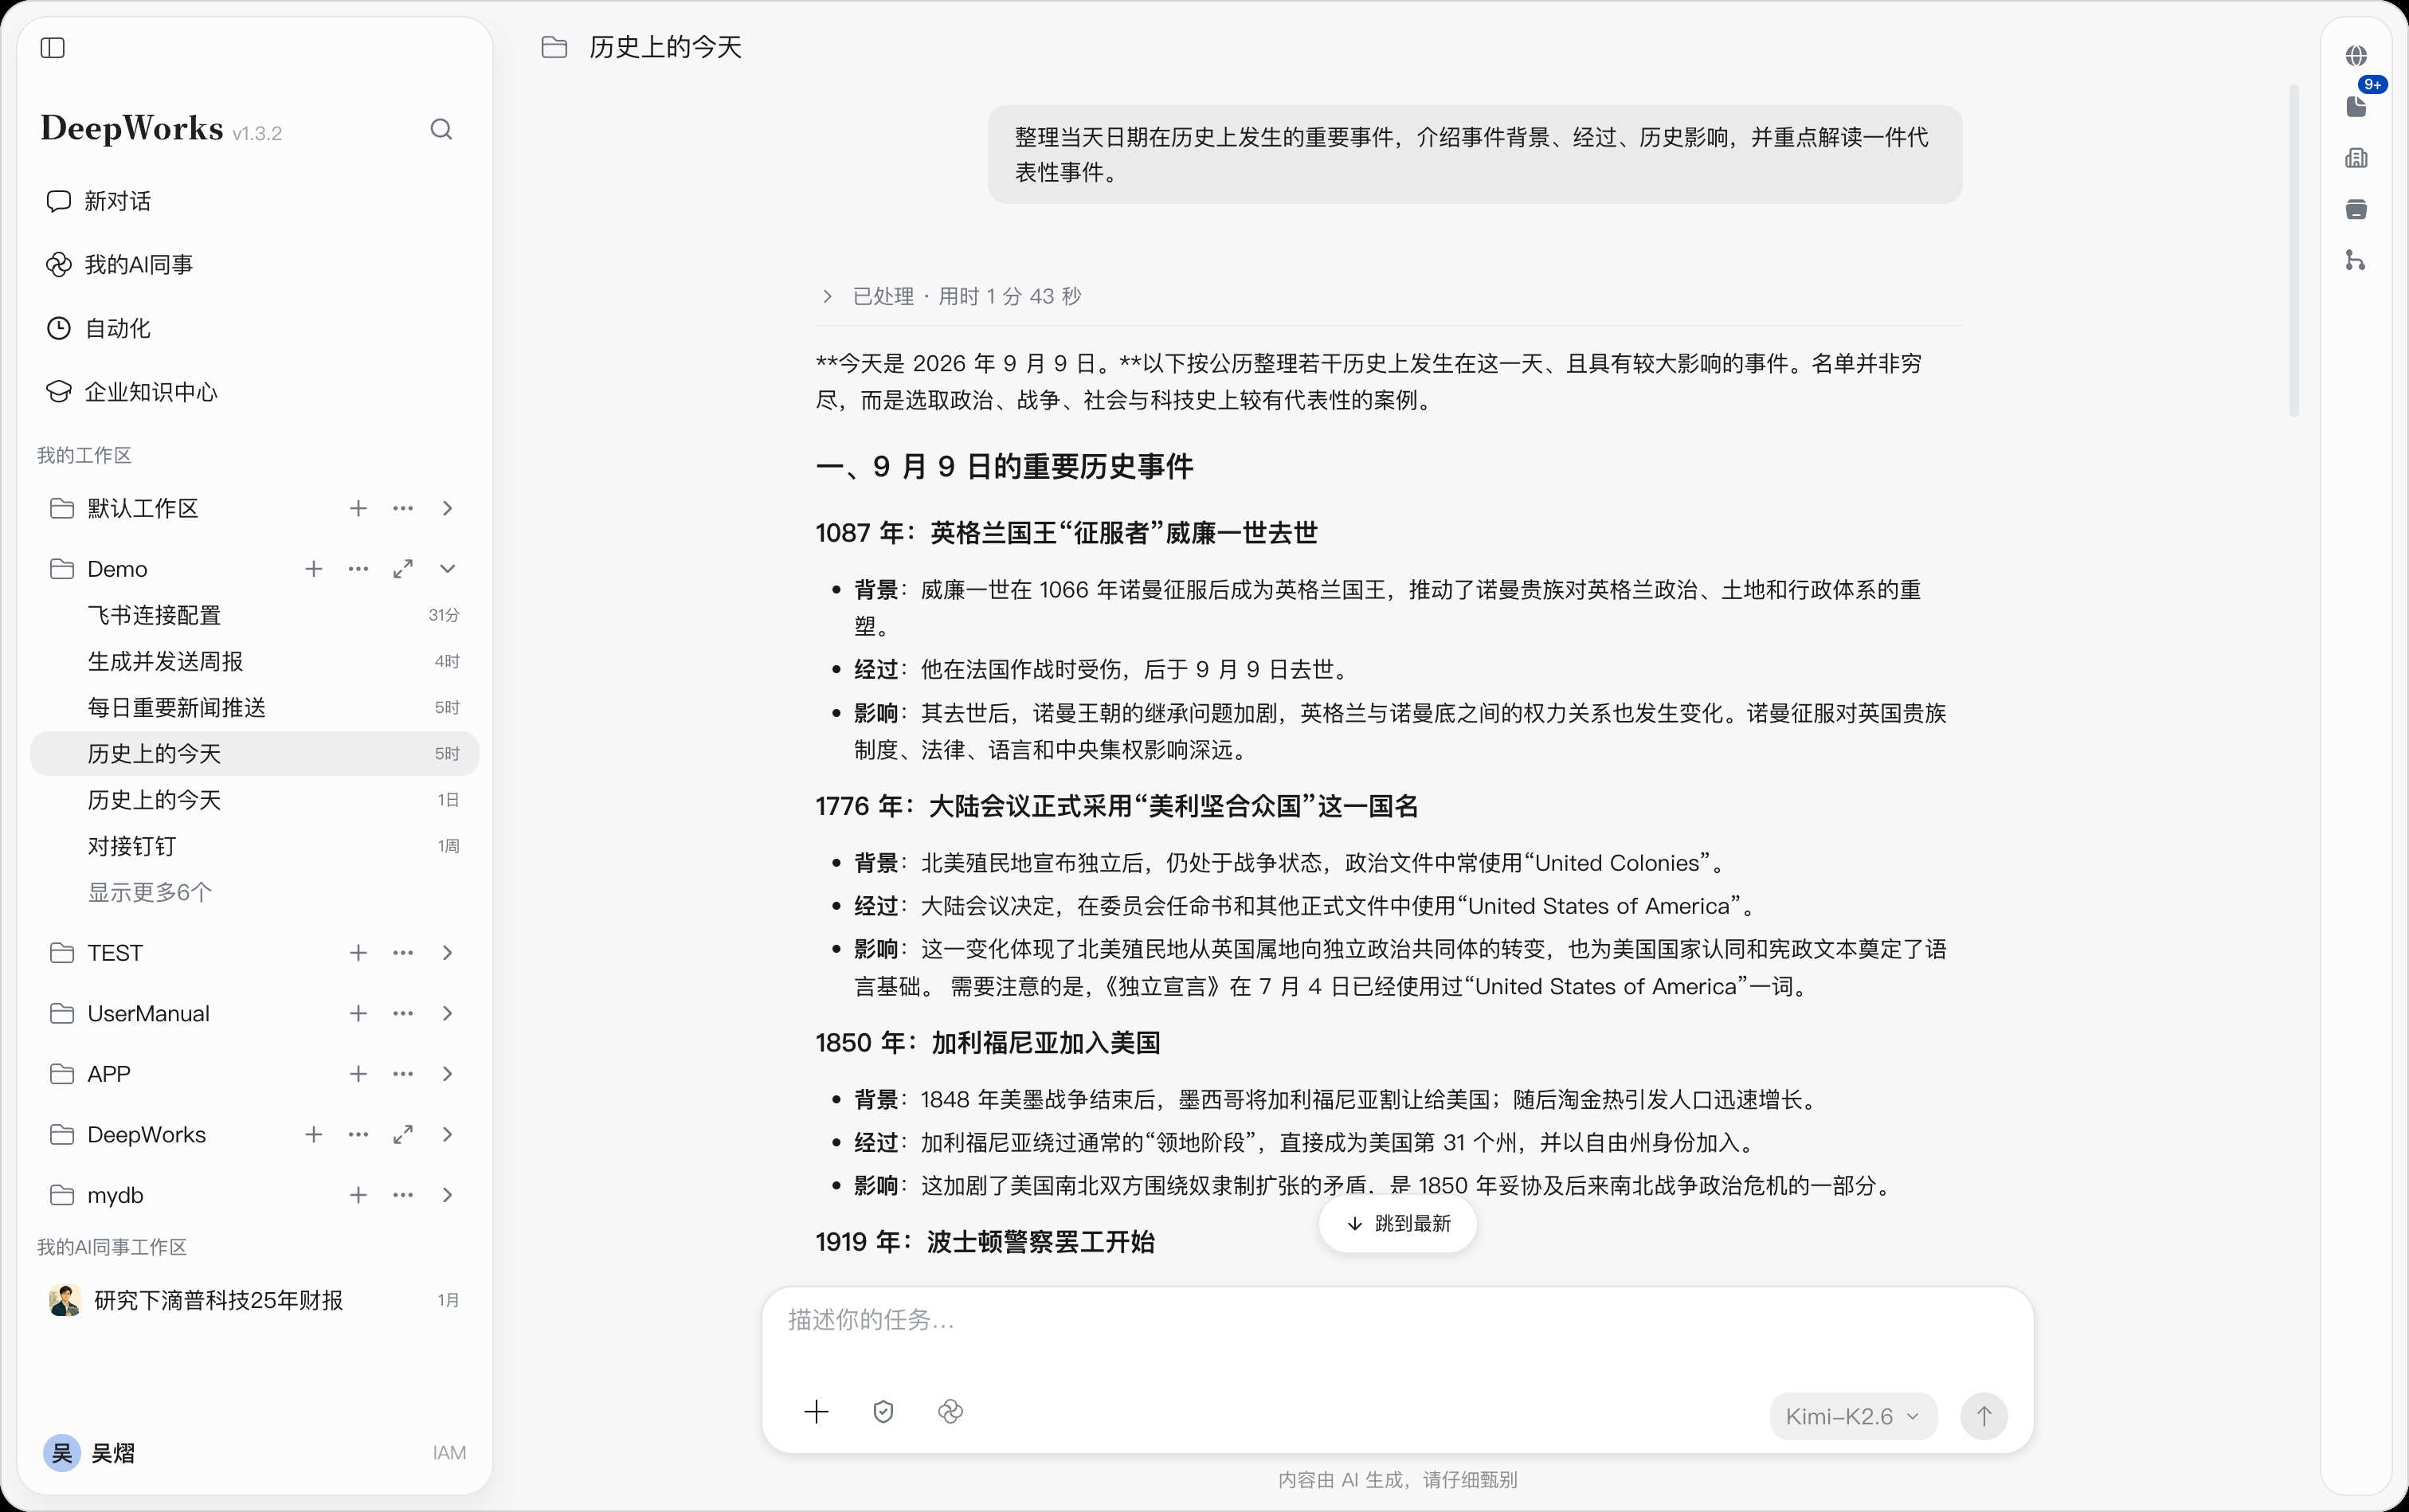
If multiple sessions with the same name appear in the workspace, verify the record you are viewing using the time hints next to the list and the task content in the session. Use the execution records in the task details to check status and summaries, and read the full output in the session; if the task generated files, locate the deliverables according to the save location in the task description.
When a task runs for the first time, a session with the same name is created; subsequent runs reuse that session, while each run still saves its own execution record. If the linked session is deleted, a new one is created at the next actual run; old execution records keep their original session association.
Deleting a Task
Path: Target task card → delete button.
- Click the delete button.
- In the confirmation prompt, verify the task name and the impact of deletion.
- After confirming deletion, the task is removed from the list and future schedules stop; to keep the task, cancel the deletion instead.
Deleting an automation task does not delete workspace sessions and results that have already been generated; runs already started will still run to completion. To disable a task temporarily, use the pause toggle instead of deleting the configuration.
IM Channels
IM Channels are used to connect instant messaging platforms such as DingTalk and Feishu, allowing DeepWorks to receive new messages between you and platform bots. You can connect platform accounts, create or integrate bots, and also view enterprise bots and contact their creators to request usage permission.
The page is divided into two tabs: Channel Connections andBots: the former is used to connect or unbind platform accounts, while the latter is used to add, configure, and manage bots.
Accessing IM Channels
Path: Click the user avatar in the lower-left corner to open the user menu, then select IM Channels.
- Enter the IM Channels page.
- Check the “Workspace” in the upper-right corner and select the desired workspace from the drop-down box.
- Depending on your task, switch to the Channel Connections orBots tab.
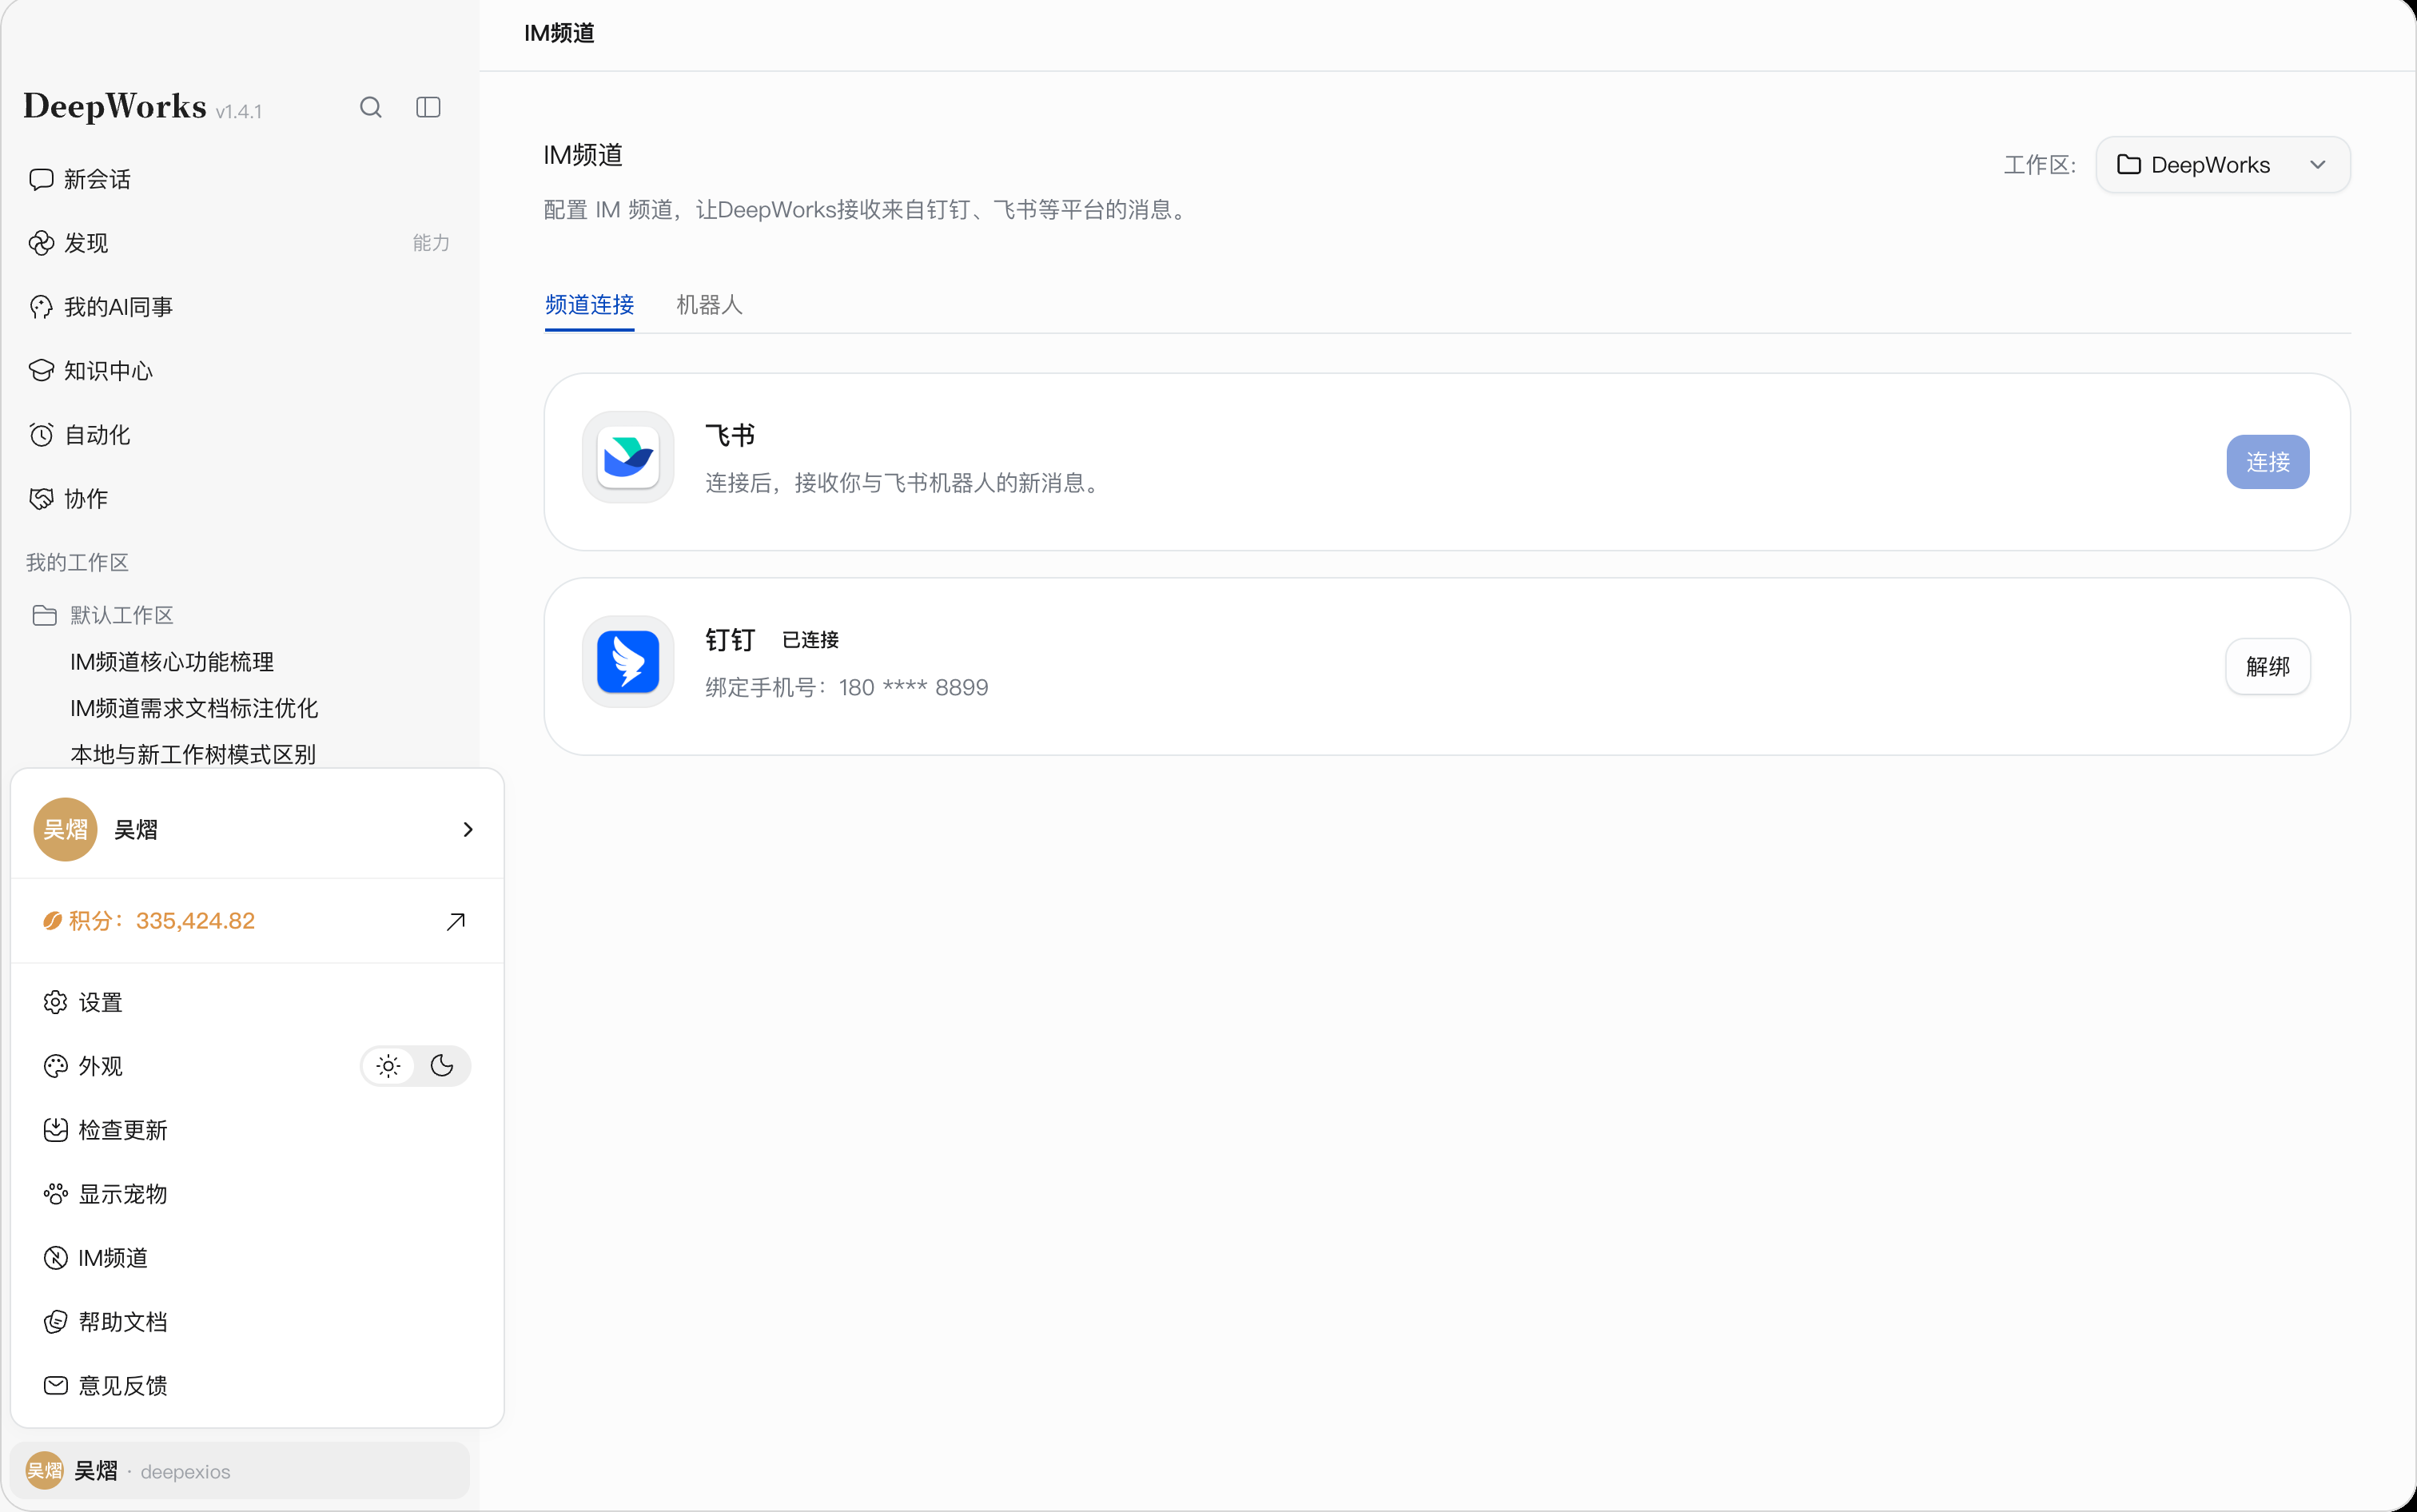
Connecting and Unbinding Channels
Viewing Channel Connection Status
In the Channel Connections tab, view the Feishu and DingTalk platform cards respectively.
| Status | Page Display | Available Actions |
|---|---|---|
| Not connected | Shows connection instructions and a Connect button | ClickConnect and follow the prompts in the dialog to complete the connection |
| Connected | Shows “Connected” and the masked bound phone number | Verify the bound phone number, or click Unbind to release the connection |
Channel connections are used to bind platform accounts; bots need to be added or viewed separately in the Bots tab. To use a bot, you also need permission for that bot.
Connecting a Channel
- In the Channel Connections tab, clickConnect on the right side of the channel card.
- In the dialog, verify the phone number to make sure it is the one you use in DingTalk.
- Click Confirm to complete the connection; to abandon it, clickCancel or the close icon in the upper-right corner.
- Return to the channel list, check whether the card shows “Connected”, and verify the bound phone number.
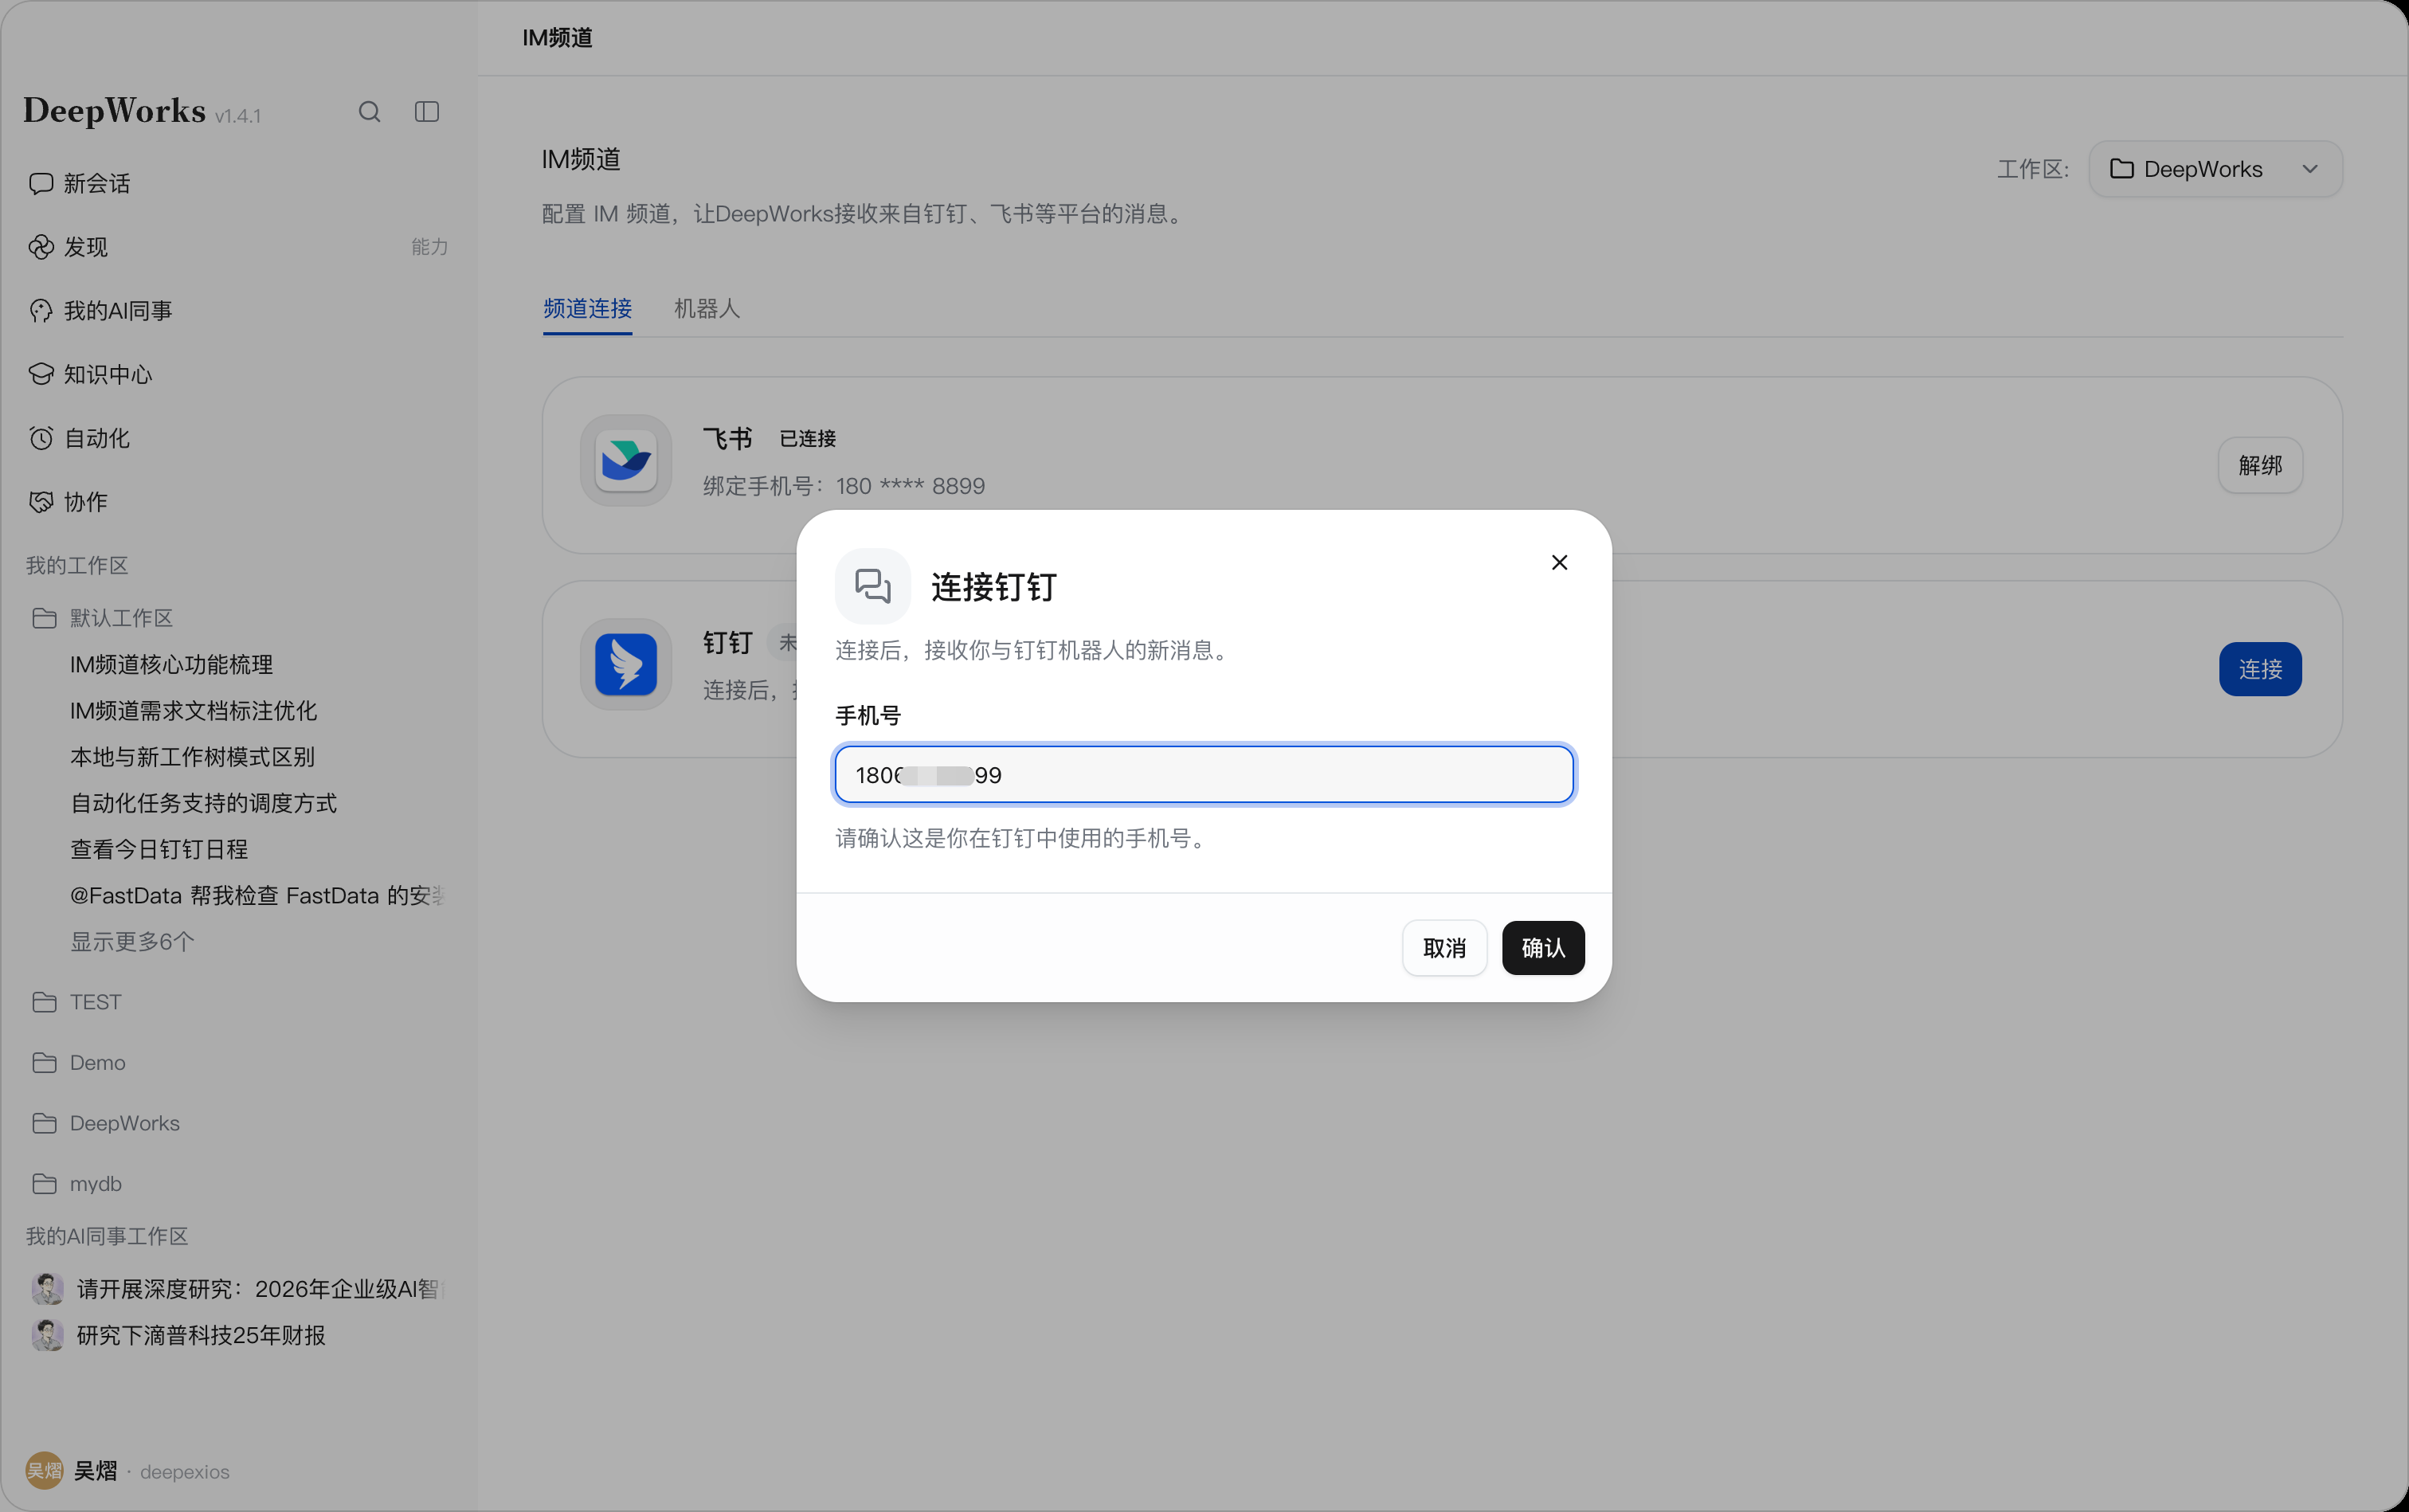
After connection, DeepWorks can receive new messages between you and the DingTalk or Feishu bot. Next, you can go to the Bots tab to add your own bot or view available enterprise bots.
Unbinding a Channel
- Click Unbind on the right side of the connected channel card.
- In the confirmation dialog, verify the phone number to be unbound and read about the impact of unbinding.
- Click Confirm Unbind to release the connection; to keep the connection, clickCancel.
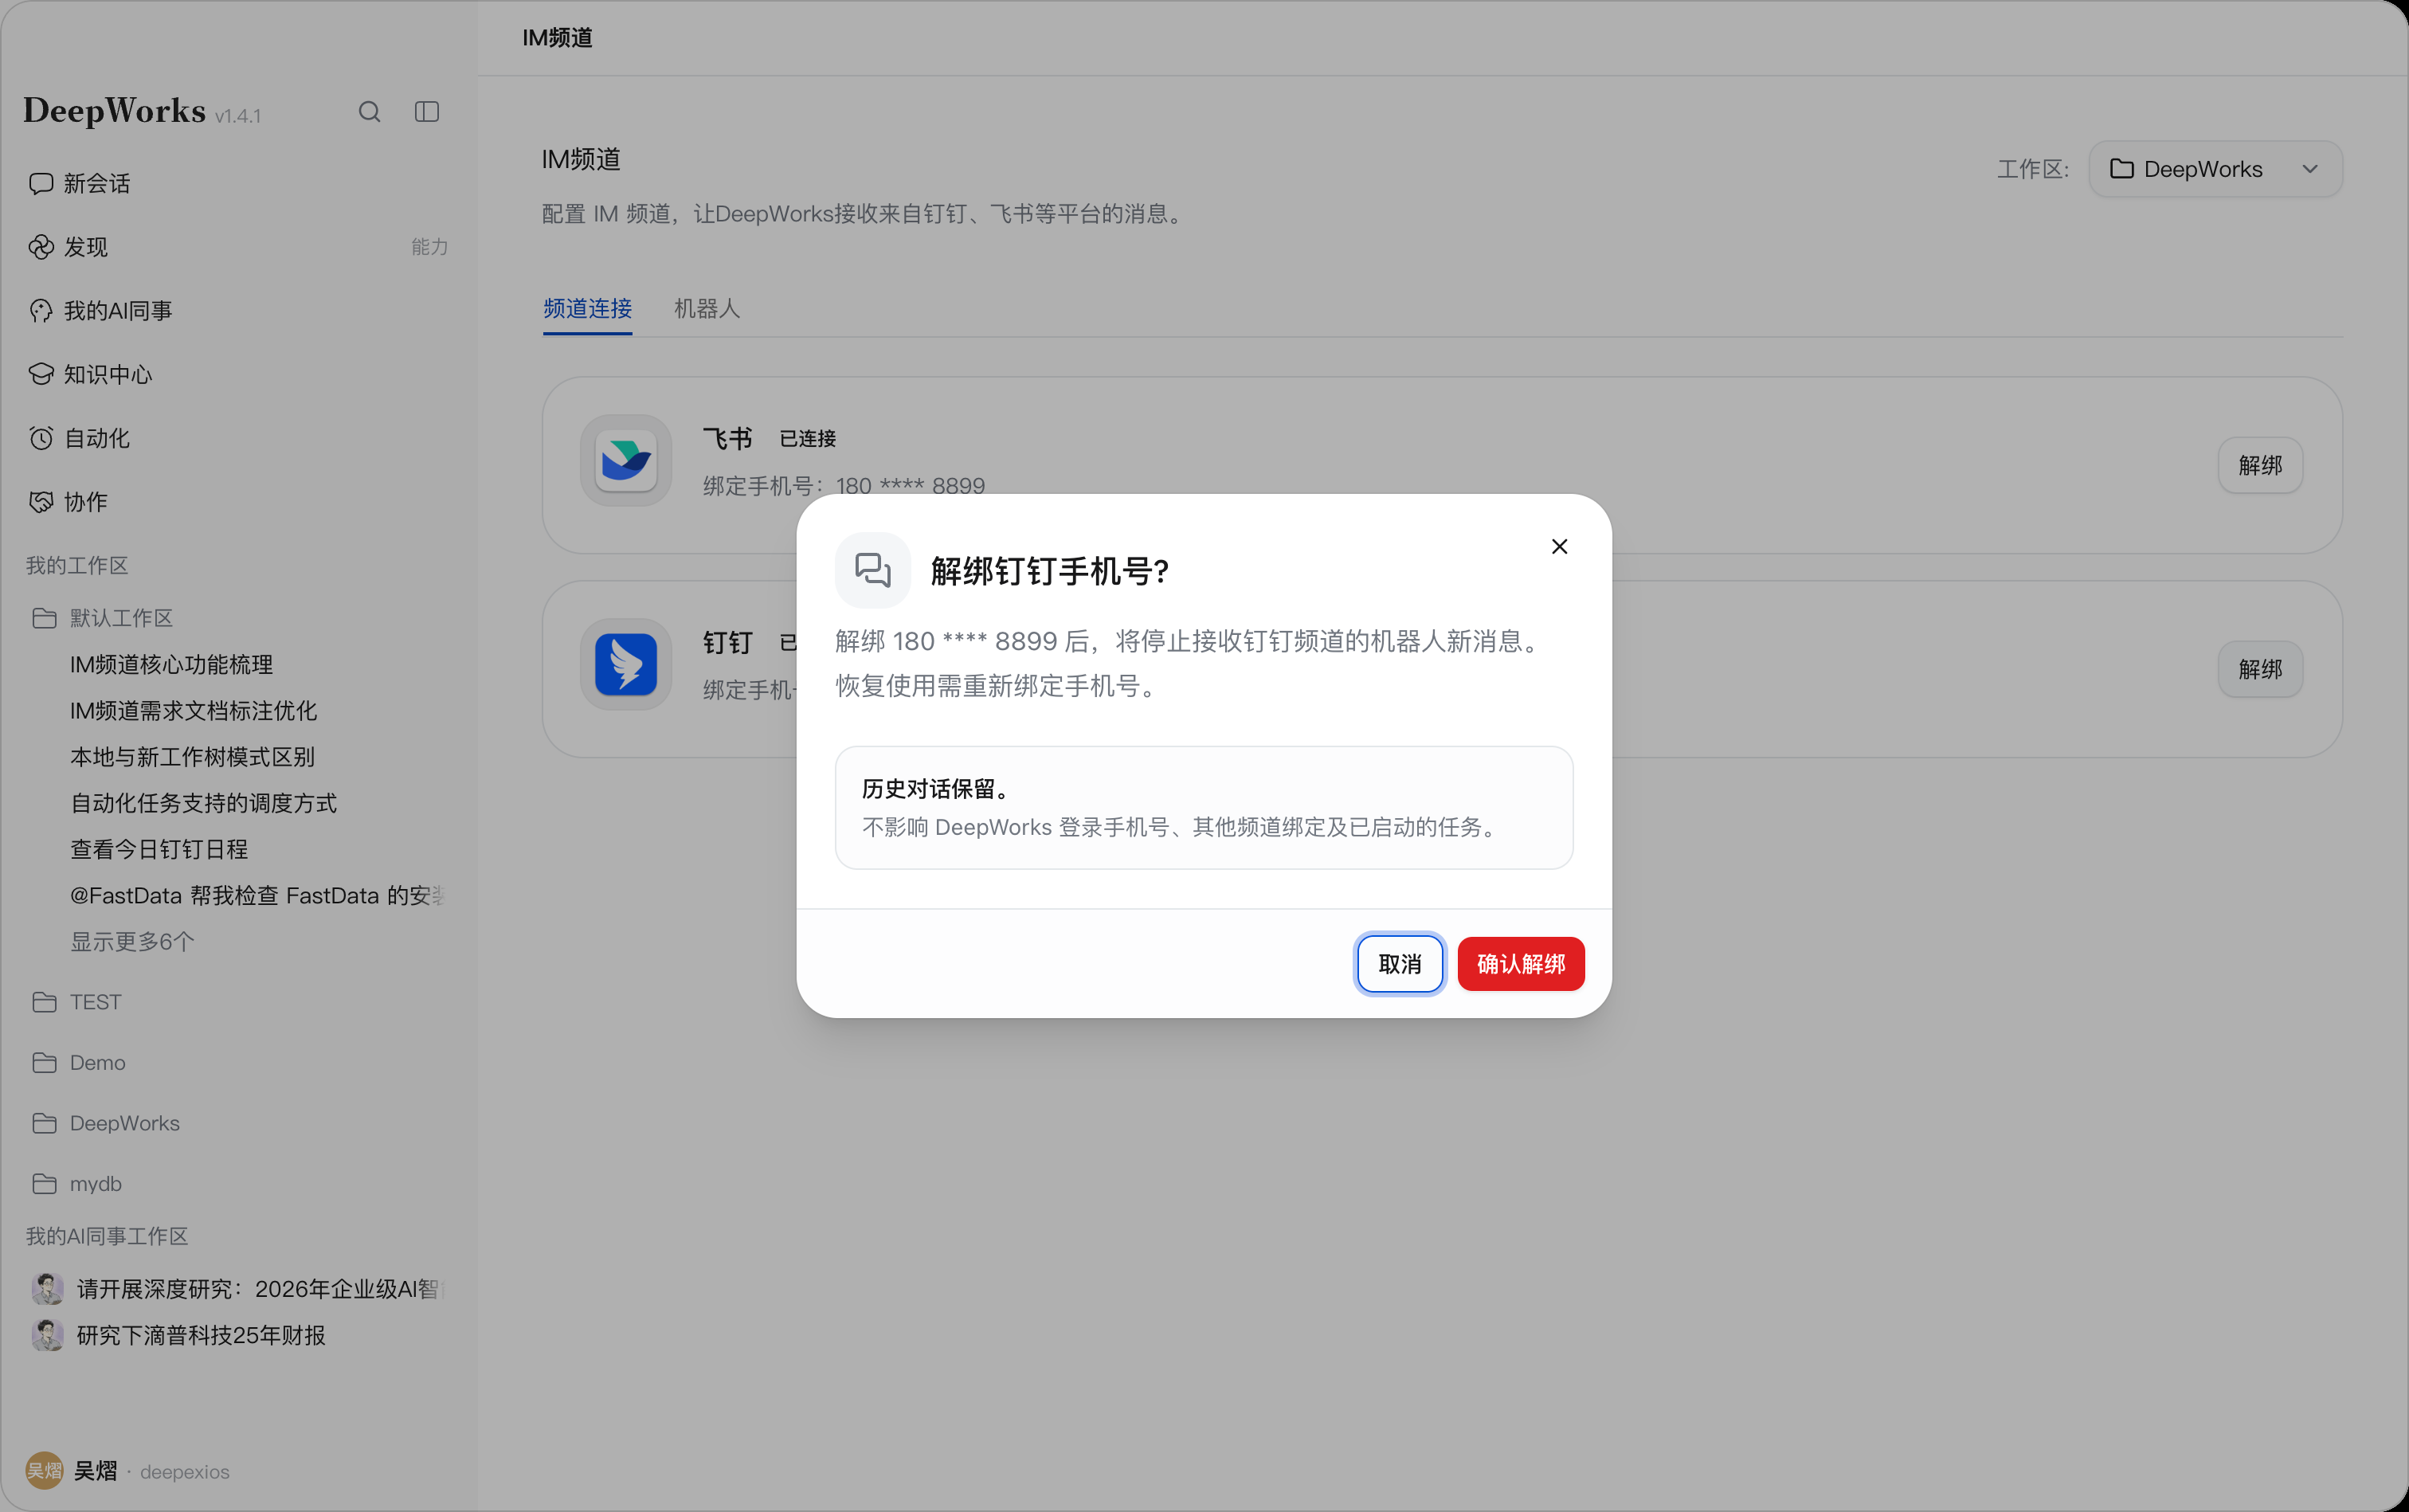
After unbinding, new messages from bots in that channel will no longer be received. To resume use, you need to bind the phone number again.
Unbinding preserves historical conversations and does not affect the DeepWorks login phone number, other channel bindings, or tasks already started.
Viewing Bots
Enter the Bots tab to view two lists: “My Bots” and “Enterprise Bots”.
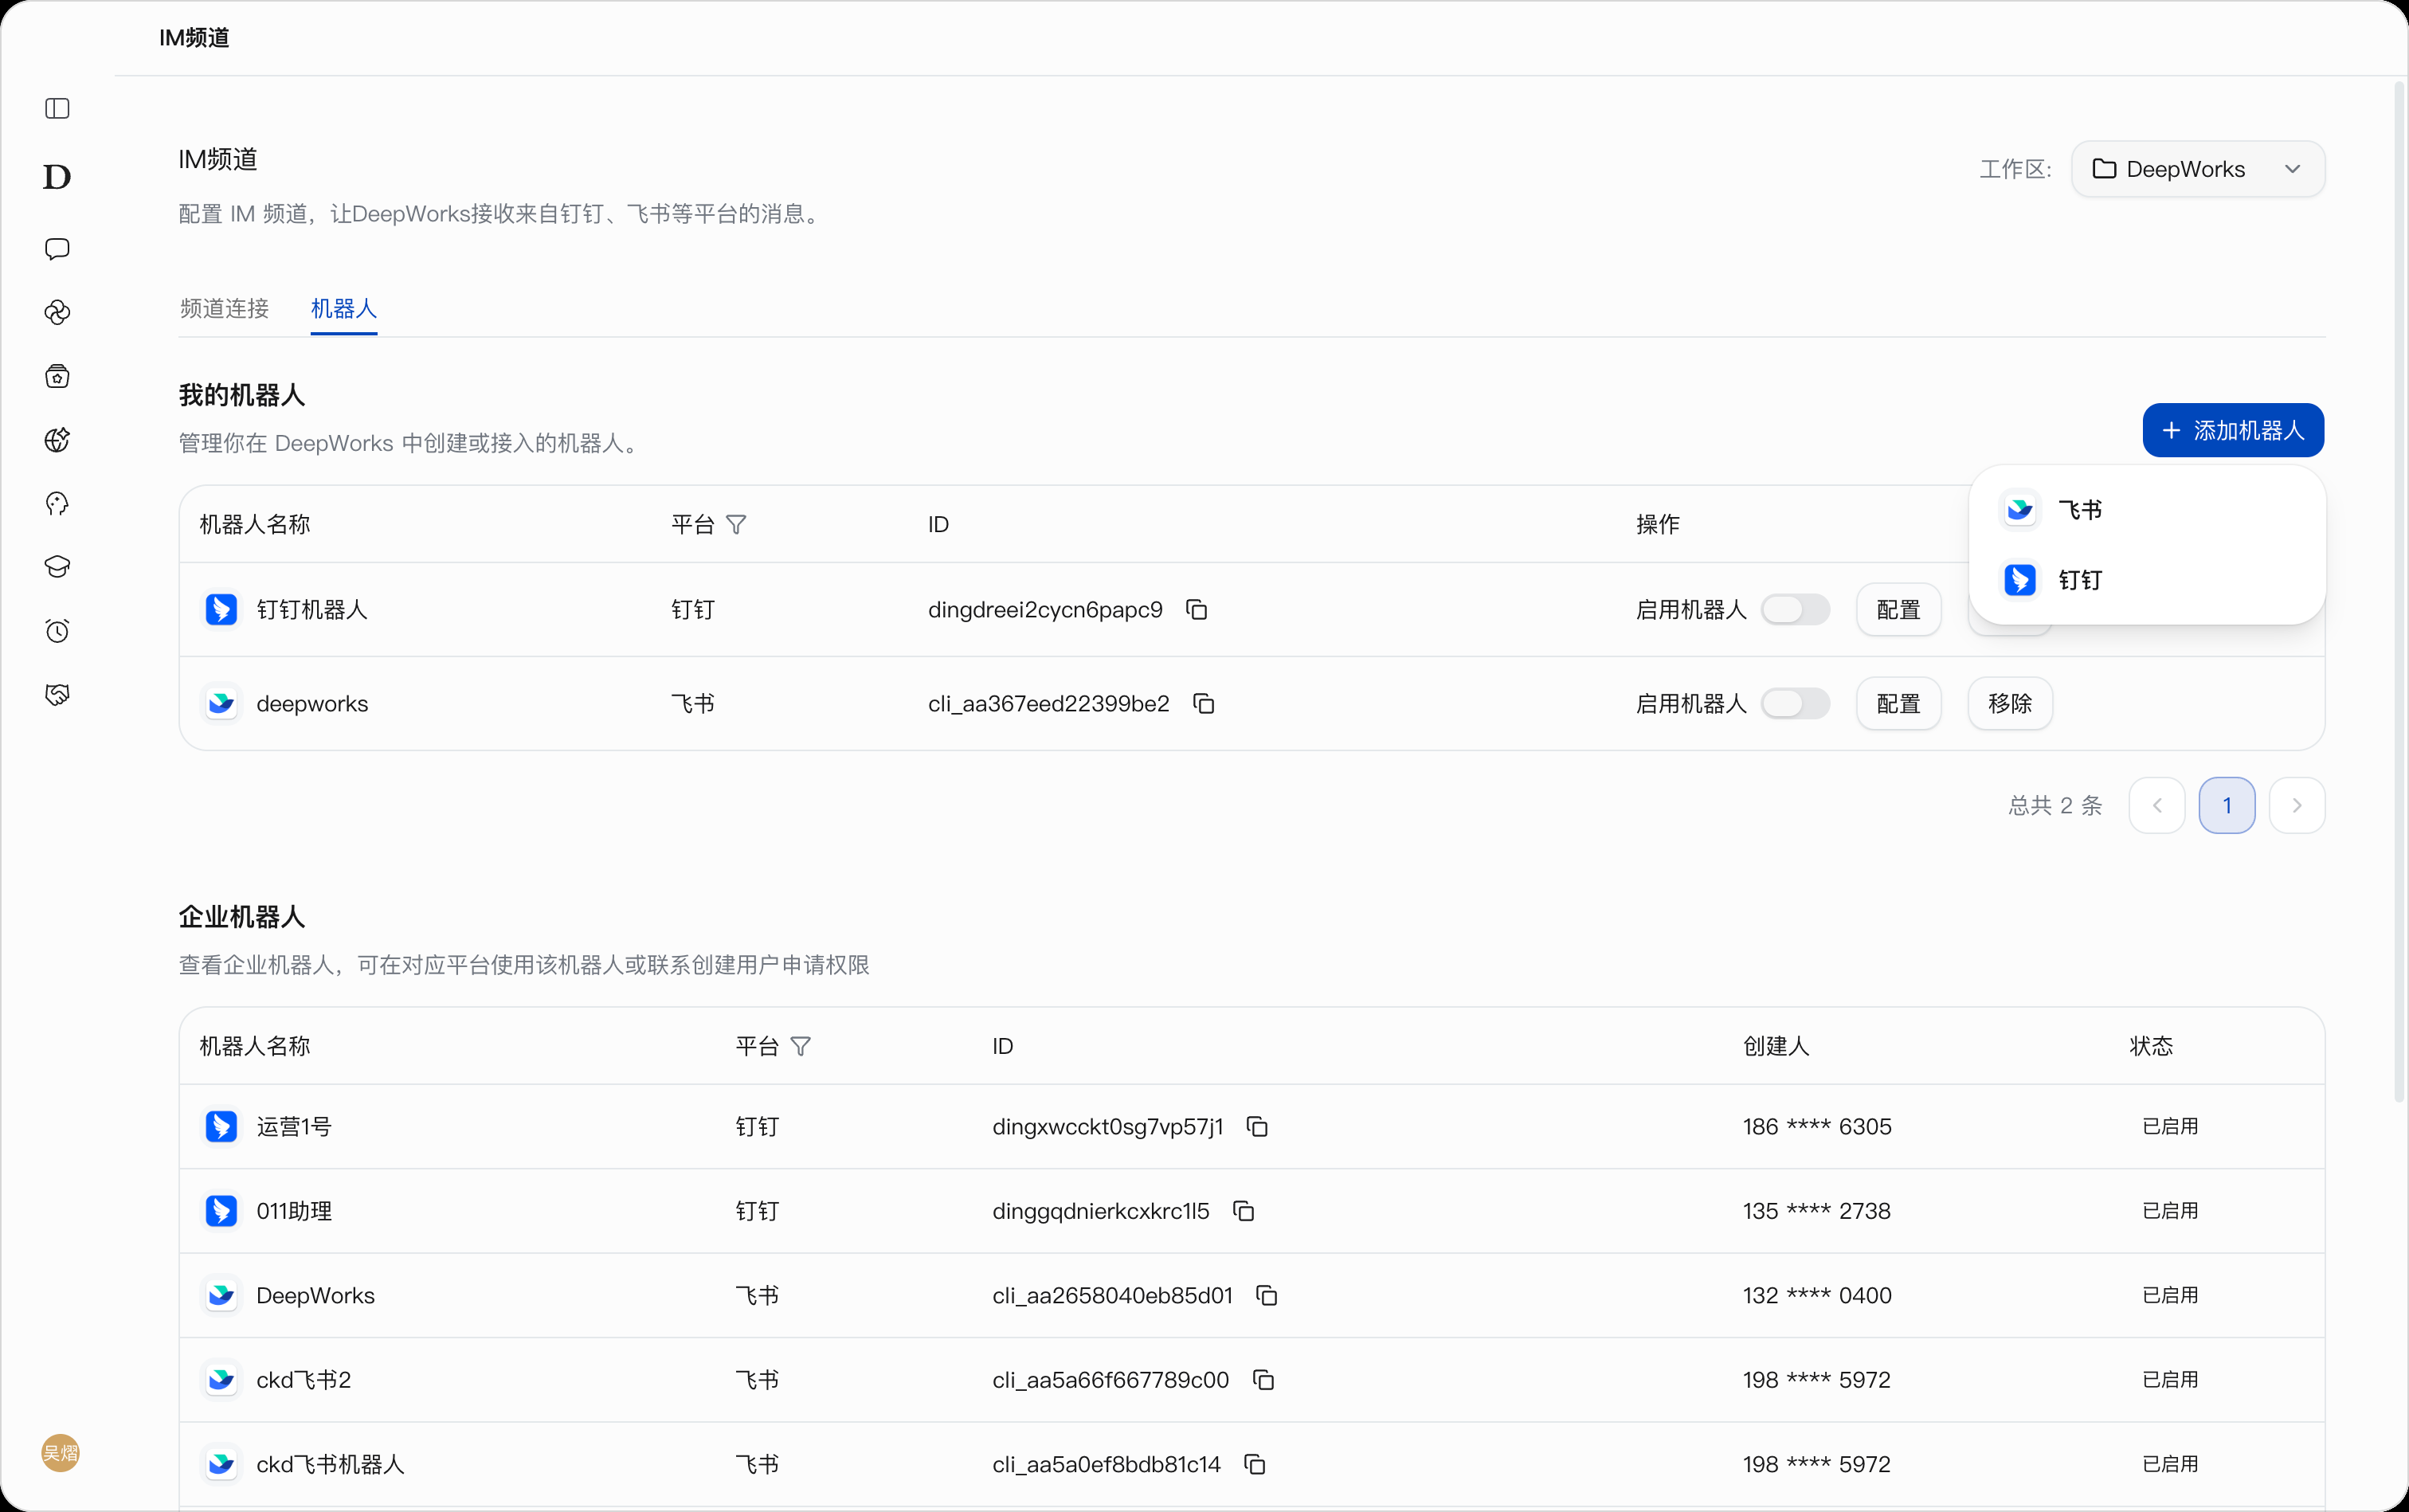
My Bots
“My Bots” is used to manage bots you have created or integrated in DeepWorks.
| Item | Description |
|---|---|
| Bot name | Shows the bot name and platform icon |
| Platform | Shows the platform the bot belongs to; can be filtered via the filter icon next to the column title |
| ID | Shows the bot application identifier; click the copy icon on the right to copy it |
| Enable bot | Adjust the bot’s enabled status via the toggle |
| Configure | Opens the configuration dialog to modify the bot name, application credentials, and enabled status |
| Remove | Removes the entry for the corresponding bot |
Click Add Bot in the upper-right corner to chooseFeishu orDingTalk. The bottom of the list shows the total count and provides paging buttons.
Enterprise Bots
“Enterprise Bots” is used to view bots within the enterprise. The list shows the bot name, platform, ID, creator, and status.
- Find the bot you need in the list; you can filter by platform using the filter icon next to the “Platform” column.
- Check the bot status and creator information; to copy the application identifier, click the copy icon to the right of the ID.
- Use the bot in the corresponding platform. If you do not have permission, contact the creator to request it.
Adding a Bot
After connecting a platform account in “IM Channels”, you can use your own bots or bots integrated by others. To integrate your own bot, add it in the “Bots” tab; to use an existing enterprise bot, view it in the “Enterprise Bots” list and contact its creator to request the required permission.
Entering the Add Page
- Confirm the workspace in the upper-right corner of “IM Channels”, and complete the account connection for the corresponding platform in the “Channel Connections” tab.
- Switch to the “Bots” tab and click Add Bot.
- Select DingTalk orFeishu to open the corresponding creation dialog.
Choosing an Integration Method
- Scan QR code with phone: Click the one-click scan entry at the top of the creation dialog, use the corresponding platform’s mobile app to scan the QR code generated on the current page, and follow the prompts to complete creation or select an application. After returning to DeepWorks, verify the automatically filled application credentials and bot name.
- Enter credentials manually: Fill in the bot name, Client ID, and Client Secret. For DingTalk, these correspond to Client ID (AppKey) and Client Secret (AppSecret); for Feishu, App ID and App Secret.
The bot name should match the actual name on the platform. QR code integration also requires meeting the corresponding platform’s account permission, application permission, and release requirements. For detailed steps, see 9.5 DingTalk Integration Configuration Guide and9.6 Feishu Integration Configuration Guide below.
Creating and Enabling
- Verify the information, set the Enable Bot toggle as needed, and clickCreate.
- Return to the “My Bots” list and confirm the bot has been added; when you need to use it, make sure it is enabled.
- Open the bot conversation in the corresponding platform, send a message, and check the reply.
To abandon the addition, click Cancel or close the dialog. For subsequent configuration changes, enabling/disabling, and removal, see 9.7 Managing My Bots.
DingTalk Integration Configuration Guide
This guide helps you configure a DeepWorks bot in DingTalk, so you can remotely control DeepWorks on your computer anytime, anywhere via DingTalk to complete programming tasks.
Prerequisites
Before you start, make sure you have met the following conditions:
- DeepWorks is installed on your computer, and the IM Channels remote control feature is enabled
- You have a DingTalk account with enterprise administrator permission
If you do not have a DingTalk account yet, go to the DingTalk official website to download the client and create a team.
Creating a DingTalk Application
Logging in to the Developer Console
Open a browser, visit the DingTalk Developer Console , and log in with an administrator account.
Select an organization you have joined. If the system prompts “This account has not joined an organization yet”, you can create a personal enterprise and fill in the information as needed.
Creating an Application
- On the developer console home page, go to “DingTalk Development” and click “Create Application”
- In the pop-up creation window, fill in the following information:
| Configuration Item | Description |
|---|---|
| Application name | A custom name |
| Application description | Briefly describe the purpose |
| Application type | Can be left empty |
- After filling it in, click “Save”
Adding Bot Capability
After the application is created successfully, it will automatically jump to the “Add Application Capabilities” page:
- Find the “Bot” option and click “Add Bot”
- Fill in the bot’s basic information; Stream mode is recommended for the message receiving mode
- Click “Confirm Publish”
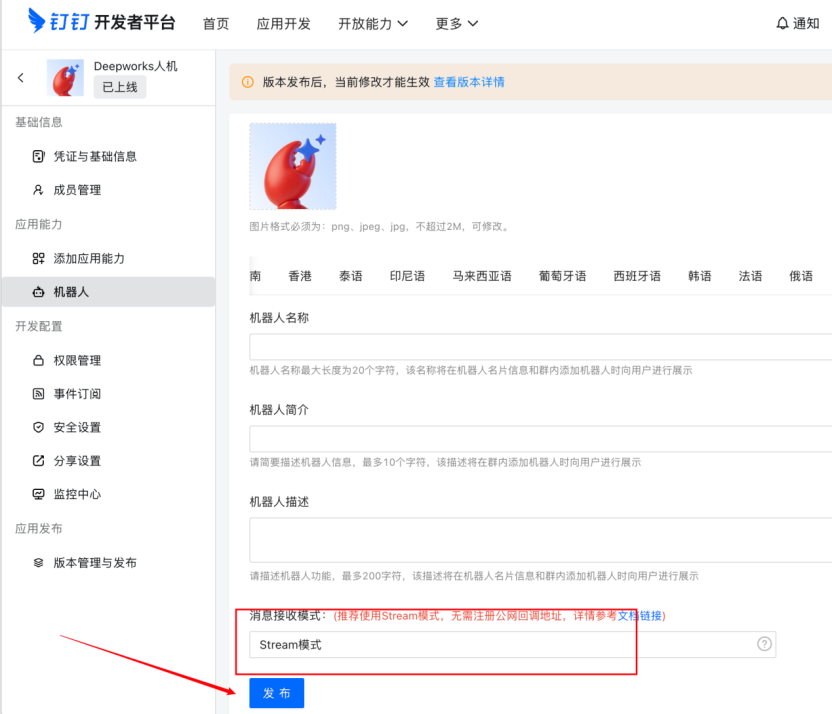
Configuring Application Permissions
To enable the bot to send and receive messages normally, the following permissions need to be enabled:
- In the left menu of the application details page, click “Permission Management”
- Search for each of the following permissions in the search box and click “Enable Now”:
- Enterprise employee phone number information
- Member information read permission
- In-enterprise bot message sending permission
- Interactive card instance write permission
- AI card streaming update permission
Publishing the Application
After completing the application configuration, you need to create and publish a version for the configuration to take effect. Before publishing, confirm that the application’s availability scope includes the people who need to use the bot.
Creating a Version
In the left menu of the application details page, select “Version Management and Release” and click “Create New Version”.
Filling in Version Information and Setting the Availability Scope
- Fill in the “Application version number” and “Version description” to briefly describe the content of this release.
- In “Application availability scope”, select “All employees”, “Some employees”, “Administrators only”, or “Visible to me only” as needed. To open it to specific people only, select “Some employees” and set the corresponding people.
- After confirming that the users are within the availability scope, click “Save”.
Confirming the Release
- After saving, click “Publish” on the version details page.
- In the confirmation dialog, click “Confirm Publish”.
- Return to “Version Management and Release” and check whether the version status is “Released”.
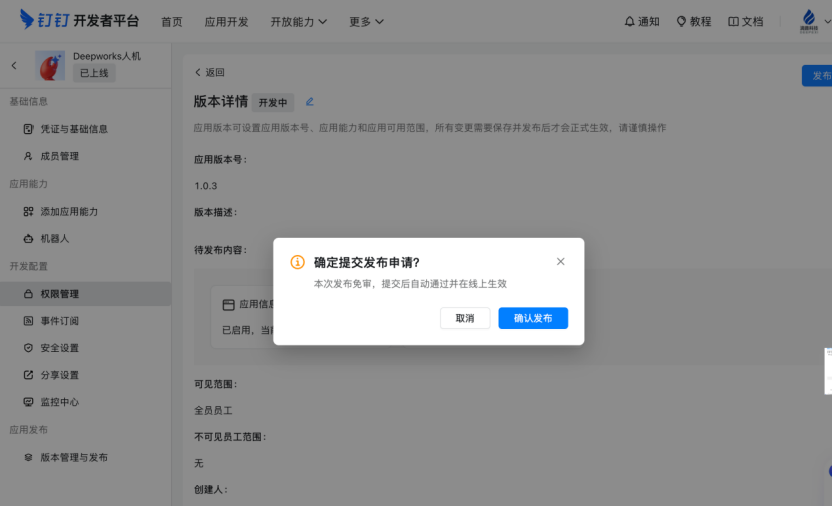
Obtaining Application Credentials
Viewing Credential Information
- In the left menu of the application details page, click “Credentials and Basic Information”
- Find the following two important pieces of information on the page:
- Client ID (also called AppKey)
- Client Secret (also called AppSecret)
Be sure to keep the credential information safe and do not disclose it to others!
Configuring DingTalk in DeepWorks
You can create a DingTalk application via phone QR code scanning and integrate it, or manually fill in the credentials of an existing application.
Integration prerequisites: Both methods require DingTalk enterprise administrator permission, and the application to which the bot belongs must have all the permissions listed in Section 9.5.3 “Configuring Application Permissions” enabled. QR code integration does not waive the administrator permission and application permission requirements.
Entering Bot Configuration
- Click the DeepWorks user avatar in the lower-left corner, select “IM Channels”, and confirm the workspace to be configured.
- Complete the DingTalk account connection in the “Channel Connections” tab; see IM Channels for details.
- Switch to the “Bots” tab and click “Add Bot” → “DingTalk” to open the “Create DingTalk Bot” dialog.
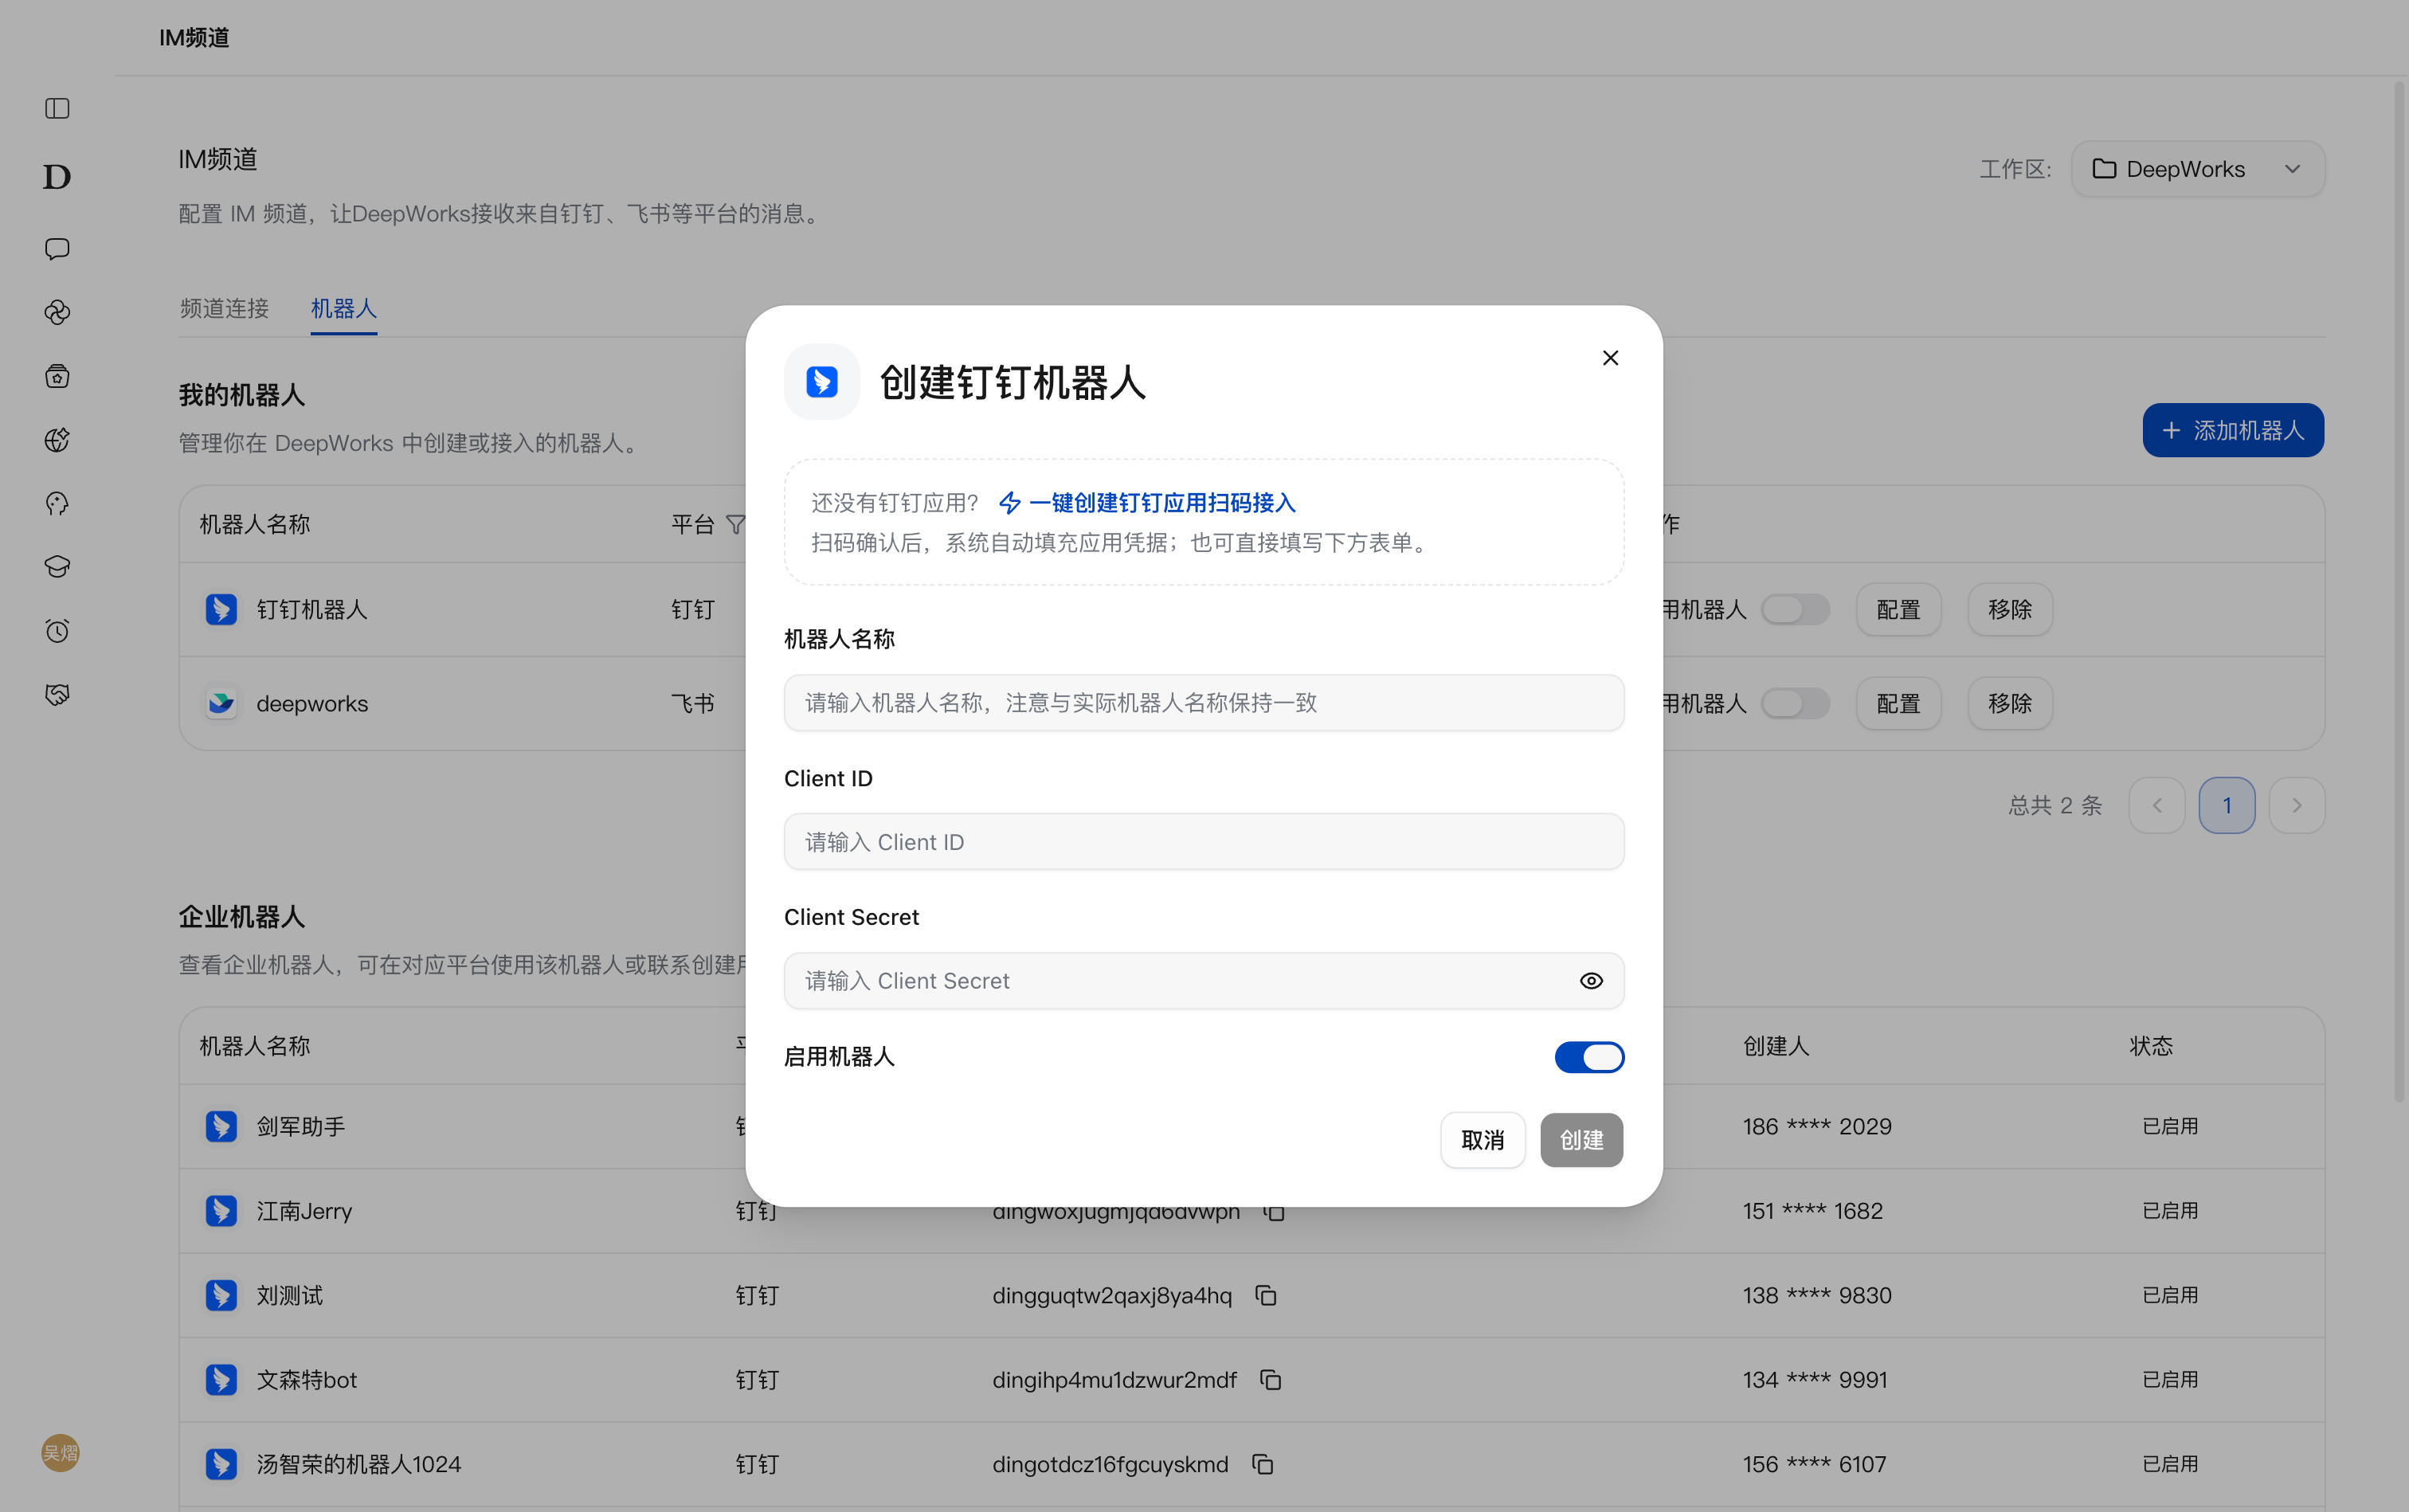
Choosing an Integration Method
Method 1: Scan QR code with phone
- Click “One-click DingTalk application creation via QR code”.
- Use DingTalk on your phone to scan the QR code generated on the current DeepWorks page, and use an account with enterprise administrator permission to confirm creation as prompted on the phone.
- After completion, the application credentials will be filled in automatically. Return to the creation dialog, check the credentials, and fill in a “Bot name” consistent with the actual bot name.
- Check the application’s permissions in the DingTalk Developer Console to ensure all permissions listed in Section 9.5.3 are enabled, and complete the required version release as described in Section 9.5.4.
Method 2: Fill in credentials manually
If you have already created an application in the DingTalk Developer Console, you can fill in the following information directly:
| Configuration Item | Description |
|---|---|
| Bot name | Keep it consistent with the actual bot name in DingTalk. |
| Client ID | Enter the application’s Client ID (AppKey). |
| Client Secret | Enter the application’s Client Secret (AppSecret). |
For how to obtain application credentials, see “Obtaining Application Credentials” above. Before integration, confirm that application permission configuration and version release have been completed.
Creating and Enabling the Bot
- Confirm the bot name and application credentials are filled in completely, turn on the “Enable Bot” toggle, and click “Create”.
- Return to the “My Bots” list and confirm the bot has been added and is enabled. You can later modify the information via “Configure”, or adjust the enabled status via the “Enable Bot” toggle.
- Open the corresponding bot conversation in DingTalk, send a message, and check whether a reply is received.
After connecting a DingTalk account, you can also directly use your own or others’ integrated bots without creating them again; if you do not have usage permission, view the creator in the “Enterprise Bots” list and contact them to request it.
Getting Started
After completing the DingTalk account connection and bot integration, you can send tasks and receive replies via group chat ordirect chat. Before use, confirm that the bot is enabled, the application is published, and the users are within the application’s availability scope; the computer must stay powered on and running DeepWorks.
Using in Group Chat
Step 1: Add the bot to the group chat
- Open the group chat in DingTalk where you want to use the bot, and confirm that the group’s organization matches the bot’s organization.
- Click the settings icon in the upper-right corner of the group chat, and find “Bots” in “Group Settings”.
- Enter the bot management page and follow the prompts to add the bot integrated with DeepWorks; if the bot is already in the group, you can start chatting directly.
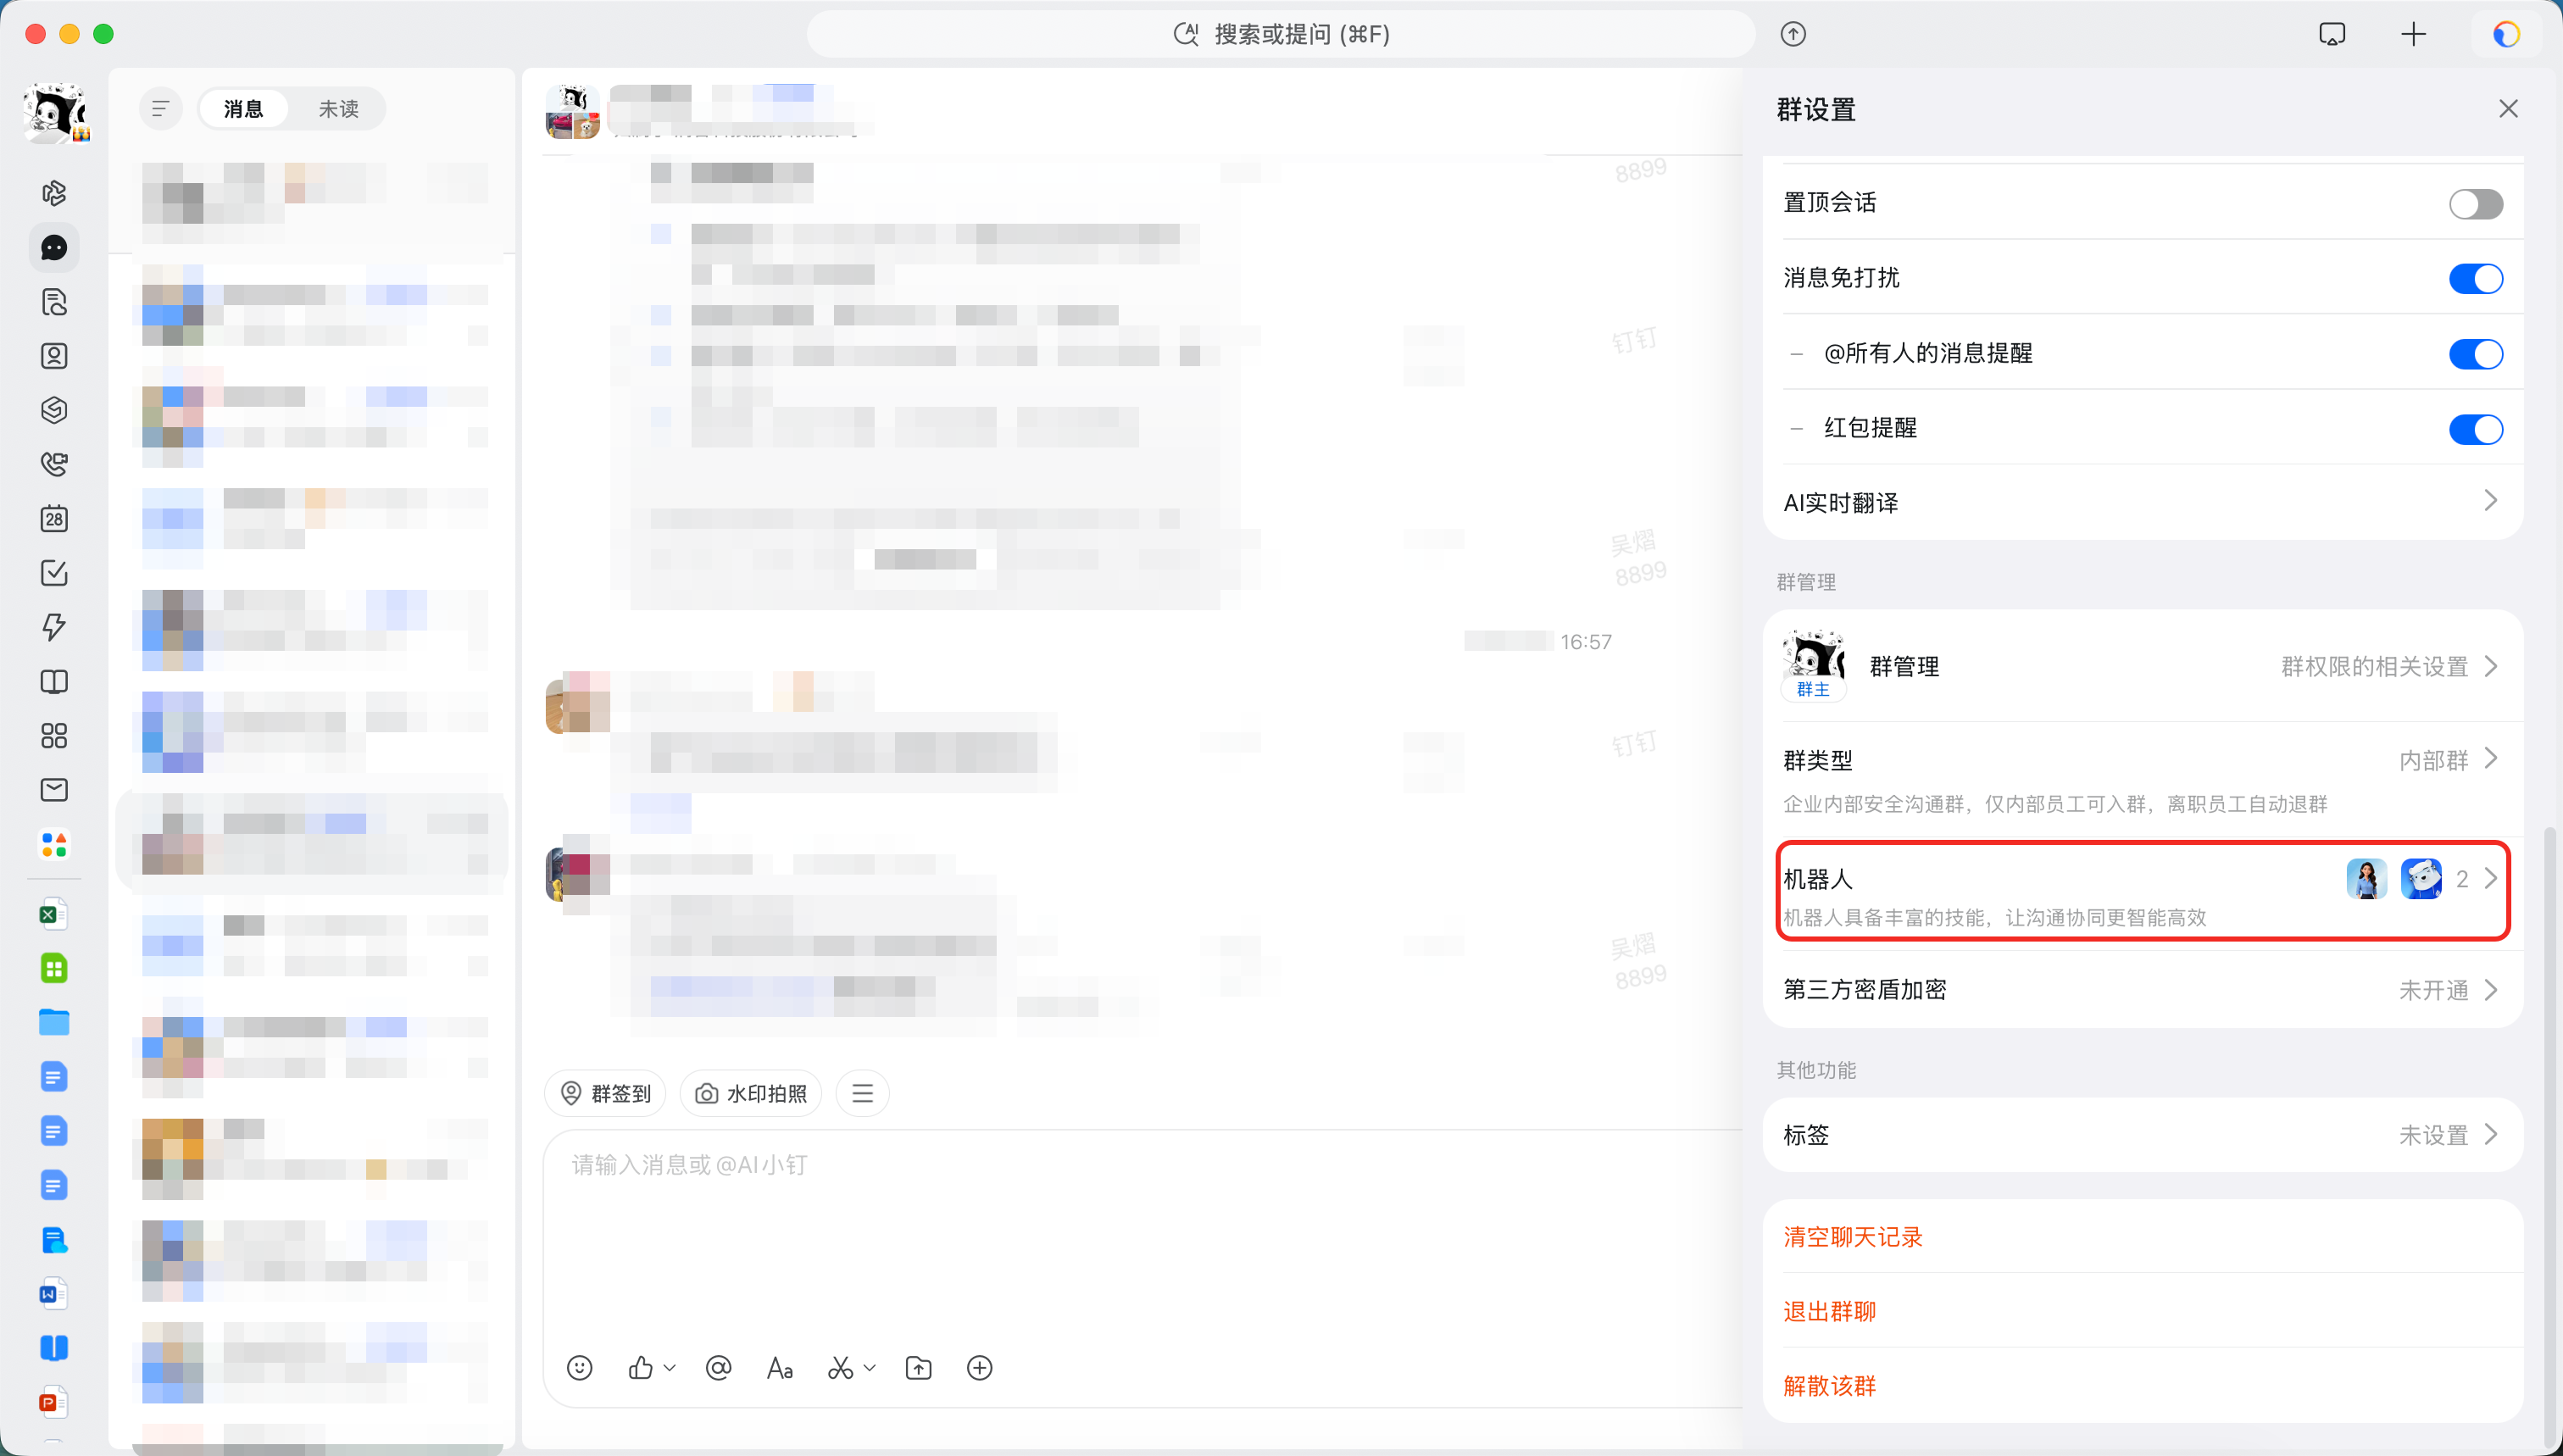
Step 2: @ the bot to send tasks
Type @ in the group chat input box and select the corresponding bot, then enter your question or task requirements and send. After DeepWorks processes it, the bot will return the reply to the current group chat. When sending tasks later, you also need to @ the corresponding bot.
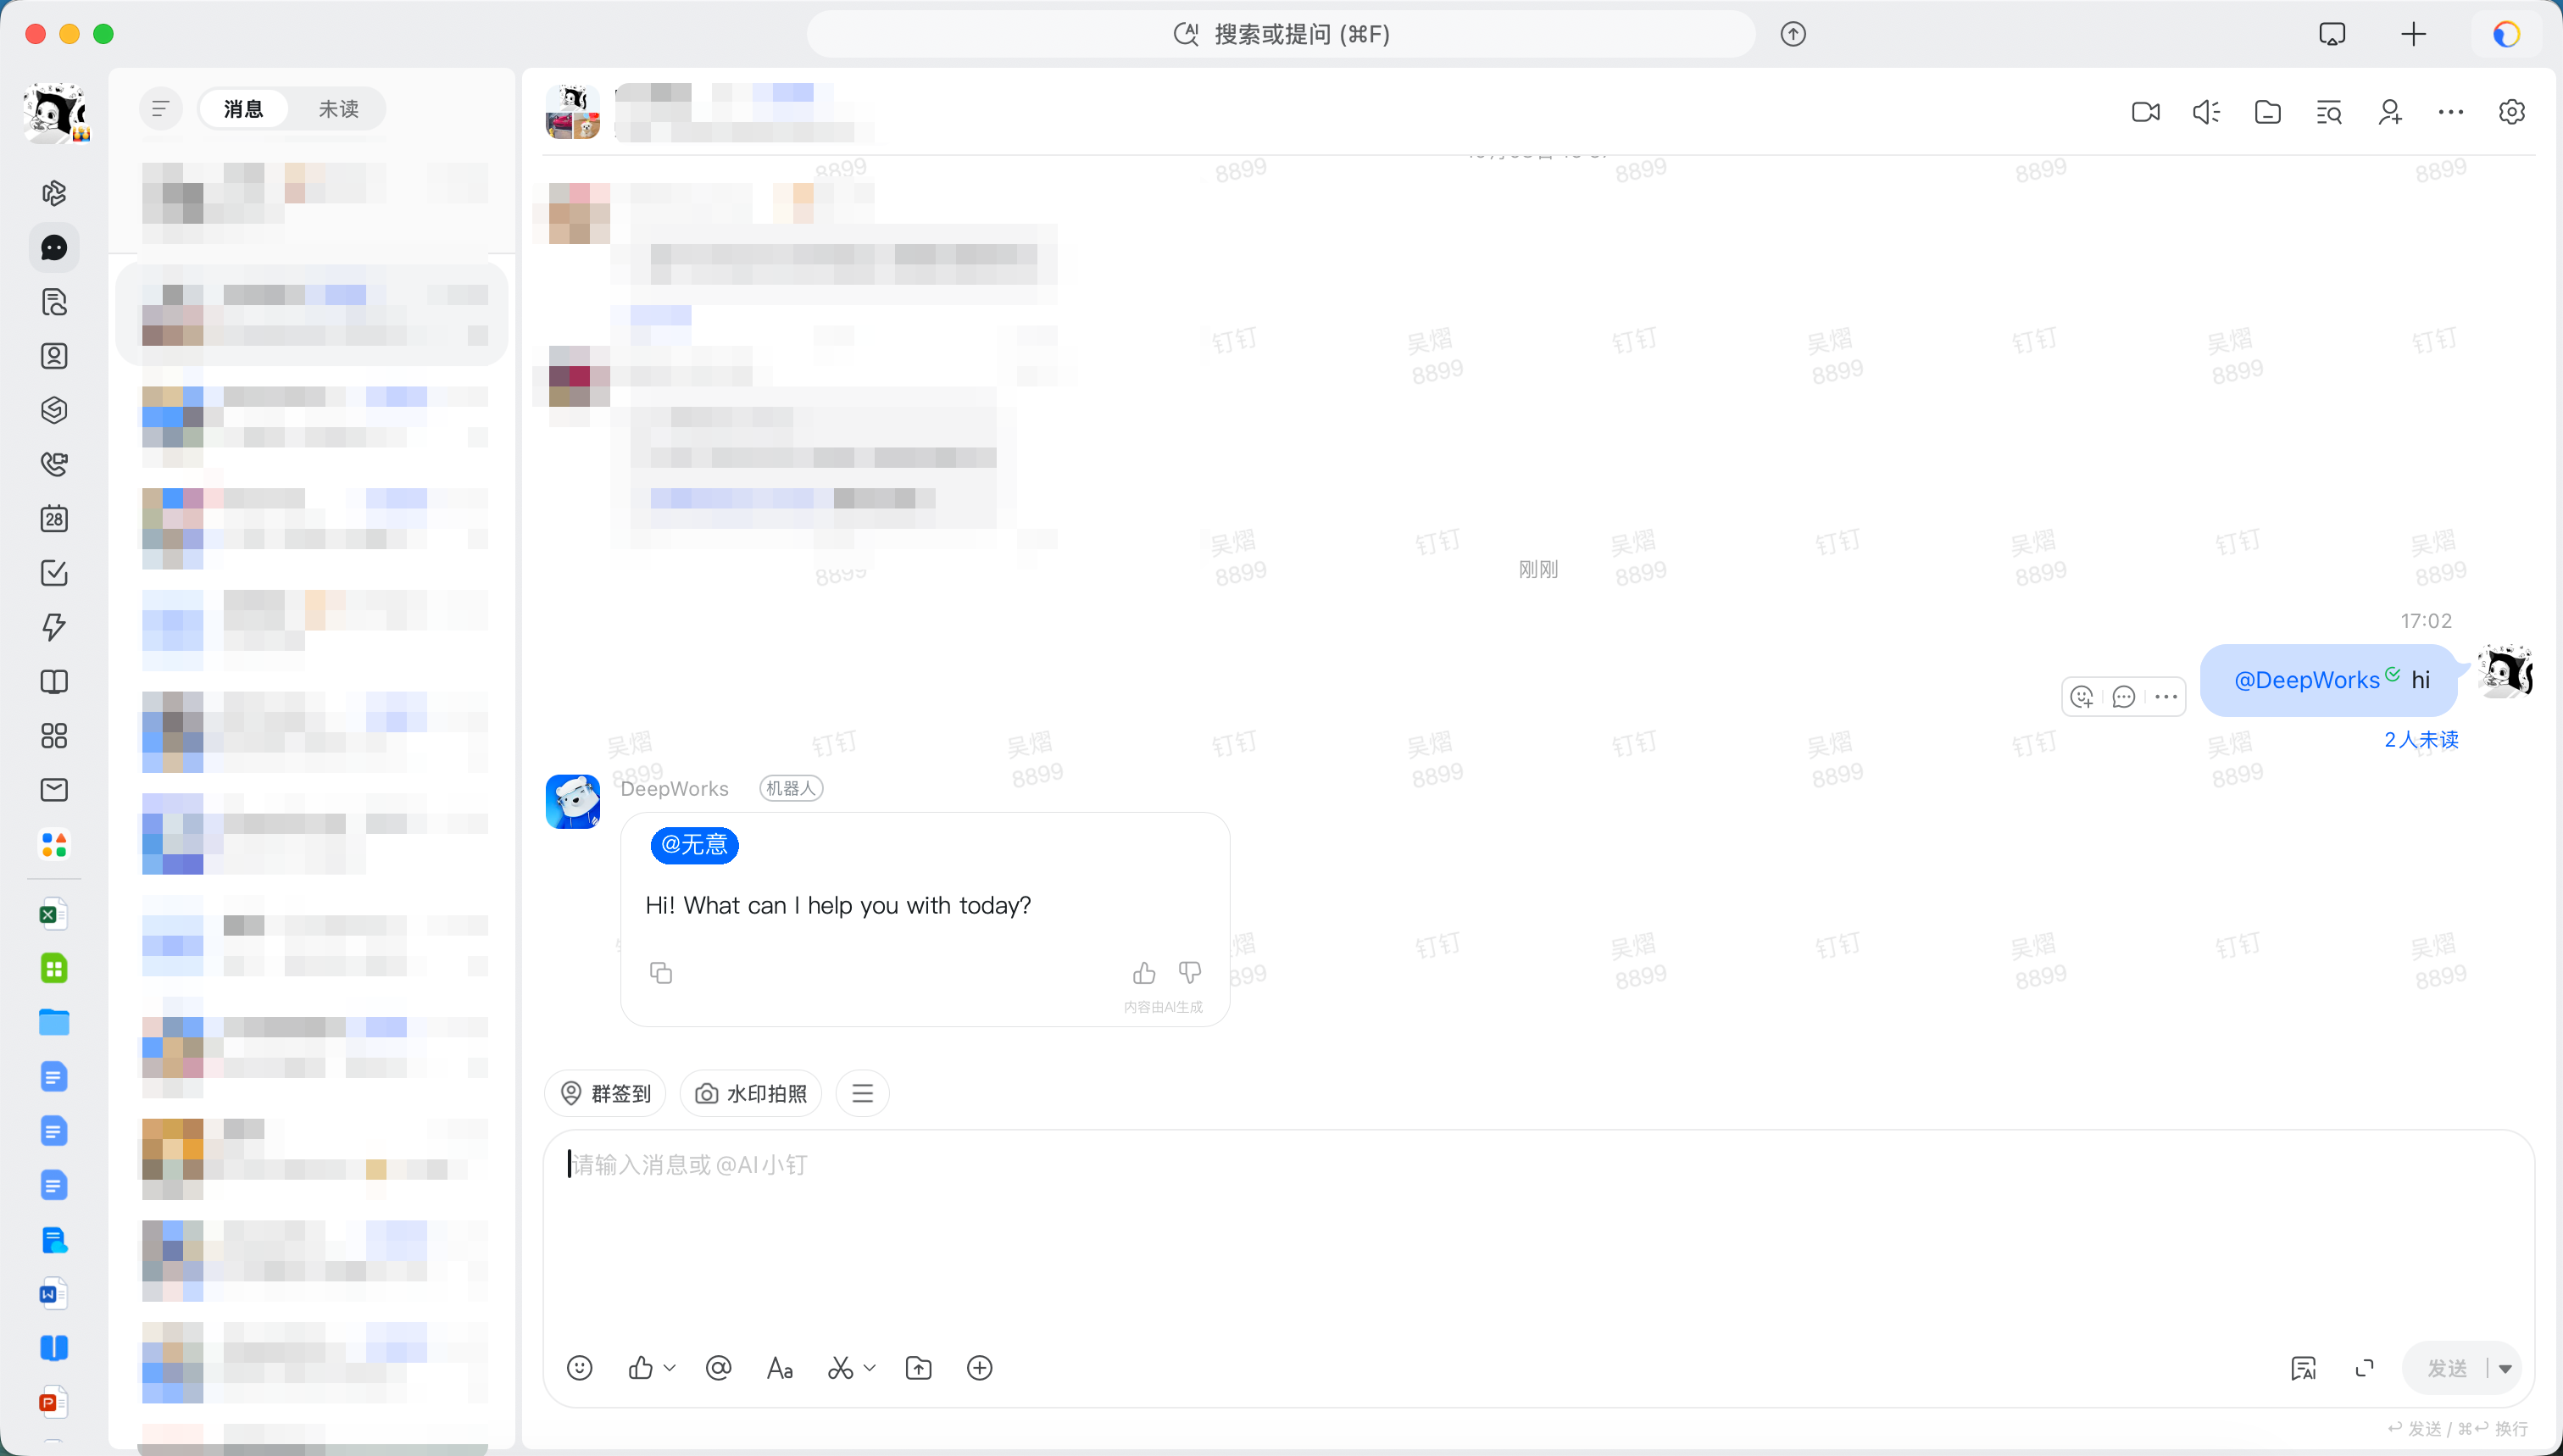
Step 3: View the session in DeepWorks
To check the processing status of the corresponding task, return to DeepWorks, find the session with the DingTalk icon in the session list of the selected workspace, and click it to view the task content, processing status, and reply results.
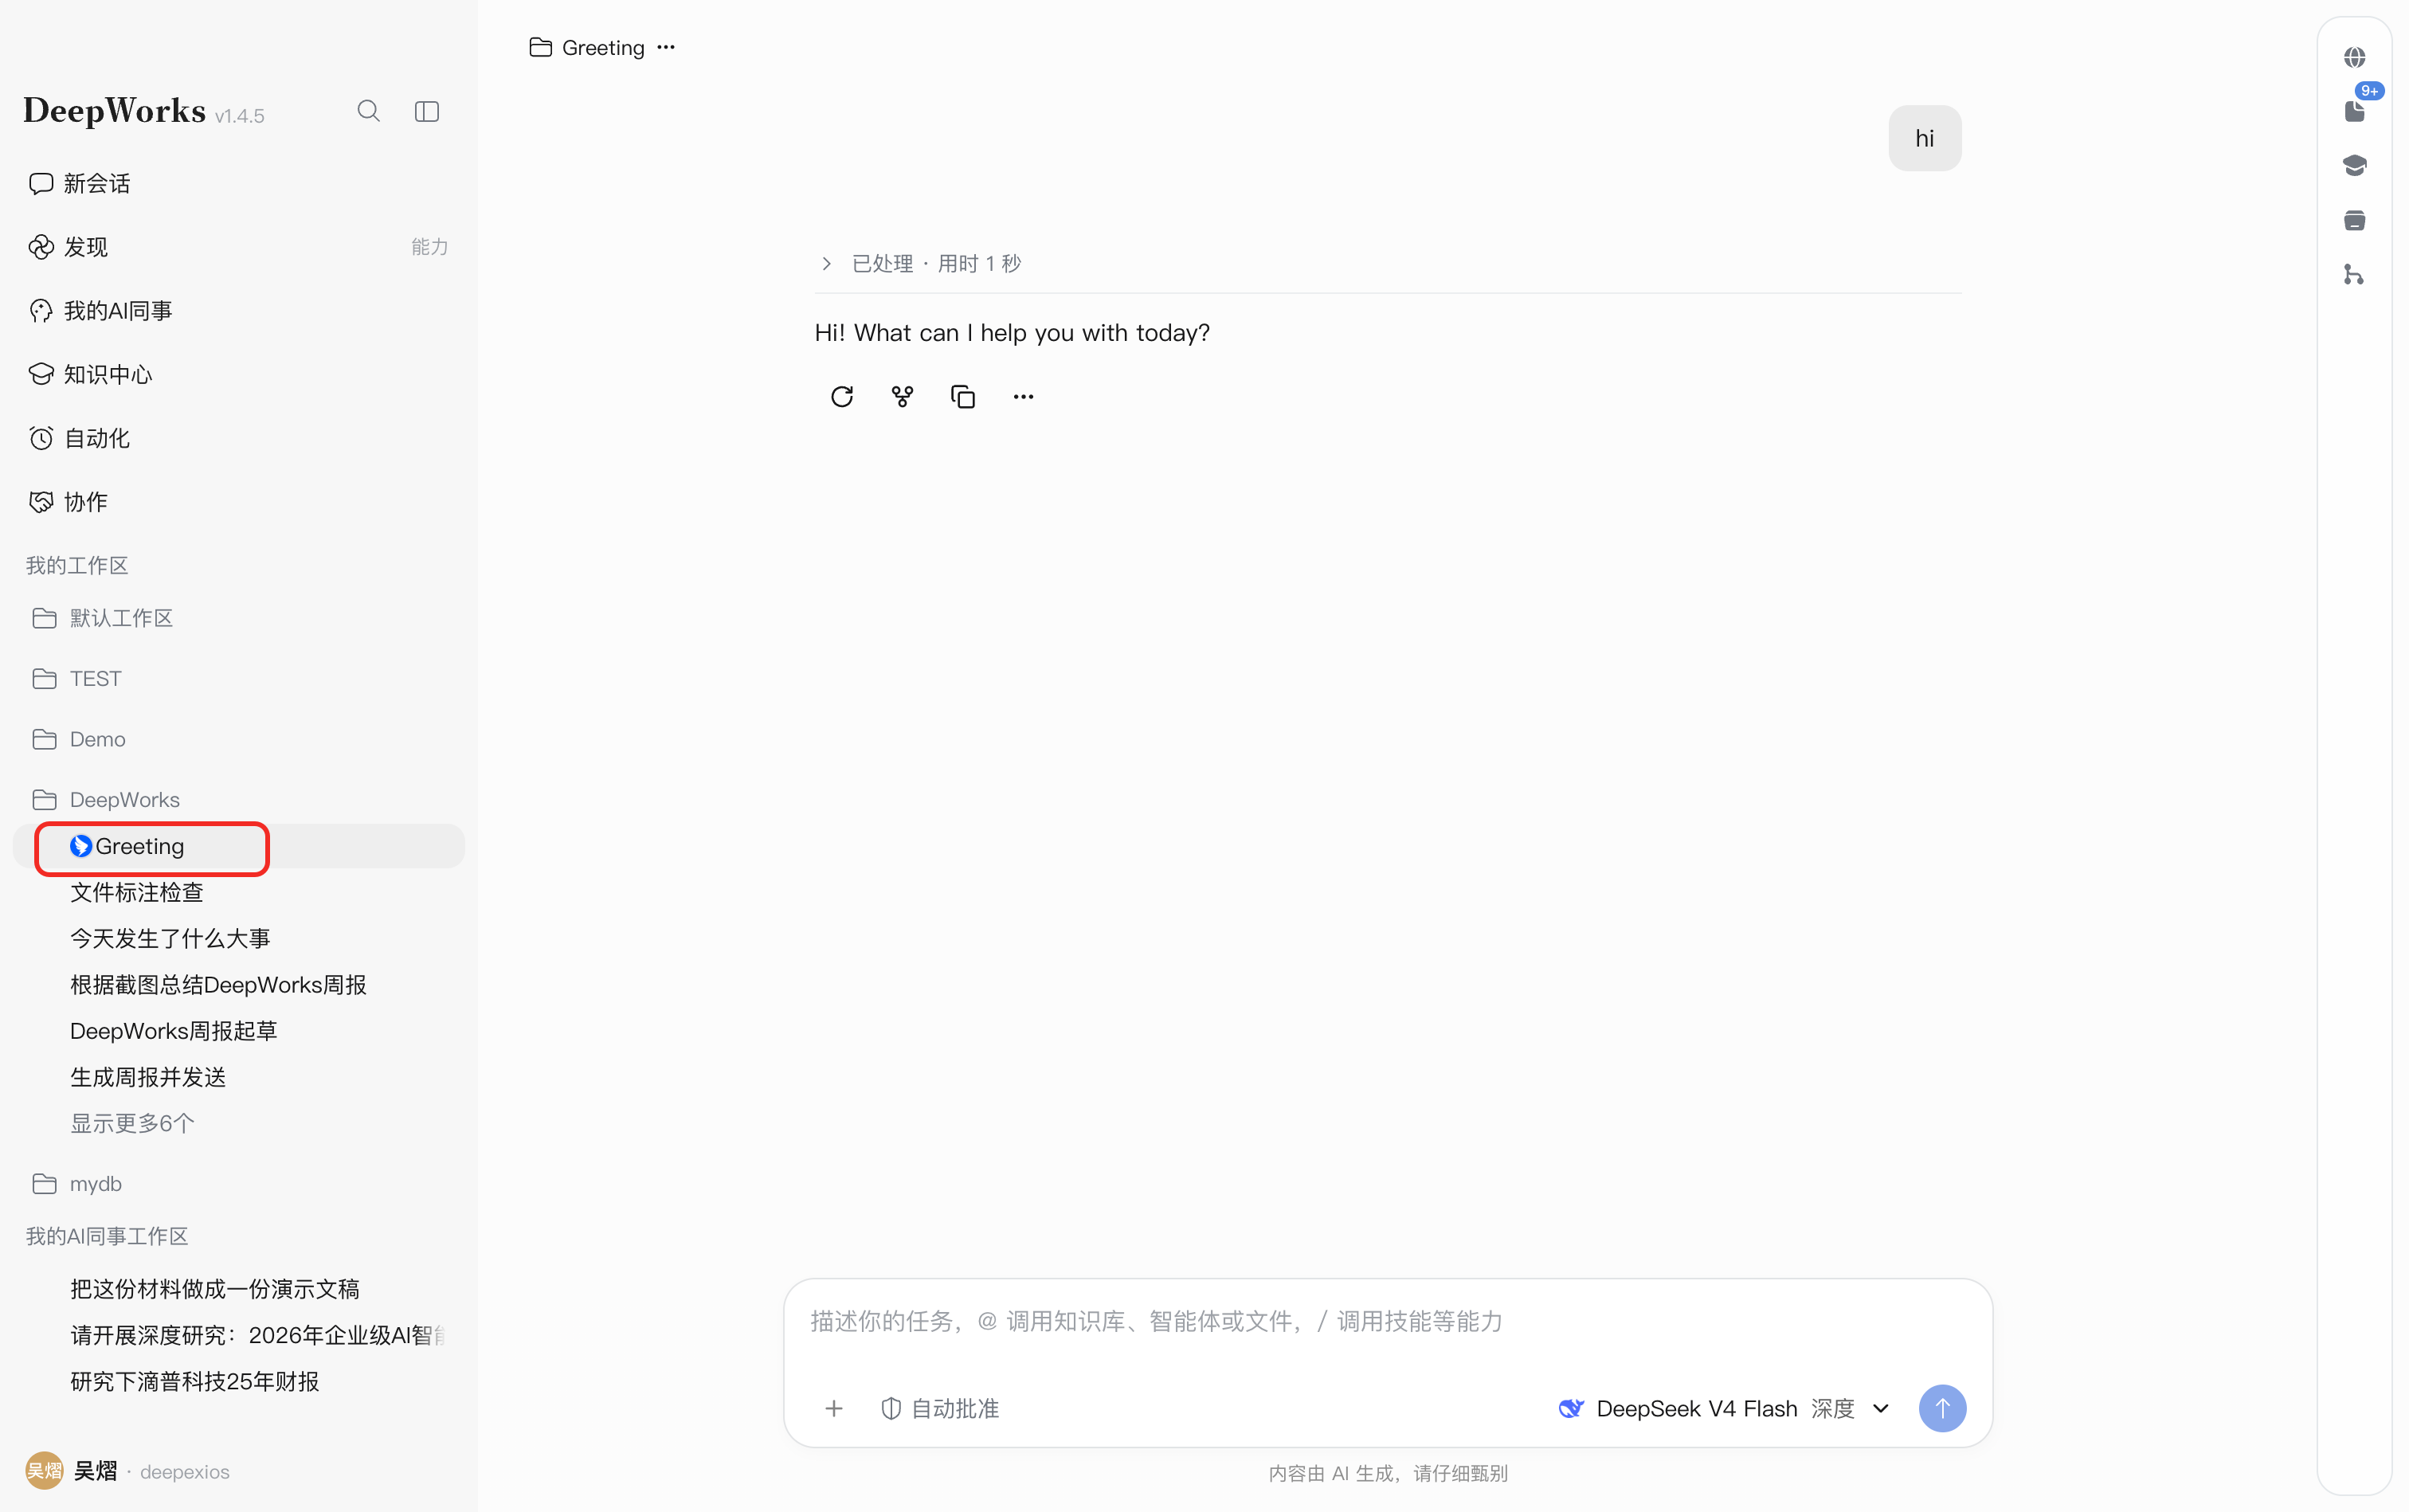
Using in Direct Chat
Direct chat is suitable for sending personal tasks directly to the bot, without first adding the bot to a group chat or @-mentioning it.
Step 1: Open the bot conversation
Enter the bot name in the search box at the top of DingTalk, select the corresponding bot, and enter the direct chat window. If a conversation already exists, you can open it directly from the message list.
Step 2: Send tasks and view replies
Describe your question or task requirements in the input box and send; after DeepWorks processes it, the reply will be returned to the current conversation. To add requirements, continue sending messages in the same conversation.
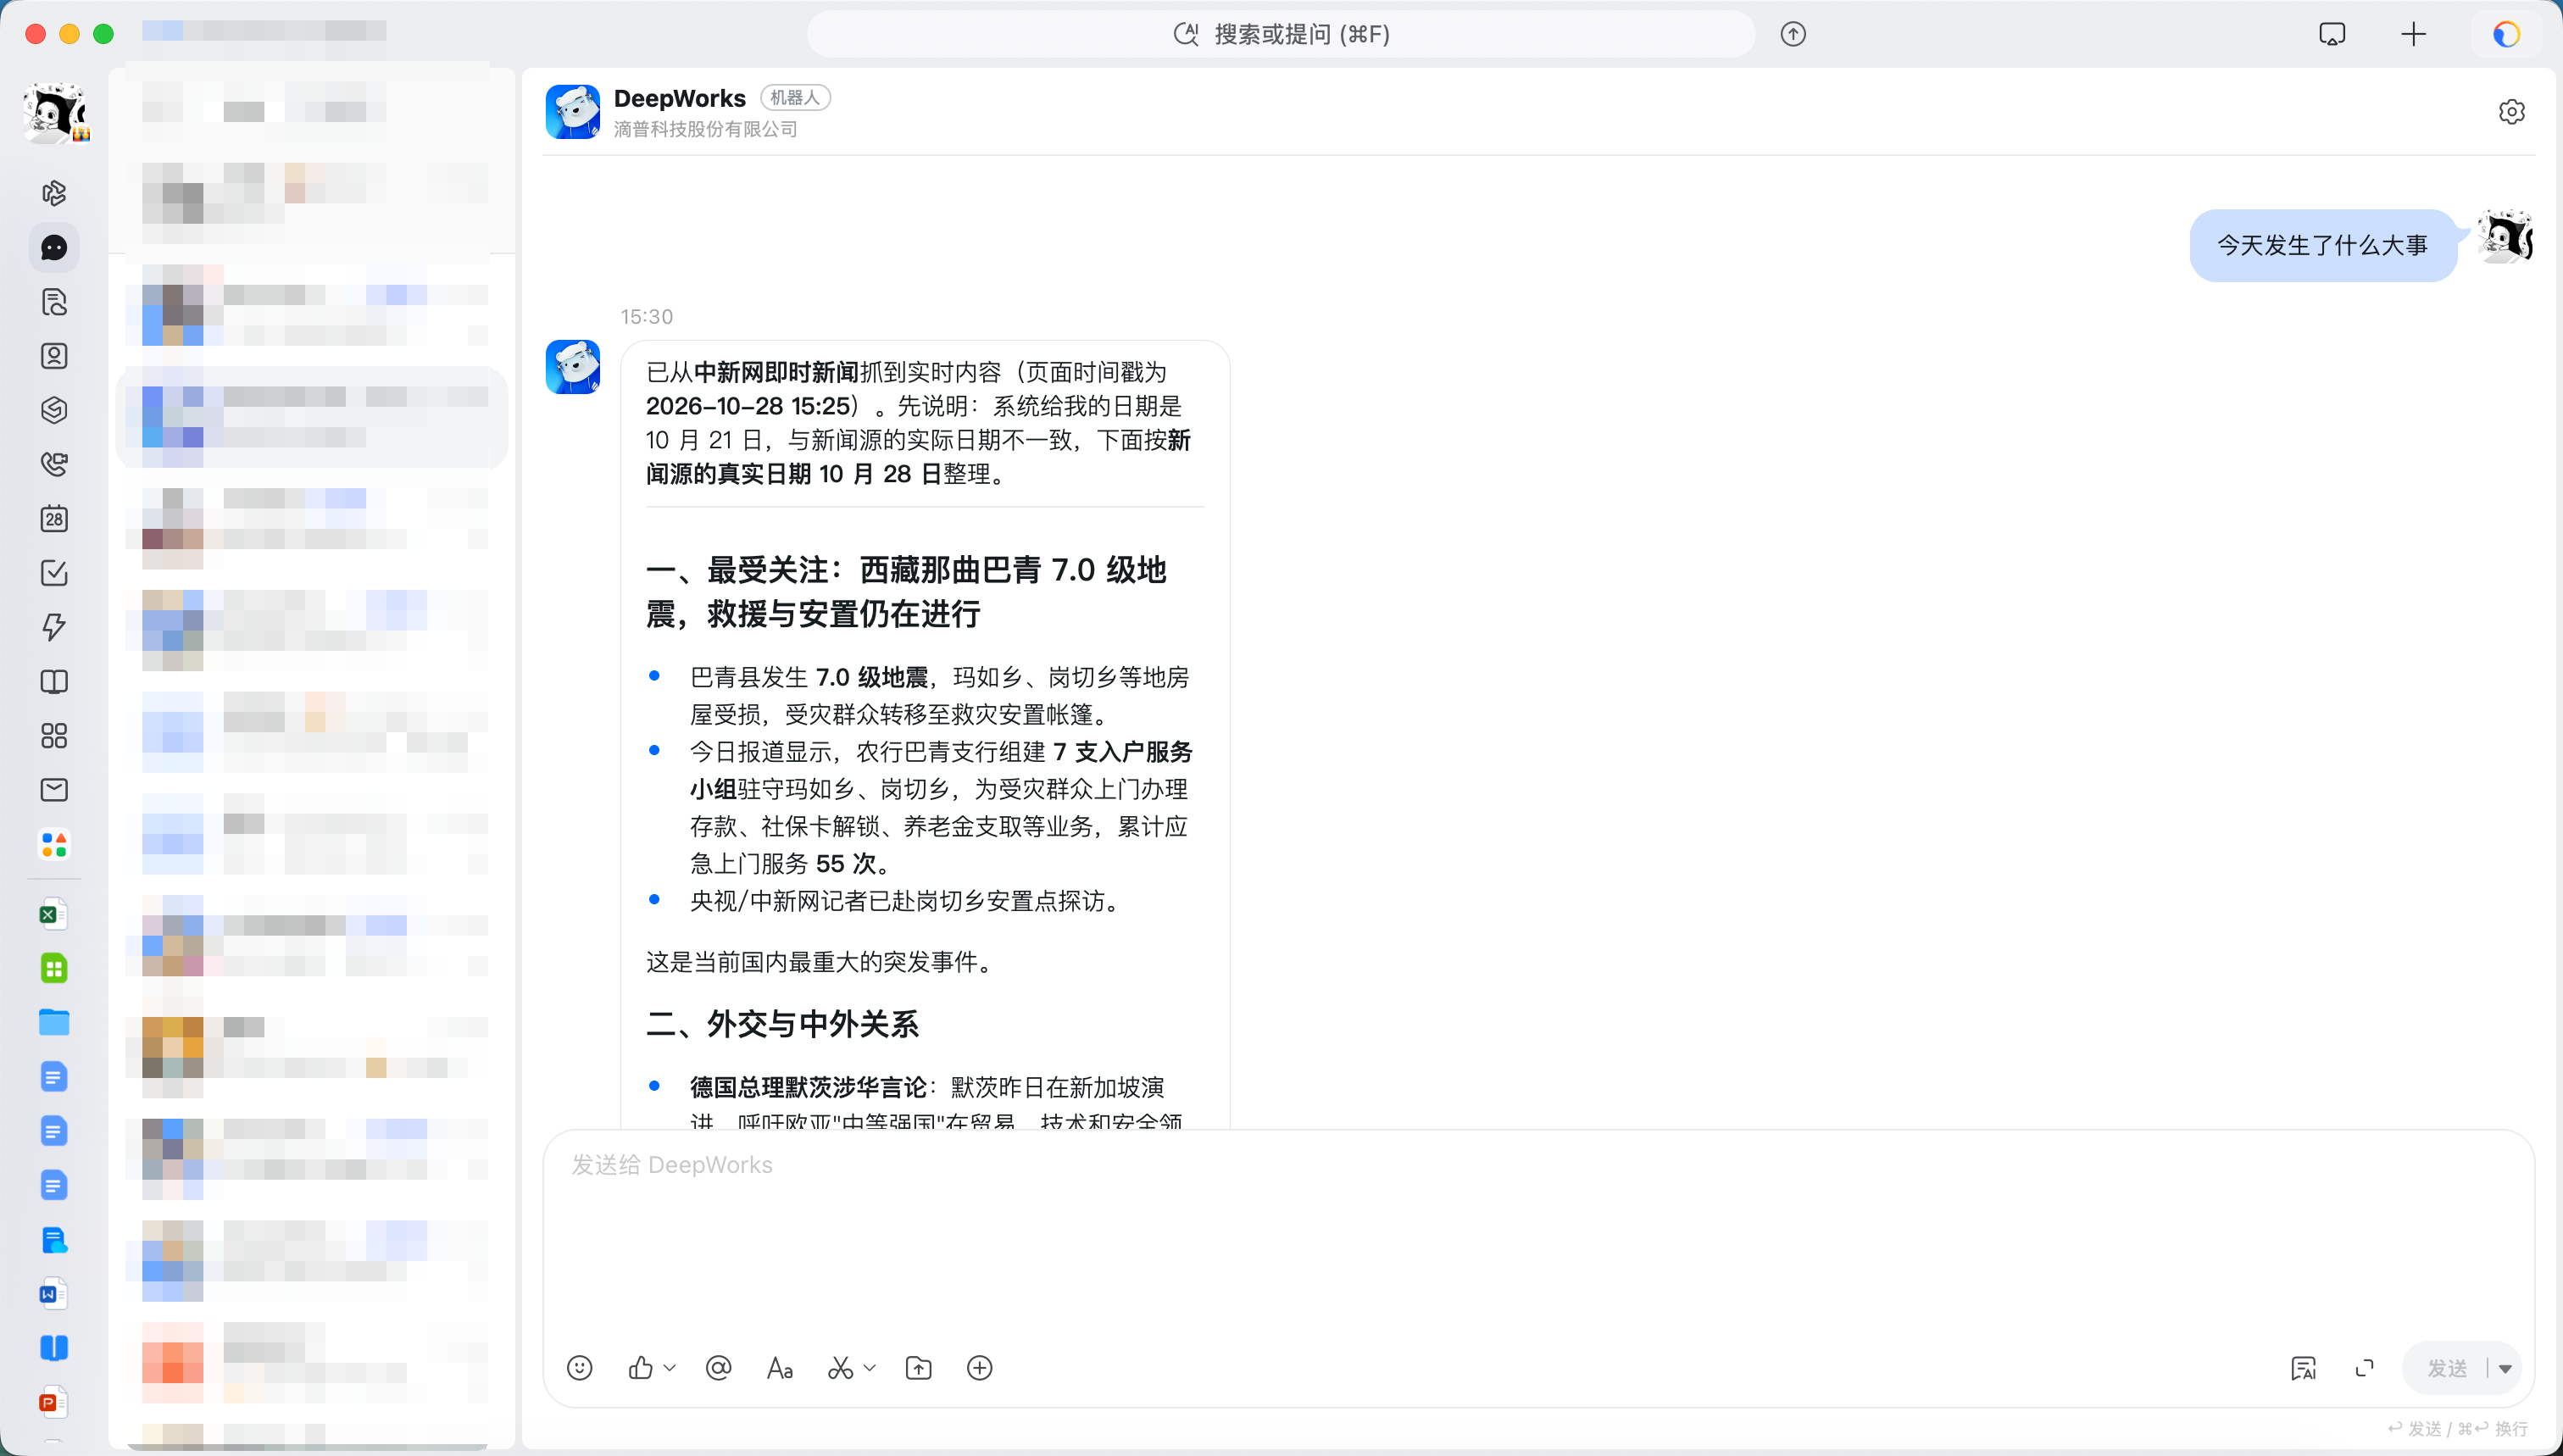
Step 3: View the task processing process
To view the detailed processing process, return to DeepWorks, open the session with the DingTalk icon in the corresponding workspace, and check the task content, processing status, reply process, and final result.
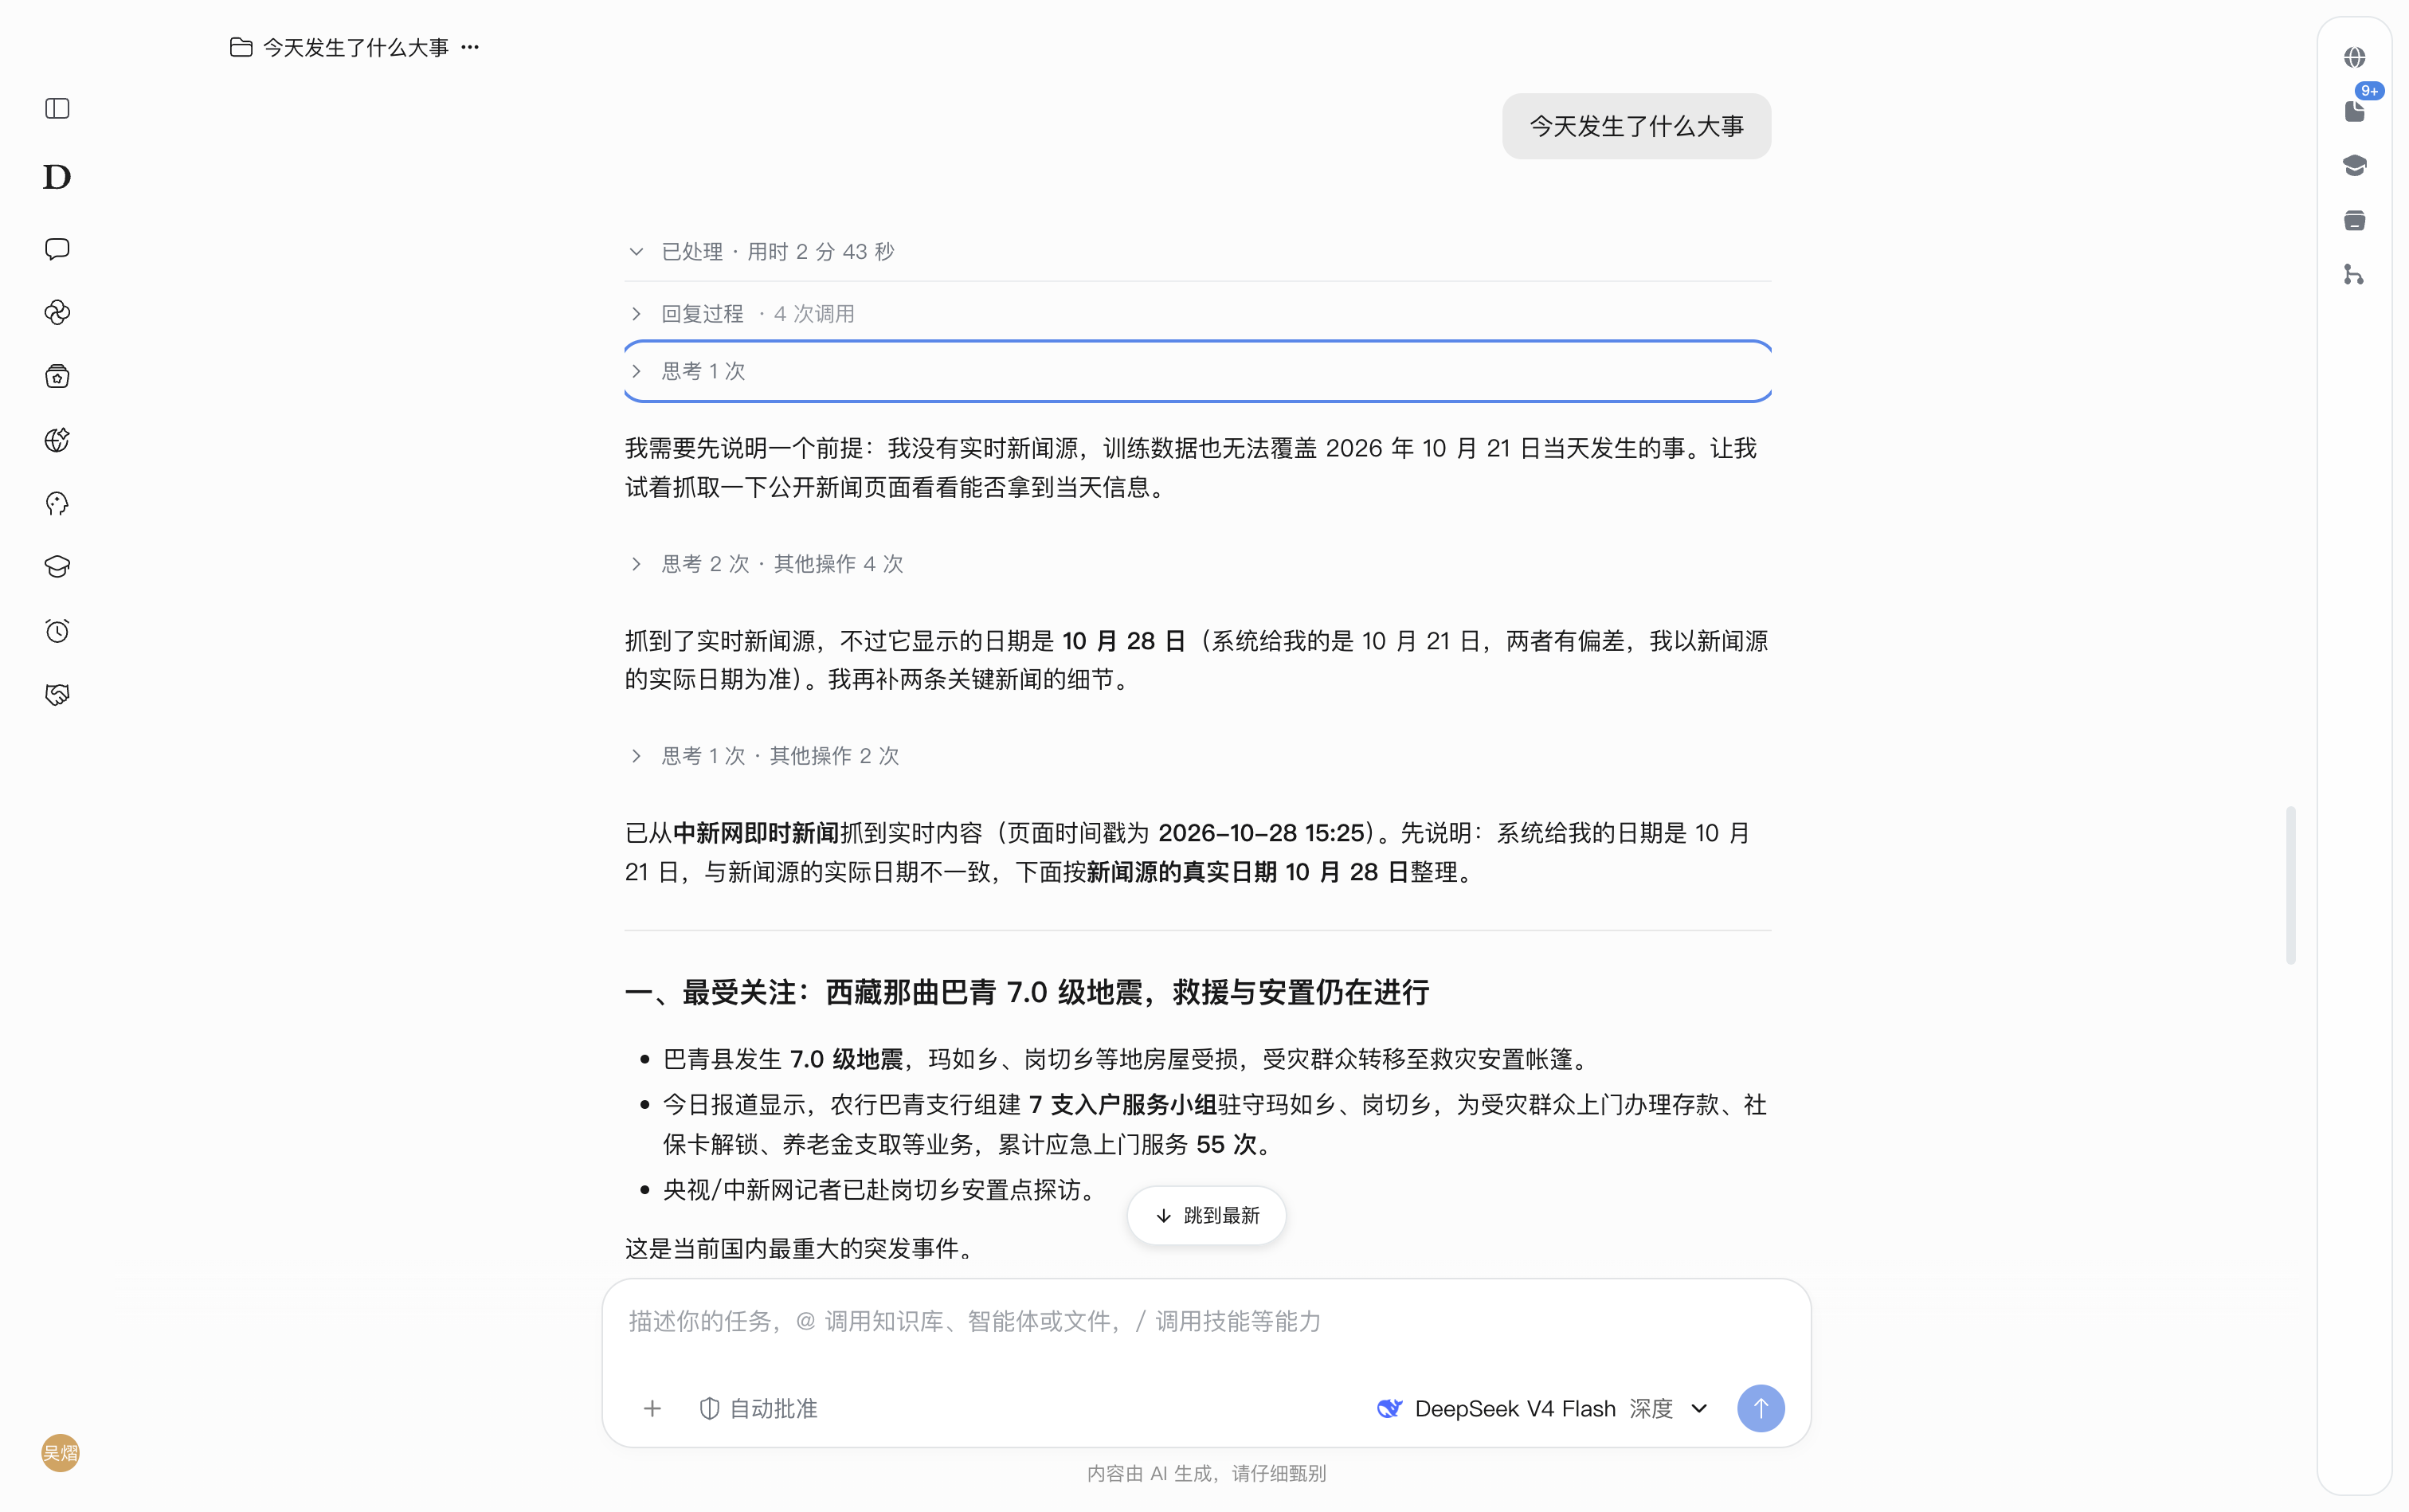
FAQ
When using the bot, if you receive one of the following prompts, handle it with the corresponding method, and then resend the message to verify.
What to do when prompted “Permission not configured, cannot interact with the bot”?

Contact the administrator to check the application’s availability scope and make sure it includes your account. The administrator can go to “Version Management and Release” of the corresponding application in the DingTalk Developer Console, adjust the “Application availability scope”, save, and publish the version. For detailed steps, see Section 9.5.4 “Publishing the Application”.
What to do when prompted “Cannot read the channel phone number, cannot verify the existing binding”?

Contact the bot administrator to check the application permissions and the accessible scope of the directory:
- Following Section 9.5.3 “Configuring Application Permissions”, verify that all required permissions are enabled, focusing on “Enterprise employee phone number information” and “Member information read permission”.
- Confirm that the directory’s accessible scope includes your account, so the application can read your phone number and verify the binding relationship.
- If the configuration change requires a release, complete the version release and then resend the message to verify.
What to do when prompted “The current phone number is not bound to a DeepWorks channel account”?

Connect your DingTalk account in DeepWorks:
- Click the user avatar in the lower-left corner, select “IM Channels”, and confirm the workspace you want to use.
- In the “Channel Connections” tab, click “Connect” on the DingTalk card.
- Enter the phone number you actually use in DingTalk and complete the connection as prompted.
- After confirming the card shows “Connected”, return to DingTalk and resend the message.
If already connected, verify whether the bound phone number matches the phone number of the current DingTalk account; if not, unbind first, then reconnect with the correct phone number.
Feishu Integration Configuration Guide
This guide helps you configure a DeepWorks bot in Feishu, so you can remotely control DeepWorks on your computer anytime, anywhere via Feishu to complete programming tasks.
Prerequisites
Before you start, make sure you have met the following conditions:
- DeepWorks is installed on your computer, and the IM Channels remote control feature is enabled
- To create an enterprise bot, you need a Feishu enterprise account (with permission to create applications).
Creating a Feishu Application
Logging in to the Developer Console
Open a browser, visit the Feishu Open Platform , log in with an enterprise account, and click “Create Enterprise Custom App”. This uses an application bot with the ability to send and receive messages. Webhook-only notification bots in group chats cannot replace this integration method.
Filling in Application Information
In the pop-up creation window, fill in the following information:
| Configuration Item | Description |
|---|---|
| Application name | Give the application a name, such as “DeepWorks Assistant” |
| Application description | Briefly describe the application’s functions |
| Application icon | Upload an application icon |
After filling it in, click the “Create” button.
Entering Application Details
After the application is created successfully, it will automatically jump to the application details page. Click “Add Application Capabilities”, find the “Bot” card, and click the “Add” button.
Configuring Events and Callbacks
In the left menu of the application details page, click “Events and Callbacks”, configure the receiving methods for events and callbacks respectively, and add the “Receive Message” event.
Step 1: Configure the event receiving method
- Go to the “Event Configuration” tab and select “Use long connection to receive events” under “Subscription method”.
- After confirming that “Connection successful” is displayed, click “Save”.
Step 2: Configure the callback receiving method
- Switch to the “Callback Configuration” tab and select “Use long connection to receive callbacks” under “Subscription method”.
- Verify the connection status; after confirming that “Connection successful” is displayed, click “Save”.
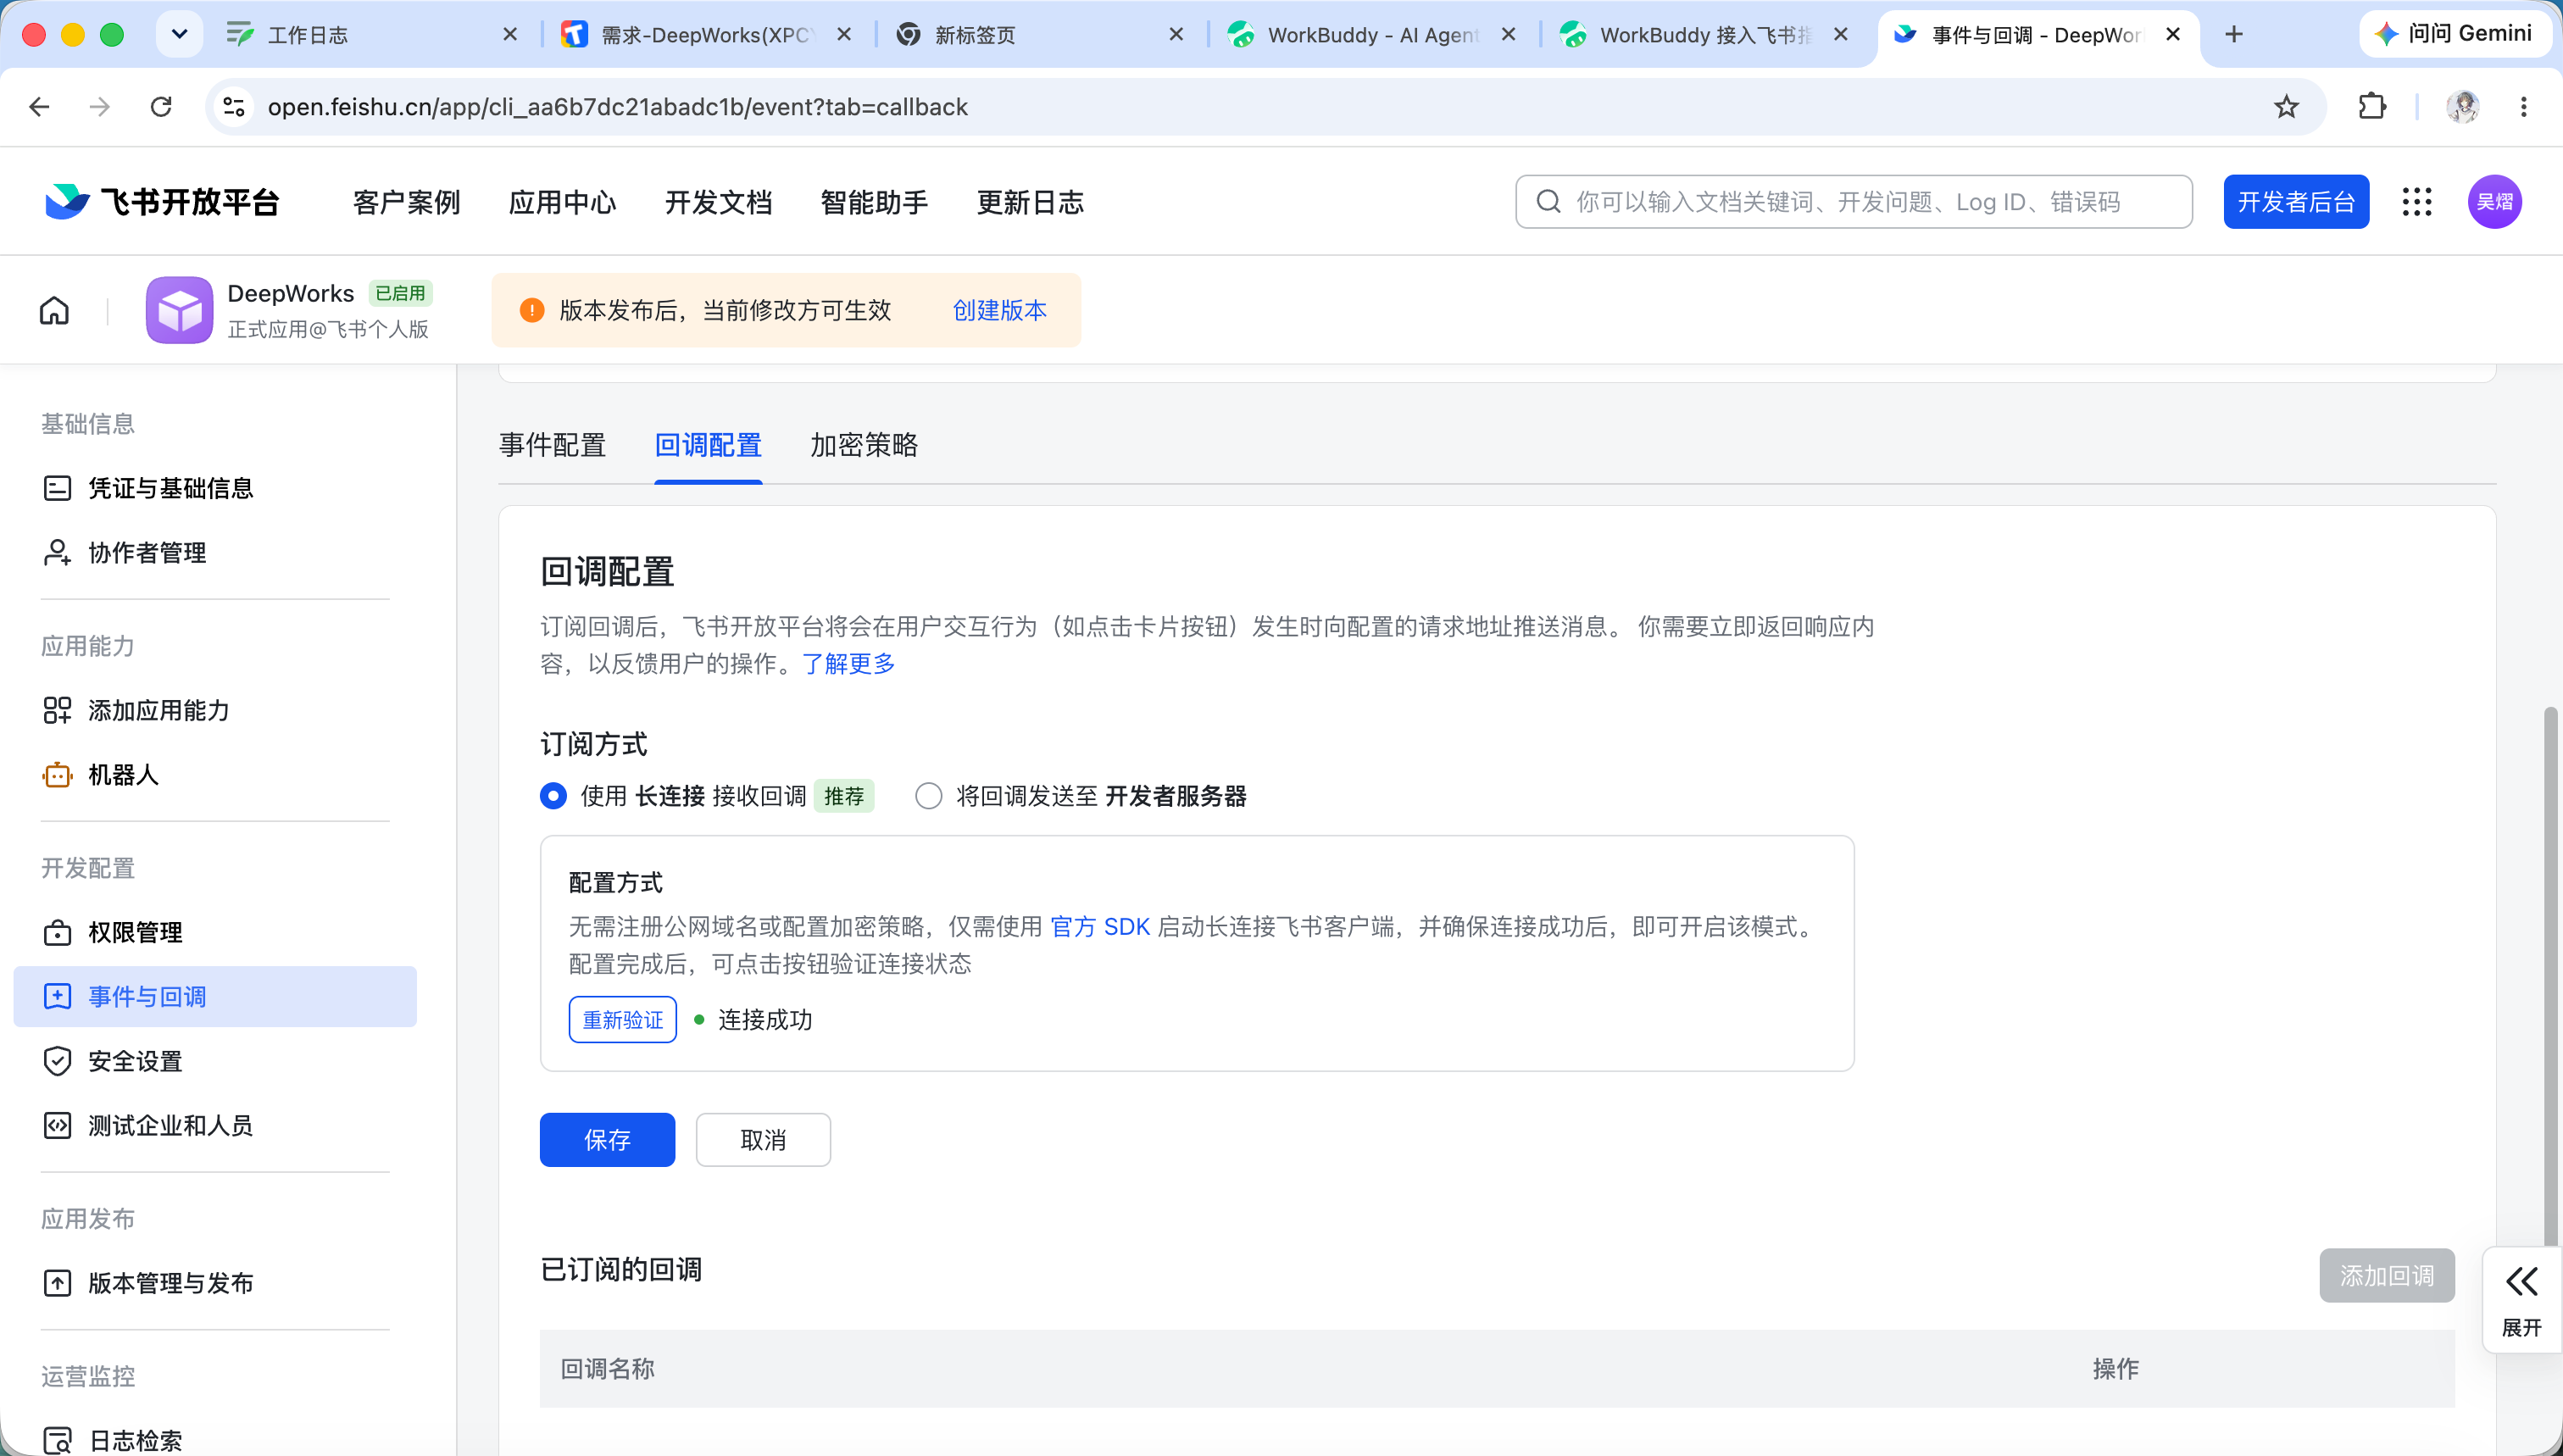
Step 3: Add the Receive Message event
- Return to the “Event Configuration” tab and click “Add Event” in the “Added events” area.
- Select the “Receive Message” event (
im.message.receive_v1) to complete the addition. - Confirm that the event has appeared in the list, and enable the permissions required for direct-chat messages and in-group @ messages as described in Section 9.6.3 “Configuring Application Permissions”.
After adding this event, the application can receive user messages within the scope of the permissions, including direct messages sent to the bot and messages @-mentioning the bot in group chats.
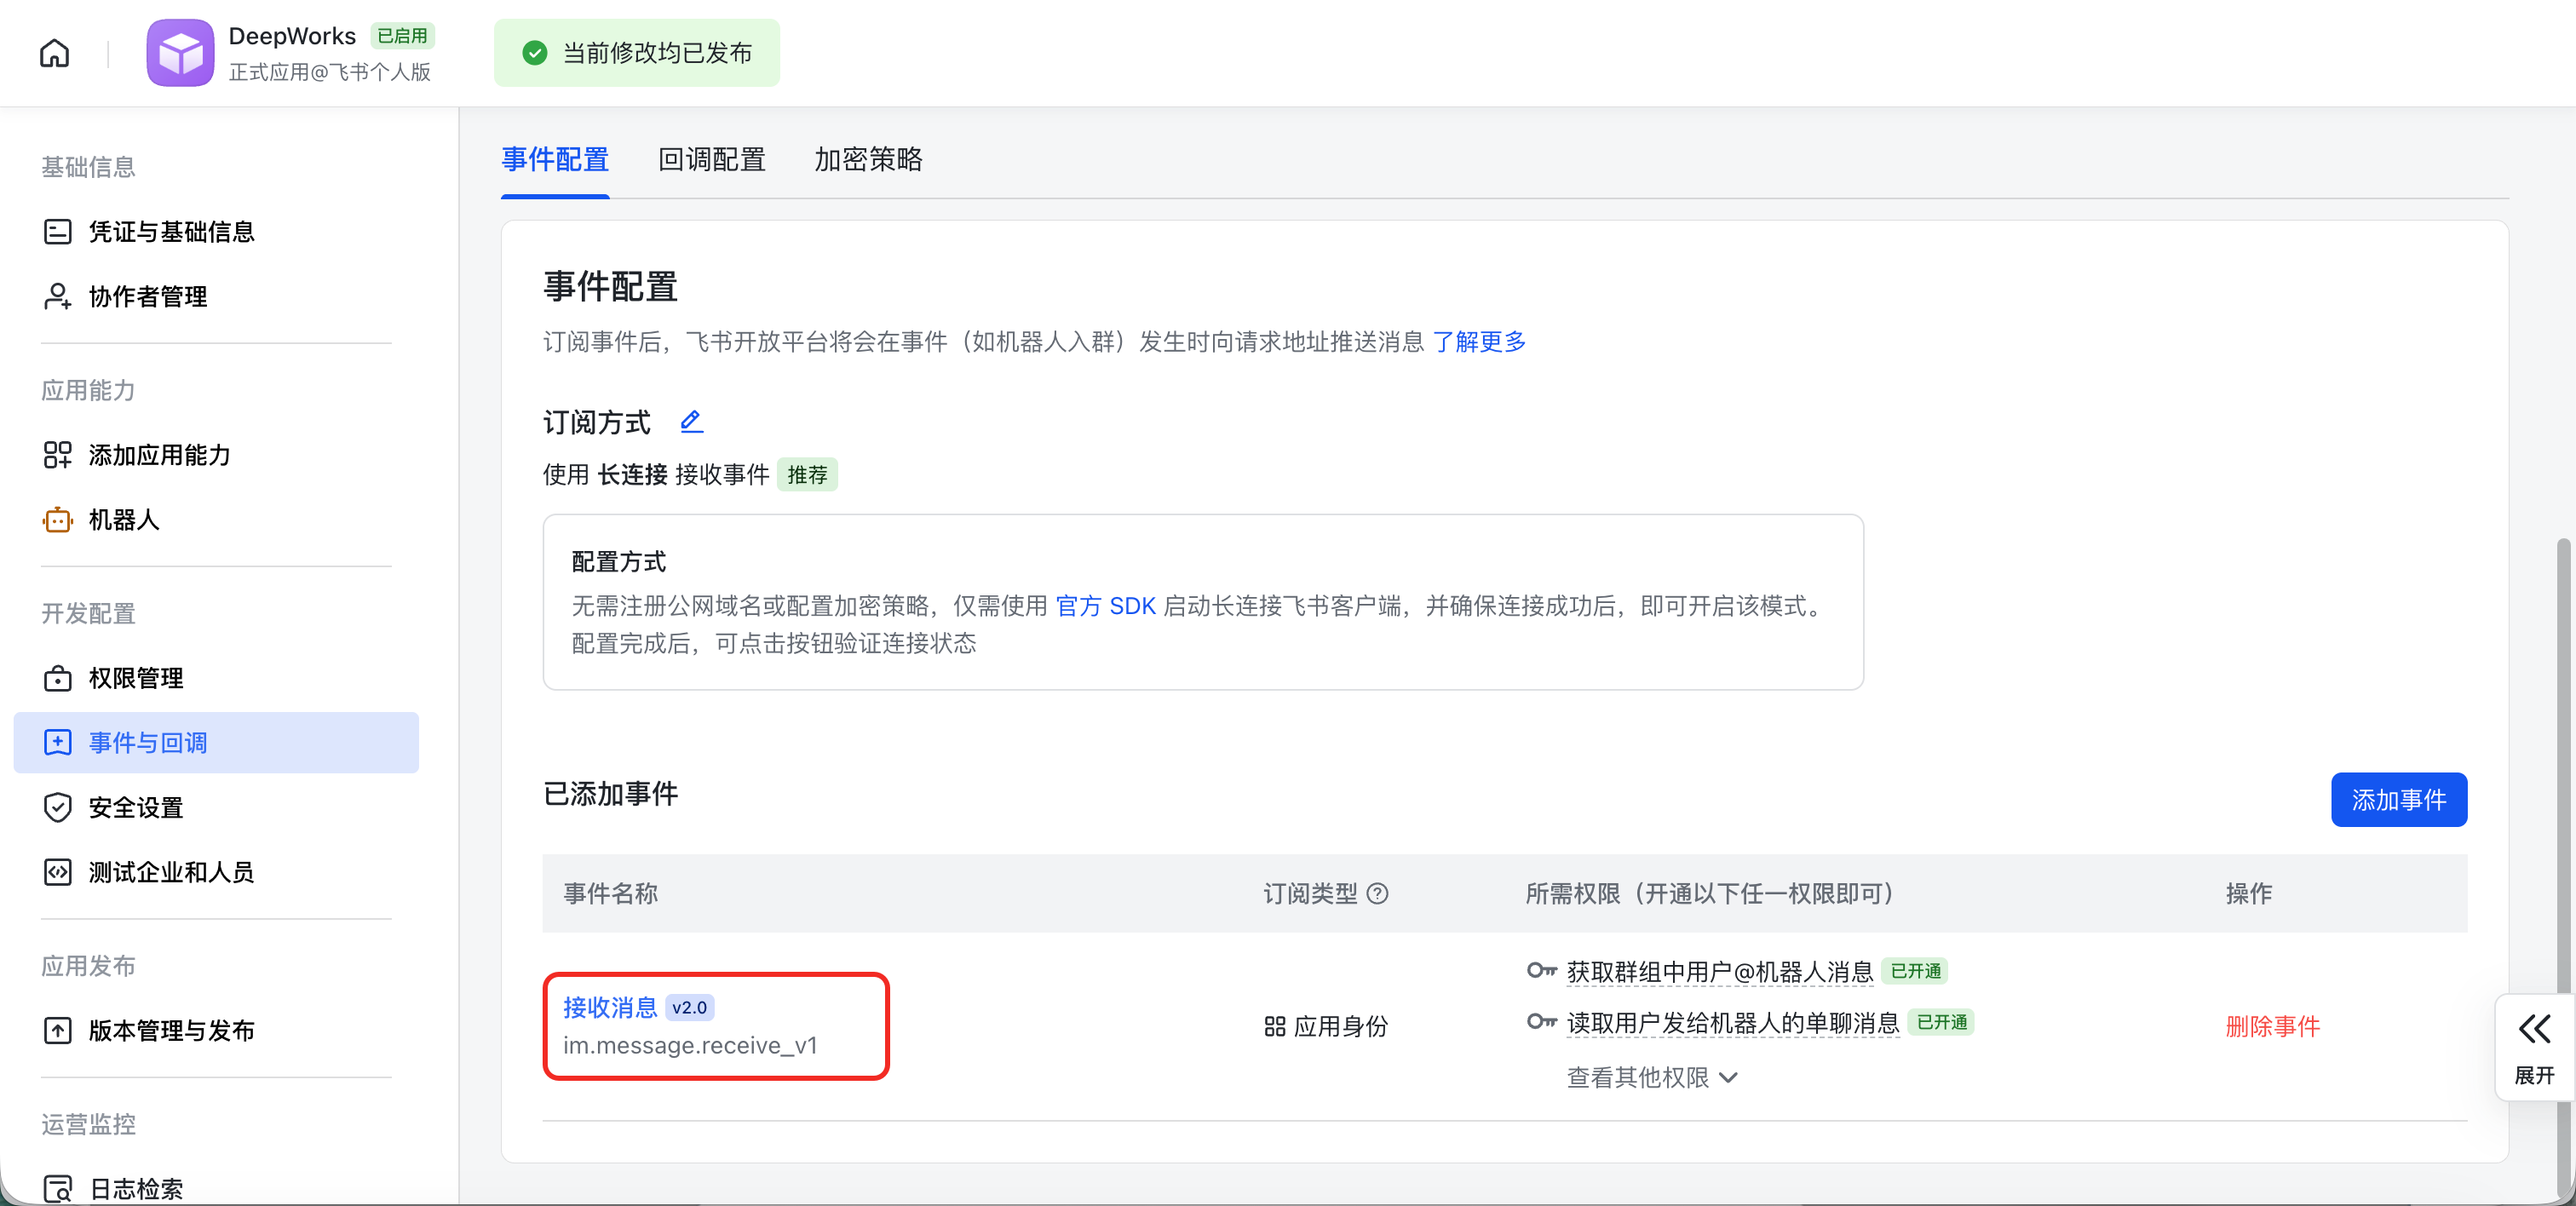
You can refer to Feishu’s official documentation on receiving events via long connection and message event description .
Configuring Application Permissions
To enable the bot to send and receive messages normally, you need to add the necessary permissions to the application.
Entering Permission Management
In the left menu of the application details page, click “Permission Management”
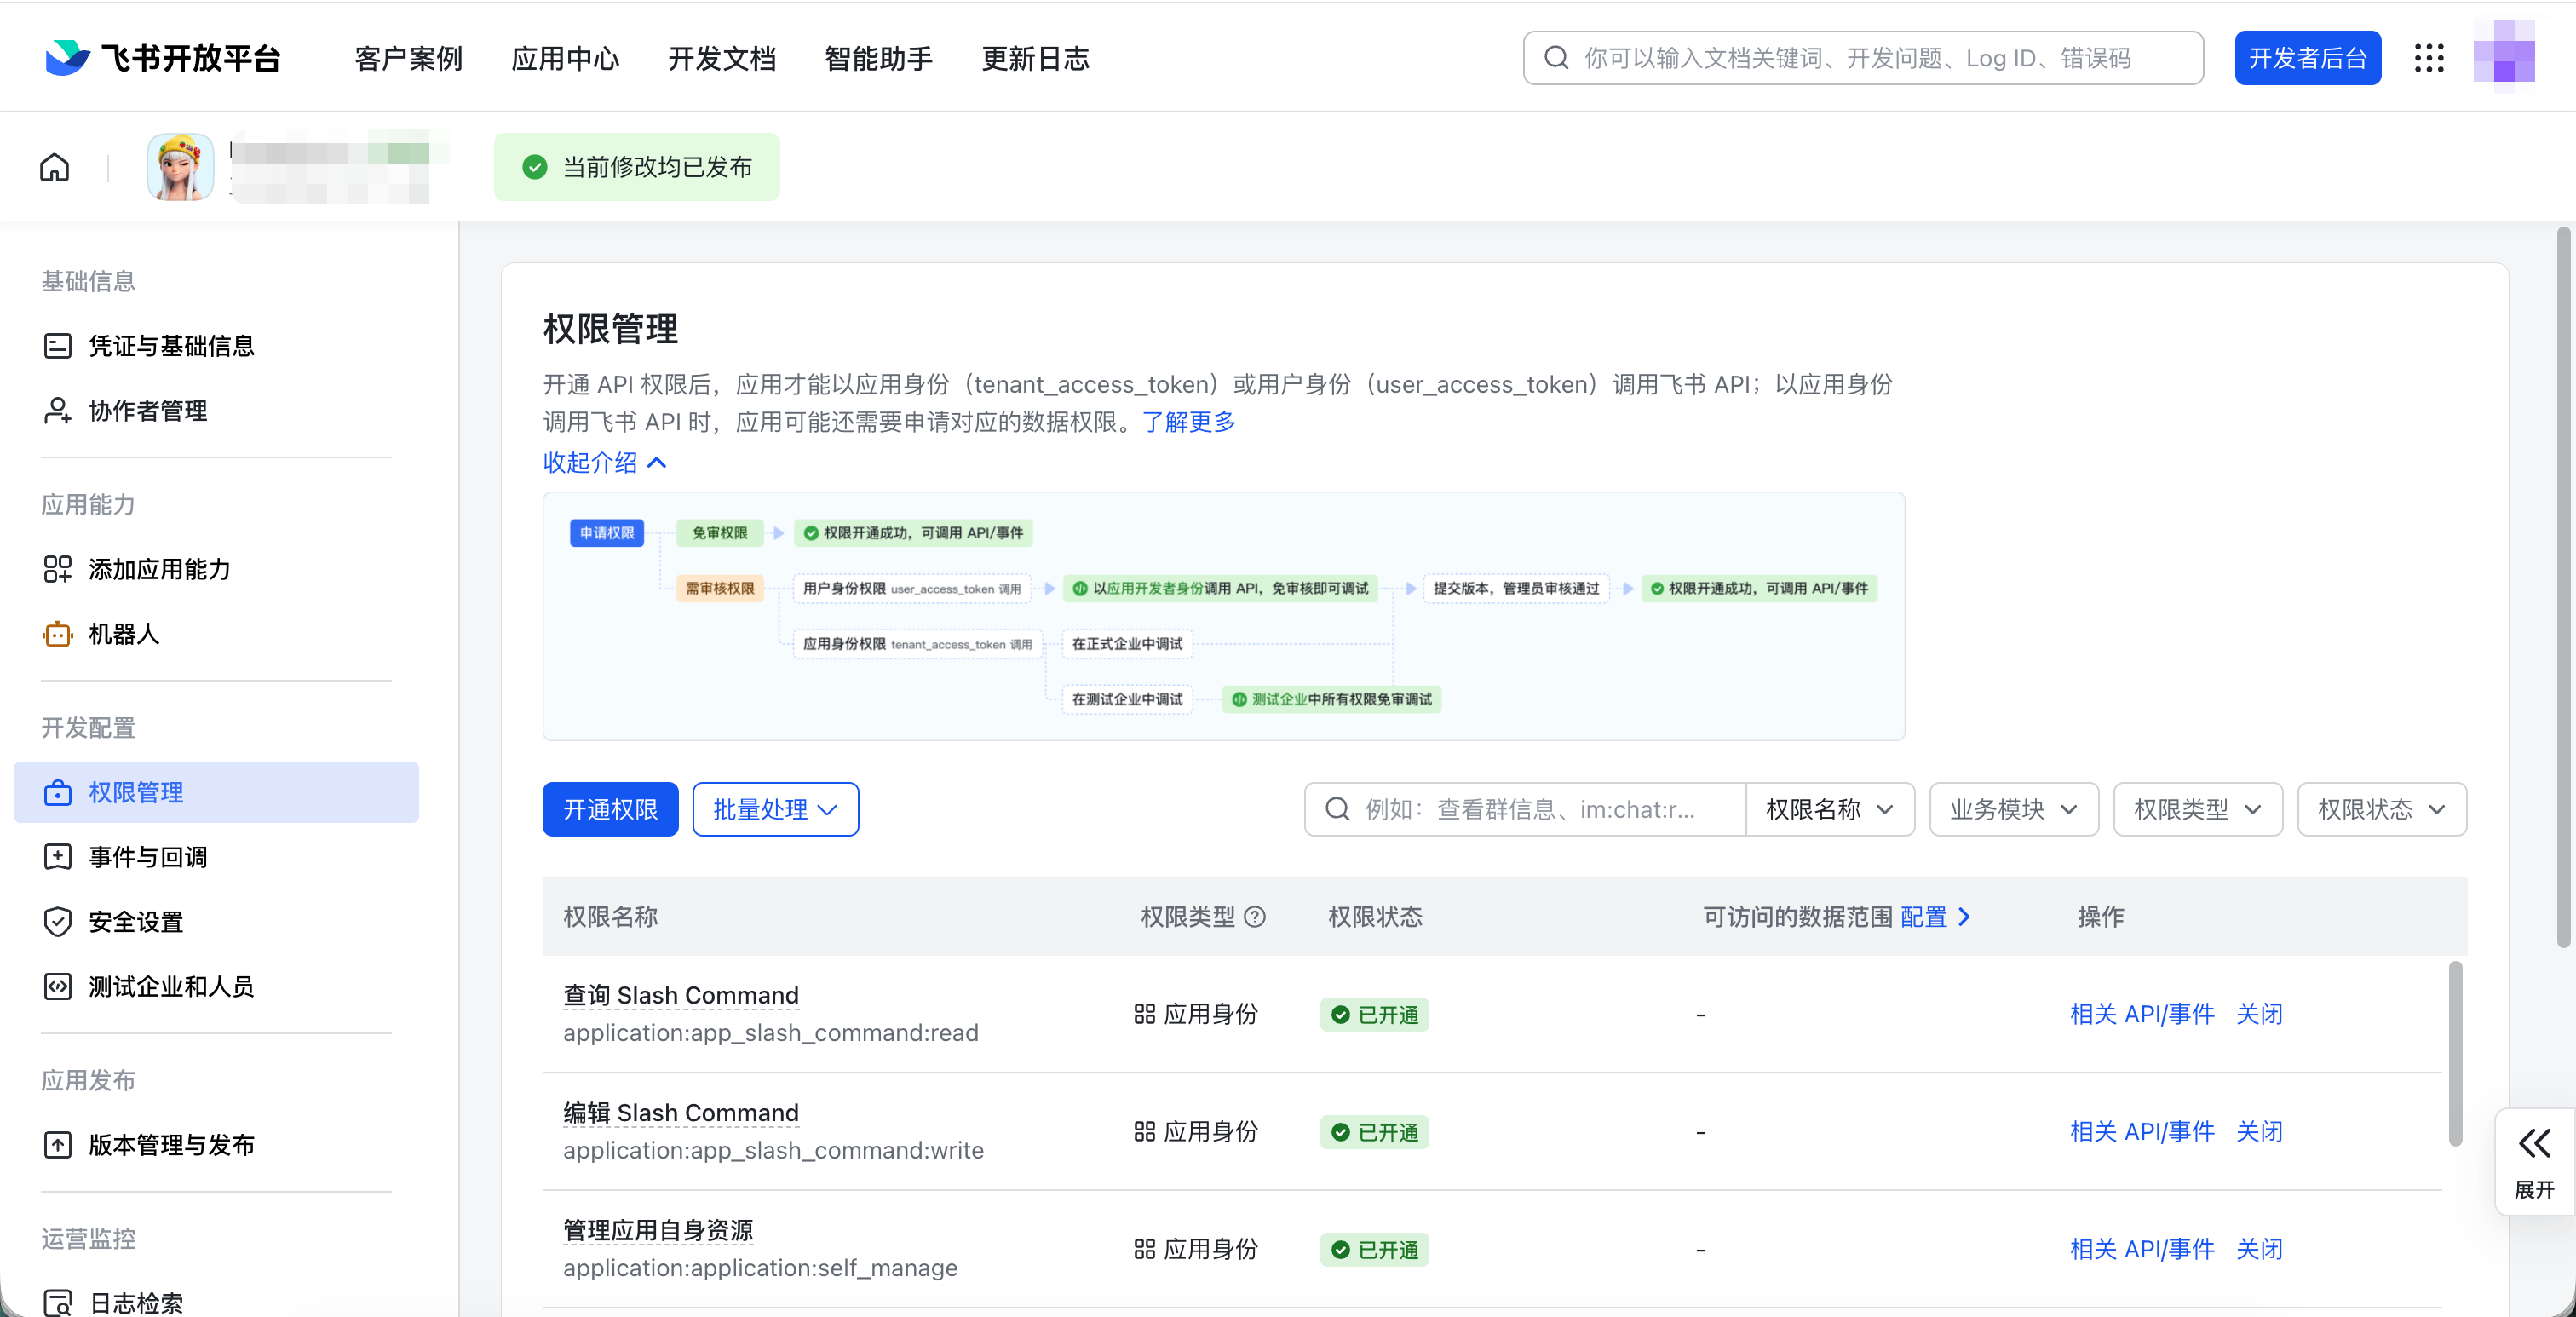
Search for and configure the following permissions:
| Permission | Purpose |
|---|---|
Receive direct-chat messages im:message.p2p_msg:readonly | Receive direct messages users send to the bot |
Receive in-group @ messages im:message.group_at_msg:readonly | Receive messages that @ the bot in groups |
Send messages as the application im:message:send_as_bot | Reply to users or groups |
| Get basic user information | Identify the user |
| Get user phone number | Both the phone number field authorization and the directory data scope must cover the user |
Get and upload resources im:resource | Process resources such as images and files in messages |
Create and update cards cardkit:card:write | Required when using the streaming card feature |
After enabling the permissions, complete the approval and version release as prompted by Feishu. The application availability scope and the directory data scope need to be checked separately.
Batch Importing Permissions
For more commonly used permissions, see the list below, which can be imported in batch directly.
In the pop-up window:
- Clear all content in the input box
- Copy and paste the permission list below in full
- Click “Confirm to add permissions”
Permission list to import:
{
  "scopes": {
    "tenant": [
      "contact:contact.base:readonly",
      "docx:document:readonly",
      "im:chat:read",
      "im:chat:update",
      "im:message.group_at_msg:readonly",
      "im:message.p2p_msg:readonly",
      "im:message.pins:read",
      "im:message.pins:write_only",
      "im:message.reactions:read",
      "im:message.reactions:write_only",
      "im:message:readonly",
      "im:message:recall",
      "im:message:send_as_bot",
      "im:message:send_multi_users",
      "im:message:send_sys_msg",
      "im:message:update",
      "im:resource",
      "application:application:self_manage",
      "cardkit:card:write",
      "cardkit:card:read"
    ],
    "user": [
      "contact:user.employee_id:readonly",
      "offline_access",
      "base:app:copy",
      "base:field:create",
      "base:field:delete",
      "base:field:read",
      "base:field:update",
      "base:record:create",
      "base:record:delete",
      "base:record:retrieve",
      "base:record:update",
      "base:table:create",
      "base:table:delete",
      "base:table:read",
      "base:table:update",
      "base:view:read",
      "base:view:write_only",
      "base:app:create",
      "base:app:update",
      "base:app:read",
      "board:whiteboard:node:create",
      "board:whiteboard:node:read",
      "calendar:calendar:read",
      "calendar:calendar.event:create",
      "calendar:calendar.event:delete",
      "calendar:calendar.event:read",
      "calendar:calendar.event:reply",
      "calendar:calendar.event:update",
      "calendar:calendar.free_busy:read",
      "contact:contact.base:readonly",
      "contact:user.base:readonly",
      "contact:user:search",
      "docs:document.comment:create",
      "docs:document.comment:read",
      "docs:document.comment:update",
      "docs:document.media:download",
      "docs:document:copy",
      "docx:document:create",
      "docx:document:readonly",
      "docx:document:write_only",
      "drive:drive.metadata:readonly",
      "drive:file:download",
      "drive:file:upload",
      "im:chat.members:read",
      "im:chat:read",
      "im:message",
      "im:message.group_msg:get_as_user",
      "im:message.p2p_msg:get_as_user",
      "im:message:readonly",
      "search:docs:read",
      "search:message",
      "space:document:delete",
      "space:document:move",
      "space:document:retrieve",
      "task:comment:read",
      "task:comment:write",
      "task:task:read",
      "task:task:write",
      "task:task:writeonly",
      "task:tasklist:read",
      "task:tasklist:write",
      "wiki:node:copy",
      "wiki:node:create",
      "wiki:node:move",
      "wiki:node:read",
      "wiki:node:retrieve",
      "wiki:space:read",
      "wiki:space:retrieve",
      "wiki:space:write_only"
    ]
  }
}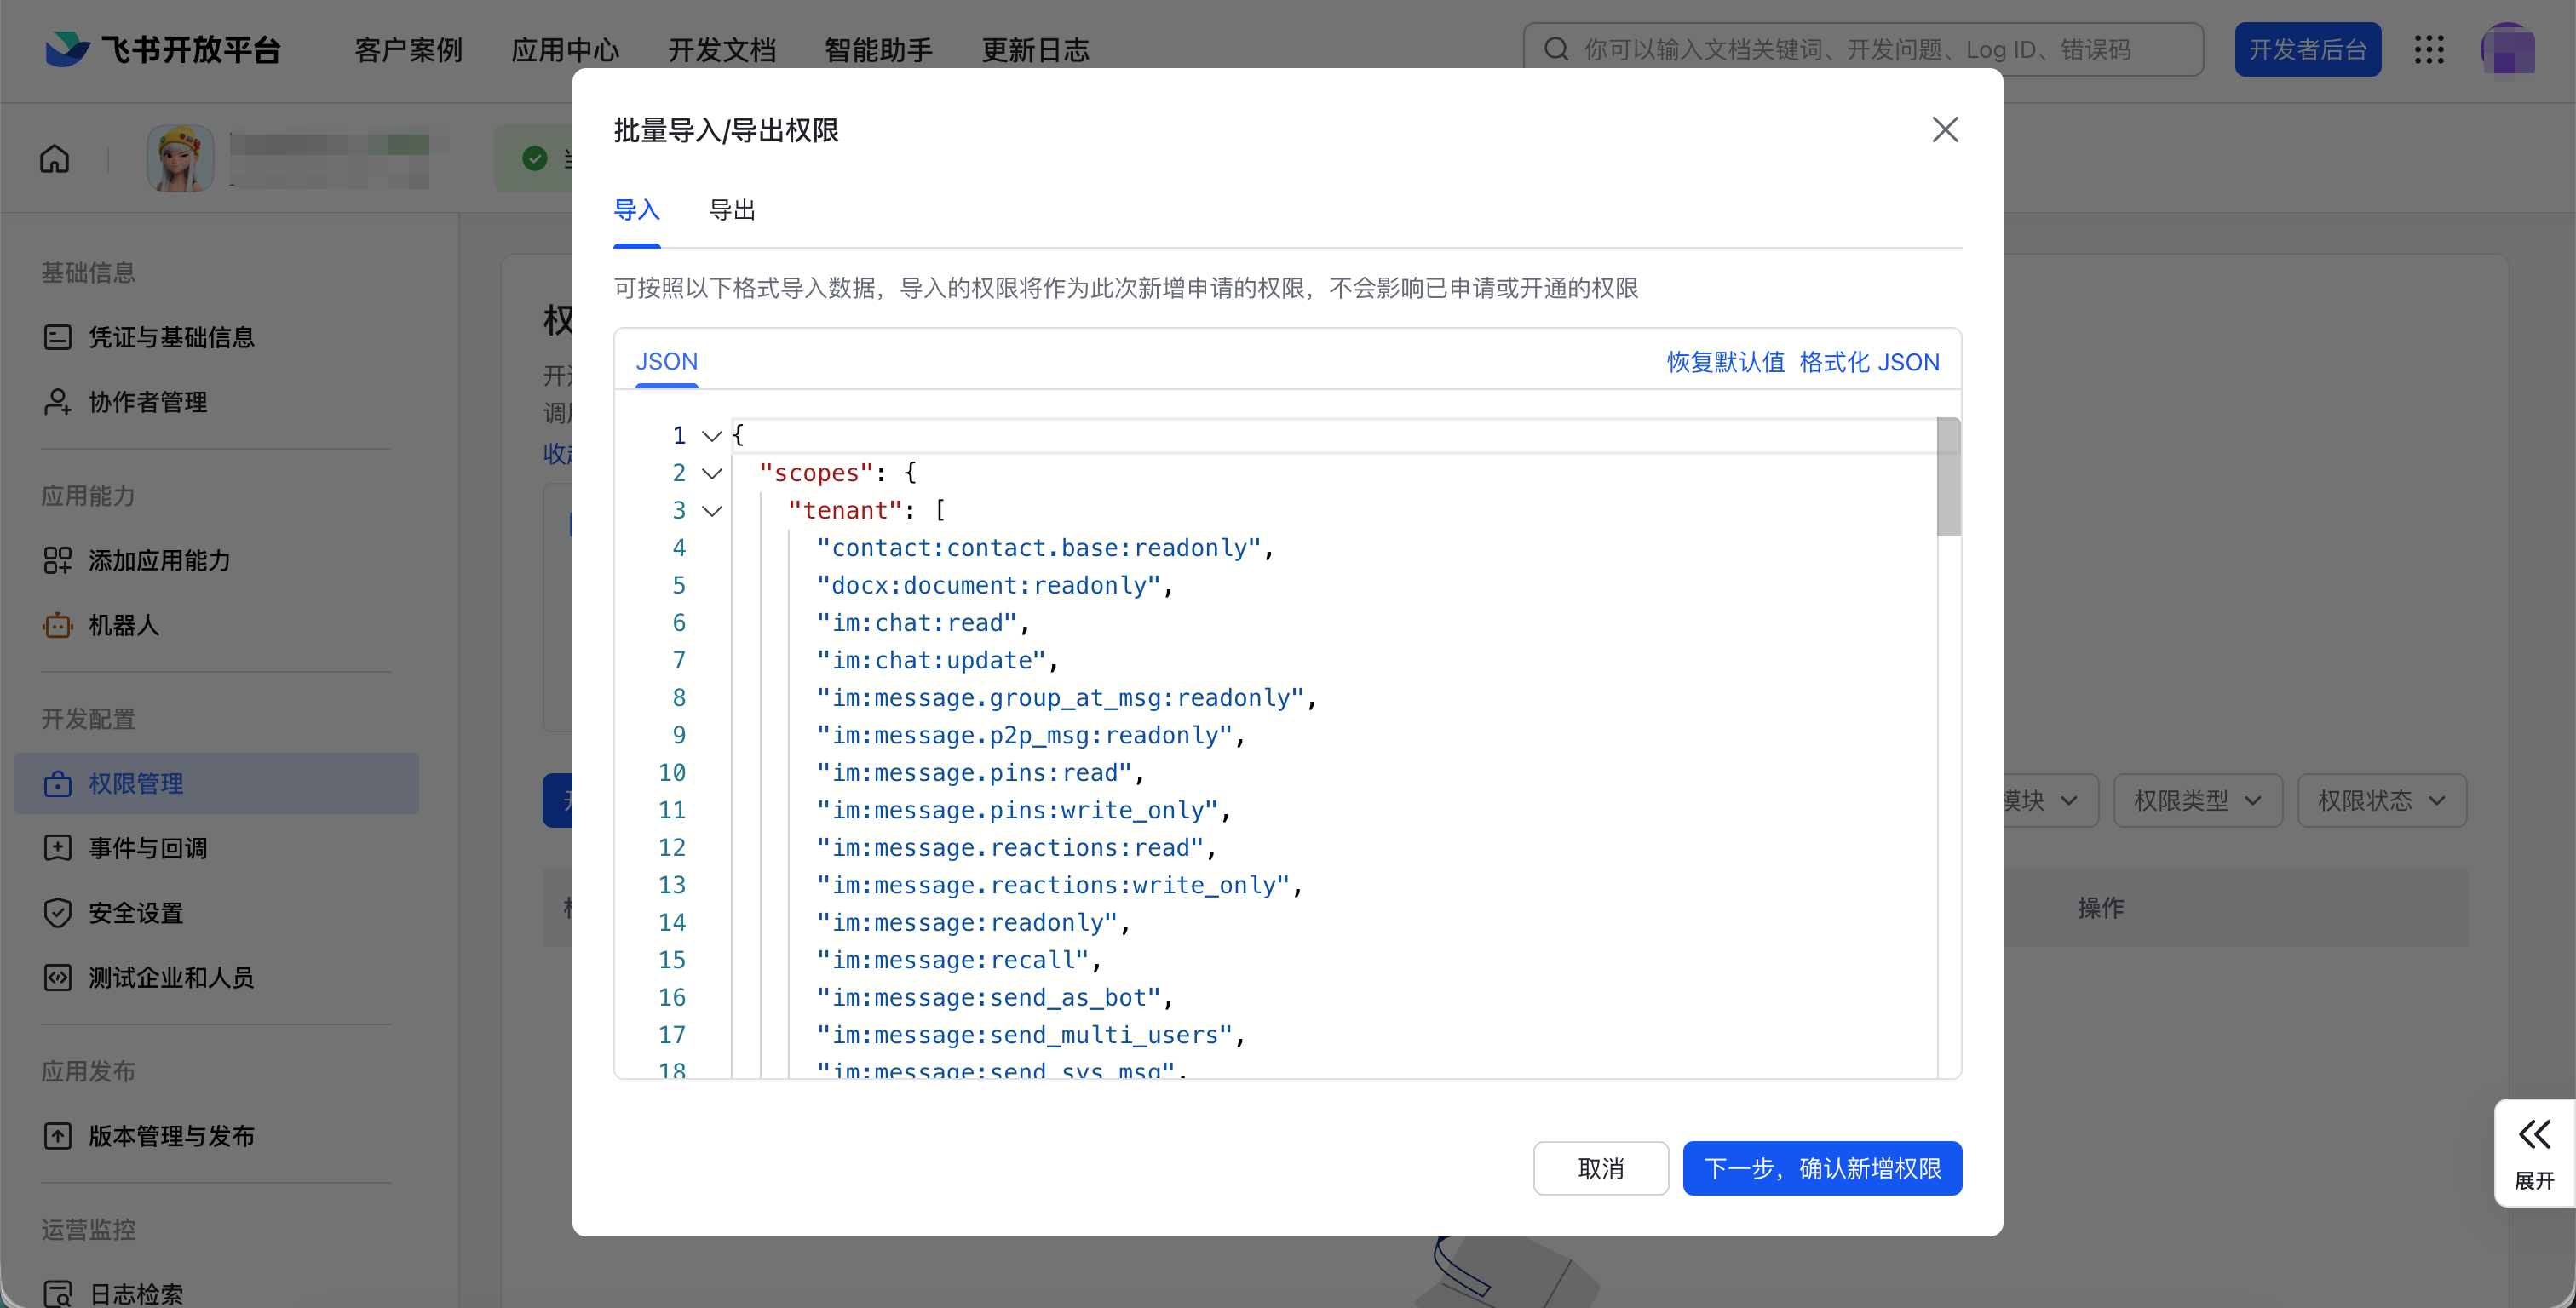
Determine the permission access scope according to the actual situation.
Publishing the Application
The application must be published before it can be used in Feishu.
Creating a Version
Click the “Create Version” button at the top of the page to enter the details page and create or update a version.
Publishing the Version
After successful creation, click the “Publish” button to the right of the version.
If you are an enterprise administrator or are creating a personal application, the application will usually be approved automatically. If approval is required, contact your enterprise administrator.
Obtaining Application Credentials
In the left menu of the application details page, click “Credentials and Basic Information”.
On the page, you will see two important pieces of credential information:
- App ID: the unique identifier of the application
- App Secret: the application’s secret key (click to view)
Be sure to keep the App Secret safe and do not disclose it to others!
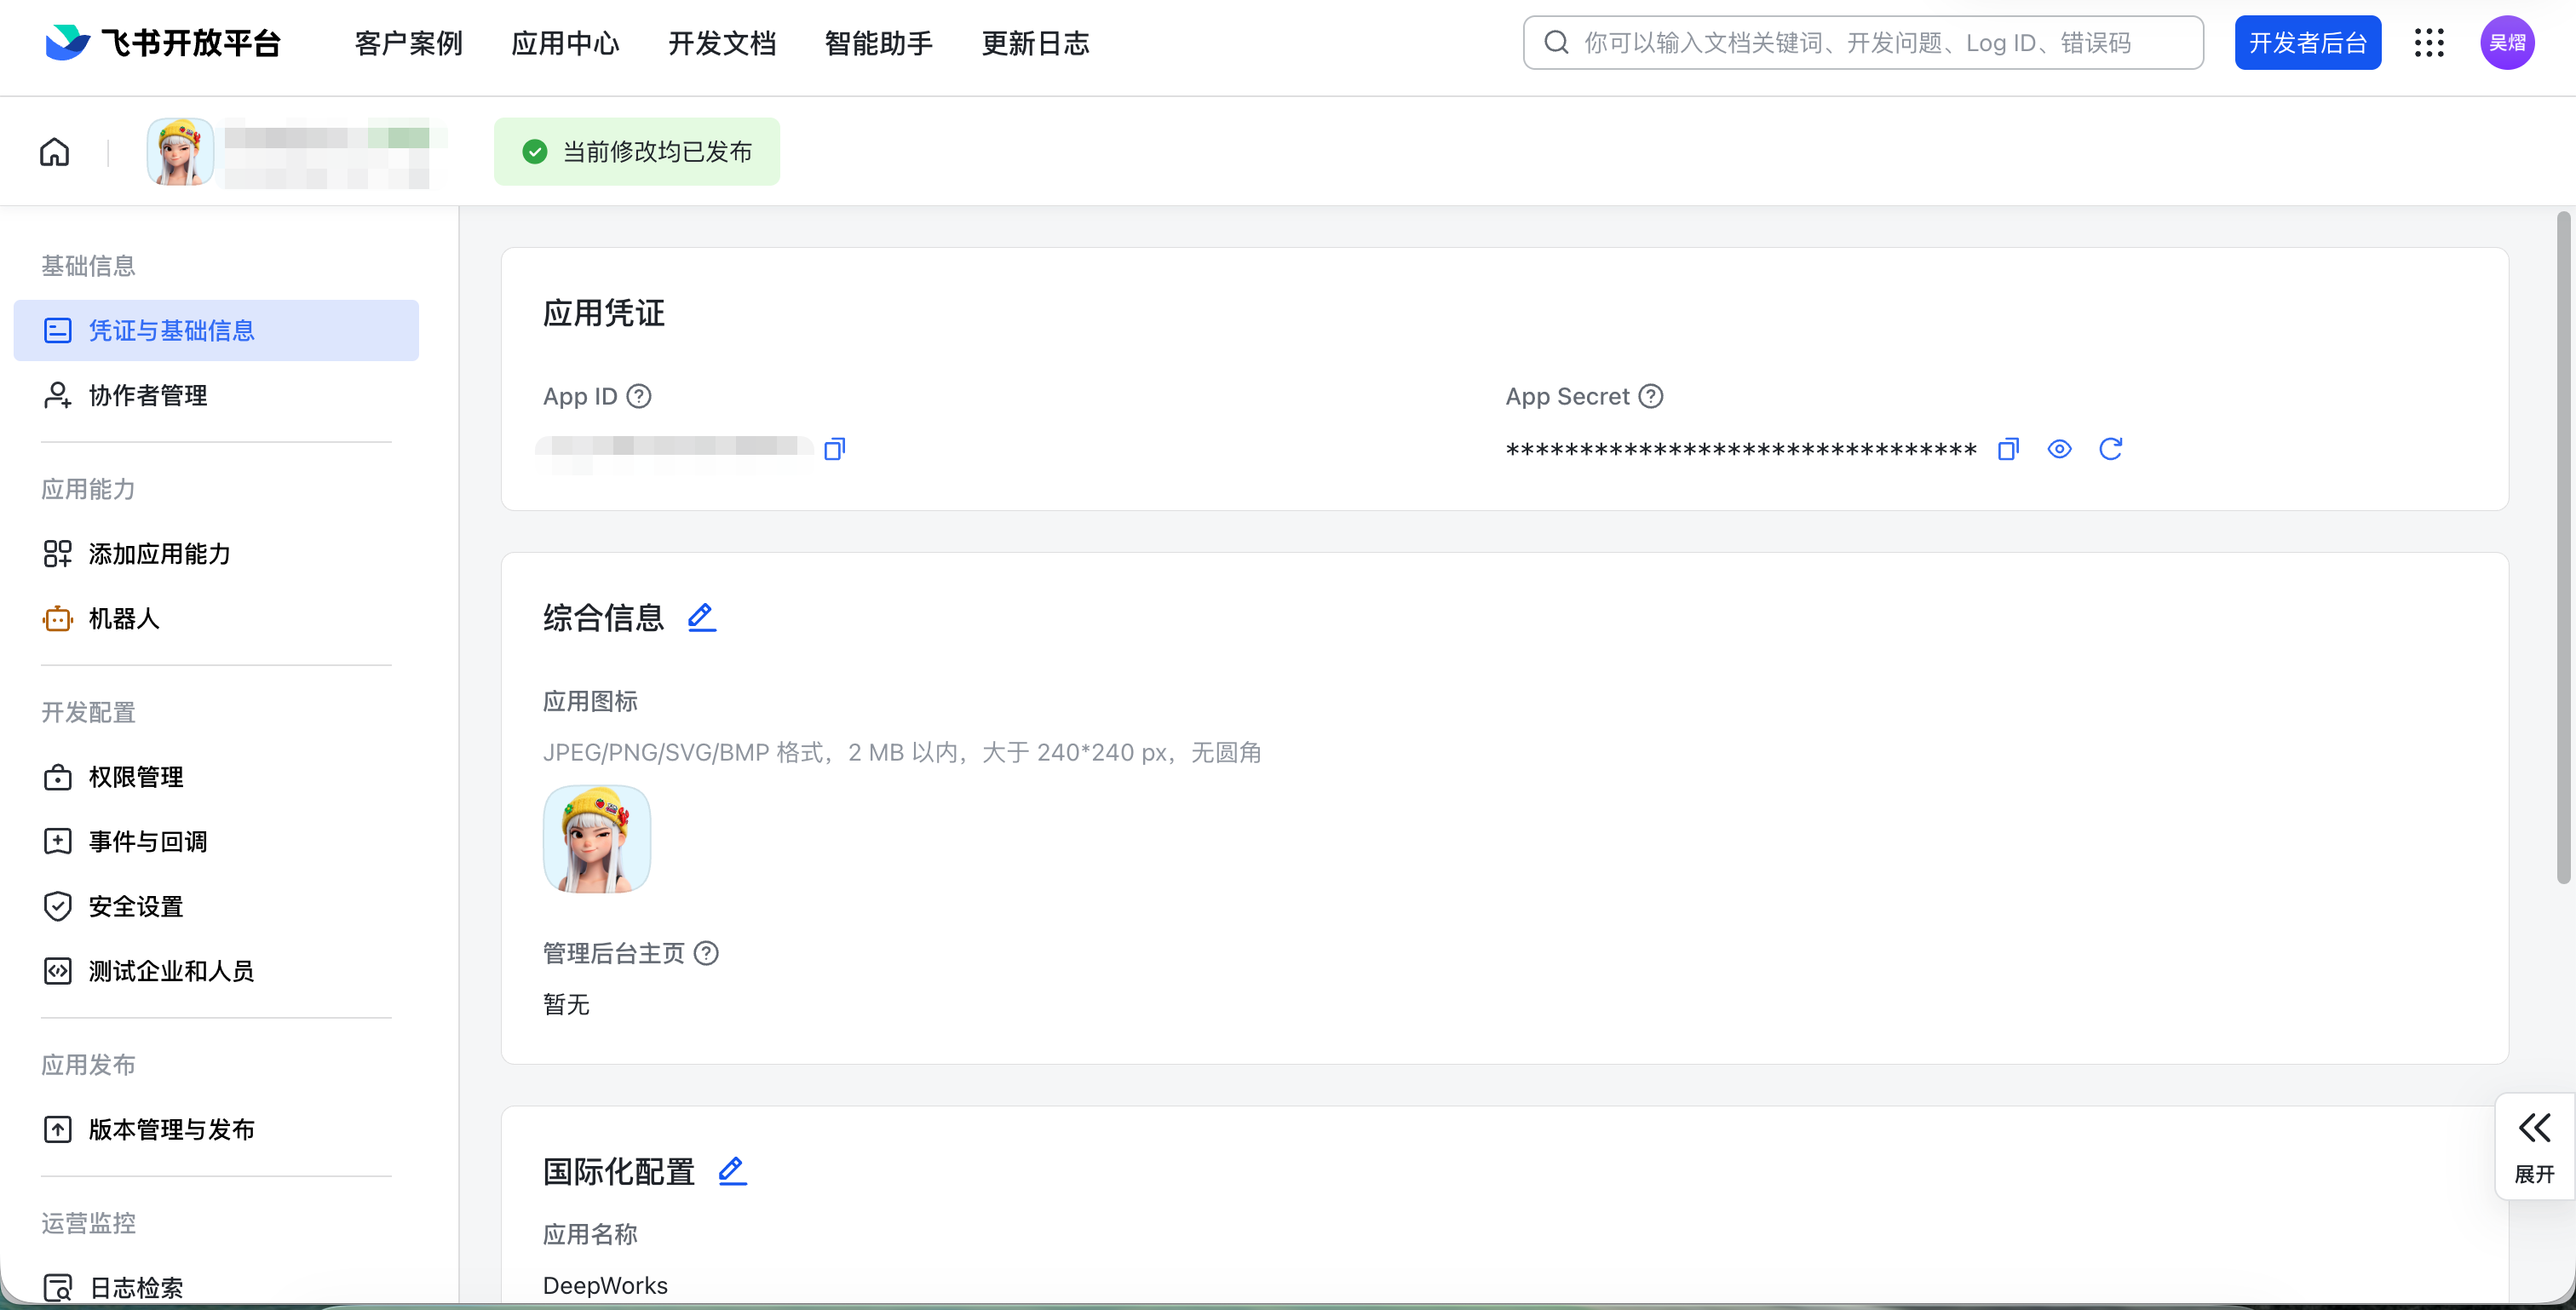
Configuring Feishu in DeepWorks
You can create or select a Feishu application via phone QR code scanning and integrate it, or manually fill in the credentials of an existing application.
Integration prerequisites: Creating an enterprise application requires the corresponding creation permission. Before integration, complete the bot capability, subscription method, and required application permission configurations as described above, and complete the version release; the enterprise bot’s application availability scope, phone number authorization, and directory data scope must cover the users. These configurations also need to be verified after QR code integration.
Entering Bot Configuration
- Click the DeepWorks user avatar in the lower-left corner, select “IM Channels”, and confirm the workspace to be configured.
- Complete the Feishu account connection in the “Channel Connections” tab; see IM Channels for details.
- Switch to the “Bots” tab and click “Add Bot” → “Feishu” to open the “Create Feishu Bot” dialog.
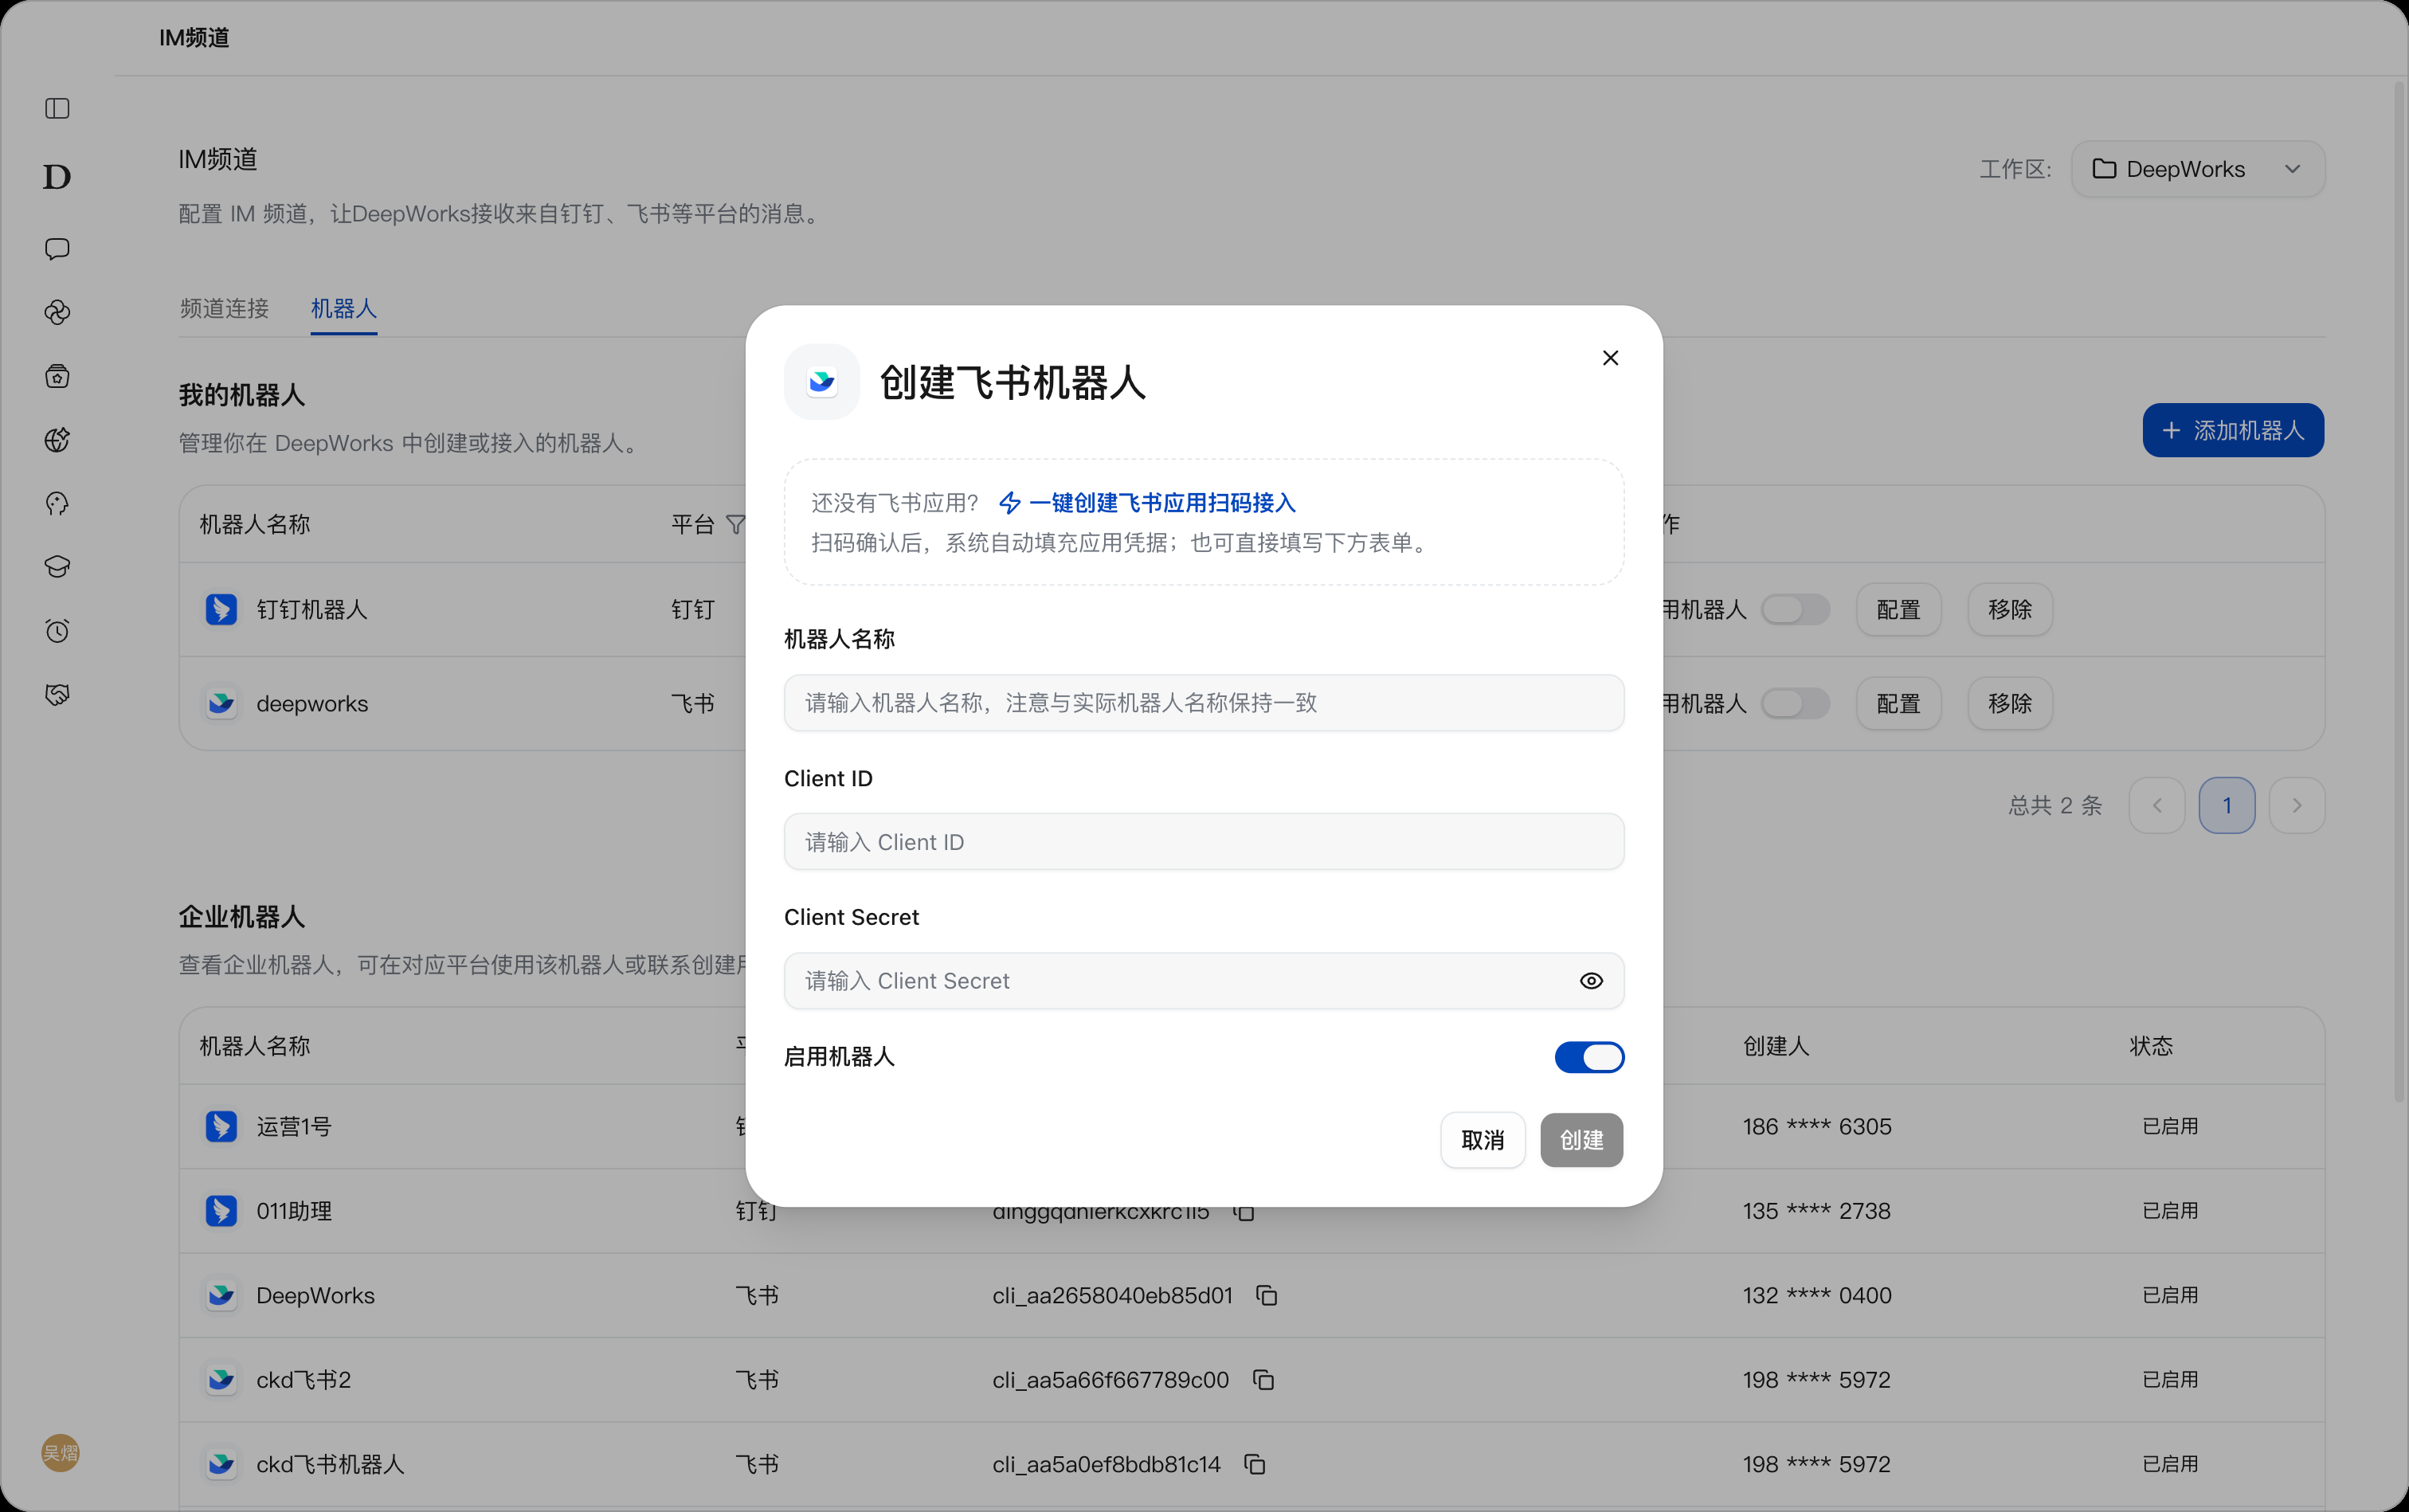
Choosing an Integration Method
Method 1: Scan QR code with phone
- Click “One-click Feishu application creation via QR code”.
- In the “Feishu create or select bot QR code” dialog, use Feishu on your phone to scan the QR code generated on the current DeepWorks page, follow the prompts on the phone to create a bot or select an existing application, and complete the confirmation.
- After completion, the application credentials will be filled in automatically. Return to the creation dialog, check the credentials, and fill in or verify the “Bot name” to ensure it is consistent with the actual bot name.
- In the Feishu Open Platform, verify the application’s bot capability, subscription method, and the required permissions listed in Section 9.6.3, and complete the required version release as described in Section 9.6.4.
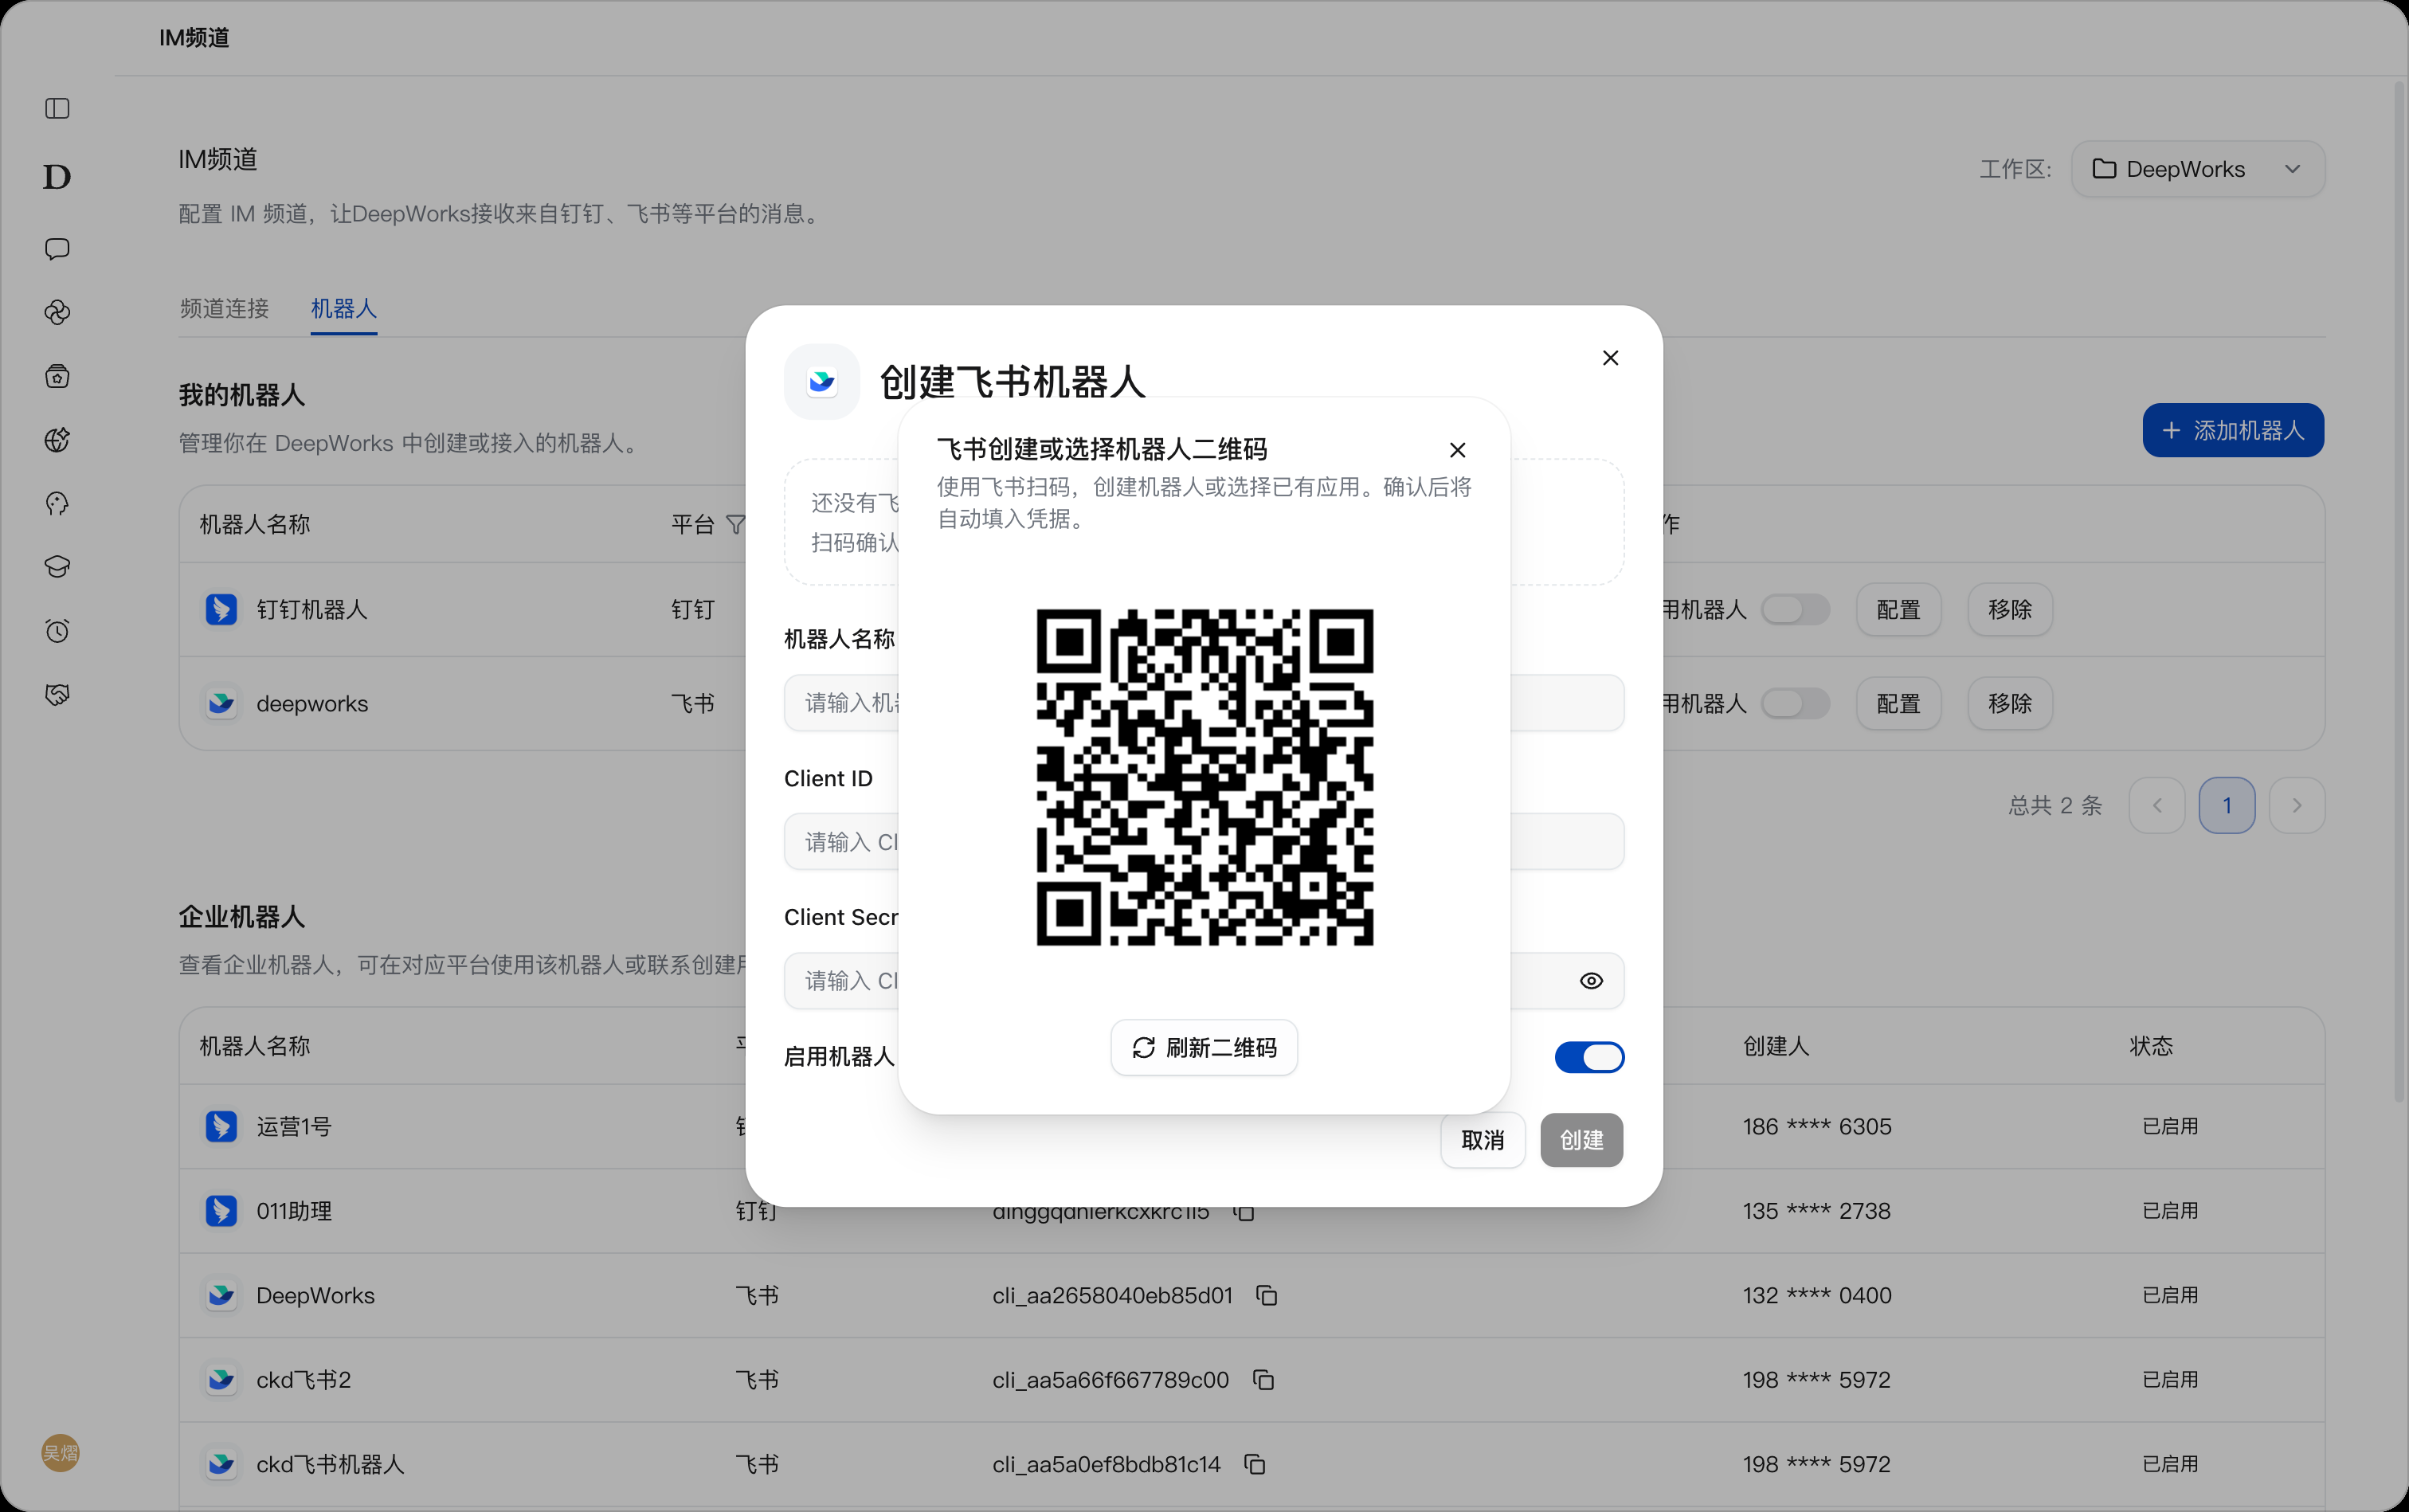
To obtain a new QR code, click “Refresh QR Code”. Scan the QR code generated on the actual operation page, not the sample image in this guide.
Method 2: Fill in credentials manually
If you have already created an application on the Feishu Open Platform, you can fill in the following information directly:
| Configuration Item | Description |
|---|---|
| Bot name | Keep it consistent with the actual bot name in Feishu. |
| Client ID | Enter the Feishu application’s App ID. |
| Client Secret | Enter the Feishu application’s App Secret. |
For how to obtain application credentials, see Section 9.6.5 “Obtaining Application Credentials”. Before integration, confirm that the bot capability, subscription method, application permission configuration, and version release have been completed.
Creating and Enabling the Bot
- Confirm the bot name and application credentials are filled in completely, turn on the “Enable Bot” toggle, and click “Create”.
- Return to the “My Bots” list and confirm the bot has been added and is enabled. You can later modify the information via “Configure”, or adjust the enabled status via the “Enable Bot” toggle.
- Open the corresponding bot conversation in Feishu, send a message, and check whether a reply is received.
After connecting a Feishu account, you can also directly use your own or others’ integrated bots without creating them again; if you do not have usage permission, view the creator in the “Enterprise Bots” list and contact them to request it.
Getting Started
Finding the Bot
Enter the name of the bot you just created in the Feishu search box to search for it.
Starting a Conversation
Click the bot to enter the conversation window, or click “Open App” to start using it and send a task.
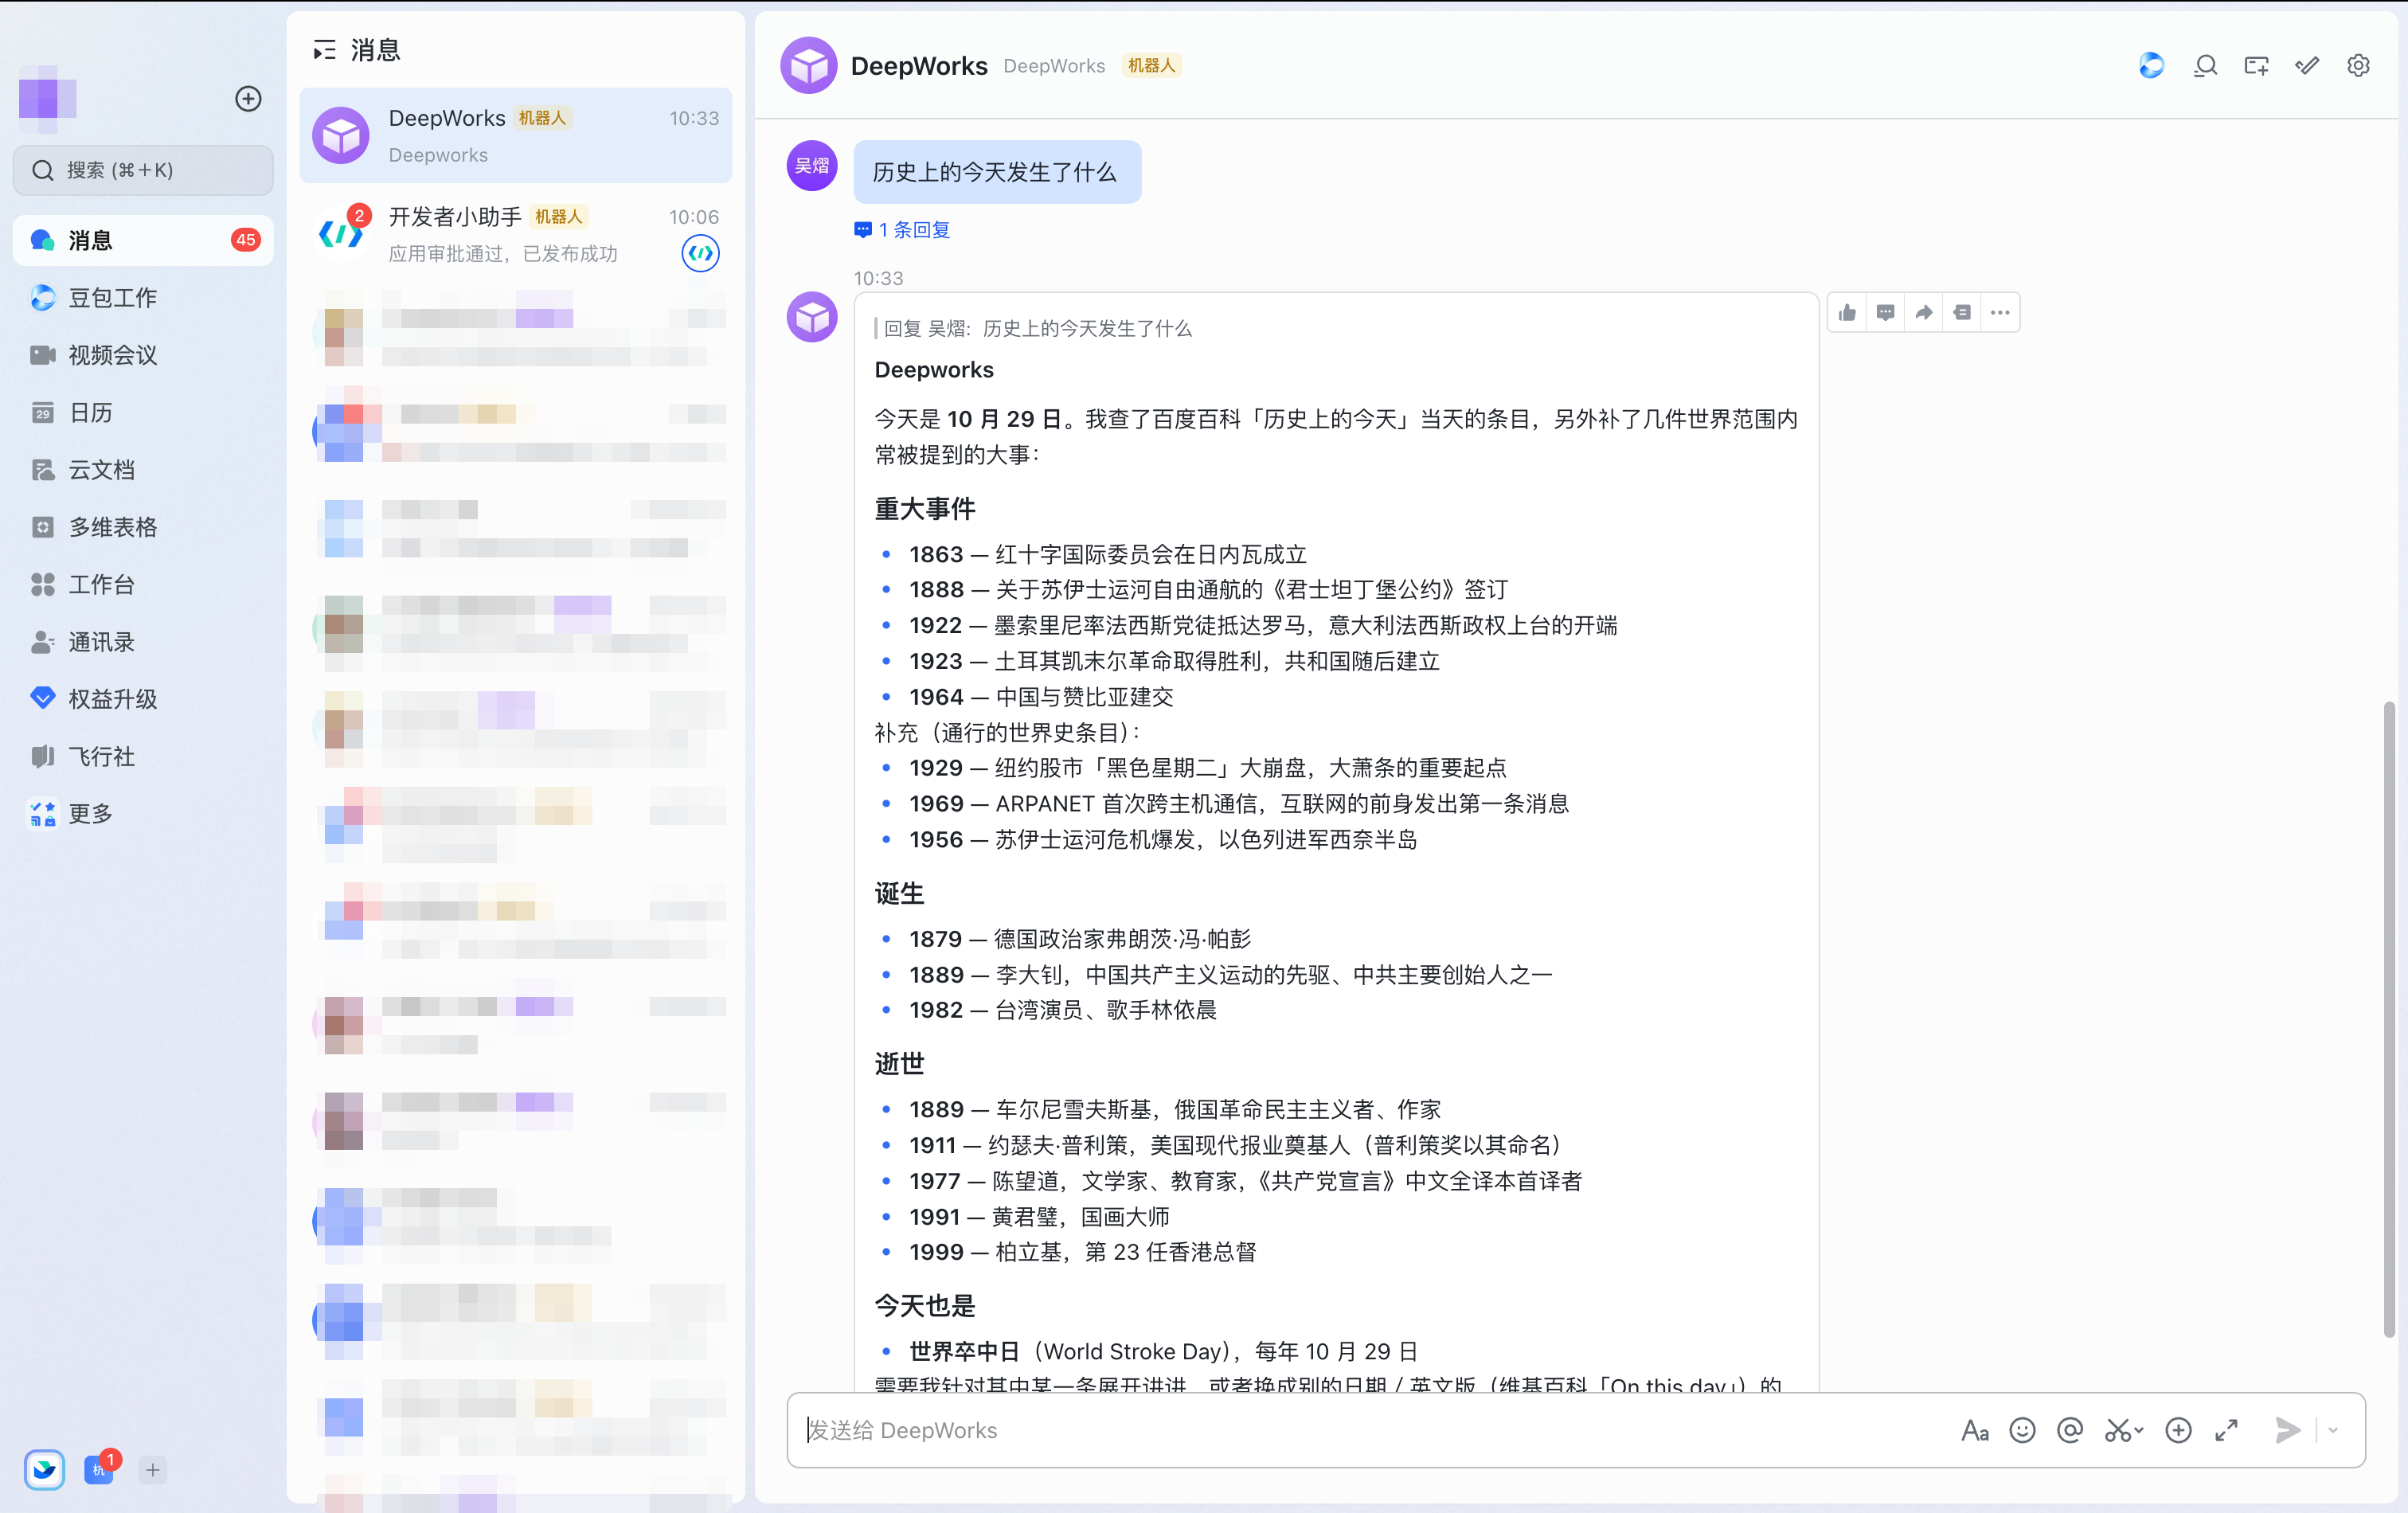
Receiving the Message in DeepWorks
Switch to DeepWorks, and the message can also be received there.
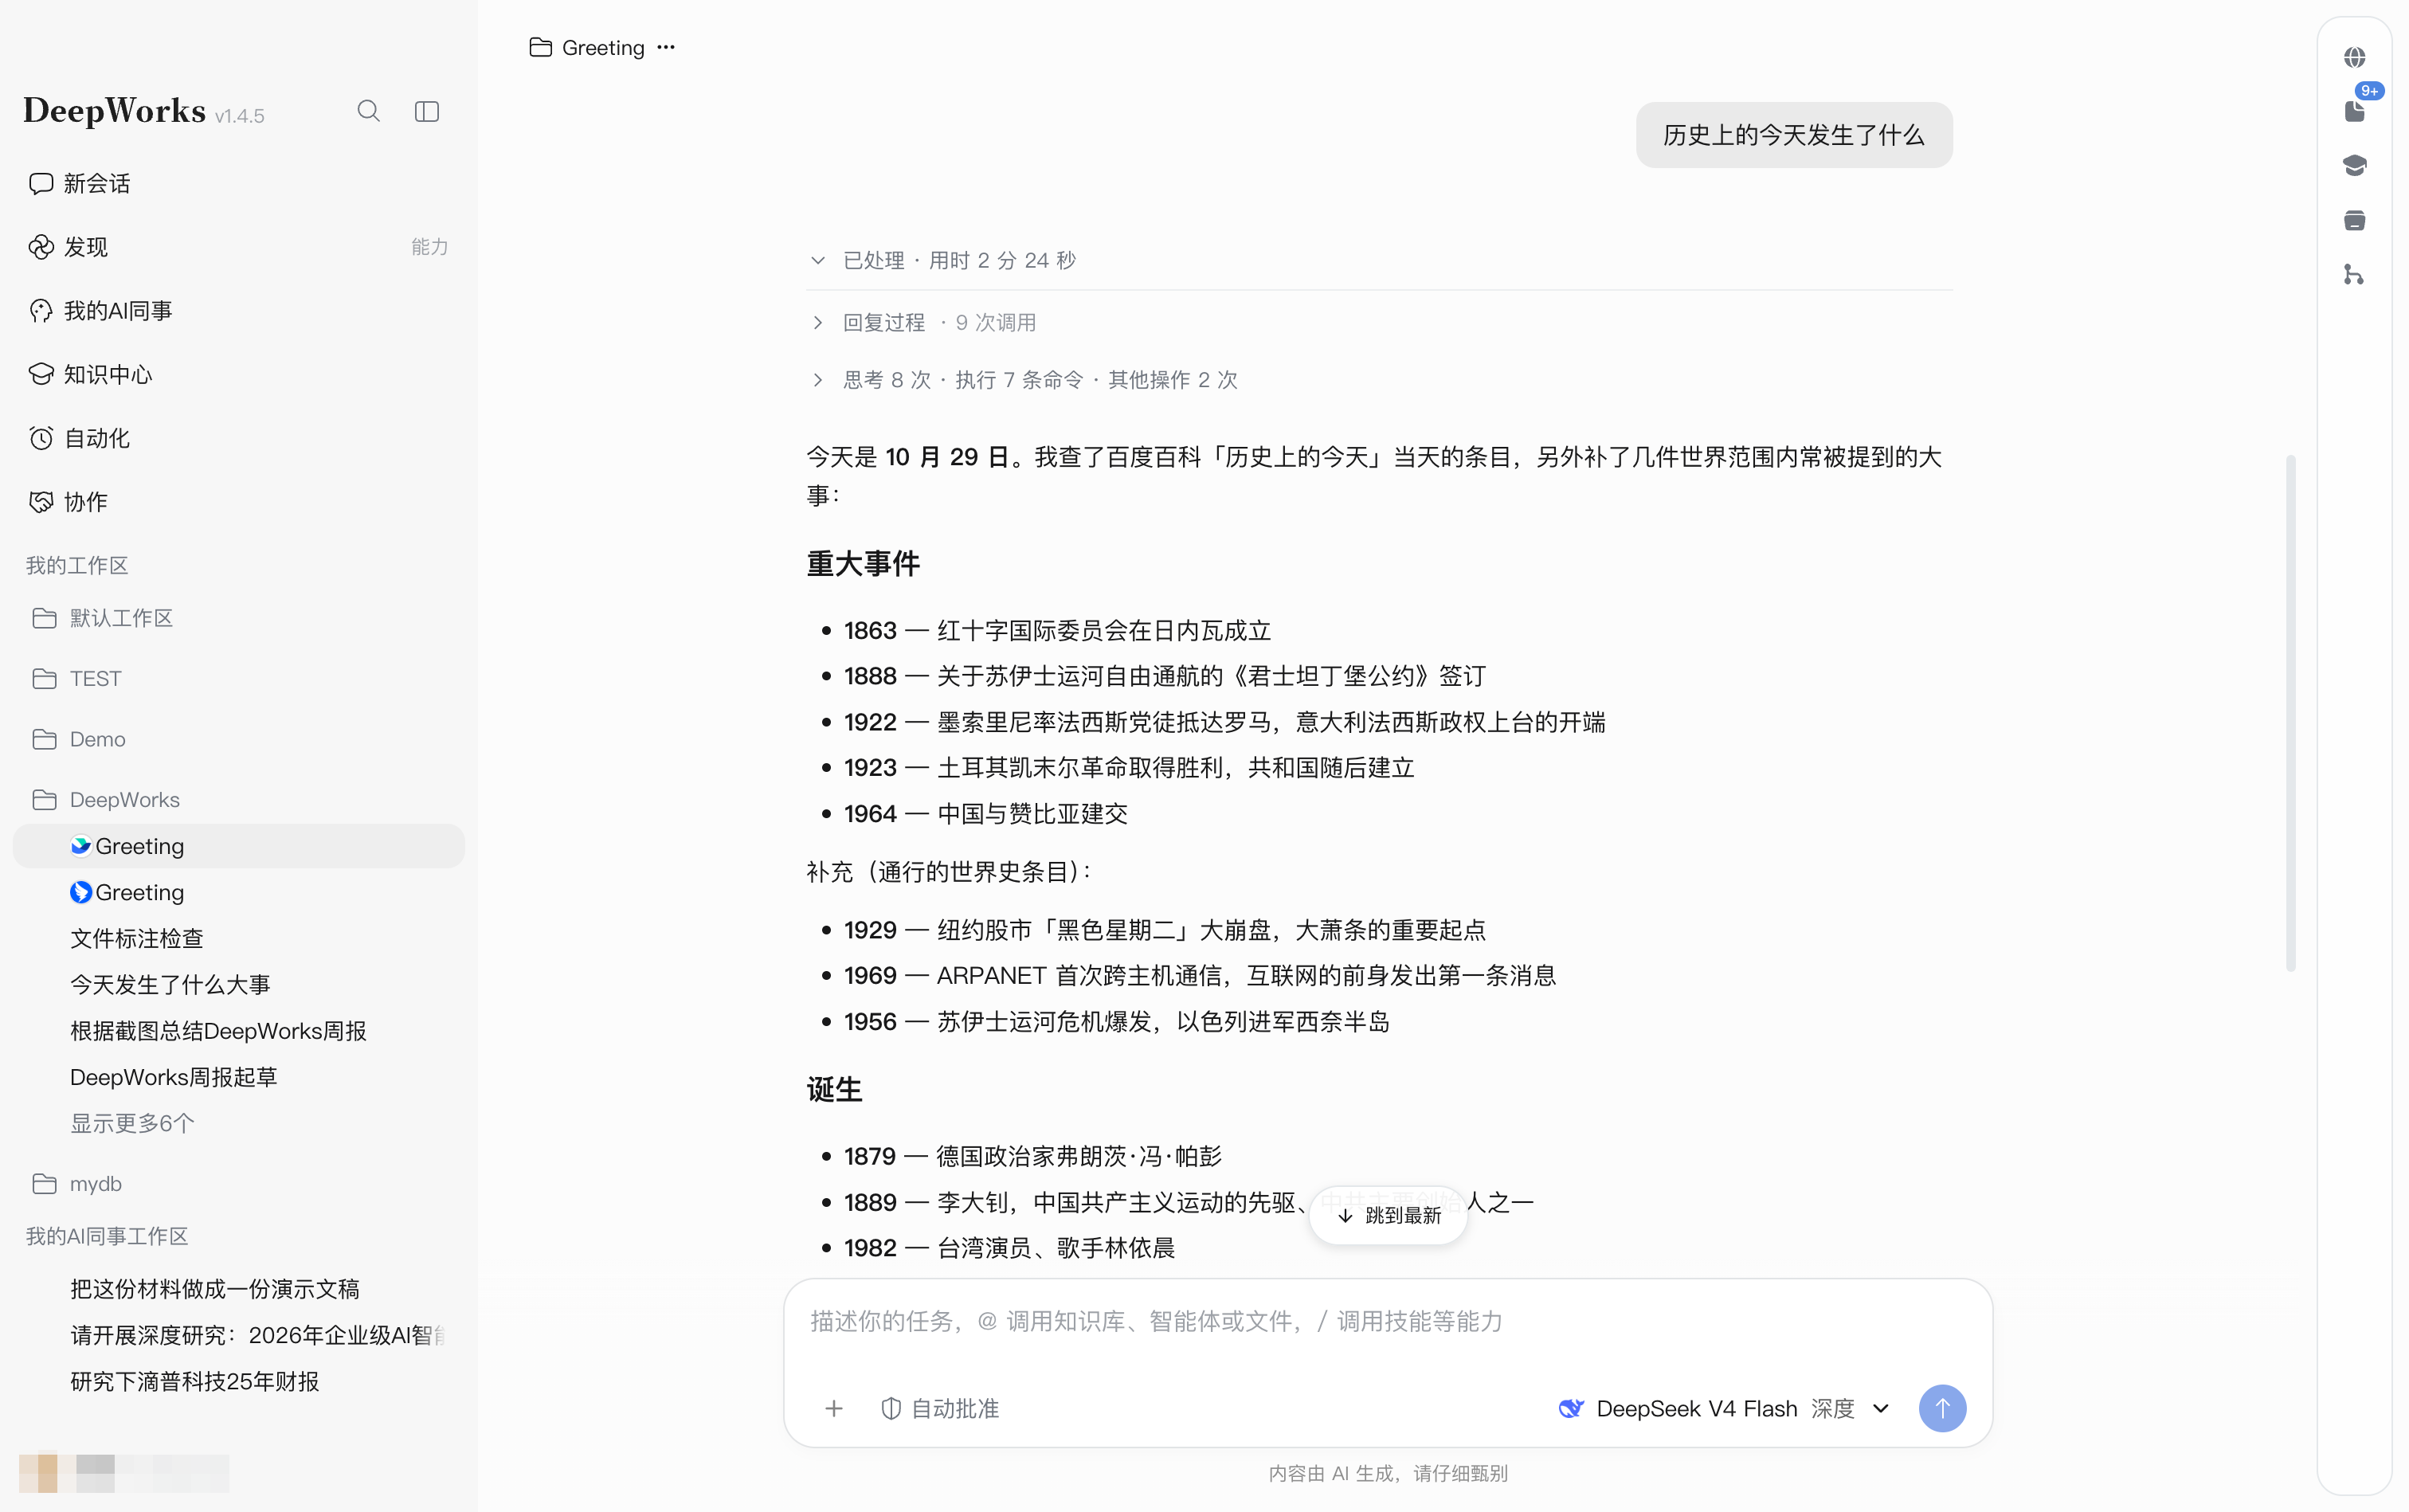
Managing My Bots
Modifying Bot Configuration
Taking a DingTalk bot as an example:
- In the “My Bots” list, find the DingTalk bot to be modified and click Configure.
- In the configuration dialog, modify the bot name, App ID, or App Secret; you can also adjust the Enable Bot toggle.
- Click Save to update the current bot’s configuration.
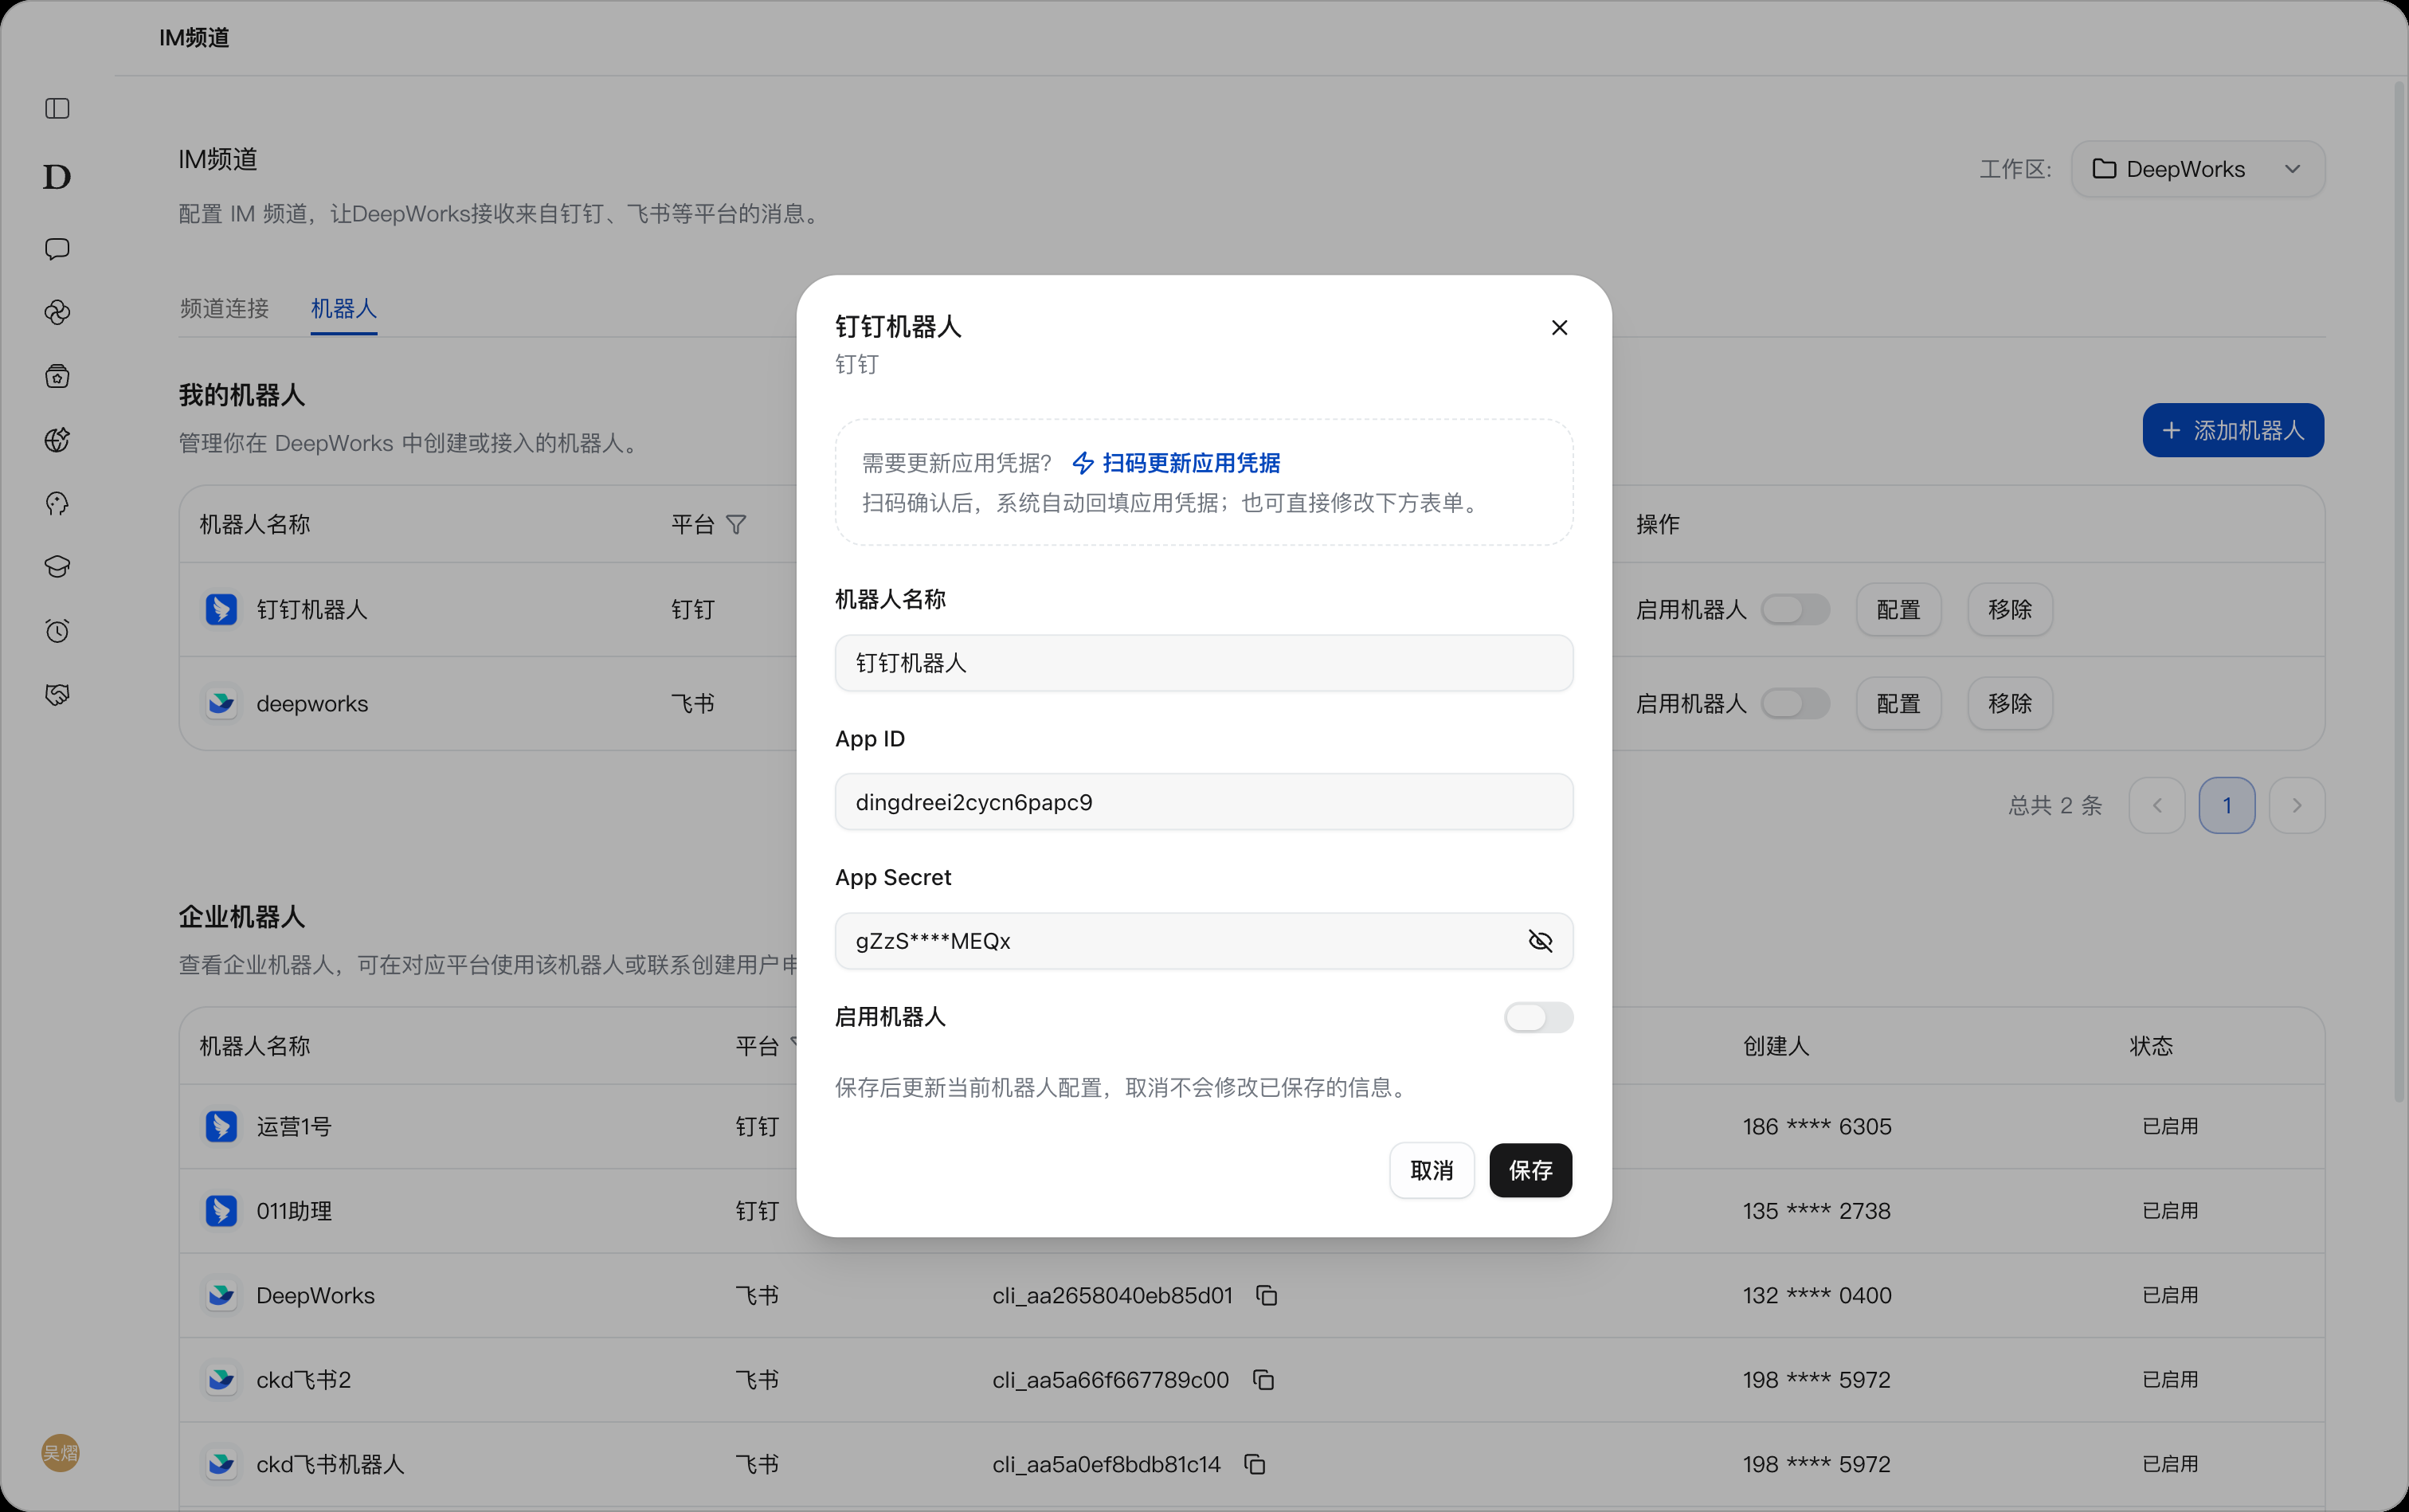
Clicking Cancel does not modify the saved information. A visibility toggle icon is provided to the right of the App Secret to show or hide the secret as needed.
Updating Application Credentials via QR Code
- In the DingTalk bot’s configuration dialog, click Scan QR Code to Update Application Credentials.
- Follow the page prompts to scan with DingTalk and complete the confirmation.
- Return to the configuration dialog and verify the application credentials automatically filled back in by the system.
- Click Save to make the changes take effect.
You can also modify the application credentials directly in the form and then save.
Enabling or Disabling a Bot
In the “My Bots” list, adjust the status via the Enable Bot toggle in the target bot’s row. You can also clickConfigure, adjust theEnable Bot toggle in the dialog, and then clickSave.
A bot can only be used by yourself or others after it is enabled.
Removing a Bot
In the “My Bots” list, find the target bot and click Remove, then follow the prompts on the following pages to complete the operation.
Remove is the bot management entry; to release the platform phone number binding, go to the Channel Connections tab and performUnbind.
Using Bots in Instant Messaging Platforms
After completing the channel connection and bot integration, you can send tasks and receive replies in instant messaging platforms, and view the corresponding sessions in the DeepWorks desktop client. DingTalk is used as an example below.
Pre-use Checks
- In the Channel Connections tab, confirm that DingTalk is connected and the bound phone number matches the currently used DingTalk account.
- Confirm that the target bot has been integrated and is enabled, and that the current account has usage permission.
- Verify the workspace selected in the upper-right corner of the IM Channels page, so that the corresponding session can be found in the desktop client later.
Sending Tasks and Viewing Replies in DingTalk
- Open the chat window of the corresponding bot in DingTalk. The bot name in the example is “DeepWorks”.
- Enter your question or task requirements in the input box at the bottom.
- Click Send and wait for the bot to process.
- View the bot’s reply in the same chat window.
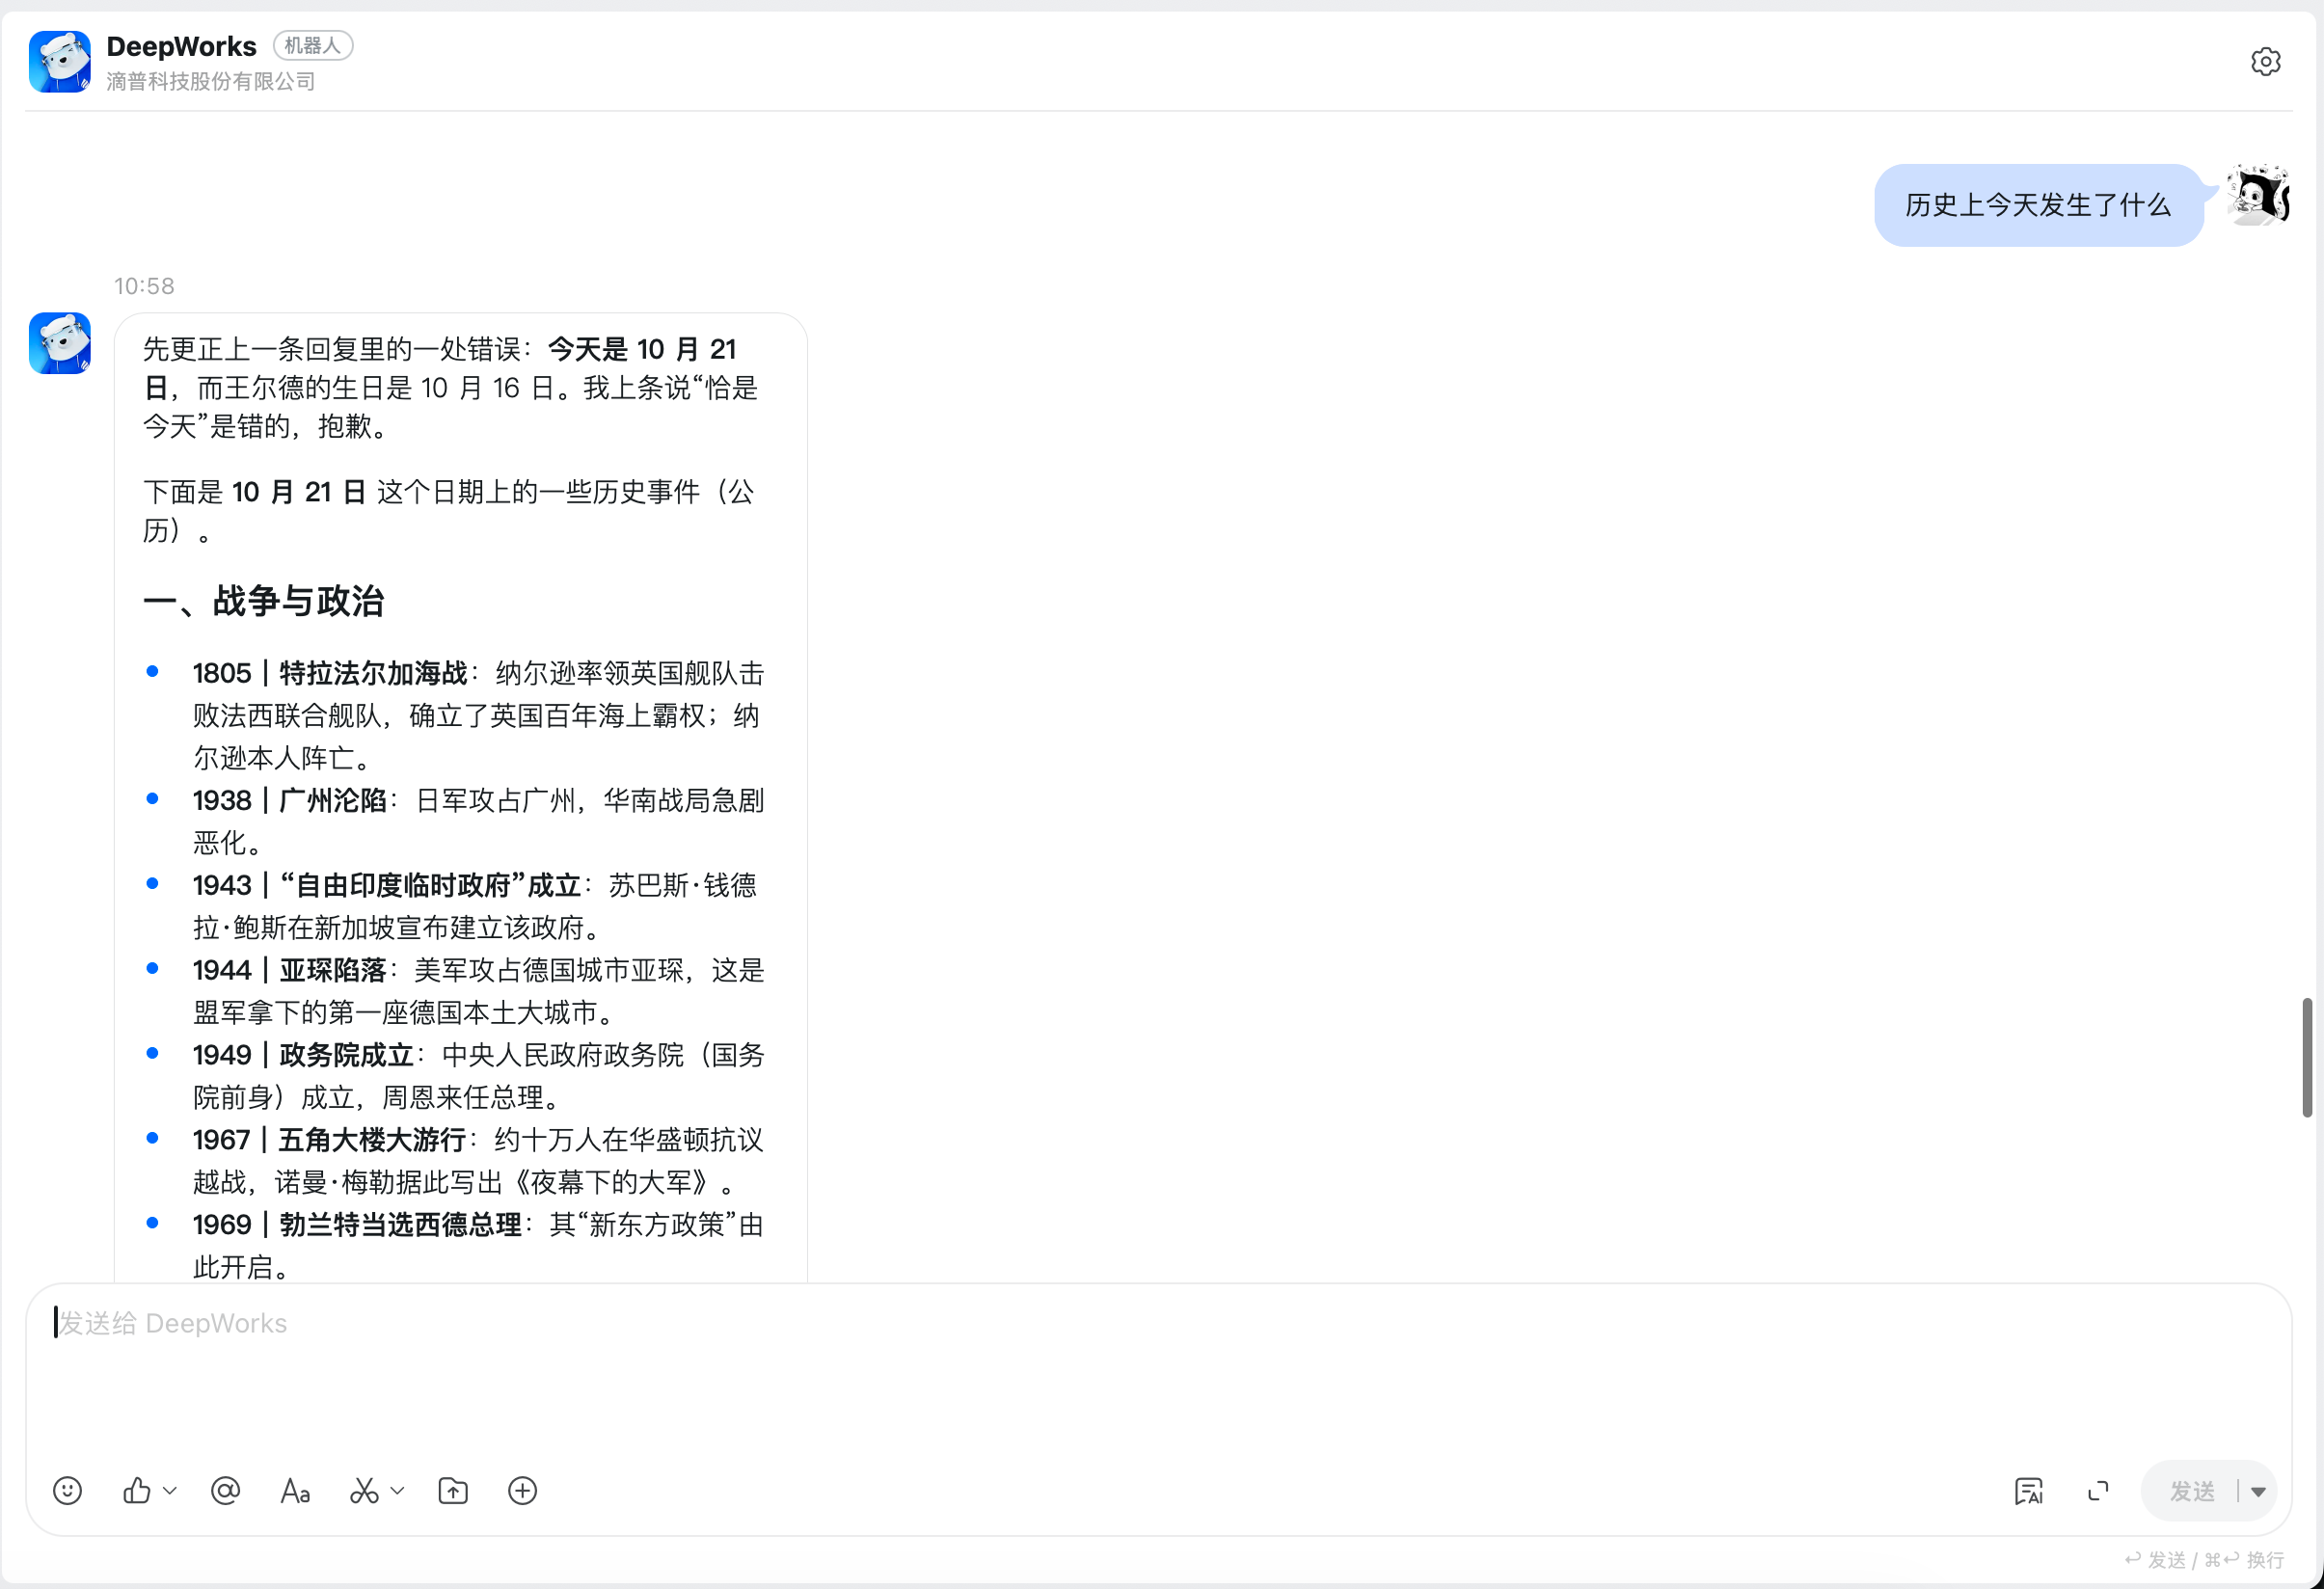
You can also enter task requirements such as document organization or information retrieval. The actual executable scope depends on the workspace’s file authorization, the configured tools, and the related account permissions.
Viewing the Corresponding Session in the DeepWorks Desktop Client
- Return to the DeepWorks desktop client and find the workspace selected in IM Channels under “My Workspaces” on the left.
- In that workspace’s session list, click the session corresponding to the task.
- In the session body, view the sent question and the AI reply, and verify the task processing result. The page also displays the processing status and elapsed time.
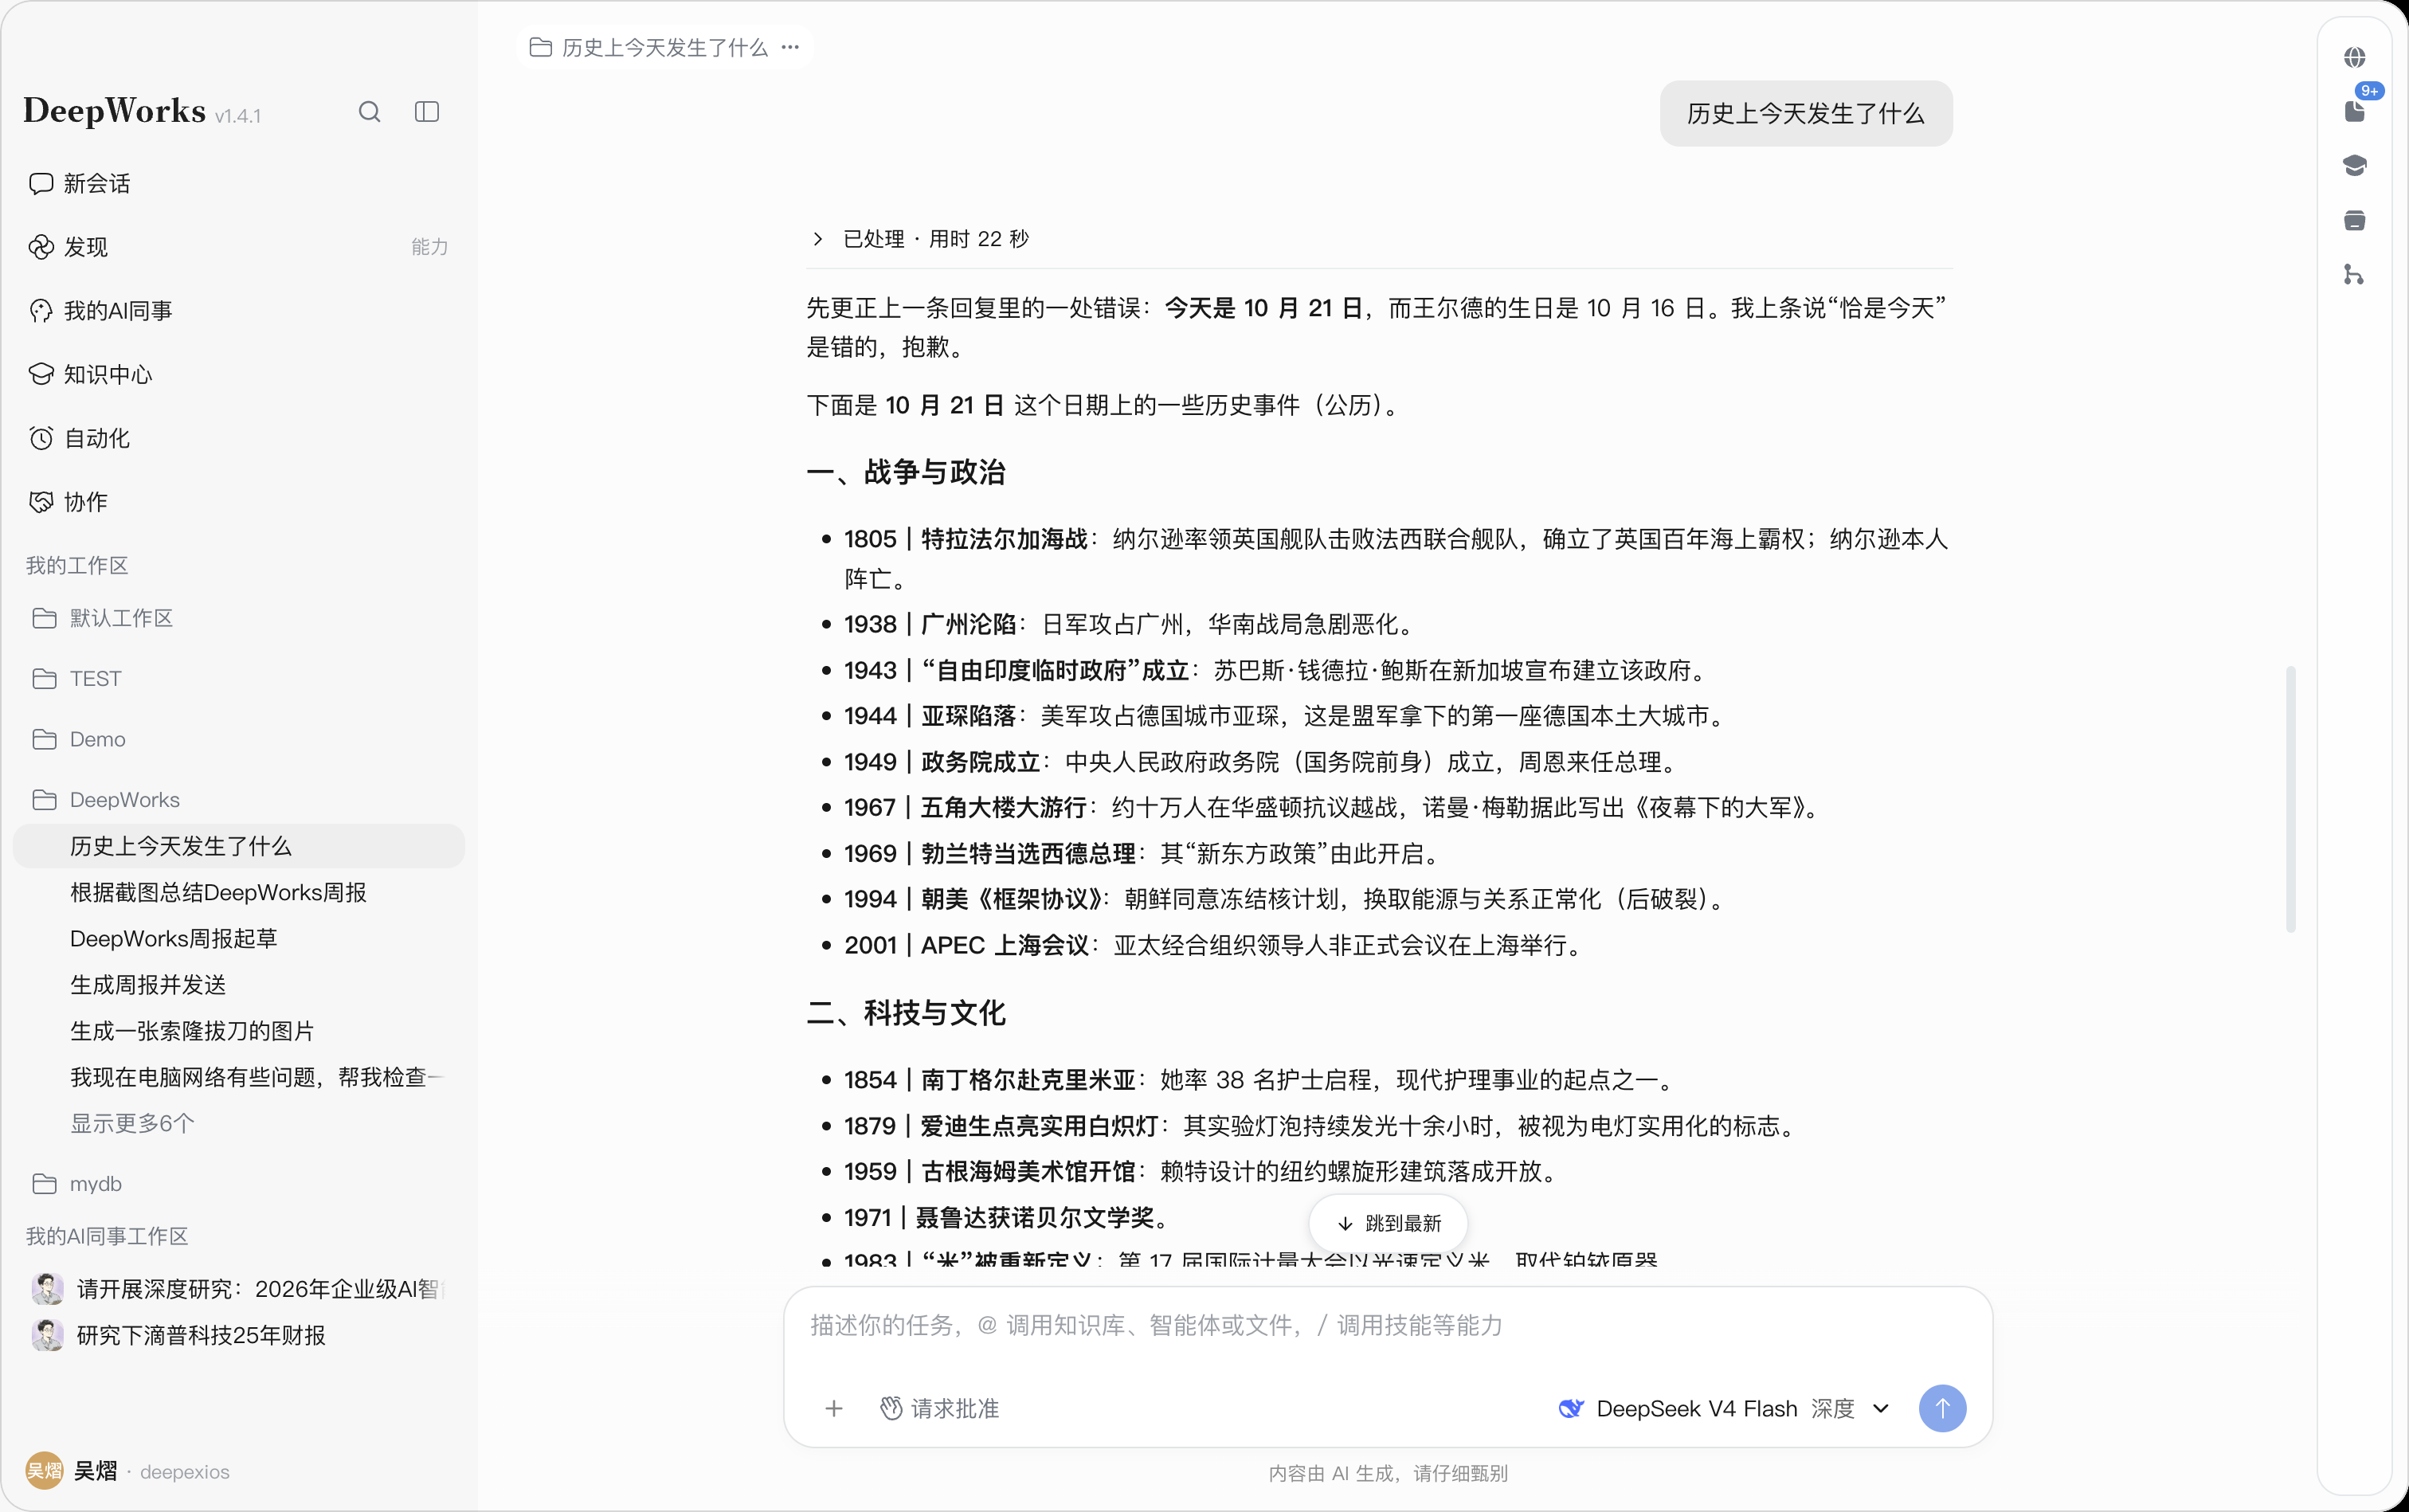
In the example, both the DingTalk chat and the DeepWorks desktop client session show the same question and its corresponding reply, so you can view the results on either side as needed.
Collaboration
Collaboration is used to centrally manage tasks, materials, AI capabilities, and deliverables. Collaboration Spaces organize members and work content, the Asset Library stores files and their versions, and Task Management is used for assigning work and tracking progress; when you need AI to process something, you can choose local execution or cloud execution and submit the results back to the Asset Library.
Collaboration Space List
Path: Collaboration in the left navigation.
The top of the page provides a space search box and a New Collaboration Space entry, and the list below filters spaces by five categories: Recently Used,Created by Me,I’m Participating In,Pending My Action, andArchived. Search matches spaces whose names contain the search term and can be combined with filters.
Each space in the list shows its name, description, status label, number of files and members, creator, and creation time. Click the space’s main information to enter its workspace, or click the pending count to go to that space’s pending list.
Click … at the end of a row to open the space action menu; the menu items shown depend on your current role and the space status:
| Action | Description |
|---|---|
| Mark as Complete | Sets an in-progress space to completed; completed spaces open in read-only mode |
| Archive | Moves the space to the archived list so it no longer appears in other filter results |
| Edit | Edits the space name and description; only in-progress spaces can be edited |
| Delete | Permanently deletes the space and its contents; this cannot be undone |
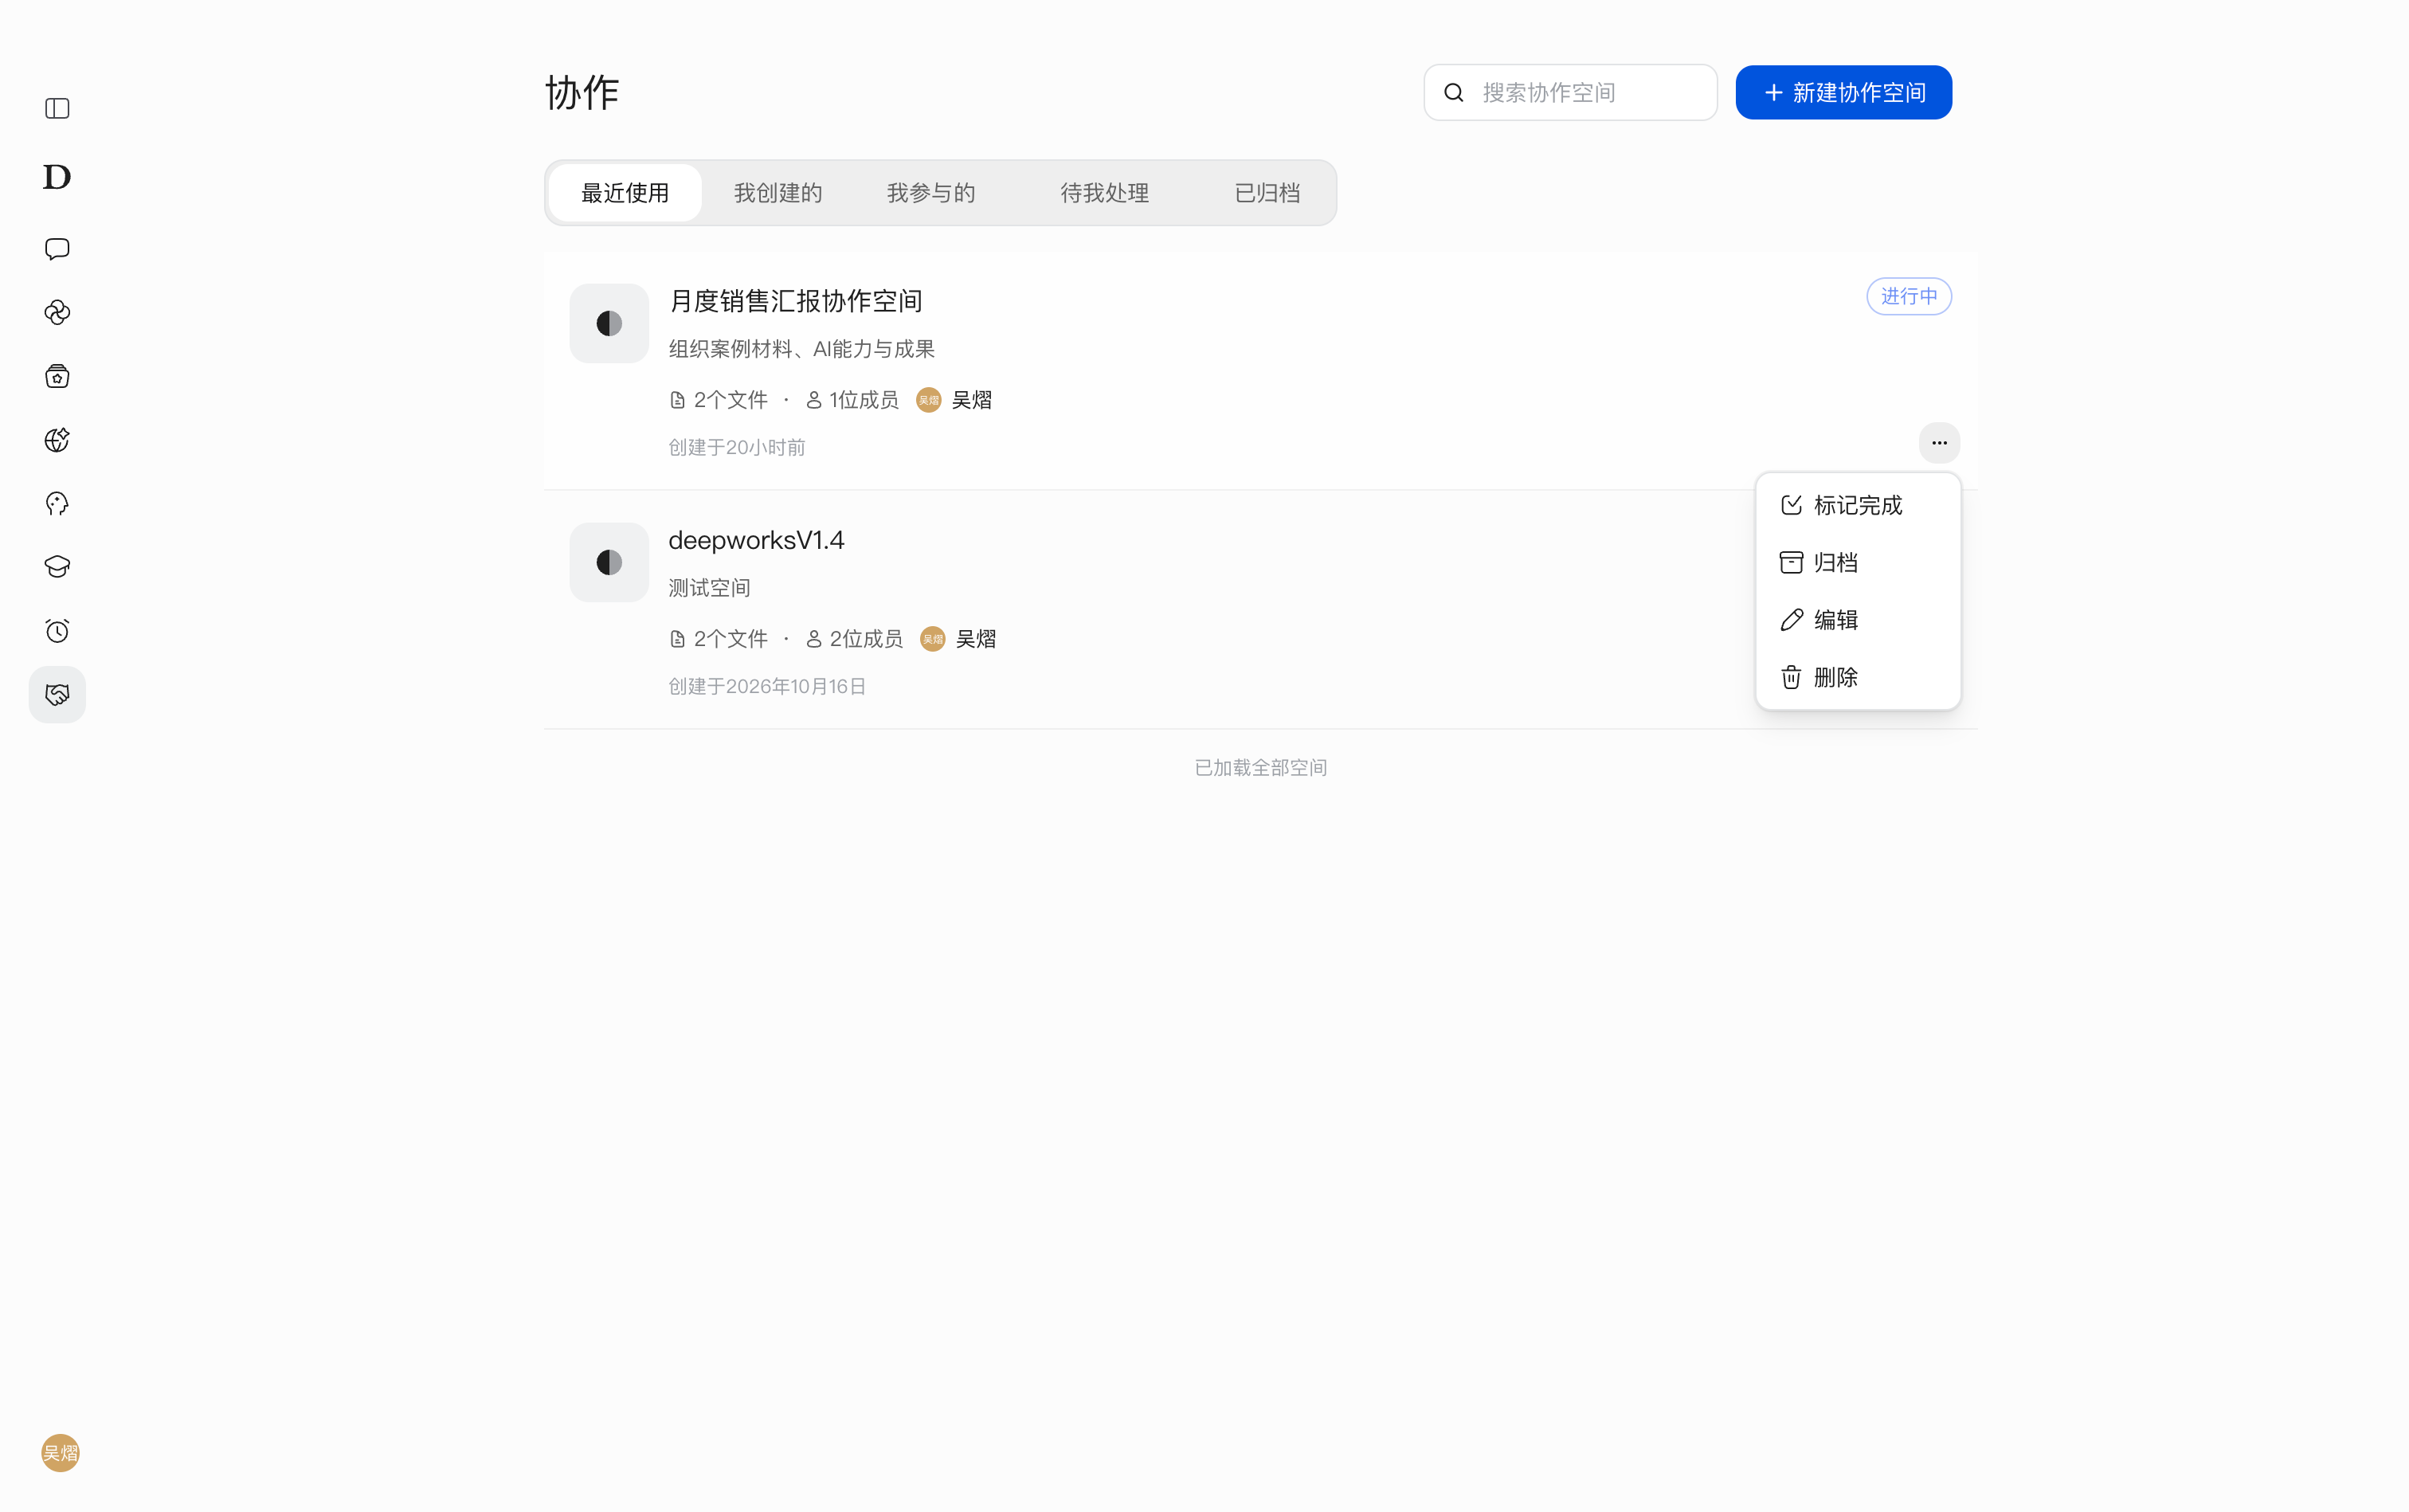
Creating and Entering a Collaboration Space
Path: Collaboration in the left navigation →New Collaboration Space.
Click New Collaboration Space, fill in the required space name, optionally fill in a description, and click Create. After the space is created, you enter it, where you can use Task Management,Cloud Execution,Space Settings, and the Asset Library on the left.
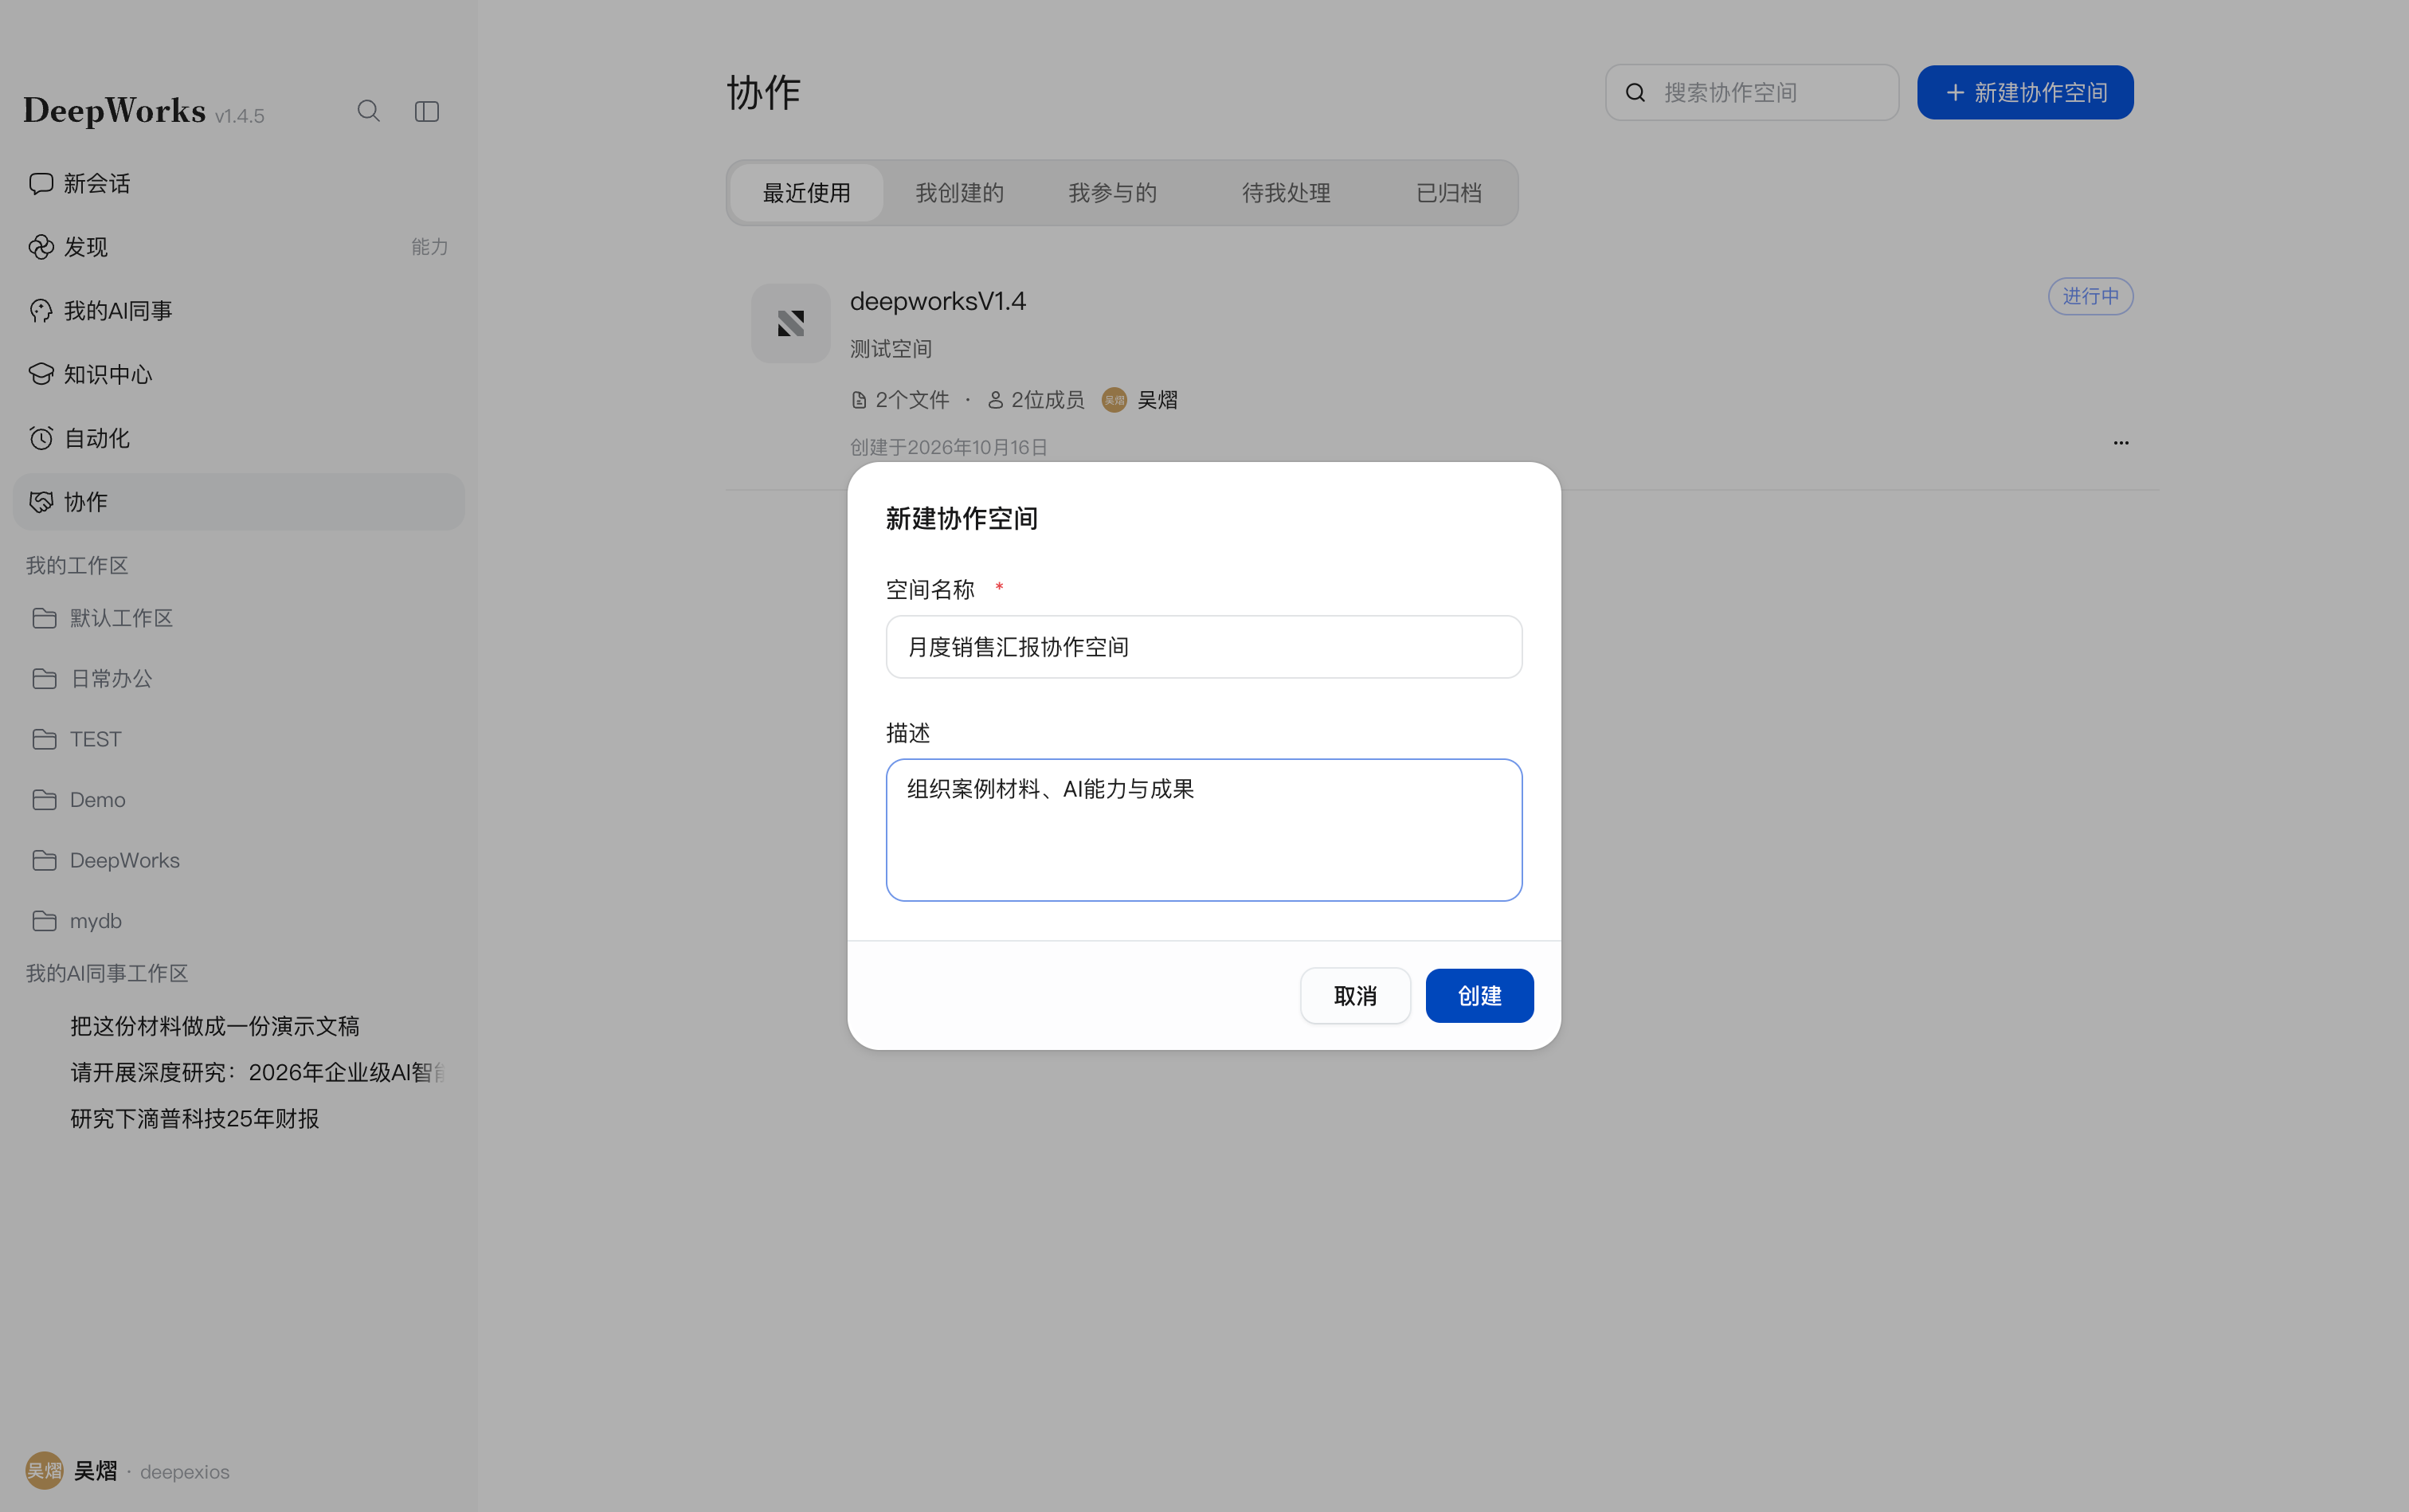
Space Settings
Member Management
Go to Space Settings →Member Management to view space members and roles; you can search by member or filter by role. The page provides role information such as administrator, collaborator, and visitor.
Click Invite Members to send an invitation, and useInvite Records to view invitation status. The specific actions available depend on your current account permissions and the options on the page.
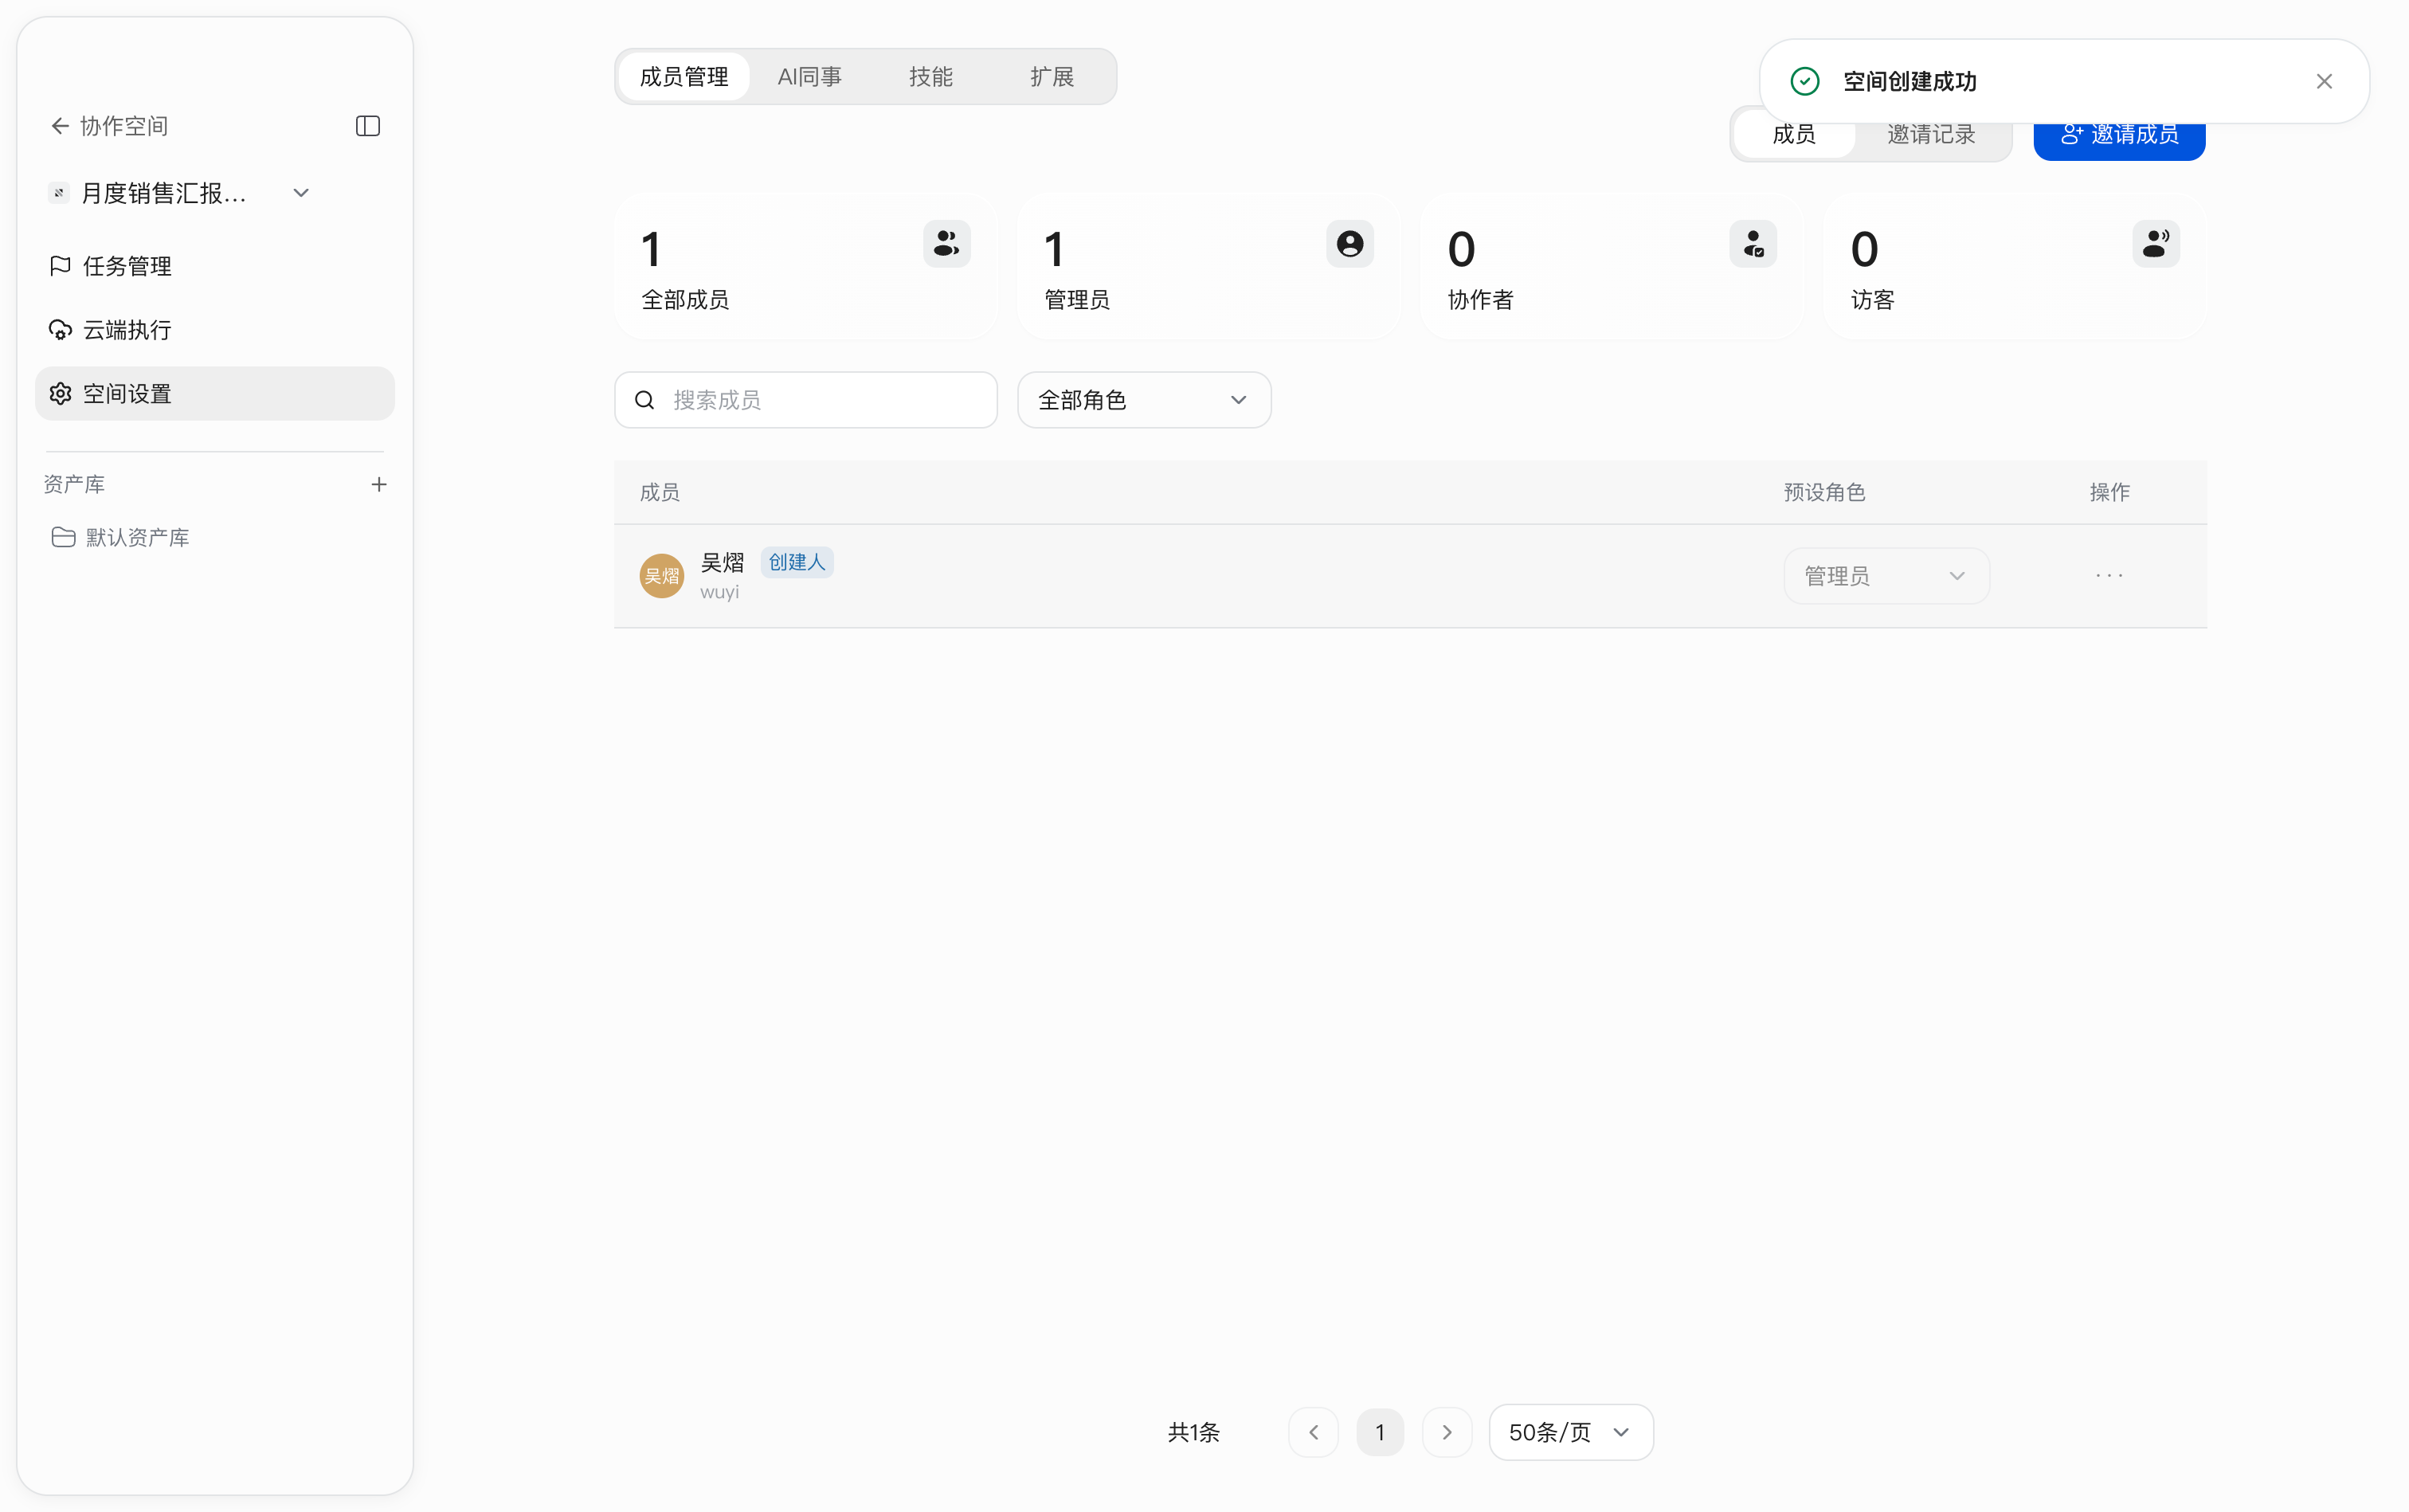
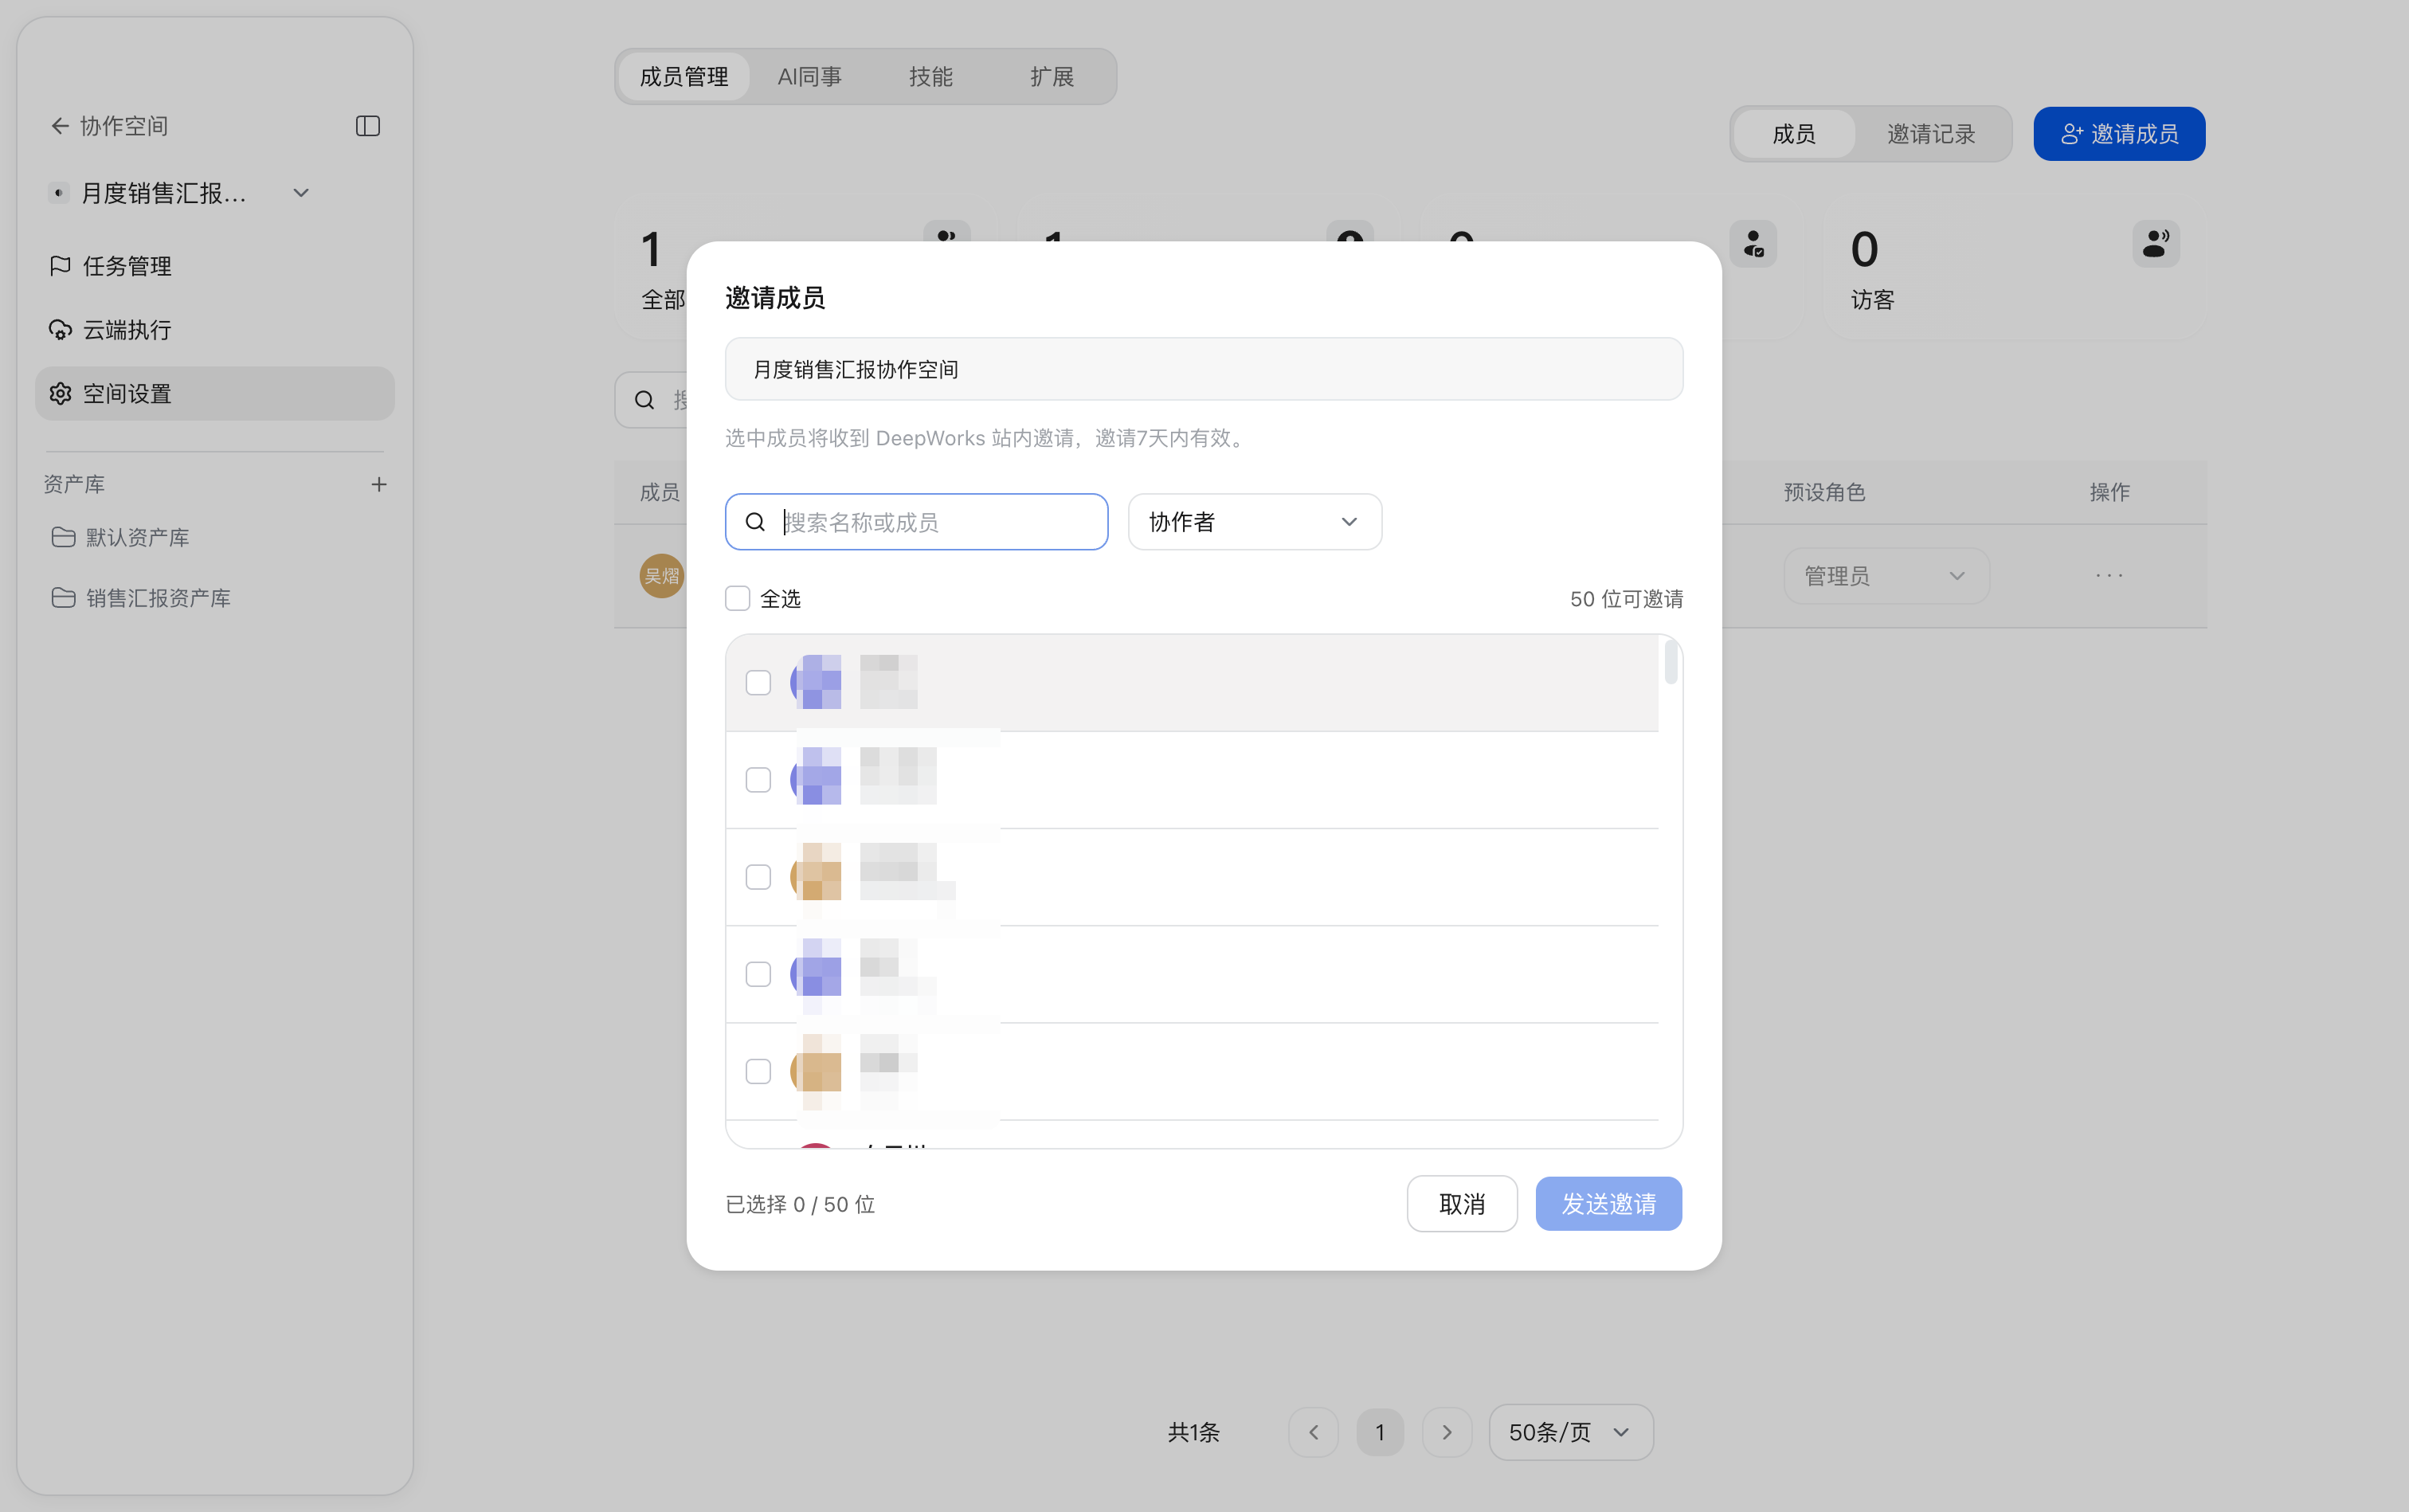
Adding AI Colleagues
Go to Space Settings →AI Colleagues →Add AI Colleague, search or filter capabilities by type and category, select the AI Colleagues you need, and confirm adding them. After adding, you can select and use them in execution sessions in the current space.
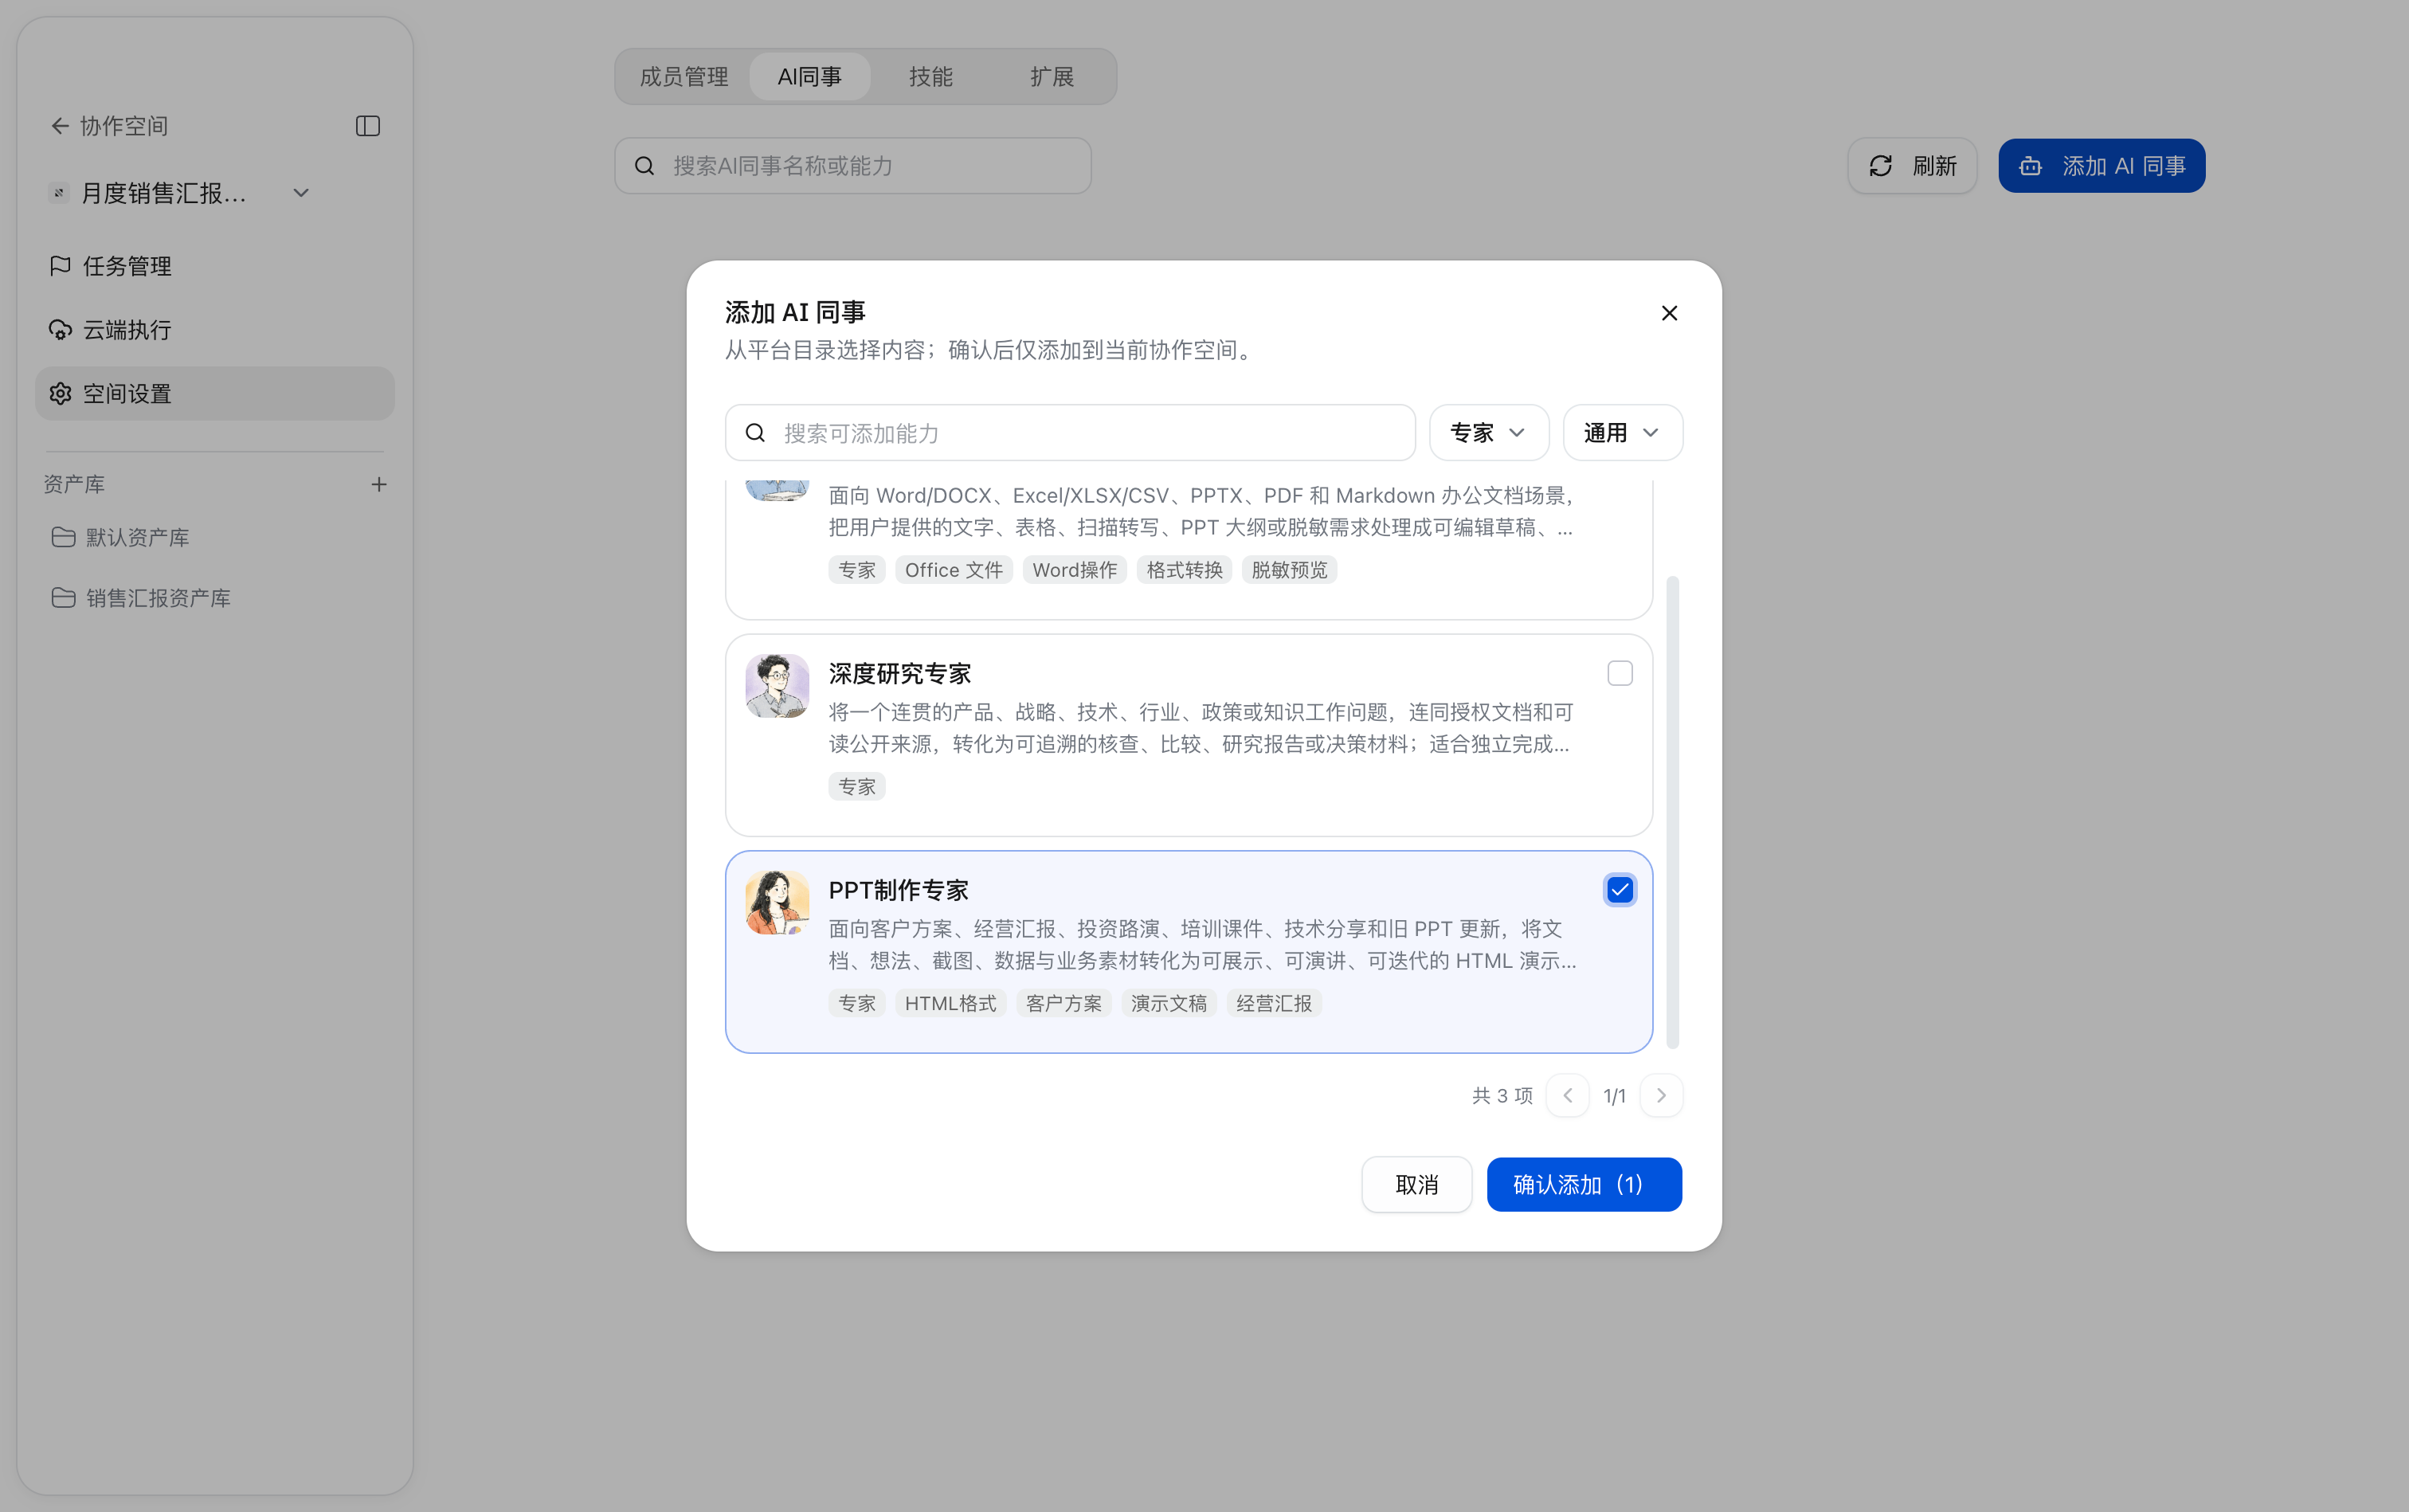
Skills and Extensions
Space Settings provides theSkills andExtensions tabs for viewing and managing the corresponding capabilities in the space.
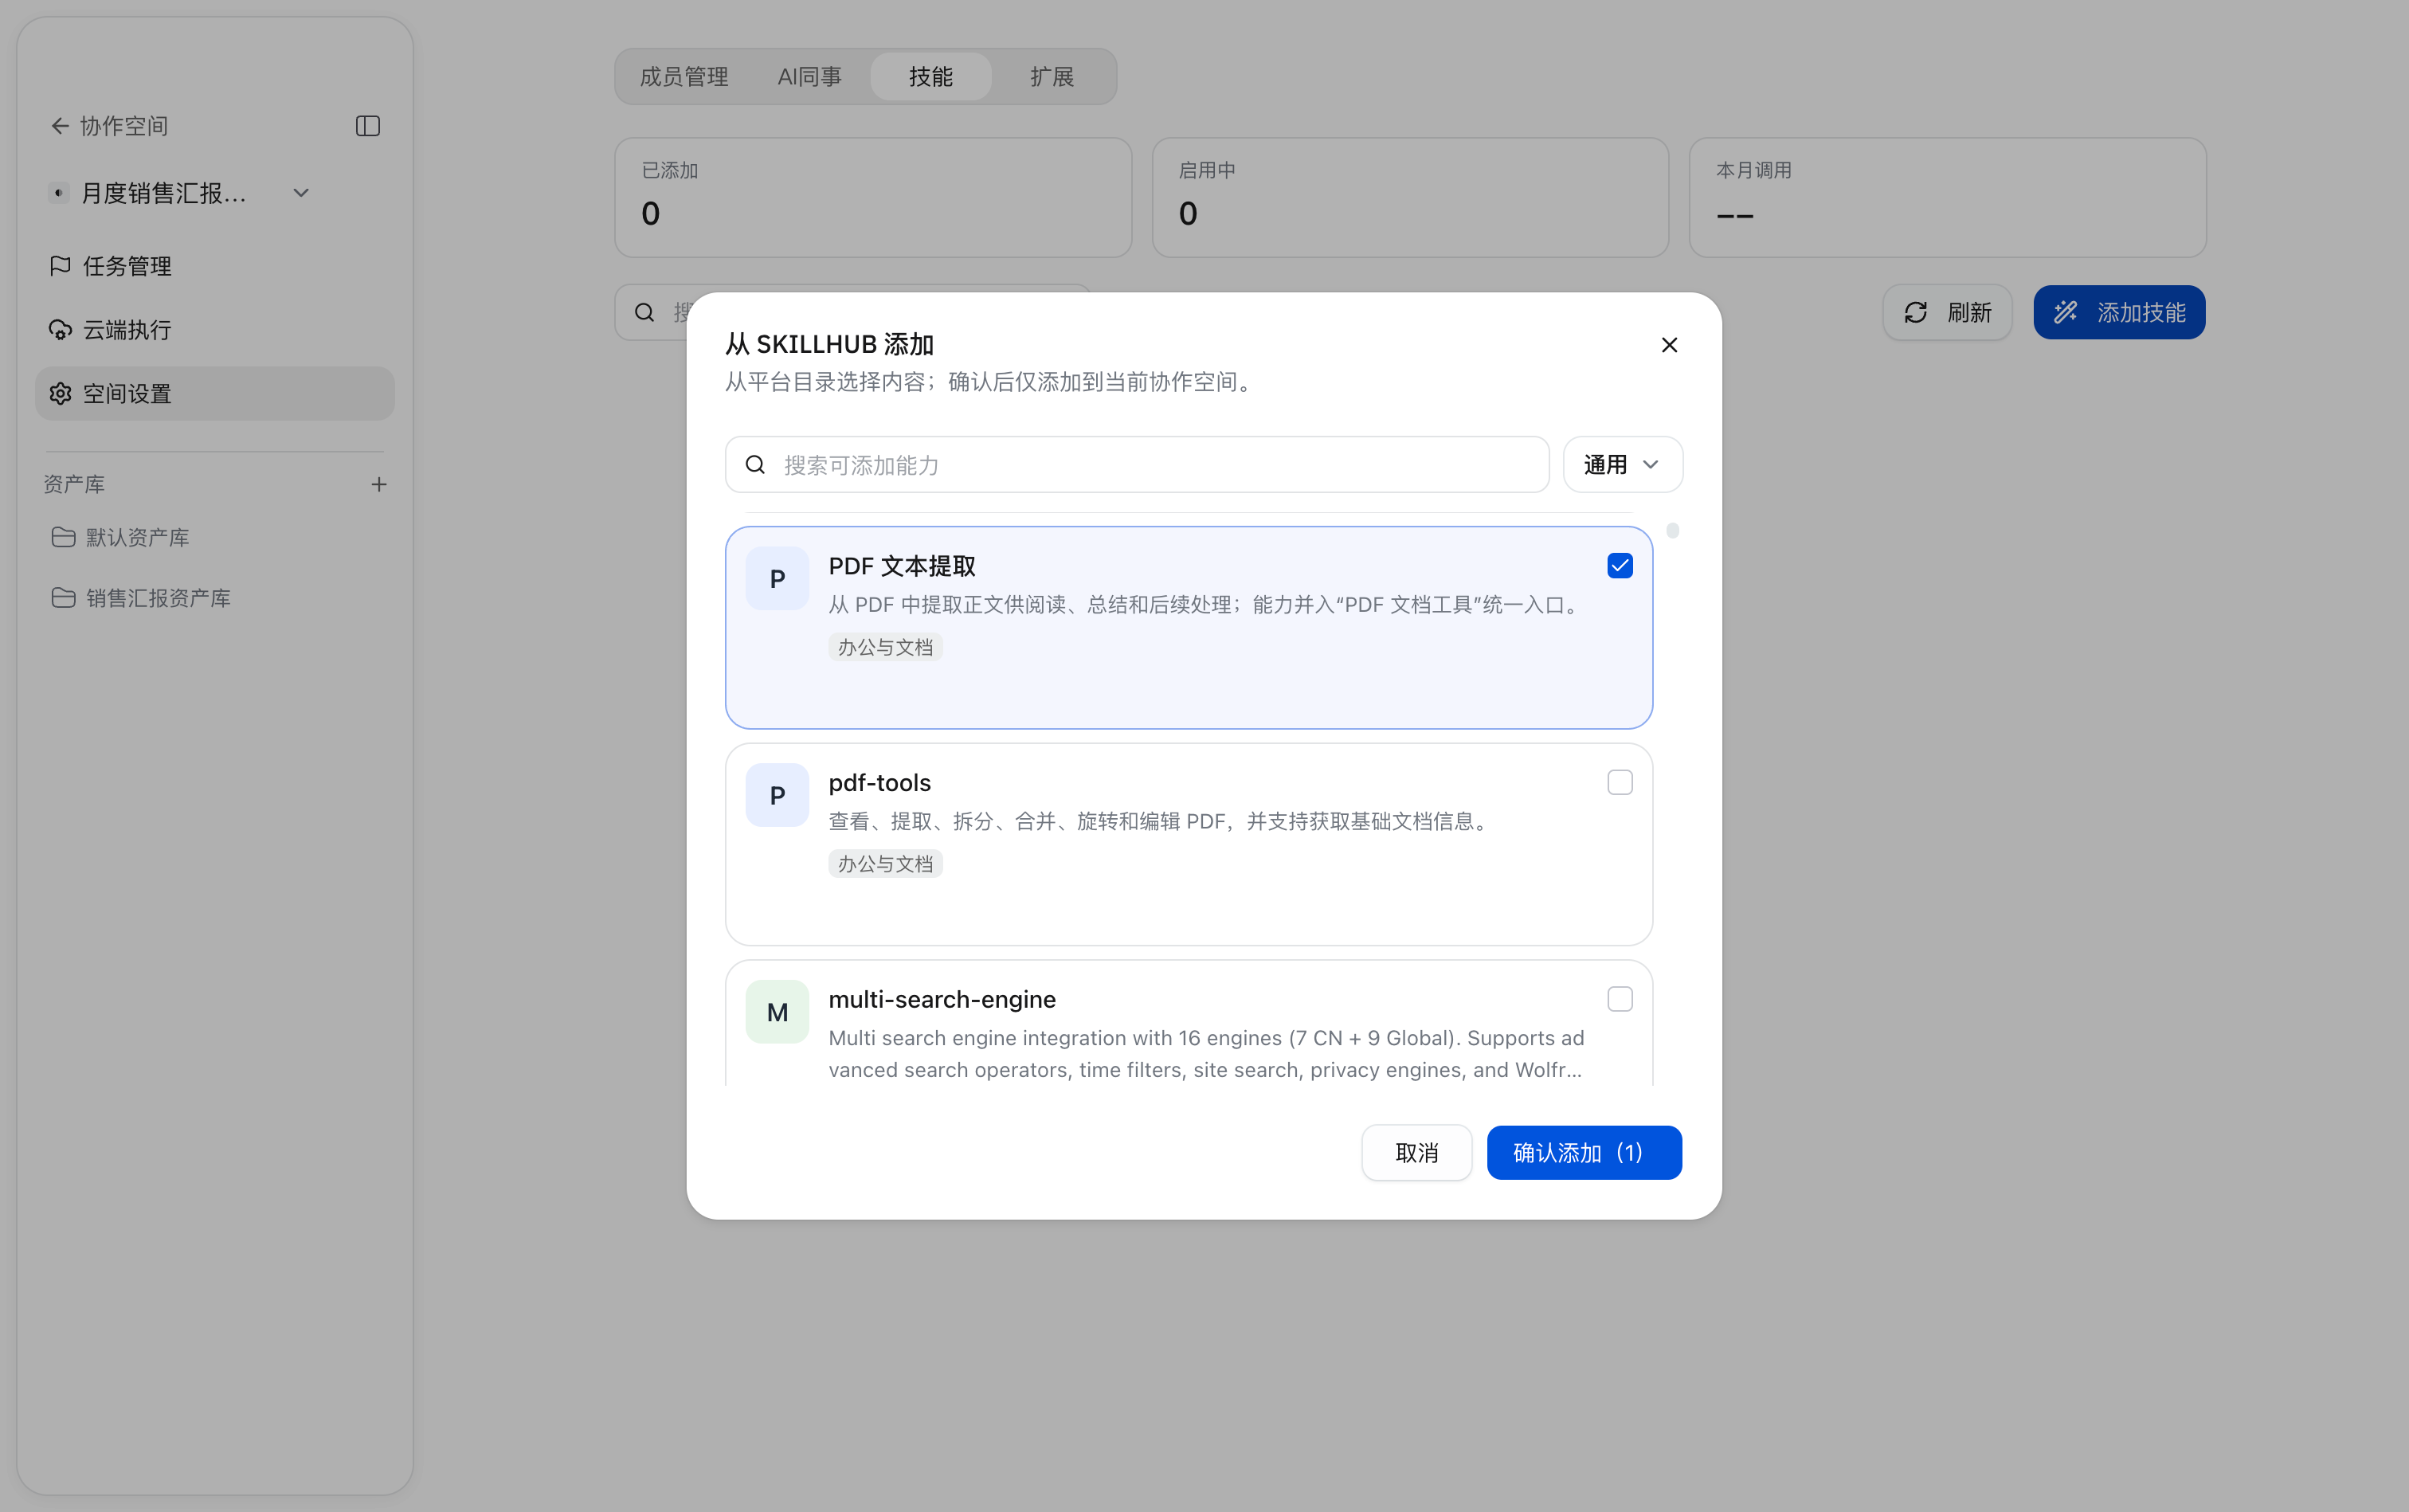
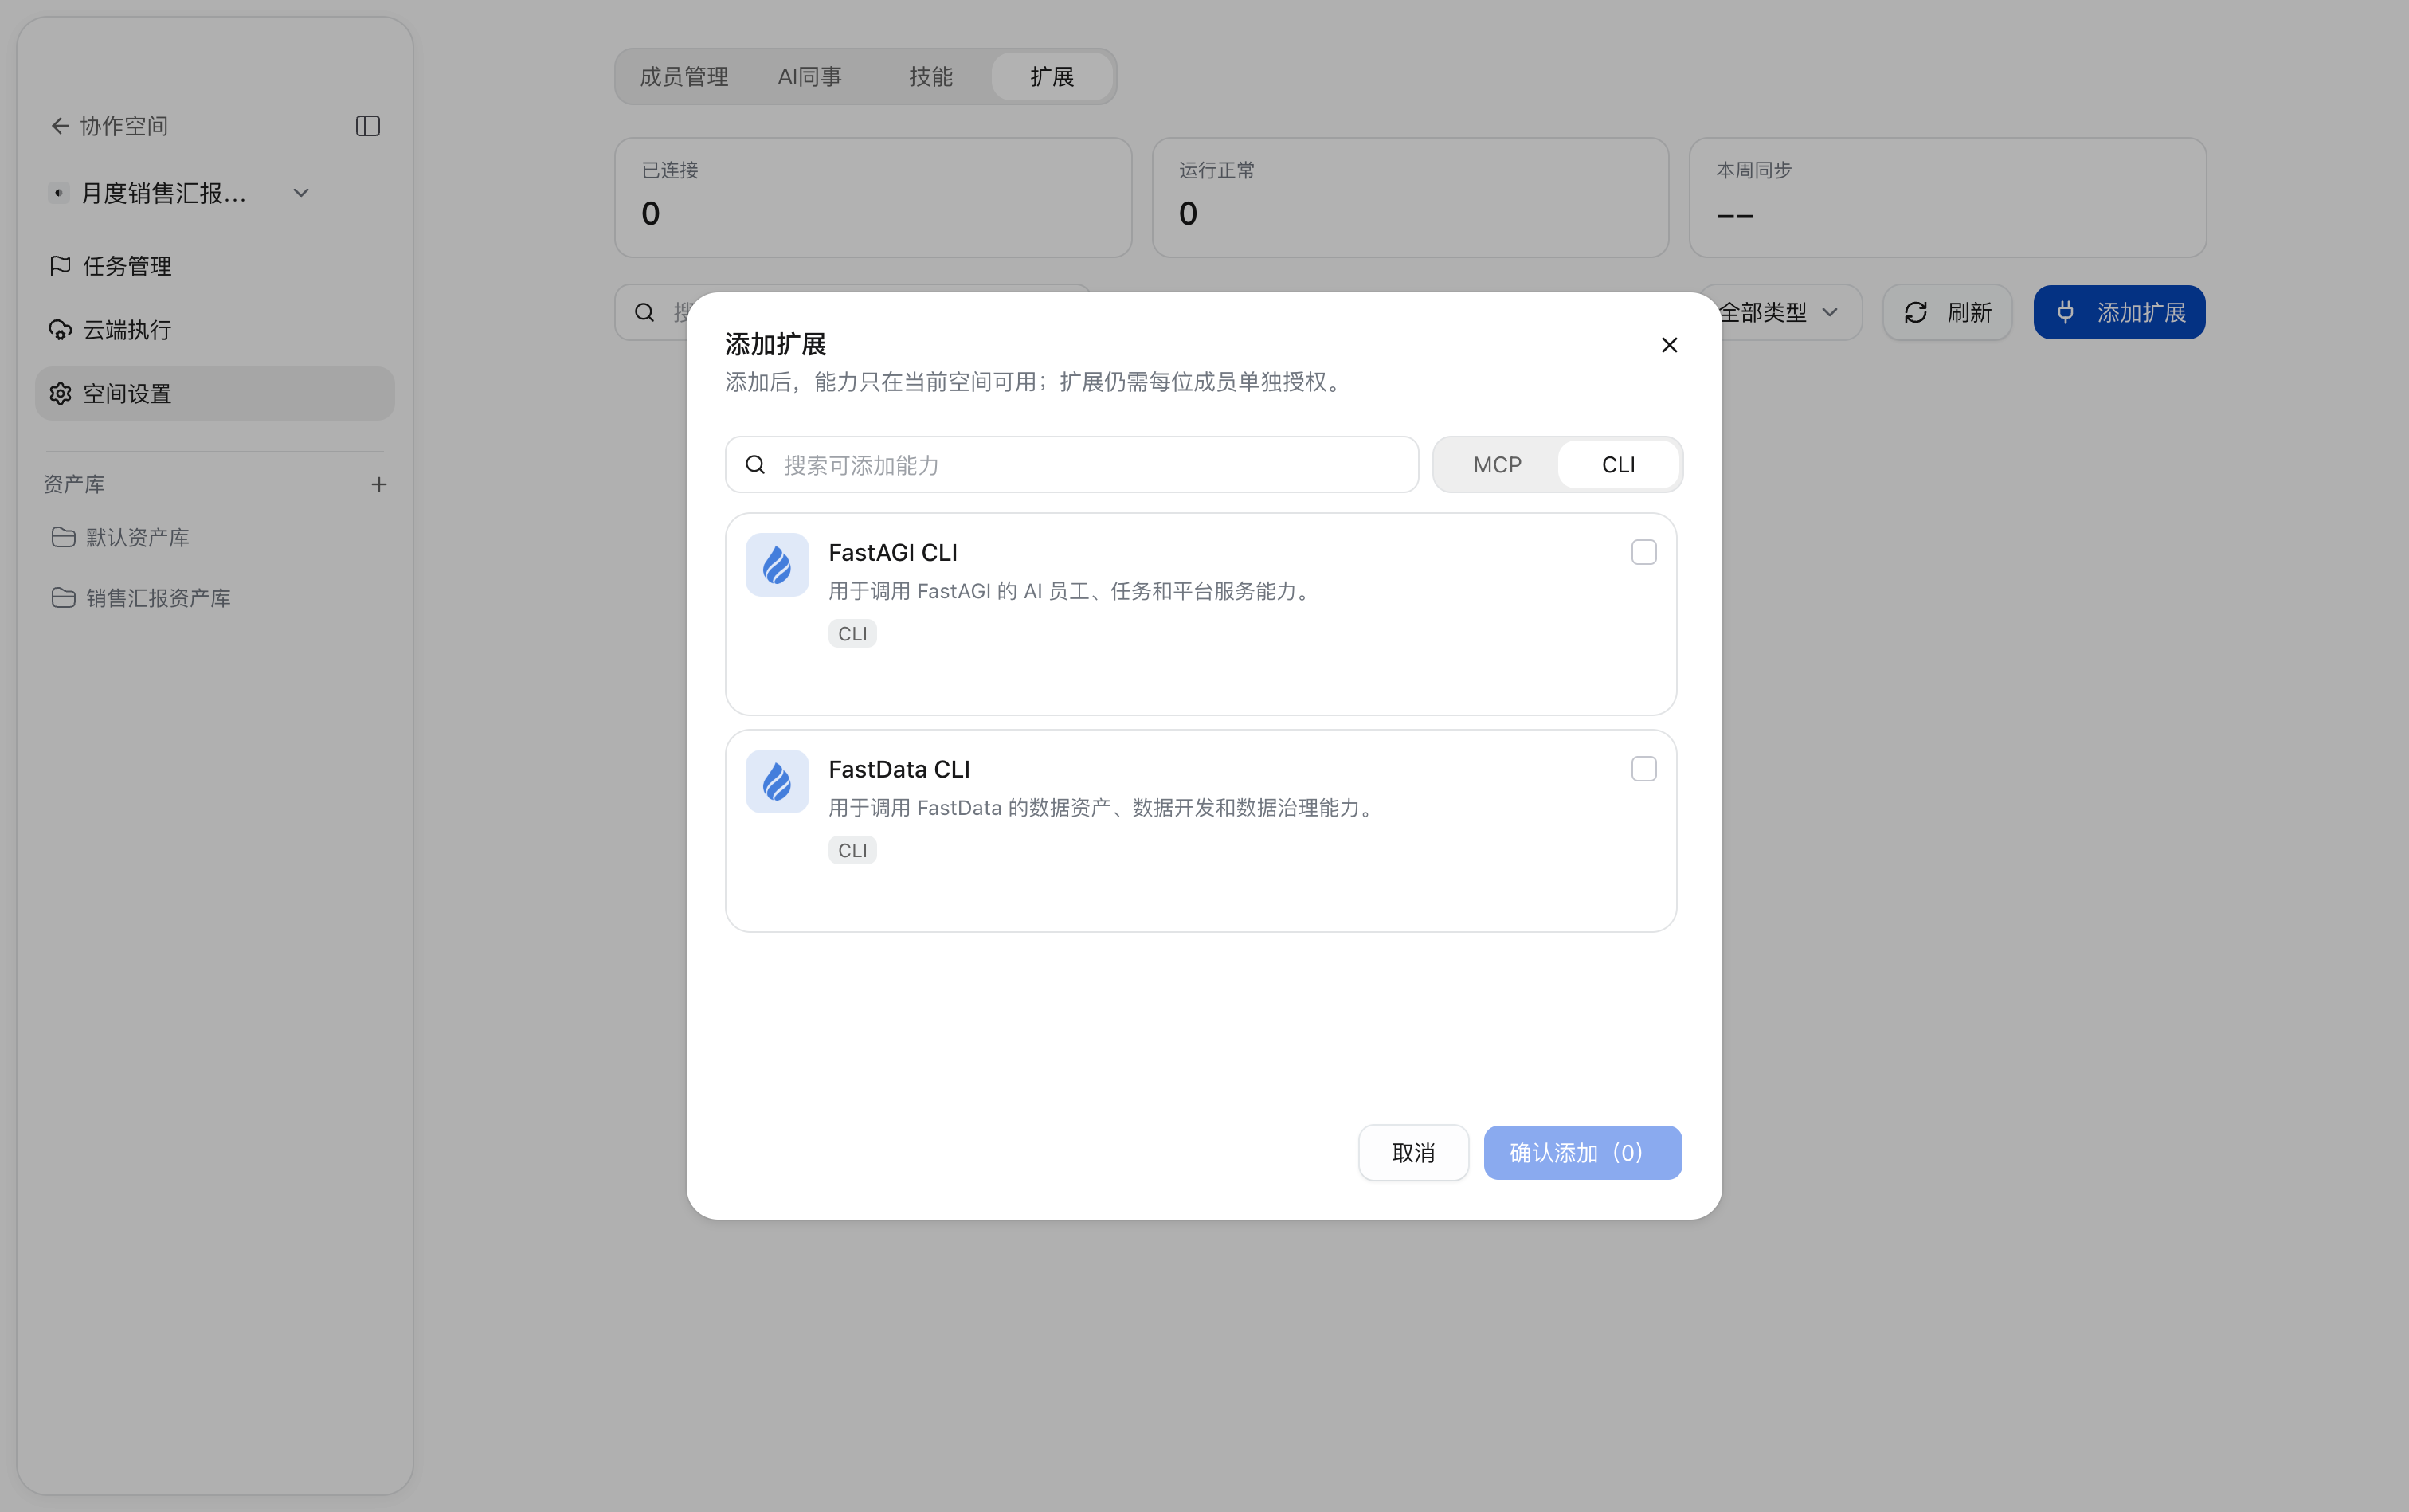
Asset Library and File Management
Creating an Asset Library
Click + next toAsset Library on the left side of the space, enter the Asset Library name, optionally enter a description, and click Save. After creation, you can enter the Asset Library from the left directory to centrally manage related materials and deliverables.
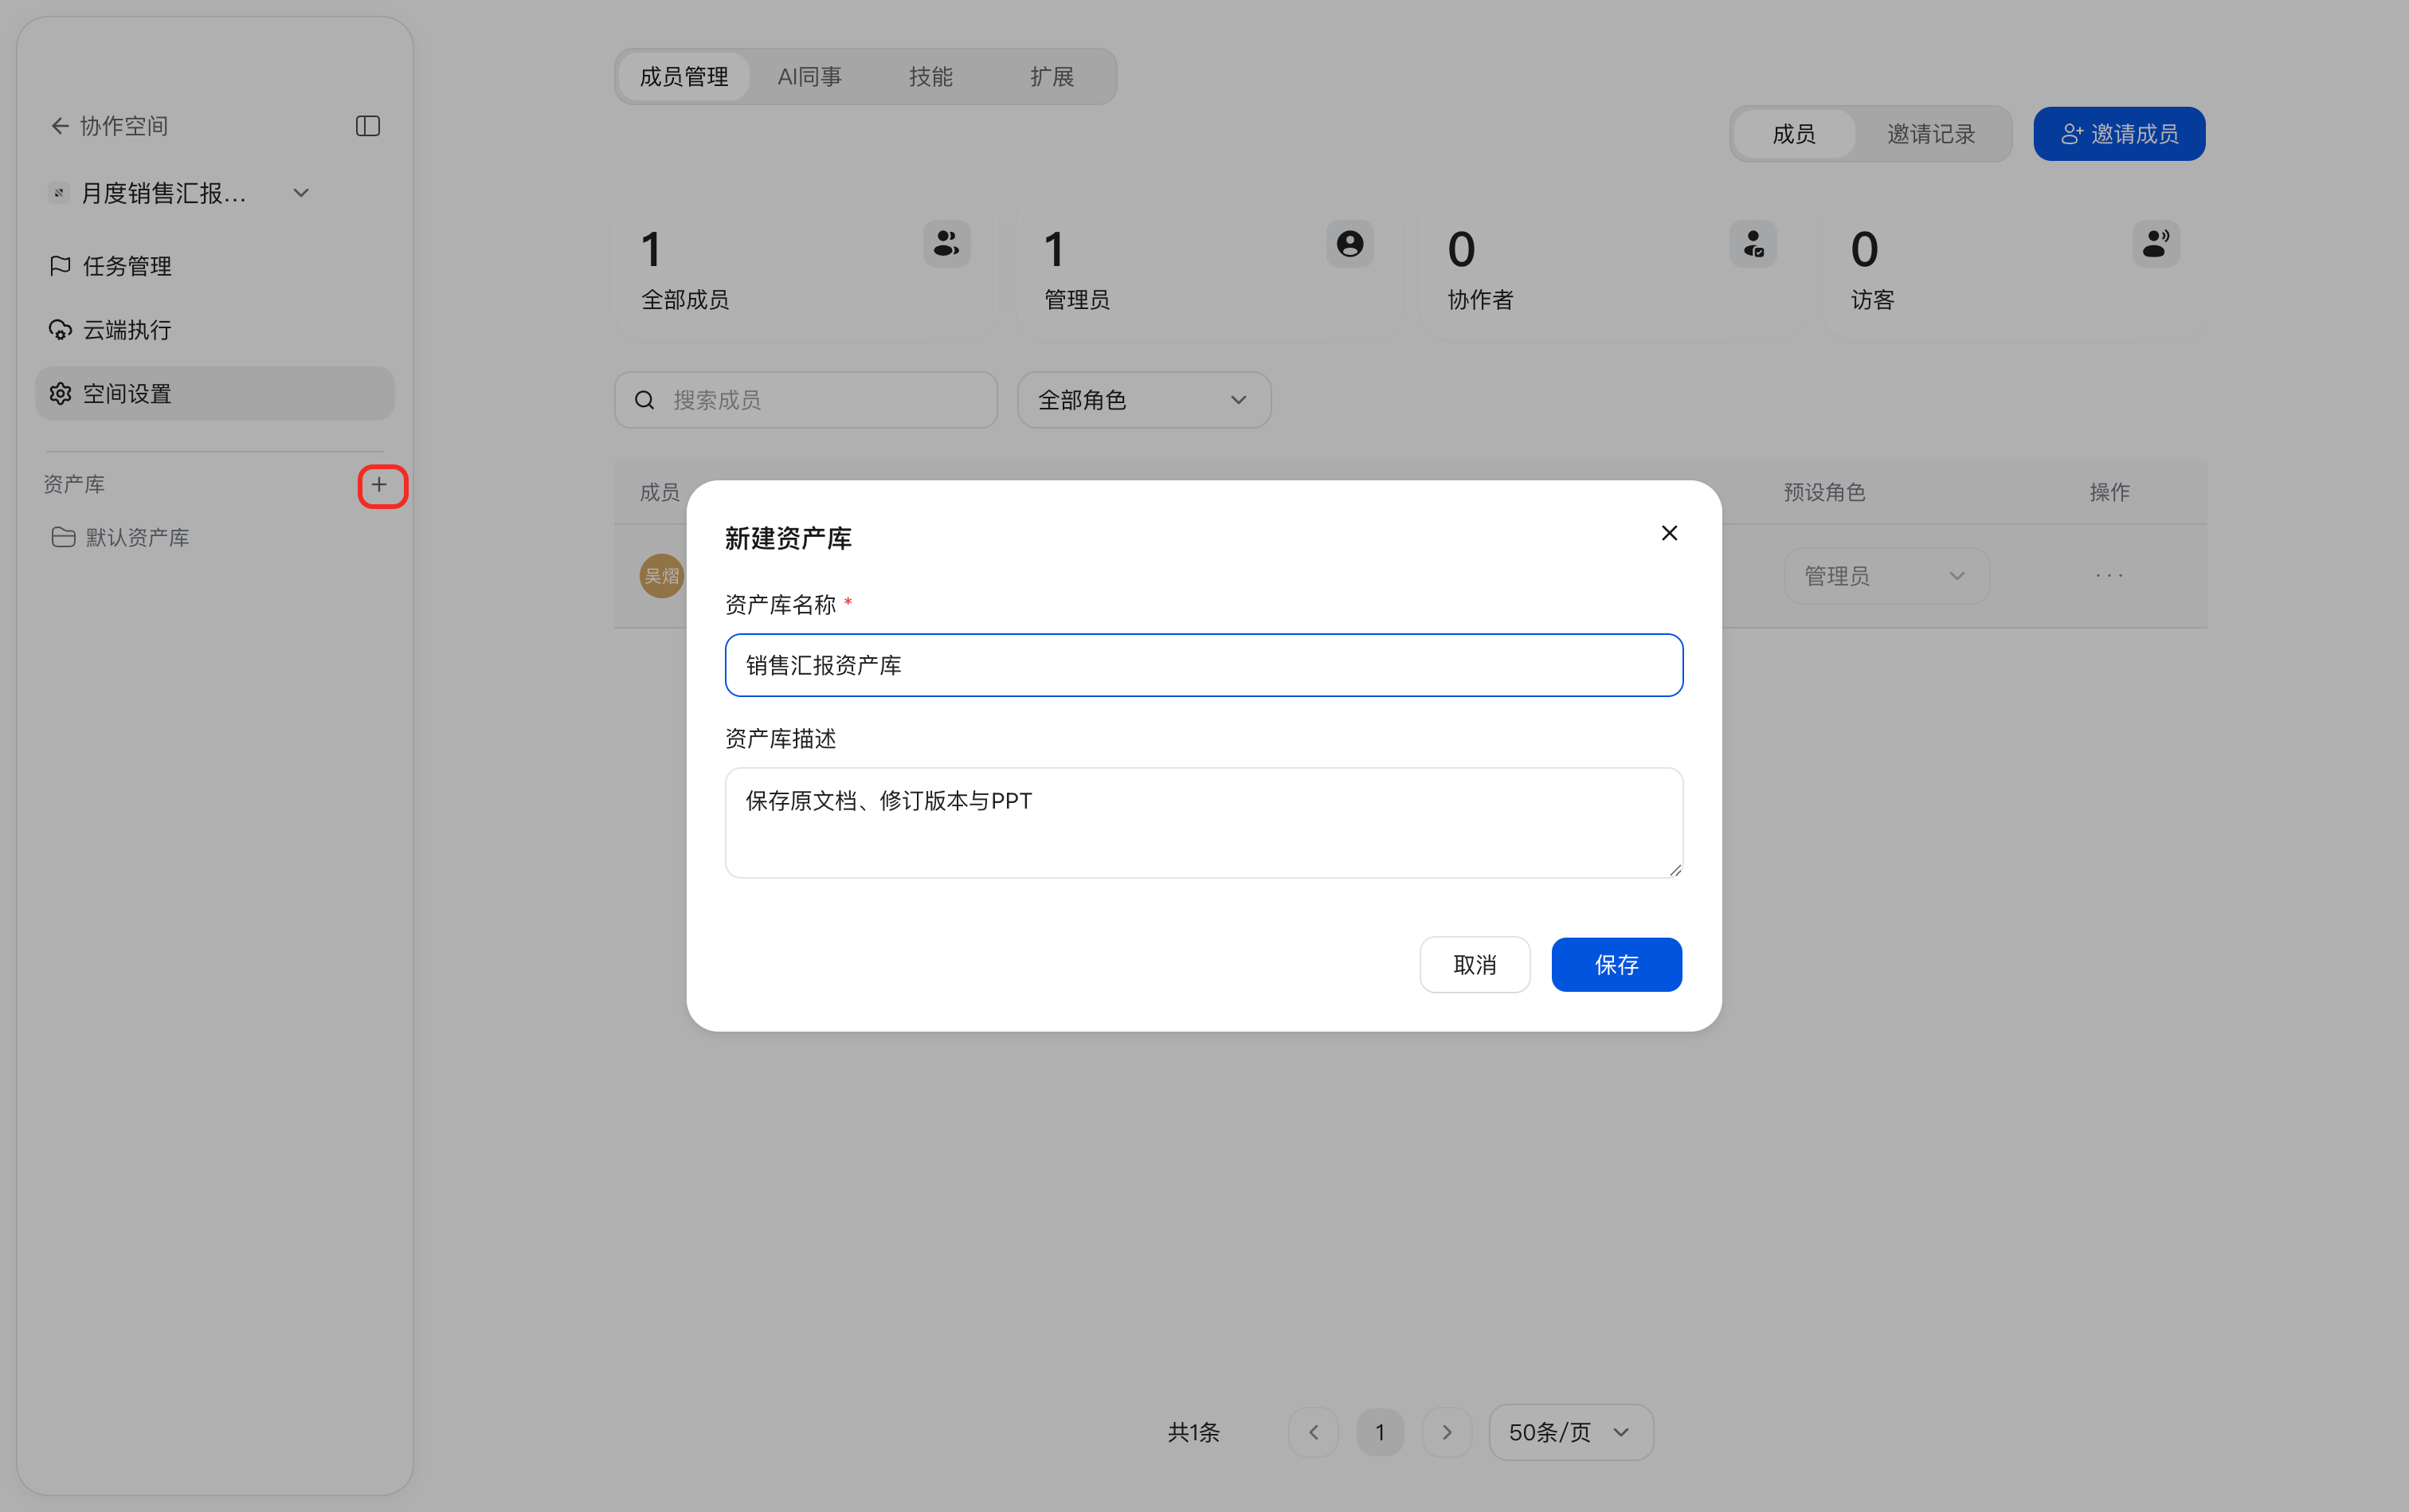
Uploading Files
Go to the Files tab of the target Asset Library and clickUpload Files; select local files or drag them into the upload area, verify the target location, and click Start Upload. After uploading, you can view the files, versions, and update information in the list.
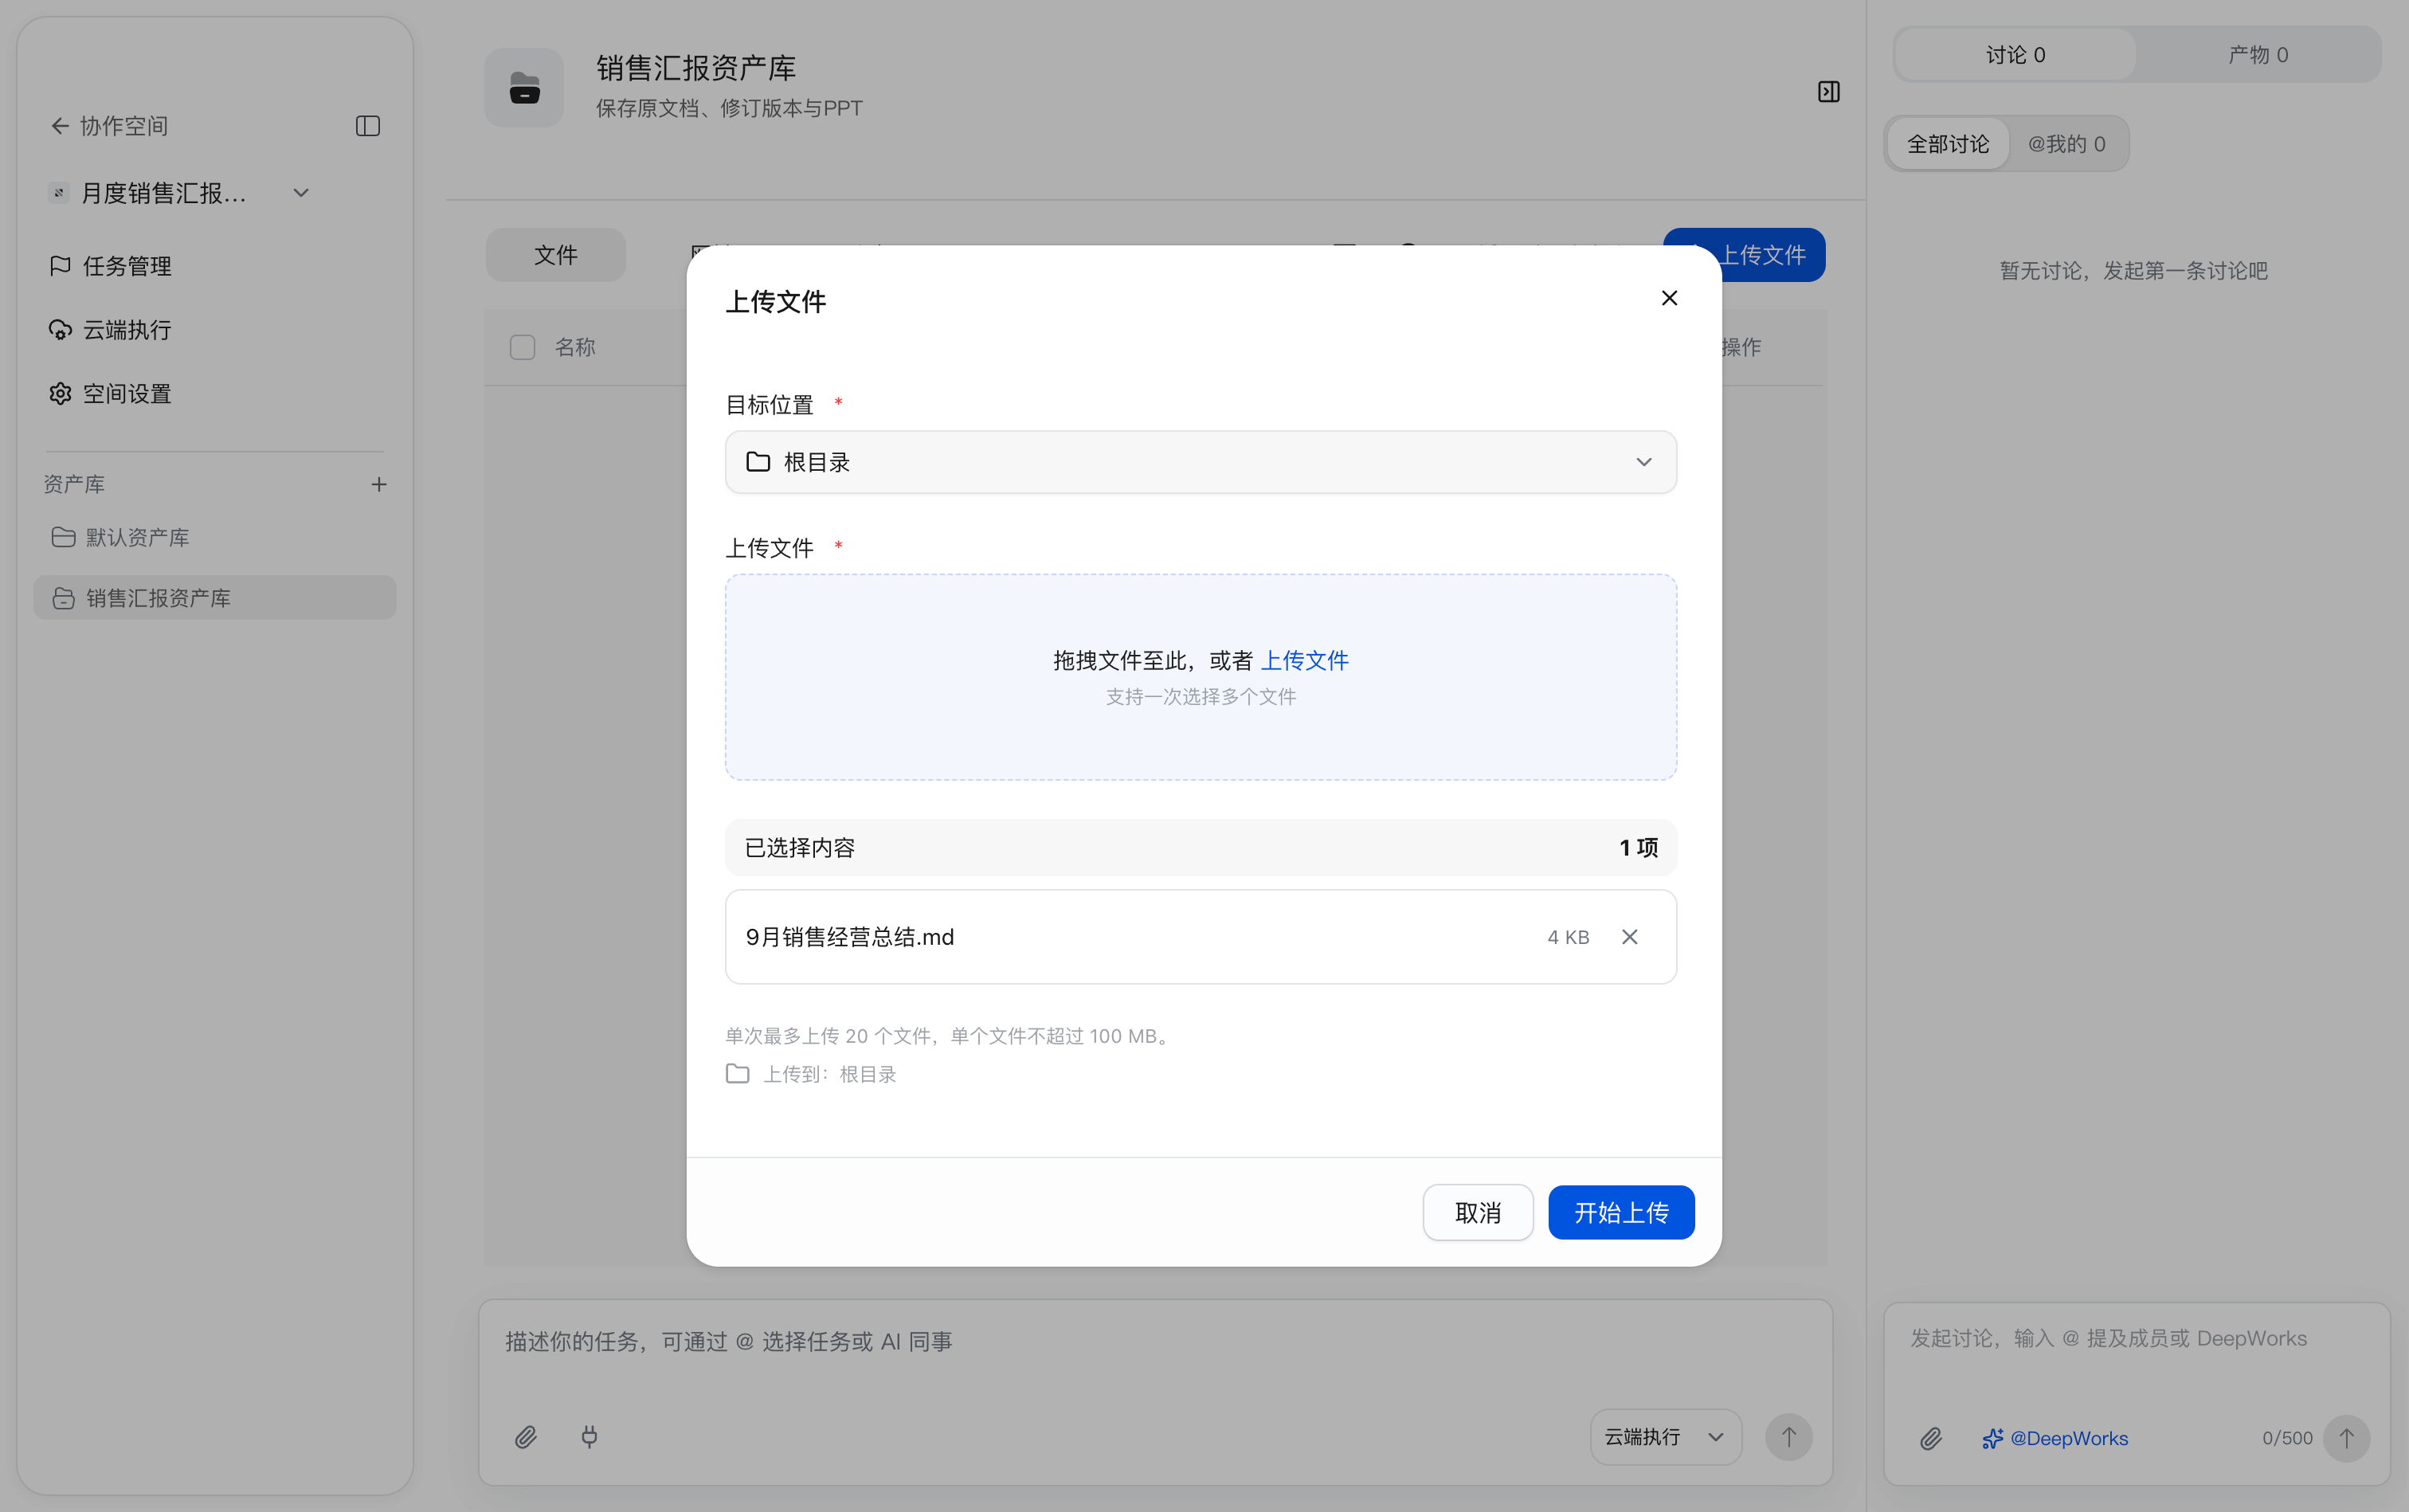
Preview, Download, and Version Management
Click a file name to open the preview; you can use the full-screen button to enlarge it, or click Download to save the file.Version Management on the right keeps the file’s version records, where you can view the latest version and historical versions; historical versions are read-only.
When you submit an updated file to the same path, the file version is updated; if the content is identical, the upload is skipped and no new version is created.
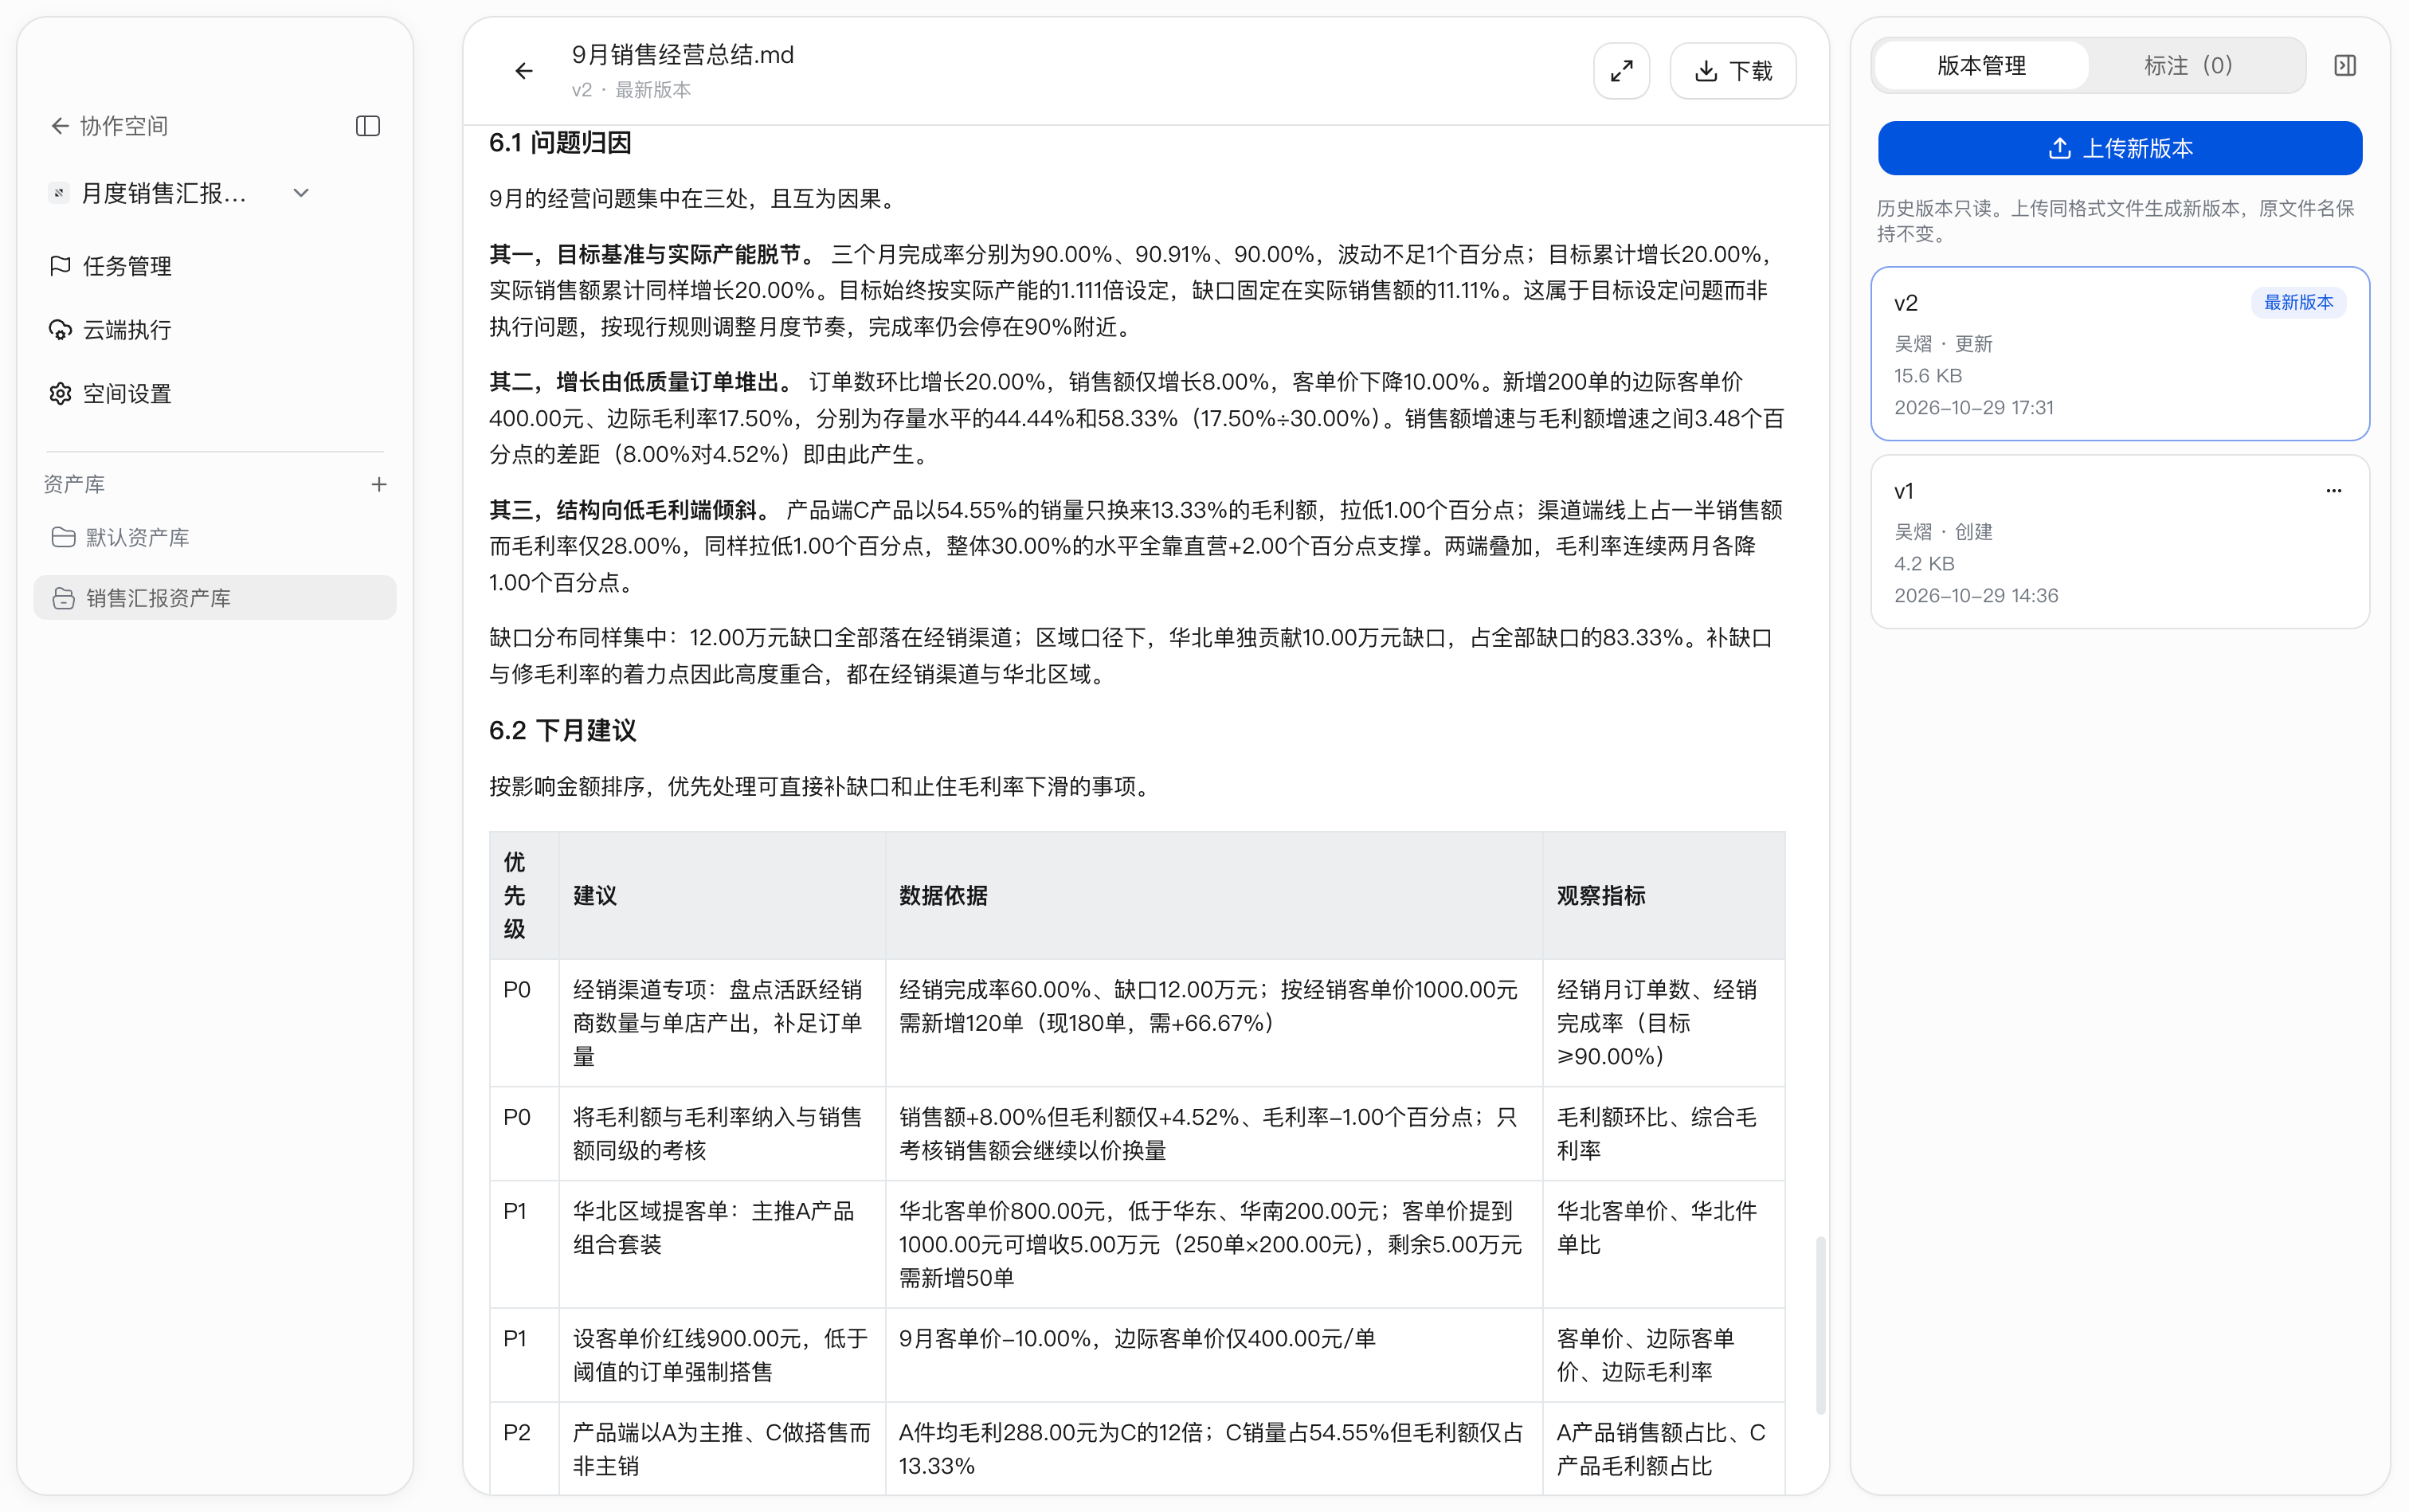
Document Annotations
Open the document preview, switch to the Annotations tab on the right, select the passage of text you want to discuss or revise, enter your comment, and send it. Annotations save the quoted passage and the comment, making it easier to locate issues, and can also be provided to AI for processing together with the file.
Adding an annotation does not directly modify the body text; after making the changes, submit the revised file separately.
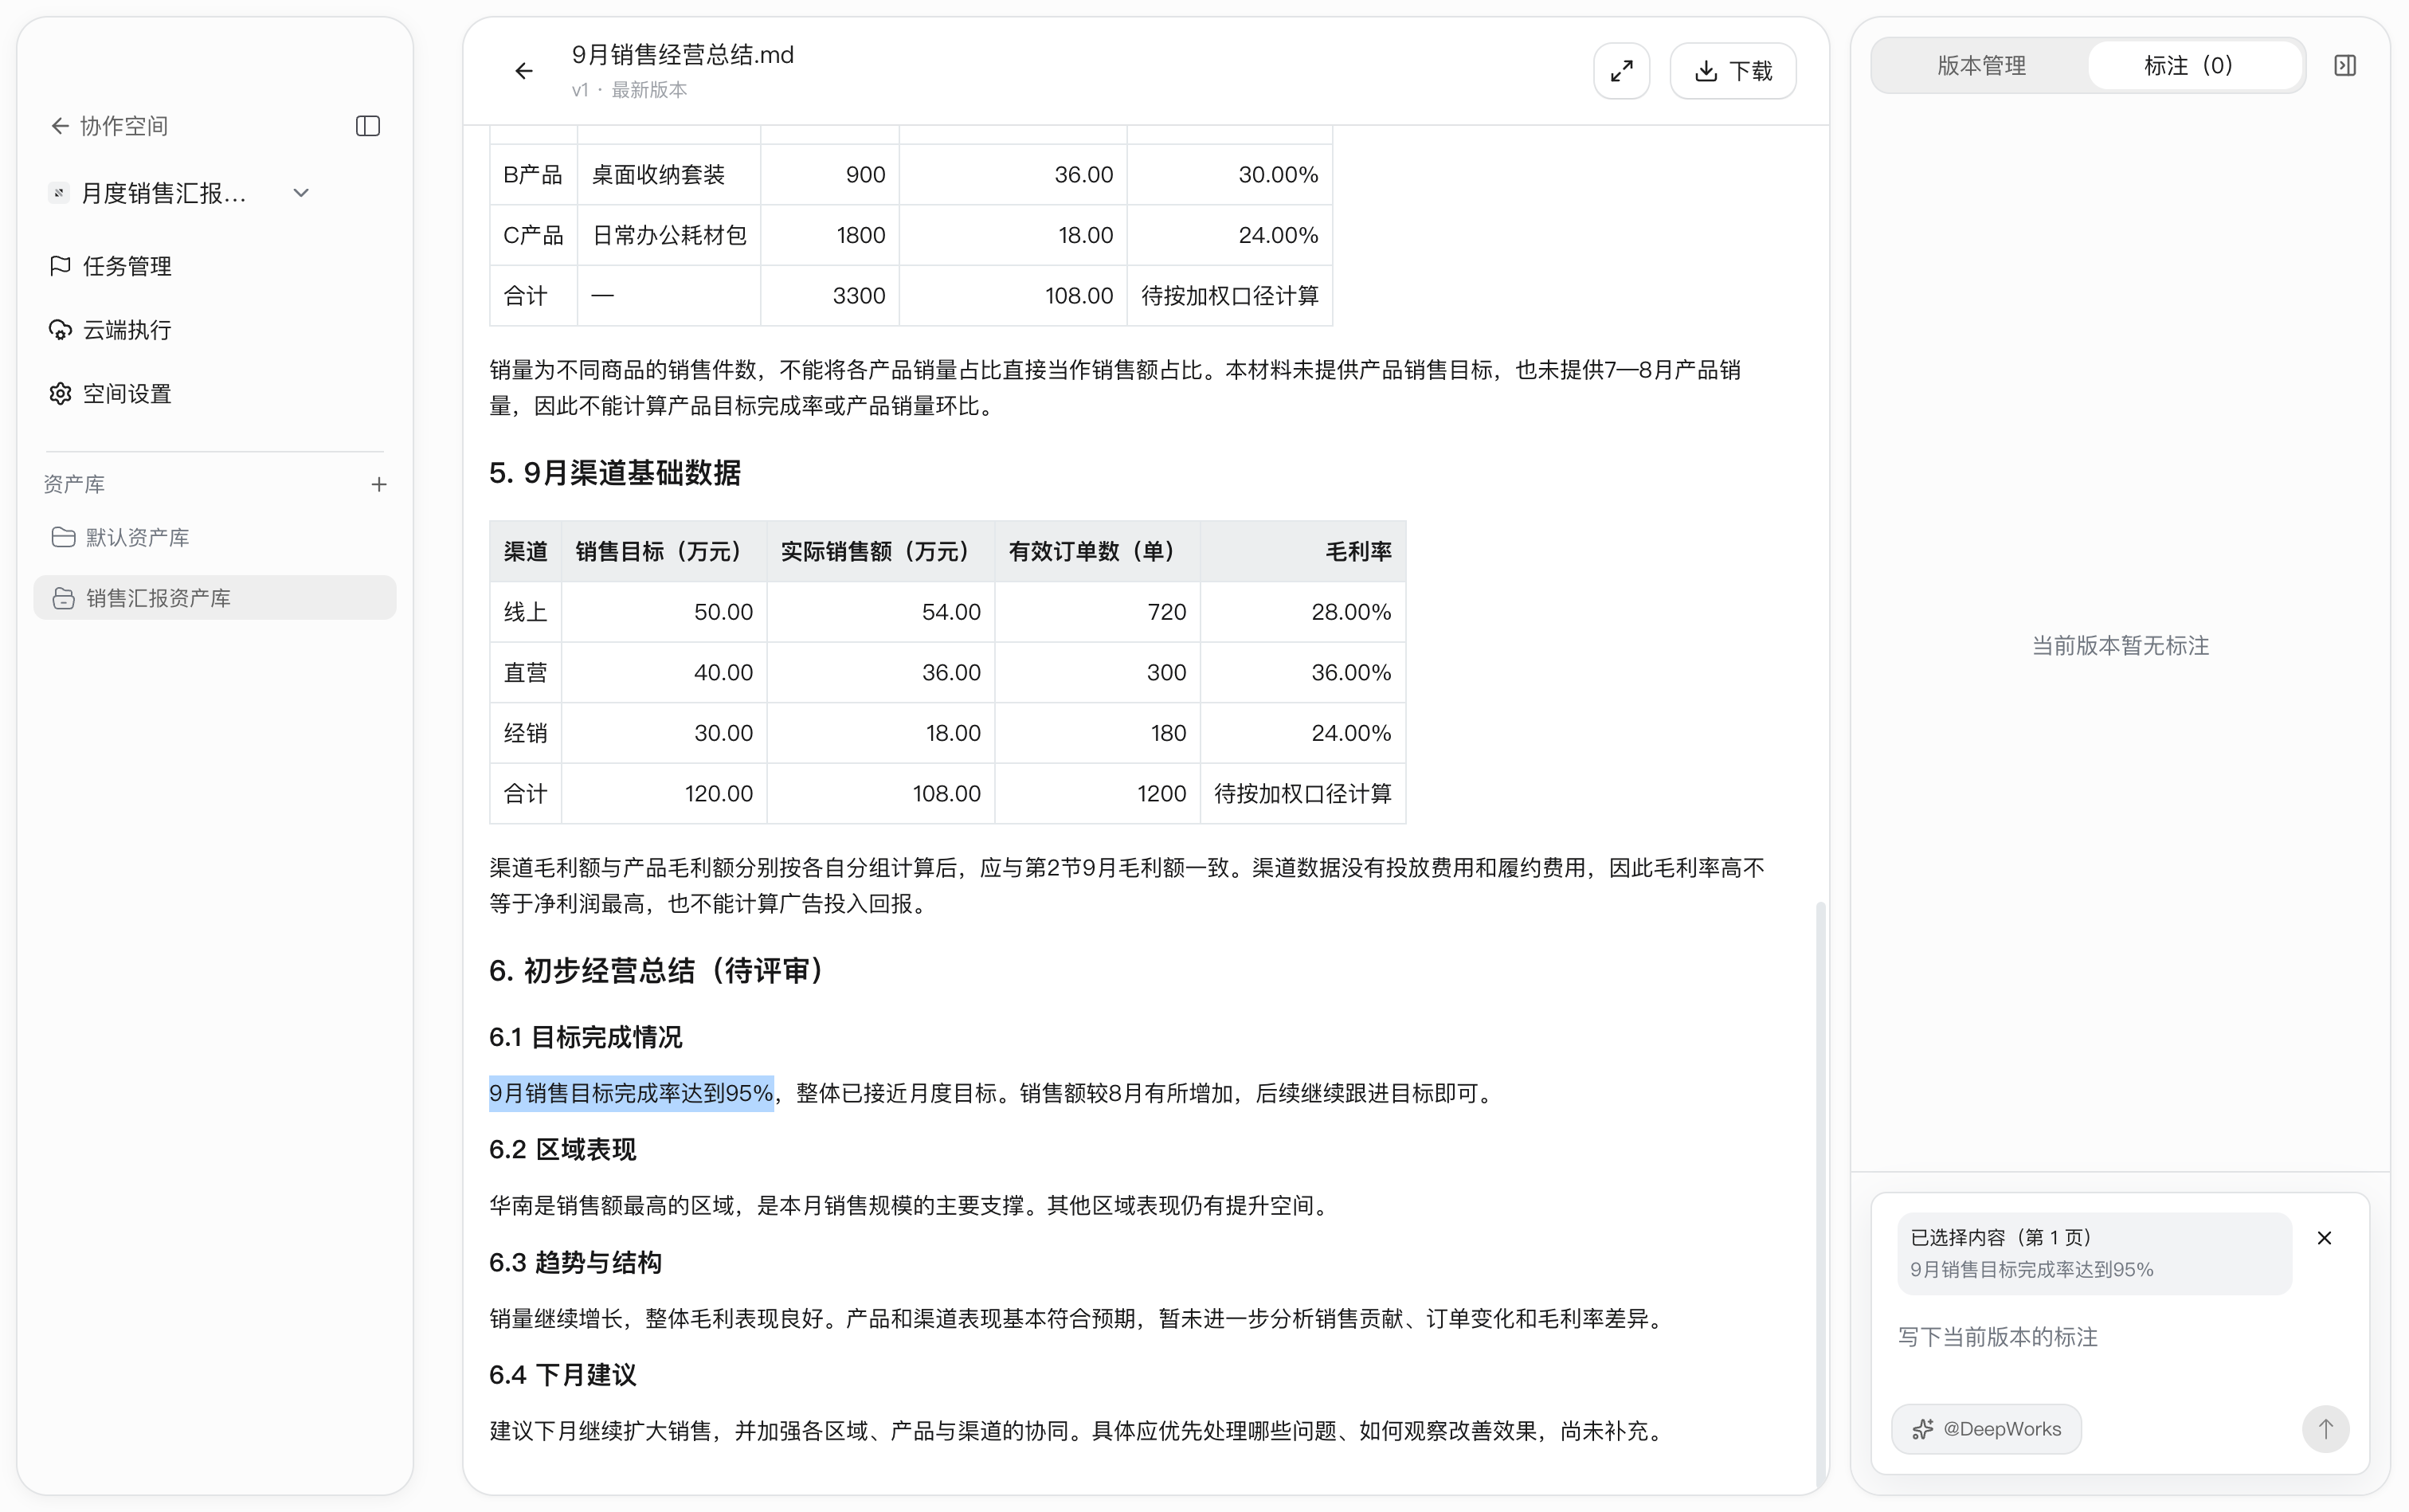
File Operations
In the Files list of the Asset Library, click**…** to the right of the target file to open the action menu:
| Action | Description |
|---|---|
| Mark as Key Deliverable | Adds the file to the key deliverable view of the current Asset Library |
| Move | Moves the file to another Asset Library or folder, updating its ownership and path accordingly |
| Download | Downloads the selected file to your local machine |
| Delete | Permanently deletes the file after a second confirmation |
The list supports multiple selection; after selecting multiple files, you can perform a batch move or batch delete. When the filter criteria change, the current selection is cleared to avoid accidental operations on files that are not displayed.
Asset Library Discussions and Key Deliverables
The right panel of the Asset Library provides two tabs: Discussion andDeliverables.
Discussion is used to communicate about materials, questions, and conclusions related to the current Asset Library; you can filter by All Discussions or**@Mentions**. Start a discussion in the input box; you can mention space members or @DeepWorks and cite a specific version of an Asset Library file so that the discussion stays linked to the material.
When you mention @DeepWorks in a discussion, your discussion is saved first, and then a separate AI reply is generated. The AI reply is based on the Asset Library files and related tasks you have permission to access, and it does not automatically modify files, tasks, or key deliverables. Publishing a discussion itself does not create an execution task.
Deliverables displays the files marked as key deliverables in the current Asset Library together with their versions, so you can quickly locate the main delivery results.
URL Management
In addition to files, the Asset Library can also store web addresses related to the project in a unified way. Switch to the URLs tab; the list shows the web address, purpose, update time, and actions.
Click Add Web Address, fill in the required web address and an optional purpose description, and click Add. The address must be a valid HTTP or HTTPS address; the purpose description indicates the content the link points to.
Code Branch Association
The Branches tab links the Asset Library with the code repositories and branches shared by the team, so that the code context is clear when executing tasks.
Click Add Repository and Branch, fill in the code branch and the repository it belongs to, optionally fill in a description, and click Add. The same Asset Library can be linked to multiple branches of that repository; when you continue adding later, the repository information is filled in automatically.
This only records the association for the team to identify and reference; it does not create or modify branches in the remote repository. When adjustments are needed, you can edit or delete the association record, which likewise does not affect the remote repository.
Task Management
Workflow Management
A workflow defines the processing statuses of a task, the transition paths allowed between statuses, and the fields to fill in when transitioning. When creating a task, you select the applicable process by associating a task type.
Go to Task Management →Workflow Management; the management drawer opens on the right. ClickNew Workflow to create a process, and click an existing workflow card to view or edit its configuration; the card’s … menu provides Set as Default, Copy, and Delete. Built-in workflows can be edited and copied but not deleted.
Workflow configuration is divided into three tabs — Basic Information,Status Settings, andTransition Settings — which you complete in order and then save.
Basic Information: Fill in the workflow name, associated task type, and workflow description, and you can check Set as Default. After saving, the workflow appears in the task type candidates when creating a task.
Status Settings: Lists all statuses of the current workflow and supports adding and editing statuses. The start status is single-select and there can be only one; end statuses can be multi-select; keep at least two statuses. When you delete a status, the transition configurations that use that status as a source or target are removed as well.
Transition Settings: The flowchart at the top visually shows status types and transition directions; the matrix below is used to configure paths — rows are source statuses, columns are target statuses, and checking an intersection allows transition in that direction. Forward and reverse paths are configured separately, which can cover scenarios such as acceptance rejection.
Creating a Task
Go to Task Management →Add Task, fill in the task title and description, select the task type and workflow, set the priority and assignee, and optionally fill in the due date and select dependent tasks, then click Create.
Updating Status and Acceptance
Click the current status of a task to open Change Status, select the target status, verify the assignee, optionally fill in a note, and click Confirm. You can useView Flowchart to understand the transition paths.
| Status | Purpose |
|---|---|
| Not Started | Created but not yet started |
| In Progress | Being executed or the deliverable is being revised |
| Pending Acceptance | The deliverable is ready and awaiting review |
| Completed | Acceptance passed; the task is finished |
| Closed | The process has ended and no further processing will occur |
These are the default statuses of the built-in workflows; the actual available statuses and transition paths are determined by the workflow selected for the task. If an issue is found during acceptance, you can return the task for rework along the allowed paths. Adding a file to the library or marking it as a key deliverable does not replace task acceptance.
Comments and Attachments
Open the task details and enter progress or feedback in the comment area. When you need to attach materials, click the attachment icon, select an Asset Library and check the files, then click Post Comment to save the text and attachments together in the comment record.
Local Execution and Cloud Execution
Referencing Files and Annotations
In the execution input area, click the attachment icon, select files from the Asset Library, and verify the versions; if you need to handle them together with review comments, check Include Annotations. After closing the selection window, confirm that the required attachments have been added to the input area.
Execution attachment references are pinned to a fixed version. After a file is updated, you should select the attachment again and verify the version.
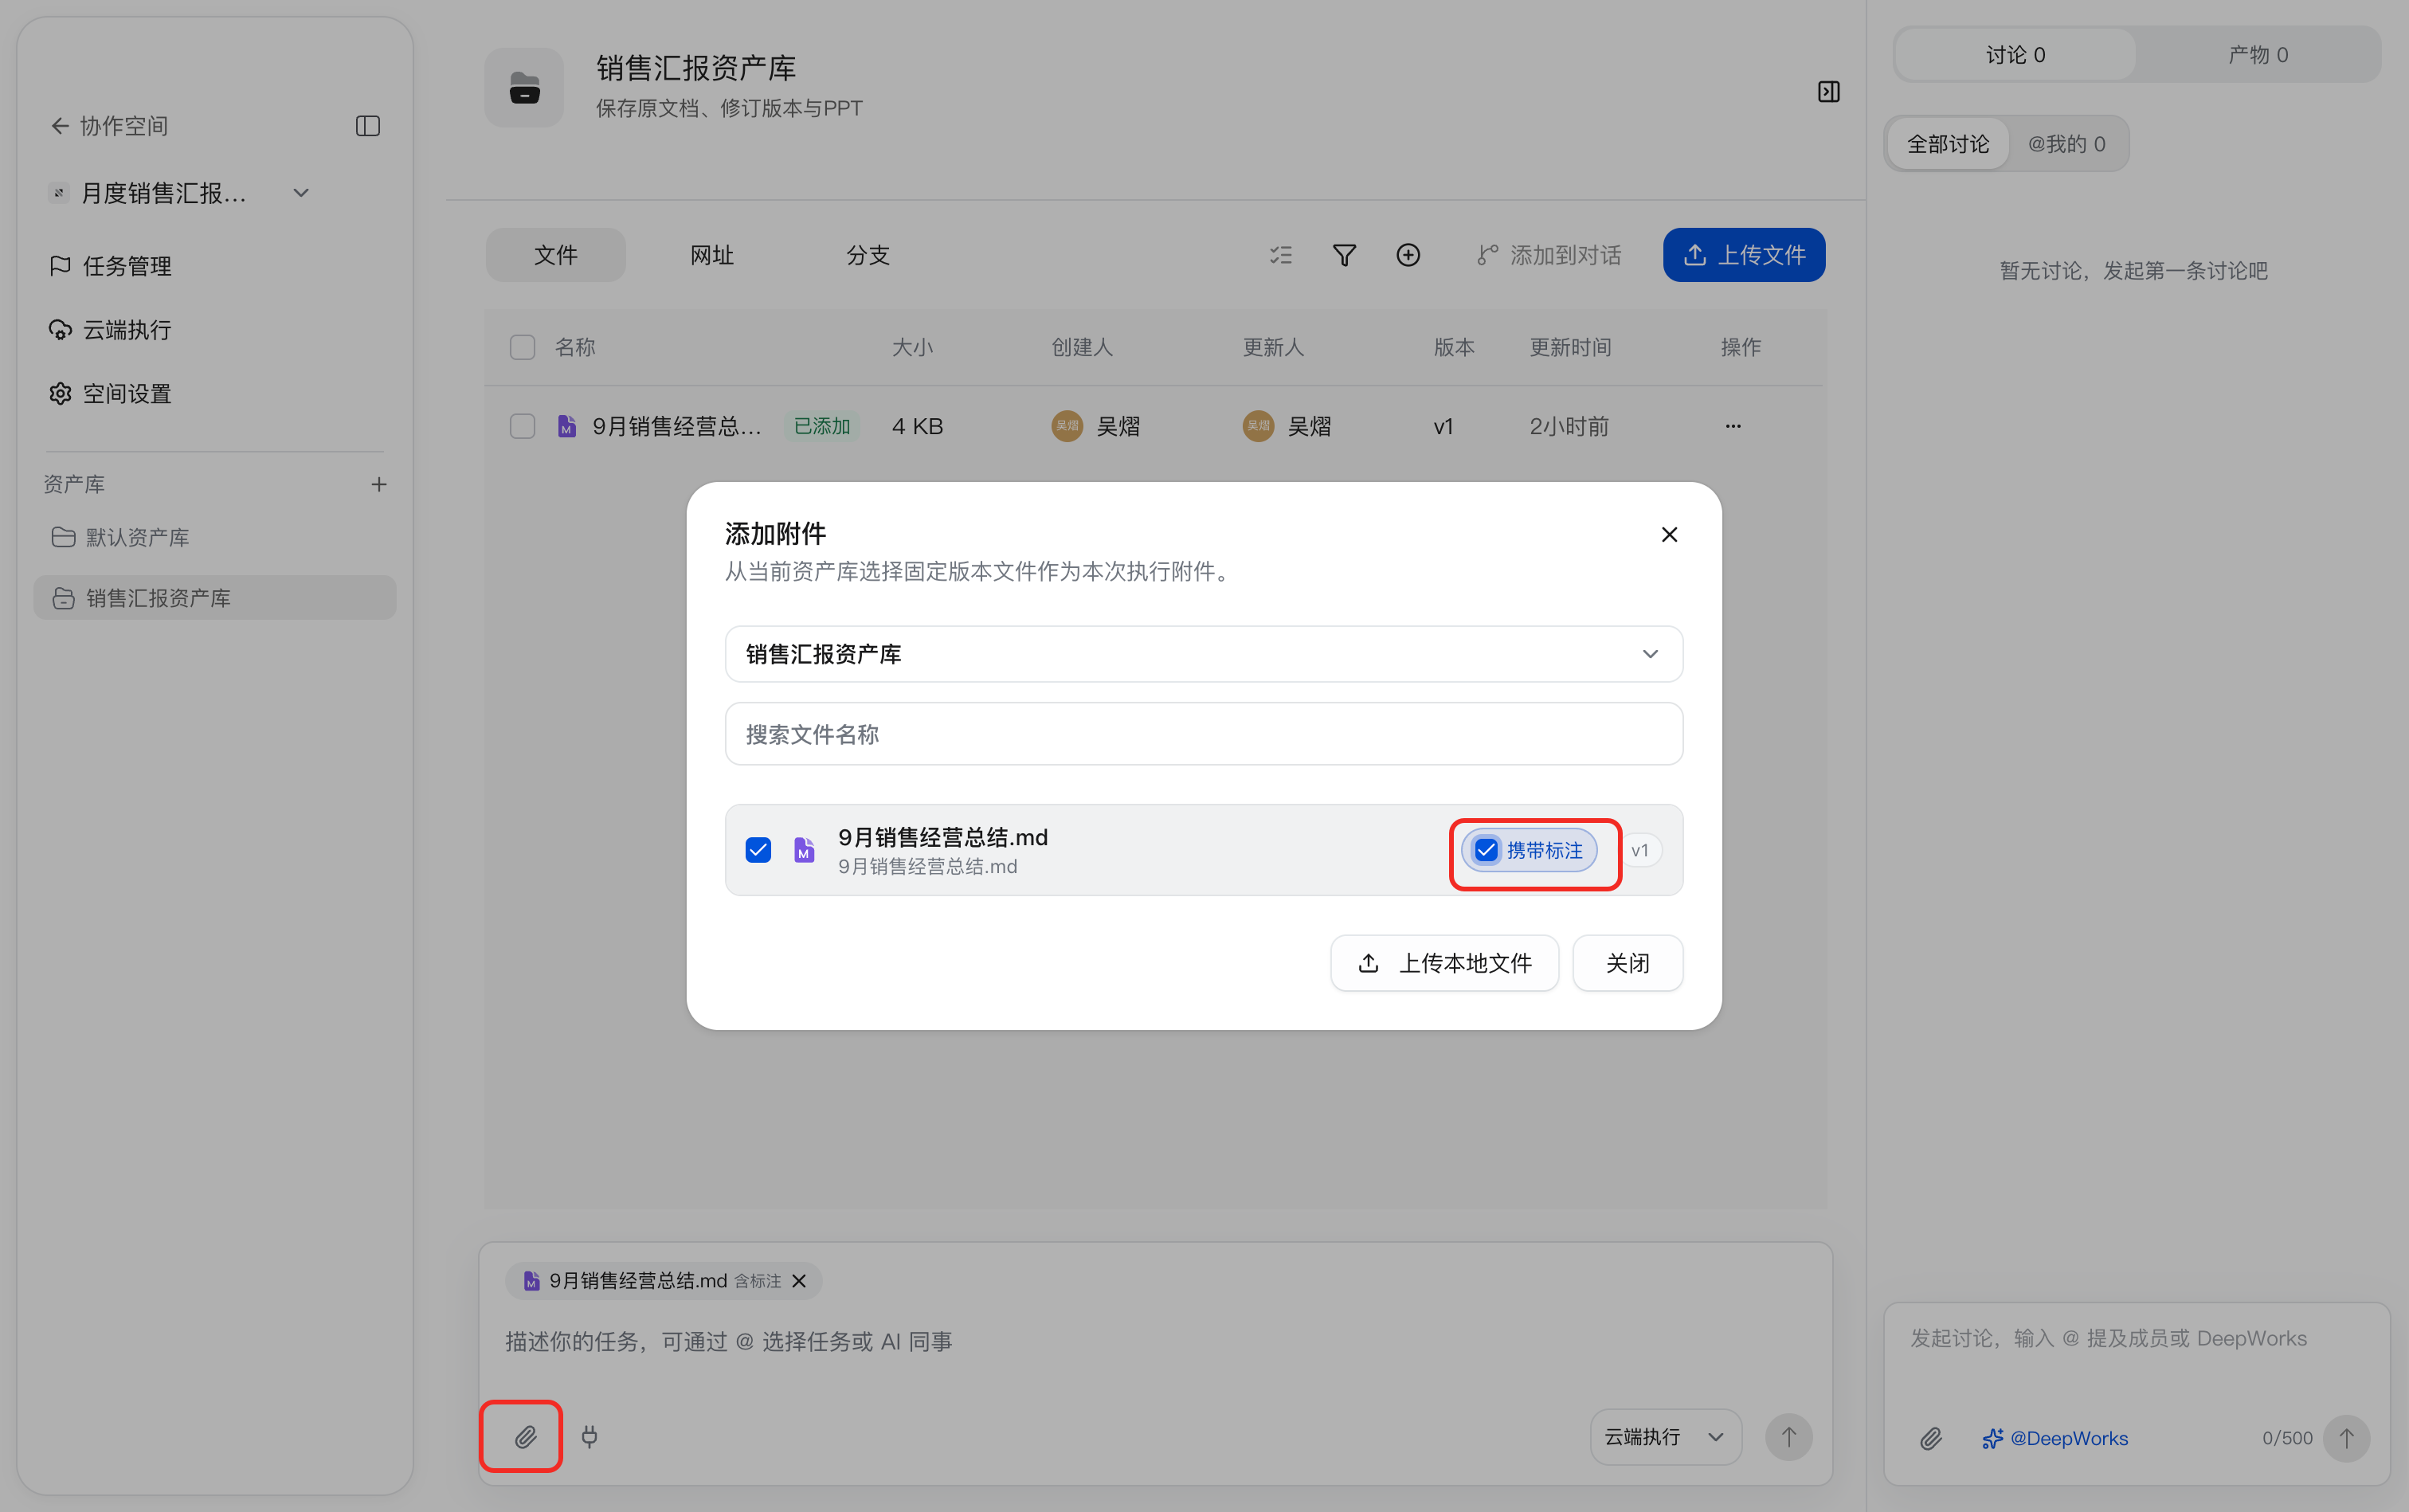
Local Execution
In the conversation input area of the Asset Library, select Local Execution, specify a local workspace, add materials, enter the processing requirements, and send. Then view the execution process and preview and check the deliverables in the session of the corresponding workspace.
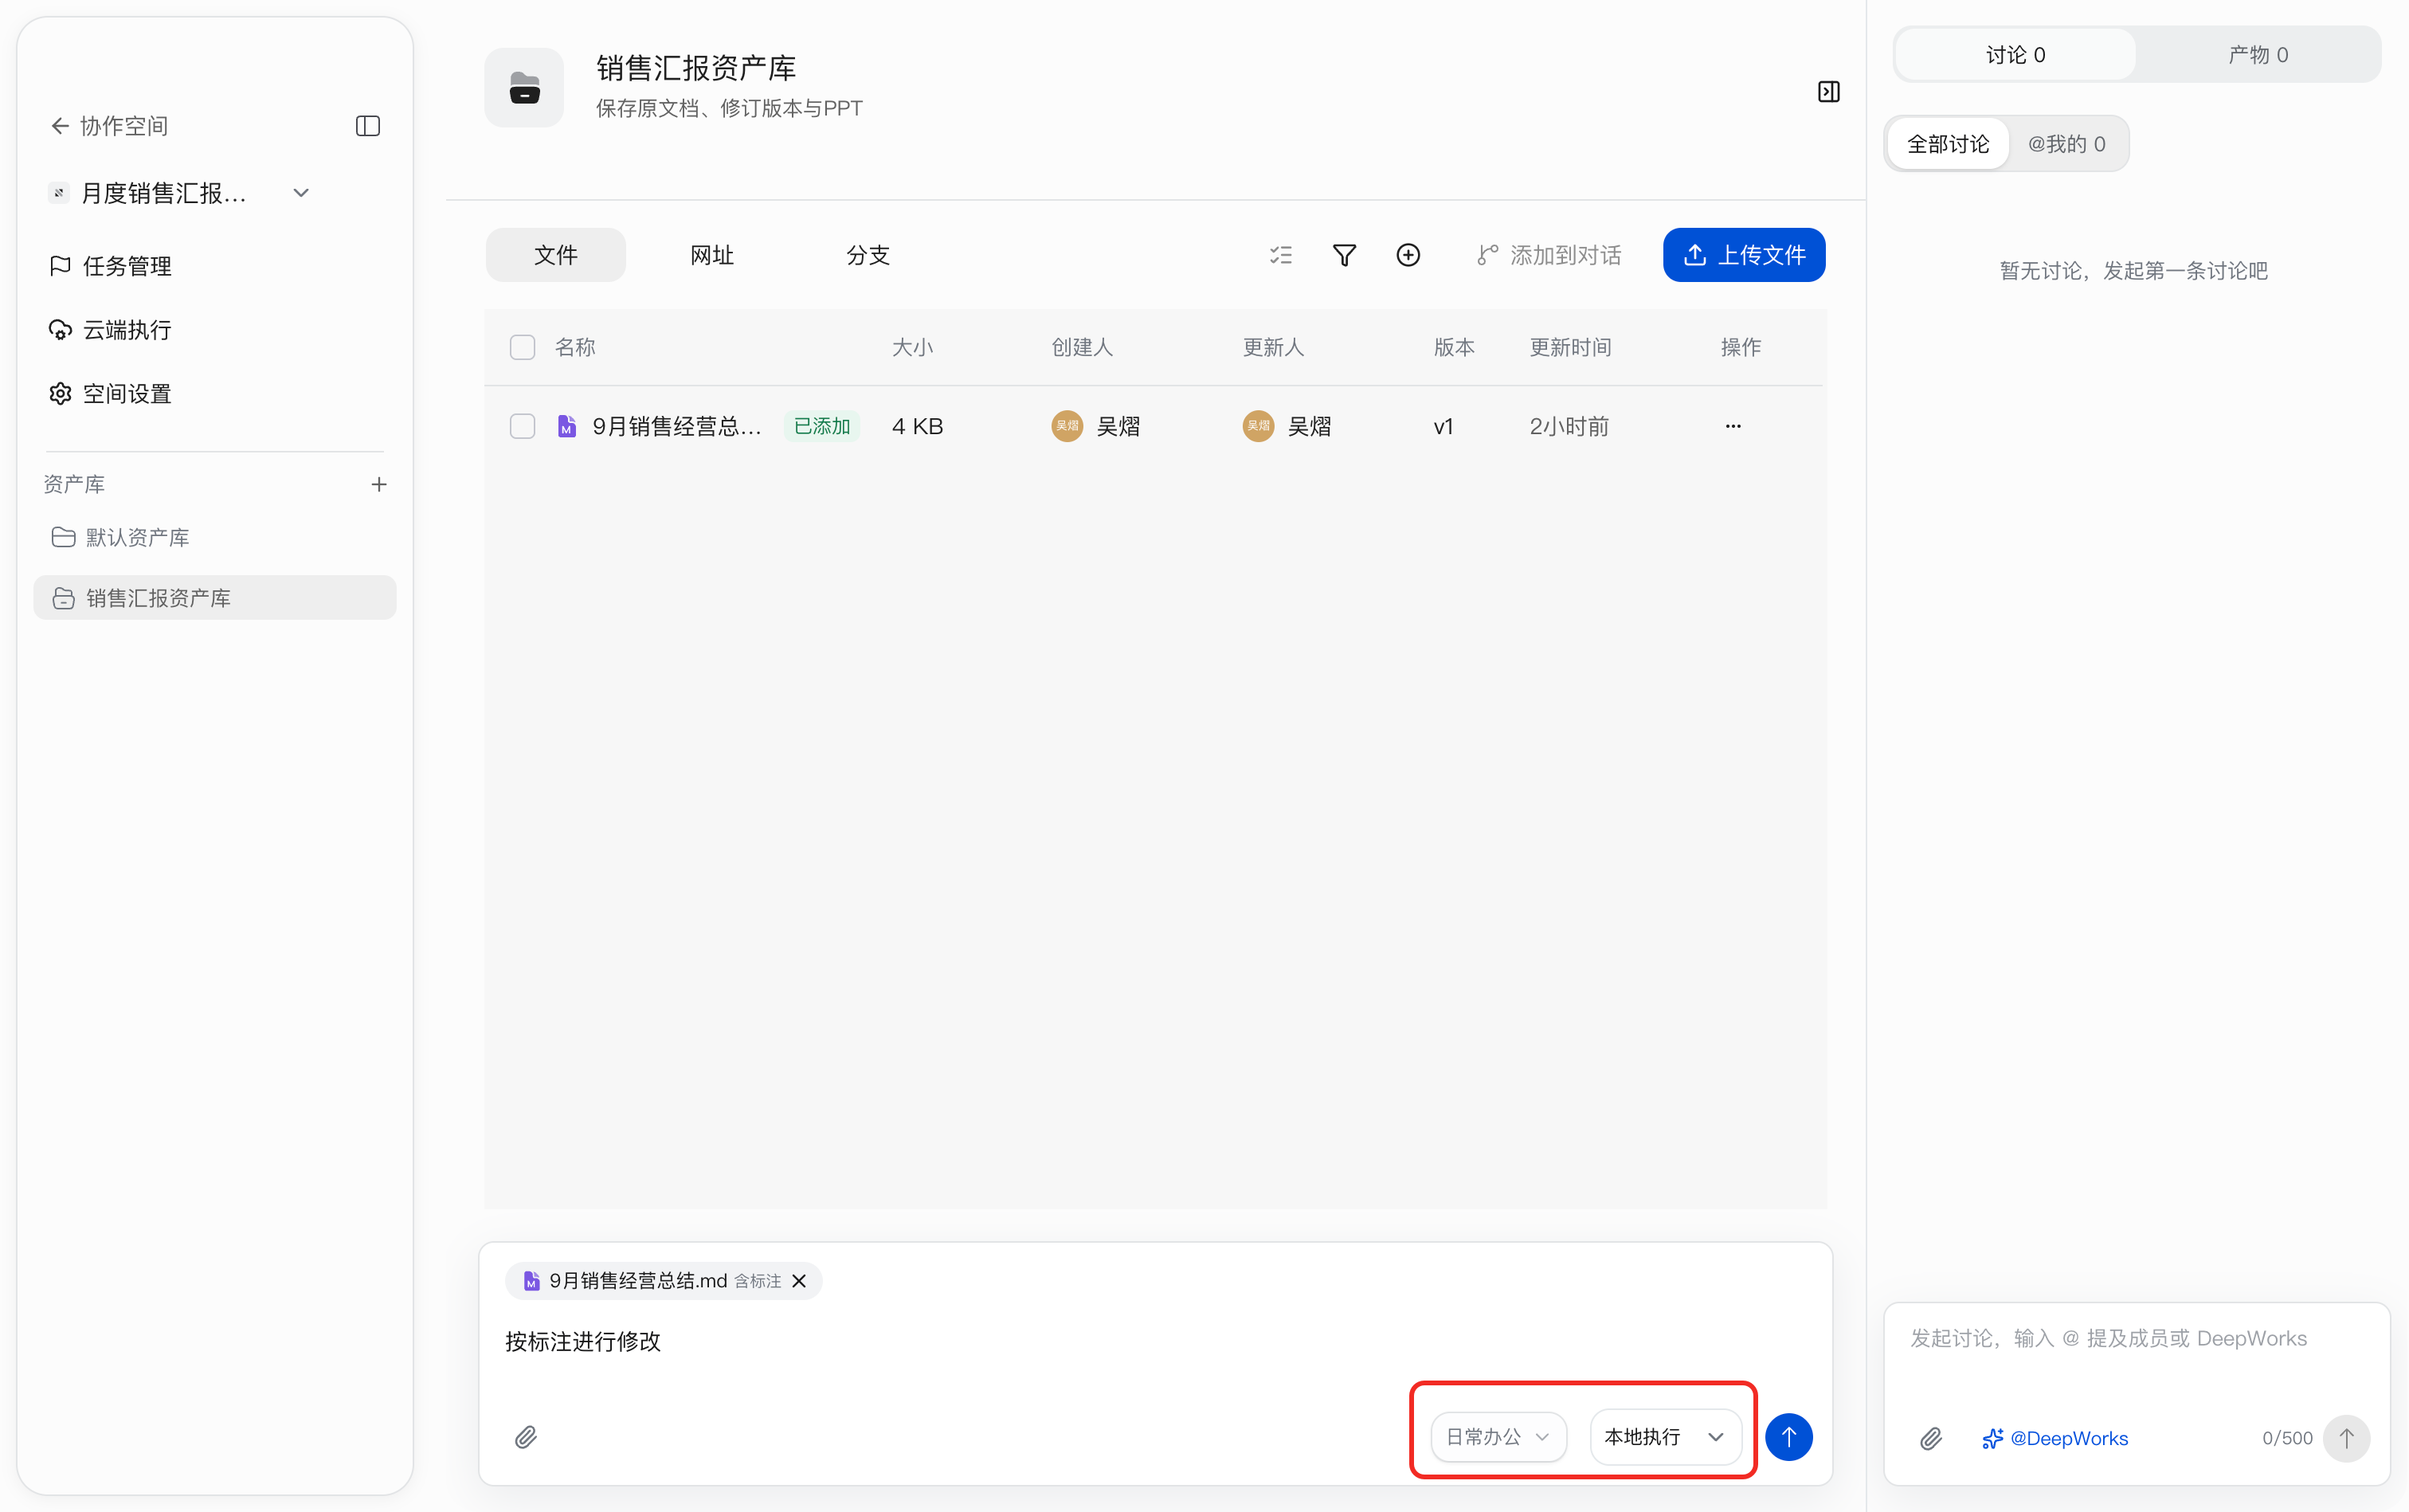
Cloud Execution
Go to Cloud Execution in the space, or clickProcess on a task row to enter a cloud session with the task context. Select the target Asset Library and file attachments; when you need specialized capabilities, open Add Extension →AI Colleagues and check the colleagues you need. After entering the requirements and sending, view the execution process and deliverables in the session.
Clicking Process only enters the execution session; you still need to send the requirements before this execution starts.
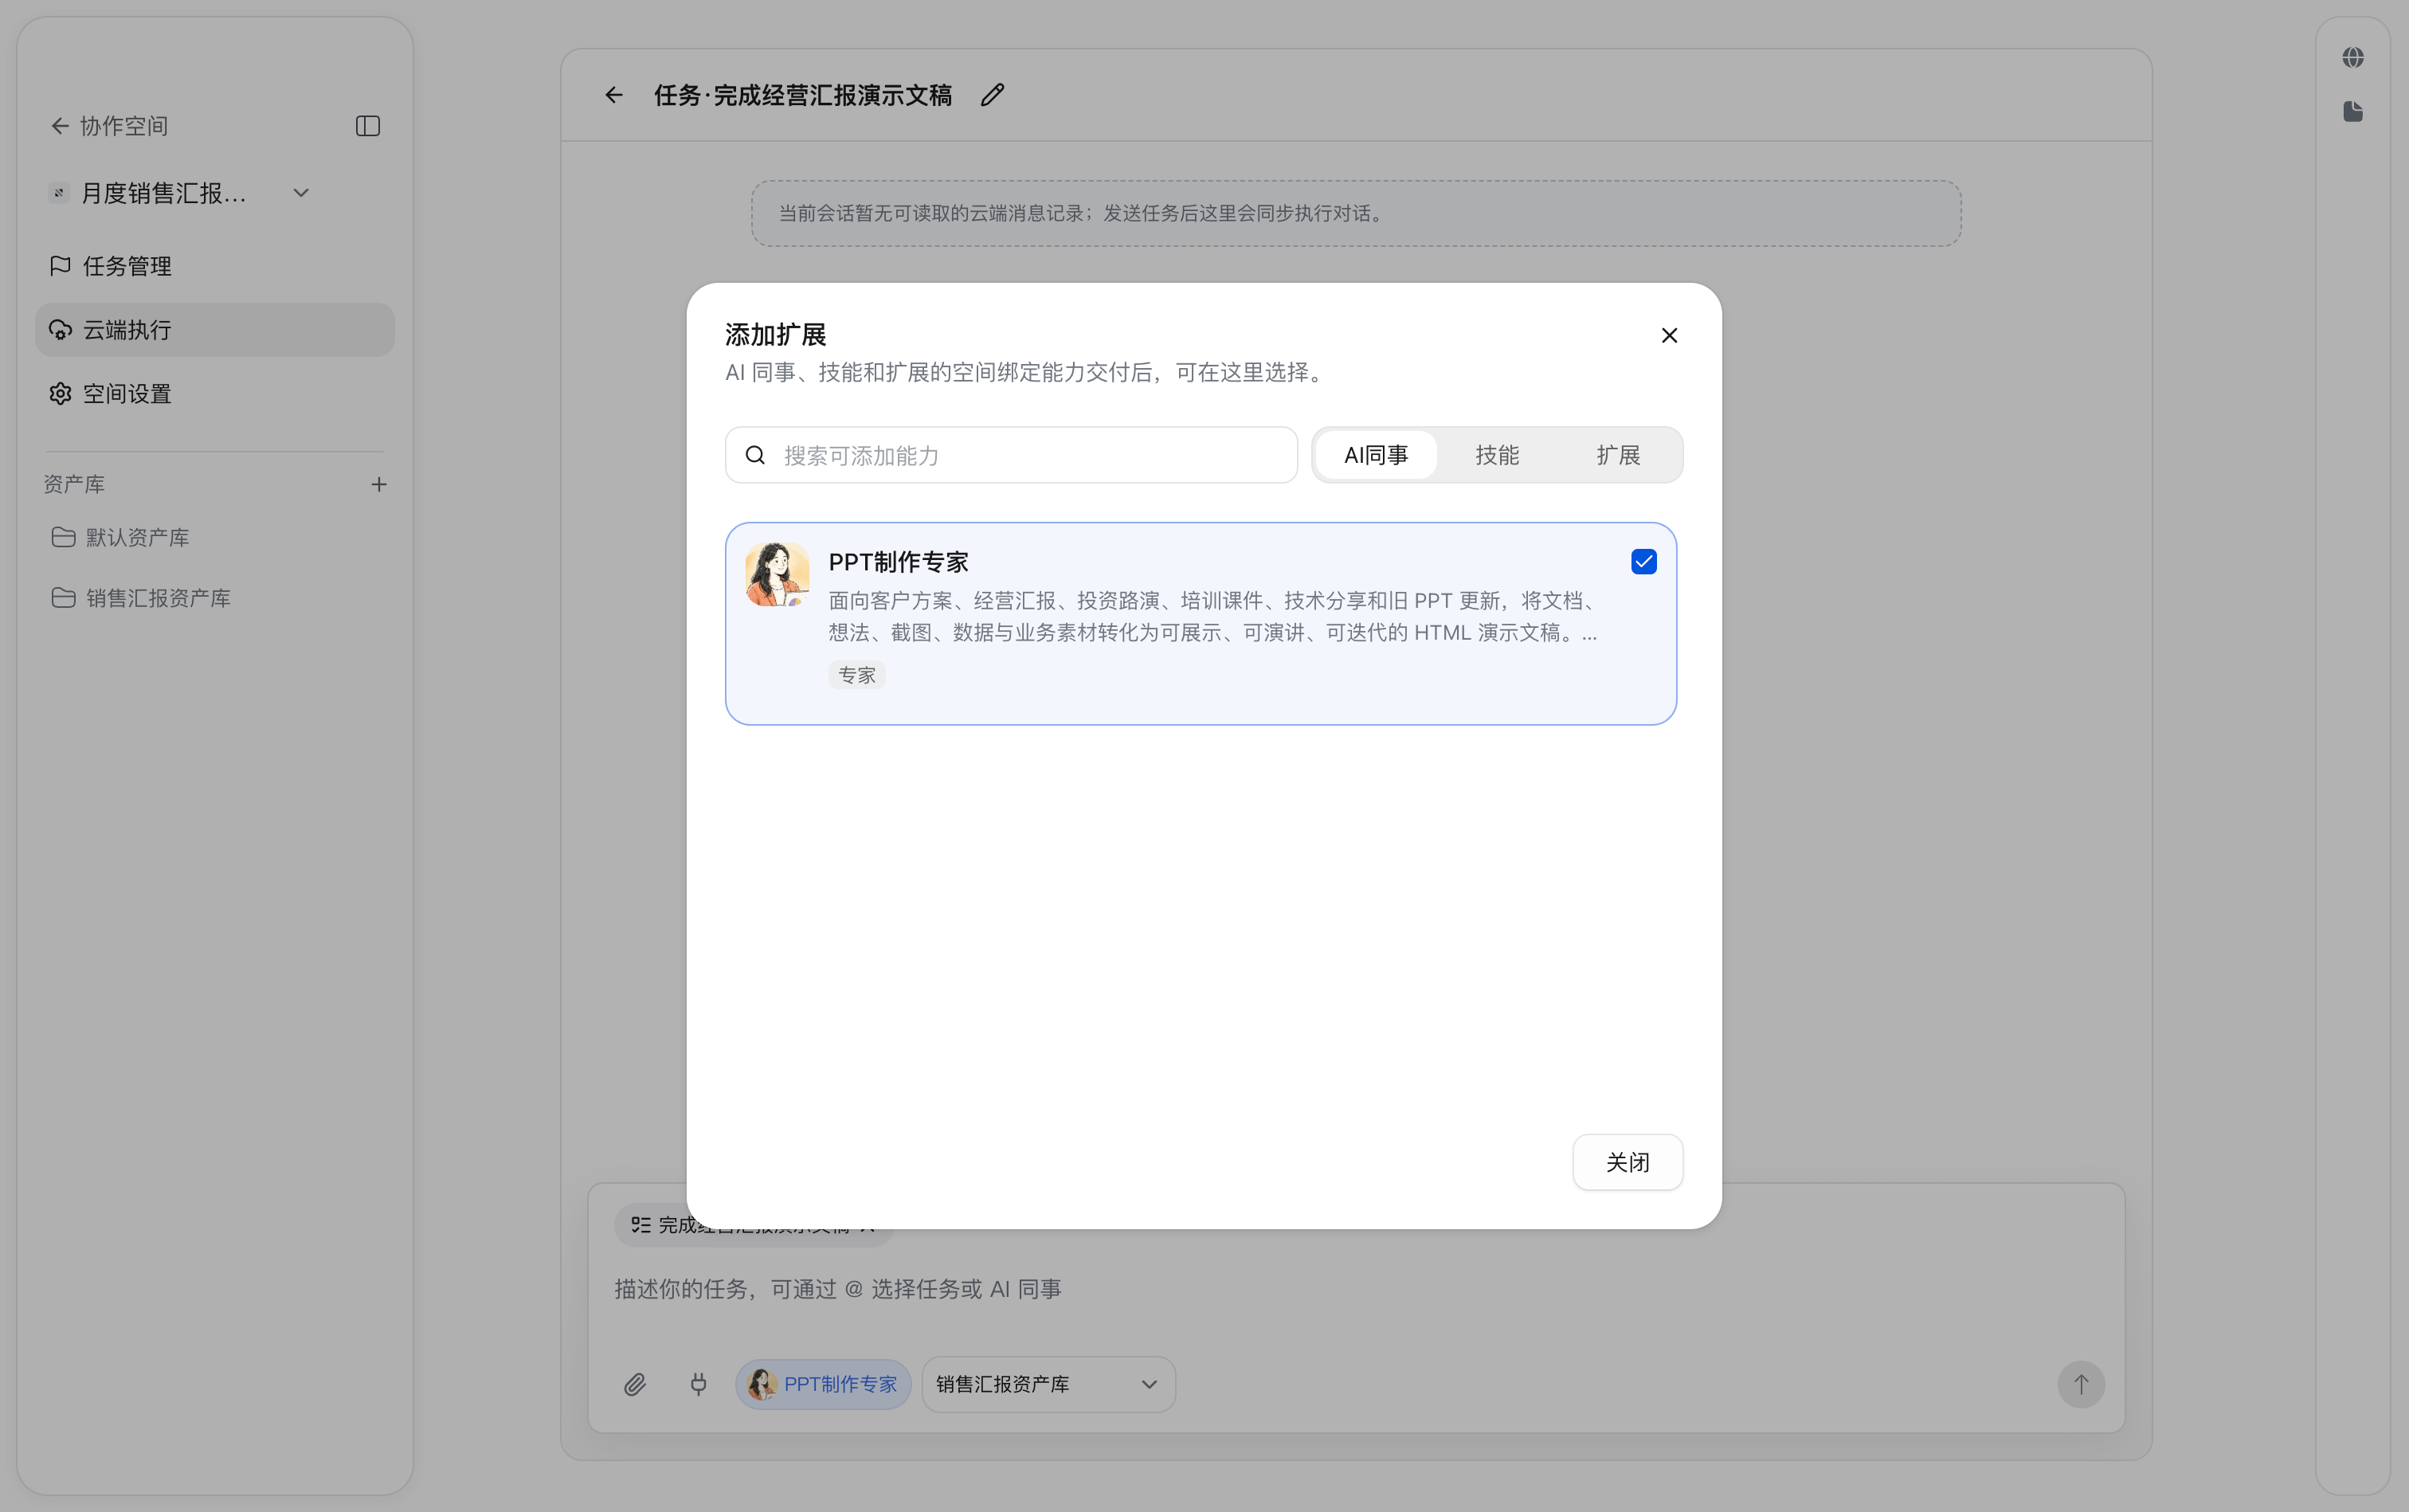
Submitting Deliverables and Key Deliverables
Submitting Local Deliverables
In the file panel on the right of the local session, switch to Deliverables, check the files, and clickSubmit to Collaboration Space. In the submission dialog, select the submission method, target Collaboration Space, and Asset Library, verify the target path, and submit.
Selecting Submit Files Only places the files in the root directory of the target Asset Library. When you need to update an existing file, keep the file name and target path consistent; after submitting, return to the Asset Library to verify the version.
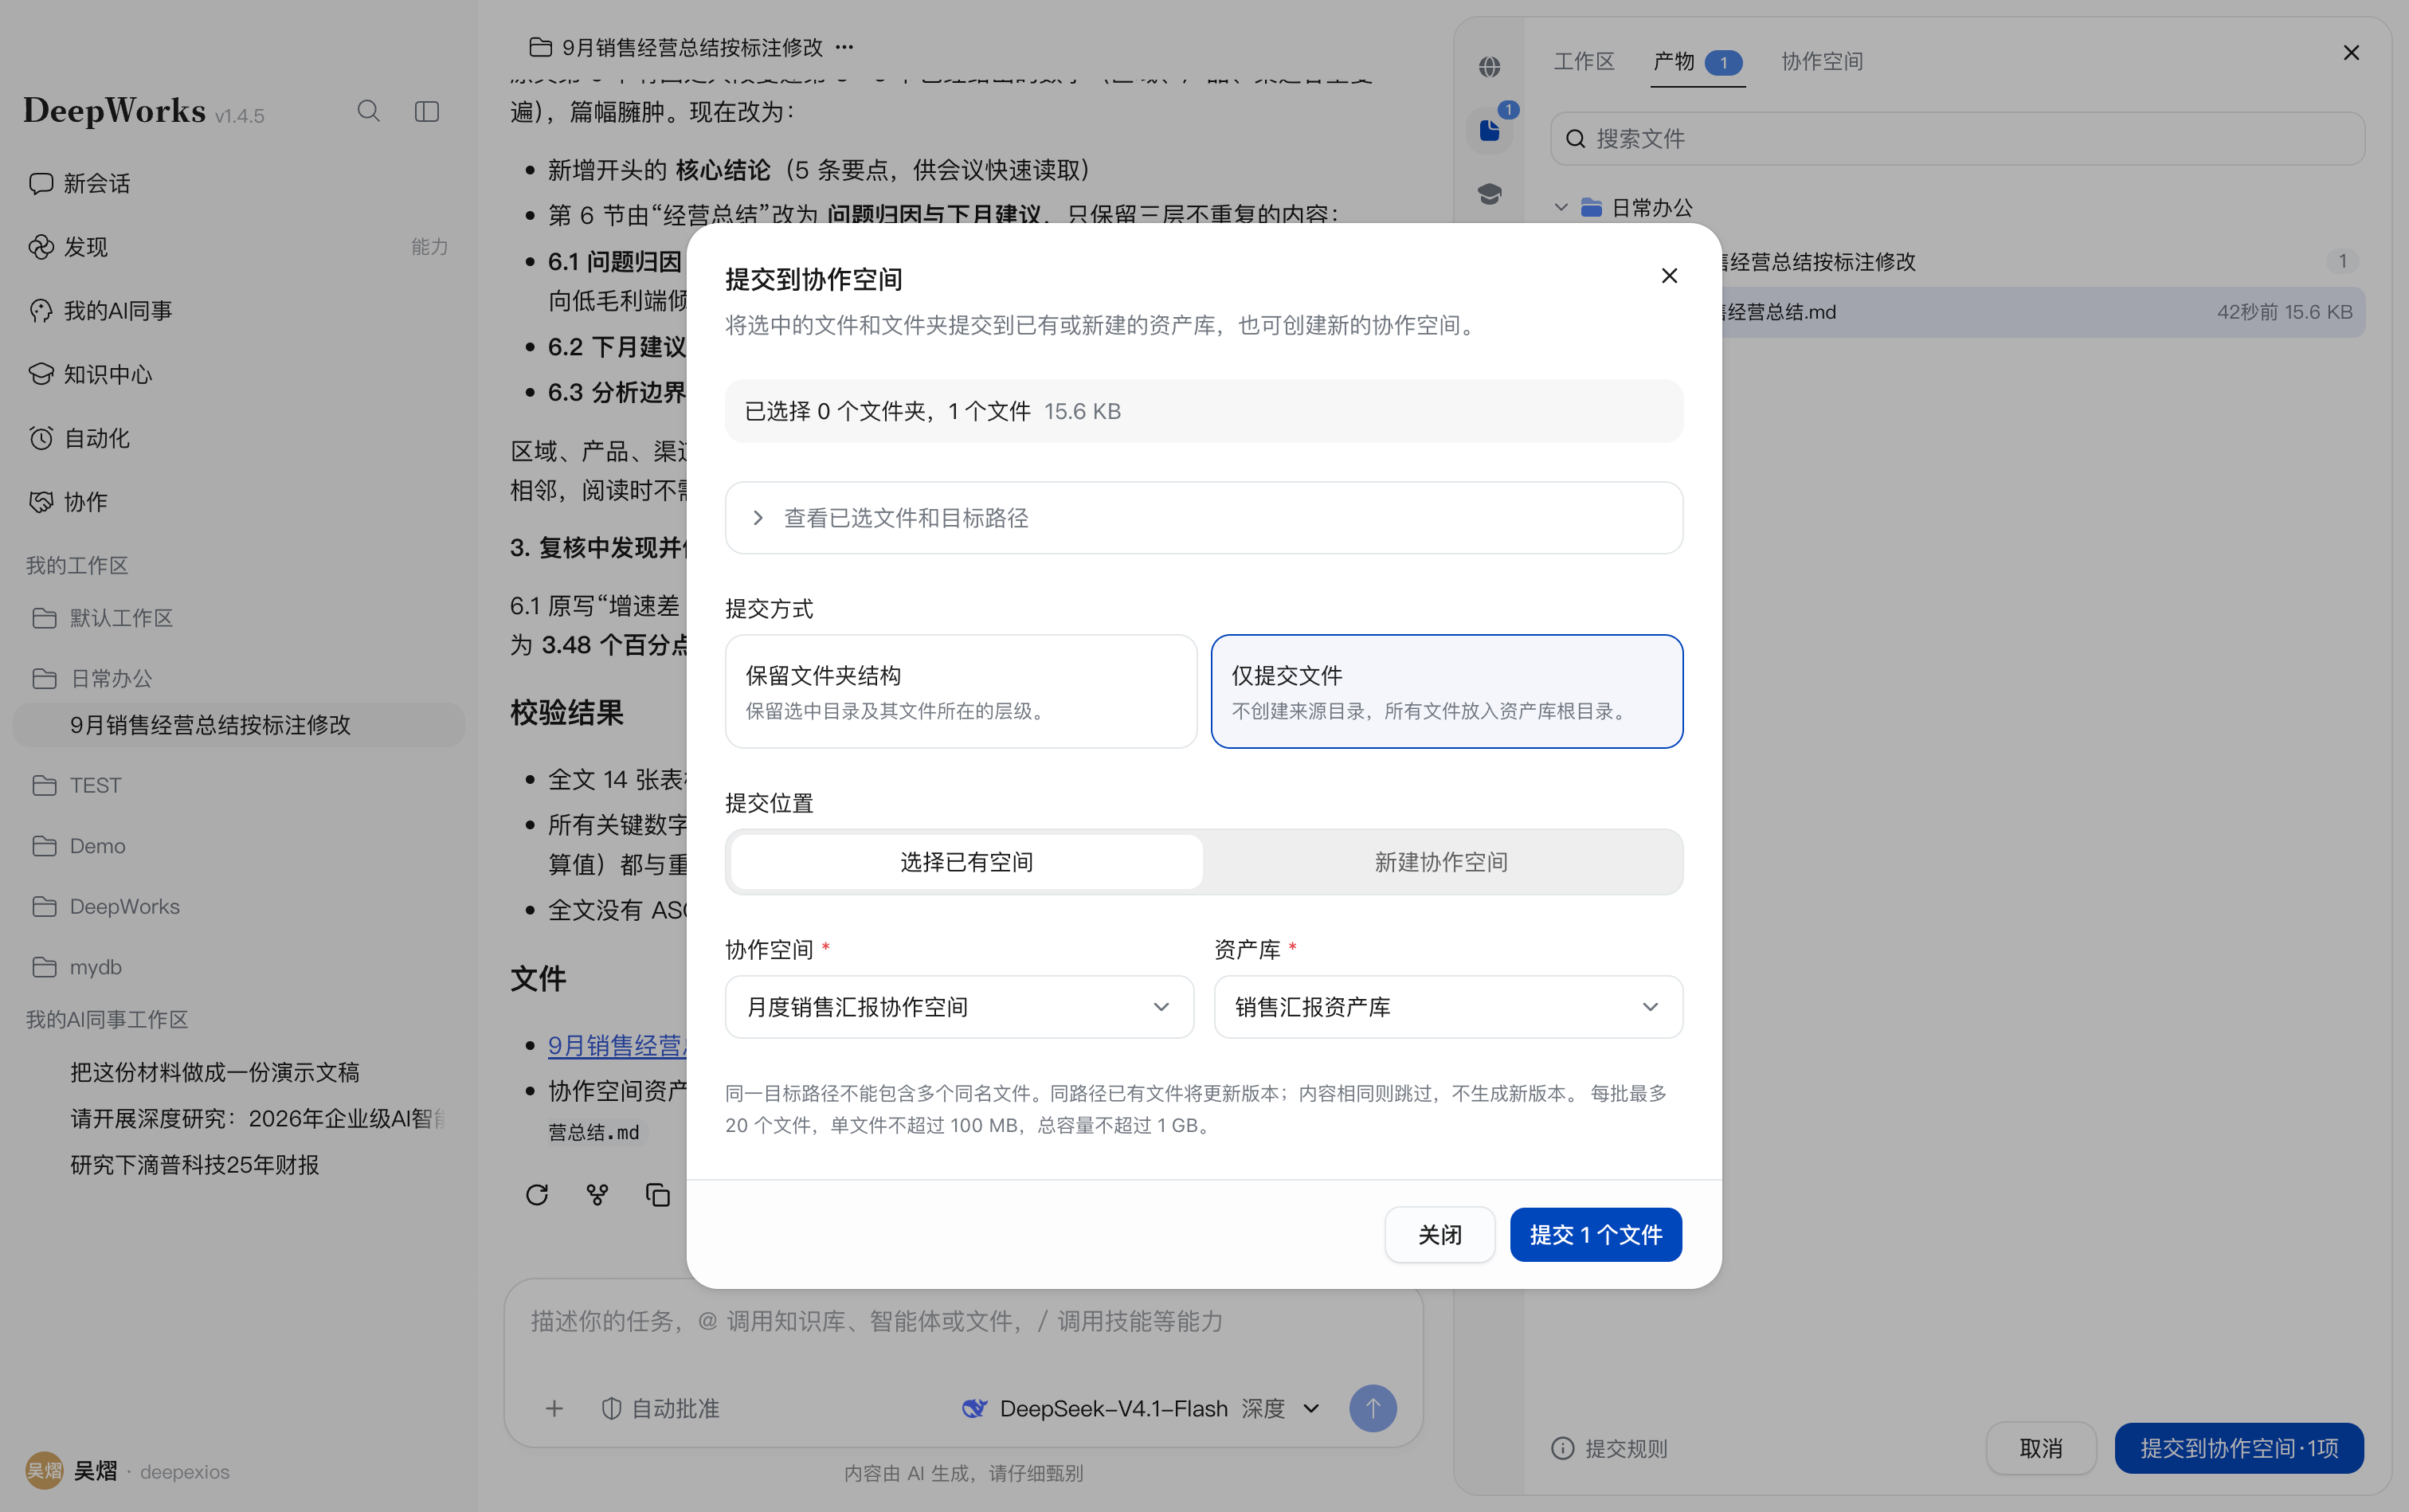
Submitting Cloud Deliverables
In the deliverables panel on the right of the cloud session, check the files to save and click Submit, then verify the number of deliverables and the target Asset Library and confirm. After submission, an immutable version is generated that you can preview and download in the Asset Library.
After the Submit Deliverables to Asset Library confirmation dialog appears, confirm that the target Asset Library is correct and then click Submit; once the submission succeeds, the corresponding files in the file tree on the right are marked In Library, while the remaining files stayNot in Library, making it easy to verify the submission scope.
Marking Key Deliverables
In the Files list of the Asset Library, click**…** to the right of the target file →Mark as Key Deliverable. After marking, the file shows theKey Deliverable label and can be viewed together in theDeliverables tab on the right, making it easier to find the main delivery results.
Account and System Settings
Credits Balance
Click the avatar menu to view your current credits. Click it to jump to the official website and check how the credits were consumed.
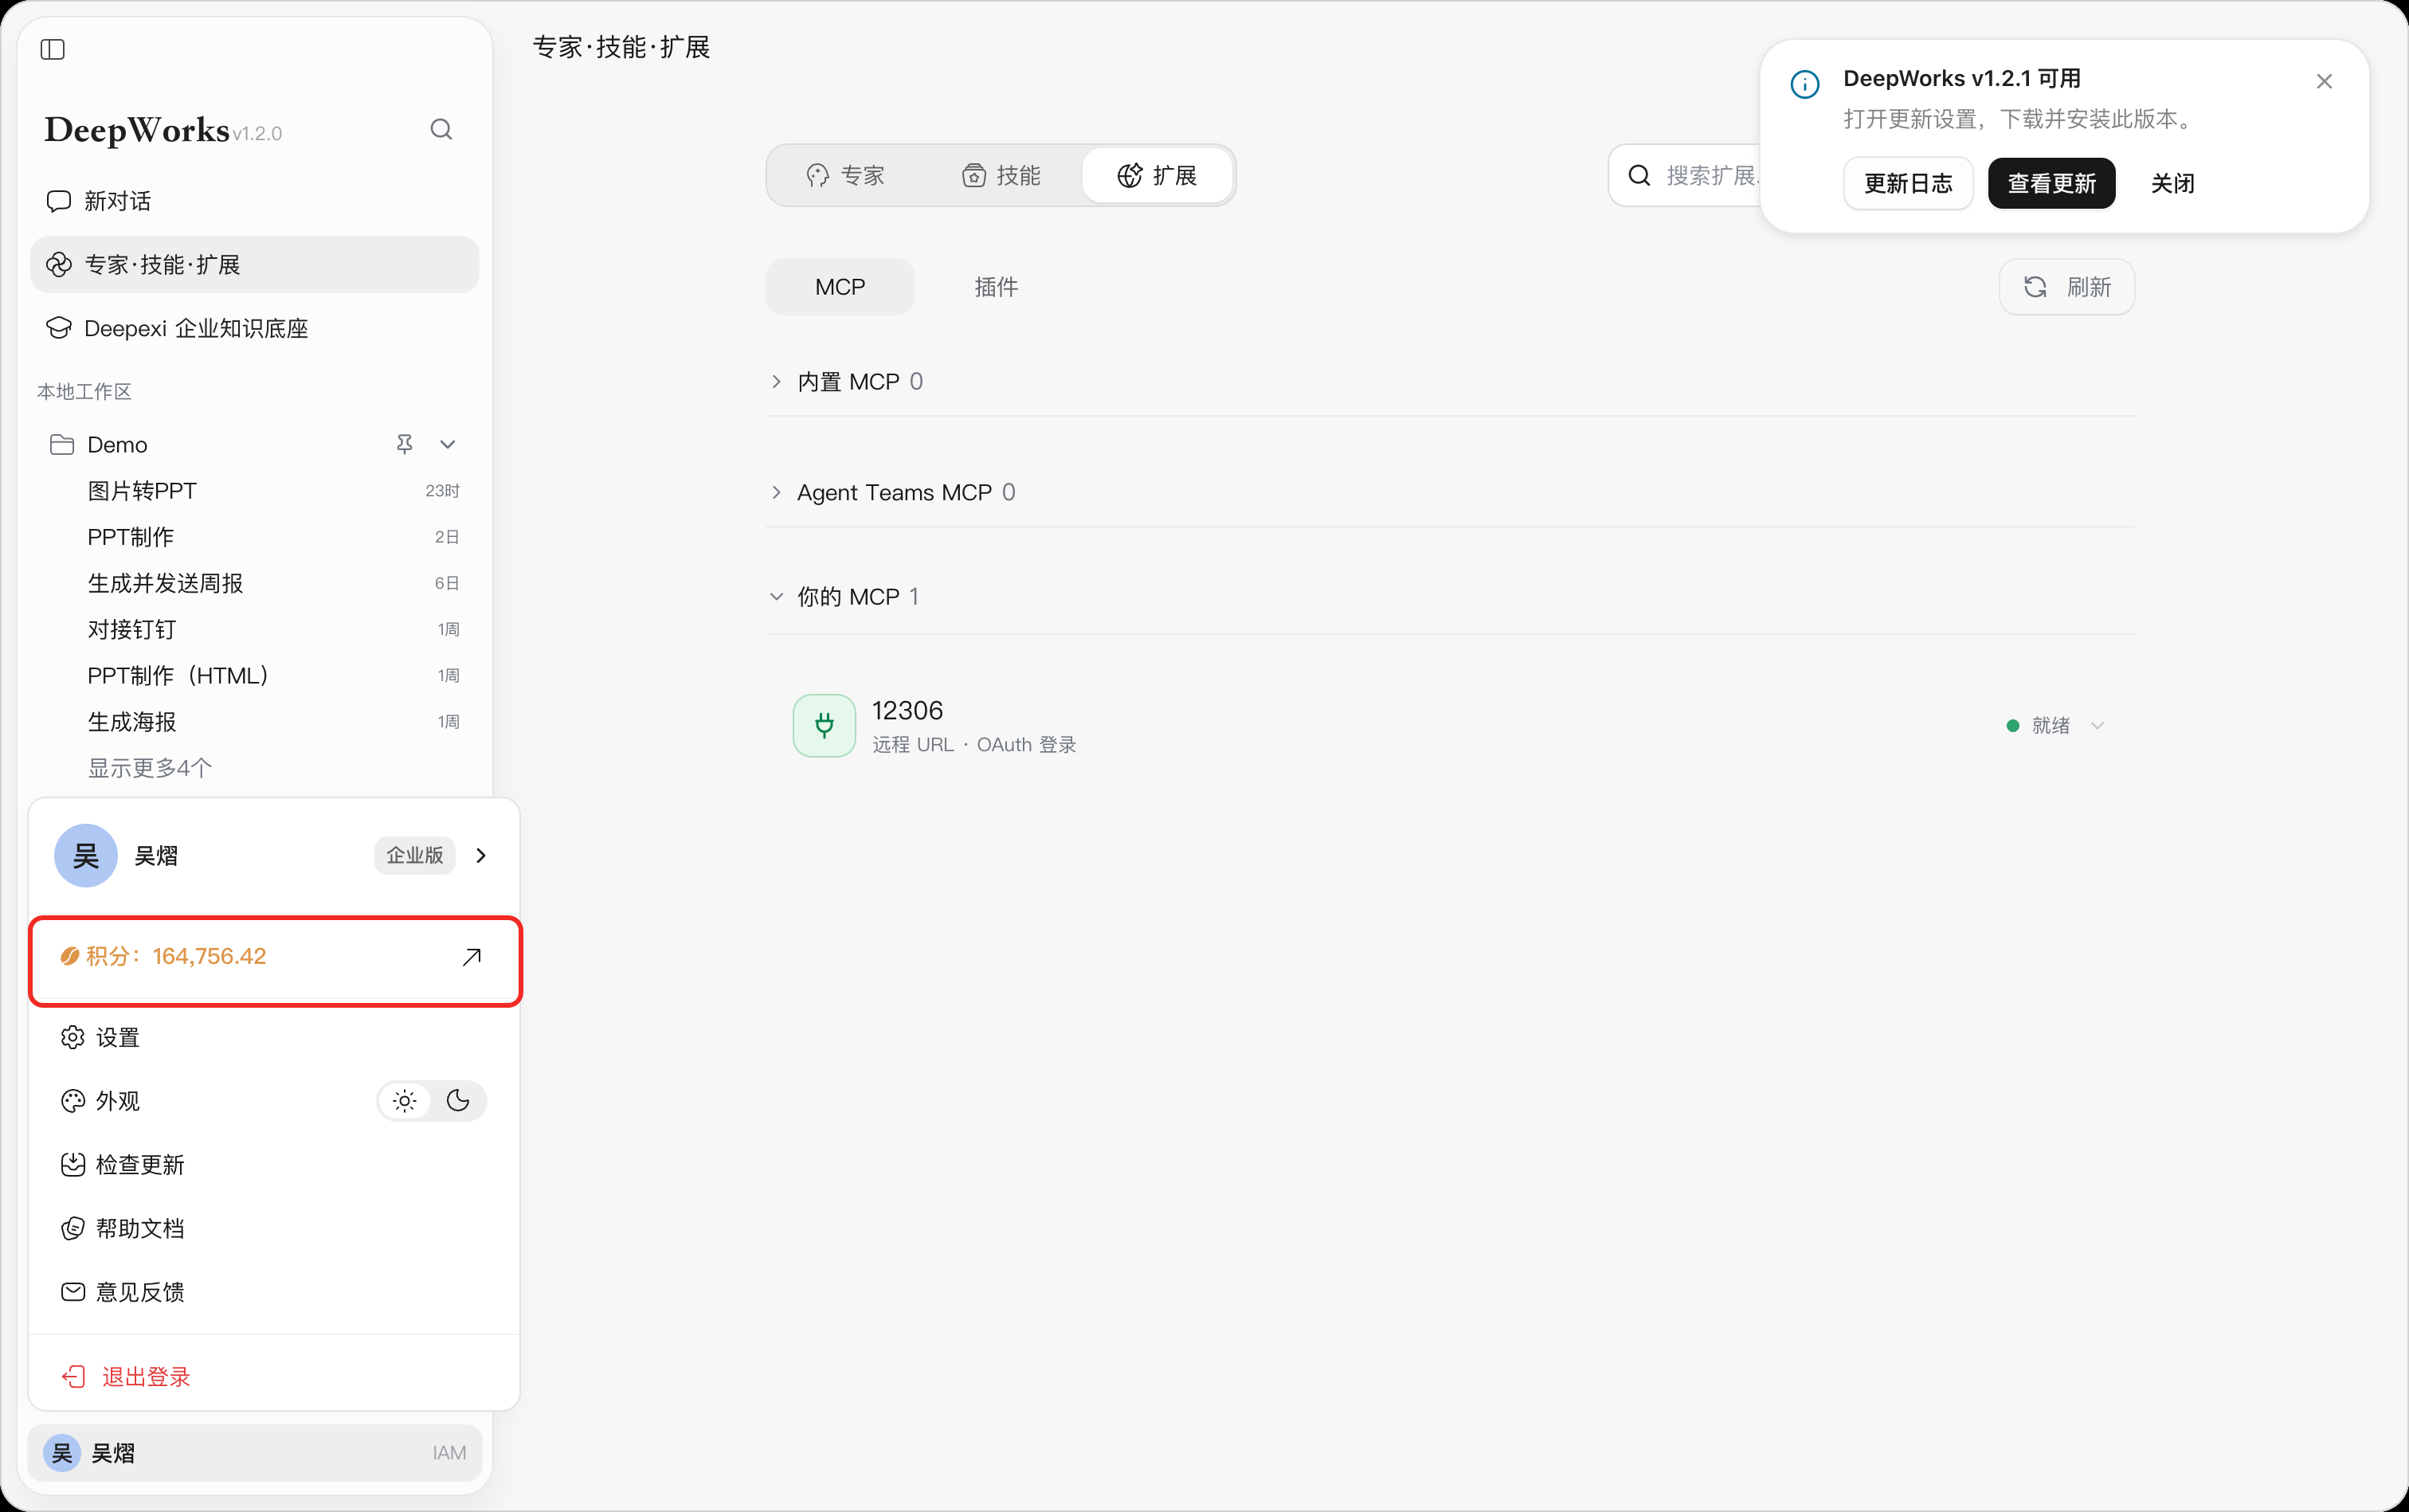
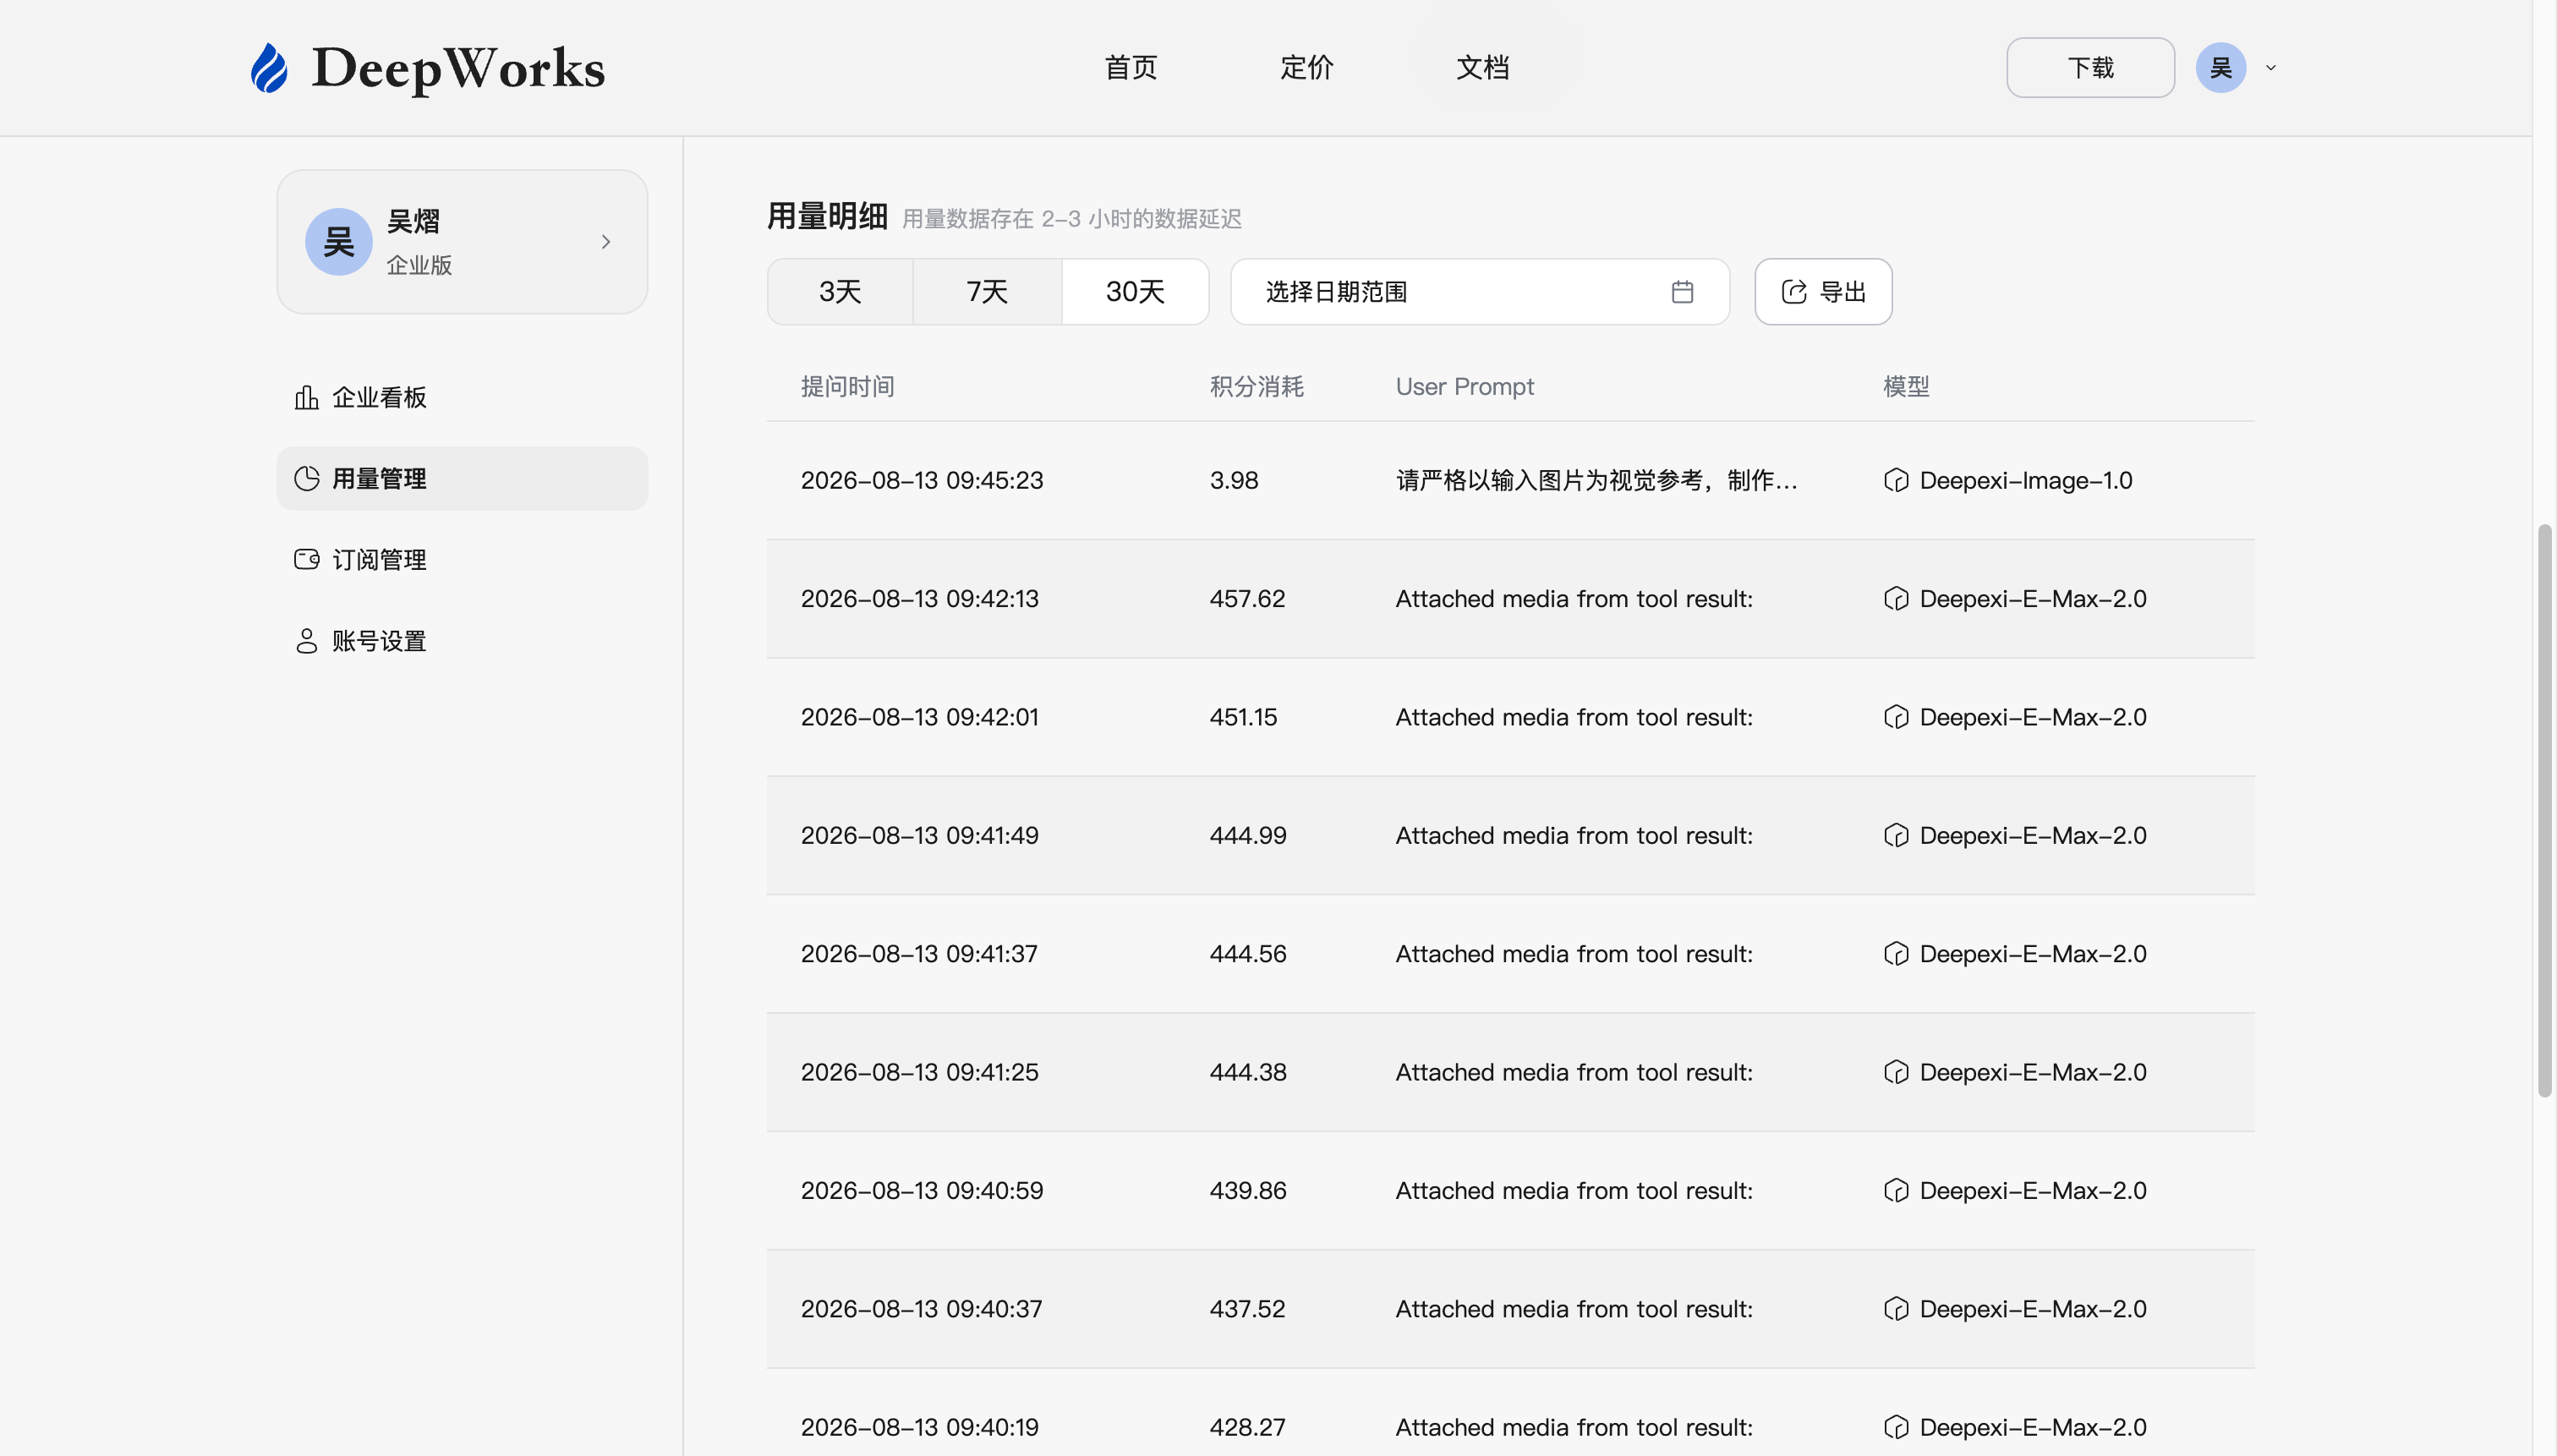
Help Documentation
Click Avatar menu -Help Documentation to jump to the official website and view the help documentation.
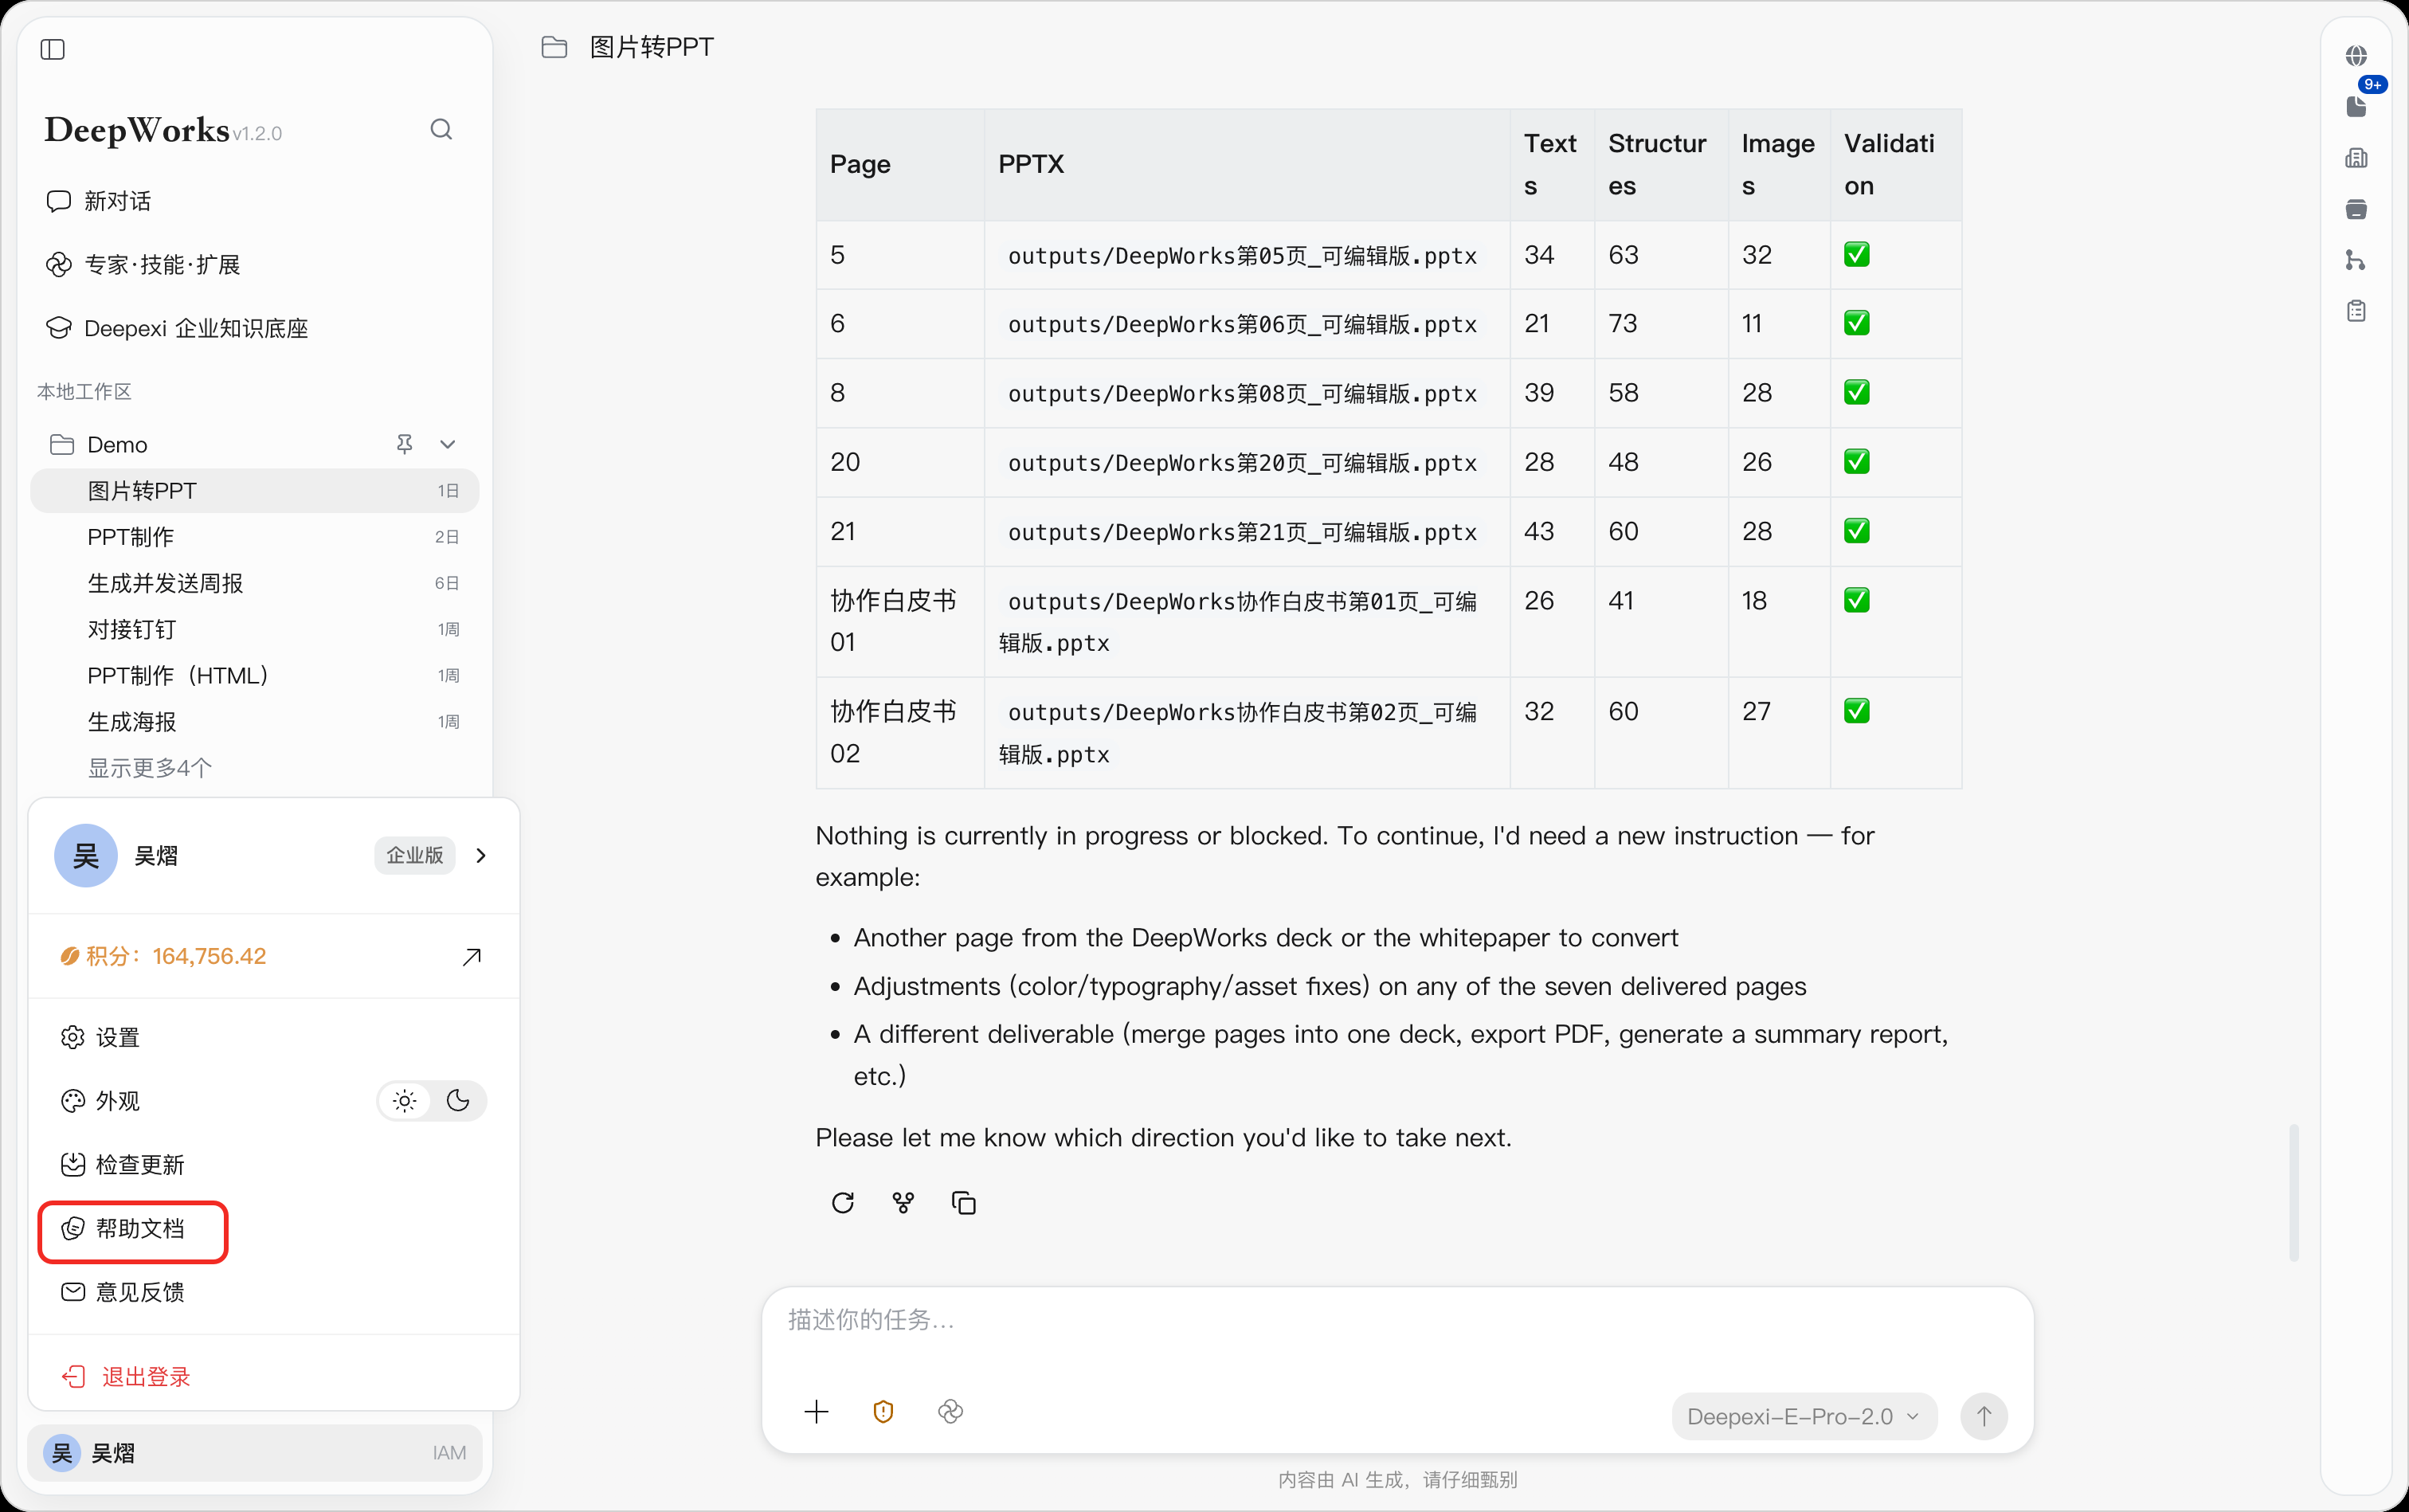
Accessing Settings
Click Settings in the bottom-left user menu to open the settings page. The settings include Account, Models, Advanced, Appearance, Pet, Git, Updates, Environment Variables, Feedback, and Archived Chats.
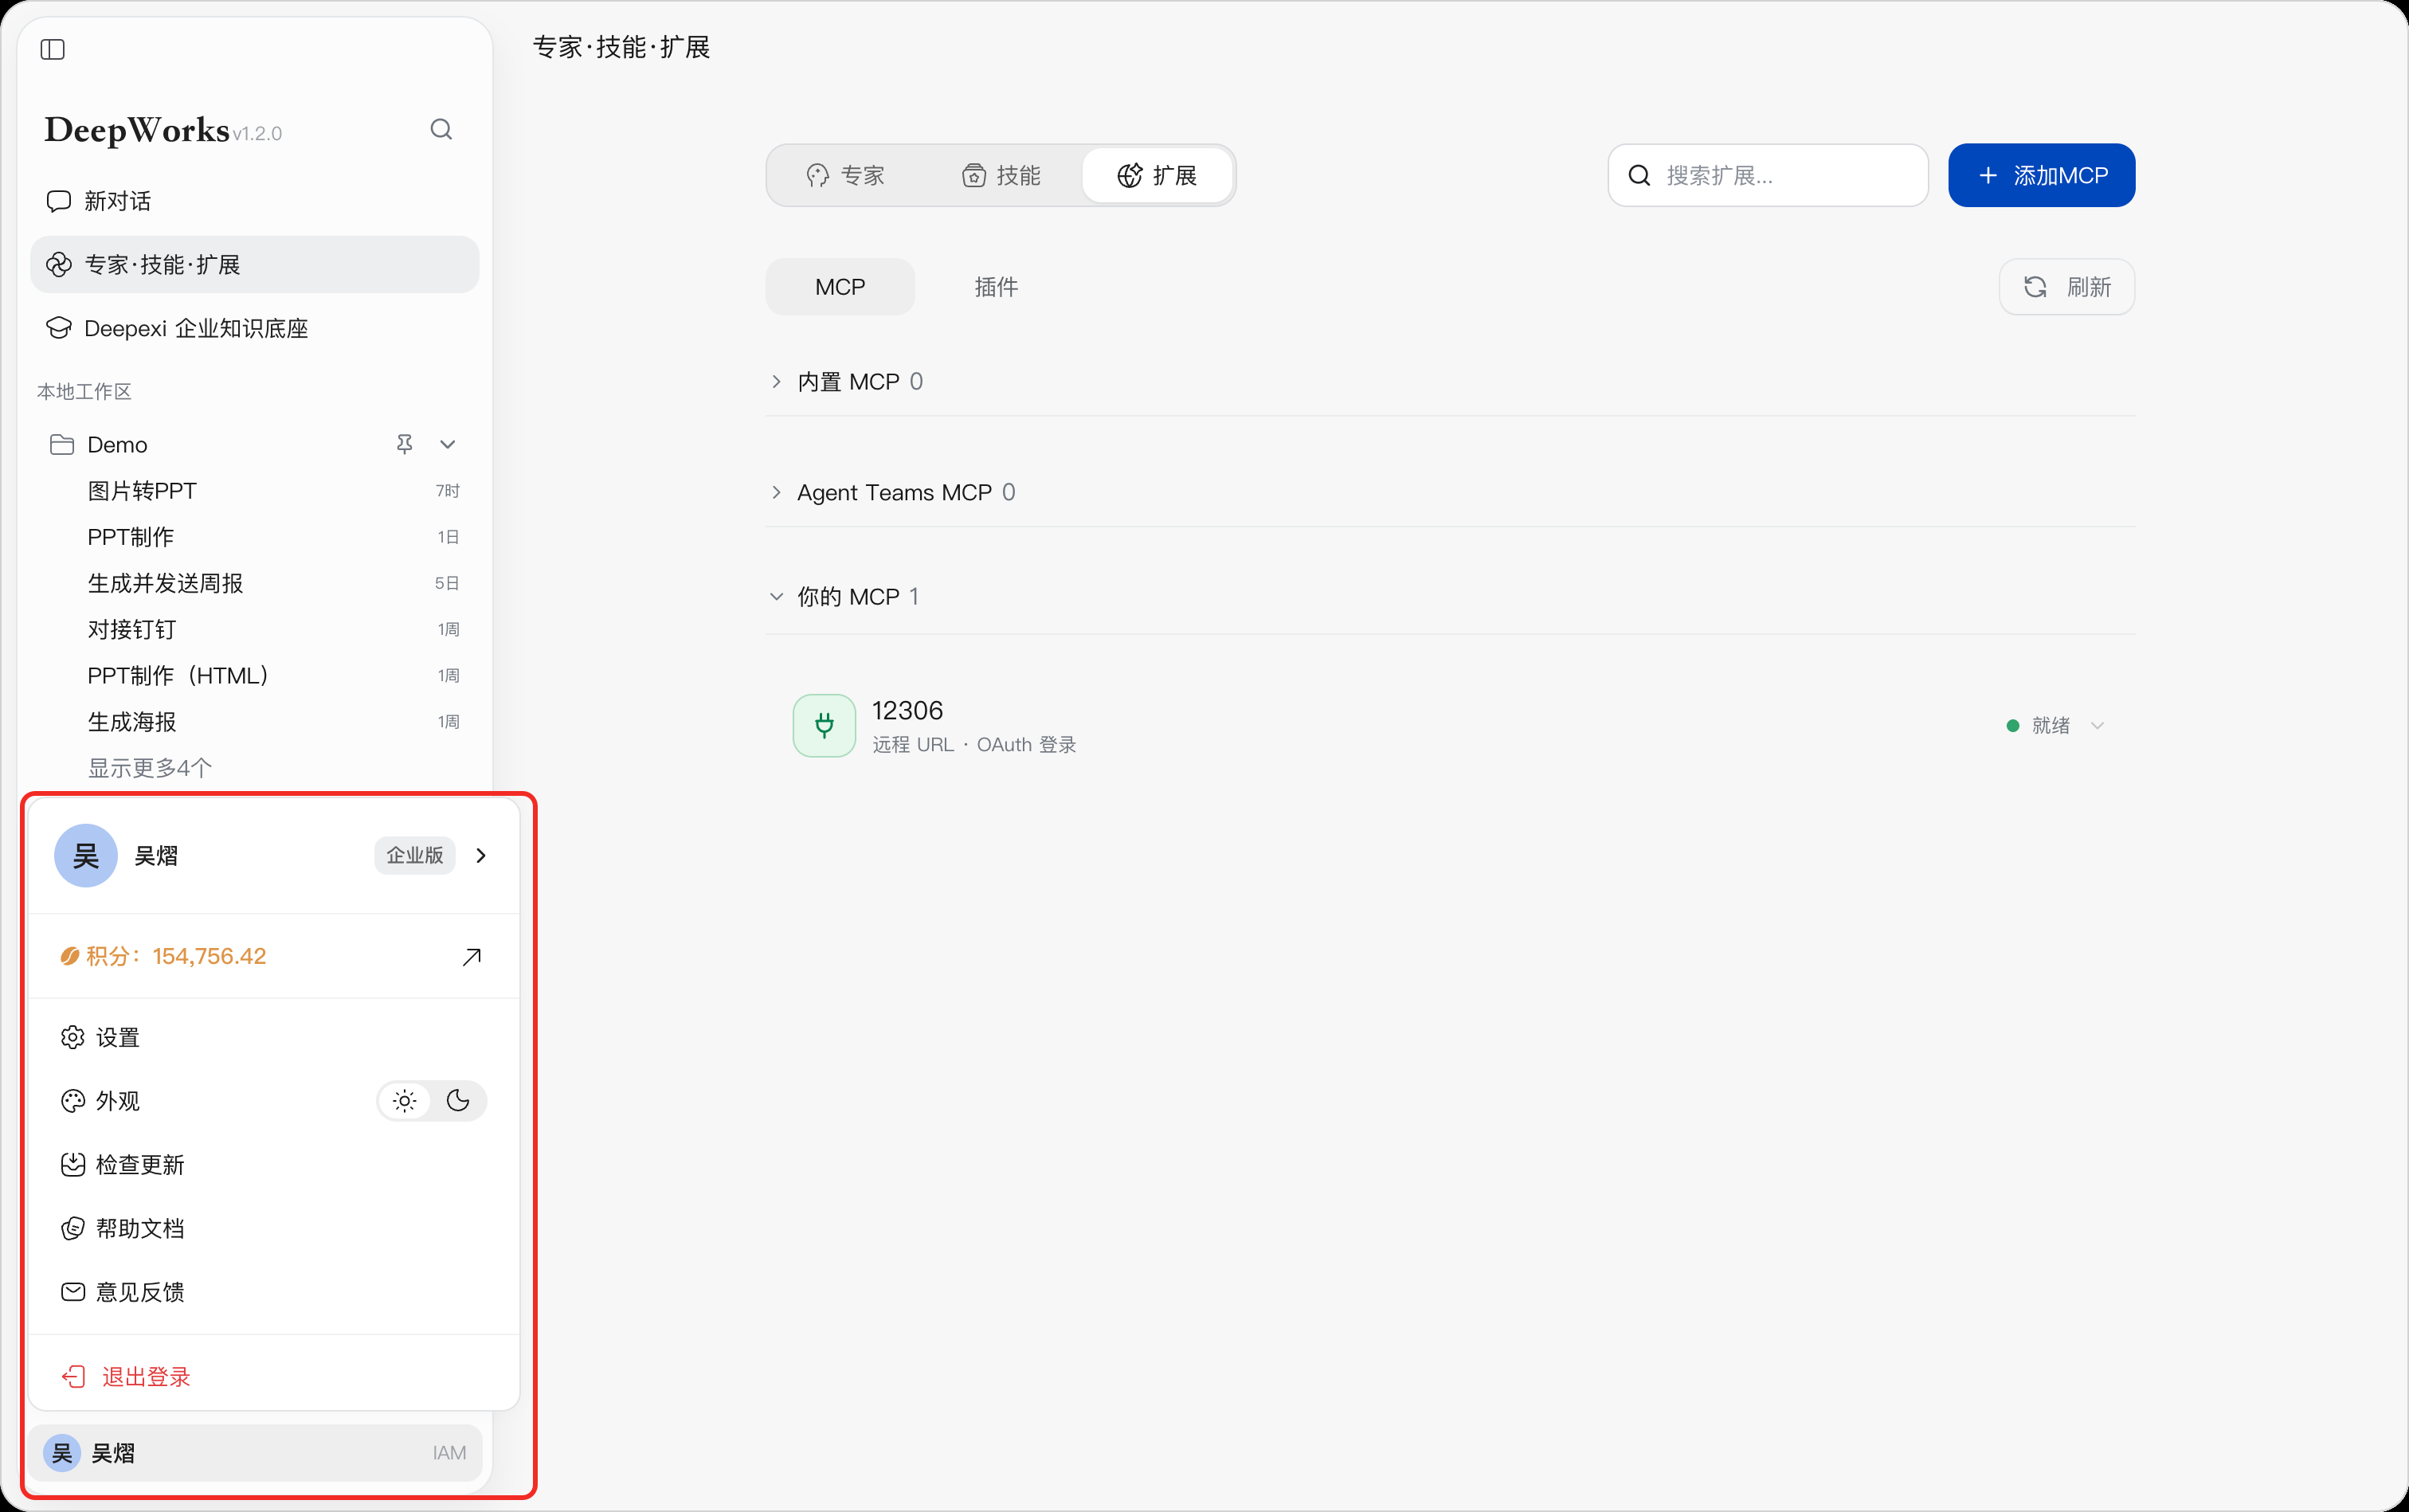
Account Settings
Click Account to view the current user account.
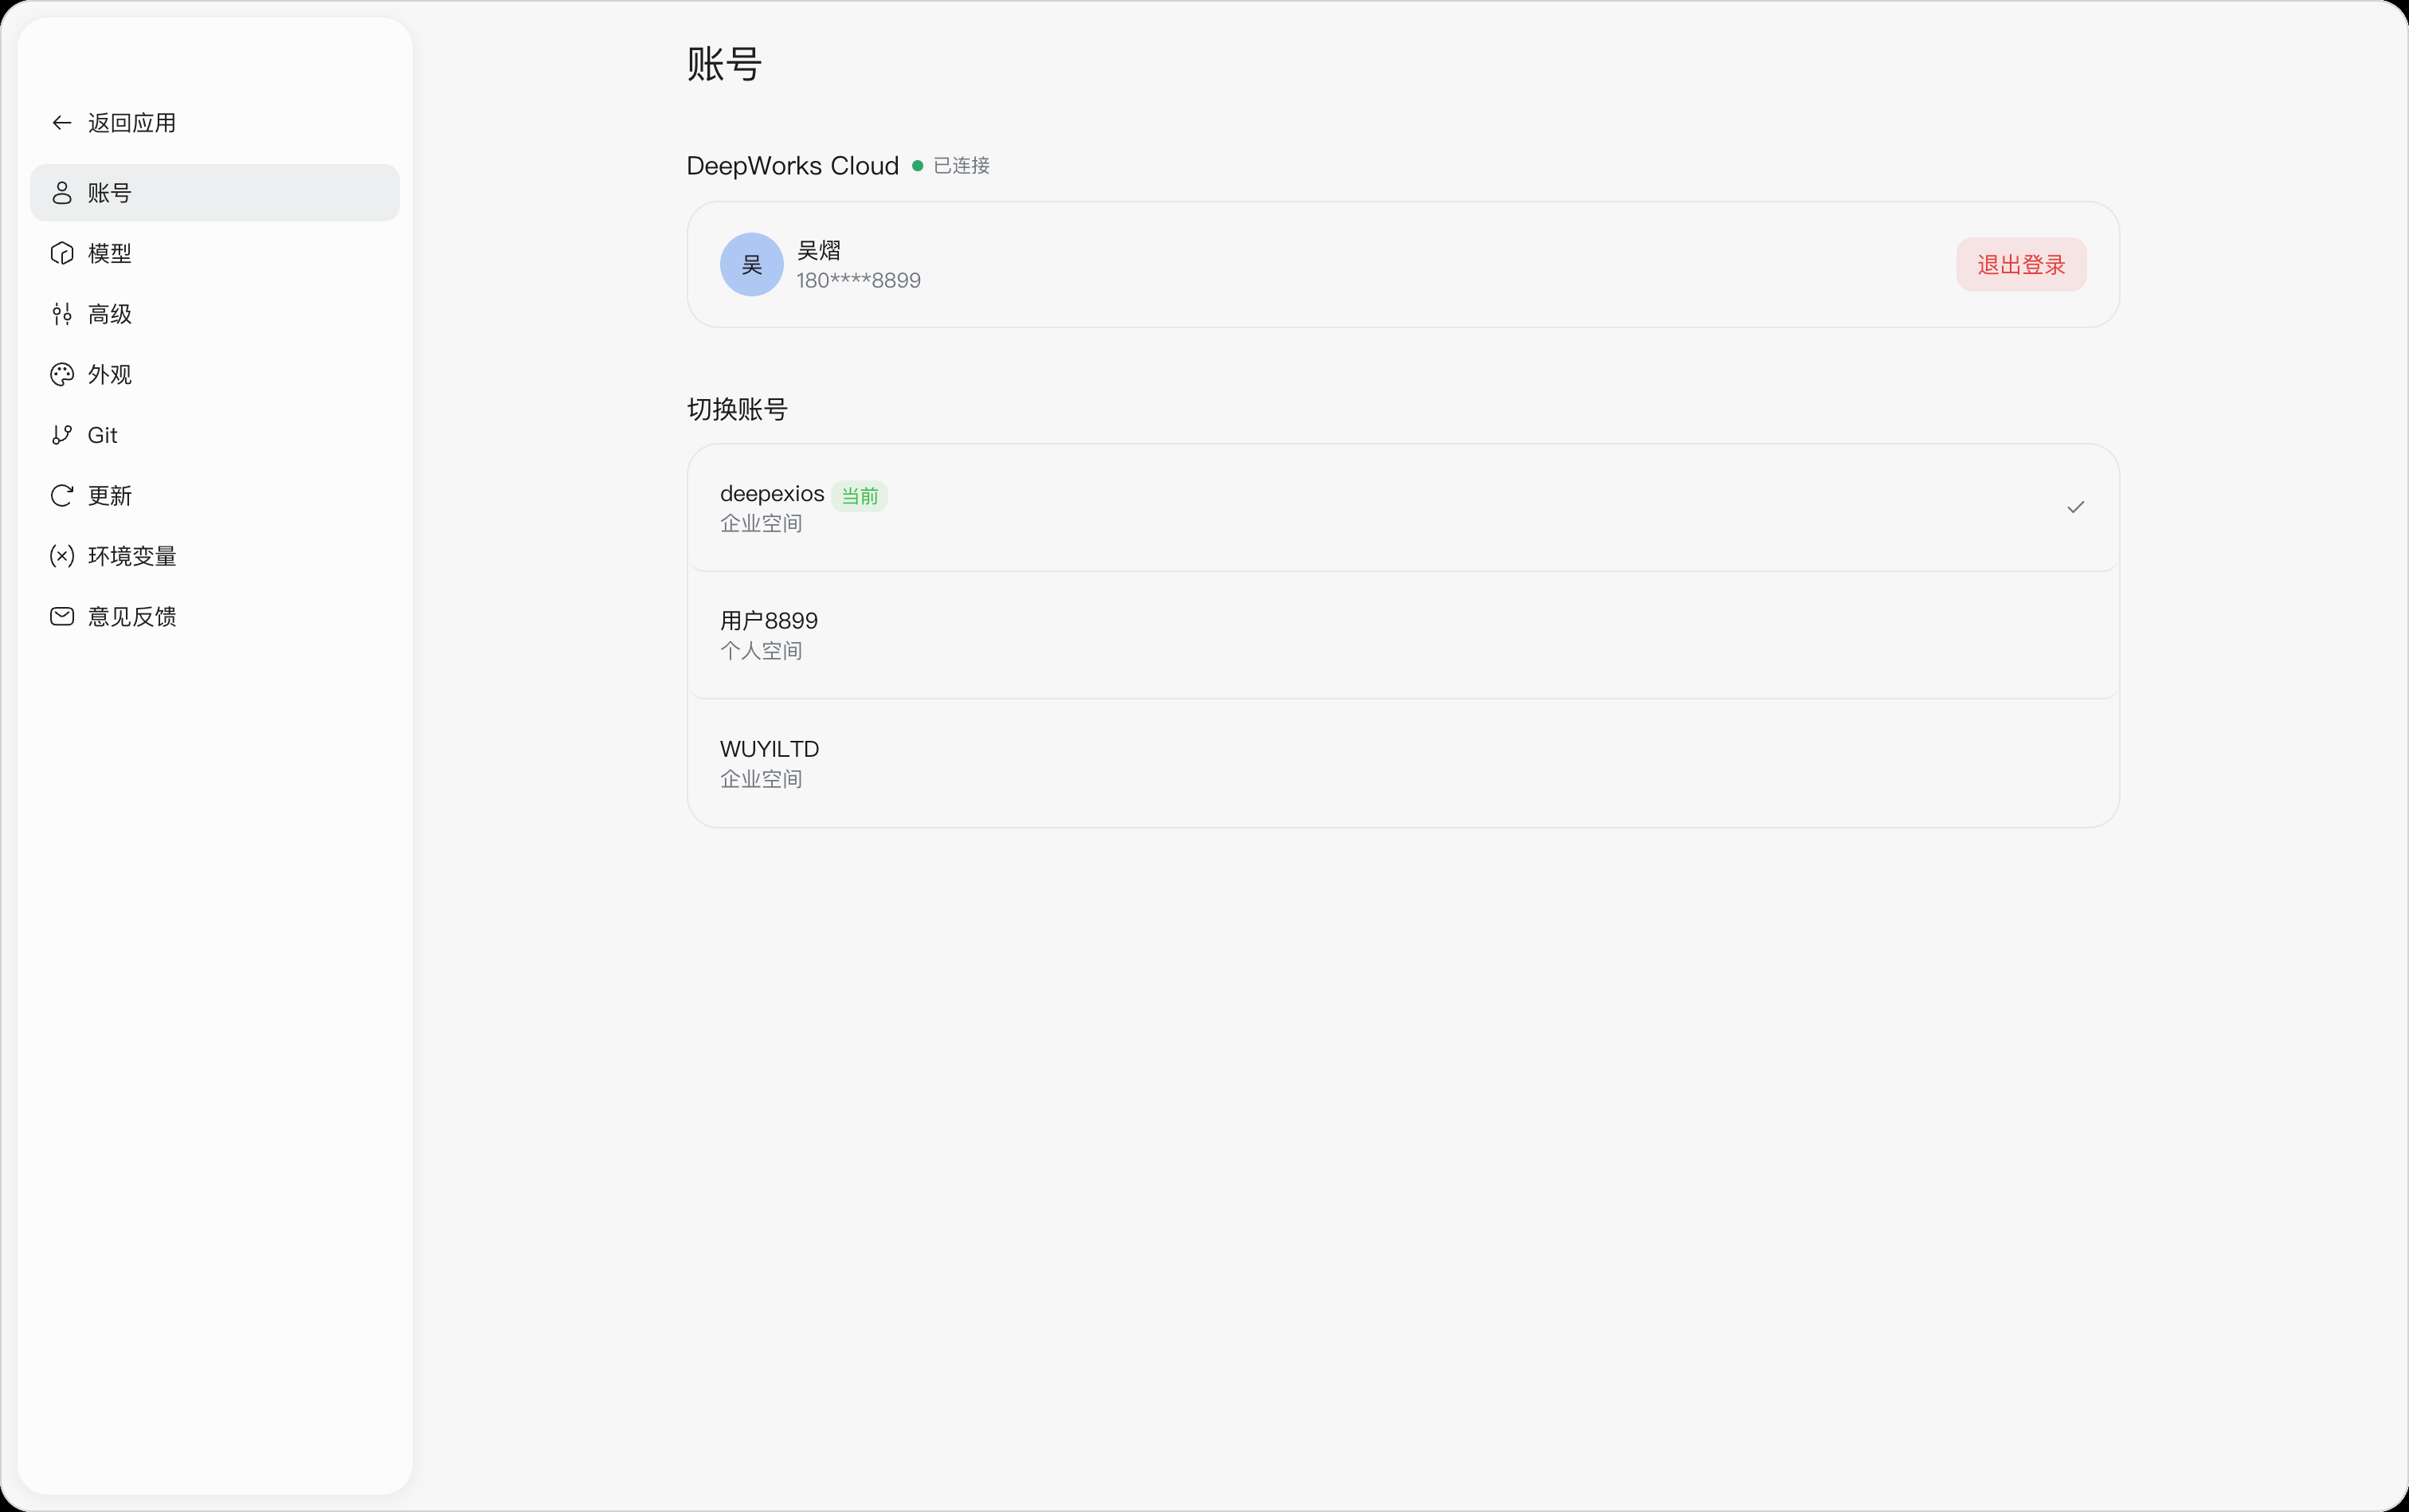
The available actions include:
-
View or edit your profile;
-
Switch between personal space and enterprise space;
-
Sign out.
Switching account spaces affects the visible models, experts, Skills, data, and permissions. After switching, re-confirm which space the current task belongs to.
Advanced Settings
On the Settings > Advanced page, you can configure the privacy, interface accessibility, and developer features of DeepWorks.
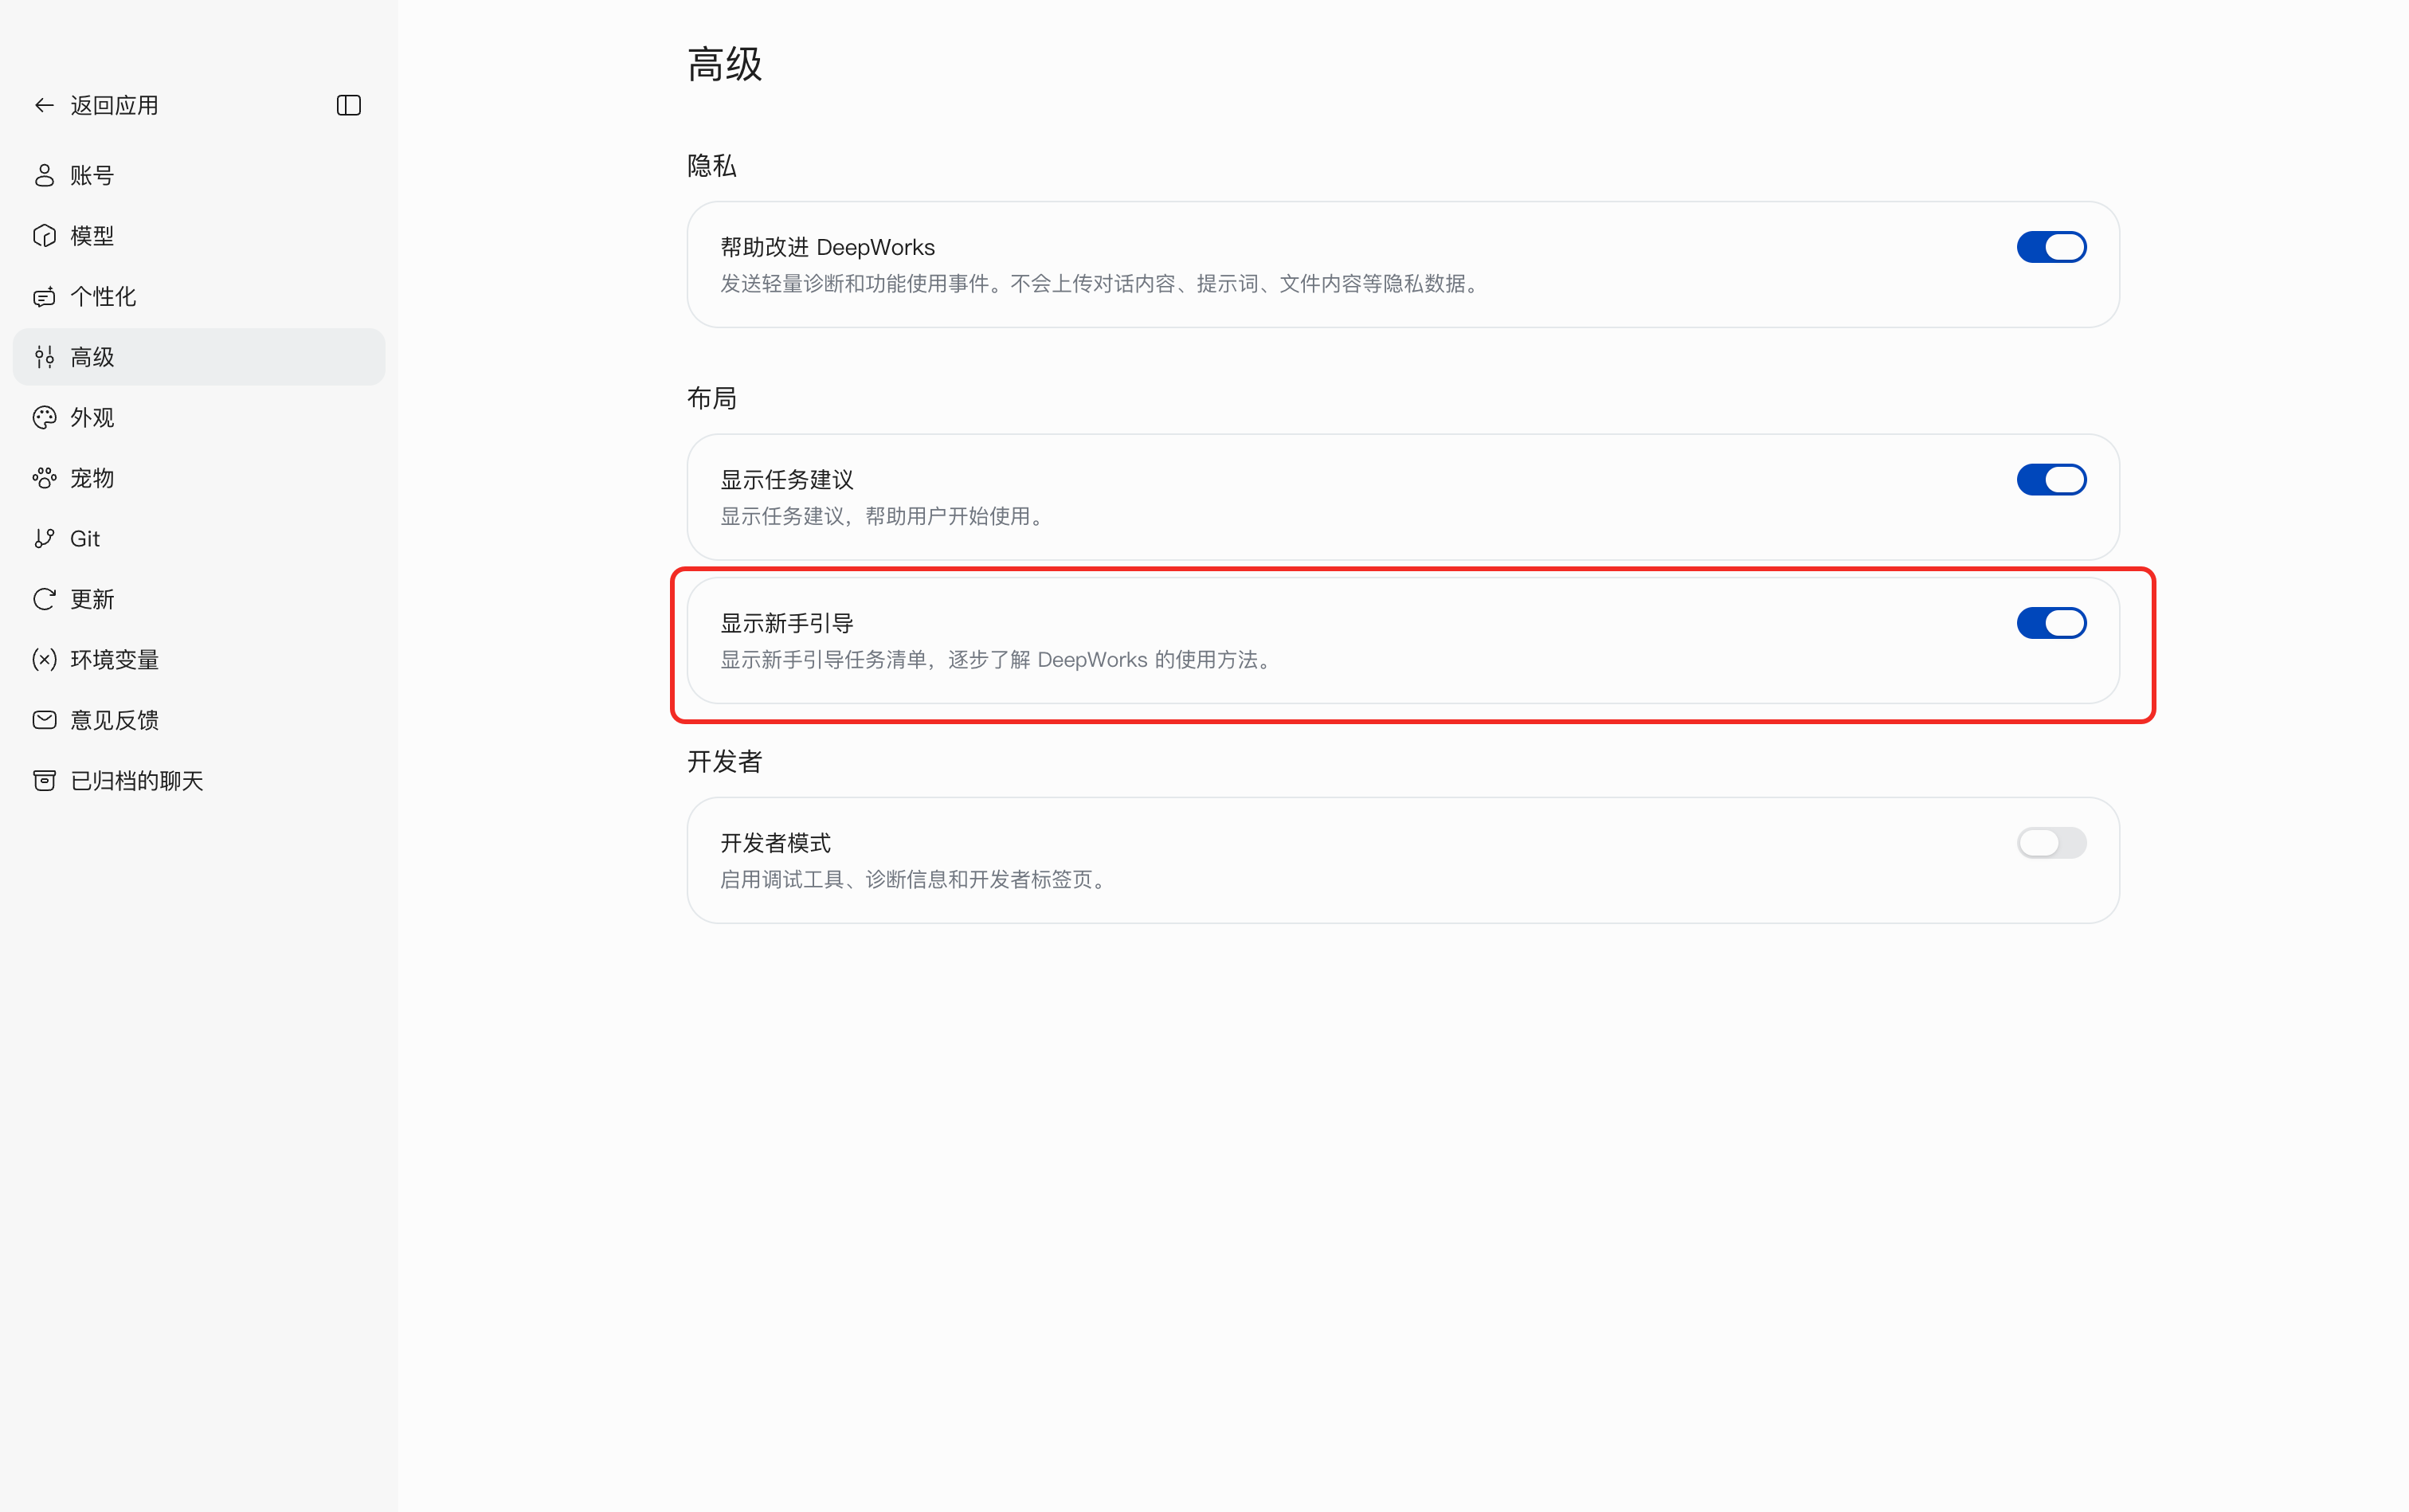
Help Improve DeepWorks
In the “Privacy” section, use the Help Improve DeepWorks toggle to control whether anonymous diagnostics and feature usage events are sent.
When enabled, DeepWorks collects the necessary anonymous diagnostic information and feature usage data to improve the product experience and stability.
This feature does not upload private data such as conversation content, prompts, or file contents.
If you do not want to send such diagnostic information, turn off the toggle.
Show Task Suggestions
In the “Layout” section, use the Show Task Suggestions toggle to control whether task suggestions appear on the relevant pages.
When enabled, DeepWorks displays task suggestions based on the current scenario, helping users quickly understand what work can be handed over to AI and start using the related capabilities.
When disabled, the interface no longer shows task suggestions, and other features are not affected.
Show Getting Started
Use Show Getting Started under Layout to control the tutorial entry’s visibility.
- Open Settings > Advanced and find
Show Getting Startedunder Layout. - Enable it, click
Back to App, and openGetting Startedat the bottom of the left sidebar to expand the task list. - Disable it to close the tutorial list and introduction and hide the sidebar entry.
Selecting Hide Entry from the sidebar entry’s … menu also disables this switch. Both disabling and re-enabling preserve progress and do not resend tutorial tasks. See 3.3 Getting Started Tutorials.
Developer Mode
In the “Developer” section, use the Developer Mode toggle to enable advanced features for development and debugging scenarios.
After enabling Developer Mode, you can use:
-
Debugging tools;
-
Diagnostic information;
-
Developer-related tabs.
Developer Mode is mainly intended for troubleshooting, feature debugging, and development testing. Regular users usually do not need to enable it.
If you need to debug or work with technical staff to locate an issue, you can enable this feature and turn it off again afterward as needed.
Usage Notes
All options on the page are controlled by the toggles on the right:
-
Blue indicates that the feature is currently enabled;
-
Gray indicates that the feature is currently disabled.
Click the corresponding toggle to change the setting directly. No additional saving is required after the setting takes effect.
Appearance Settings
DeepWorks lets you adjust the interface theme, display language, and font size for conversations and code according to your personal habits. You can quickly switch between light and dark themes from the shortcut entry, or open the “Appearance” settings page for full configuration.
Quickly Switching the Interface Theme
Click the user avatar in the bottom-left corner to expand the personal menu.
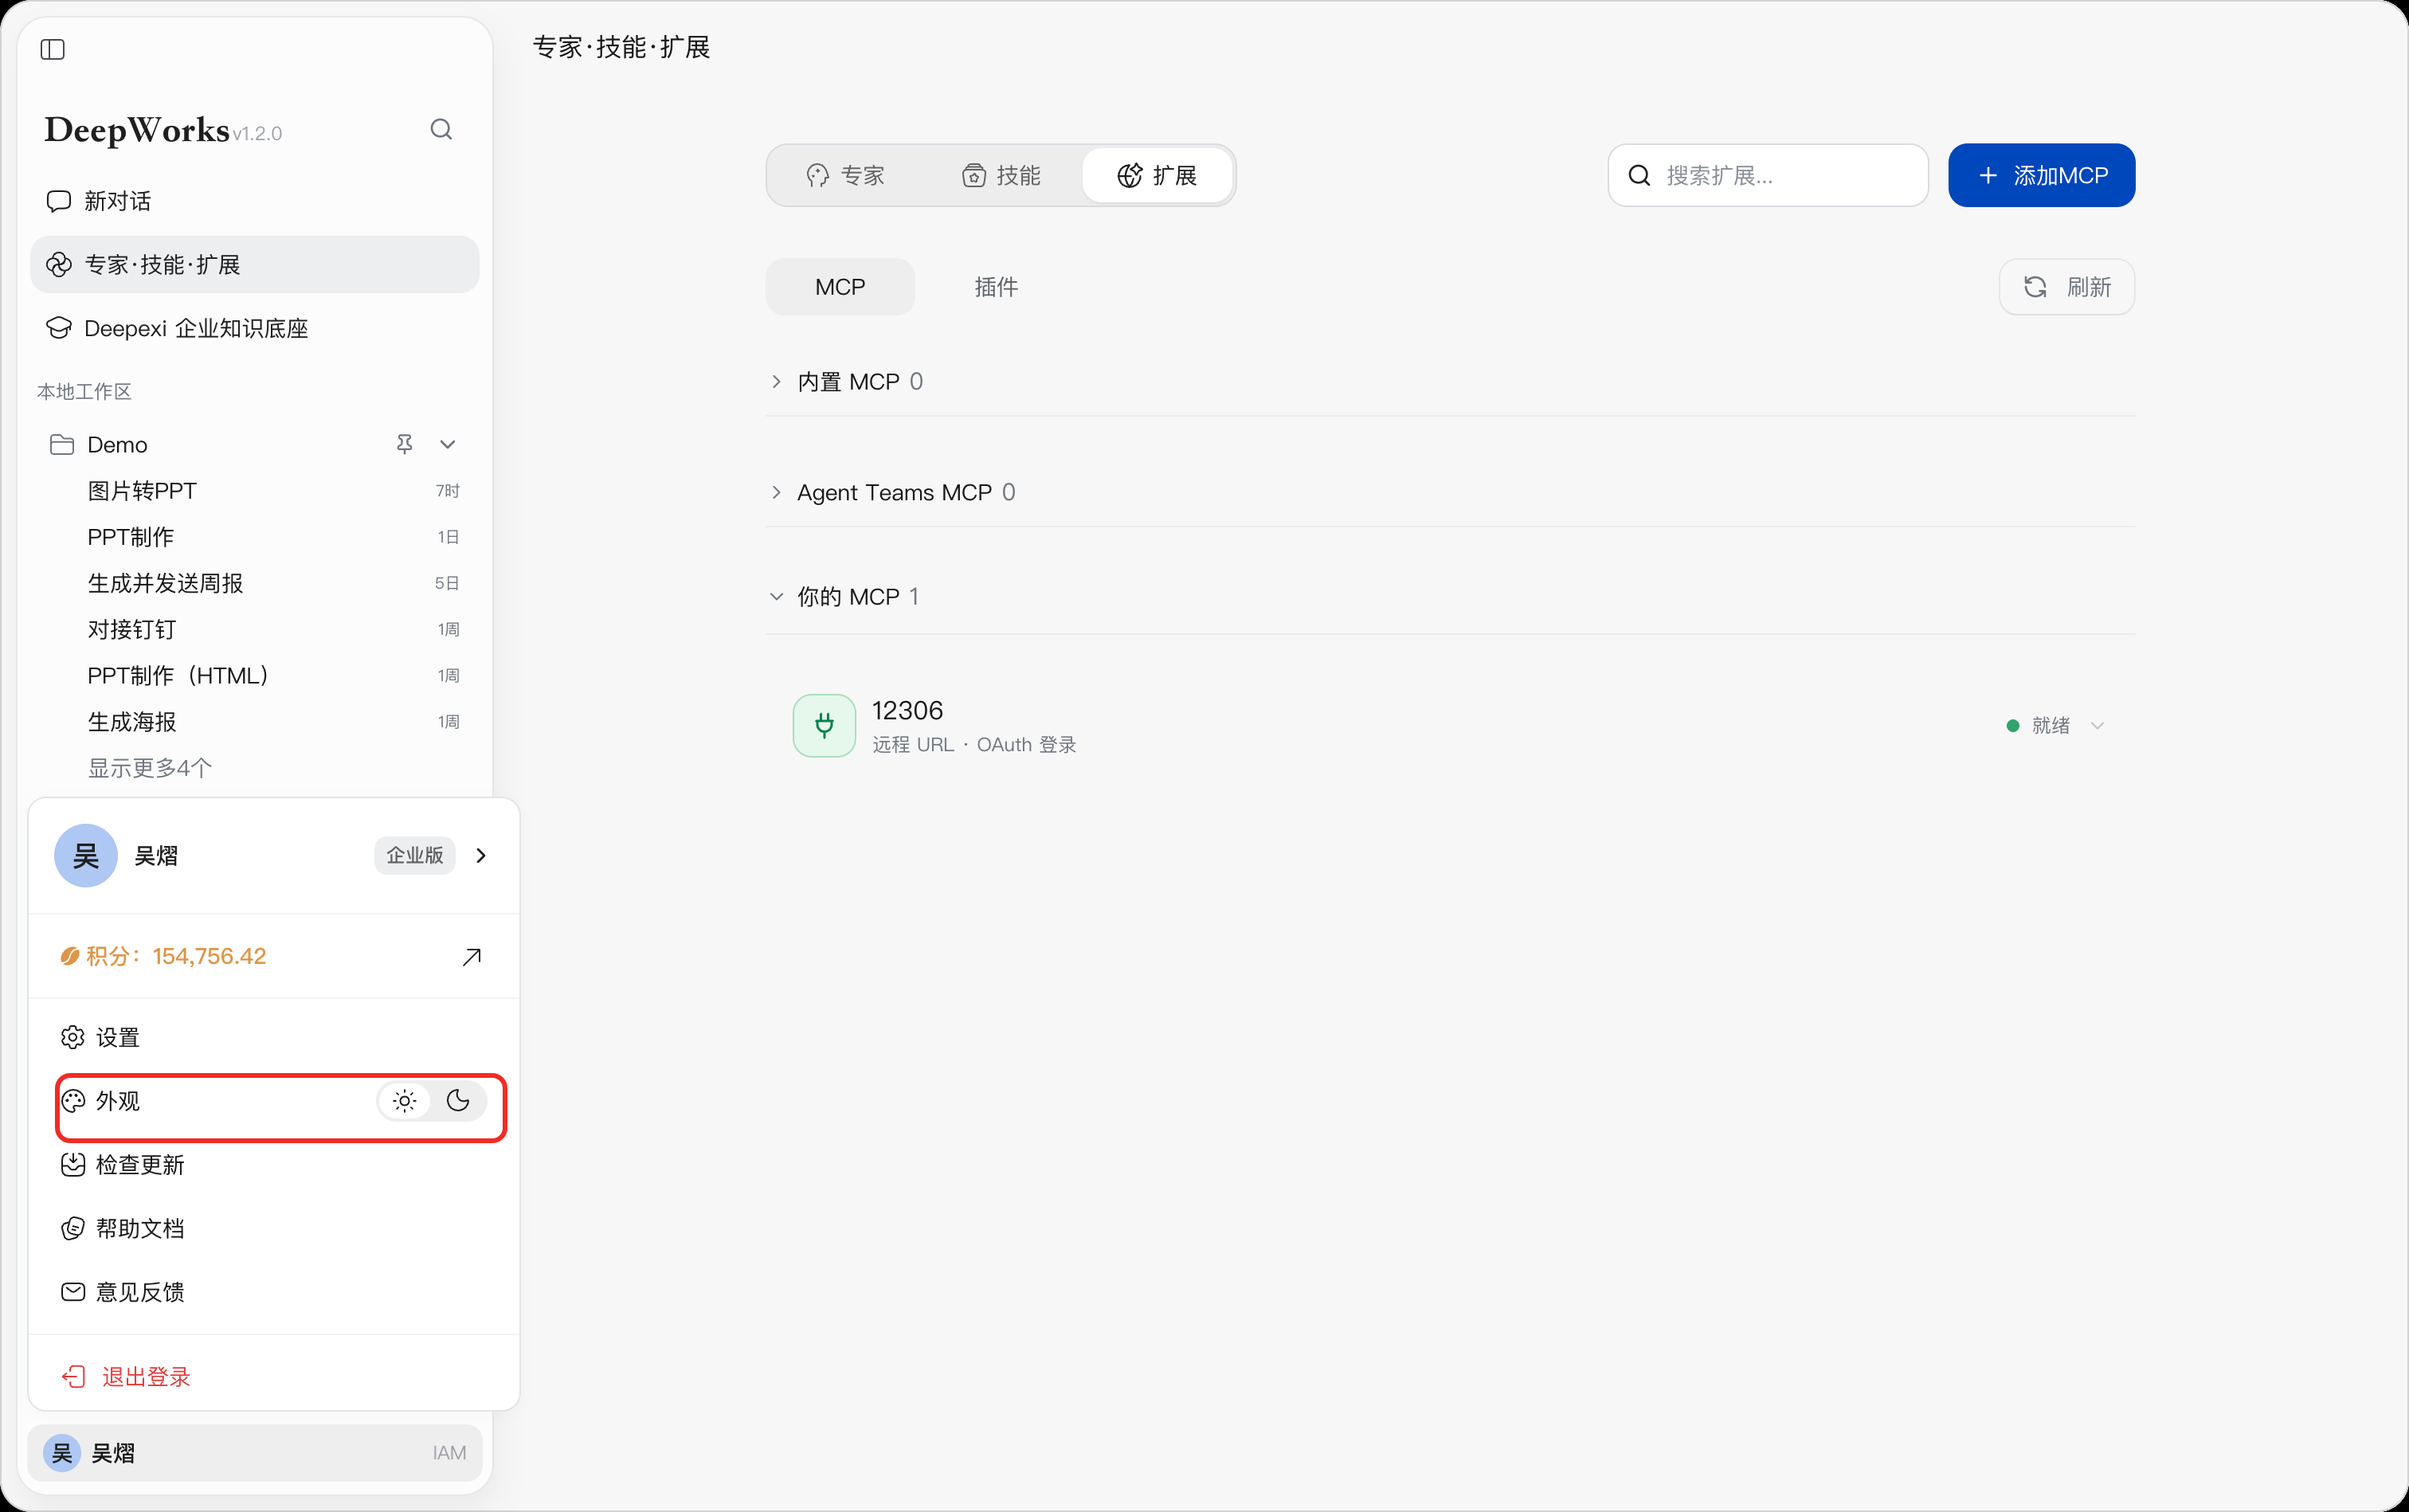
In the “Appearance” row, you can quickly switch the interface theme using the icons on the right:
-
Light Mode: Displays the interface on a light background, suitable for daytime or bright environments.
-
Dark Mode: Displays the interface on a dark background, suitable for nighttime or low-light environments.
After you make a selection, the interface theme switches immediately, without restarting DeepWorks.
Setting the Interface Theme
For more complete theme settings, go to: Settings > Appearance
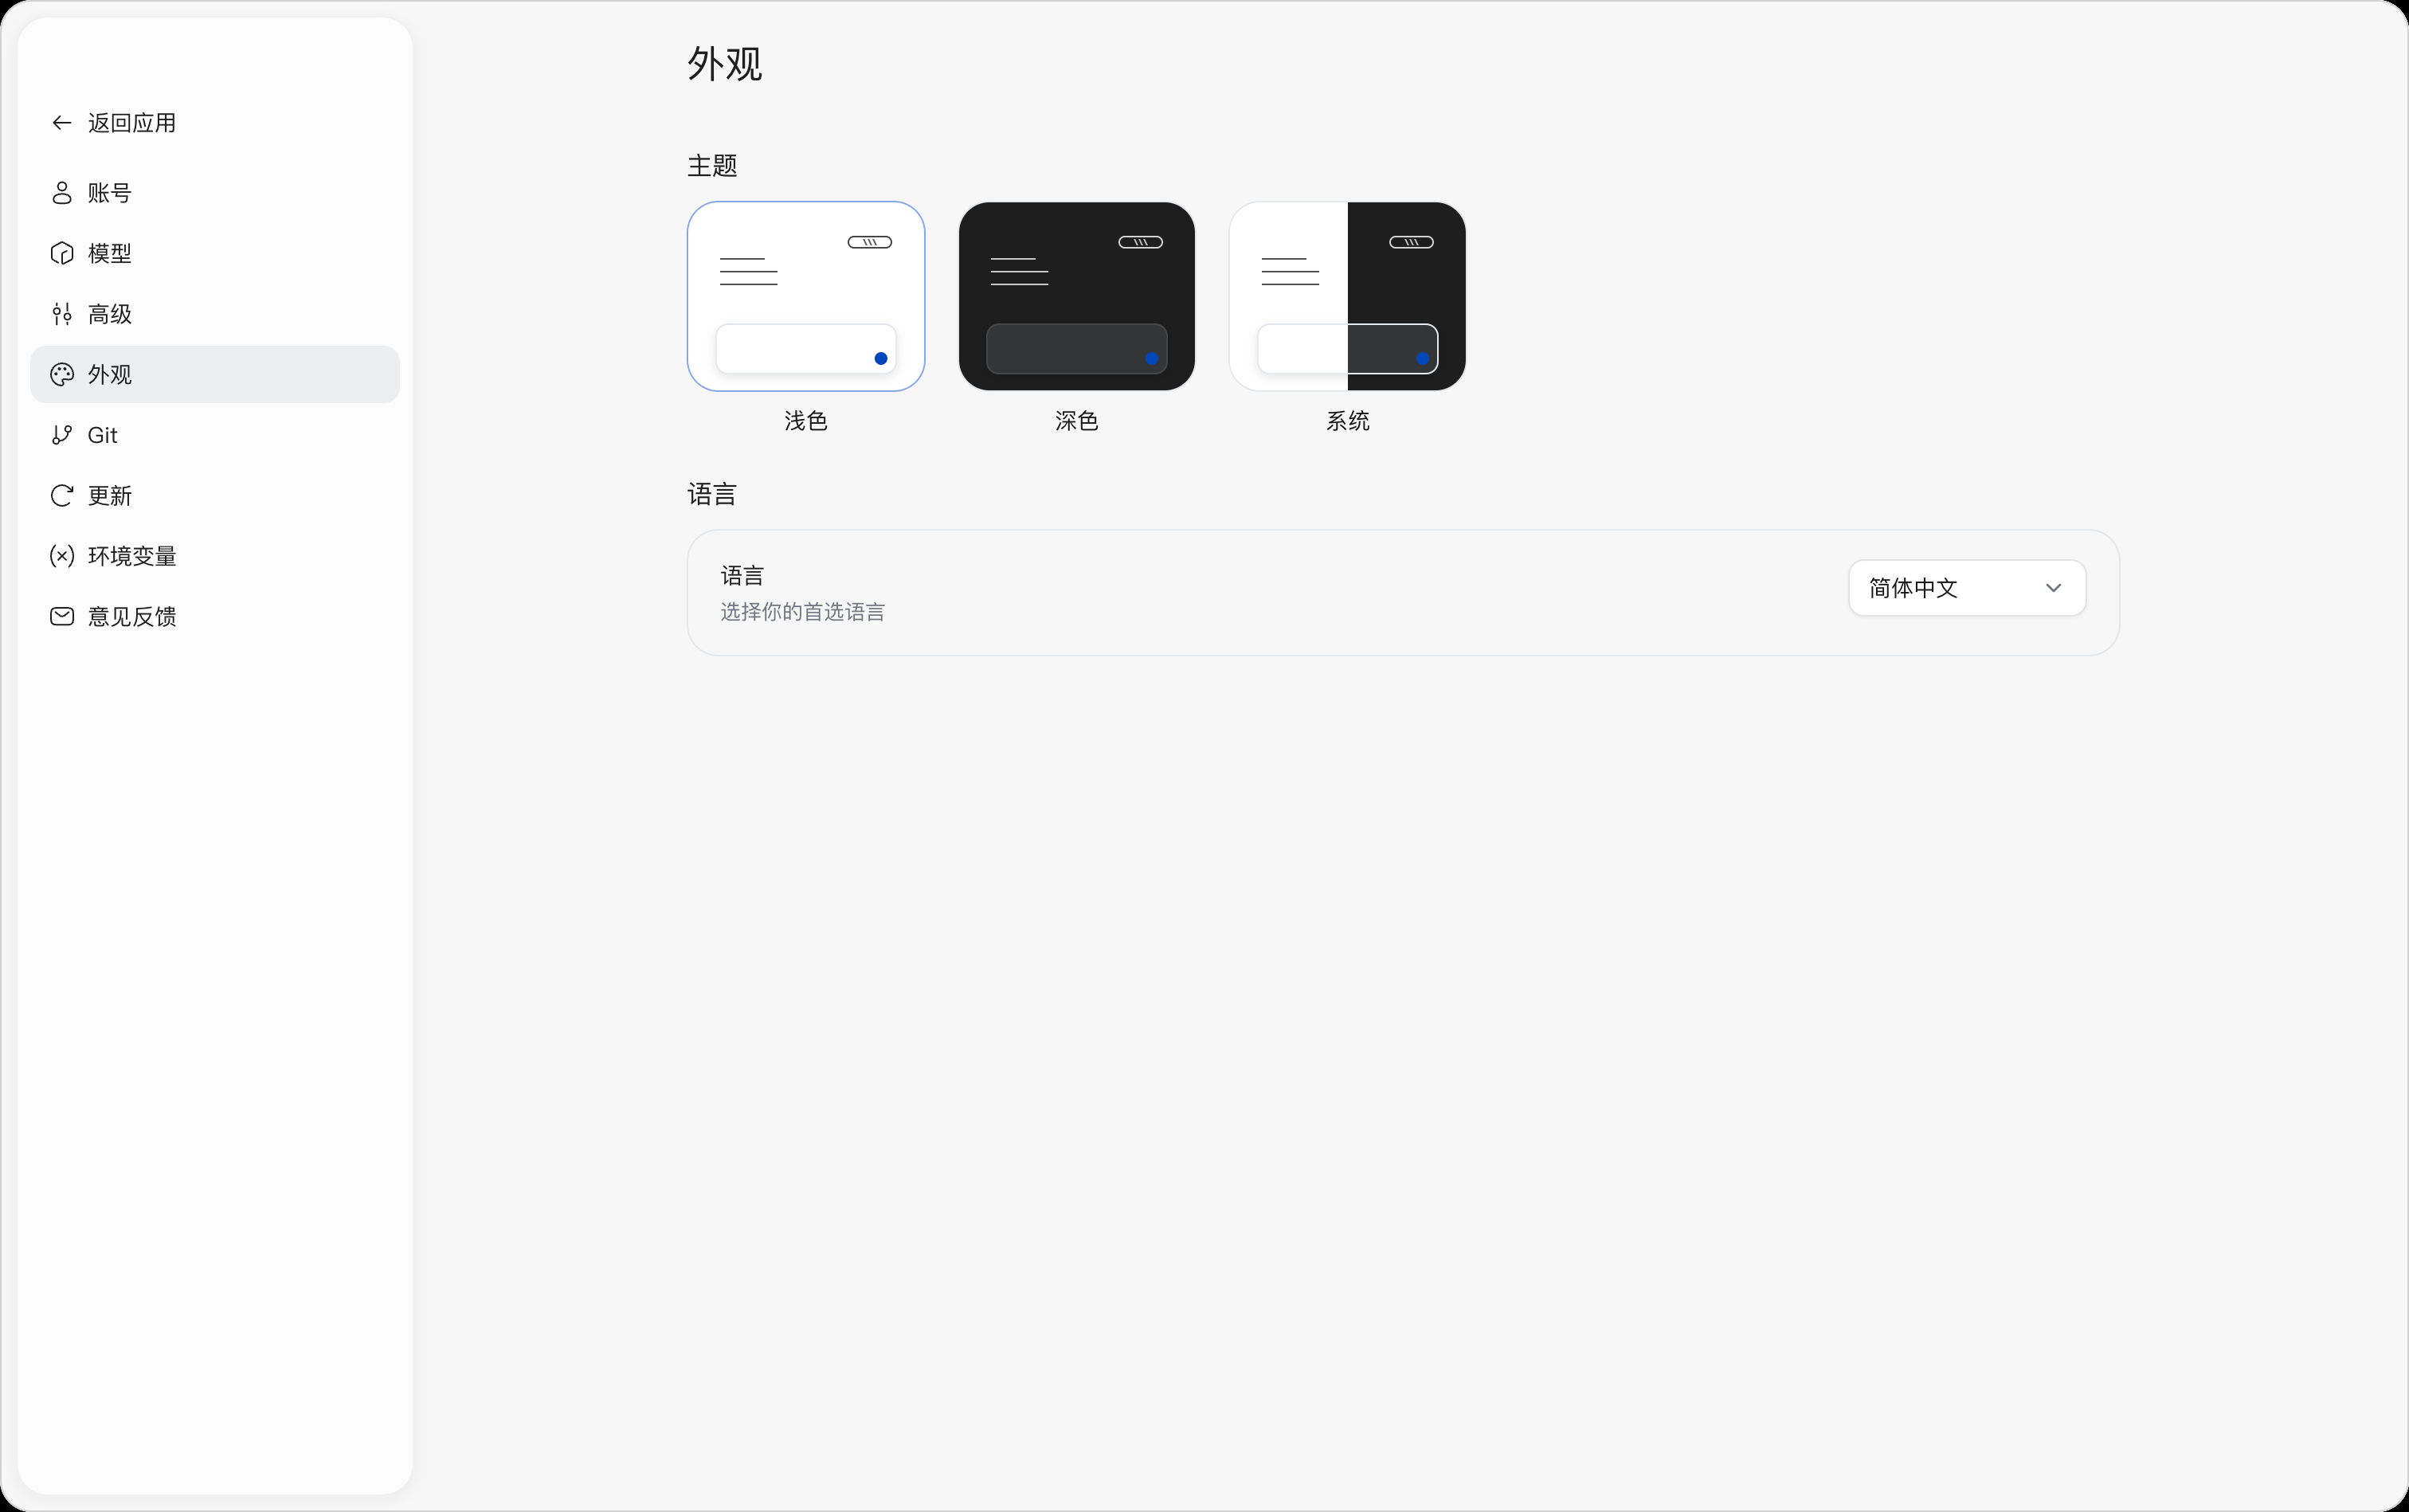 In the “Theme” section, select the display mode you need.
| Theme | Description |
|---|---|
| Light | Always use the light interface |
| Dark | Always use the dark interface |
| System | Automatically follow the appearance settings of the current operating system |
After you select System, DeepWorks adjusts the interface display in sync when the computer switches between light and dark modes.
Click the corresponding theme card to switch. The currently selected theme is shown in the selected state.
Setting the Interface Language
In the “Language” section, you can set the interface display language of DeepWorks.
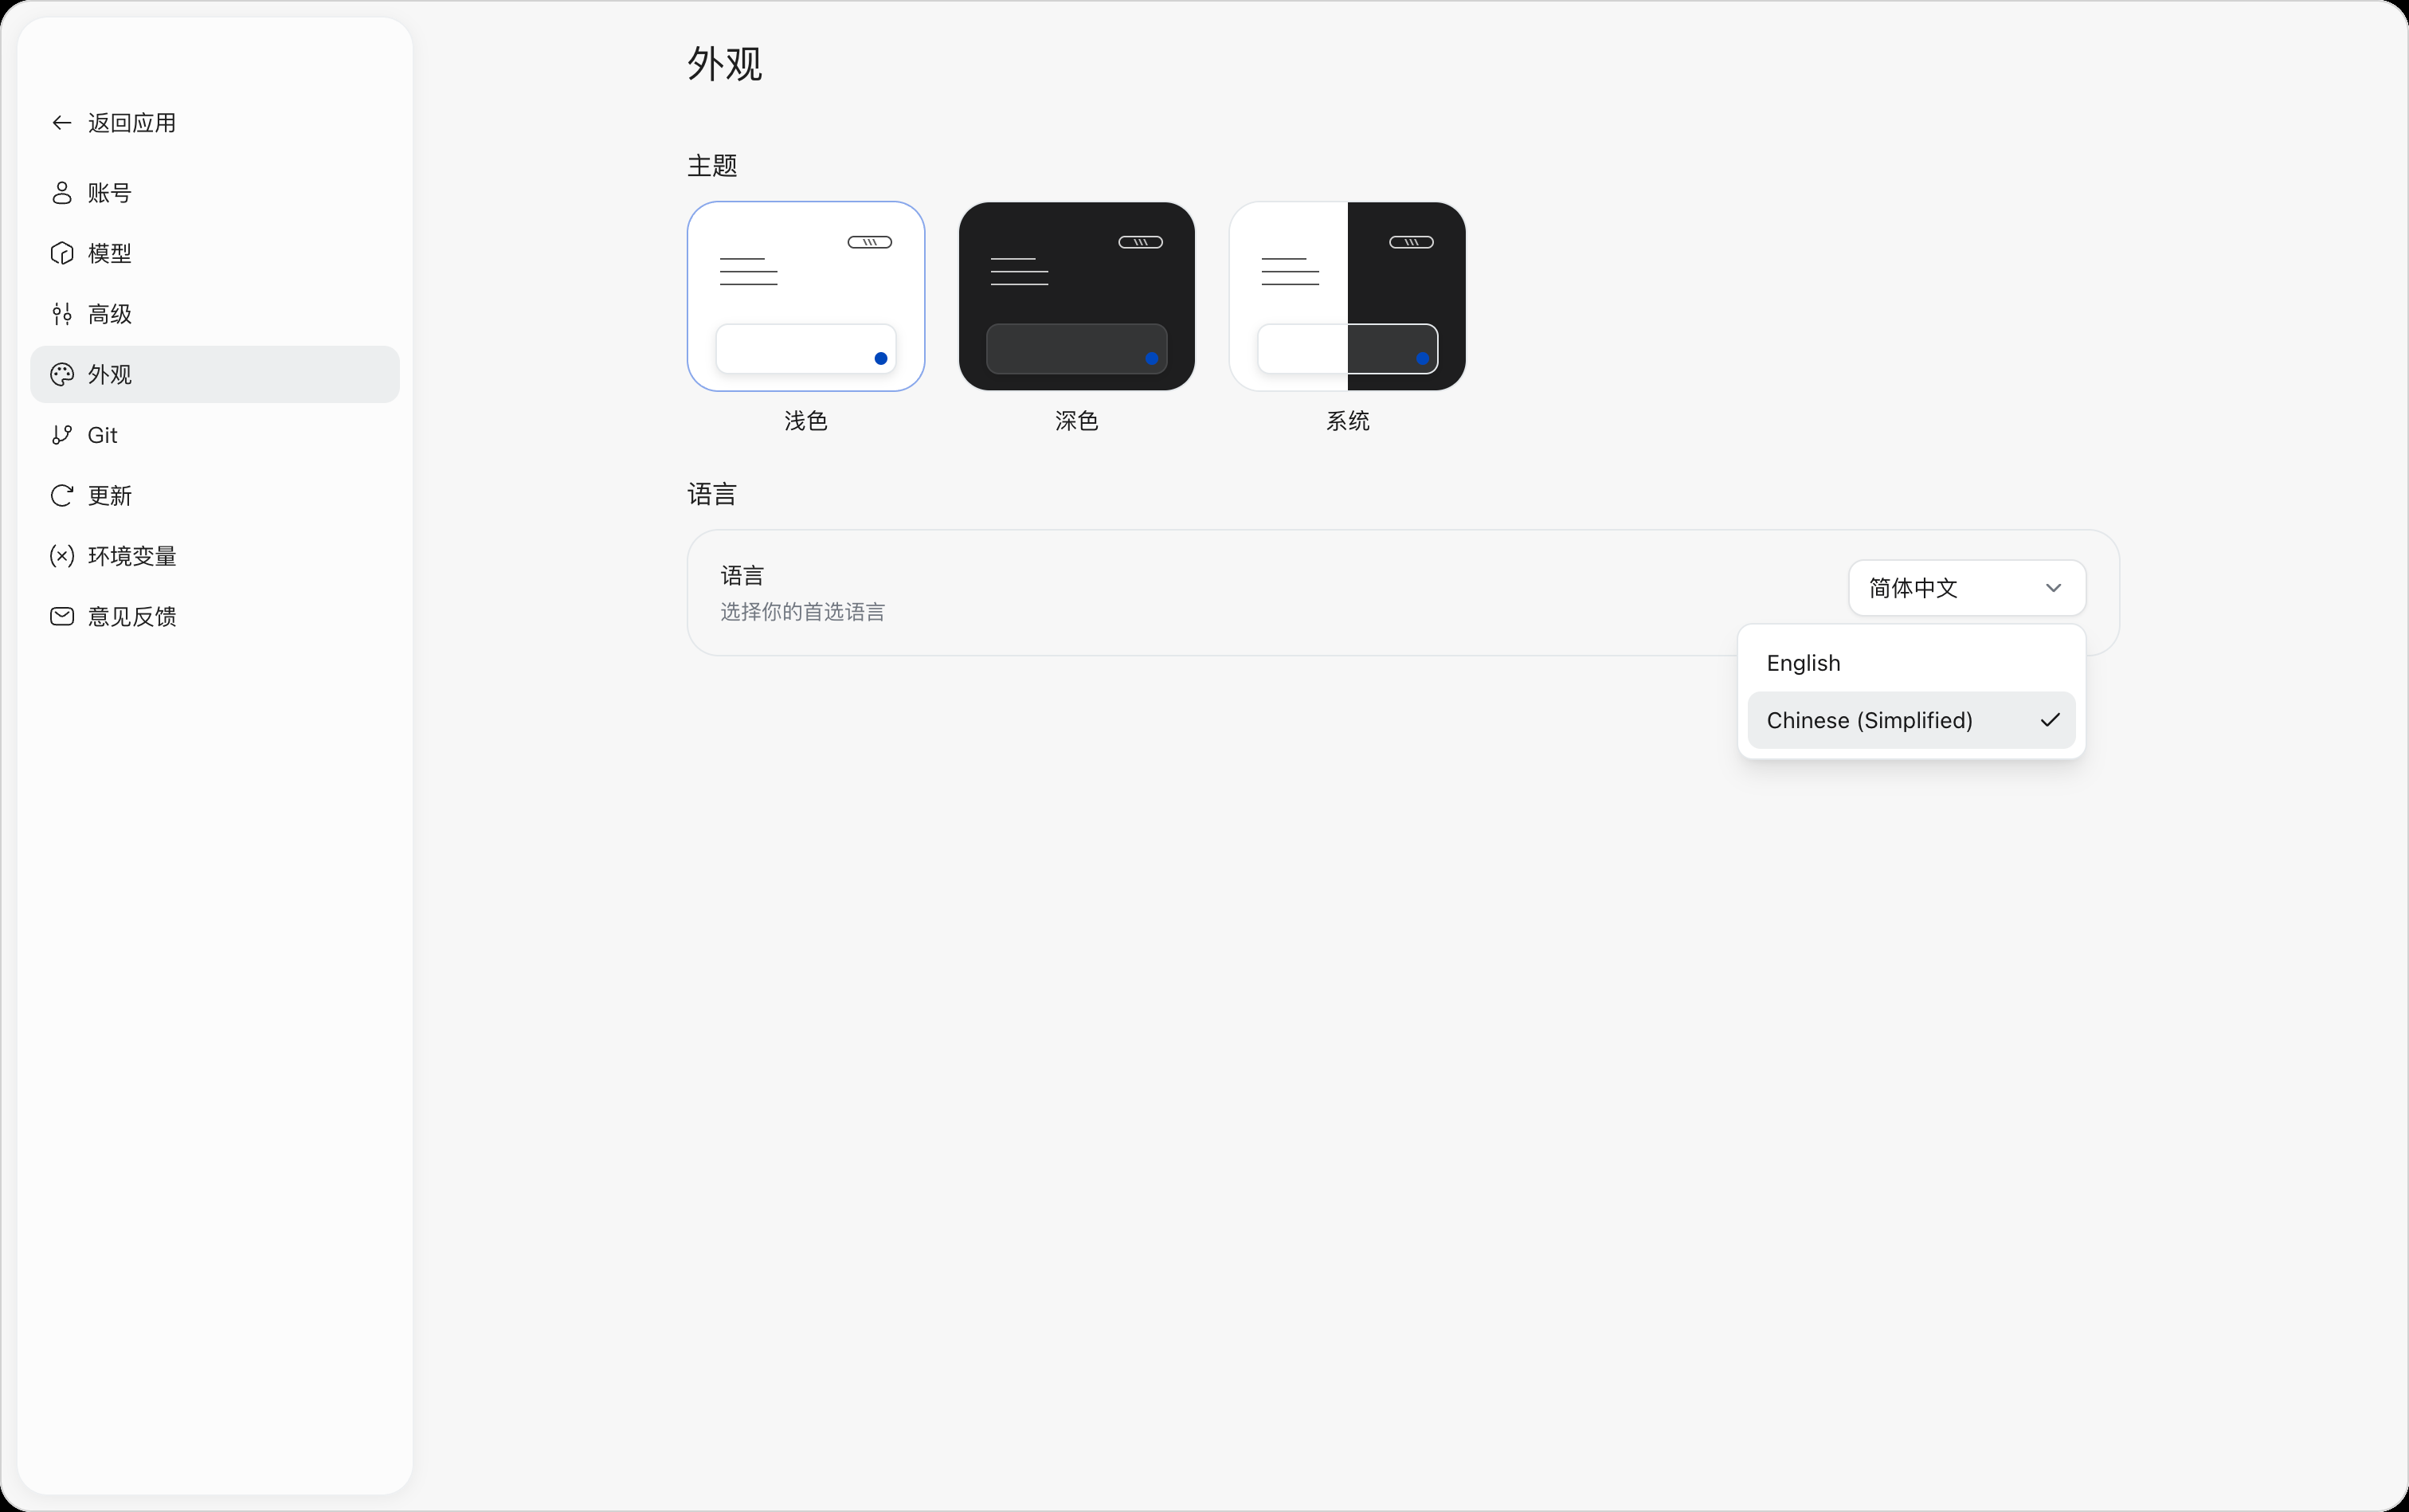
Click the language drop-down list on the right and select the language you need, for example Simplified Chinese.
After the setting is complete, DeepWorks displays menus, buttons, and related interface content in the selected language.
Setting the Font Size
In the “Preferences” section, you can adjust the font size of conversation content and code content separately.
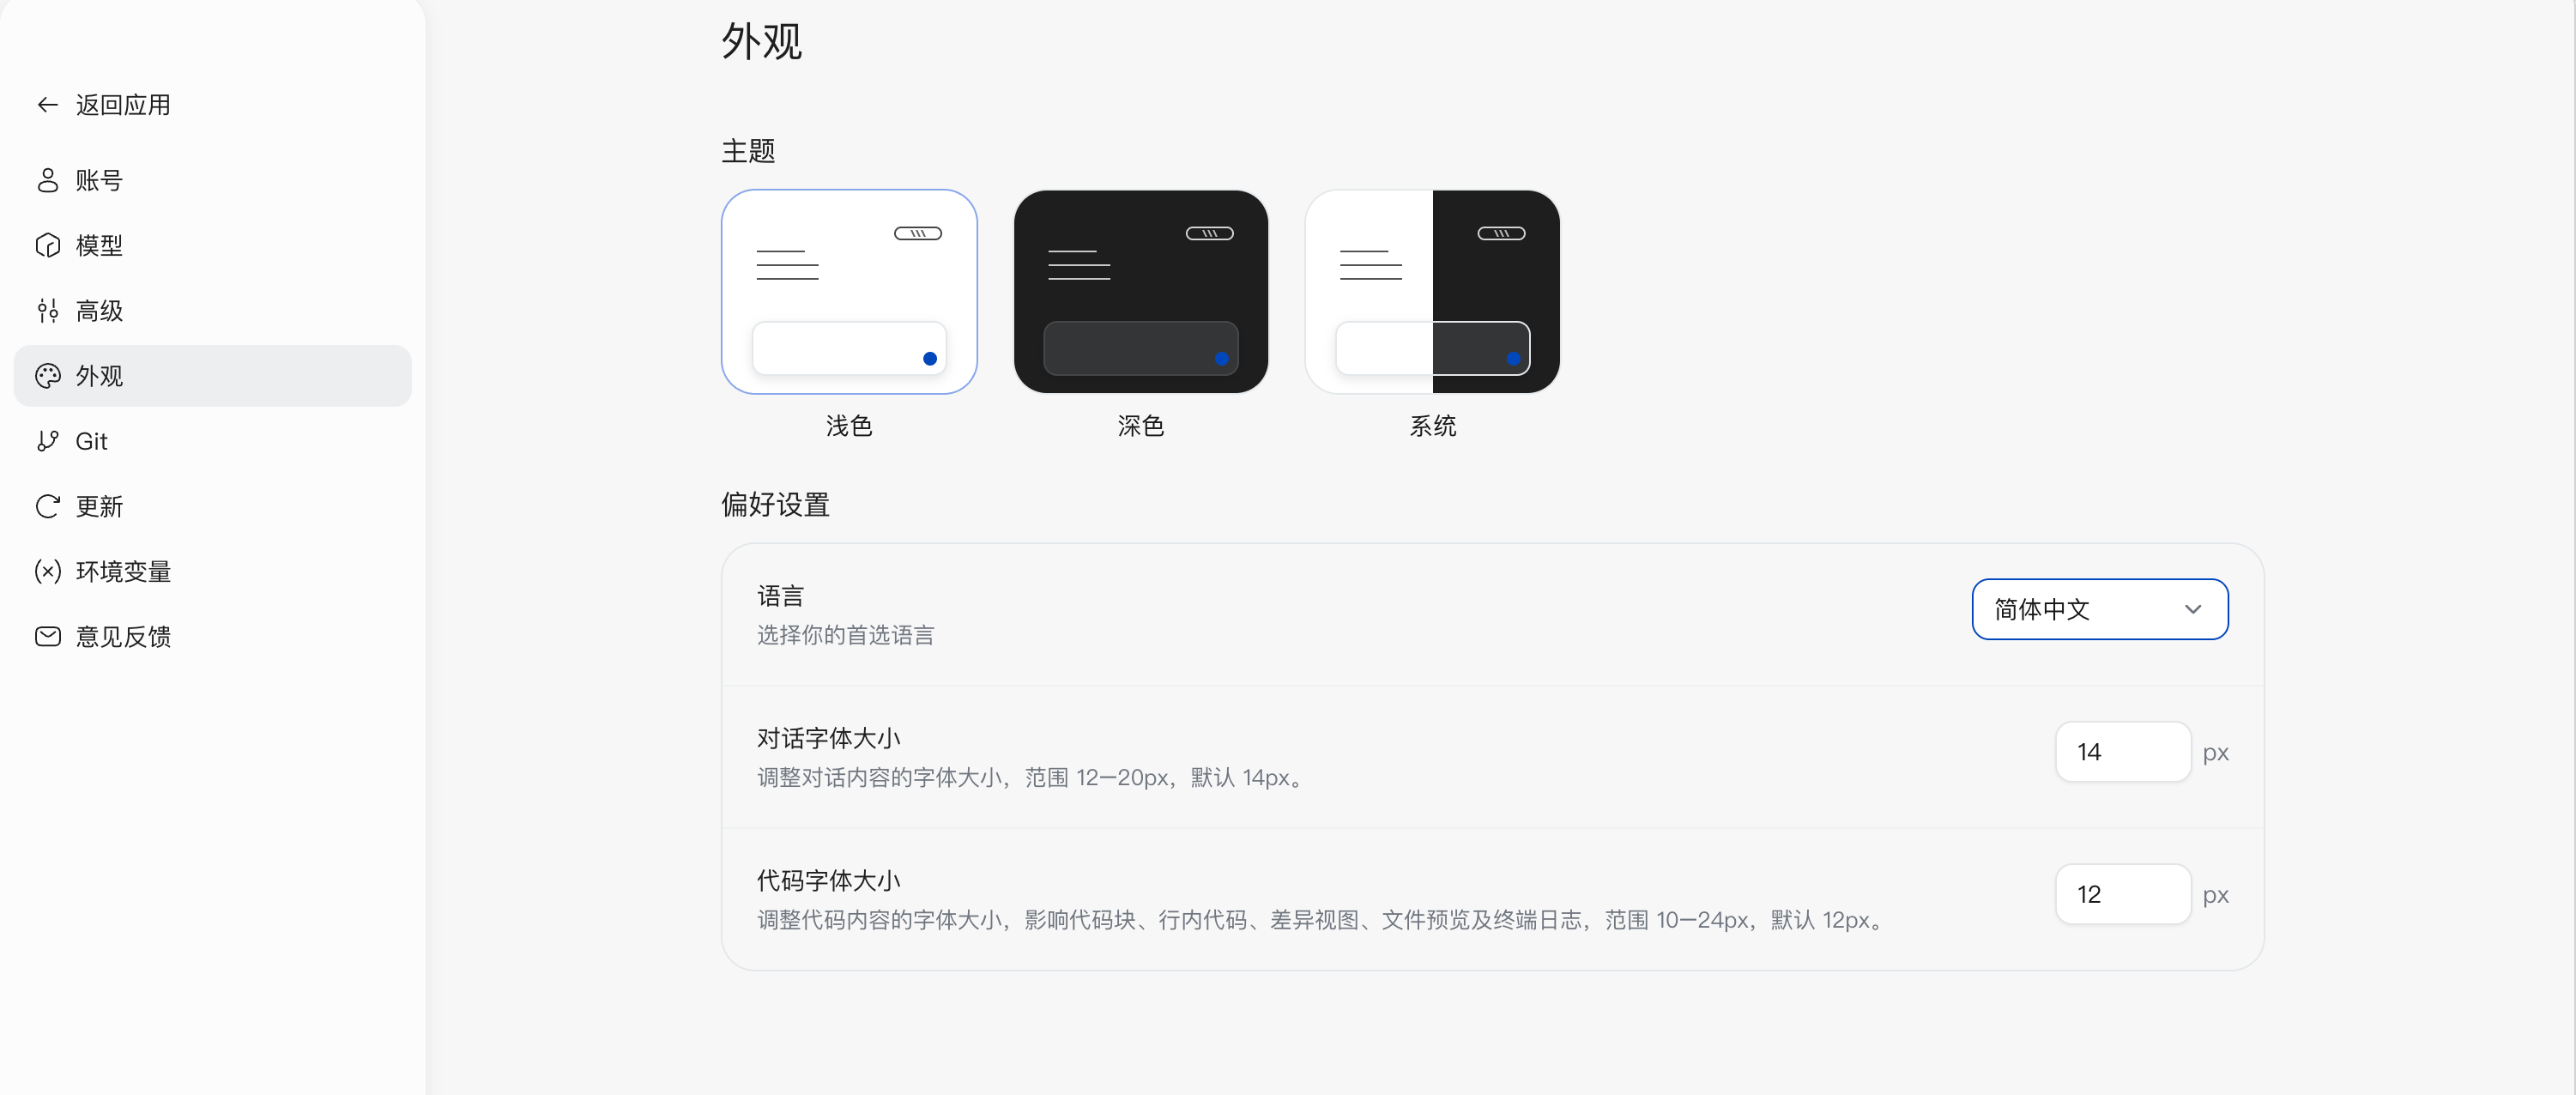
-
Chat font size: Adjusts the font size of conversation content. The range is 12–20 px, and the default is14 px.
-
Code font size: Adjusts the font size of code blocks, inline code, diff views, file previews, and terminal logs. The range is 10–24 px, and the default is12 px.
Click the corresponding value input box and enter a font size within the allowed range to complete the adjustment. After the change, check the display in conversation content, code blocks, or terminal logs, and continue adjusting to suit your reading habits.
Usage Notes
Appearance settings take effect immediately after they are changed, with no need to click Save.
If you only need to switch between light and dark modes temporarily, use the appearance shortcut entry in the user menu. To set “follow system”, change the interface language, or modify font sizes, go to Settings > Appearance.
Model Settings
On the Settings > Models page, you can manage model providers, model connection methods, the default model, and other preferences used by DeepWorks. You can connect to the model providers preset by the platform, or add a custom model service compatible with the OpenAI API.
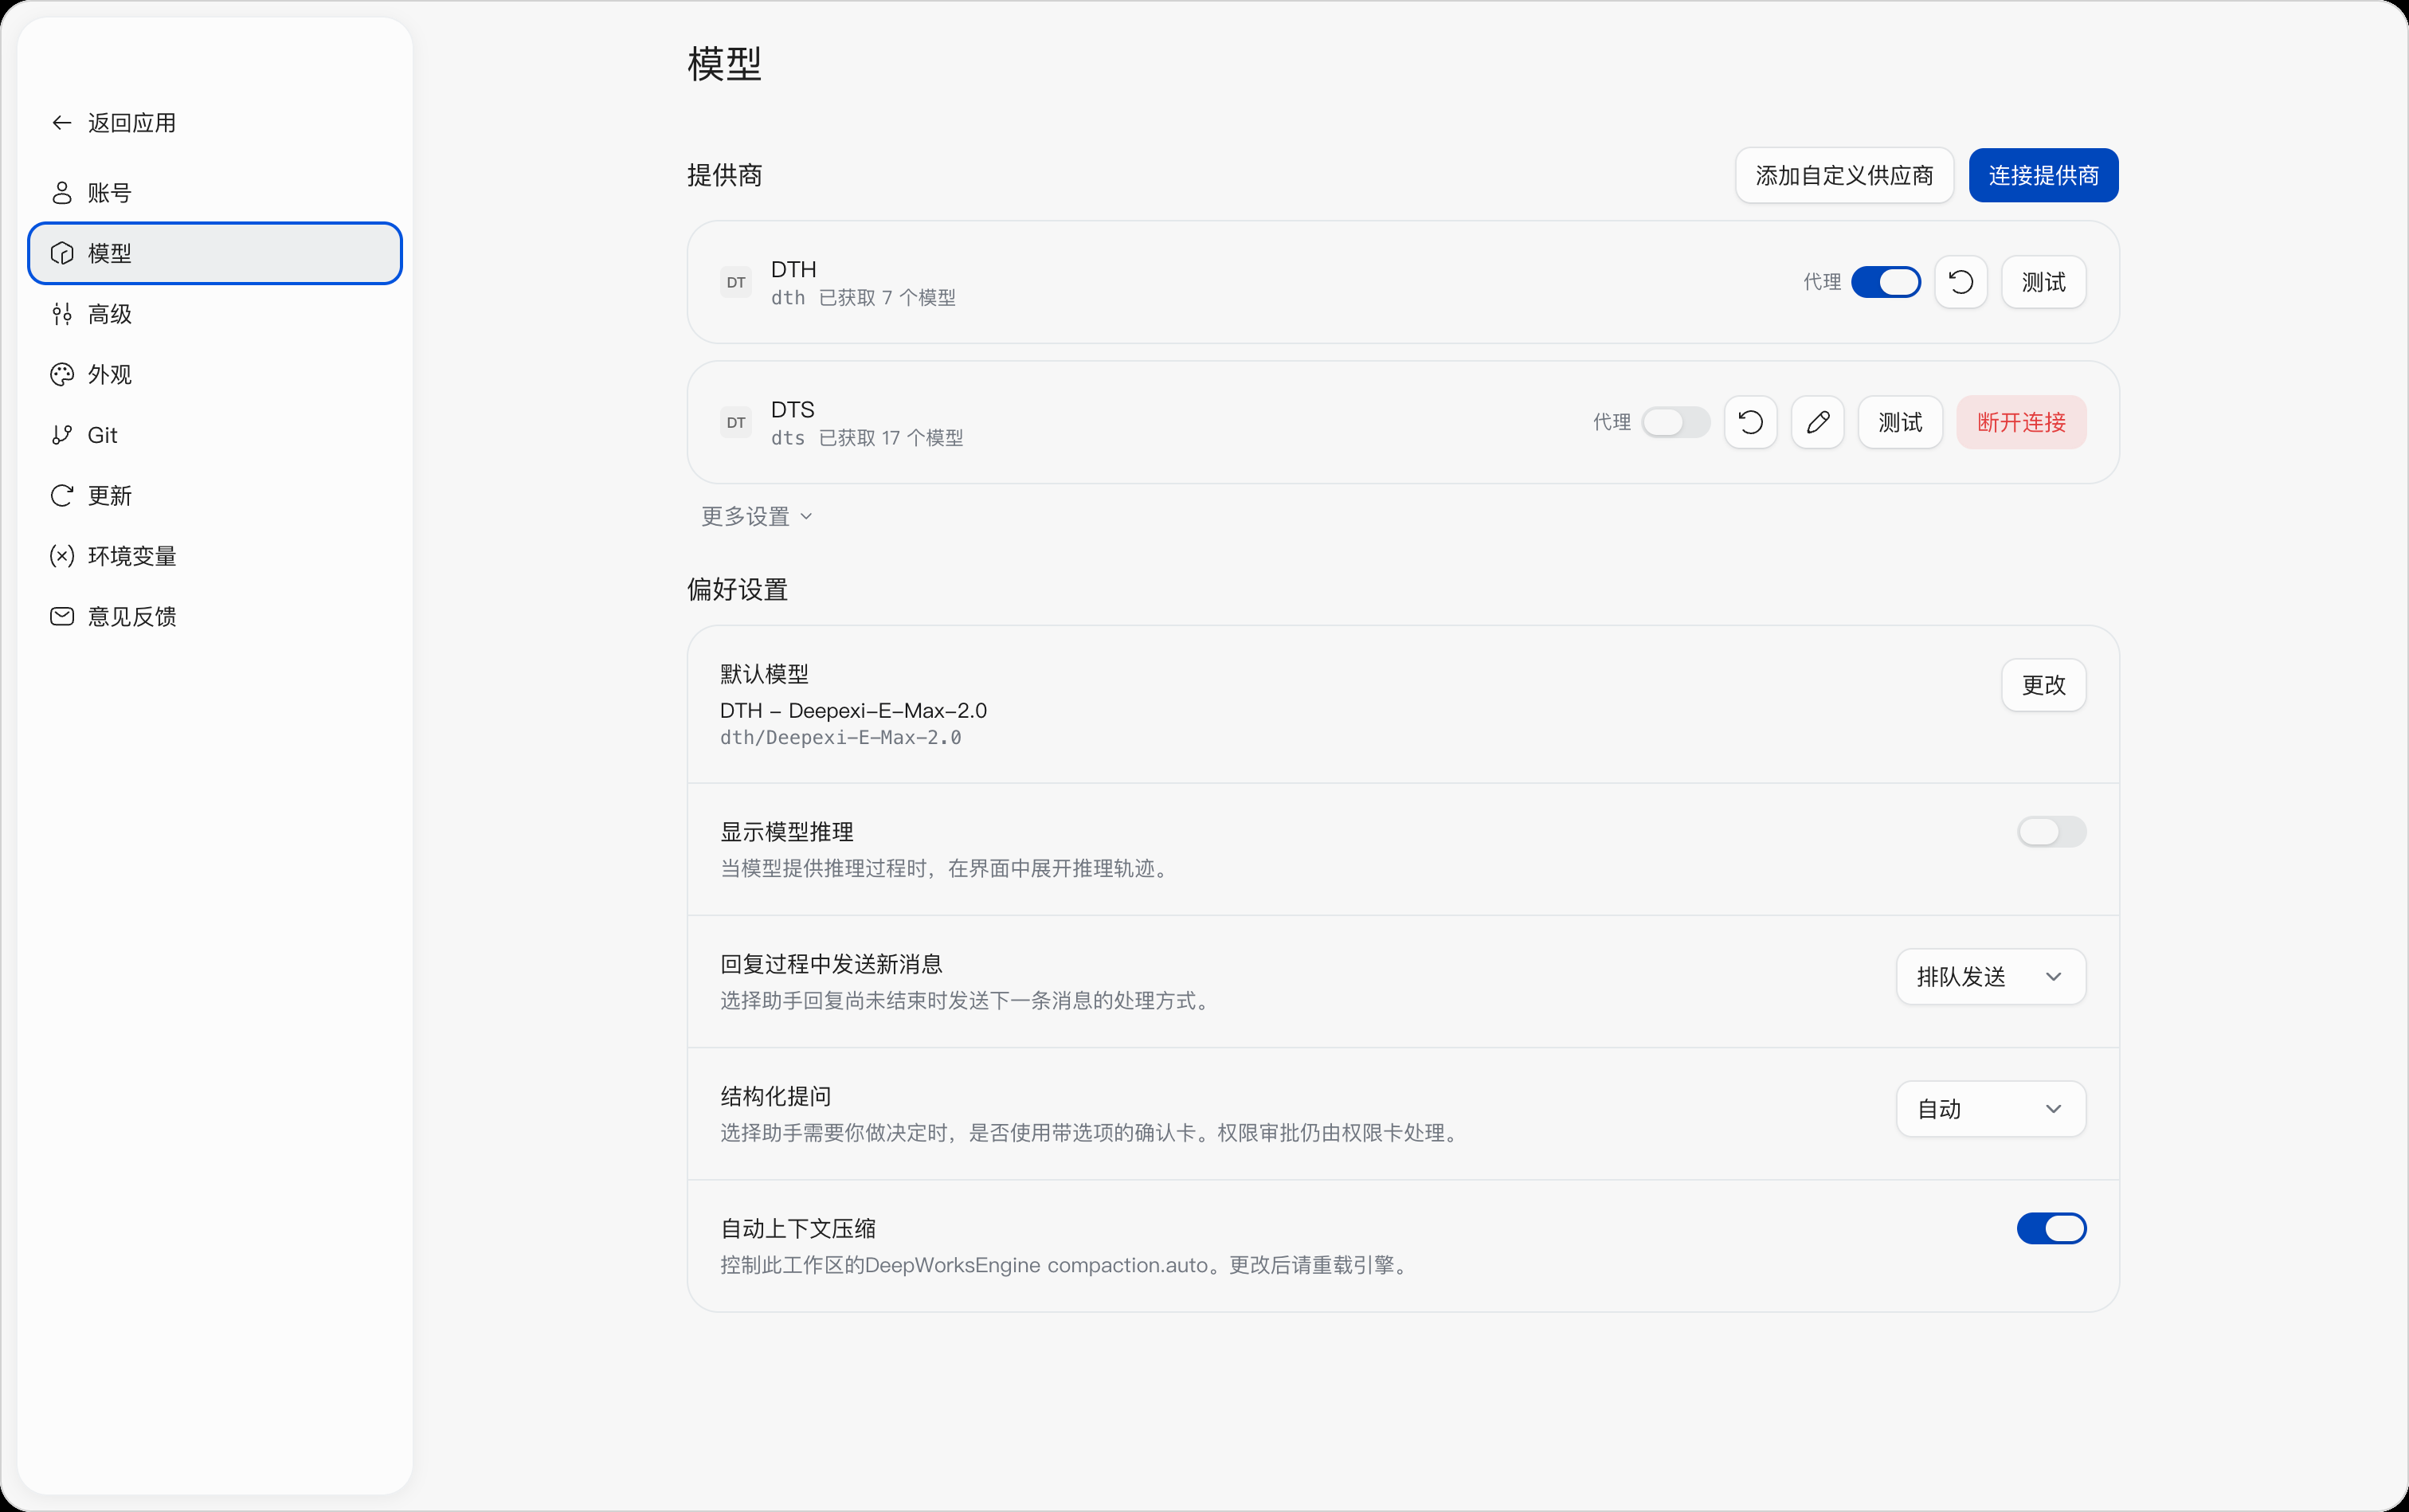
Managing Model Providers
The “Providers” section shows the model providers that have been configured and the number of models retrieved for each provider.
Each provider supports the following actions depending on its current state:
| Action | Description |
|---|---|
| Proxy | Controls whether this provider uses the configured global proxy when accessing model services |
| Refresh | Retrieves the models and connection information of this provider again |
| Edit | Modifies the configured connection information of the provider |
| Test | Tests whether the current configuration can connect to the model service normally |
| Disconnect | Removes the connection configuration of the current provider |
After the initial configuration, we recommend clicking Test to confirm that the model service is accessible.
Connecting a Model Provider
Click Connect Provider in the upper-right corner of the page to open the provider list.
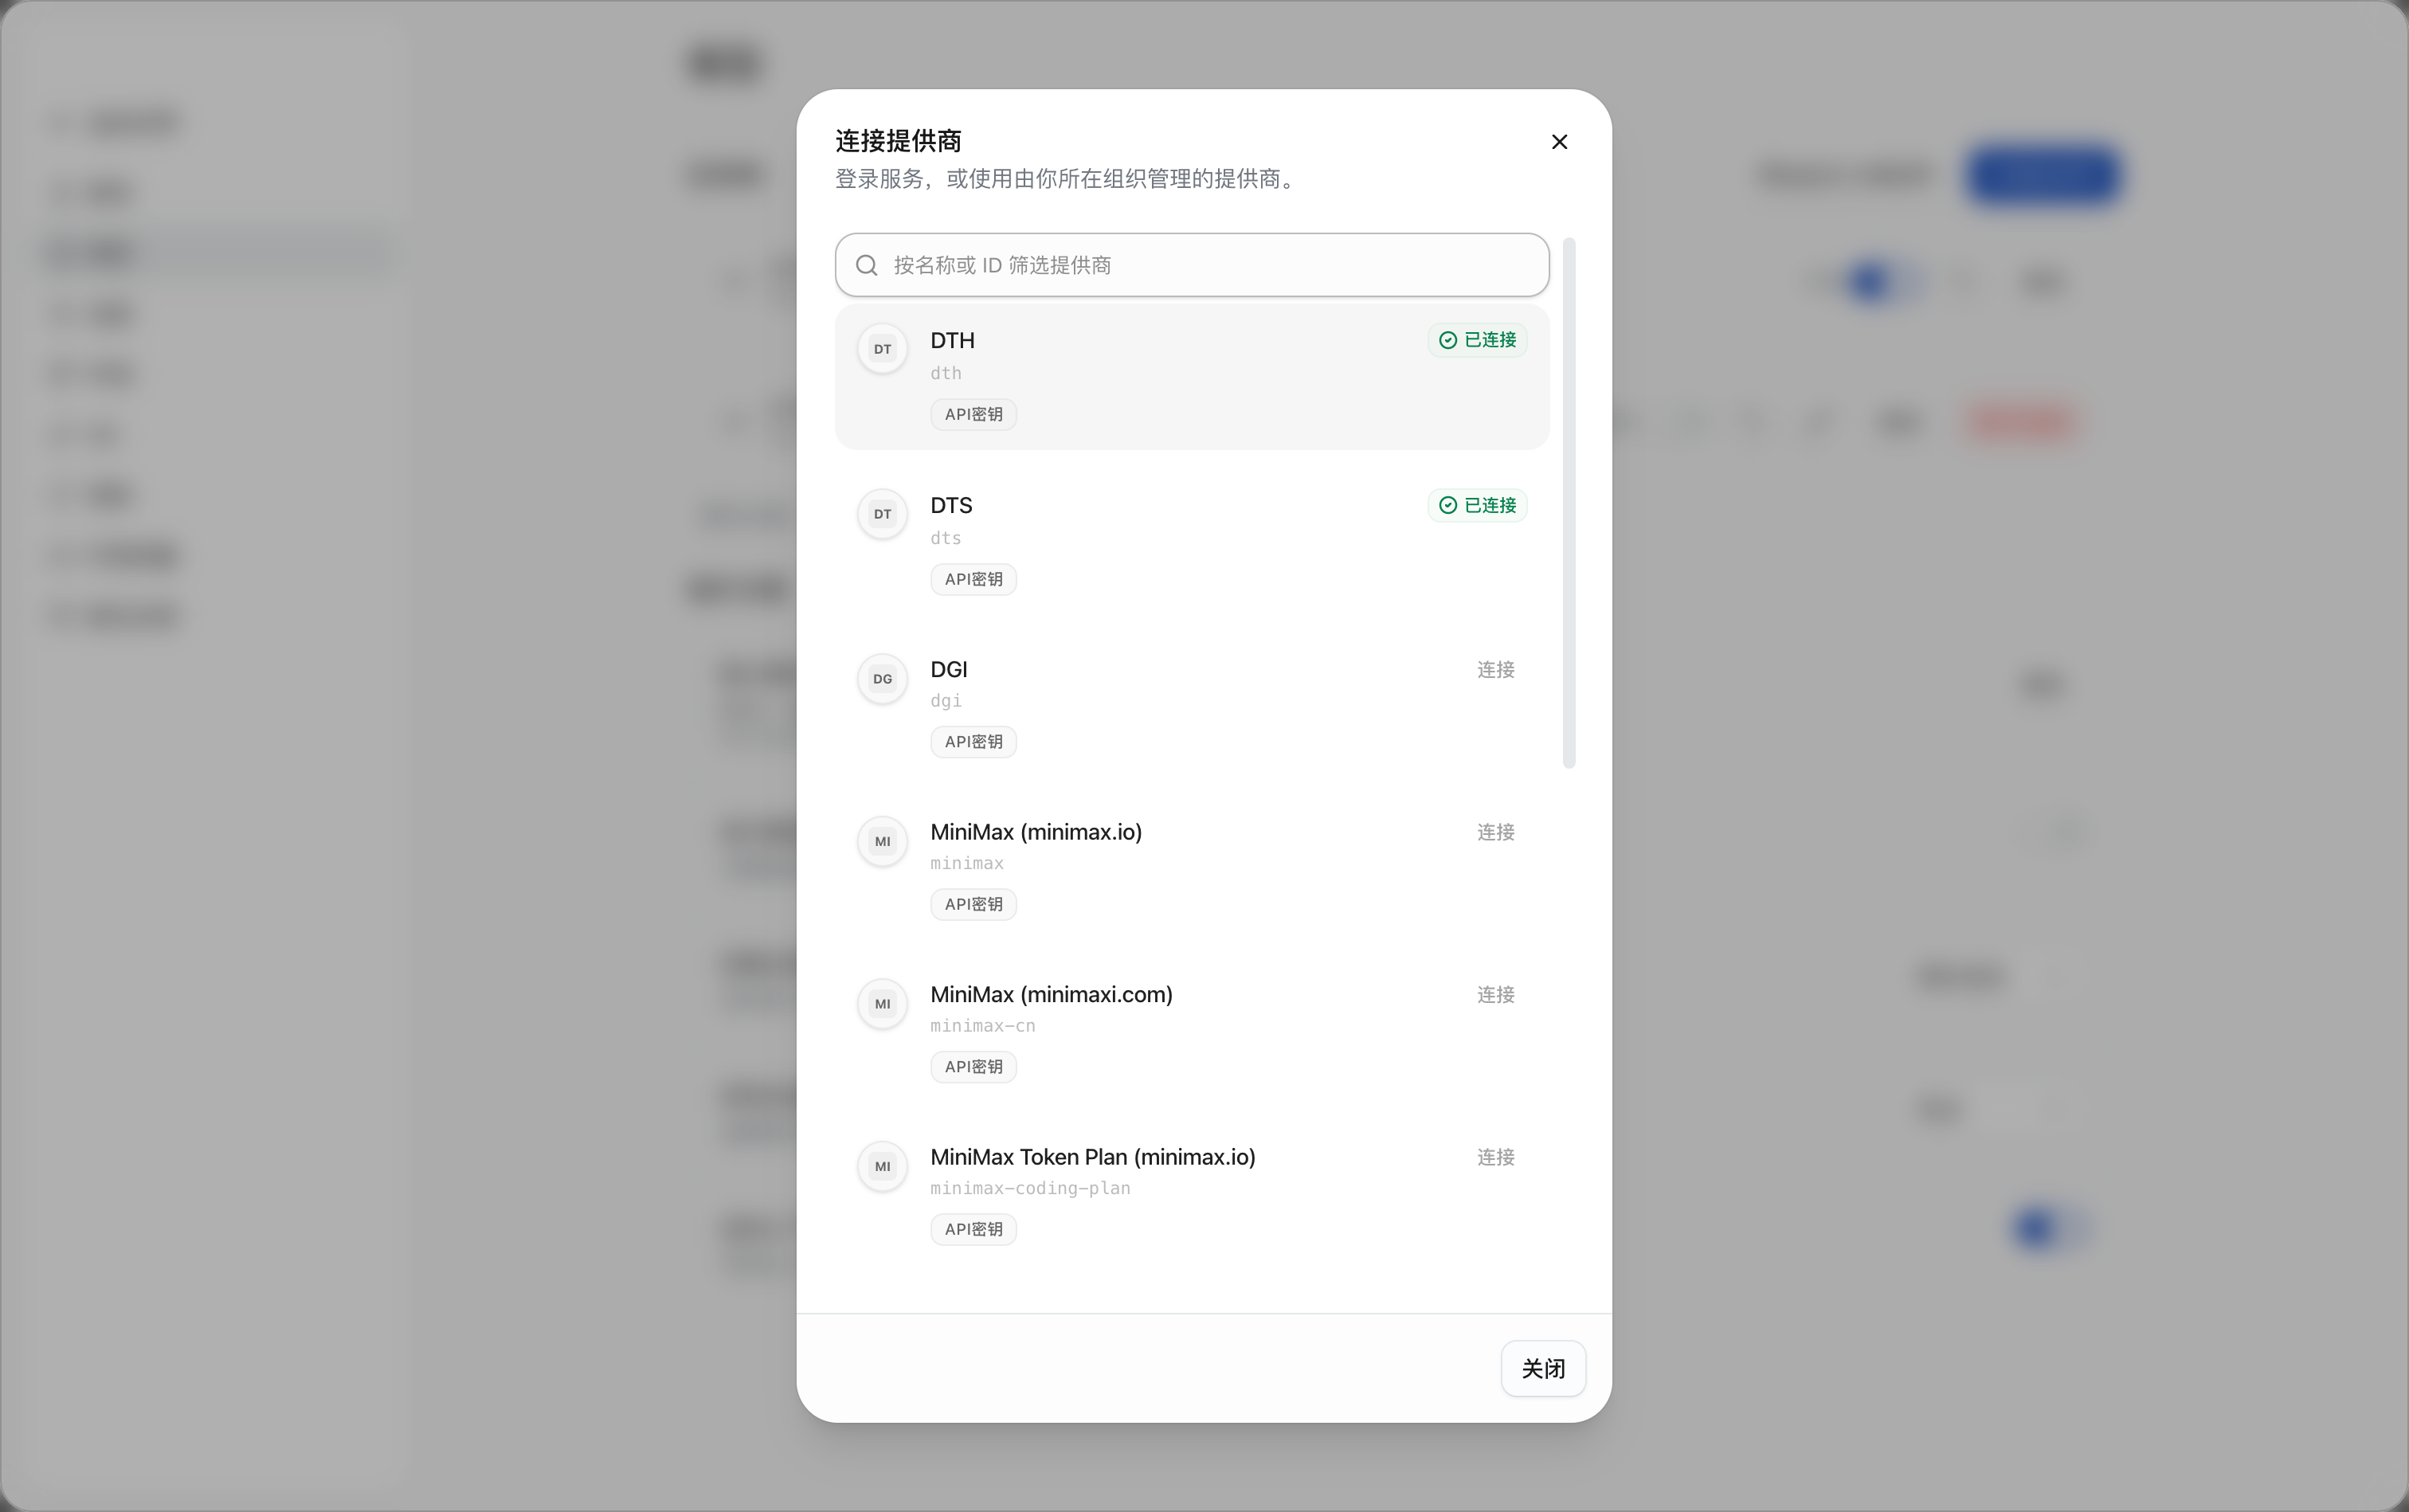
Use the search box at the top to quickly find the model service you want to connect by provider name or ID.
After selecting the target provider, click Connect on the right and complete the authentication configuration as prompted on the page.
Providers that have already been configured show the Connected status and do not need to be connected again.
Different providers may use different authentication methods, such as API keys. Fill in the information according to the requirements of the corresponding model service provider.
After a successful connection, DeepWorks retrieves the models available from that provider and displays the number of retrieved models on the Models settings page.
Adding a Custom Provider
If you need to connect to a model service that is not preset in the list, click Add Custom Provider. DeepWorks supports model gateways or model services compatible with the OpenAI API format.
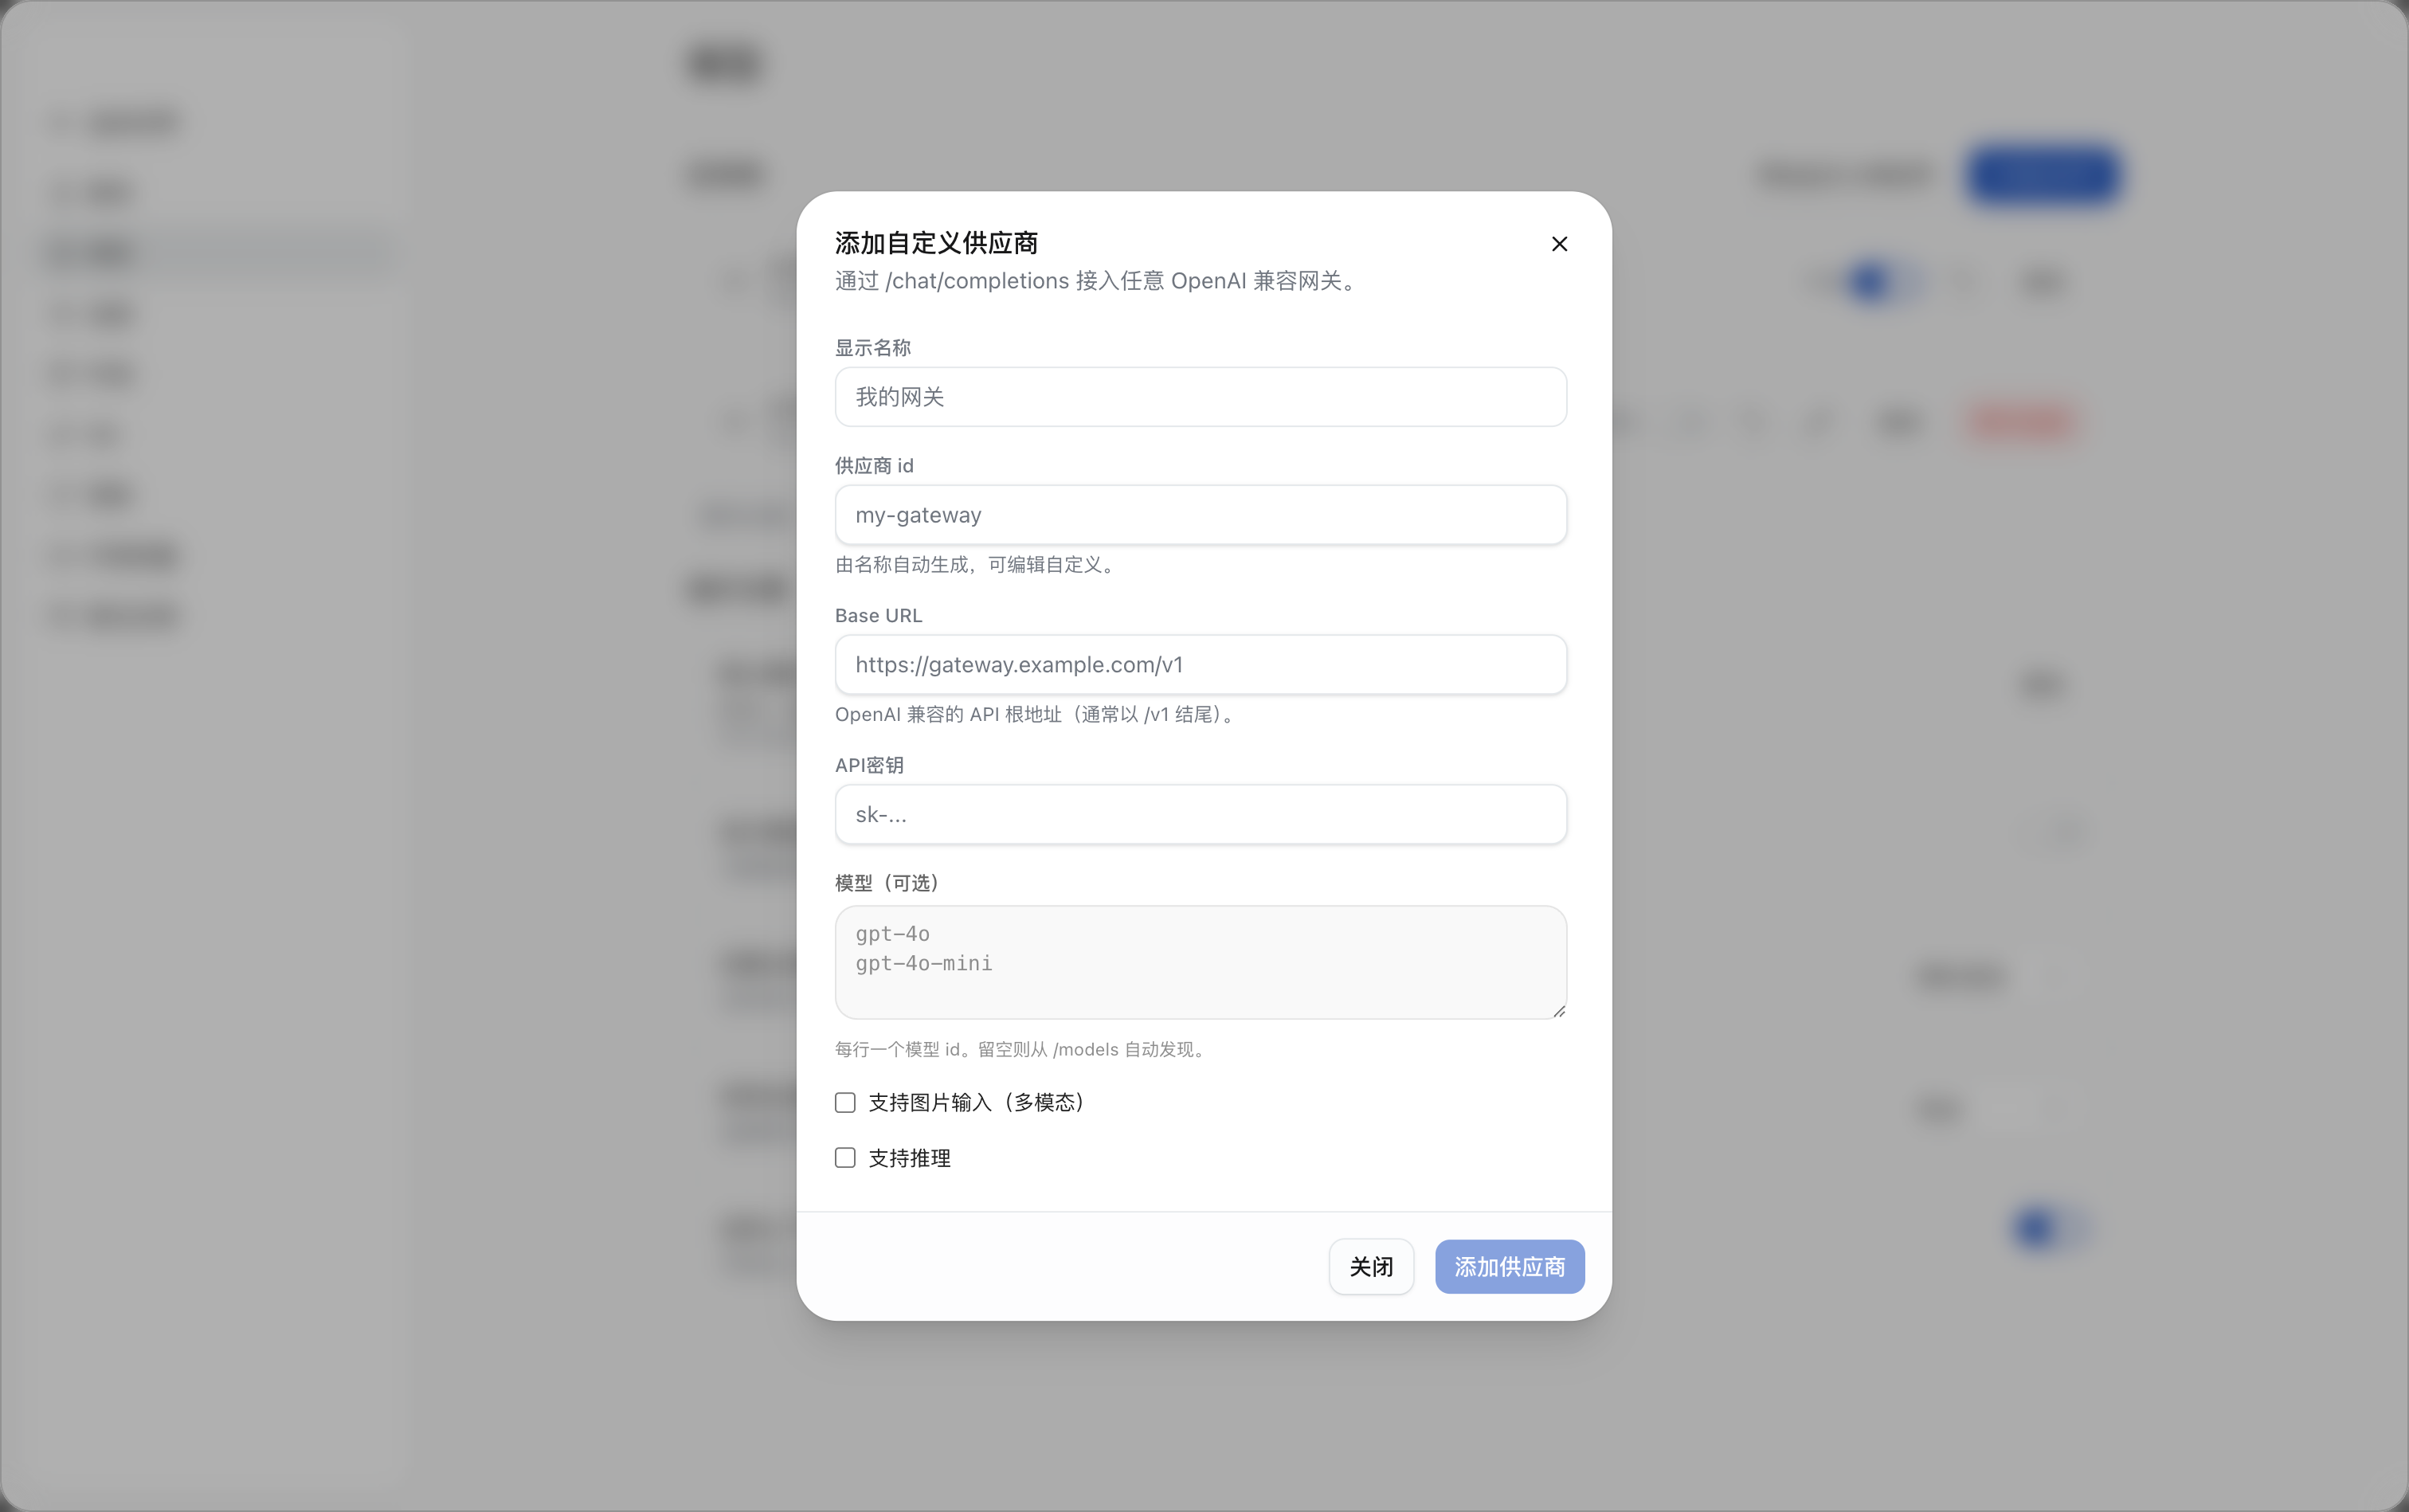
Fill in the following information according to the actual model service:
| Setting | Description |
|---|---|
| Display name | The name of the custom provider displayed in DeepWorks |
| Provider ID | The unique identifier of the provider. It can be generated automatically from the display name or modified manually |
| Base URL | The API root address of the OpenAI-compatible endpoint, usually ending with /v1 |
| API key | The API key used to access the model service |
| Models | The model IDs to use, one model per line |
“Models” is optional. If you leave it empty, DeepWorks tries to automatically discover the available models through the /models endpoint of the model service.
For example, you can enter models as follows:
gpt-4o
gpt-4o-mini
Depending on the actual capabilities of the custom model, you can also select:
-
Supports image input (multimodal): Enable when the model can receive visual content such as images.
-
Supports reasoning: Enable when the model has reasoning capabilities.
After filling in the information, click Add Provider to complete the configuration.
After the provider is added, the custom provider appears in the model provider list, and you can continue to test, edit, and perform other actions.
Configuring a Proxy
If your network environment requires a proxy to access model services, expand More Settings to configure a global proxy address.
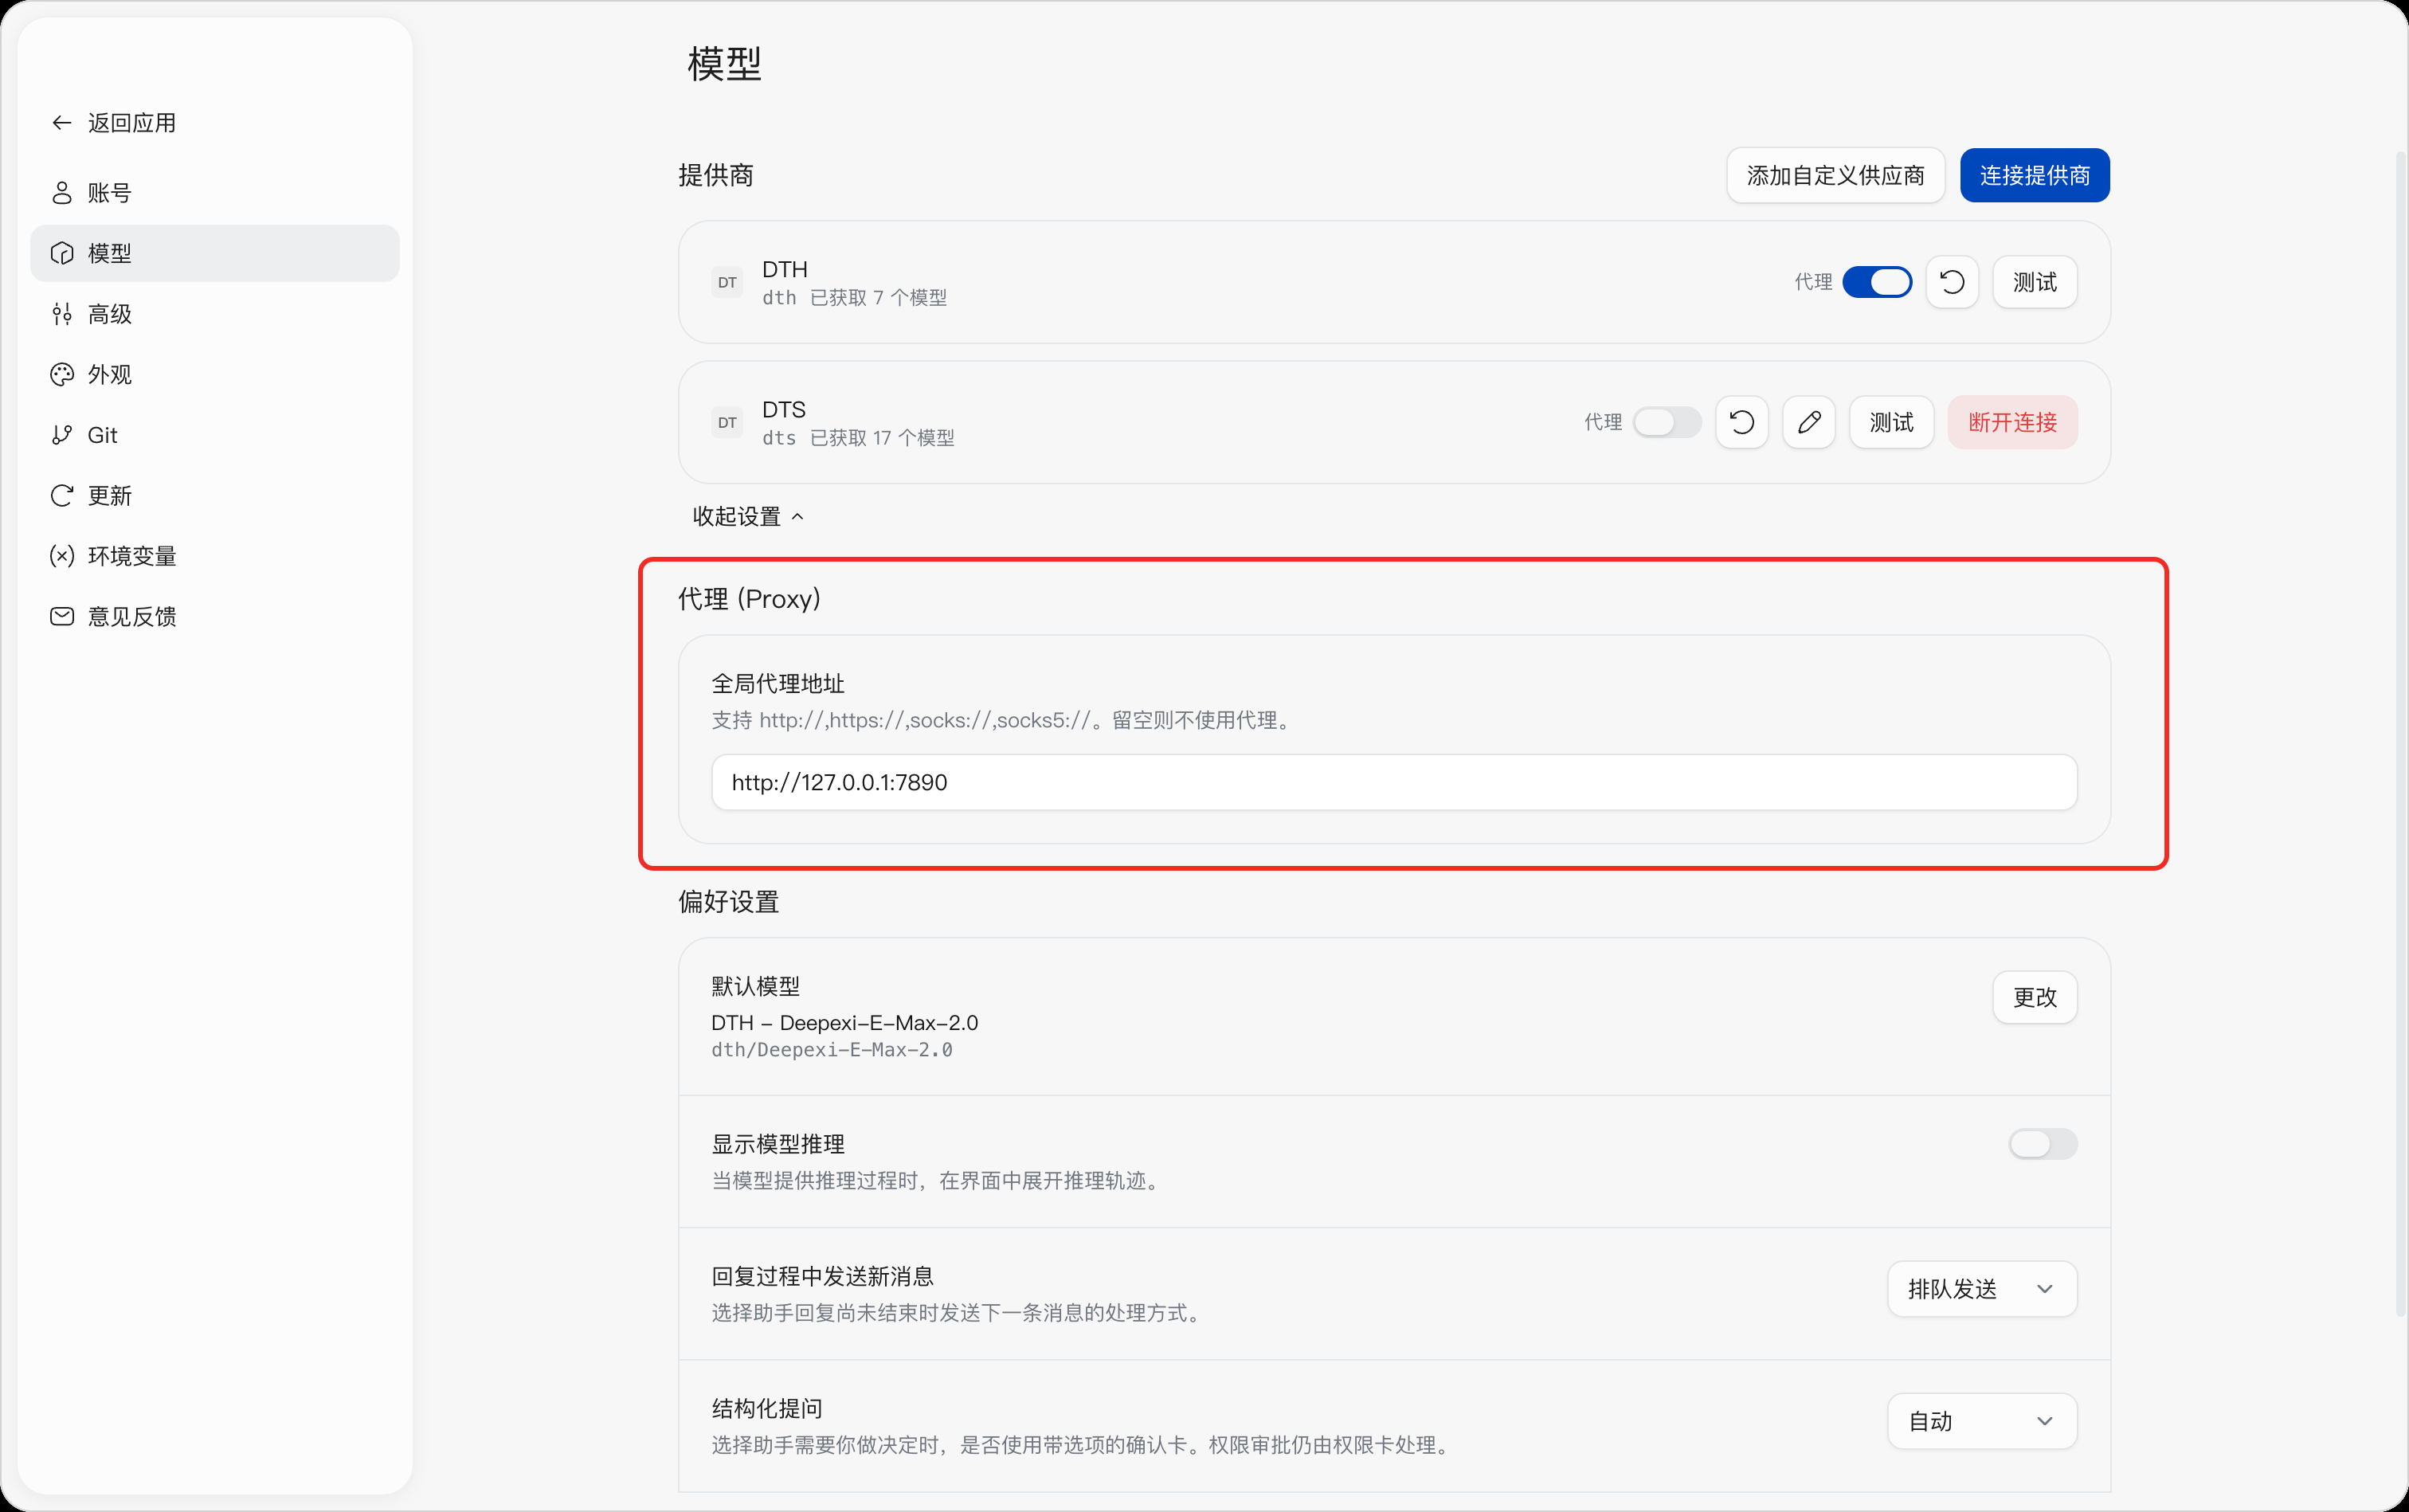
Enter the proxy service address in “Global proxy address”. For example:
http://127.0.0.1:7890Leave it empty to not use a proxy.
After configuring the global proxy, you also need to turn on the Proxy toggle on the right side of the corresponding model provider to specify that the provider accesses the network through the proxy.
If the model cannot connect, check whether the proxy address is correct and verify the connection status with the Test function on the right side of the provider.
Setting the Default Model
In the “Preferences” section, you can set the model that DeepWorks uses by default.
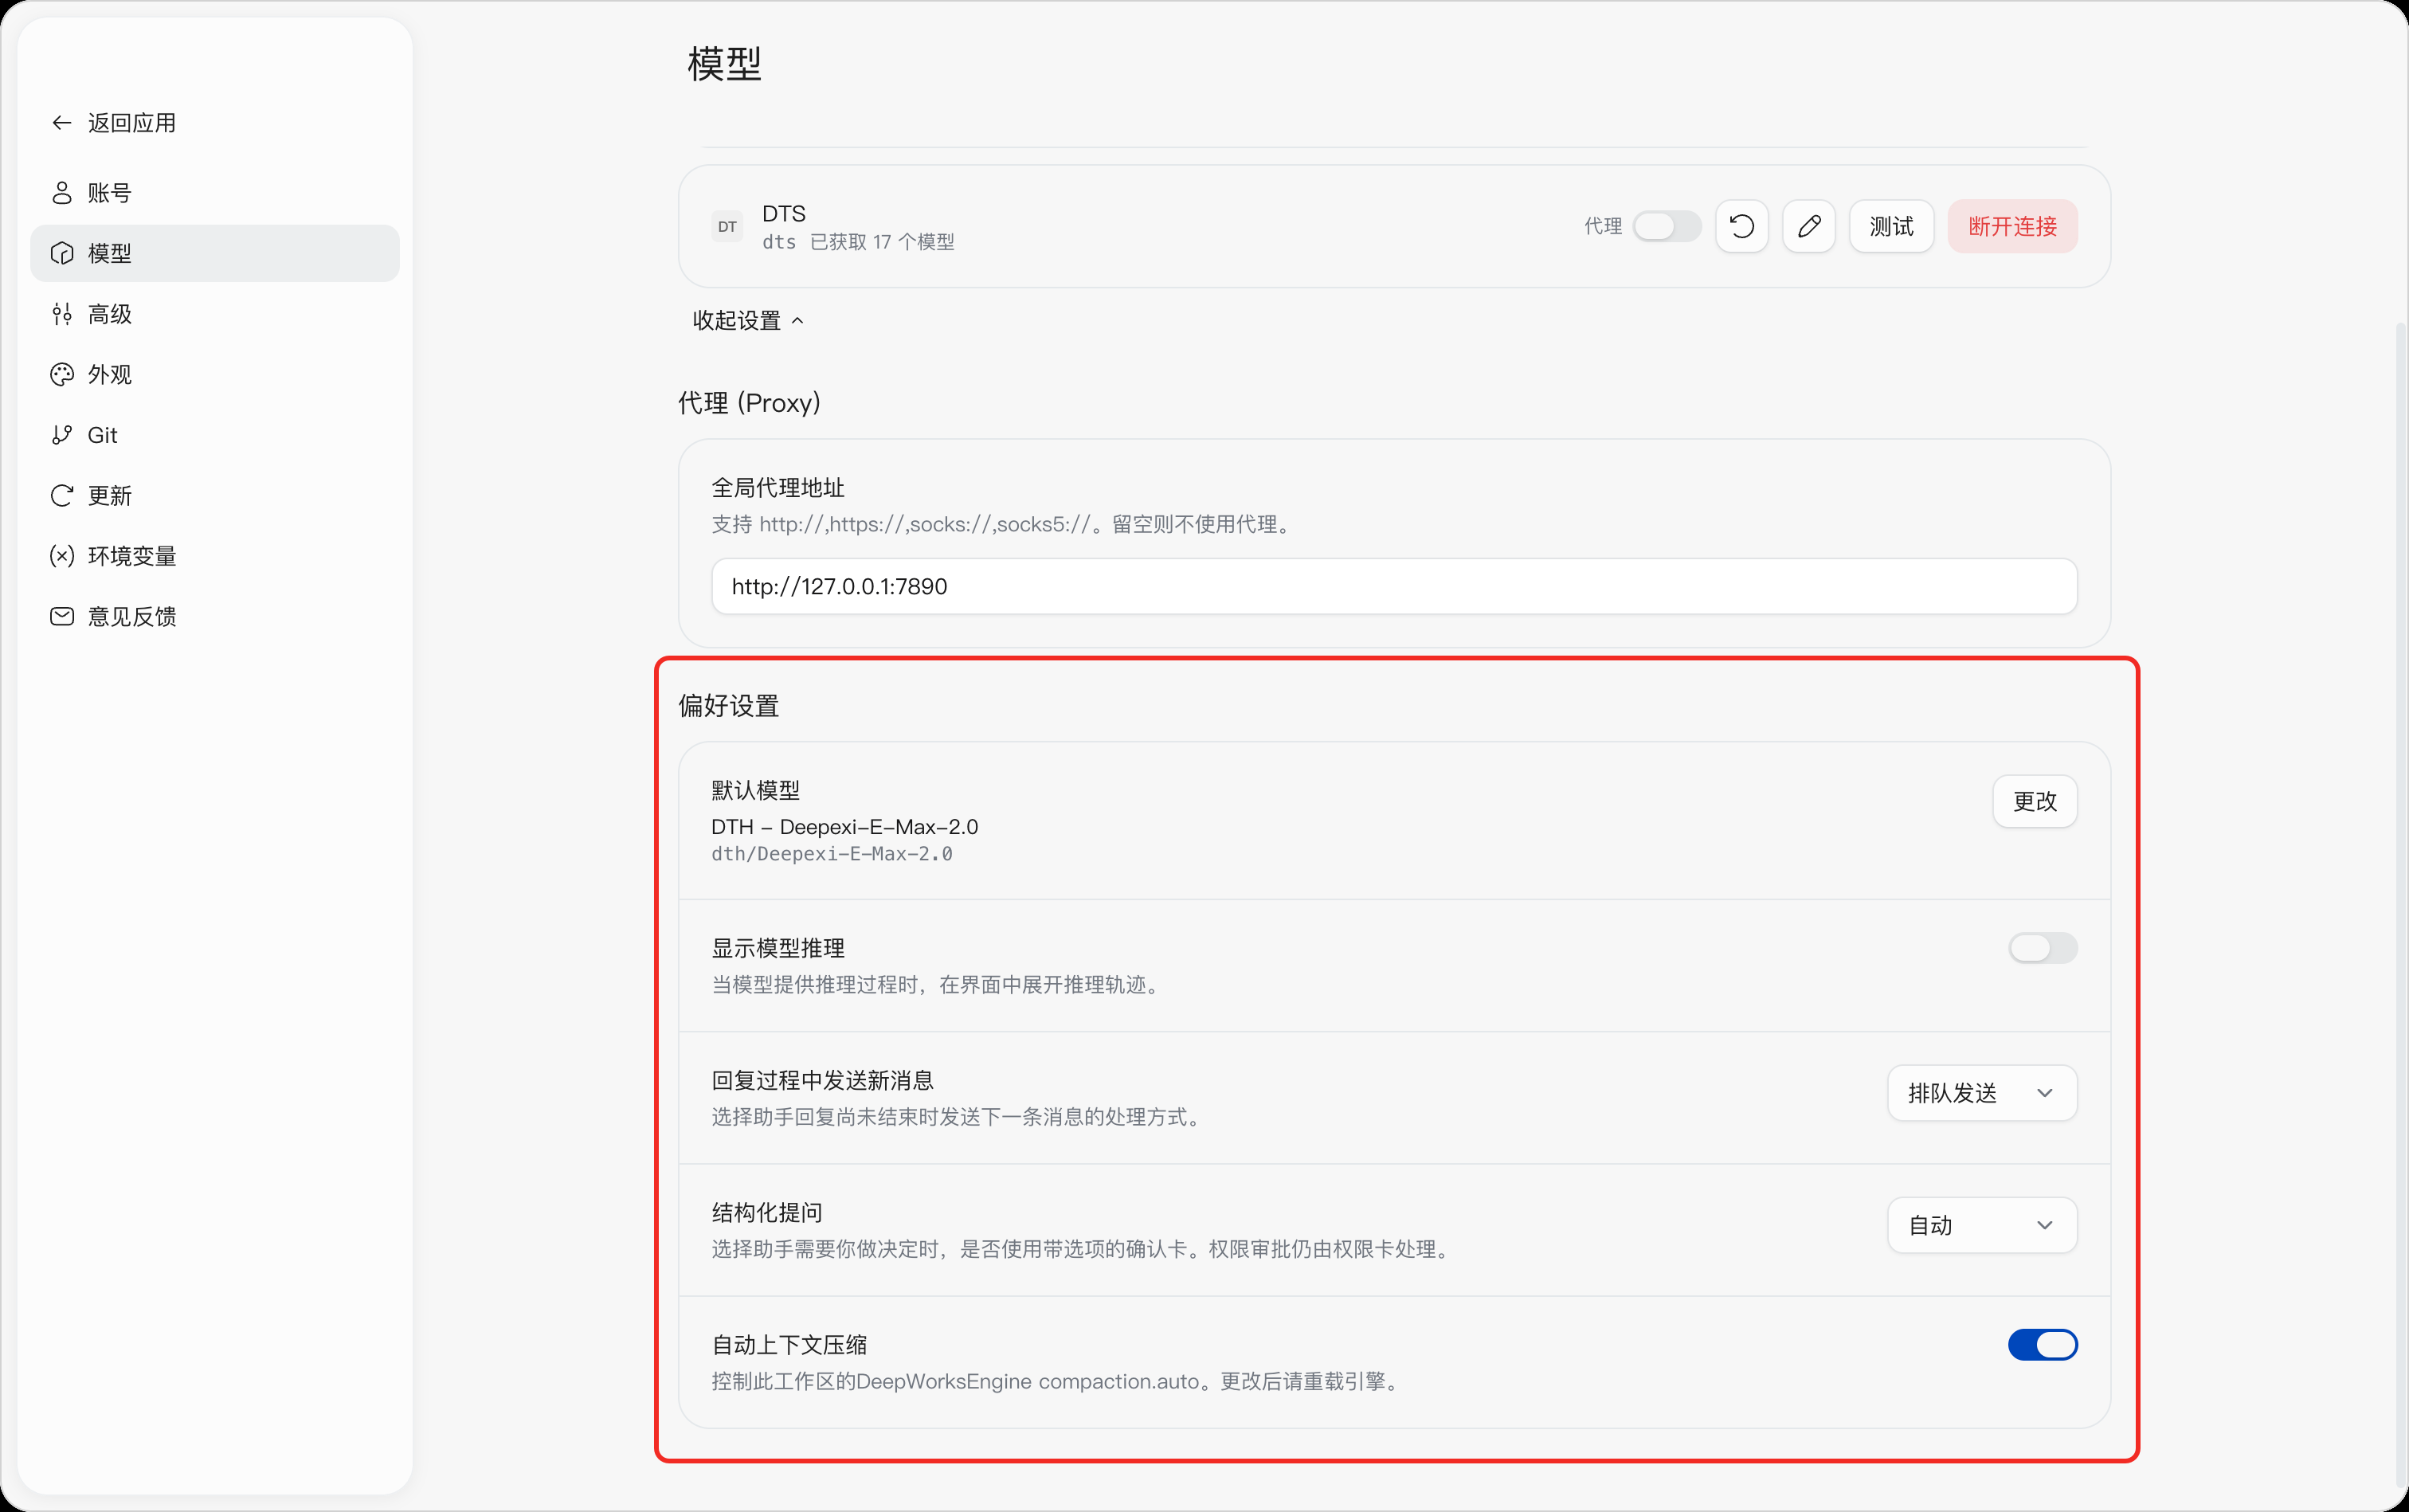
Click Change on the right side of “Default model” and select one of the currently connected and available models as the default model.
After the setting, DeepWorks gives priority to this model when creating tasks or conversations. In scenarios that support model switching, you can still choose other models as needed.
Showing Model Reasoning
The Show Model Reasoning toggle controls whether the reasoning traces provided by the model are expanded and displayed in the interface.
- On: Displays reasoning-related content when the model supports it.
- Off: Does not expand or display reasoning traces in the interface.
This setting takes effect only when the model in use provides the corresponding capability.
Setting Message Handling During an Ongoing Reply
“Send messages during an ongoing reply” sets how DeepWorks handles a message you send before it has finished the current reply.
Click the drop-down list on the right to select the message handling method.
For example, after you select Queue, new messages sent while the current reply is still in progress enter a waiting queue and are processed at an appropriate time. Choose the method that suits your usage habits.
Setting Structured Questions
“Structured questions” controls whether the assistant uses confirmation cards with options when it needs further confirmation or a choice from the user.
Click the drop-down list on the right to adjust how this feature is used.
For example, after you select Auto, DeepWorks decides based on the current task whether to use structured options to help the user confirm.
Operations that involve permission approval are still handled by the corresponding permission mechanism and are not affected by this setting.
Automatic Context Compression
After you enable Automatic Context Compression, DeepWorks can automatically compress the workspace context in scenarios where the context keeps growing, such as long conversations and long tasks, so that subsequent tasks can continue.
This feature is suitable for work scenarios that last a long time, contain a large amount of session content, or require multiple rounds of processing.
After changing this setting, reload the relevant engine as prompted on the page so that the new configuration takes effect.
Recommendations
When using model features for the first time, complete the configuration in the following order:
-
Click Connect Provider to connect the model service you want to use;
-
Use Test to confirm that the model connection works;
-
Select the model you use every day in “Default model”;
-
If your network environment requires a proxy, configure the global proxy and enable the proxy for the corresponding provider;
-
Use Add Custom Provider only when you need to connect a private model, a model gateway, or another OpenAI-compatible service.
After completing the above configuration, you can use the connected models in DeepWorks conversations, tasks, agents, and other related scenarios.
Environment Variables
On the Settings > Environment Variables page, you can configure the environment variables used while DeepWorks runs, such as model service API keys, third-party tool keys, and other external service parameters.
Configuration information saved as environment variables can be used by the relevant models, Skills, MCP, or other tools at runtime, so you do not have to enter it again each time.
Viewing Environment Variables
Go to Settings > Environment Variables. The page shows the environment variables that have been saved.
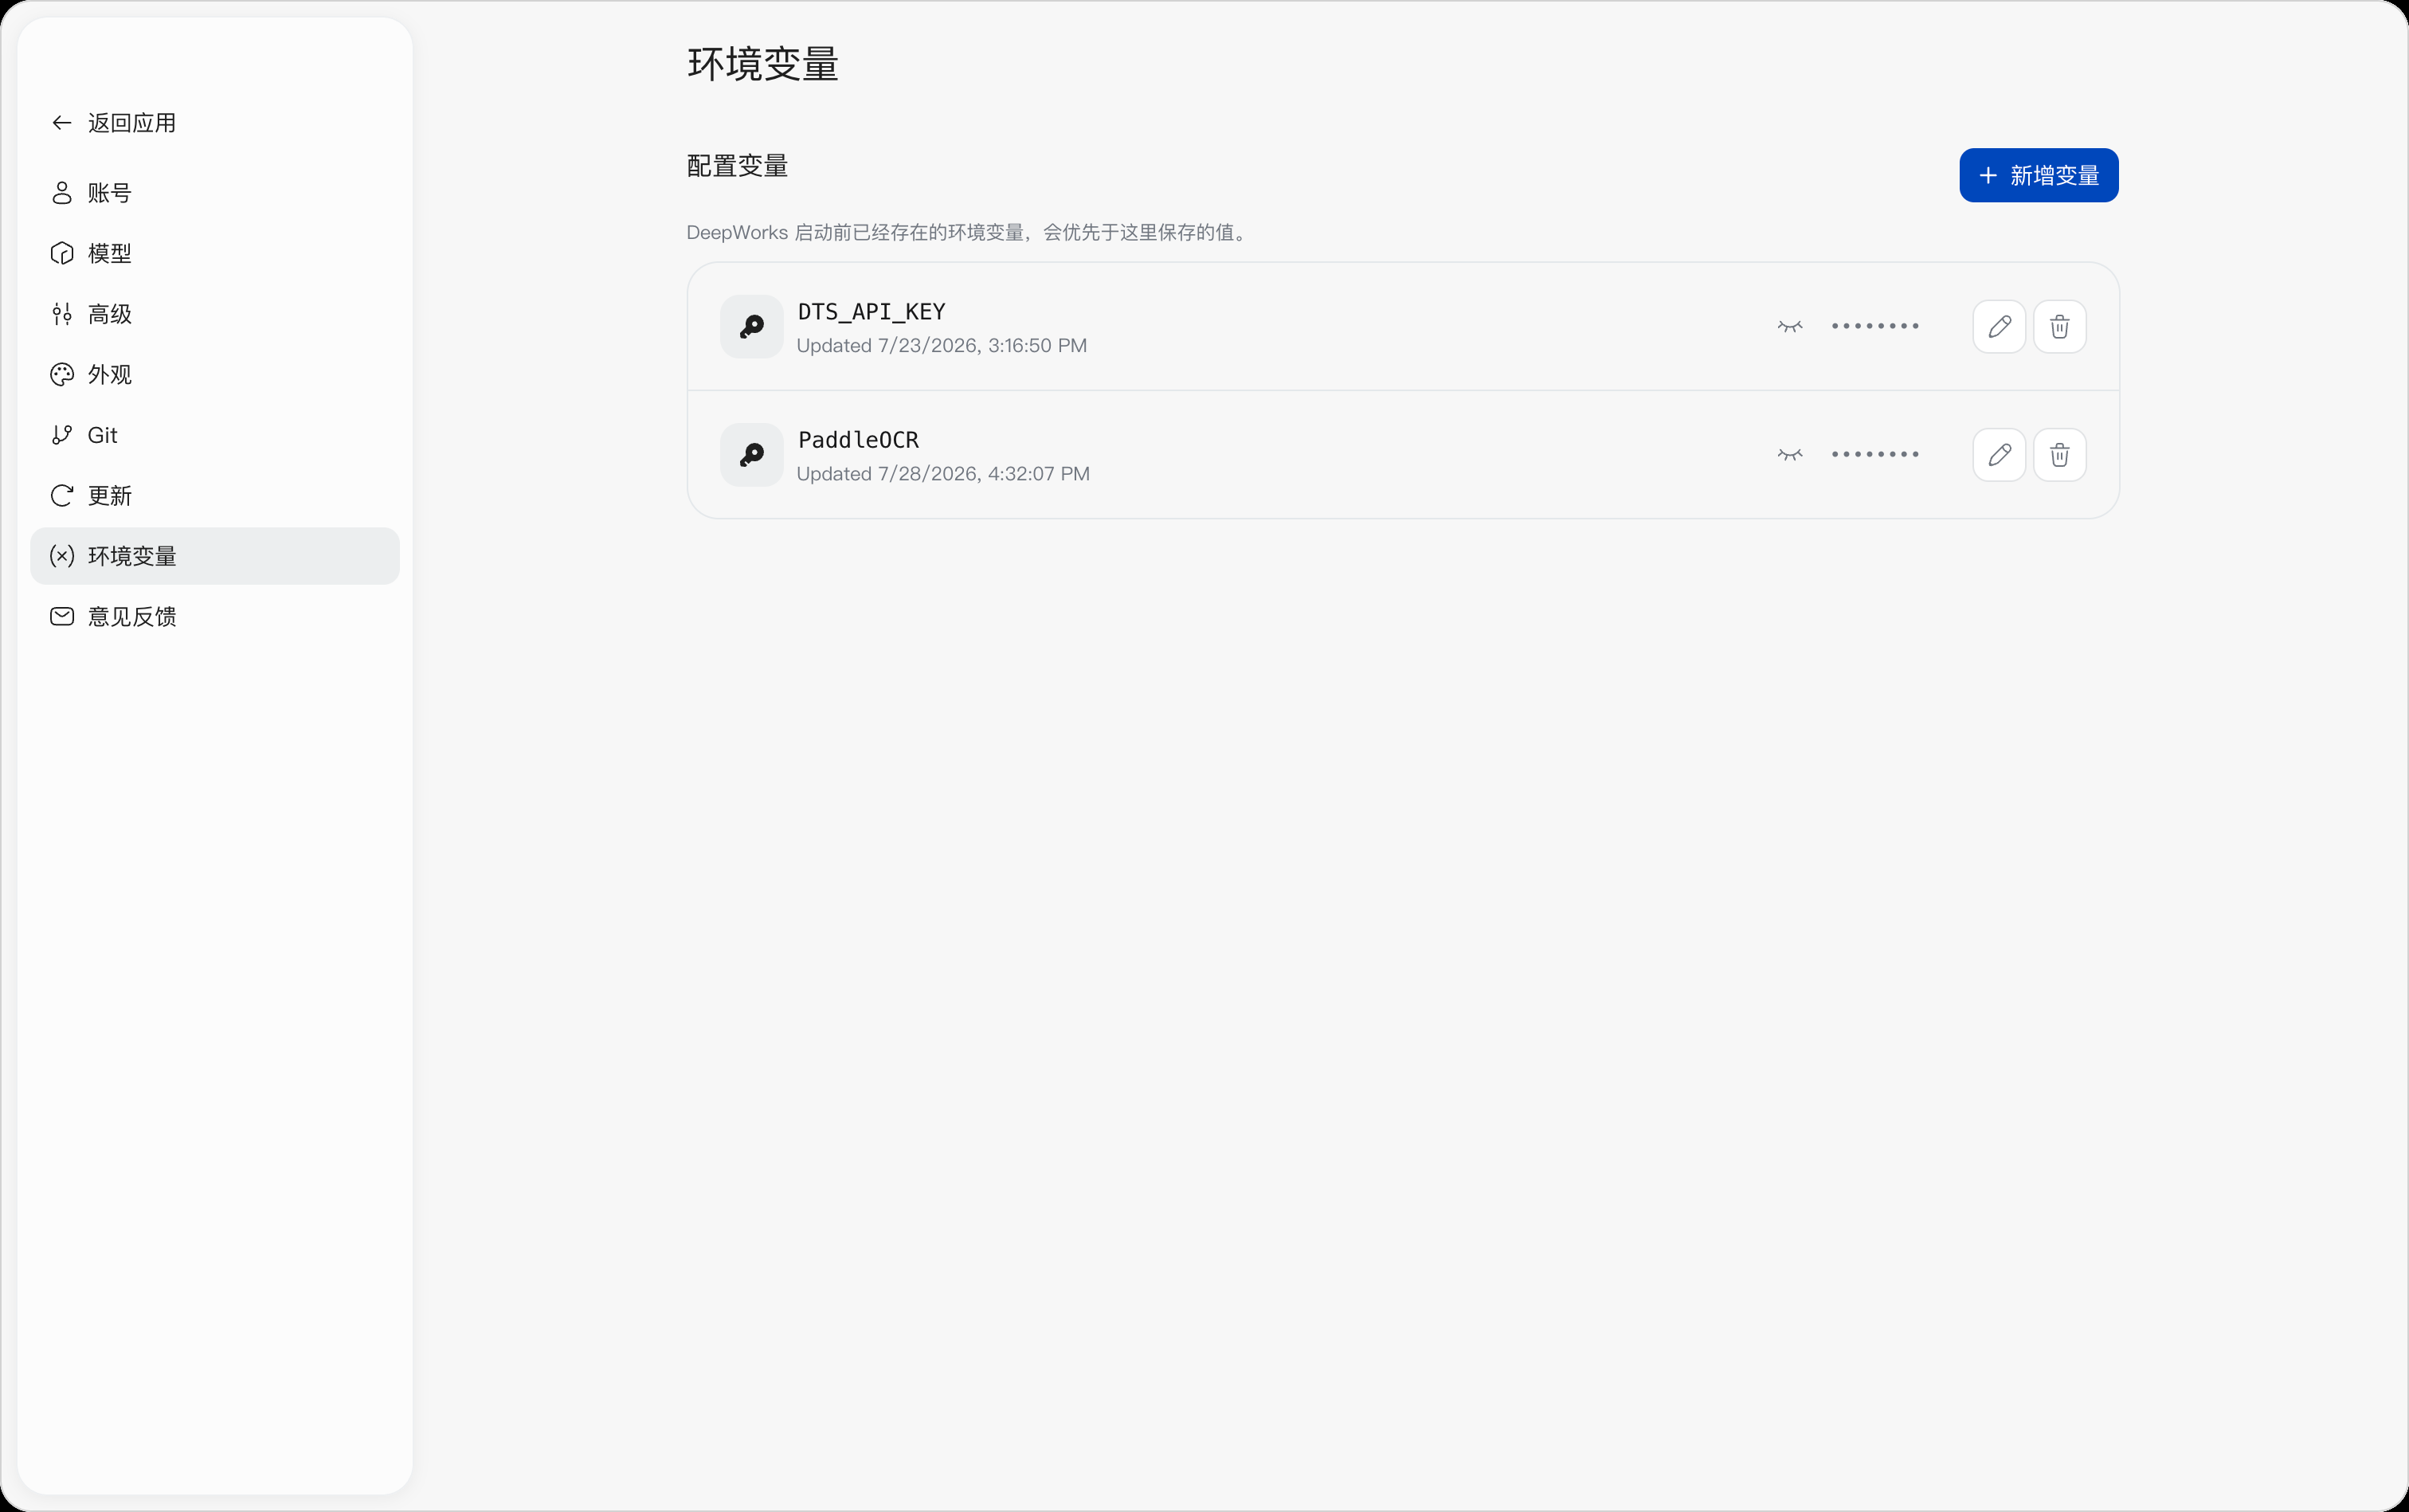
Each environment variable mainly includes:
| Item | Description |
|---|---|
| Variable name | The name of the environment variable, for example DTS_API_KEY |
| Variable value | The corresponding environment variable content, hidden by default |
| Updated | The time when the environment variable was last modified |
| Actions | Supports viewing, editing, and deleting the variable |
For sensitive information such as API keys and tokens, the variable value is hidden by default to avoid direct exposure.
Adding an Environment Variable
Click Add Variable in the upper-right corner of the page and fill in the environment variable name and value as prompted.
For example, if a model service requires the following:
DTS_API_KEYyou can save the API key provided by the service provider as the value of this variable.
After filling in the information, save it, and the new variable appears in the environment variable list.
The exact names and contents of environment variables should follow the configuration requirements of the corresponding model, Skill, MCP, or third-party service.
Viewing a Variable Value
Keys, tokens, and other contents of environment variables are hidden by default.
To check the saved content, click the Show/Hide button on the right side of the variable to view the value, and click it again to hide the value.
View sensitive variables only when necessary, and avoid exposing the related information during screen sharing, screenshots, and similar situations.
Editing an Environment Variable
To modify a saved environment variable, click the Edit button on the right side of the corresponding variable.
Modify the variable name or value and save it to update the current configuration.
When authentication information such as an API key or token changes, you can update it this way directly without deleting and recreating the variable.
Deleting an Environment Variable
To remove an environment variable you no longer use, click the Delete button on the right side of the corresponding variable.
Before deleting, confirm that the relevant models, Skills, MCP, or other features no longer depend on the variable; otherwise, the corresponding services may fail to work properly.
Recommendations
Environment variables are usually used to store sensitive configuration such as API keys and tokens. Add only the variables you actually need and manage the related keys carefully. When a key expires, is rotated, or the related service is no longer used, update or delete the corresponding variable promptly.
Git Settings
On the Settings > Git page, you can configure the default behavior of DeepWorks when creating Git branches, merging pull requests, pushing branches, and managing worktrees, and you can also provide additional instructions for AI-generated commit messages and pull request descriptions.
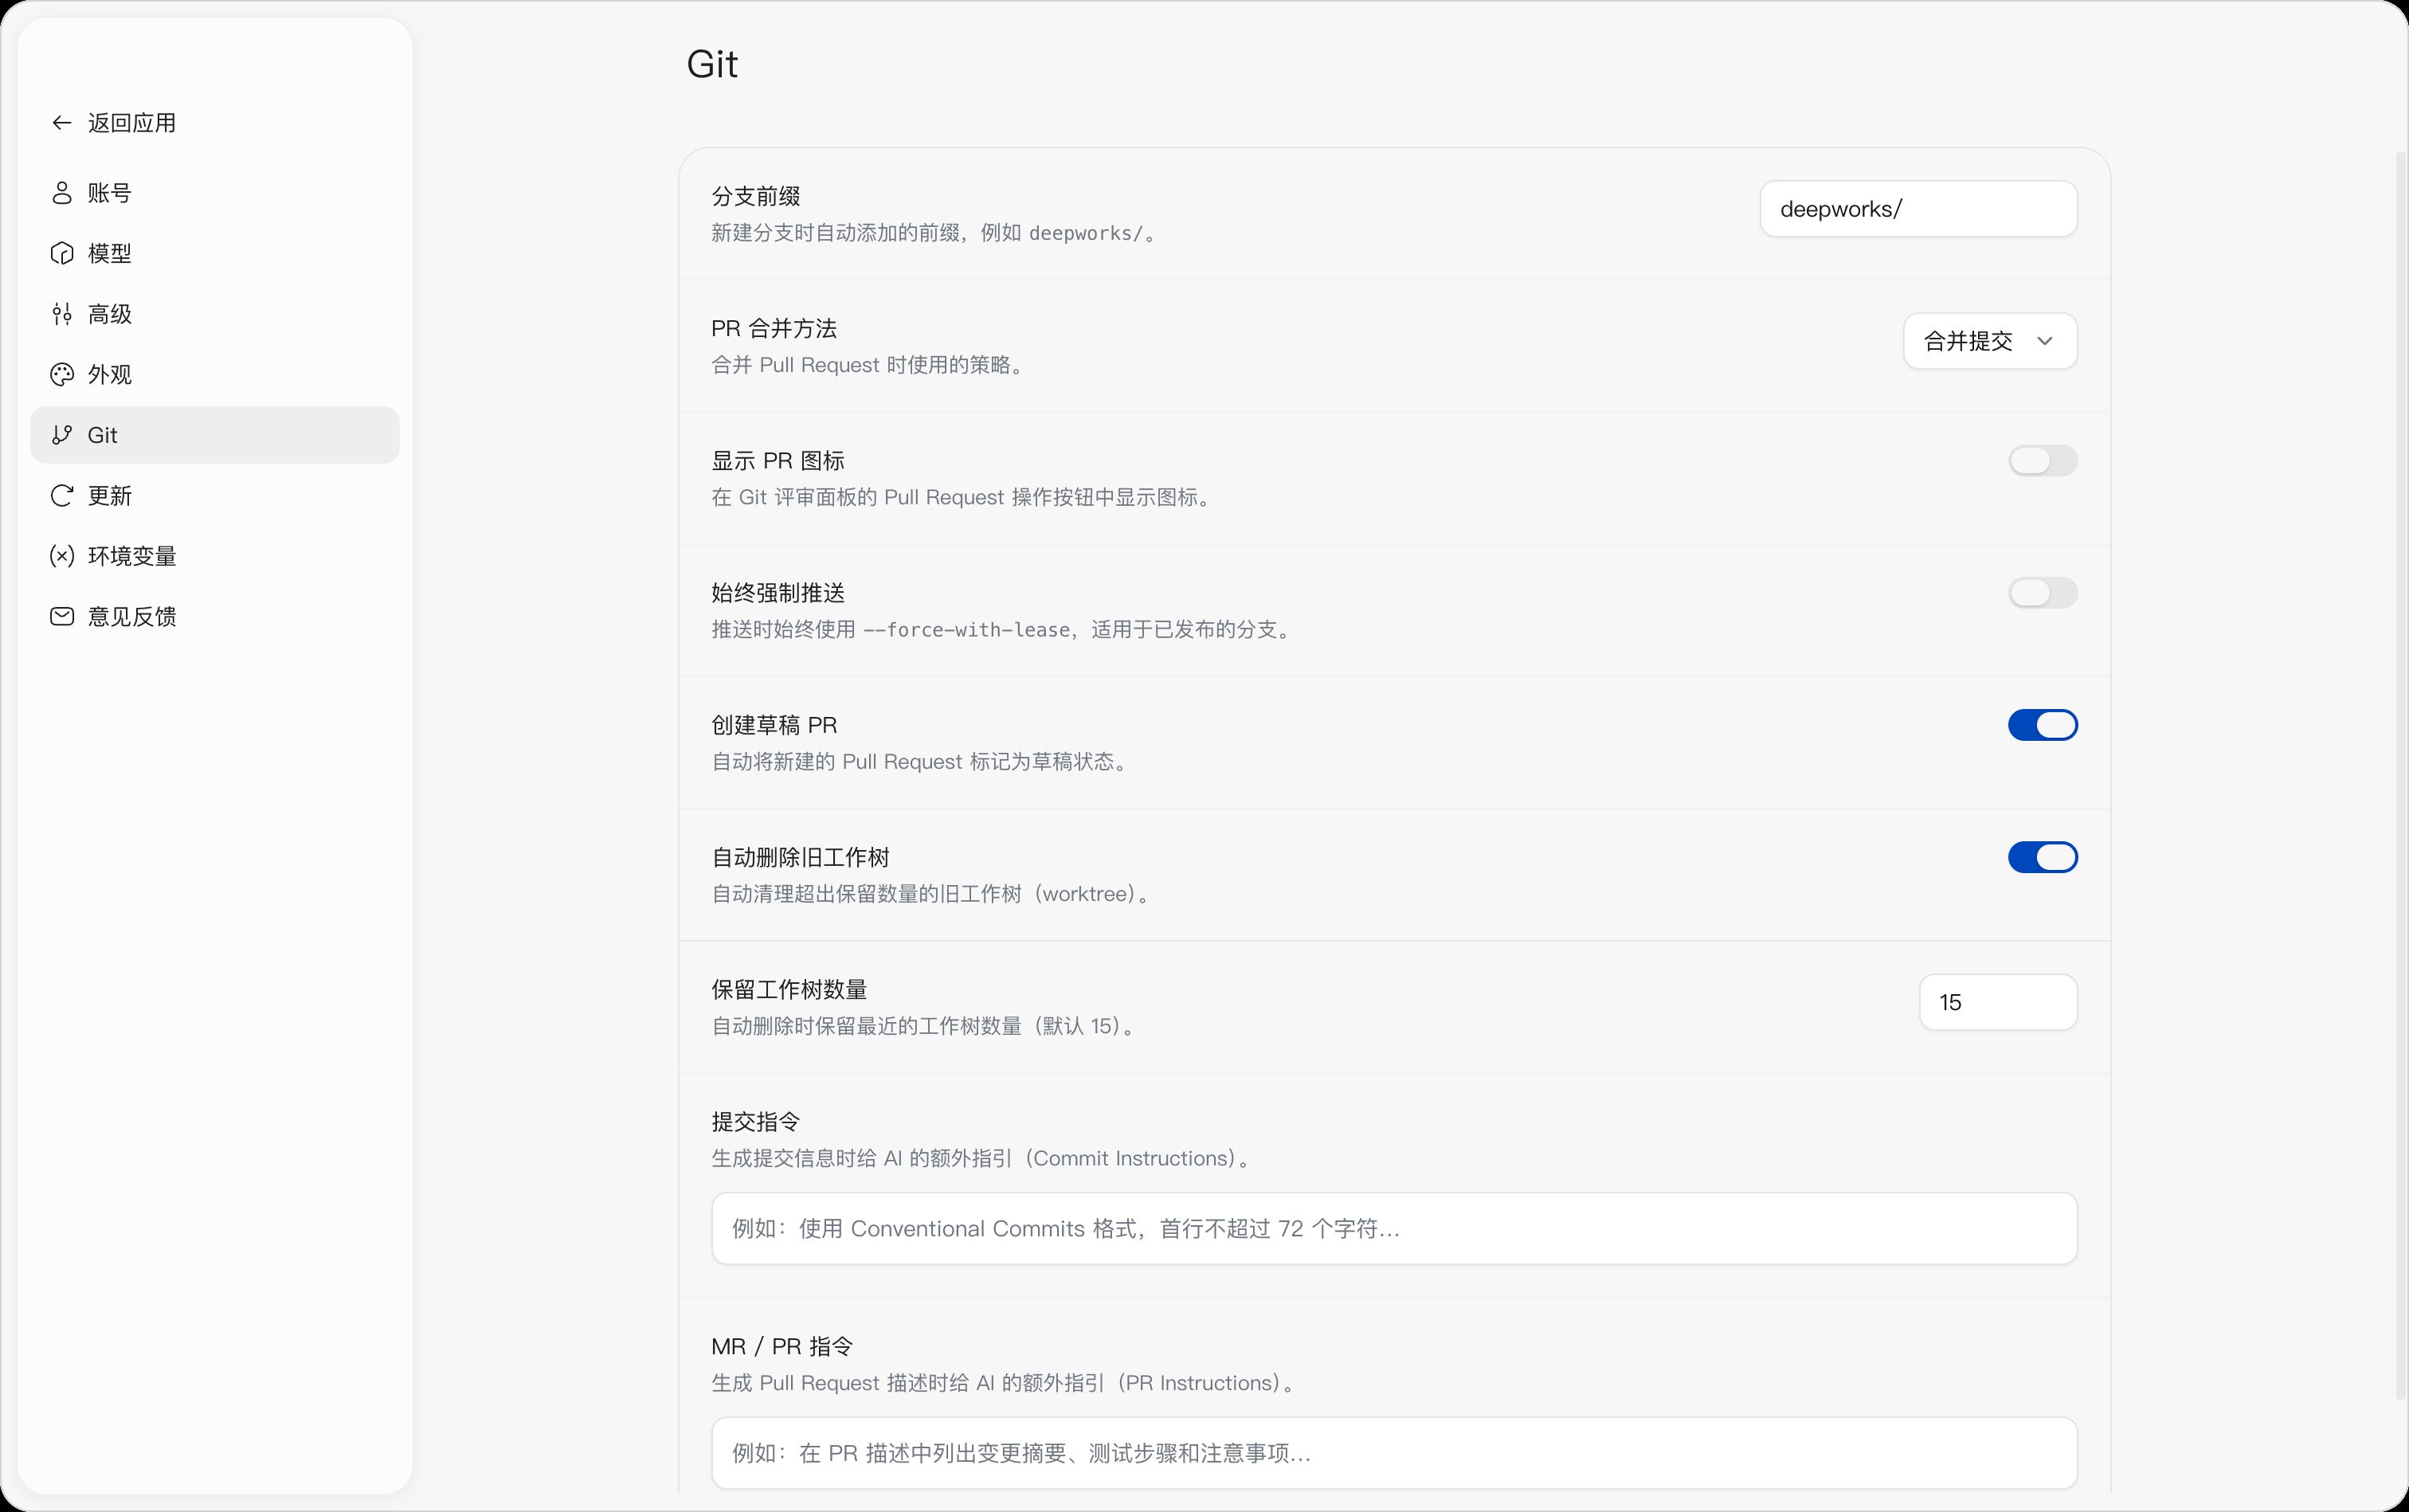
Setting the Branch Prefix
“Branch prefix” sets the name prefix automatically added when creating a new branch. For example, if you enter deepworks/, branch names created by DeepWorks automatically start with deepworks/.
Use a short, recognizable prefix that ends with / so that branches created by DeepWorks are easy to identify.
Setting the PR Merge Method
“PR merge method” sets the default strategy used when merging pull requests. Click the drop-down list on the right to select a merge method supported by the current code hosting platform.
If you select Merge commit, the system merges the changes in the pull request into the target branch through a merge commit and keeps the commit history on the branch.
The available options may vary depending on the code hosting platform and repository configuration. If your enterprise or project has a unified standard, follow the repository requirements.
Showing PR Icons
After you enable Show PR Icons, the pull request action buttons in the Git review panel show the corresponding icons; when disabled, the icons are not shown.
This setting affects only the interface display, not pull request functionality.
Always Force Push
After you enable Always Force Push, DeepWorks uses --force-with-lease when pushing a branch that has already been published.
This method is often used to update a branch after rebasing, cleaning up, or rewriting commit history. Although --force-with-lease prevents overwriting when unexpected changes occur on the remote branch, force pushing can still affect other collaborators. Enable it only when you clearly understand how the branch is shared and when it complies with the project standards.
Create Draft PR
After you enable Create Draft PR, pull requests created by DeepWorks are automatically marked as drafts, indicating that the related changes are not yet ready for formal review or merging.
If you want new pull requests to enter the formal review process immediately, turn off this toggle.
Auto-Delete Old Worktrees
After you enable Auto-Delete Old Worktrees, DeepWorks automatically cleans up old worktrees that exceed the retention limit, reducing the local space taken up by worktrees left over from long-term use.
The system cleans up only the excess according to the configured retention count. Before cleanup, make sure that important changes in the old worktrees have been committed or properly saved.
Setting the Number of Retained Worktrees
“Number of retained worktrees” specifies how many of the most recent worktrees to keep during automatic cleanup. The default is 15.
This setting works together with Auto-Delete Old Worktrees. When auto-delete is enabled and the number of worktrees exceeds the set value, the system cleans up the older worktrees. When auto-delete is disabled, this count does not trigger automatic cleanup.
Setting Commit Instructions
“Commit instructions” provide additional requirements when AI generates Git commit messages. For example, you can require the Conventional Commits format, limit the title length, or specify the language of the commit message.
Example:
Use the Conventional Commits format, keep the first line within 72 characters, and describe the changes in Chinese.If left empty, AI generates commit messages according to the default rules.
Setting MR / PR Instructions
“MR / PR instructions” provide additional requirements when AI generates Merge Request or Pull Request descriptions. For example, you can require the description to include a summary of changes, test steps, scope of impact, and notes.
Example:
List the summary of changes, test steps, scope of impact, and notes in the PR description.If left empty, AI generates the MR or PR description according to the default rules.
Git settings take effect immediately after they are changed, with no need to click Save. For settings that involve branch naming, merge strategy, force push, and worktree cleanup, we recommend keeping them consistent with the Git collaboration standards of your project.
Updates
DeepWorks supports both manual and background automatic update checks. You can view the current version, download a new version, and complete the installation on the Settings > Updates page, or quickly check for updates from the bottom-left user menu.
Viewing the Current Version
Go to Settings > Updates. In the “Current version” section, you can view the DeepWorks application name and the currently installed version.
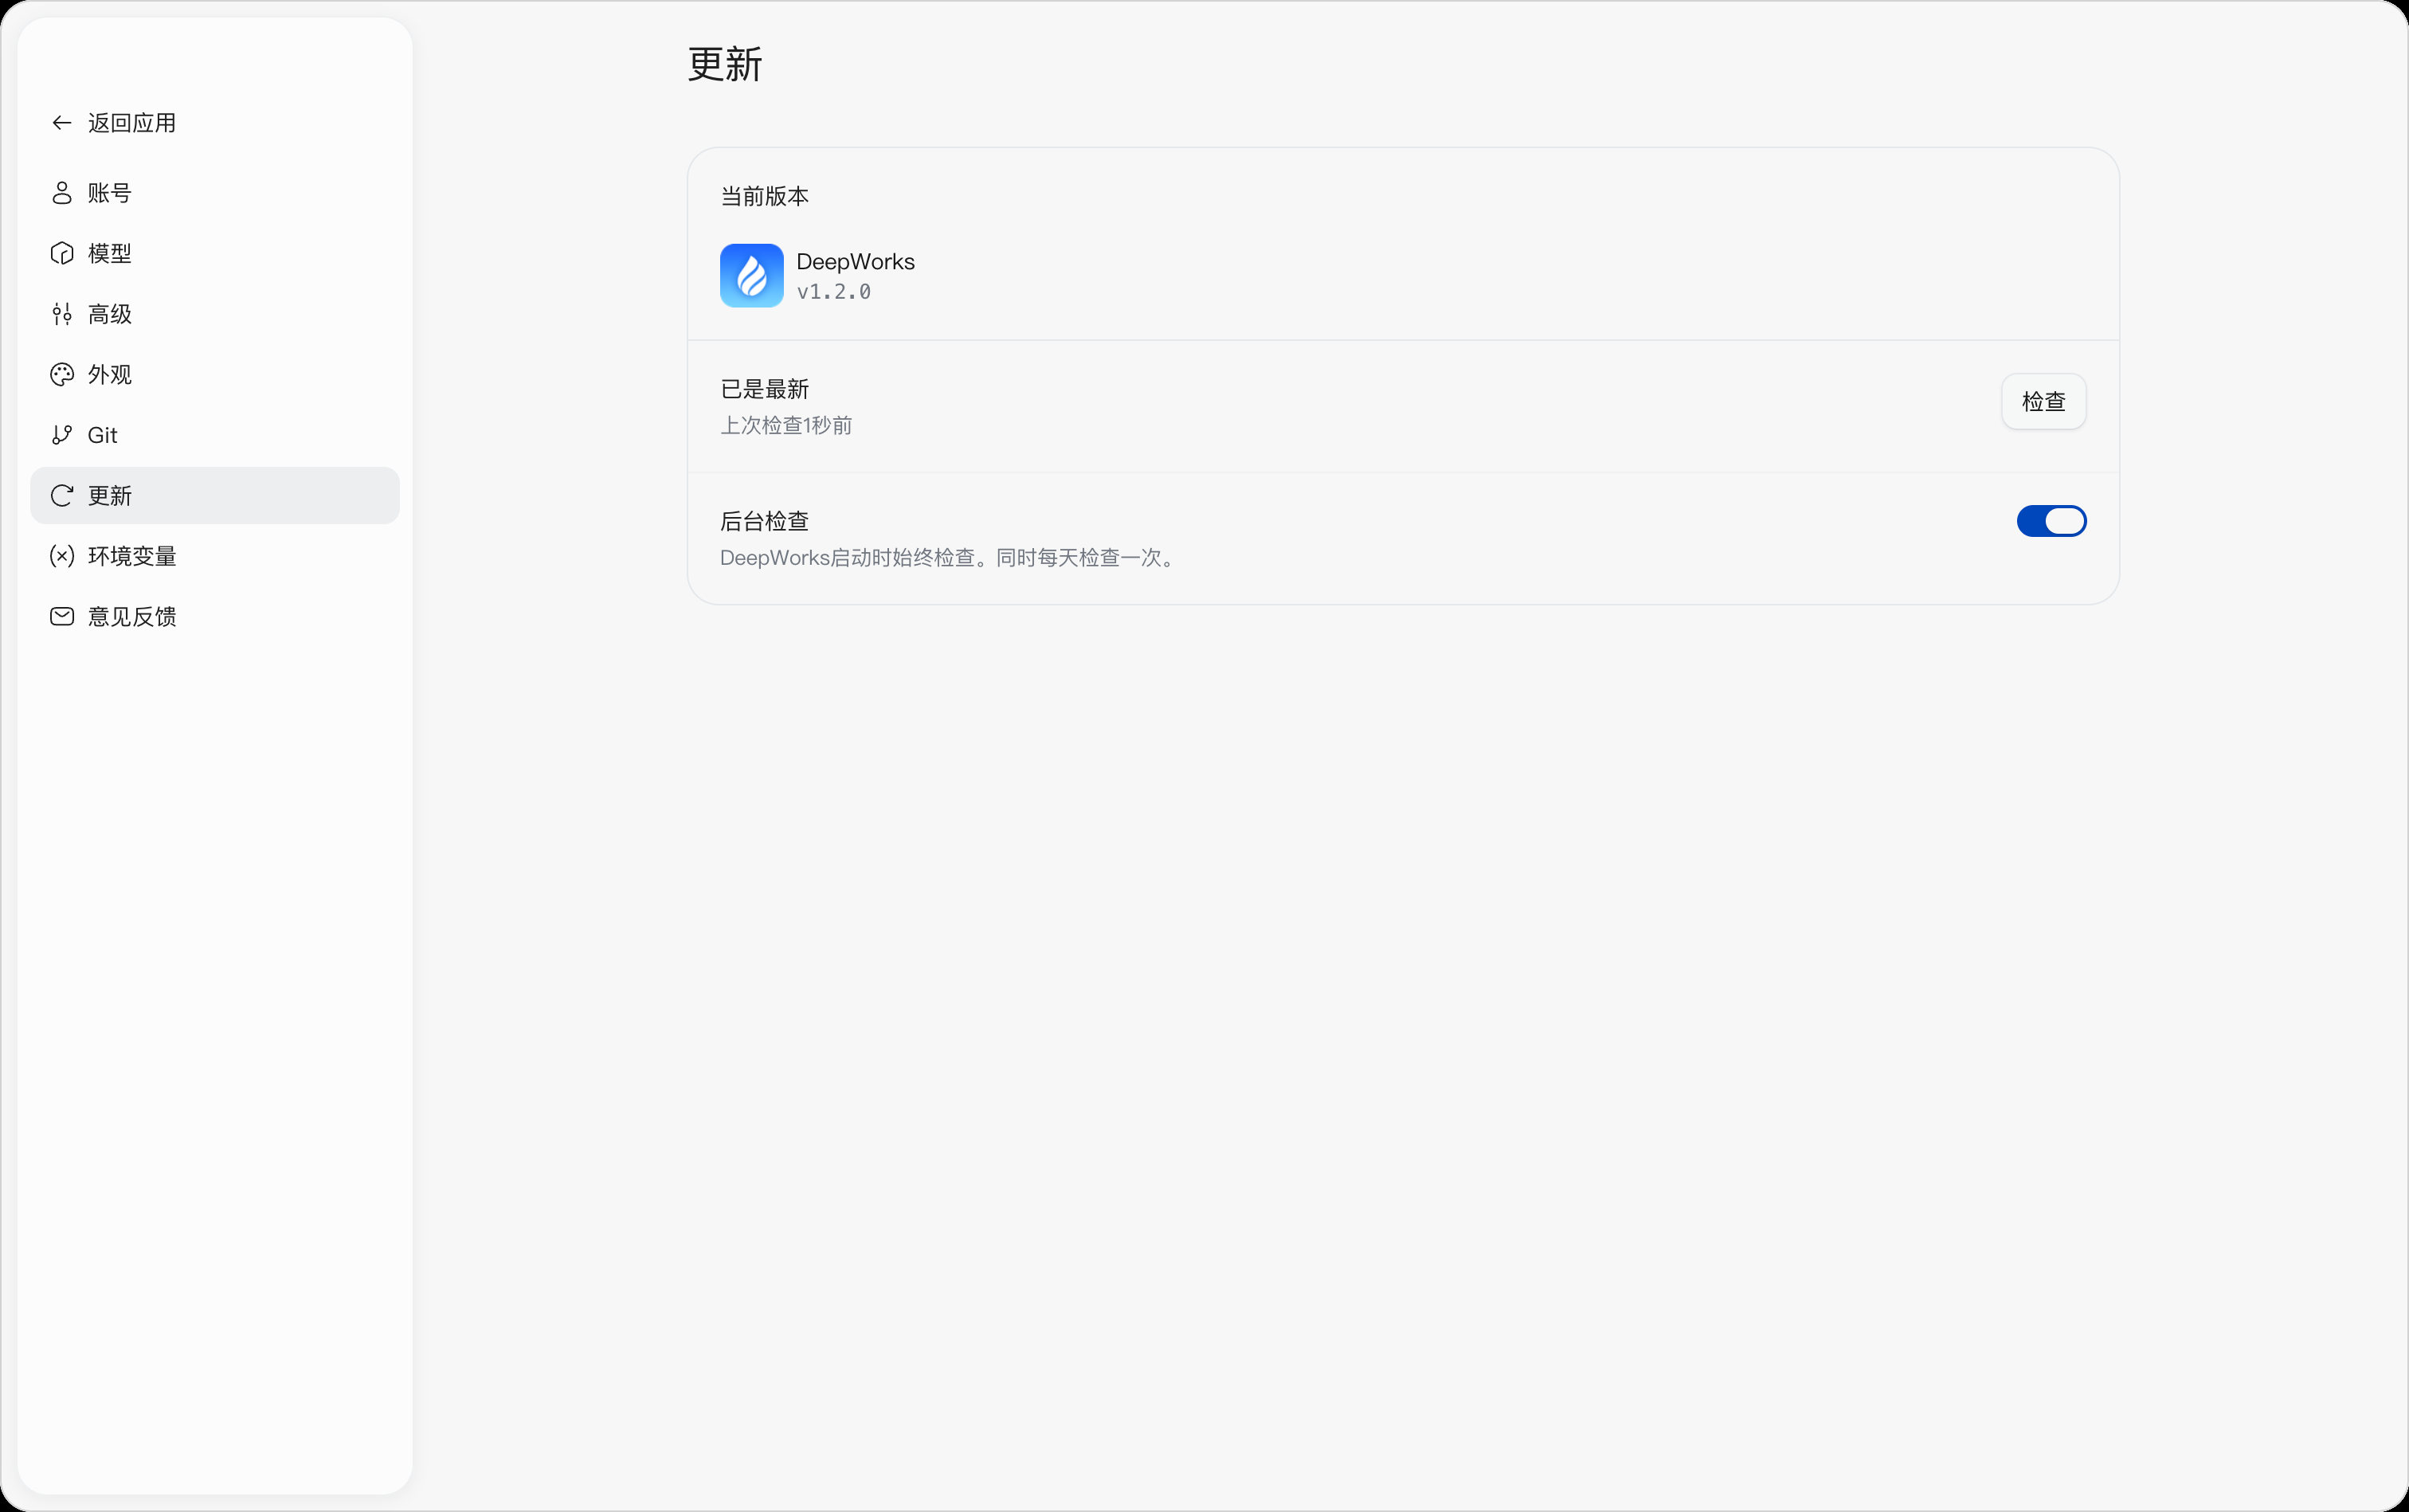
When reporting an issue or contacting technical support, include the version number shown here so that the feature scope can be confirmed and the issue investigated.
Checking for Updates on the Settings Page
Click the Check button on the right, and DeepWorks immediately checks whether a new version is available.
-
Up to Date indicates that the currently installed version is already the latest available version;
-
Ready to install: vX.X.X indicates that the new version package has been downloaded and can be installed;
-
If the check fails, confirm that the network connection is working and try again.
Checking for Updates from the User Menu
In addition to the settings page, you can click the user avatar in the bottom-left corner to open the user menu, then clickCheck for Updates to start a version check quickly.
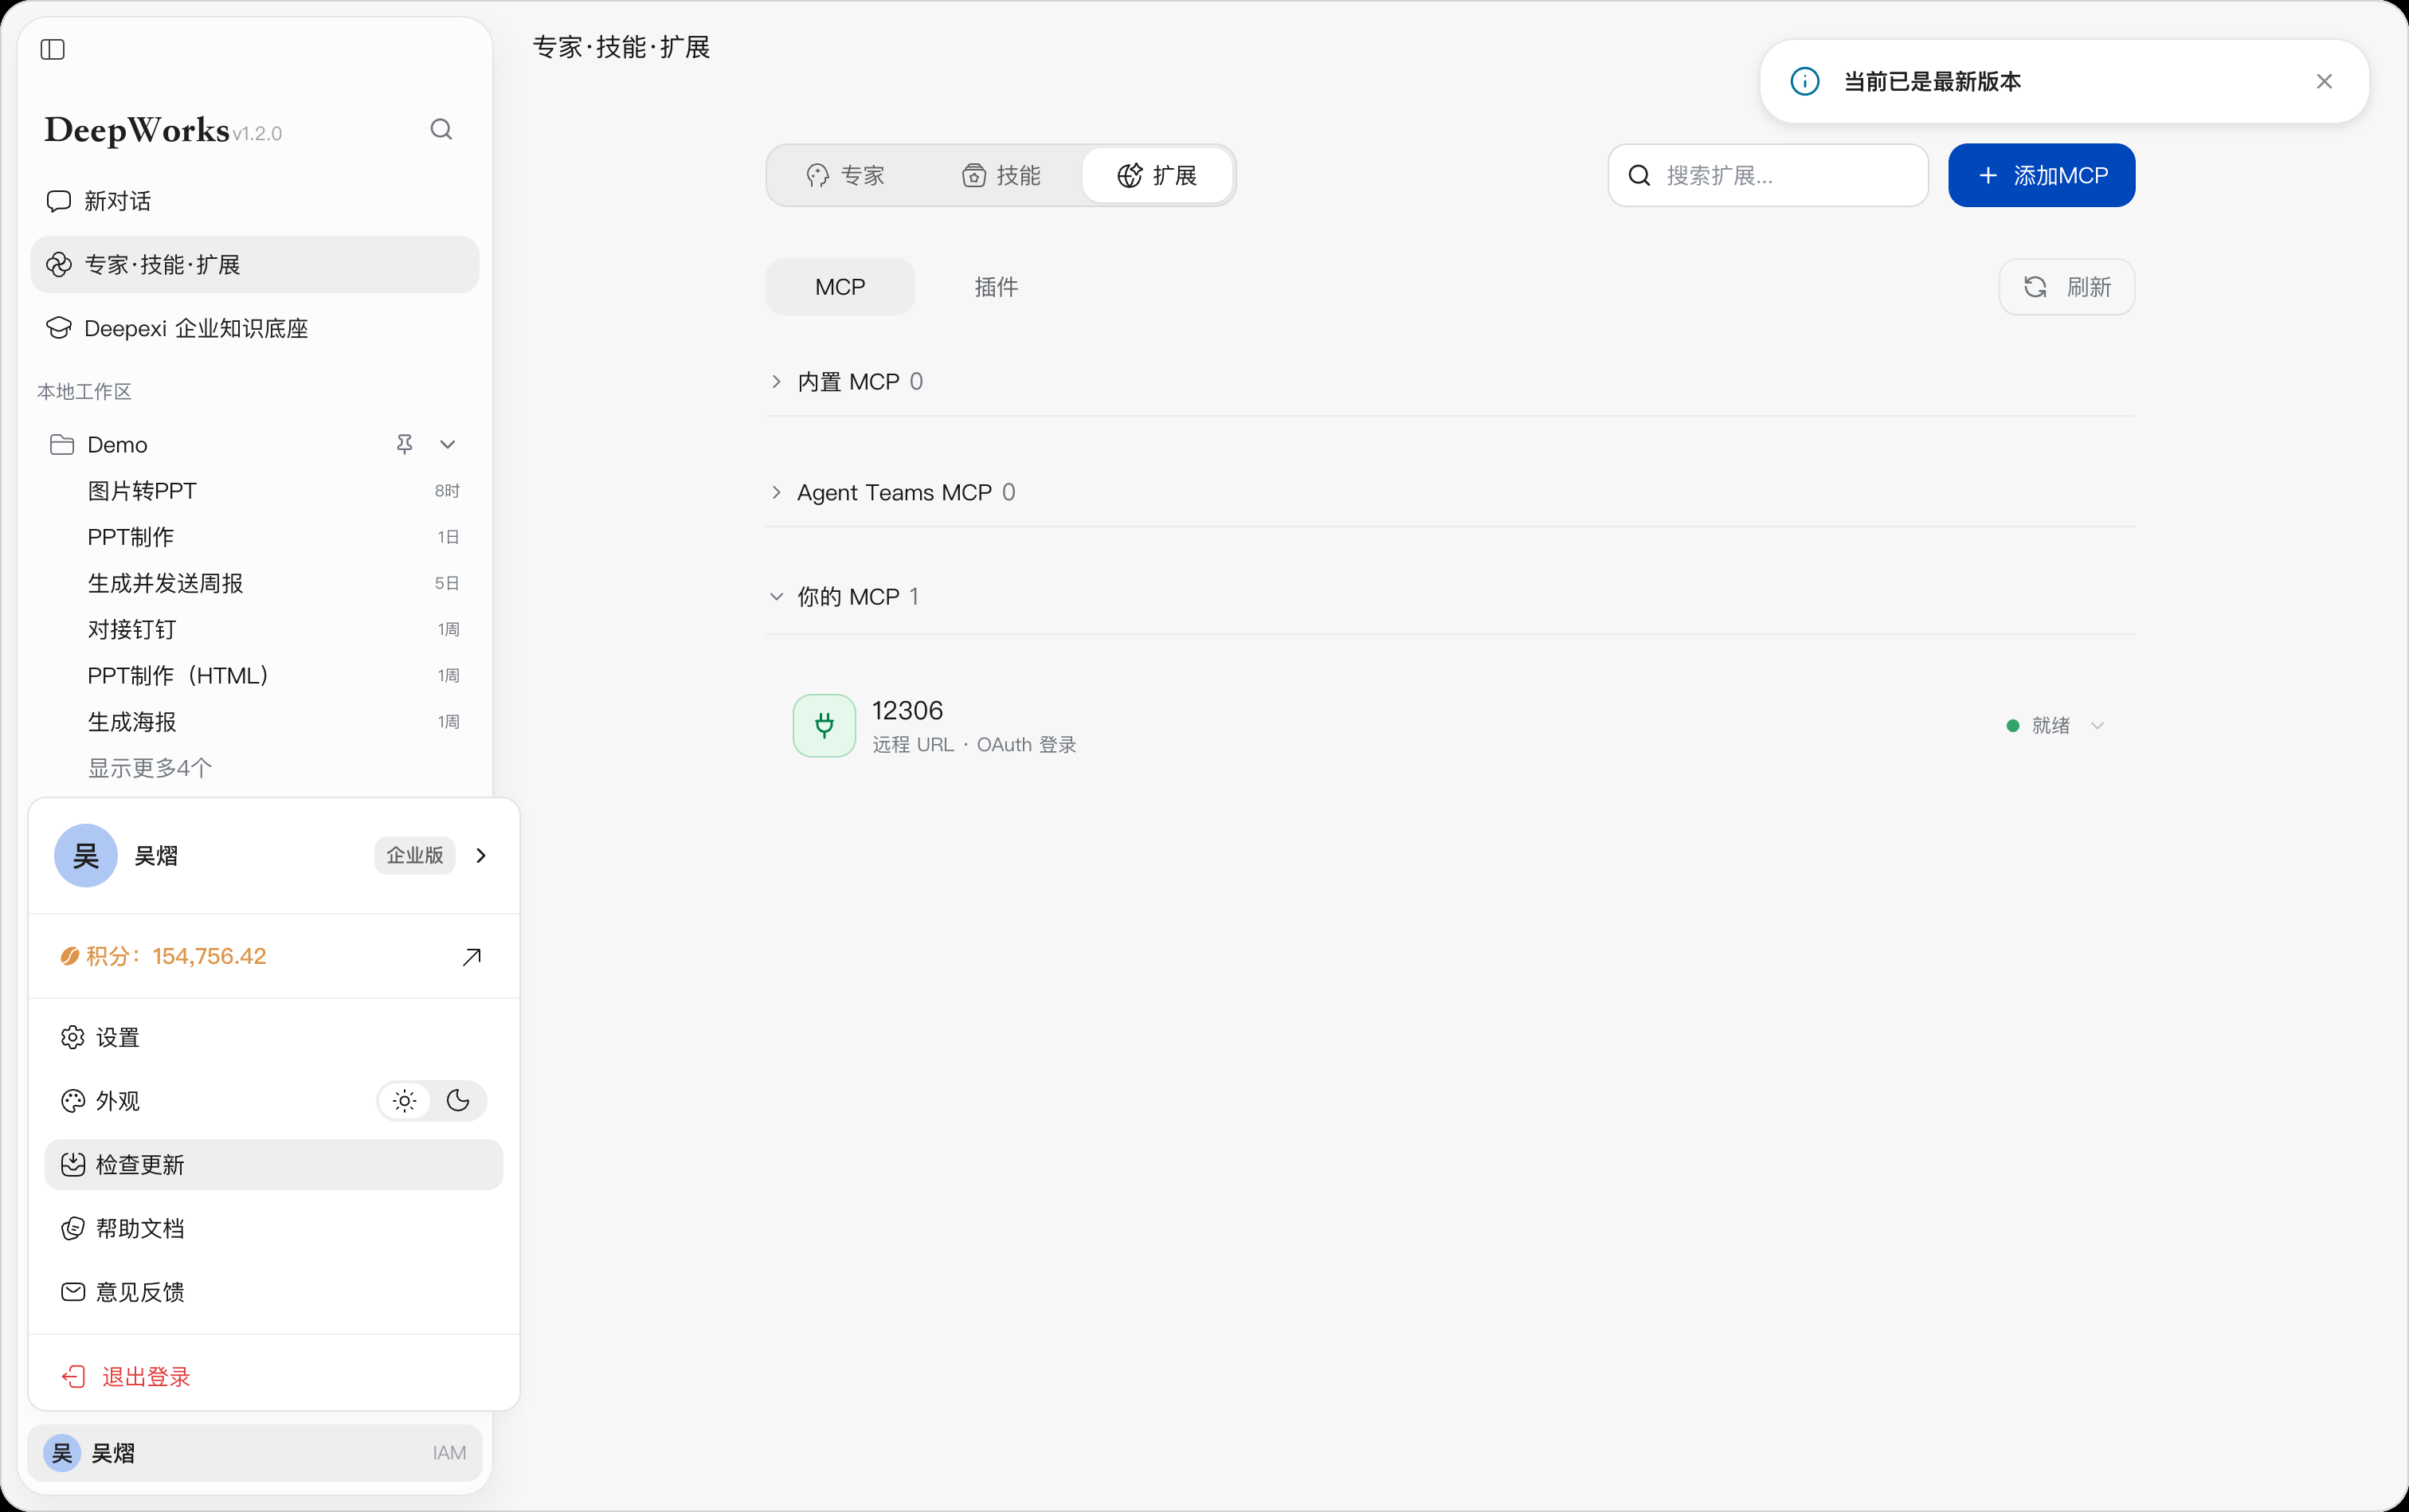
If a new version is detected, a New version ready notice appears in the upper-right corner of the page. You can click Release Notes to view the changes in the version, or clickDownload Update to start downloading.
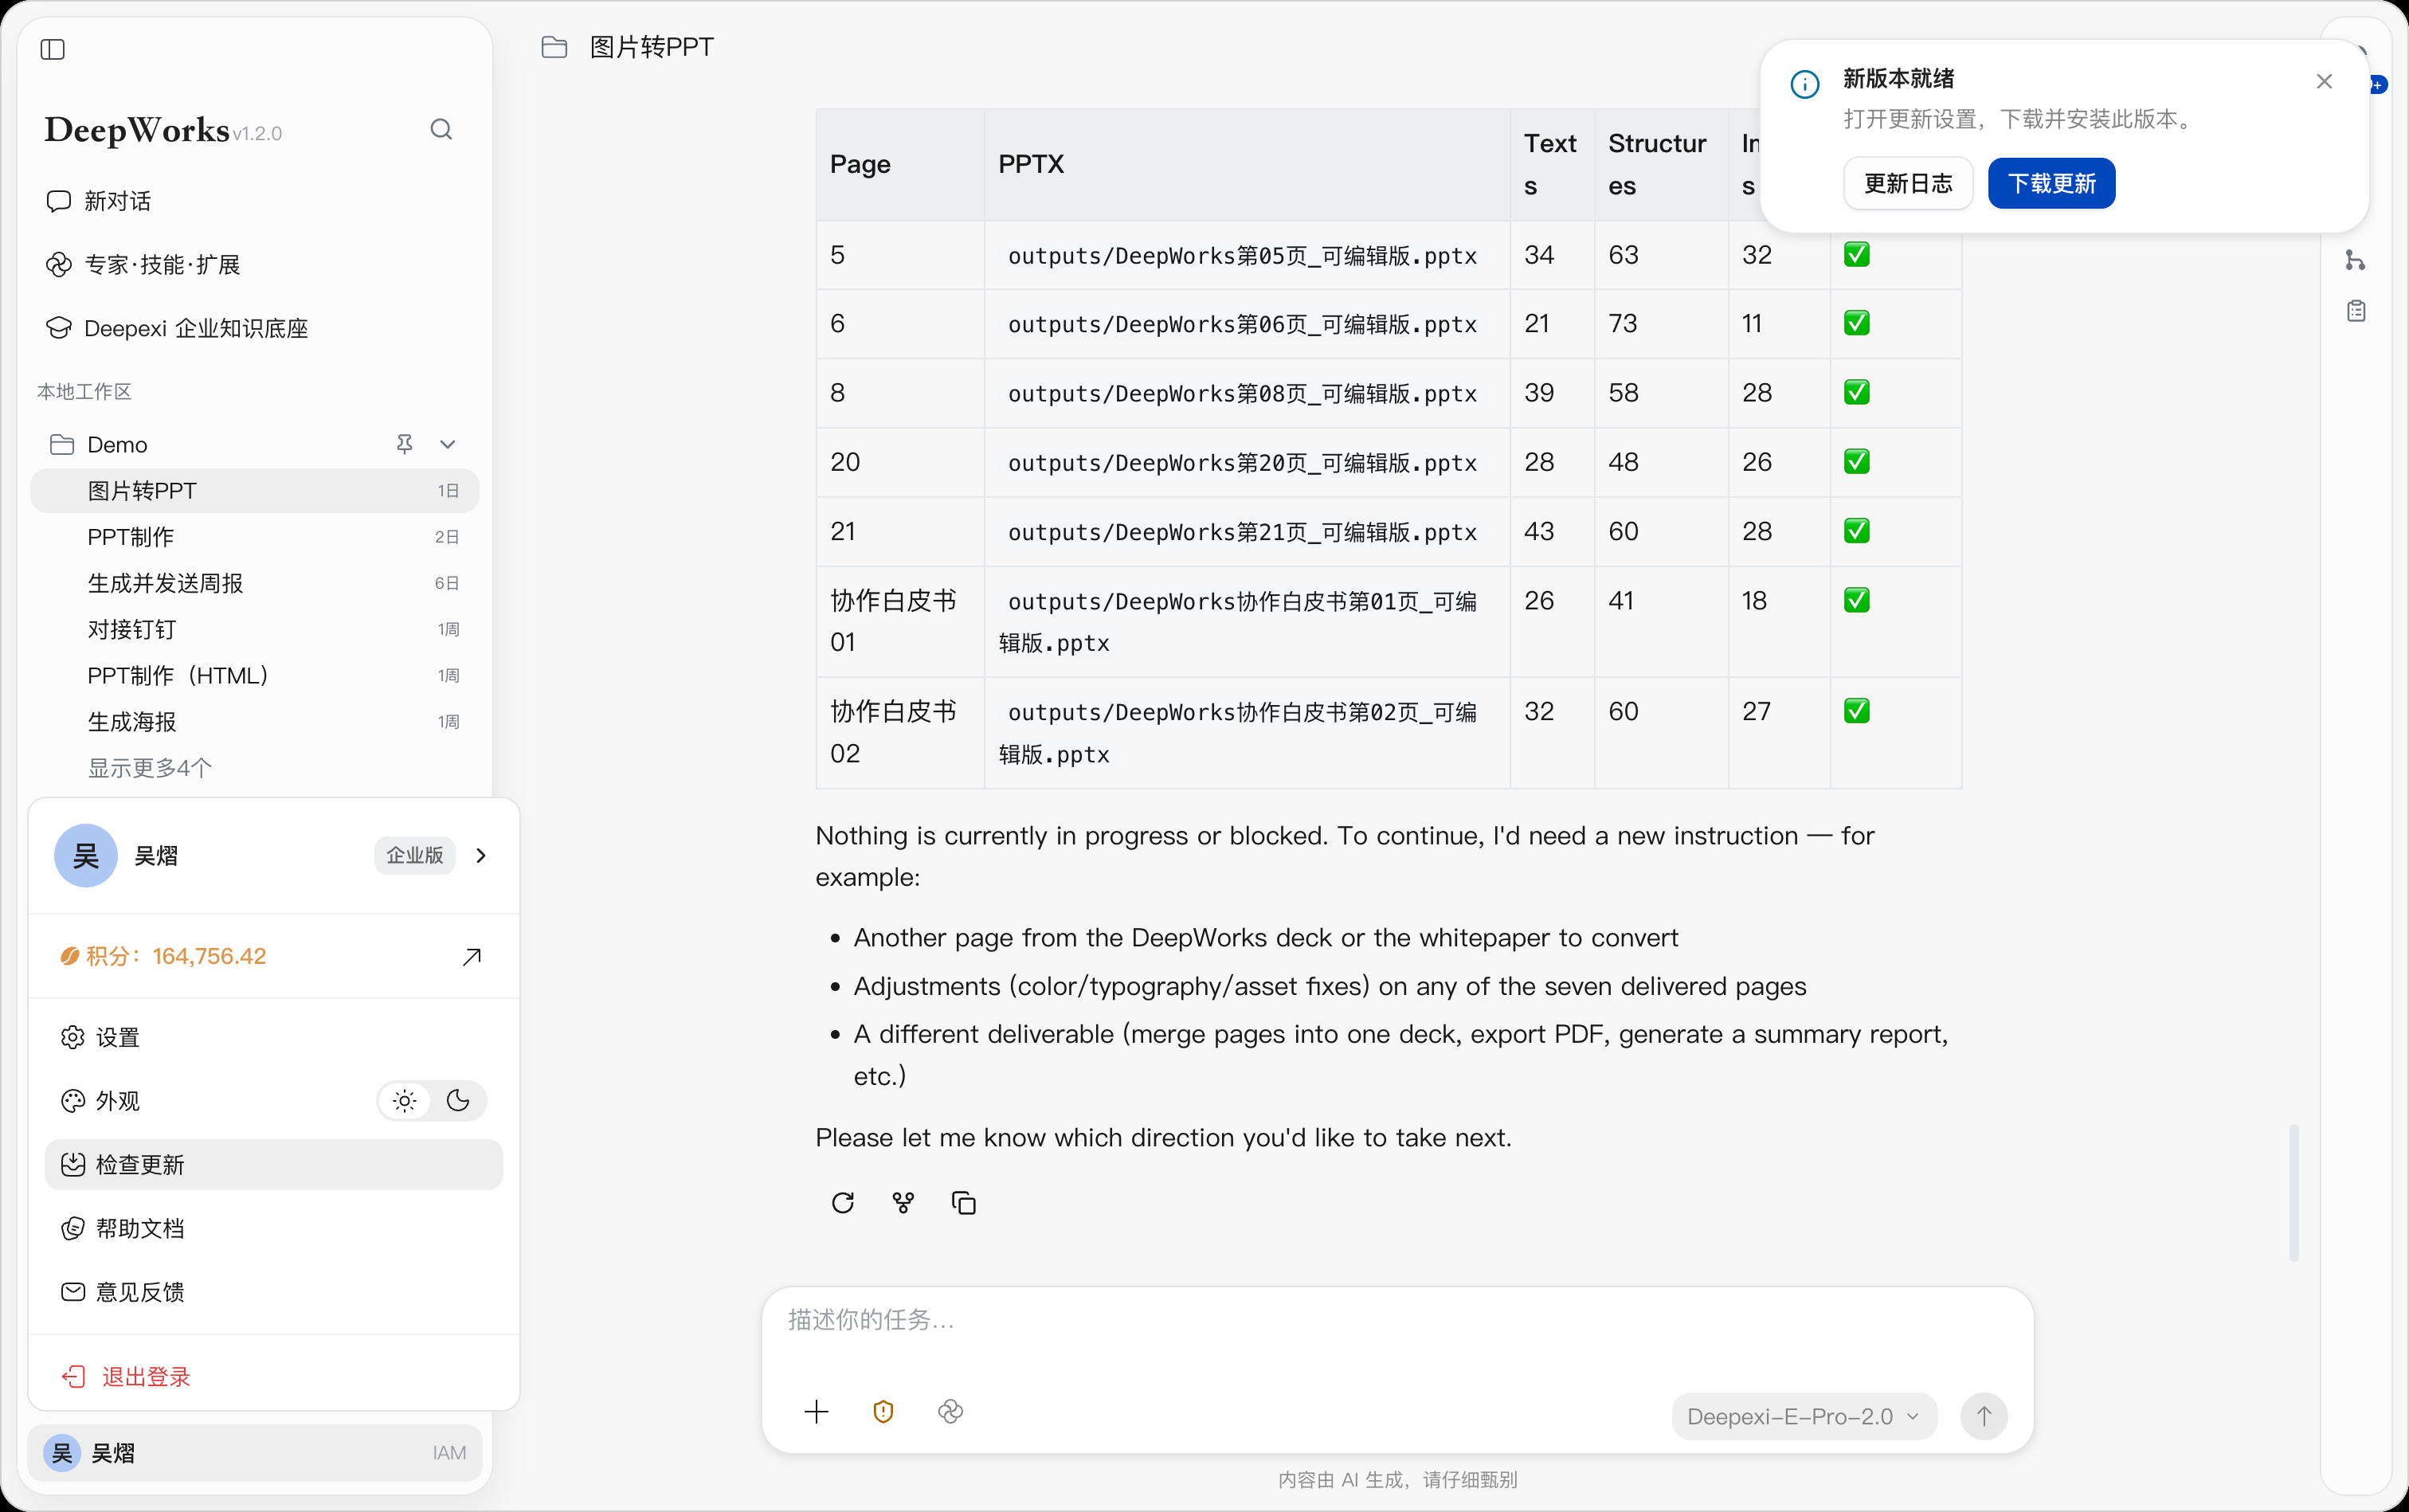
Downloading the Update
After you click Download Update, theSettings > Updates page opens. During the download, the page shows the amount downloaded, the total package size, a progress bar, and the progress percentage. Keep the network connection working and wait for the download to finish.
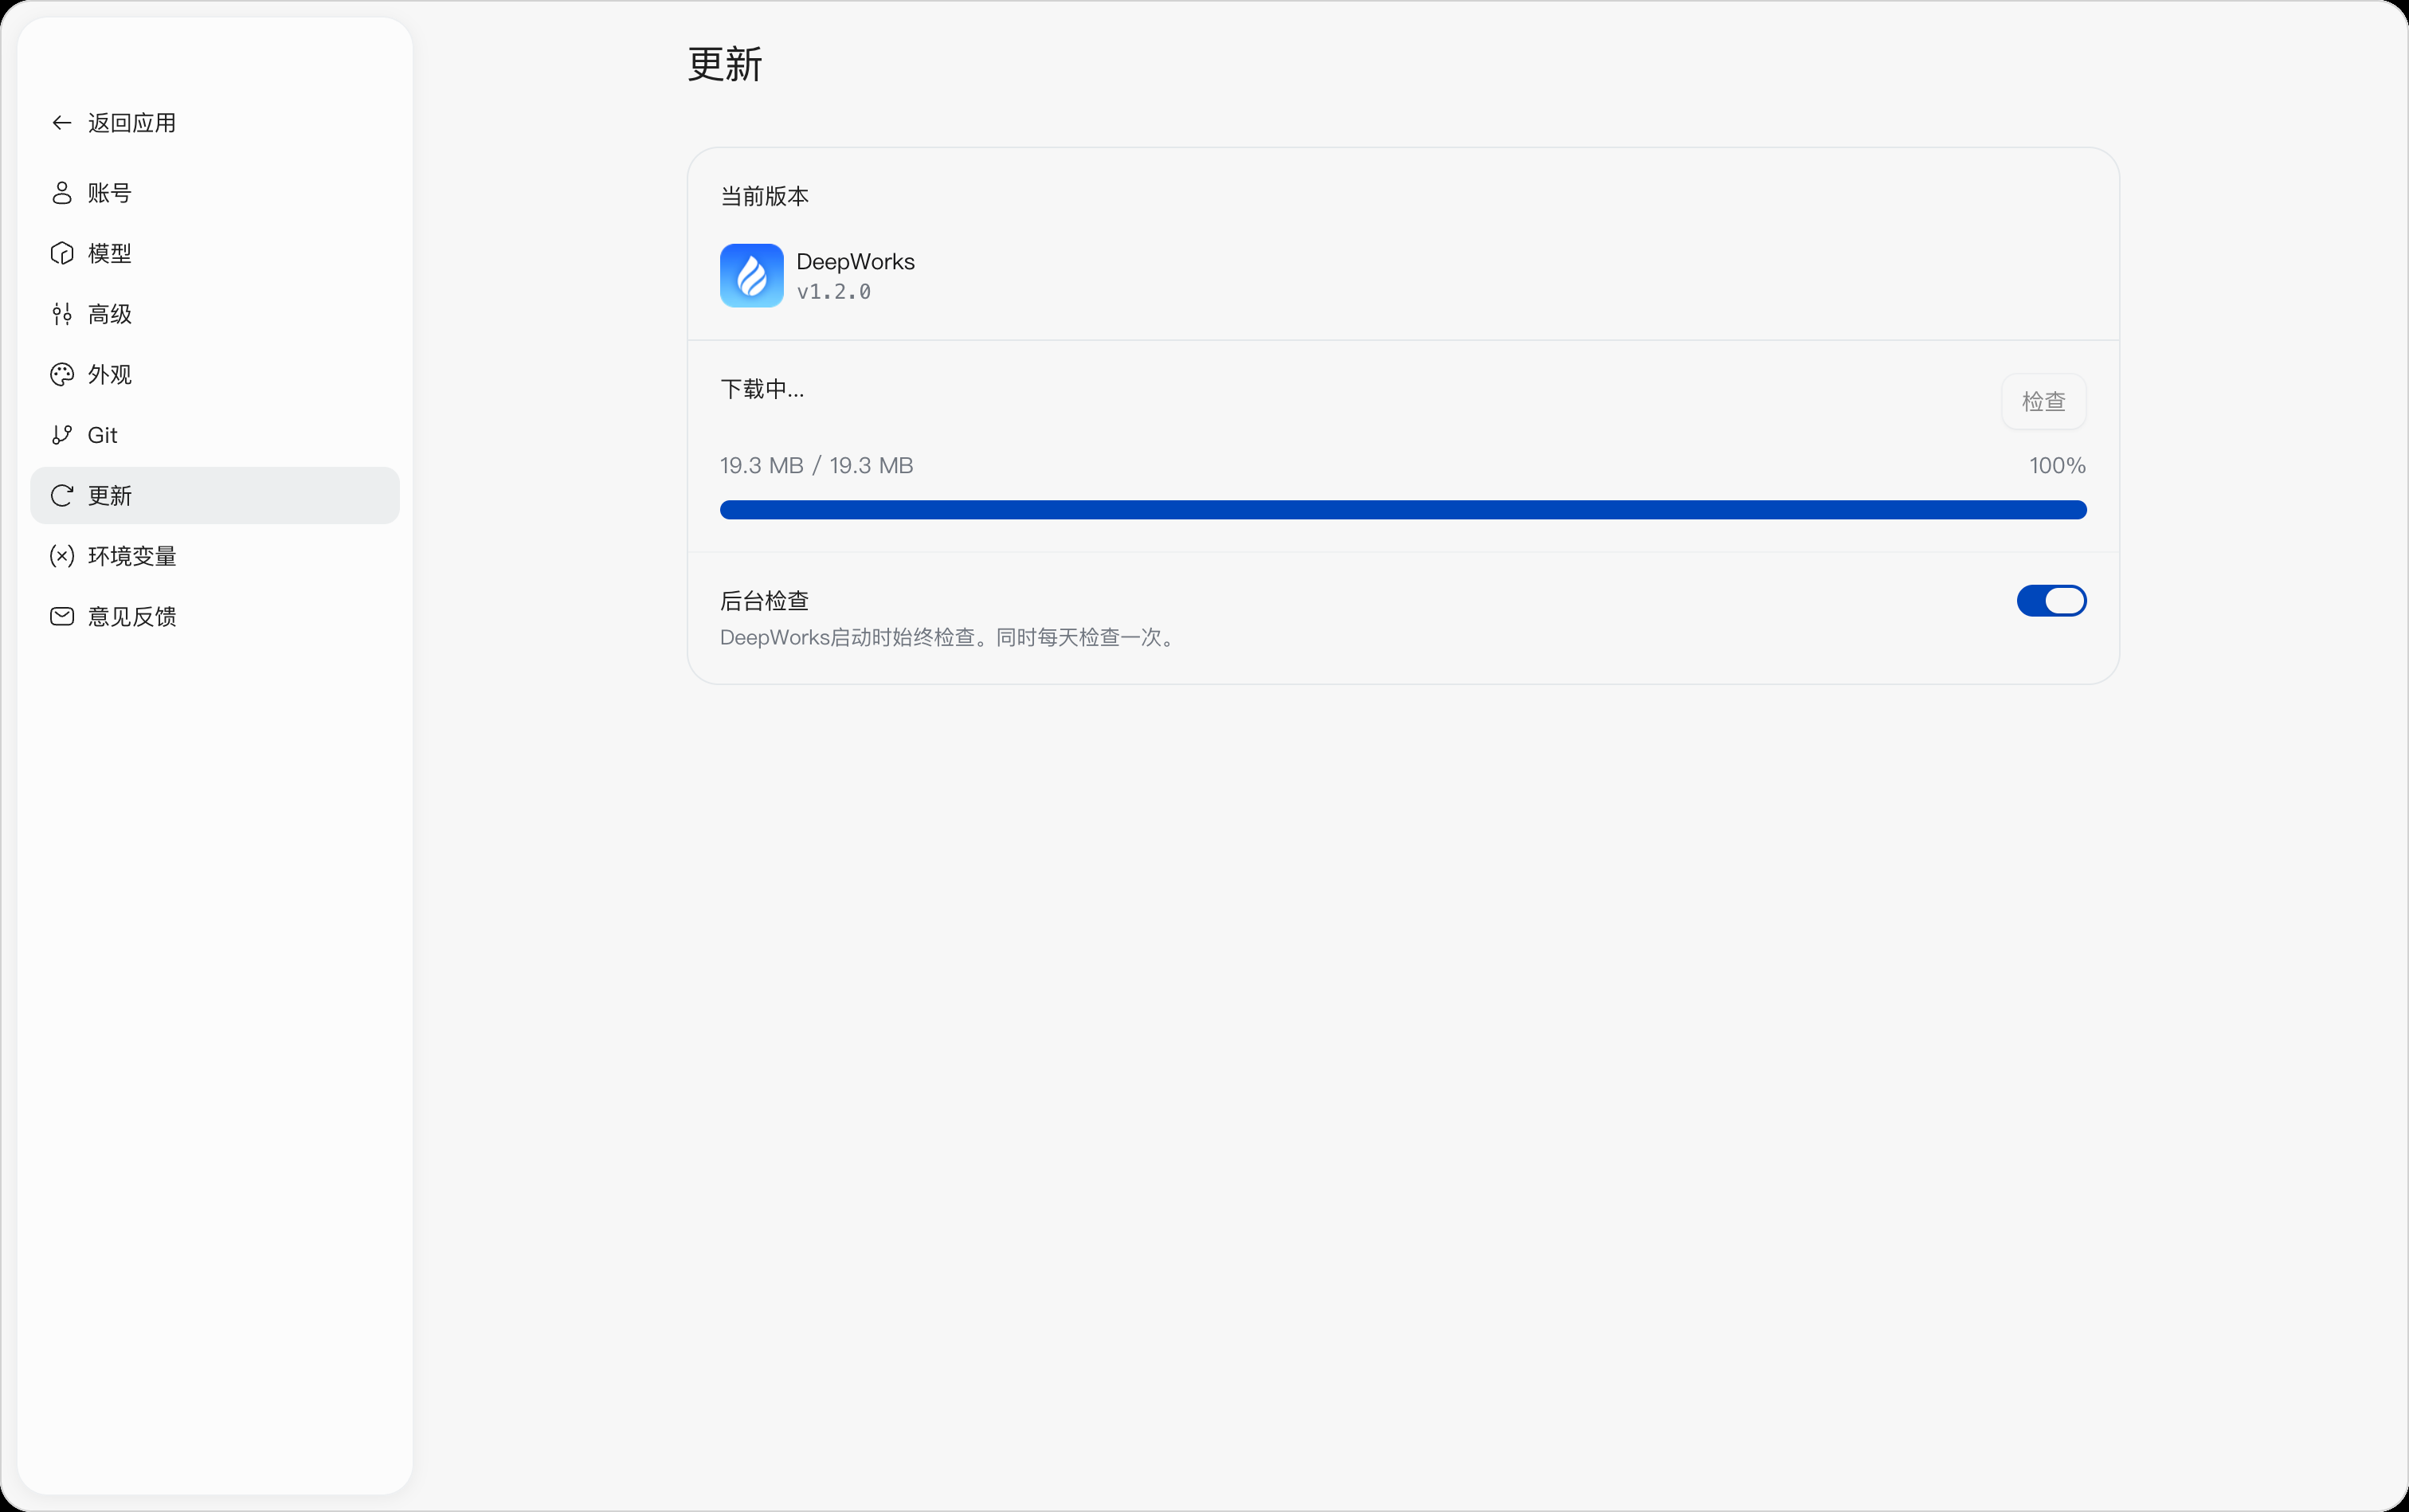
During the download, the Check button may be temporarily unavailable. Do not click Check repeatedly or close the application, as this may interrupt the download.
Installing and Restarting
After the download is complete, the update status shows Ready to install: vX.X.X, and anInstall and Restart button appears on the right.
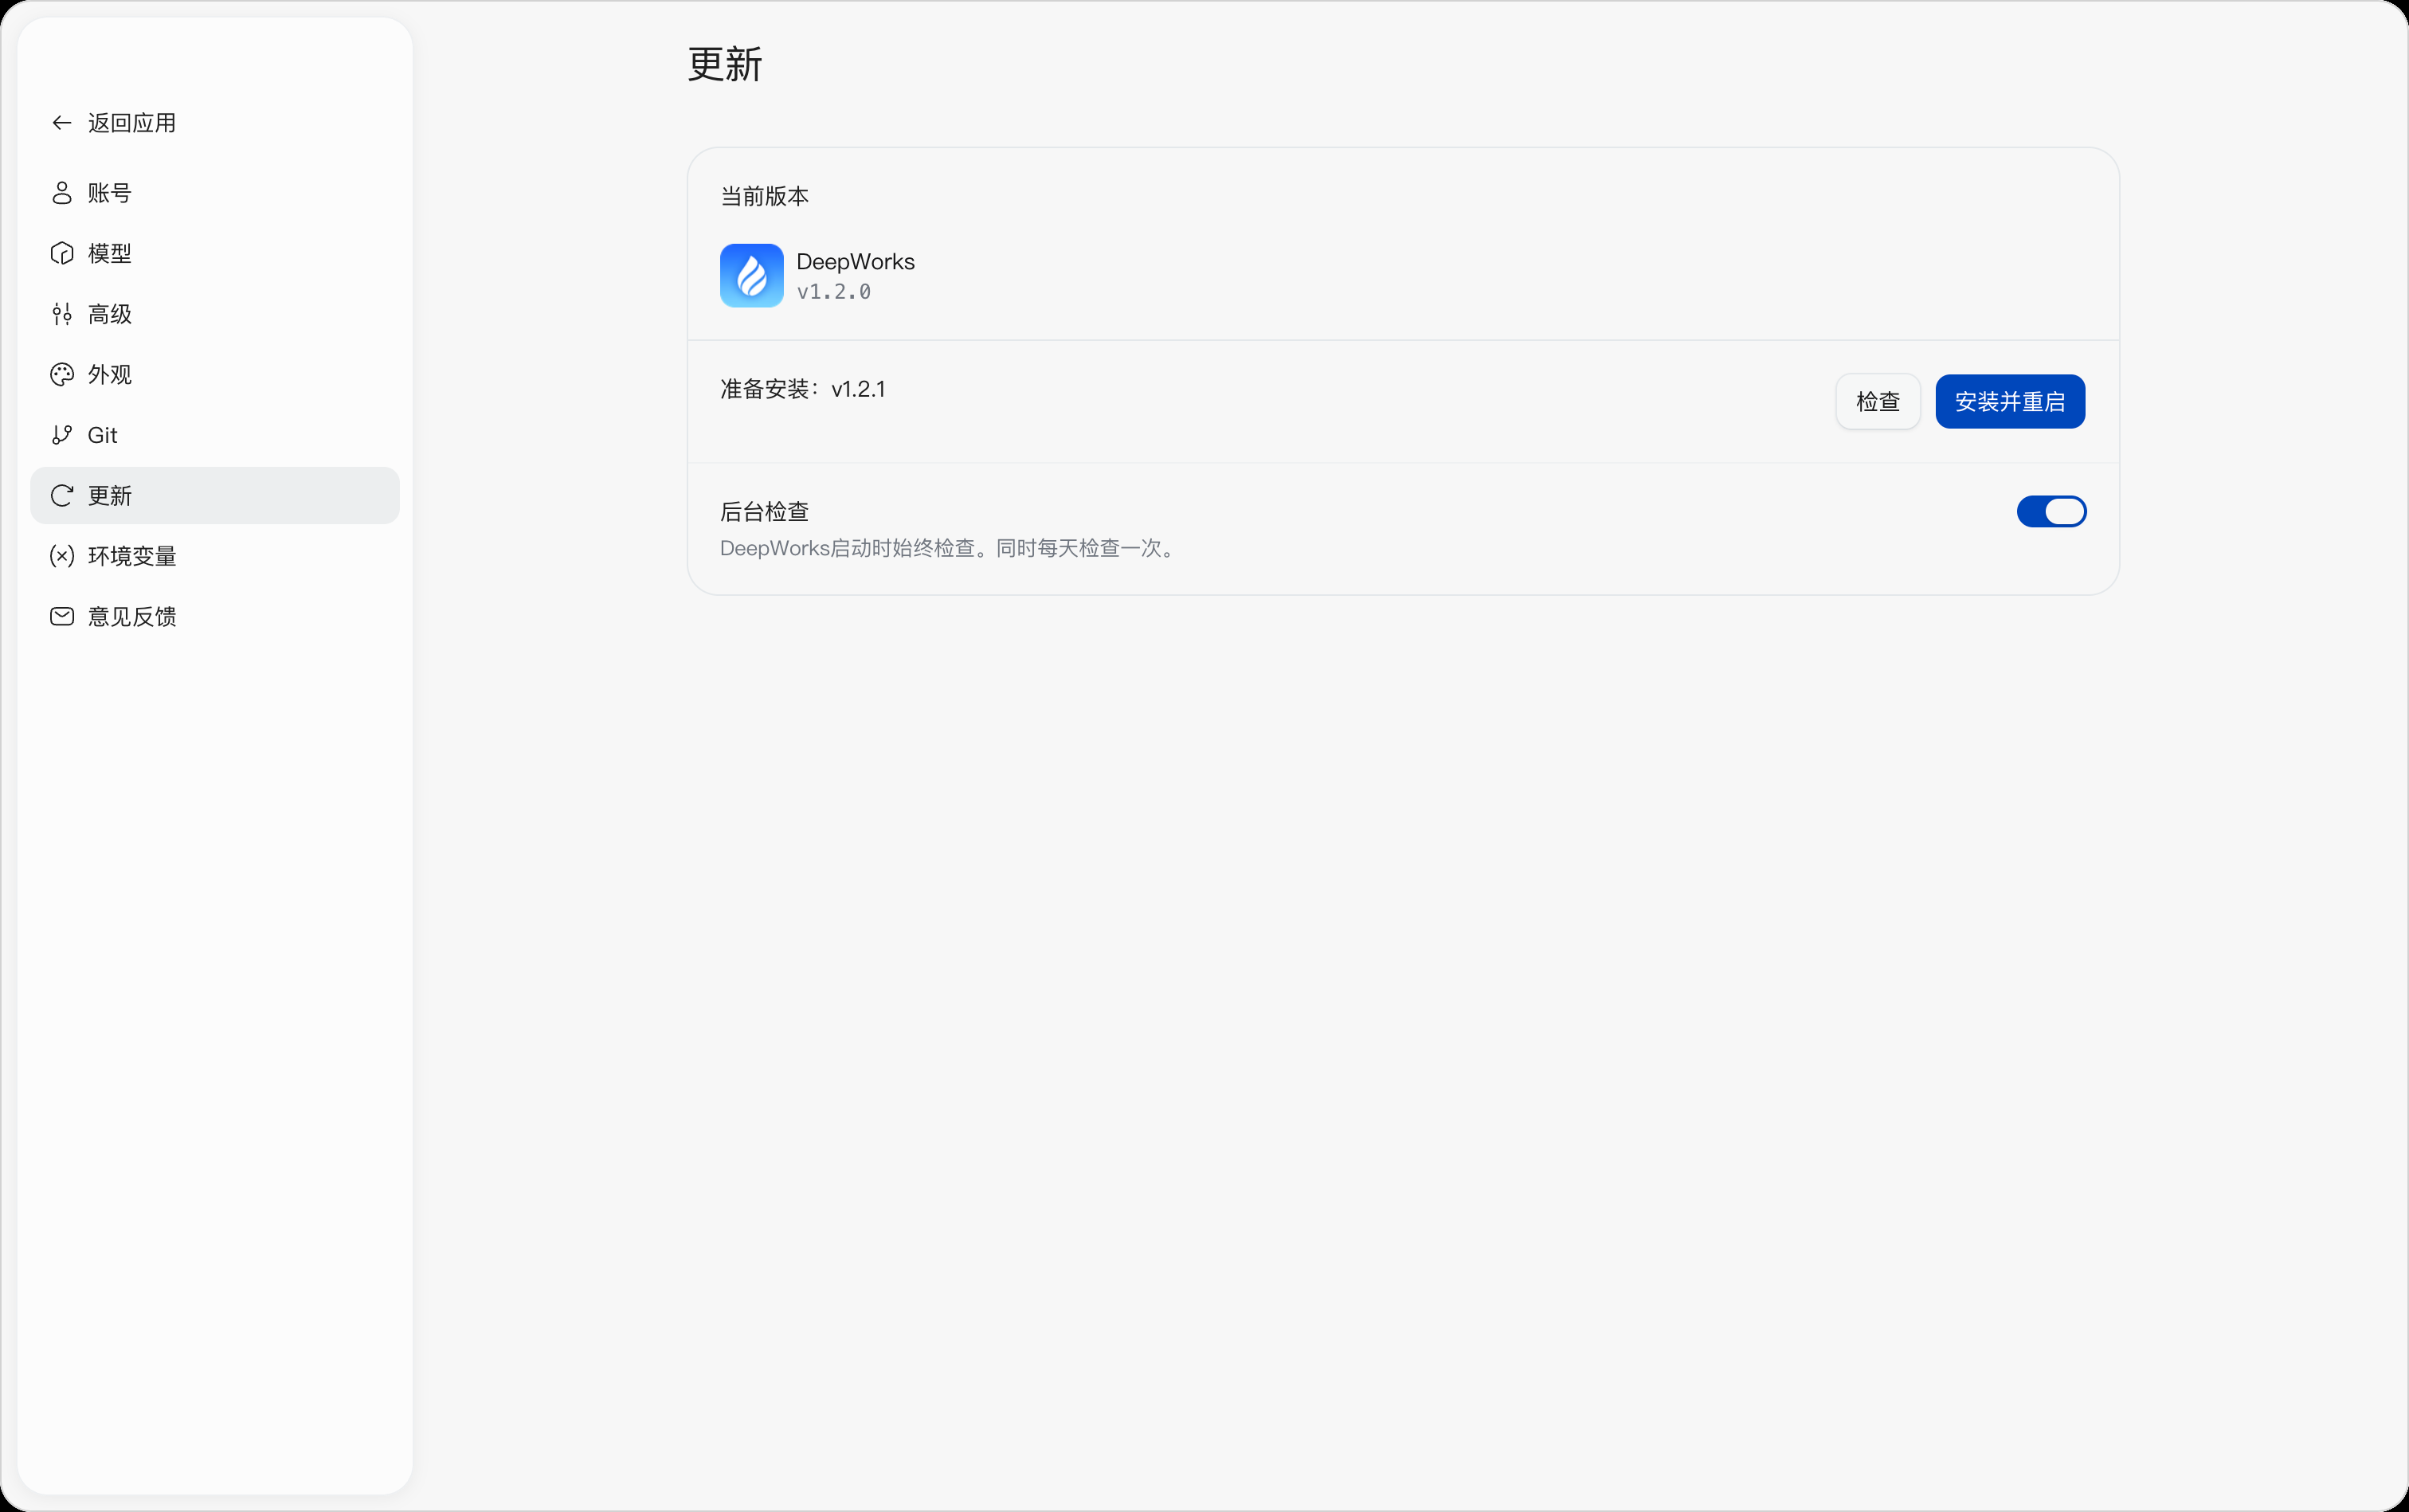
Before installing, save the files you are editing and confirm that the current tasks are complete or can be interrupted. After you click Install and Restart, DeepWorks exits the current application, installs the new version, and starts again. After the restart, go to Settings > Updates again to verify that “Current version” has been updated to the target version.
Setting Background Checks
After you enable Background Checks, DeepWorks checks for updates when the application starts and once a day while the application is running.
Background checks only retrieve the version update status automatically. When a new version is found, complete the follow-up steps as prompted in the interface. After you turn off the toggle, DeepWorks no longer checks automatically at the frequency described above, and you can still check manually with the Check button orCheck for Updates in the user menu.
Toggles on the page take effect immediately after they are changed, with no need to click Save. Clients managed centrally by an enterprise should be upgraded according to the enterprise release schedule. If your organization has unified requirements for versions or upgrade timing, follow the administrator’s notice.
Handling Update Errors
-
Check failed: Confirm that the network connection is working and clickCheck again. If it still fails, contact your enterprise administrator or technical support.
-
Download makes no progress for a long time: Check the network status and start the download again later. Do not repeat the operation continuously.
-
Version unchanged after installation: Quit and restart DeepWorks and check the version again. If it is still not updated, keep the current version number, the target version number, and a screenshot of the page, and contact technical support.
Feedback
DeepWorks provides a feedback feature for submitting feature issues, product suggestions, or other problems encountered during use. You can submit feedback quickly from the bottom-left user menu, or submit feedback and check the handling status of past feedback on the Settings > Feedback page.
Opening Feedback
Click the user avatar in the bottom-left corner to open the user menu, then clickFeedback to open the feedback window.
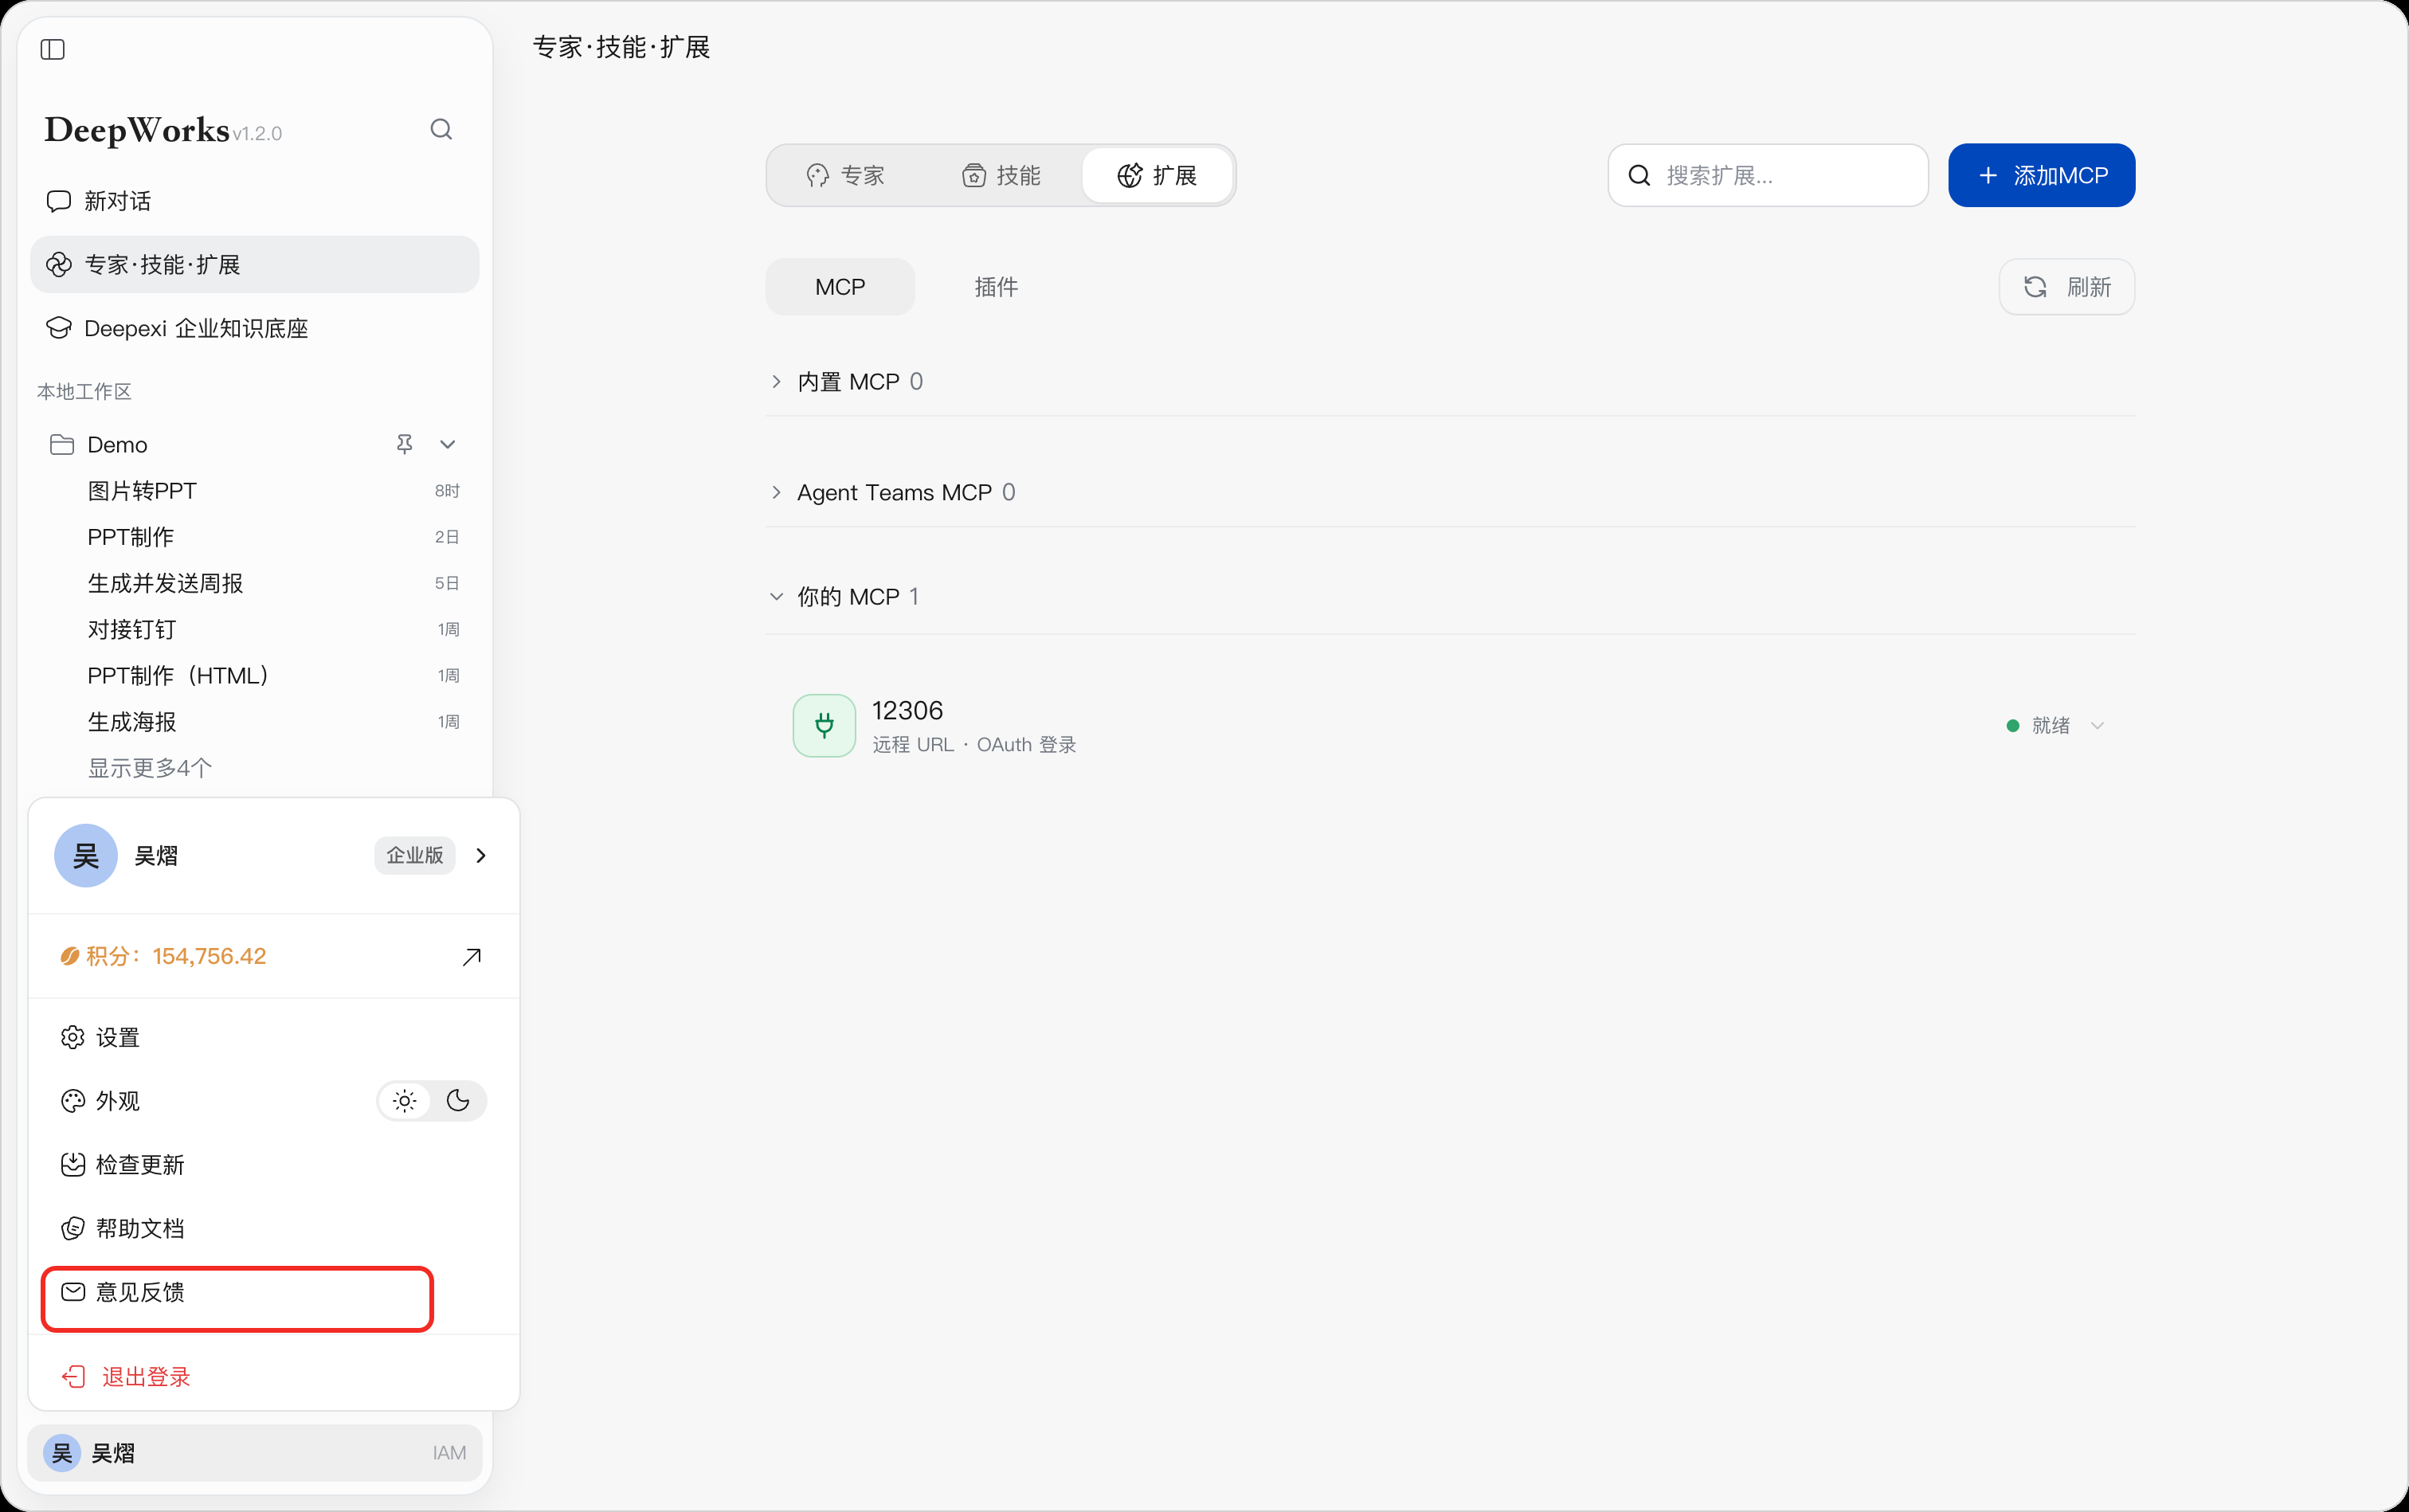
You can also go to Settings > Feedback and clickSubmit Feedback in the upper-right corner of the feedback records page.
Selecting a Feedback Category
After the feedback window opens, first select a feedback category based on your situation.
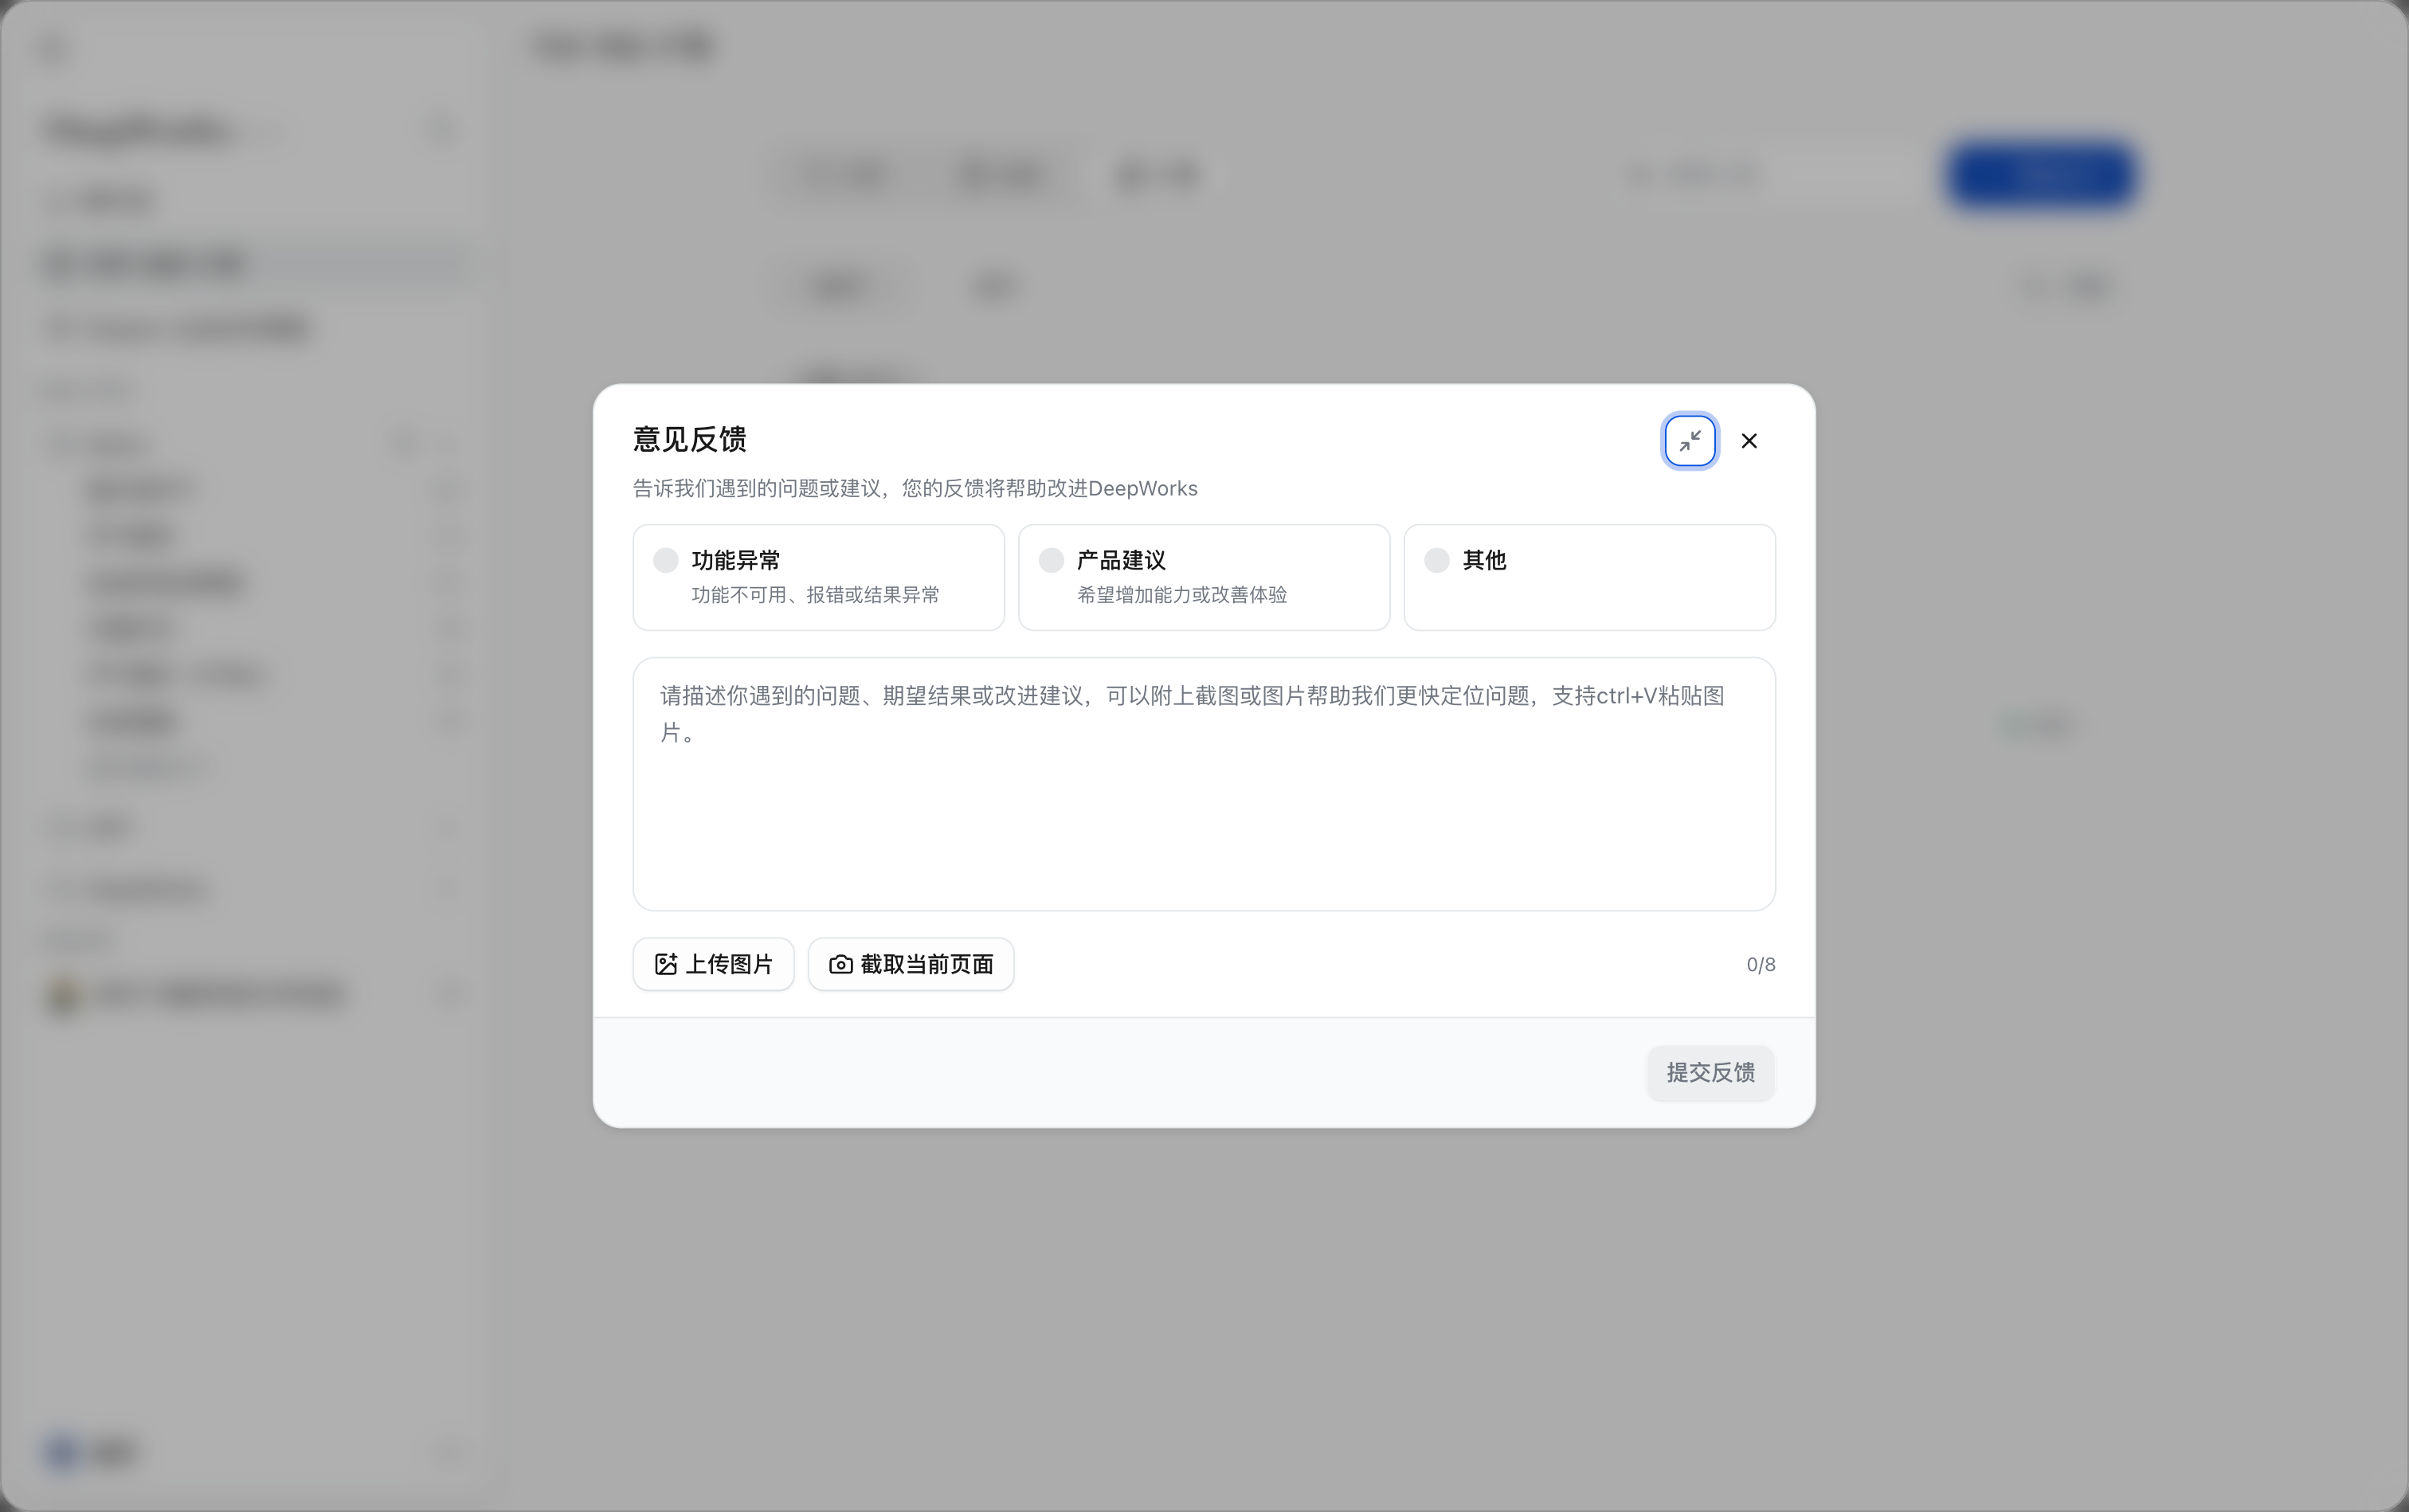
| Category | Applies to |
|---|---|
| Feature issue | Features unavailable, runtime errors, or actual results that differ from expectations |
| Product suggestion | Requests for new features, or suggestions for improving existing features and the user experience |
| Other | Other feedback that does not fall into the two categories above |
Selecting the category that best matches the problem helps the relevant staff understand and handle the feedback more quickly.
Writing the Feedback
Describe the problem, the expected result, or your suggestion in the feedback input box. To make it easier to locate and handle the issue, include the following information where possible:
-
When the problem occurred, the page you were on, and the feature you were using;
-
The steps you performed;
-
The expected result and the actual result;
-
Whether the problem can be reproduced consistently;
After you finish writing and select a feedback category, click Submit Feedback to submit.
Adding Images
If you need to illustrate the problem with images, add attachments in the following ways:
-
Click Upload Image and select an existing screenshot or image from your computer;
-
Click Capture Current Page to capture the current DeepWorks page directly;
-
Paste an image from the clipboard in the feedback input box with
Ctrl+V(Command+Von macOS).
Before submitting, check the image content and avoid including account credentials, API keys, tokens, customer data, or other sensitive information.
Viewing Feedback Records
Go to Settings > Feedback to view the feedback records you have submitted.
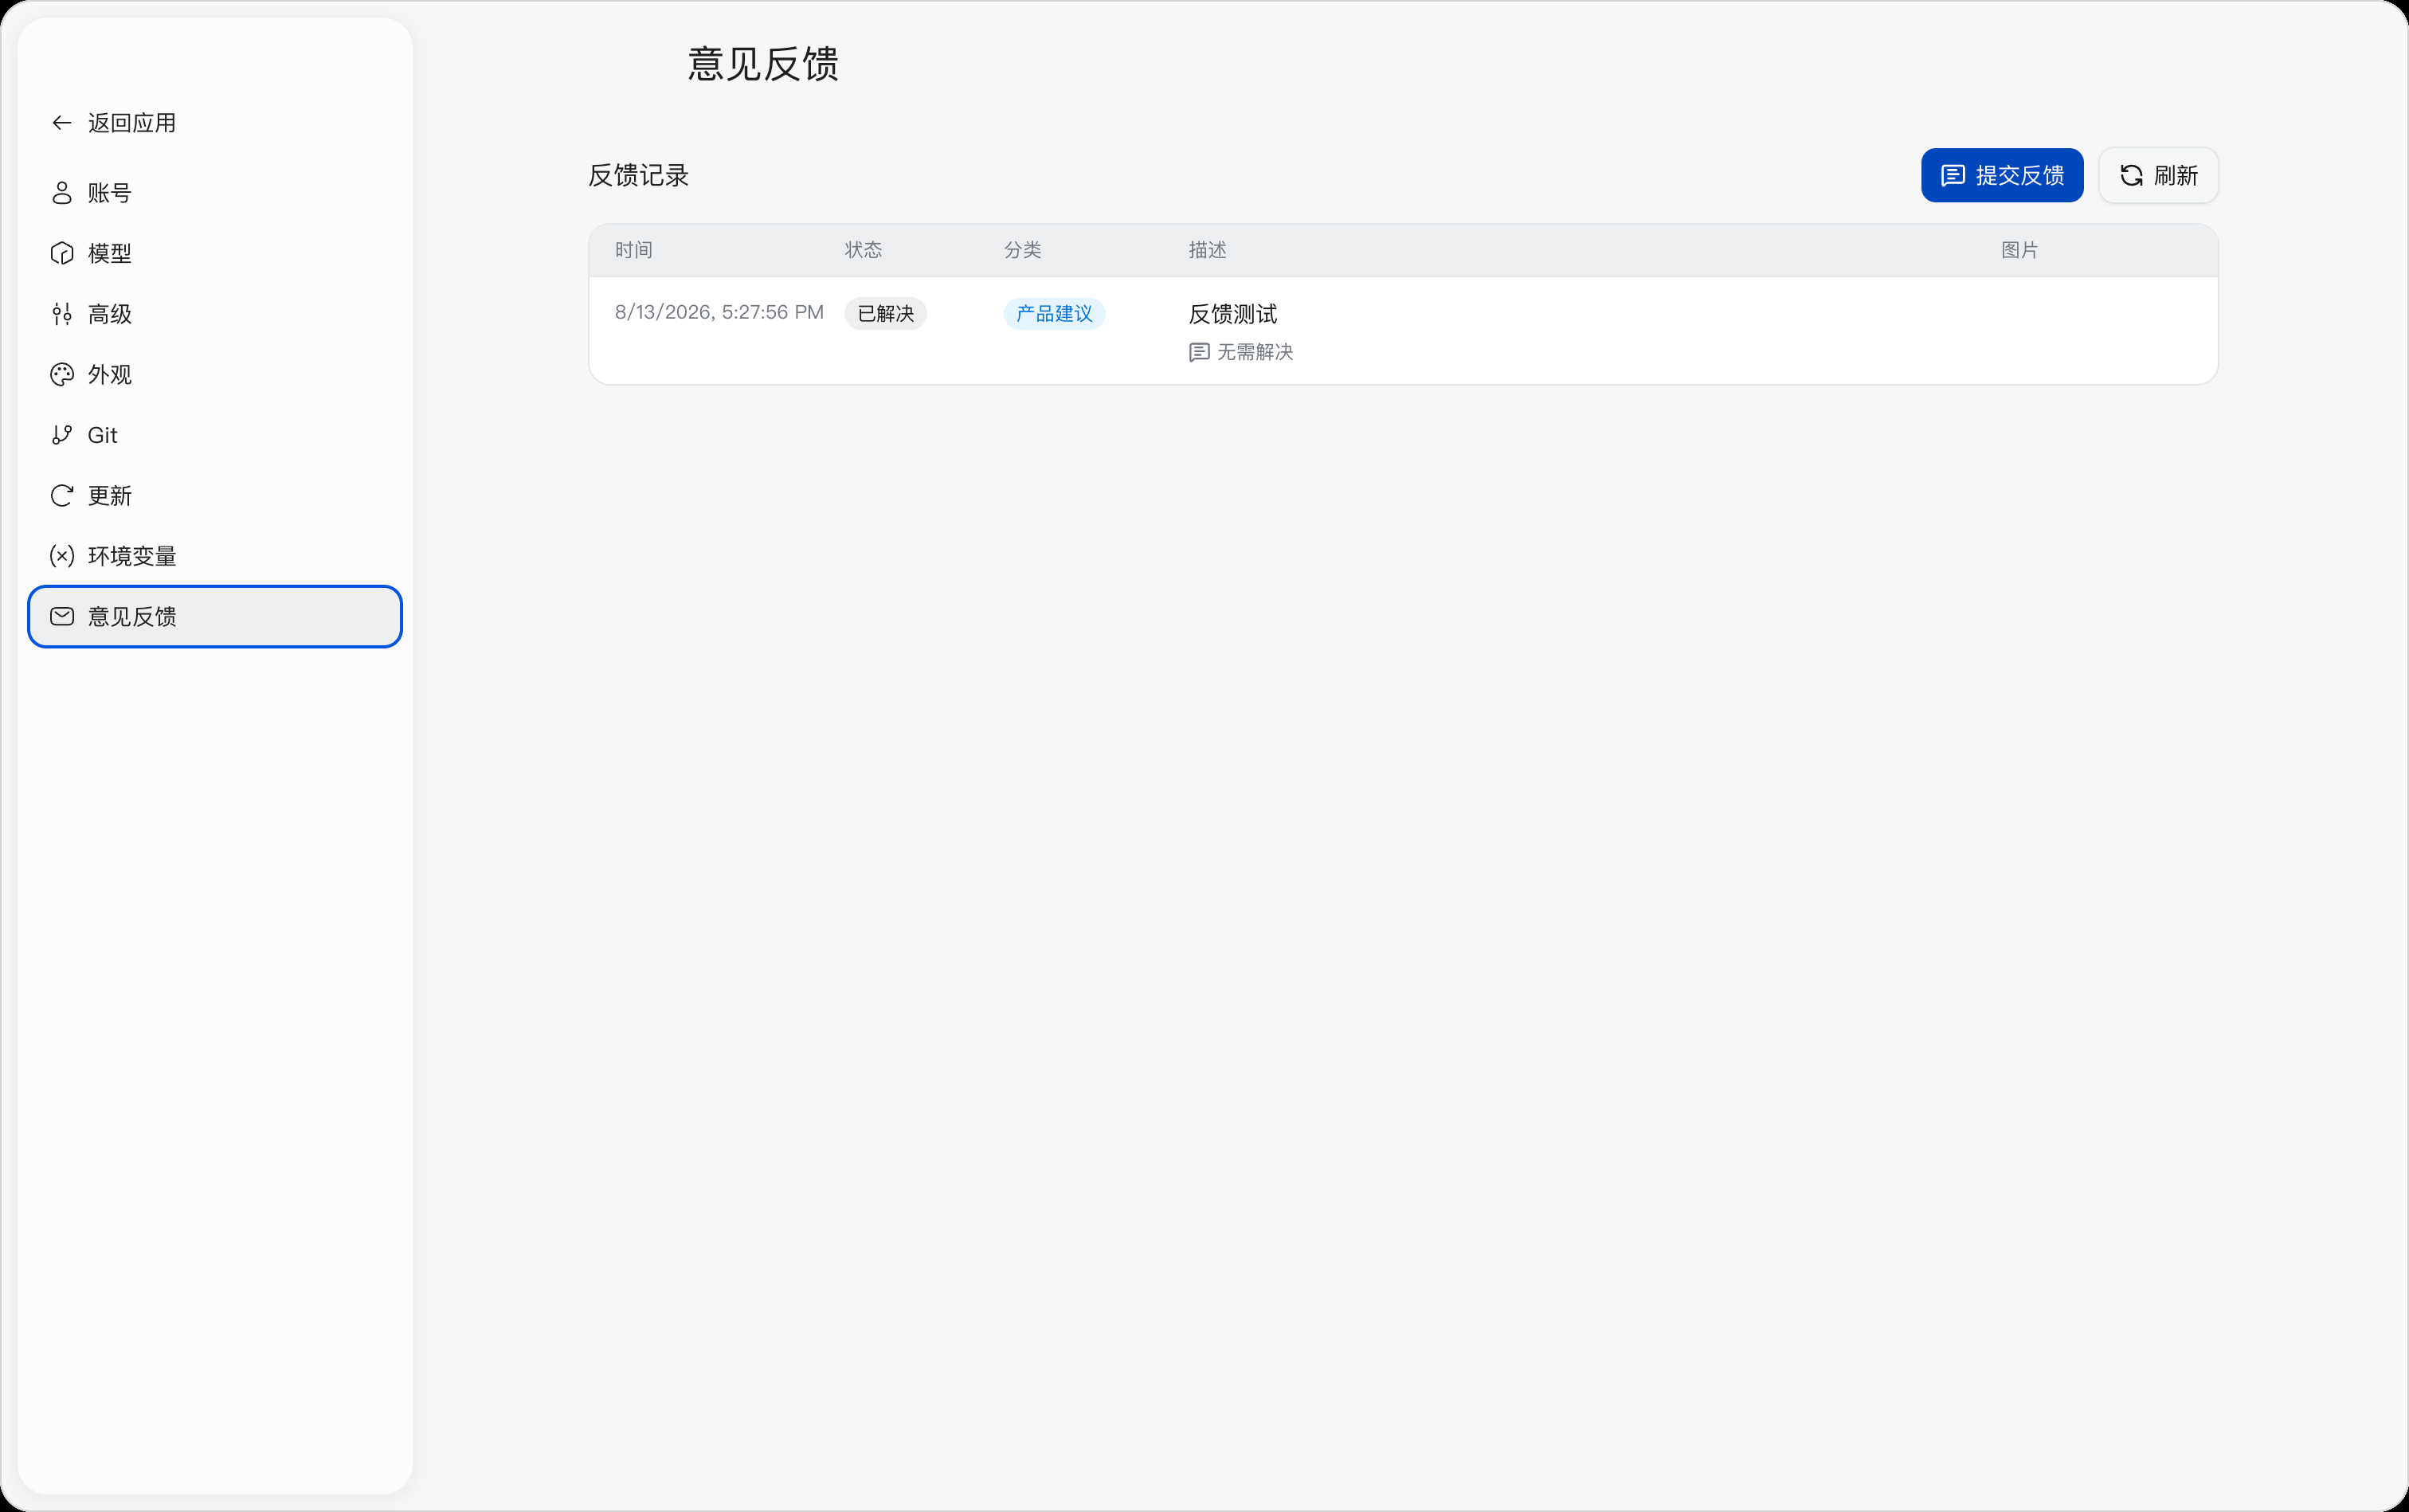
The feedback list mainly shows the following information:
| Item | Description |
|---|---|
| Time | When the feedback was submitted |
| Status | The current handling status, for example “Resolved” |
| Category | The feedback category selected at submission |
| Description | A summary of the feedback content and the latest reply |
| Images | The images attached when the feedback was submitted |
Click Refresh in the upper-right corner to retrieve the latest feedback records and handling status. Click a feedback item in the list to open the corresponding feedback conversation and view the handling details.
Viewing Replies and Adding Information
In the feedback conversation, you can view the feedback category, handling status, submission time, the original feedback content, and replies from DeepWorks support staff.
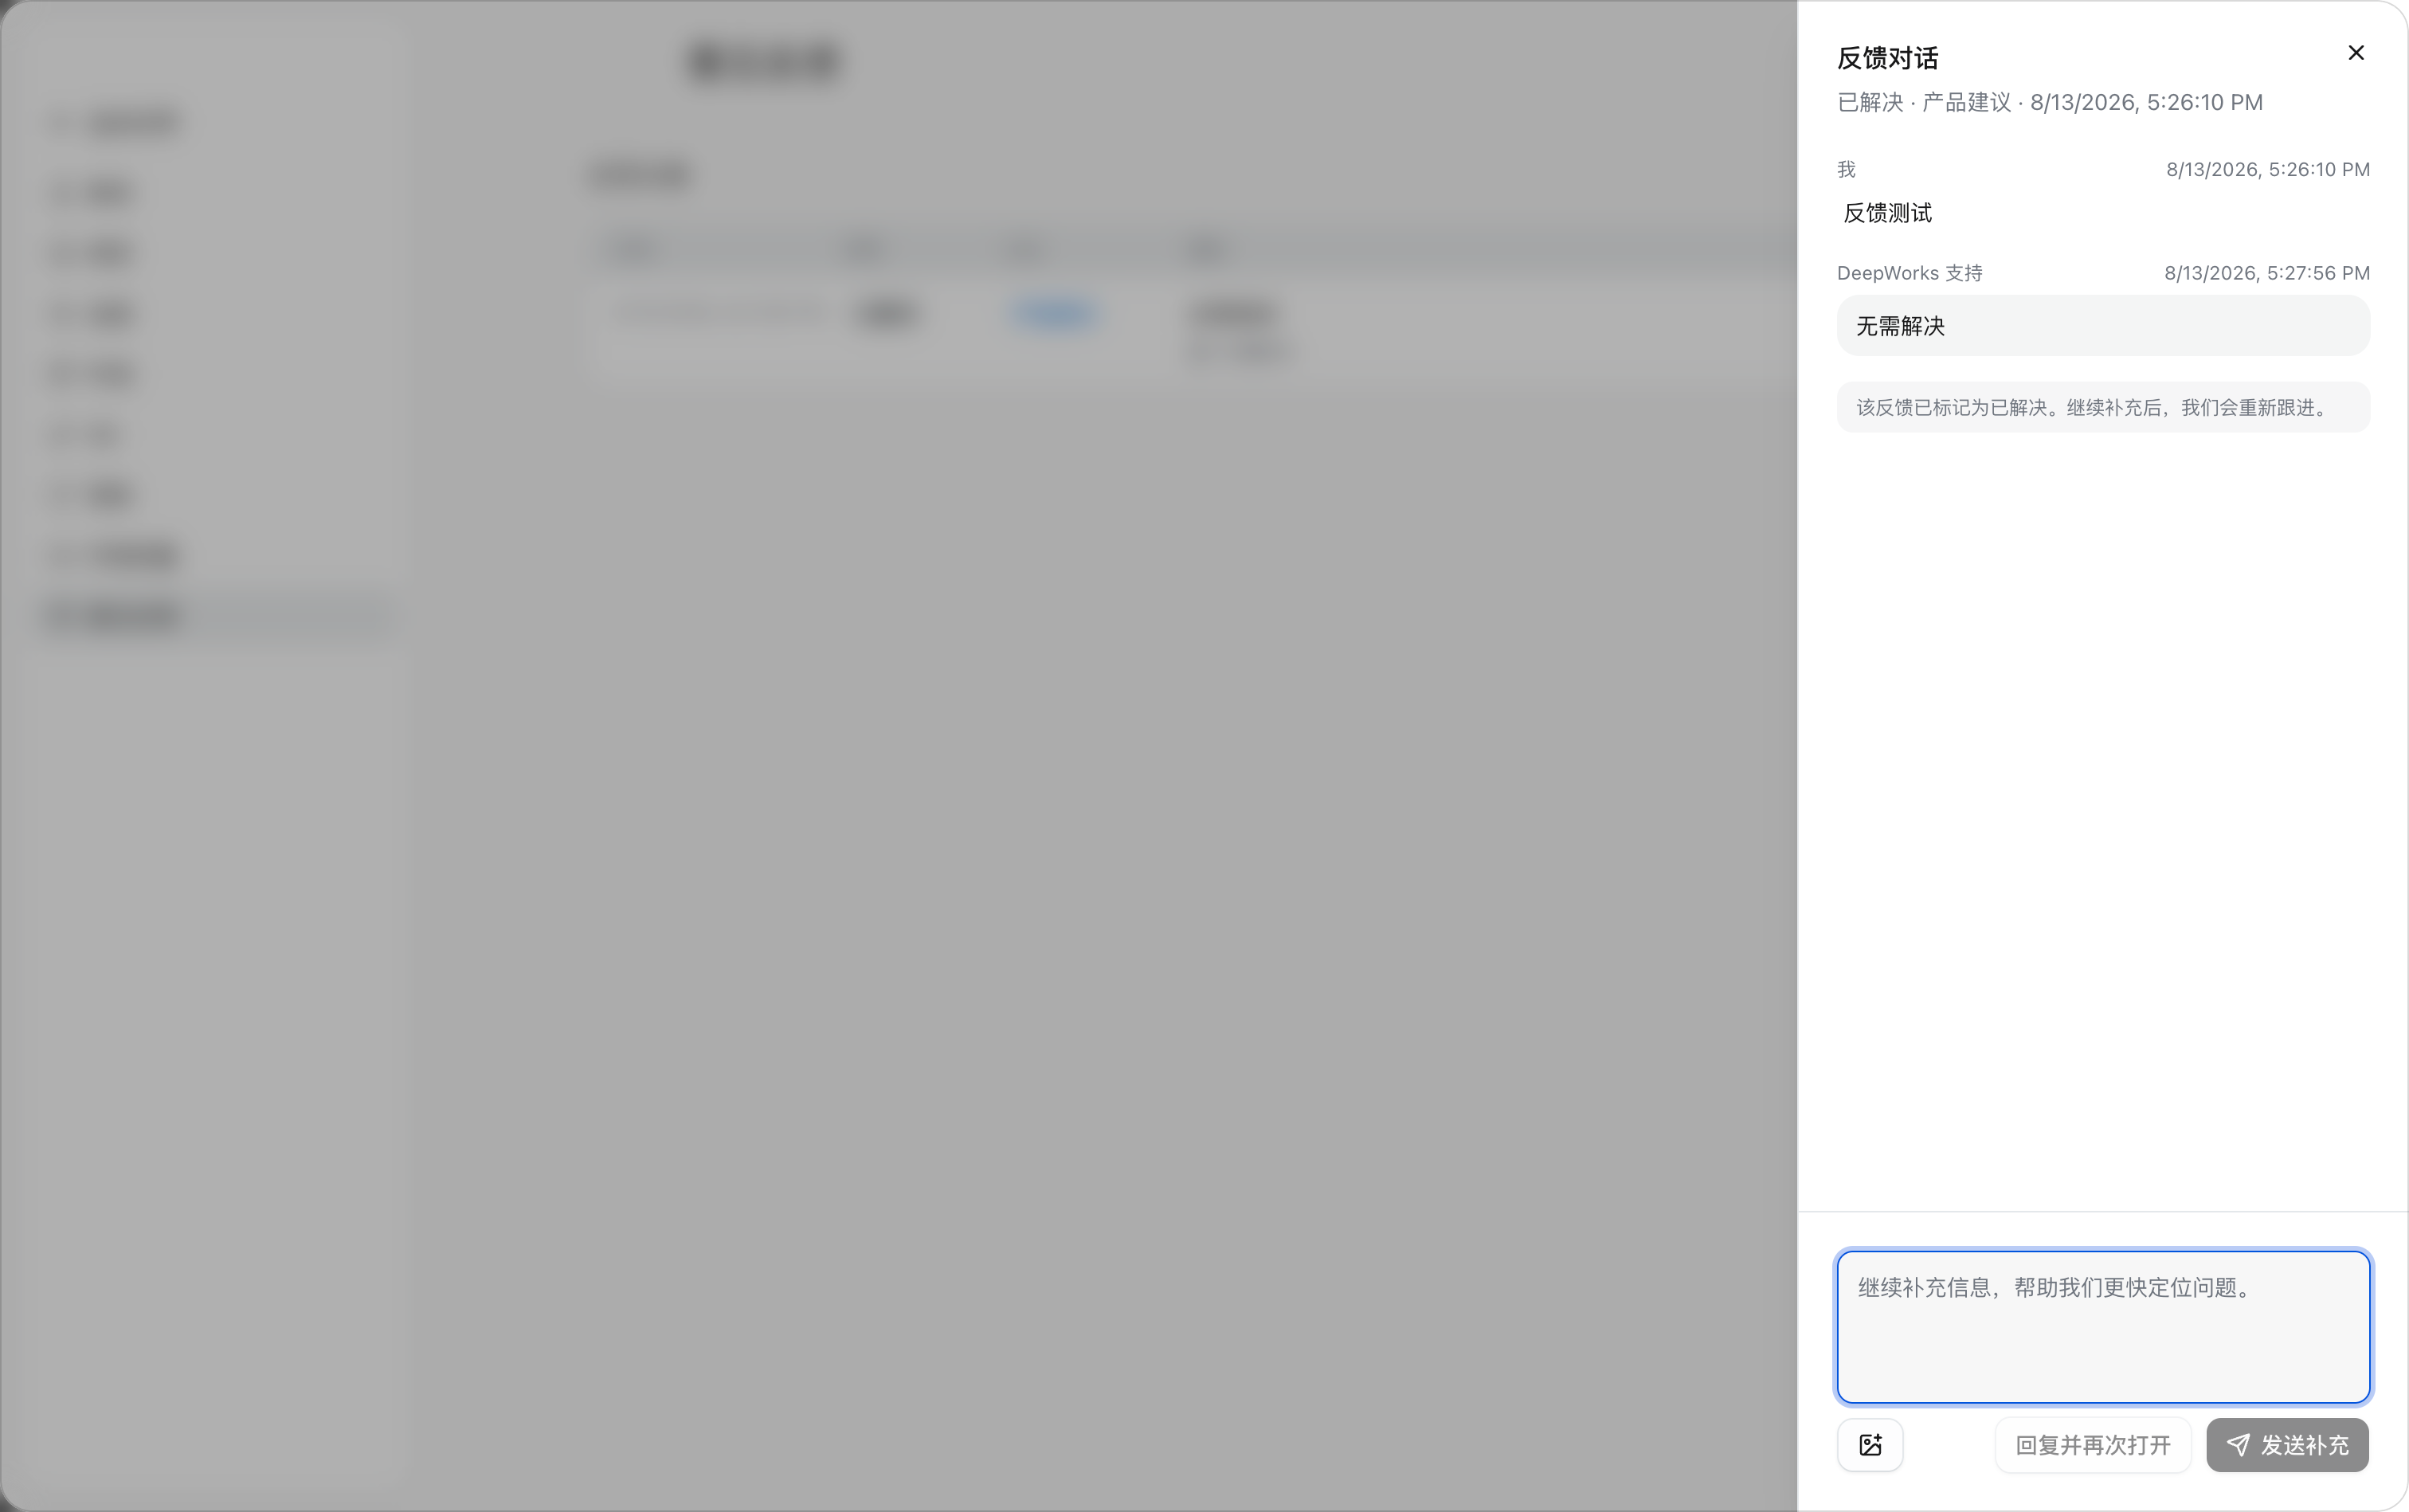
If you need to provide further reproduction steps, screenshots, or other information, enter the additional content in the input box at the bottom, or click the image button to add images, and then click Send Follow-up.
For feedback that has been marked as resolved but still needs further discussion, click Reply and Reopen to add information and re-enter the handling process.
When submitting feedback, provide only the information needed to locate the problem. Before uploading screenshots or logs, redact customer names, accounts, contact information, business data, keys, and other sensitive content.
Pet
The pet keeps you company while you work and indicates the status of tasks that need attention. Click Settings in the bottom-left user menu, then clickPet to select a pet and adjust how it is displayed.
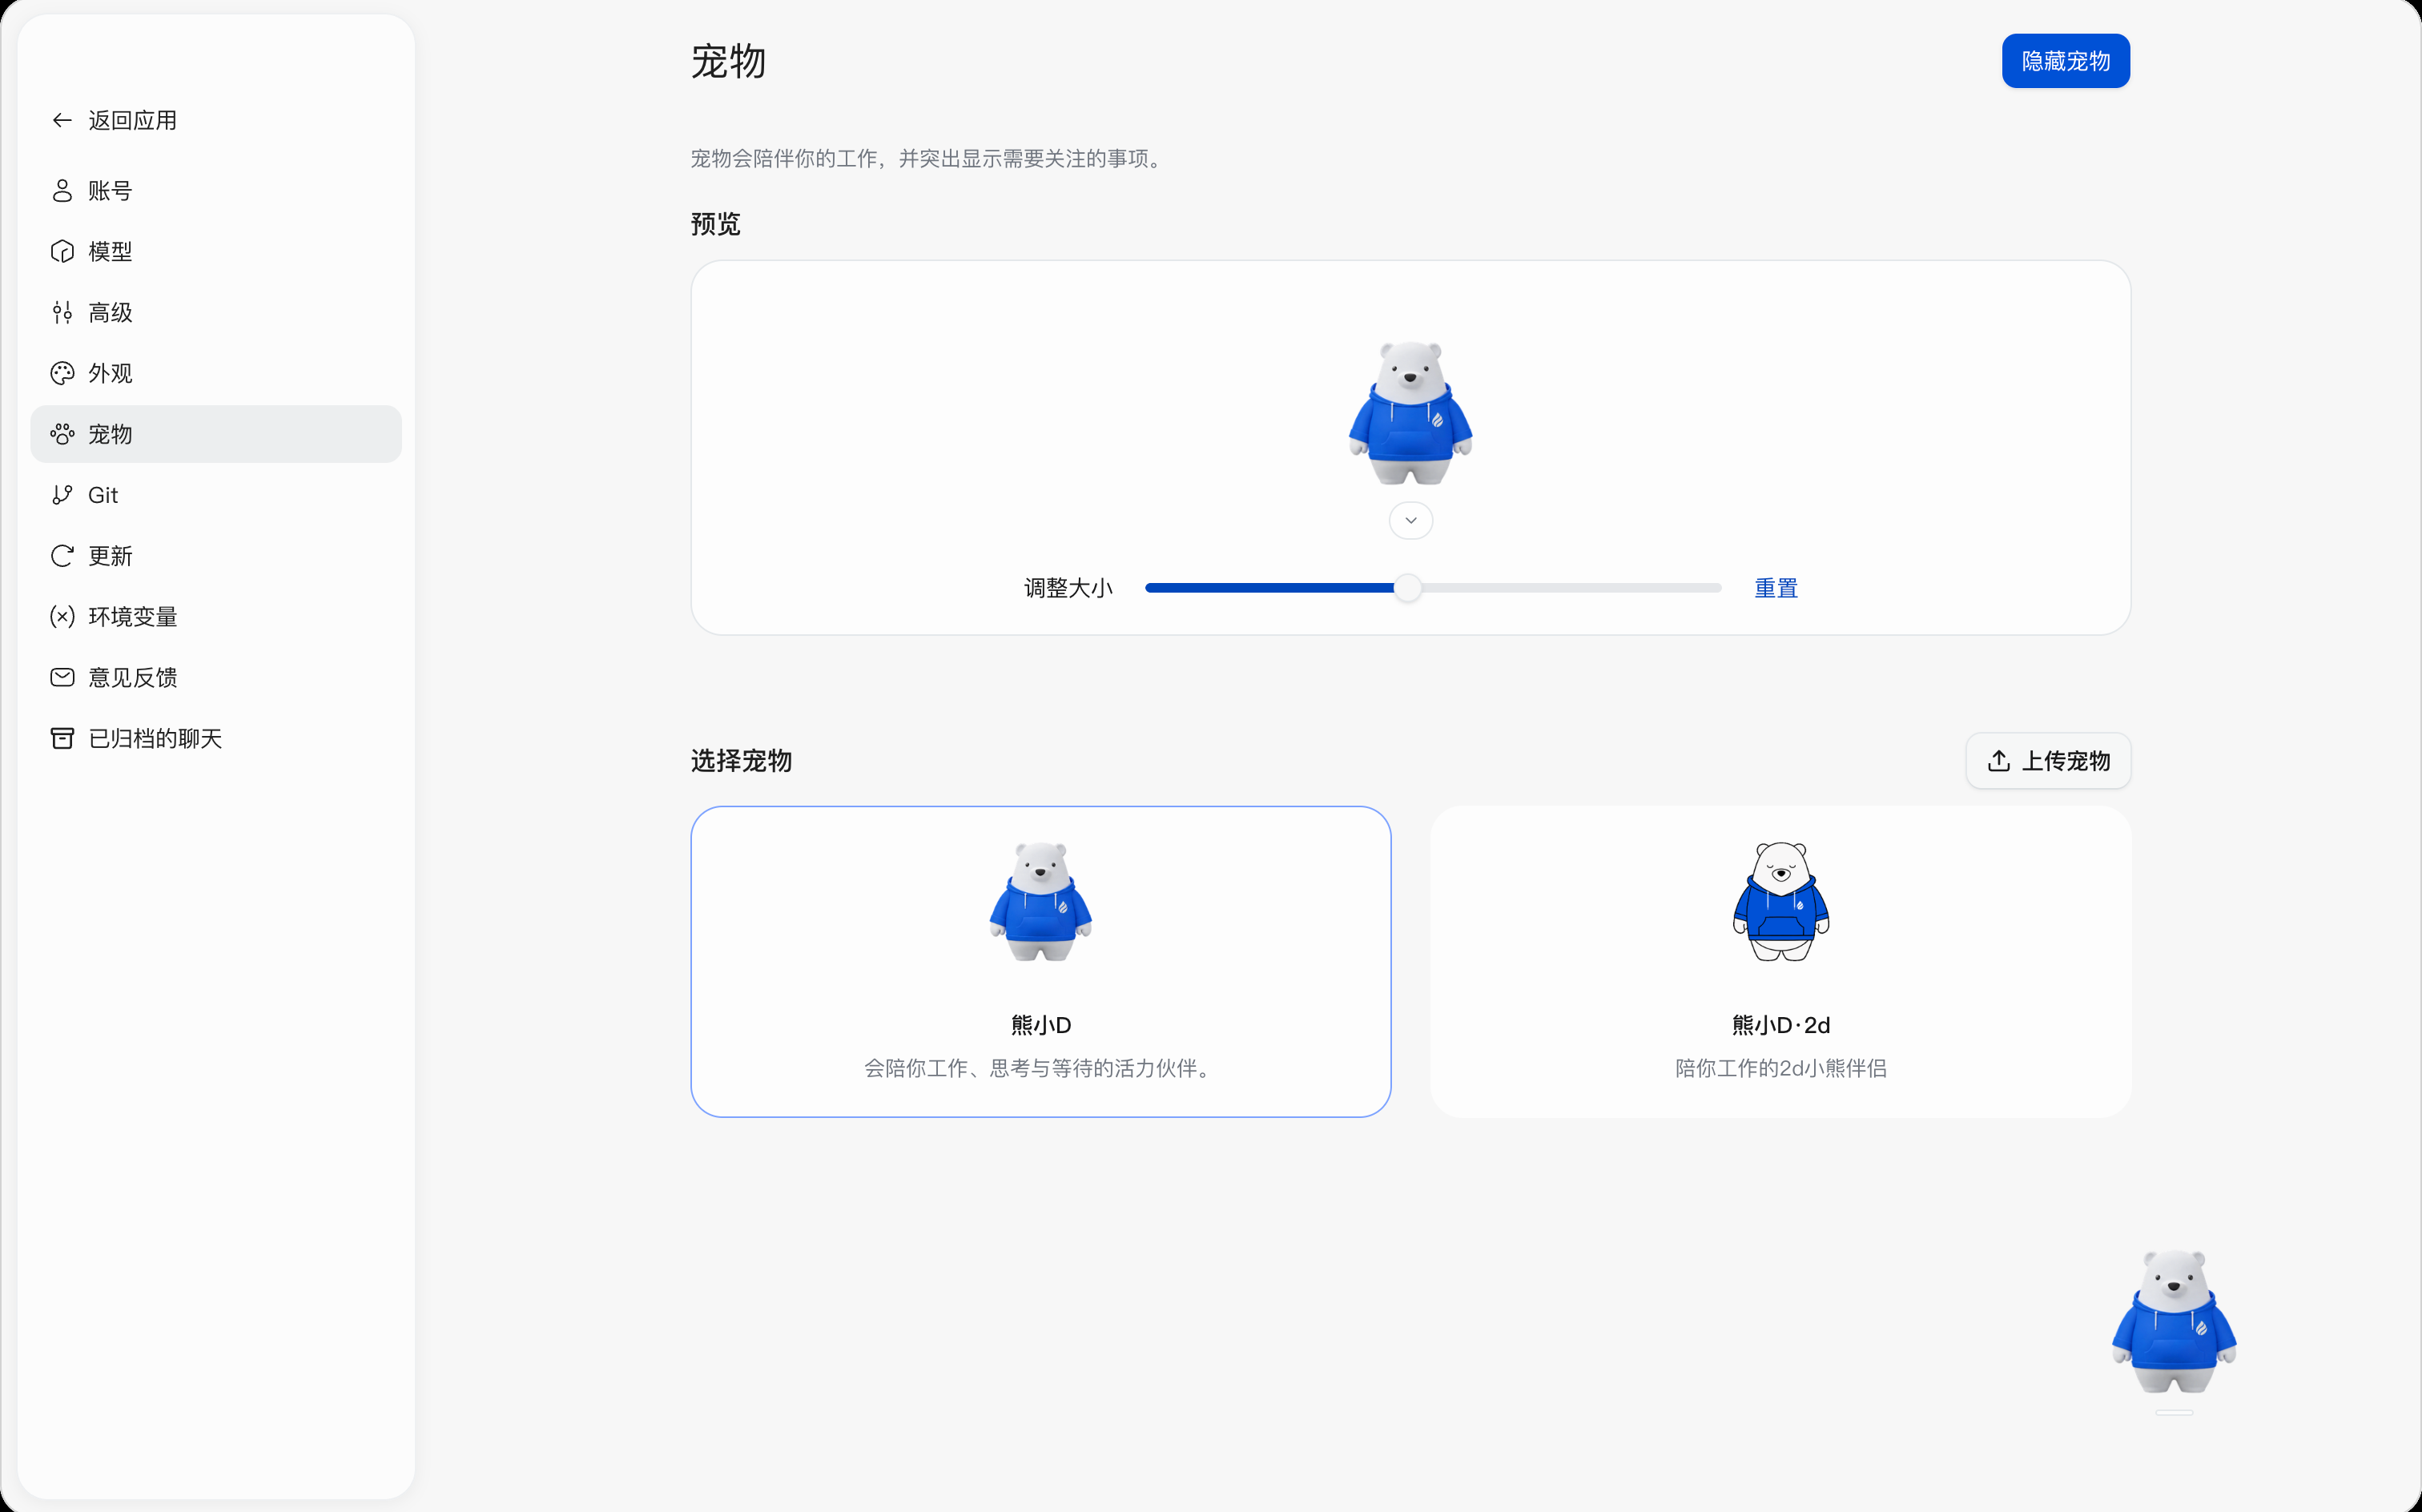
Selecting or Switching Pets
- In the “Select pet” section, click the card for XiaoD the Bear orXiaoD the Bear · 2D.
- Confirm the appearance after switching in the preview area. When the pet is displayed, the pet on the desktop switches as well.
Only one pet can be selected at a time. Switching keeps the current display state and size settings, and the related settings are saved automatically, with no need to click Save.
Hiding or Showing the Pet Again
When you do not need the pet’s company for a while, click Hide Pet in the upper-right corner of the settings page. To show it again, return to Settings > Pet and use the show button in the upper-right corner to restore it. You can also click Avatar - Hide Pet.
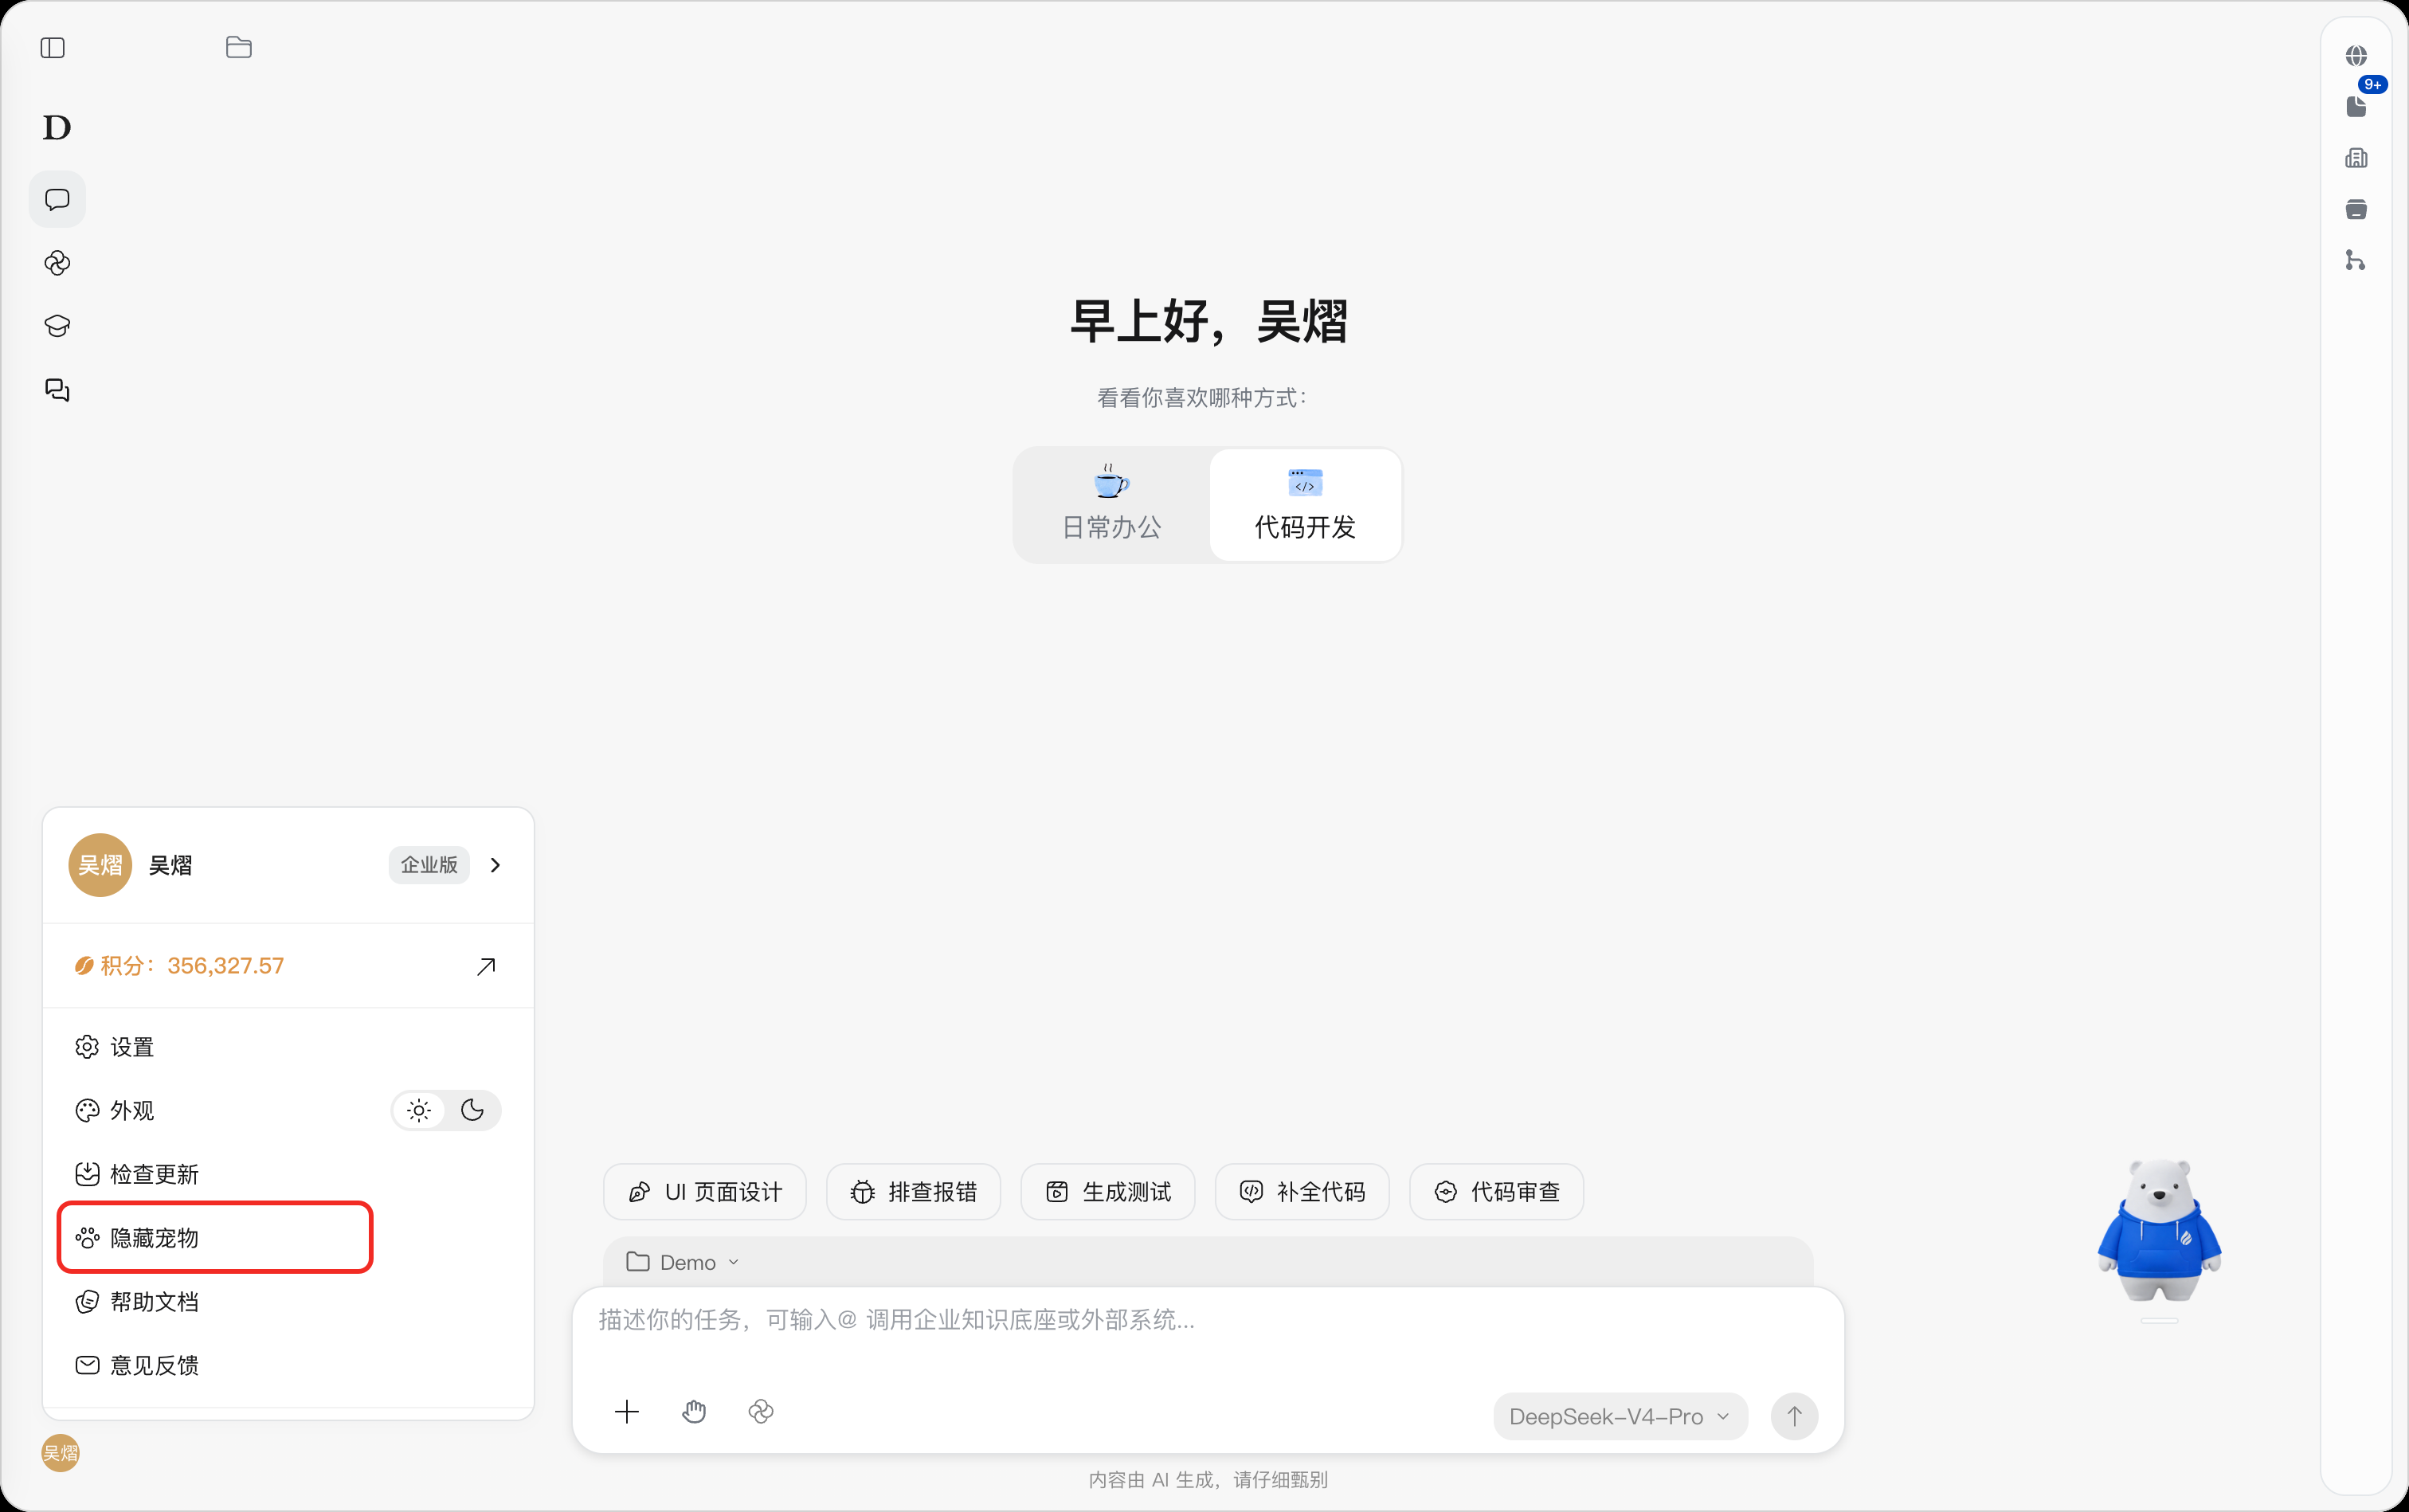
After hiding, the pet and its task prompt box are hidden together, but running tasks are not stopped, and the selected pet and size settings are not cleared. When you show it again, it is restored with the saved configuration.
Adjusting the Pet Size
- Drag the “Resize” slider in the preview area: move left to shrink and right to enlarge.
- Watch the preview and release the slider when the size is right.
- To restore the default size, click Reset.
Size adjustments are saved automatically. If the pet interferes with reading or operating the content, reduce its size or hide it temporarily with Hide Pet.
Uploading a Pet
To use a custom pet, click Upload Pet and follow the prompts in the upload window that opens to select the assets and complete the upload. The asset format and size requirements are those stated in the upload window.
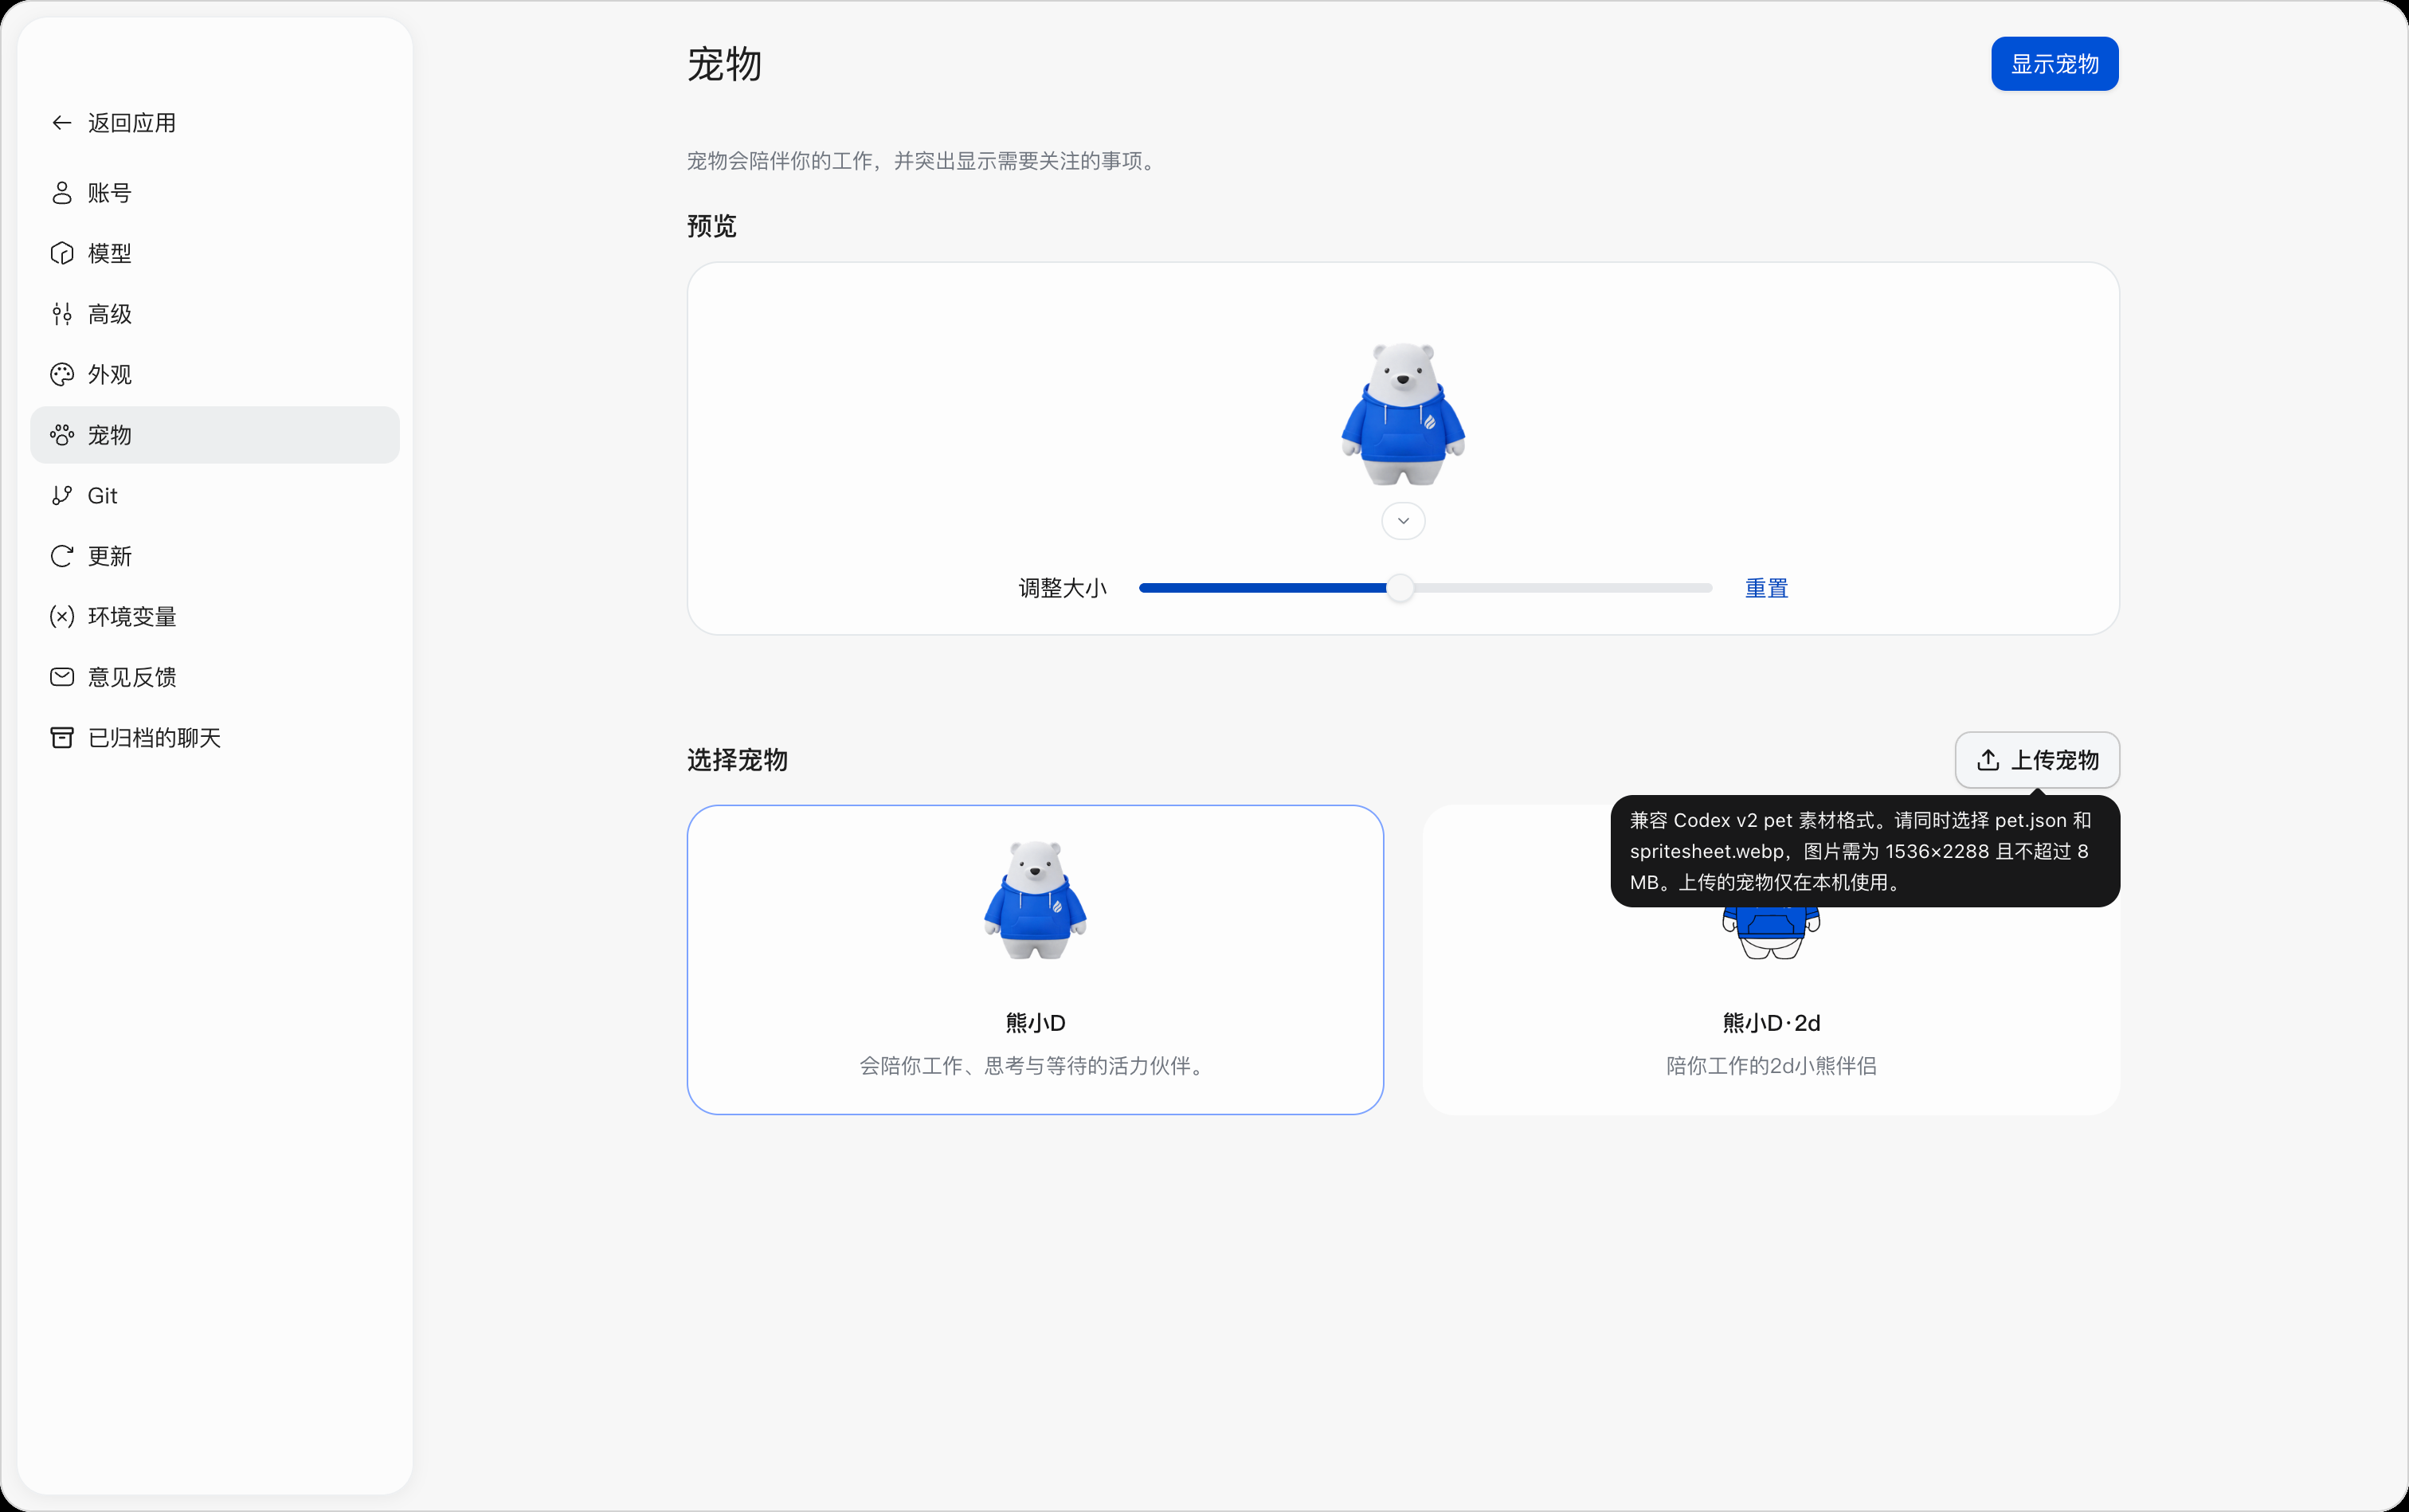
Viewing Task Reminders
When the pet is displayed, you can follow the status of the associated conversation through the task prompt box above it. Use the arrow button below the pet to expand or collapse the task information; collapsing the task information does not hide the pet or stop the task.
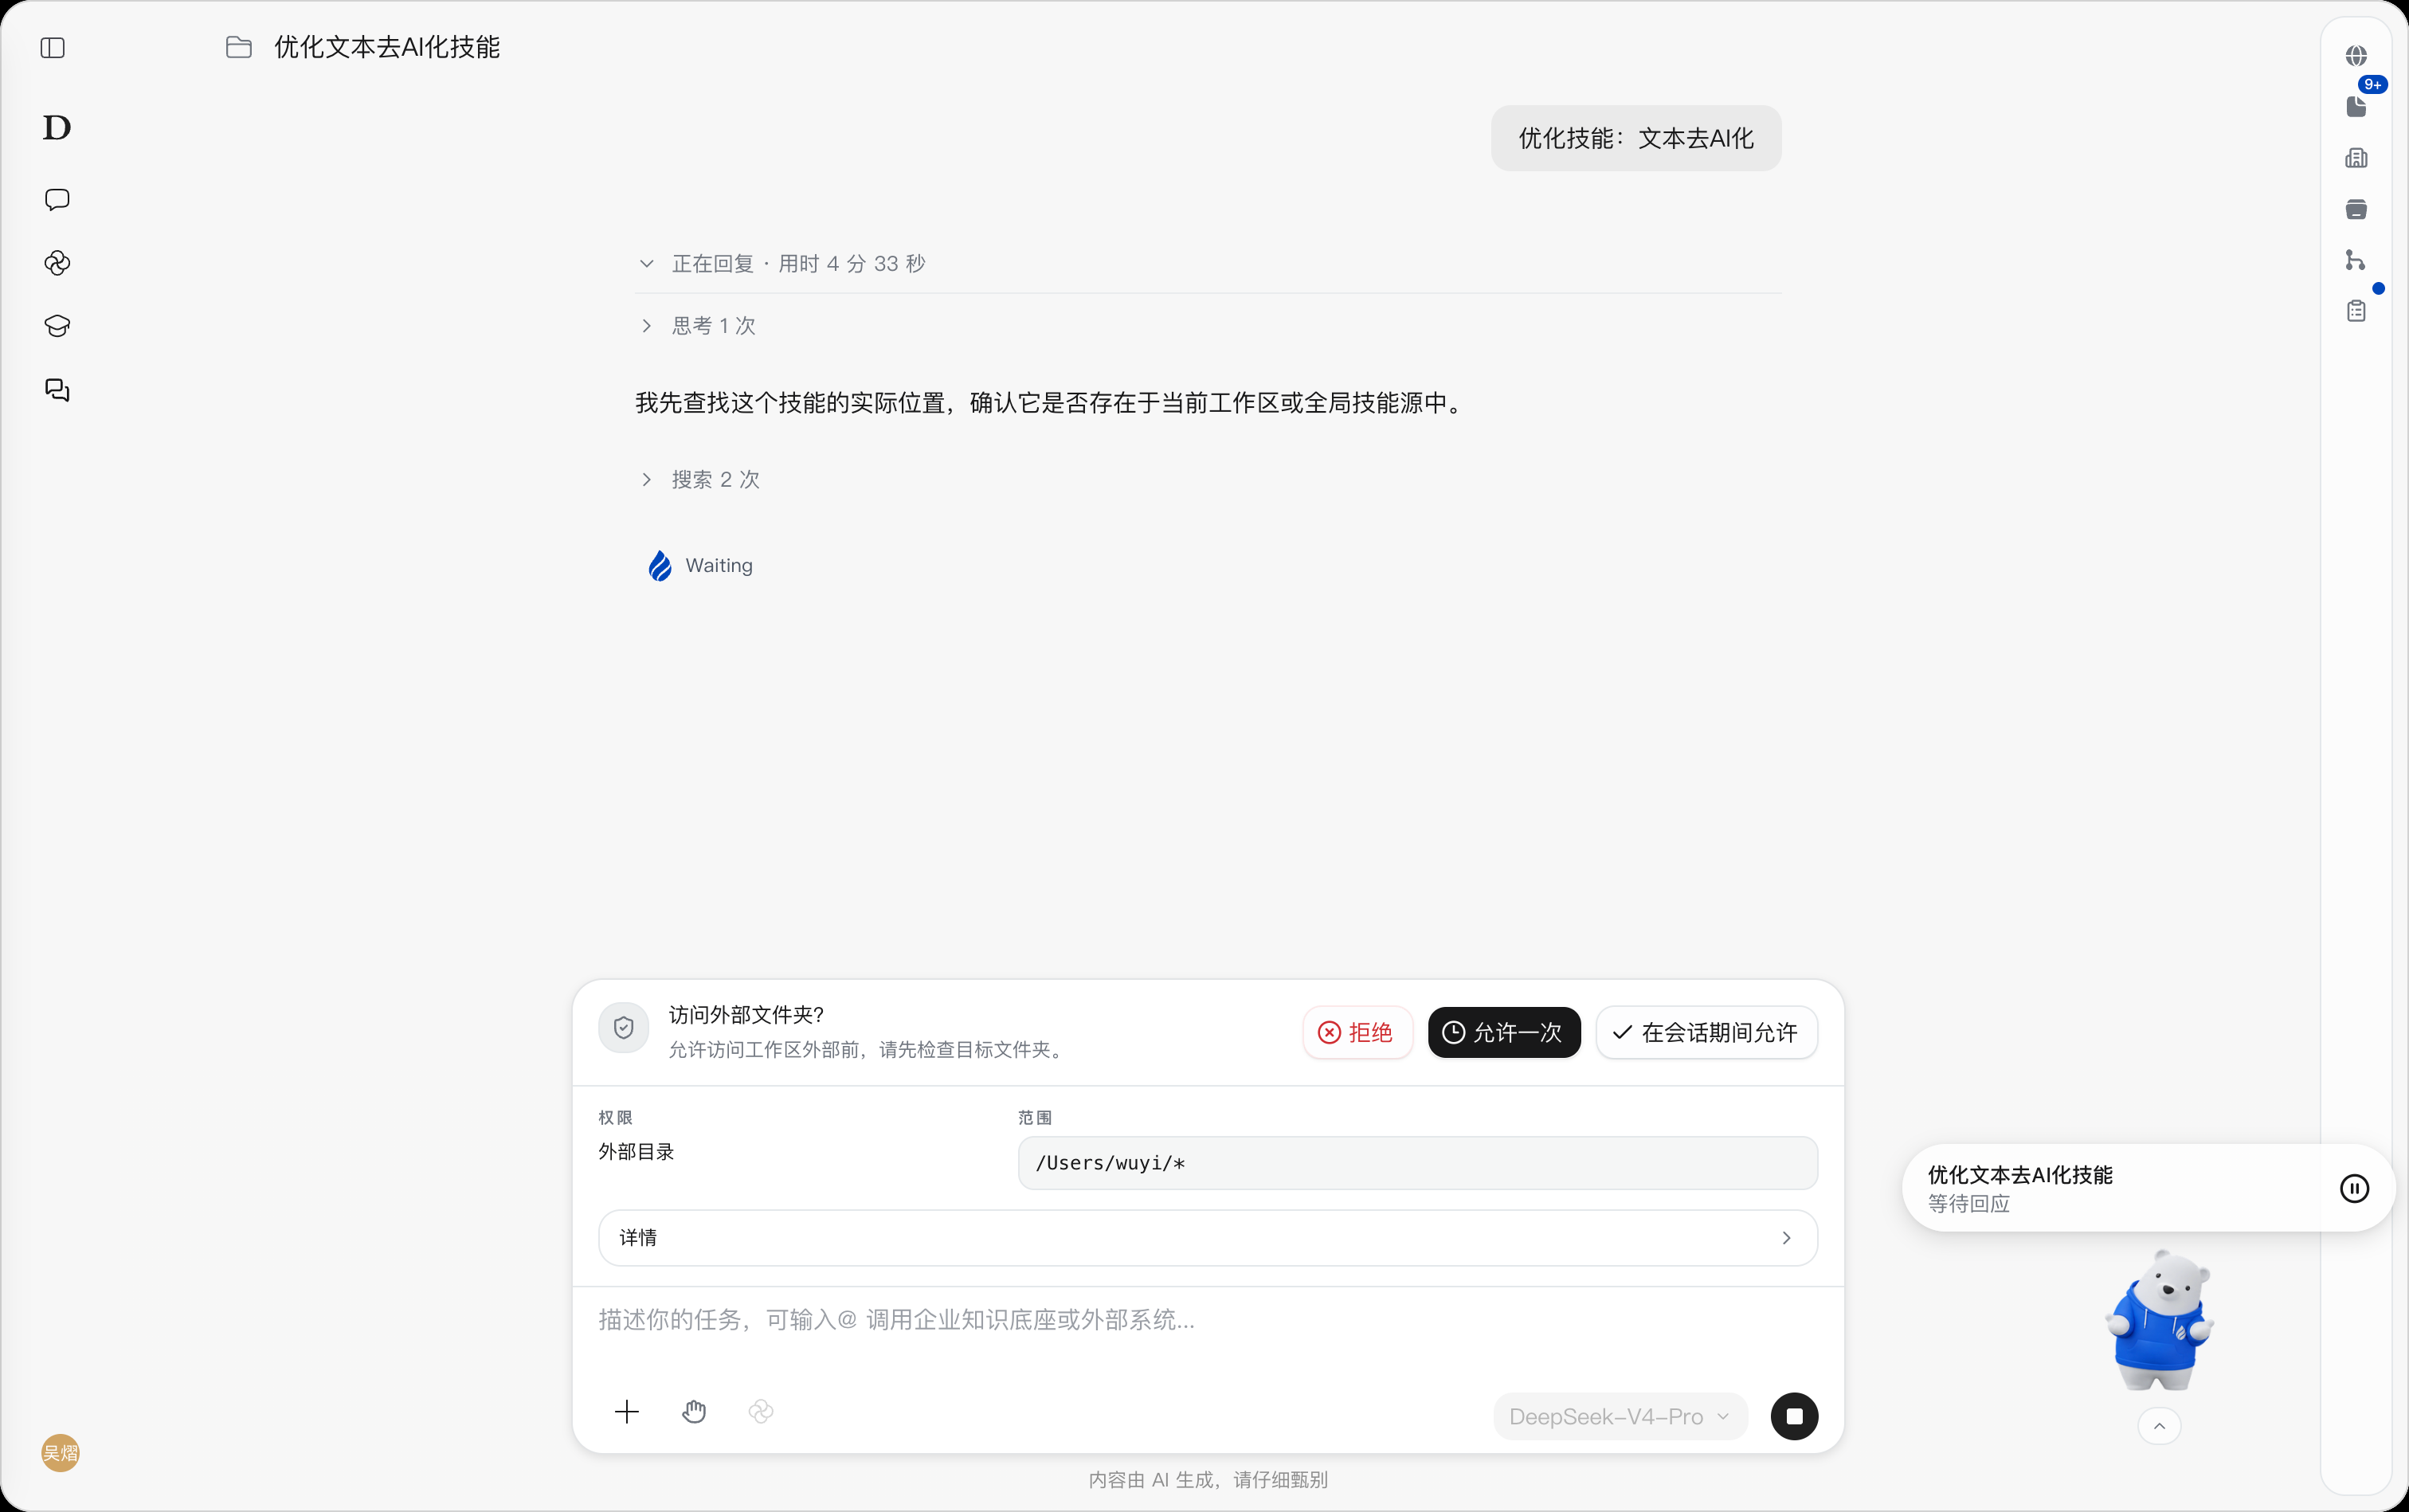
When Waiting for response is shown, go to the corresponding conversation, find the question, confirmation, or permission request that has not been handled, and complete the operation as prompted. After you respond, continue to check the follow-up results in the conversation. The pet’s actions change with the task status and do not need to be switched manually; the specific to-dos and execution results are those in the associated conversation.
Archived Chats
Archived Chats is used to find, unarchive, or delete archived conversations in one place.
Path: bottom-left user menu →Settings →Archived Chats.
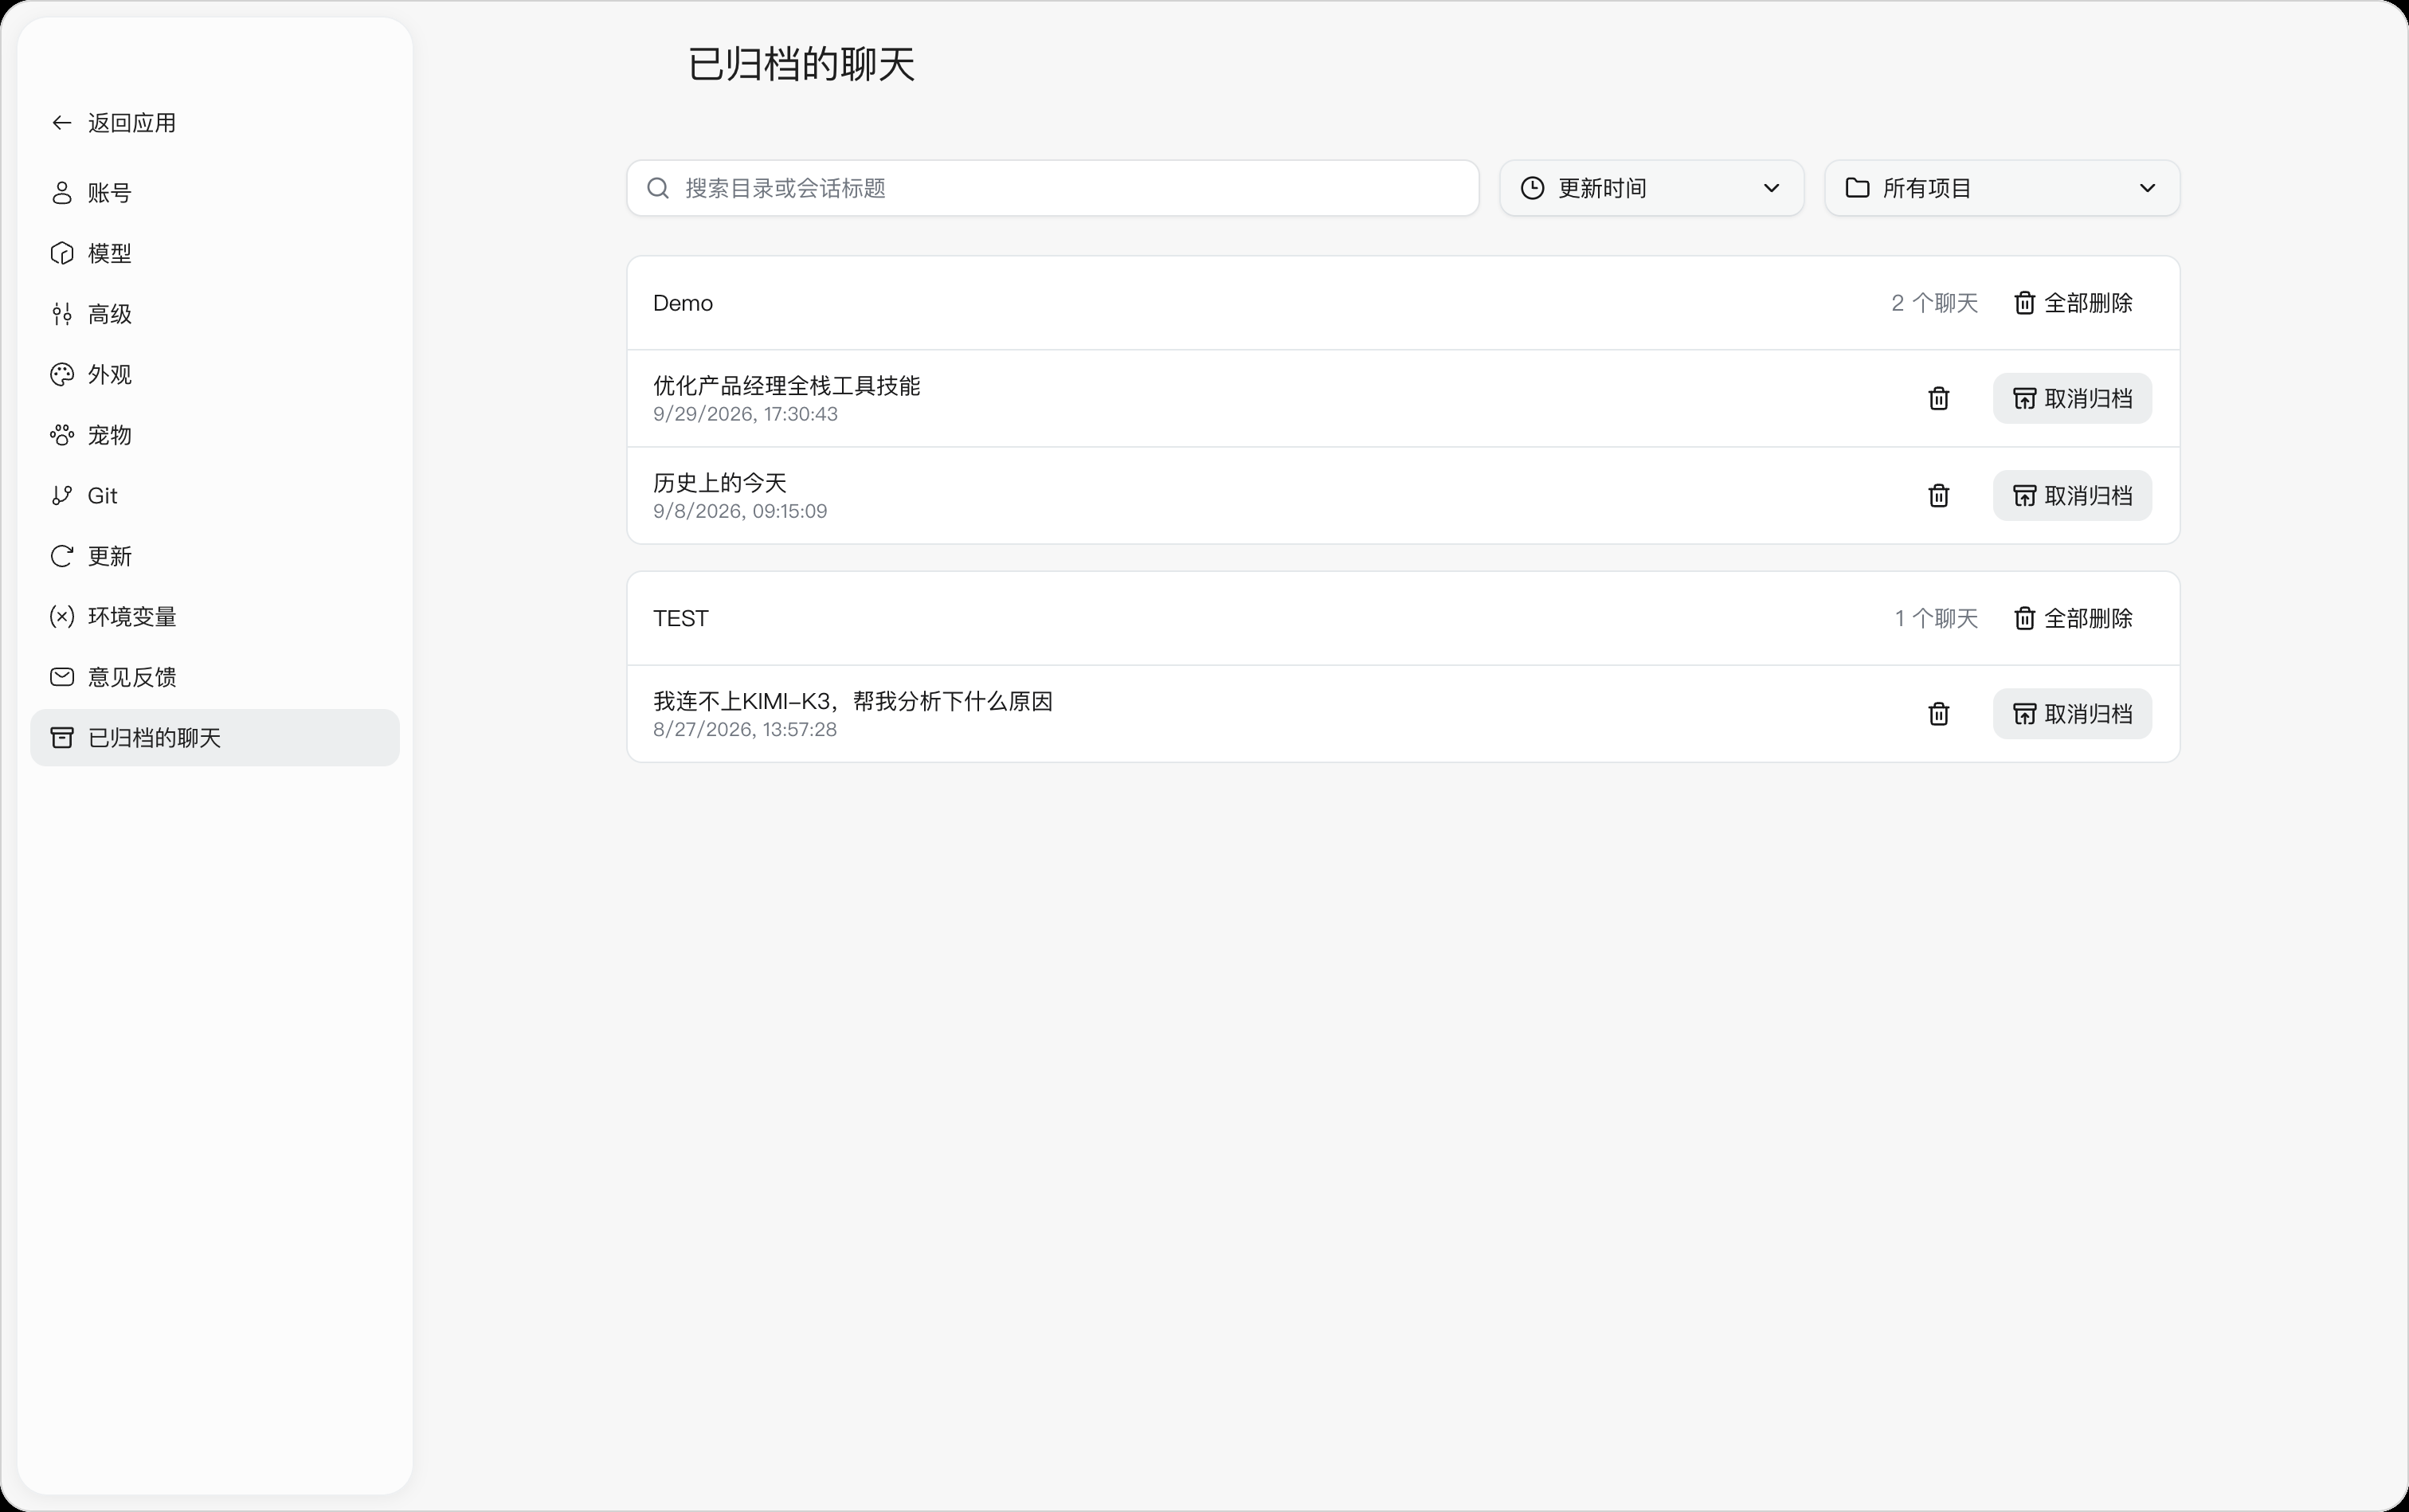
Finding an Archived Chat
- Enter a directory name or a keyword from the session title in the search box at the top to find the target conversation.
- To narrow the scope, click the All Projects drop-down list and select the target project.
- To change the order, click the sort drop-down list and select the desired sorting method.
Unarchiving
- Find the conversation you want to restore and click Unarchive on the right.
- Click Back to App in the upper-left corner and find the conversation in the corresponding workspace to continue using it.
Deleting Archived Chats
- Delete a single chat: Find the target conversation and click the delete icon on the right side of the row.
- Delete all archived chats under a project: Verify the project name and clickDelete All in the upper-right corner of that project group. This operation applies to the archived chats in the selected project group.
To keep a conversation and continue using it, select Unarchive.
Personalization
Choose DeepWorks’ default communication style, provide custom instructions for rules and preferences, enable global memory, and view or export memory content.
Path: User menu at the bottom left → Settings → Personalization.
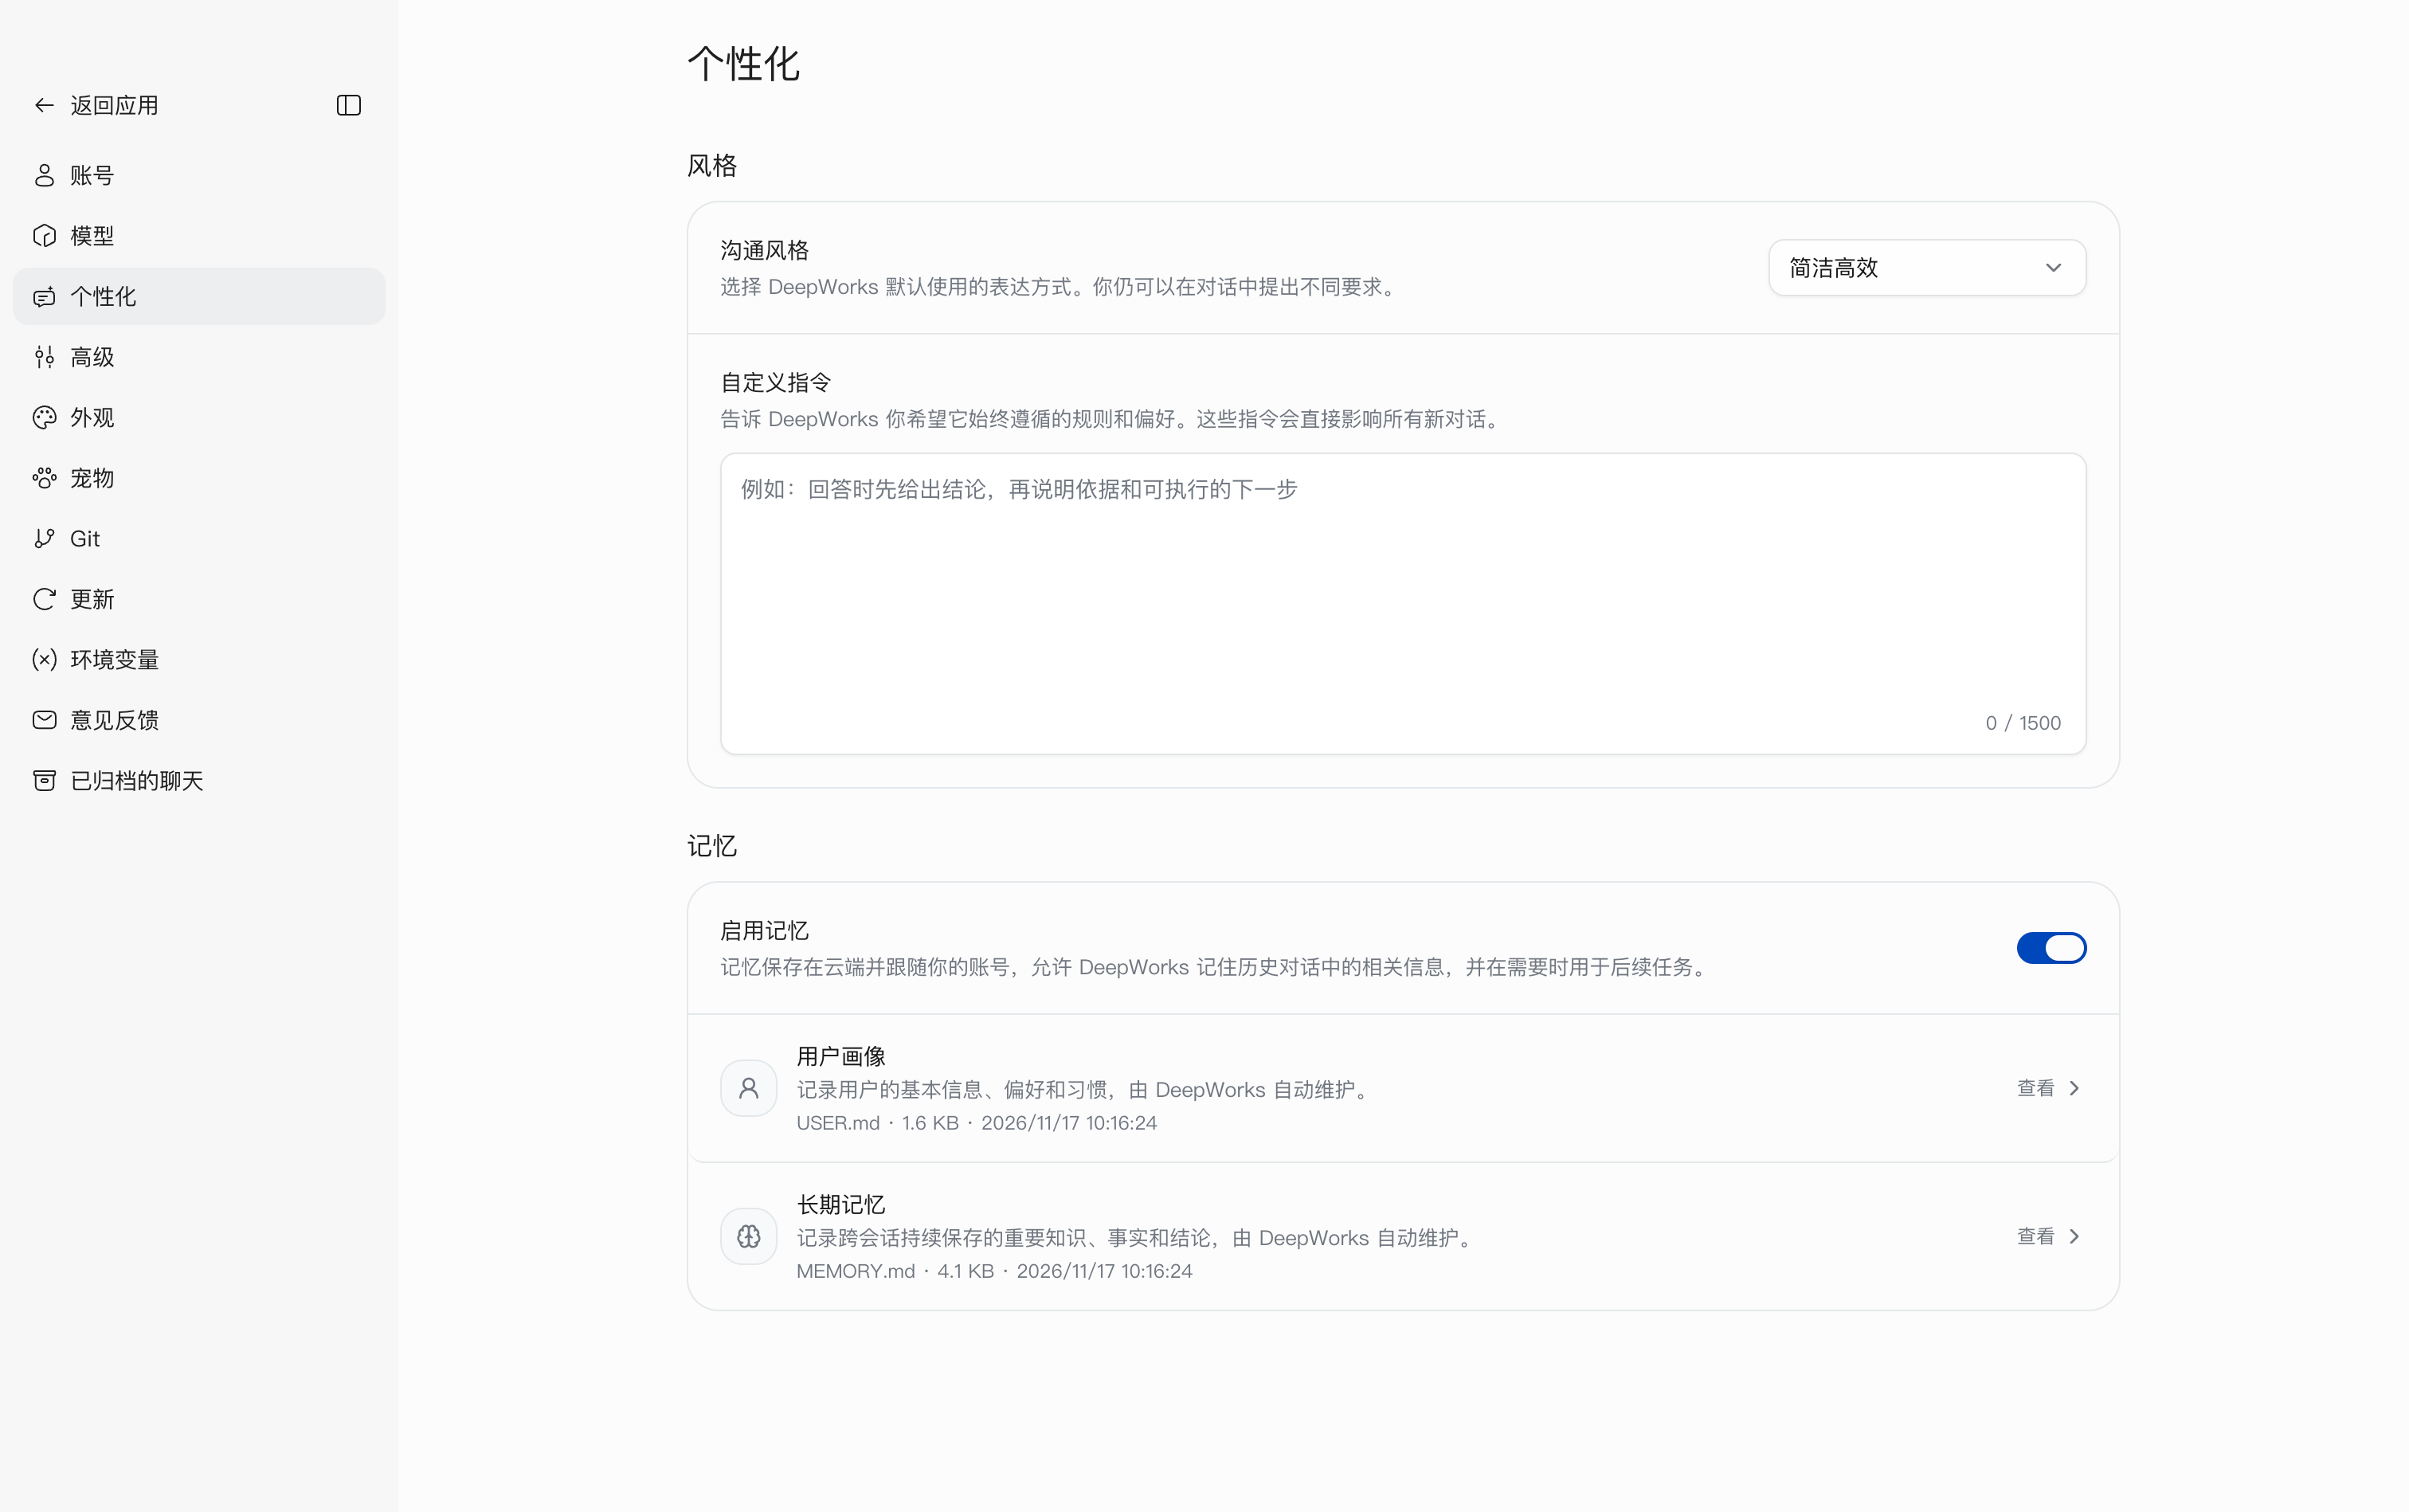
Choosing a Communication Style
- Open
Personalizationand click the dropdown besideCommunication Style. - Select a style:
| Style | Description |
|---|---|
| Default | No specific style. |
| Concise and Efficient | Clear, accurate, and focused on key points. |
| Warm and Friendly | Warm, considerate, encouraging, and supportive. |
This sets the default style. You can still request a different style in an individual conversation.
Setting Custom Instructions
- Enter rules and preferences in
Custom Instructions, for example, “Start with the conclusion, then provide supporting evidence and actionable next steps.” - Check the character count at the bottom right. The limit is 1,500 characters.
Custom instructions directly affect all new conversations and can standardize response structure, language, or expression preferences.
Enabling or Disabling Global Memory
Global memory lets DeepWorks remember relevant information from previous conversations for later tasks, reducing repeated explanations of background and preferences. Memory is stored in the cloud, follows your account, and is maintained automatically by DeepWorks.
Path: Bottom-left user menu → Settings → Personalization → Memory.
- Open
Personalizationand scroll to Memory. - Click the switch beside
Enable Memory. Blue means enabled; gray means disabled. - Click again to disable it. You can re-enable it through the same path.
There are two types of memory:
| Type | Filename | Content |
|---|---|---|
| User Profile | USER.md | Basic information, preferences, and habits. |
| Long-term Memory | MEMORY.md | Important knowledge, facts, and conclusions retained across sessions. |
Both entries display the filename, file size, and update time. Click View beside an entry to read its contents.
Viewing the User Profile
- Find
User Profileunder Memory and clickView. - Read the information, preferences, and habits recorded in the
USER.mdwindow. Scroll within the content area if necessary. - Click
Closeat the bottom right or the upper-right close button (×) to return toPersonalization.
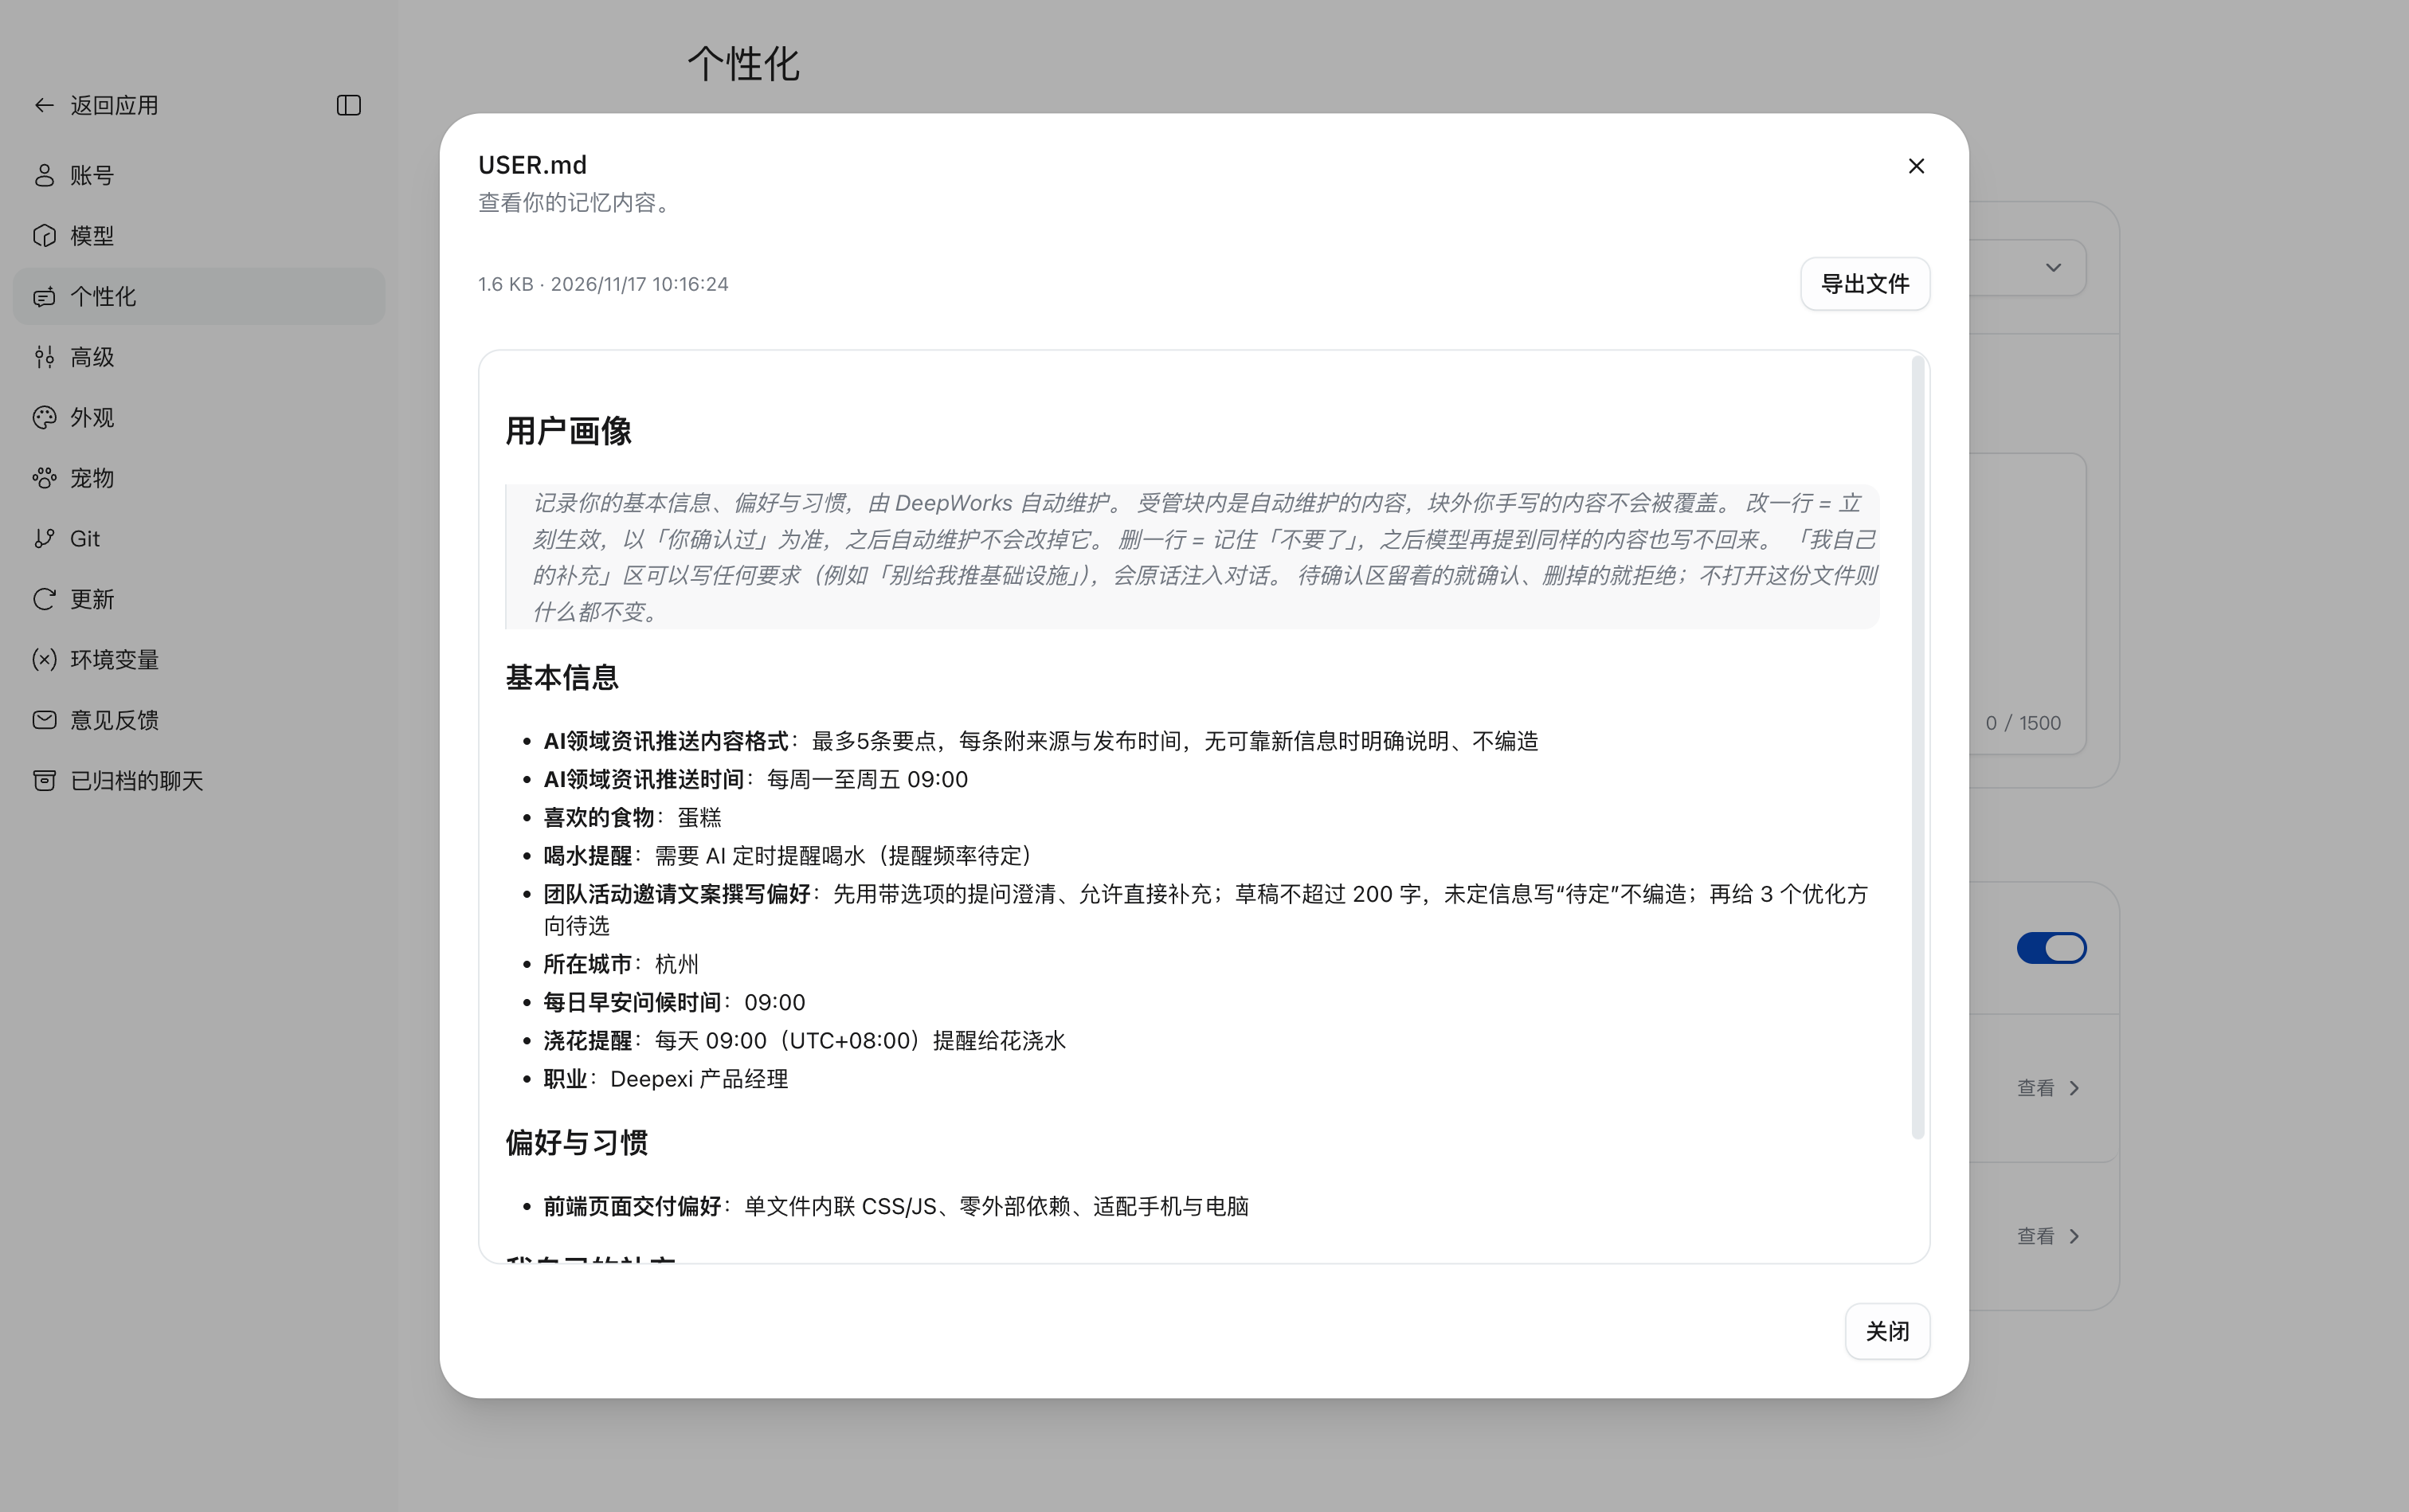
Viewing Long-term Memory
- Find
Long-term Memoryunder Memory and clickView. - Read the knowledge, facts, and conclusions accumulated across sessions in
MEMORY.md, such as project background or working methods. Scroll within the content area if necessary. - Click
Closeat the bottom right or the upper-right close button (×) to return toPersonalization.
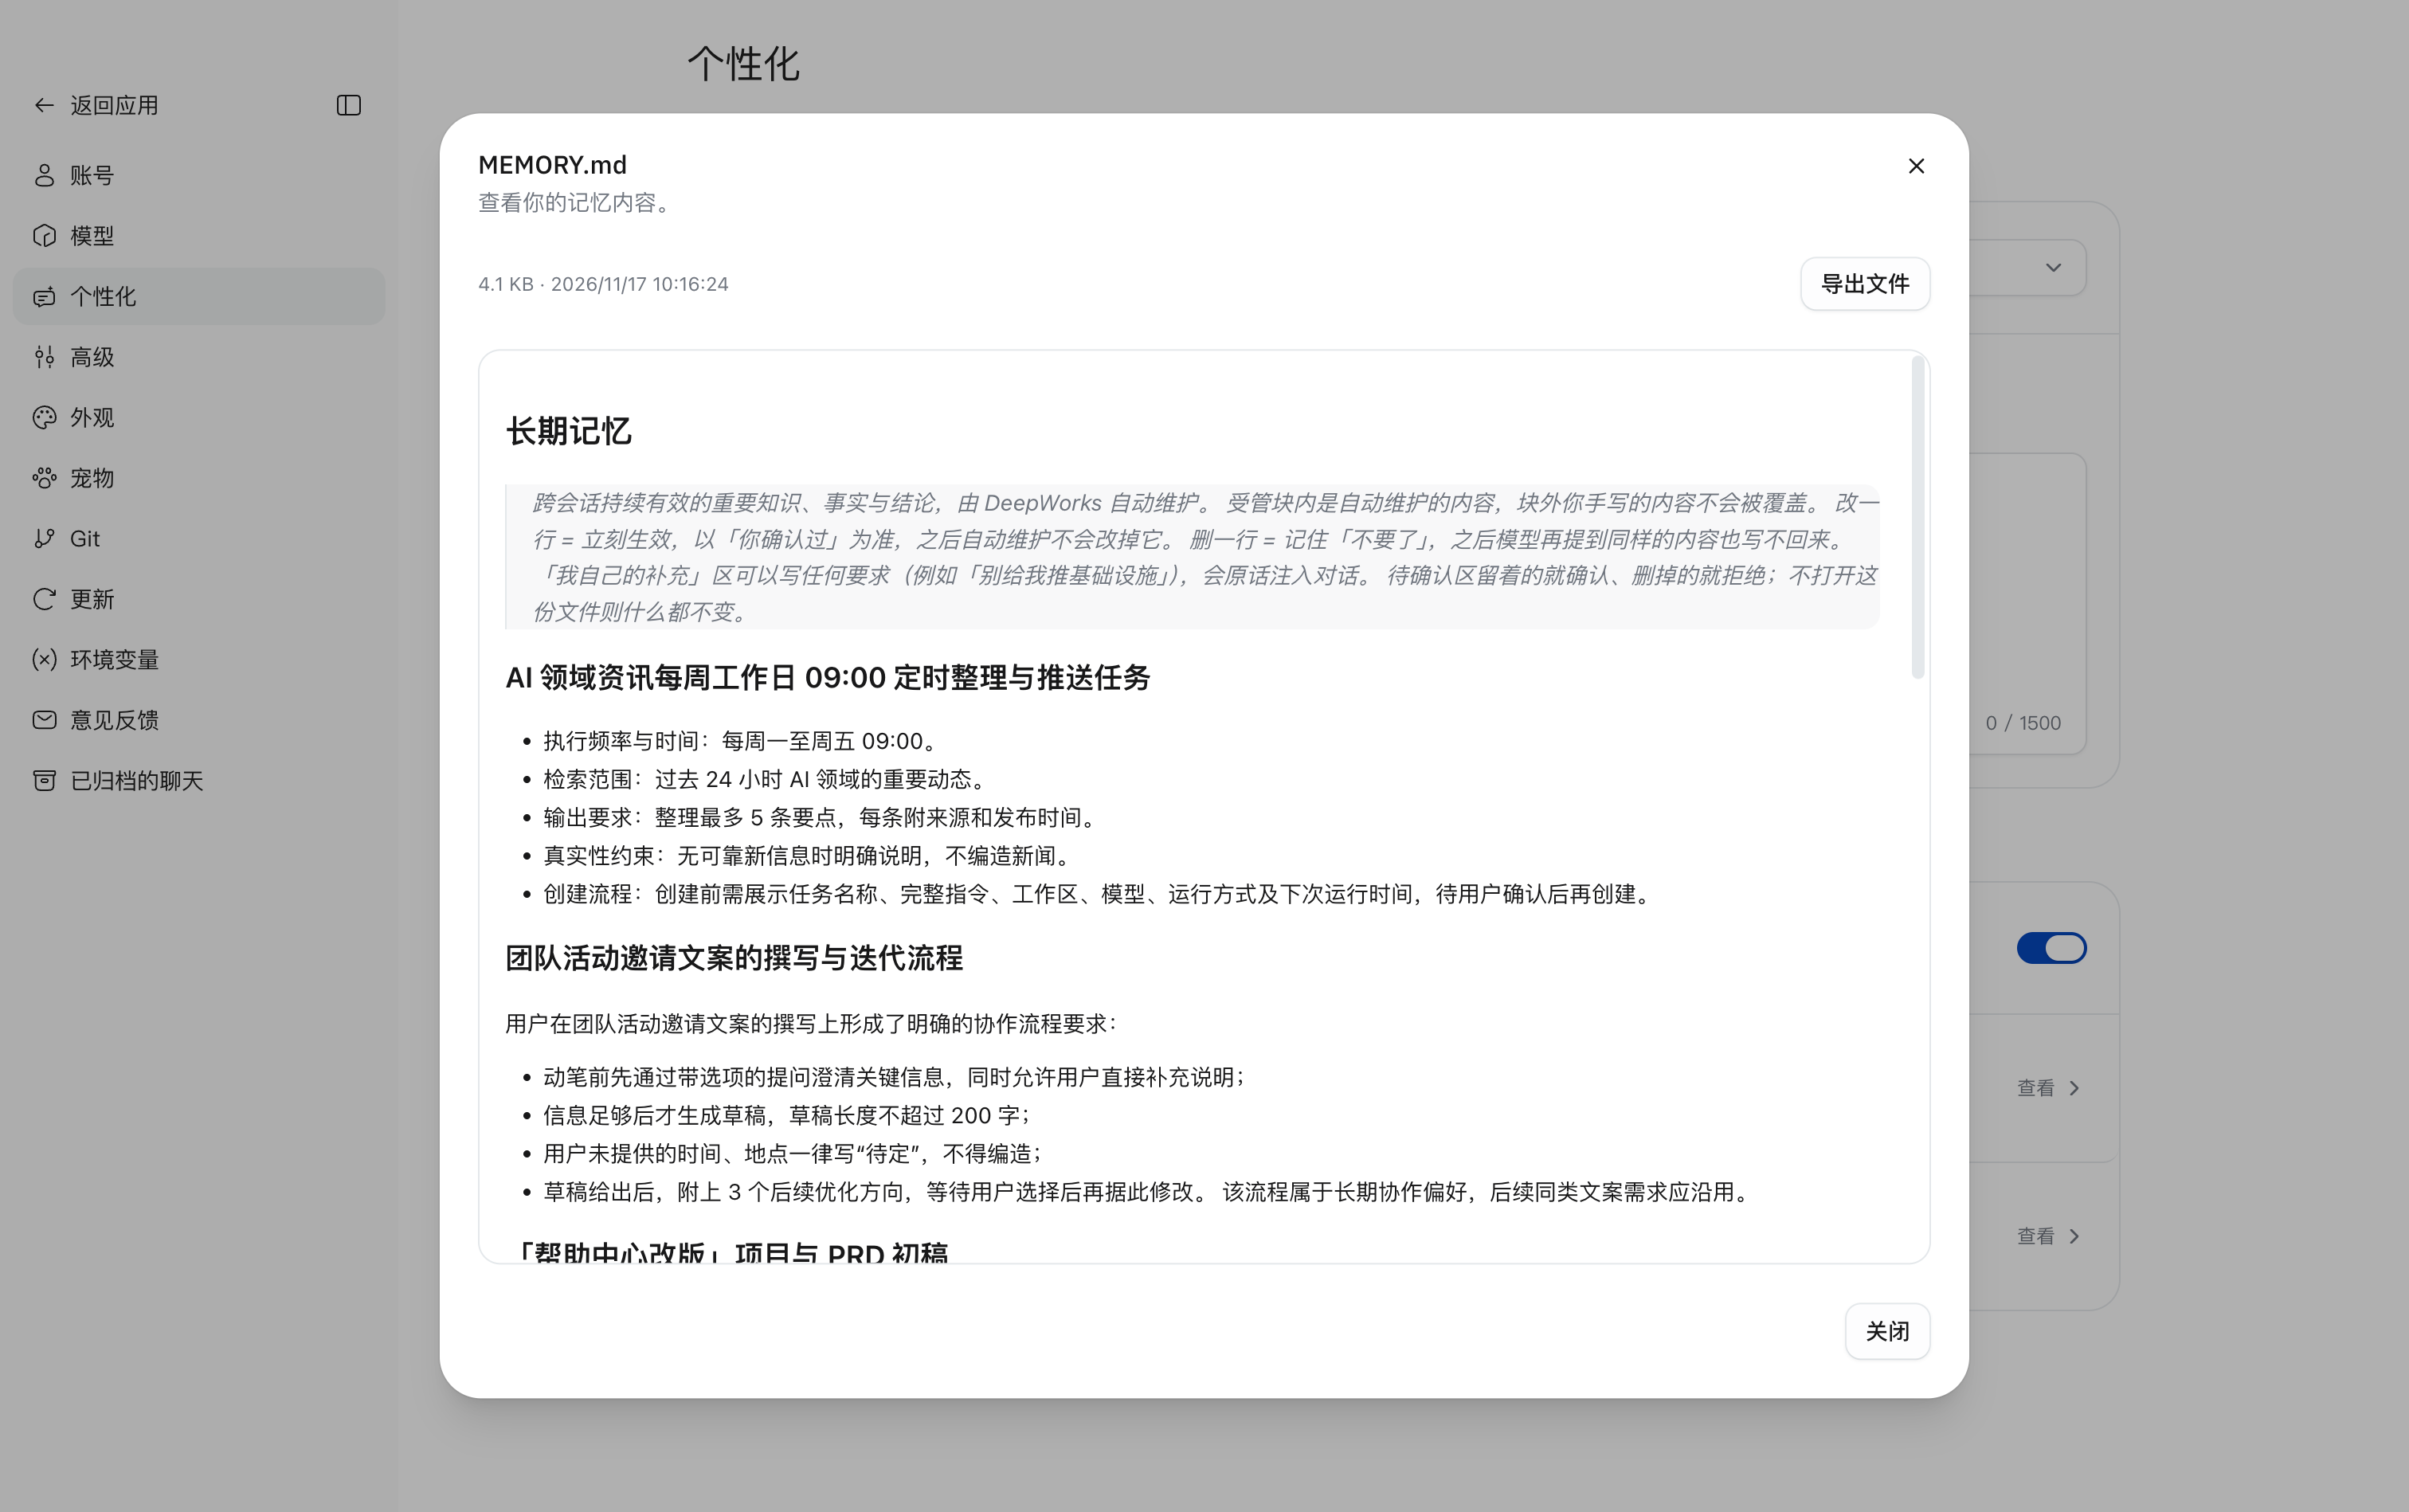
Exporting Memory Files
Export memory to retain a copy or read it in another tool.
- Click
ViewbesideUser ProfileorLong-term Memory. - Check the dialog title to confirm whether USER.md orMEMORY.md is open.
- Click
Export Fileat the top right to export the current file. - To export the other type, close the window, open the other entry, and repeat.
The memory viewer supports browsing and exporting. DeepWorks maintains the memory automatically.
About Us
Use About Us in the avatar menu to open the DeepWorks contact and support webpage for feedback, technical support, and sales inquiries.
Path: Avatar at the bottom left → About Us.
- Click your avatar at the bottom left of DeepWorks to expand the menu.
- Click
About Usat the bottom of the menu.
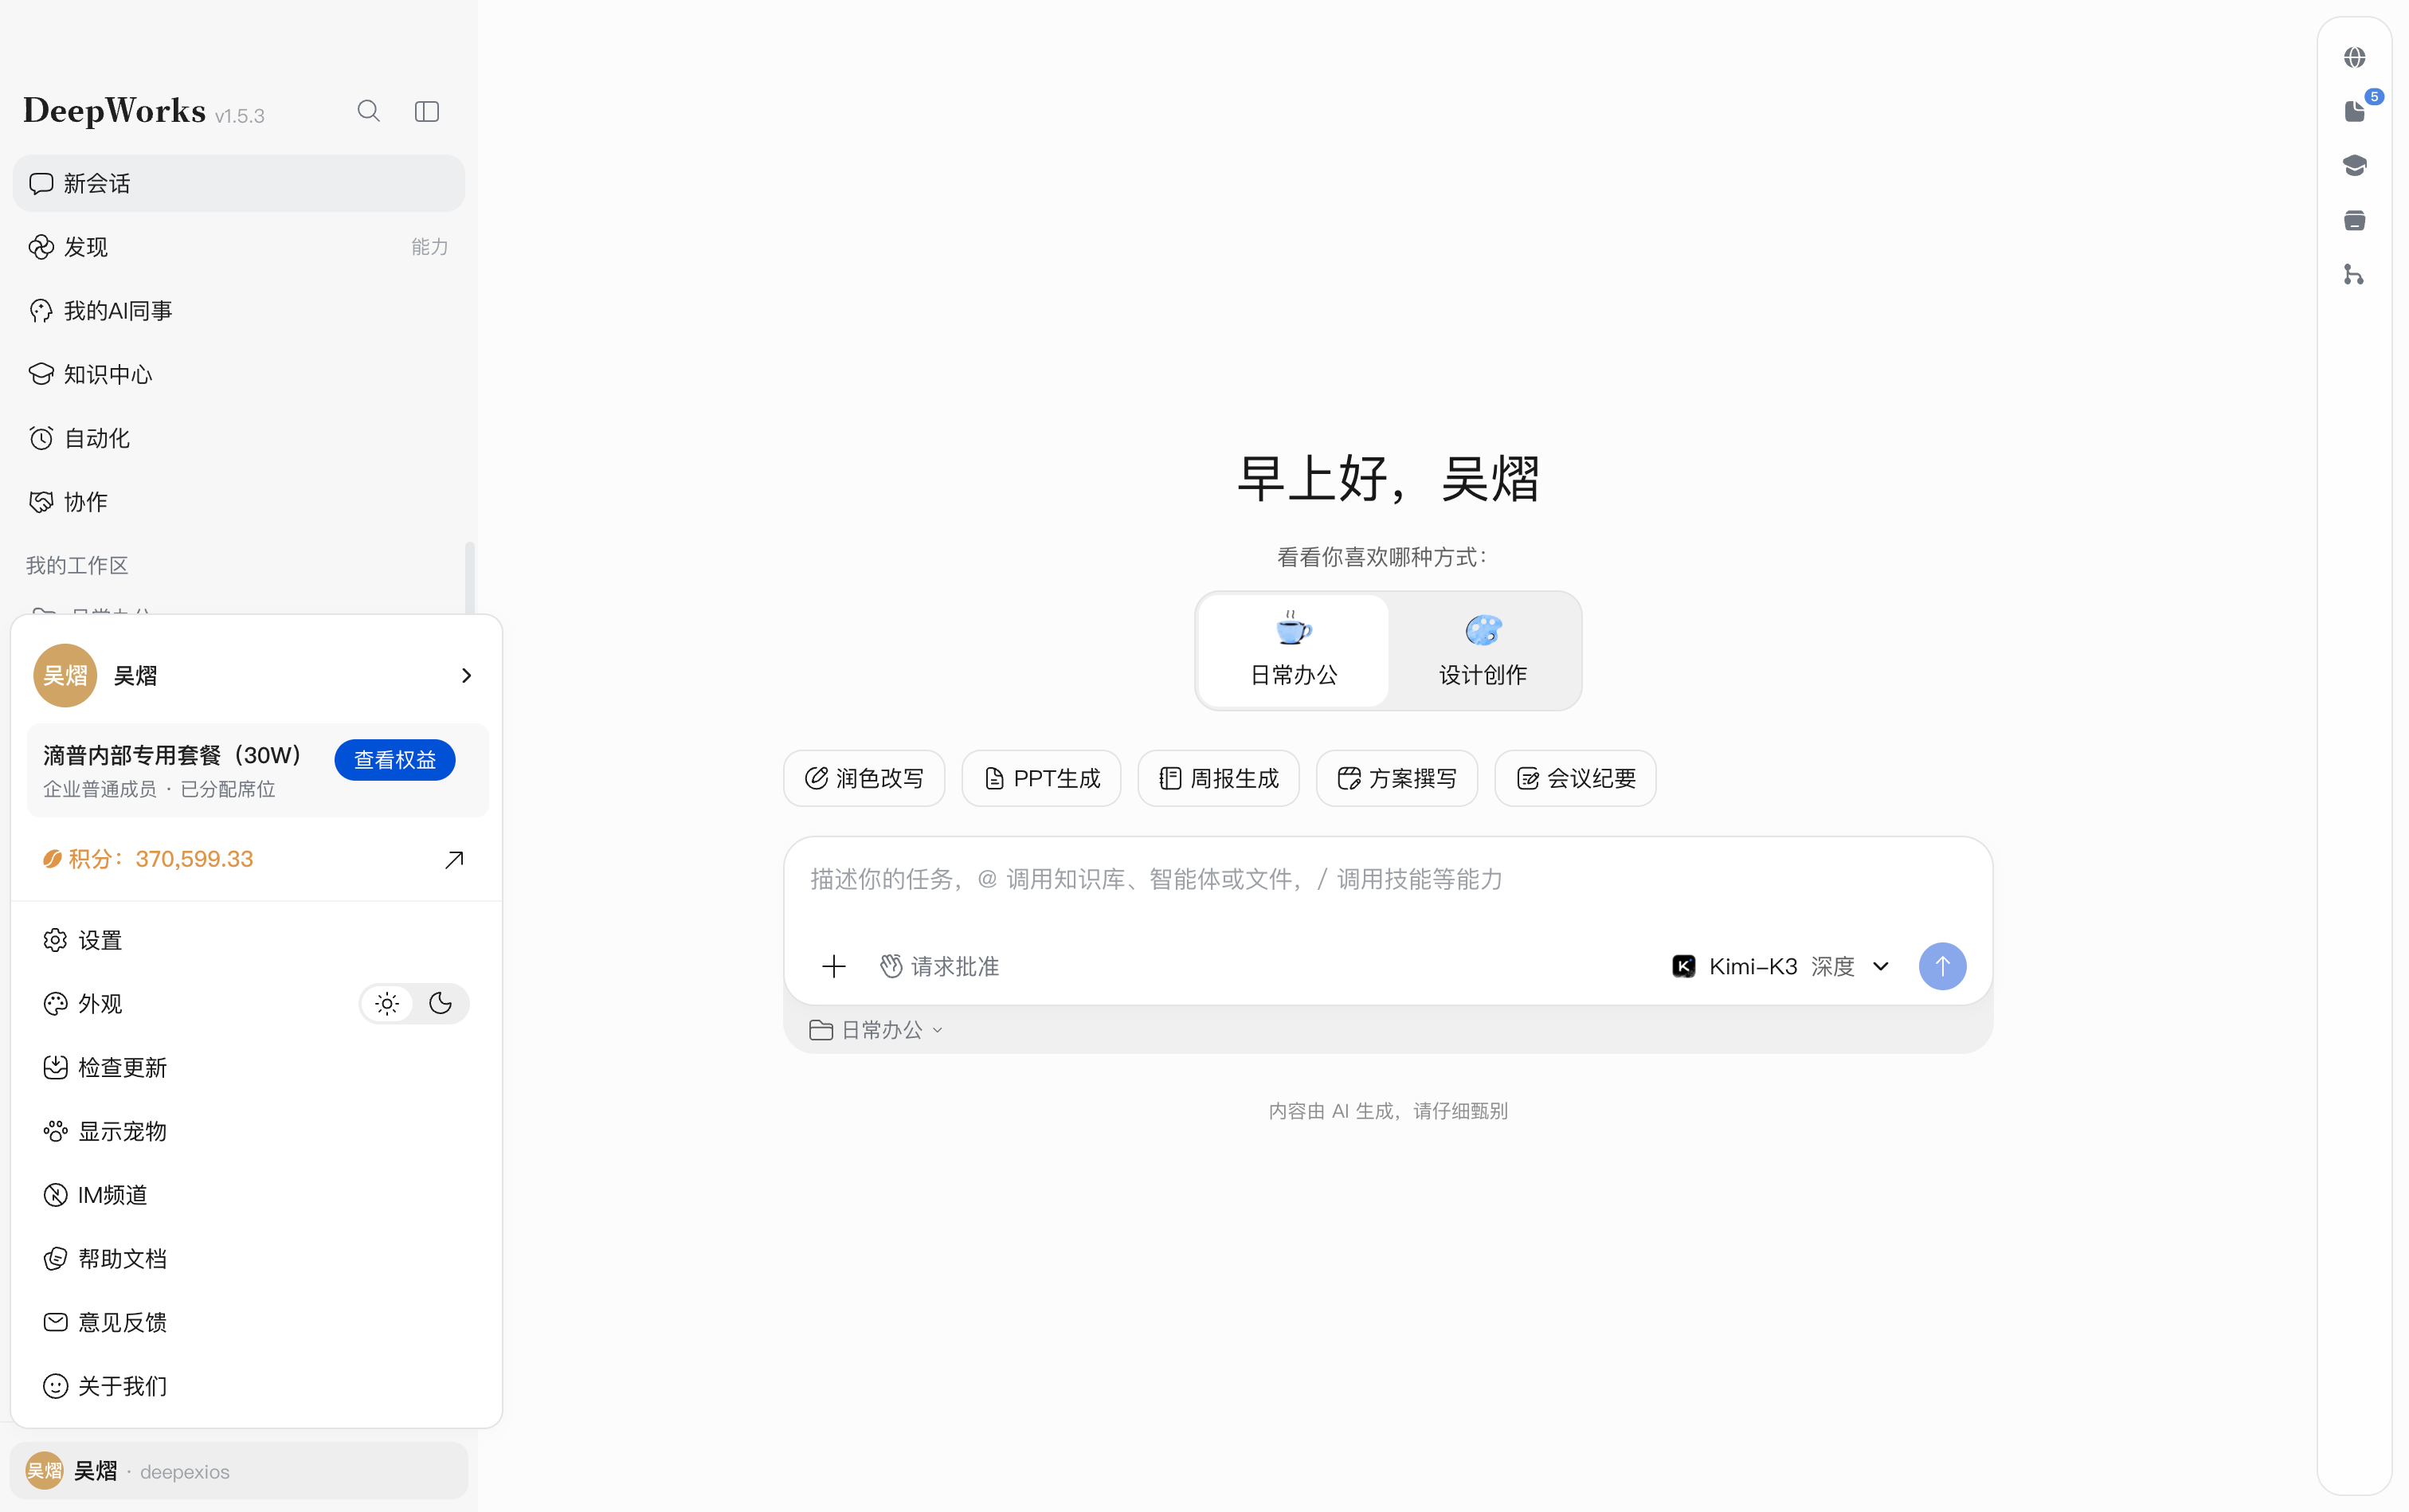
- The browser opens the
Contact Uspage in the DeepWorks documentation. Scroll or use the right-hand “On This Page” contents to locate Feedback, Technical Support, Sales Inquiries, or WeCom and review the contact and support instructions.
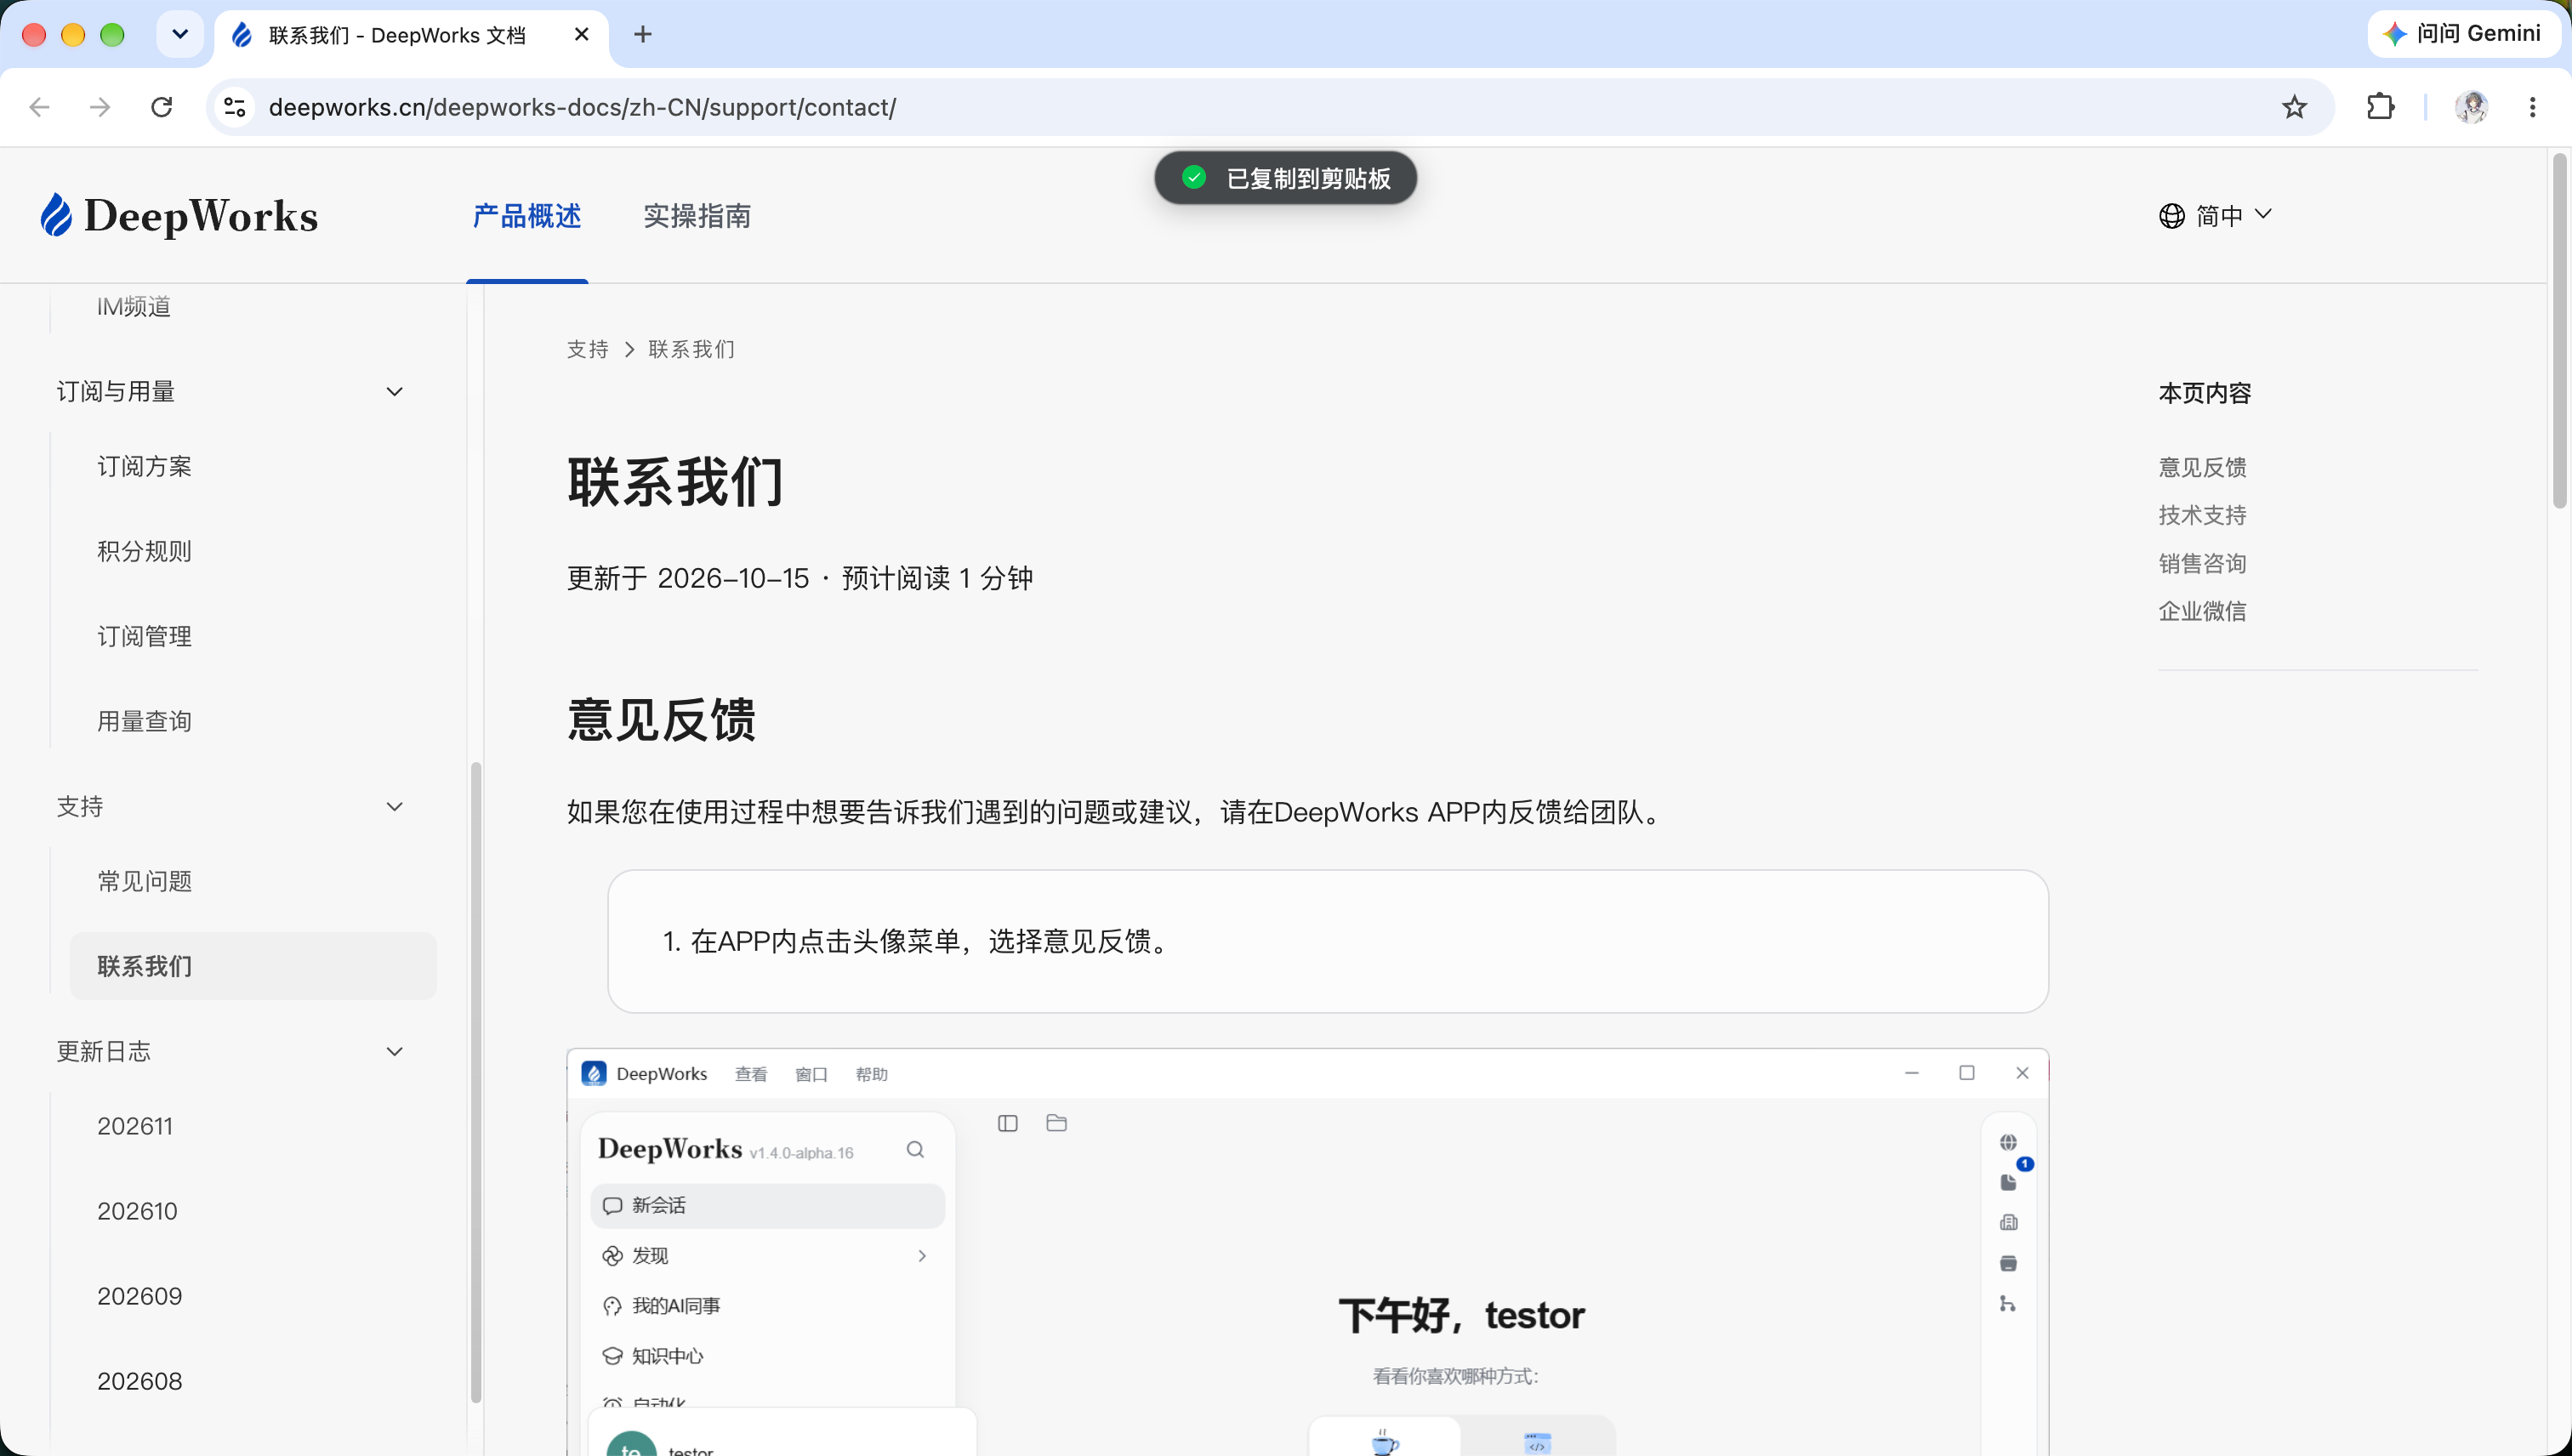
You can also visit Contact DeepWorks directly.